From Assignment to Showcase: Sculpting A Mythological 3D Character
Lorenzo Baraldi, a student at BigRock School, transforms a class assignment into a masterpiece, bringing the deity Ganesh to life.
Lorenzo Baraldi, a student at BigRock School, transforms a class assignment into a masterpiece, bringing the deity Ganesh to life.

Meet Lorenzo Baraldi, a student at BigRock School, as he shares a detailed process behind bringing the deity Ganesh to life. Originating as a class assignment, this project evolved from a mere sculpting exercise into a masterpiece for Lorenzo's portfolio. Guided by a passion for Hindu mythology and a desire to refine sculpting skills, Lorenzo shares a detailed breakdown, from references and sculpting in ZBrush to Maya polishing, garment modeling, texturing in Substance 3D Painter, grooming in Xgen, and finally, the magic of lighting and rendering in Arnold. Read on!
I started this project during my time at BigRock School, as part of a class assignment focusing on sculpting. Although feeling satisfied with the results, the project remained incomplete for me, as I wanted to explore the entire character creation process. After finishing the course, I jumped back into the project, refining and expanding it. What began as a school assignment turned into a significant piece for my portfolio.
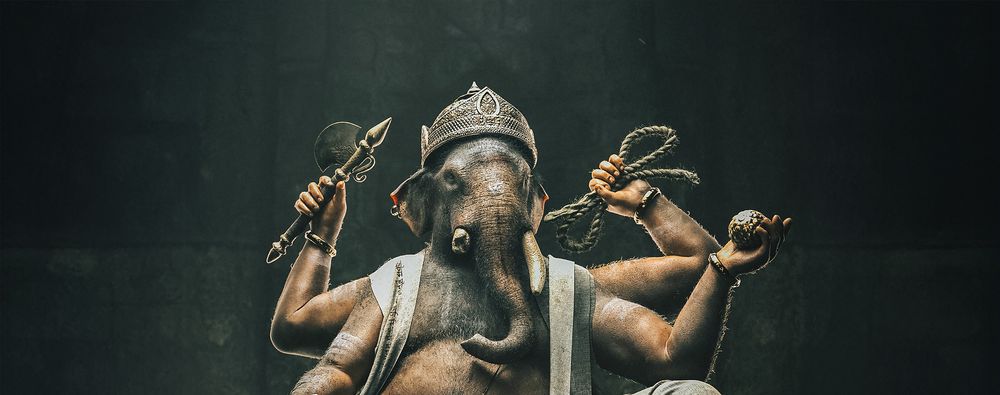
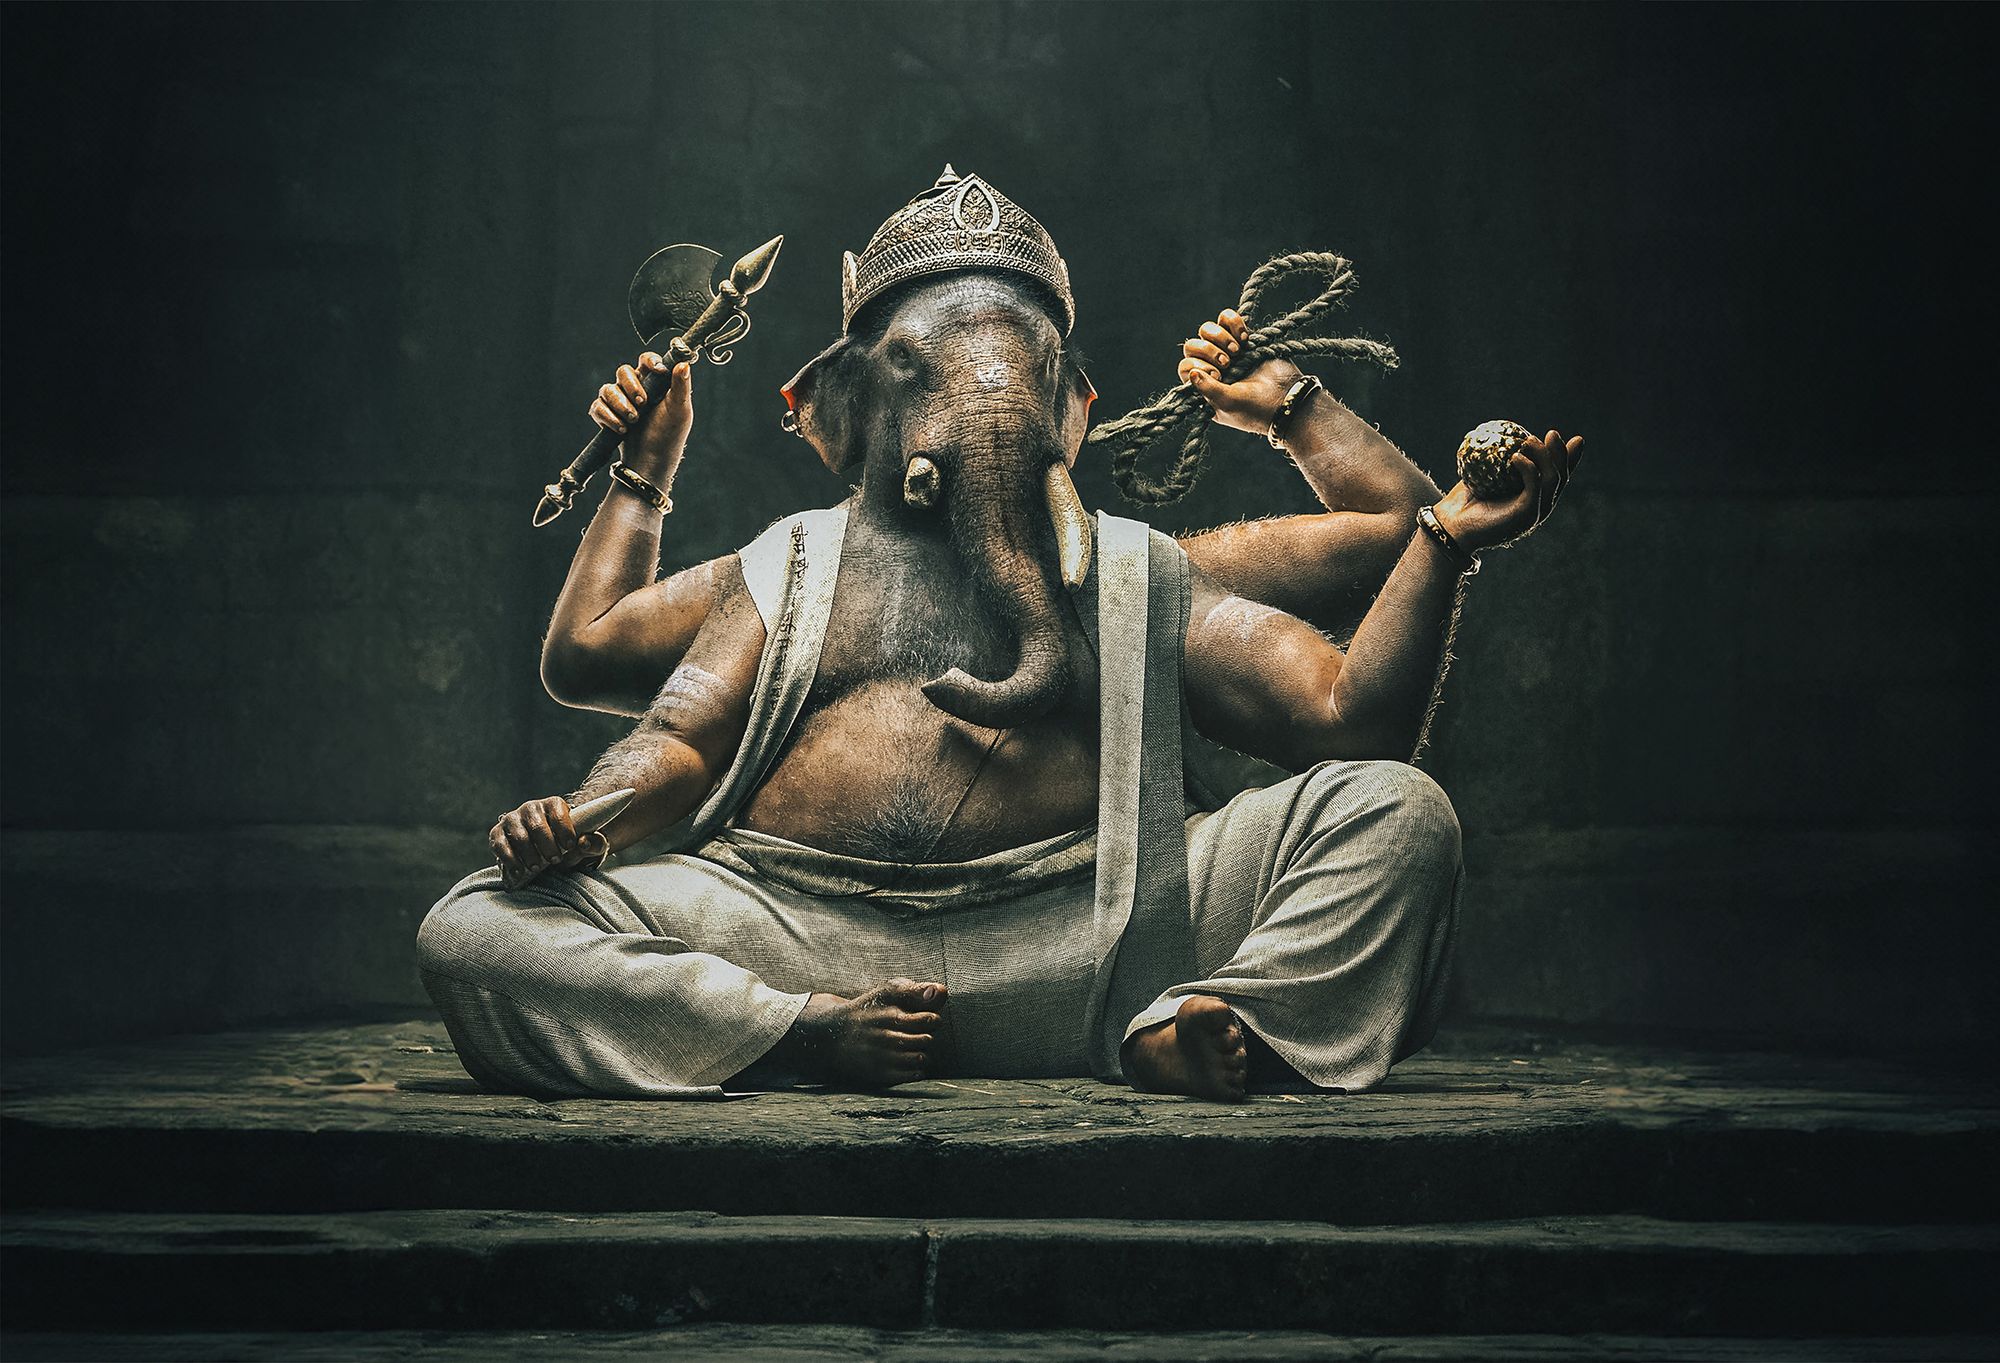
Why Ganesh? Two reasons: I’ve always been fascinated by Hinduist mythology and I wanted to refine my sculpting skills on both humans and animals. Ganesh, with its rich symbolism and various religious icons, provided the perfect challenge. Instead of sticking to one concept, I played with different representations, each distinct yet unified by consistent poses and symbolism. Targeting a completely photorealistic style, my goal was to capture Ganesh's essence while preserving the traditional features found in mythology icons.
As with any project, I initiated this one by gathering references using PureRef, my go-to software for this task. As previously mentioned, I wanted to opt for a heavy photorealistic style, so I looked for real-life photos as much as I could. Throughout the project's progression, I added more images and sections as needed, making it a smooth and natural process.
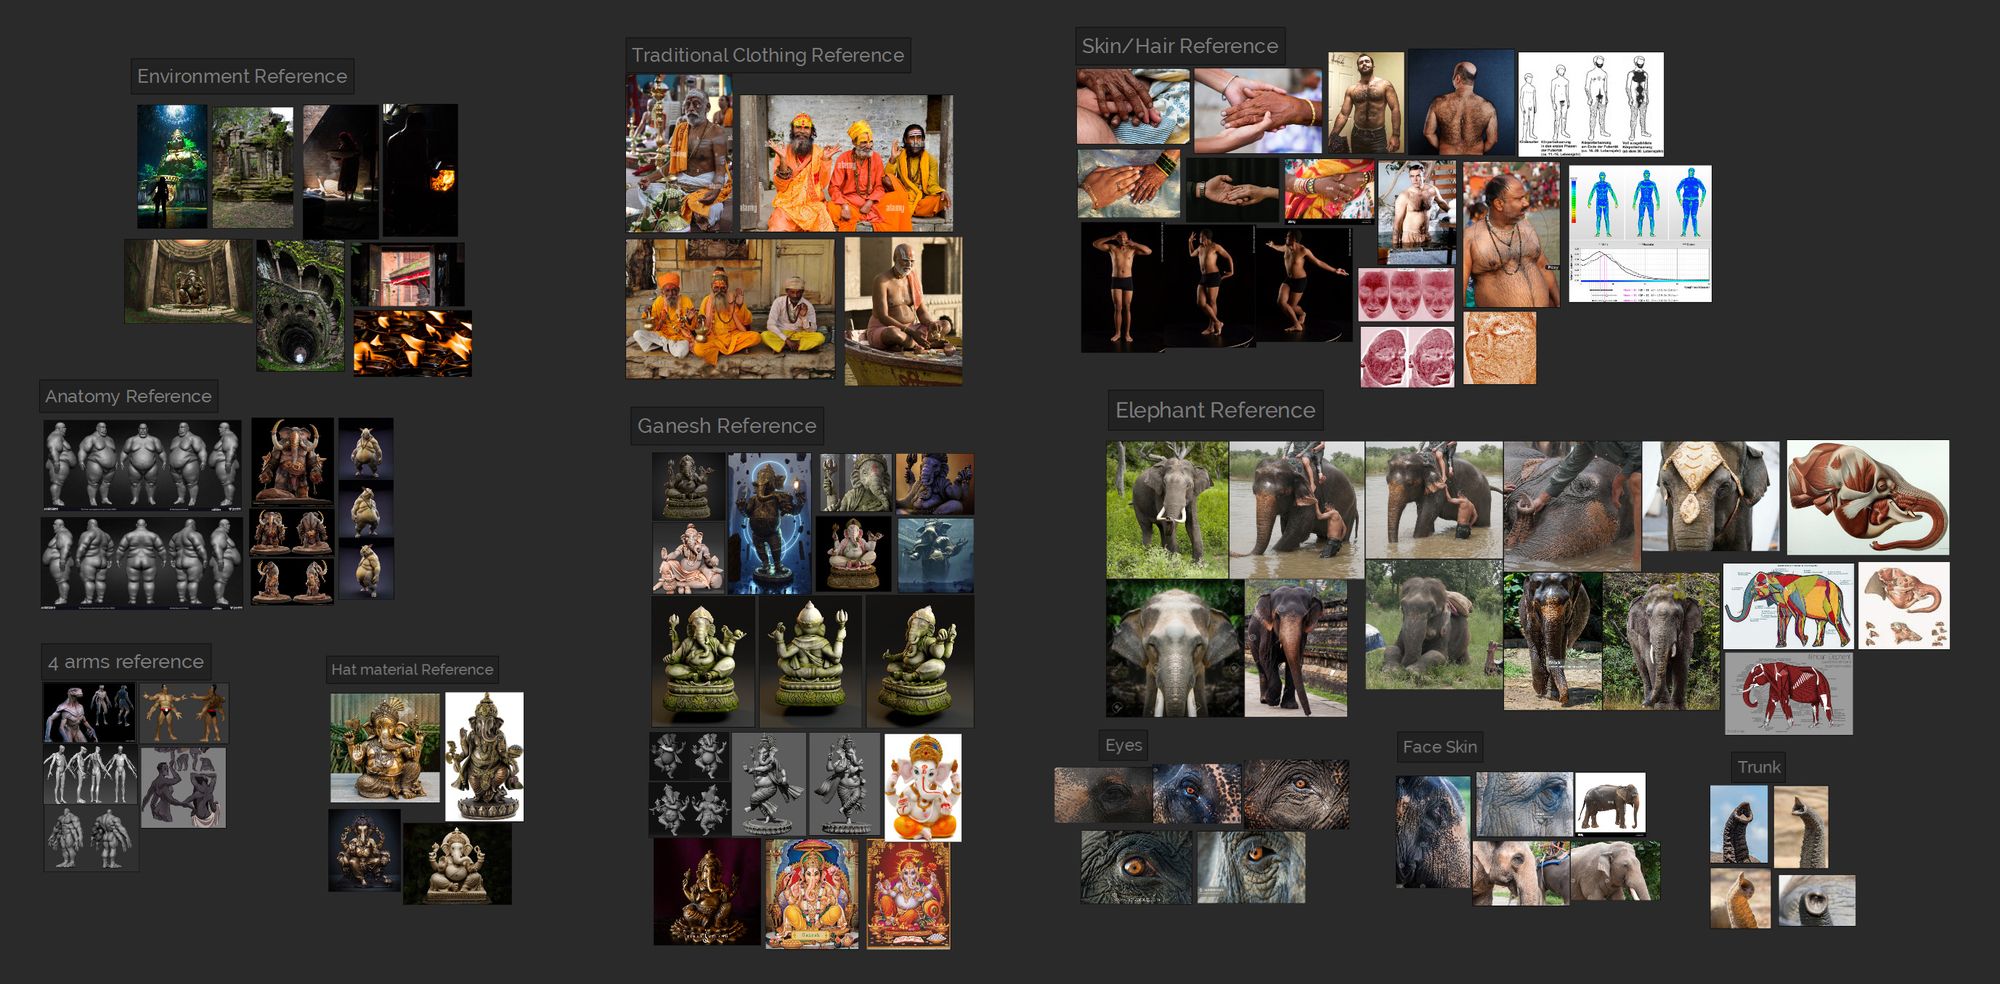
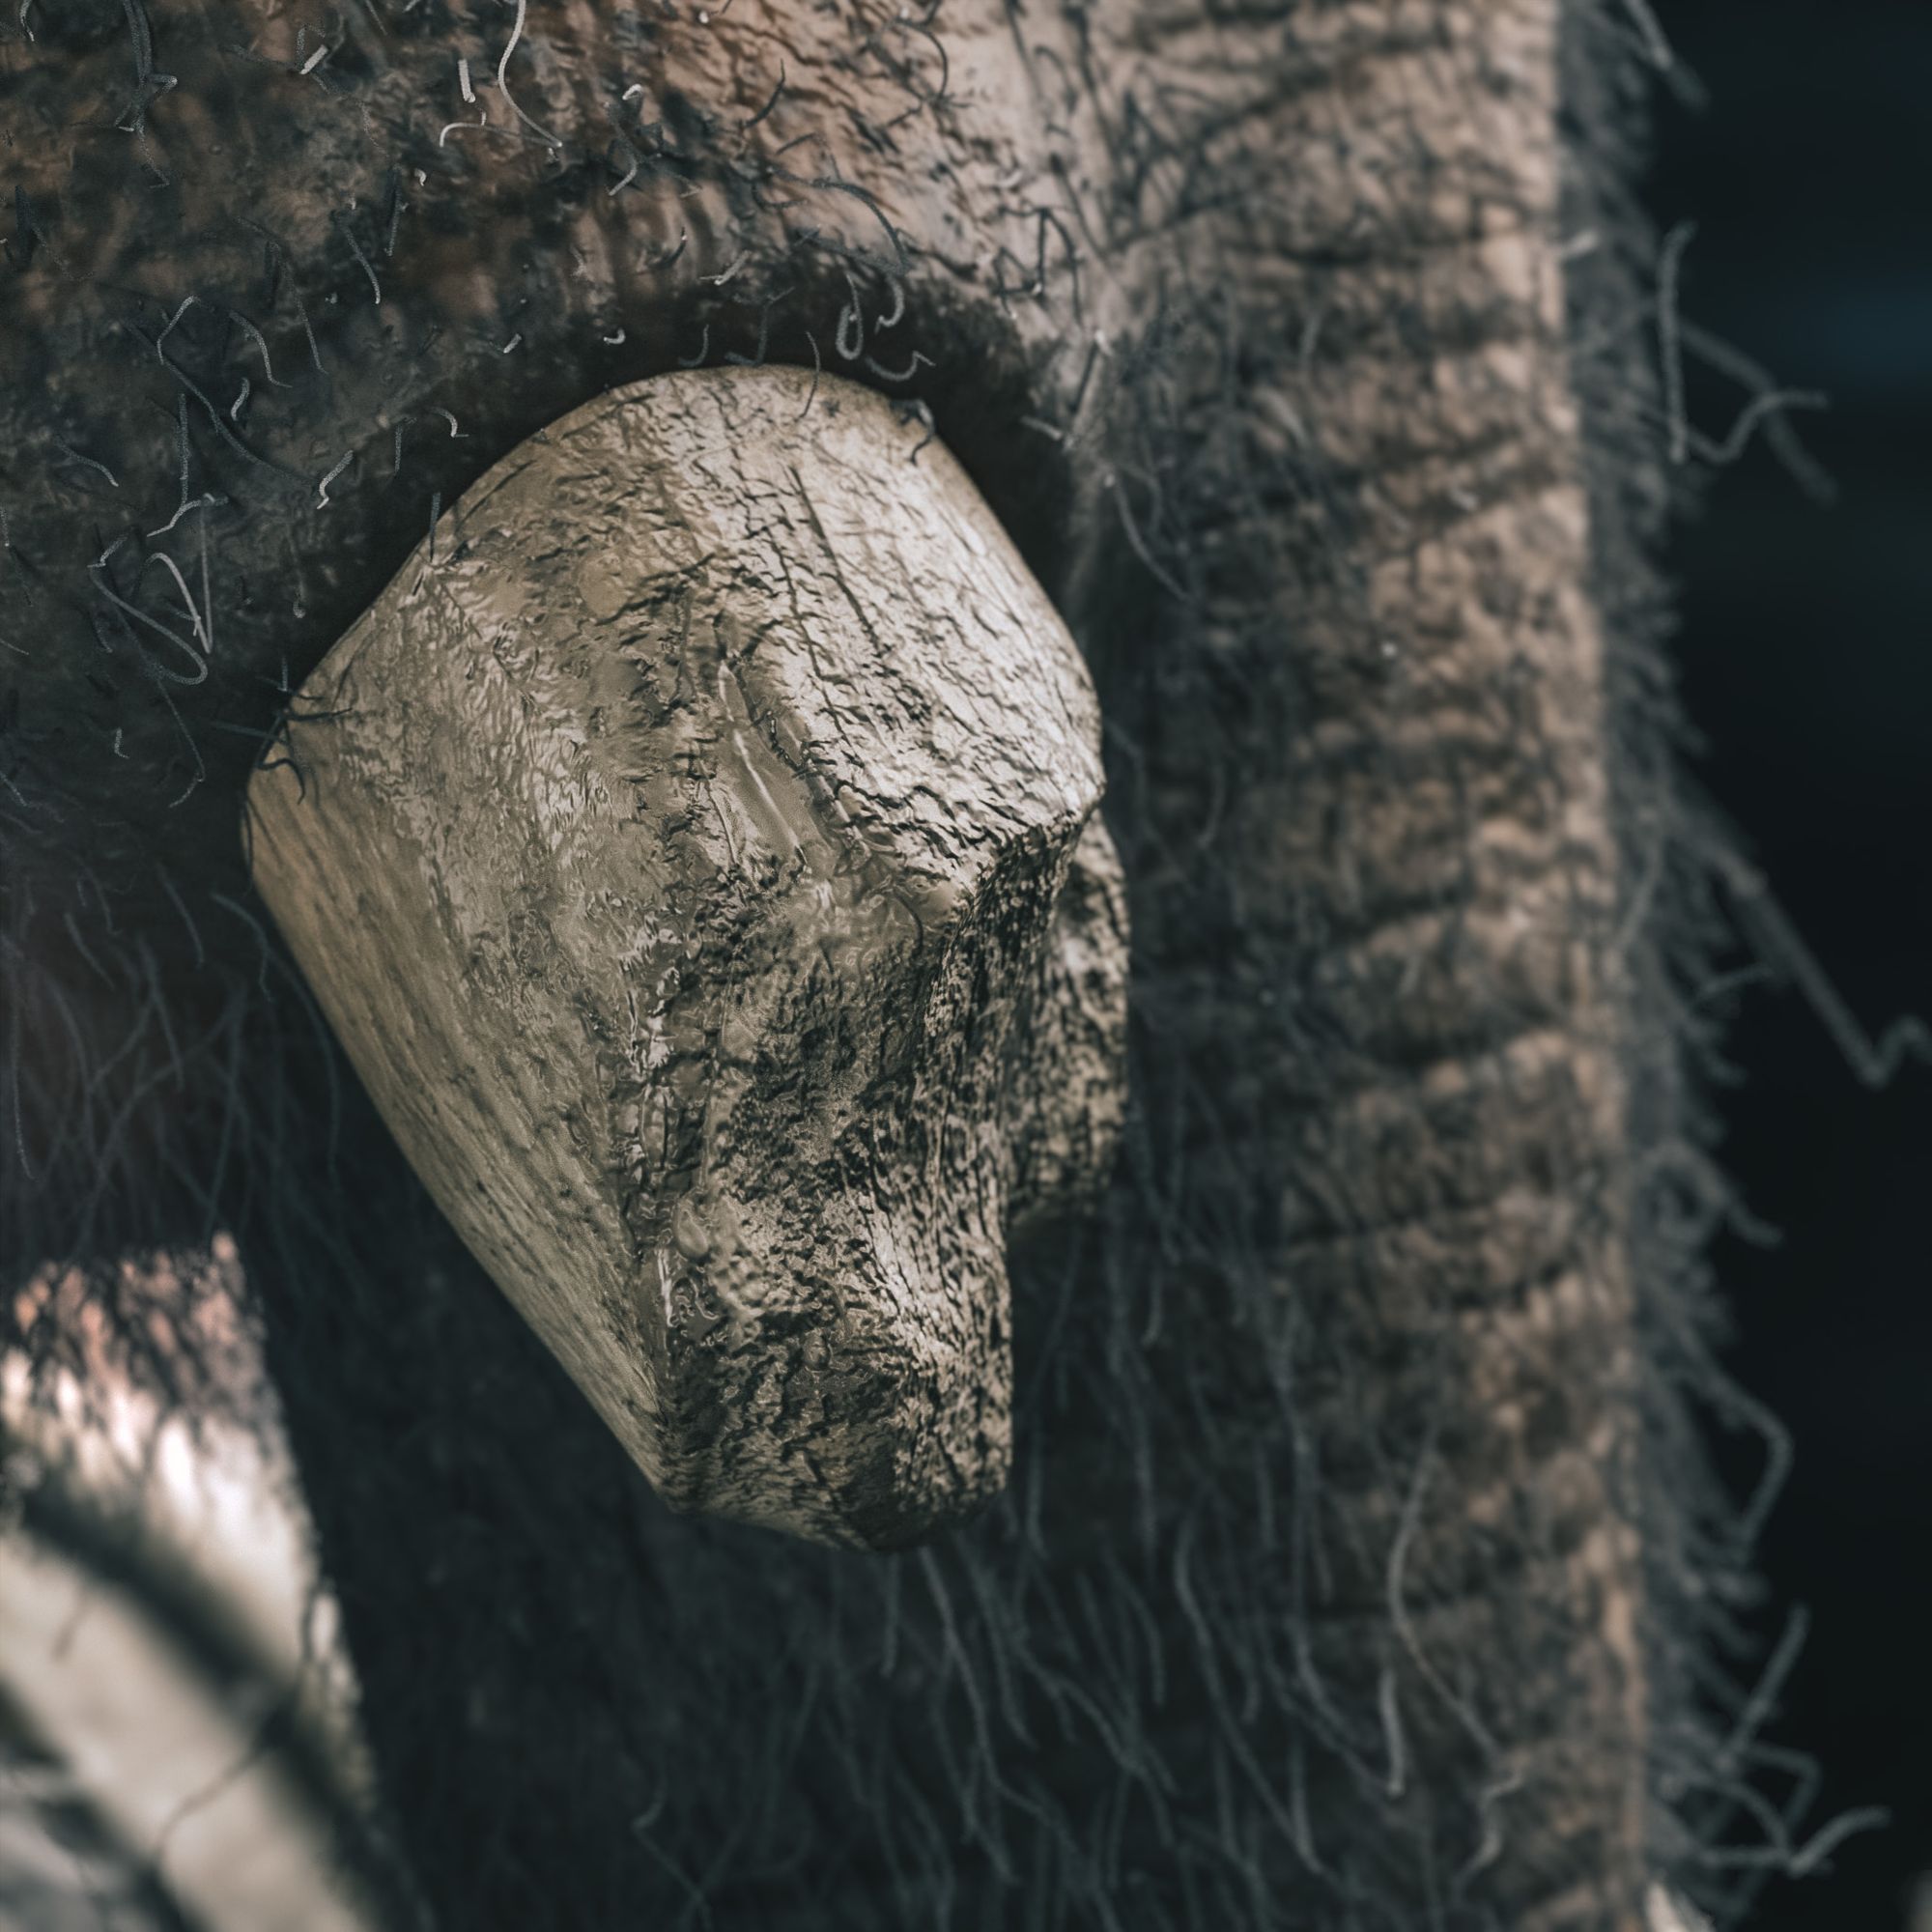
In the early stages, I searched for references of Ganesh and Indian Elephants, covering everything from skin close-ups to muscle anatomy, eyes, and trunk structure. I also focused on human anatomy and four-armed characters references, which was a bit tricky to blend with my goal of achieving realistic and accurate features. As the project progressed, I added references for traditional Indian clothing, skin tones and textures, hair patterns on both humans and elephants, and details about the environment where the final character would be rendered.
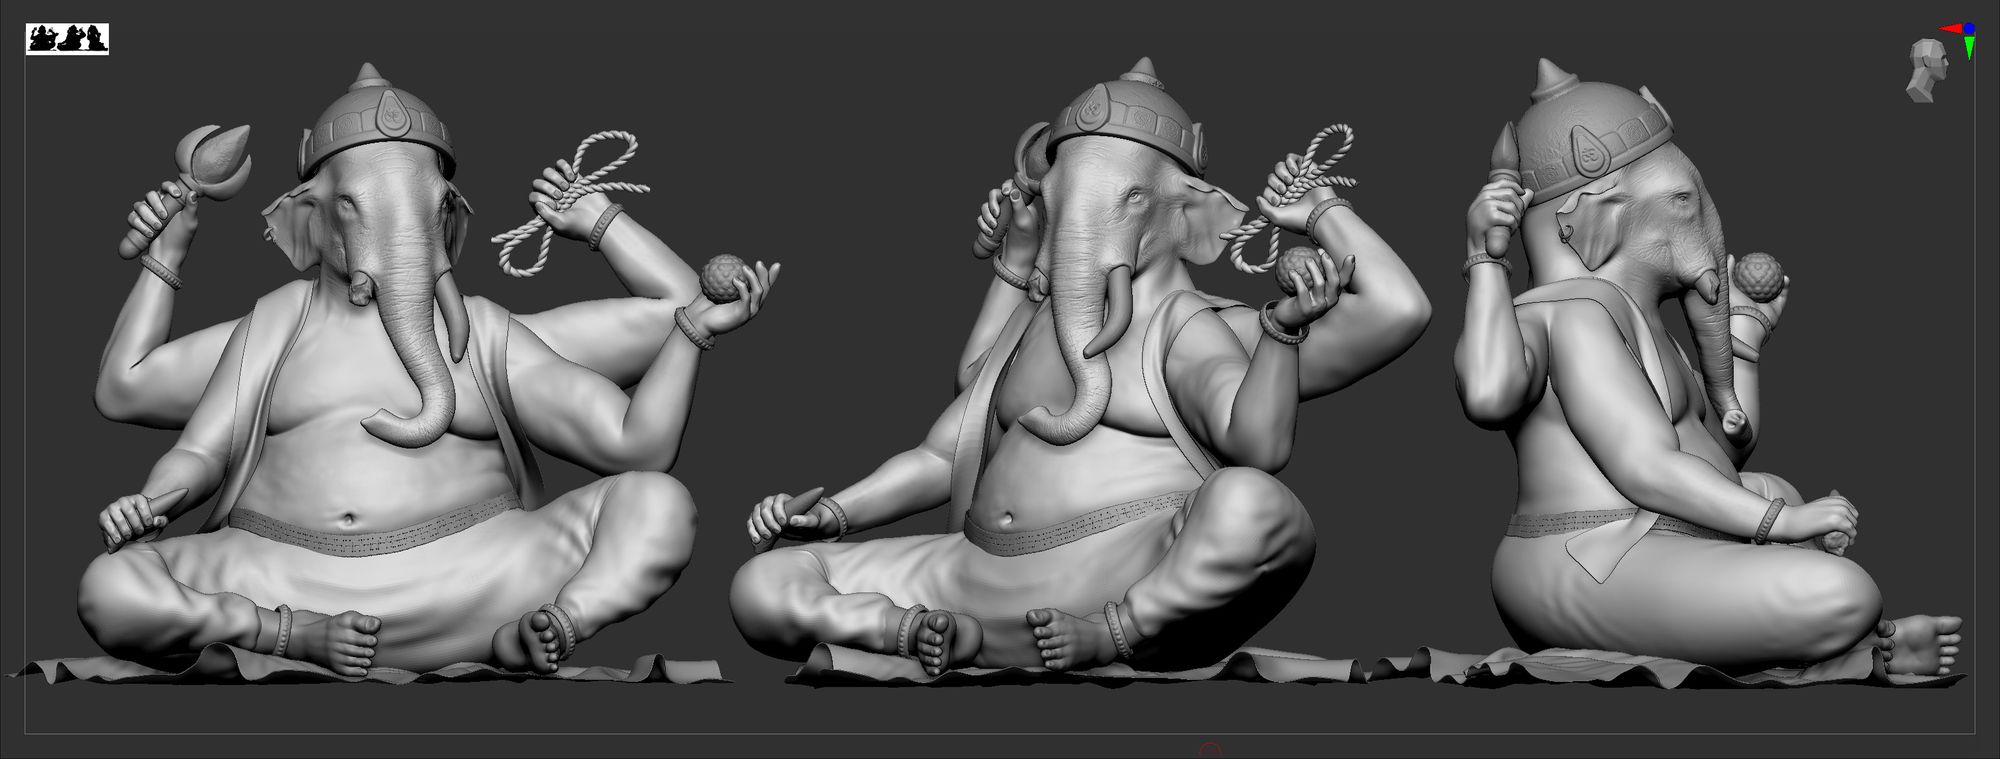
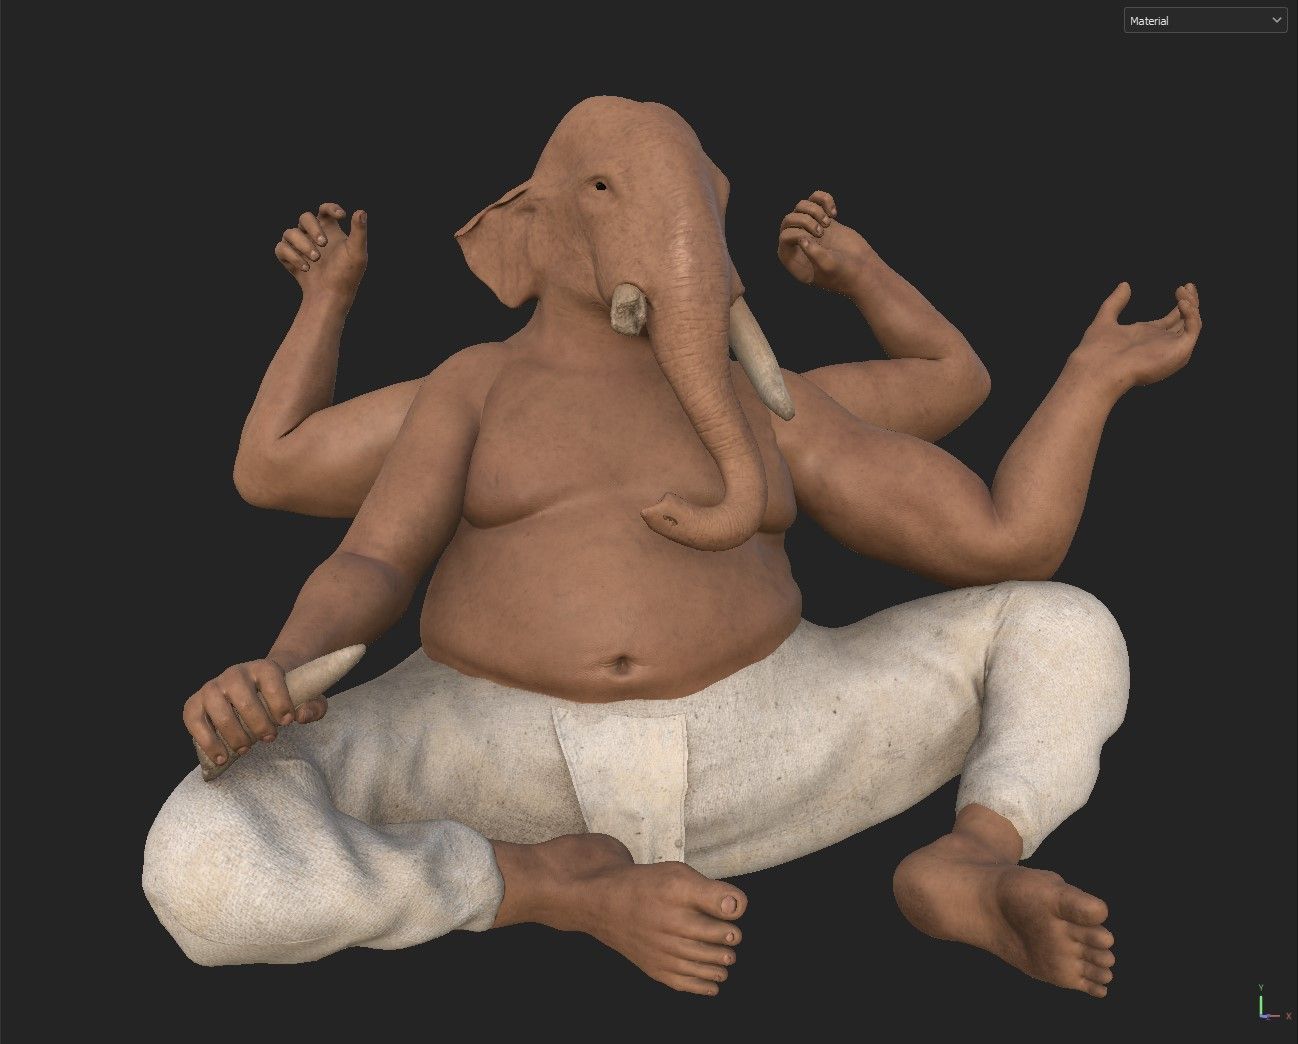
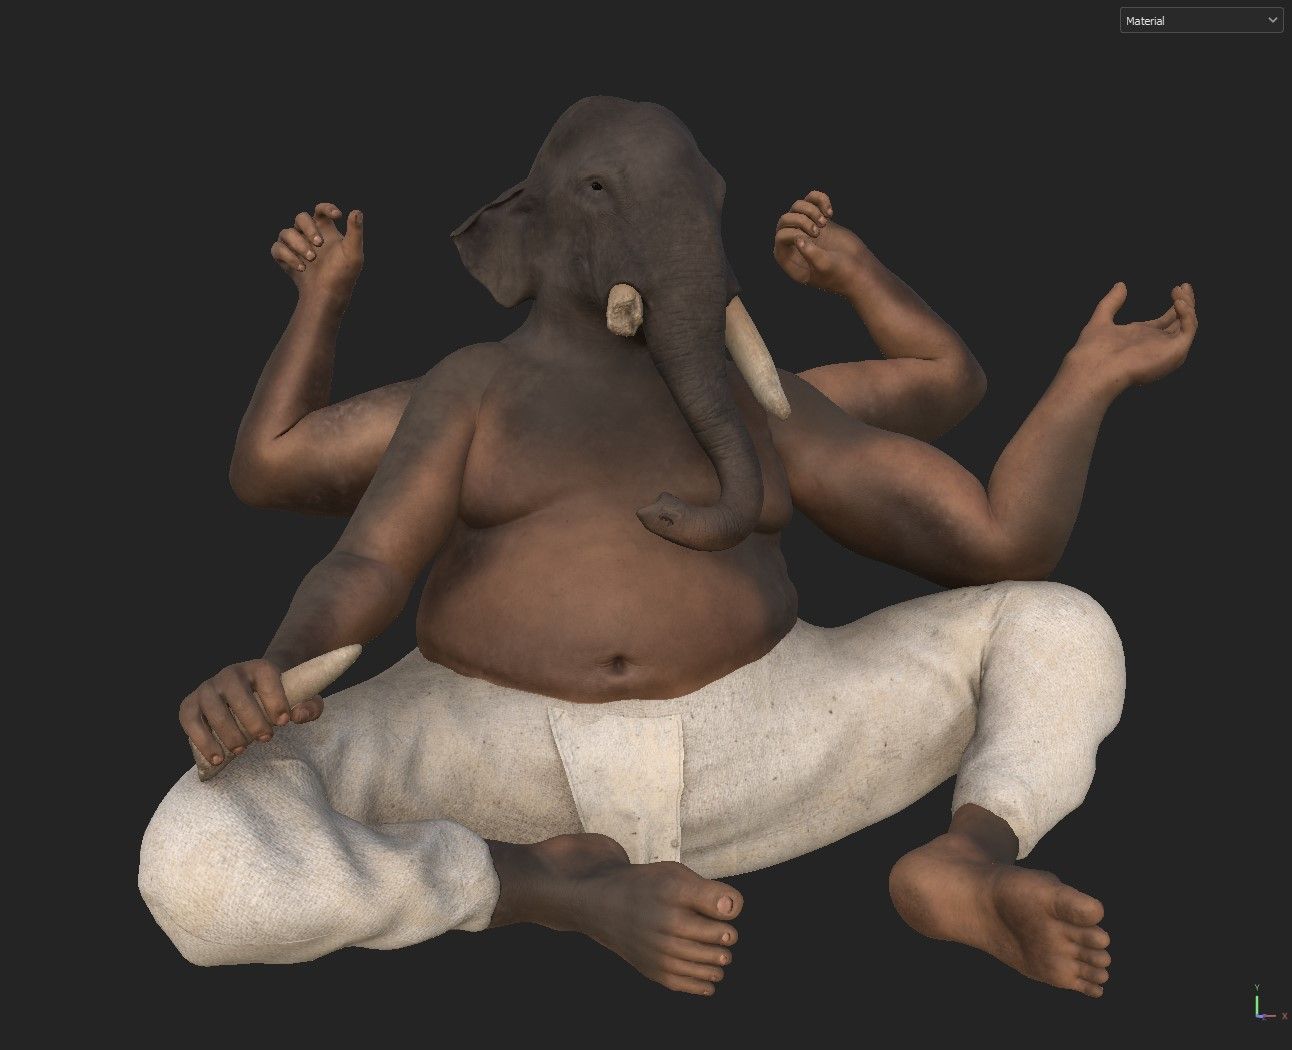
I initiated the sculpting phase in ZBrush by creating a rough block of primary forms, ensuring that the silhouette and main volumes of the mesh were precise. This stage tends to be the most challenging yet crucial for me, so I spent a lot of time on this phase to make sure everything was on point. Once the primary forms were established, I transitioned to the secondary: refining muscles and fleshy areas. During this stage, props and clothing placeholders were introduced, adding depth and personality to the character.
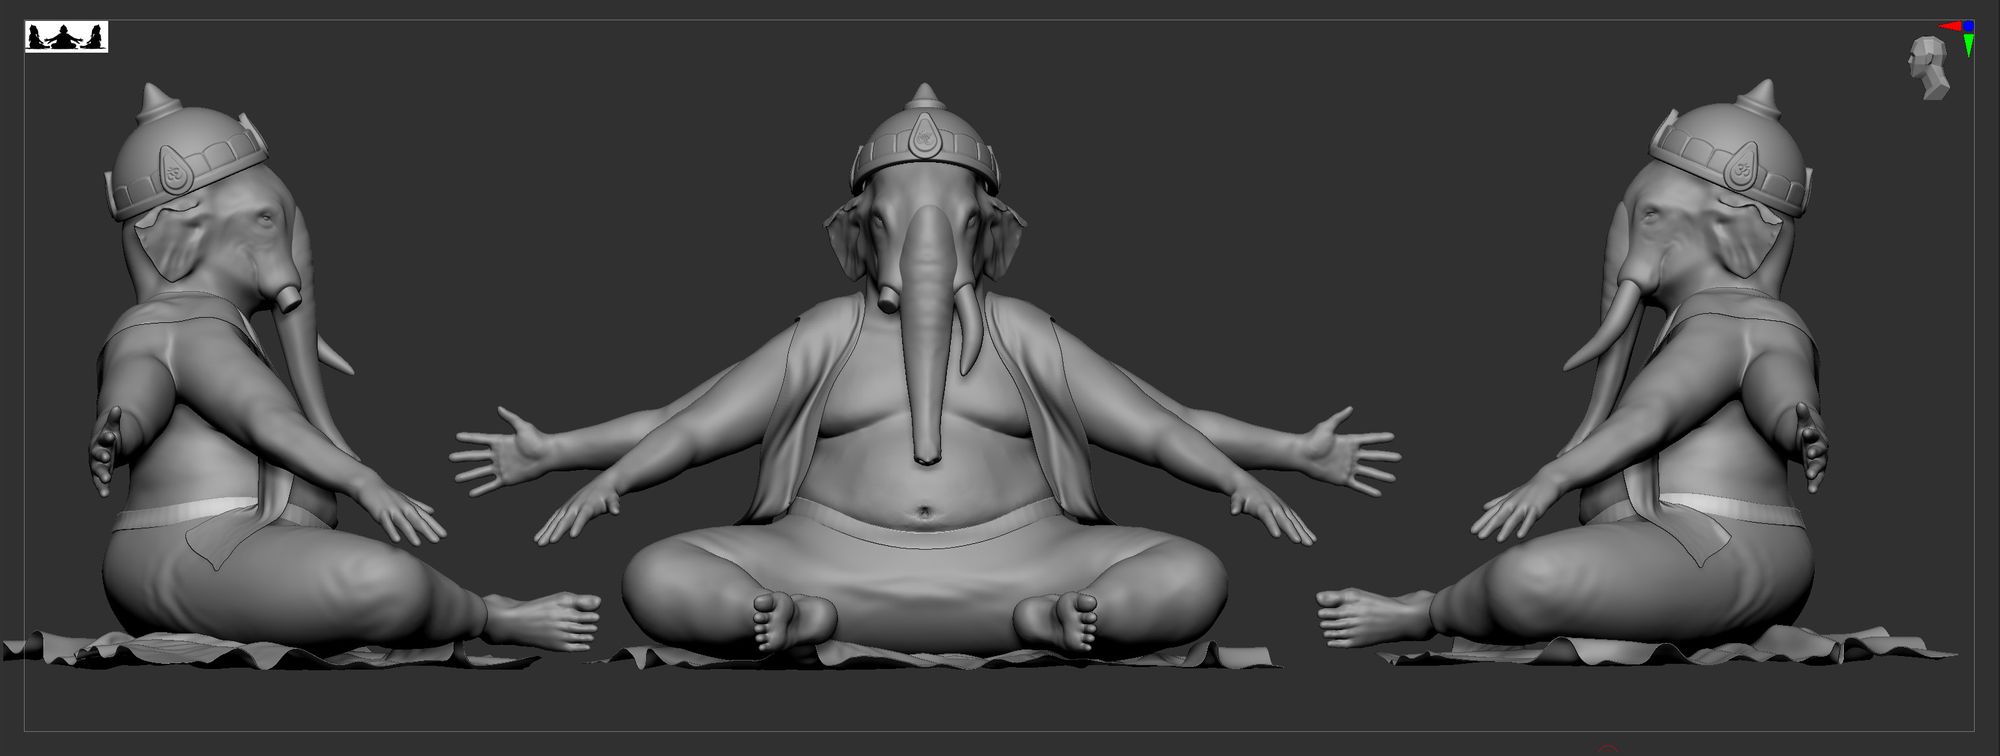
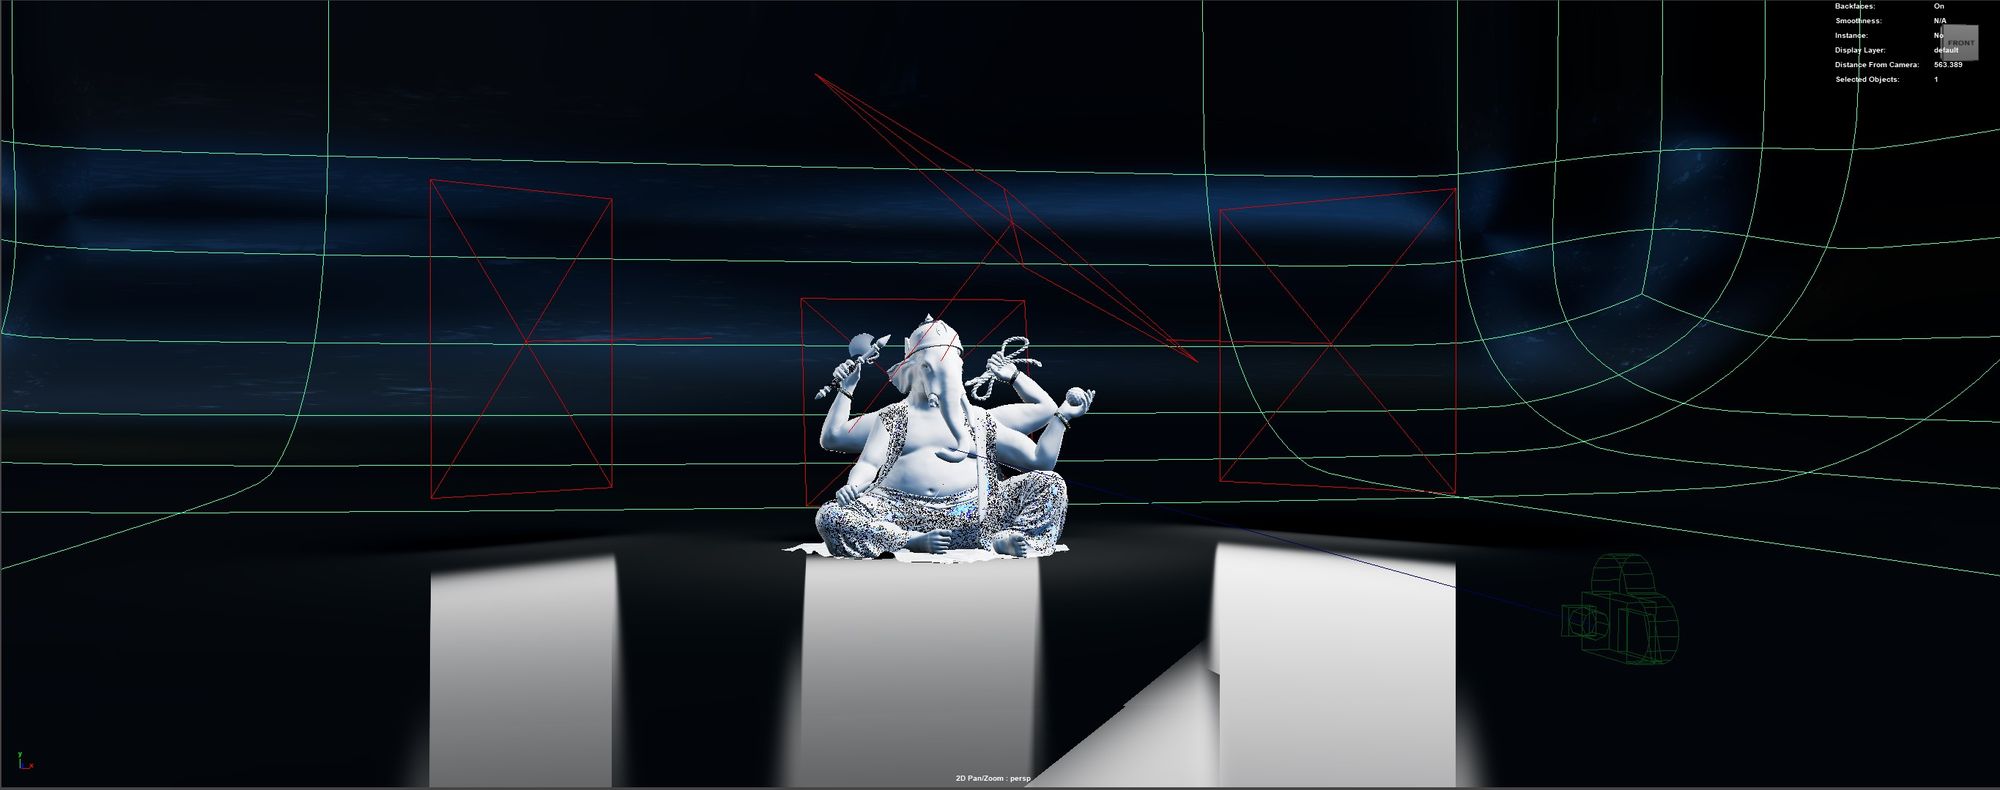
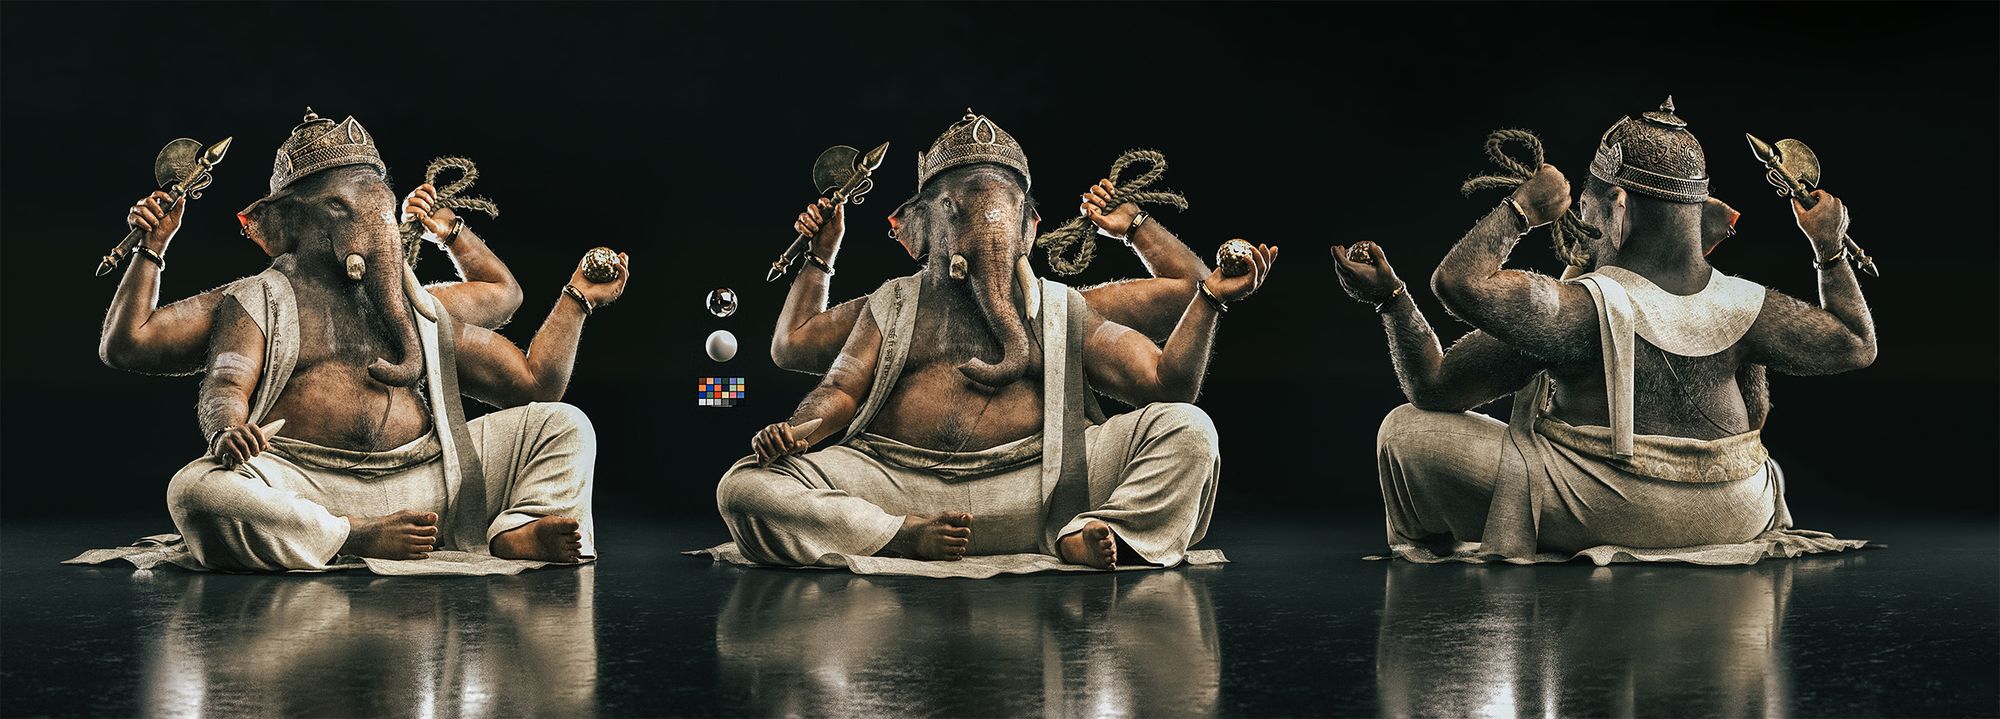
As this character was designed purely for display, I opted to pose it directly in ZBrush, using the Transpose Master Plugin. The pose chosen was a classic representation of Ganesh, drawing inspiration from all the icons I found of the deity.
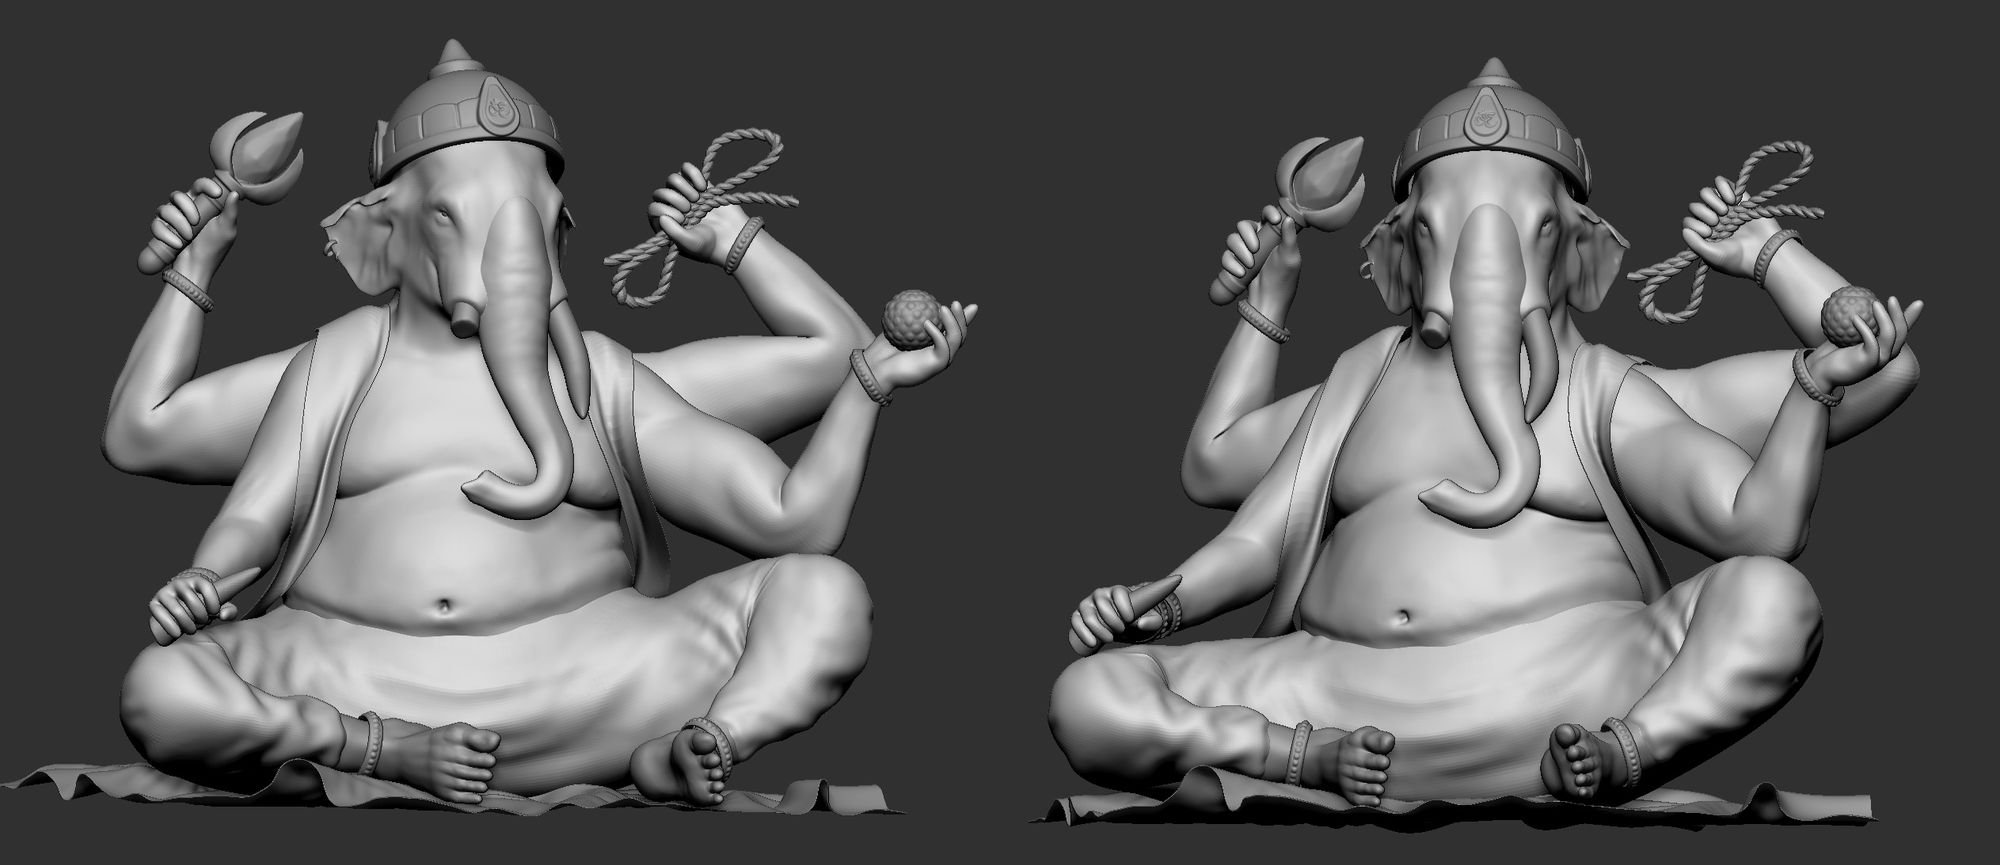
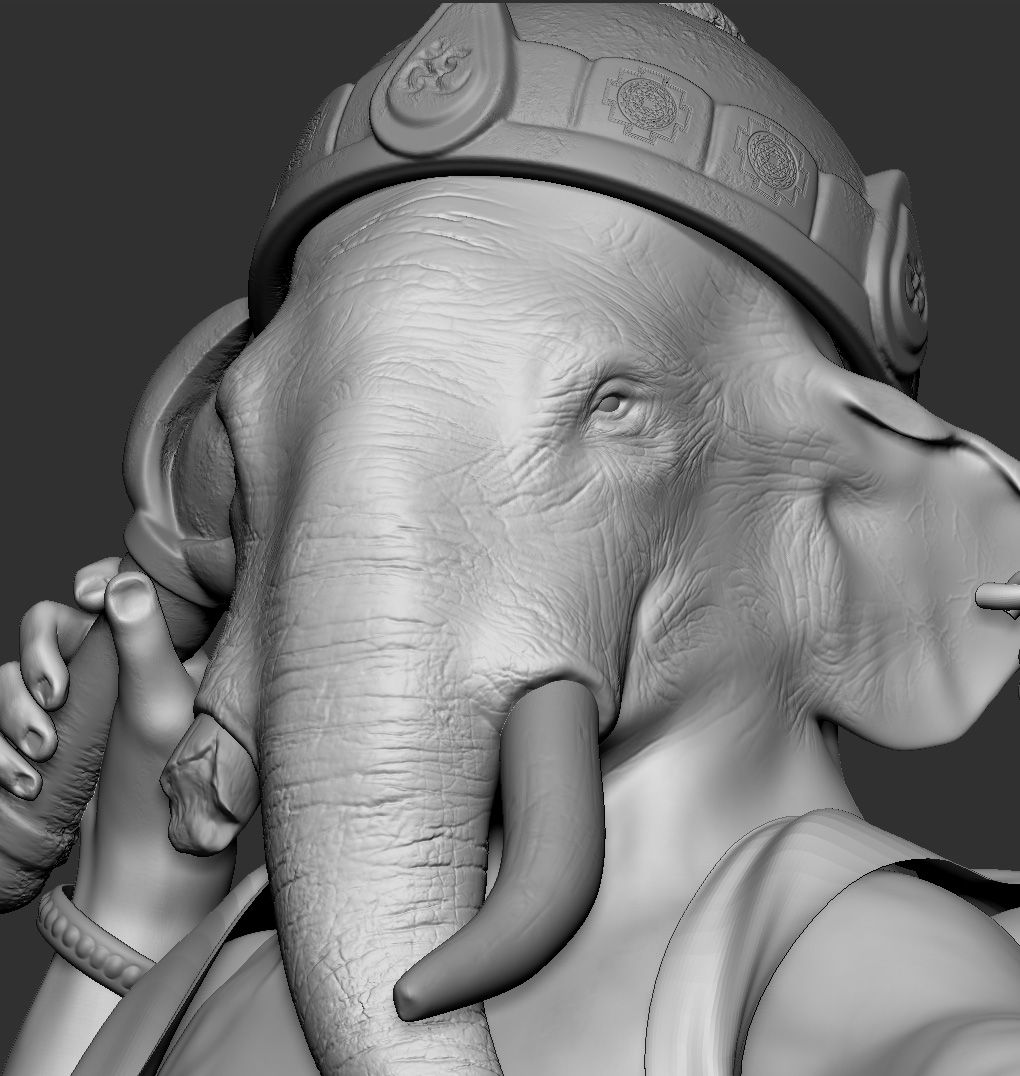
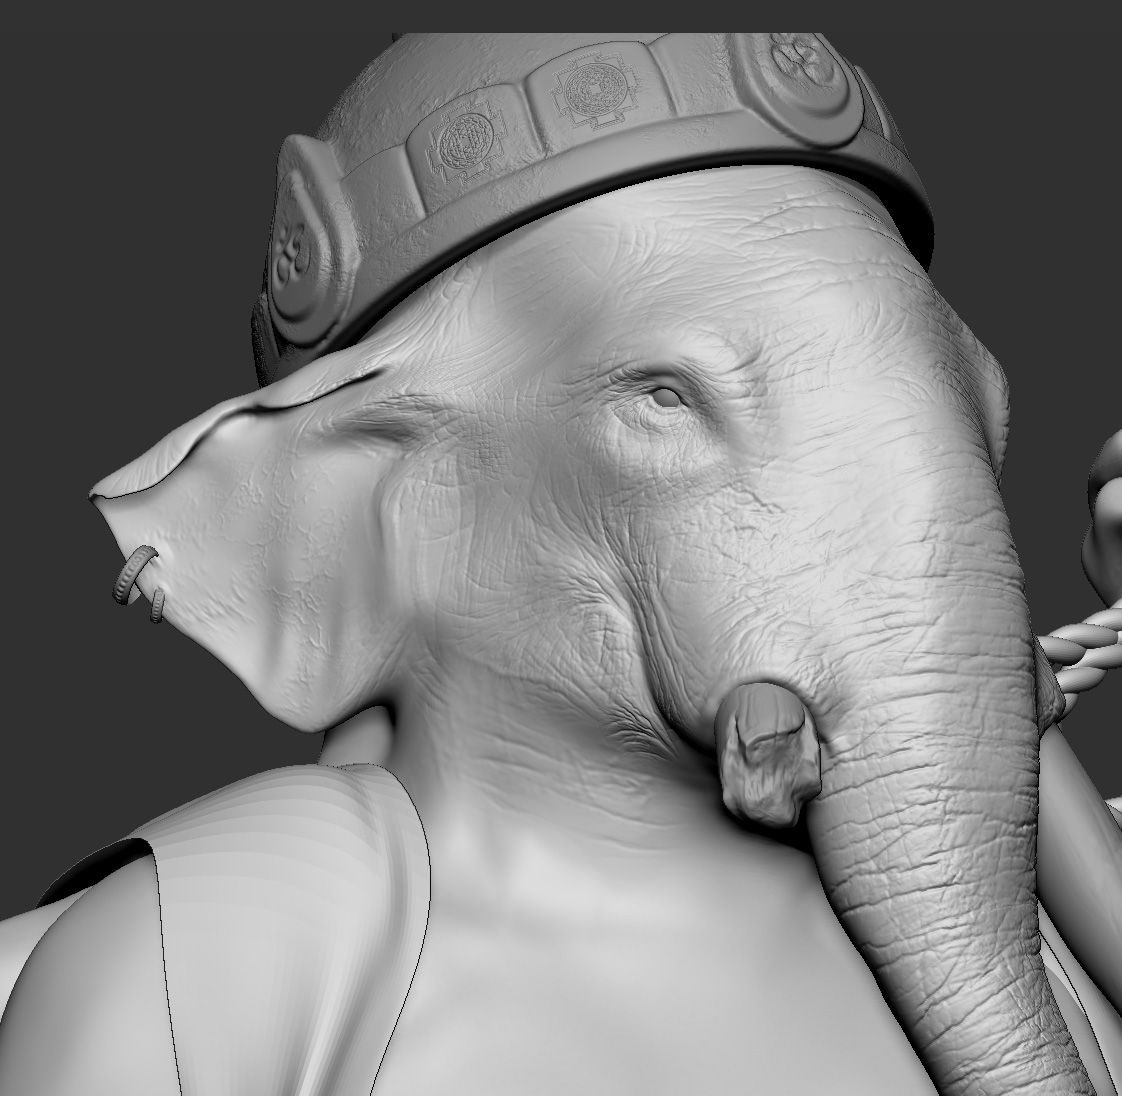
After finalising the pose, it was time to dive into the intricate details, the step I enjoy the most. I addressed any deformations from the posing and, with the help of ZBrush brushes and alphas I found online, added a good amount of fine details. I didn't go too far though, saving room for additional enhancements in the upcoming texturing phase.
After exporting the mesh from ZBrush, it was time for retopology. Given the time-intensive nature of this stage, and since the character wasn't designed for rigging or animation, I didn’t want to spend a lot of time on this phase. I used a low-poly version created with ZBrush's ZRemesher as a base in Maya. While I manually corrected the critical spots, the overall result was sufficient for the project.
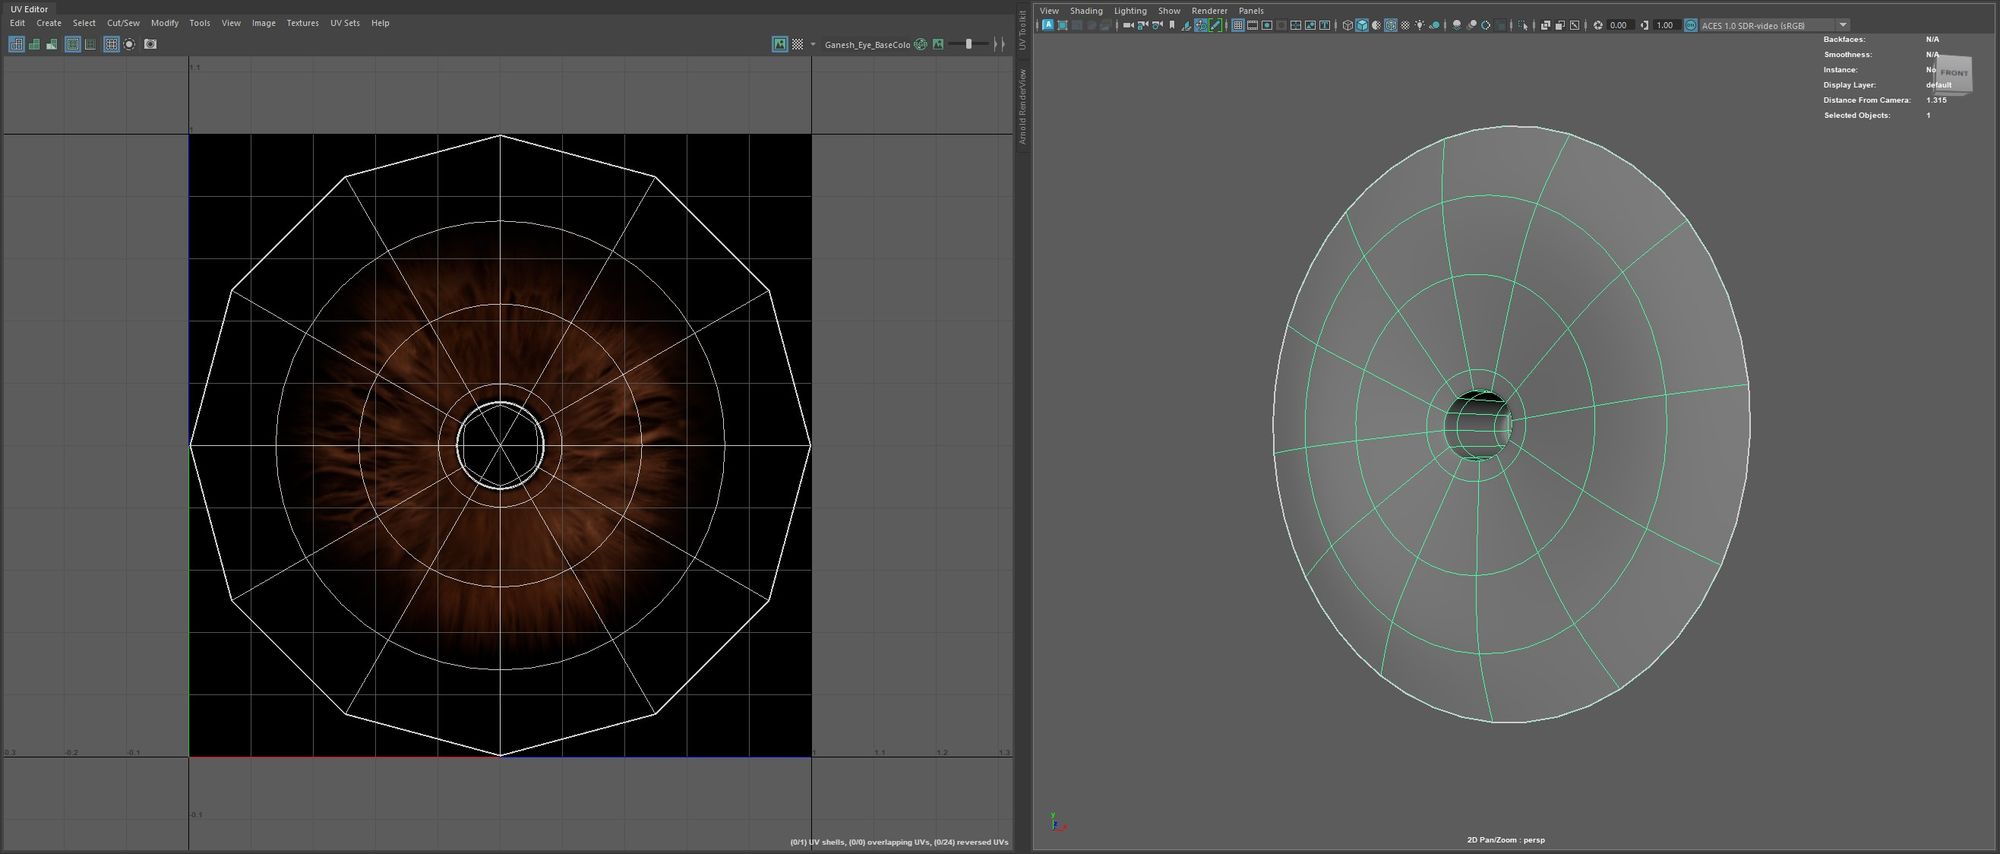
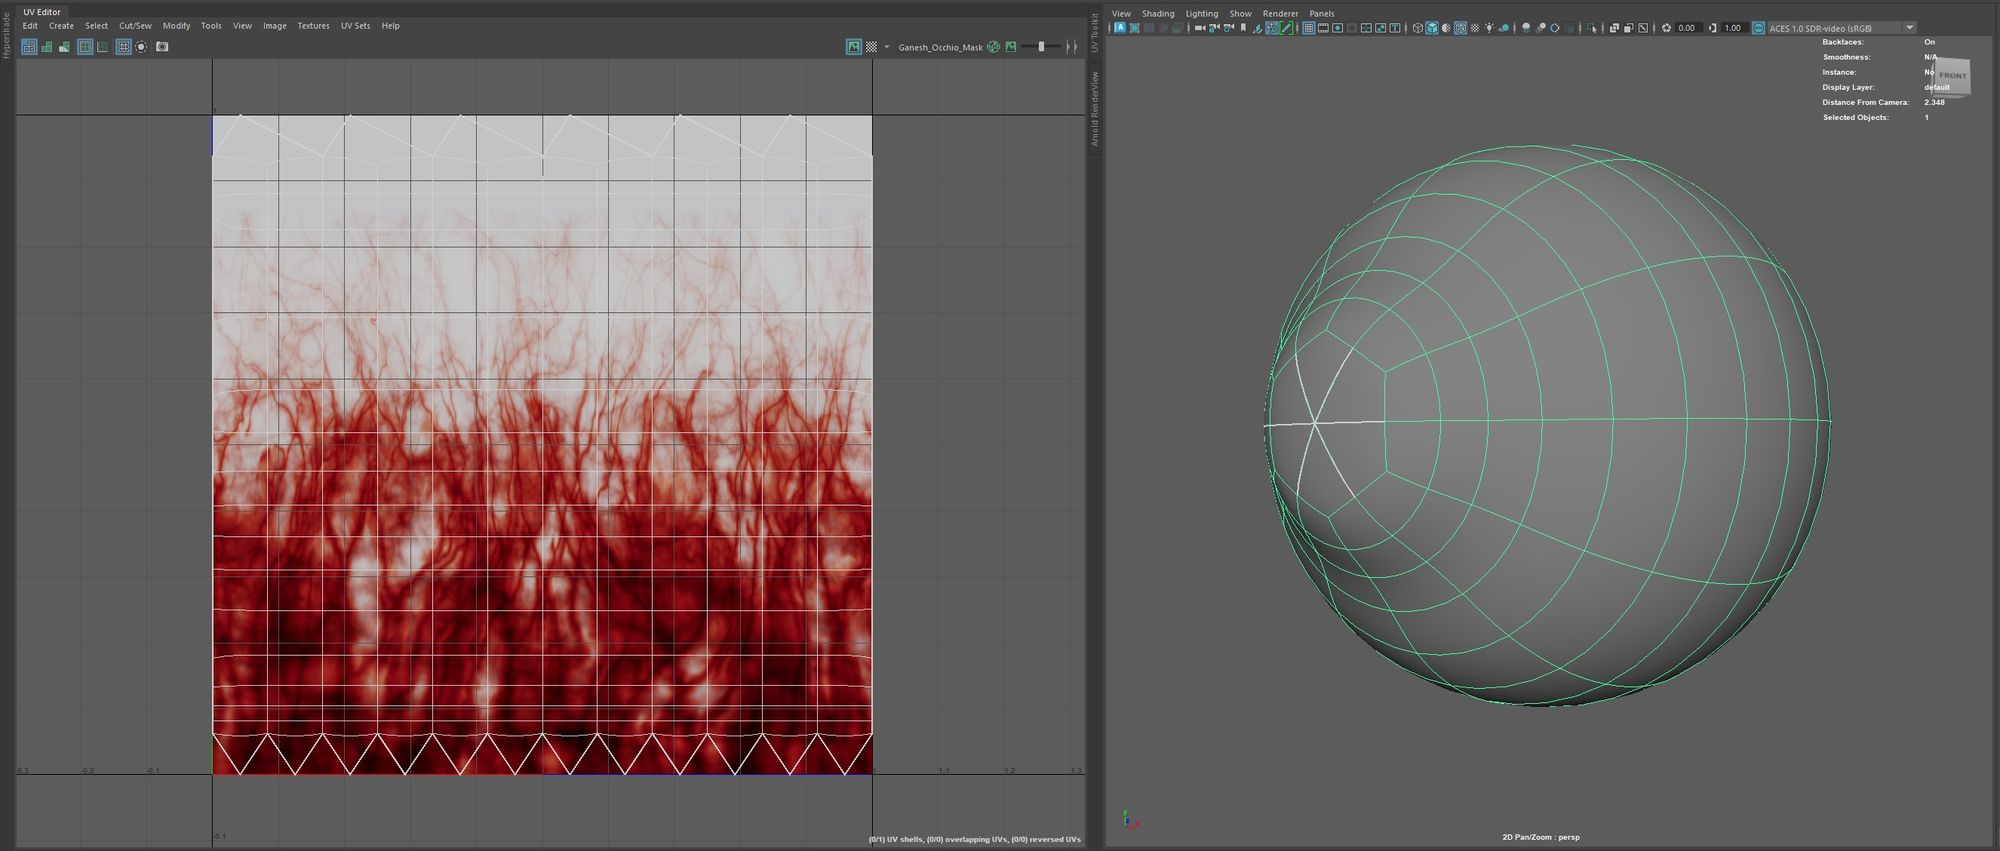
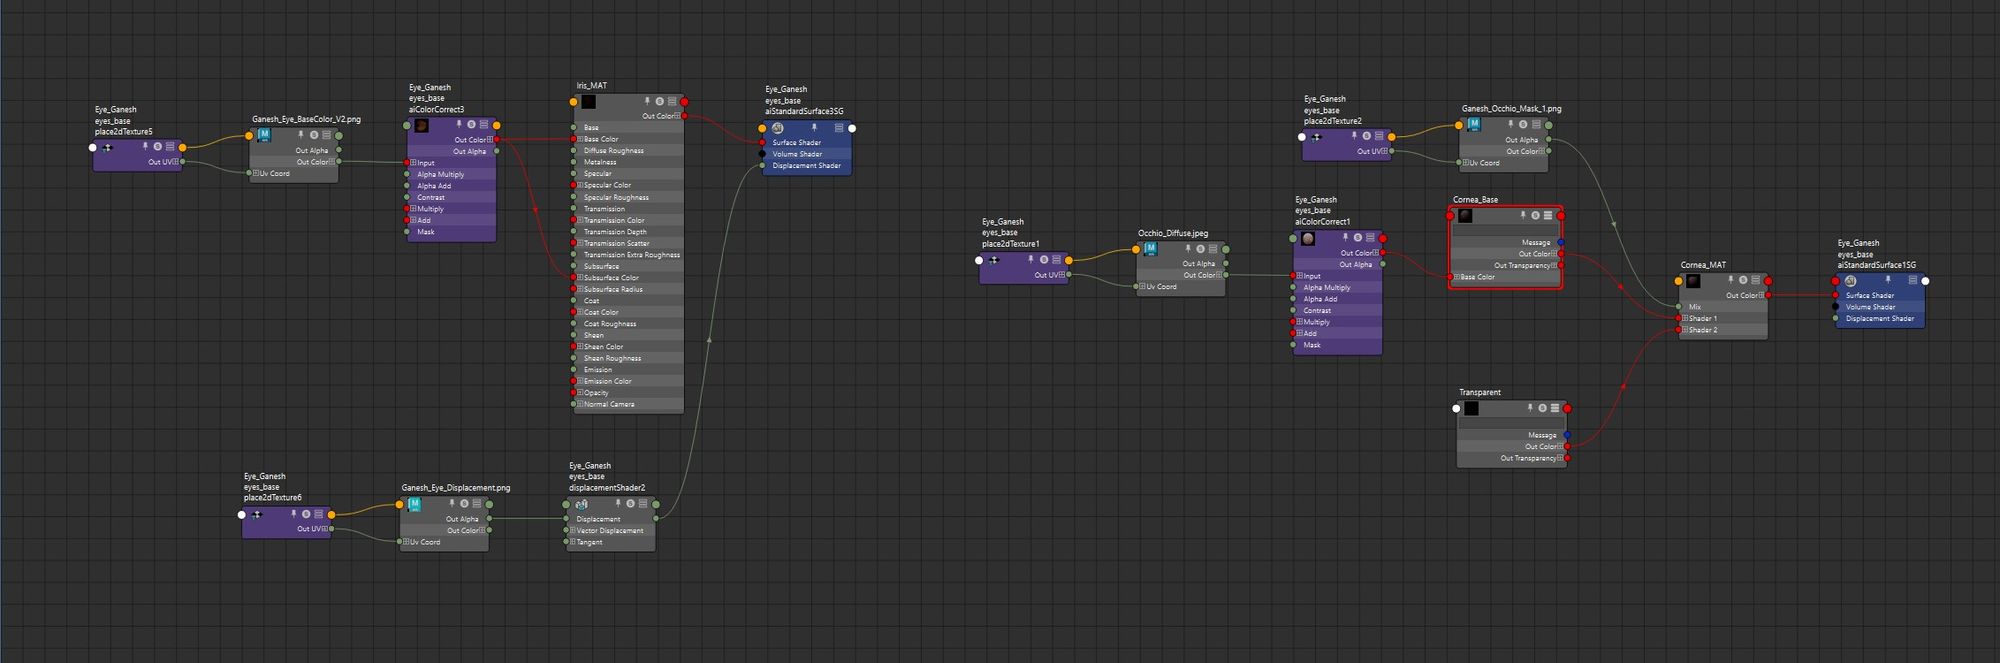
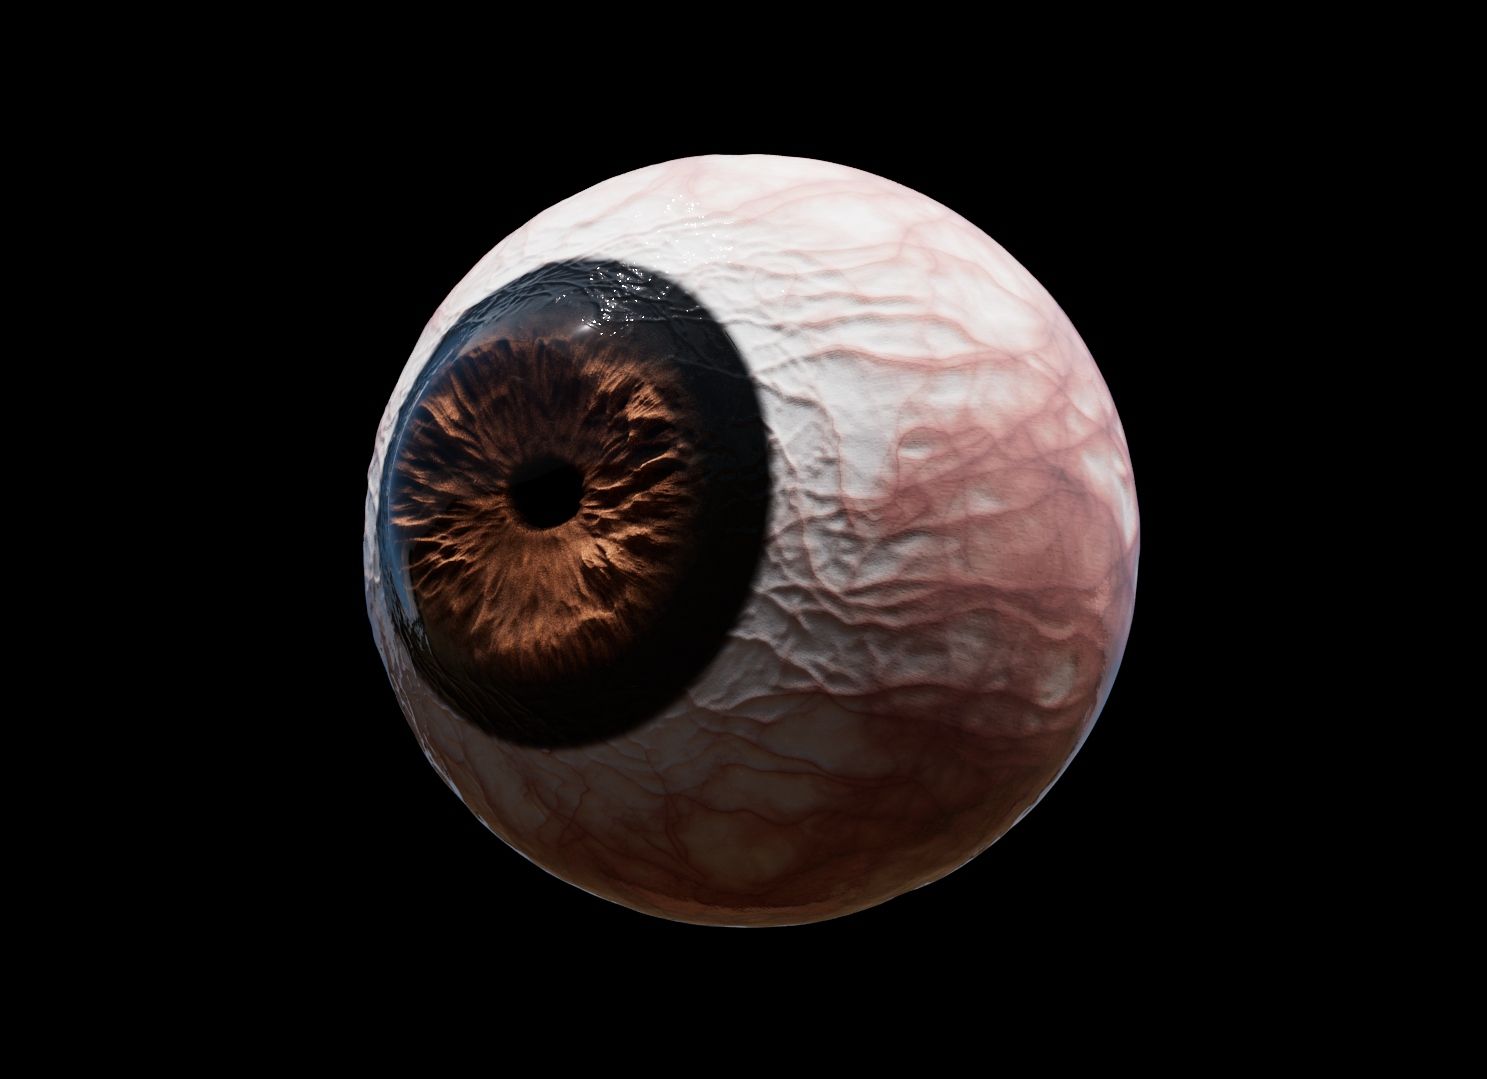
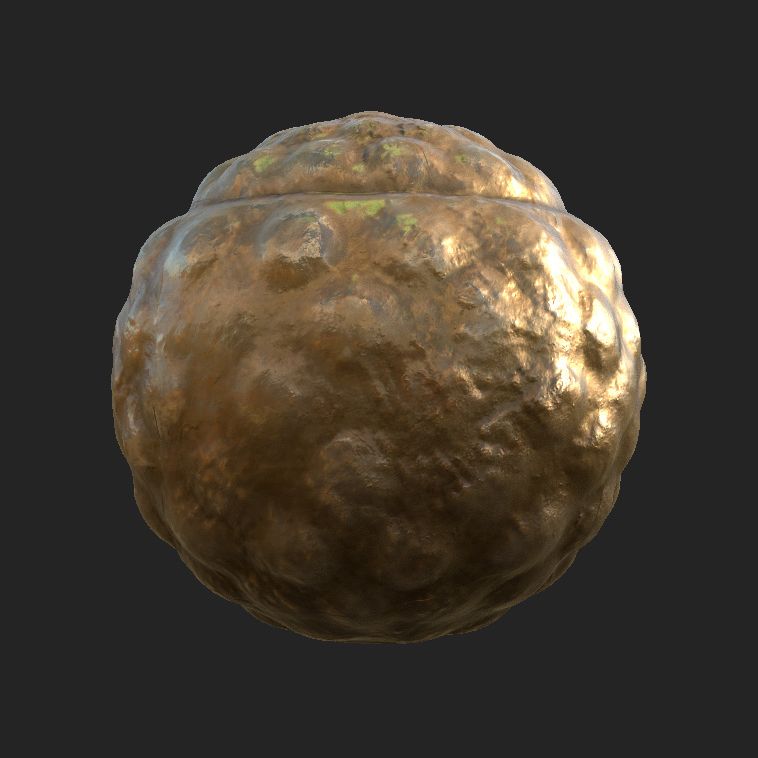
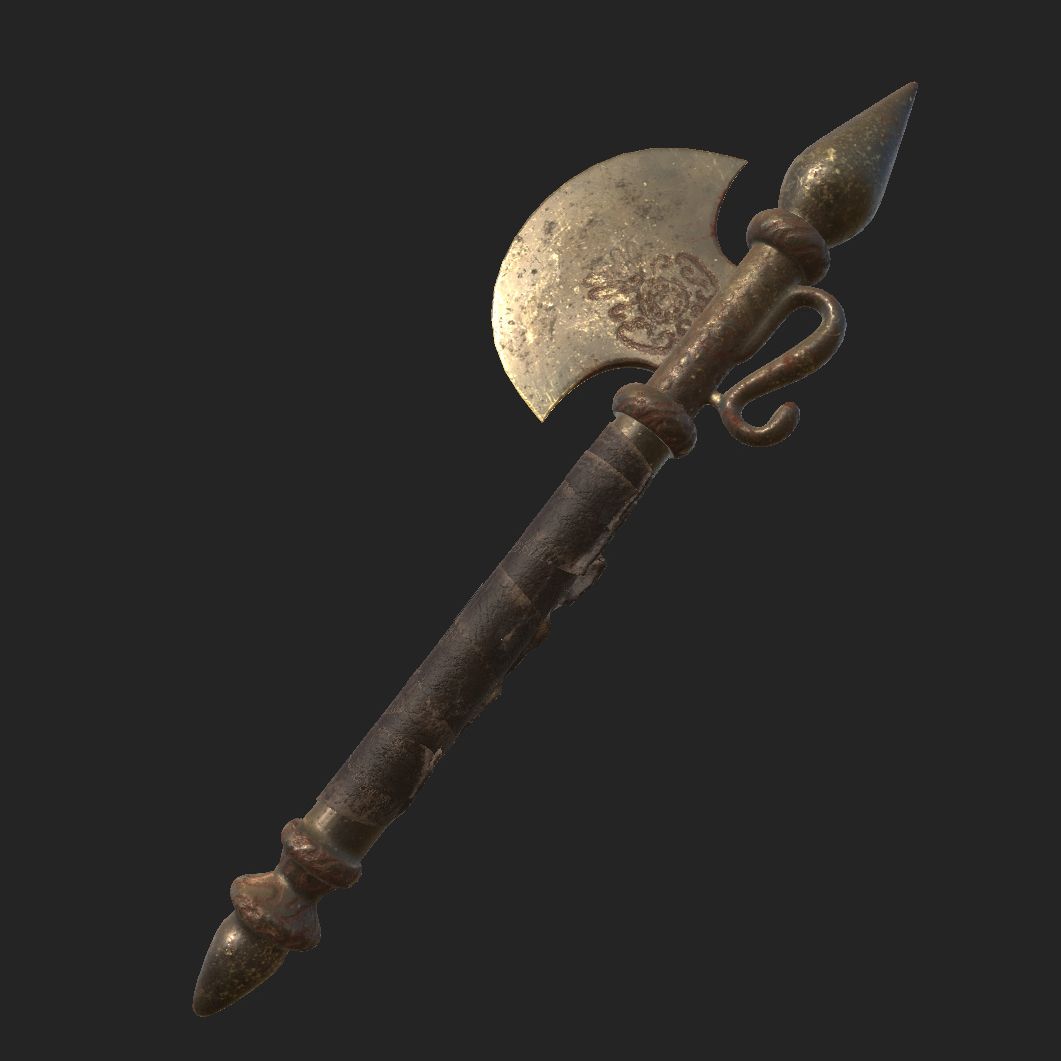
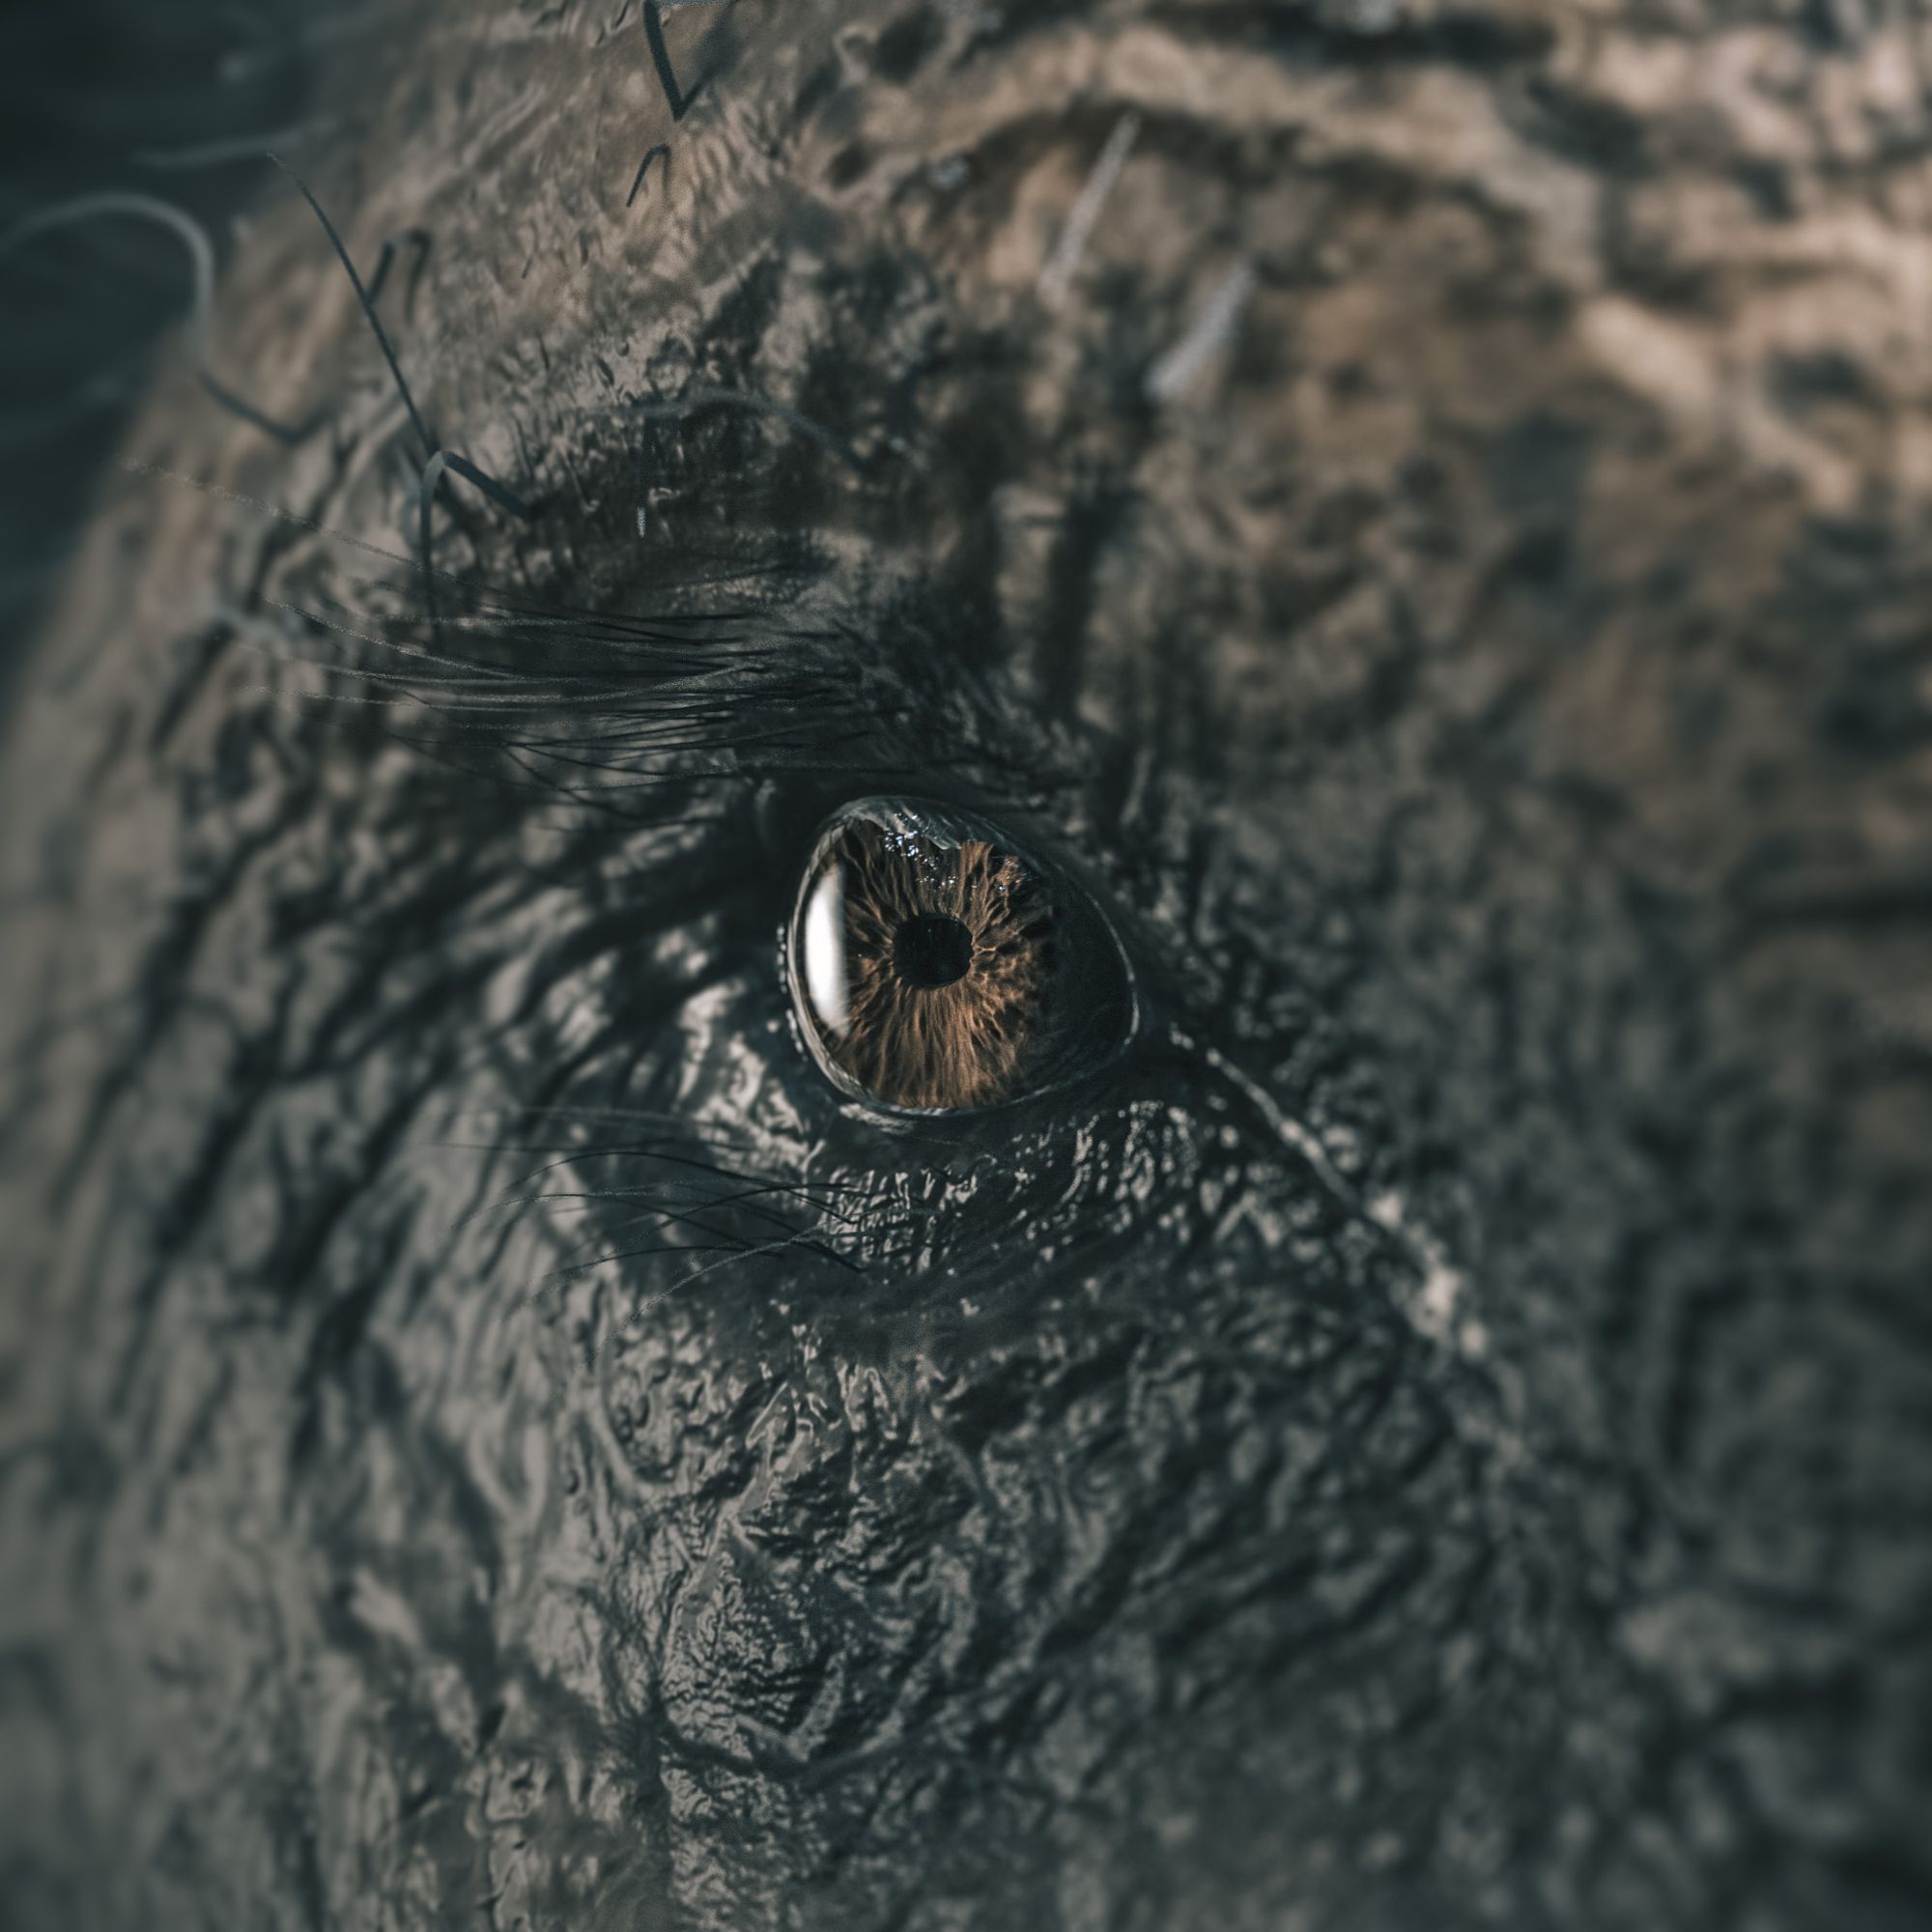
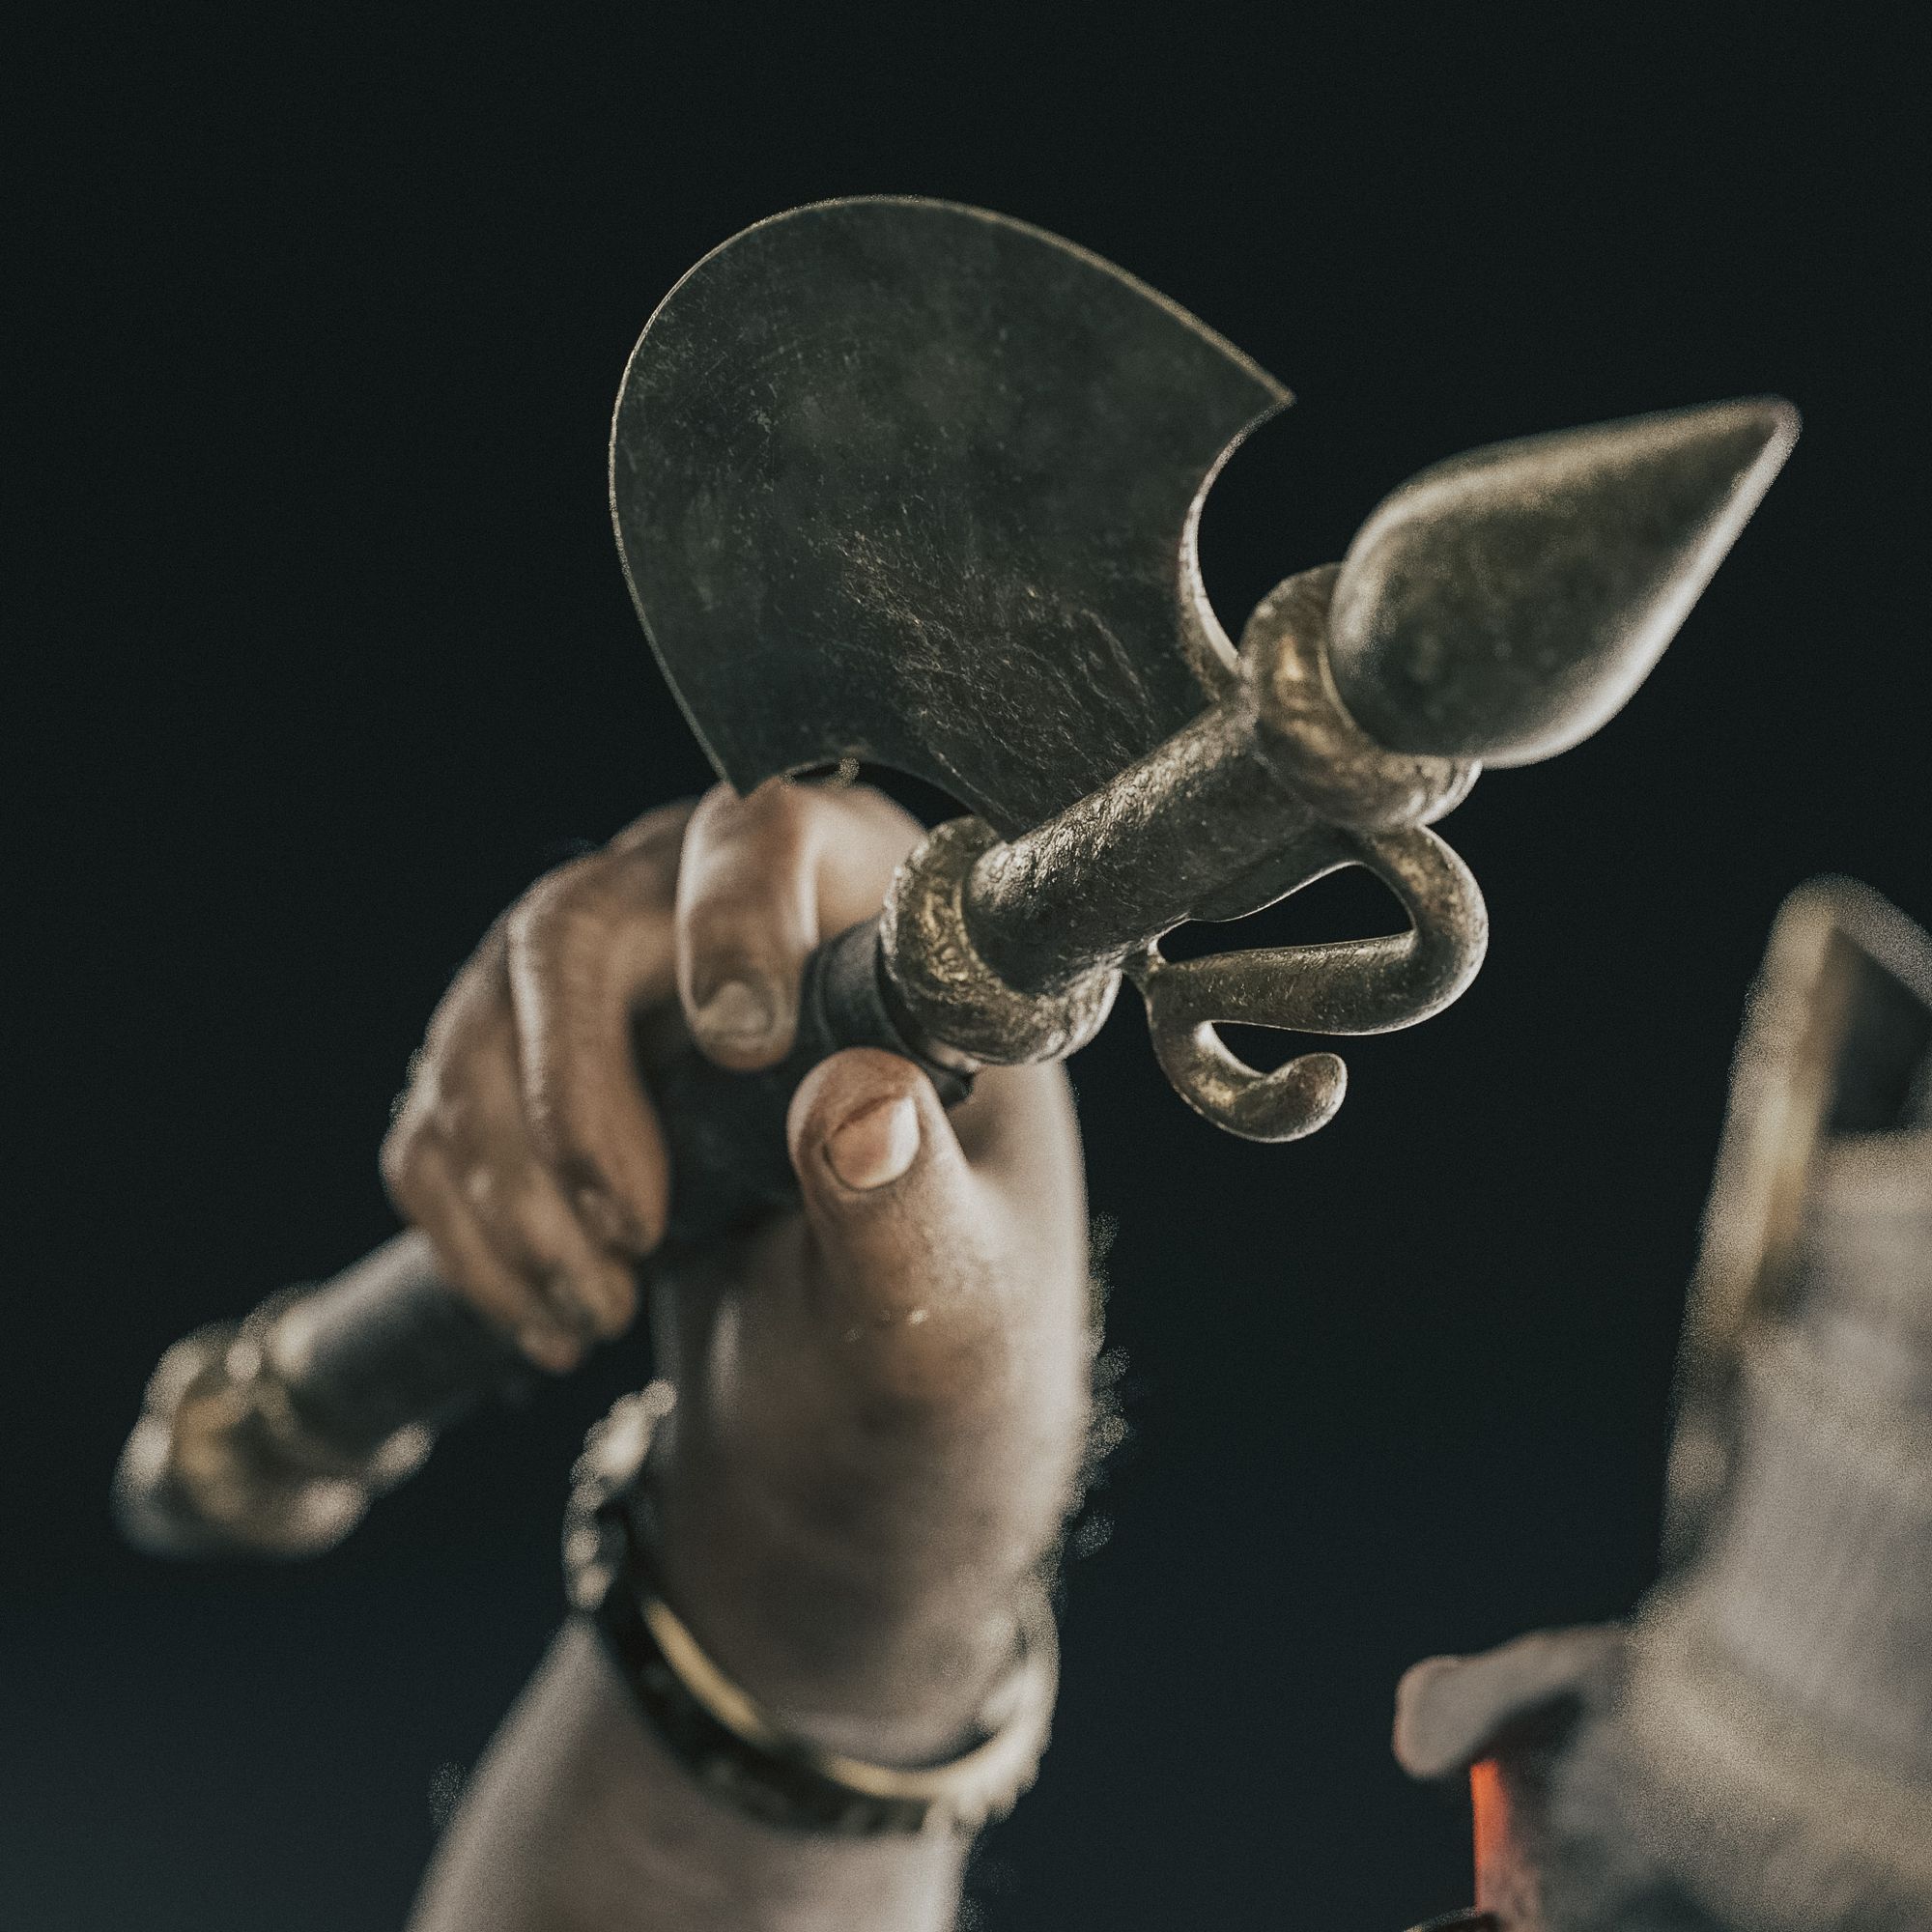
During this stage, I quickly modeled some elements that I kept simple during the sculpting phase, like the axe, hat, and eyes. I kept the modeling straightforward, planning to add more detail to the first two elements during texturing. However, for the eyes I took a different approach. I found textures online for the cornea and iris and, after some tweaking in Photoshop, by plugging them into a simple node setup in Maya Hypershade, I achieved a good amount of detail.

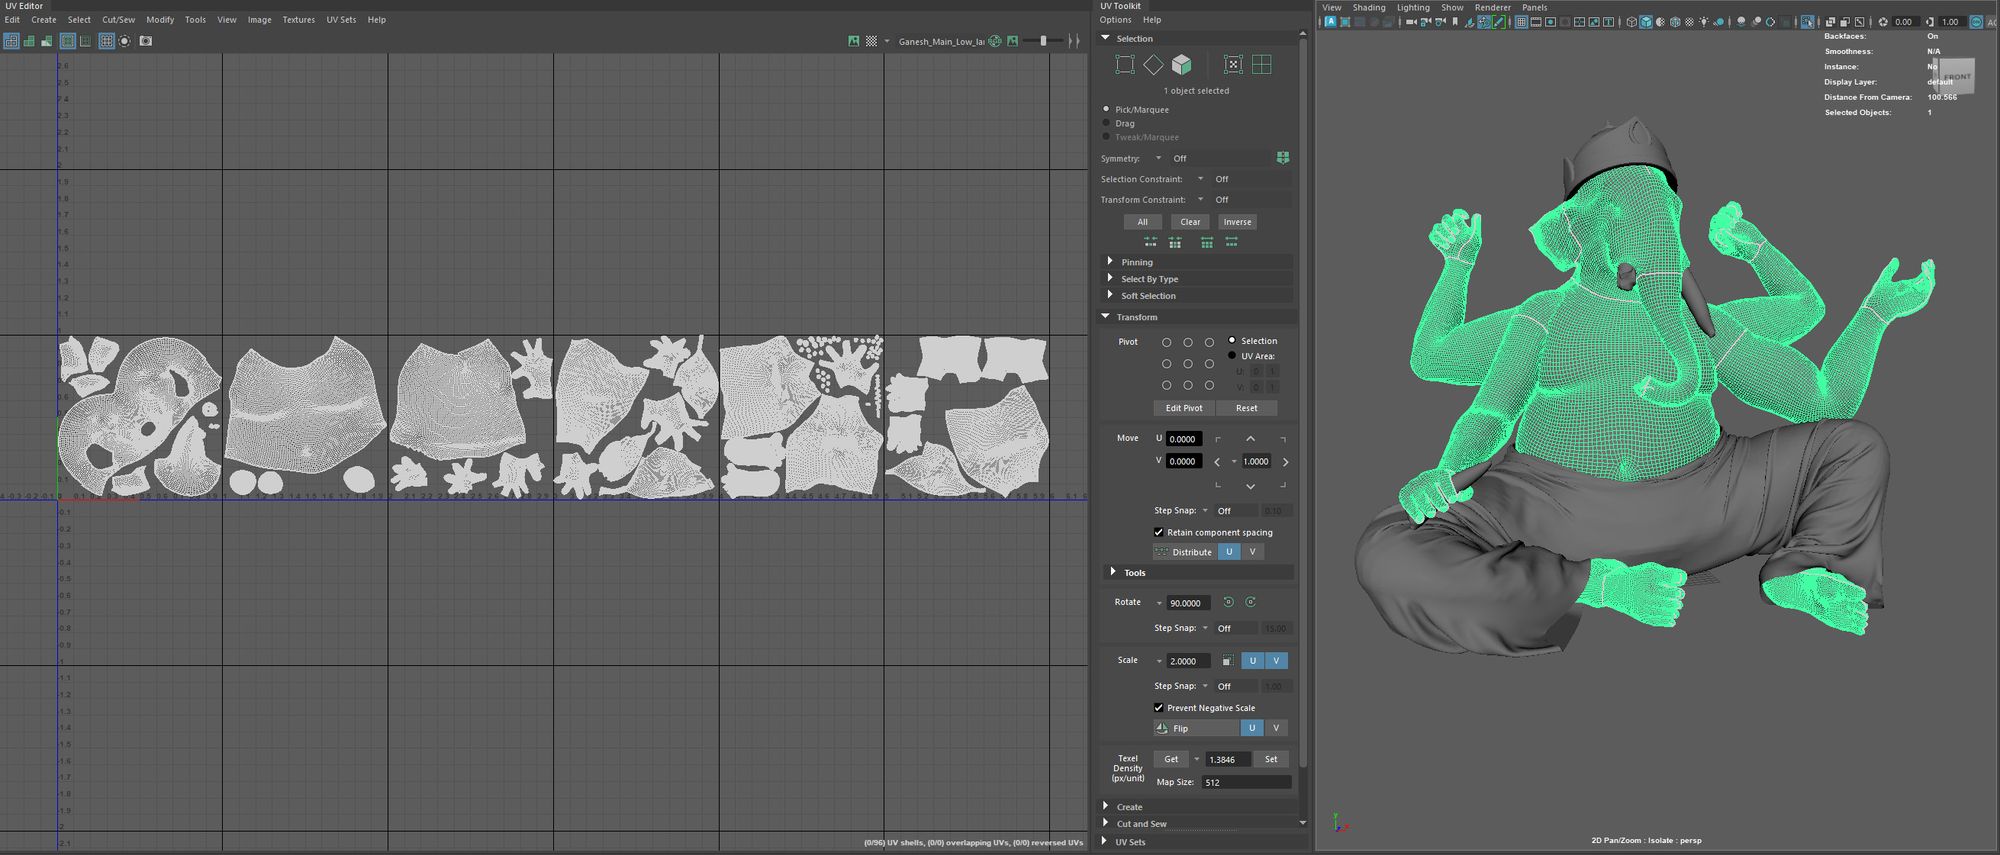
Afterwards, I moved on to unwrapping the character's UVs. I aimed for a fairly high resolution during texturing, so I opted for an overall high texel density. This led me to work with several UDIMs, especially for the main body, as I had plans for detailed close-up shots of the face.
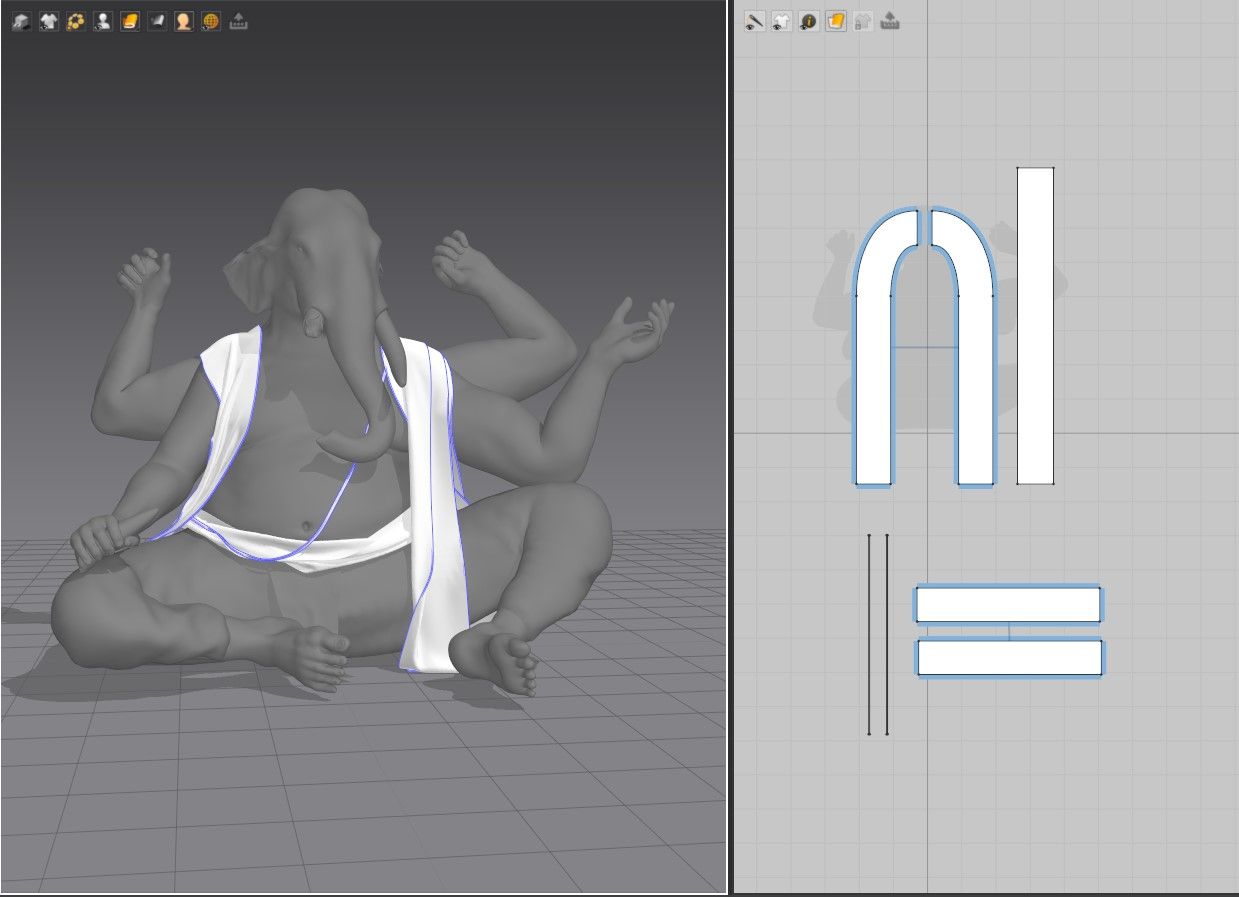
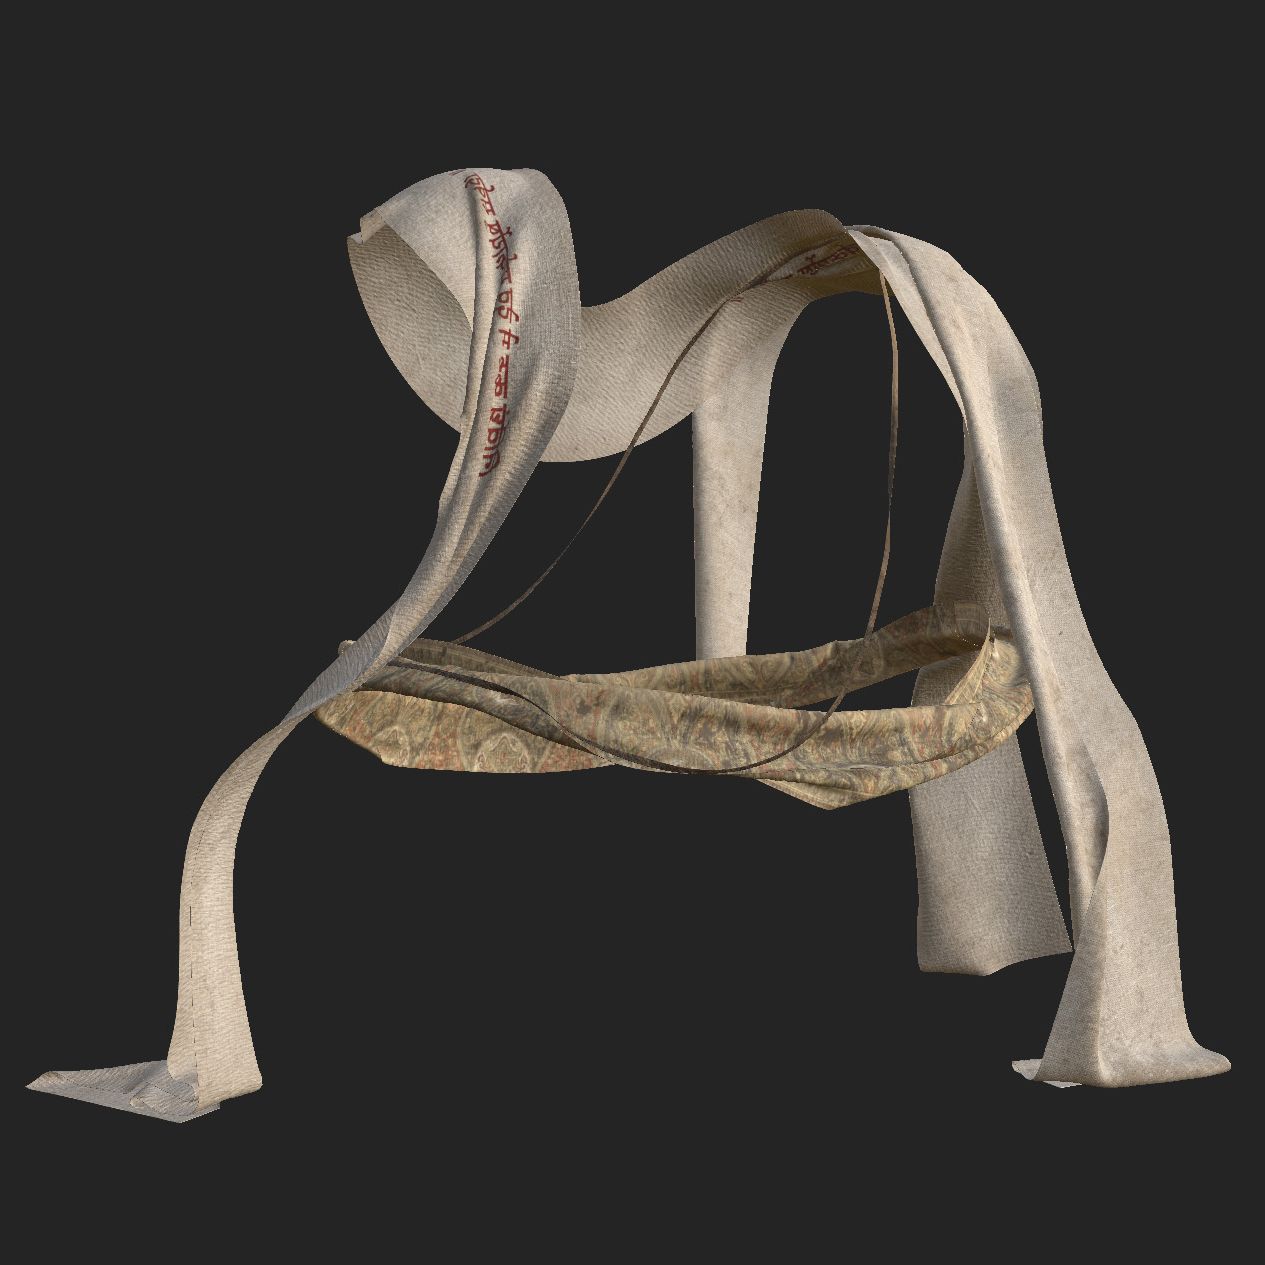
With just one step left before diving into the texturing phase, the model was nearly done, except for the placeholders for the clothing. I believe that realistic simulated garments elevate the realism of any character, so I brought the low-poly version into Marvelous Designer and got to work.
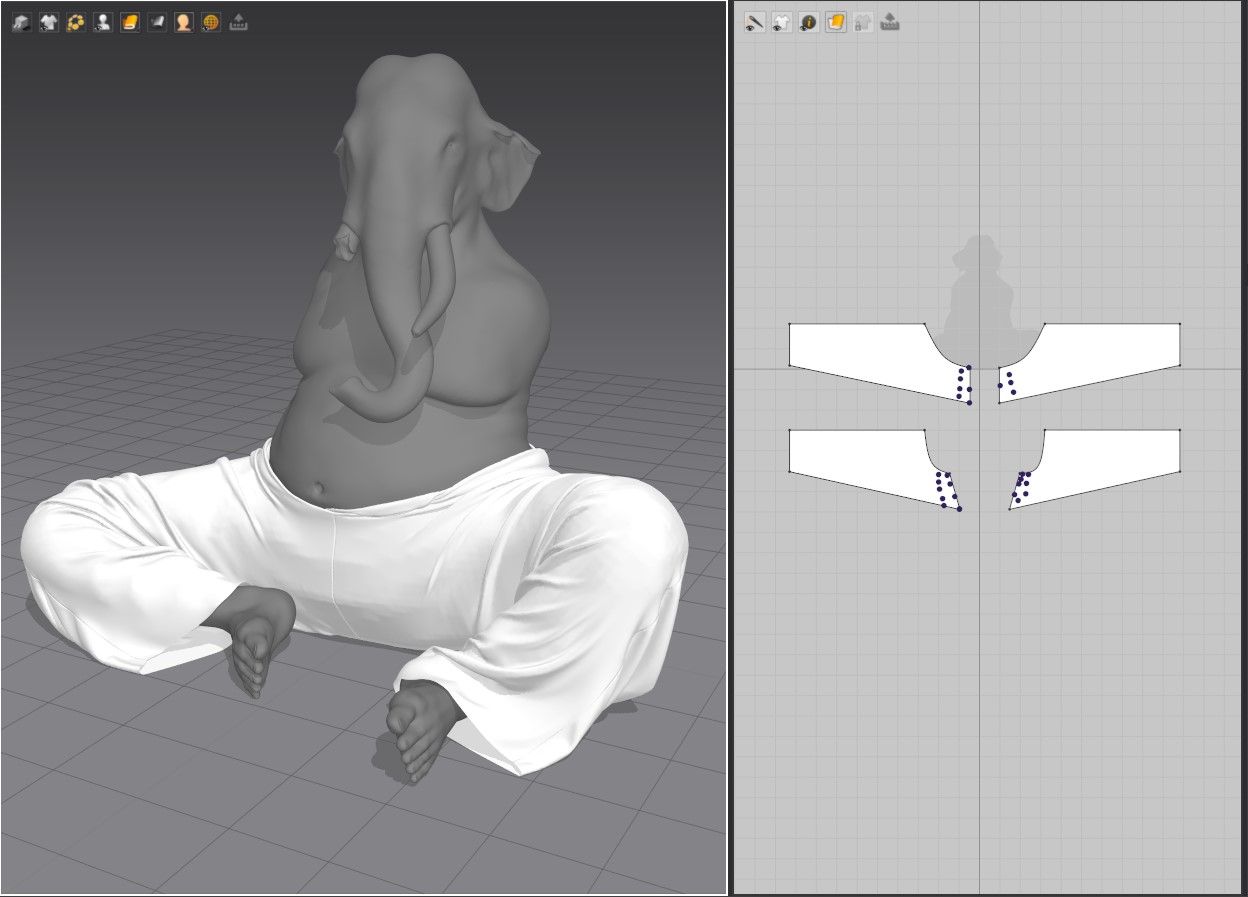
The garments I needed to create were relatively simple, making the process rather straightforward. For the shawl, I drew square and rounded shapes, manually placing them during the simulation. Designing the pants was a bit more challenging since the model was already posed with the legs tucked in. Nevertheless, I got a fairly satisfying result achieved through patience and a step-by-step approach (starting from an underwear garment and gradually lengthening it to avoid glitches), alongside plenty of manual adjustments during the simulation.
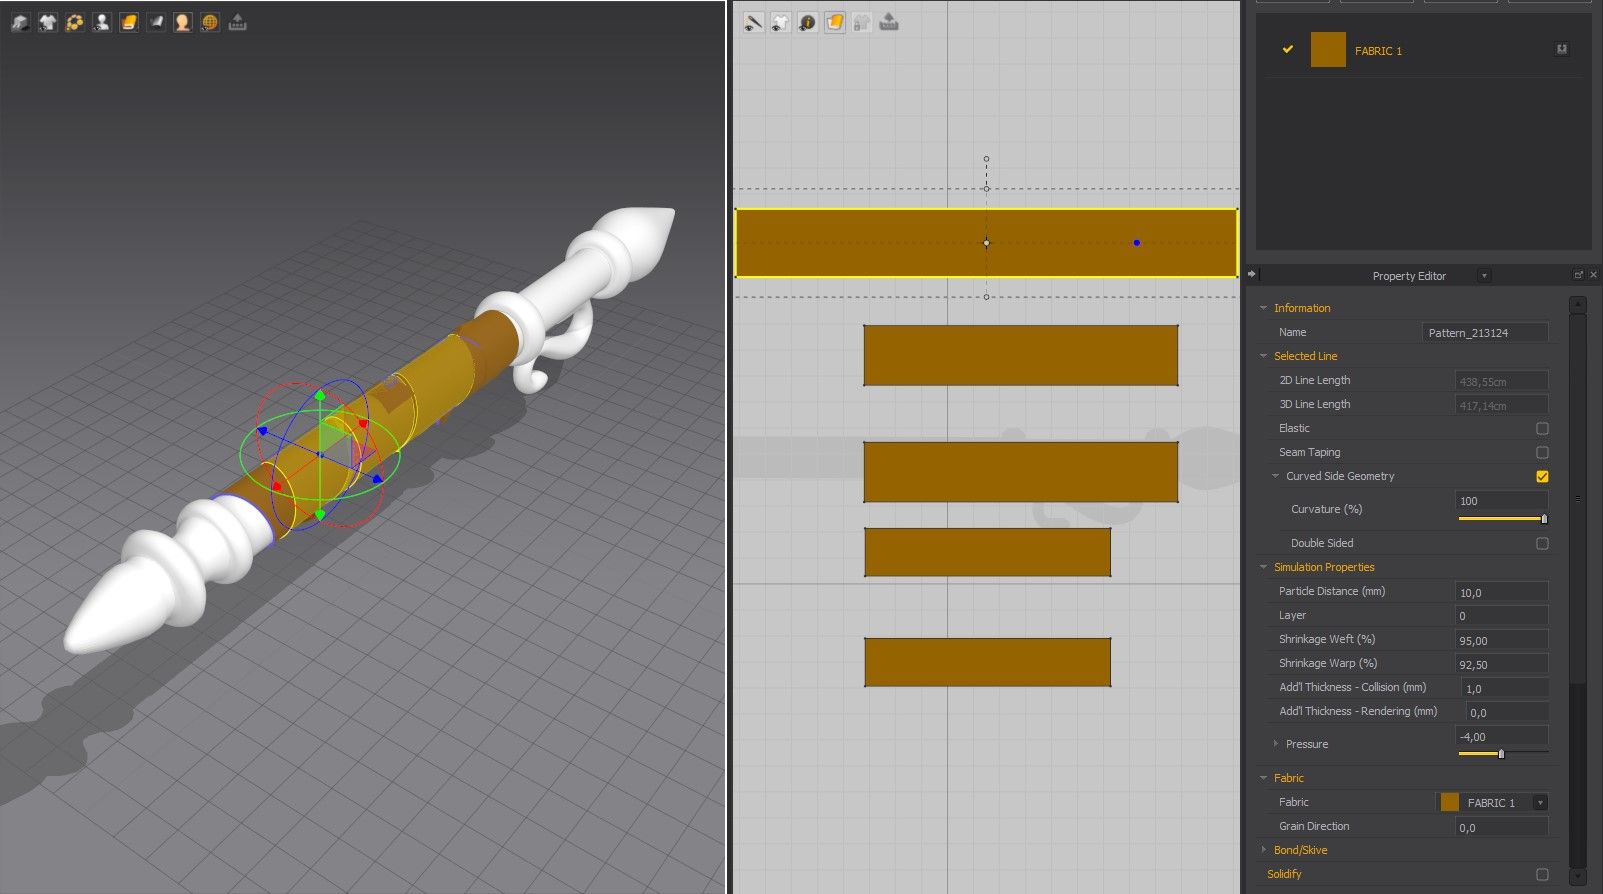
During this stage, I also made the strap on the axe handle using simple square patterns. I adjusted pressure and shrinkage parameters in both warp and weft to ensure it wrapped around the handle. Using Marvelous Designer I could handle the UVs of the garments directly, so I just exported everything and I was finally ready for the texturing phase.
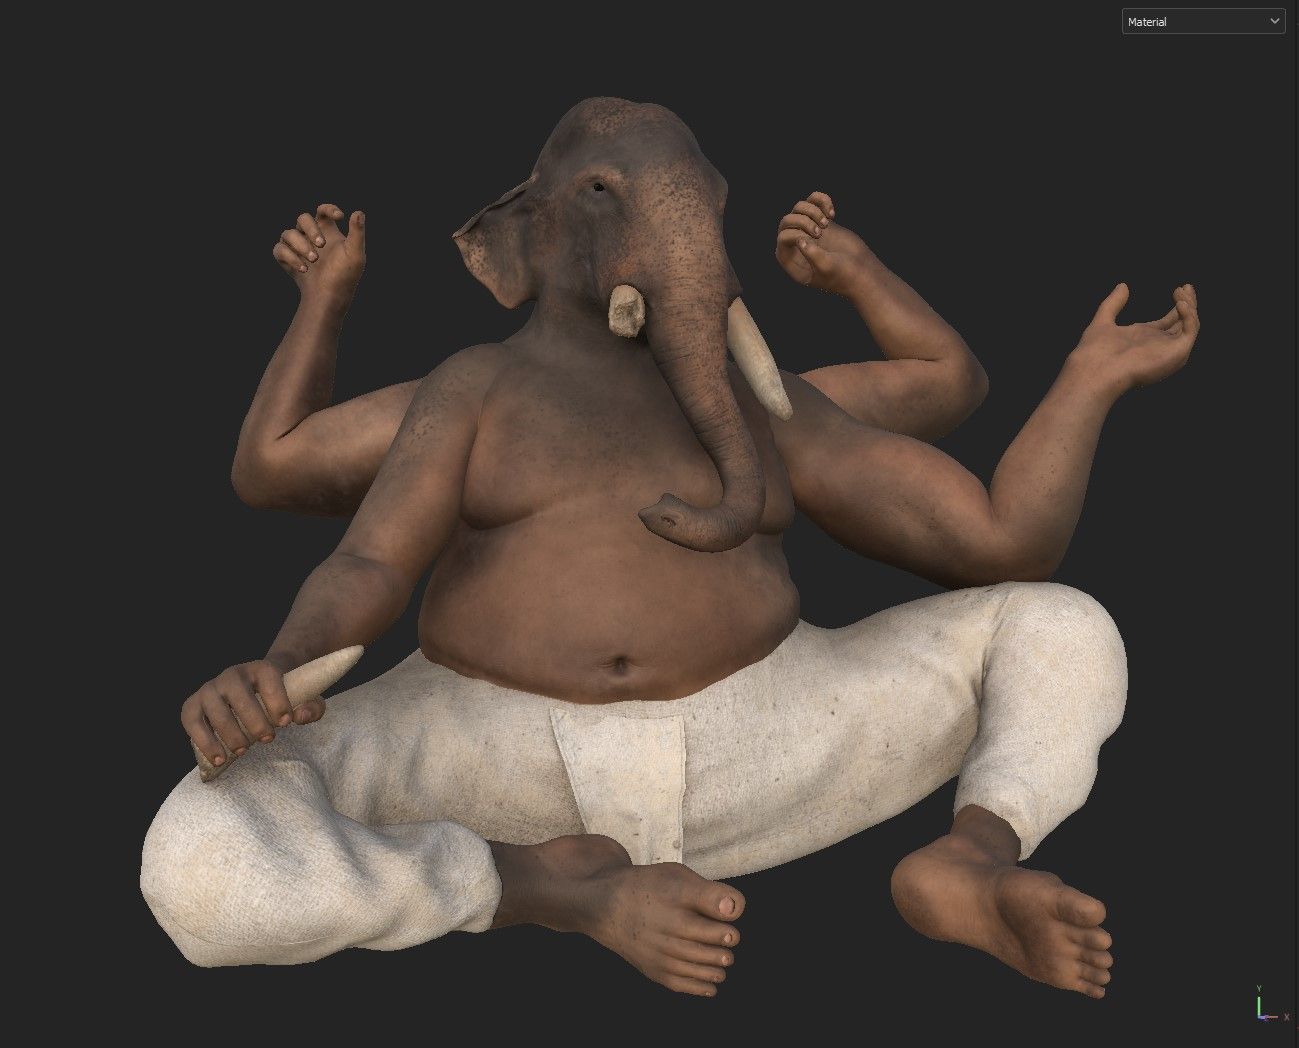
Texture work is always a crucial step in every project, but this time I believe it truly elevated the realism of the character to a whole new level. I used Substance 3D Painter, starting with the main body as it presented the most significant challenge.
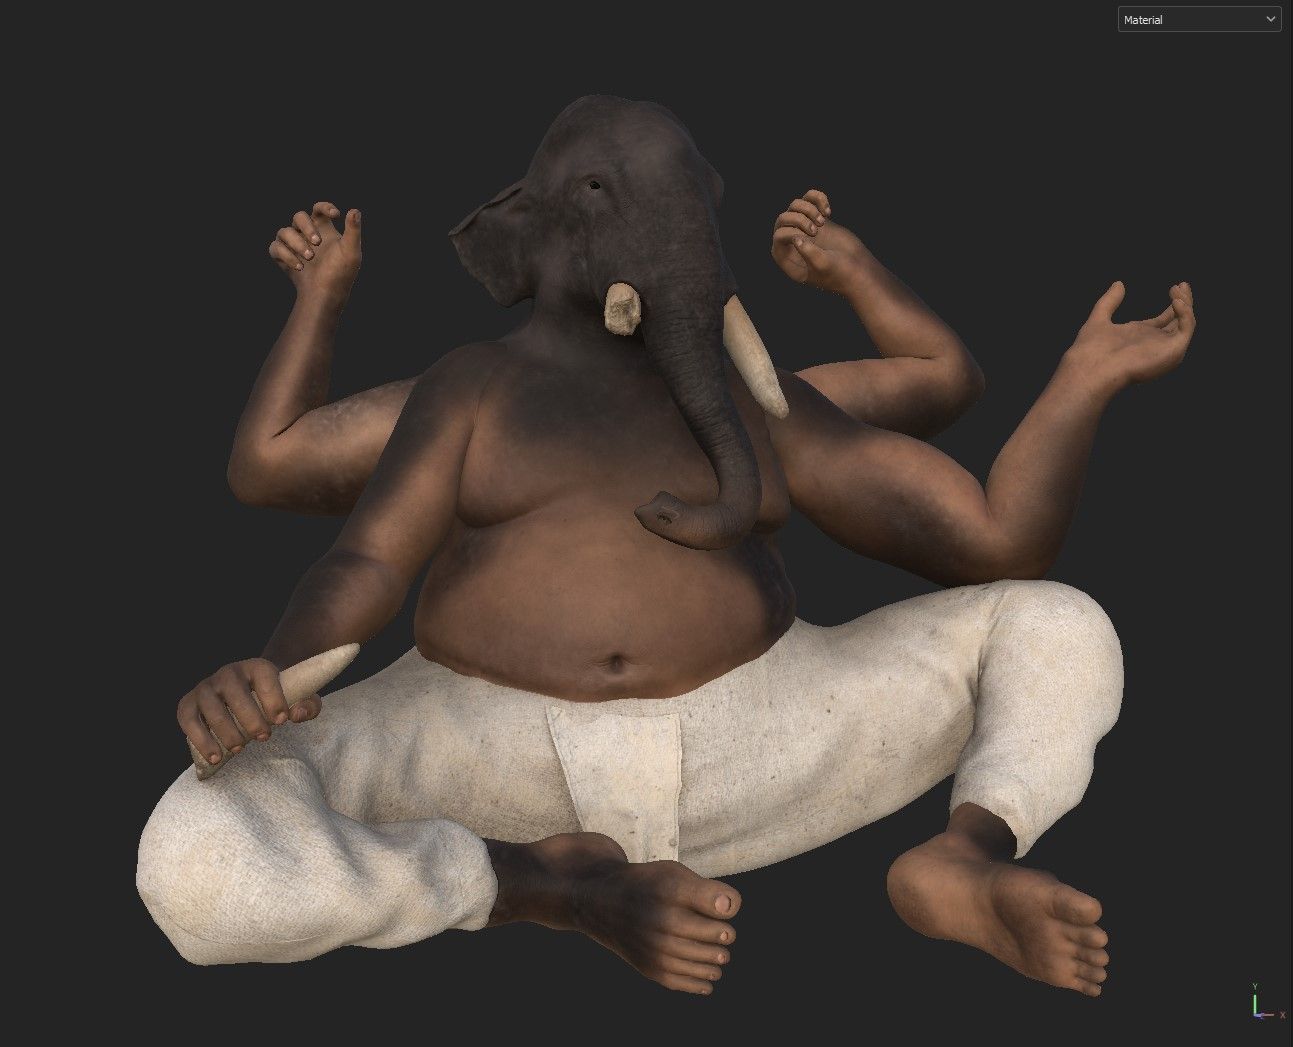
To achieve photorealistic and organic textures, I approached it in a 'real-life based' manner. I layered various 'skin' levels, beginning with the sub-dermis layer, that consists of different shades of red to represent what lies beneath the skin. I subsequently added the first layer of skin, slightly masking the areas where I wanted some inner redness to show through. Further layers included: damage, imperfections, moles, and more.
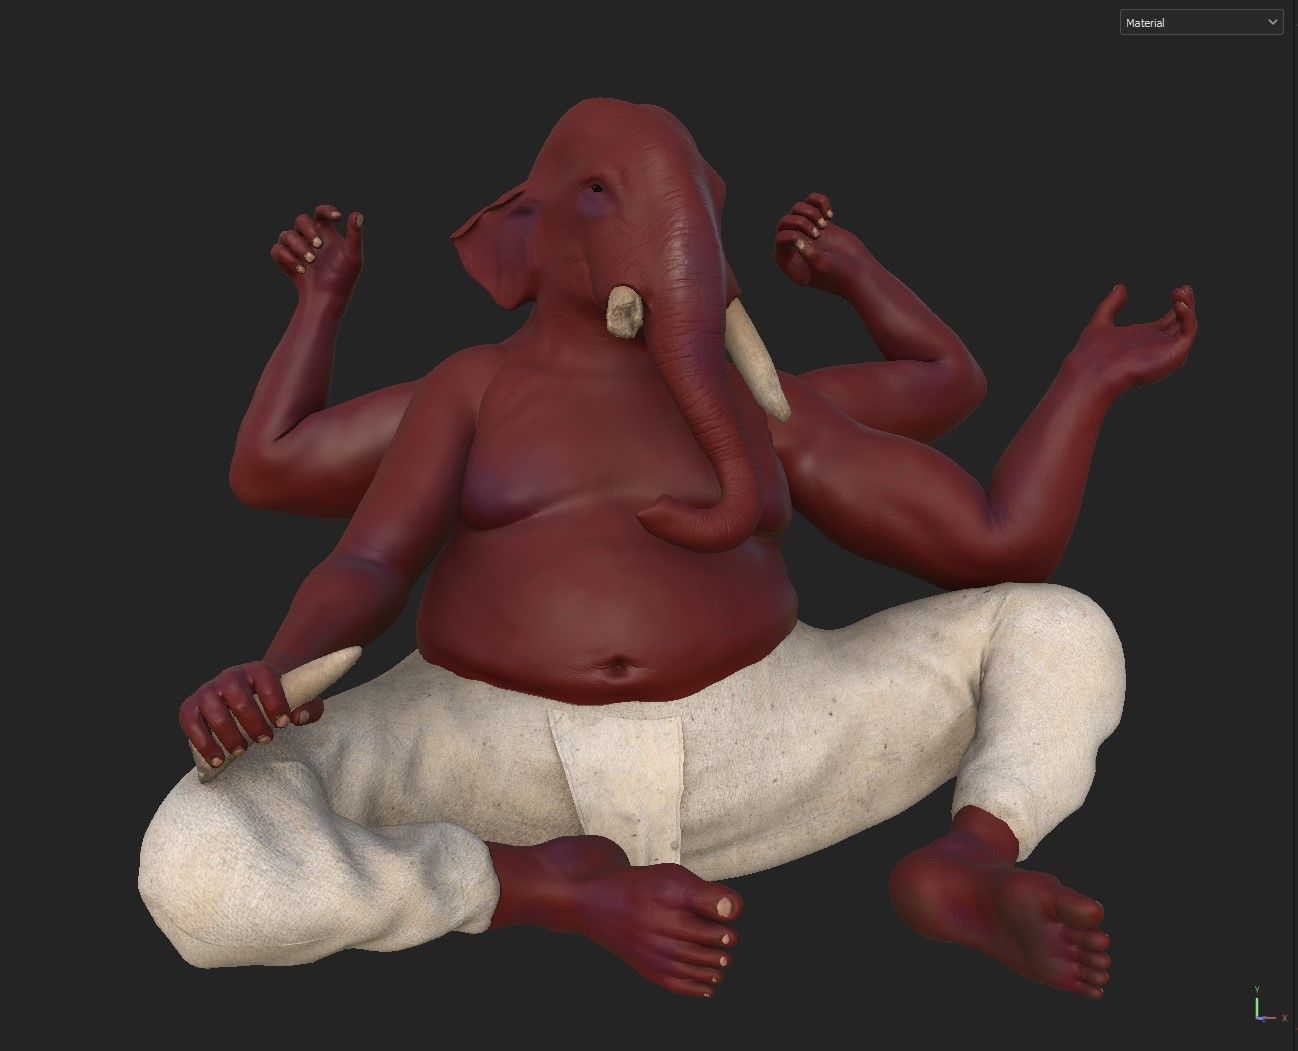
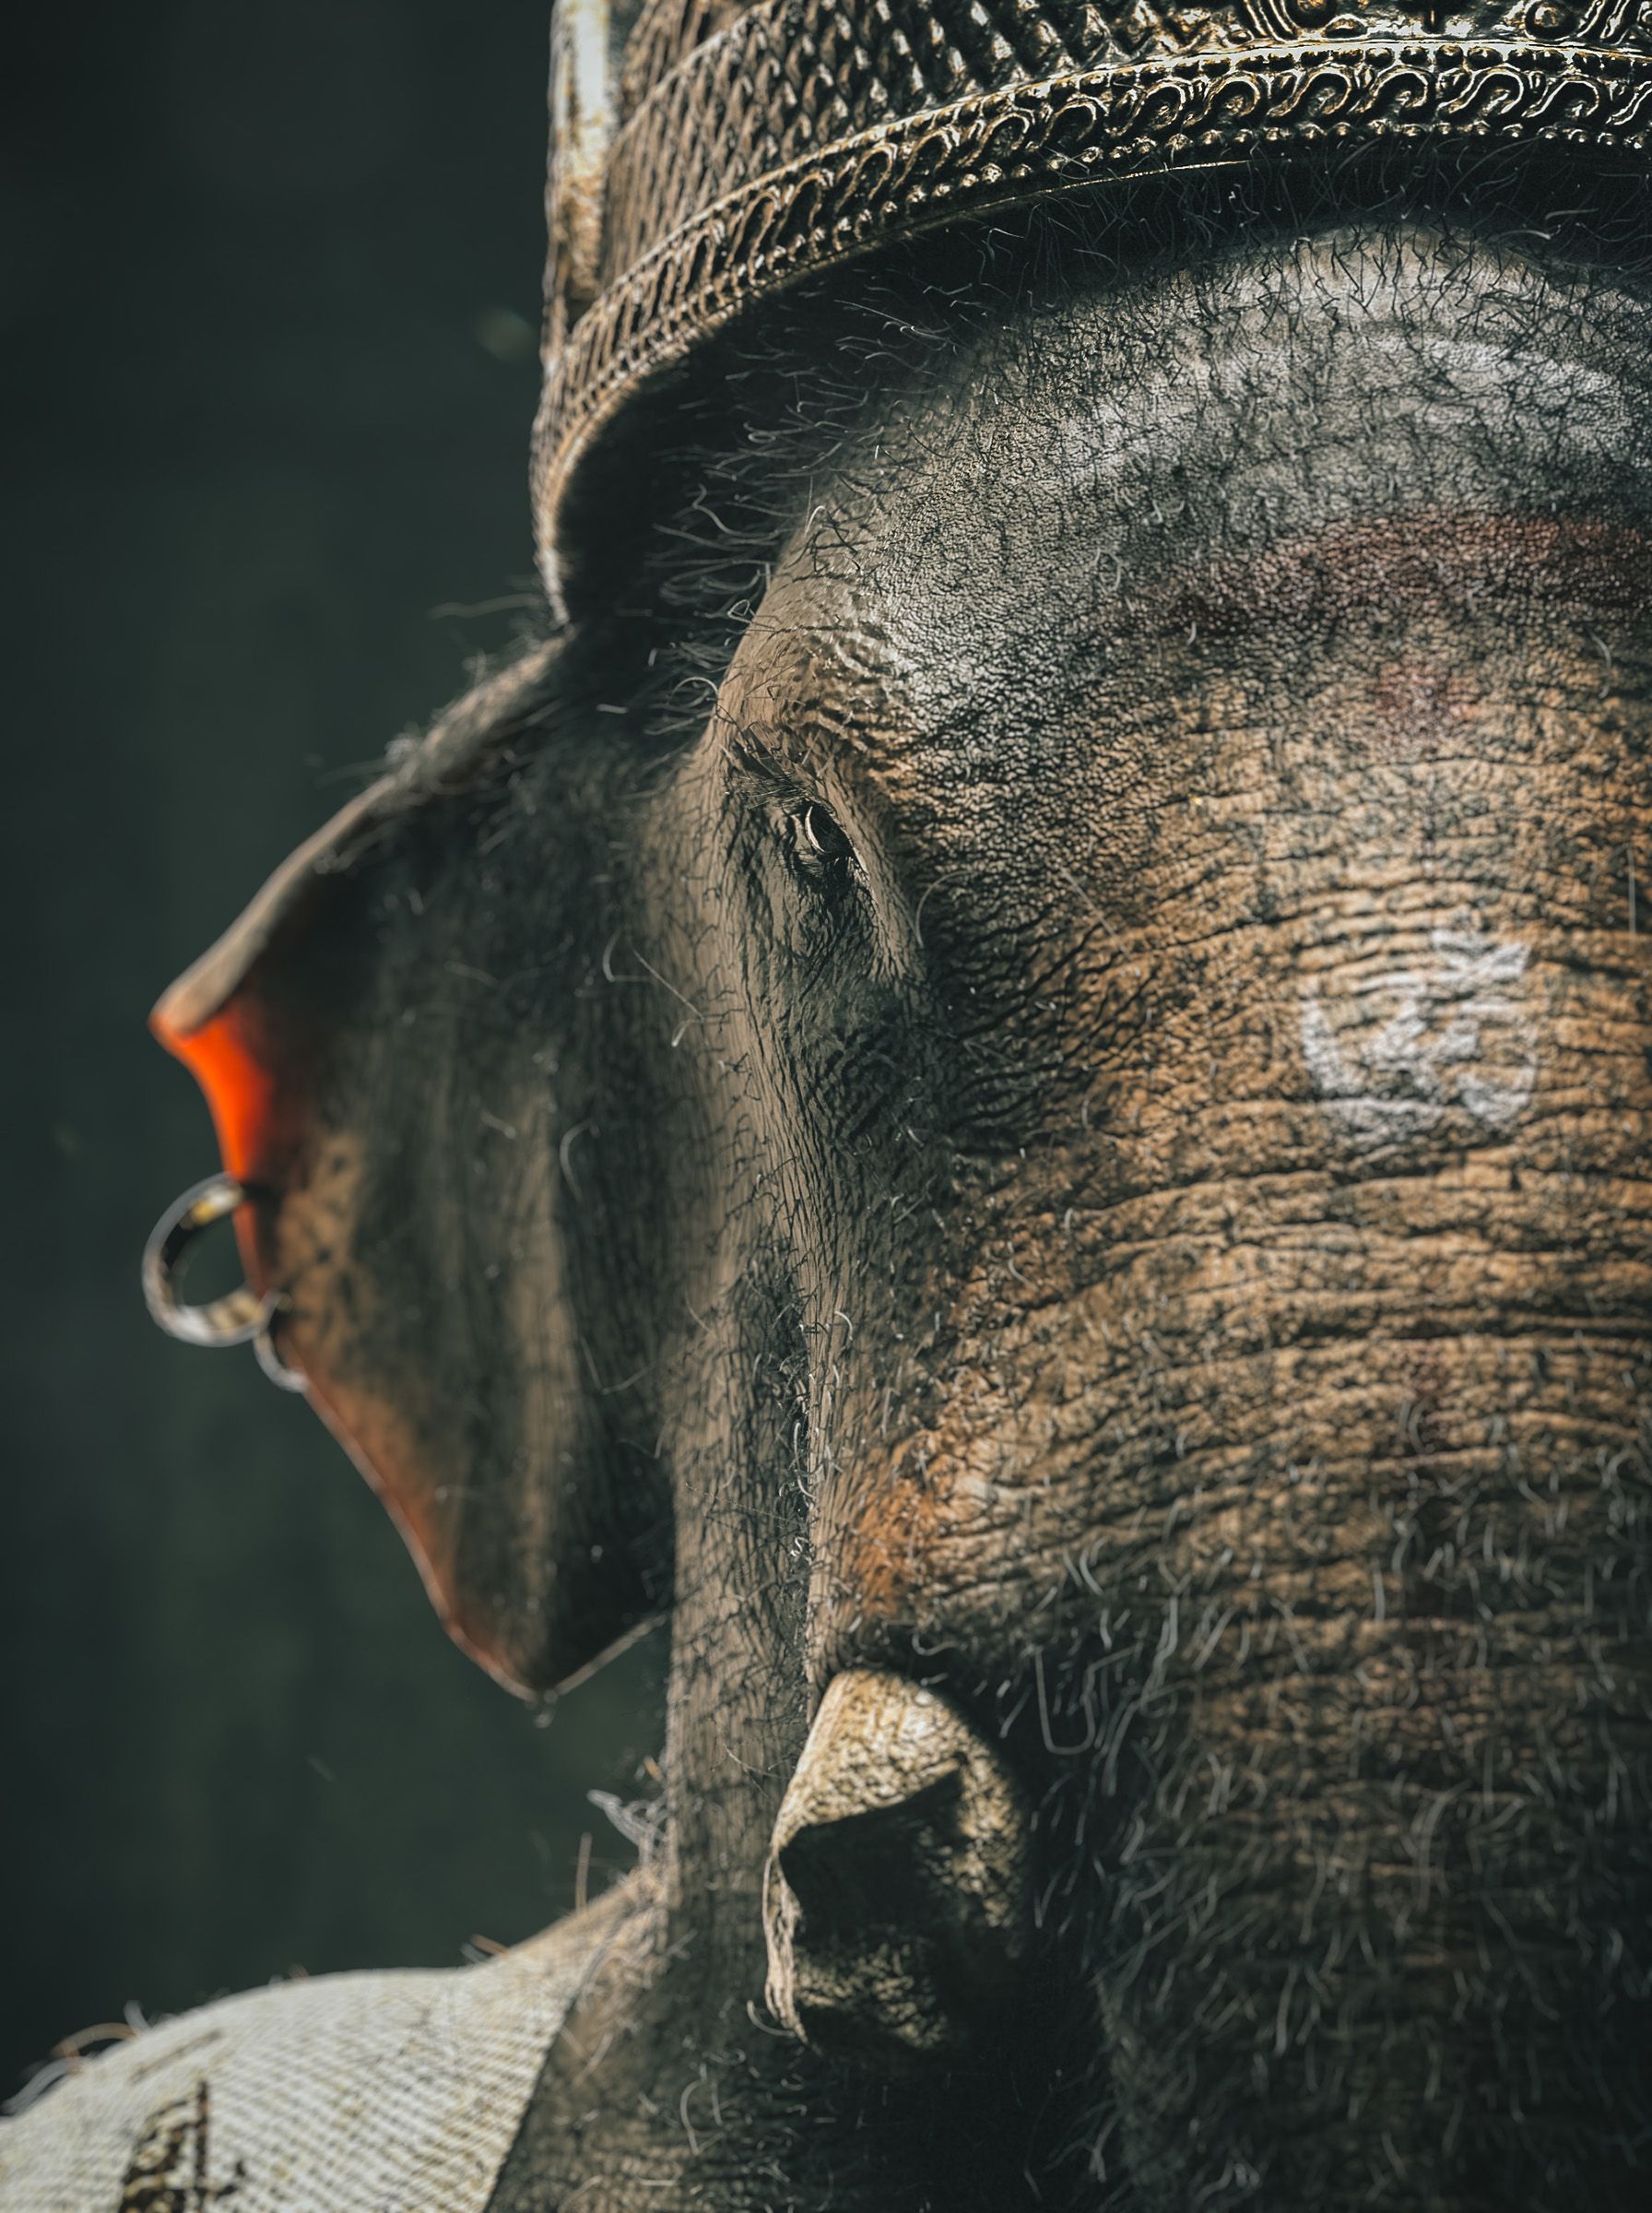
Whilst I made good progress with the human skin, I hadn't started working on the elephant part yet. For this part, I began adding layers with different shades of brownish gray, blending them organically using a mix of procedural and hand-painted masks. To enhance the elephant skin, I added a final layer for the dotted pattern seen in older Indian elephants.
I always try to use textures to tell a character's story, and this layer, combined with paint and dust layers, achieves both realism and narrative depth.
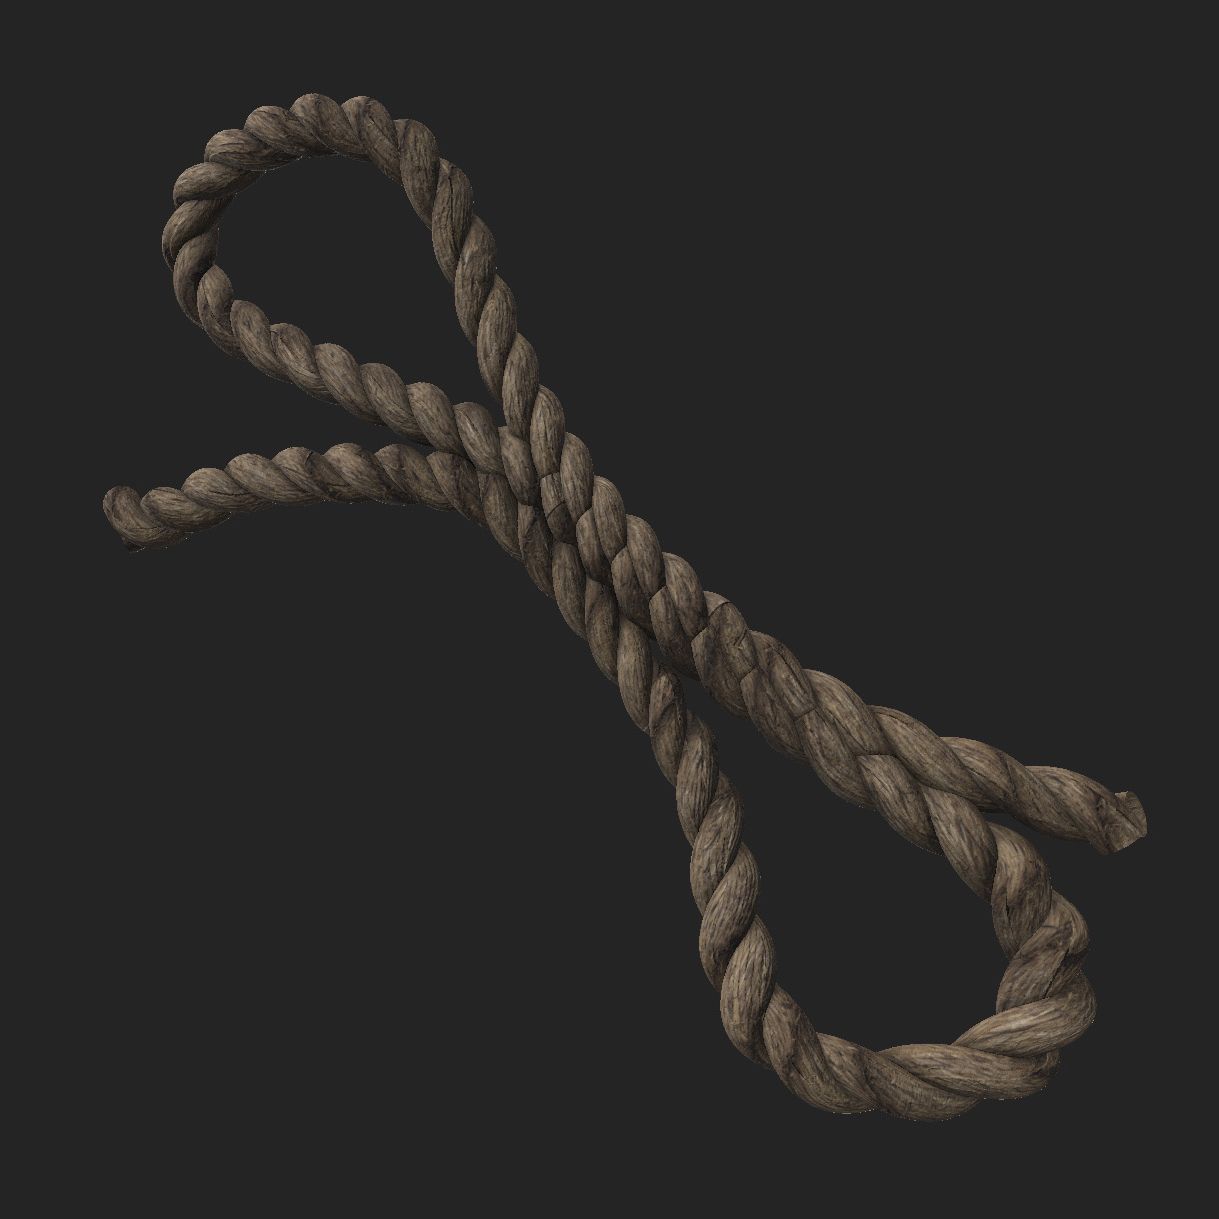
The process for the rest of the character was more straightforward. I based garment textures on PBR textures from Quixel Megascans, adding imperfections and colour variations. The same approach was applied to the rope.
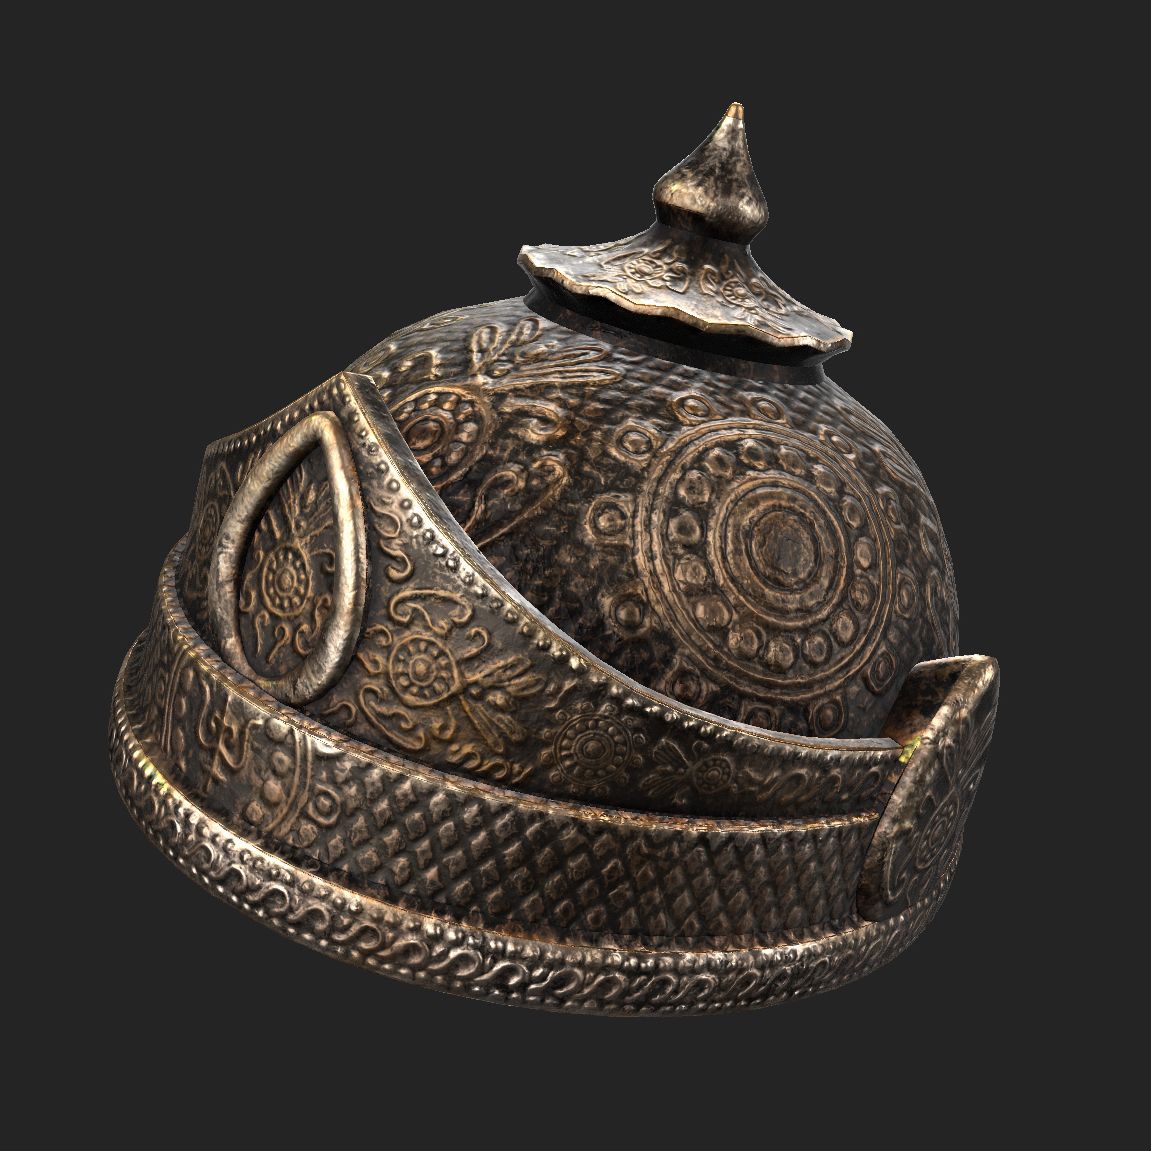
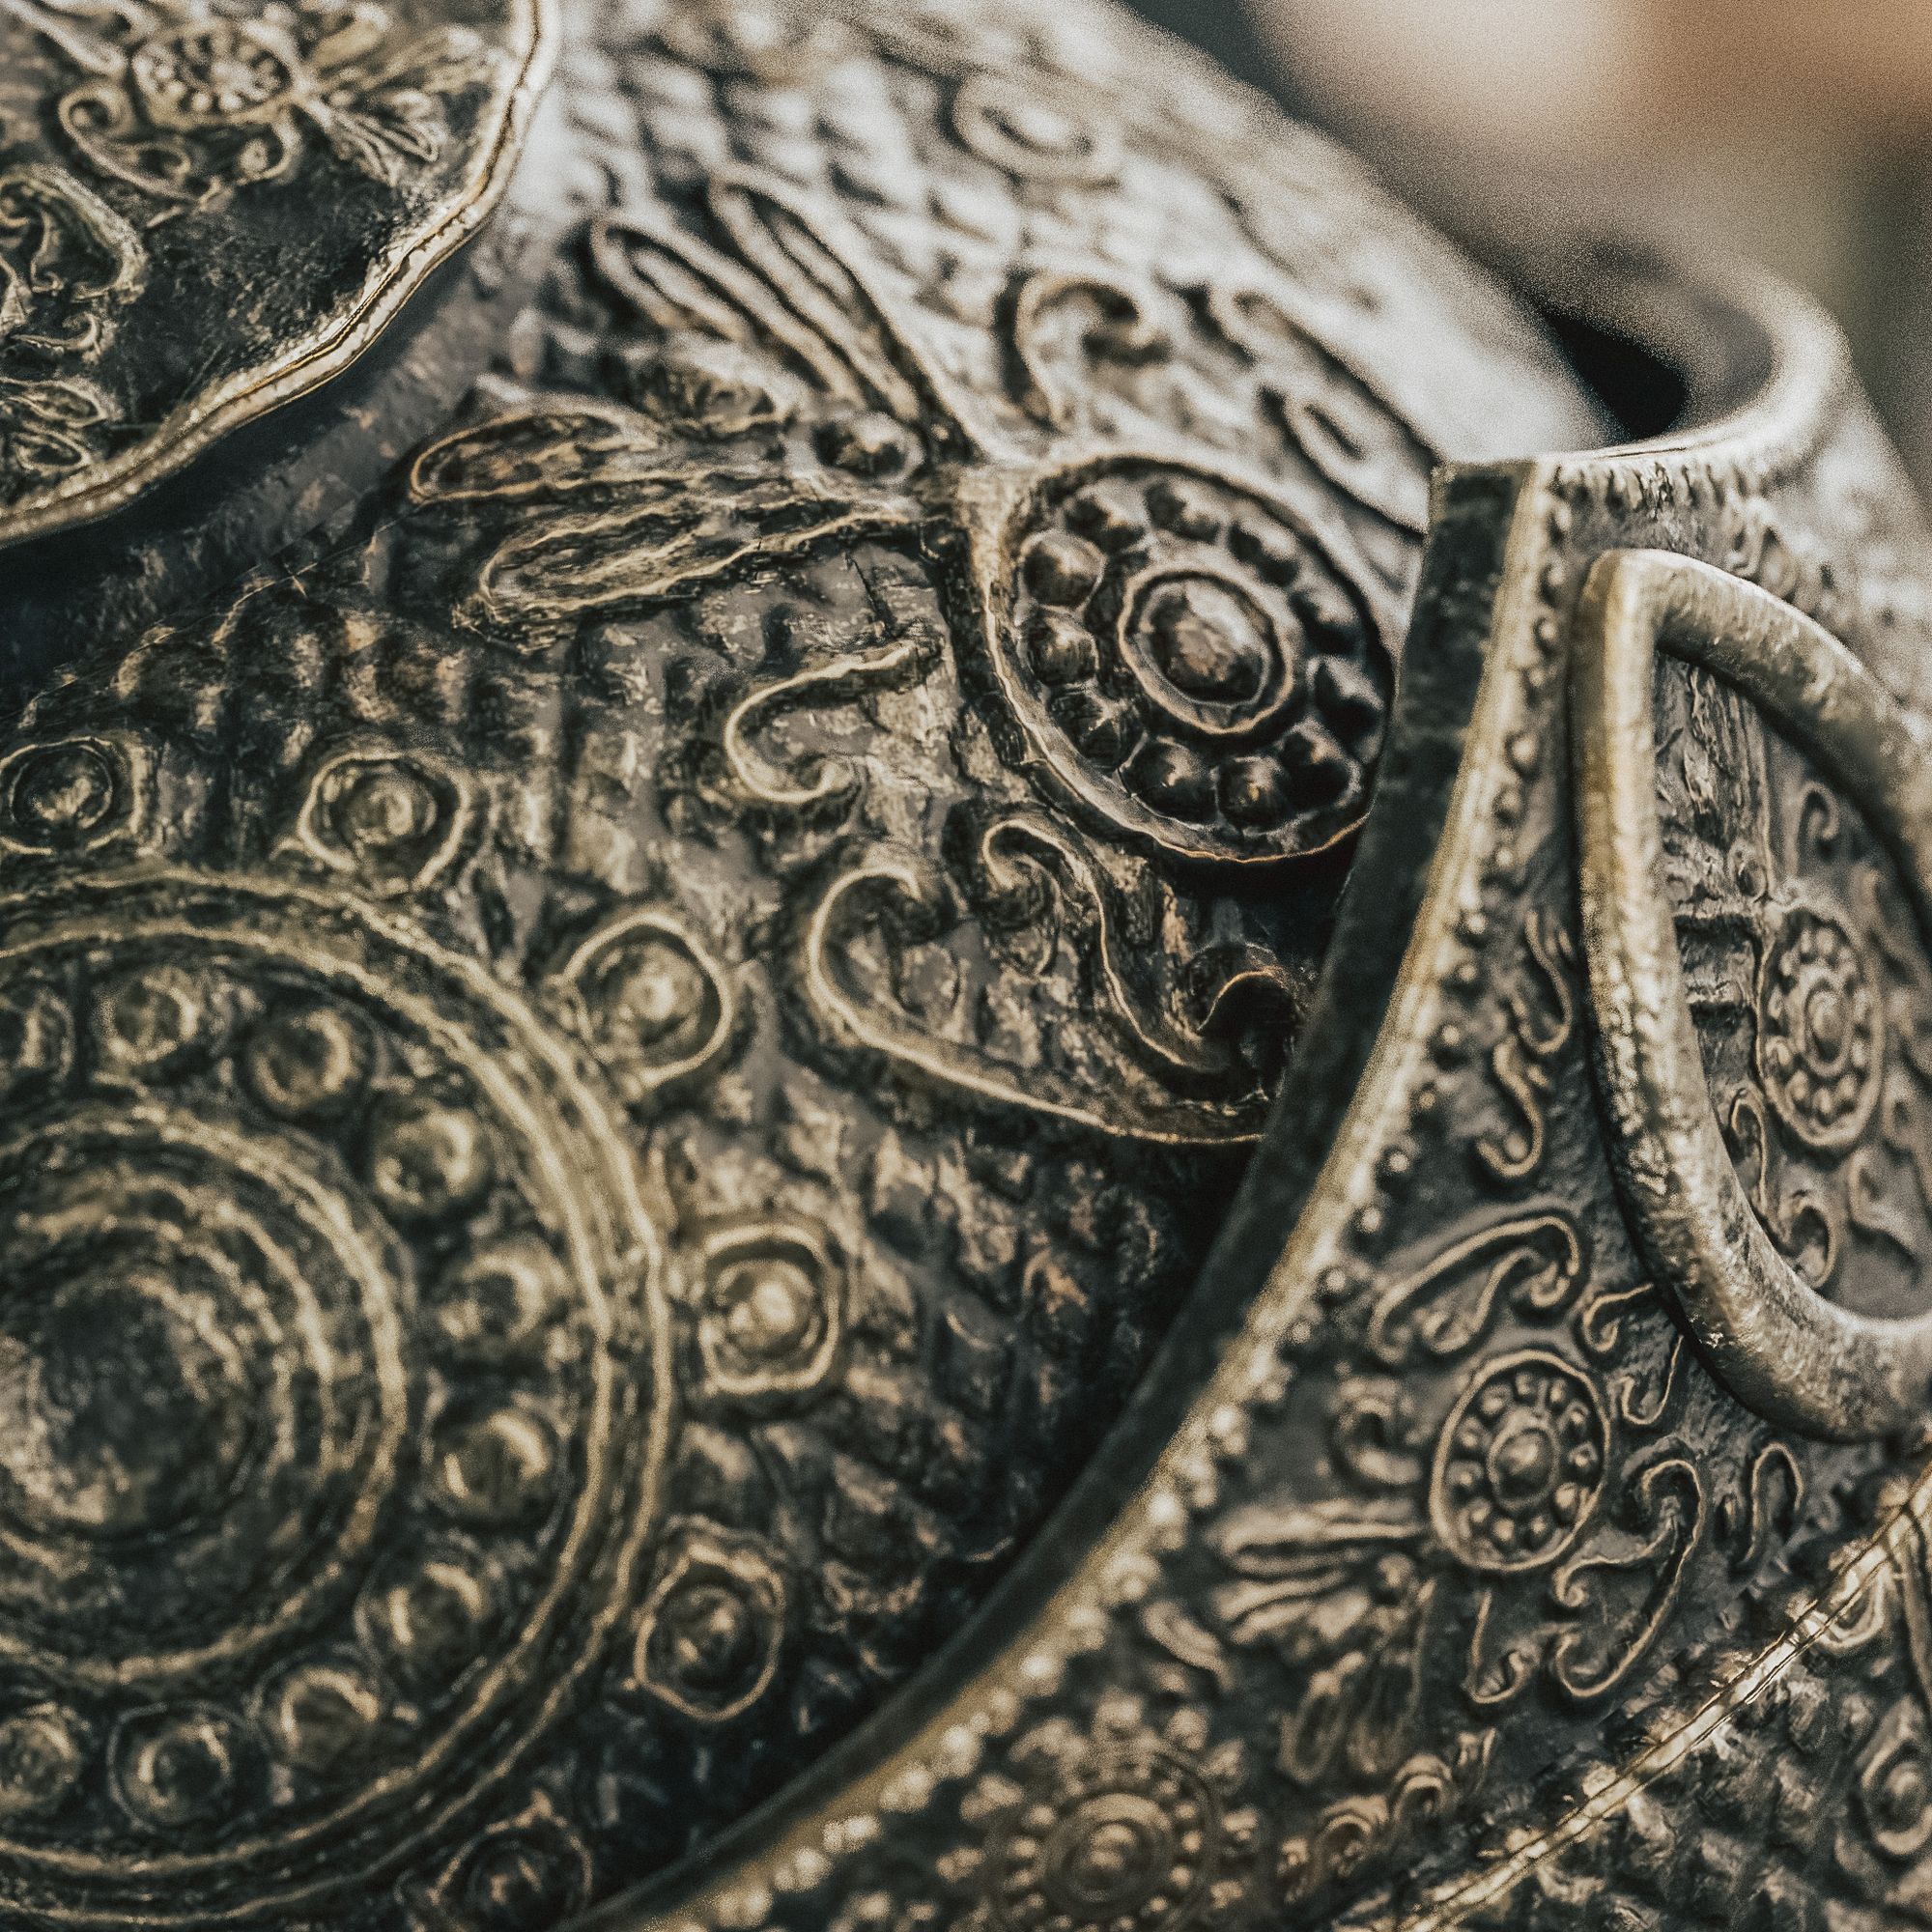
Props such as the axe and hat required a bit more effort, especially the hat (with its intricate traditional patterns). In particular, to establish the base motif of the hat, I combined custom alphas from Photoshop with hand-painted details. I then applied procedural warp and noise effects, alongside Substance's displacement feature, to give it a realistic relief effect. For the simpler props, textures were crafted by blending various metals using Substance's generator features, enabling swift and detailed results.
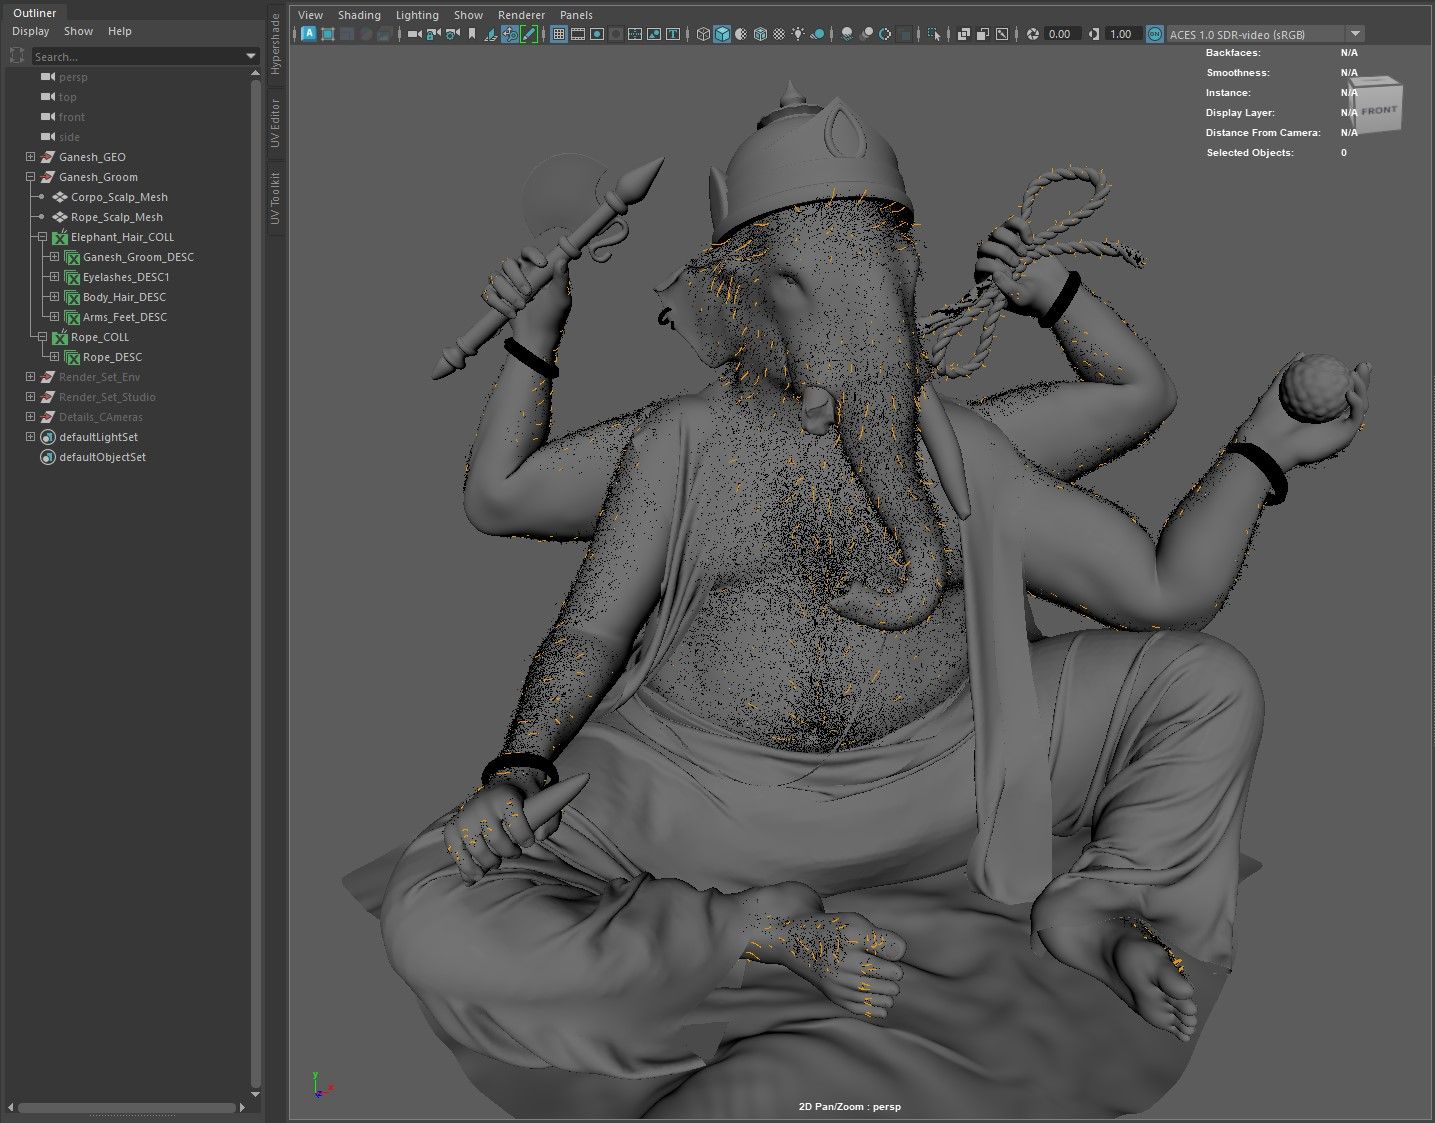
After completing the textures, I usually jump straight into rendering and finalising the project. However, I've recently been experimenting with grooming in Xgen and have found both the process and the results to be incredibly enjoyable. To truly elevate this project, I decided to add a groom as well.
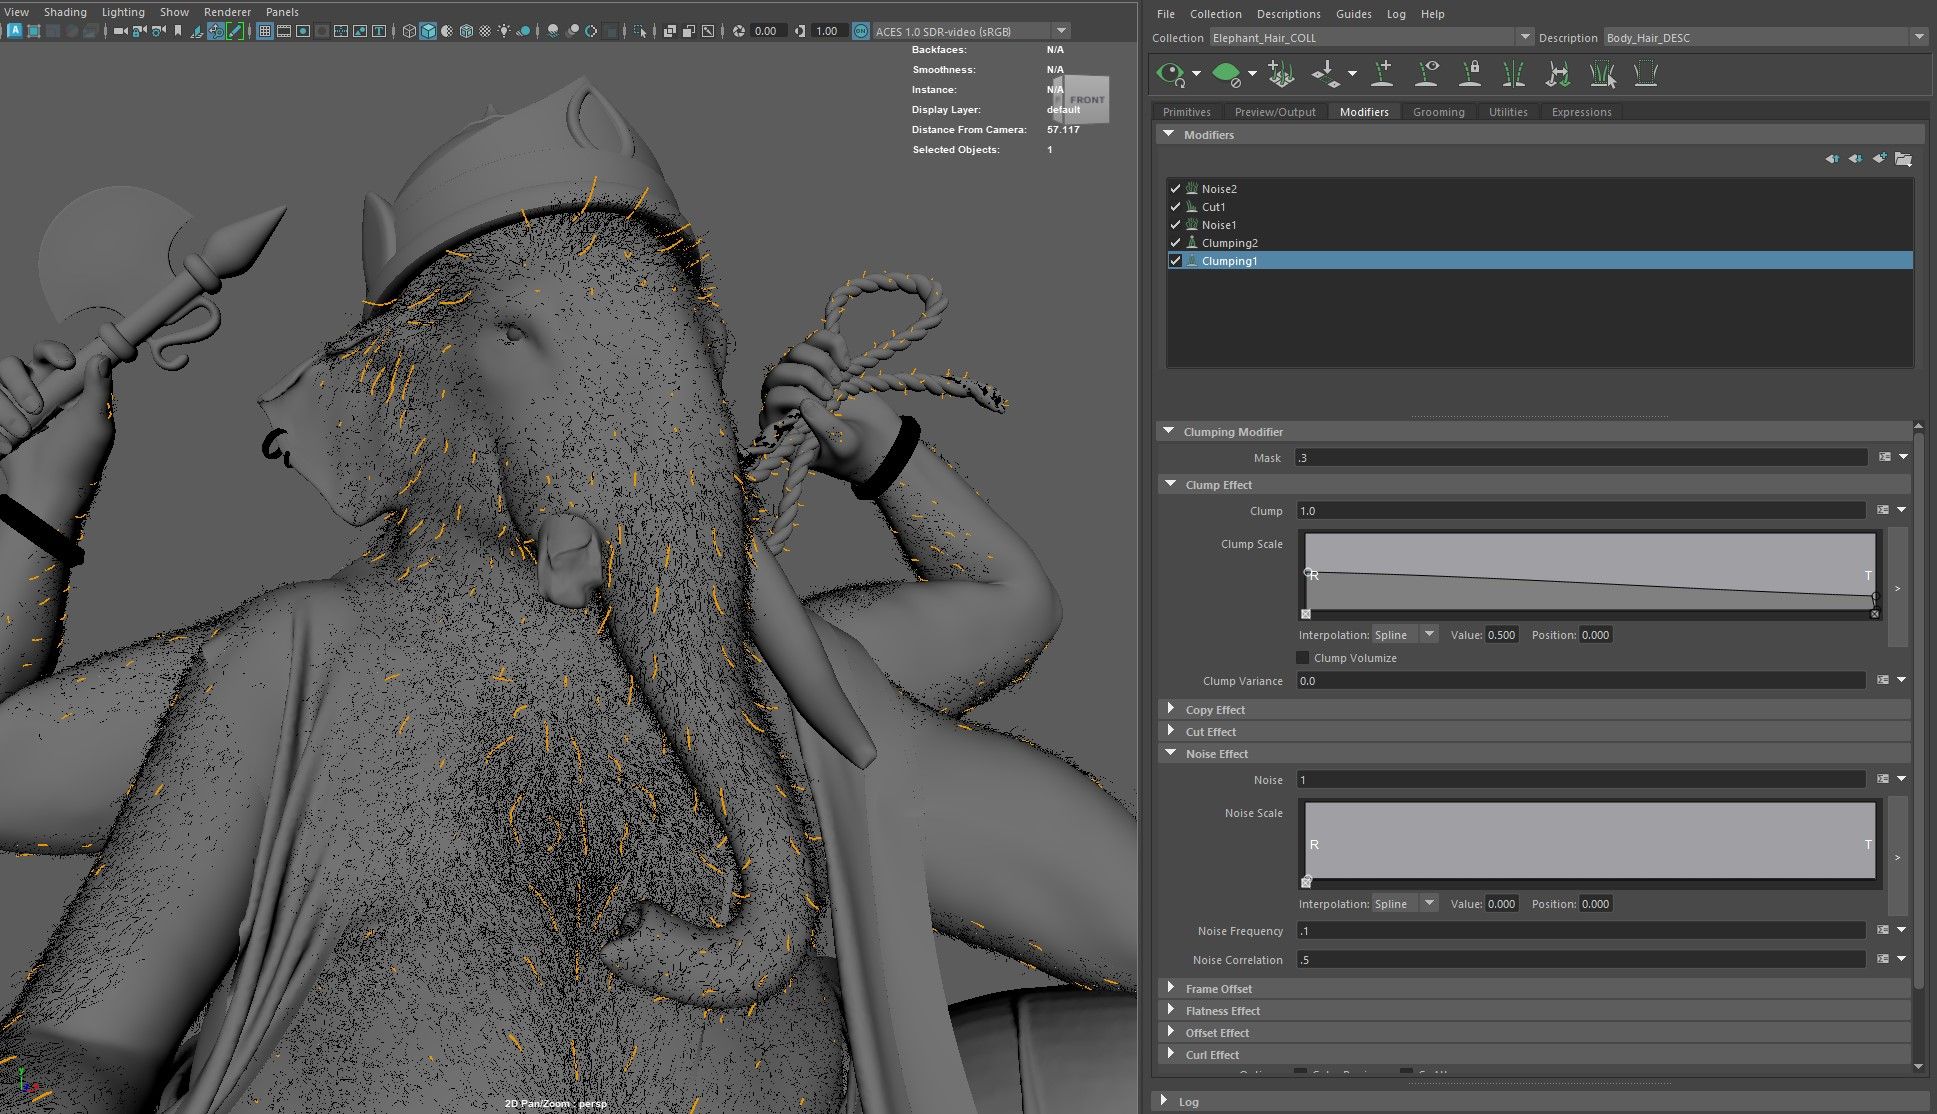
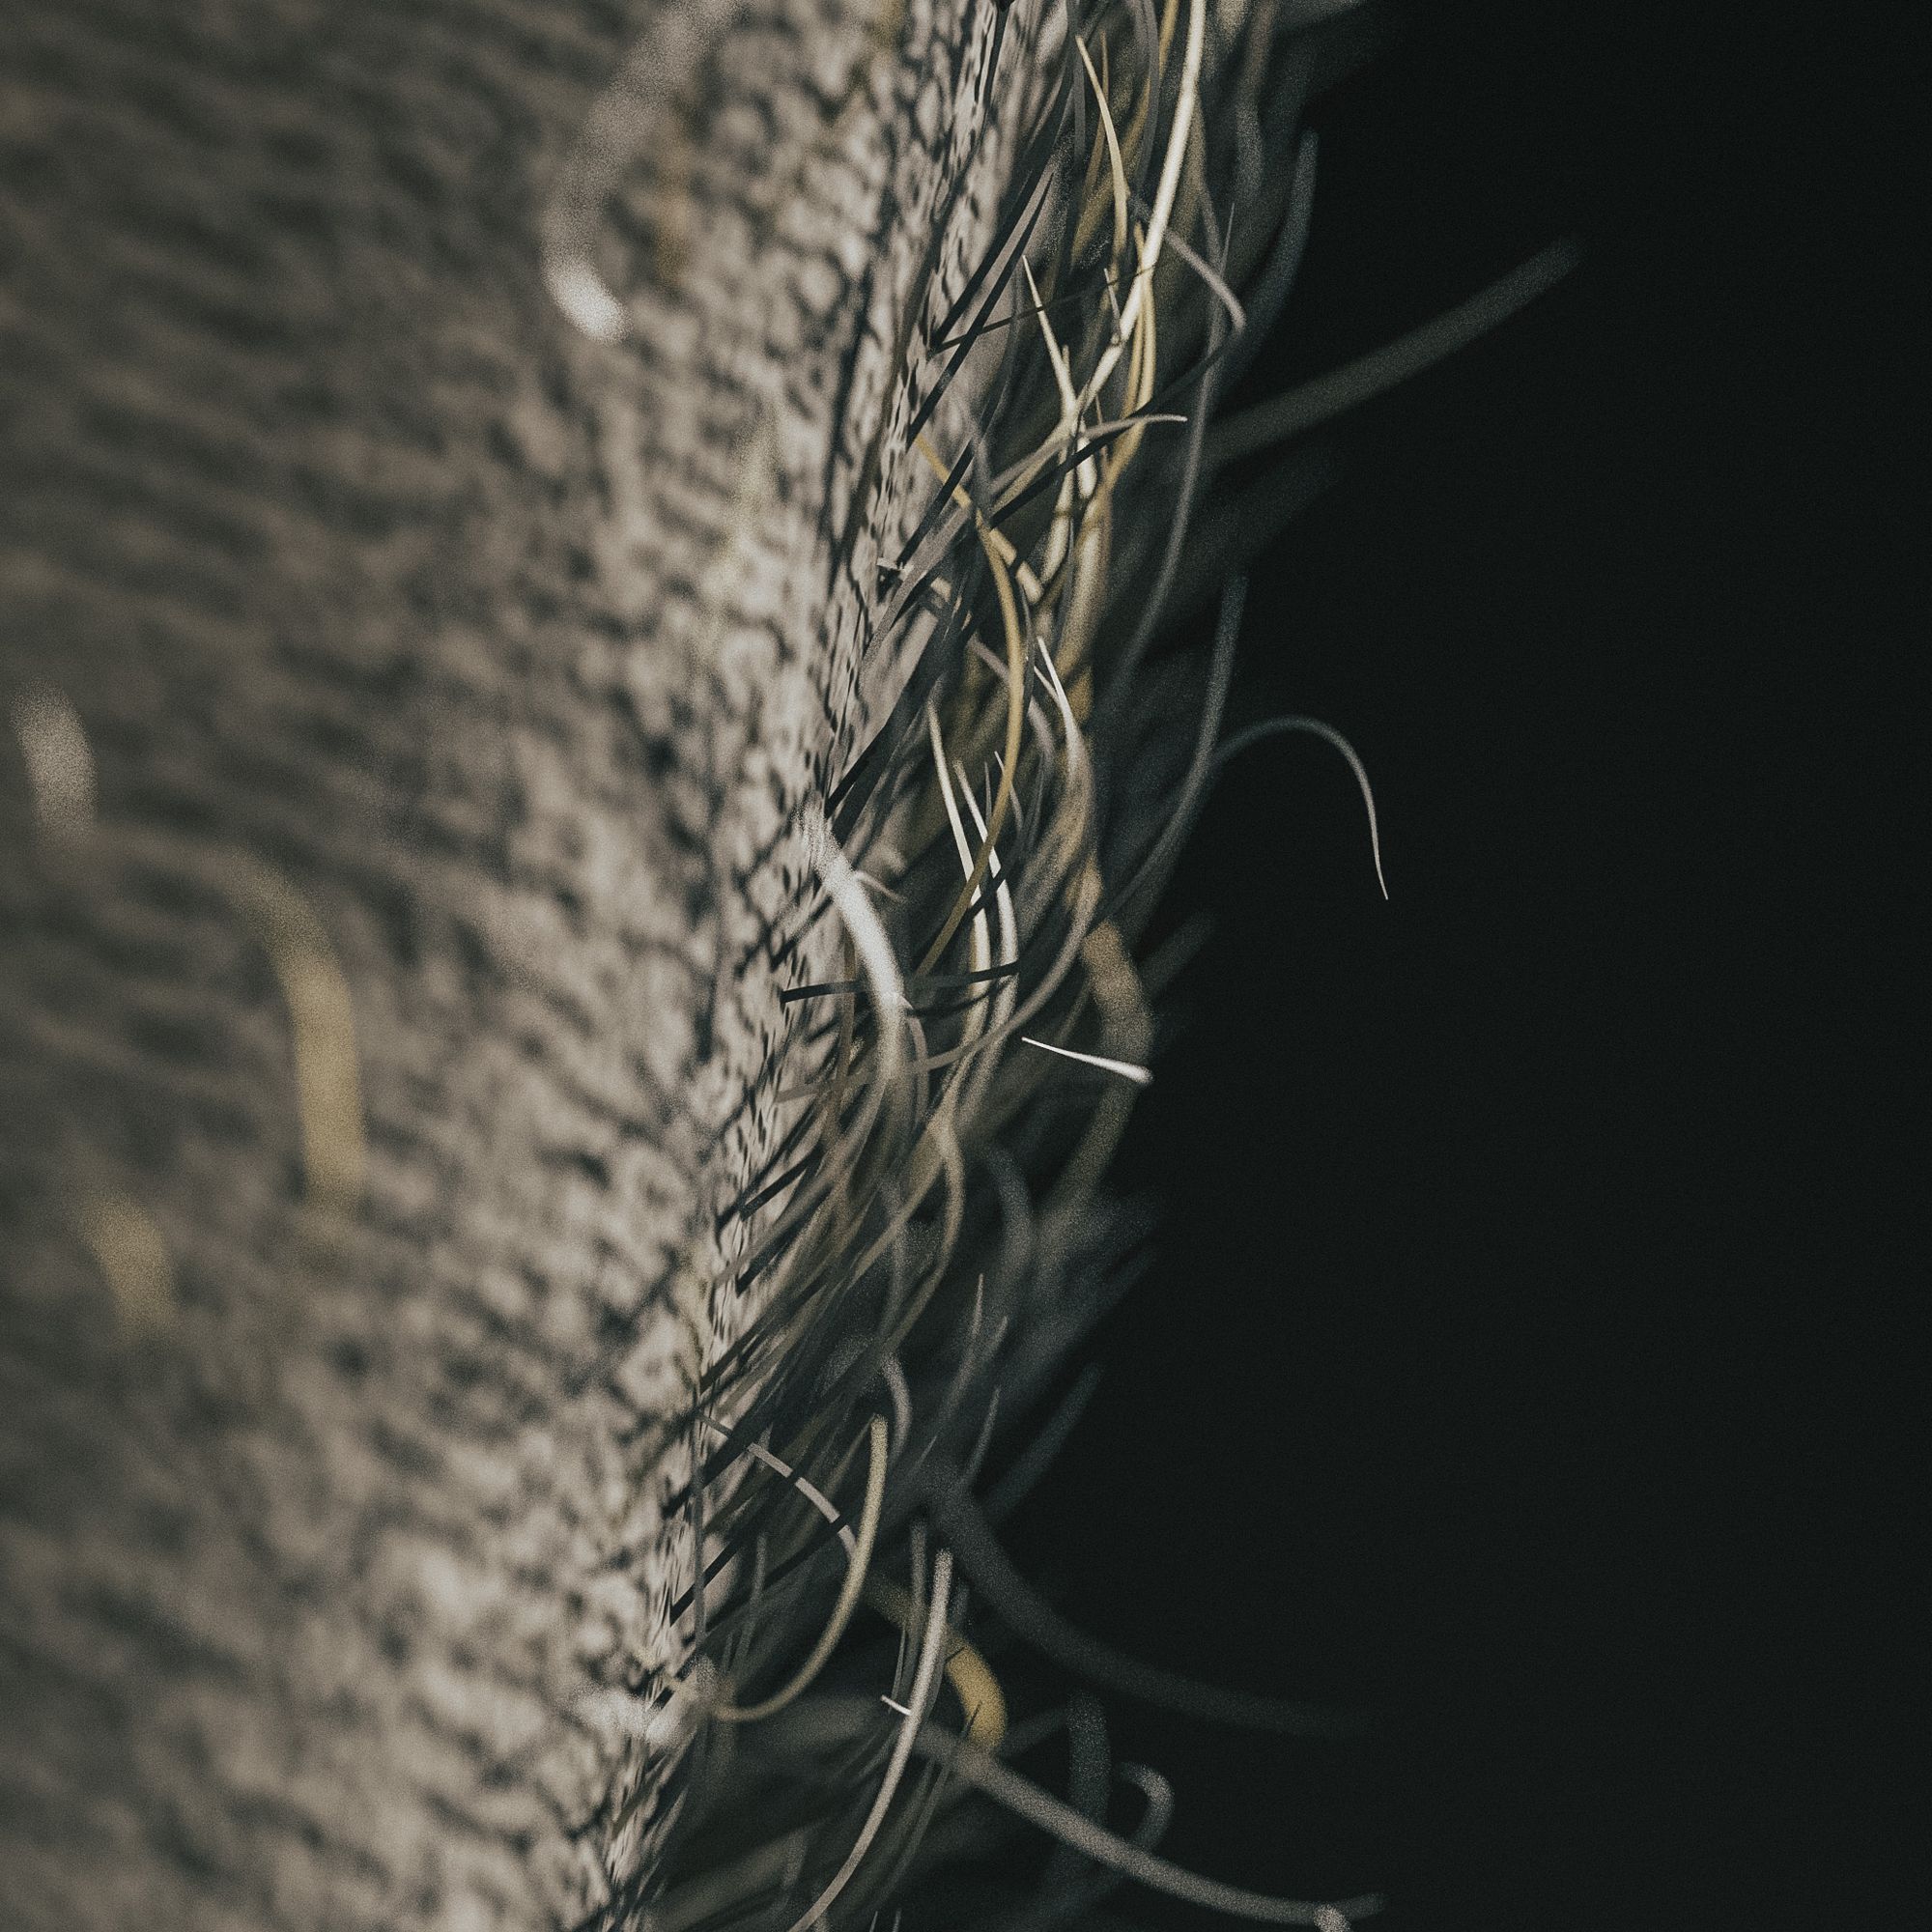
To manage the entire grooming process more efficiently, I divided it into different descriptions. I chose to manually place each guide, finding this workflow more effective than an interactive groom. The initial stage essentially consisted of placing guides one at a time, ensuring the hair flow remained realistic and organic; the references I gathered before, covering both human and elephant hair patterns, were particularly valuable in achieving these results.
Once all the guides were in place, the challenging part was completed. I then added modifiers such as clumping and noise to each section, enhancing the realism of the groom. Parameters were adjusted based on the hair's location. I opted for curly and thin hair on the body, while the elephant portion of the groom featured thicker and straighter hair, with a good percentage of frizzy strays.
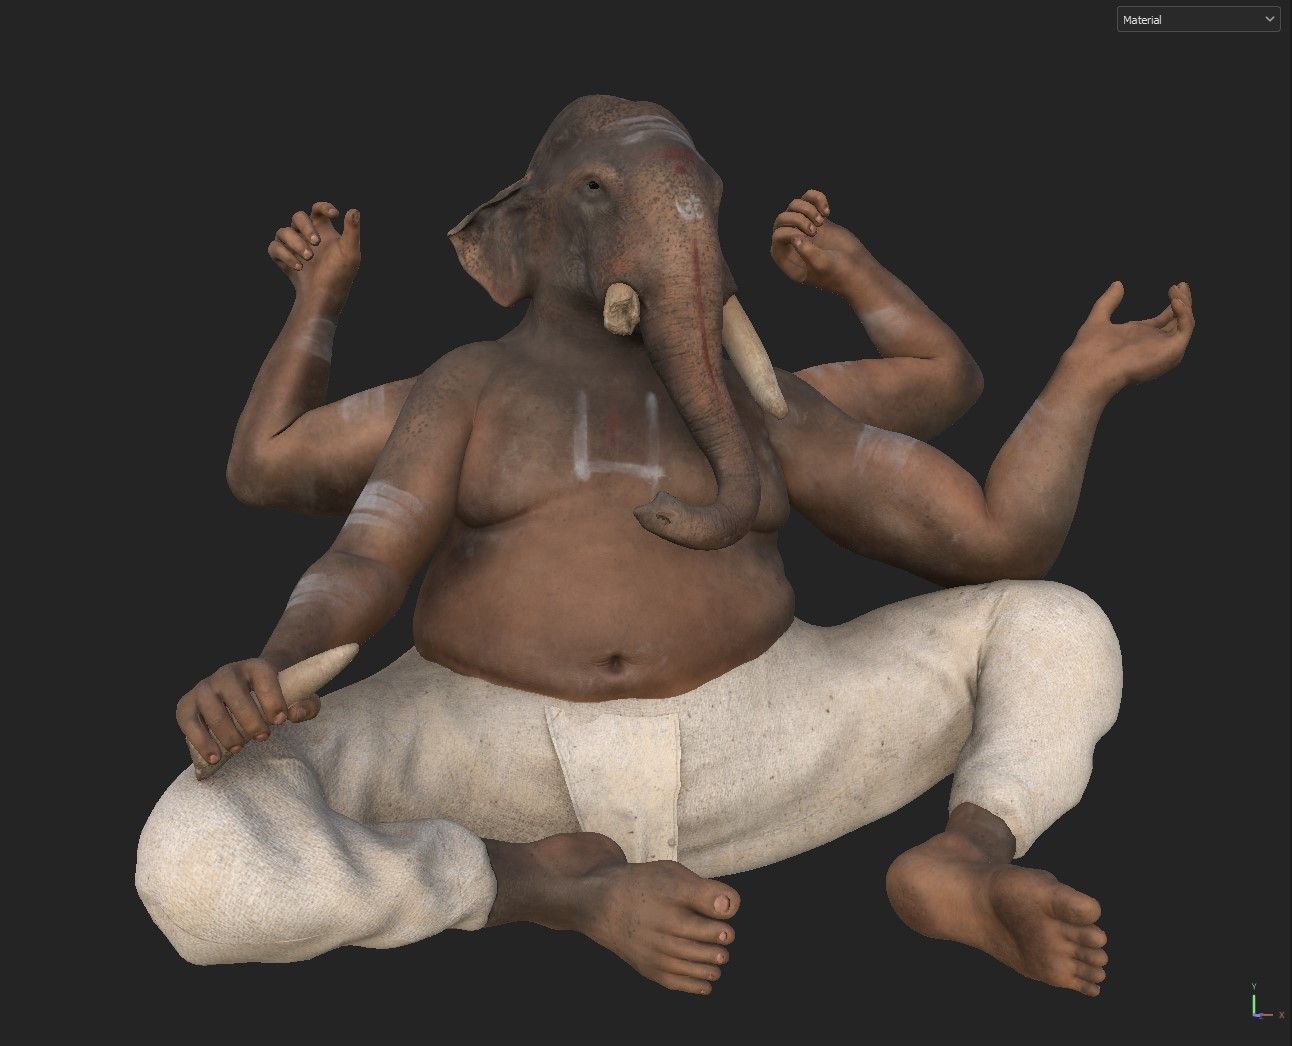
After completing the earlier phases, I was eager to dive into the rendering stage and truly see the project come together. I selected Arnold as my rendering engine, as I believe it delivers outstanding results, particularly excelling in Subsurface Scattering and Hair Realism, both critical aspects for my renders.
Setting up the materials was straightforward; most of it involved simply plugging in the textures created earlier. For the hair material though, I used the Ai Standard Hair shader, incorporating some melanin variations to create random white hairs, particularly on the body.
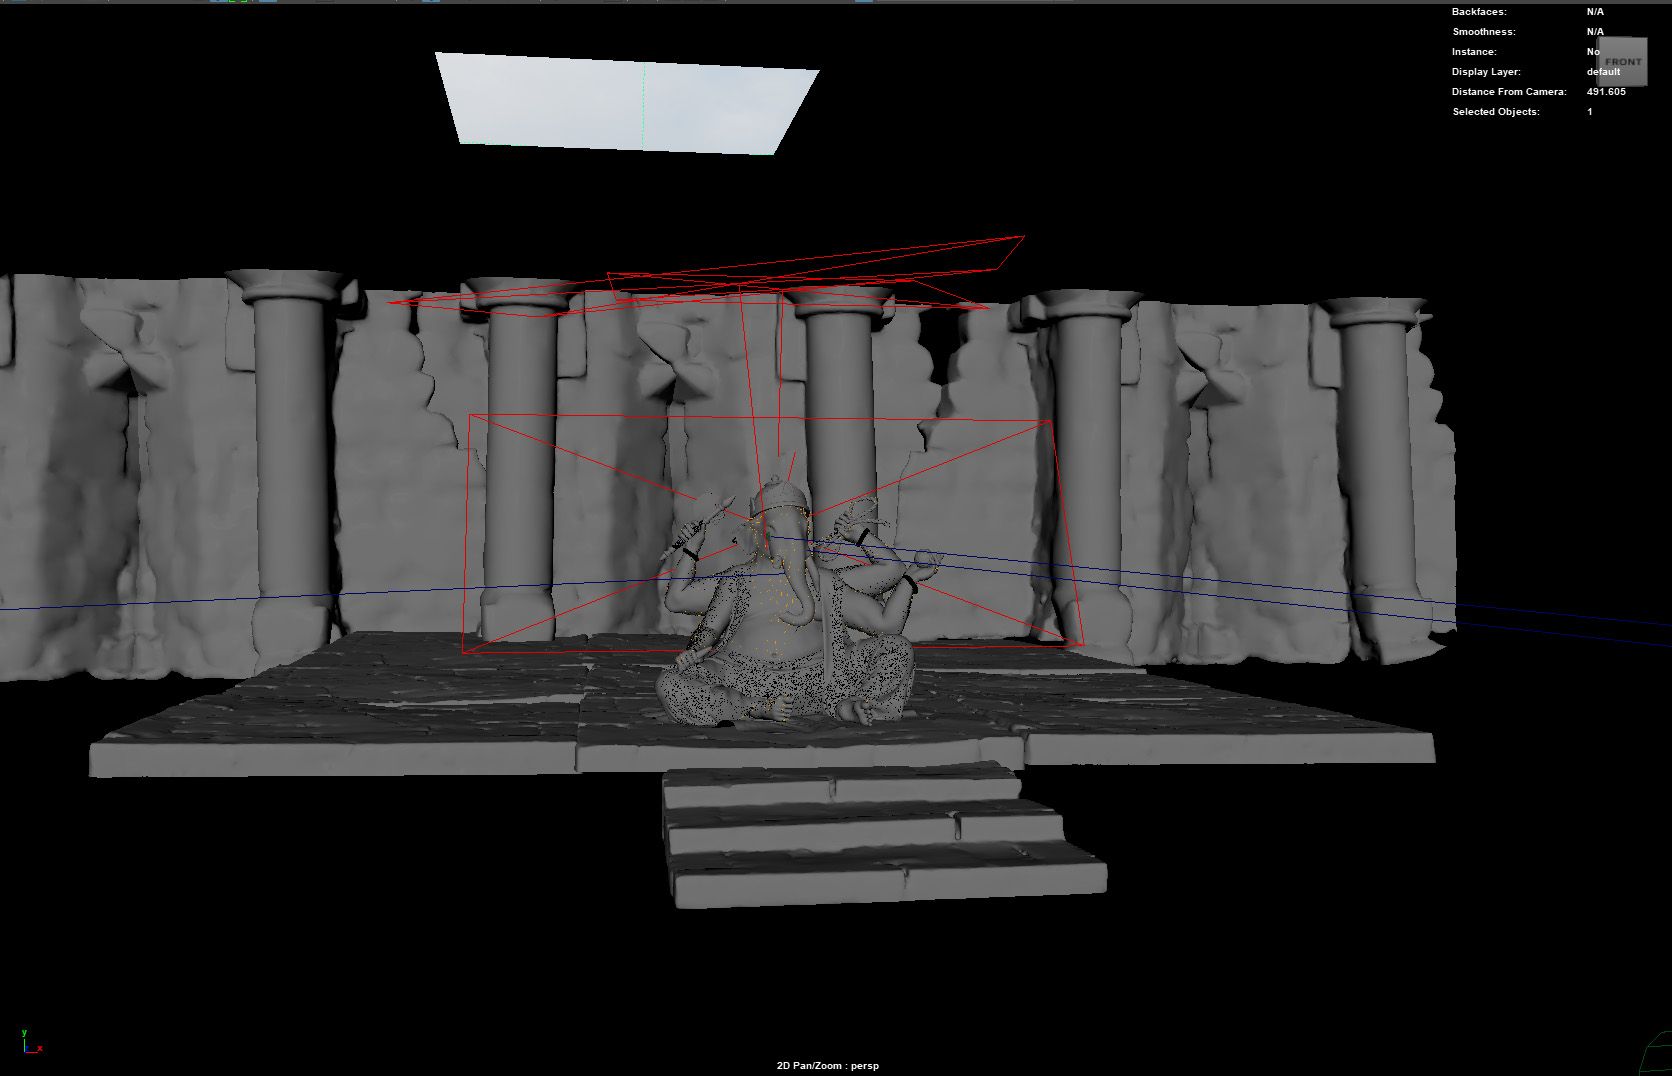
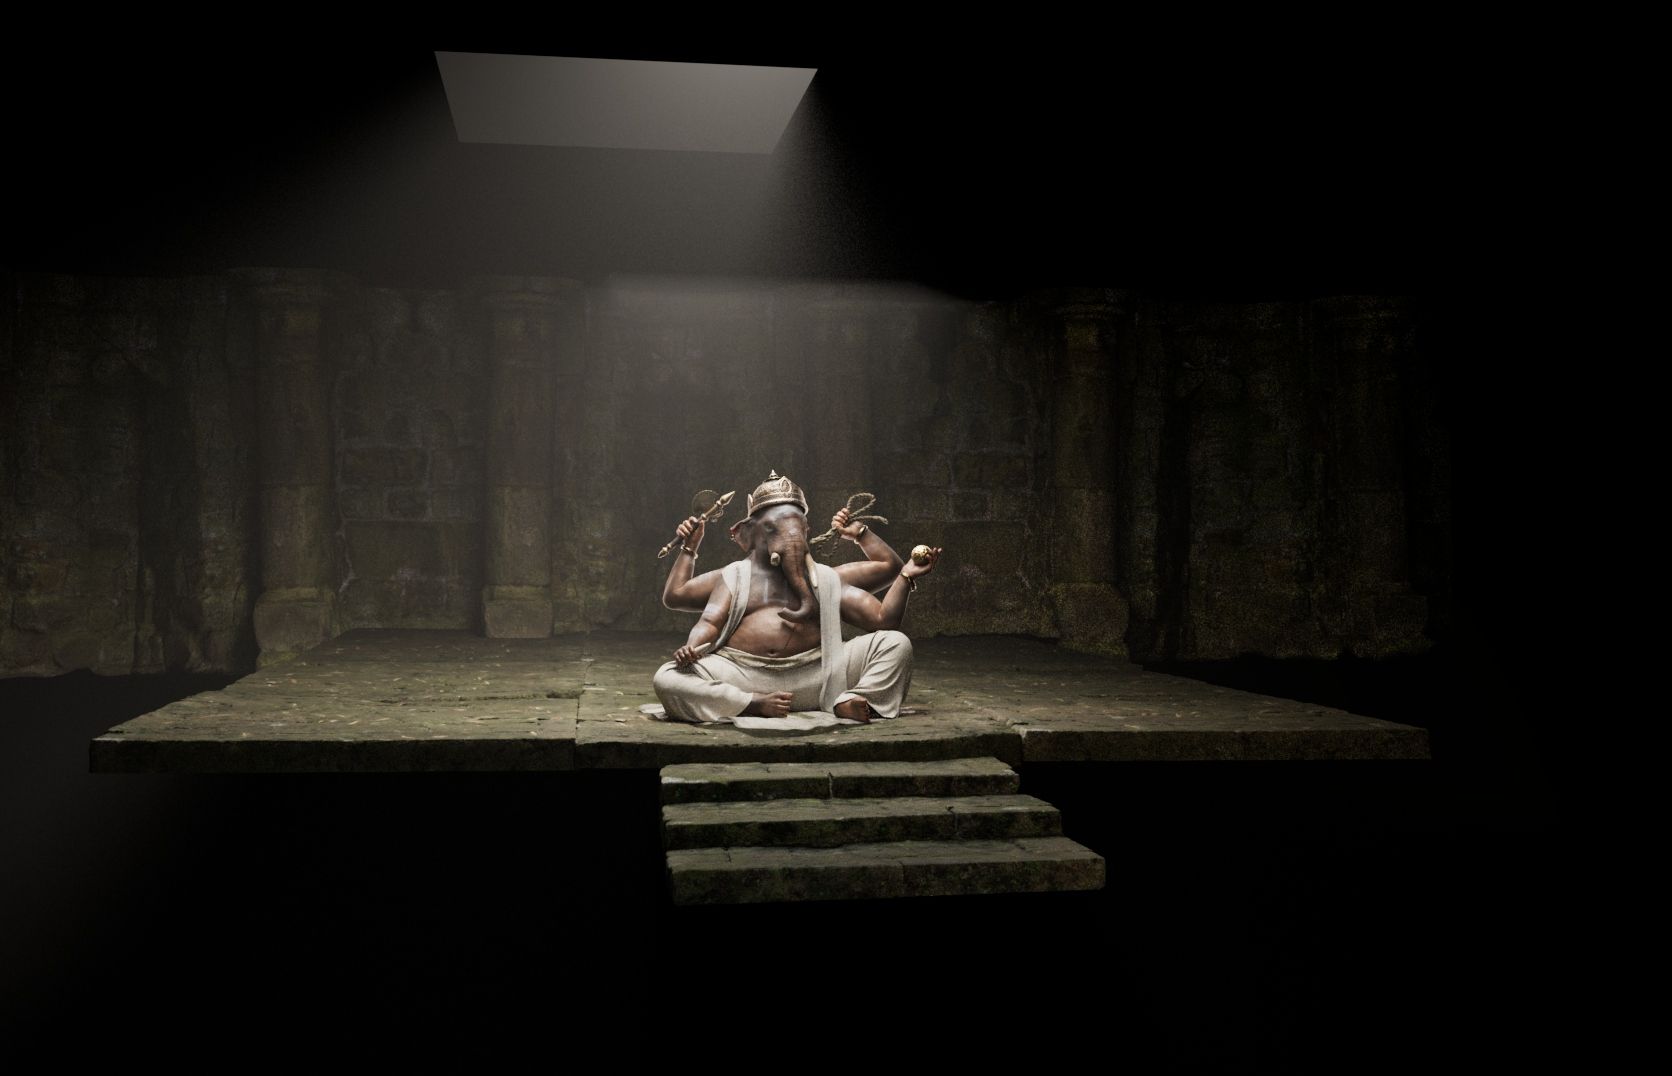
To showcase the project from different perspectives, I designed two sets with varying lighting scenarios. The first featured a background environment with dramatic lighting, evoking an 'abandoned jungle temple' vibe that complemented Ganesh. I quickly assembled the environment using models from Quixel Megascan, making minor texture tweaks. The lighting brought it all to life - I used an HDRI as a base, enhancing the effect of being inside a temple with a simple mesh and adding a few volumetric lights for atmosphere.
The second set was much simpler, with a neutral background to direct focus to the model. For lighting, I placed a large, soft keylight at a 45-degree angle as the primary source, accompanied by three rim lights to separate the character from the background. This lighting arrangement was very versatile, allowing me to capture close-up shots of all the details I wanted to highlight.
At this point, the project was essentially finished, so I simply brought all the renders into Lightroom and Photoshop for colour correction and post-production, bringing this journey of a project to an end.


This project is a special one for me, and I hope you enjoyed the breakdown as much as I enjoyed creating Ganesh. Indeed, it was a significant learning experience for me, enhancing my skills in various aspects of character creation. However, the most crucial lesson it taught me is the importance of loving what you do, the most valuable 'skill' for creating beautiful works. For me, the key is maintaining curiosity about everything and finding joy in the creative process as much as in the final result.
My favourite moments in this project were undoubtedly the research phases, diving deep into references of various kinds. Whether analyzing the intricate wrinkles on elephant skin or learning about the traditional dressing and body painting of the Brahmins, each detail became a source of inspiration. I truly believe that a genuine care for these details only enhances the final outcome.
Of course, not every project unfolds seamlessly. Challenges, errors and moments of frustration are inevitable, and this project had its fair share too. However, I always remind myself of the thoughts shared here. Witnessing the project unfold and realizing that the results align with my vision, make me never regret undertaking it in the first place.
Many thanks to everyone who took the time to read this article.
Check out more of Lorenzo's work and contact him via his Rookies profile here.