Fred Lopes, a Brazilian born artist living in Vancouver, is honing his character and creature development skills at Think Tank Training Centre. Recently, he created a character inspired by the X-Men, showcasing his modeling and texturing prowess.
Fred Lopes is a Brazilian artist currently residing in Vancouver. He is studying character and creature development for films at Think Tank Training Centre. In one of his latest projects, Fred had an incredible opportunity to explore the creation of a character inspired by the X-Men and put his modeling and texturing skills into practice. Read on for more inspiration.
Motivation
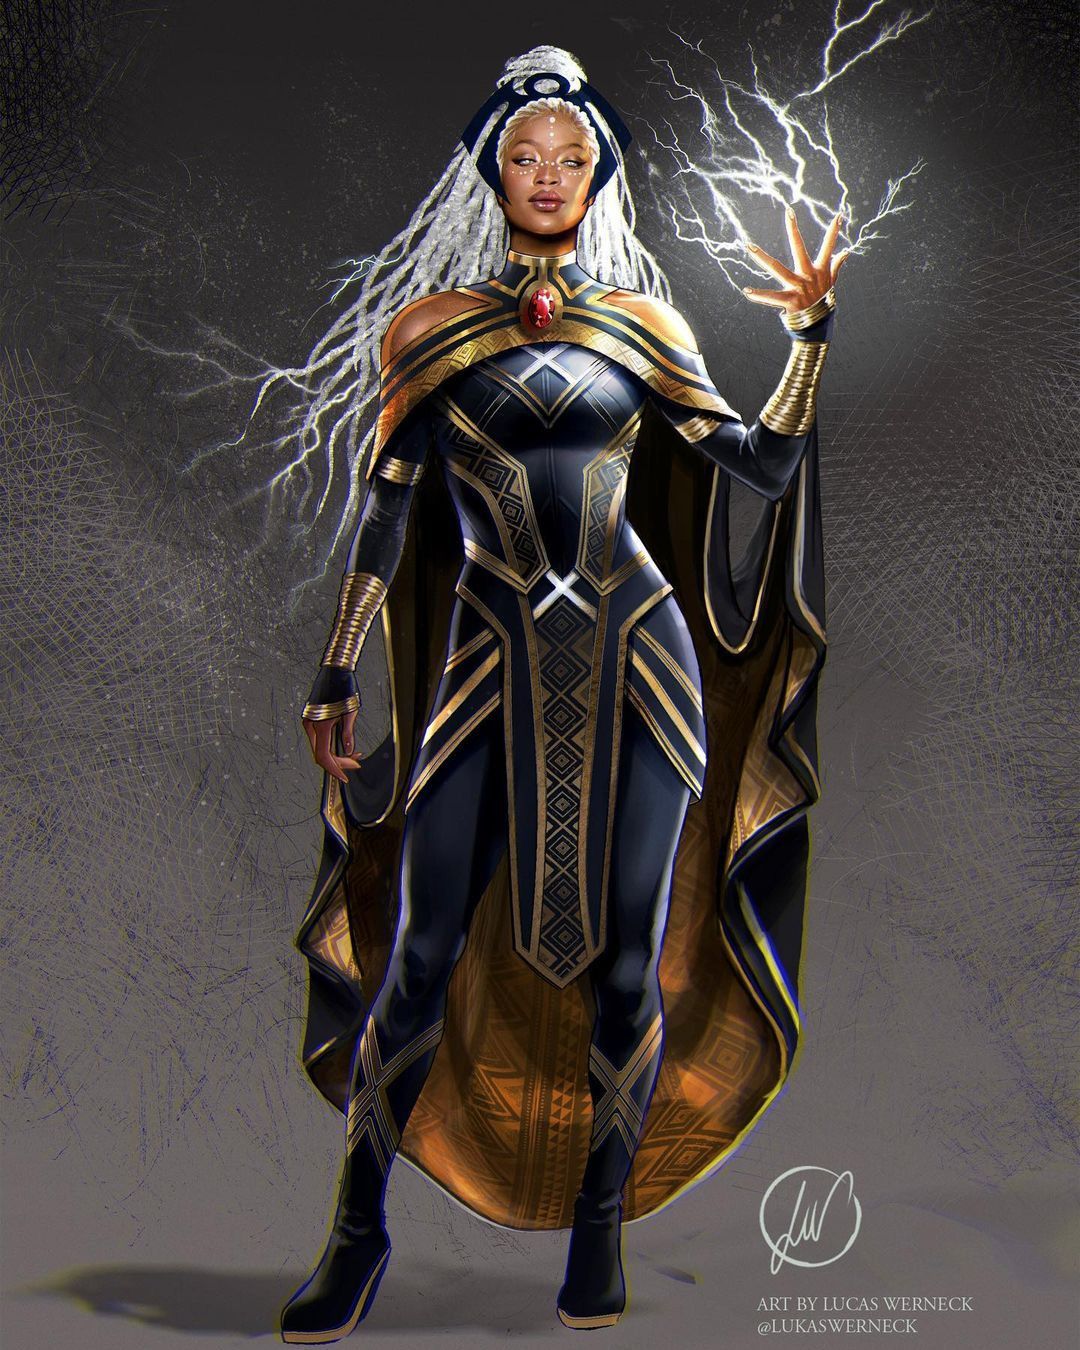
Storm has always been one of my favourite characters from the X-Men. For this project, I decided to draw inspiration from the incredible design of Brazilian artist Lucas Werneck (@lukaswerneck on Instagram). It was a lot of fun to incorporate some of my own ideas into the character and adapt certain details.
In his art, Lucas envisioned how the character would look in the MCU. Some decisions he made seemed very interesting to me, such as the character's hair being intertwined with lightning, and the costume design, which I immediately recognised as a challenging endeavour.
Another detail I found intriguing is that despite the relatively simple pose, it conveyed a lot of strength, making it clear that this is a highly powerful character.
One of the details I decided to change from the original concept was the character's hair. Although I liked the original hair a lot, I saw an opportunity to explore a hairstyle that I don't usually do and also to bring a slightly more modern and rebellious look to the character.
I also adapted some other details of the costume, always trying to use elements from the original concept but constantly experimenting as I developed my ideas. This led me to subtly change some colours of the costume, such as swapping the orange of the cape for red, the blue of the suit for a darker shade of leather, and also tweaking some colours around the head to highlight the character's face.
Additionally, I ventured a bit into likeness work by using the face of actress Sonequa Martin-Green (Star Trek Discovery), who, in my opinion, would make an excellent Storm.
References
I consider this to be the most crucial part of the project. Before diving into modeling, I surrounded myself with references that accurately represented the proposed ideas in the concept art. I also experimented with various alternatives in Photoshop to ensure the direction I was taking.
Moreover, I incorporated details I found interesting, such as symbols and patterns, to enrich the project. These were discovered through research on Google and Pinterest, aiming to add some meaning to my choices and represent elements of African culture, as Ororo is considered an African Goddess.
Lucas did an excellent job searching for symbols and patterns that immediately evoked the character's origins. Although I haven't conducted an in-depth study on the meaning of each chosen symbol, I was greatly inspired by the artist's choices to explore new possibilities that conveyed the same quick interpretation of symbols reminiscent of African tribes.
The individual meaning of the symbols was not a criterion I adopted in my choices; I aimed to create an association with African culture solely by drawing inspiration from images found in my research and always focusing on how they would fit into the character's design.
Another factor I considered throughout was, of course, choosing symbols that referenced the X-Men. Therefore, both in my study and in the original concept, you can find various forms of X, a direct nod to the mutant group's logo. This allowed people to easily identify the character, even though it doesn't adhere to the classic uniform and lacks the original X-Men logo.
While I'm a big fan of the Star Wars universe, I confess that I've also watched and enjoyed Star Trek Discovery (for me, there are no rivalries between these two pop culture classics; I've learned to appreciate both).
In Star Trek, actress Sonequa Martin-Green plays the charismatic Michael Burnham. Upon seeing her performance, I envisioned her as perfect for an upcoming X-Men film. I gathered numerous images of the actress to use as references for the modeling stage.
Additionally, I collected references from Marvel films, with a particular interest in images from the Wakanda universe and one image in particular from one of the X-Men movies.
Modeling
For the face, I decided to use a basemesh from Vface, which I acquired from the Texturing XYZ website. I used this mesh in ZBrush to achieve the likeness through observation.
To achieve the likeness, the challenge was first to find high-resolution images of the actress. I looked for images that represented the same time period or at least had similarities in style and age because her face could have different characteristics at different ages.
Another criterion I adopted was to prioritise images where the actress had short hair, as this would allow me to better see the structure of the head and anatomical landmarks. Finally, I sought images that could be used to align the mesh and proportions from the main angles: front, sides, and perspective. In addition to these images, I also obtained some supporting images, some at more extreme angles such as lower cameras or close-ups, to identify more specific features such as the nose and eyes.
Subsequently, I took the lower subdivision from ZBrush to Maya, to refine the proportions. The reason I did that was to take advantage of Maya’s camera features.
During the modeling, I ensured that the model aligned with the images, attempting to simulate the lens used in the reference photos for better accuracy. For this purpose, I used a technique taught by my mentor Tony Juricic, which consisted of three steps:
Adding a camera and trying to match the lens used in the photographs, evaluating if the photo was taken from a distance and making my best guess regarding the lens.
Projecting the reference image onto an image plane in Maya and finally freely moving the object until it fits into the photograph.
The idea was to move the object instead of the camera to achieve a more correct alignment in less time. Neutralising the object. After aligning the object with the image plane, I could parent the camera with the object. When neutralizing the model, the camera followed the movement.
In the end, I had the neutral object properly aligned with the image plane.
The clothing was entirely modeled in Maya, using a simplified version of the character's uniform. By extracting the polygons from the character's body, I could use Maya's Quad Draw feature to model all the pieces with the required shape and topology, adding details later on using ZBrush.
The cape was the only piece I felt necessary to simulate, and for this, I used Marvelous Designer.
Texturing
For the textures, I found it important to try to convey a story, give some meaning to the patterns used, and also add a bit of wear from the character's previous adventures. Not making the suit perfect was crucial. This imperfection was achieved using the roughness of the reflections in Substance 3D Painter.
One of the most important aspects for me in the texture of the character's costume was the reflection, as it would interact with the rays and lighting of the scene, adding more visual interest to the image. Additionally, the character had many golden elements, which conceptually conveyed a sense of royalty related to the character's story.
Another crucial element was portraying Storm as a warrior who had experienced battles, so the costume couldn't be pristine. It needed some minor wear and scratches resulting from its use. However, I aimed for subtlety because I didn't want the costume to appear dirty, as it wouldn't align with the character's concept. I simply wanted to bring a level of detail that would make the observer believe it was functional and had been used by the character.
A piece of advice I would give to artists looking to incorporate these subtle elements into their textures is to always search for photographic references and try to justify their choices by thinking about how they will make their intentions clearer to the viewer. Guiding the observer's interpretation so that they understand exactly what you intended is always a good idea. Sometimes, a subtle detail is necessary for that purpose.
The entire texture process was done in Adobe Substance 3D Painter. I also made corrections and adjustments to the Vface skin maps. Substance proved to be extremely flexible for the look development process.
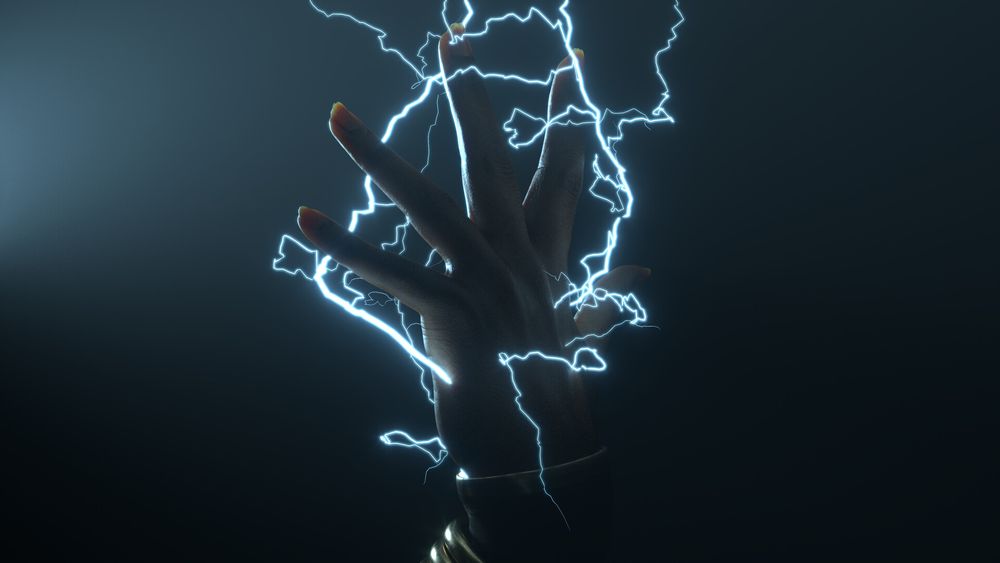
Lightning Effect
I tested various lightning effects during the process. Initially, I thought about creating something more complex using Bifrost, but I ended up choosing the most practical option and used PaintFX in Maya to generate the effect.
This was also the most artistic and flexible choice because, besides being a more practical process, the way Maya's Paint FX works allowed me to paint various interactions, mix some, and even easily convert them into geometry, making it more lightweight.
Simulations can certainly be more complex and yield better results, but they would have taken more time to execute and might have generated slightly less predictable outcomes.
In my case, I knew from the beginning that I wouldn't be animating the scene. However, this method of creating the lightning shows some potential for animation, as Paint FX has parameters for randomising the shapes and positions of the rays, which could be utilized for animation purposes.
Pose and Render and Post-Production
Finally, I used a free Maya plugin called Advanced Skeleton to create a simple rig and pose the character.
0:00
/
After posing, I positioned the camera and lit the scene. In this stage, I also built a simple set, similar to the reference I had collected from the X-Men movie, the X-Men training room. This set was built using MASH to repeat elements in a modular way (light and geometry) and a bend deformer to curve the wall.
Post-production was done in Nuke. This was my first time using the software, and I found it powerful and essential for achieving a more cinematic image.
The node system in Nuke proved to be extremely practical for streamlining various rendering interactions. I could set up a simple structure and easily reuse it throughout the various rendering iterations I did during the process.
To facilitate the process, I used EXR Multipasses, consolidating all the passes I used into a single file. Within Nuke, I could separate lights, masks, and also some specific and highly useful passes to achieve the final result, such as AO, roughness, and depth.
Although I didn't do anything extremely complex, especially since it was my first time doing post-processing within the software, I could see many advantages in terms of performance and the resources provided by the software, such as depth of field and excellent colour correction tools.
Conclusion
This project gave me an incredible opportunity to explore the creation of a character inspired by the X-Men and put my modeling and texturing skills into practice.
I am currently working on my final project at Think Training Centre. I chose to undertake a single project that combines a more in-depth study of hardsurface techniques and a new likeness study. There is still a lot of work ahead, but it is undoubtedly the most complex project I have undertaken so far, and I can't wait to share some images. In this project, I am learning new techniques that I hope to share here soon as well.
Thank you for reading this article, and I hope it has been helpful. Until the next project!
Check out more of Fred's work and reach out to him via his Rookies profile here.