Creating a Foundation Term Project: Expedition to Mars
Shubham Goyal, a final-year student at Think Tank Training Centre, transformed an existing concept into 3D within 4 weeks for a Foundation Term Final project. Join him as he shares his process in this insightful article for those embarking on similar endeavours.
The project featured in this article was created for a Foundation Term Final for Think Tank Training Centre. Shubham Goyal, a student in his final year, had 4 weeks to take an existing concept and transform it into 3D. In this article he takes us through his entire process. If you're looking to take on a similar project, this article is for you!
Hi, My name is Shubham and I am in my final term at Think Tank Training Centre Online program while writing this article. Through this article, I am detailing my process of creating this project based on the amazing concept by Tomek Larek.
Overview of the Project
This project was completed as the final assignment for the foundation term at TTTC. The goal was to select an existing 2D concept and translate it into 3D, incorporating all the fundamentals and tools covered during the term.
The first step of starting the project was to select the concept. My supervisor suggested to pick something that was stylised and had some sort of appeal to it. While searching for concepts I always prefer finding concepts on ArtStation primarily as I can always credit the main artist which is a very professional practice to do whenever you’re attempting 3D interpretation of any 2D concept. I came across Tom Larek’s ArtStation profile and I found his concepts attractive and they caught my attention instantly due to the stylised shading, overall mood, and great composition. It perfectly aligned with what I was looking for and had all the elements that offered a balance between challenge and doability in the given time frame for the project.
Setting up a Schedule
Making a schedule for every task not only makes the whole process simple but also gives an idea of what are your areas of strength and tasks that you can do faster and what needs more practice. I always divide my project based on the core process in this case, I gave Modelling, Camera Setup, and UVs two weeks, One week of texturing, and a Final week for rendering and composition. It's a good practice to keep some buffer days in case you are running behind your schedule!
Collecting References
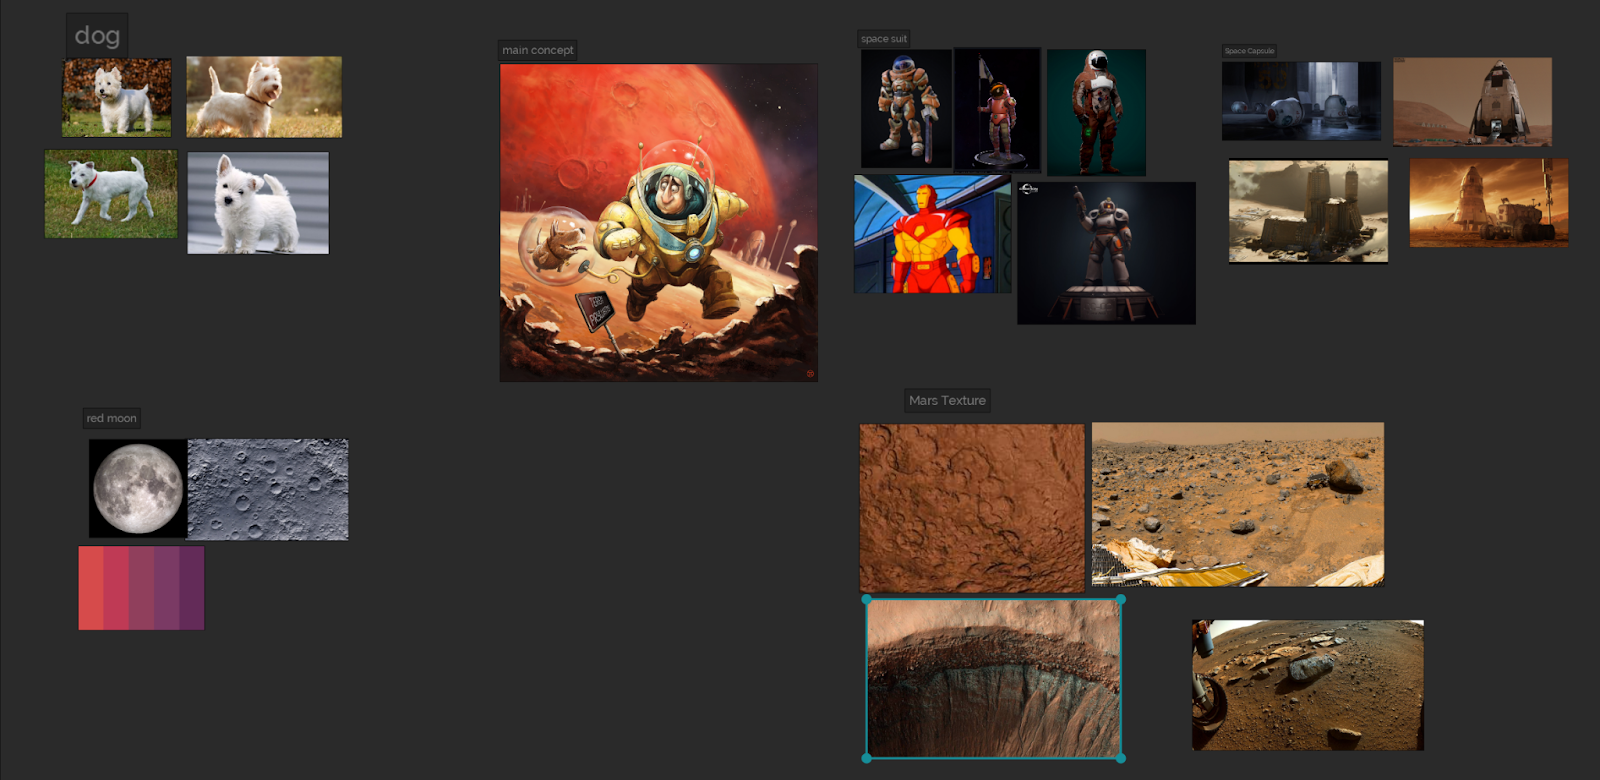
After finalising my concept, the first thing I always do is collect references to have a clearer idea of what exactly I am looking for and you can always expand your reference board as you progress more on the project. My Supervisor advised us to have additional references for stuff like LUTs and something that catches your attention and you can always try to implement it in your project like a certain type of texturing style, lighting style, or such.
Reference Board
Setting up the render camera
The second thing I did was to match my final render camera with the concept to the best accuracy before I started blocking out my main shapes. This step is crucial and I ended up spending some time to get the best camera angle before I start modeling all the pieces. While matching the camera to a still image seems simple, it can turn into a tedious process in no time and while figuring out the best camera angle, I came across a tool suggested by one of my peers known as fSpy, which is a free tool to match the camera. It is a simple-to-use application and helps a lot in camera settings like field of view, camera position, orientation, etc. It's a useful tool for budding environment artists.
Modelling in Maya
After setting up my render camera and laying down basic block-out shapes, I started modeling the different components of the scene. I always prefer to keep a certain level of completion across the scene rather than doing an individual complete piece and moving to another. This is a useful practice to implement as it helps to keep a visual track of how things look rather than one being fully done other being in just a blockout shape. The back-and-forth process of modeling kept me engaged with the project while having a clear idea of the final product that I was aiming to get. I always prefer modeling my hard surface assets in a more polygon modeling environment like Maya and sculpting organic assets like the dog, rocks, face, and cloth in sculpting applications like ZBrush.
I used Maya and ZBrush as I was fairly comfortable with these applications but you can always try other tools like Mudbox, 3DSMax, and Blender. As long as you enjoy the artistic hustle, the tools don't matter.
For the hard surface assets, I prefer modeling them in a process of first capturing the silhouette shape followed by the inside details. This approach always helped me to get the most accurate results for my models. The three-step approach for modeling hard surface assets I follow is:
capture the silhouette (with minimum polygons)
Refine the silhouette (complex holes, extrusions, and more topology)
Adding control edges/creasing (adding edges on borders for using Catmull Clark smooth level 3 division preview in Maya)
A very common issue while doing hard surface assets is edge flow, which I always tackle by adding a temporary edge loop using the multi-cut tool to check how my topology flows across the border and in general.
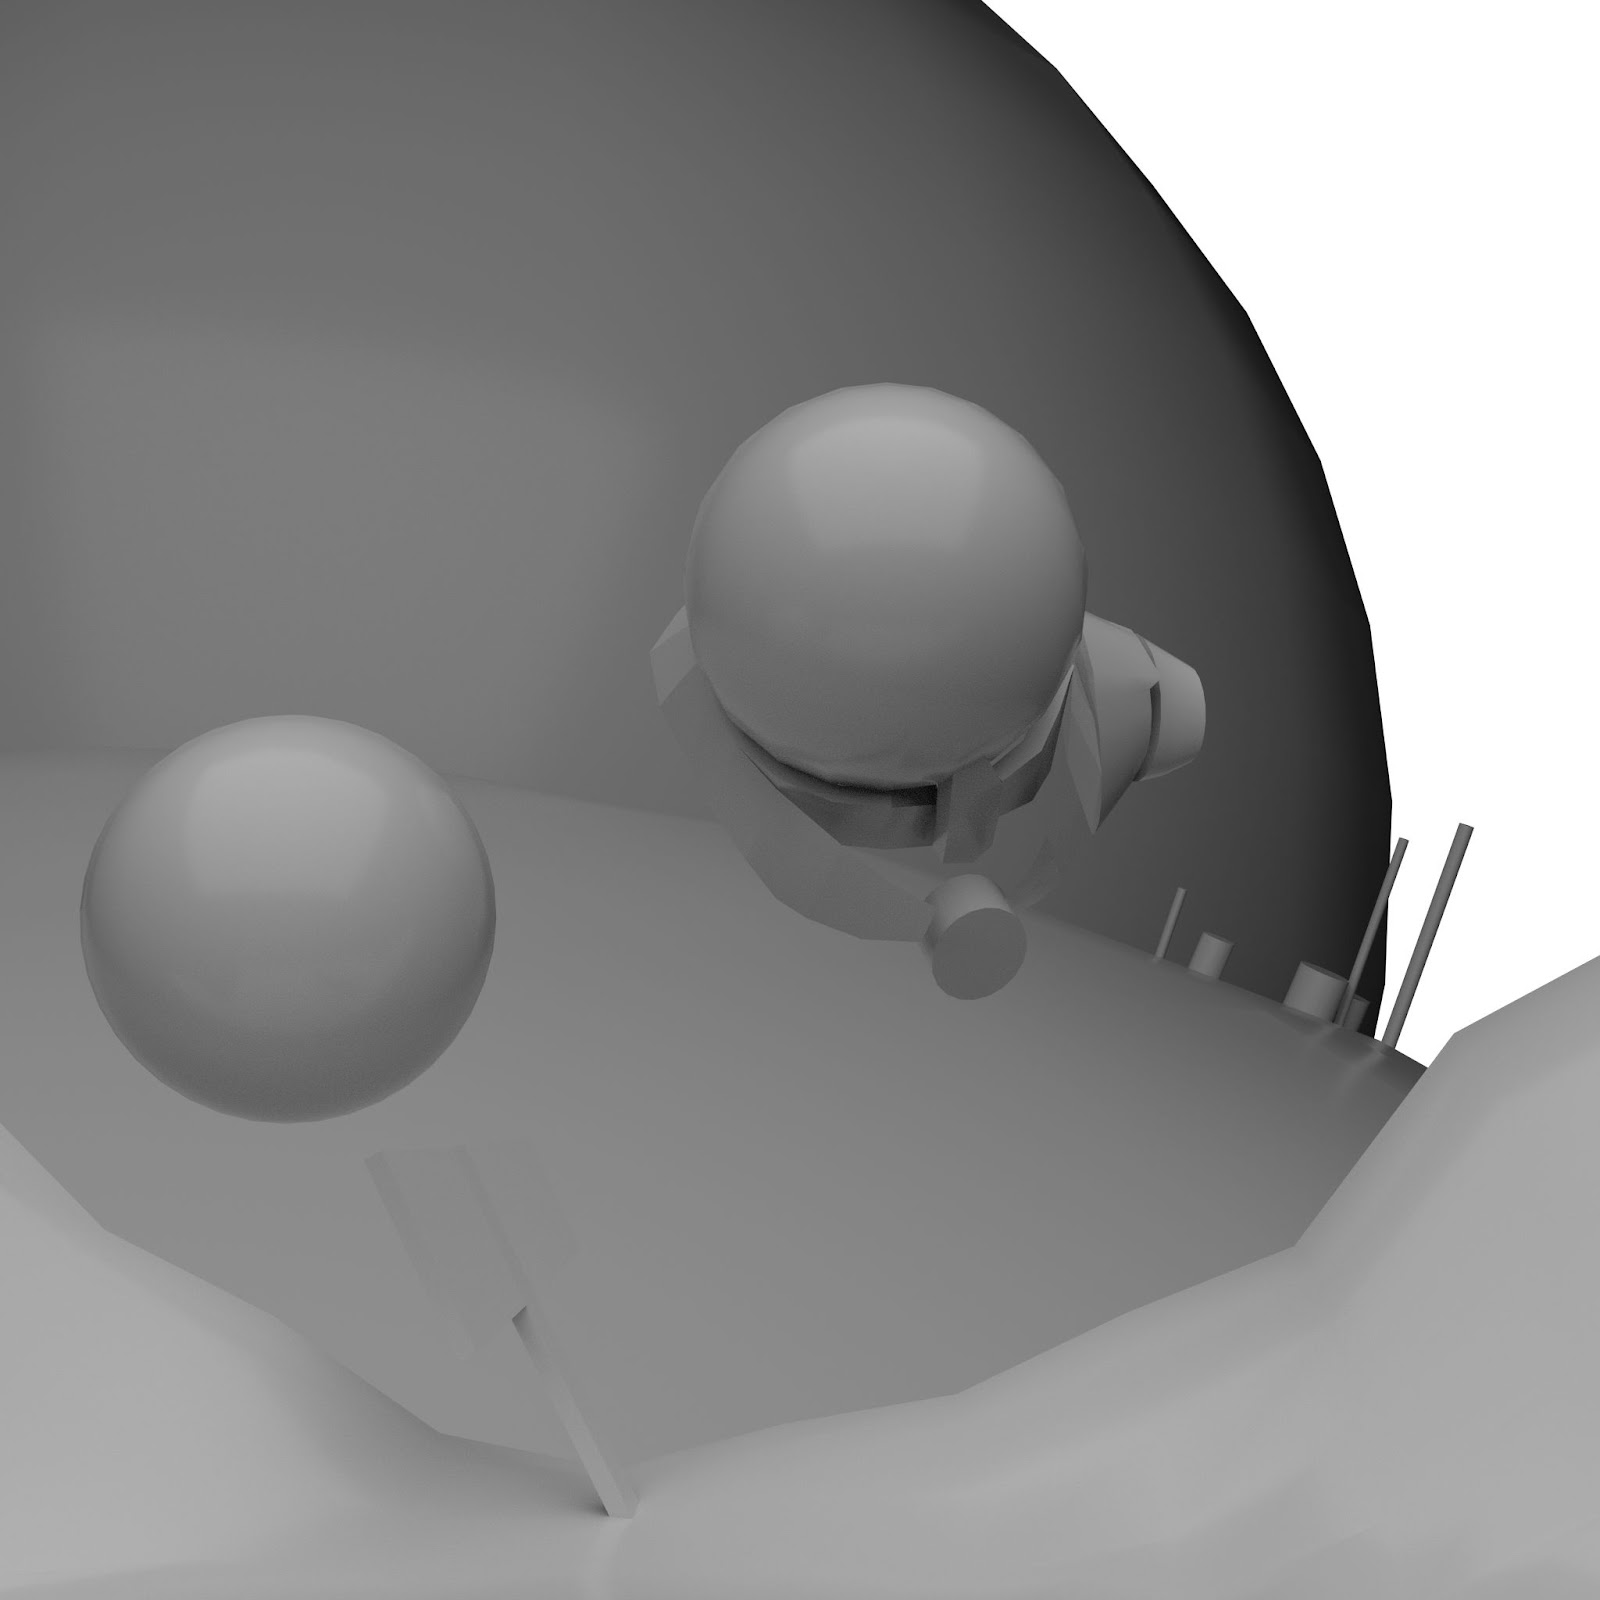
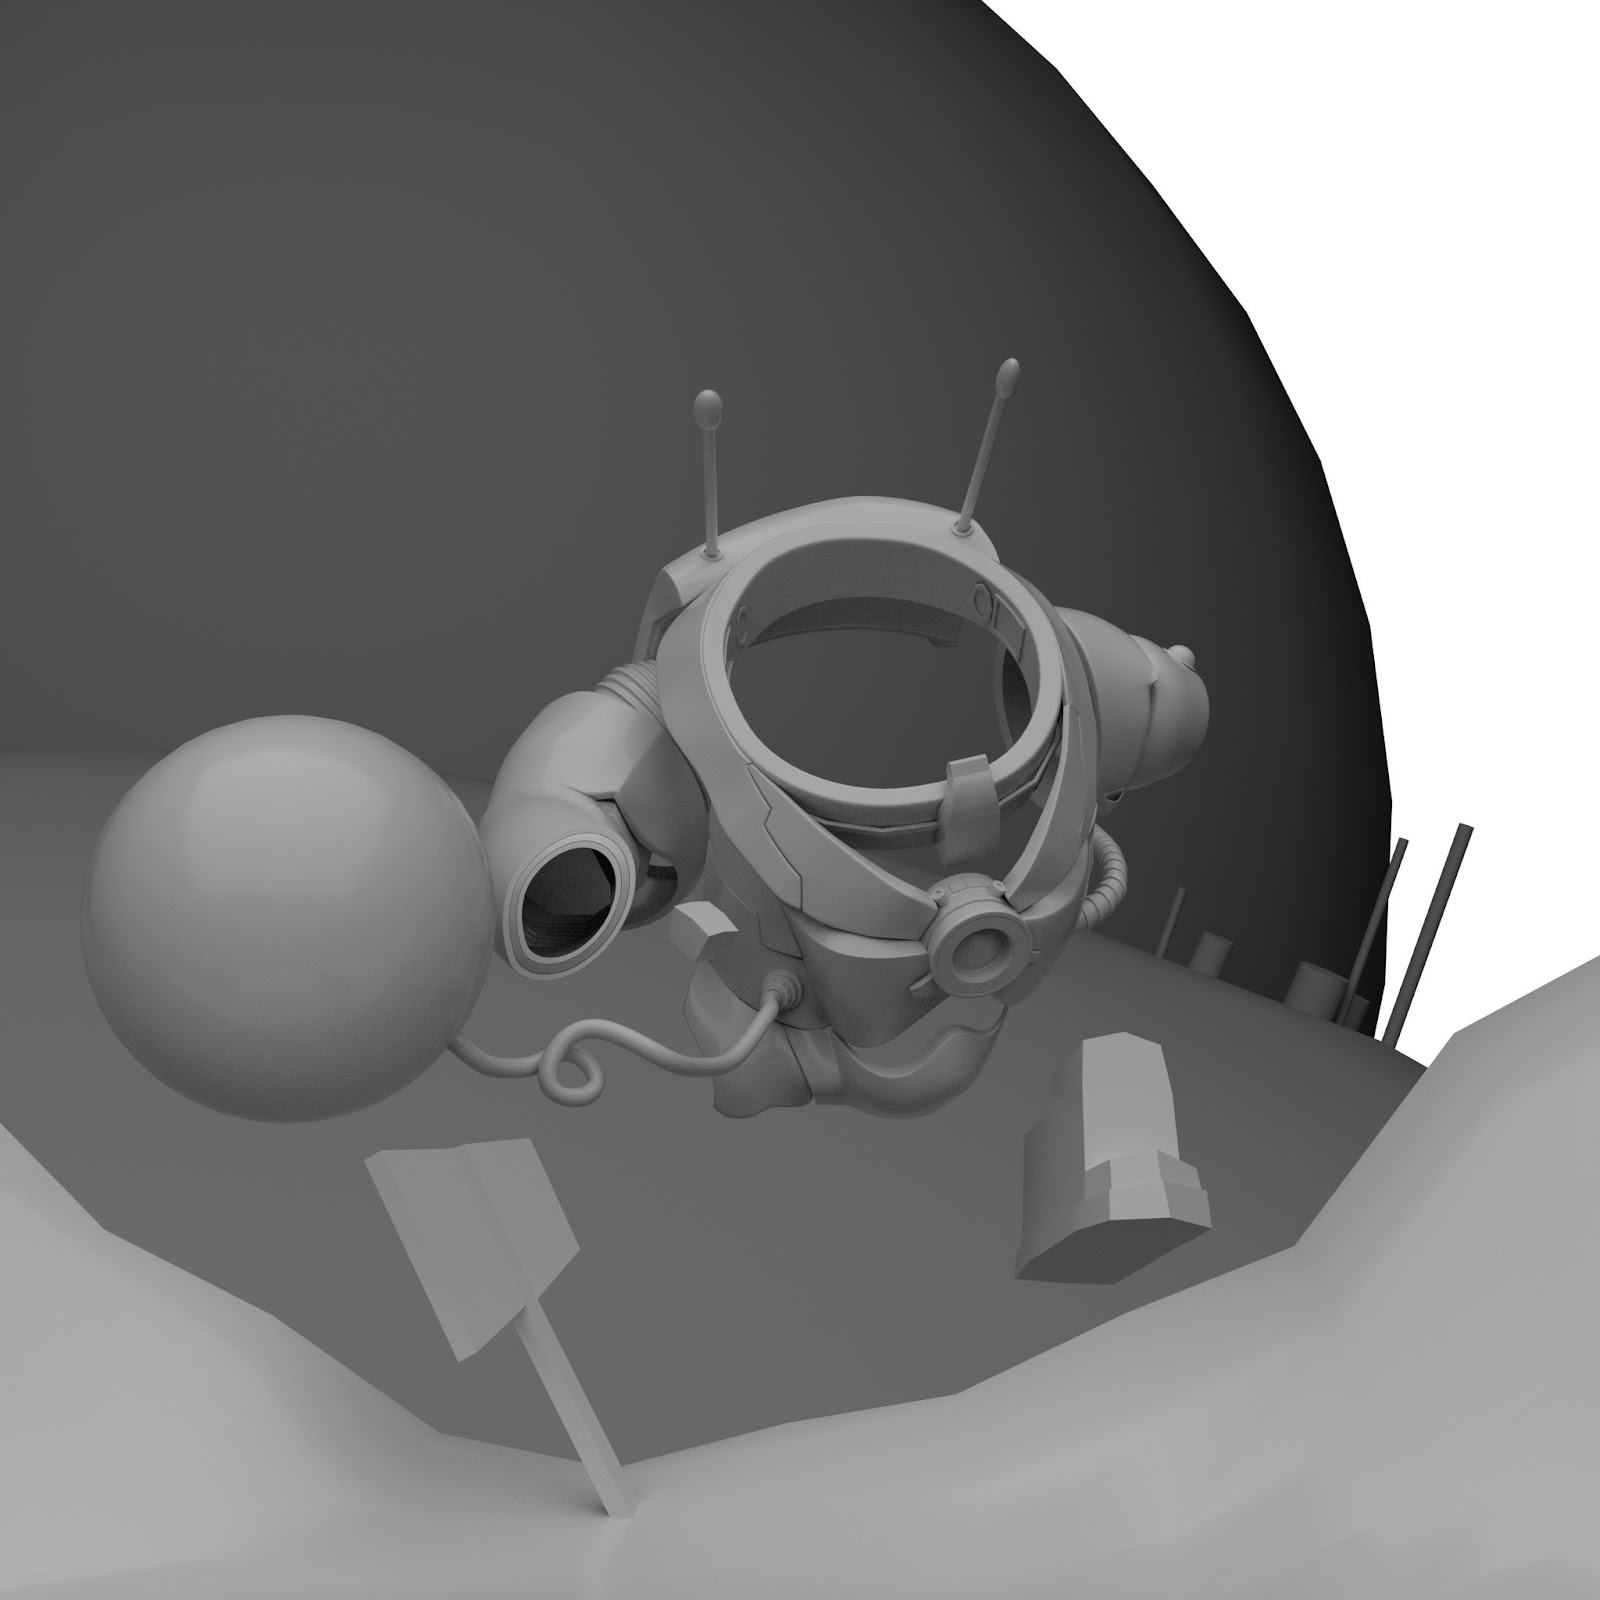
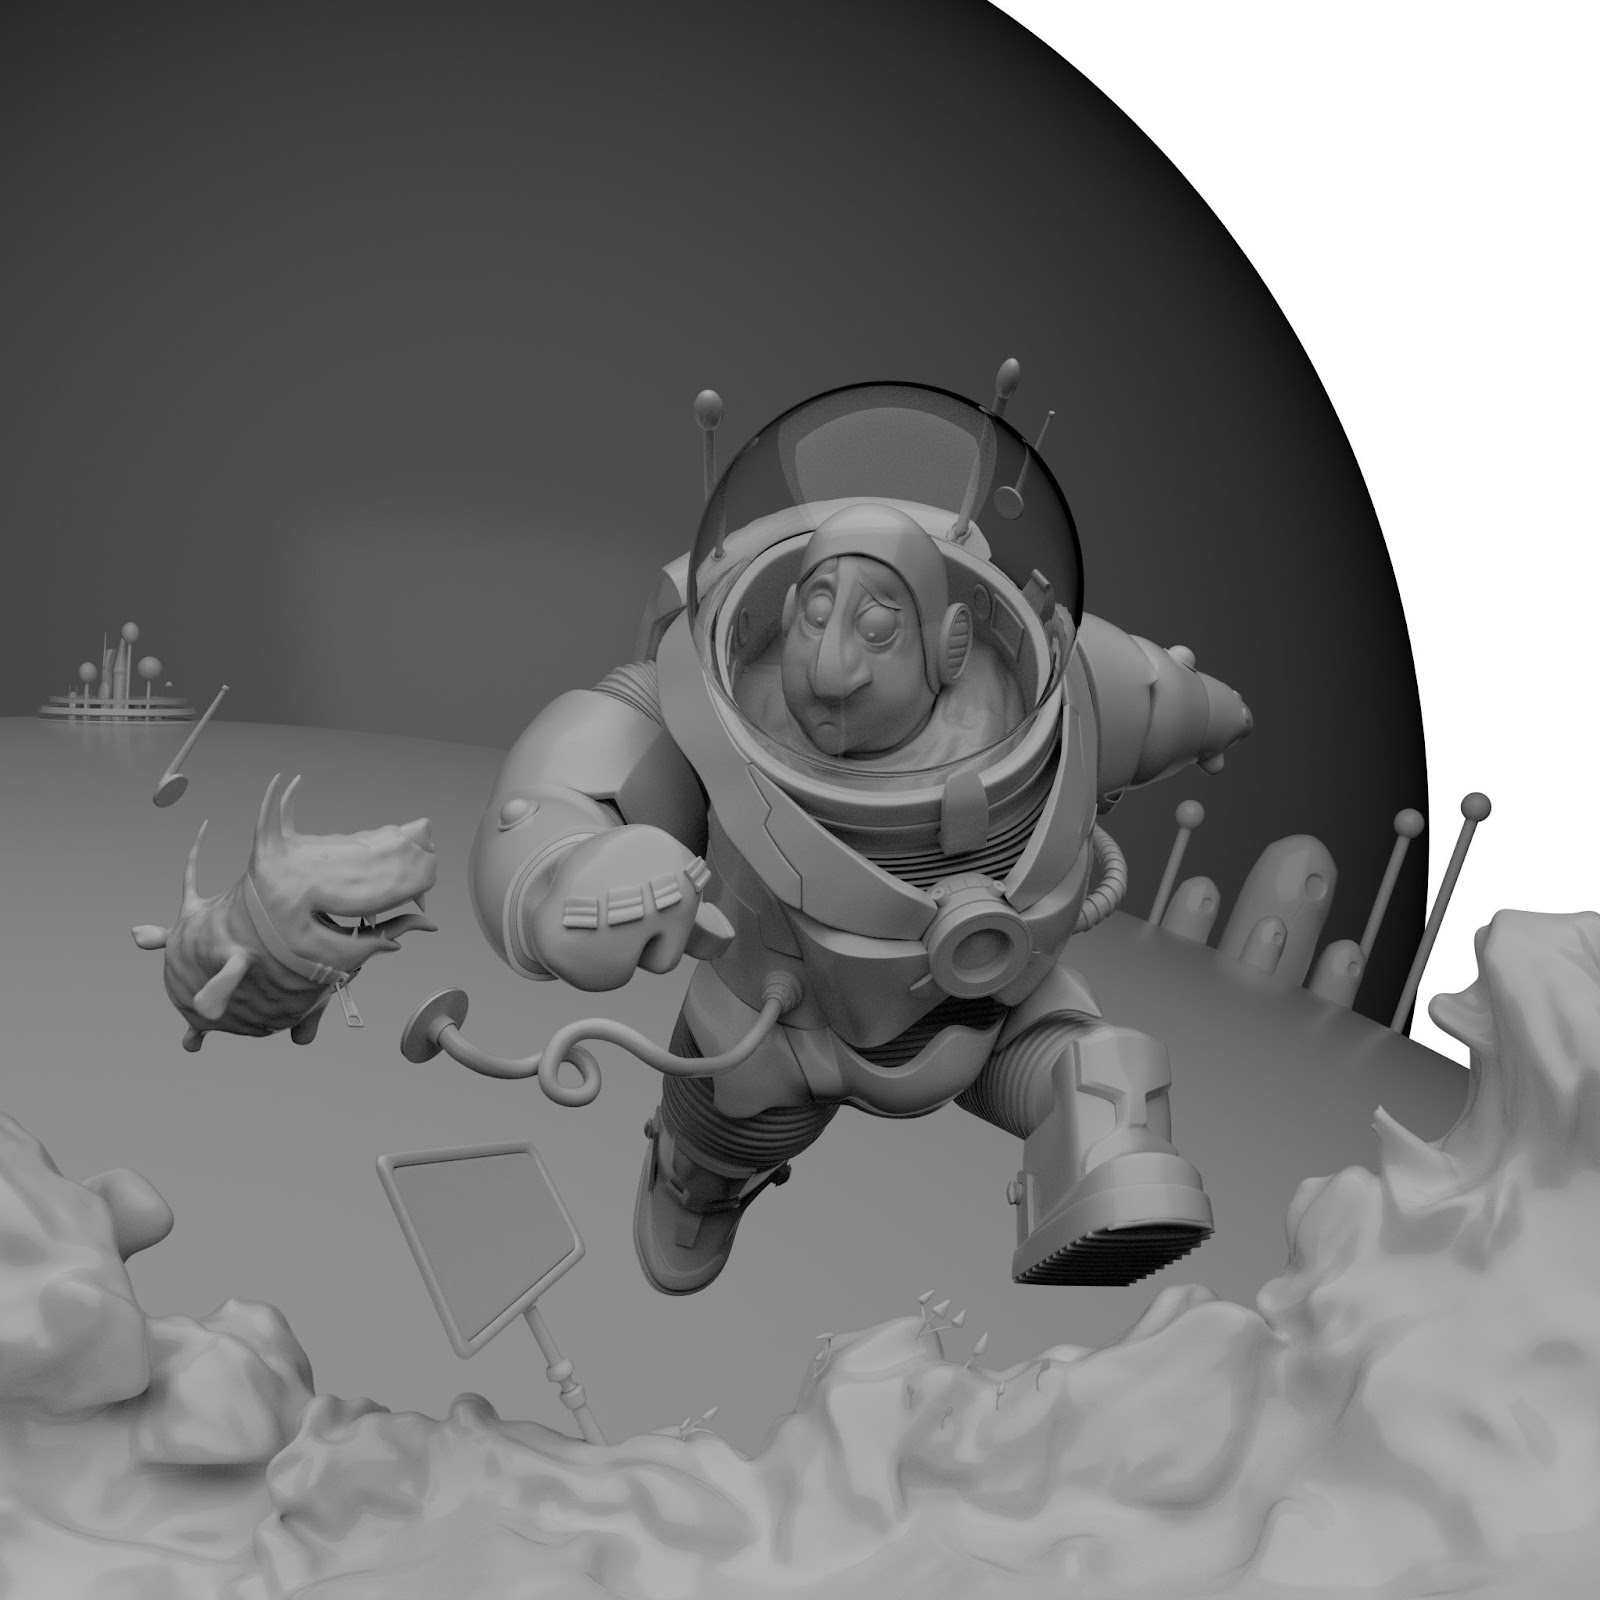
The initial blackout with basic shapes and the camera setup.Modelling Progress 1Modeling Progress/ Final Model
An important thing I kept in consideration while making this project was that I solely focused on making the model aligned with my final render camera and not bothering if it looked off in any other view because of the scope of the project. This might not be an ideal situation when doing 3D projects at all but due to the time constraint, I kept things the way as long as my final render view looked the way I wanted it to look.
For organic assets, a similar approach is followed i.e. capturing the silhouette and then doing details. I used Zremehser to get a low-resolution topology due to both limited time and my knowledge of the topic while doing this project.
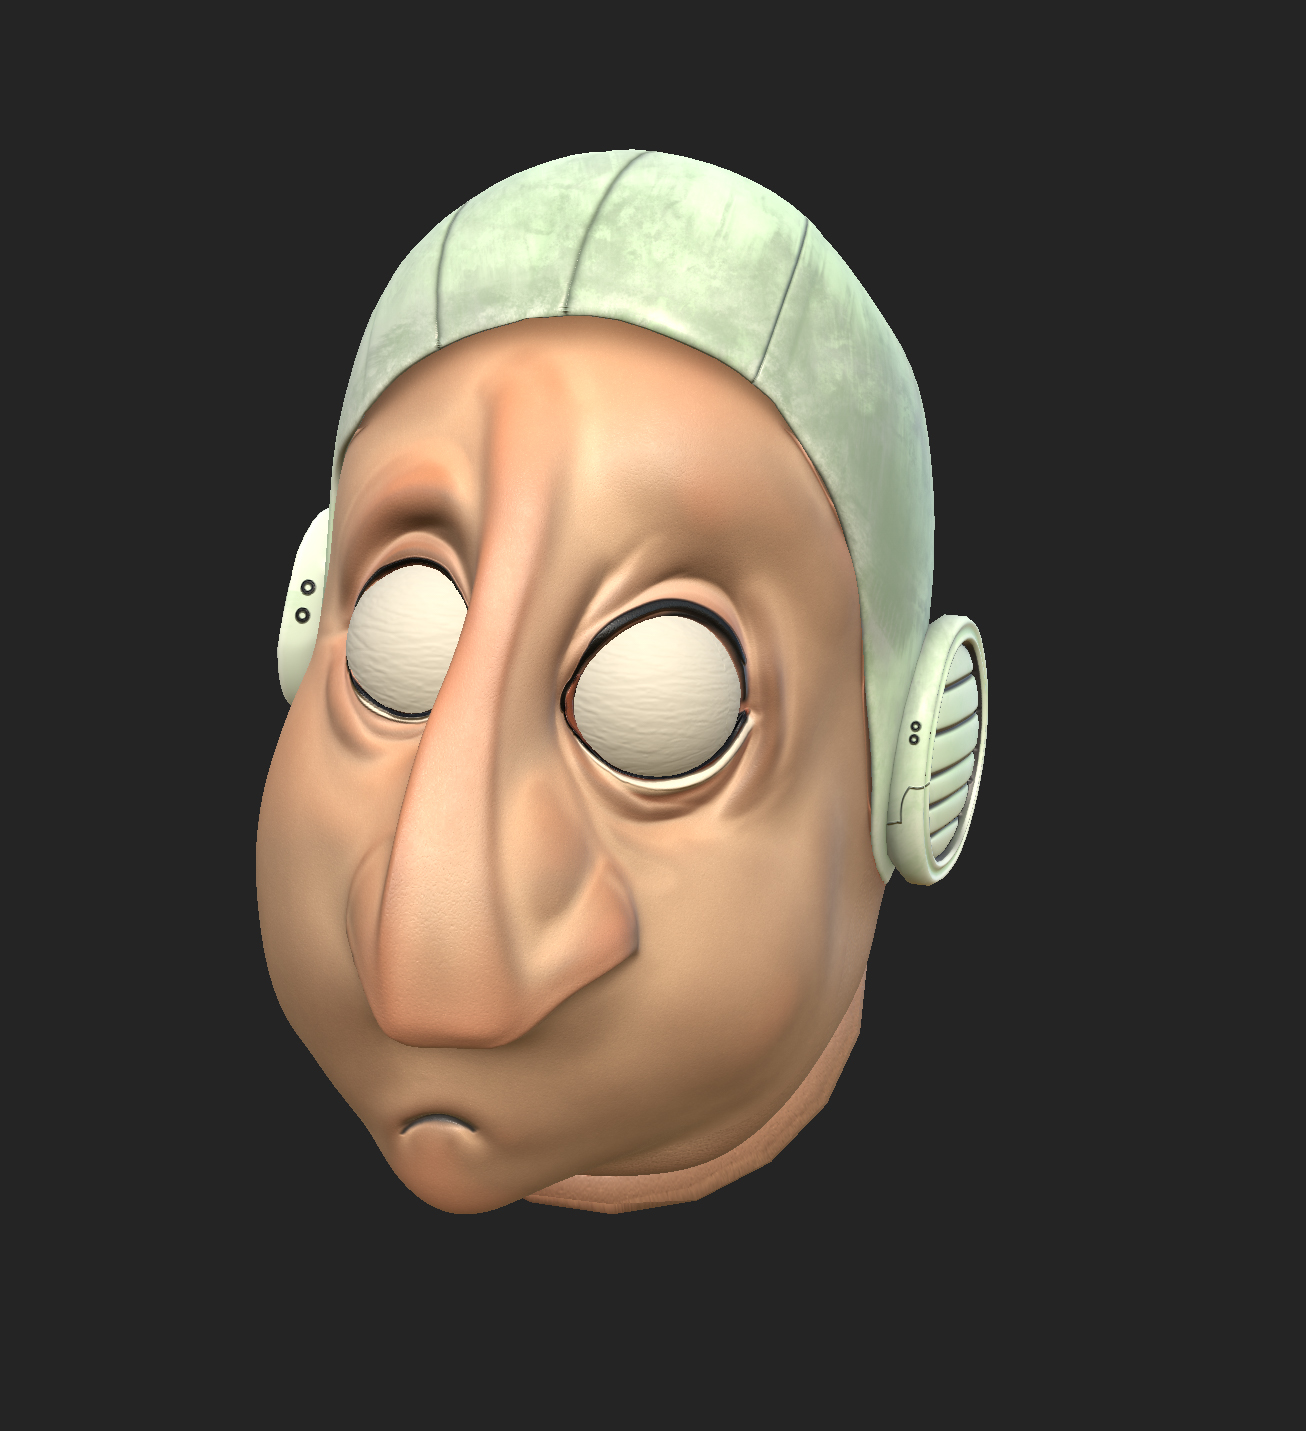
The below parts are done in ZBrush and the rest of the stuff is done in Maya as seen in the final model.
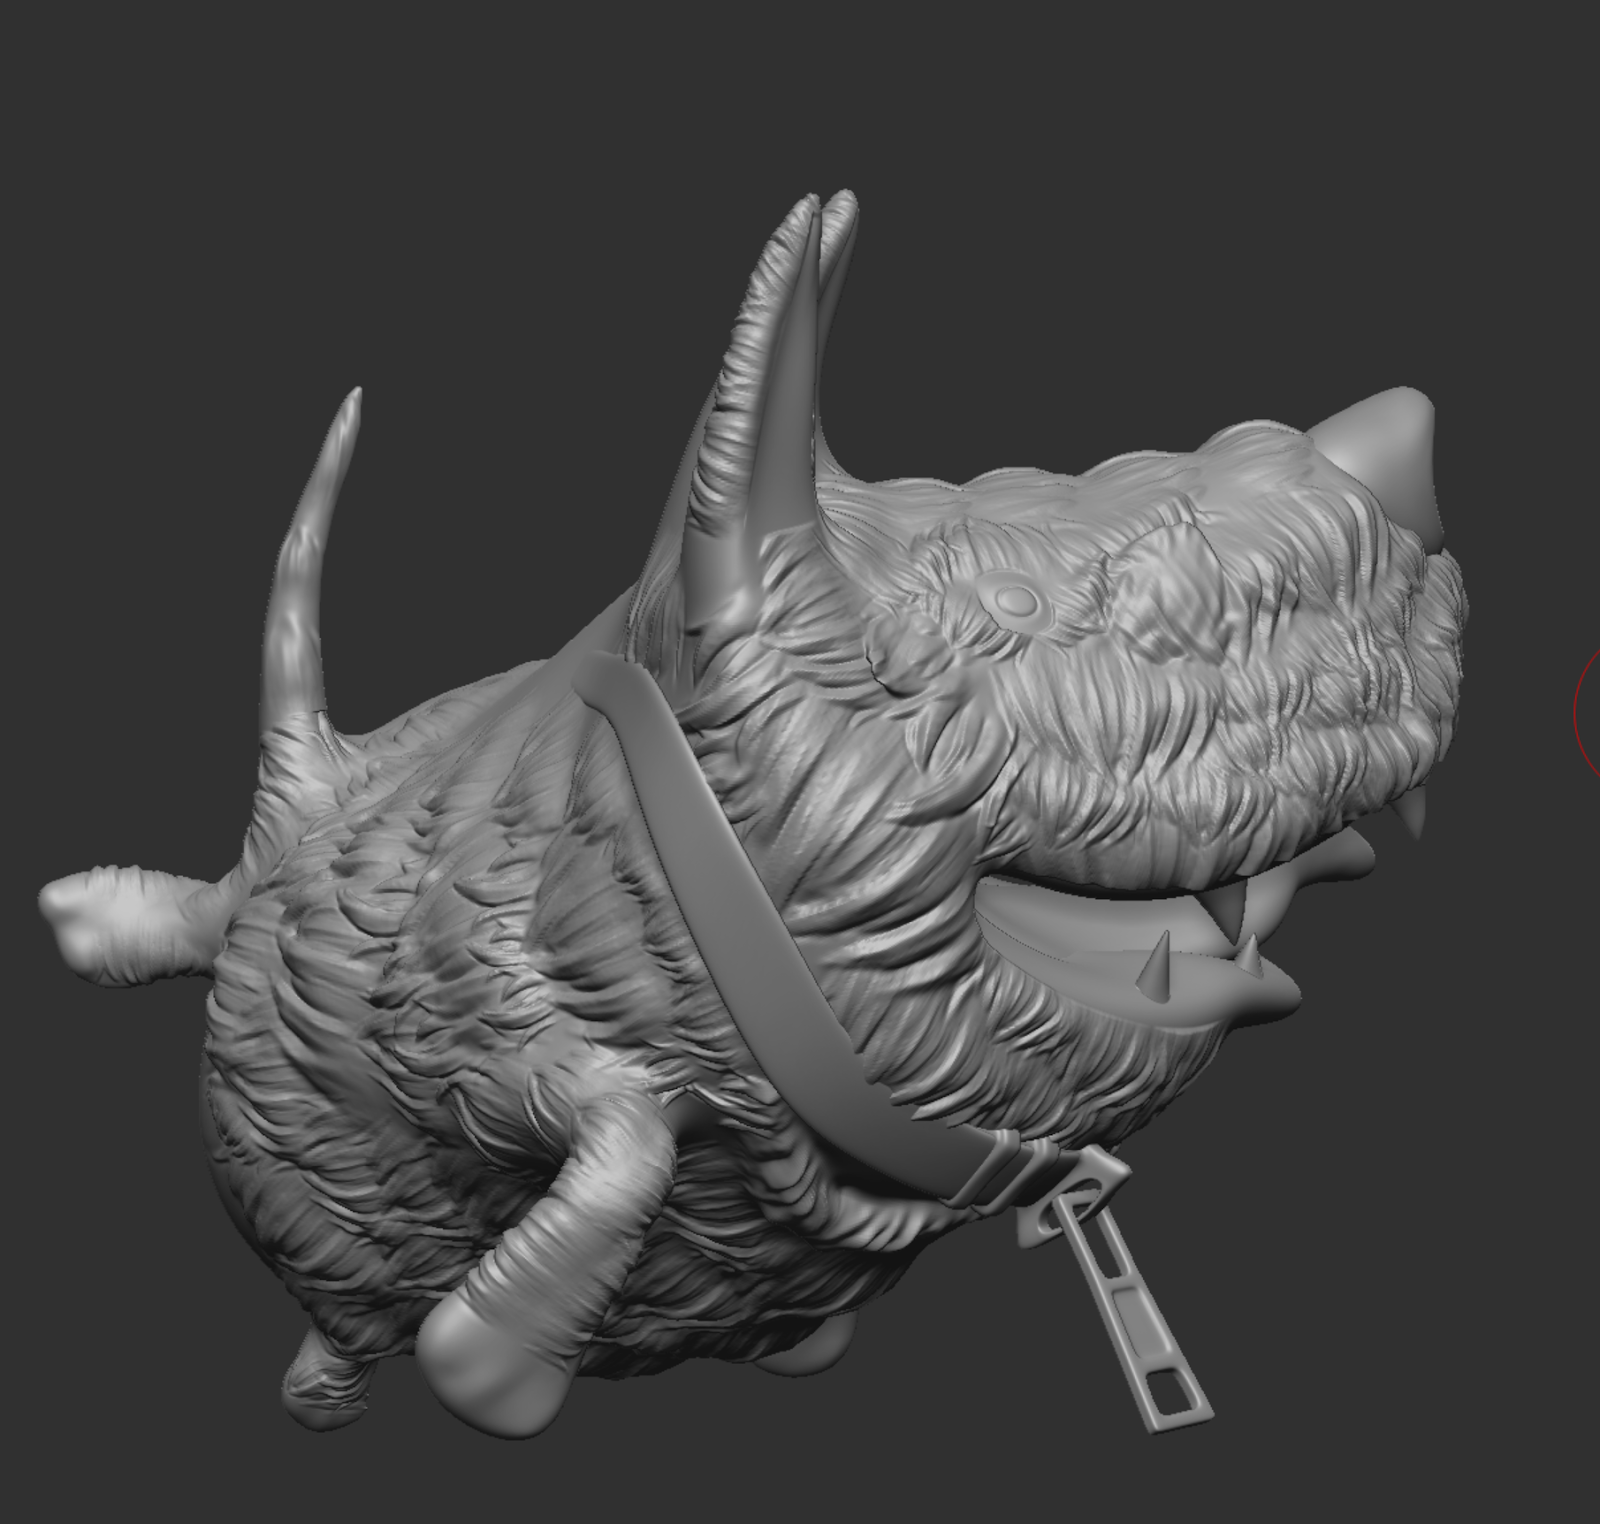
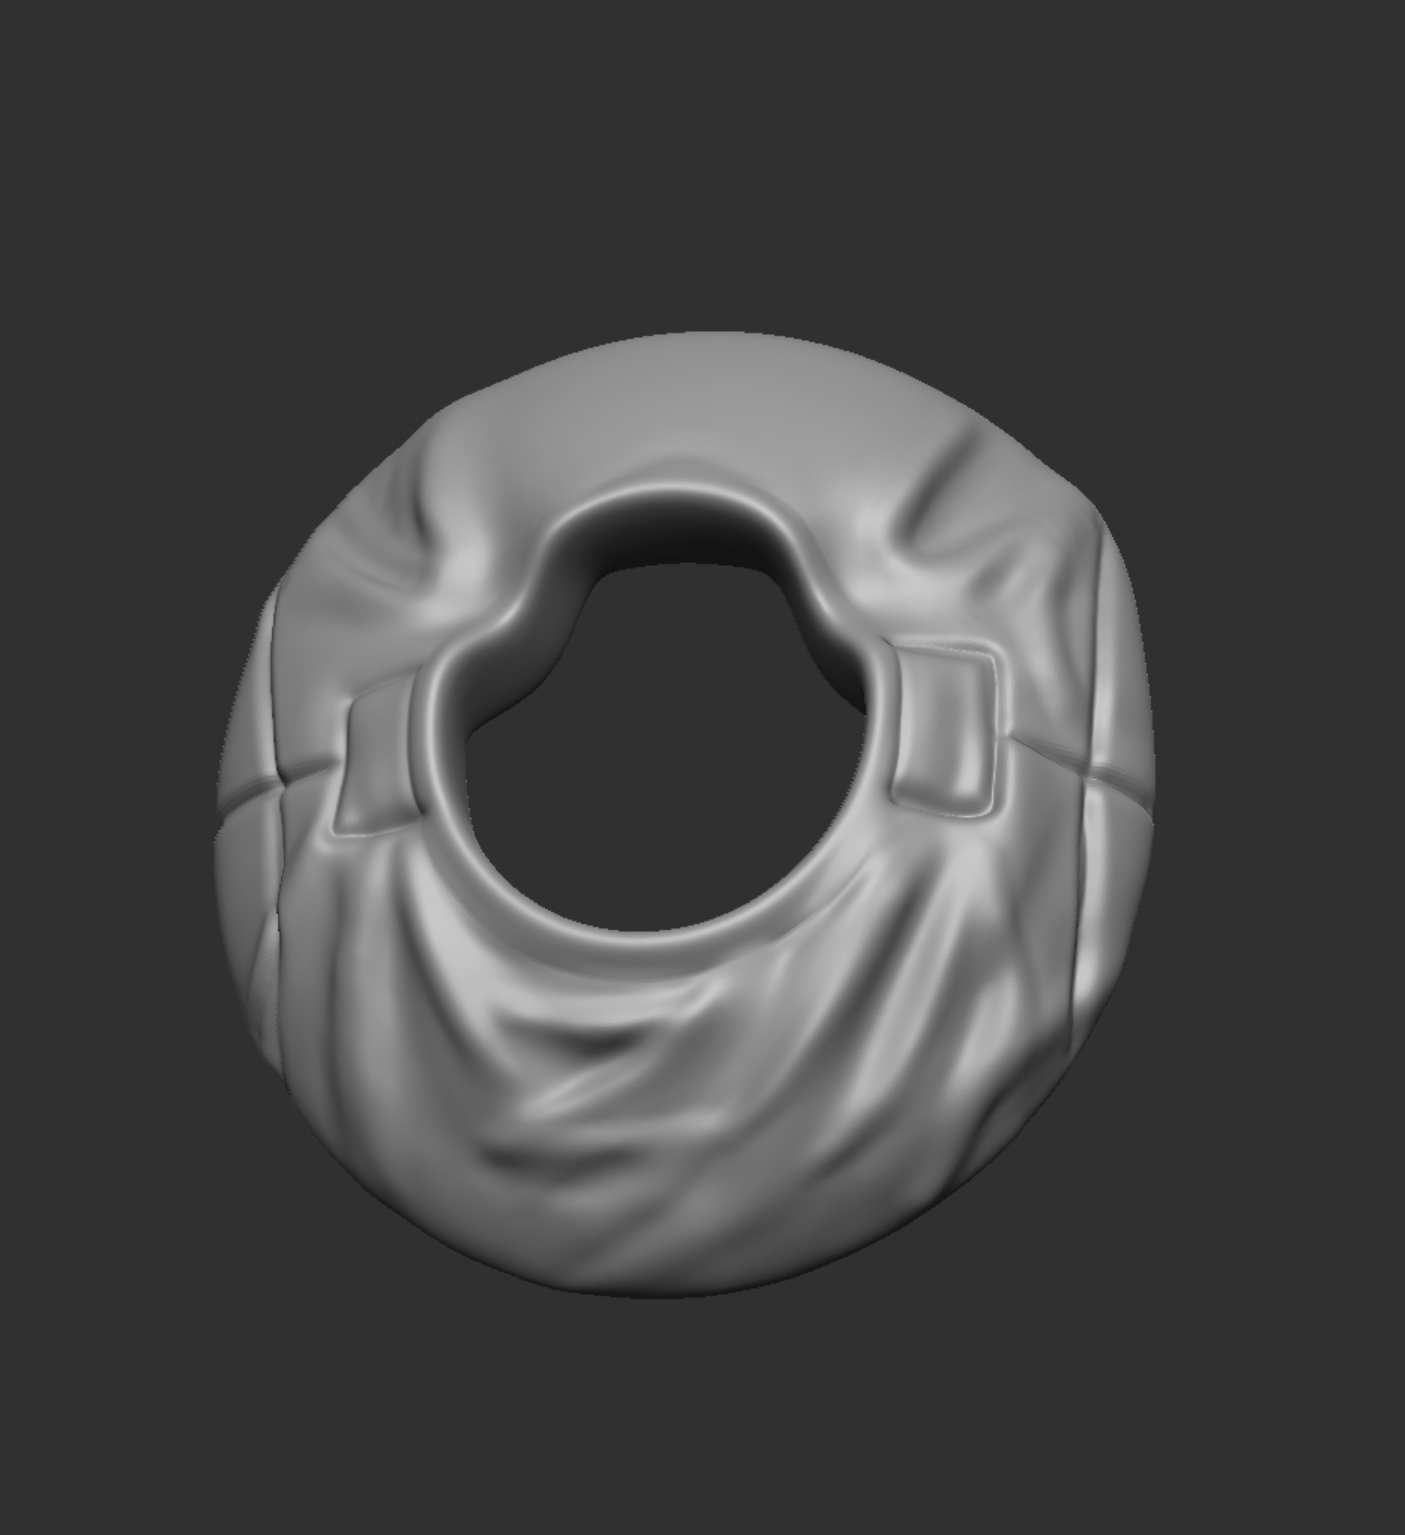
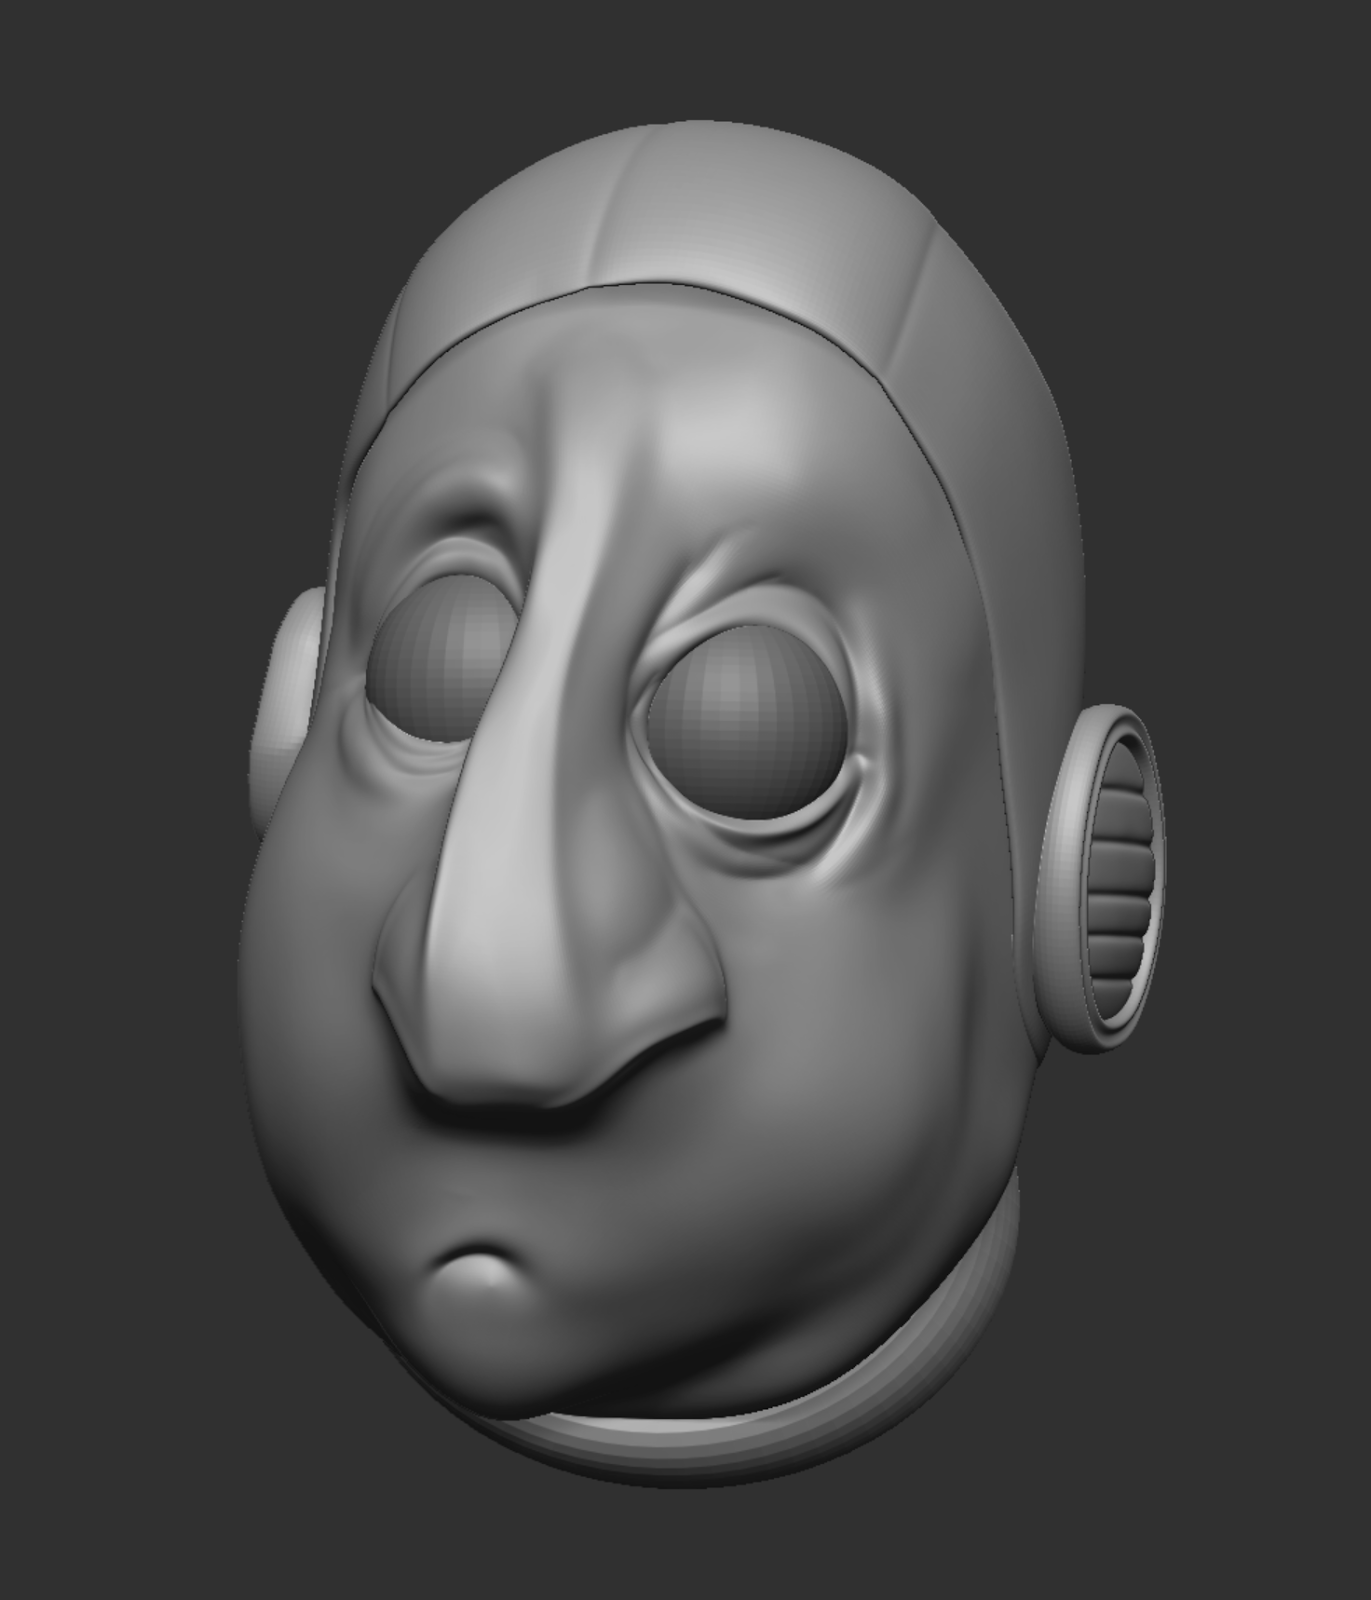
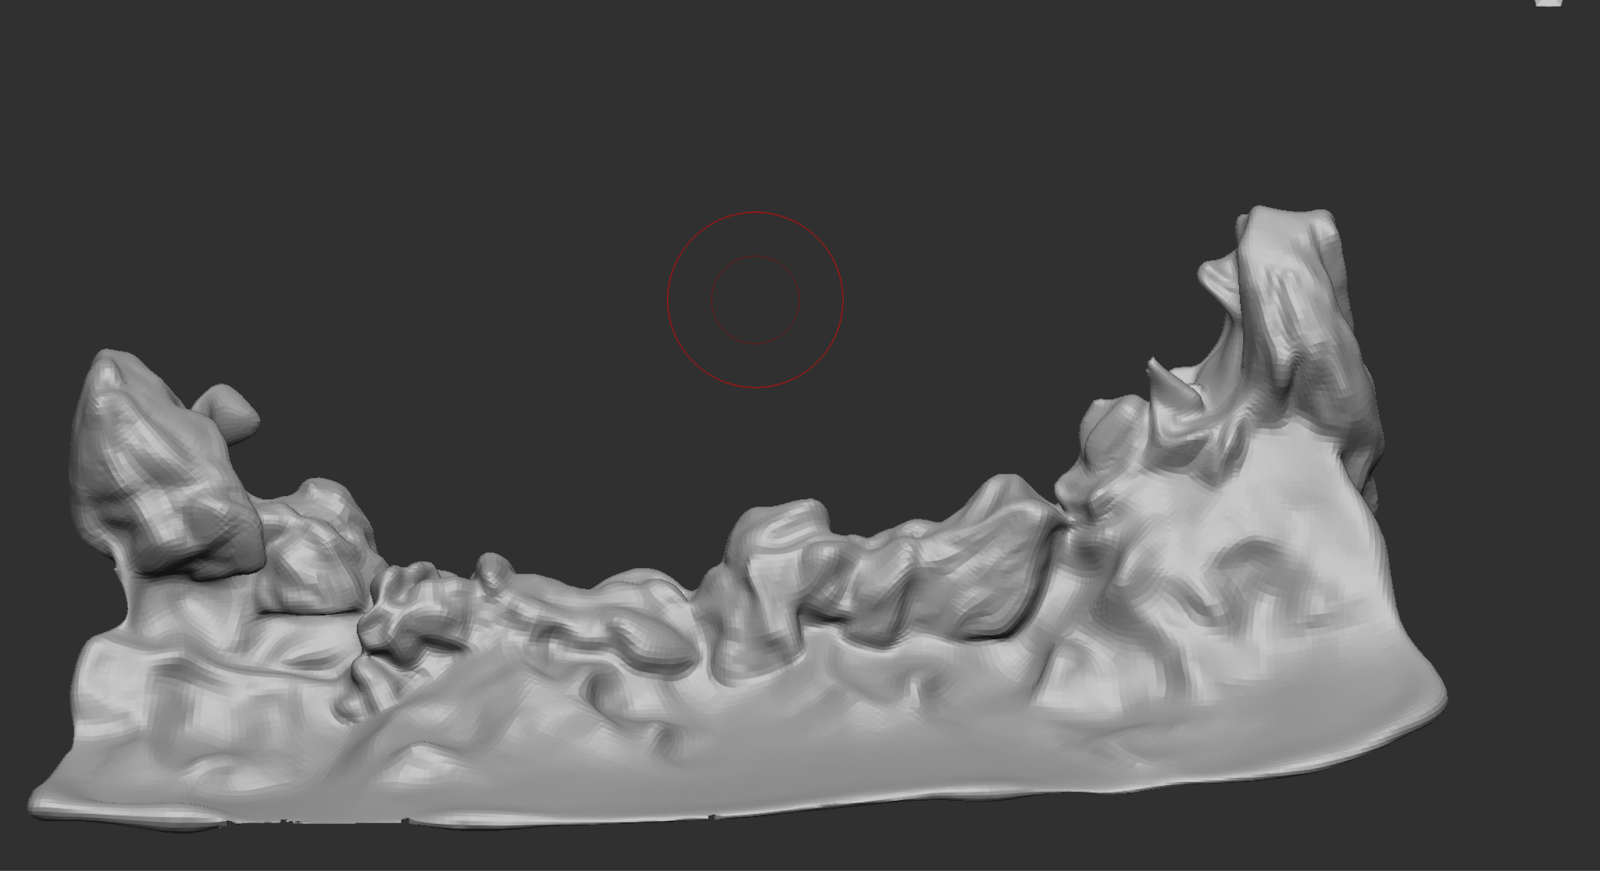
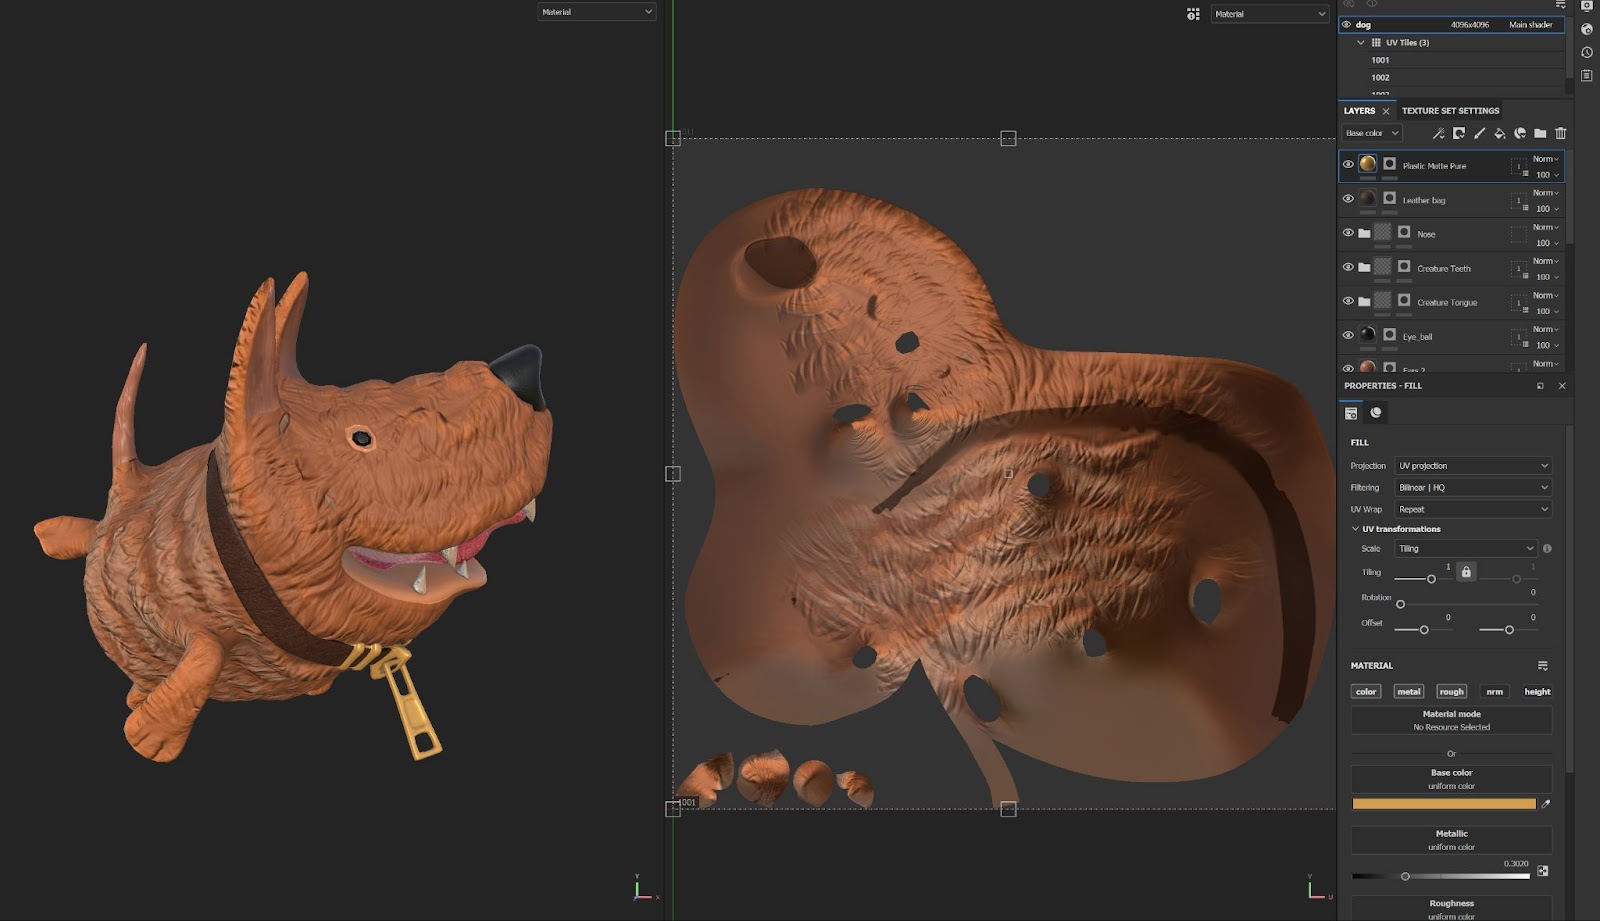
The Dog was done entirely in ZBrush and since I wasn't familiar with Xgen, I used a set of VDM brushes in ZBrush to make the fur and extract a displacement map in the final render. The Face was done entirely in Zbrush using a sphere as a base shape followed by pulling and pushing using move brushes and then damn standard brush for defining the sharper details.. The Upper cloth of the space suit features here and also the front rocks - Sculpting the front rocks was a really fun exercise!
Making UVs
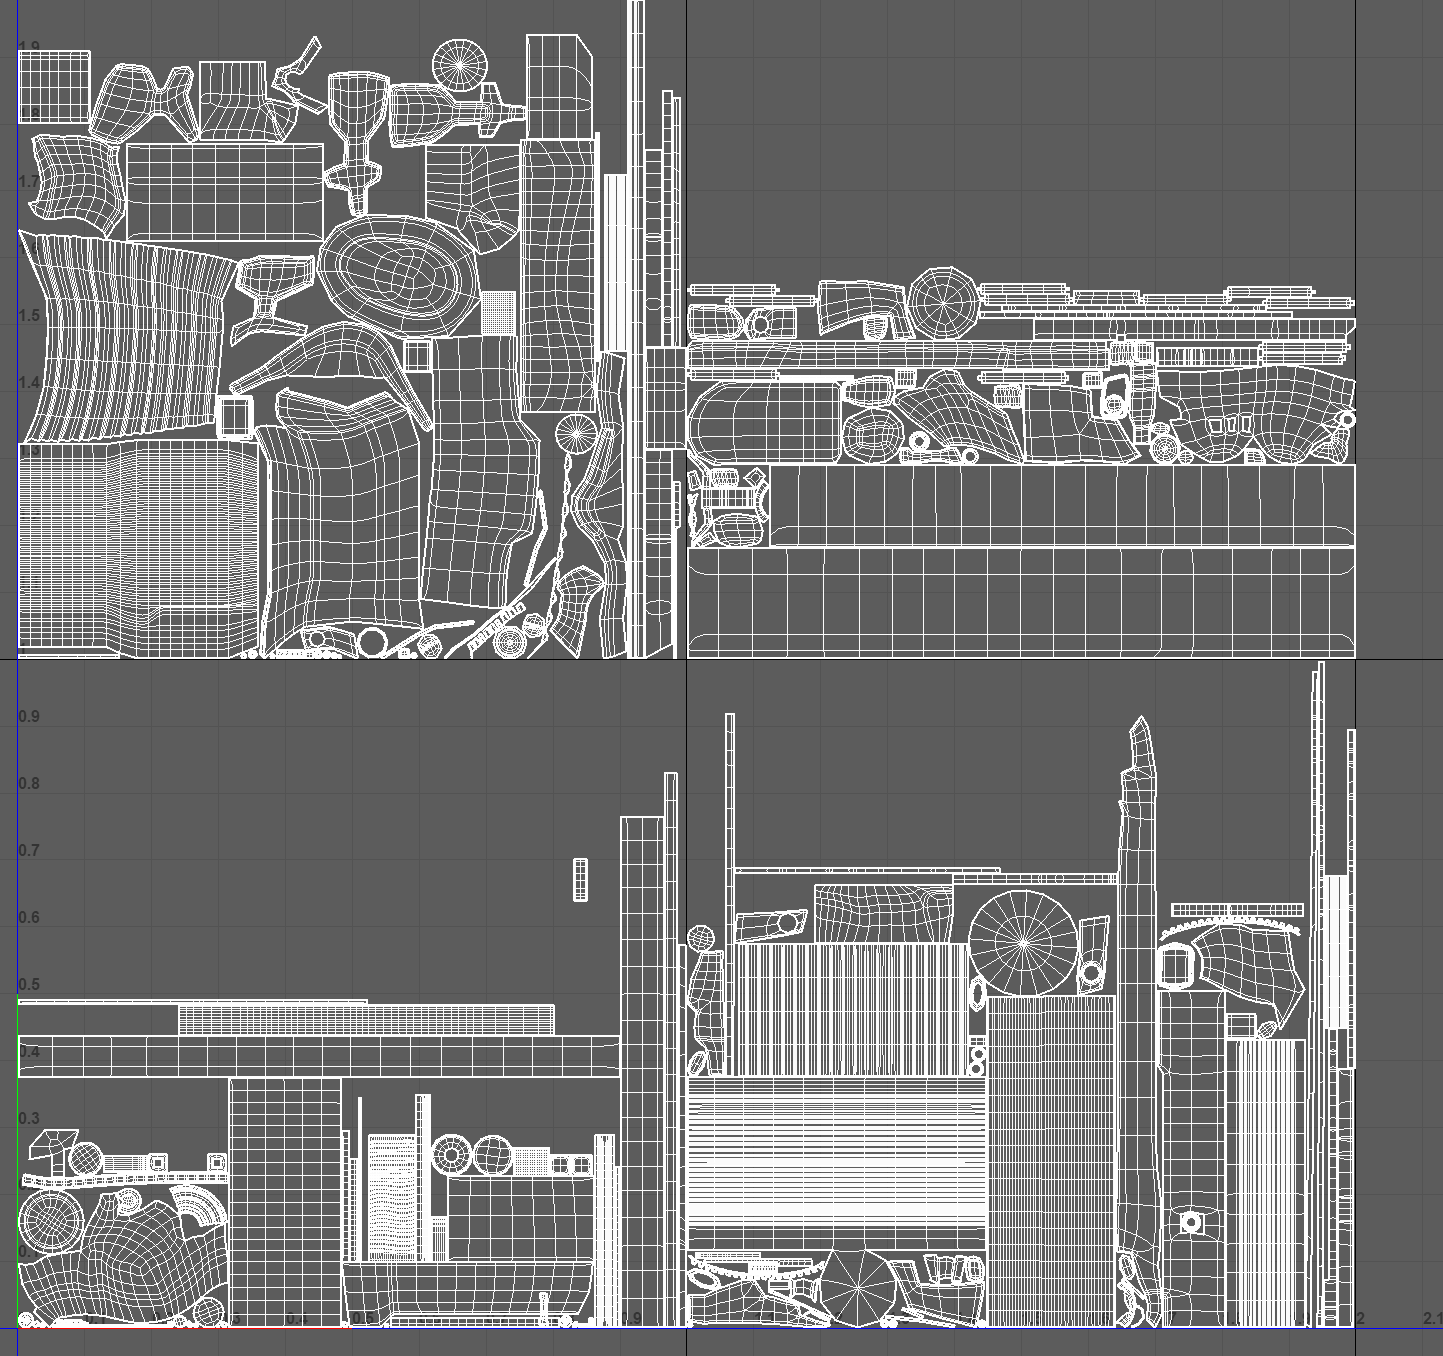
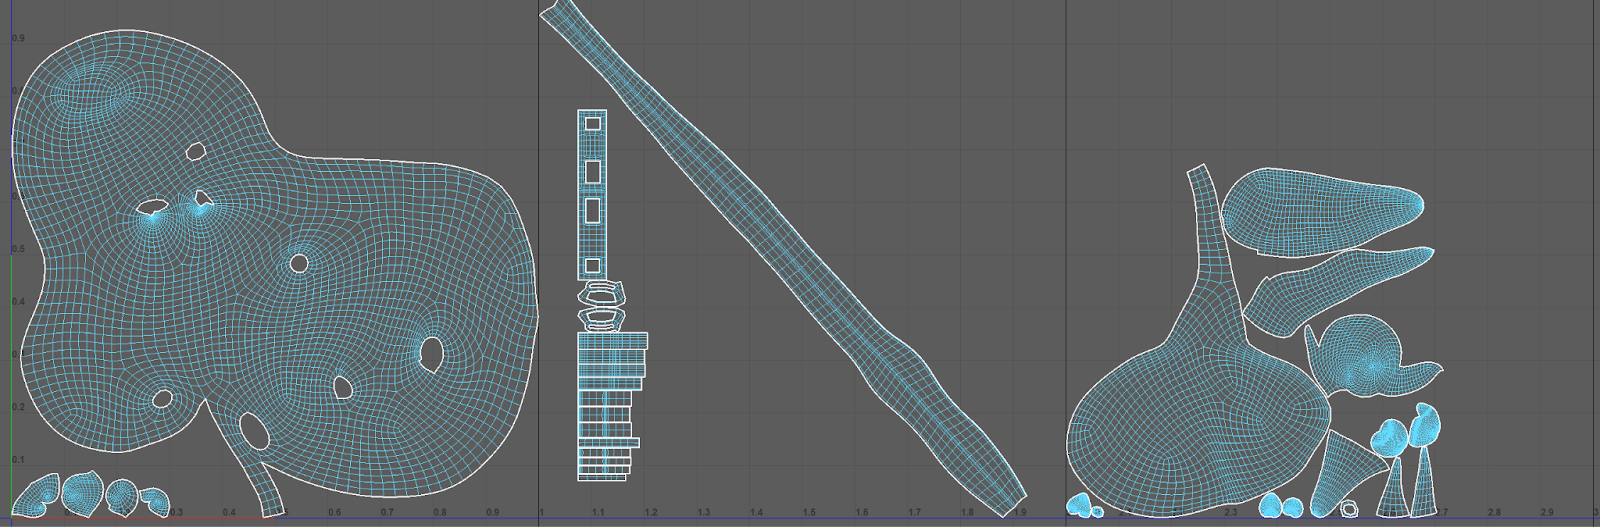
After finishing all the models, the next step was to make UVs for each component. Since there was no limit on the number of texture sets, I decided to do separate material and separate UV islands for every component. Make sure you keep the texel density consistent for every shell for optimal resolution and crisp renders.
My approach for doing UVs for this project was putting all my seams to the topology that wasn't visible in my render camera. I used camera projection followed by cutting my seams and then doing an Unfold followed by laying them down in the best possible manner.
Another method of doing UVs is doing automatic UVs and then sewing the Edges to make the shells as per your requirements. While this might not be a very fun part of doing 3D for some, it gives optimal results.
UVs for the Space SuitUVs for the Dog
Texturing
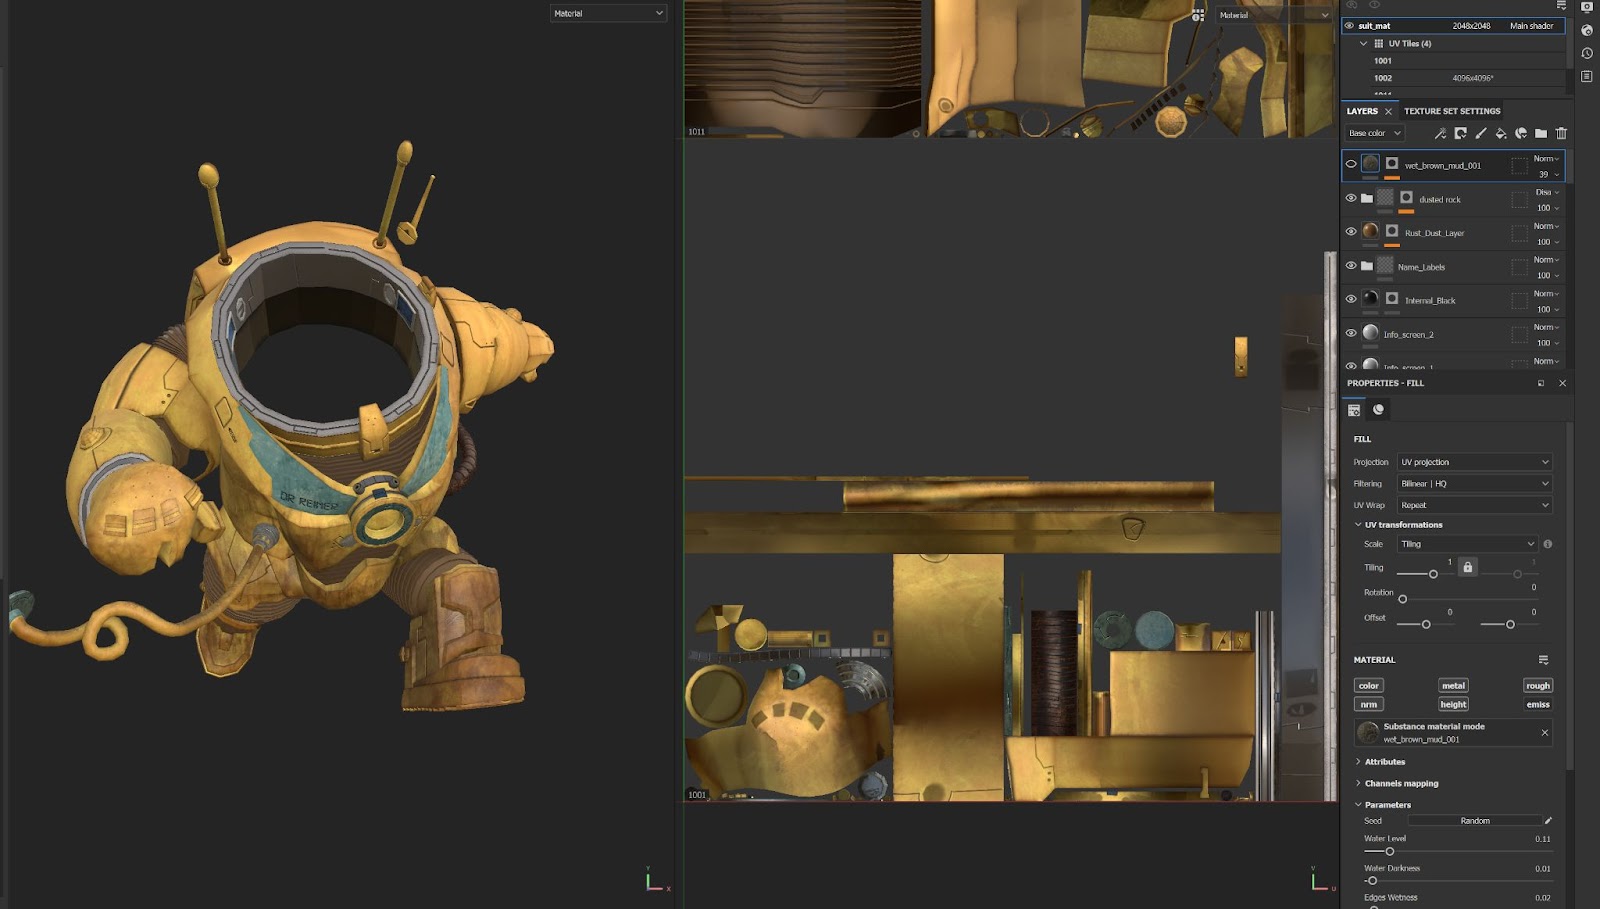
I used Substance 3D Painter for texturing because of the ease of use and the flexibility it gave me for doing quick changes before I finalised the textures. Mari is another package for texturing and has a better toolkit for doing projection work, extracting 32BIT maps, and when projects require very high fidelity or very close camera shots. My project didn't have any use case of these and my better understanding of Painter made me choose to texture my project using it.
Whenever I want to texture anything I have a three-step (AGAIN) approach:
Assign Separate Basic Colours to every part for distinction;
Do the base colour pass using base materials and procedurals along with hand painting;
Do the other passes like roughness, metalness, etc.
Shader Setup
I used V-Ray for rendering my project. V-Ray is an offline renderer available for major 3D modeling applications. This was my first experience trying offline rendering as opposed to using real-time rendering like Marmoset or Unreal. The choice for using V-Ray was more of trying something new and getting experience with how offline rendering works.
After finalising the textures from Substance 3D Painter, I decided to build the shaders for every part using the PBR and roughness workflow in V-Ray.
I referred to the official documentation from the chaos group for setting my textures from painter in V-Ray for Maya.
Light Setup and Rendering
I used multiple V-Ray lights (mostly rectangular) and tweaked them as per my desire till I got the final result. After all the tweaks and setup I managed to get the following result. I always start setting up my light in batches like a group of three lights - setting the intensity, and exposure, and moving the lights.
Lighting is an interesting subject and demands huge hours to master!
V-Ray Render
I also rendered a lot of render passes to have better control in my compositing. Some of the render passes I used include Diffuse, Alpha, ReflectionFilter, Shadow, Specular, SSS, Velocity, etc.
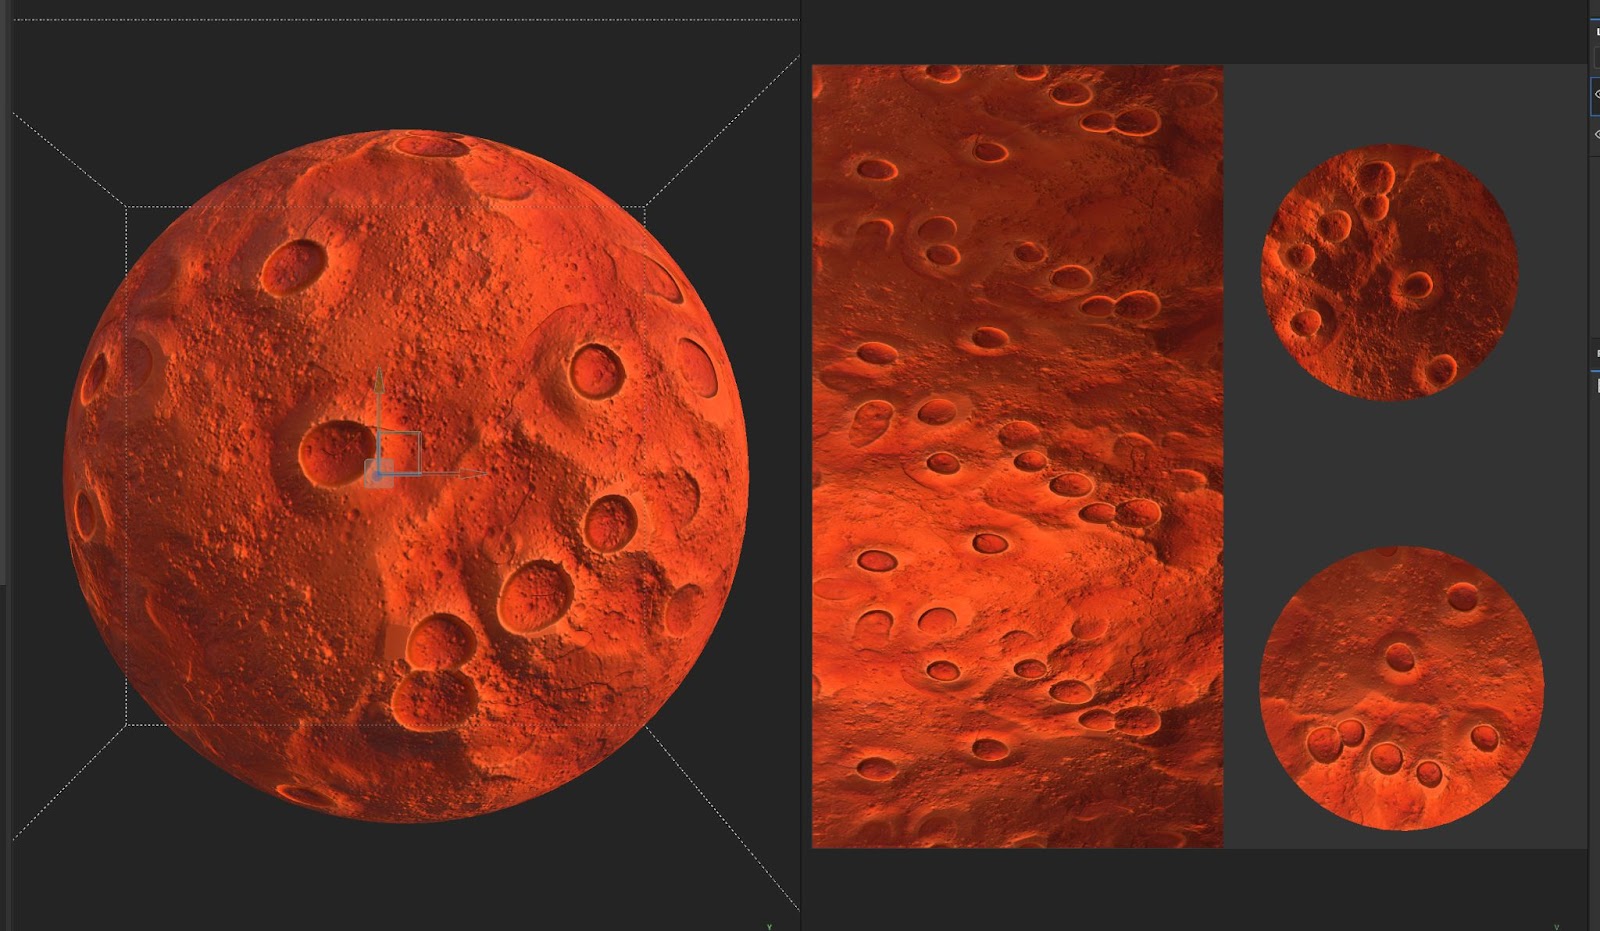
Due to the limited time frame, I resorted to Photoshop for composing the final output and doing the space in 2D using several Photoshop techniques to achieve my final result.
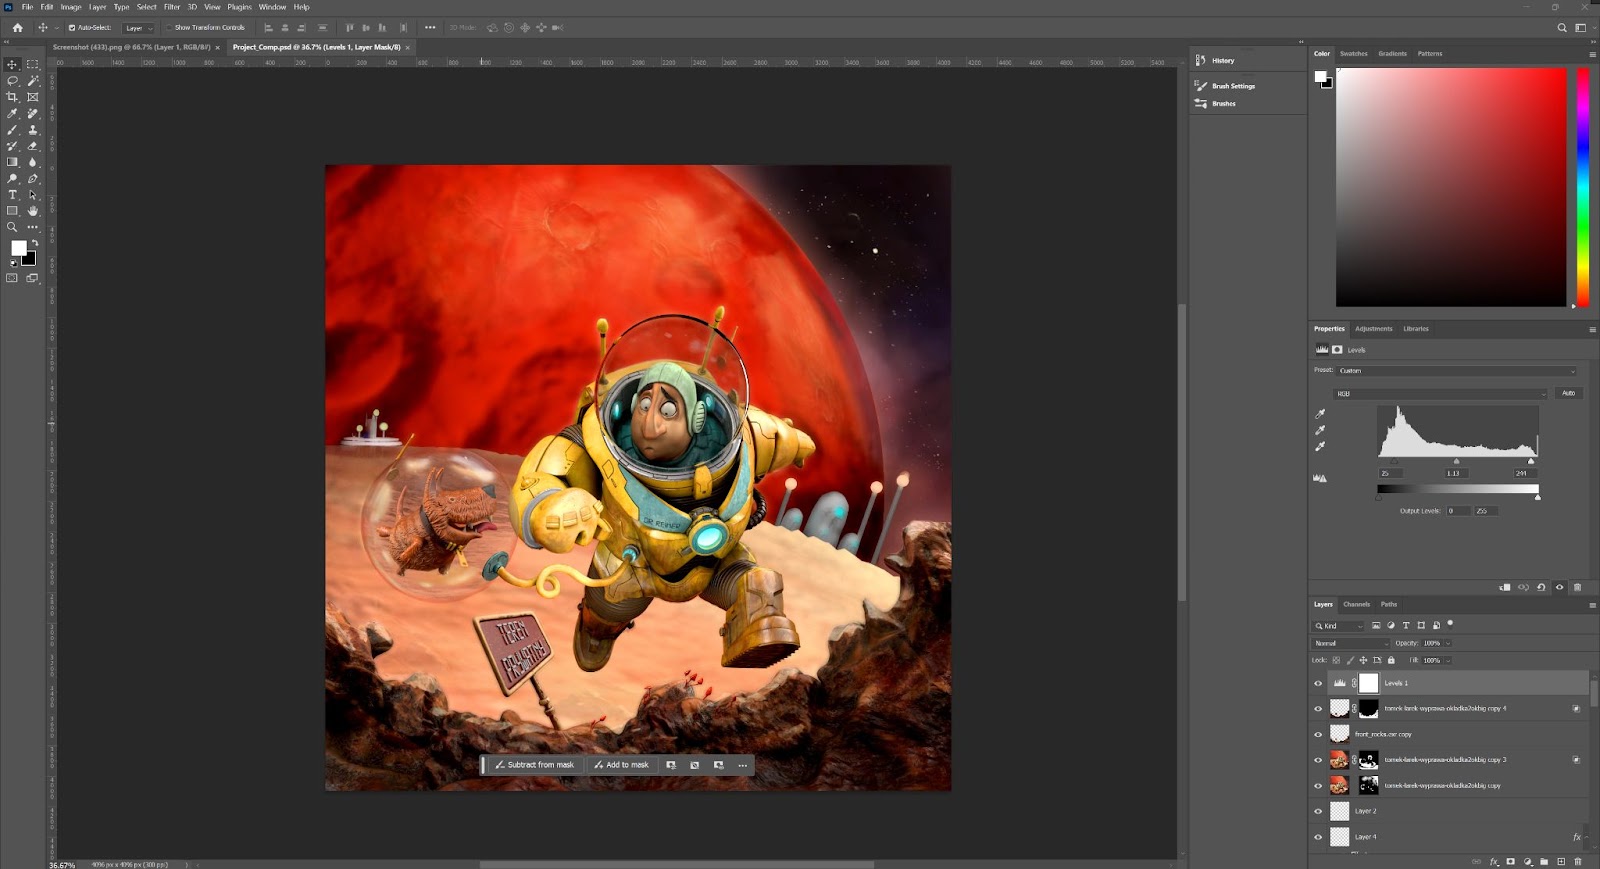
Photoshop Compositing
I always like to organise my objects in folders (like the moon, spacesuit, and rocks in this case) before I start doing any sort of tweaks.
The first thing I always do is bring in my concept image for reference and match my final render with it. I also render objects individually to get alpha and other passes that give more control and make the compositing process faster to work on.
Preview of Photoshop Composition
Some of the key techniques I used for compositing:
Using Effects like Color Overlay and Outer Glow to match the mood of the concept.
Using Drop Shadows adds more realism, depth, and better object interaction.
I also used Gradient Overlay and Outer Glow to make the glowing effects around the suit lighting areas.
Blending techniques like multiply, lighten gave interesting results. I always like to experiment with blending options for visually appealing results. I referred to this guide for getting a basic understanding of blending modes.
I also used a couple of Masking techniques by painting over my concept to capture certain elements like the space area and the front rock textures.
A final level layer for balancing the overall mood of the final composition followed by a very minute noise layer.
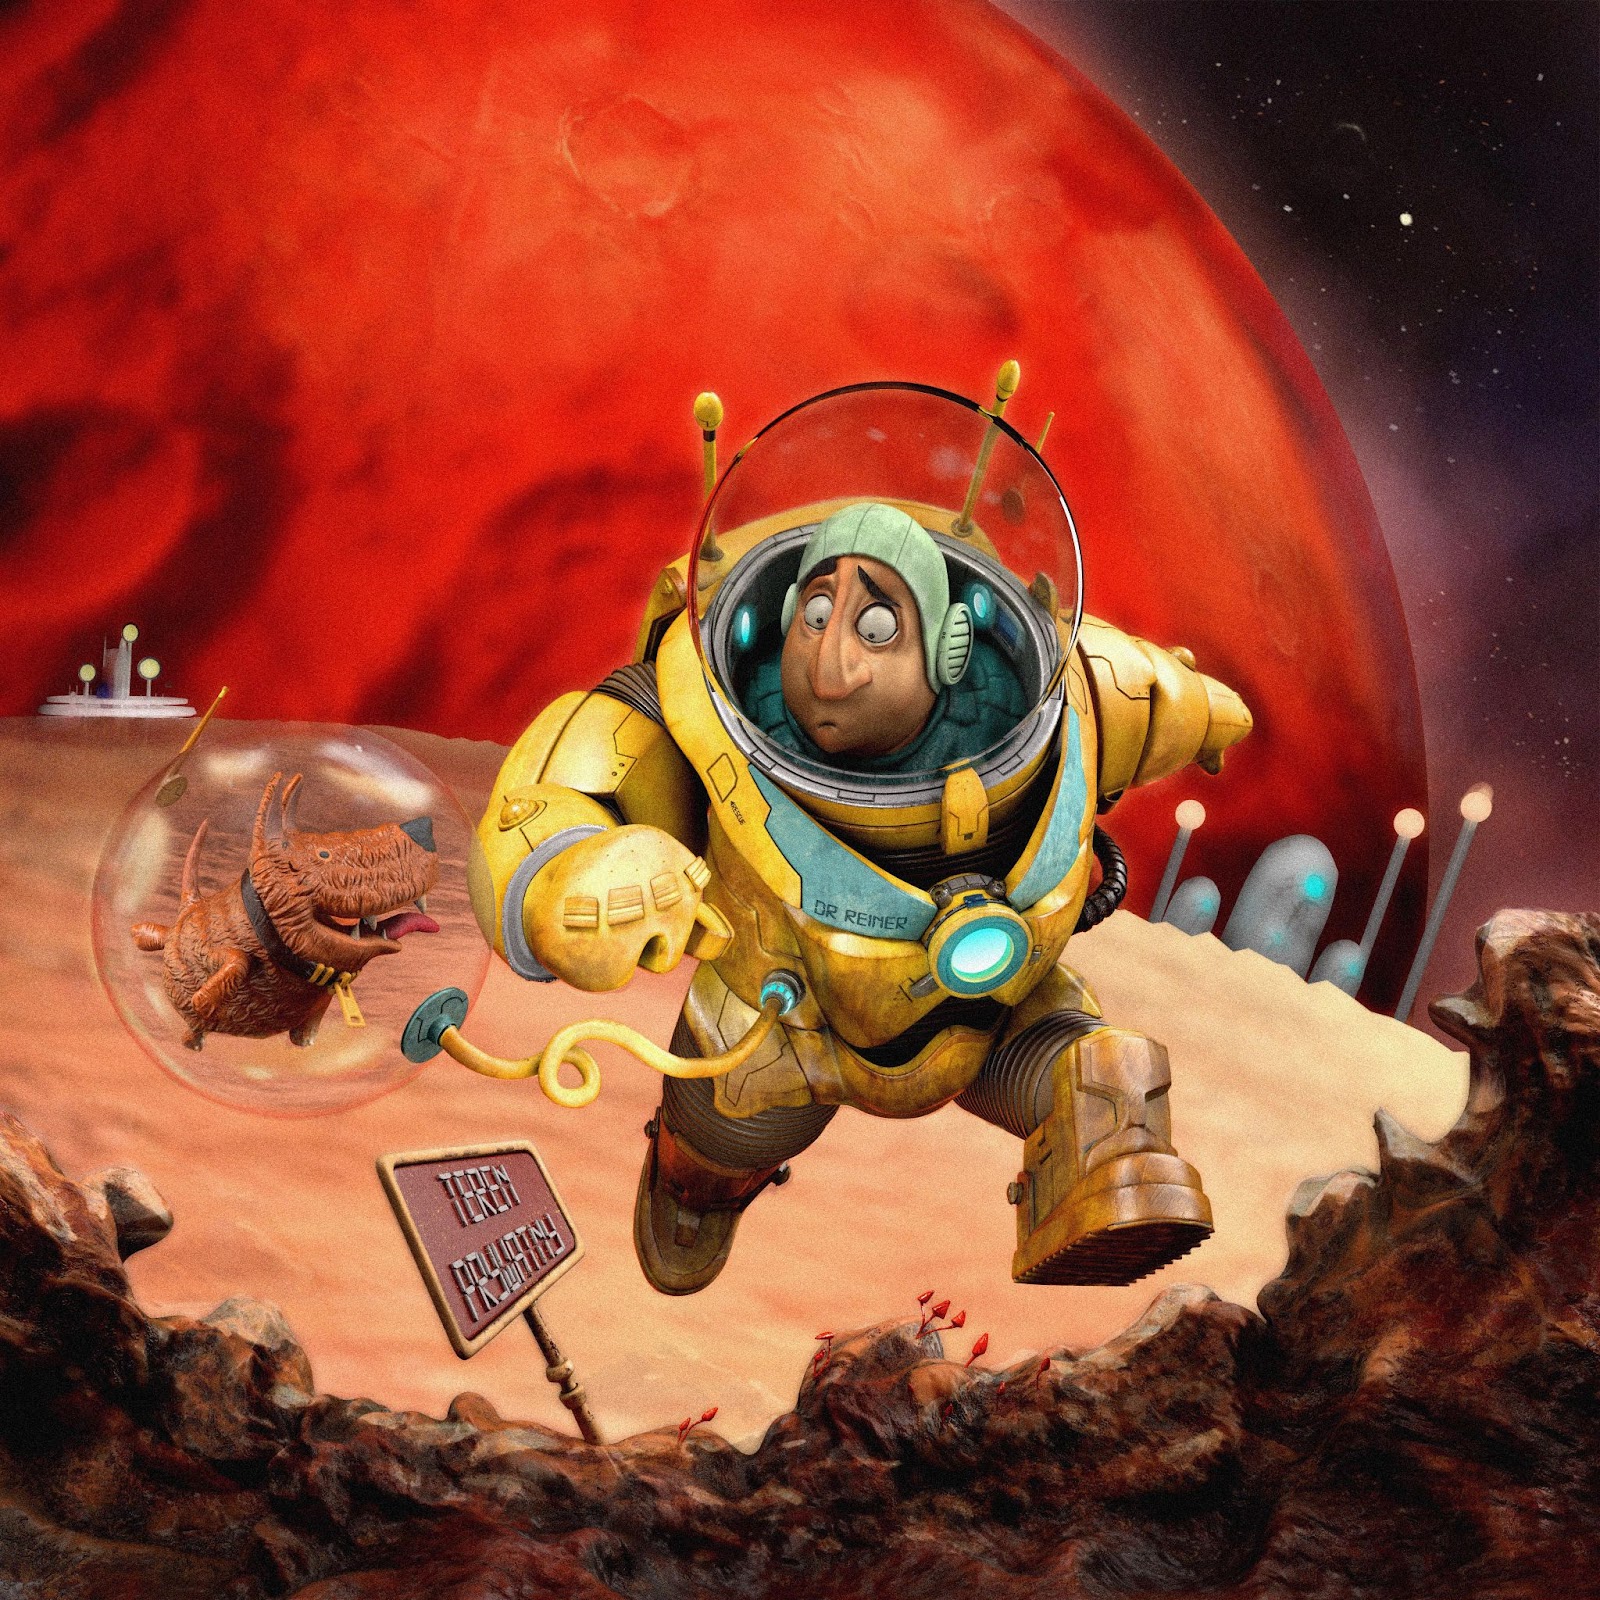
Final Composition
Closing Thoughts
I enjoyed working on this project and it was an extremely informative learning curve for me. I want to thank my supervisor Alex Zlotin and my peers for helping me during the term.
I got comfortable with a lot of tools like Maya, Substance 3D Painter, and Photoshop compositing. This project also taught me valuable lessons on how to manage time, problem-solving, implement feedback, and project management. I hope you find the breakdown useful, you can find me on the social links mentioned in my profile, feel free to hit me up, and would love to see your art as well.
Thank you and grateful to the Rookies for giving me this opportunity to share my project!
Reach out to Shubham via his Rookies profile here.