Collaborating on a Graduation Artbook Part 2: Bringing Concepts to Life in 3D
Recent graduates from The Animation Workshop/VIA University College broke tradition by crafting an Art Book for their final project, showcasing their creativity and fostering significant growth.
Recent graduates from The Animation Workshop/ VIA University College, including Mads Hendriksen, Wendy Agostinho, Jonas Nathanael, and Valentina Pantaleoni, created new opportunties through their bachelor project. Shifting away from the conventional focus on animation, they created an expansive Art Book, showcasing their creativity and nurturing significant development. In this second article, the team discuss how they brought their concepts to live in 3D.
The Fish People
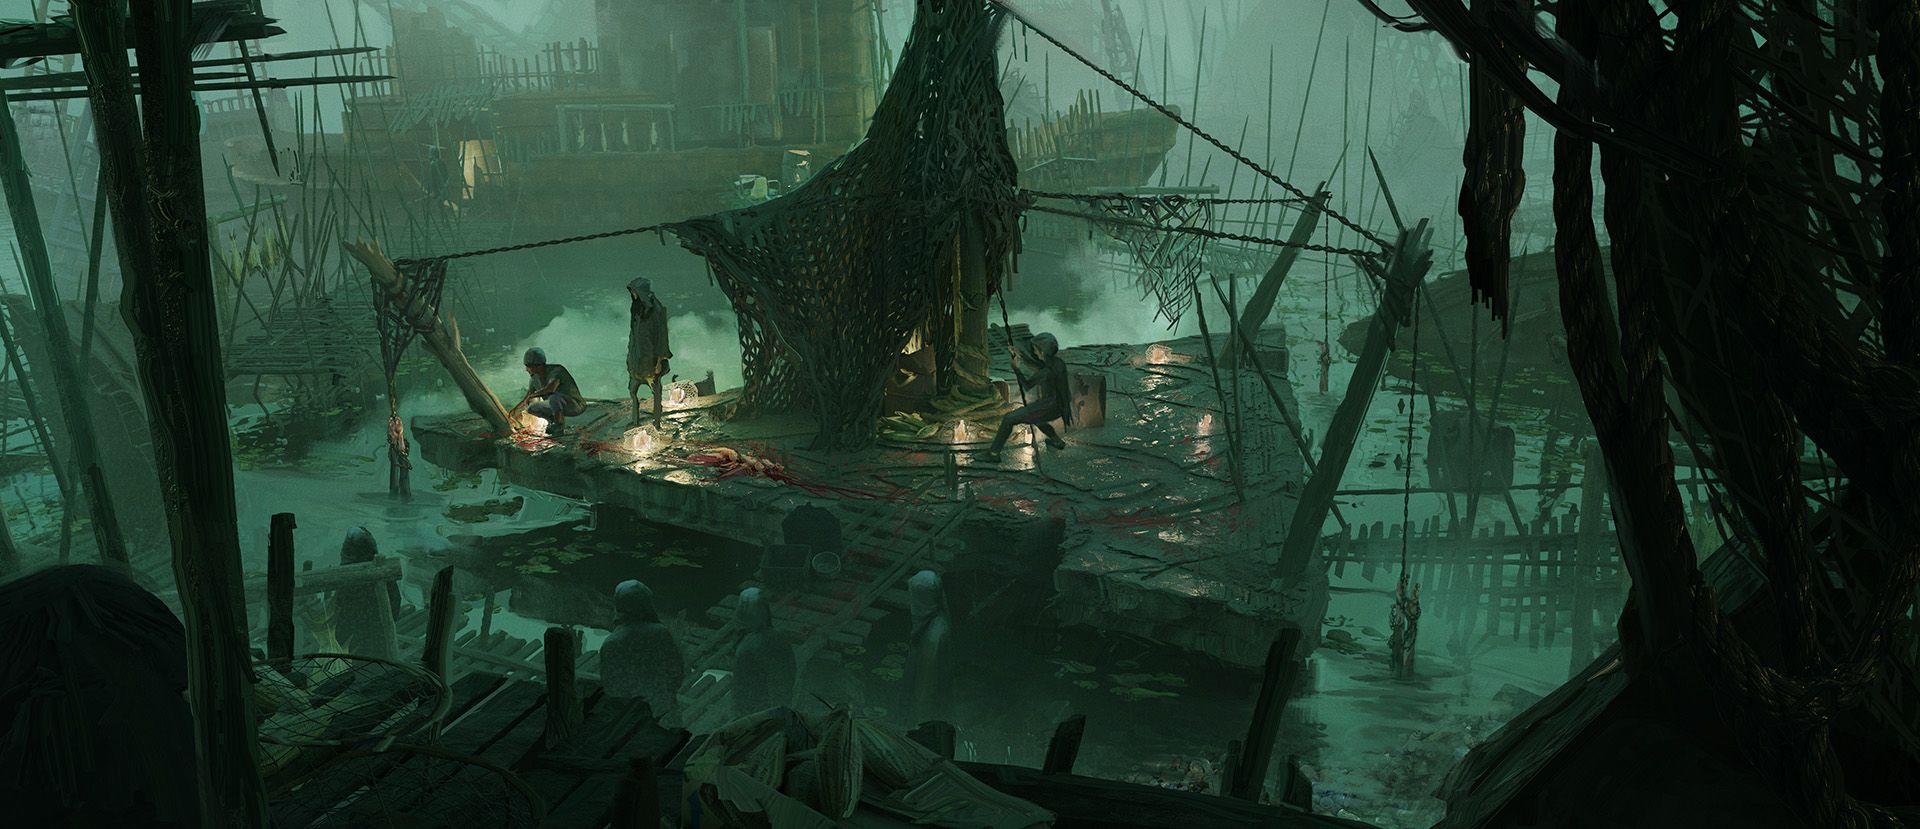
Wendy Agostinho: The Fish People live in an isolated community by a ship graveyard that they are using as their home. They are a brutal and extreme faction that believe they will be able to live and breathe underwater eventually.
Fish People Keyframe - Wendy
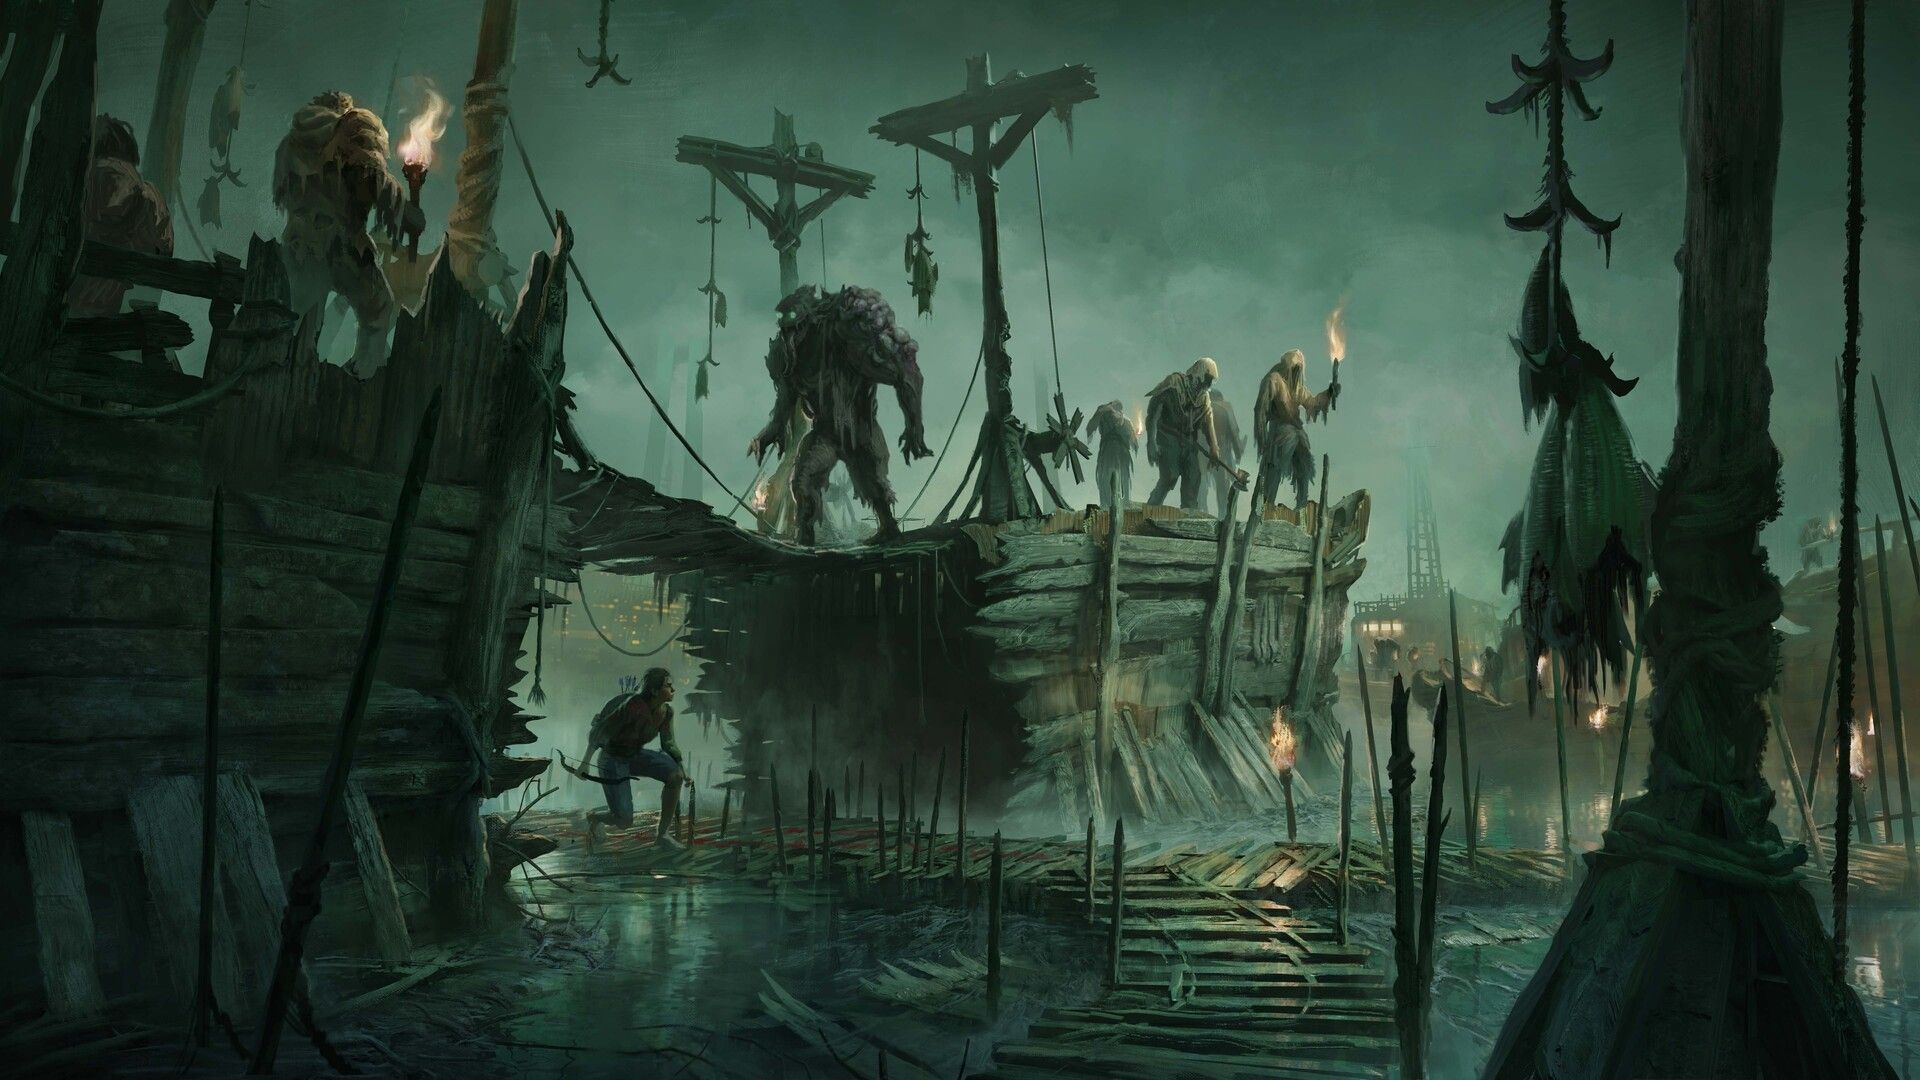
Therefore, they experiment on humans by injecting them with stem cells, radioactive waste and they even experiment with incorporating fish parts into their anatomy. In the image below, they are performing the drowning ritual, where after injecting the prisoner with those products, they hang them by their feet and release them into the water, coming back some days later to check on the results of the experiment.
Fish People Keyframe Thumbnails - Wendy
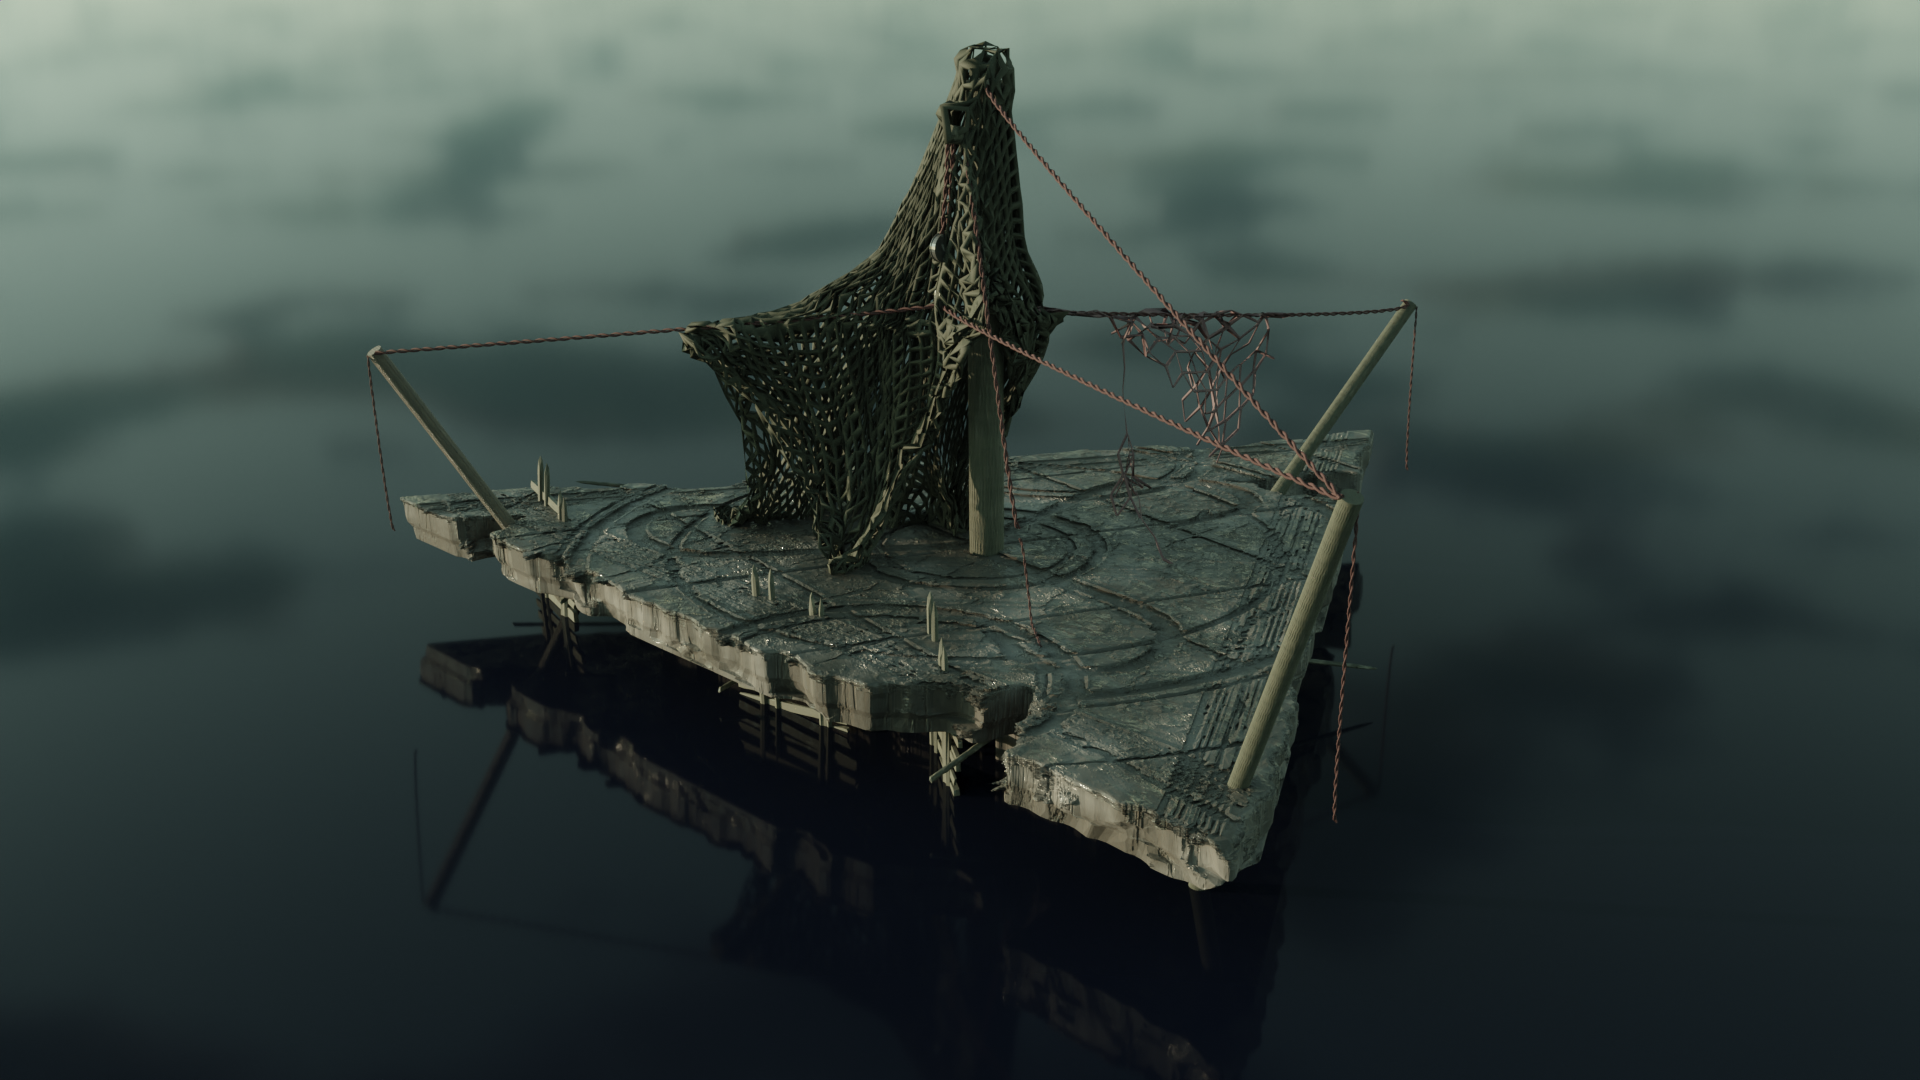
As this faction is probably the most violent one in this world, I really wanted to push the danger and chaotic feel of their design. A lot of sharpness and fog everywhere and show how they interact with the water - in a very brutal way. The platform at the center is almost a sort of shrine where victims are held and dropped into the water, while the Fish People wait for "results". It is a place of madness.
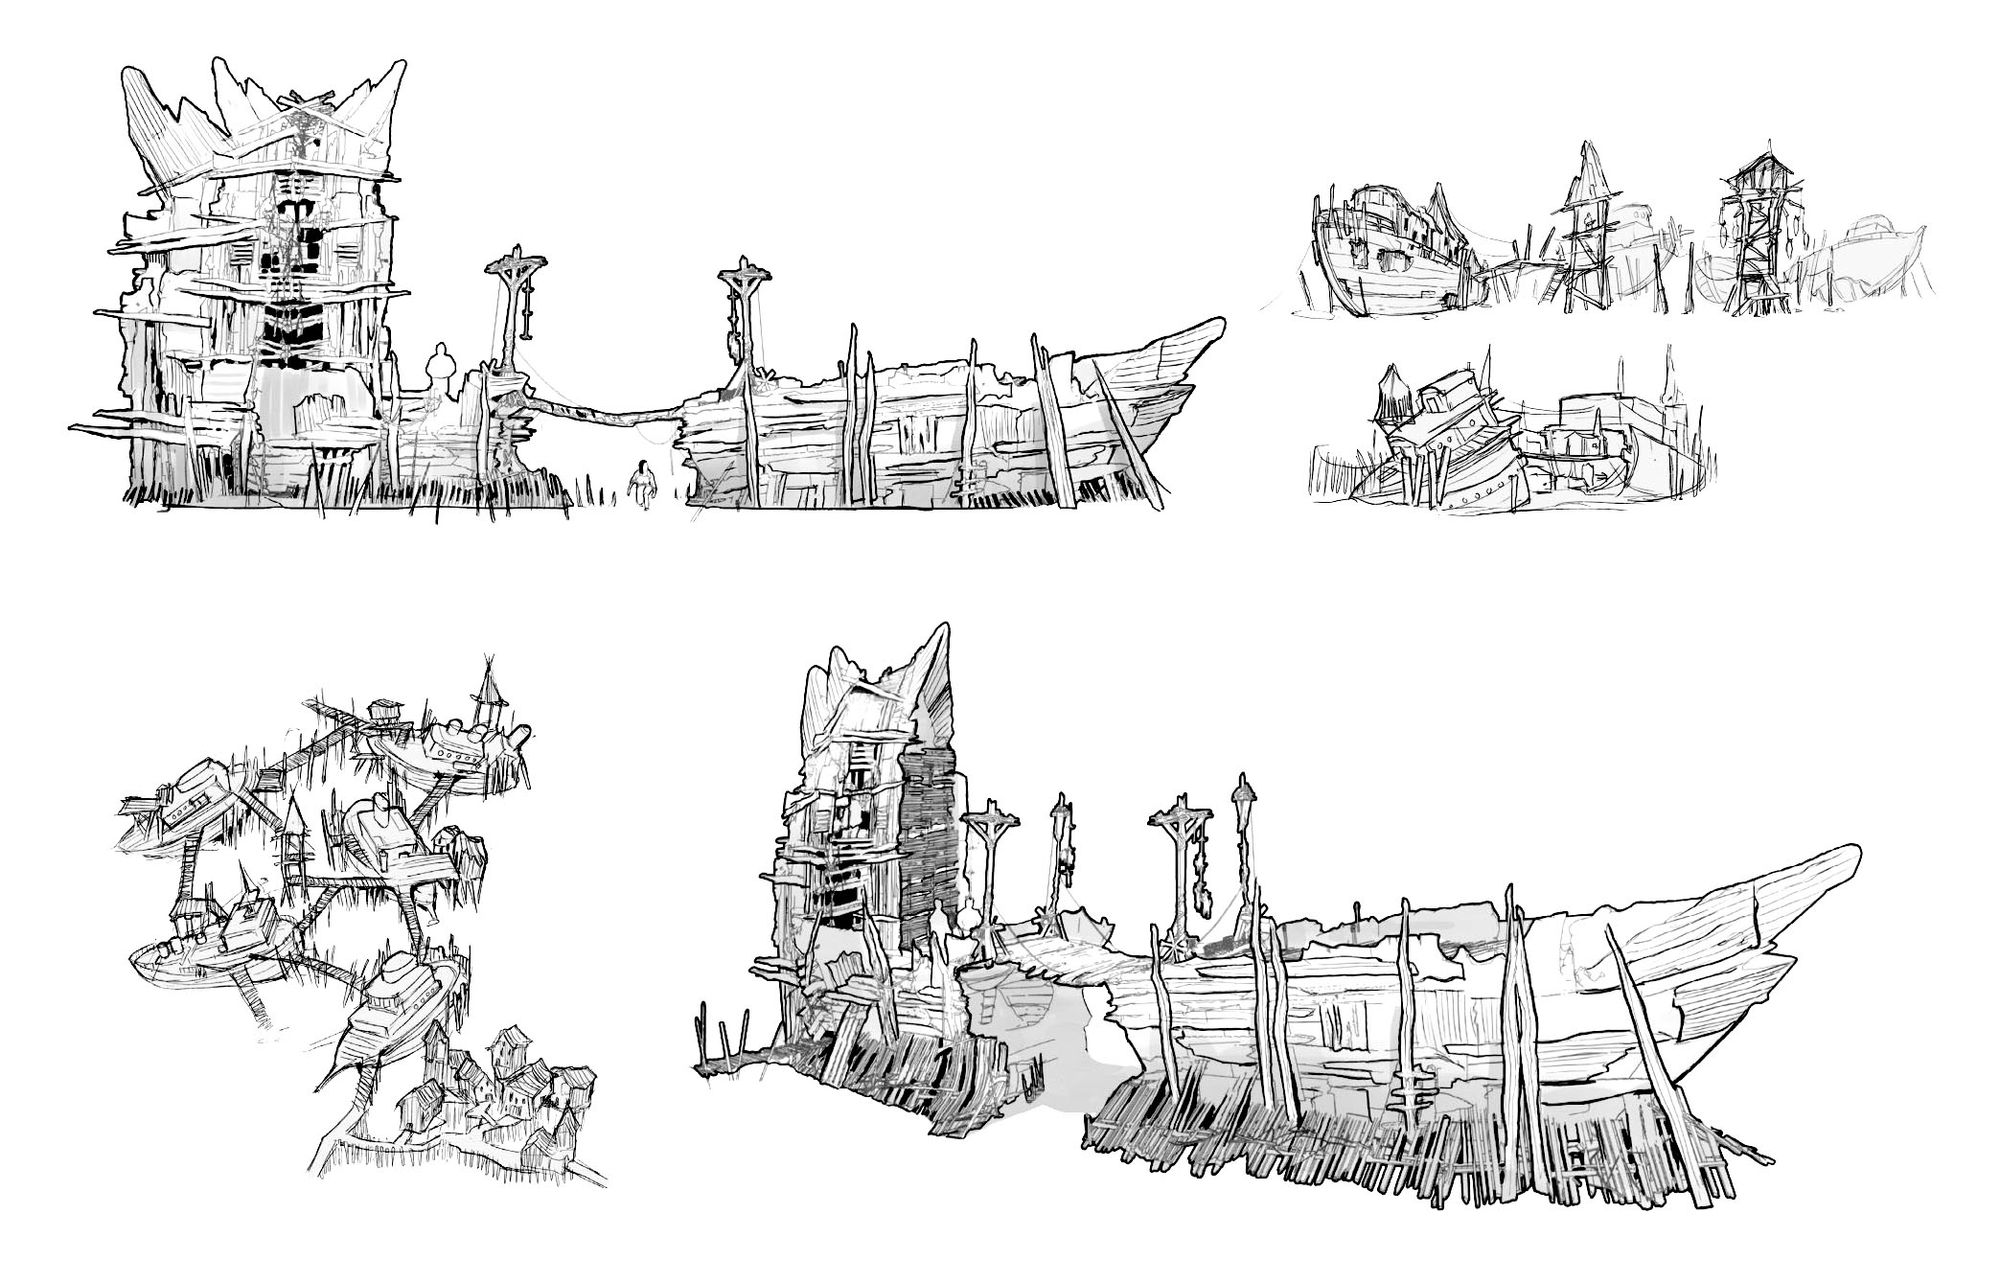
Fish People 3D assets - Wendy
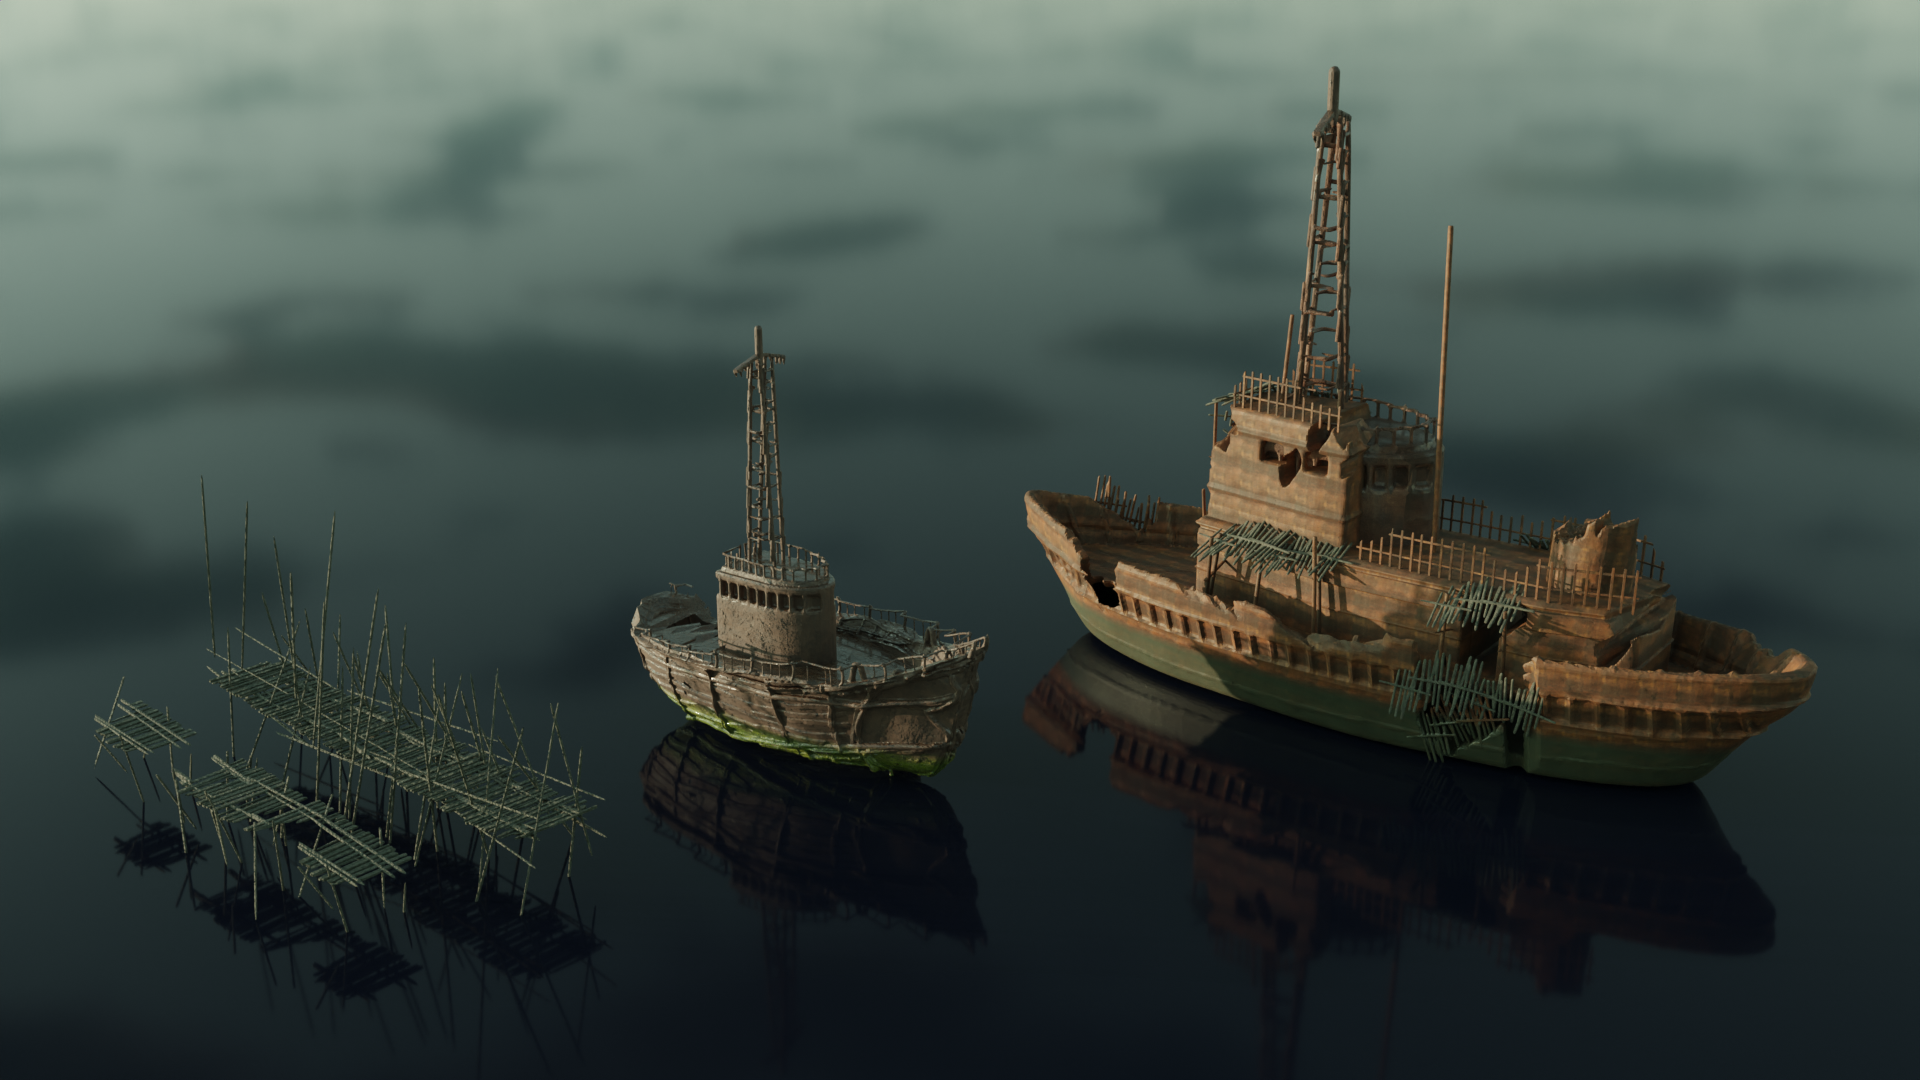
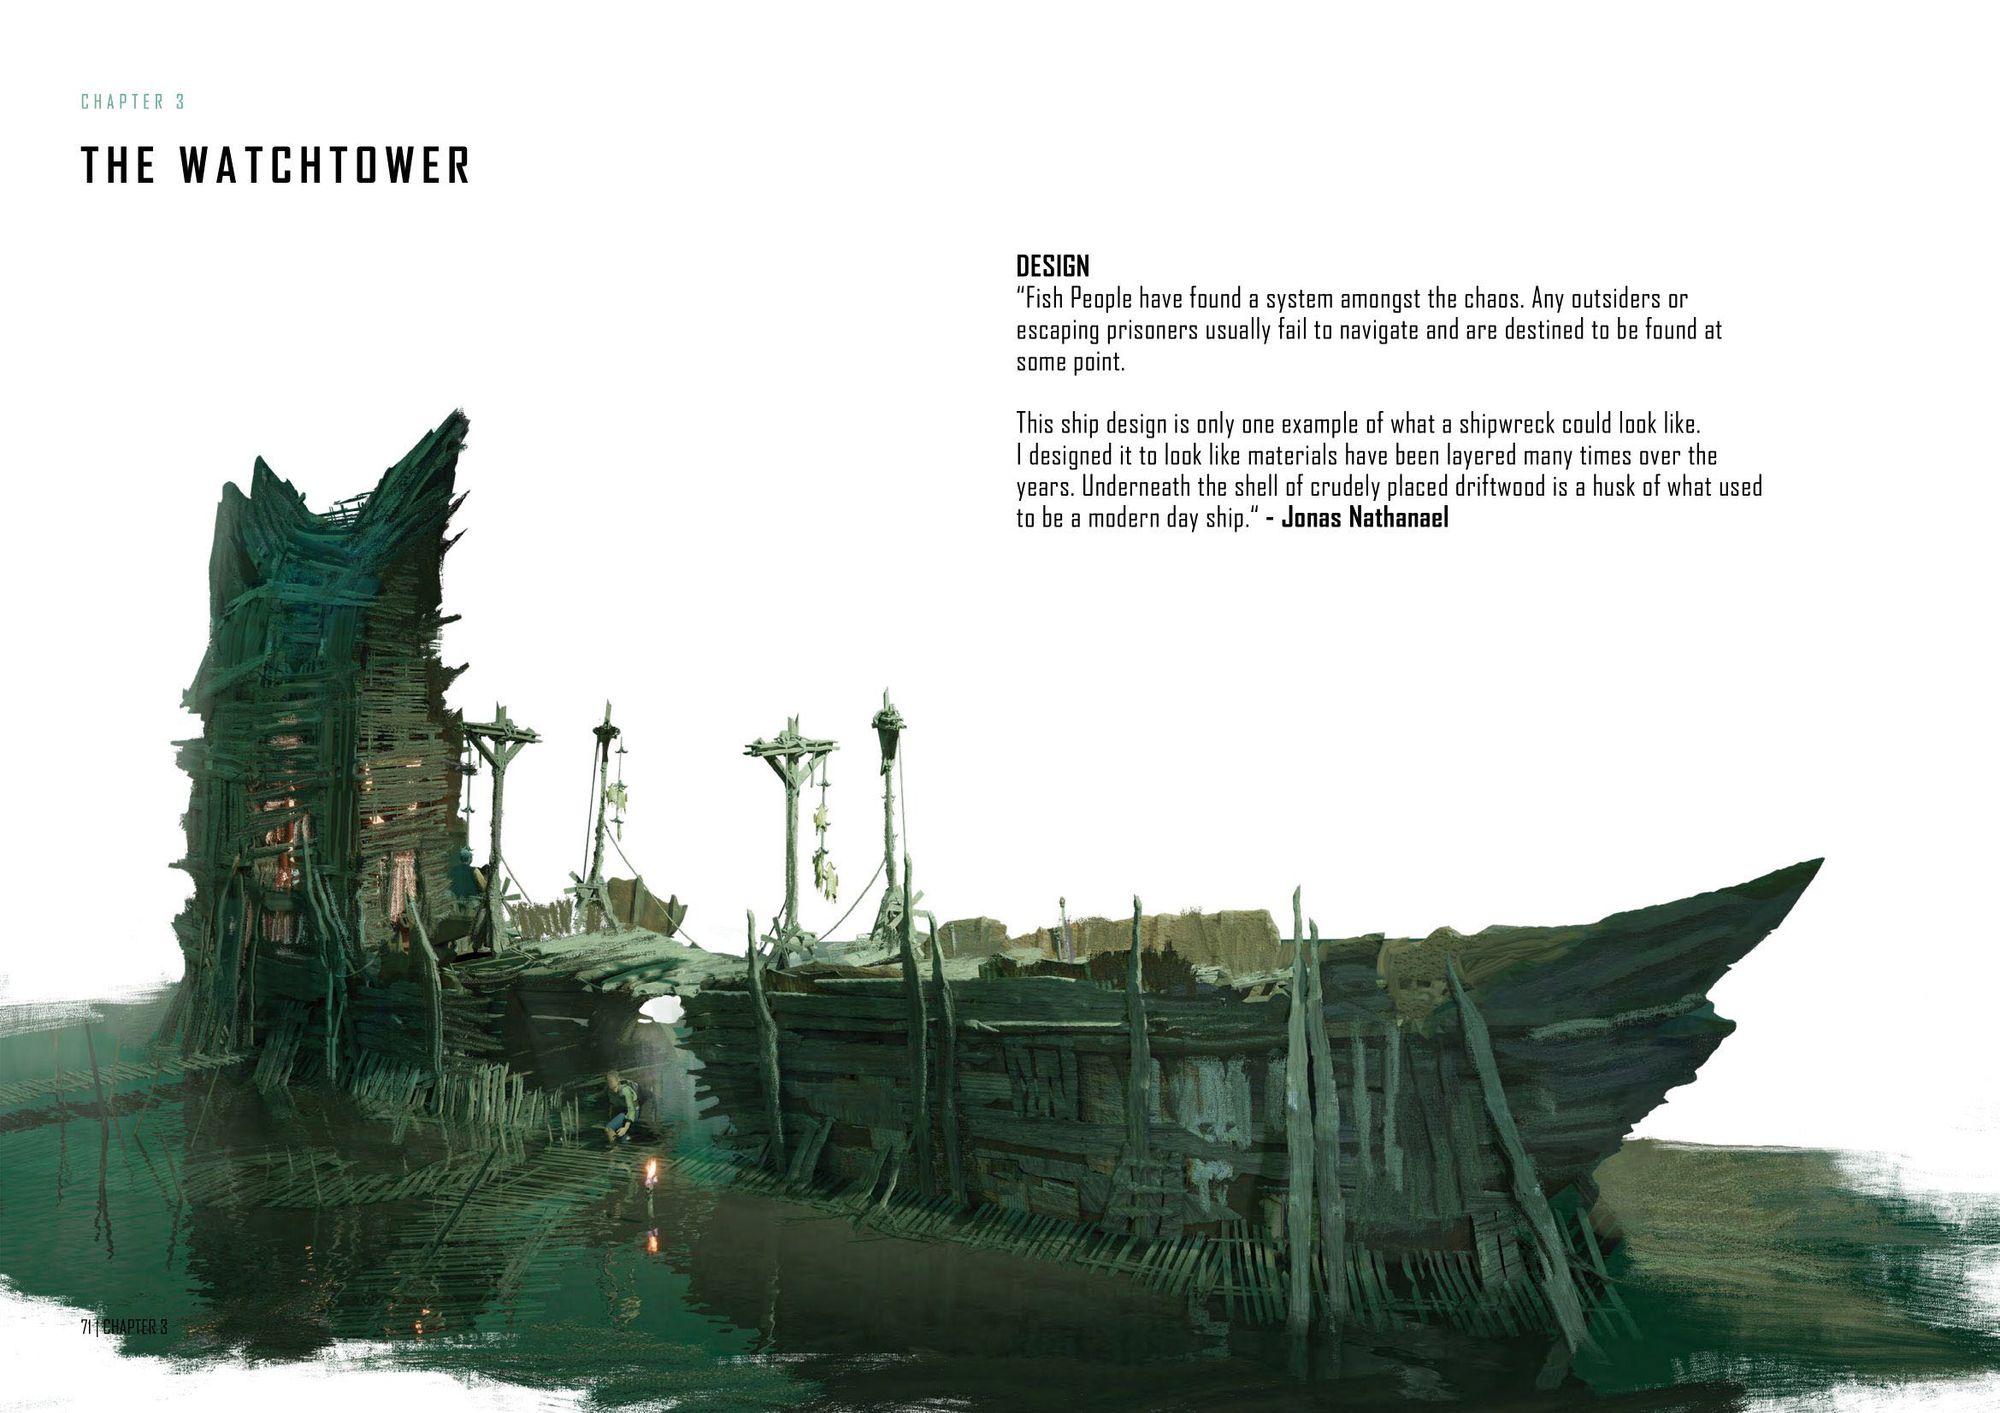
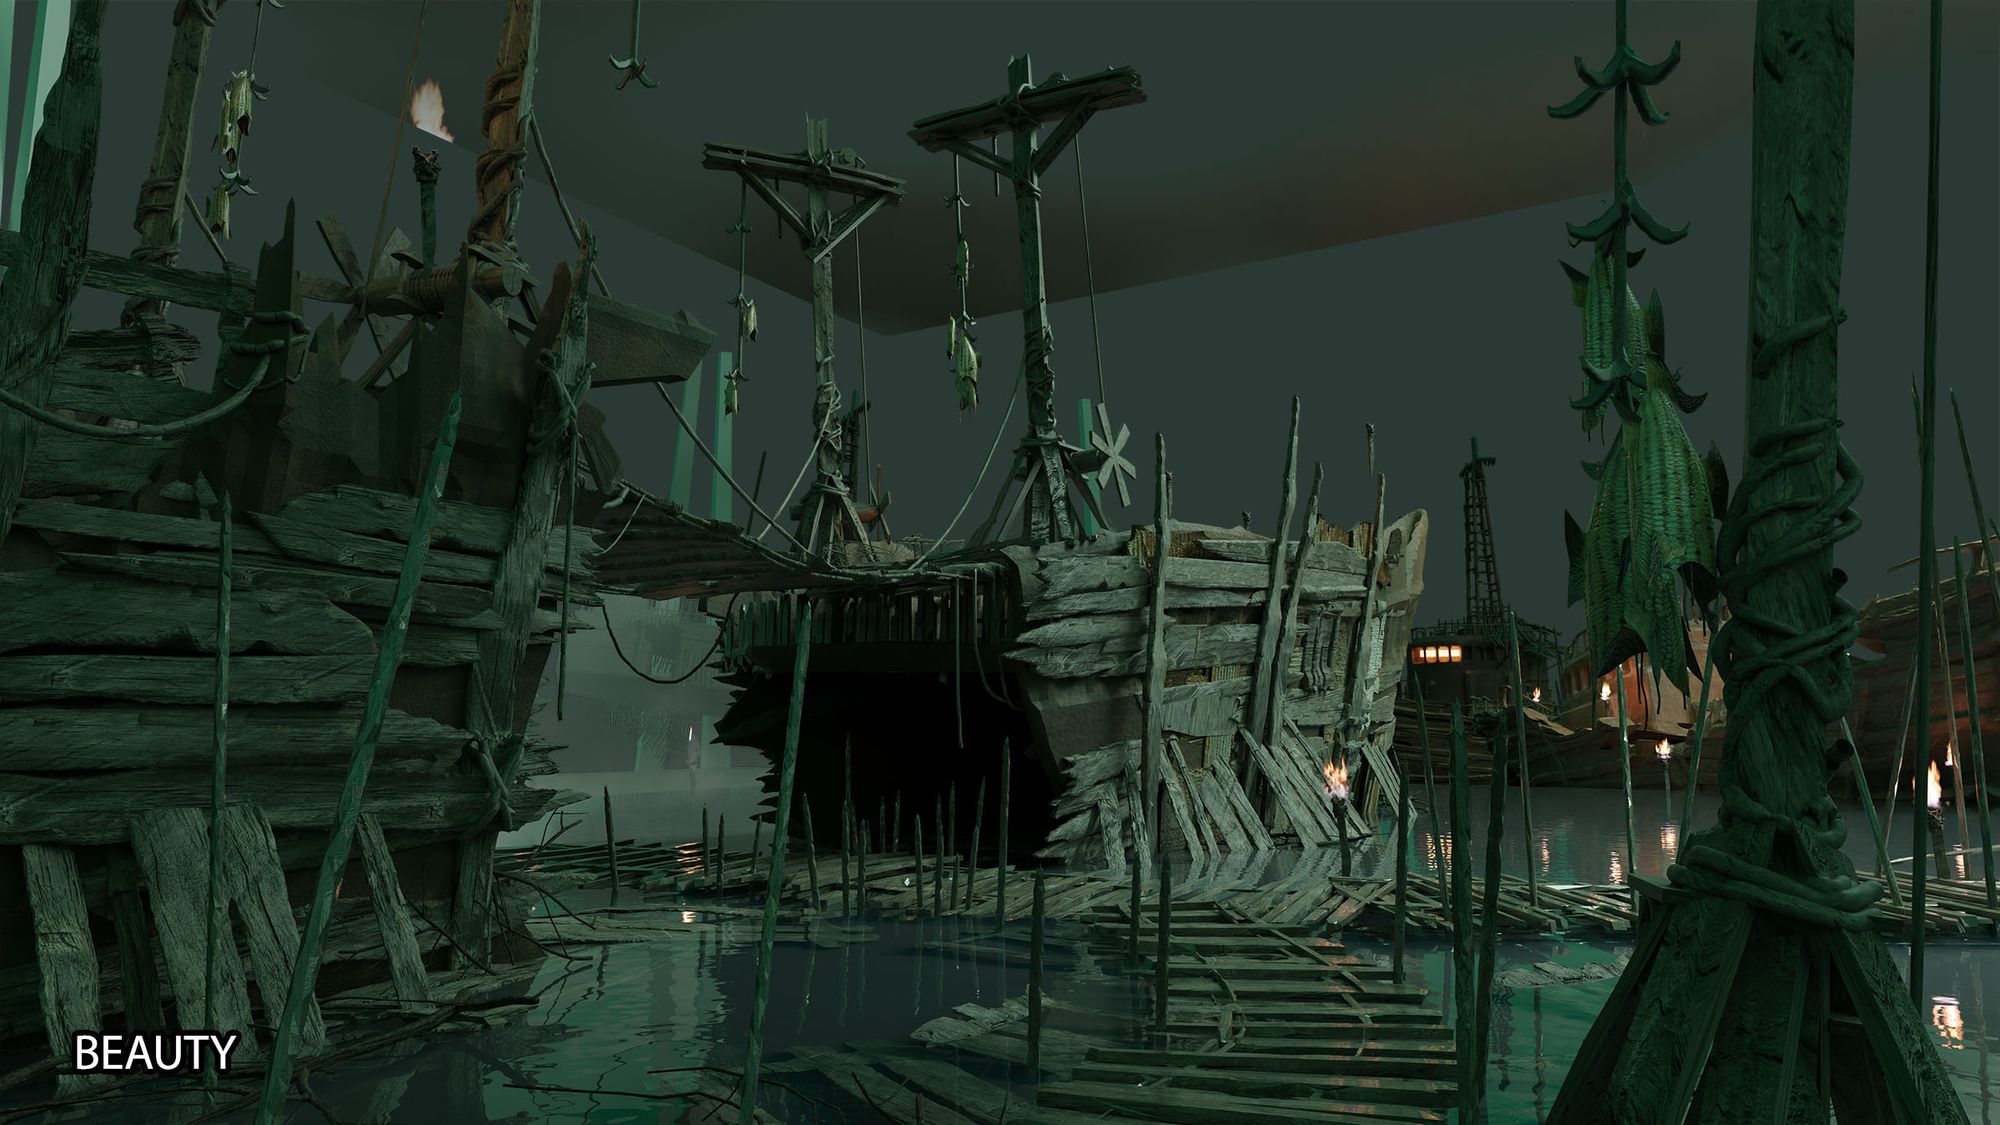
Jonas Nathanael: Scattered around the Fish People are shipwrecks - a labyrinth of shipwrecks.
Fish People Keyframe - Jonas
The wrecks are interconnected and the piers overlap from different angles; left, right under, and over. All of this makes up a cobweb of shipwrecks that the Fish People call home.
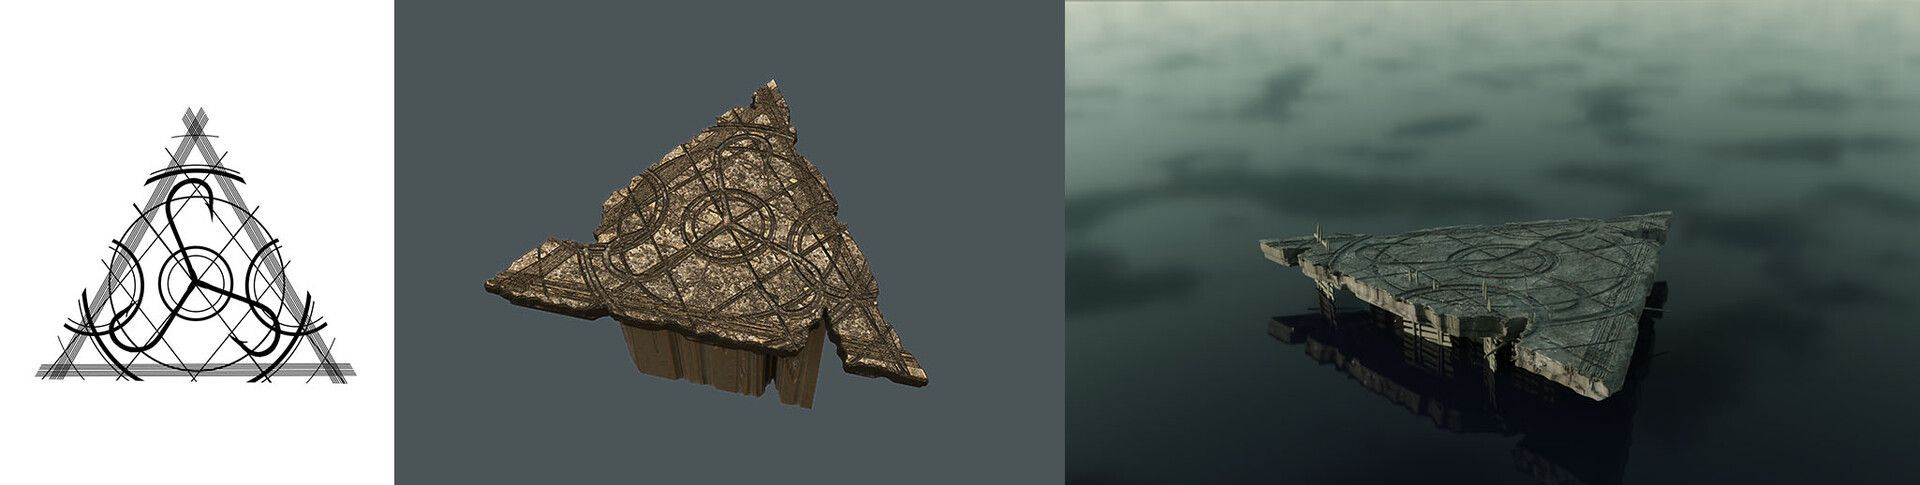
Fish People Watch Tower - Jonas
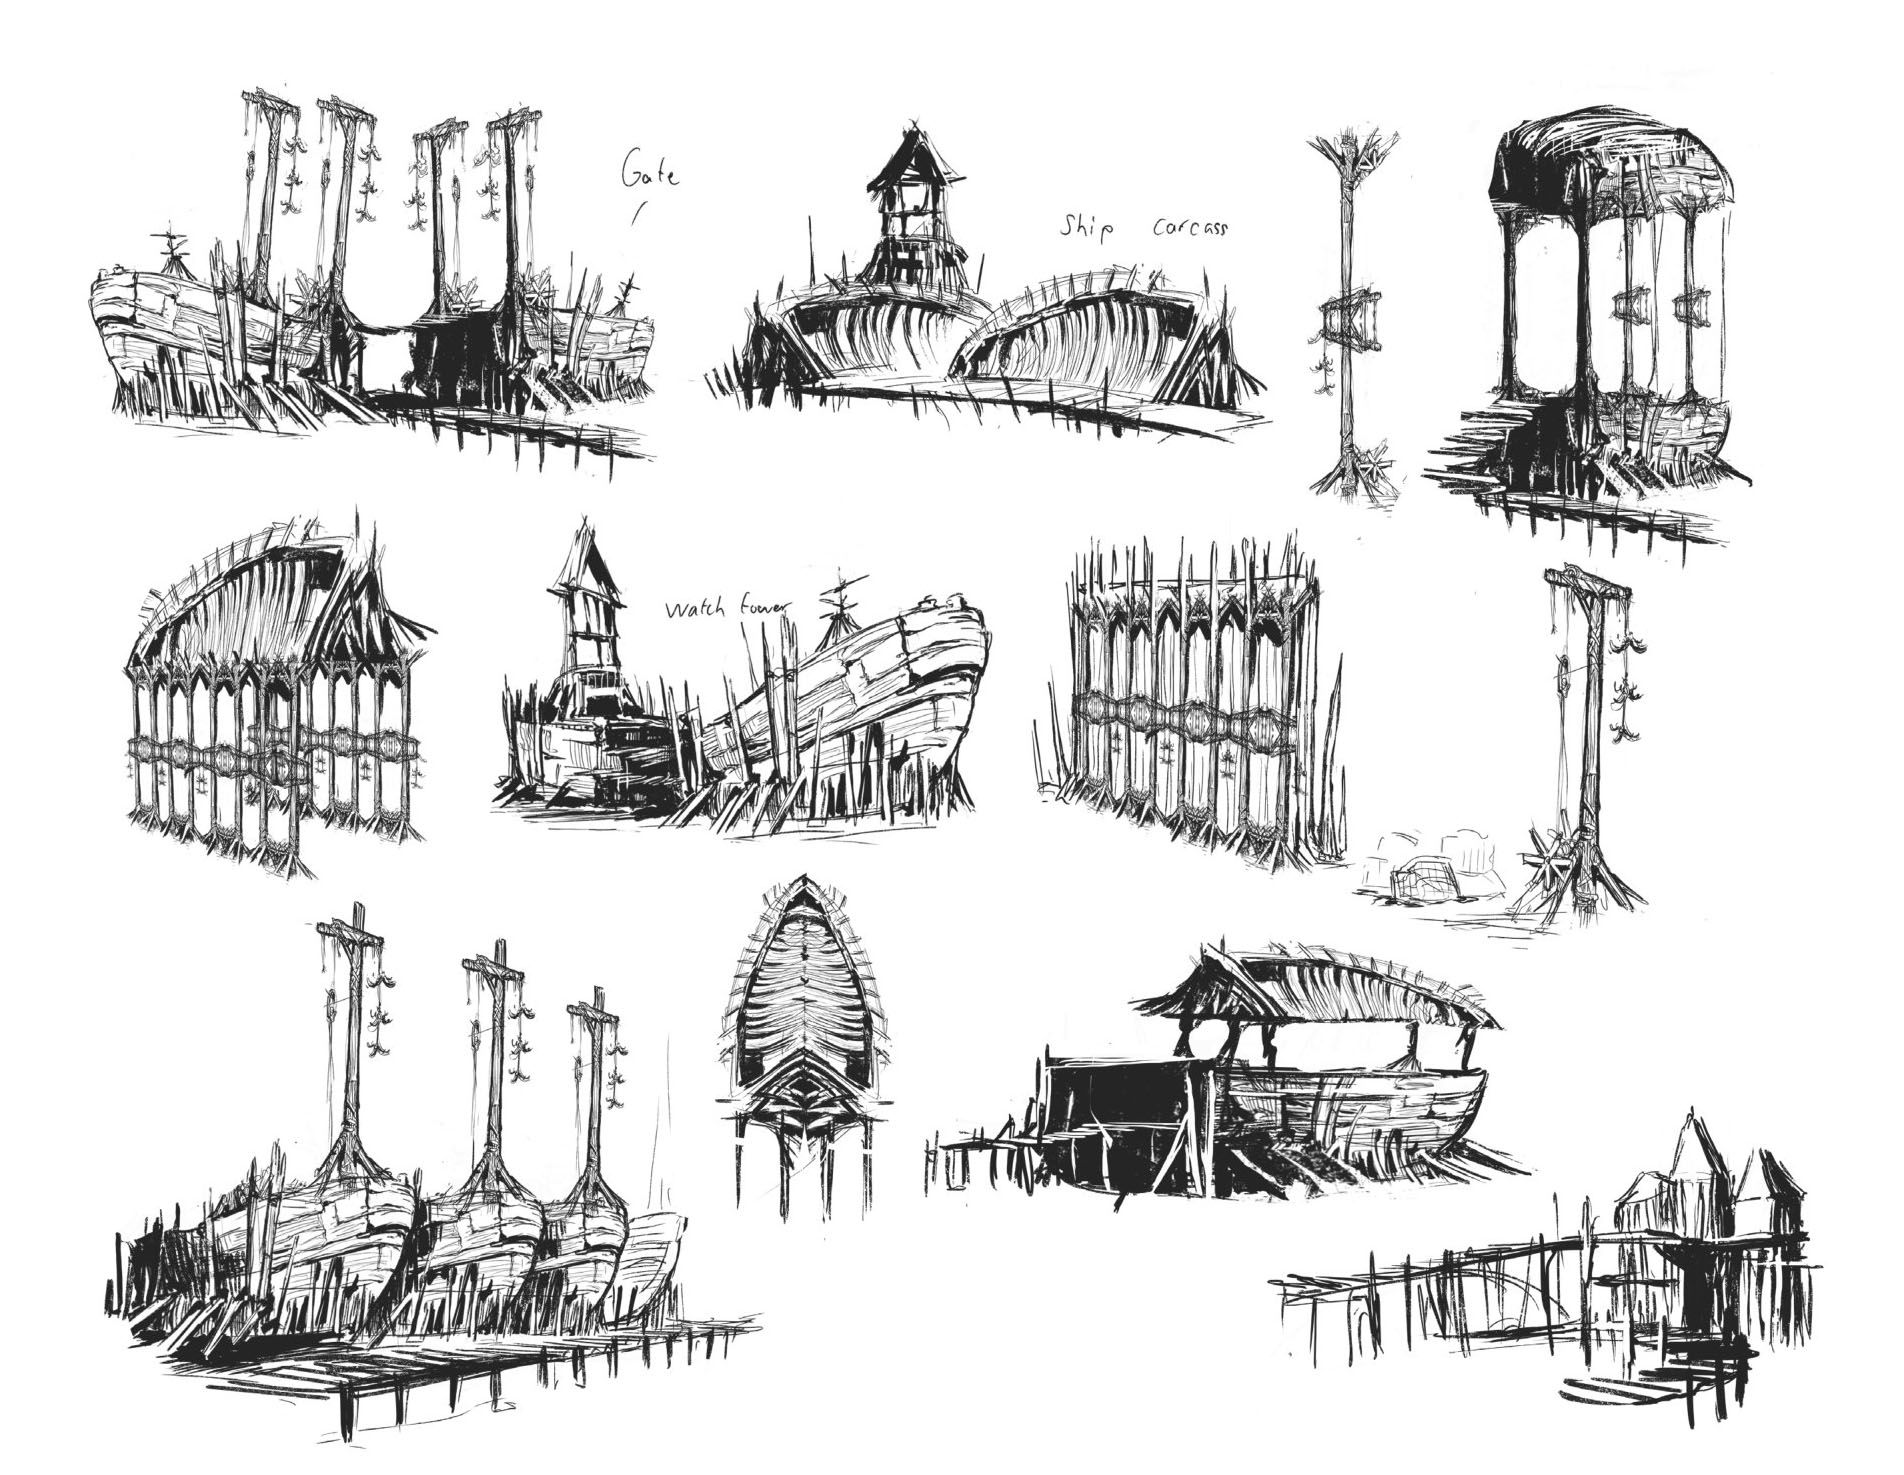
Fish People exploration sketches - Jonas
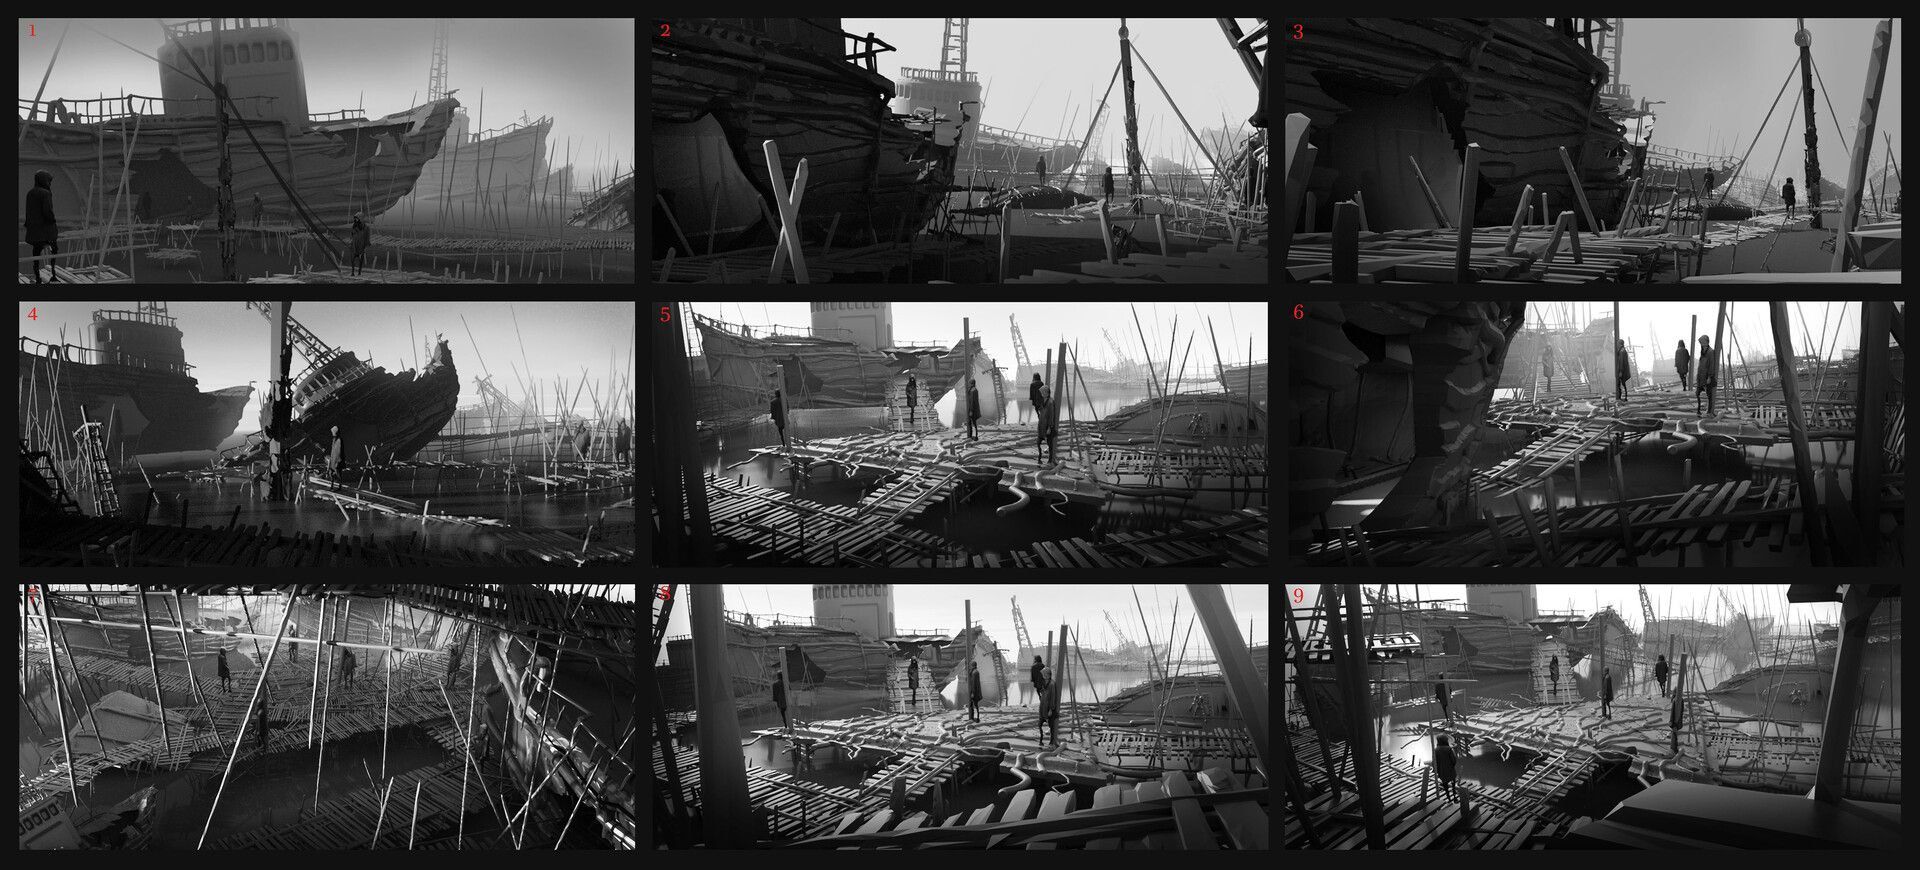
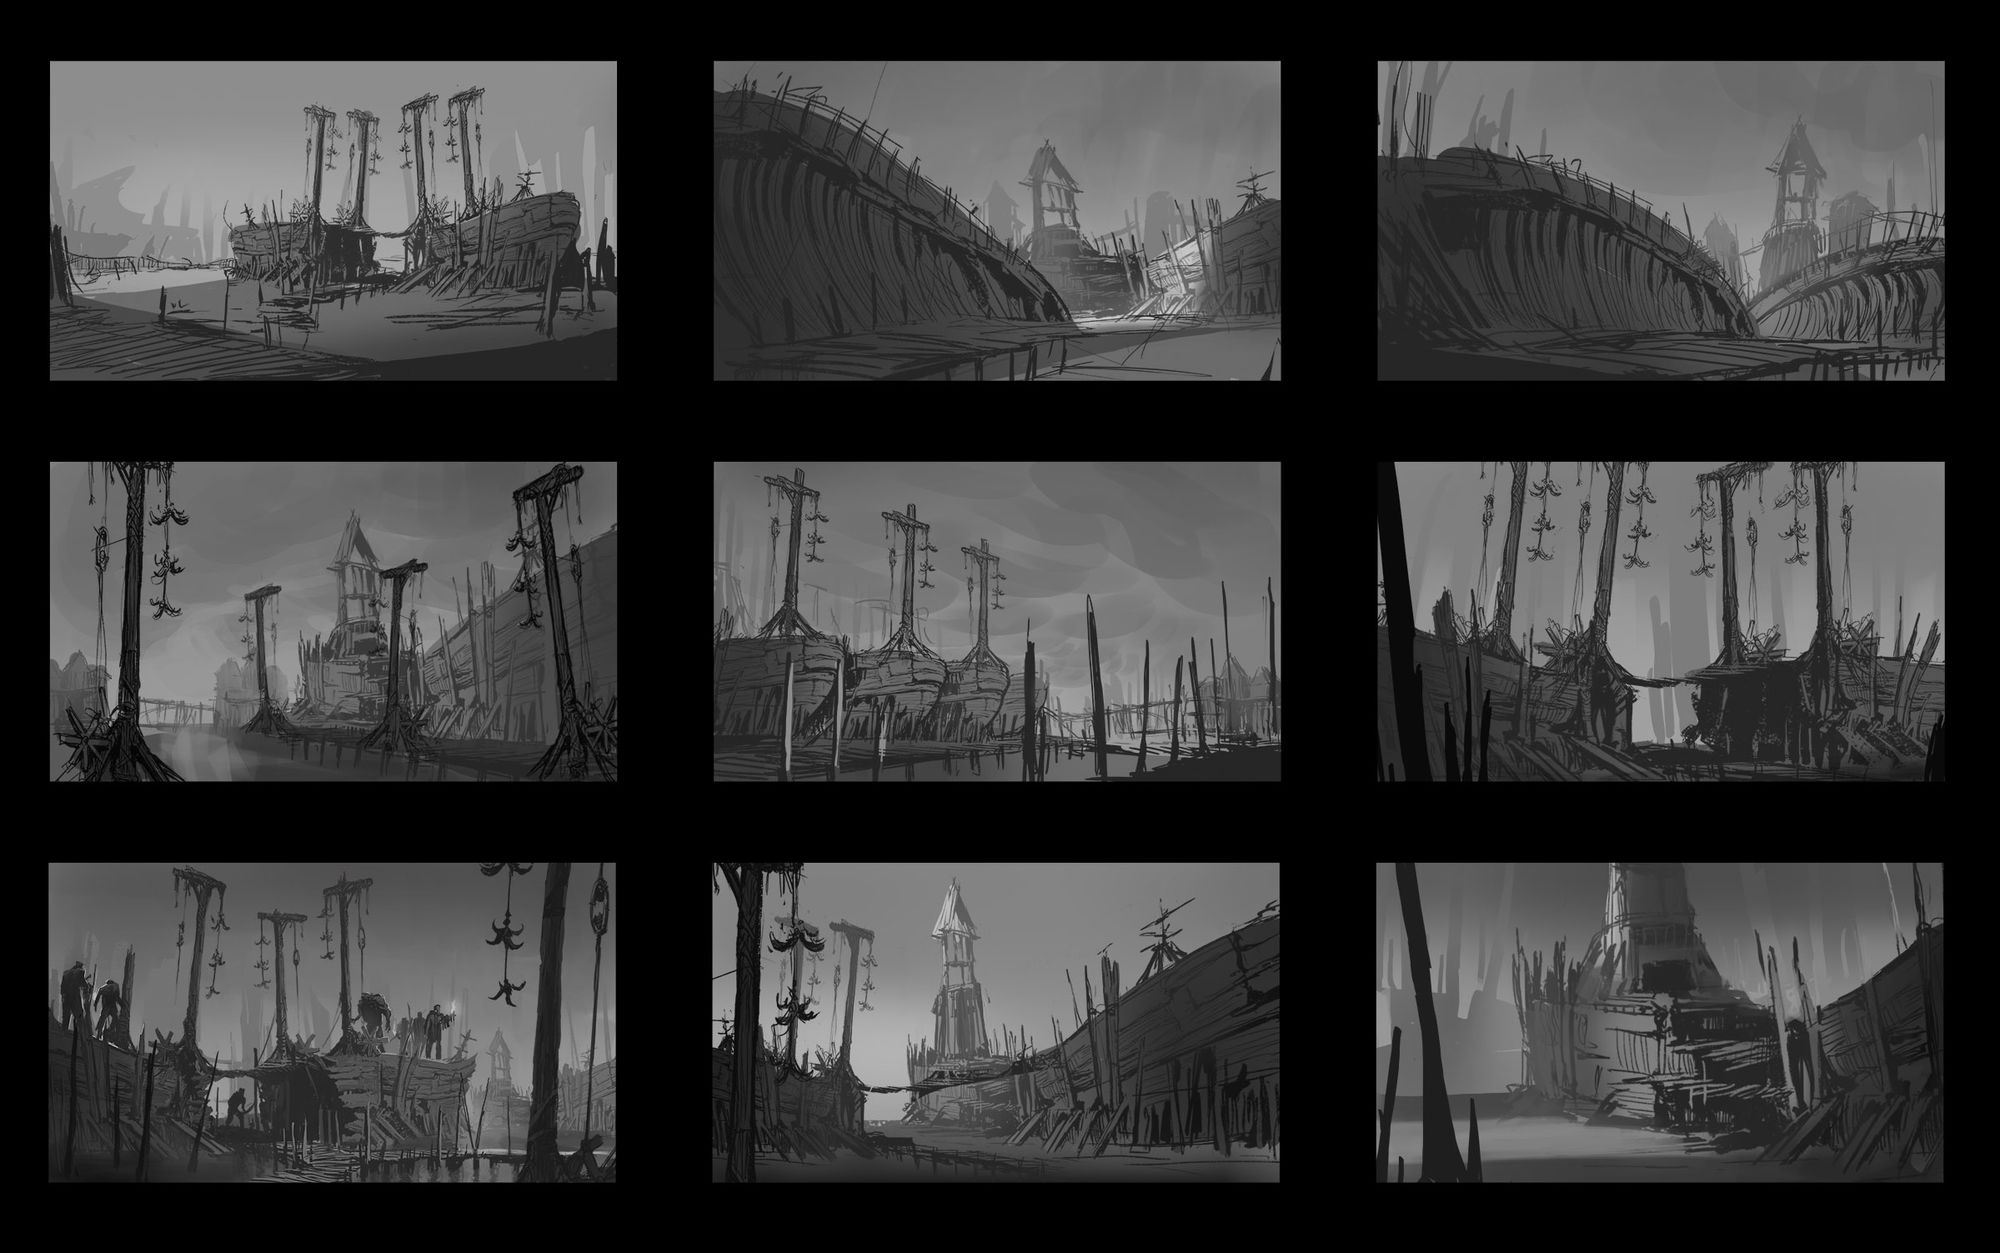
Usually, I draw the thumbnails first, but in this case, I drew several props and tried different compositions with these props. I like to go a bit heavy on the drawing and preliminary sketches to get the clear idea and mood I want to go for. Once I have a clear vision I go in Blender to model the props and play around with the composition and lighting.
Thumbnails - Jonas
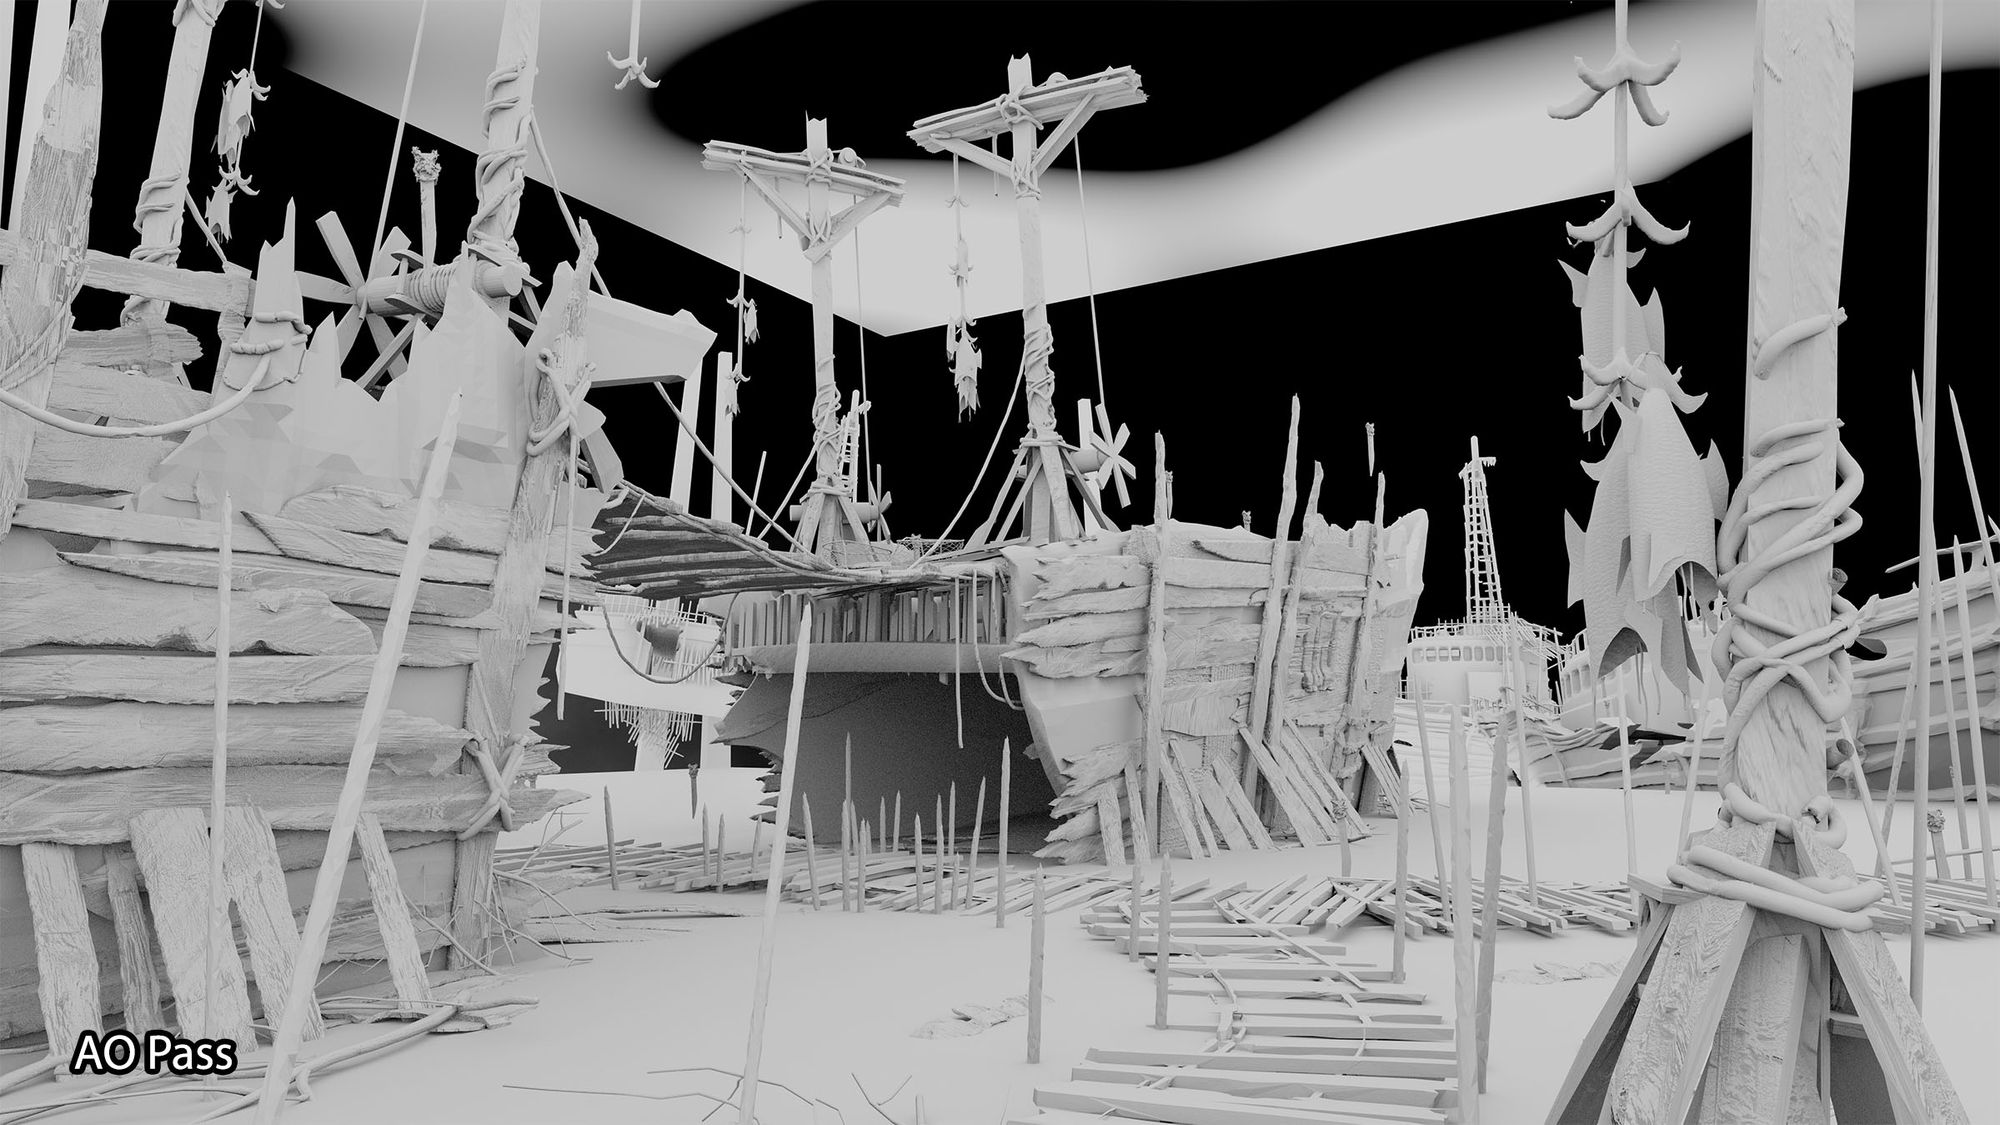
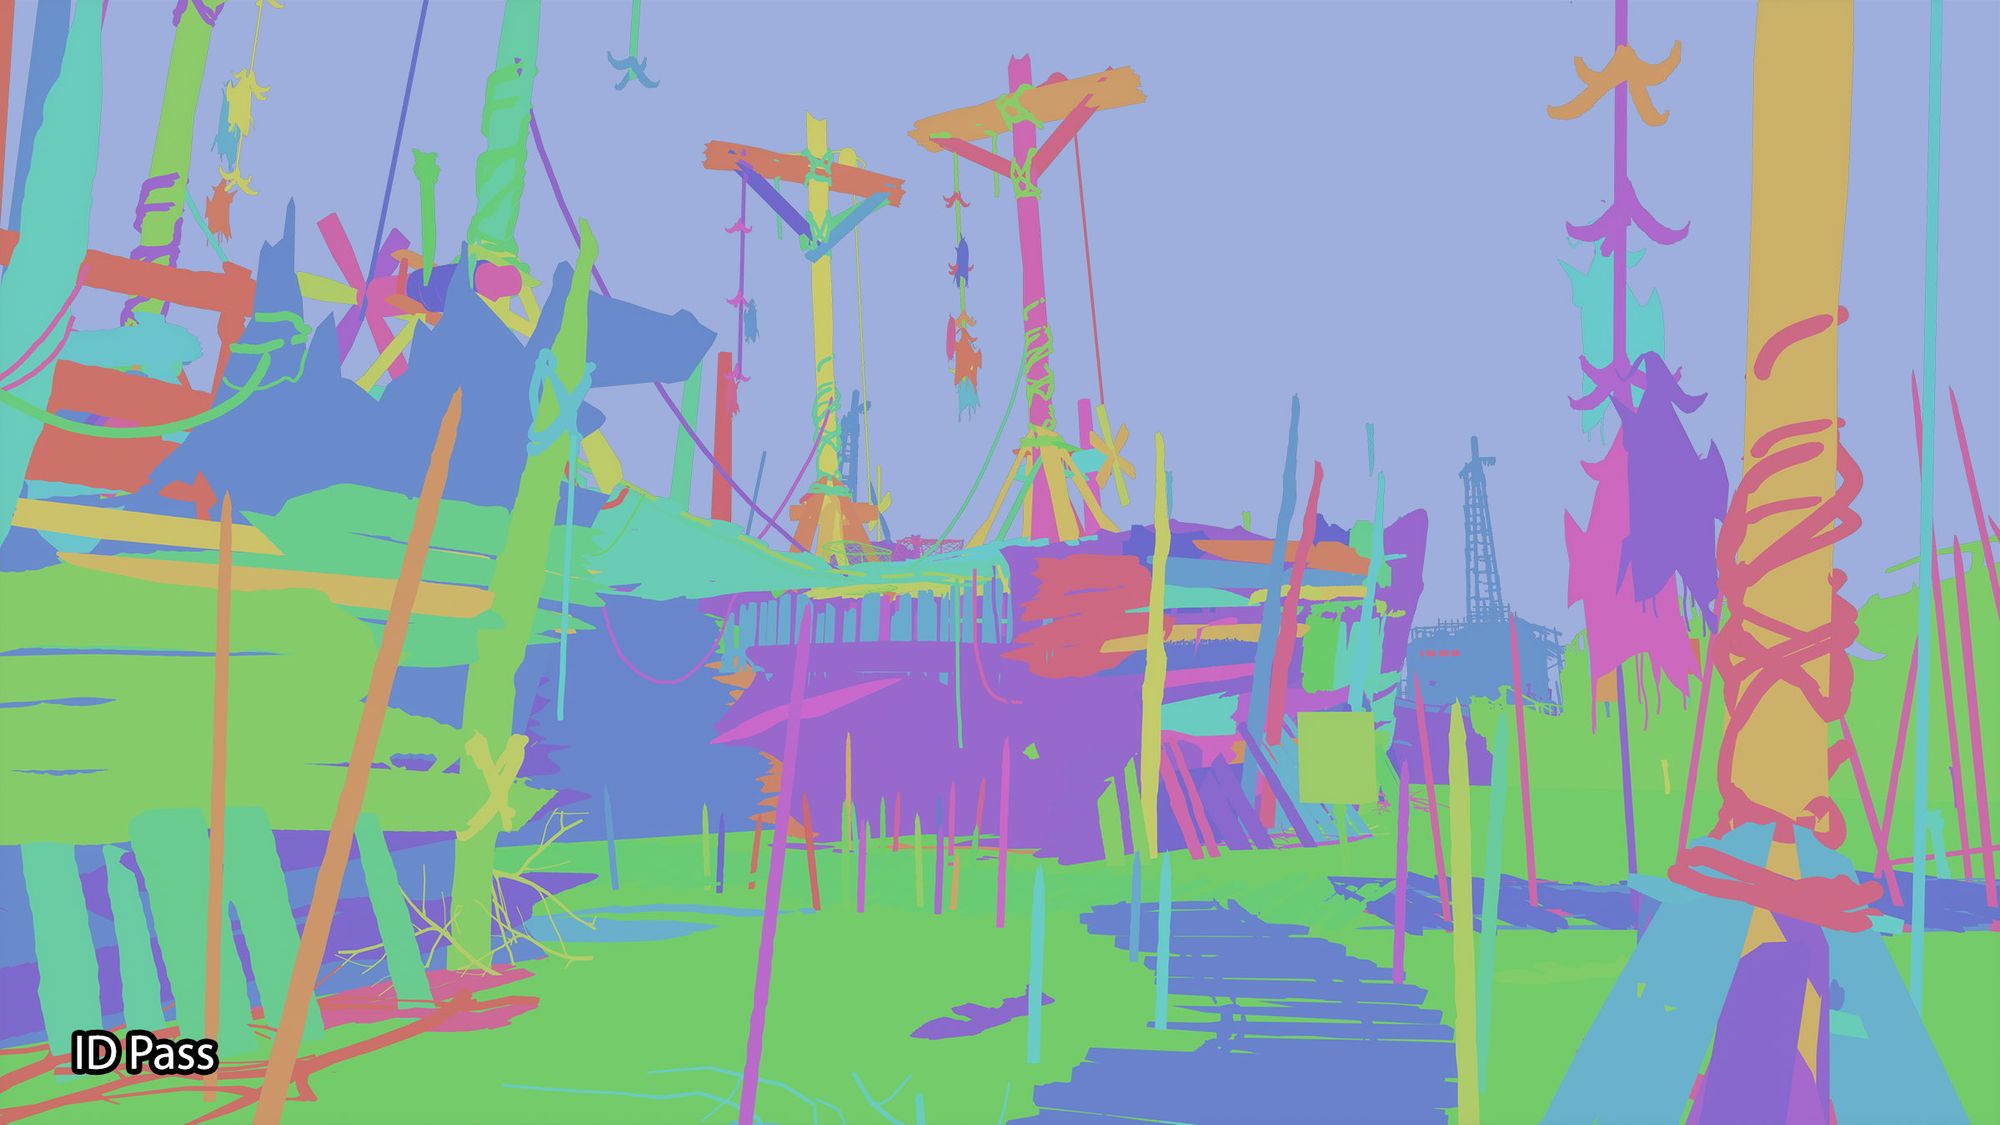
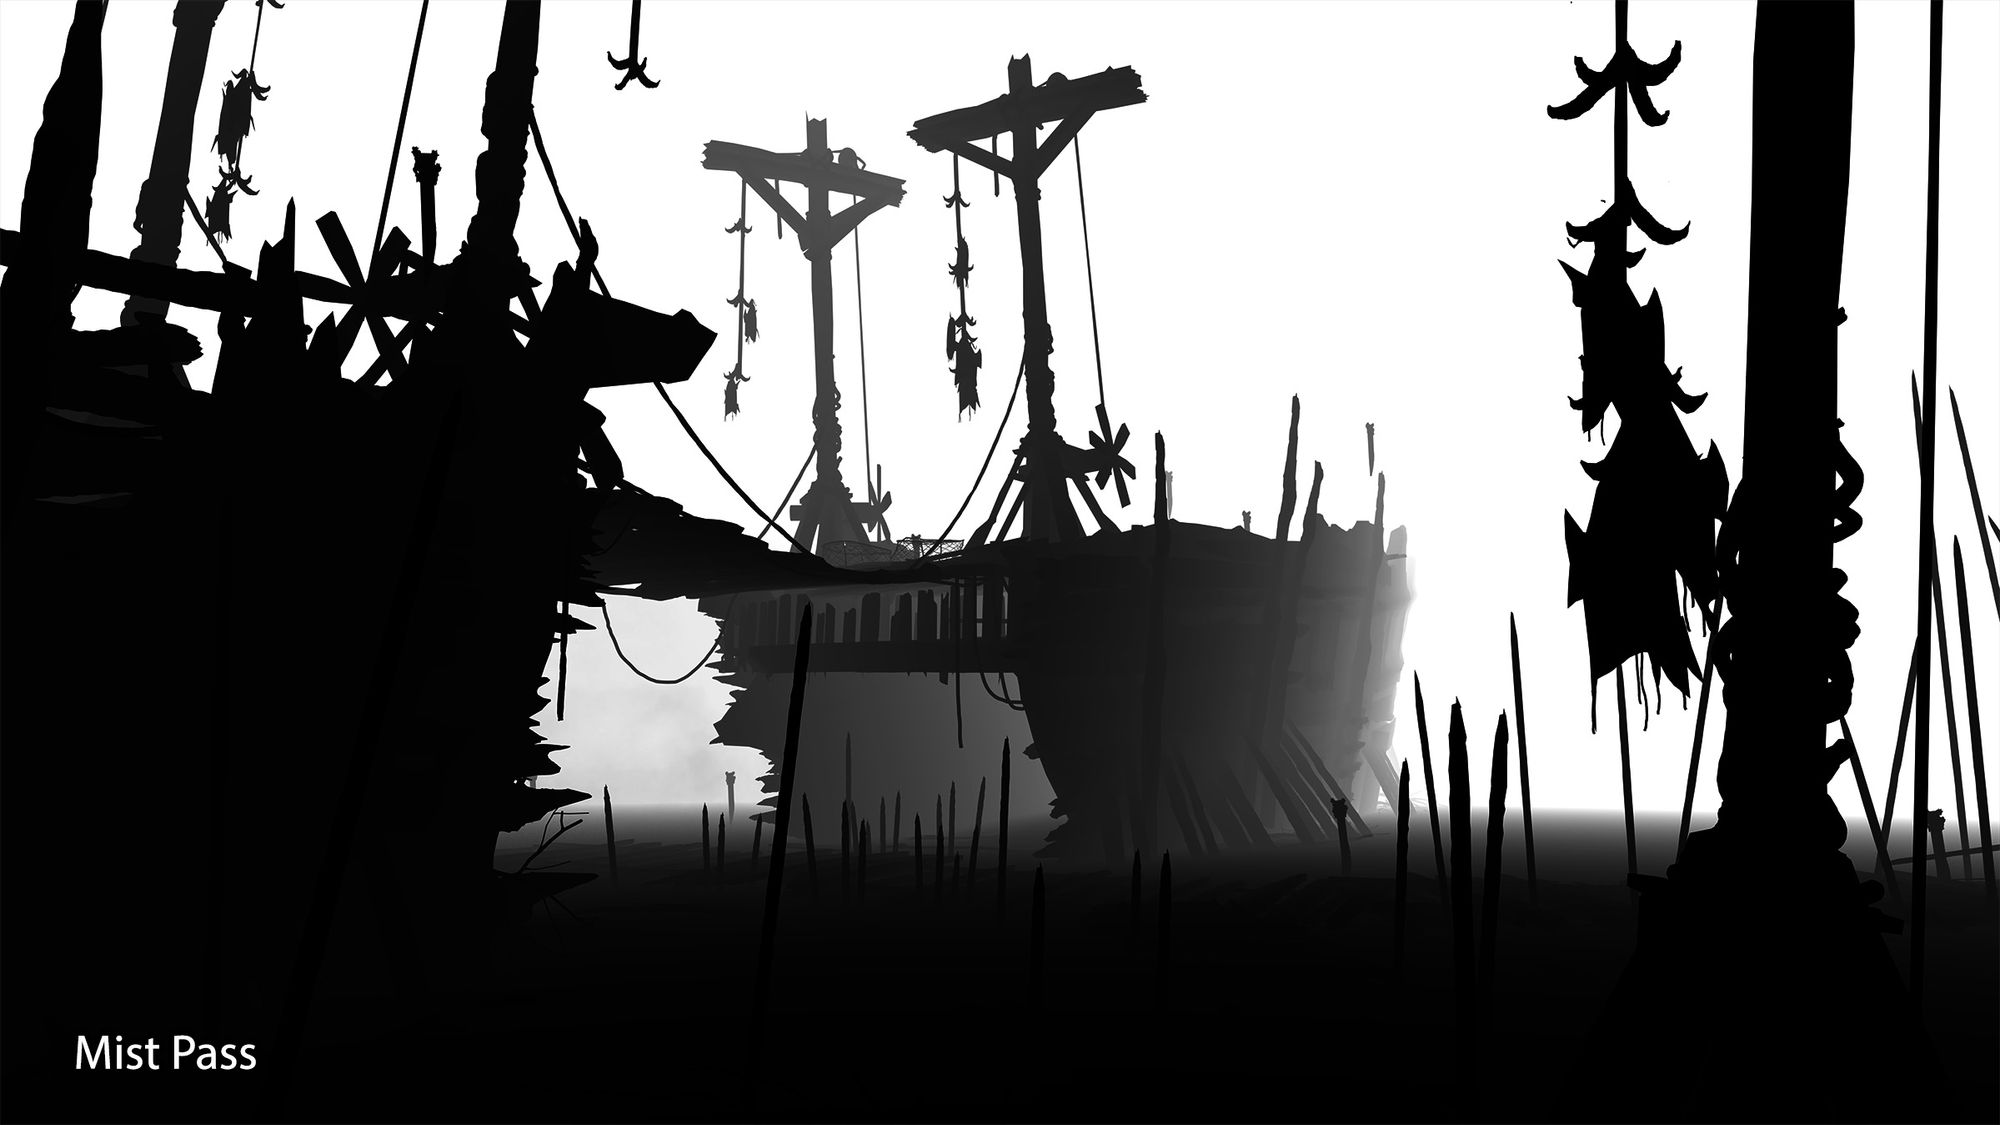
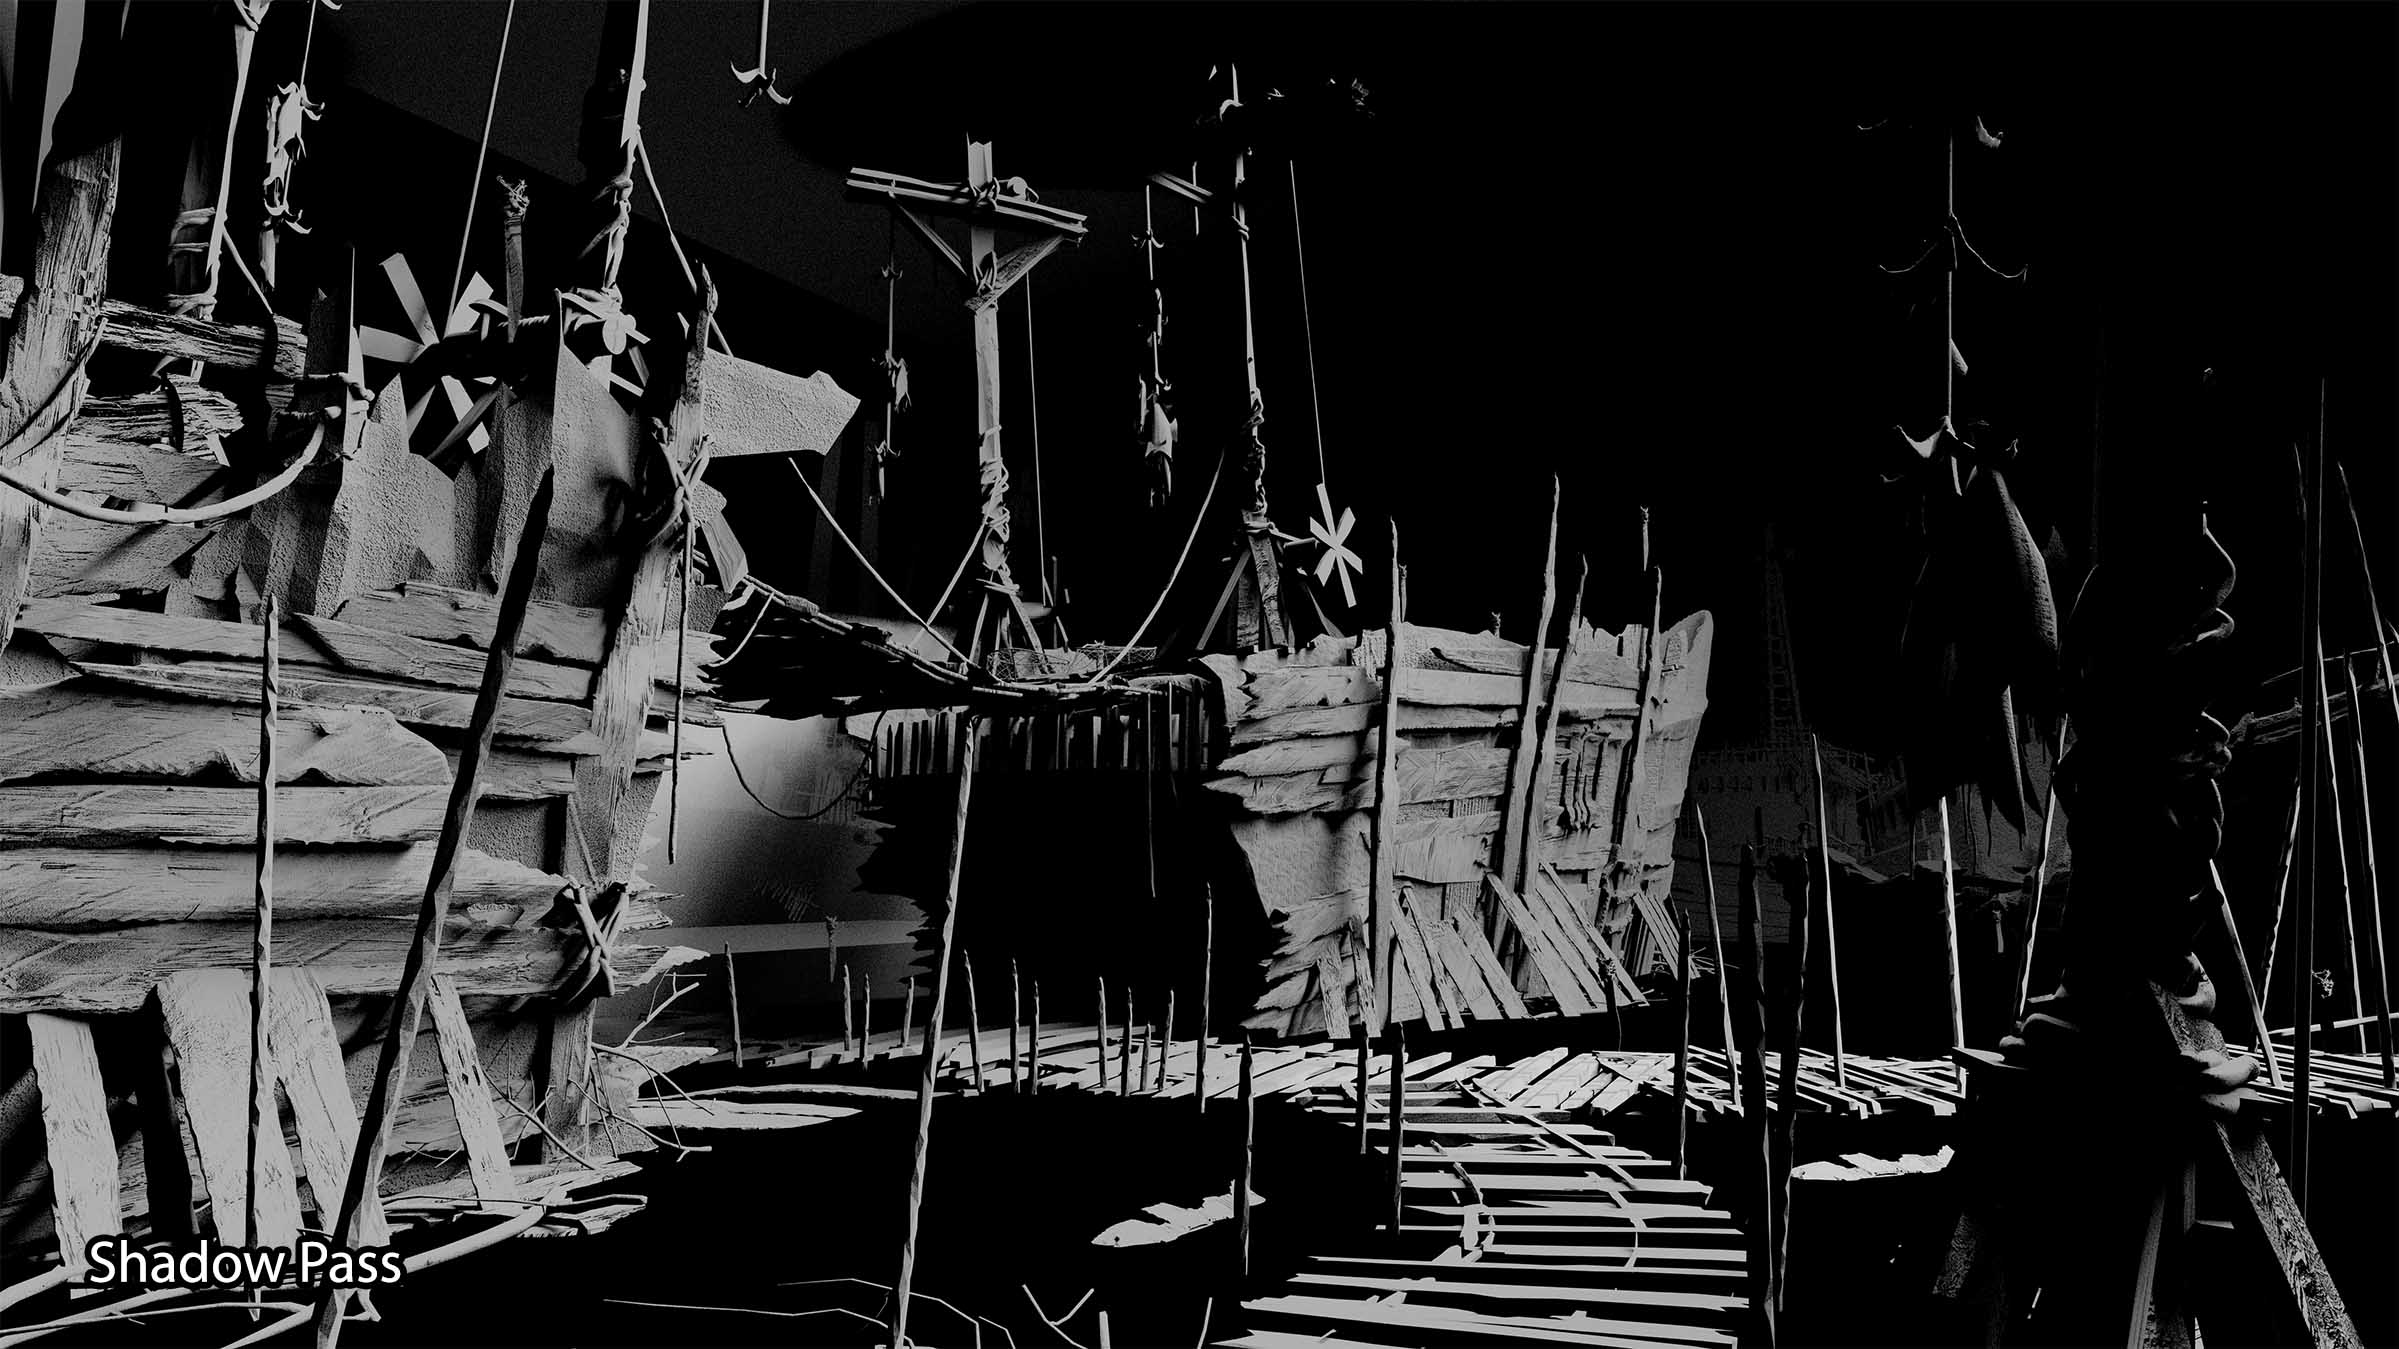
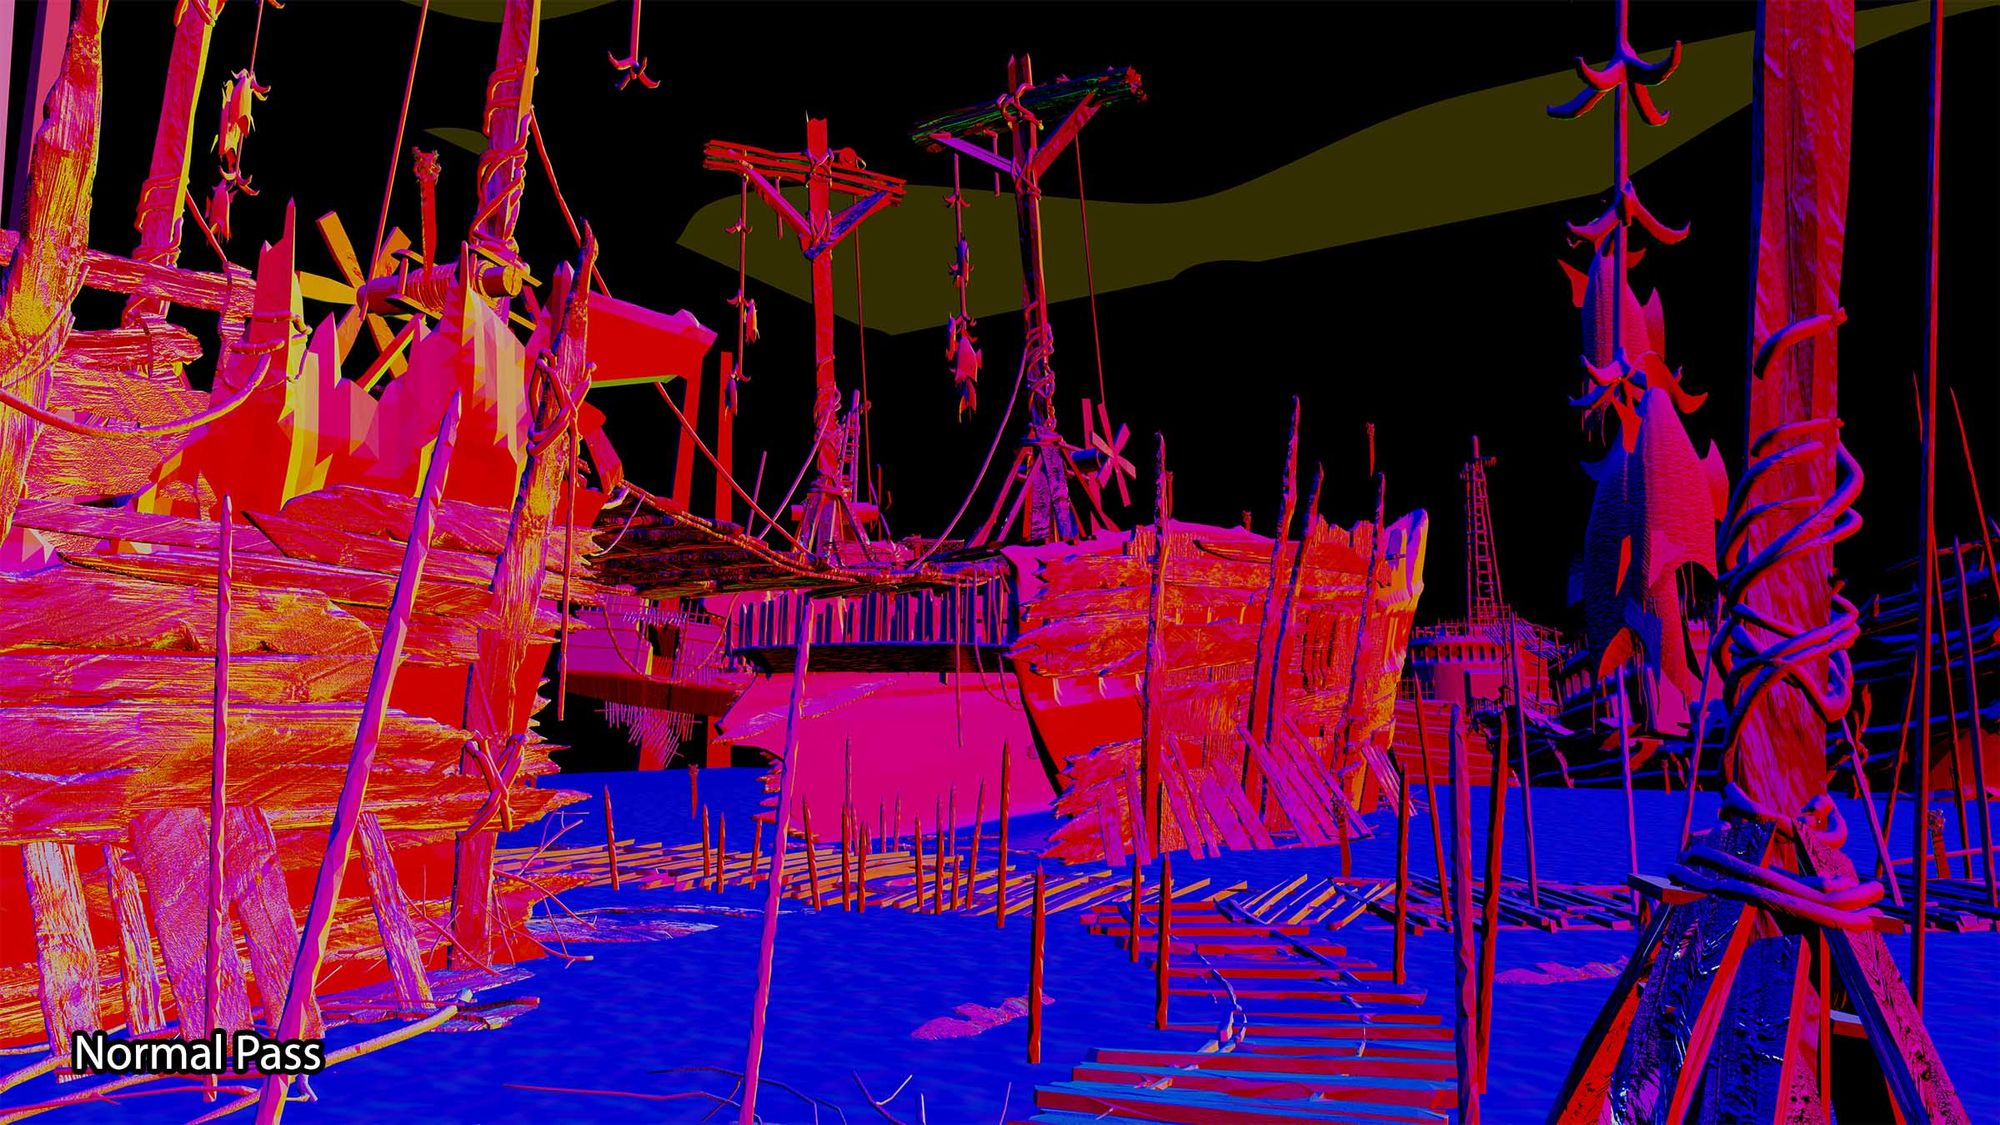
An important step of the process when rendering your 3d environment concepts is the render passes. They give you a lot of data you can play around with and can just enhance your renders in general. Usually, I like to use an Ambient Occlusion pass, ID pass, shadow pass, mist pass, and sometimes normal pass.
Before doing a paint-over of the entire render, I like to play around with these first and do a little color grading. Here is a brief explanation of how I use each render pass and why:
AO pass is an easy way of adding details to a render. I generally apply it as a mask and paint on the areas I want the most detail. For things far away, I tend to want things to look more flat and graphic to make the composition easier to read.
ID pass is a great way to mask things out but quickly becomes redundant if you do a heavy paint-over of your 3D render. You could also use the mist pass for masking elements out. This way you can adjust the levels of the pass in Photoshop and choose which things you want to mask depending on the distance from the camera.
Mist pass is a good way of adding fog. You can add this pass to your image and change the blending mode to screen. However, I like to add this to a mask and choose my colors, and paint the fog in. Mist pass is also a great way to see if your shapes work and if it all reads well in a graphic sense. It’s very important to keep the 2d shapes in mind even if you’re working in 3D. You could even preview the mist pass while working in Blender to keep it in check.
Shadow Pass has become one of my favorite passes. You can choose the colors of the shadow/light and group values if you want things to be more graphic rather than look too 3D. I use it if there is too much detail in the light/dark areas. It’s like doing a traditional painting, where you want the most detail in one specific value range, light or dark.
Additionally, most cameras can only catch all the details in either the dark areas or bright areas according to the settings. However Blender cycles likes to render the details in both extremes making it look like a super high dynamic range camera has taken the picture. This pass helps to make it look less 3D.
Finally the normal pass, I use sometimes if I want to do a mask depending on which way a face normal is facing. I like to use these if I want to add extra reflections or add another light source. It’s also a cheat code for adding snow or sand/dust on top of objects.
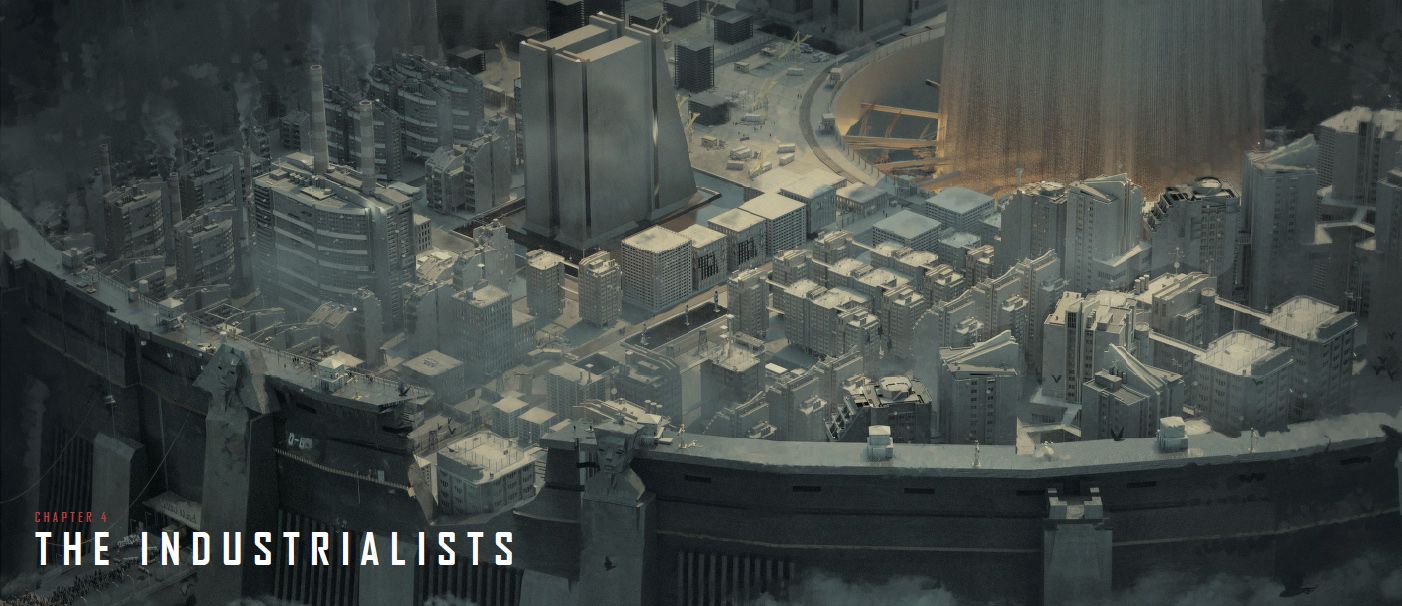
The Industrialists
Mads Hendriksen: This was the first piece I made for the book, I wanted to show the scale of the Industrialists' dome, with a 300mm lens. My primary design decisions were based around the generator in the middle, which delivers power throughout the faction.
The Industrialists Keyframe - Mads
The Industrialists are the most privileged faction in the current world. Years ago, when scientists predicted the onset of the flooding, some of the world’s most powerful individuals and corporations took proactive measures by ordering the construction of massive domes in high-elevation areas.
These structures were intended to serve as protection against the inevitable floods. These enormous domes are capable of accommodating up to 100,000 people, carefully selecting who would be granted entry into these sanctuaries. Within the core of each dome, a colossal generator was installed, equipped with a pumping system designed to purify water and generate electricity. However, this process relies on the consumption of vast quantities of coal and other natural resources.
Today, the domes have become the stuff of legends among other communities, as those who venture out in search of them never return. In truth, many of these individuals are captured by the Industrialists’ and forced to toil in the generator until their death. The Industrialists from this dome provide the Fish People with prisoners and resources for their experiments in exchange for protection from outsiders.
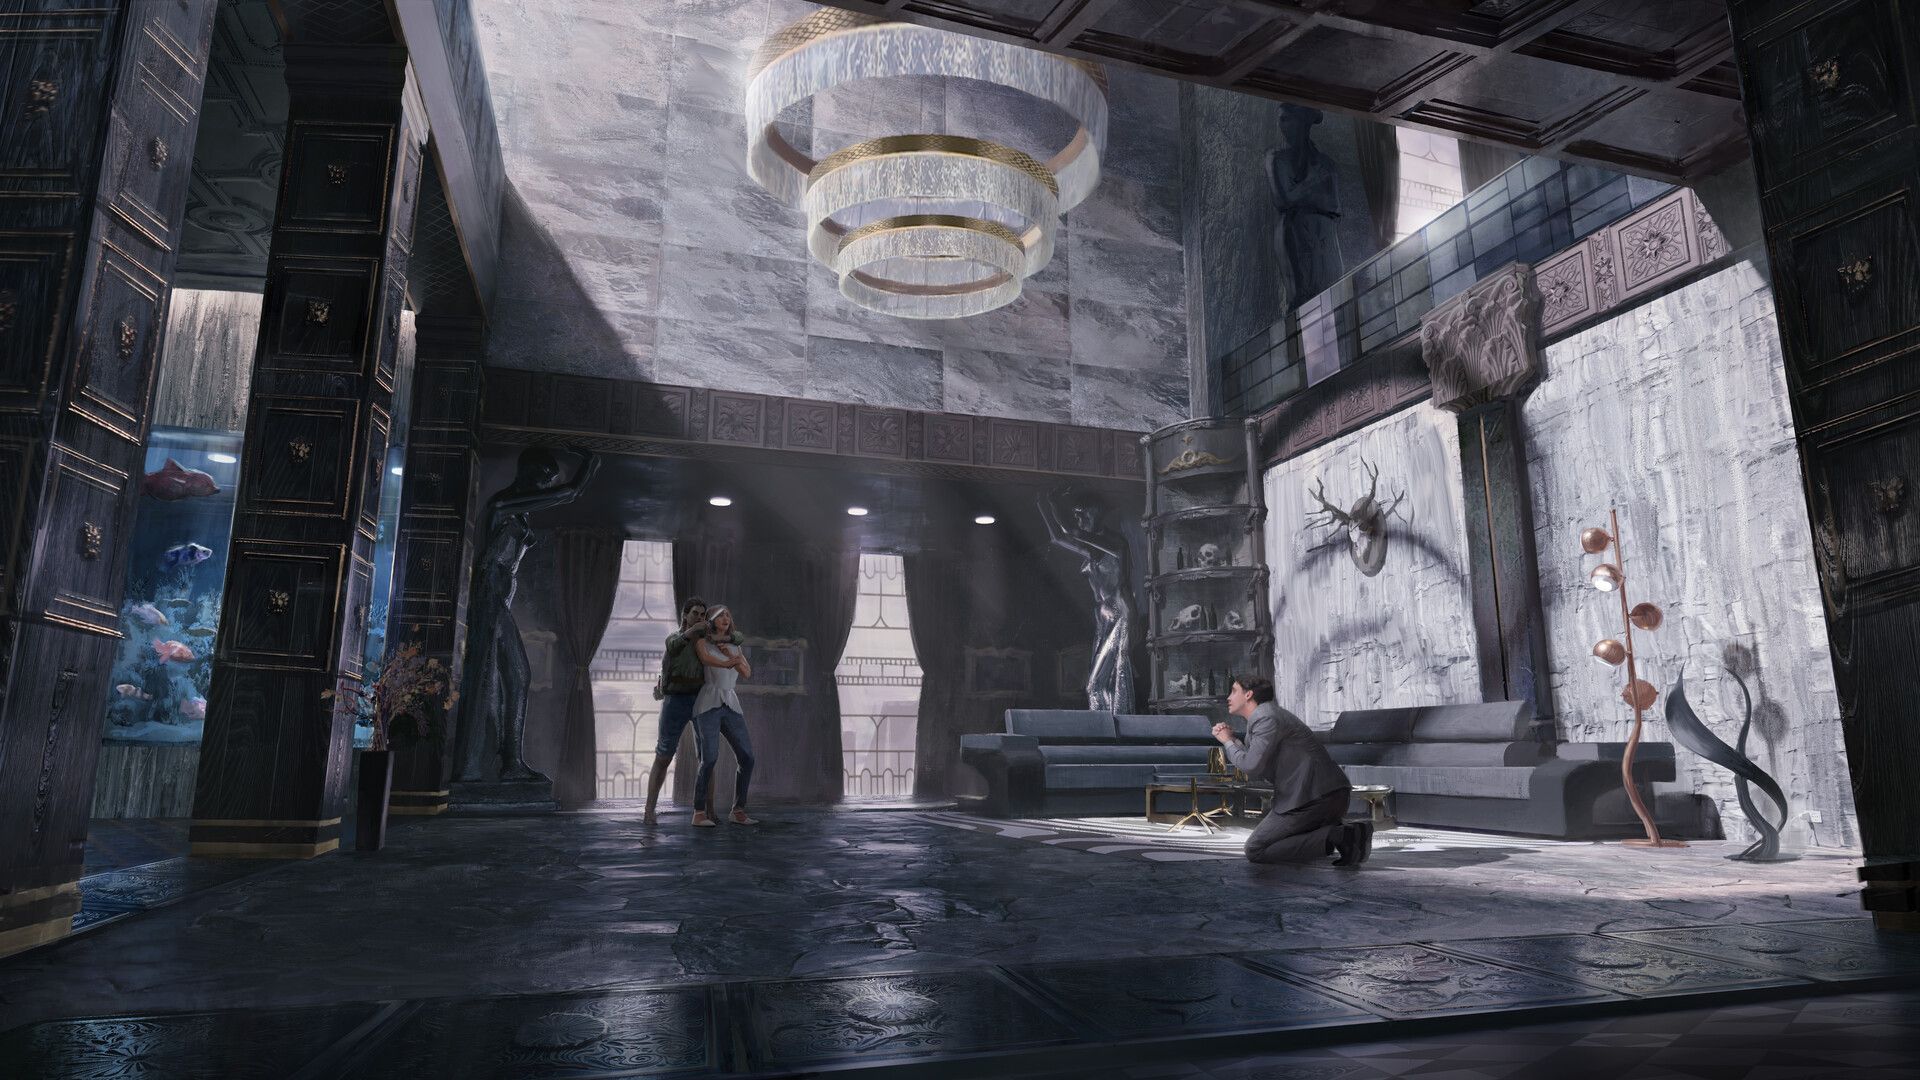
Adrian Threatening - Jonas
Jonas Nathanael: In this piece, the protagonist enters a massive concrete structure in the heart of the city and it turns out to be a mansion where a family has been living in luxury while others struggled to survive for years.
For this, I was conflicted about whether to make the action close-up or view it from further away. I ended up moving the camera further away because the interior reflects the mindset of the rich families in the dome. To make the architecture intimidating, I chose to make the interior very vertical with the camera not being able to see the ceiling, effectively creating an illusion. Additionally, I made all the materials very rocky & metallic giving off a more masculine vibe that makes it uncomfortable because of the lack of soft materials. I also added organic furniture to make it feel more like a museum.
I thought it could be ironic for the interior to contain an aquarium with exotic fish to create a contrast with the other factions.
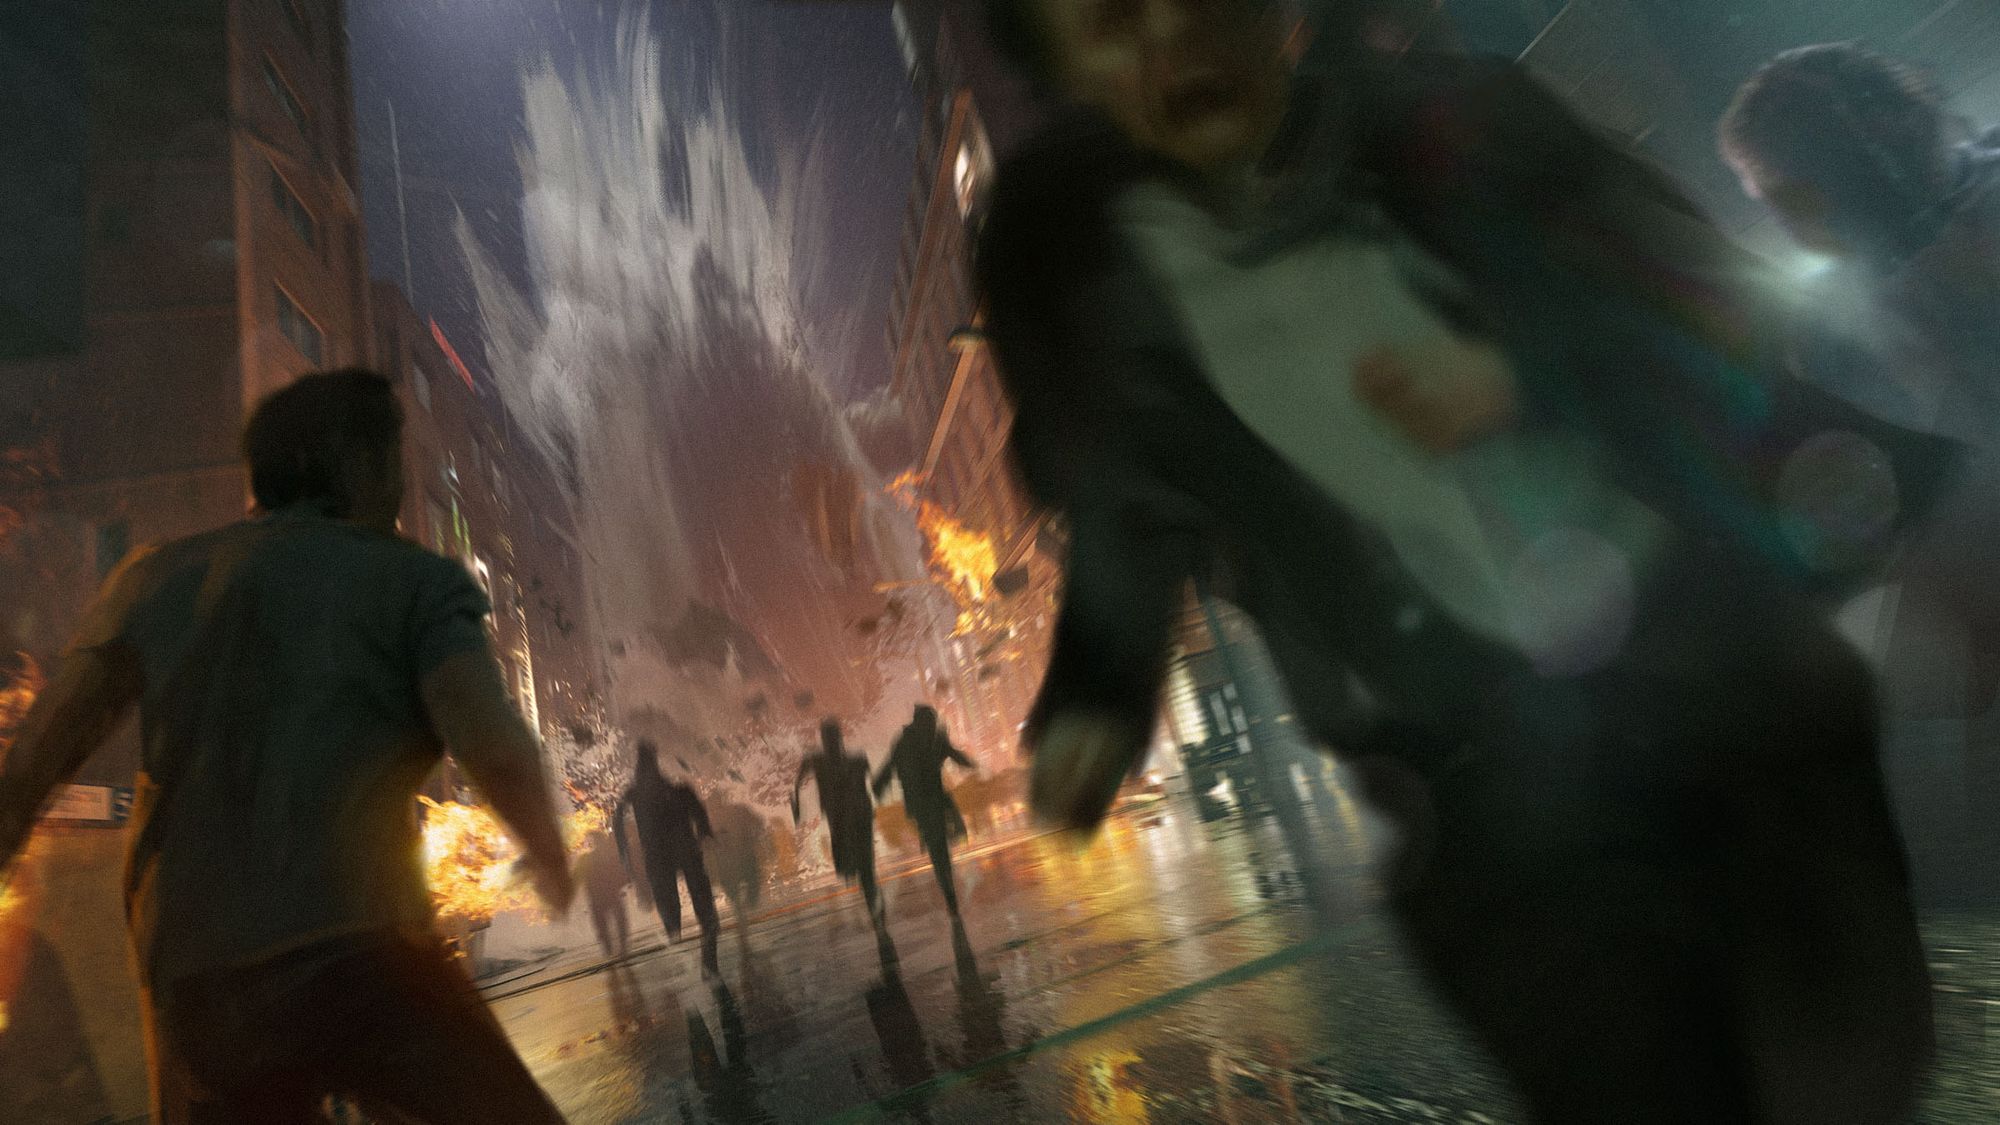
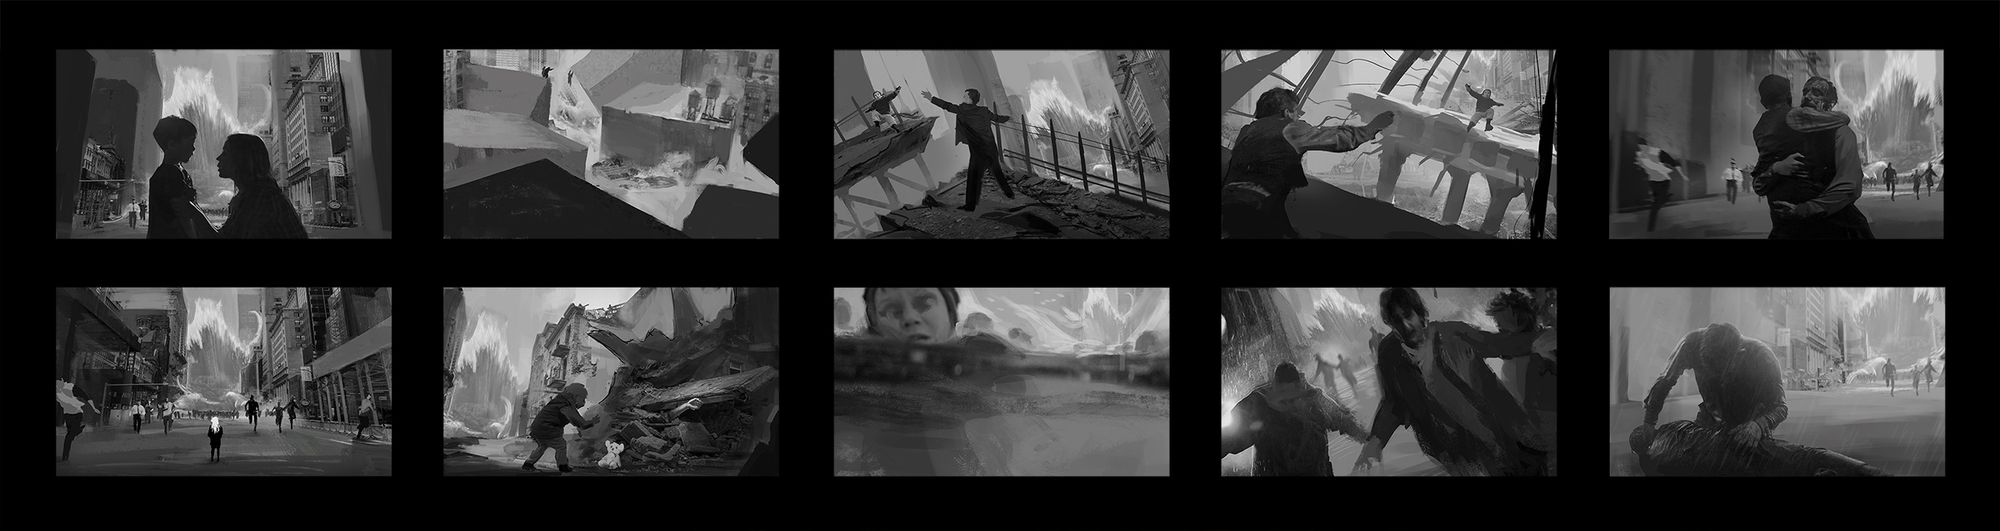
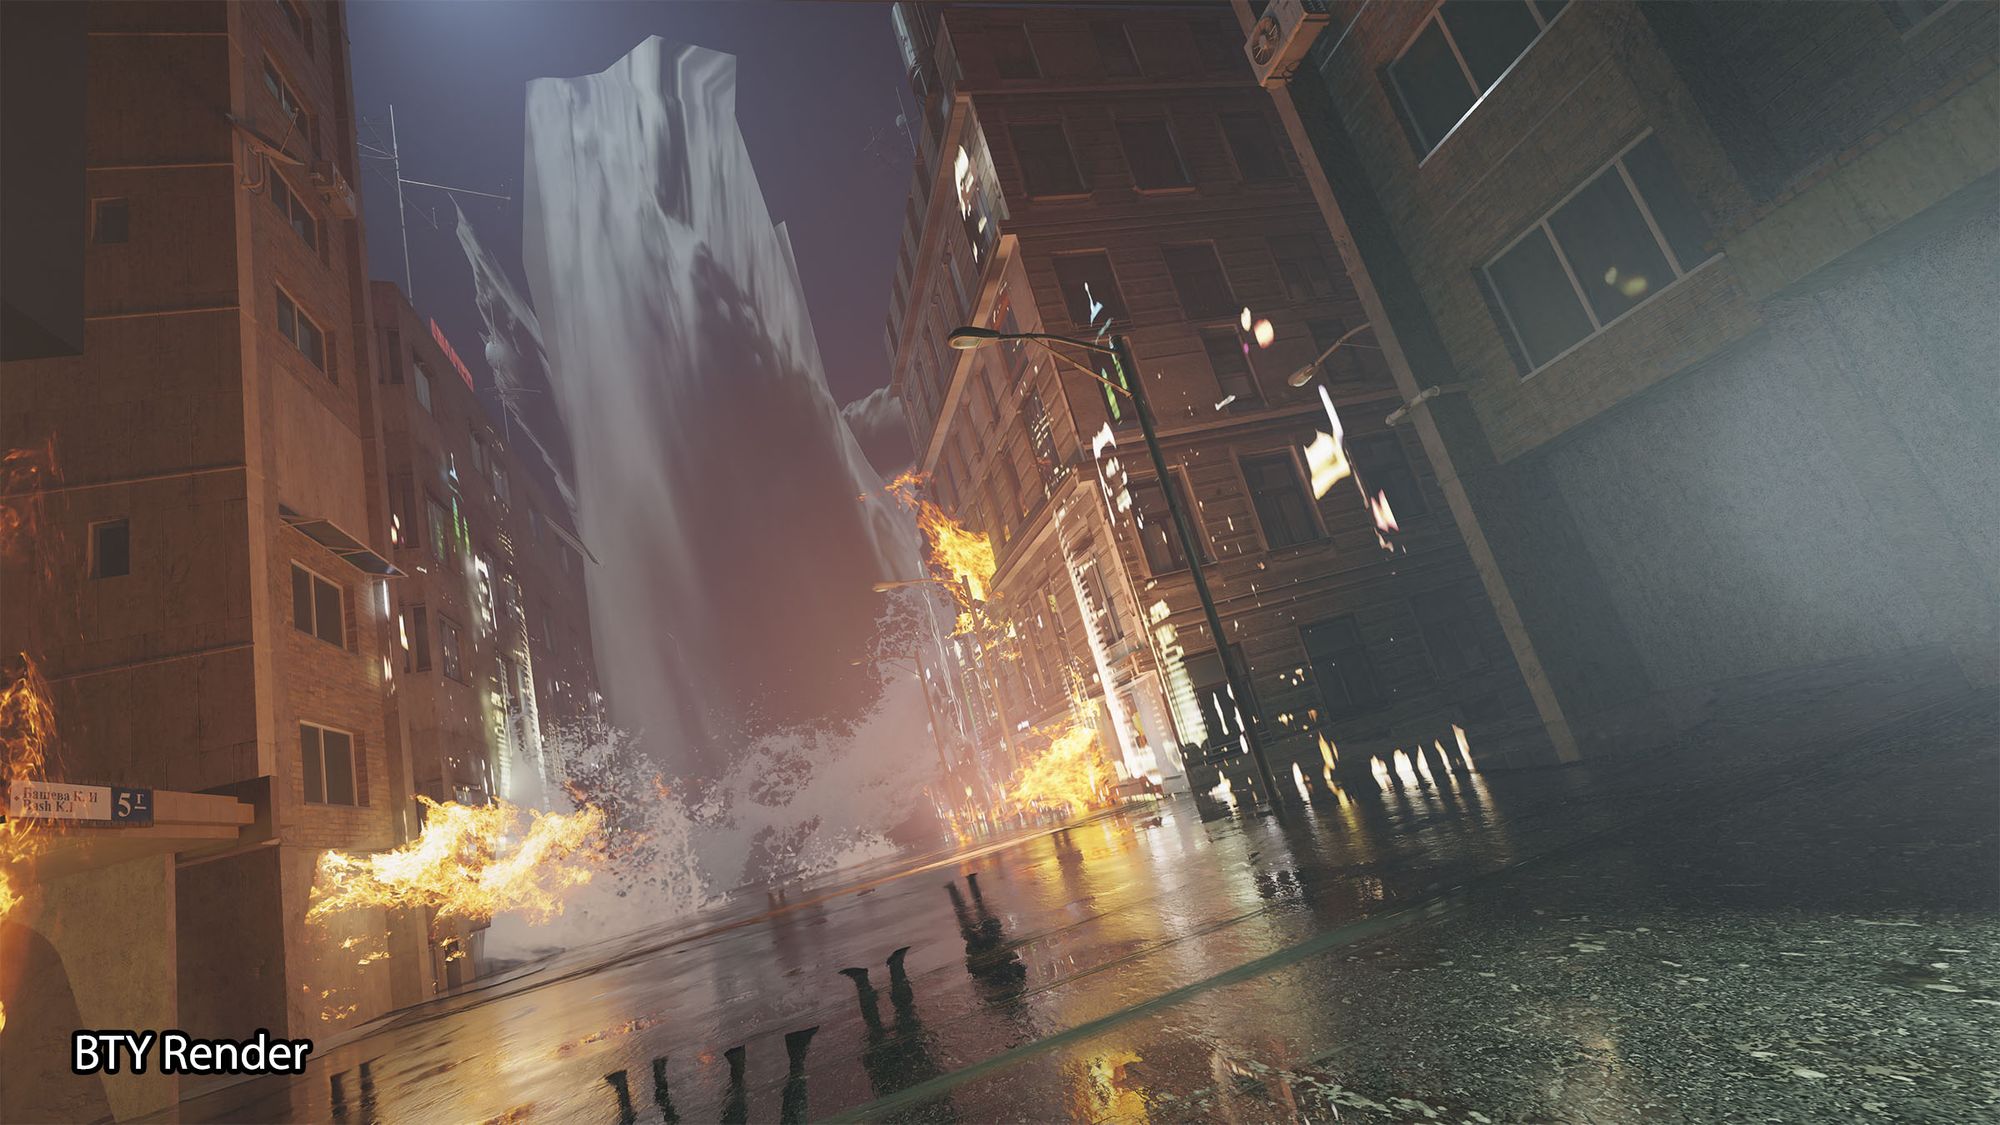
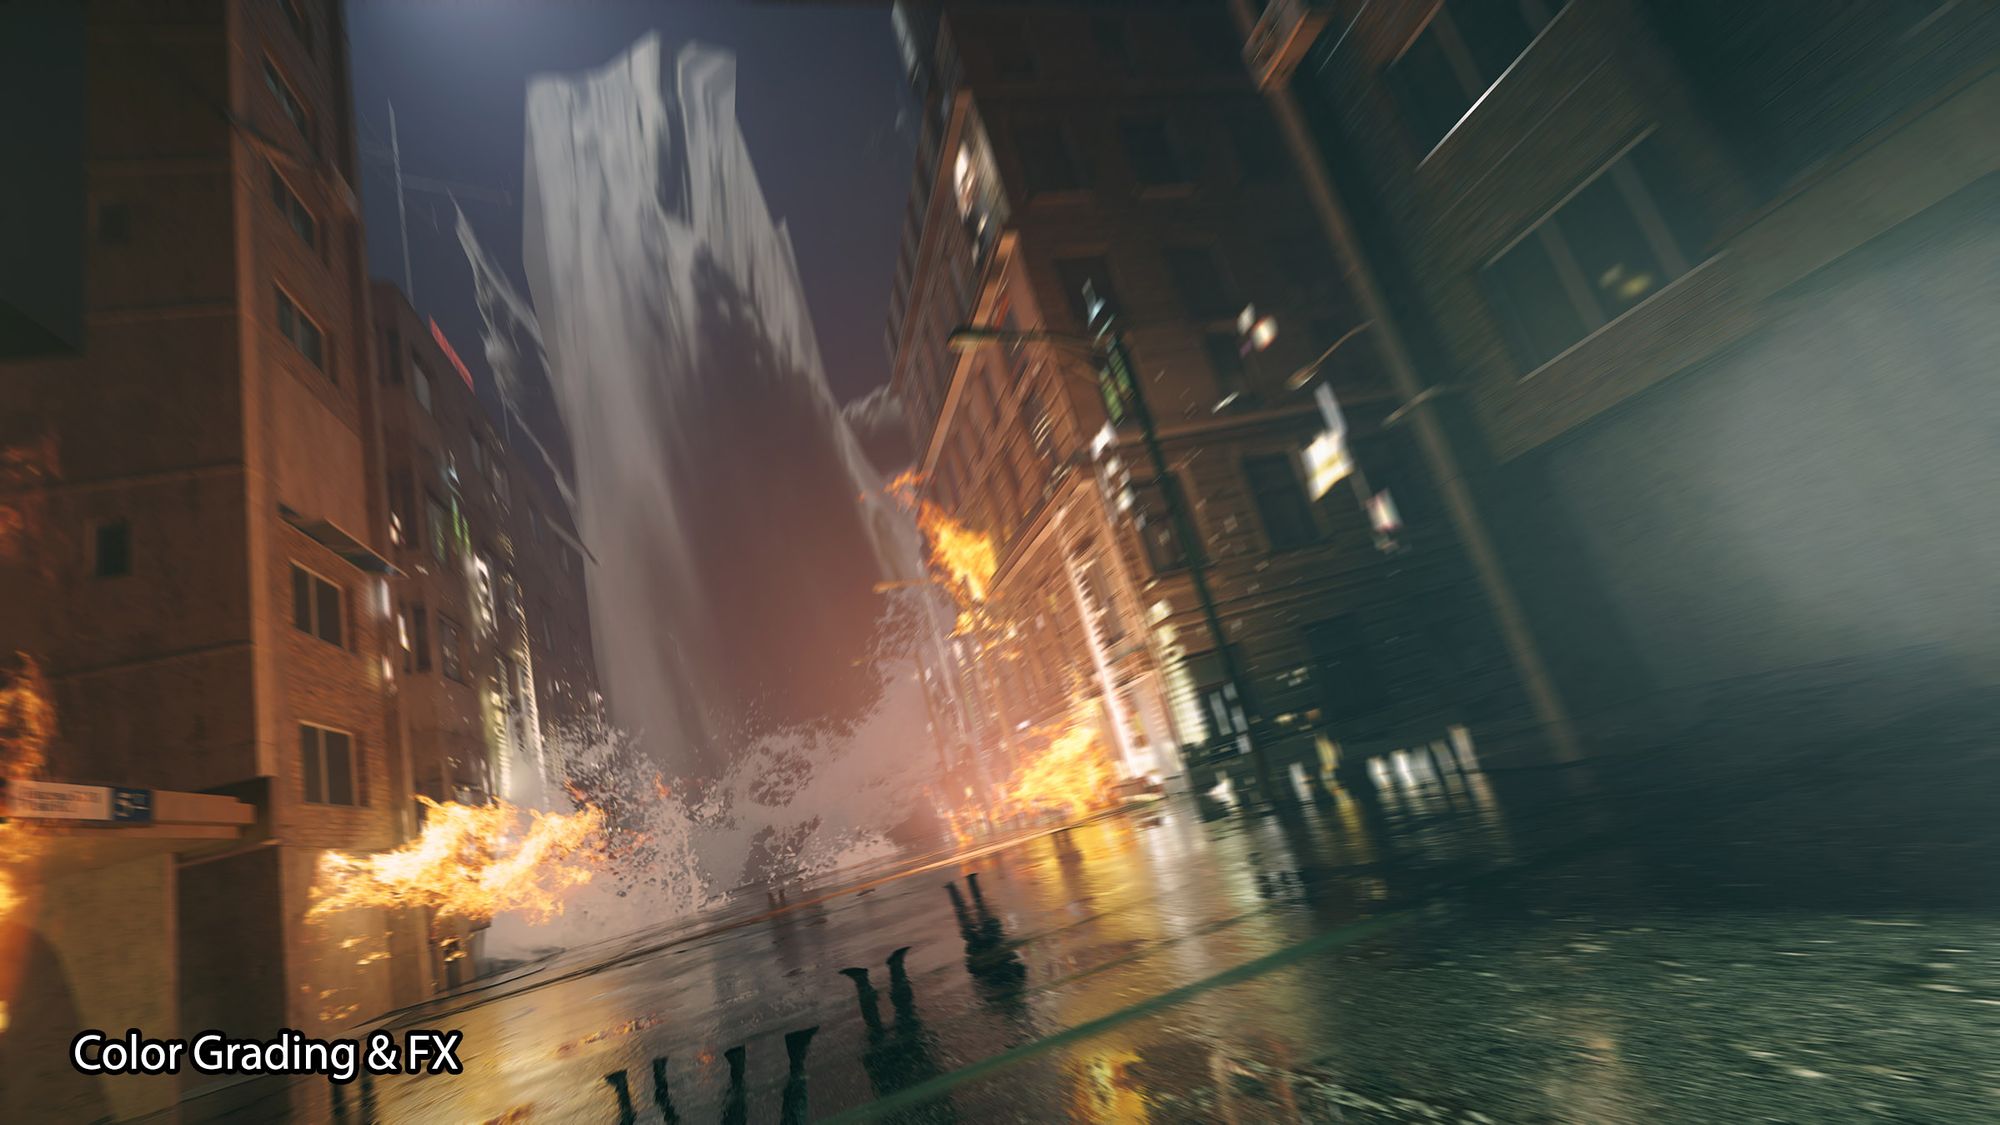
The Flood - JonasThe Flood Thumbnails - Jonas
Here is a snippet of the story where an extreme wave floods the city. The city is in a state of complete panic. Within a matter of seconds, all the buildings begin collapsing upon themselves and people are running through the streets, desperately trying to save themselves and their families.
Process & intention
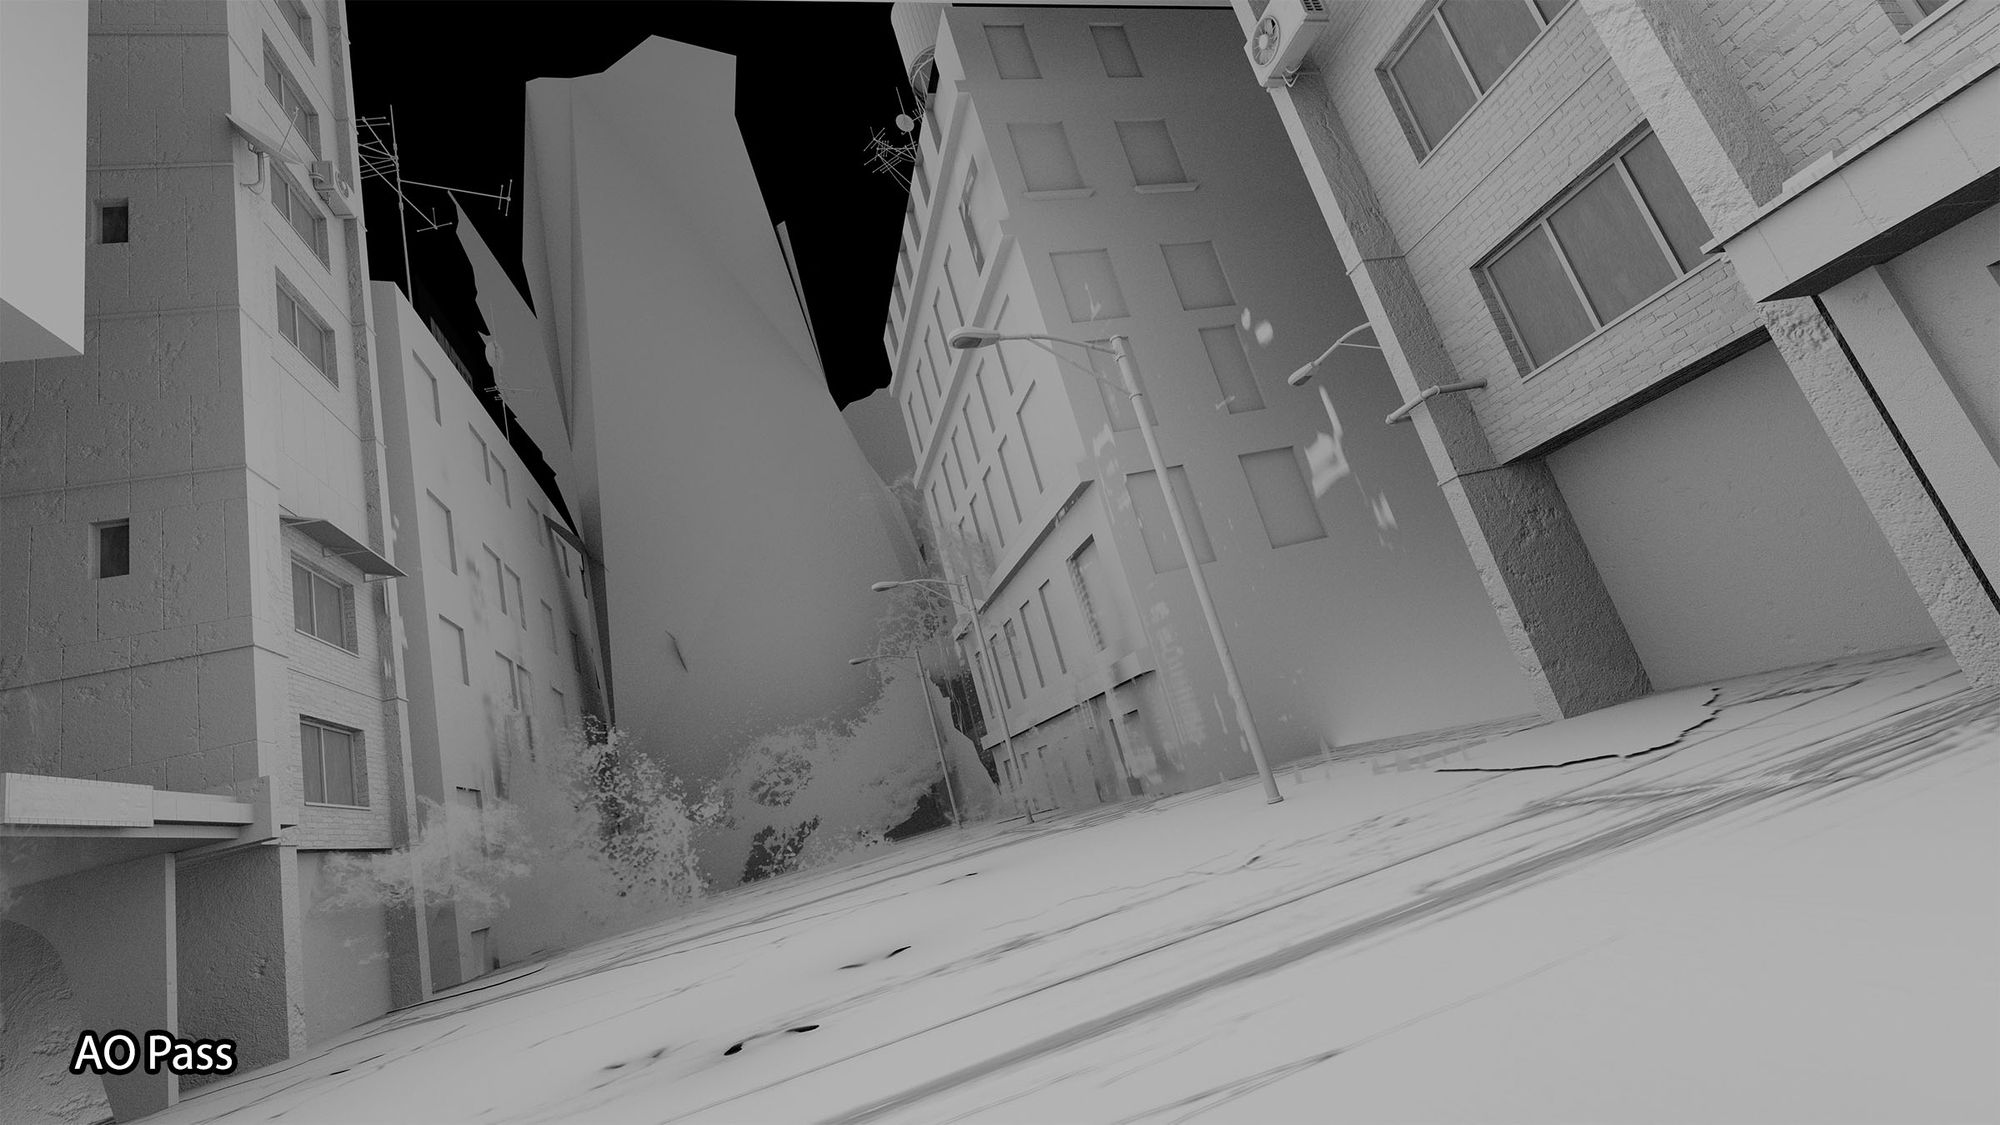
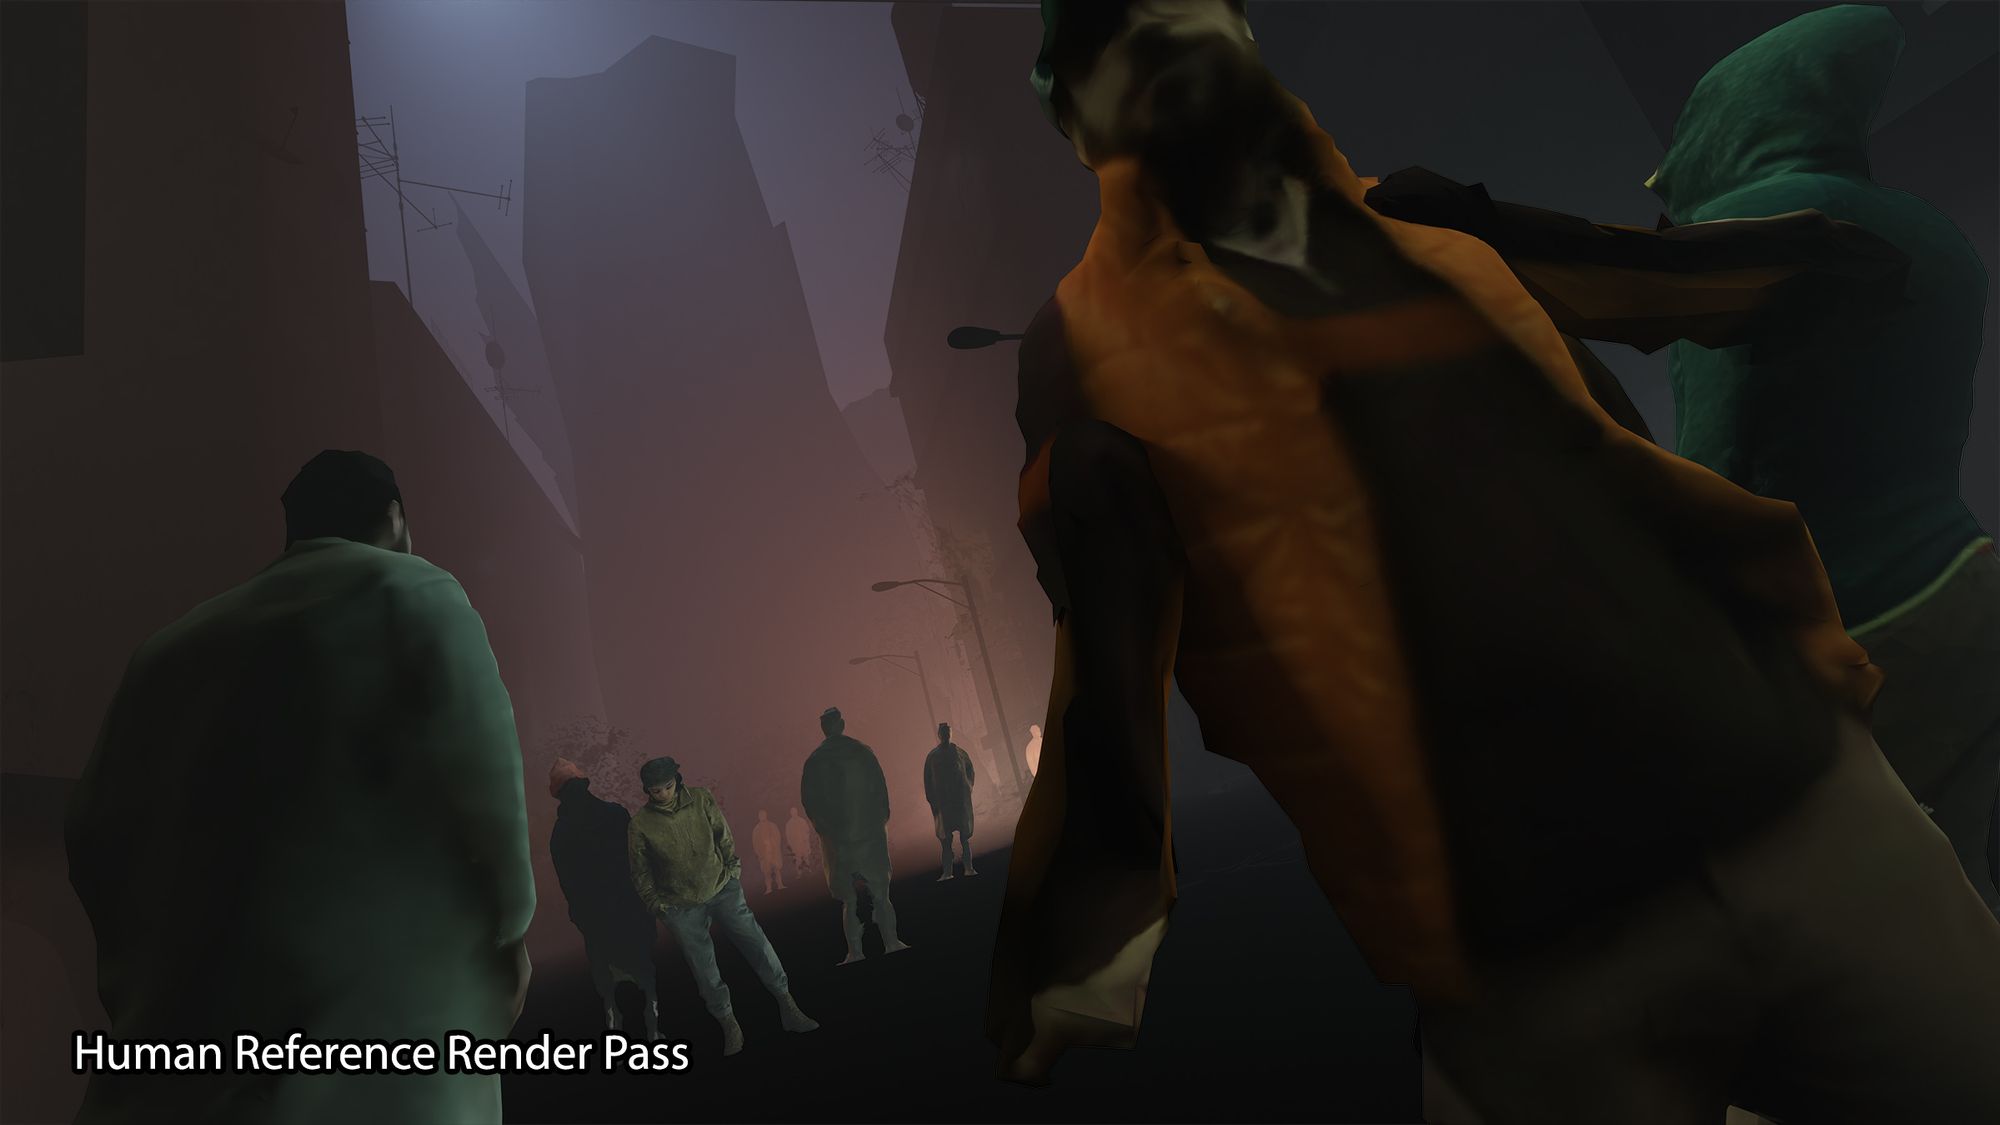
It’s important to have the intention of the image in mind when starting a new piece. I knew the 3d could be messy for this one because the motion blur and blurry characters would disguise most of it. With this in mind, I could focus my effort on other places like focusing on the effects of the big wave in Photoshop and explosions. I didn’t use many render passes or even spend that much time in 3D for this one. The majority of the time was spent on making the piece look very cinematic and adding the characters in 2D. You can see in the render passes underneath that I kept it limited and only used the characters as a reference when painting.
Tips for Aspiring Artists
Working on the project for a year I learned a lot of things, but I also got refreshed on things you should keep in mind when trying to do concept art. Here are some pointers that could help:
Know your fundamentals: This has probably been said a million times, and even though 3D is used for the majority of the concepts it’s still important to know the basics about composition, light/color theory and values, proportions, etc. It’s not only about doing the right things in your concepts but also about spending most of the time finding the things that can be improved - and knowing your fundamentals will help with that.
Experiment with Techniques and Workflows: Don't limit yourself to one approach. Explore different concept art workflows to find what works best for you and your specific concept. Be open to trying new methods and tools. It’s part of the process of exploring and experimenting, it is concepts after all.
Gather References: Collect reference images, videos, and other resources that inspire you and align with the vision of your concept. Reference materials can help you maintain consistency and realism in your designs. Use something from your own life or what you find interesting instead of what everyone else is doing.
Focus on Originality: While it's important to study the work of other artists for inspiration, try to develop your unique style and voice. Don't be afraid to think outside the box and create concepts that stand out from the crowd or what you find interesting from your own life.
Iterate and Refine: Concept art is an iterative process. Don't expect to create a perfect design on your first try. Embrace the cycle of ideation to gradually improve your concepts. As mentioned in one of the previous points, you’ll be spending most time finding ways to improve a design rather than doing the best design in the first go.
Seek Feedback: Share your work with peers, mentors, or online communities to receive constructive criticism and feedback. Fresh perspectives can help you identify blind spots and areas for improvement.
Stay Updated: Keep updated on the latest trends, techniques, and technologies in the industry. Attend workshops, conferences, and online tutorials to continue honing your skills and just have fun!
Stay Passionate: Above all, maintain your passion and enthusiasm for creating art. Enjoy the process of bringing your imagination to life, and let your love for the craft drive your artistic journey.
Conclusion
In the end, we learned a lot in a single year where our sole focus was specialising in concept art. Simultaneously, we became storytellers which in turn made the designs and keyframes more engaging. We hope that our labor of love is evident in the following pieces. We have poured countless hours, dedication, and passion into its creation.
If this project sounds intriguing to you, please take a look at the final PDF where you will learn more about the world.
We hope that you, the reader, will appreciate and enjoy the fruits of our labor, as we invite you to delve into the captivating world we have meticulously crafted. If you haven't yet, read Part 1 of the article here.