Working as Look Development Artist and Compositor on a Student Short Film
Tsaone Sehume, an aspiring VFX Artist and Compositor shares insights gained from student group projects, where behind-the-scenes excitement matches the final product.
Tsaone Sehume, an aspiring VFX Artist and Compositor shares insights gained from student group projects, where behind-the-scenes excitement matches the final product.

As an aspiring VFX Artist, Lighting and Surfacing Artist, and Compositor, Tsaone Sehume has always been drawn to the magic of movie-making. From early days obsessing over behind-the-scenes footage of films like Shrek 3 to dreaming of contributing to projects like The Super Mario Movie 2, Tsaone's passion for this field has only grown stronger. Now, nearing the end of this studies, Tsaone is eager to share his insights from working on student group projects where the behind-the-scenes magic is just as exciting as the final product.
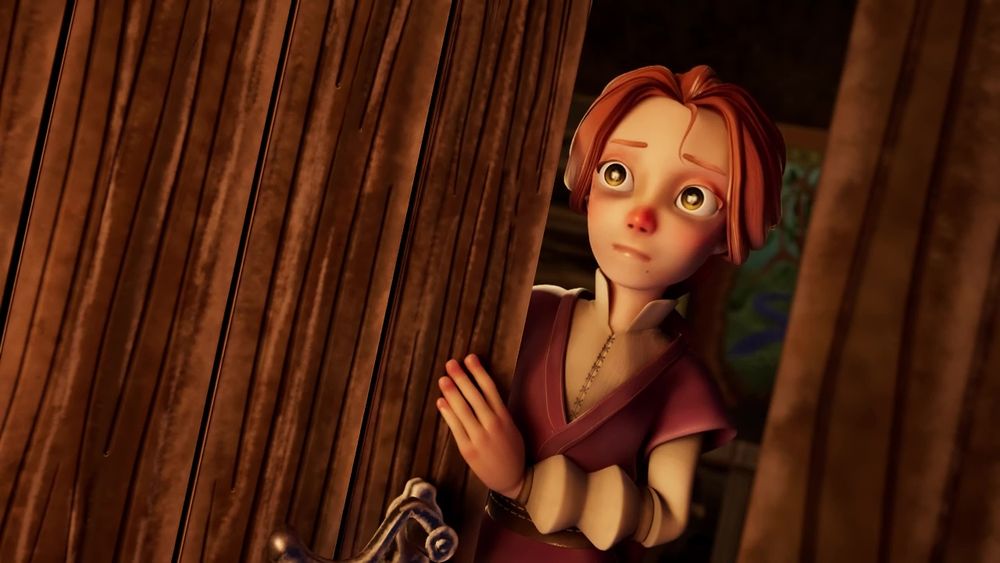
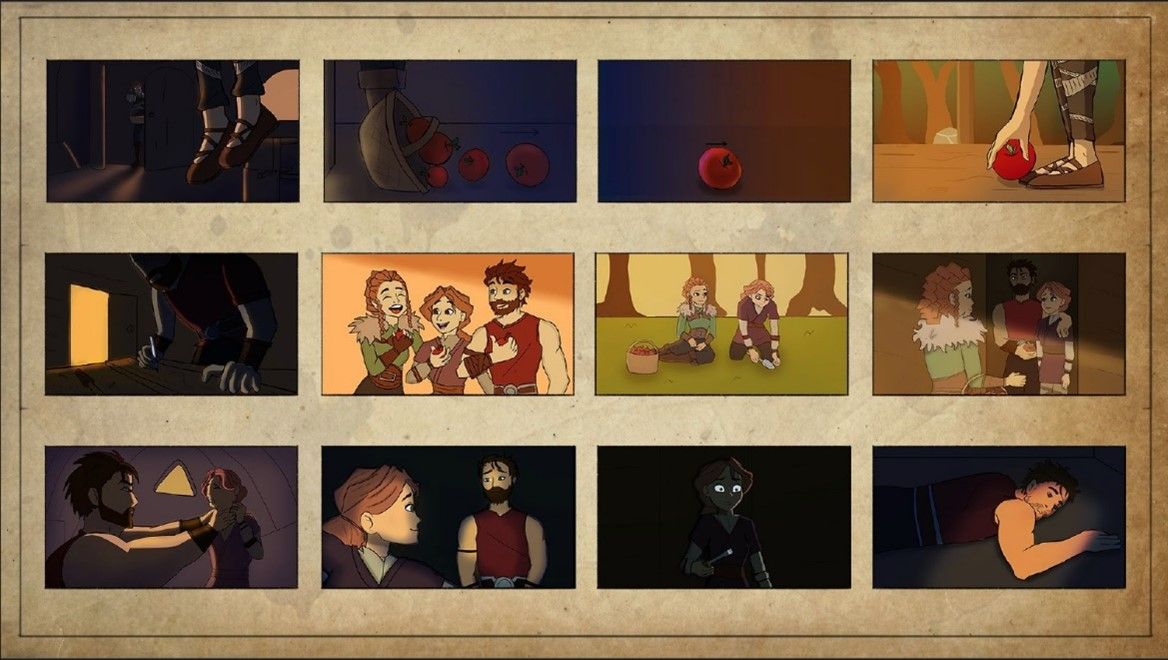
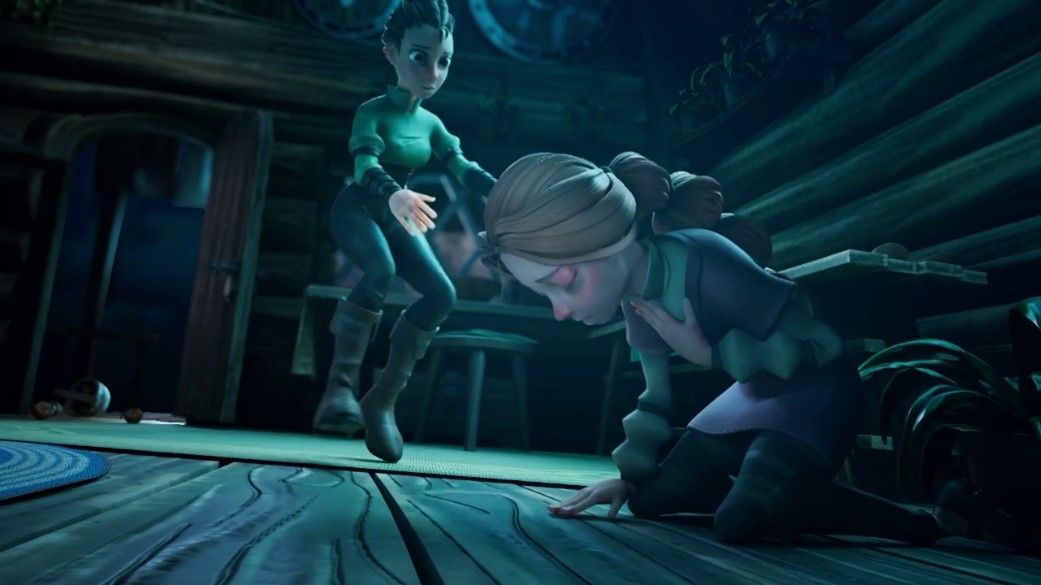
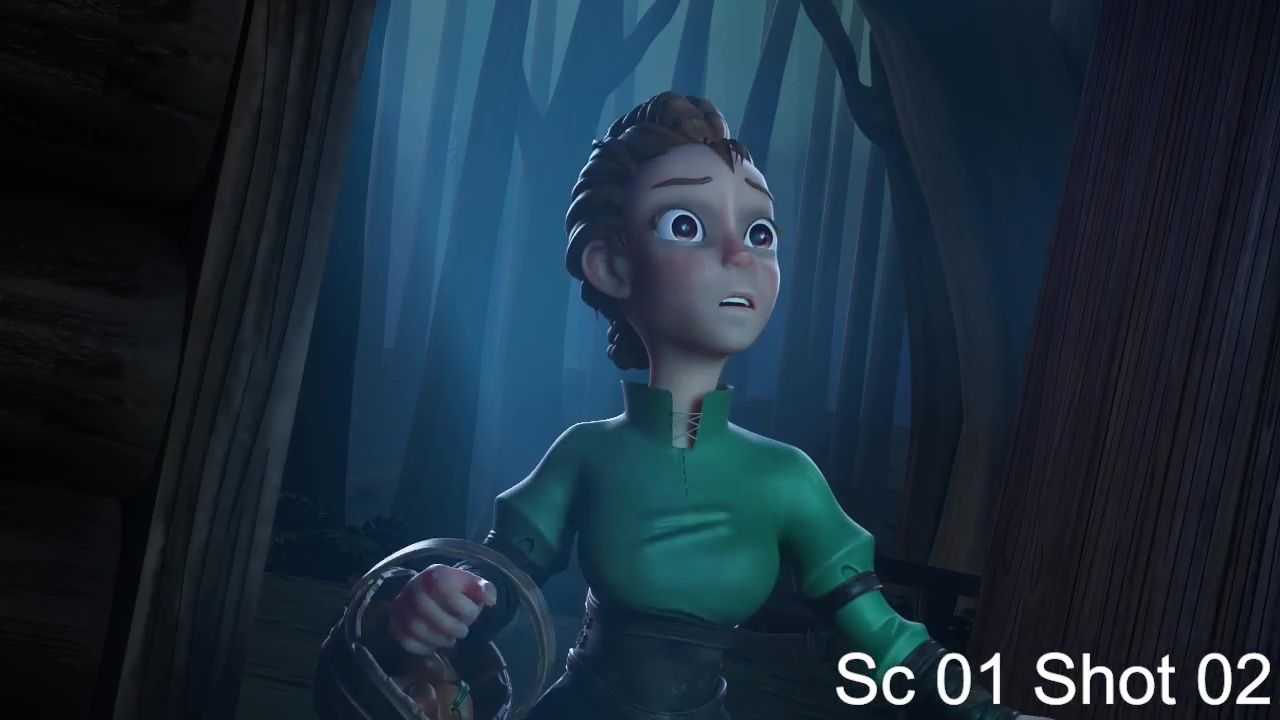
During my final year at The Animation School in South Africa, I got the assignment to be in a group to make a short film. Our film is called Behind Closed Doors. I was a Look Development artist and a Compositor in the team. It took us around 8 months to finish. It was a major assignment for our course. It was a challenge at first but I’m proud and happy of what I was able to achieve with a team. The short film was sent to festivals so won’t be seen to the public till the end of this year. But I can breakdown some of the shots I worked on to achieve the lighting and compositing.
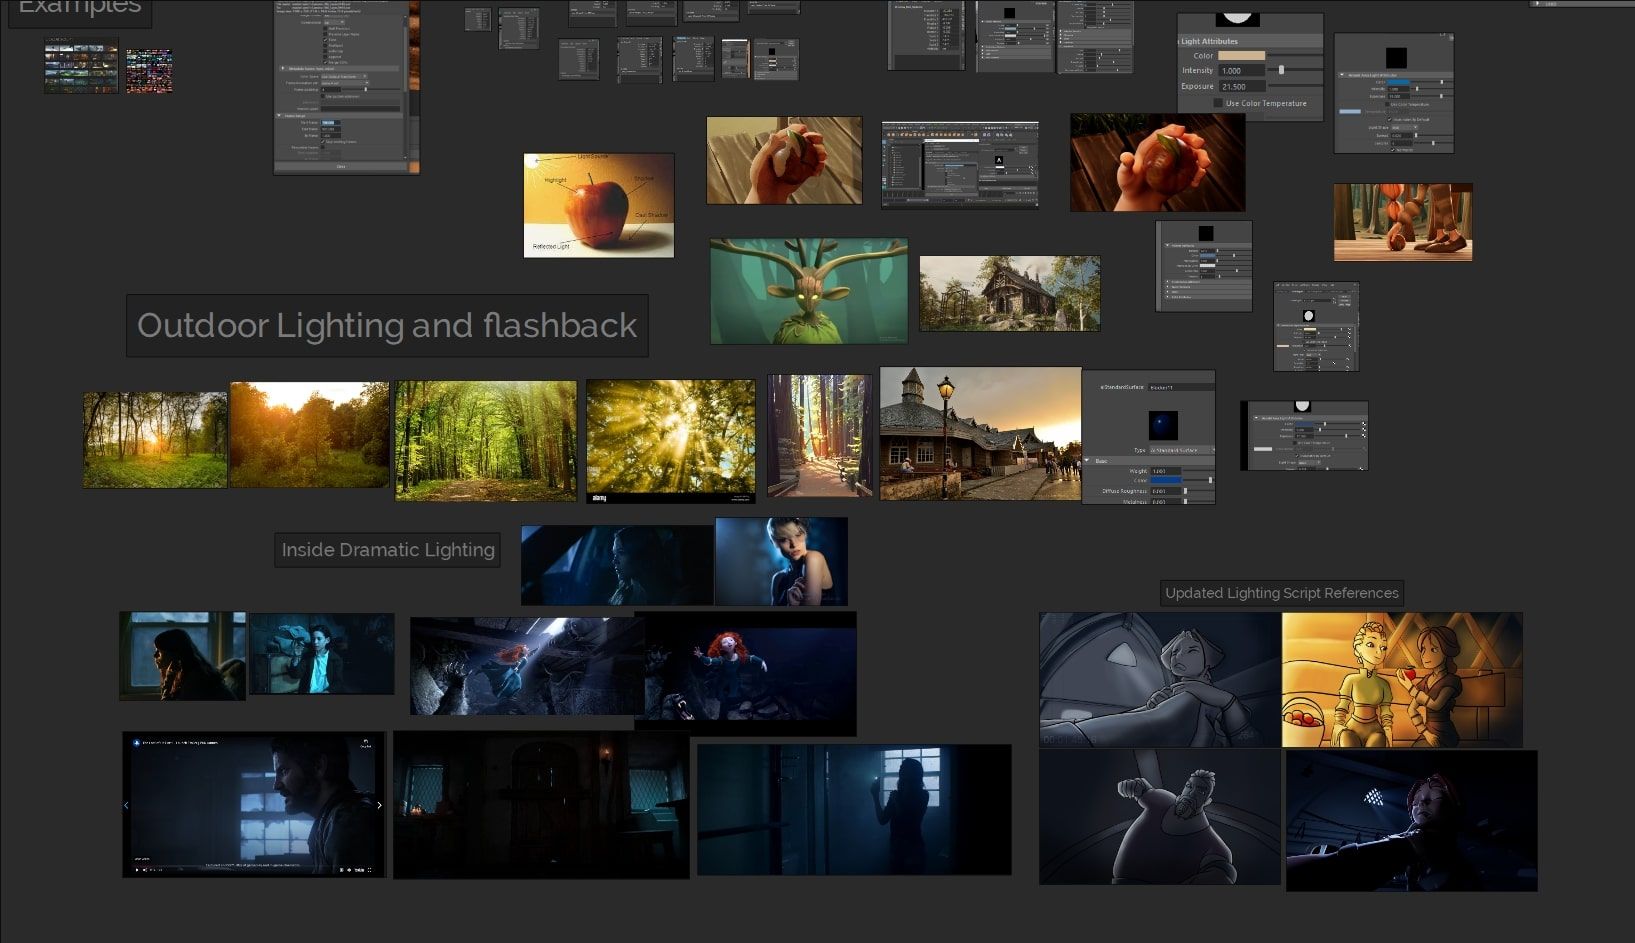
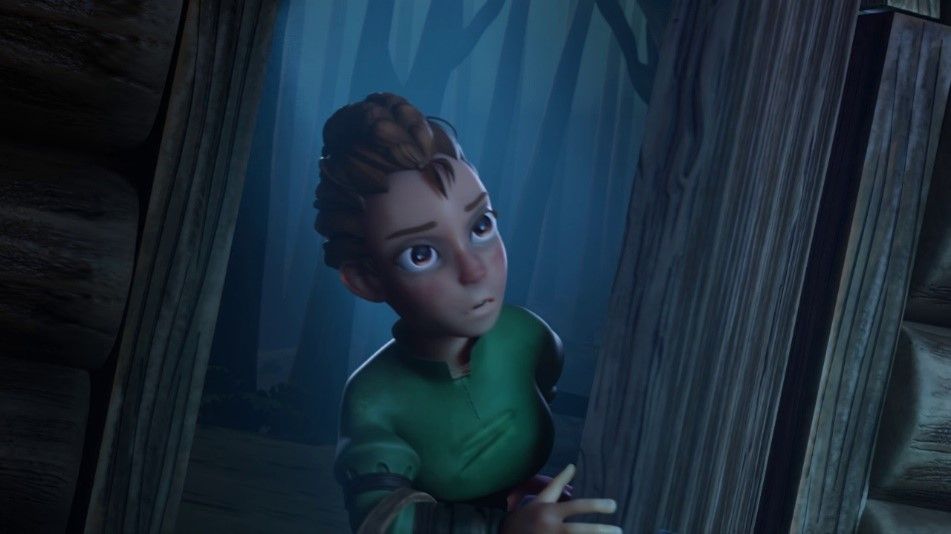
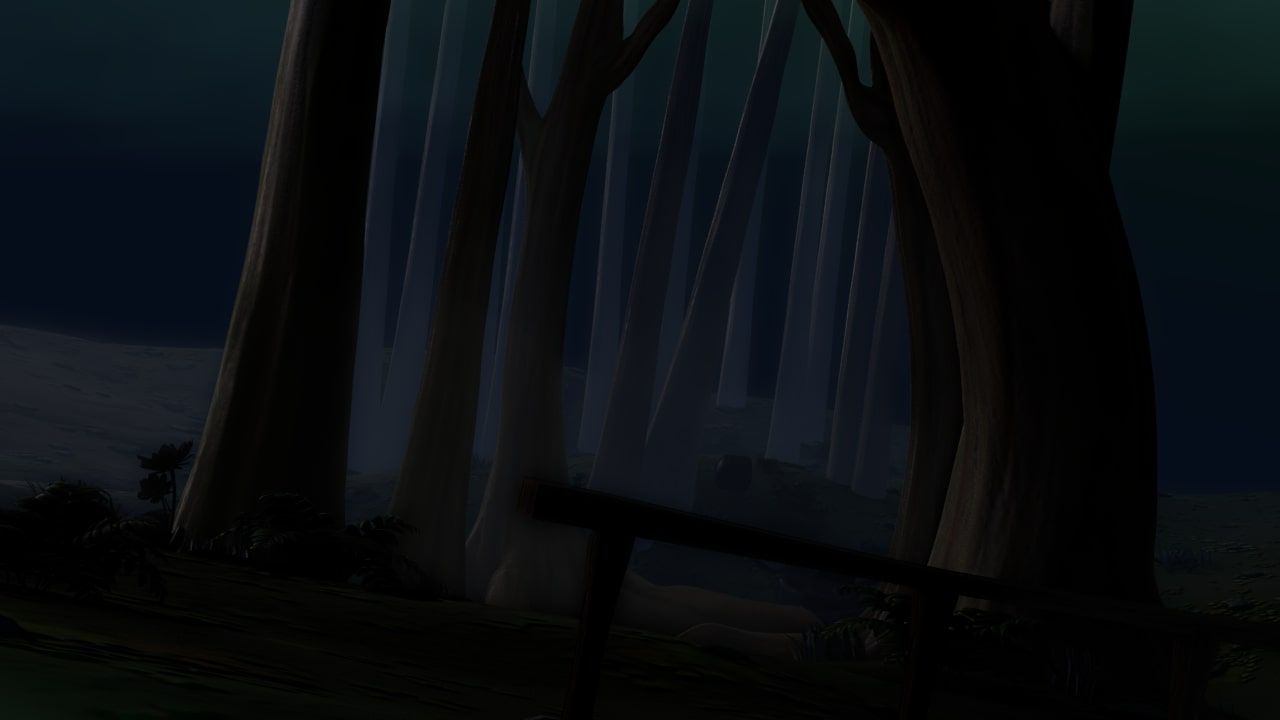
My group and I went through so many iterations of lighting scripts to achieve our look and colours right with the help from our lecturers. You can see how from our very first version there are slight changes from our final version that myself and my Look Dev teammate, Bonga Qika used. All our references were done in PureRef. Taking into account our story being about domestic abuse, we wanted to have a visual contrast. In the image below we wanted Act 1 and Act 3 to have a darker tone inside the cabin where the main plot of the story would take place. Meanwhile Act 2 we considered to be a flashback, therefore we decided to have brighter colours of yellow and orange to display a peaceful setting. This is where the forest would be seen the most so we wanted to have vibrant colours for this part of our story.
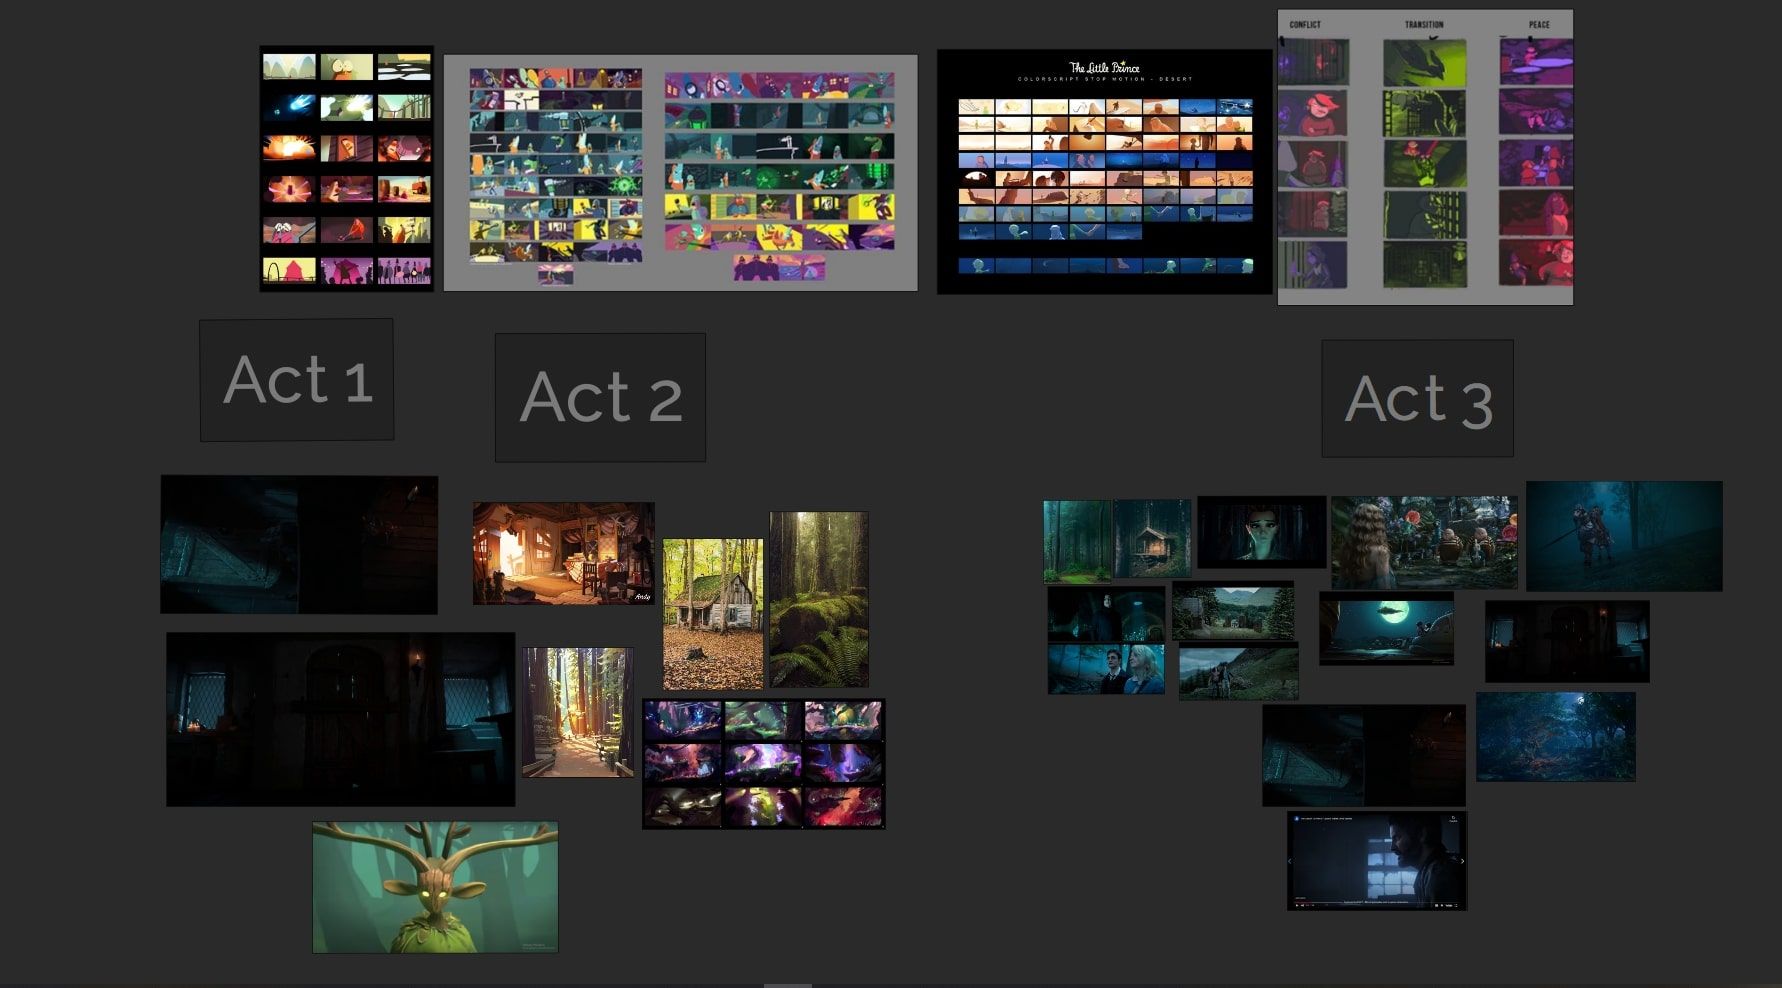
Looking back on this I wish we did have a clearer vision at the time, but my lecturer also taught us to just follow our new references as best as possible no matter what. The first version our lighting script was a team effort which was created by myself, Lenore Banton, Mia Brettell, Anika Immelman, Kgothatso Chapi, Bonga Qika and Megan Redelinghuys. Our first lighting script was done in Photoshop and was shared amongst the group. This is where I also learnt the importance of having a good lighting script as a Lighting artist.
Moving forward with the new references for our lighting script, I had a better idea how to plan my lighting for each shot depending on the act in the story.
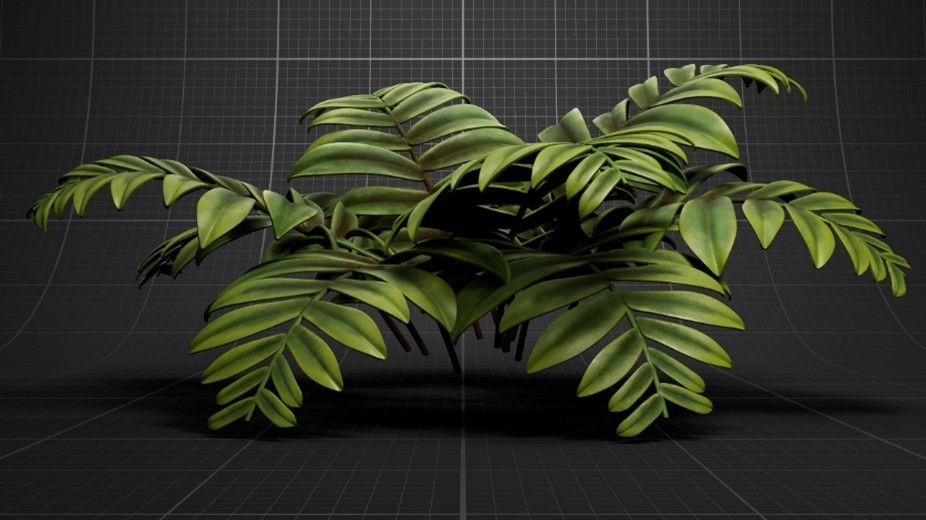
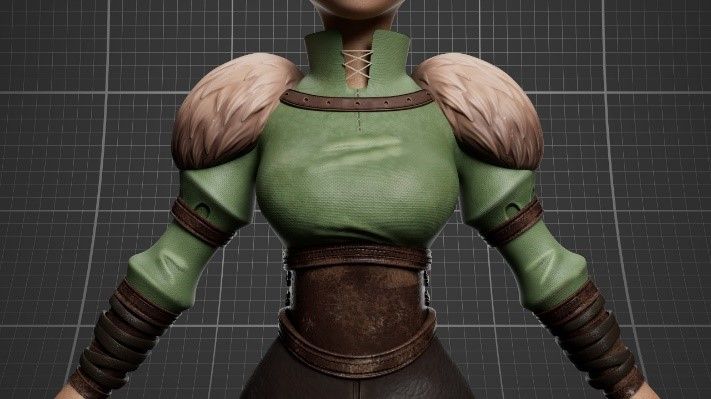
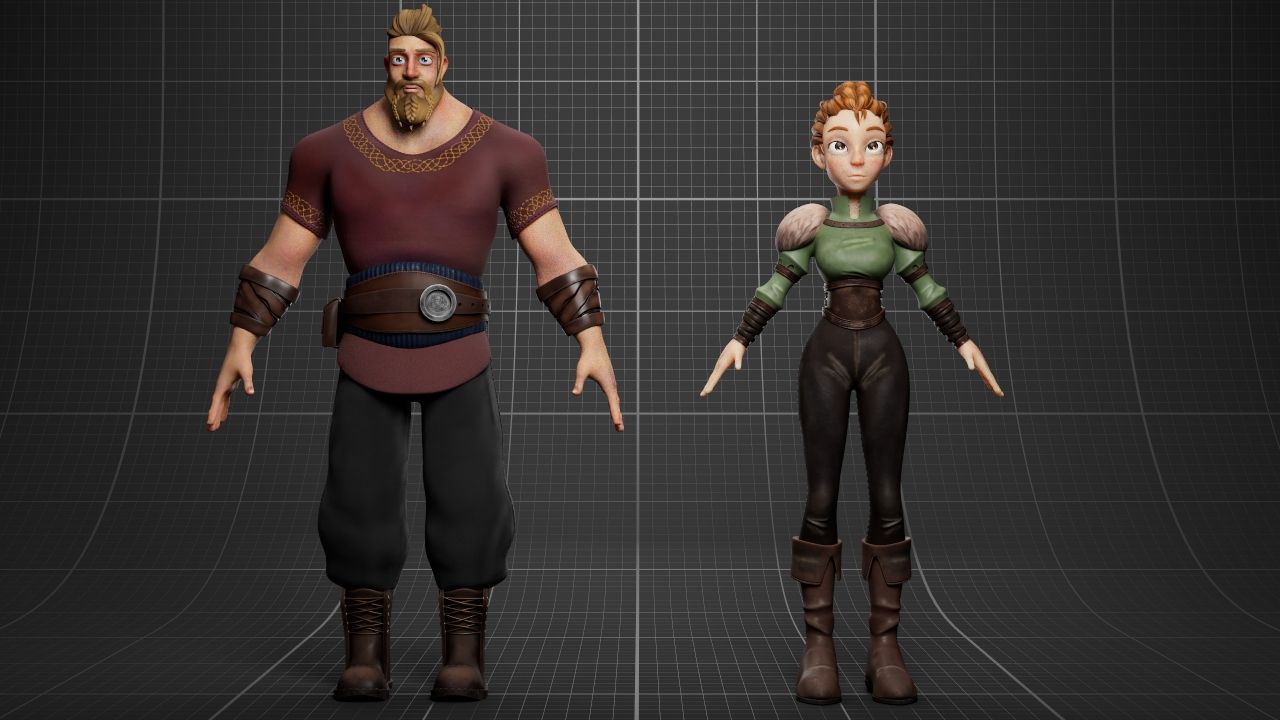
My role as a Look Development artist consisted of creating shaders in Maya for the assets, props, and characters as well as lighting and rendering shots for our film. I would receive the final model and textures from the prop and environment texture artists. The props and characters were textured in Substance 3D Painter so I would ask for all textures to be exported at specific resolutions so that I could shade the models and tweak any adjustments in Maya. An example I have below would be creating shaders for a variety of props to ensure the colours, specular reflections and displacement maps were reacting well in a 3-point lighting setup. Myself and my Look Dev teammate Bonga, each had a list of props and characters that we surfaced individually.
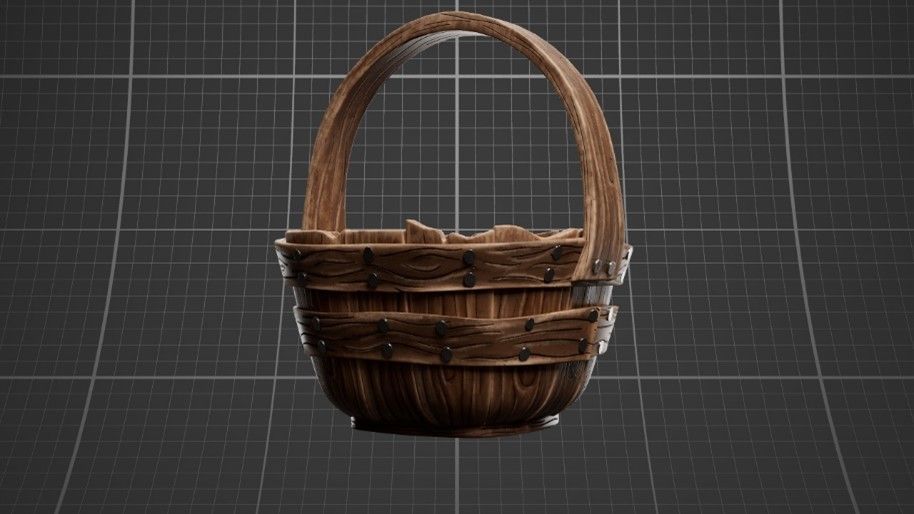
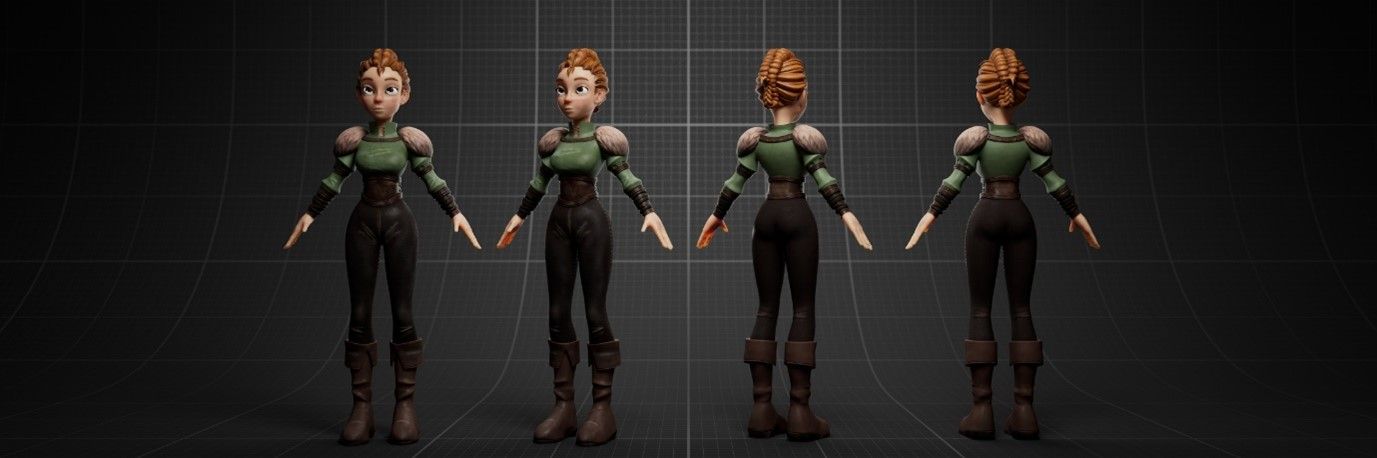
When it came to surfacing the characters, I need to ensure the skin was done well. I had to control the level of subsurface scattering in the skin and how it would react depending on the intensity of the light. I also needed to ensure that all the characters looked cohesive when placed next to each other. So Bonga and I would place the characters together to ensure the skin looked great and nothing was too shiny unless it was intentionally done. I also made sure the detail in the hair and clothing was visible and balanced the specular roughness on the clothing.
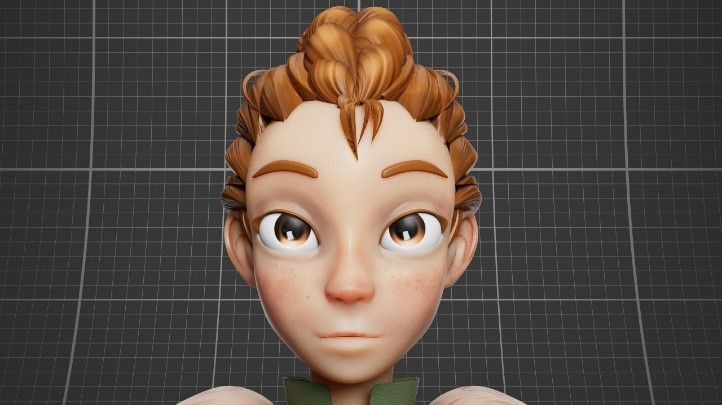
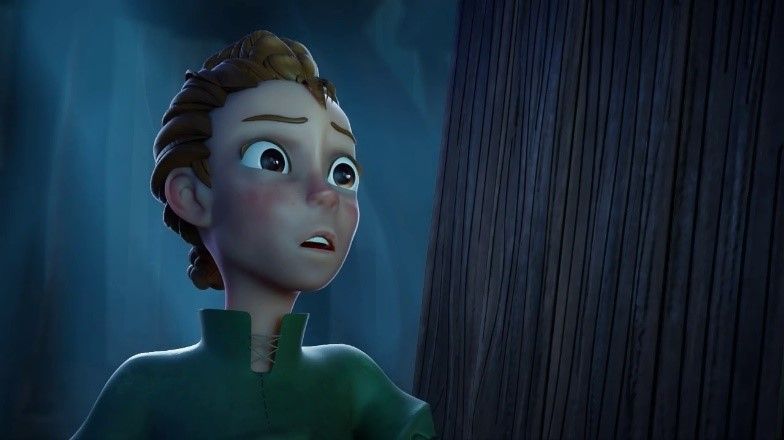
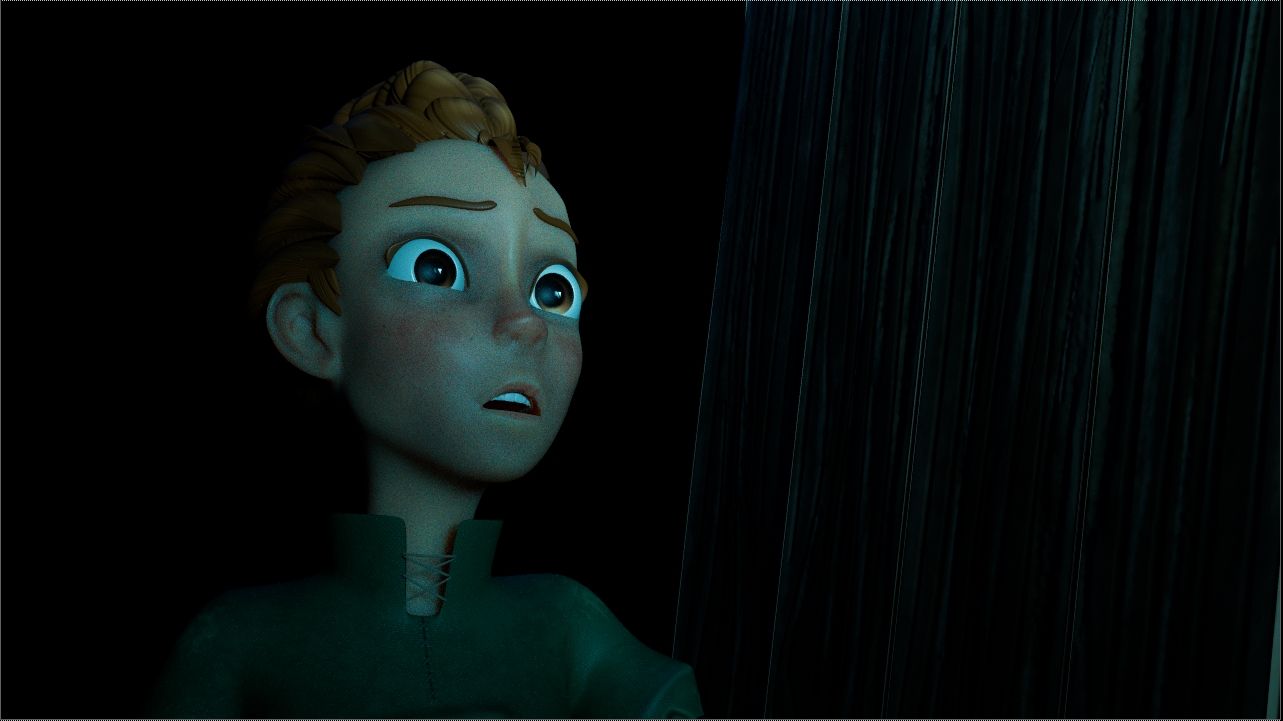
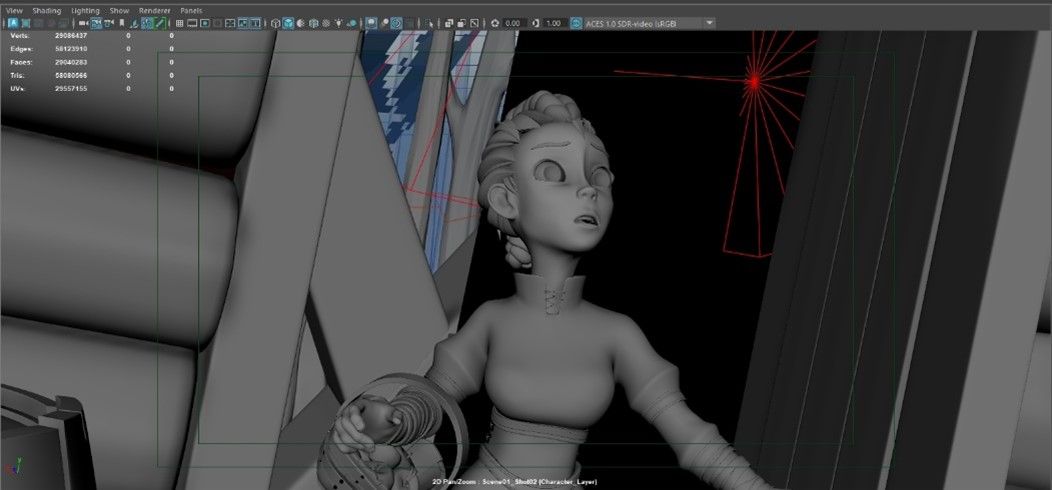
We used Maya for modelling, animation, surfacing and lighting for our short film and used the Arnold render engine. We were taught Maya since first year so this wasn’t new and is meant to improve our skills overall. Before I would light my shots, I always look at my PureRef to see the references I would be following for the shot. I would always start with an HDRI to get the overall feel for the shot. I would download HDRIs from Poly Haven which has many free HDRIs to use. After getting my HDRI into position, I would figure out where I want my Key Light to be. This would be important to have the character lit as well as showing the brightest light in most cases. Next, I would add some Fill Lights to brighten the dark parts of the character and the environment to ensure nothing is “pitch black”. Then, I would add my Rim Lights for any highlights I wanted to have and where it would come from. A trick that Bonga taught me was to have a dedicated light to light the eyes because we knew lighting the eyes was the most important part of the shot. We used light linking in Maya to link the light to the eyeballs and corneas to get the “eye ding”/eye highlight. This was only done for certain shots where it was dark and where I could not see the eyes well. In normal circumstances, I lit shots well enough to achieve the “eye ding” without having a dedicated light.
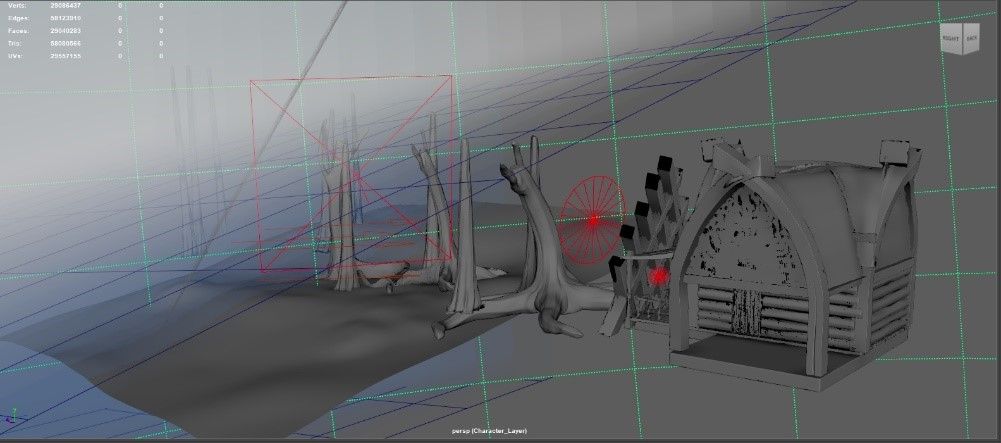
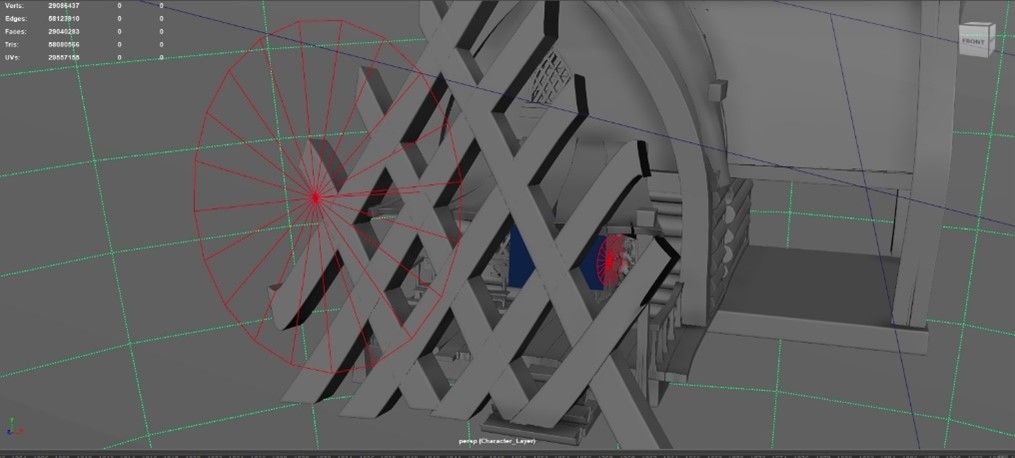
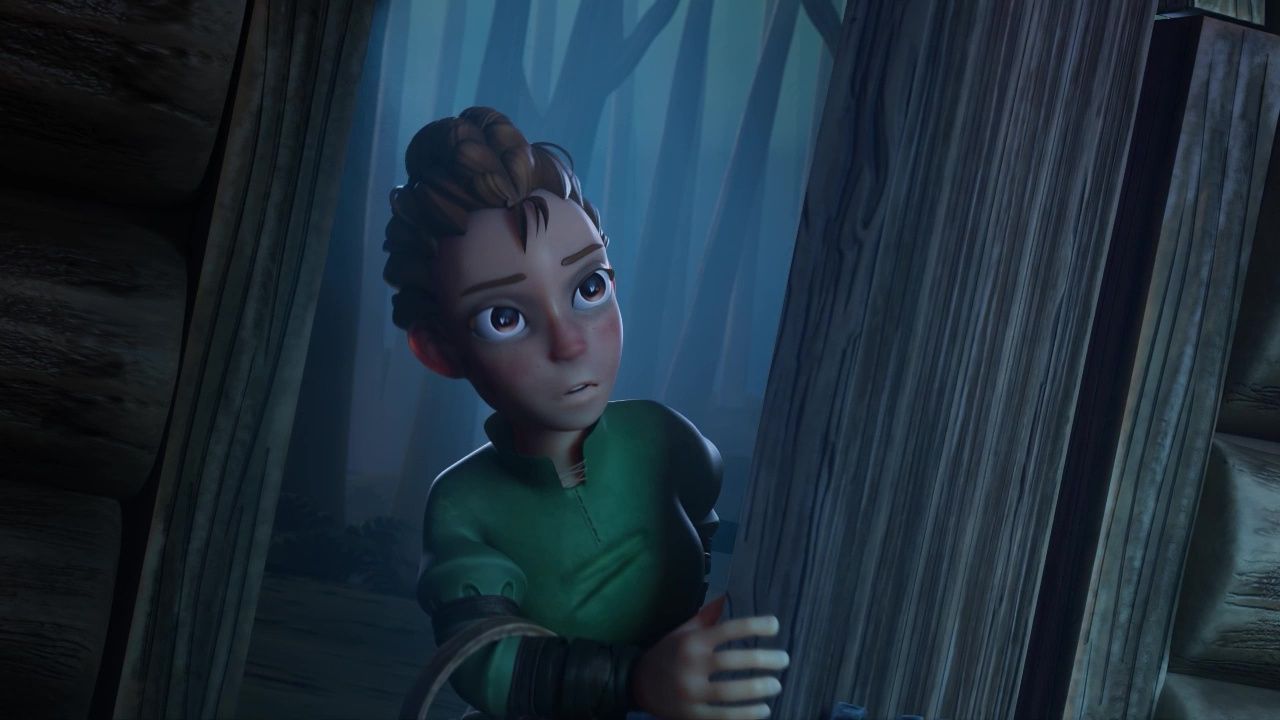
For some shots I would need to work on the environment layout. So, because we had a forest setting for our short film, I would place the trees and foliage for each shot. To avoid our scenes from getting heavy, I used the aiStandIn in Maya for the forest background. This would allow the scenes to be lighter and the standins would have the position of the forest inside a bounding box in the viewport. The trees and plants would then only show up in the render view.
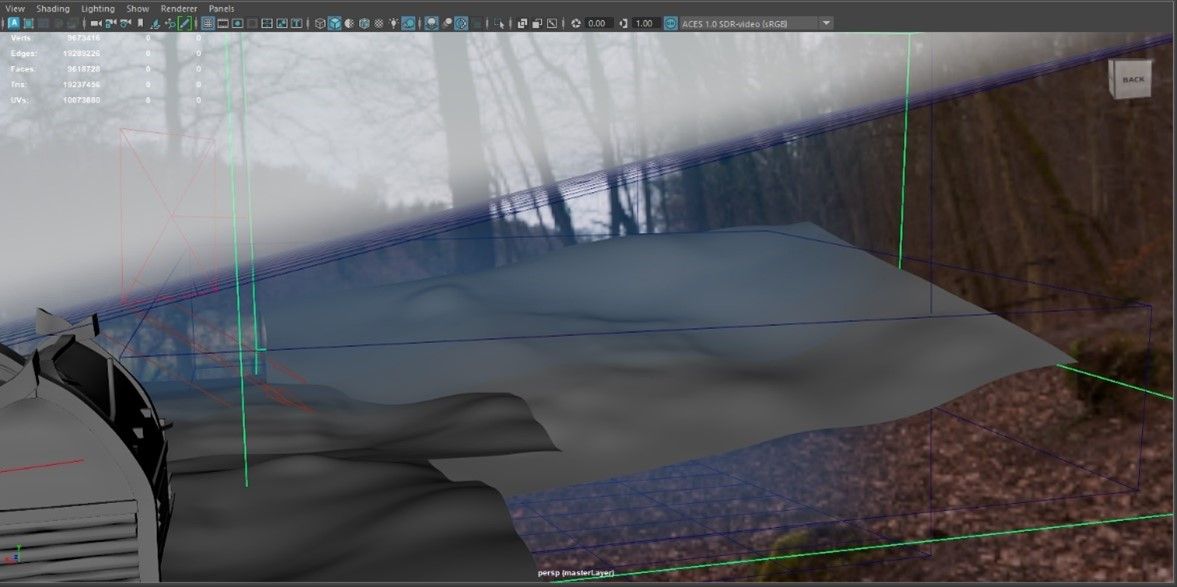
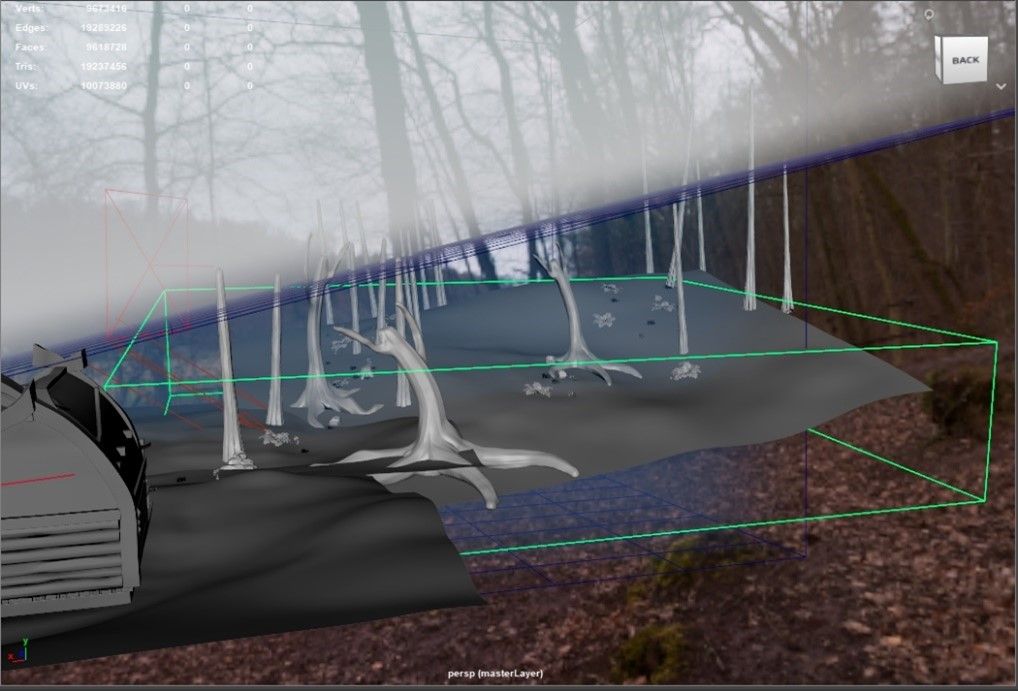
My teammate Bonga also created Fog source in Maya since we wanted to create atmosphere for the forest to have depth.
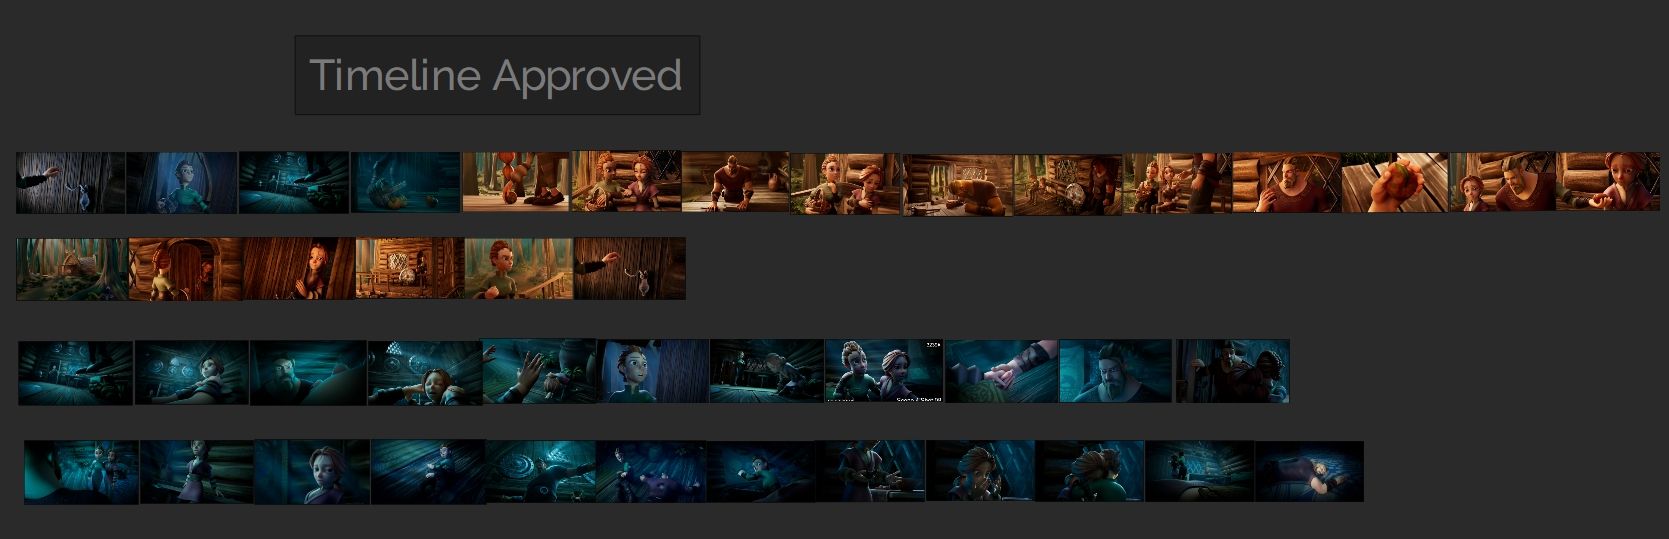
Most of our lighting process in the Look Dev department, would be sending lights back and forth so that we could keep consistency between shots. Another method I did to ensure consistency was I made a timeline of our film in PureRef. This allowed us to check which shots in a sequence needed to have a similar light setup. It also allowed us to see the whole film as a mood board when looking at the emotional points in our story.
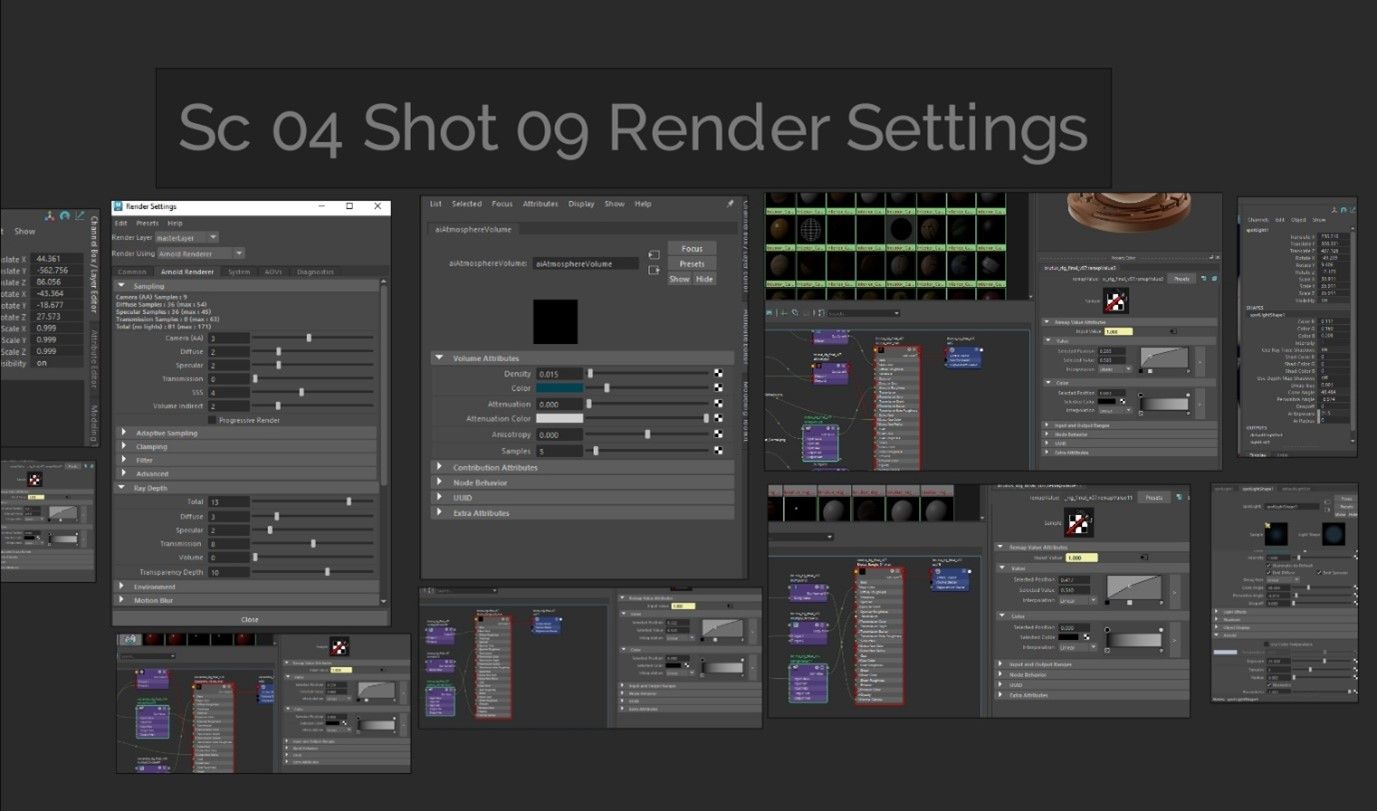
In my PureRef, I would also take note of the light values that I could recreate in other shots as well as keeping track of my render settings for each shot. This was the best thing I did because we would render shots on multiple computers, and this would always be a checklist for me to ensure that the render settings matched.
Light blockers became my greatest asset to achieve a shot. I learned how to properly manipulate the lighting with light blockers and tinting the blockers to either add colour or create shadows for a shot. It would always be the case for how the shot looks on camera, how the viewport for the shot looks like with all the light blockers, and how the shot looks like when rendered.

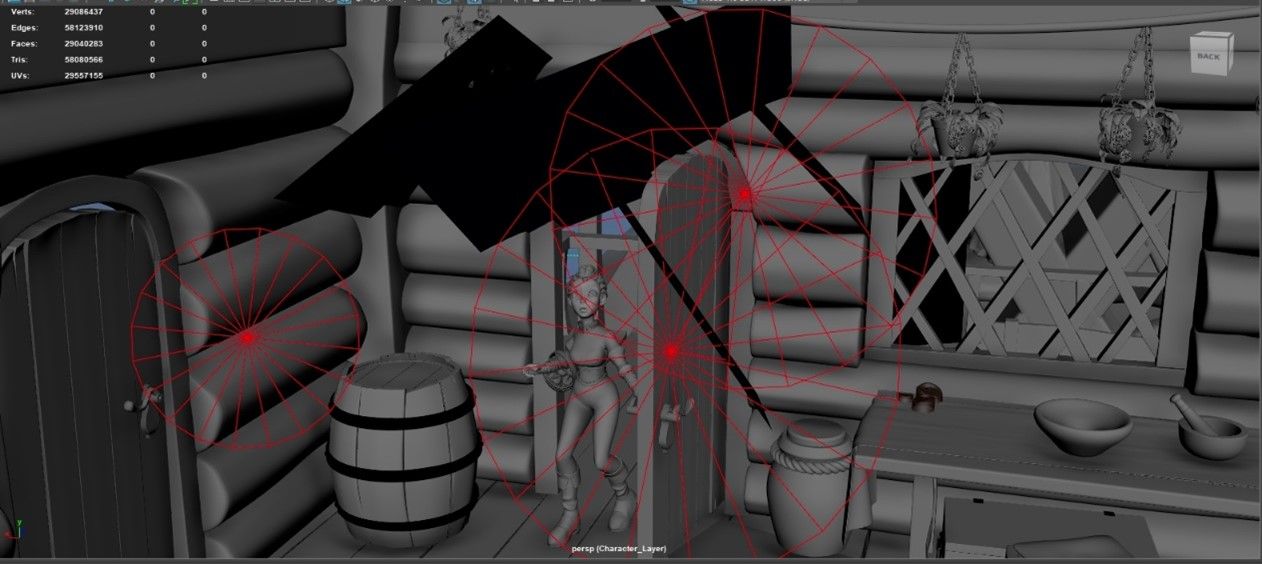
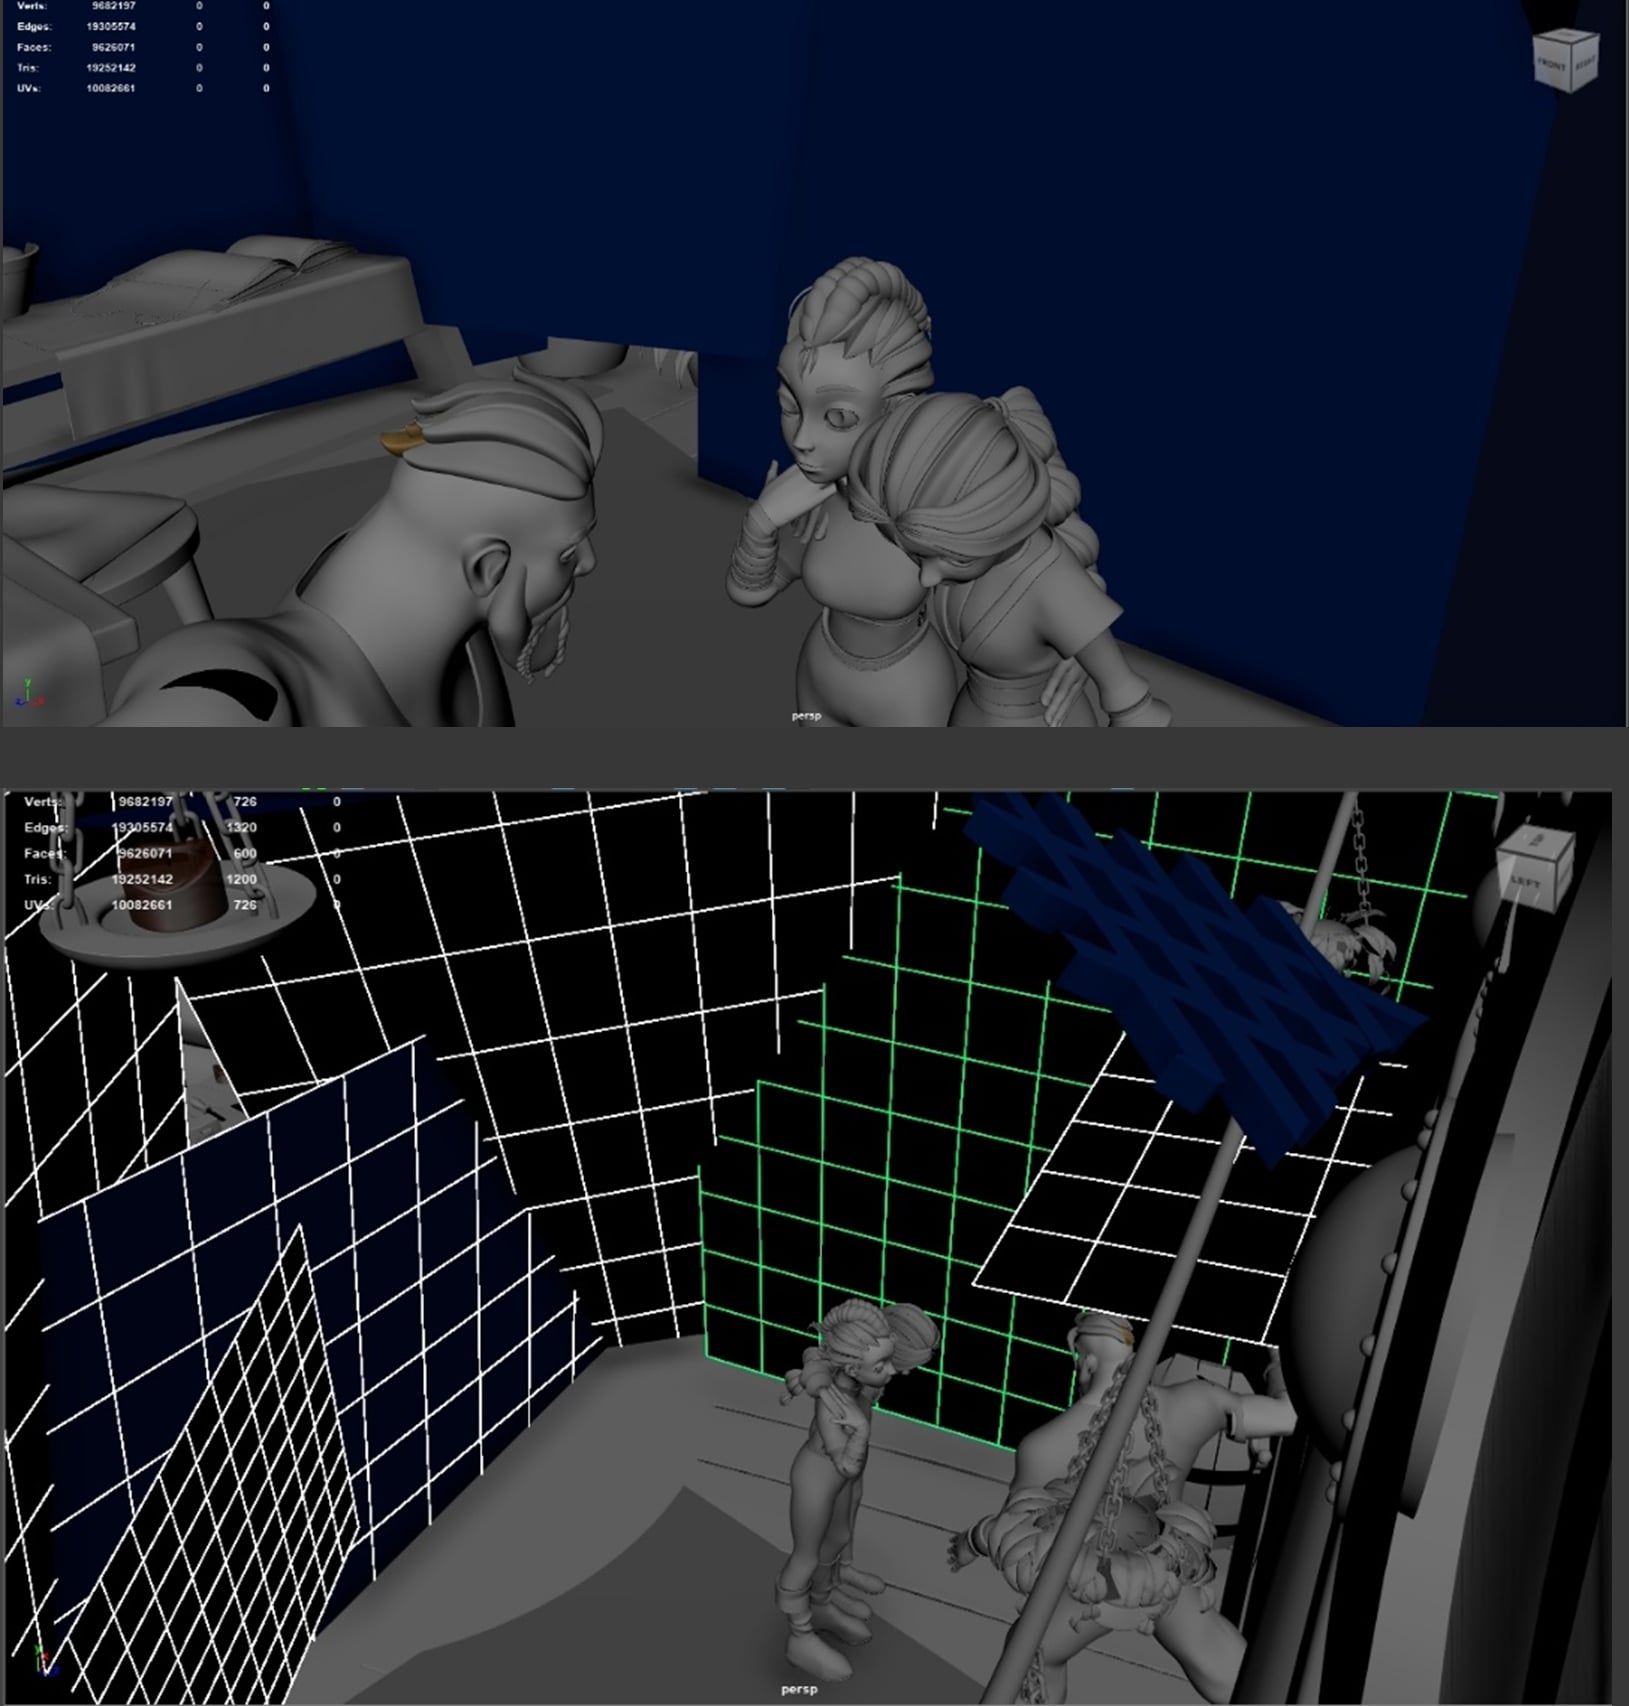
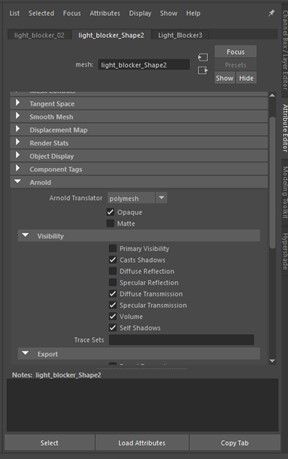
This also taught me to minimise the number of lights used and rely on light blockers more while being aware of how the characters would move to avoid intersections. To make sure the light blockers wouldn’t be visible in the render I went to the attribute editor of the mesh and turned off the primary visibility setting under the Arnold setting so that the effect would still be applied but the physical mesh wouldn’t be seen.
There is a shot where to get the volumetrics to appear right I have a giant window frame in the scene but when hidden in the render, the light rays would shine through the frame.
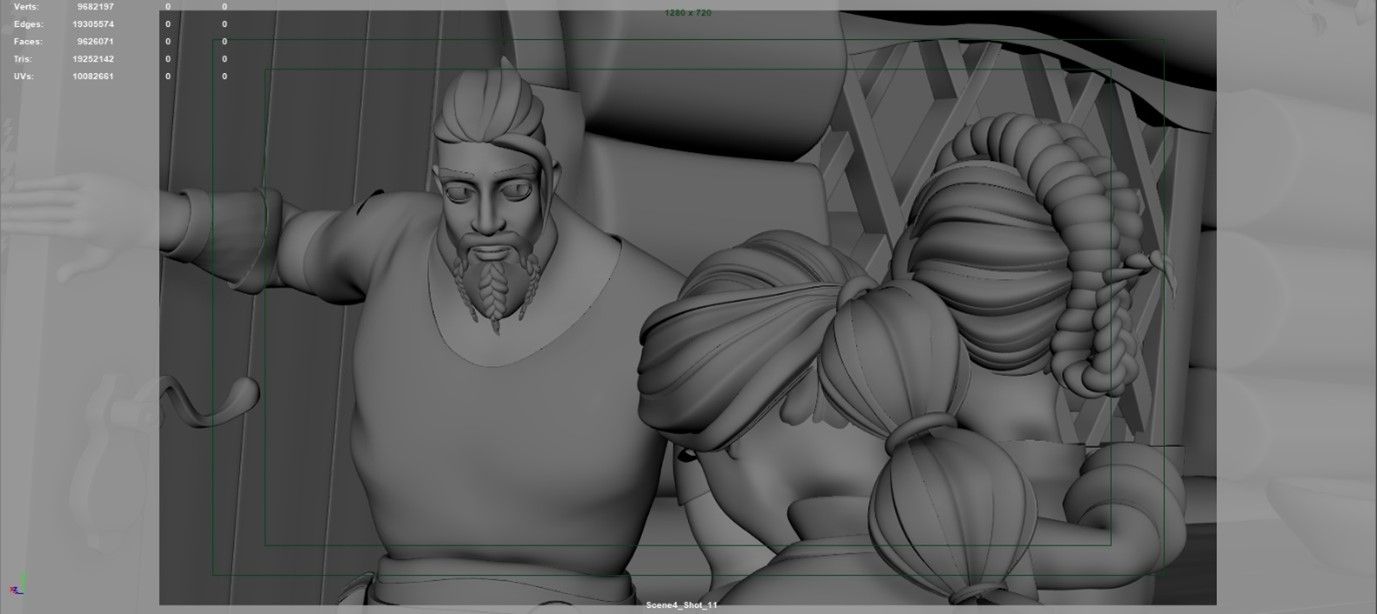
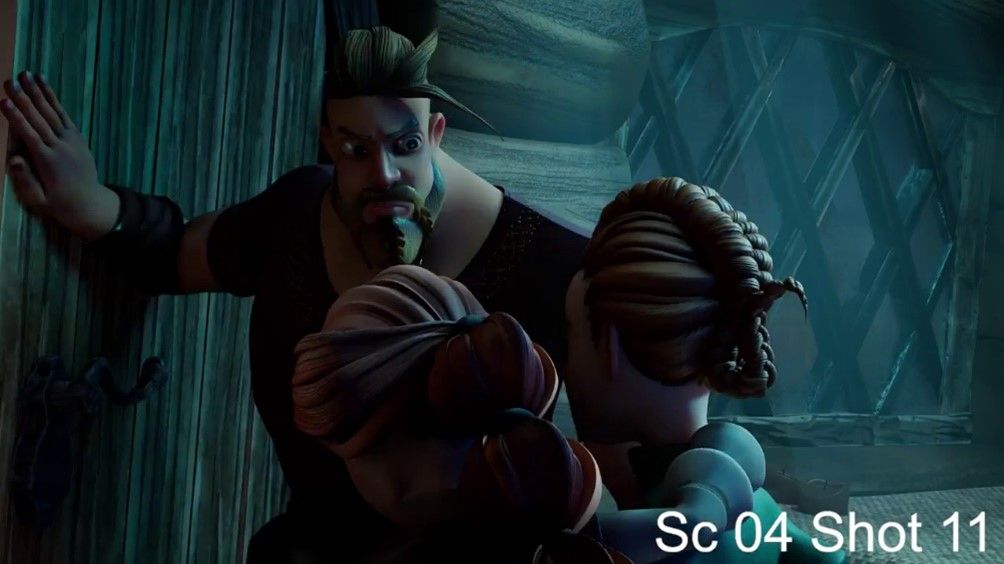
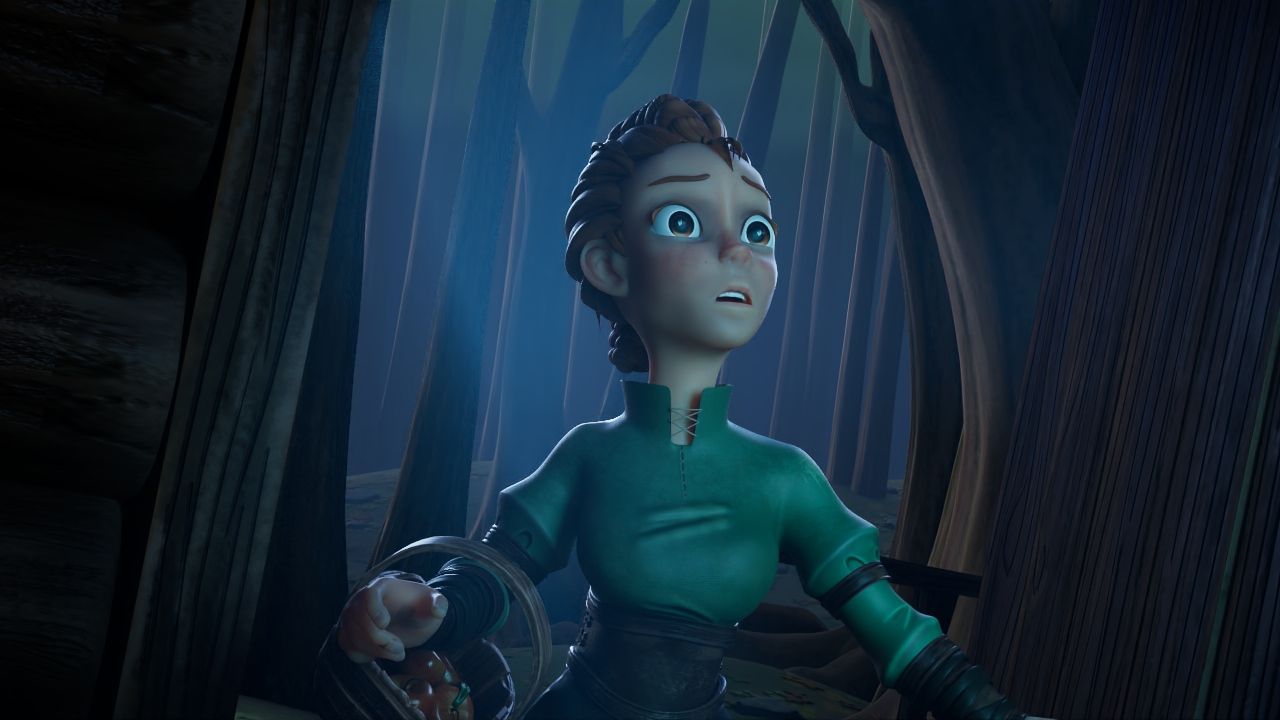
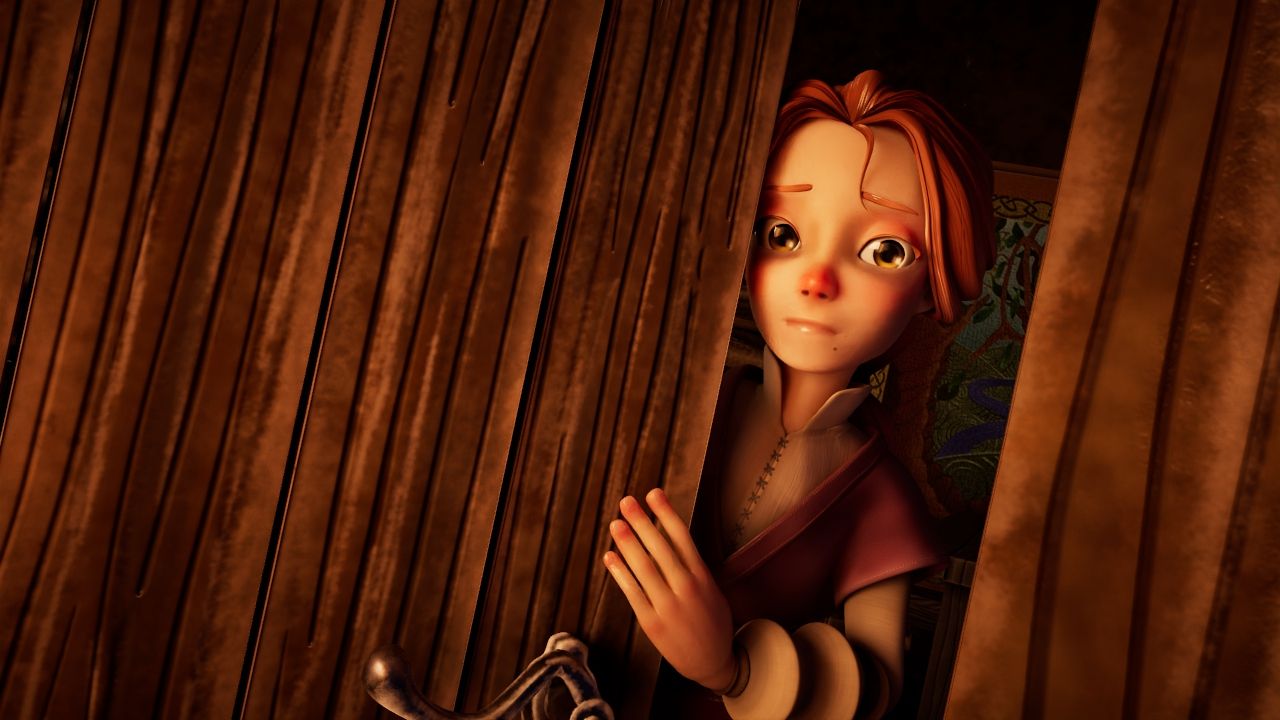
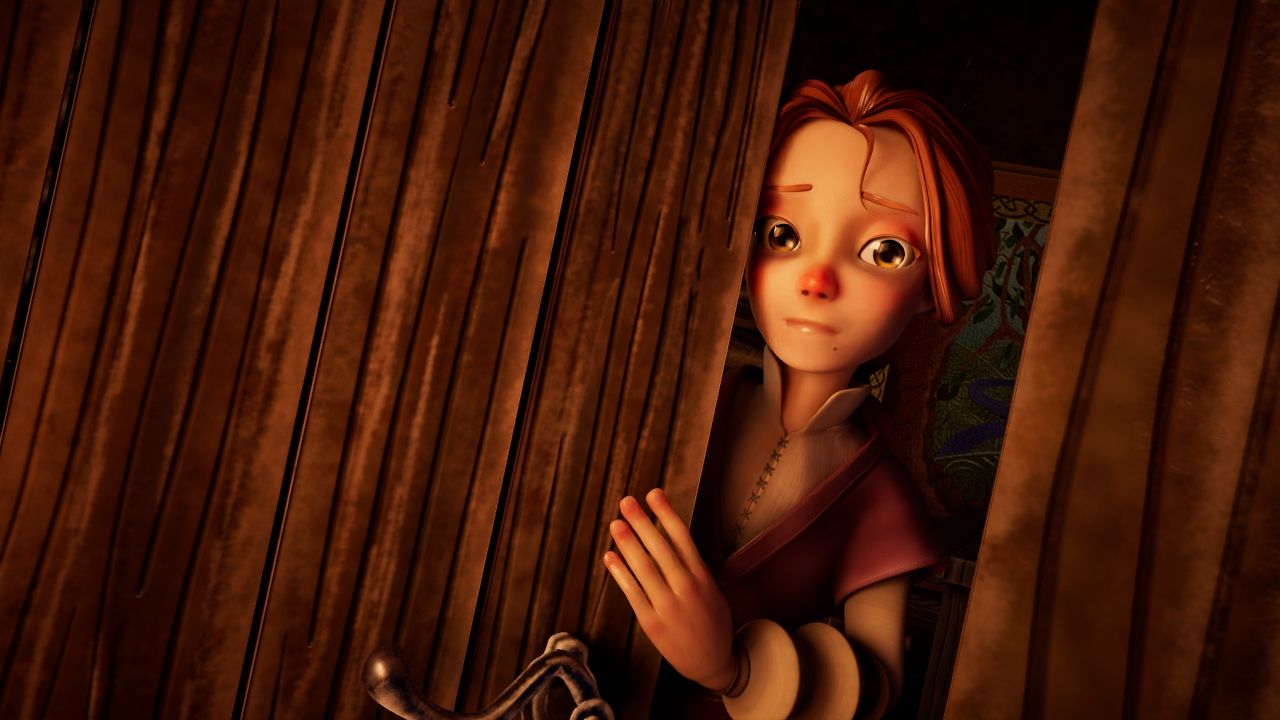
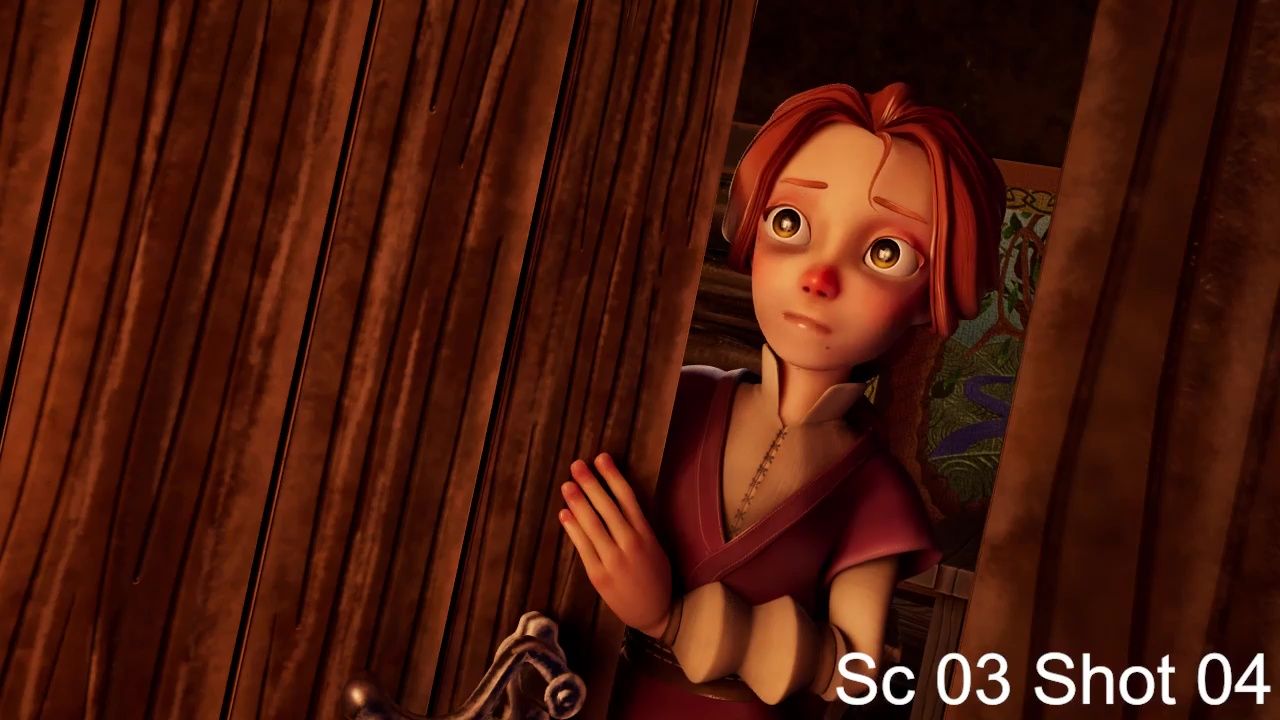
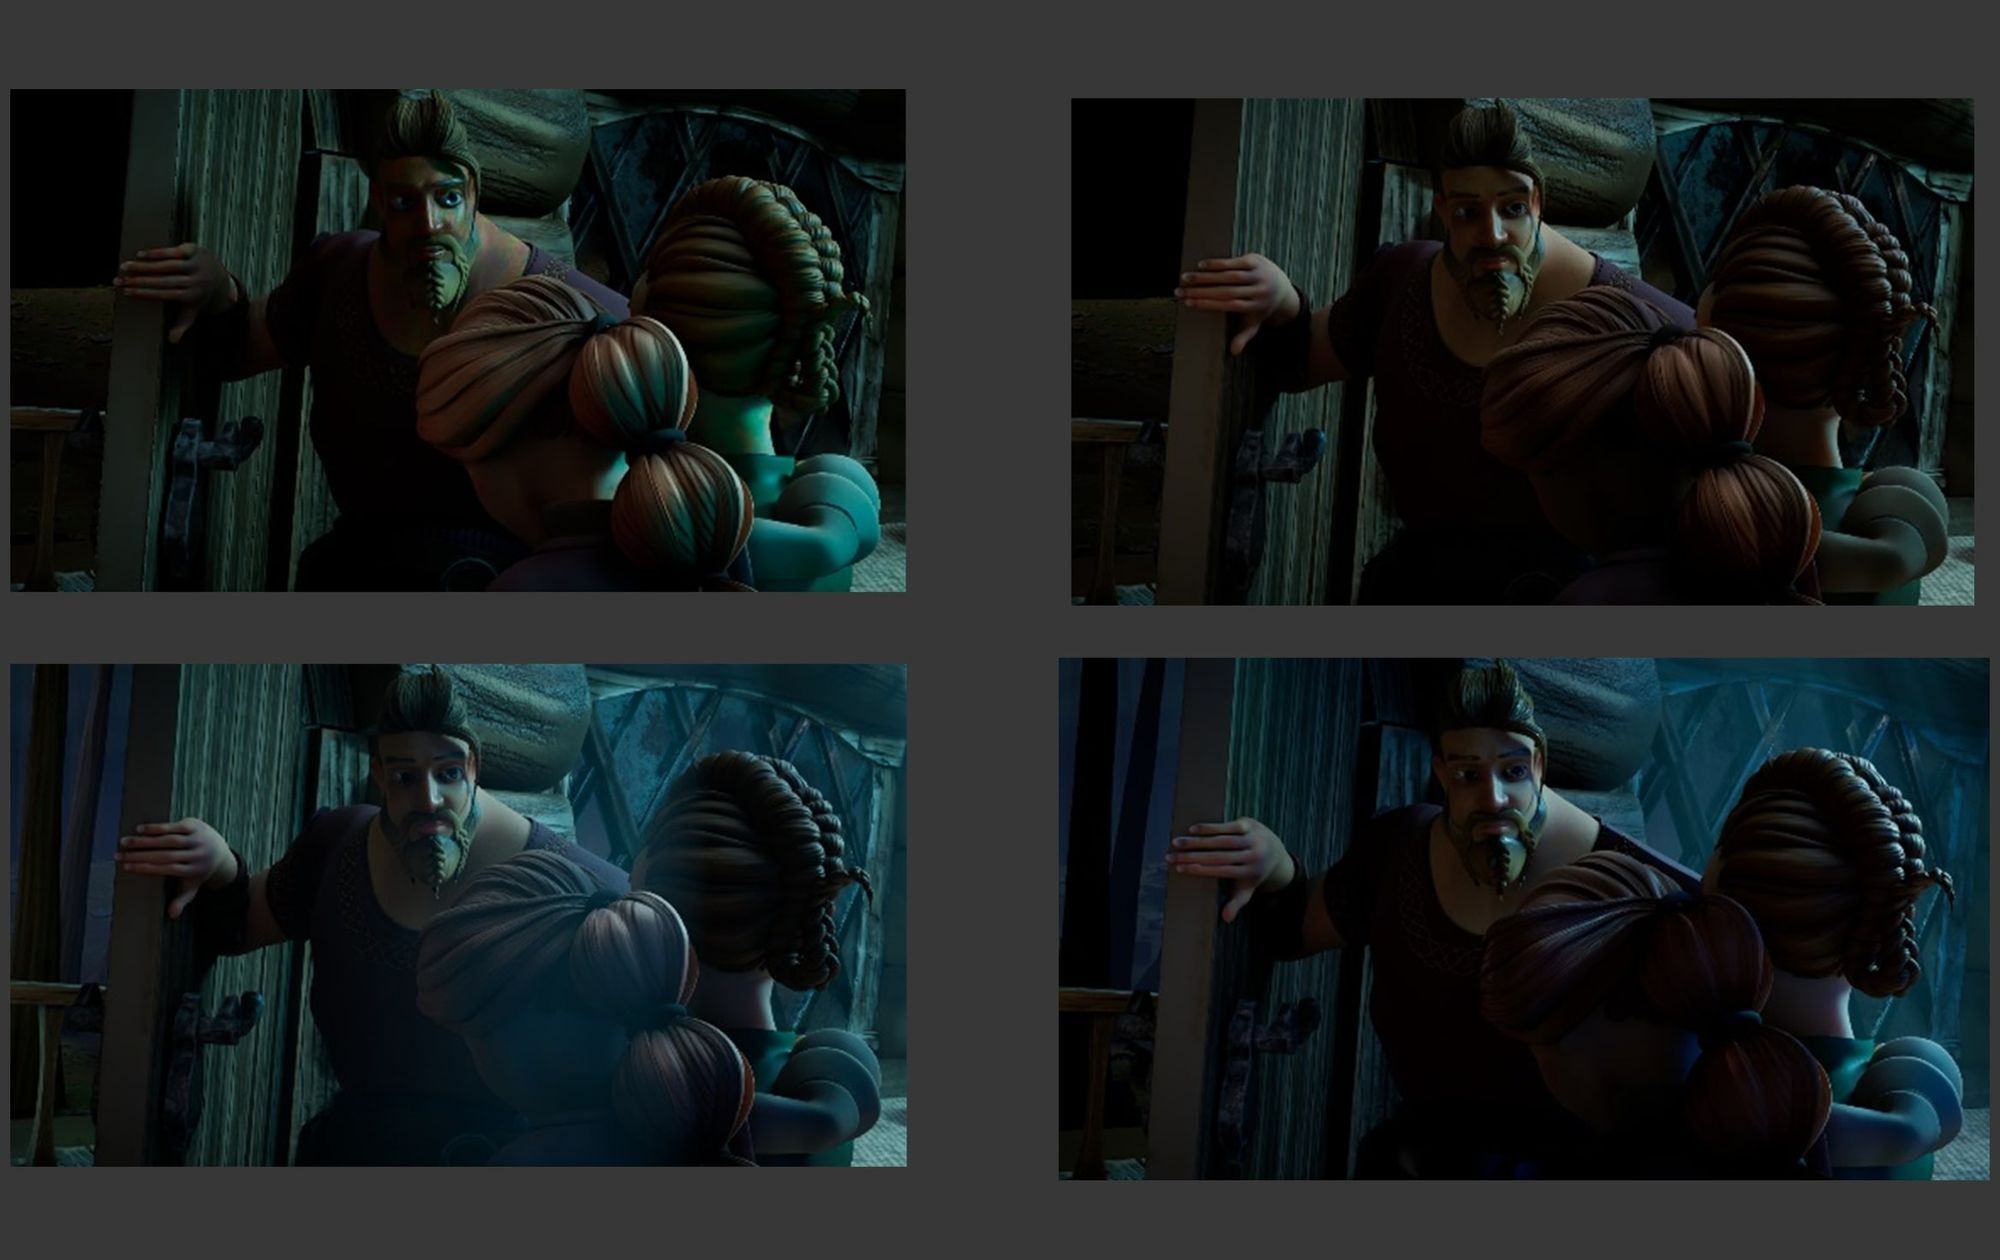
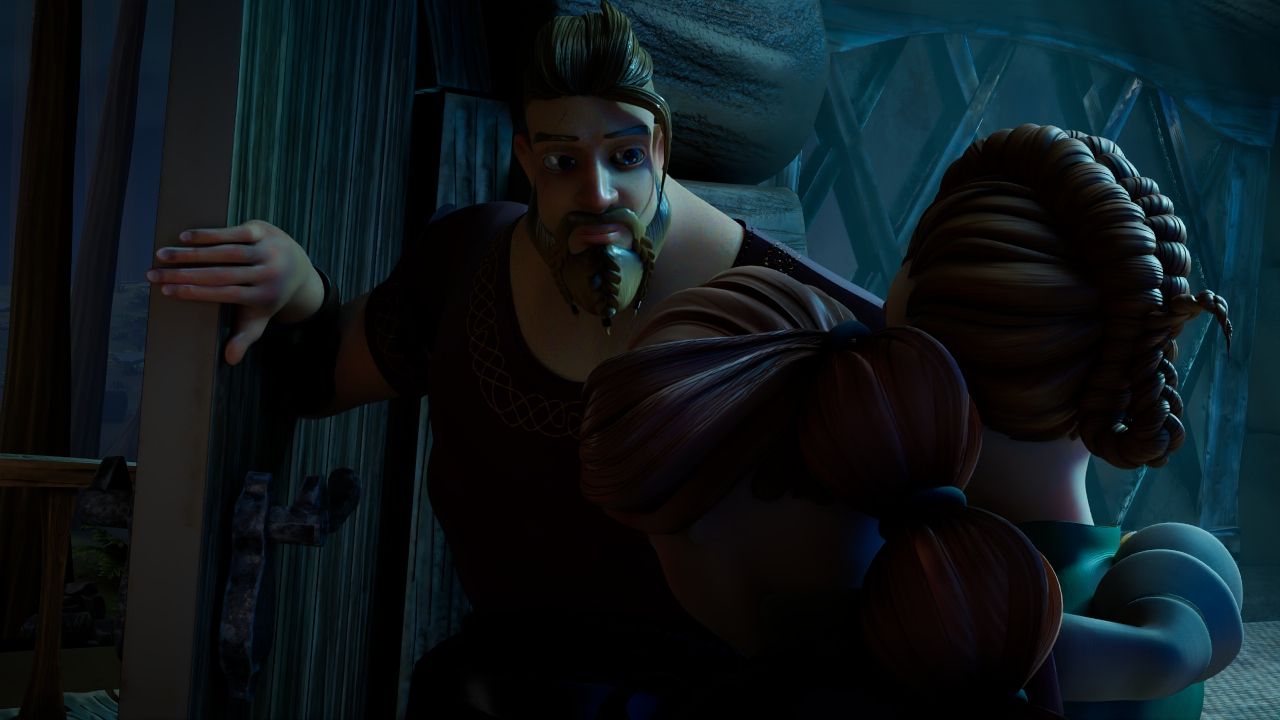
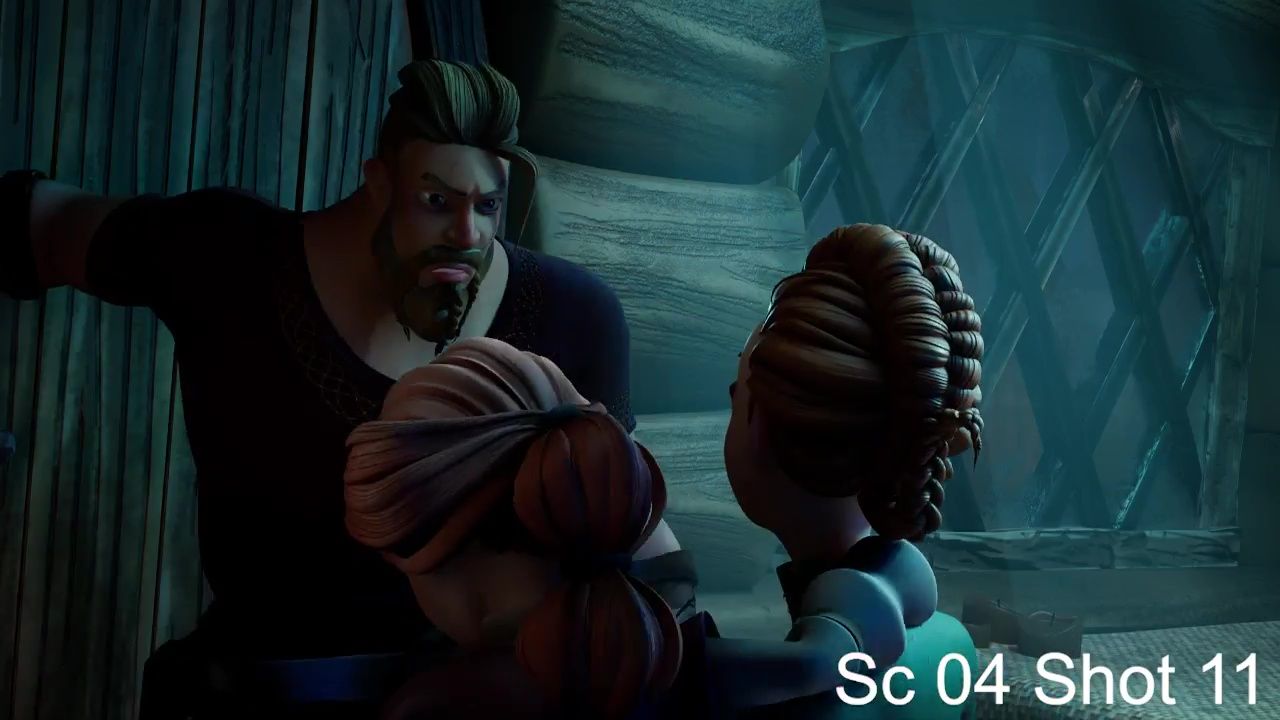
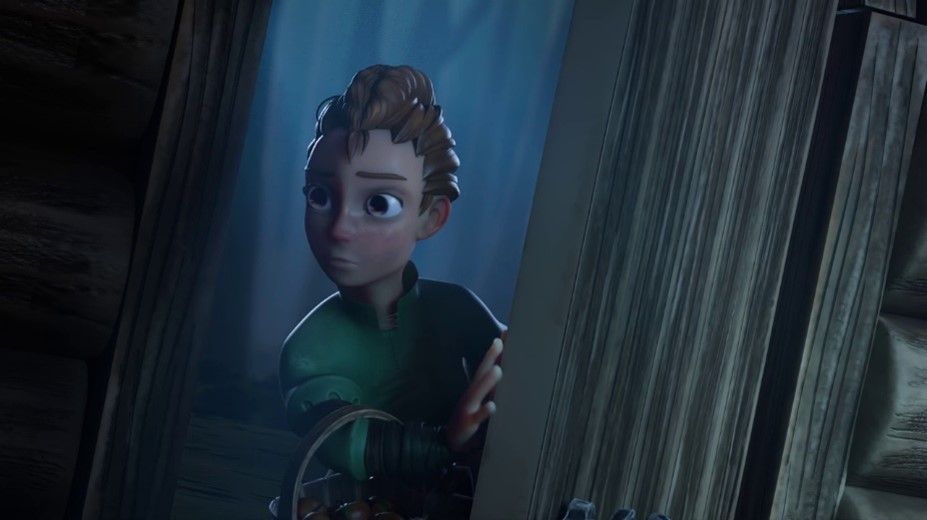
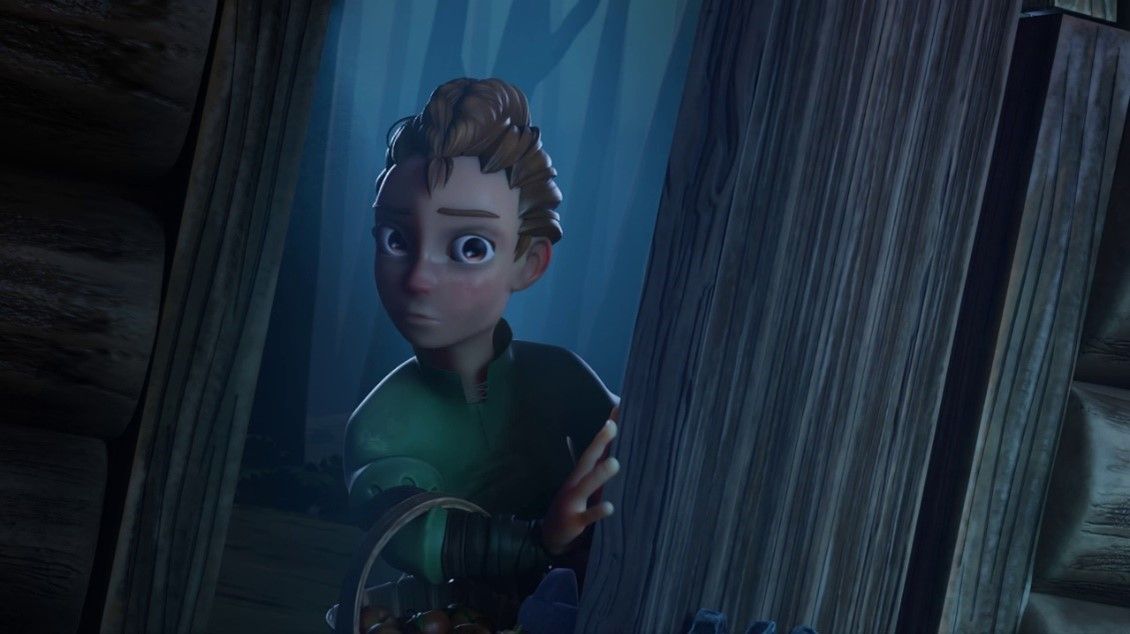
I had to treat each shot differently according to which part of the film is taking place and the references I needed to follow. Each time I lit a shot, I would take a screenshot to see if I was achieving what was needed and what versions had better lighting. I would look at these screenshots to try get the final shot lit while taking the best parts from each version. Below I have different shots from the film that are in my showreel that I worked on. Here you can see the progress through each version and ideas changing the more I worked on it. I will say the more I worked on a shot, the better I got at lighting other shots and my lighting skills were improving as well.

My role was the last part of the pipeline before editing was done. Before the shots were rendered from Maya I had to ensure the necessary AOVs were added. I also needed to decide for which shots I would use render layers and others would be rendered on one master layer with all the AOVS. The AOVs added would mainly be all the light groups for the lights used in the scene, cryptomattes, point position and the depth pass. A separate render pass was done for the motion vector so that motion blur could be added and tweaked. If any additional AOVs needed to be added it would need to be done for a specific reason when compositing.

Since I worked as a Lighting Artist and Compositor, I played a vital role to ensure renders were monitored and the right AOVs were ready for me to composite. Majority of the compositing was done in Nuke and a few shots were done in After Effects. This is the part of the pipeline I love the most. I liked learning how to colour grade and merge different elements together. It was during this part and seeing how the shots were coming together that I realised we were making a short film. I would go through multiple iterations while compositing to ensure the shots I worked on had a similar colour grading to the shots of the other compositor in my team, Megan Redelinghuys.
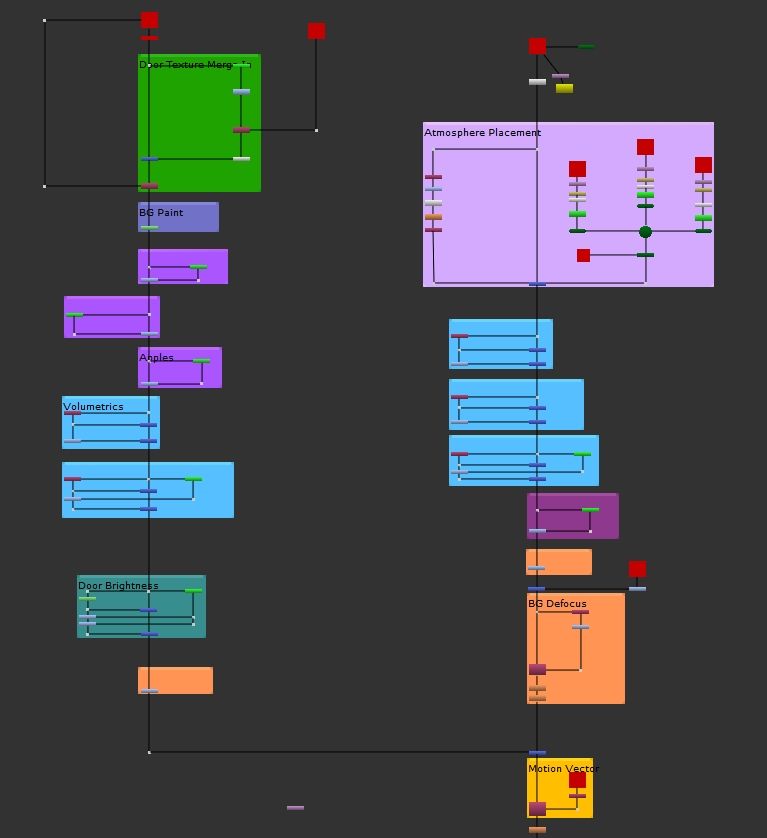
There was in instance where unexpected textures were missing and needed to be rendered again and composited back into the shot. This is also where I learned how to think quick on my feet in these situations and determine how could I fix the shot. Most of the time my lecturer informed me that I would need to comp the additional passes back into the original render for me to comp. I have an example below of the infamous “missing door texture that no one thought would be a problem” which became a joke in my group, but also gave me a headache to fix. The door needed to have the frame in the middle textured and exported. Then the door need to be the only object visible in the render view. The exact AOVs needed to be the same as the original render or else merging the pass would not work properly. The door needed to be rendered as a sequence since it moved in the original animation as well.
This also gave me more insight into my role as a compositor. Before I could do any colour grading, I would go through the shot, sometimes frame by frame to look for any issues that are fixable. Some shots had instances where I needed to roto something out or add a frame hold if there was any noise flickering. This taught me to critically think and look at how fixable the problem is before asking for the shot to be re-rendered.
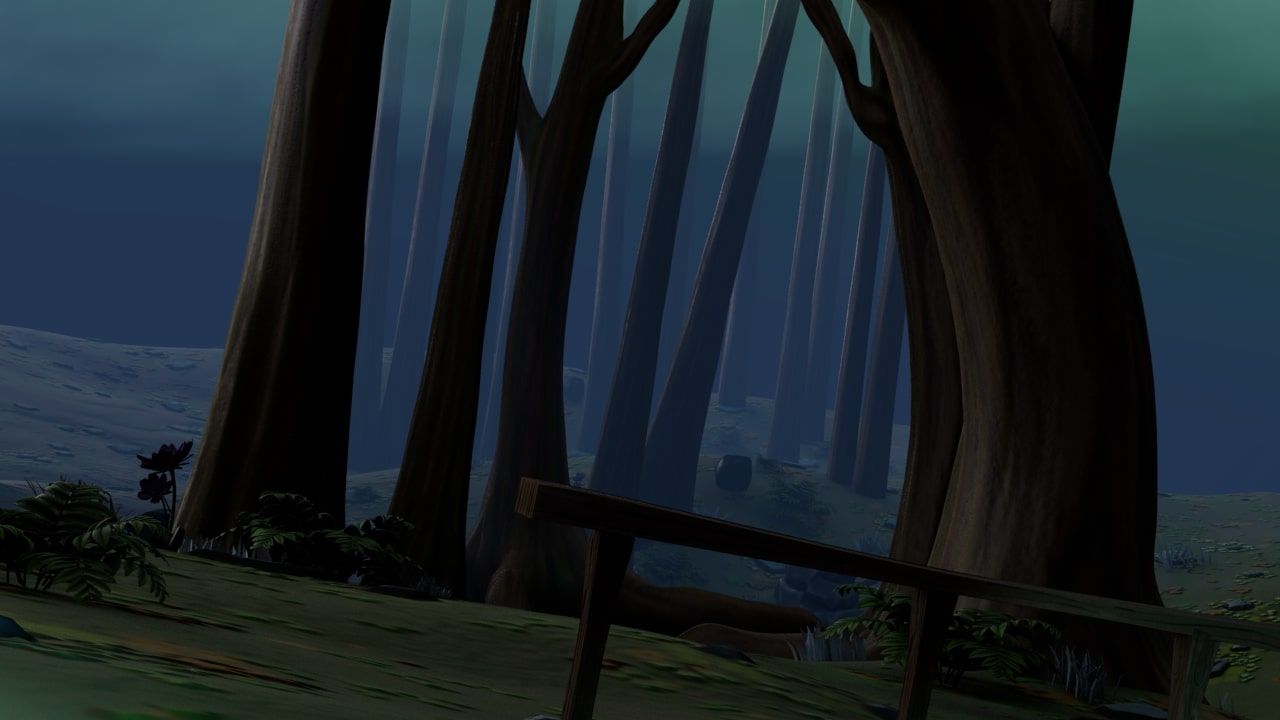
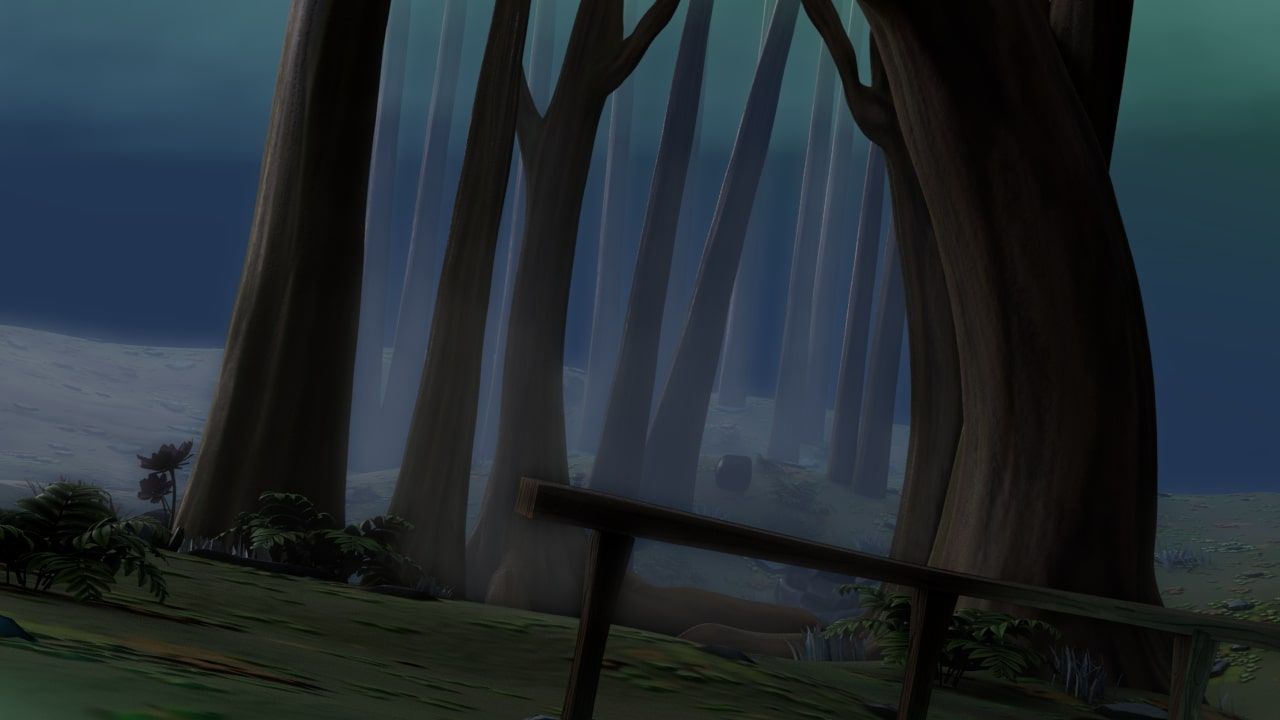
When compositing shots, colour grading became the most common thing for me to do. There were only certain shots where additional elements needed to be merged in to add more to the shot. In this shot below, I had to place a video of an atmospheric element to add more depth to the forest. Once placed properly I graded it to match the rest of the background for the shot and blurred the background plate.
Being part of the process of creating a short film was the greatest experience. I really do have to thank my lecturers for providing me with the knowledge and skills that I have now and providing me with the potential to create great projects on my own. It was amazing to produce something I could of only dreamed of as a little kid.
Lastly, I want to thank my teammates and give them a special shoutout for their respective roles:
I would also like to thank The Rookies for allowing me the chance to talk about the work I've done on my most recent project. I hope sharing my work can provide information to the forever evolving community, and thank you for taking the time to read this article.
Check out Tsaone's profile on The Rookies and get in touch!