Interactive Shoe Viewer: Realtime Applications Made in Unreal Engine
Davide De Sensi, a recent graduate of Skyup Academy, created a real-time Unreal Engine application, honing his skills while achieving realistic 3D assets with ray tracing technology.
Davide De Sensi, a recent graduate of Skyup Academy, created an interesting real-time application in Unreal Engine. This project not only allowed him to test his skills in Unreal but also enabled him to create 3D assets as realistically as possible using ray tracing technology.
The project
The interactive shoes viewer I made is part of a bigger project. The main goal was to show the potential of the realtime applications made in Unreal Engine.
For this reason, the application contains four different projects each one related to a different field:
Heart viewer
This viewer gives the possibility to interact with a human heart to understand which are the parts that make up a heart.
Unreal Engine - Heart viewer
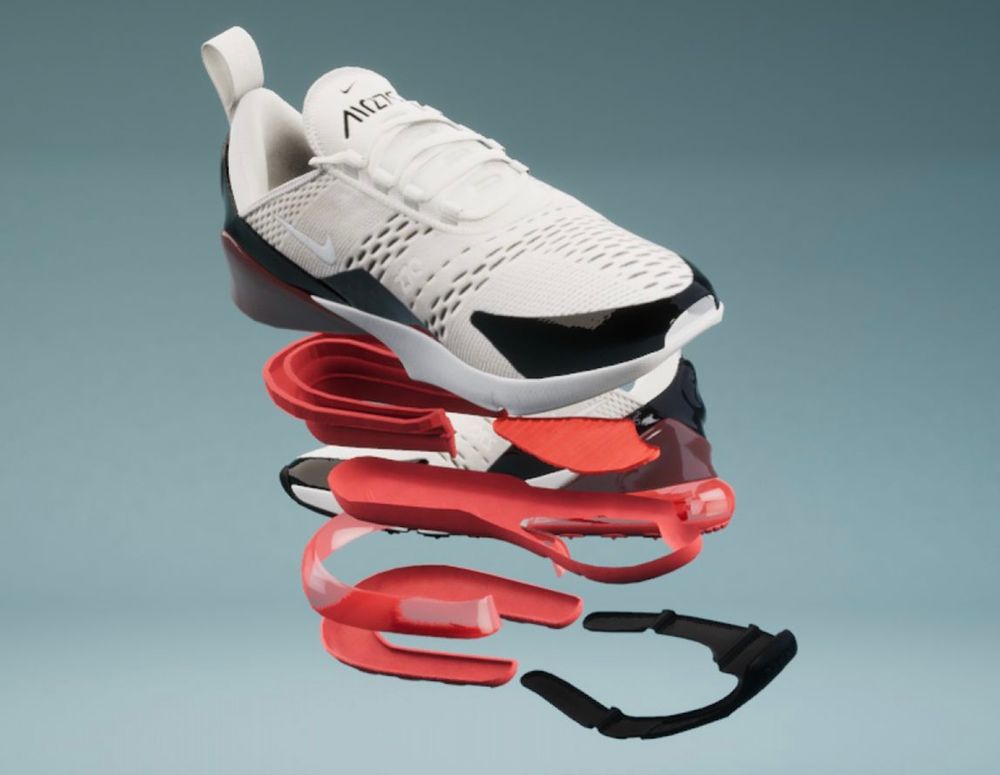
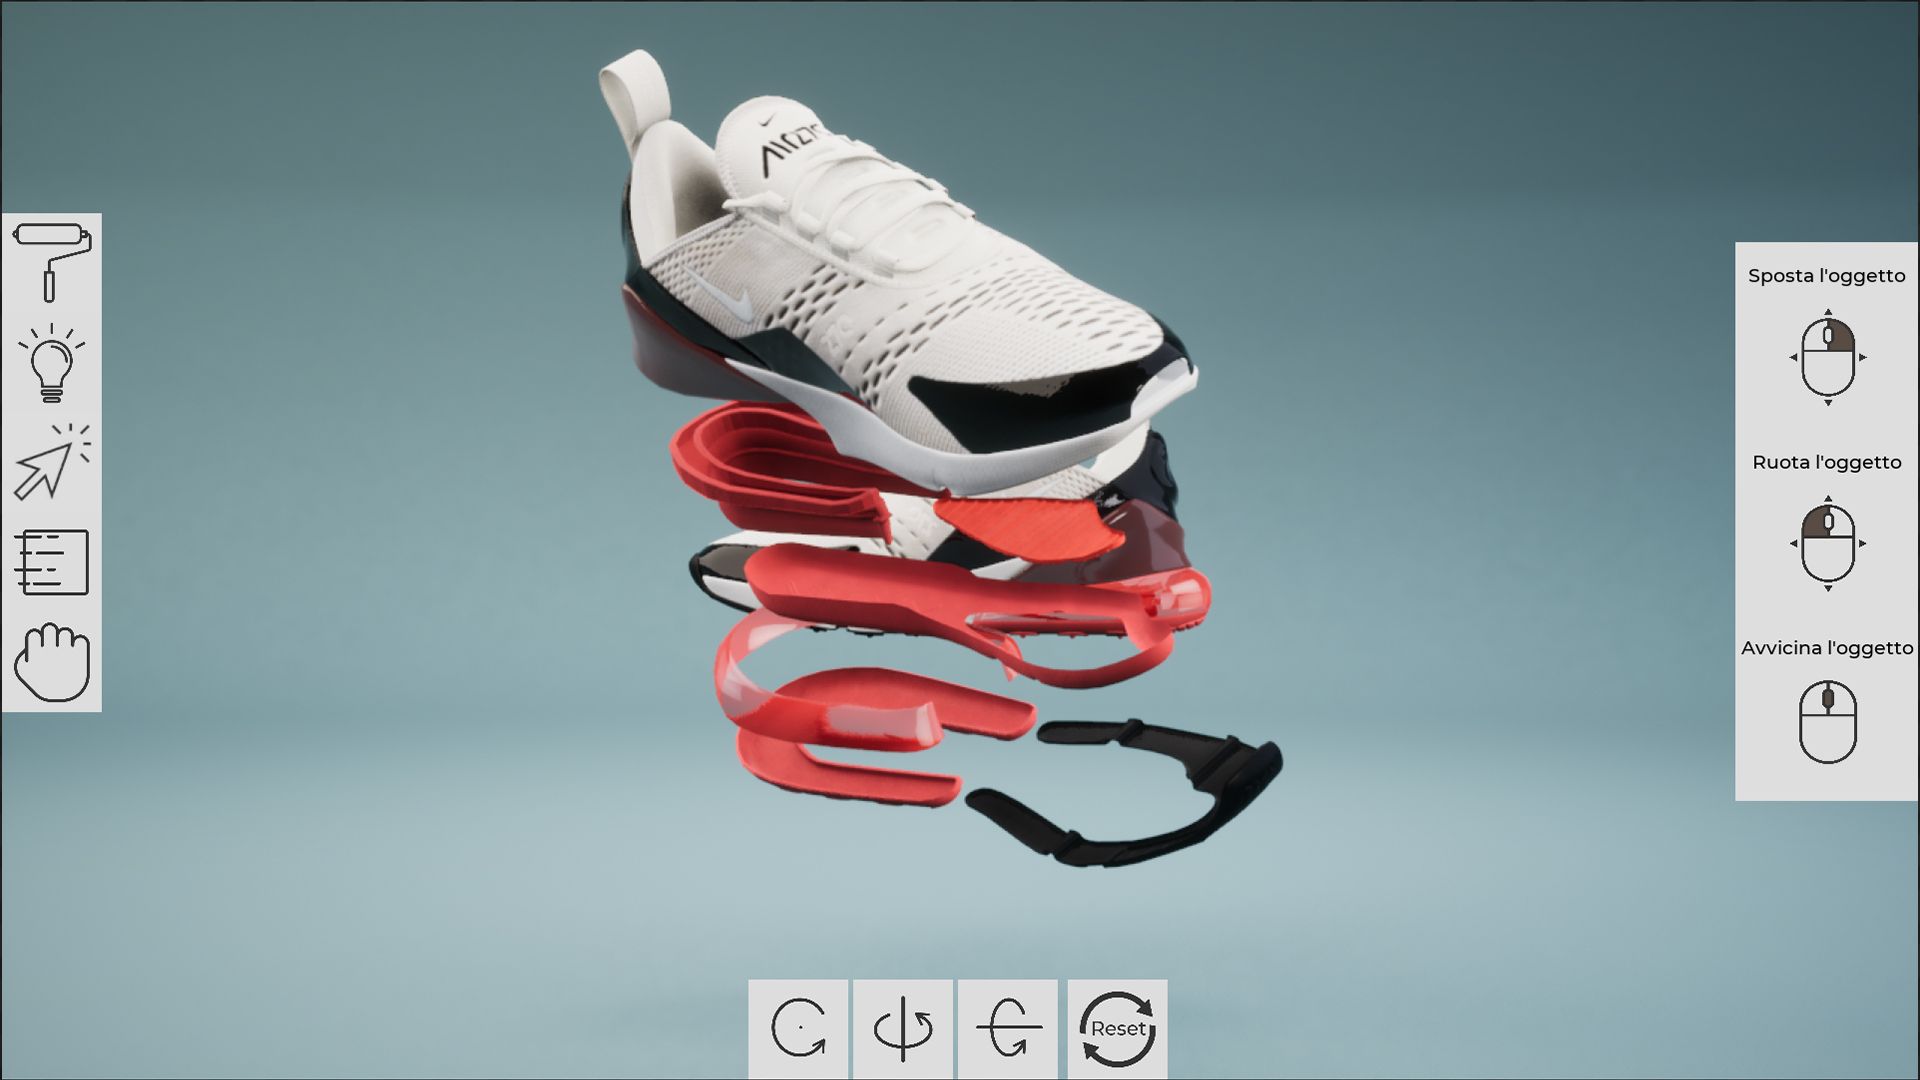
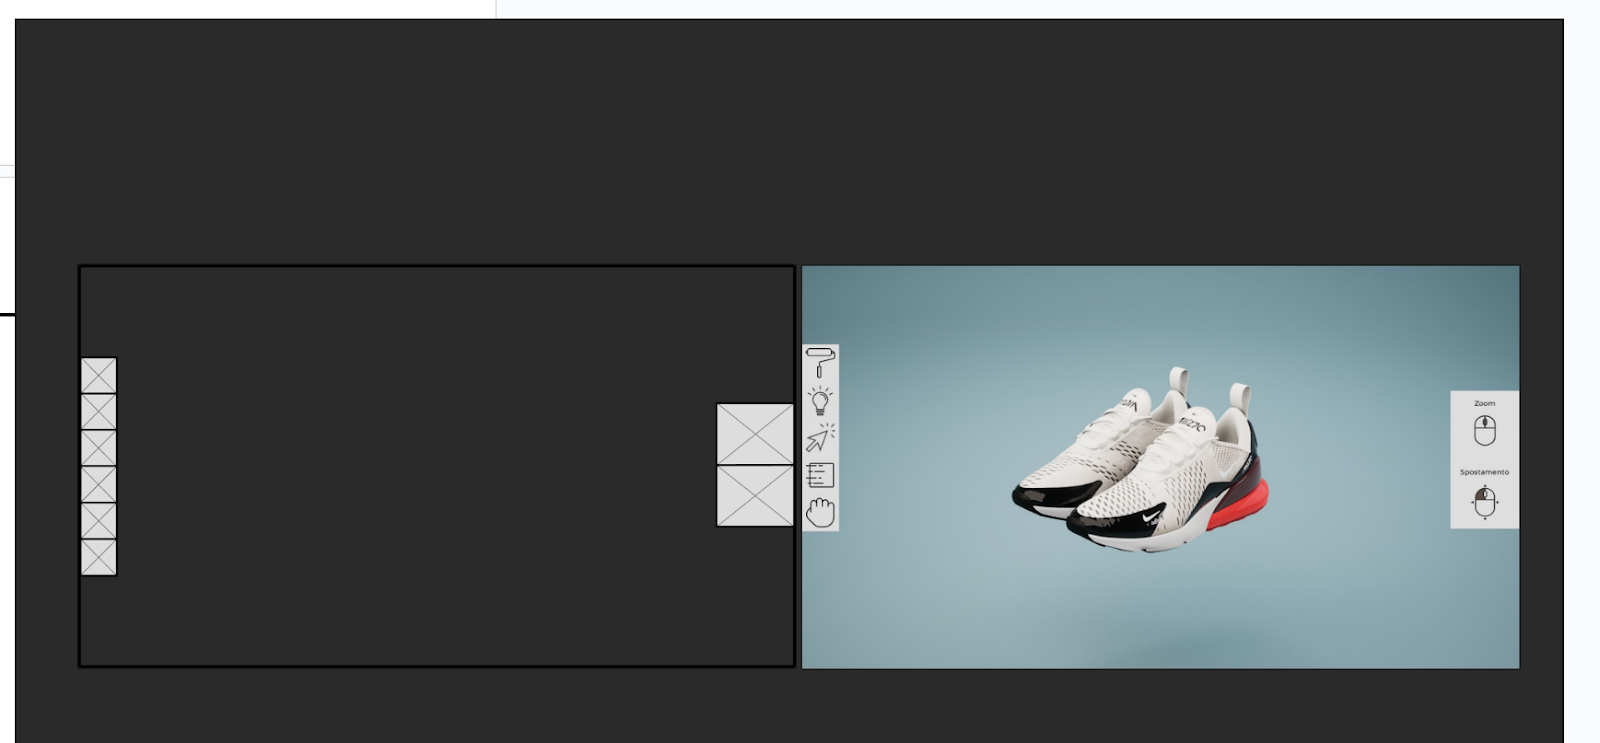
Interactive shoes viewer
This viewer allows one to interact and configure a pair of shoes by choosing different colour and texture combinations.
Unreal Engine - Interactive shoes viewer
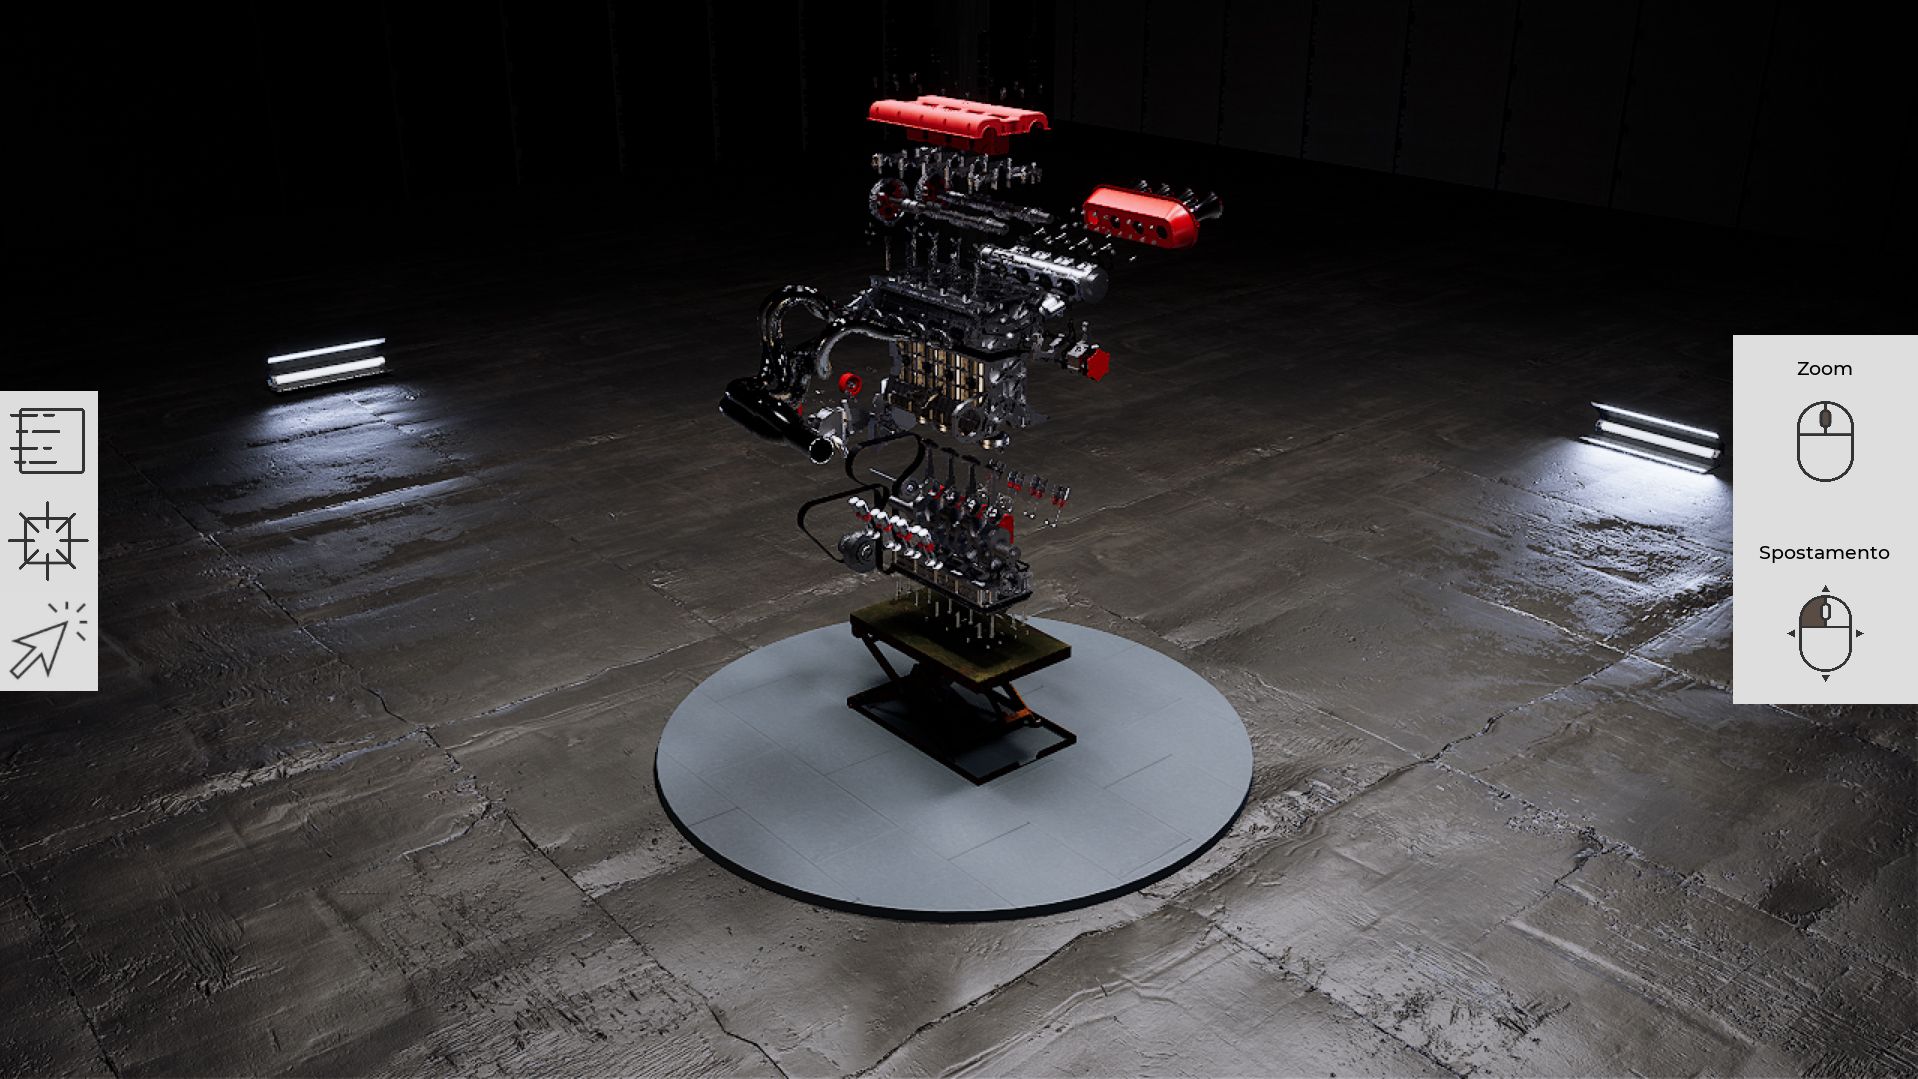
Interactive engine viewer
This viewer gives the chance to interact with an engine, start his animation, isolate and see how the different components work;
Unreal Engine - Interactive engine viewer
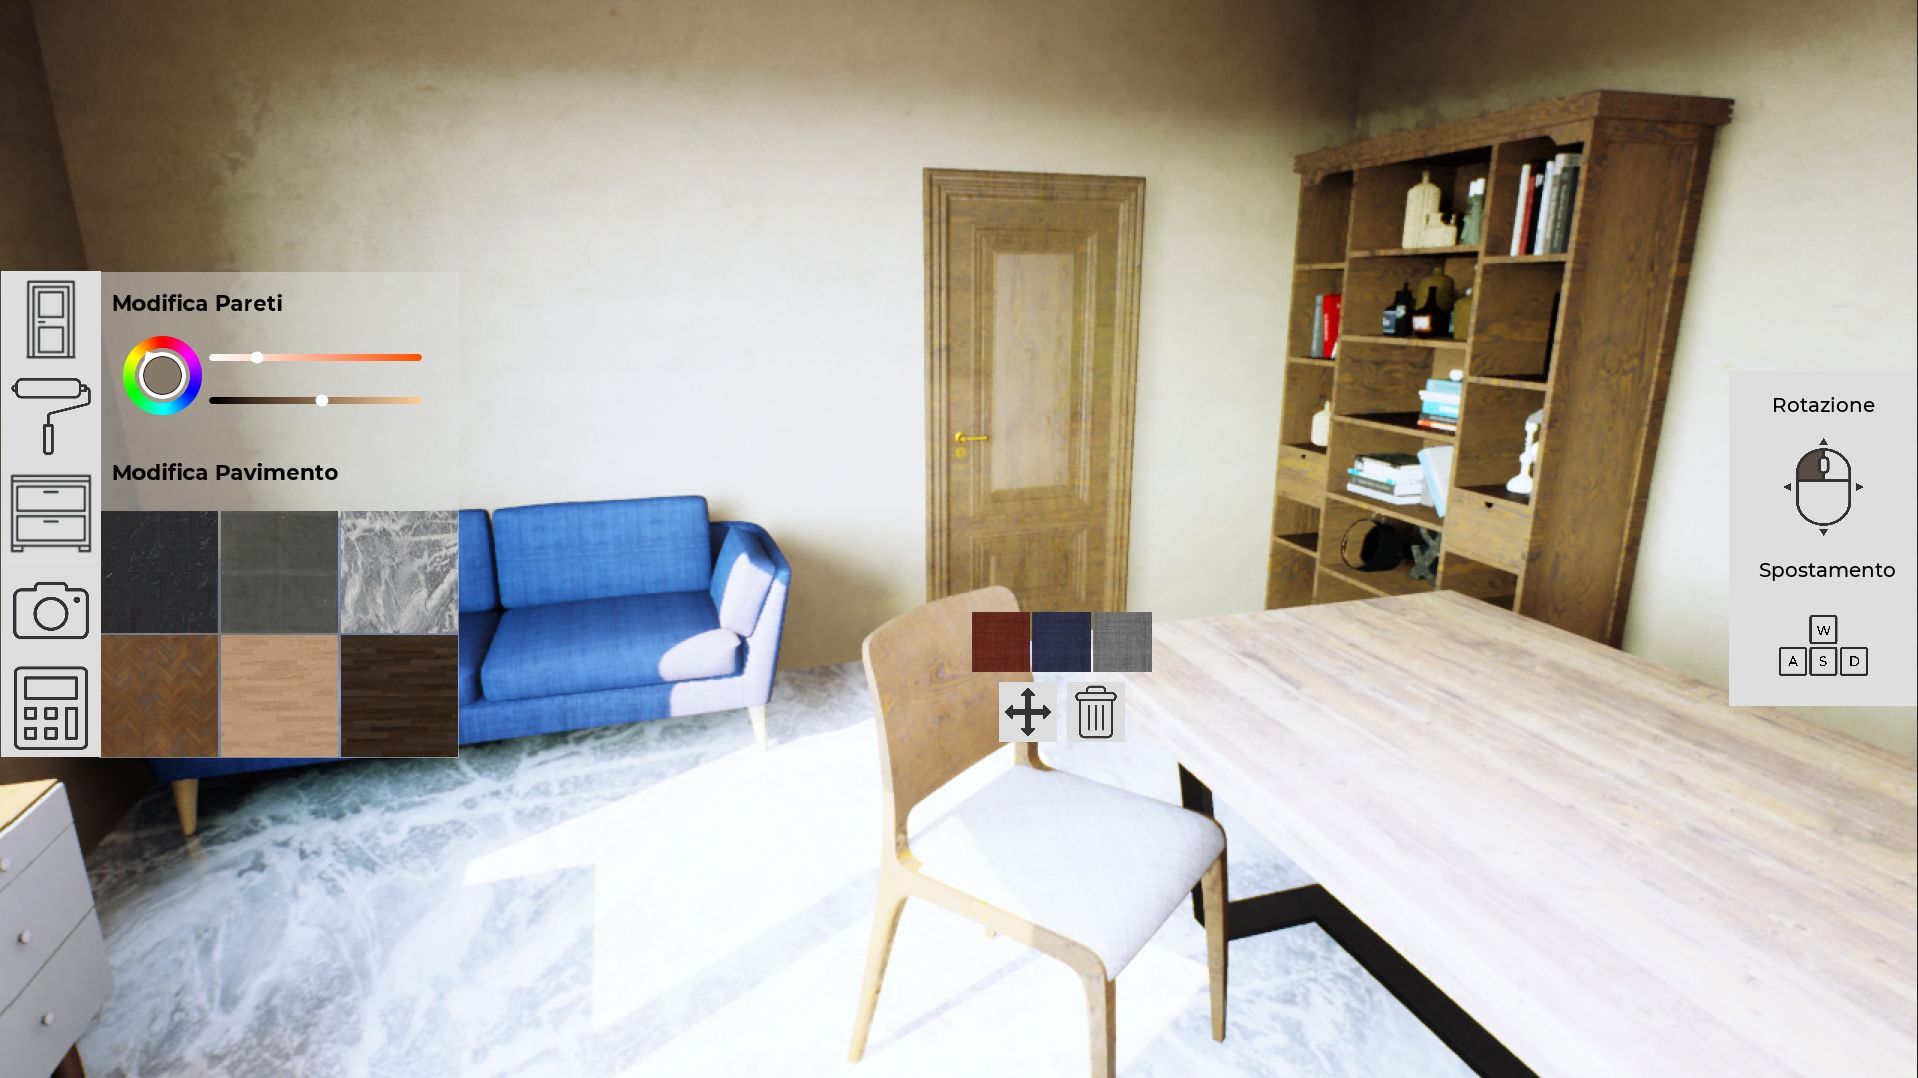
Room configurator
This viewer is the most complex, permits one to create and configure an entire room by choosing its dimensions, floor type, wall colour, and selecting a piece of furniture from the catalog to place inside the room.
Unreal Engine - Room configurator
I decided to take on this project to learn how to create interactive applications in Unreal Engine. Utilising one of the initial versions featuring realtime ray tracing, I aimed to experience firsthand the quality achievable in a game engine without pre-baking. In this article, I will focus on the Interactive Shoes Viewer project, and look at how realtime technology can realistically visualise and configure a product.
Reference
I always start a project by gathering references. This step is important to clarify the idea and to start to visualise it. During this phase, I looked for similar applications to understand how they work in terms of interaction, interface, and general look. Then, I looked for shoes presentation images to find a mood to follow.
During this phase, I used Pinterest and PureRef to collect and organise the references.
After my research was completed, I had a more precise idea of how to structure the application in terms of the look of the scene and interface.
Interface
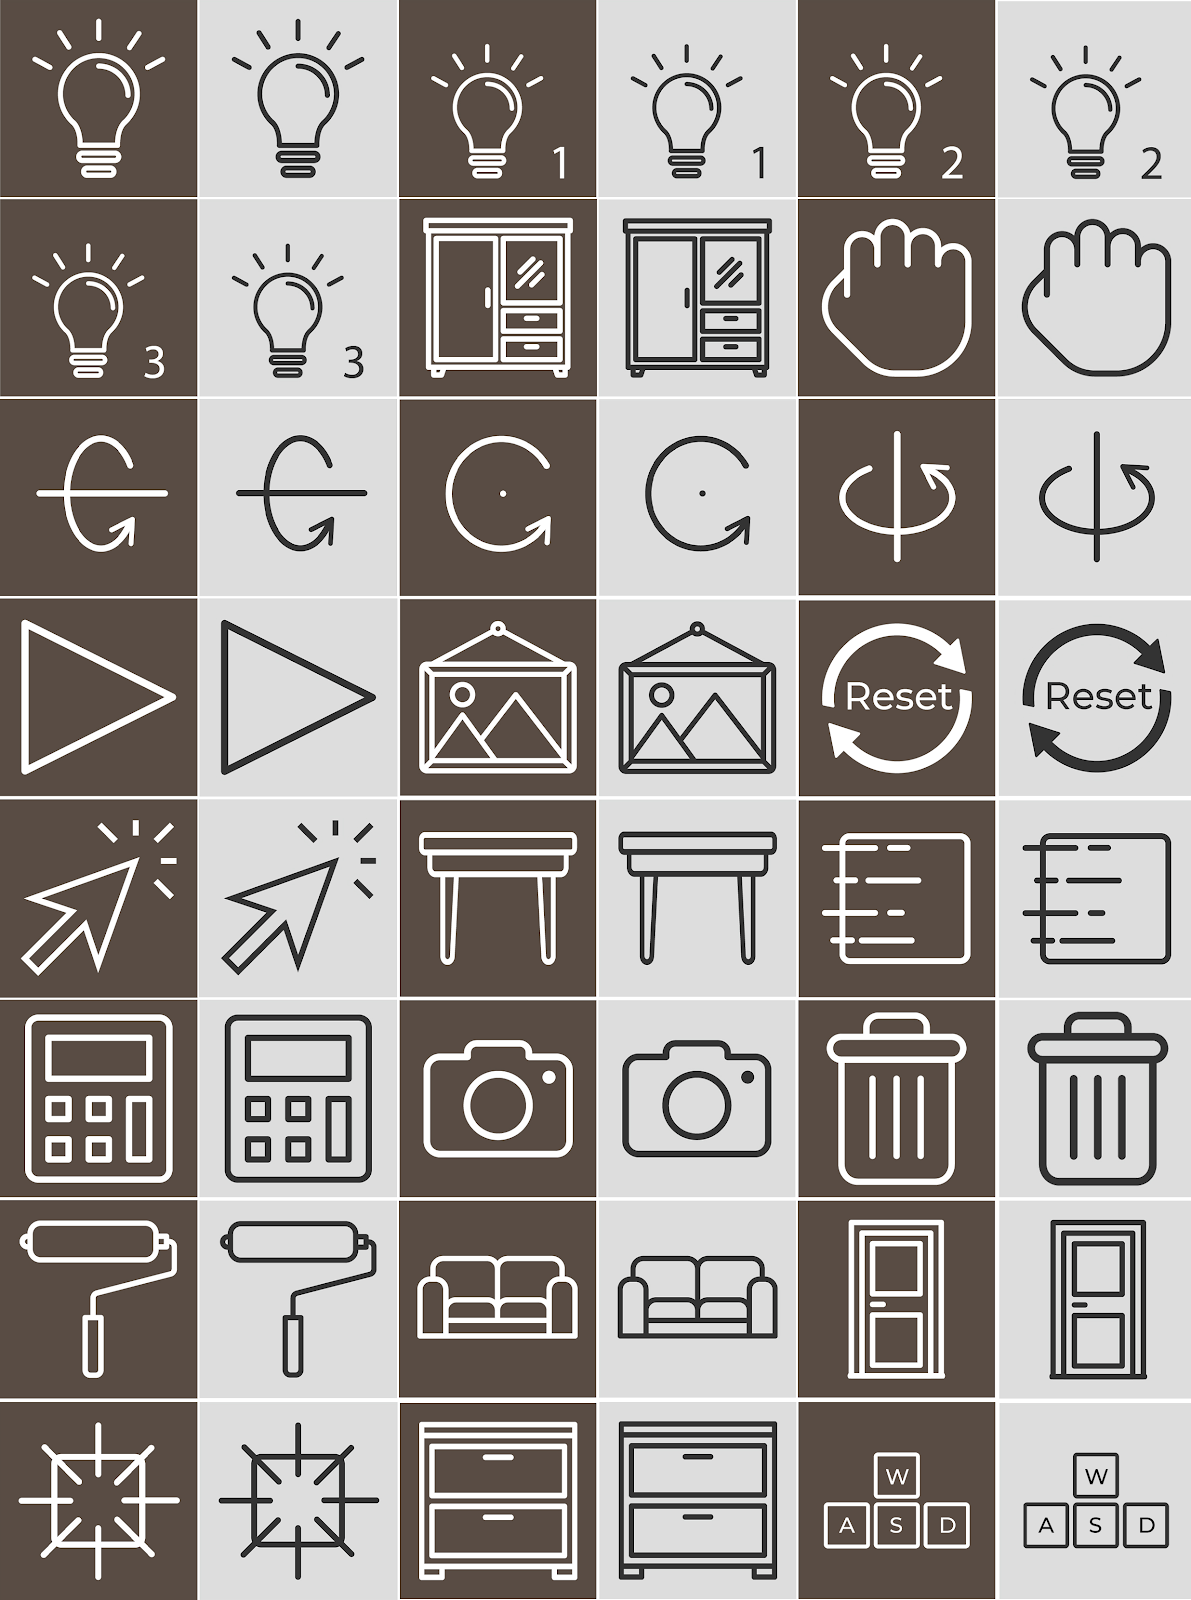
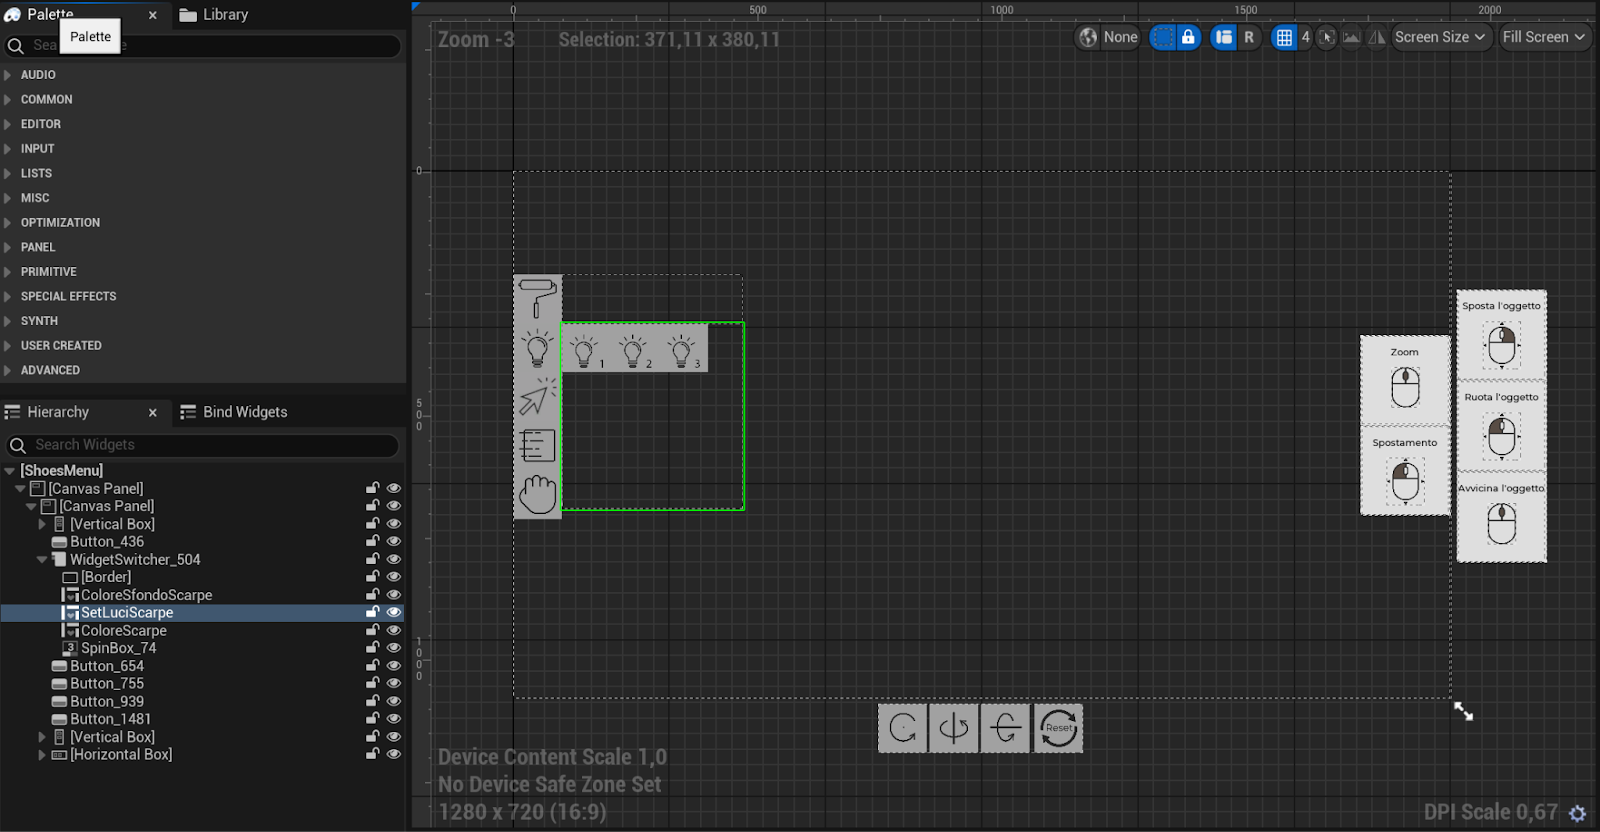
In this step, I first designed a wireframe interface to have a precise idea of where to place the buttons to make the application simple to use, and then in Adobe Illustrator I designed all the icons.
Wireframe interface and final result
The main goal in terms of design was to keep it clean, and for this reason, I decided not to use text except for the right part of the interface.
The interface is structured in two parts. On the left, all the buttons which allow you to interact with the environment and the shoes. On the right, there is a small legend that explains how you can use the application.
To keep it simple to use, the interactions happen with already known commands such as: scroll to zoom and left click plus mouse move, to orbit around the model.
All the icons were made in two versions: black on a grey background for the standard look when the icons are not pressed, and white on a brown background when pressed.
Model preparation
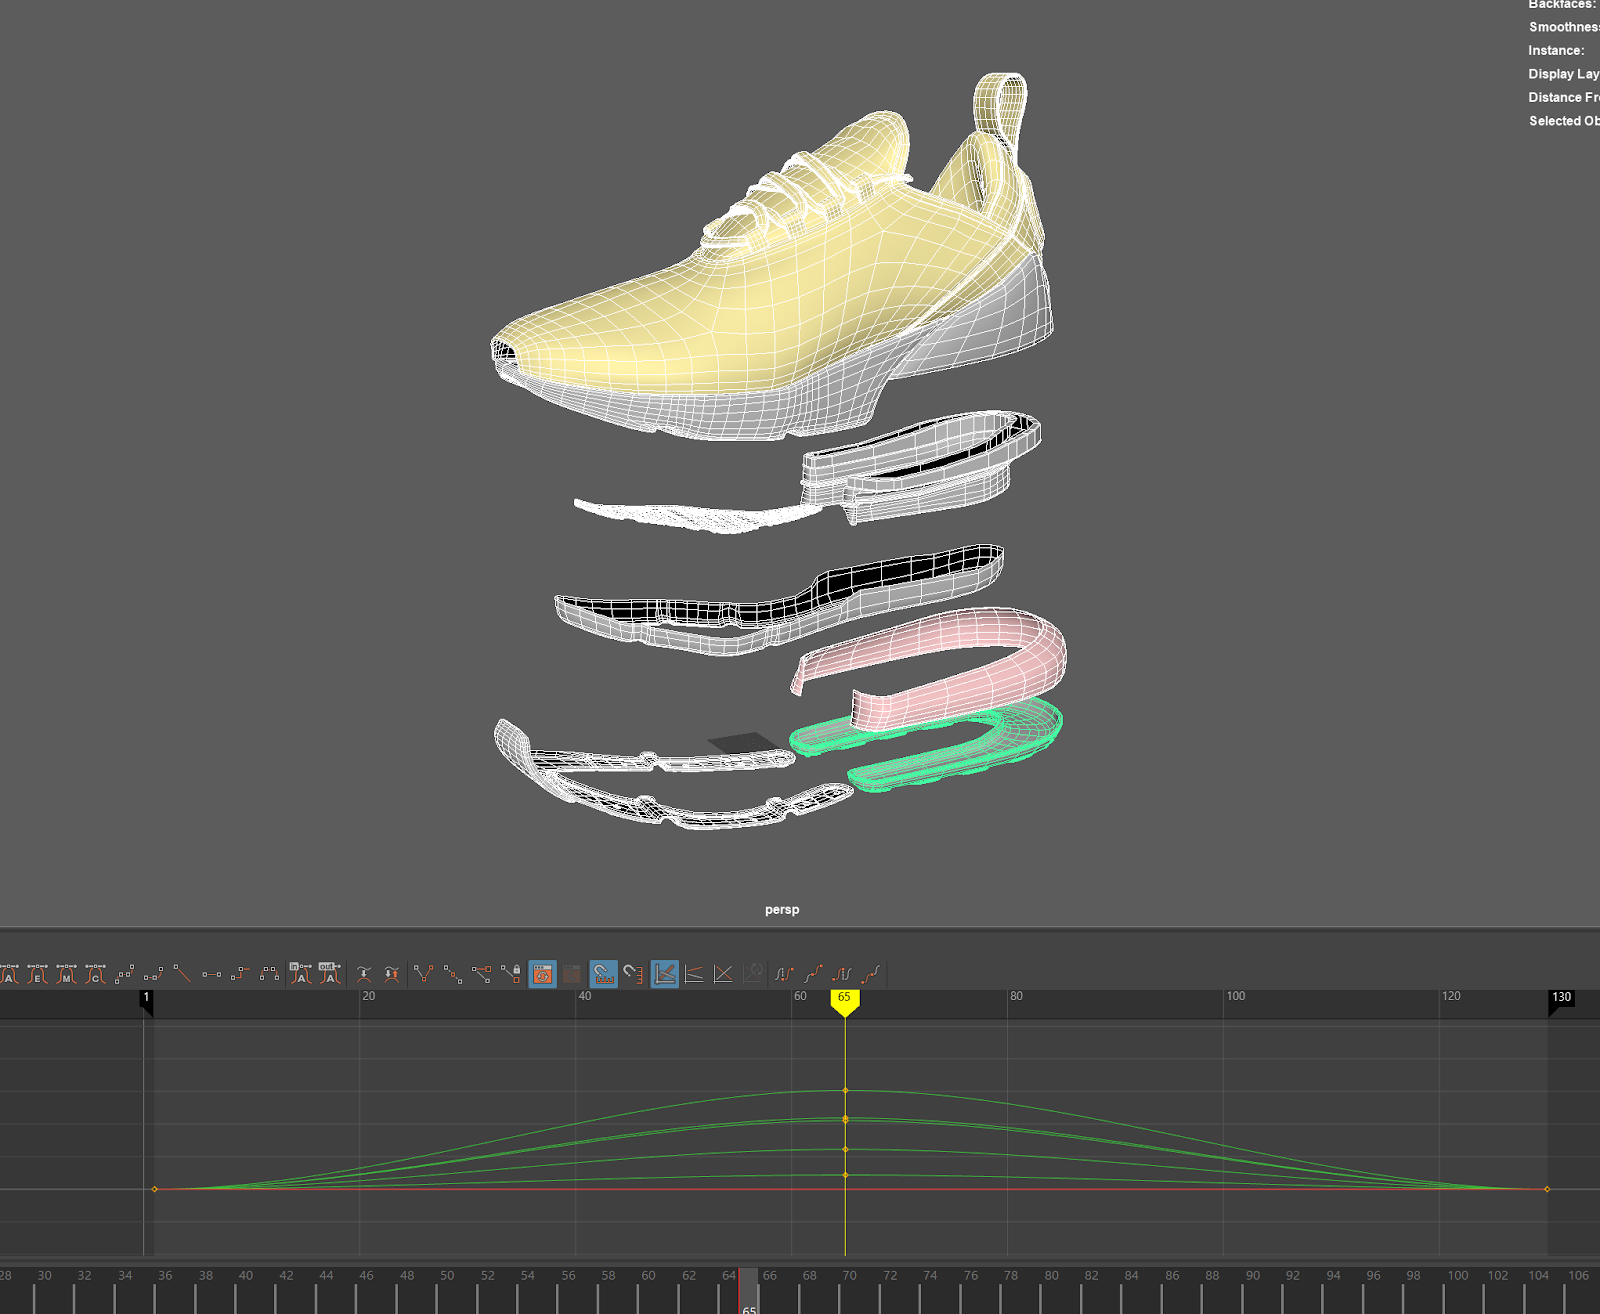
The model of the shoe was bought from Turbosquid and edited in Maya. Since the asset was perfect in terms of polygons, it didn’t require any optimisation.
The application gives the possibility, through a button, to see an exploded view of the model. This animation was prepared in Maya where the different layers were animated to open and close the shoe.
Exploded view animation in Maya
The next step involved exporting the model correctly. I experimented with different workflows, including the game exporter, alembic, and .fbx exporter. After conducting several tests, I opted for the .fbx exporter primarily for two reasons:
It allowed me to export the animation and then link it to a button inside Unreal.
It provided simplicity; if any modifications were needed for the model or animation, I could easily go back and forth between Maya and Unreal by exporting and overwriting the file.
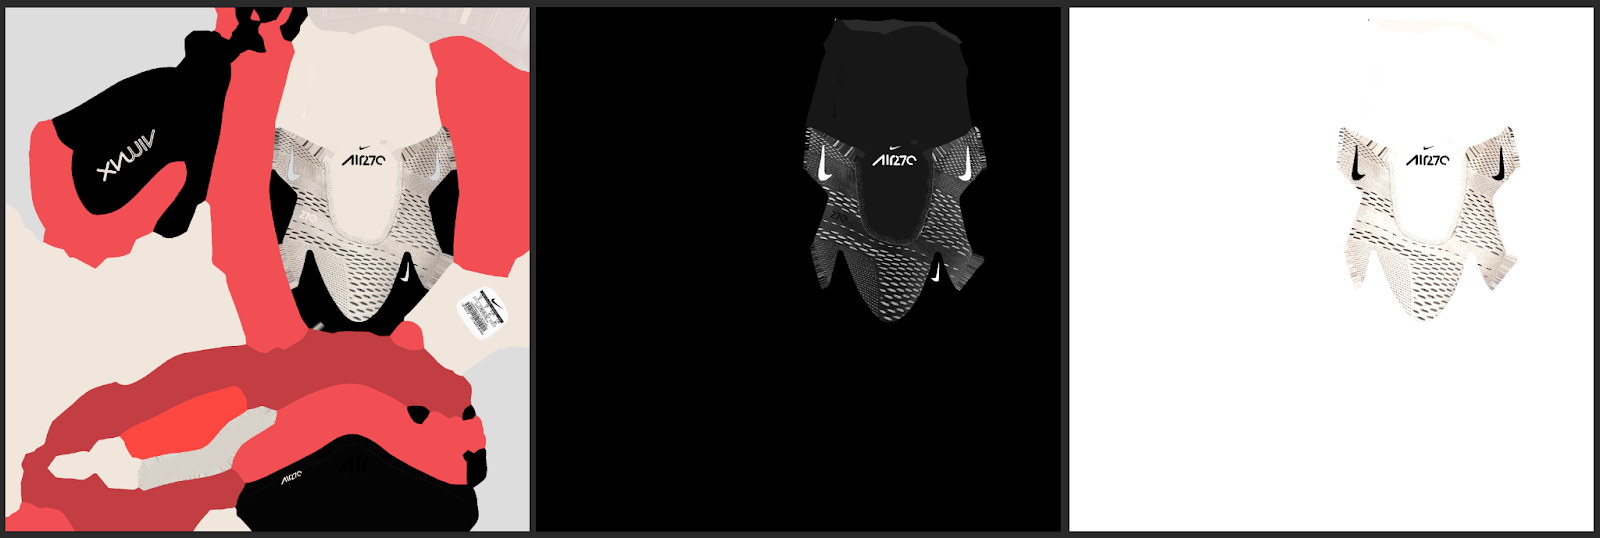
Additionally, to enable colour configuration changes, all texture variations were prepared in Photoshop.
Shoes textures variations
Scene preparation
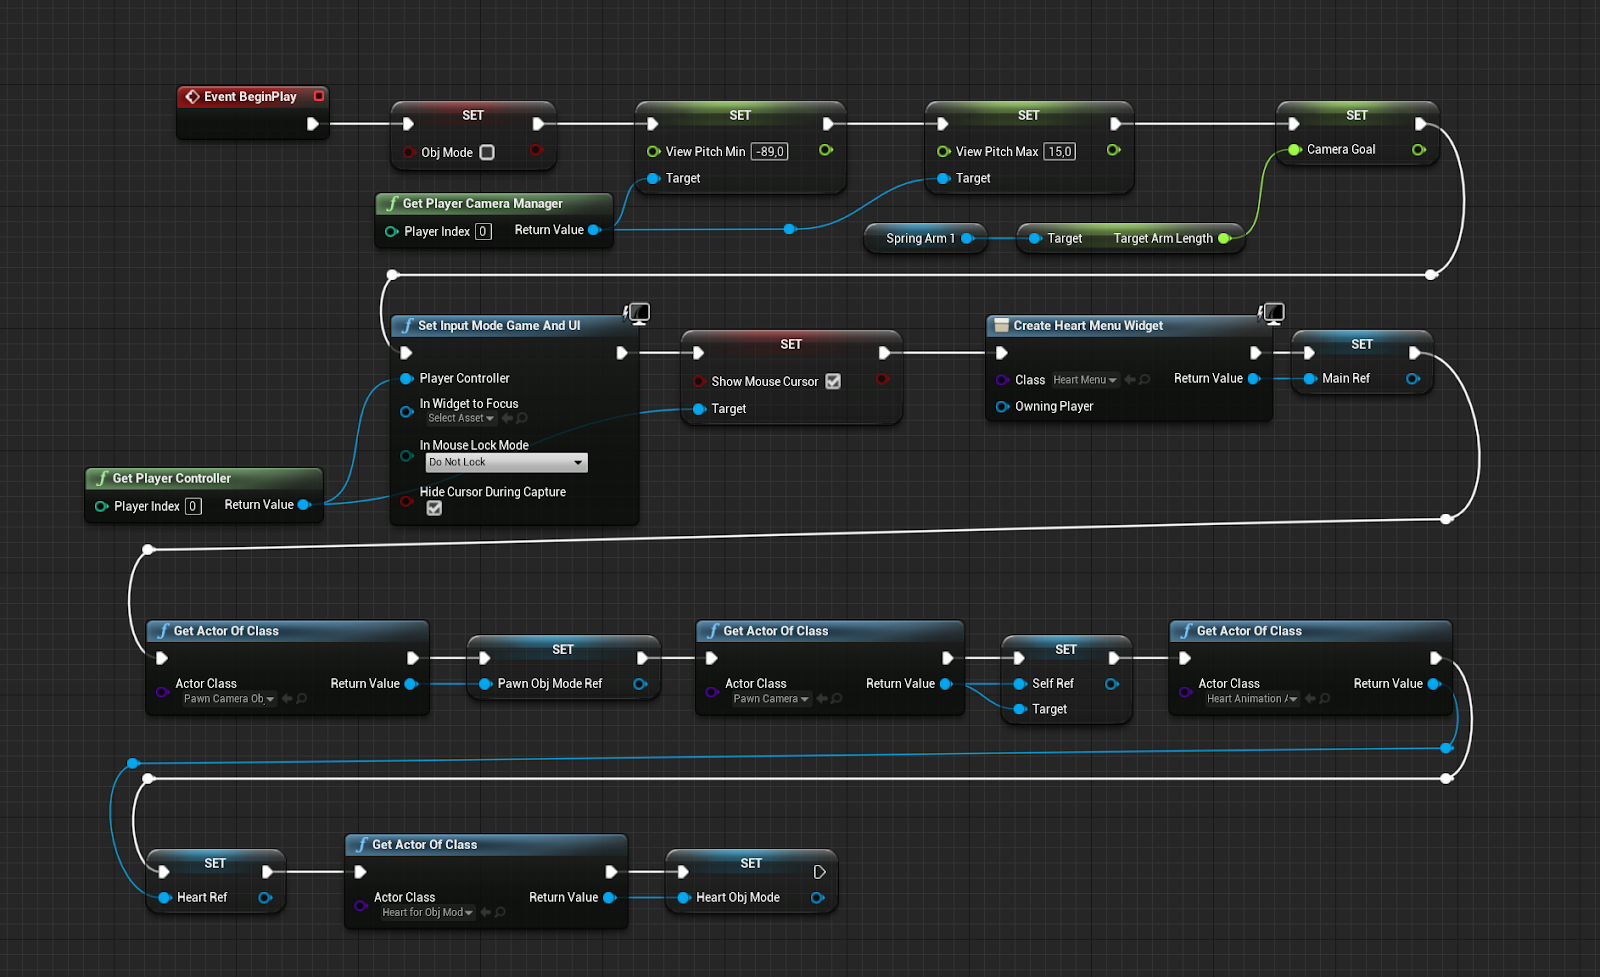
The shoe model and its animation were imported into Unreal, and a blueprint class was created for it.
Blueprint class for the shoe
This makes the model editable via blueprint and allows to link its properties to the interface buttons. After that, the scene was prepared in Unreal following the references found for the look.-p;/.
A 360° limbo and three different light sets were prepared, as one of the buttons enables switching between various light setups. To optimize the scene for at least 30fps, I limited the number of lights, considering that more lights consume more computing power and can lower the framerate in real-time. The initial light setup included a skylight utilizing an HDRI, two rectangular lights (one for fill and one for key light), and two point lights.
Lights setup
All the icons realised with Illustrator were imported in Unreal and placed correctly inside a widget.
Interface preparation
Interaction programming
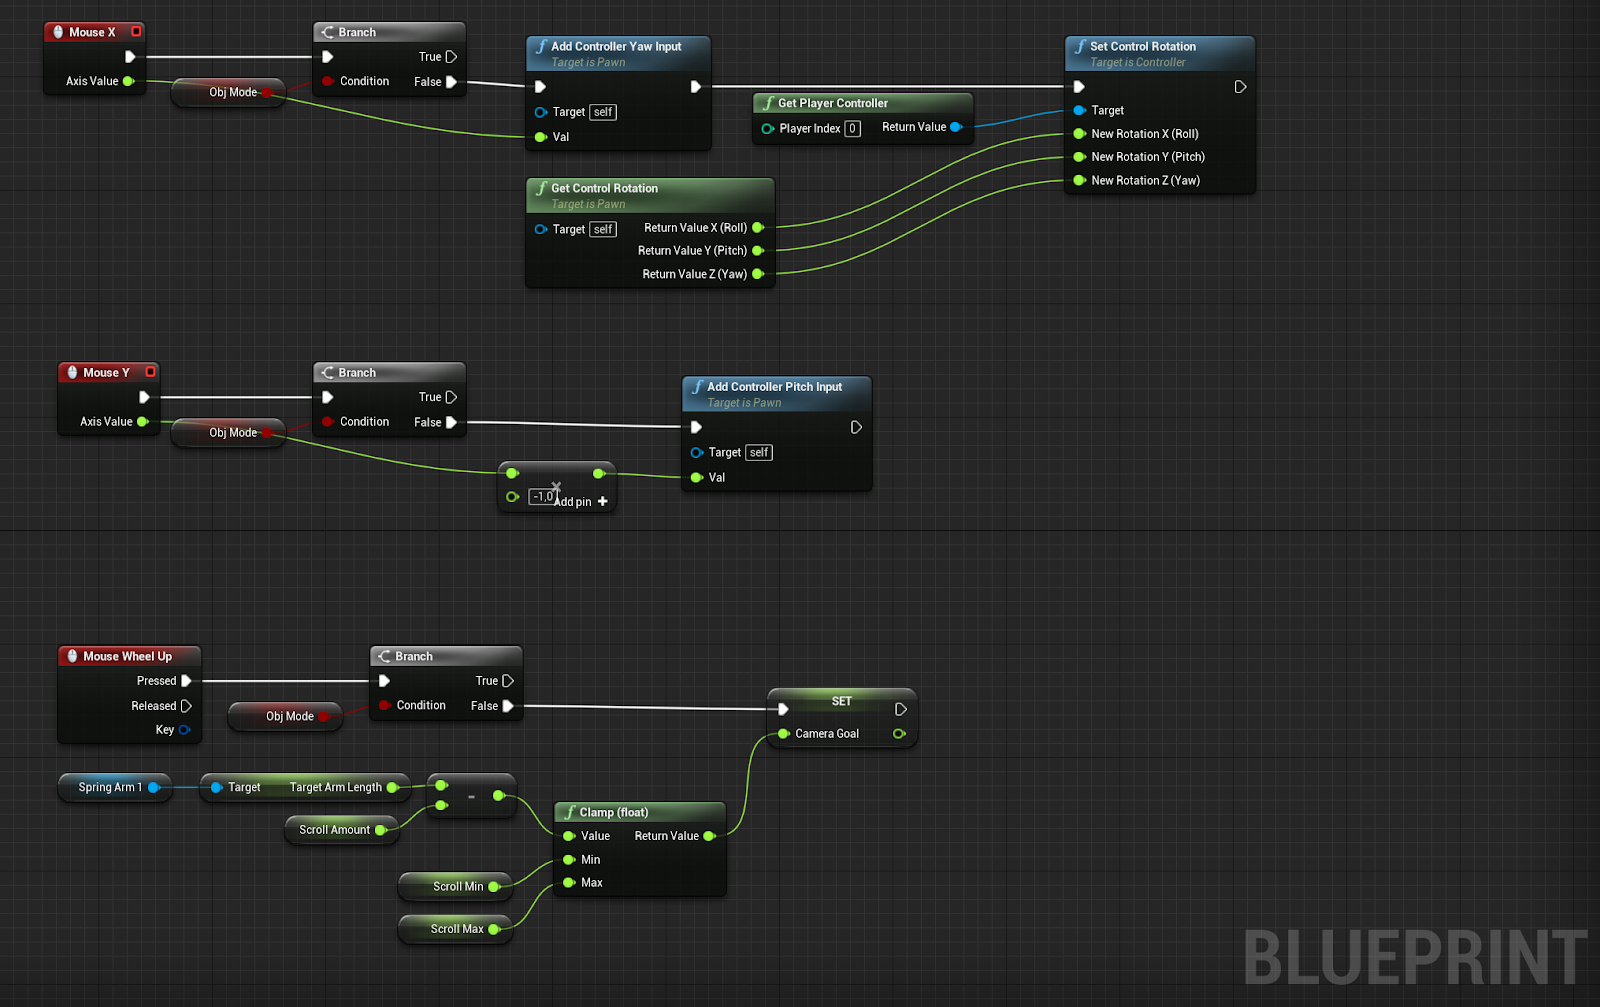
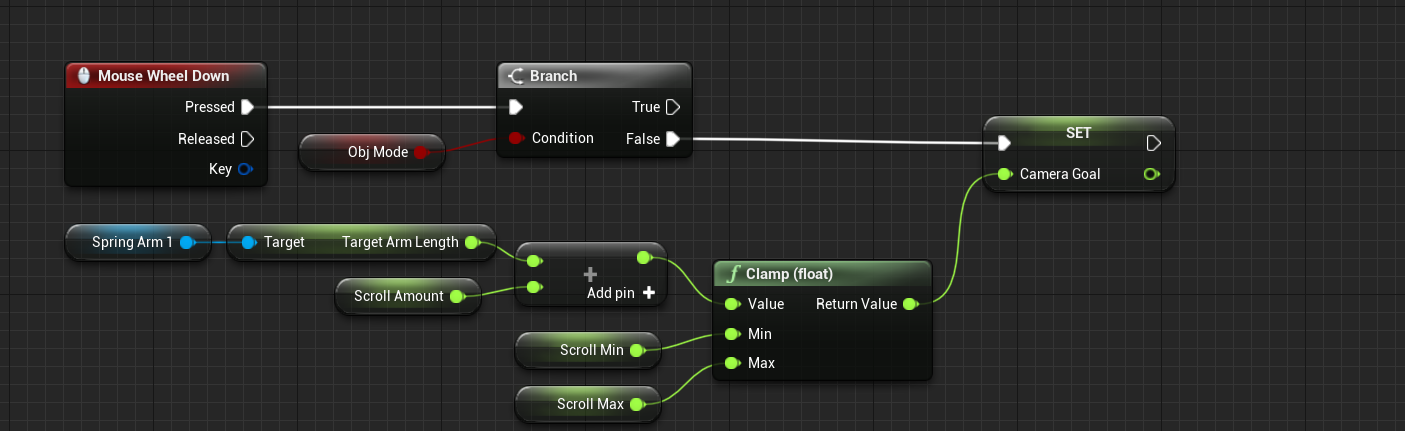
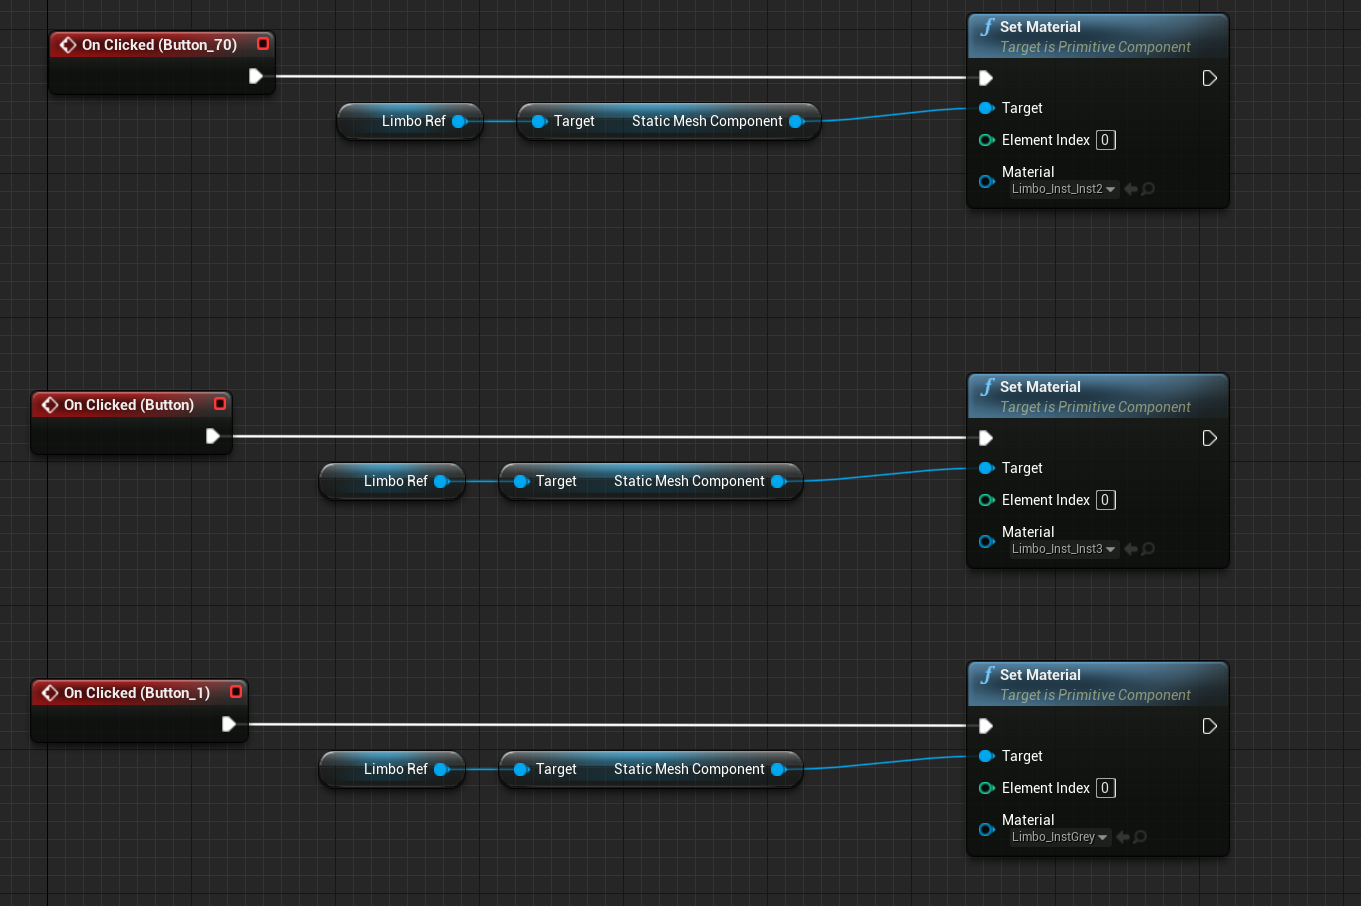
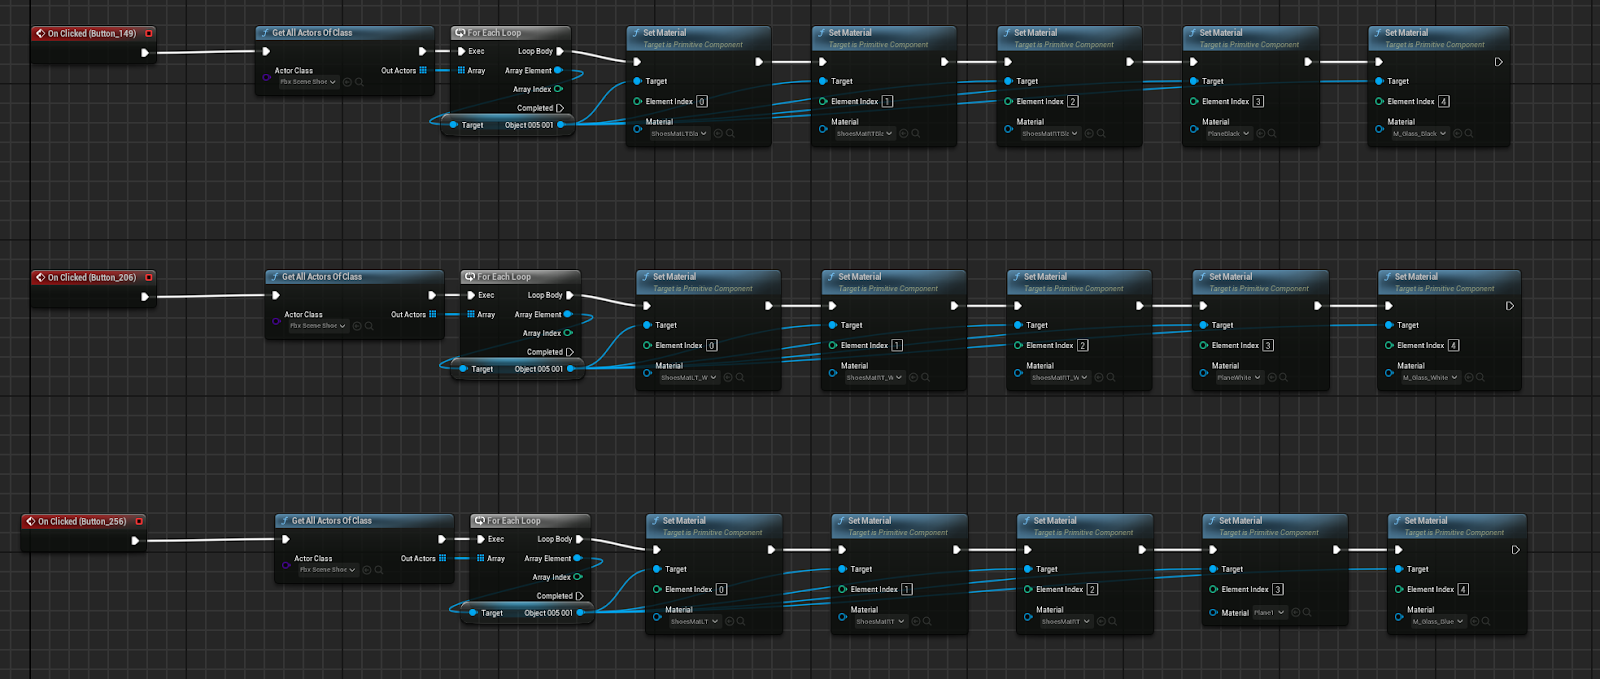
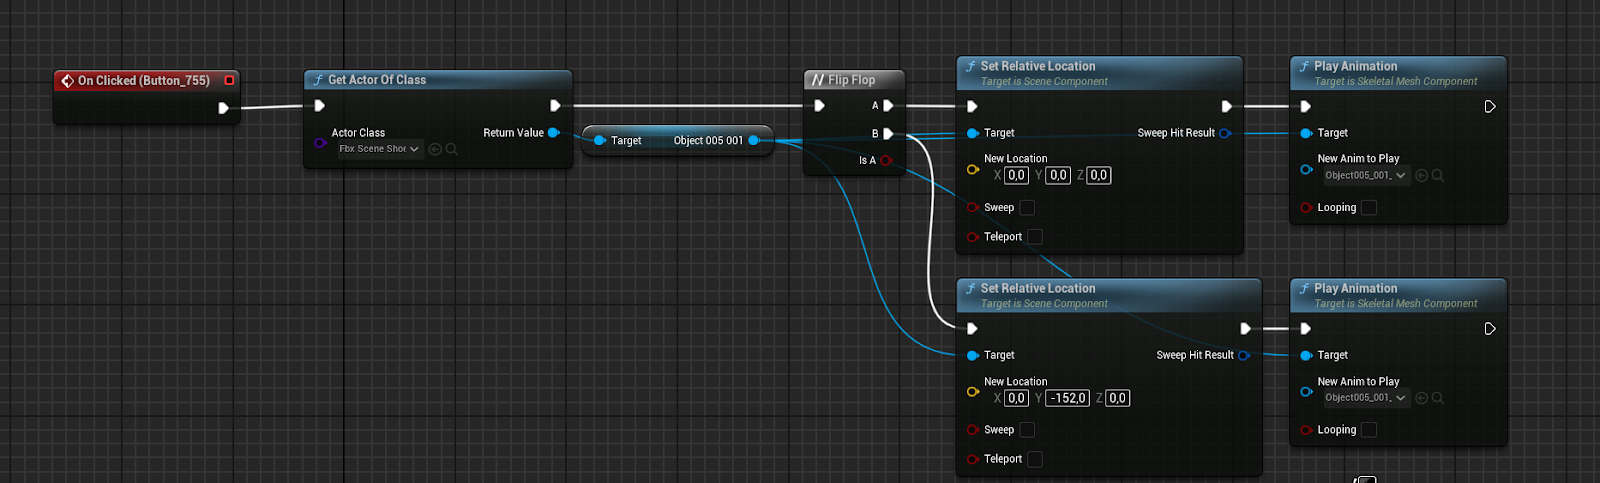
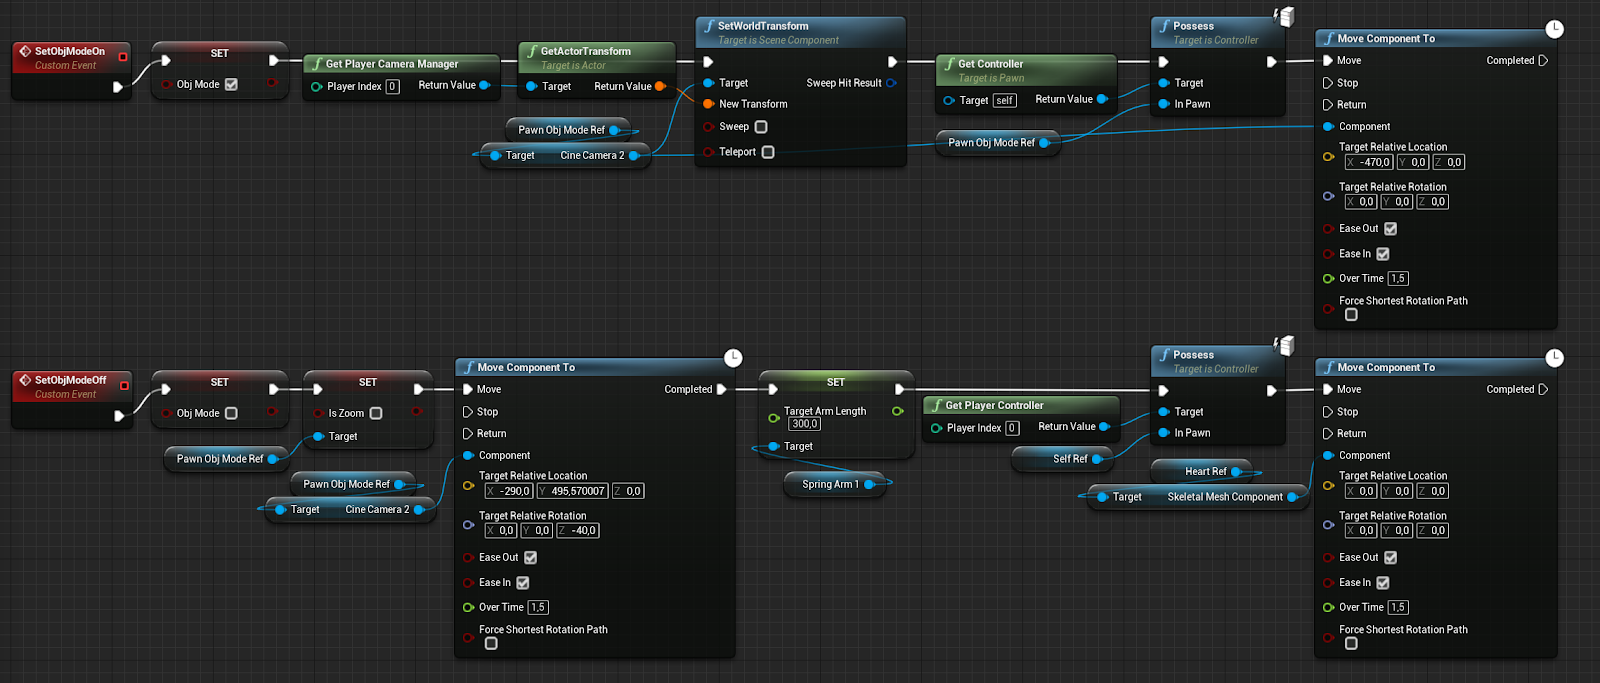
The last step was the one that took the longest: programming all the interactions and linking them to the buttons.
All programming was made with blueprint that easily allowed program interactions with a node language:
mouse interactions
Starting setupMouse move and zoom inZoom out
Background color
0:00
/
Background color
Switch light setup
0:00
/
Switch light setup
Shoe configuration
0:00
/
Shoe configuration
Exploded animation
0:00
/
Exploded animation
Switch interaction mode
0:00
/
Switch interaction modeSwitch interaction mode
Conclusion
The entire process was fun and straightforward. The application came out clean and simple as planned in the design phase.
The most challenging aspect was undoubtedly programming all the interactions with Blueprint. Despite my background as a 3D artist, I needed to study how Blueprint works and how to tailor it to my specific needs.
I watched hours of YouTube videos and explored the learning section on the Unreal website. Mathew Wadstein's videos were particularly helpful, as they taught me about basic nodes and their functions.
What I learned by studying Unreal and Blueprint was that the most effective way, at least in my case, was to learn something and immediately try it, and spend a lot of time trying and making mistakes until you find the correct solution.
I chose Unreal Engine to explore its potential with ray tracing, global illumination, and reflections. One challenge I encountered was finding a balance between scene quality and frame rate. Real-time technologies, especially in Unreal Engine 4, can be resource-intensive. With my hardware limitations, I had to compromise by slightly reducing the quality of global illumination and reflections to maintain an acceptable frame rate of 30fps. Overall, I'm satisfied with the final result, especially considering that this was my first experience with programming in Unreal Engine.
As a 3D artist, my goal for the future is to work more in Unreal to create interactive applications and environments. I would like to improve my coding skills to create even more complex applications.
The project reached its goal showing what is possible today with Unreal and the realtime technologies.