
Developing a Personal Project: Interior Design in Concept Art
Keira Santoso, a self-studying illustrator and concept artist, previously at New3dge, shares her unique style of concept art showcased in her Rookies portfolio.
Keira Santoso, a self-studying illustrator and concept artist, previously at New3dge, shares her unique style of concept art showcased in her Rookies portfolio.

Introducing Keira Santoso, a previous student at New3dge and now a self-studying Illustrator and Concept Artist who discovered her passion for the creative industries during her high school years. Driven by her love for artistic processes and challenges, Keira dedicated her post-secondary education to honing her skills in this field. We really enjoyed the work we saw in her Rookies portfolio and asked her to share more about her style of concept art.
Hello, my name is Keira, and I'm currently studying illustration and concept art. In the past, I often used to stress about creating personal projects that were fit for a portfolio. However, I later realized that personal projects can be very enjoyable, and the hardest part was simply getting started. Today I’m excited to show my process on both starting and managing a personal project.

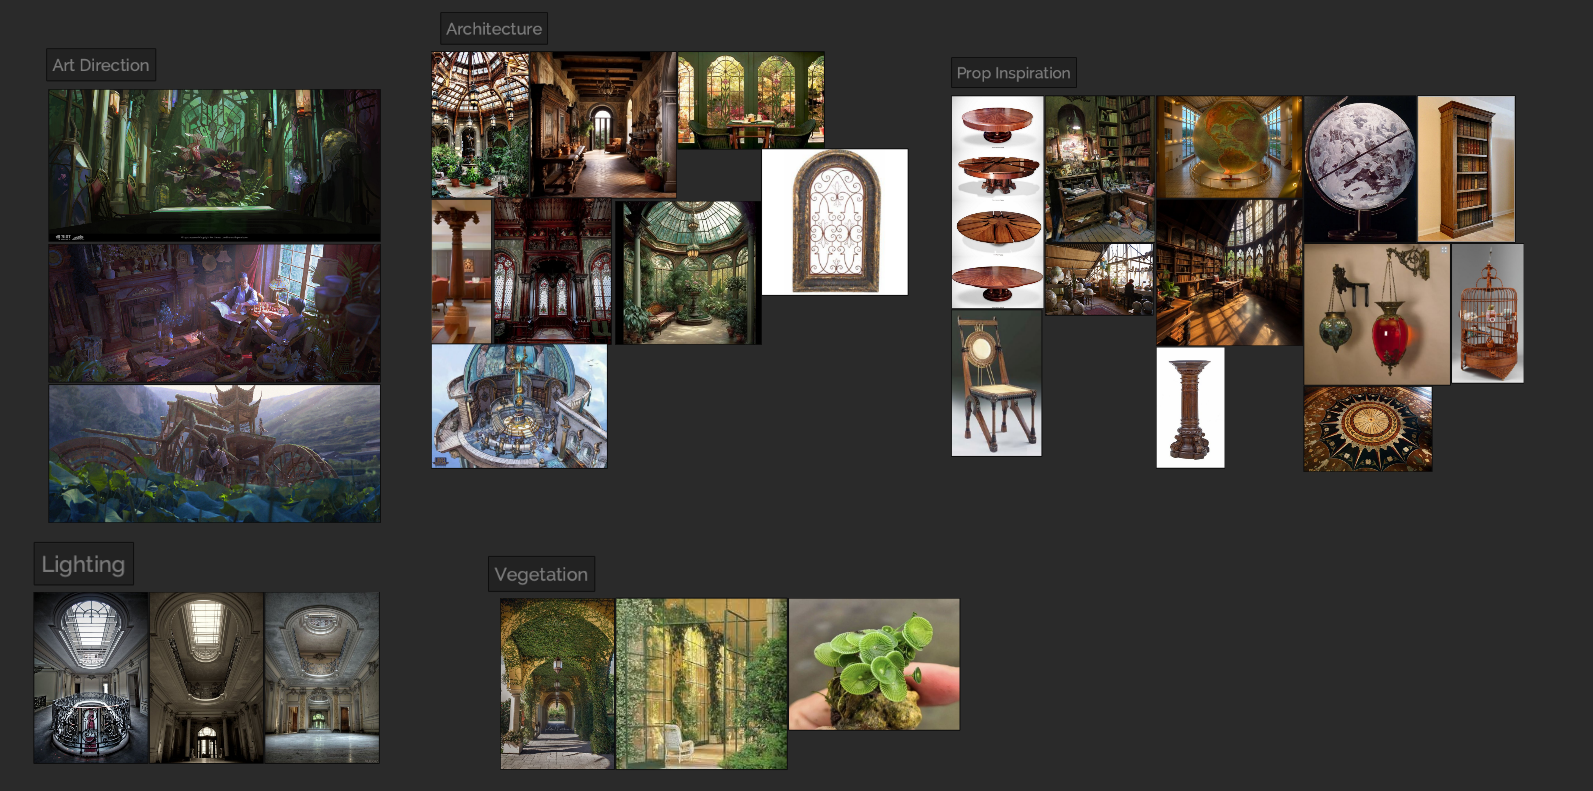
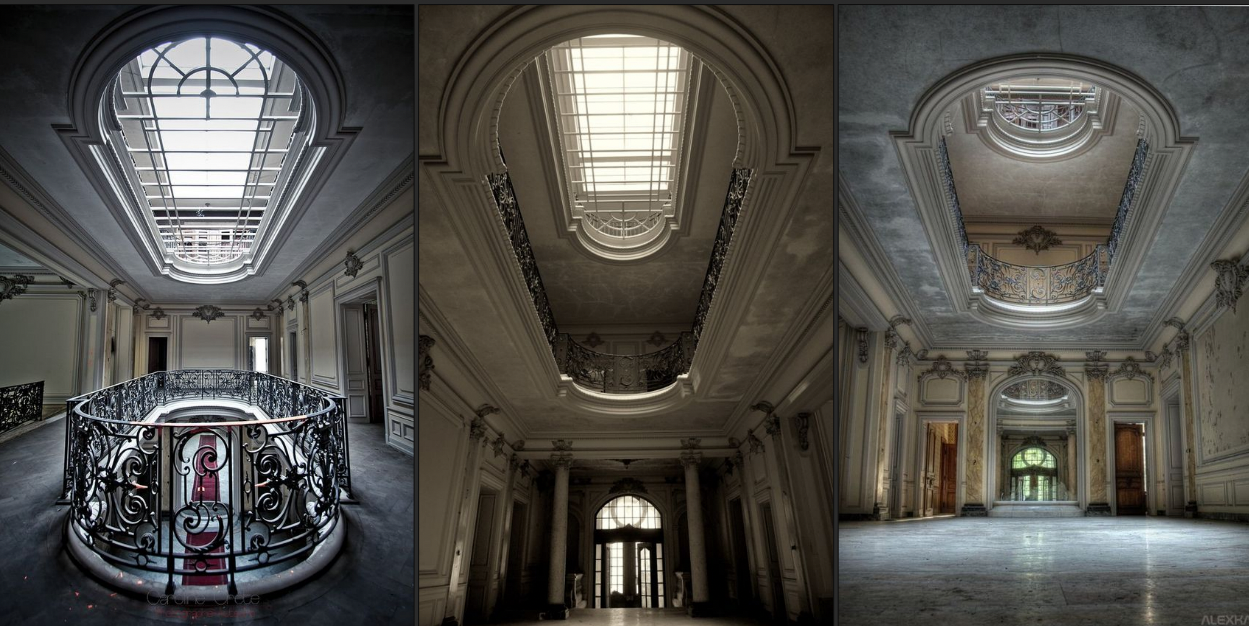
Regardless of whether it's personal or not, it never hurts to start a project with research. When I’m feeling uninspired, even looking at various images is enough to spark an idea. That being said, I try to limit how many references to use, otherwise it gets confusing referring to too many ideas. Once I have a solid idea on what to create, I establish my goals.
For this project, my goal was to create an interior concept using 2D and 3D techniques. If I were to pitch the concept in one sentence, it would be as follows:
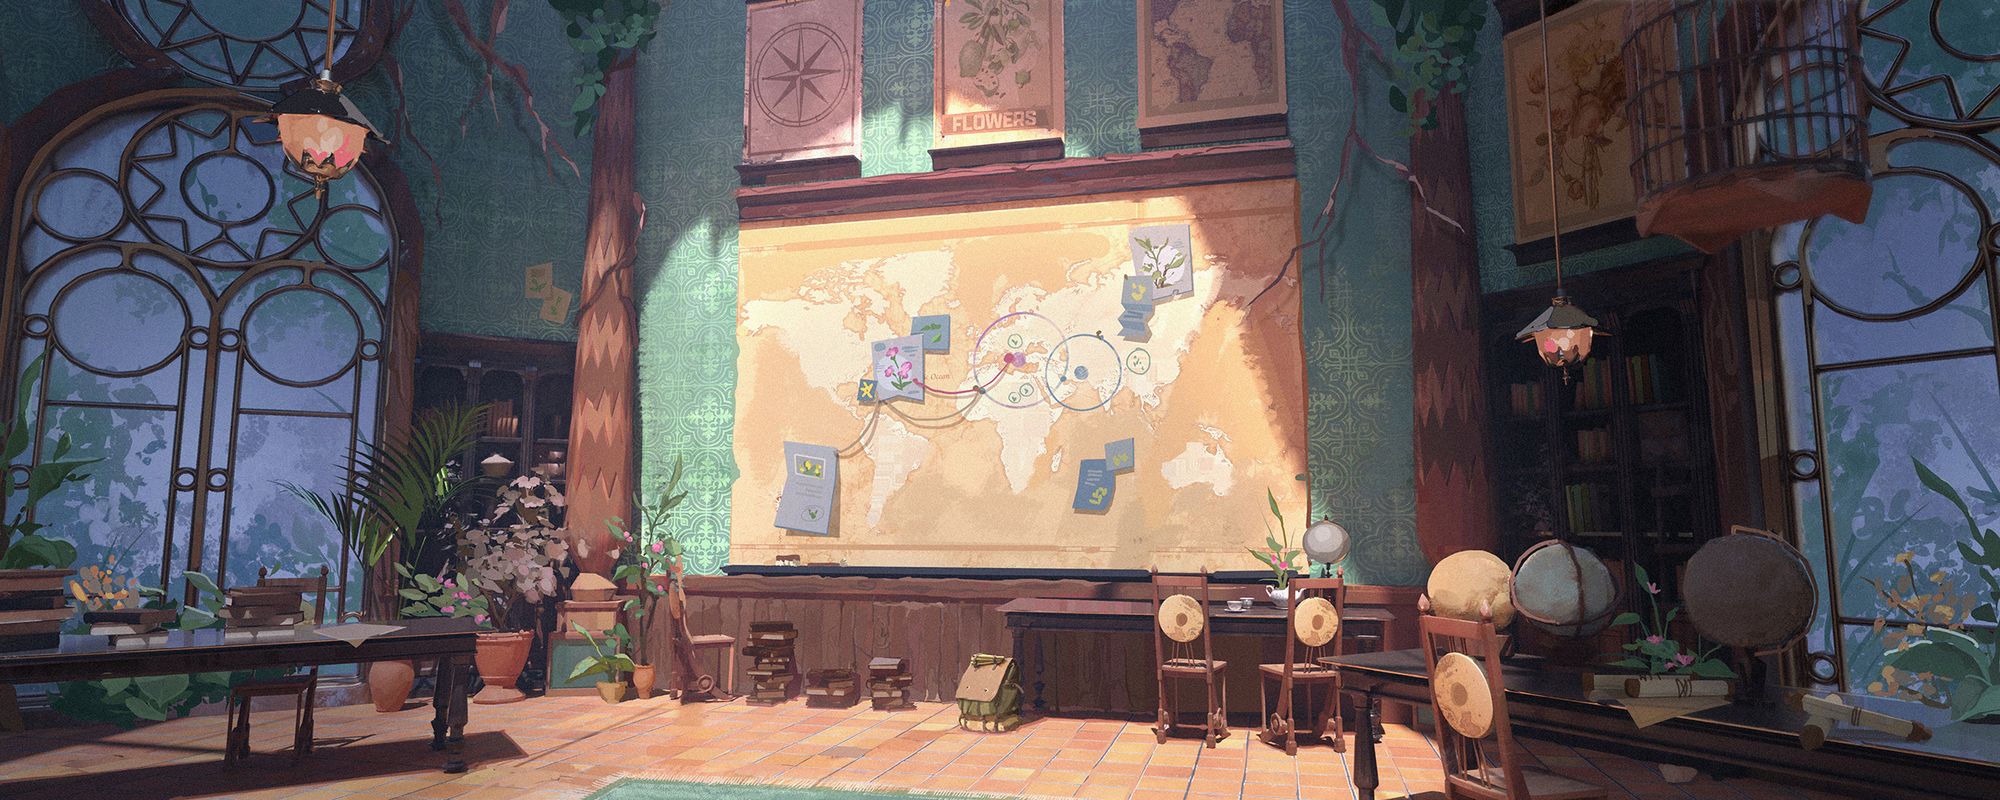
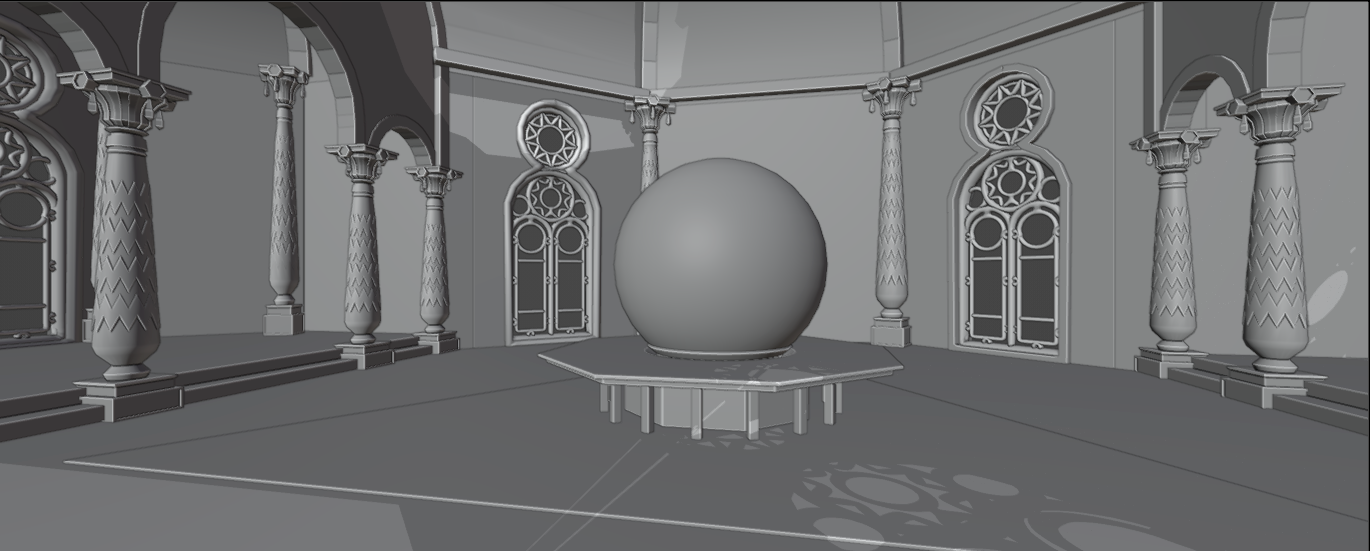
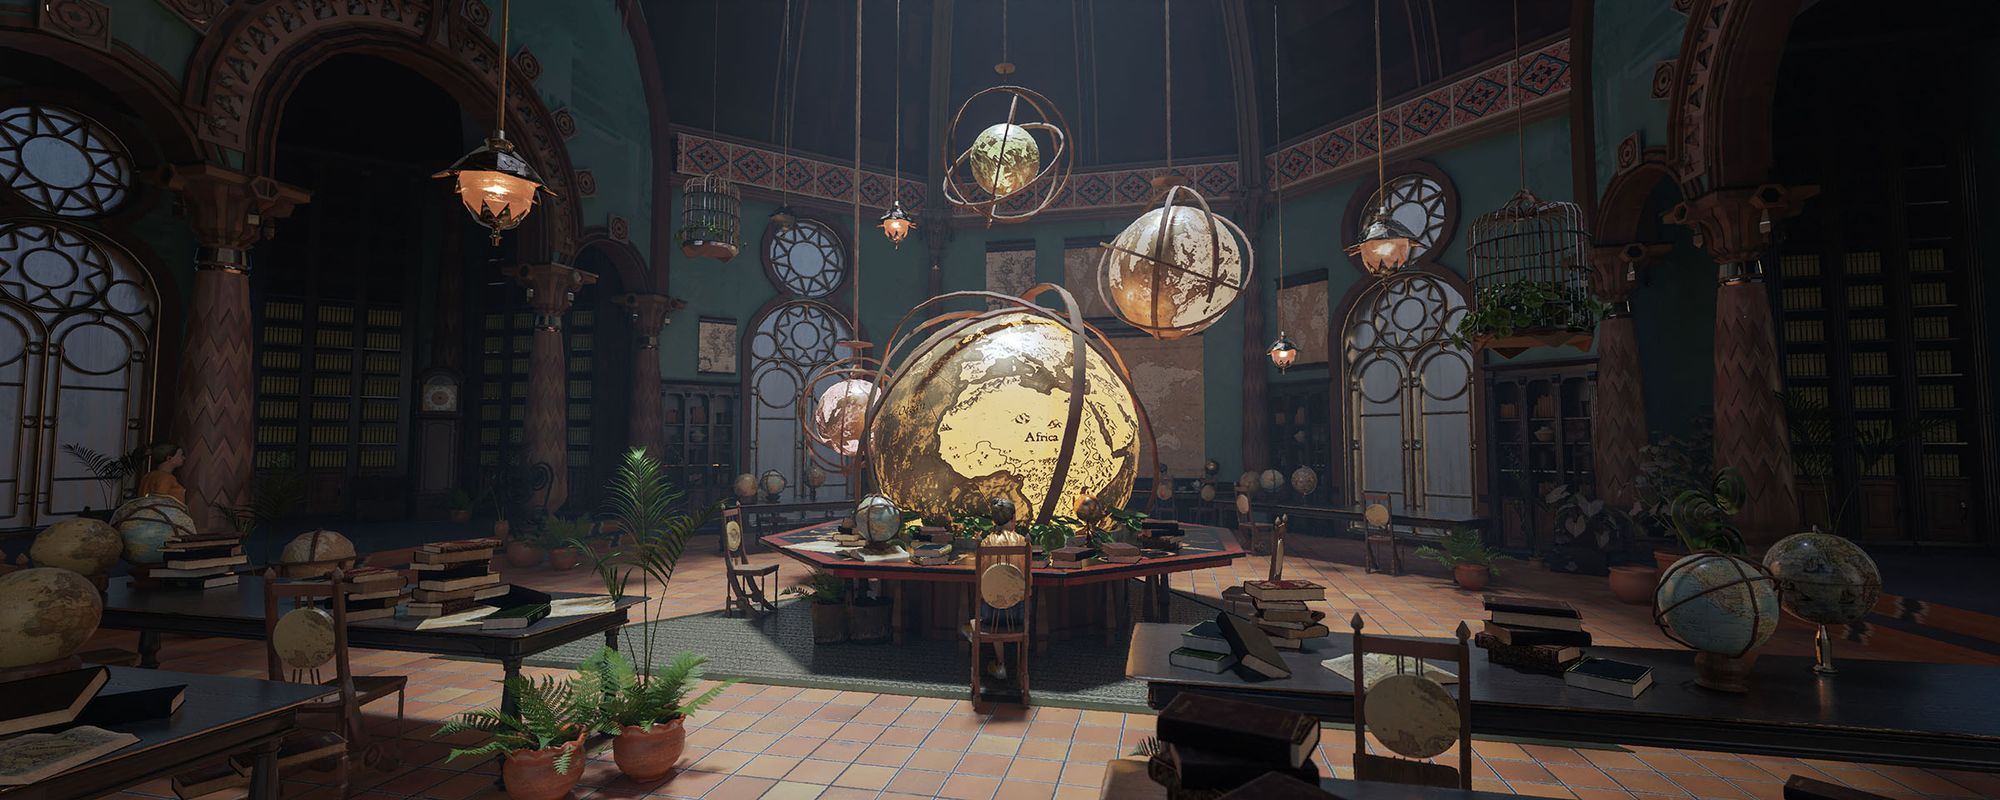
“A cluttered, private botanical cartography studio, located in a Mediterranean forest.”
Time taken: ~3.5 weeks
Programs used: Blender, Photoshop
With a solid endpoint in mind, I assembled a moodboard and gathered references from Pinterest and Unsplash. ArtStation is great for artistic reference as well.
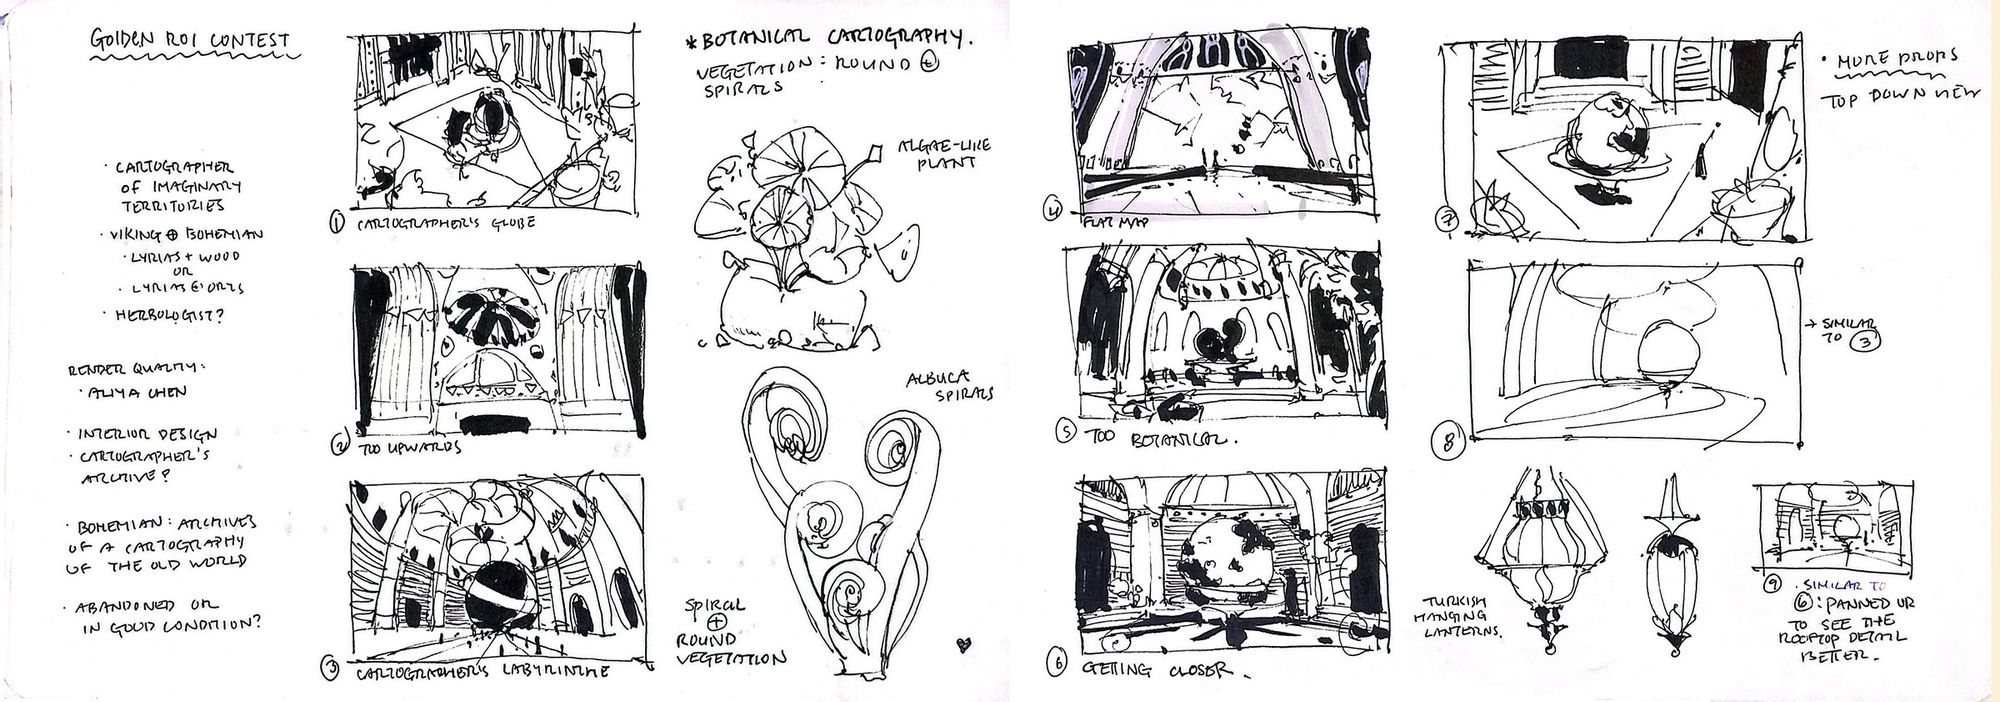
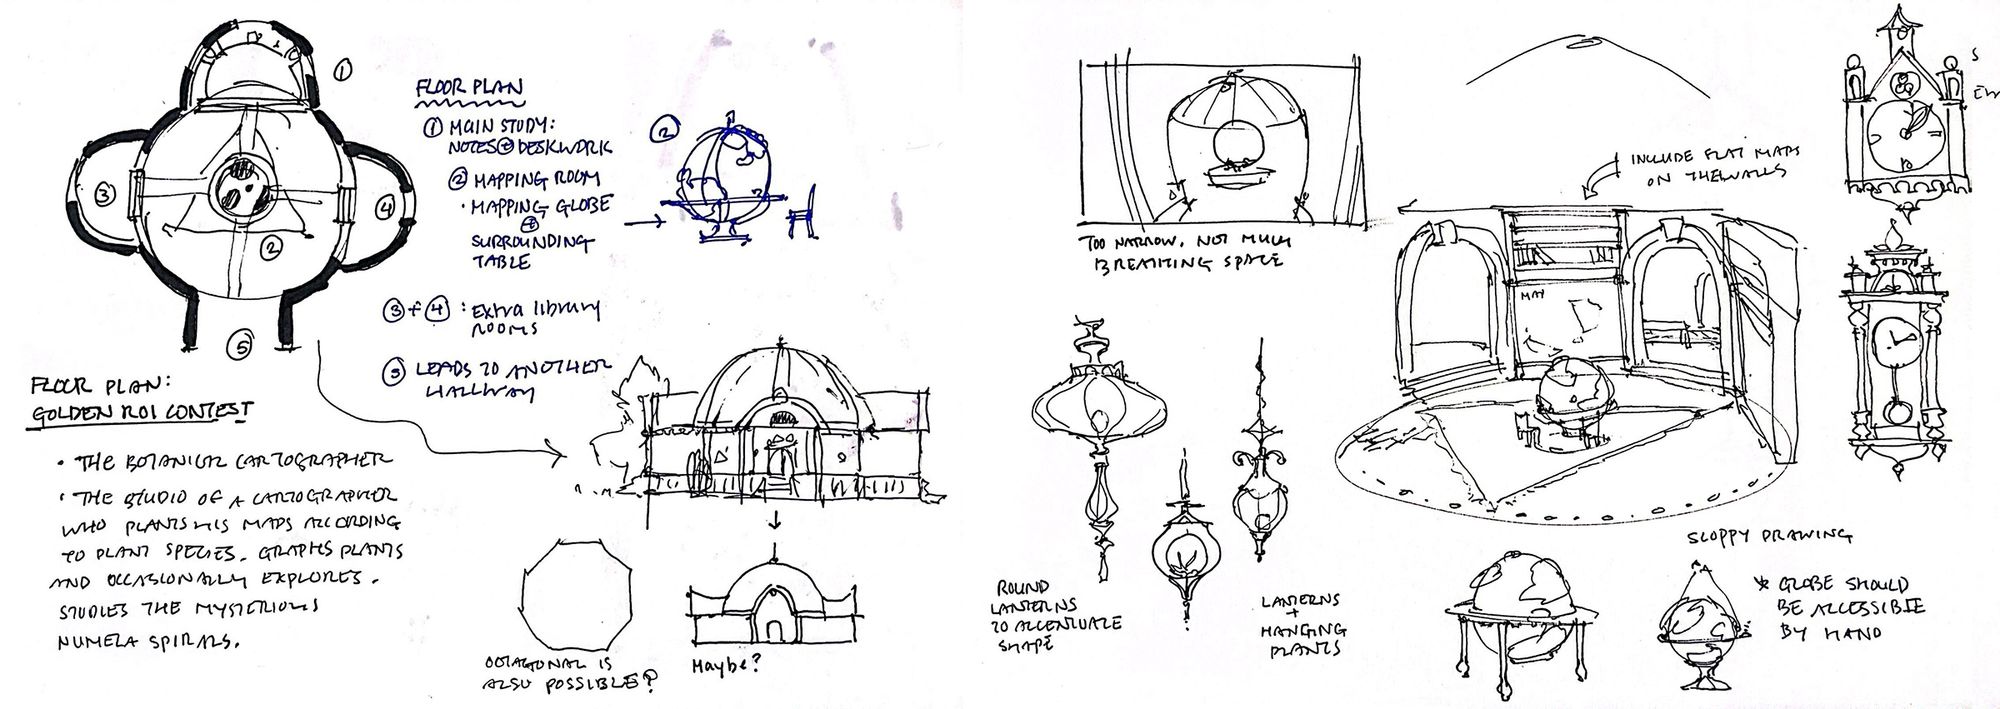
Usually, I sketch iterations in Photoshop. This time, I went analog in my sketchbook between school breaks or on transit. These were for myself only, so I didn’t focus on developing clean iterations.
I did some composition thumbnails, loose design sketches, and a few prop studies. I also included floor plans and an exterior elevation of the design.
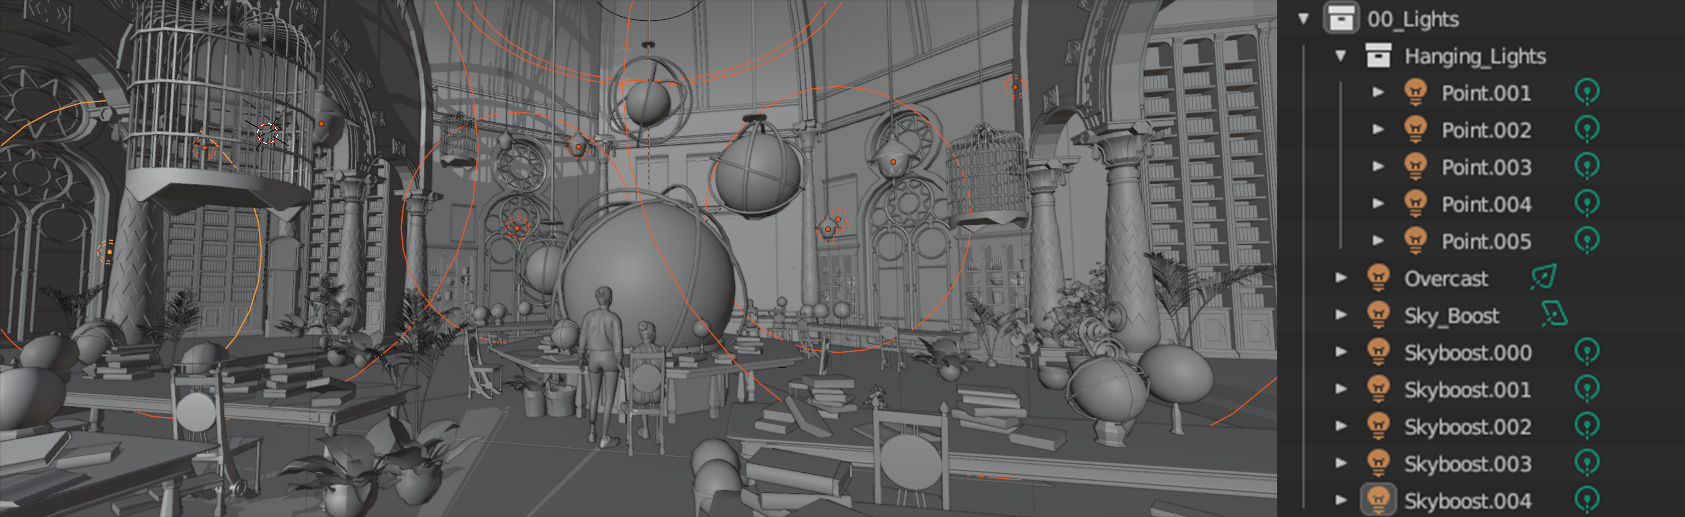
After finishing the design, I moved on to 3D modelling in Blender. It's important to keep the 3D proportions accurate to reality to avoid hitches in scale.
I started with blocking out the structural details such as the floor, walls, roof, rafter beams, windows and supporting pillars. This is where the design sketches came in handy to reference while modelling. I also established the focal point of the design, which is the spherical atlas in the center.
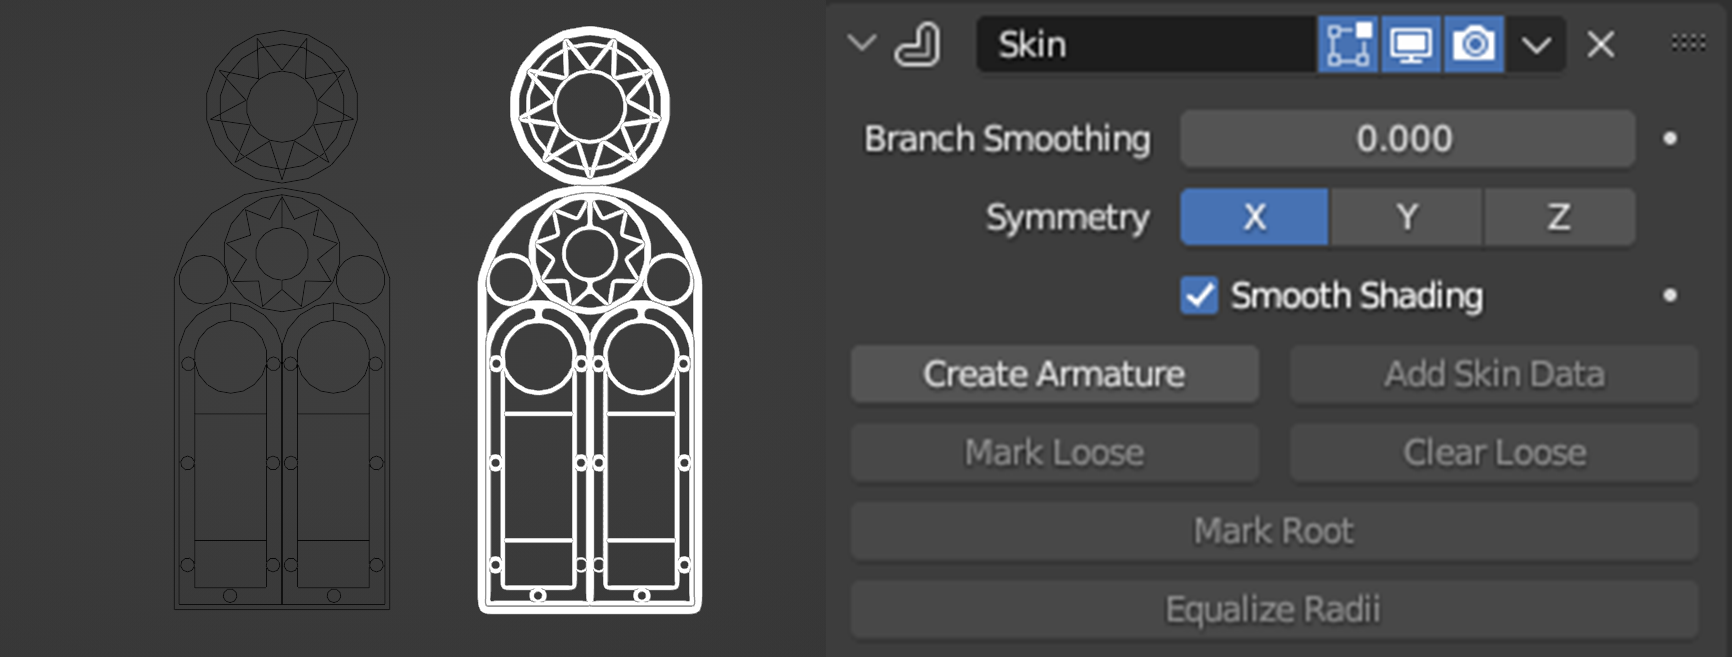
A tip for modelling decorative windows is to use the skin modifier. By using a skeletal mesh with the skin modifier, you can quickly adjust the object's thickness.
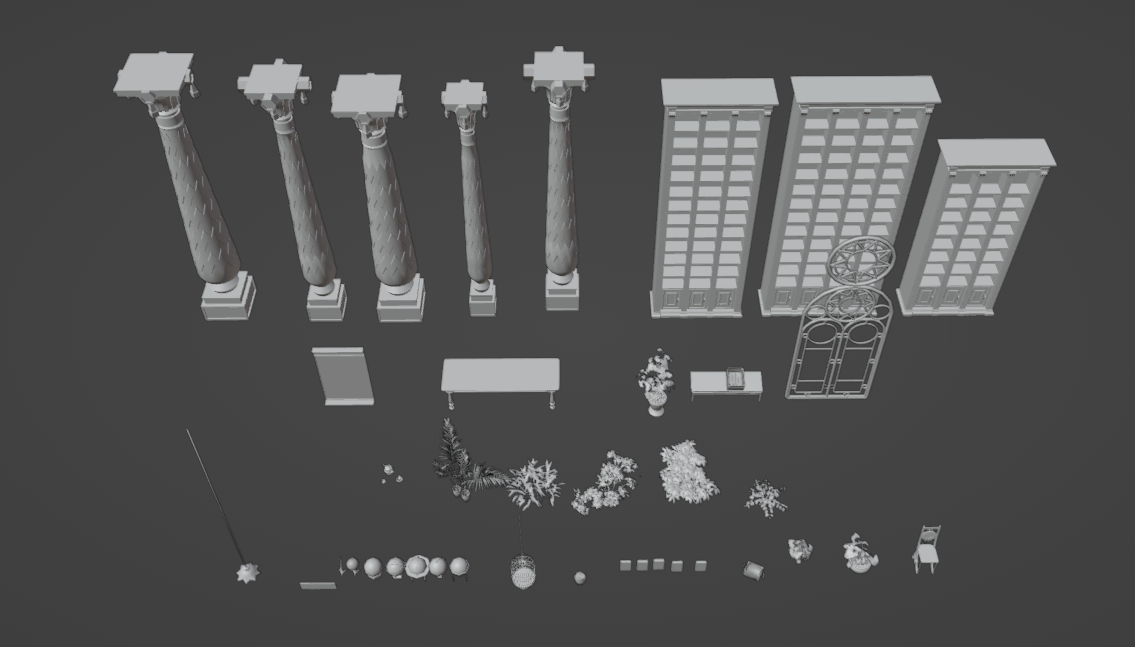
Once the base structure was finished, I moved on to furniture. I used some assets from previous projects, as well as modelled new assets such as the chairs and tables.
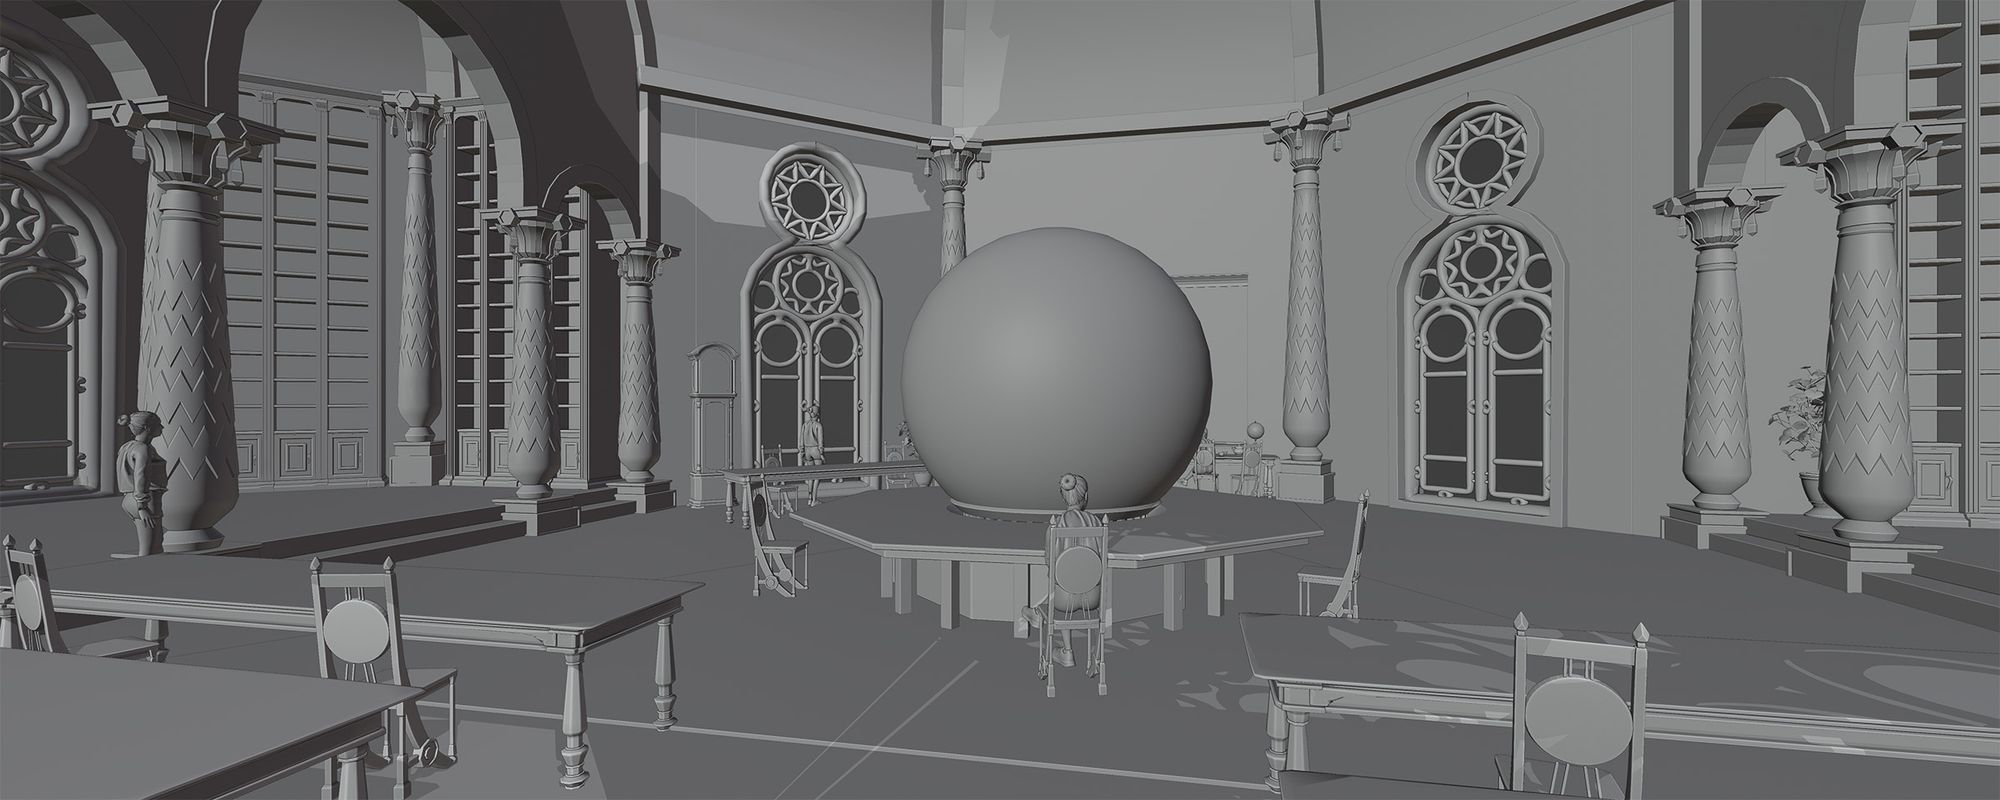
The last step in the modelling was smaller assets such as books, vegetation and trinkets. Most of these assets were from previous projects. For the vegetation, I imported some assets from Quixel Bridge.
At this stage storytelling became crucial: Who is using the space? Are they organised or scatter-brained? I wanted the space to be a cluttered, owned by botanical cartographers. Hence, I focused on haphazard placement of books, papers and plants. I also kept a library in the scene––this kept the file organized and allowed me to easily duplicate objects.

For texturing, I wanted to make something that was easy to paint over and that didn't look too “3D.” I painted some flat textures, as well as modified some photo textures in Photoshop to achieve this.
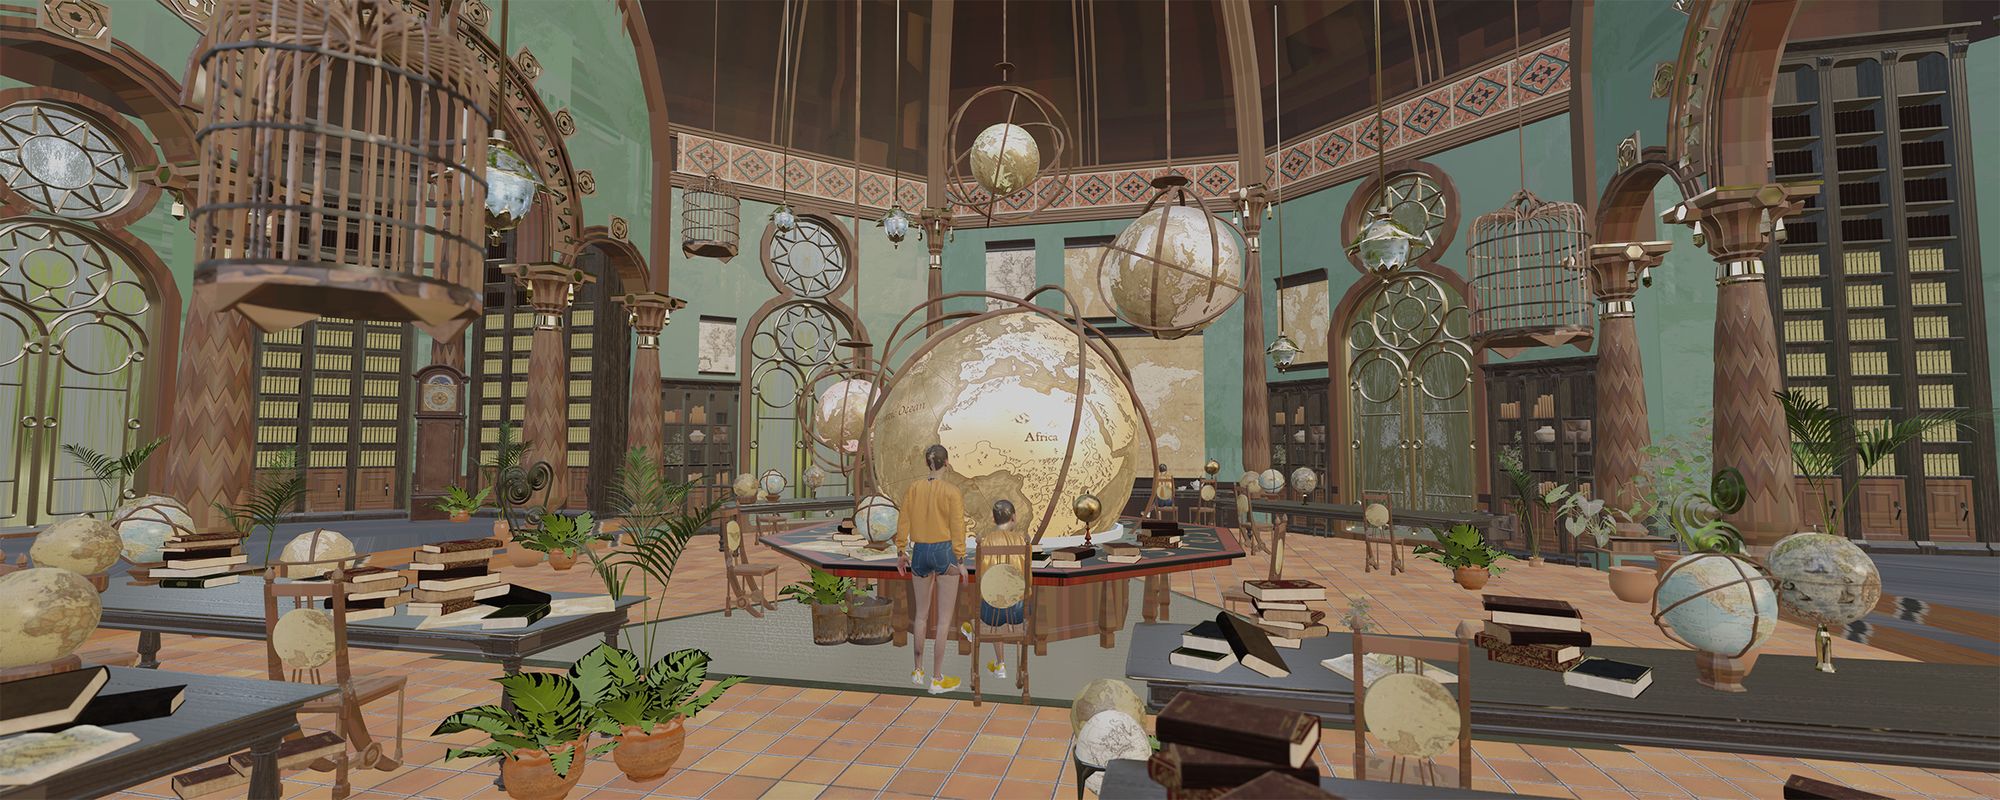
I referred back to my moodboard for lighting. I had some lights to boost the skylight, an HDRI, lamp lights, and a large area light for the main overcast above the building.
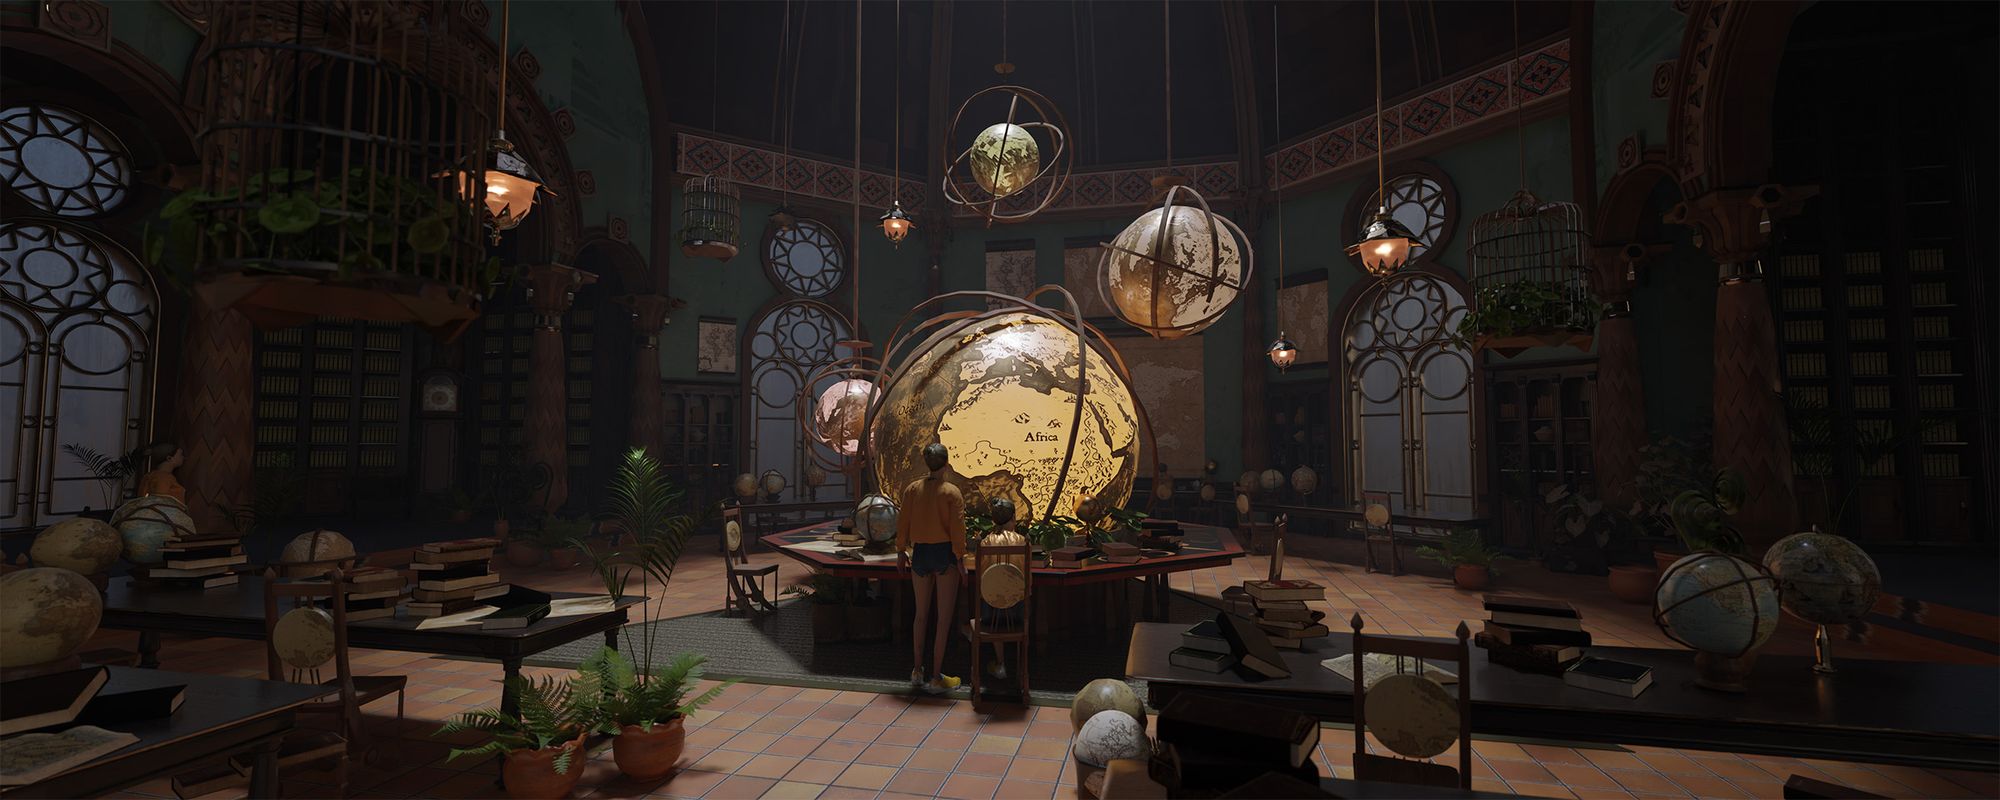
Once the render was complete, I moved the image into Photoshop to do a full paint-over. I started with the Camera Raw filter to set the atmosphere and match my reference’s lighting a little more.

When it comes to painting, I generally use both the round brush with full opacity, and use textured brushes like a “stamp” for textured painting. The lasso tool is also a great tool for painting clear shapes. At this point, I focused on simplifying detail from the 3D base, value grouping, as well as adding life to the image through brushwork and colour.
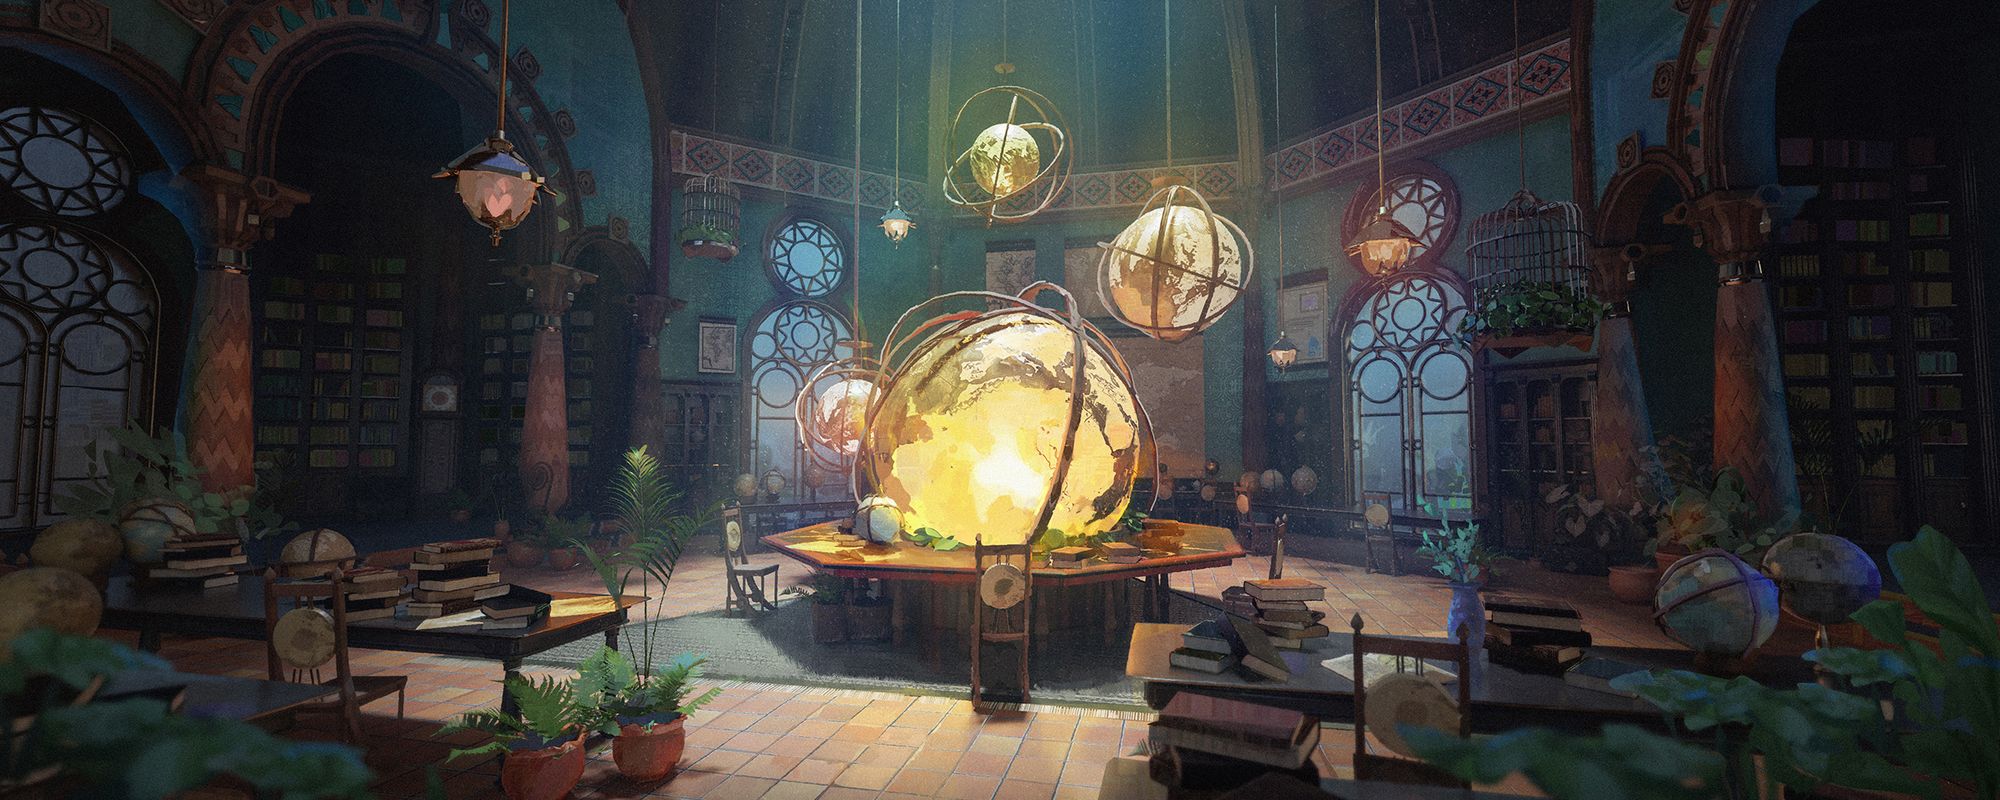
For composition, a friend gave some feedback to include more C-curve action leading to the focal point. To do this, I painted in some foreground vegetation. I also used overlay and hard light layers to make the painting more colourful.
Via the same process, I moved my camera around in Blender to create a secondary shot of the interior. I tweaked the lighting to best showcase the new angle.

While it can be difficult to manage time or find motivation, a personal project can be born from something as simple as an in-class doodle. It's important not to forget that personal work should be fun and an expression of what you like to do!
For me, the most difficult part about this project was time management. As a university student, it's difficult to commit time to personal projects while juggling school assignments. As mentioned earlier, the hardest part is starting. Once the idea is there, finding time becomes much easier.
Thank you for reading, and I hope this project inspires you in some way.
See more of Keira's work or contact her via her Rookies profile here.