Stylised 3D Model Project Inspiration: A Lighthouse Diorama
Marina Fuentes García, a student at L'Idem Creative Arts School, showcases her stylised diorama project, exploring hand-painting techniques and software like Maya, ZBrush, and Substance 3D Painter.
Marina Fuentes García is currently a student at L'Idem Creative Arts School in Barcelona. Her project in her Rookies portfolio caught our attention, prompting us to invite her to share more about it. The objective of this project was to create a stylised diorama and explore hand-painting techniques, along with other new methods, utilising software such as Maya, ZBrush, and Substance 3D Painter. If you're looking for inspiration for your next project, Marina's work might just be what you need!
Project Goal
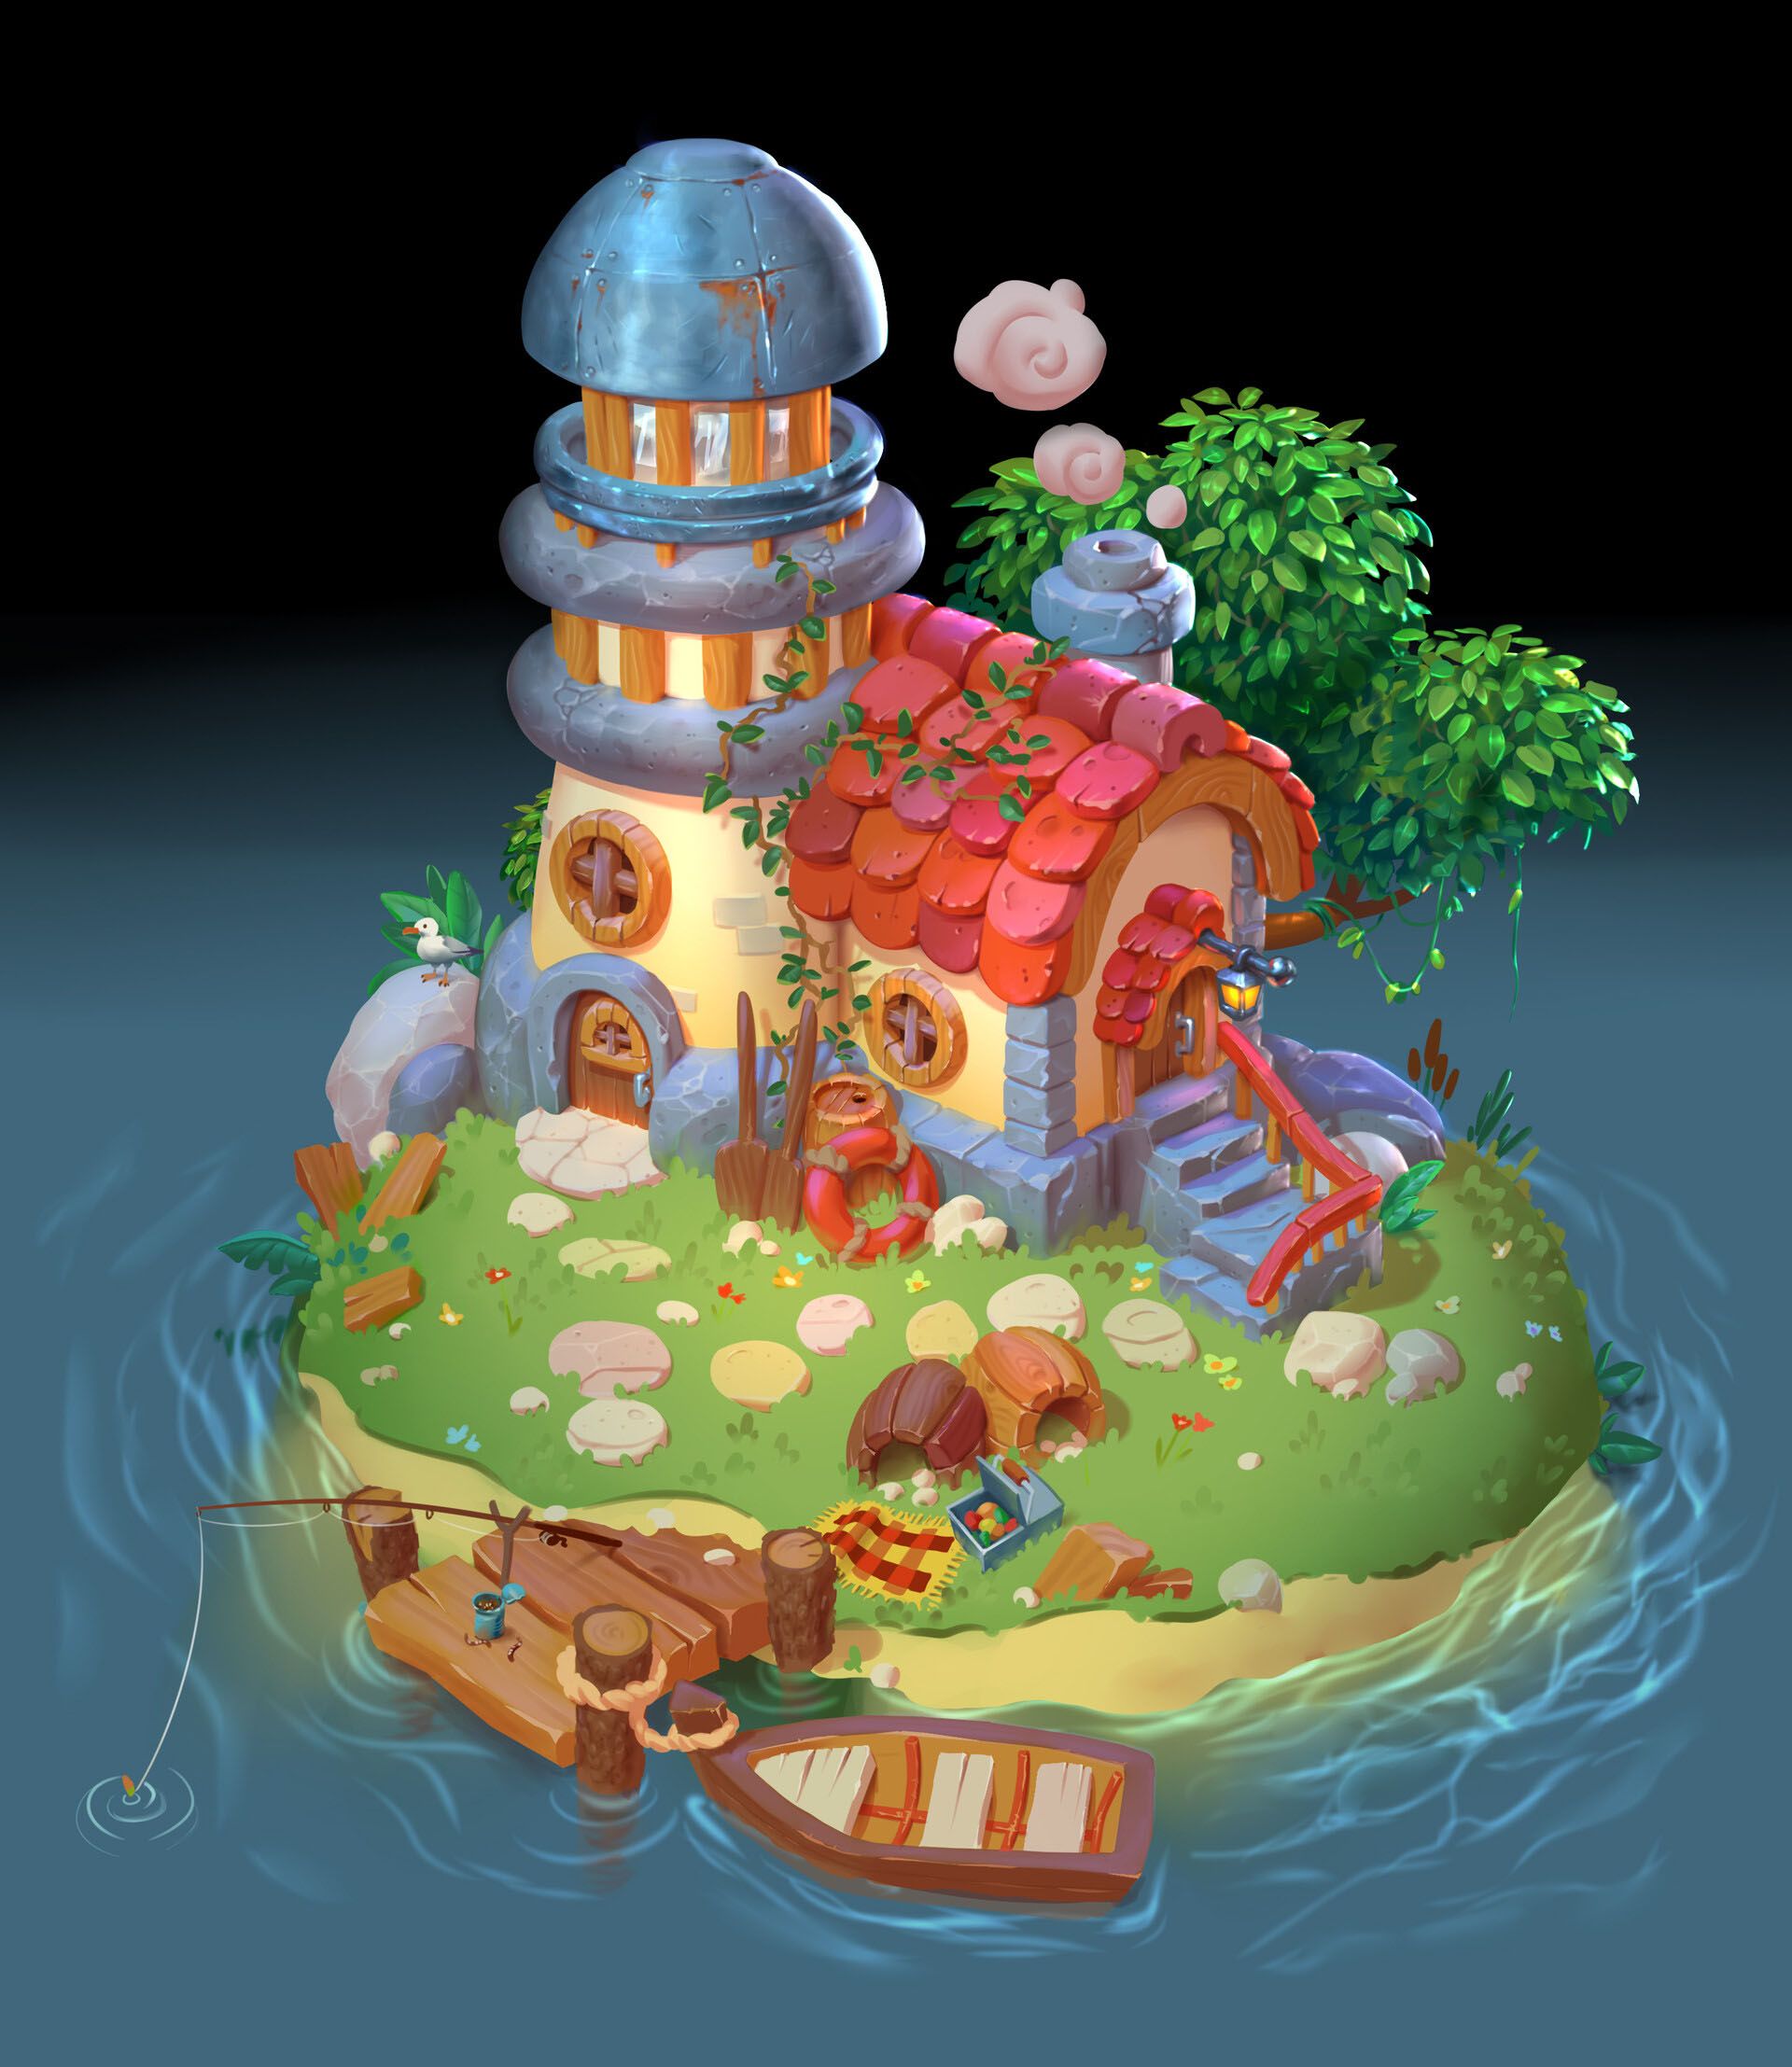
In my quest to explore a more cartoonish approach, I decided to base my diorama on a 2D concept by Egor Grishin. I wanted to experiment with hand-painting and try new techniques, challenging myself to work organically on a project that I would usually prefer hard-surface. The goal was to create a diorama true to the original concept, from modeling to rendering, using tools such as Maya, ZBrush, Substance 3D Painter, Arnold and Photoshop.
Also what motivated me about this concept, among others that I chose as a proposal, were the objects that I had. How they are different to have a variety of colours and surfaces and how they fit together with the same pattern, for example the wood parts.
Concept by Egor Grishin
Before starting, I set a detailed plan with deadlines, which allowed me to complete the project on time and still have room to refine and add additional details. You can do it in a more succinct way but I like to detail every prop I'm going to make.
Modeling
I started the process with a general blocking to determine the proper layout and size of the objects, as you can see in the video. Then, I created low poly versions of all the pieces, exporting those that required more organic and detailed modeling to ZBrush, while keeping the low poly versions for a later Bake process in Substance 3D Painter.
During the process, I used nCloth for the floor table cloth for more realism and to adapt it to the shape of the island. For the tree in the background, the creeper and the ground grass, I used Mash, by placing the meshes on top of the corresponding geometries in a random way, creating dynamism in the scene. Mash was something new for me and it was fun to play with it and get these results.
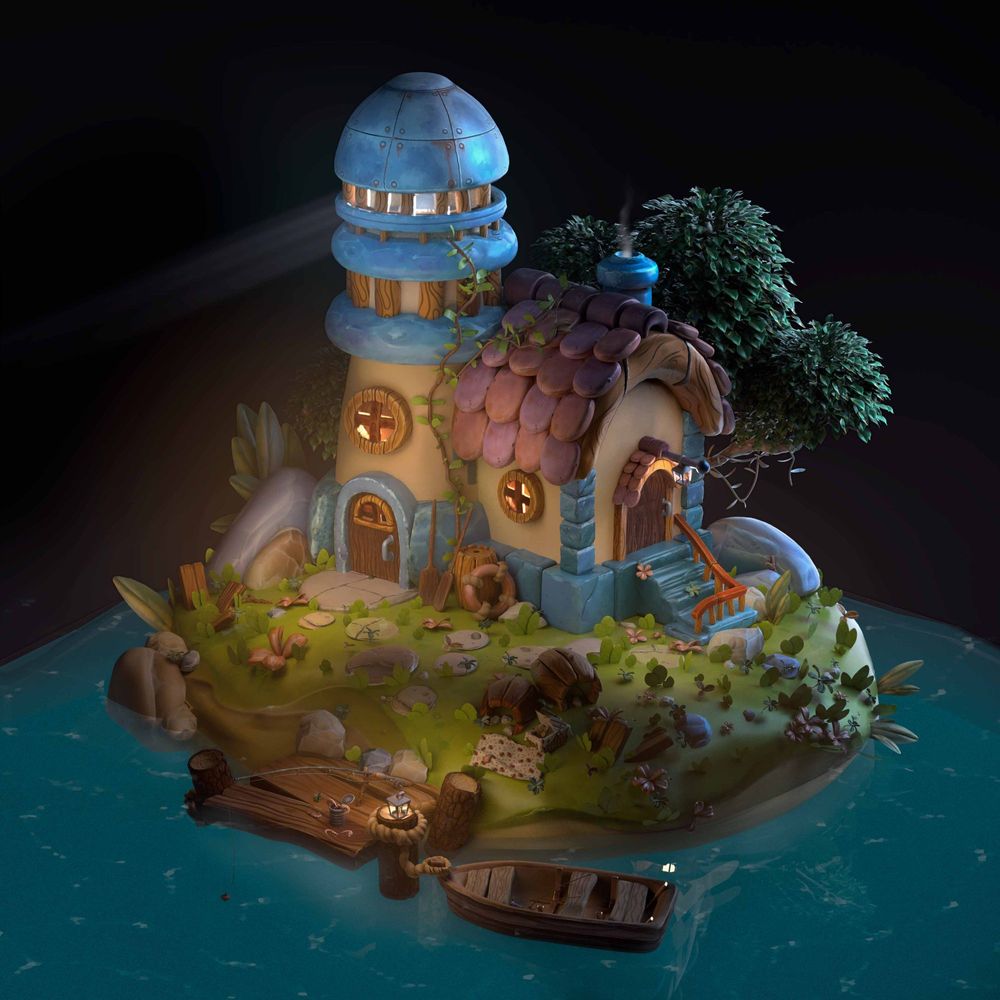
At the end of the modelling process in Maya, I added a smoke fx to give a more realistic touch to the scene, instead of making it cartoonish like the concept, which I would have considered it was more for something 2D.
0:00
/
After finalising the objects in ZBrush, I opted to optimise them by re-topologising. I used Maya's Quad Draw tool to get a more precise and cleaner result.
The UV's were created in Maya, making sure to assign independent UV's to mostly each object. I learned the importance of this step and now use texture sets for better organisation and optimisation during the texturing process later on.
Texturing
After importing the low poly versions into the project, I perform a "Bake" process to improve optimisation. However, some objects need to be high poly in the same scene for better visualisation. For texturing, I selected the colours from the original diorama concept and previously divided the objects by material to simplify the work in Substance. I use a variety of filters and apply hand-painting as needed to achieve a more cartoonish look.
For example, play with the blur slope to create a paint-stain style, add an artificial light and create shadows and play with different tonalities. I have based myself as much as possible on the concept but I have tried to experiment with new techniques that I haven't used before.
Painting process
Rendering
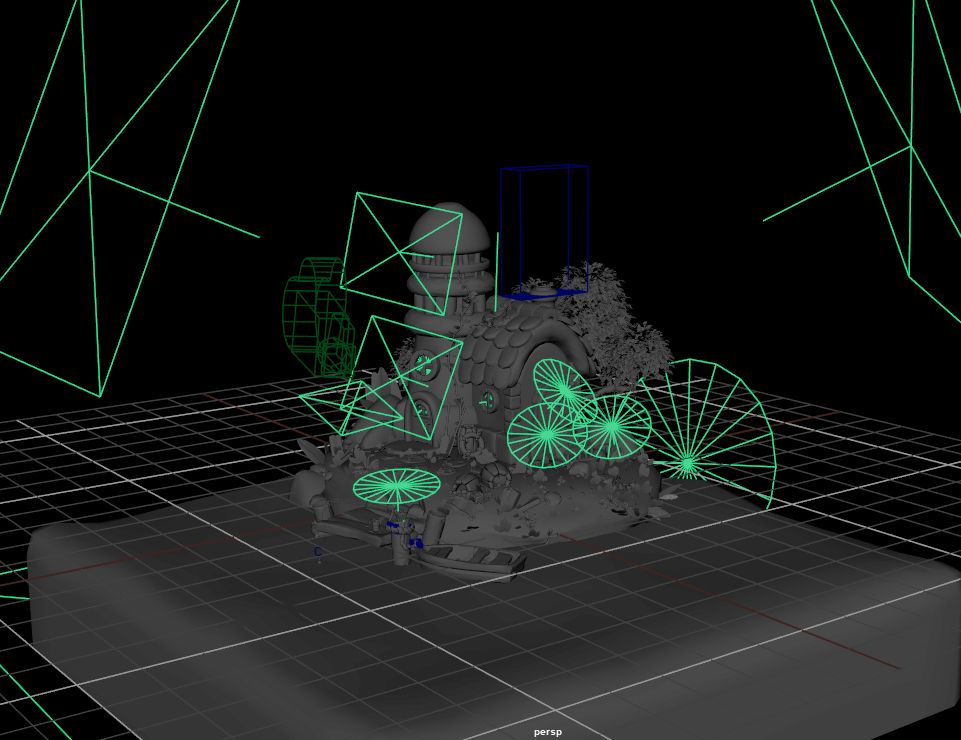
Once the textures were imported into Maya, I set up the light set with various sources around and inside the diorama, creating a nocturnal but lively setting inside the lighthouse.
Lighting Scene
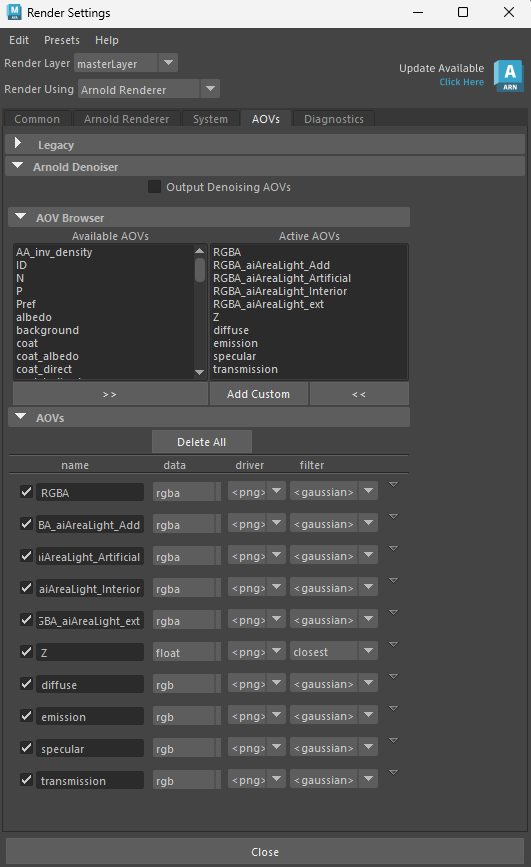
To export the lights so that I can change and adapt the lighting as needed, I do it this way. Then, I divided the lights into different Render Layers according to their location and type: the ones that simulate the moon, the ones inside the lighthouse, other additive lights to improve the scene and others that make the effect of the candle of the lanterns. After this step, it will make it easier to play in Photoshop with exposure, intensity, opacity, among other parameters, but those are the ones I've used the most.
Post-Processing
Post-processing in Photoshop was crucial to improve the ambience and adjust the lights in the scene, creating a cozy atmosphere.
At the beginning, the diorama looked duller, more in semi-darkness, and as I adjusted the lights to bring out the colours of the surroundings, I found it more convincing. So it has a more artificial light, maybe, but it makes the whole thing stand out.
0:00
/
Process of the Diorama
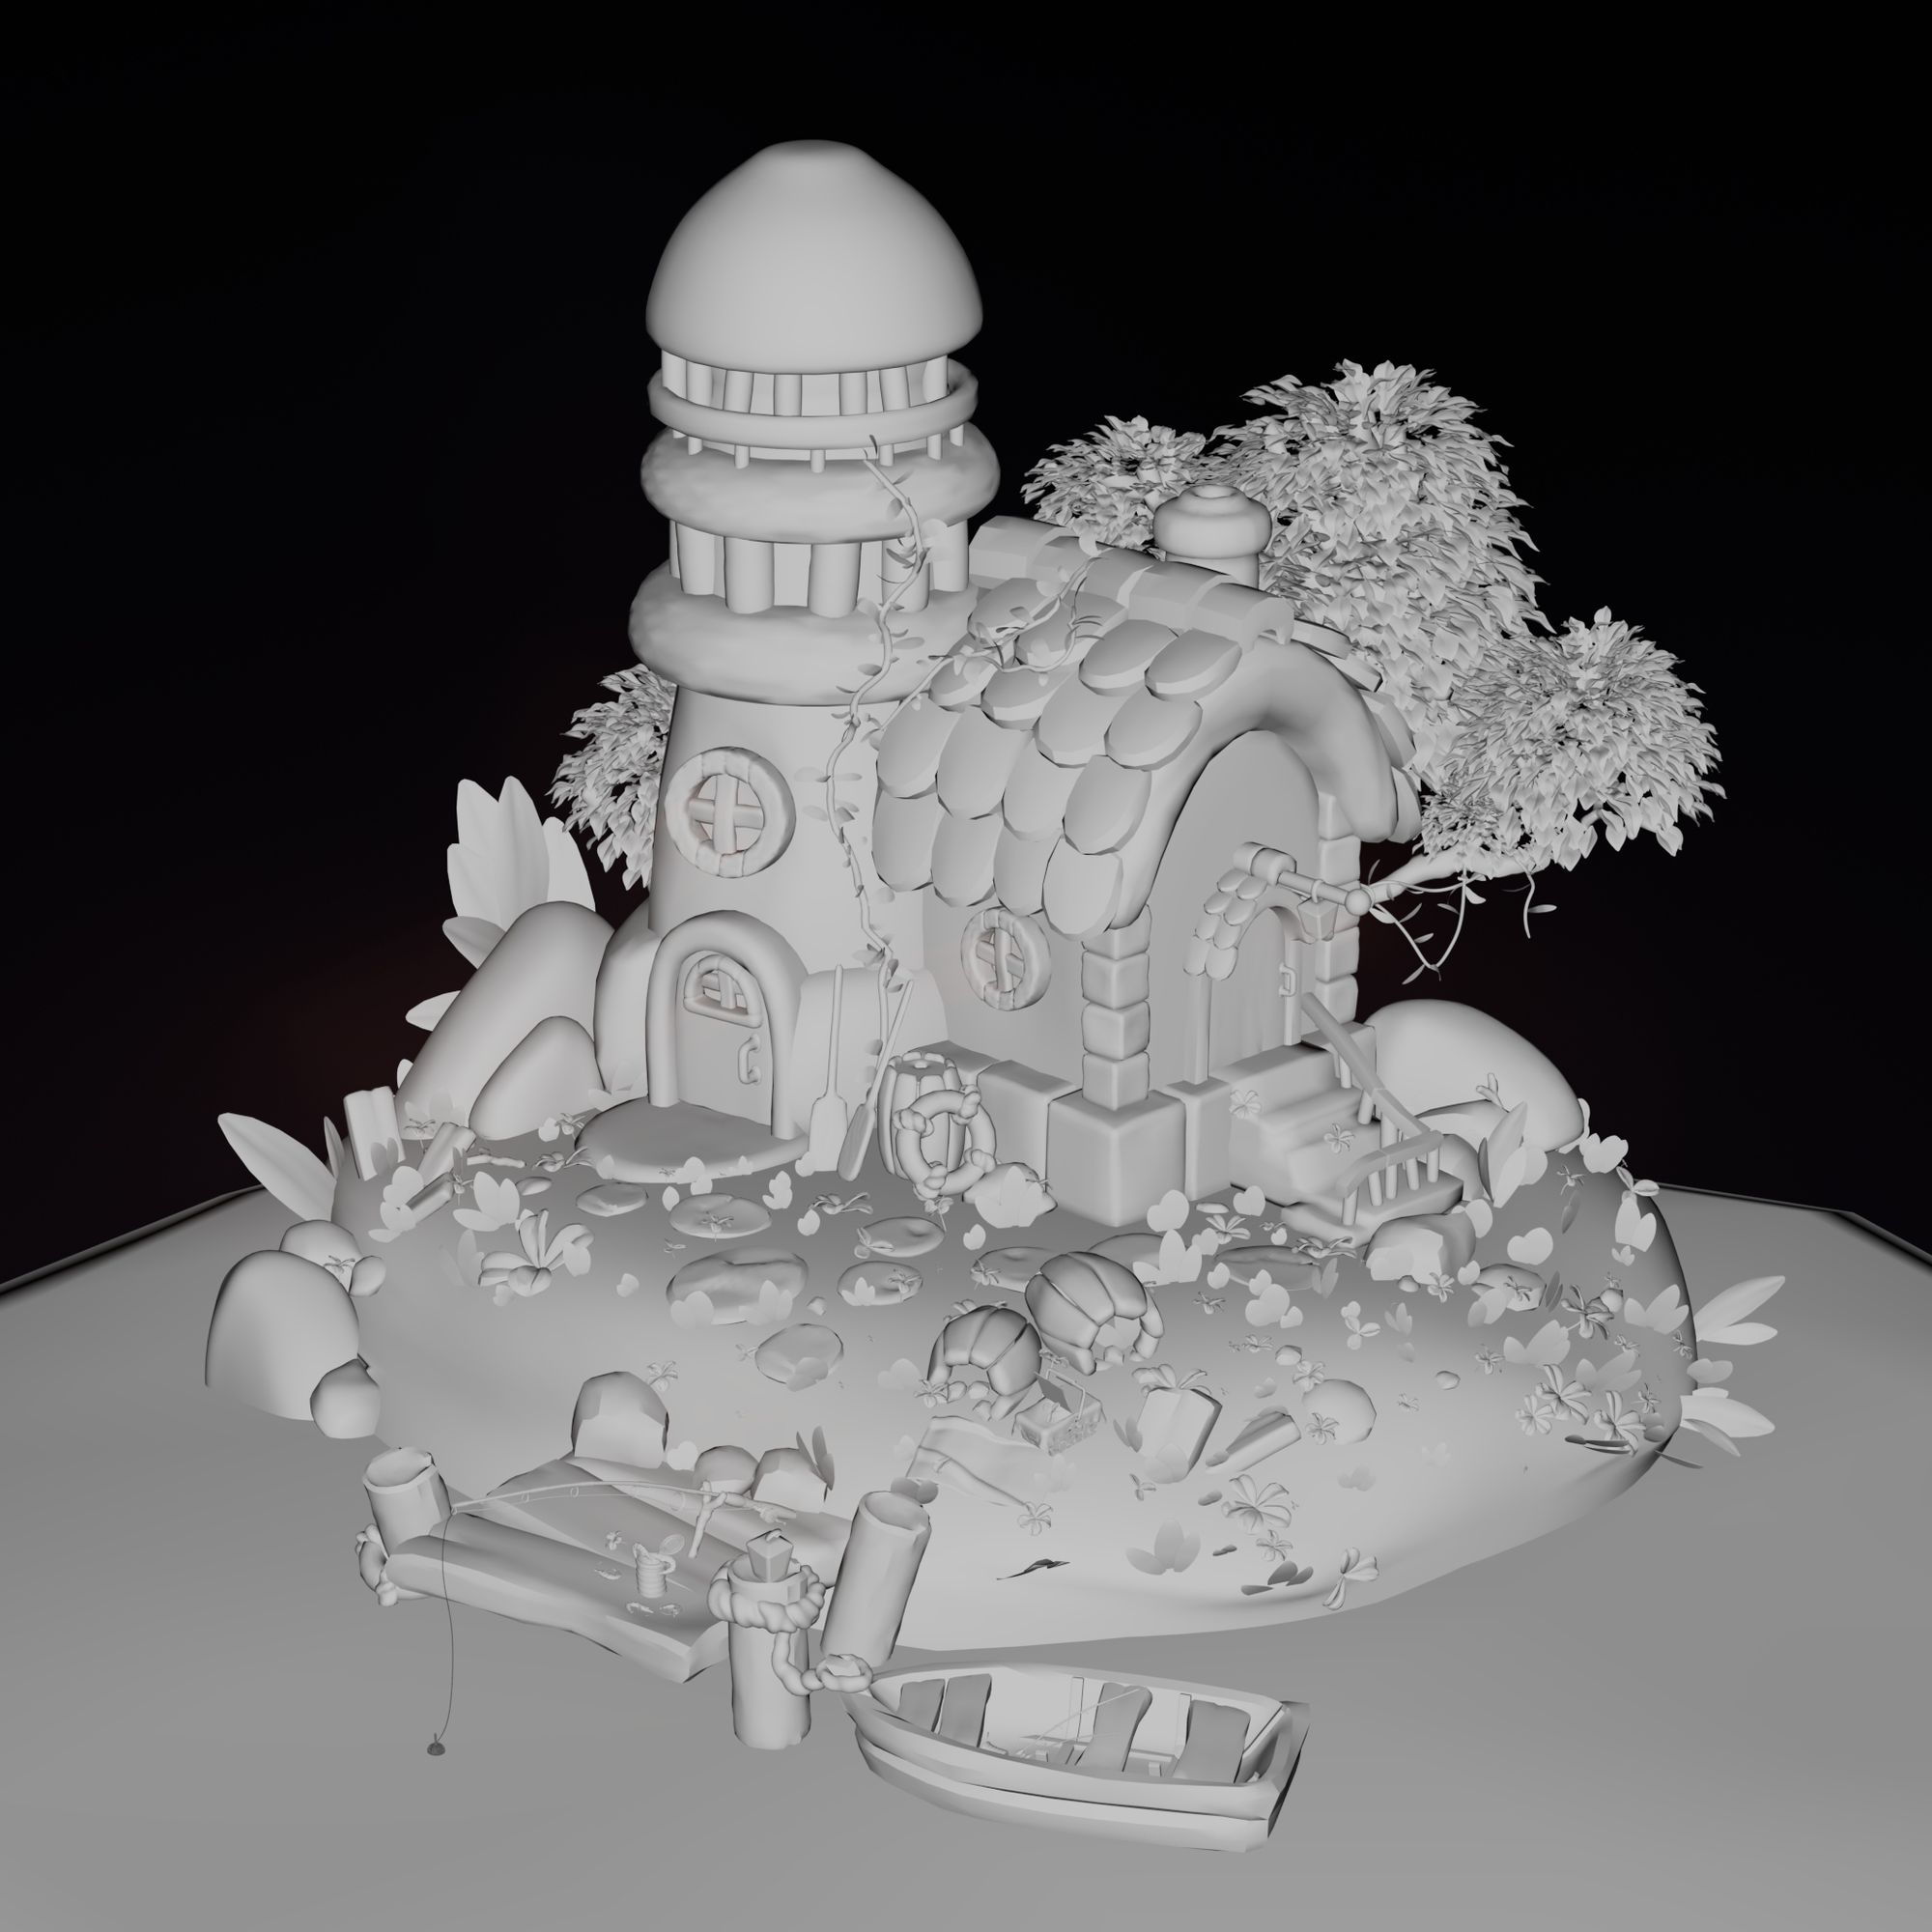
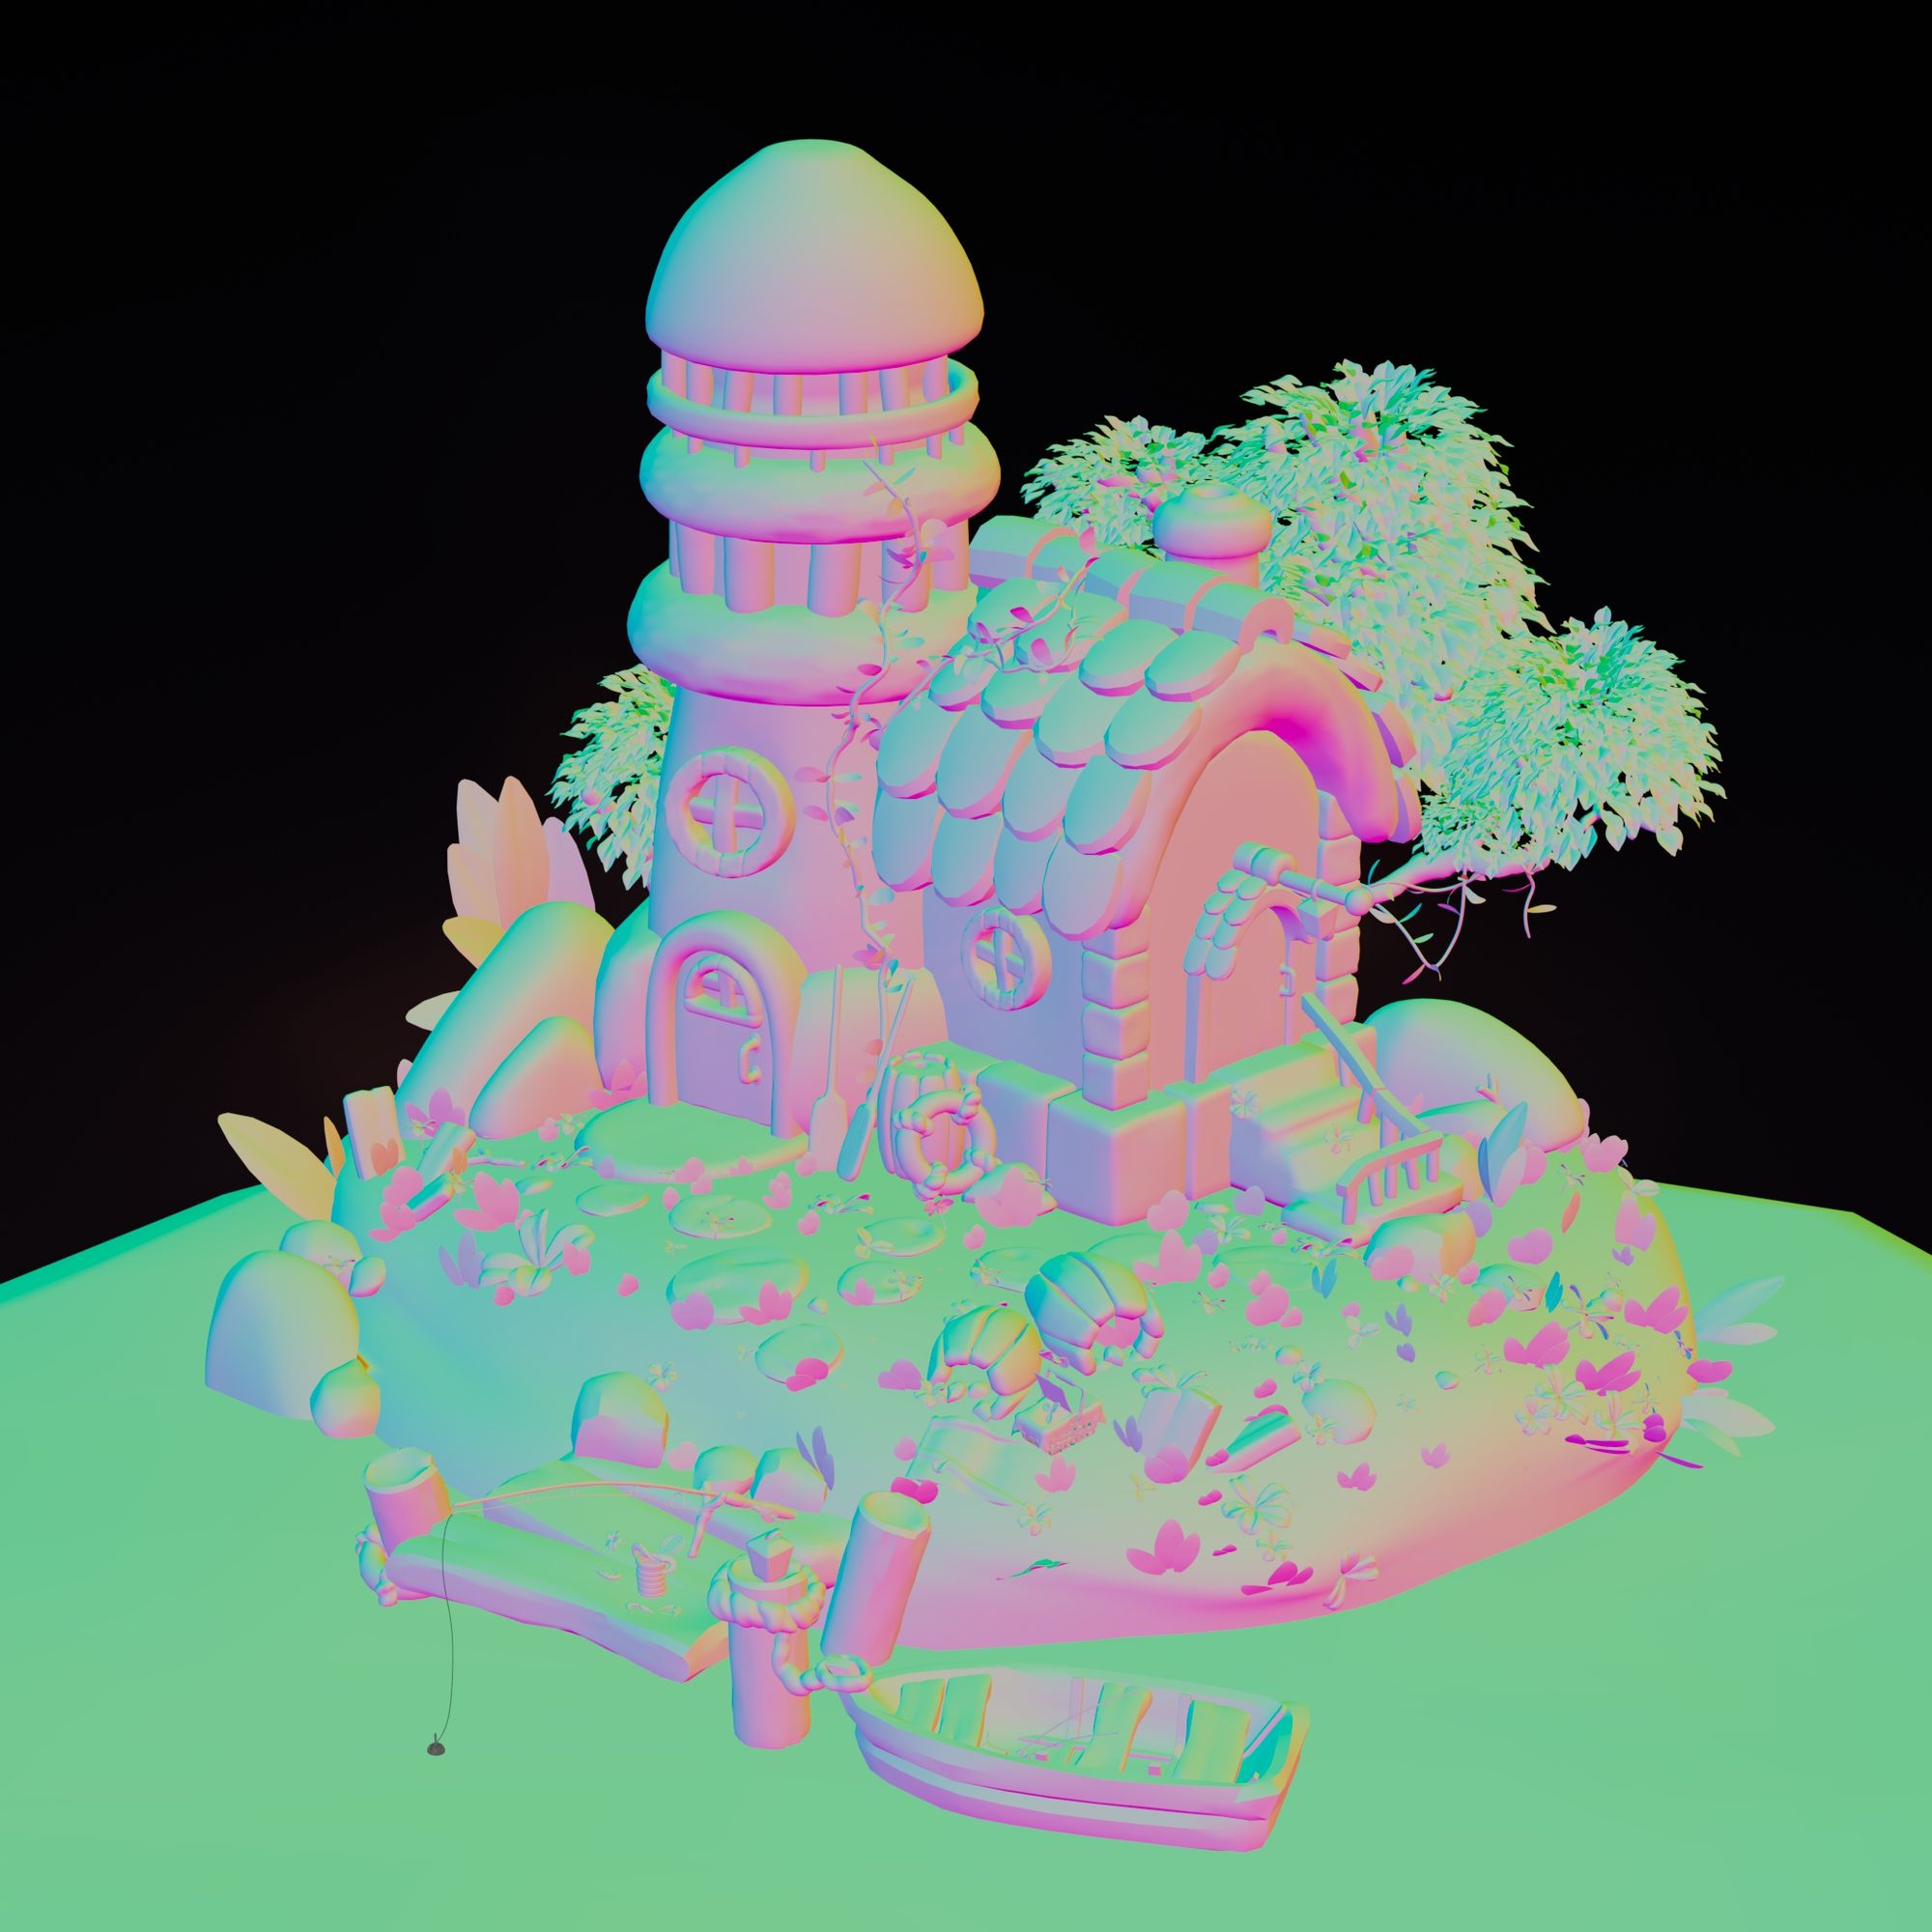
Lambert, lambert with lighting and Normals
Conclusion
This diorama has been an impetus to improve my skills in various areas of 3D work. It has allowed me to discover my passion for Set Dressing, which was one of the main reasons behind this experience. Throughout the process, I have learned important techniques, such as strategic placement of elements for optimal rendering, optimisation of Render Layers and render adjustments in Photoshop, as well as hand-painting techniques and the use of different brushes in ZBrush.
One thing that made it difficult for me at the end of the project was the rendering. I needed very high values in the samplings settings and it took me a long time to load, which was not foreseen. But the water needed it so I adjusted the schedule for a finished result on time.
In addition, I have understood the importance of organisation in a project, including managing dates and estimating the duration of each phase of the process. Although it can be challenging at the beginning, knowing my own workflow and being more demanding with myself has been fundamental to improve in this aspect.
Thanks for your interest in my project and I hope you enjoyed reading about it - see you next time!
Check out more of Marina's work in her Rookies portfolio here.