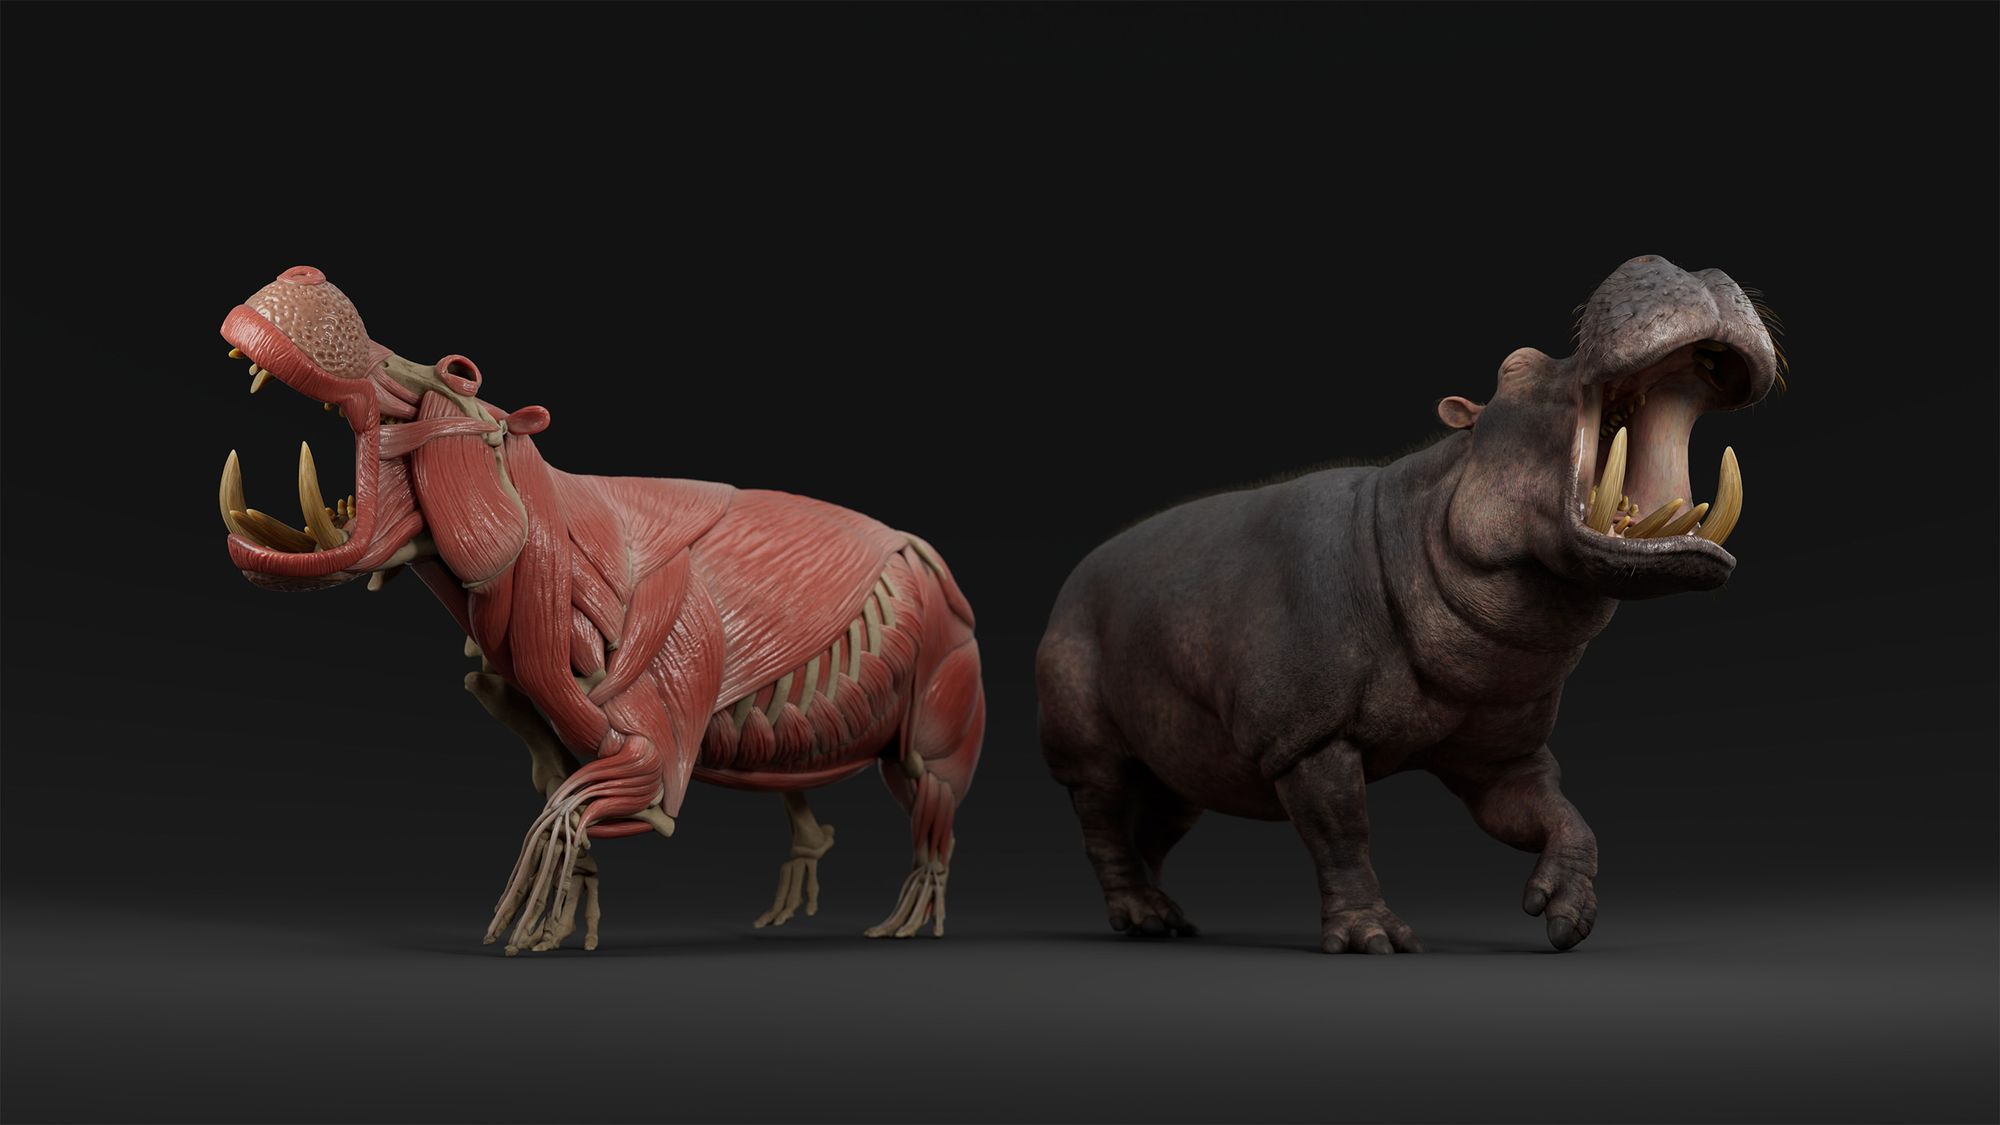
Hippo Anatomy Study: Demystifying Skeleton and Muscle Sculpting
Elias Weber, a student at the Animationsinstitut at Filmakademie Baden-Württember, showcases his skills in 3D Character art through his Hippo Écorché project.
Elias Weber, a student at the Animationsinstitut at Filmakademie Baden-Württember, showcases his skills in 3D Character art through his Hippo Écorché project.

Elias Weber is a student at the Animationsinstitut at Filmakademie Baden-Württemberg, further expanding his skillset in animation & VFX. We were interested in how he tacked his Hippo Écorché and asked Elias to share the process with The Rookies community.
Creating 3D characters is very time-consuming and the complexity seems to continuously increase with modern film and game productions. If you also have a passion for bringing digital characters to life, this is probably nothing new to you. As a 3D generalist myself, the amount of work that goes into the bones and muscles in VFX productions always seemed especially intimidating to me.
Until recently, I have mainly worked on stylised and semi-realistic characters and never felt the need to think about the underlying anatomy. I generally try to work rather fast and efficiently and I never wanted to “waste my time” when I could just jump ahead to sculpt the final anatomy as well.
This project however was a real eye-opener and I now firmly believe that all anatomical work benefits from starting with the underlying anatomy. What helped me the most was having the right resources and simplifying the bone and muscle shapes by focusing on their functionality. This enabled me to complete the whole project in under a month. If that sounds intriguing to you, hopefully, I can help demystify the process a little bit further by sharing the tips and tricks I learned along the way.
I am currently studying at the Animationsinstitut at Filmakademie Baden-Württemberg and spend most of my time working on team projects. During the semester we also have the opportunity to attend workshops that seem interesting to us or fall in our category of learning.
This project started during a workshop about “Creature Modeling - From Biology To CG” by the amazing Gael Kerchenbaum. He joined us last year, at the end of November, and spent four days sharing his workflow with us.
In this post, I will go through the entire creation process of the hippo but I can’t emphasise enough how much Gael's workshop influenced me and helped me in the beginning. He graciously allowed me to share his insights with you.
When the workshop started, my first task was to choose a mammal of my liking. By then, I didn’t know I would spend the next month working on that animal, but I never regretted deciding on a hippo. I was fascinated by the skull of the animal that had such a jarring appearance in contrast to the round and rather friendly-looking face.
I started by gathering references in multiple categories to help me during the different sculpting phases. Finding high-quality muscle references was the most challenging since there are not many anatomical photographs available for hippos. Fortunately, I was able to find an amazing Écorché by Jun Huang that I then used as my hero reference. Generally, I try to stick to real-world references but you can also learn a lot by analysing gray renders of other sculpts. I would still advise to always prioritise the quality of the references over the quantity.
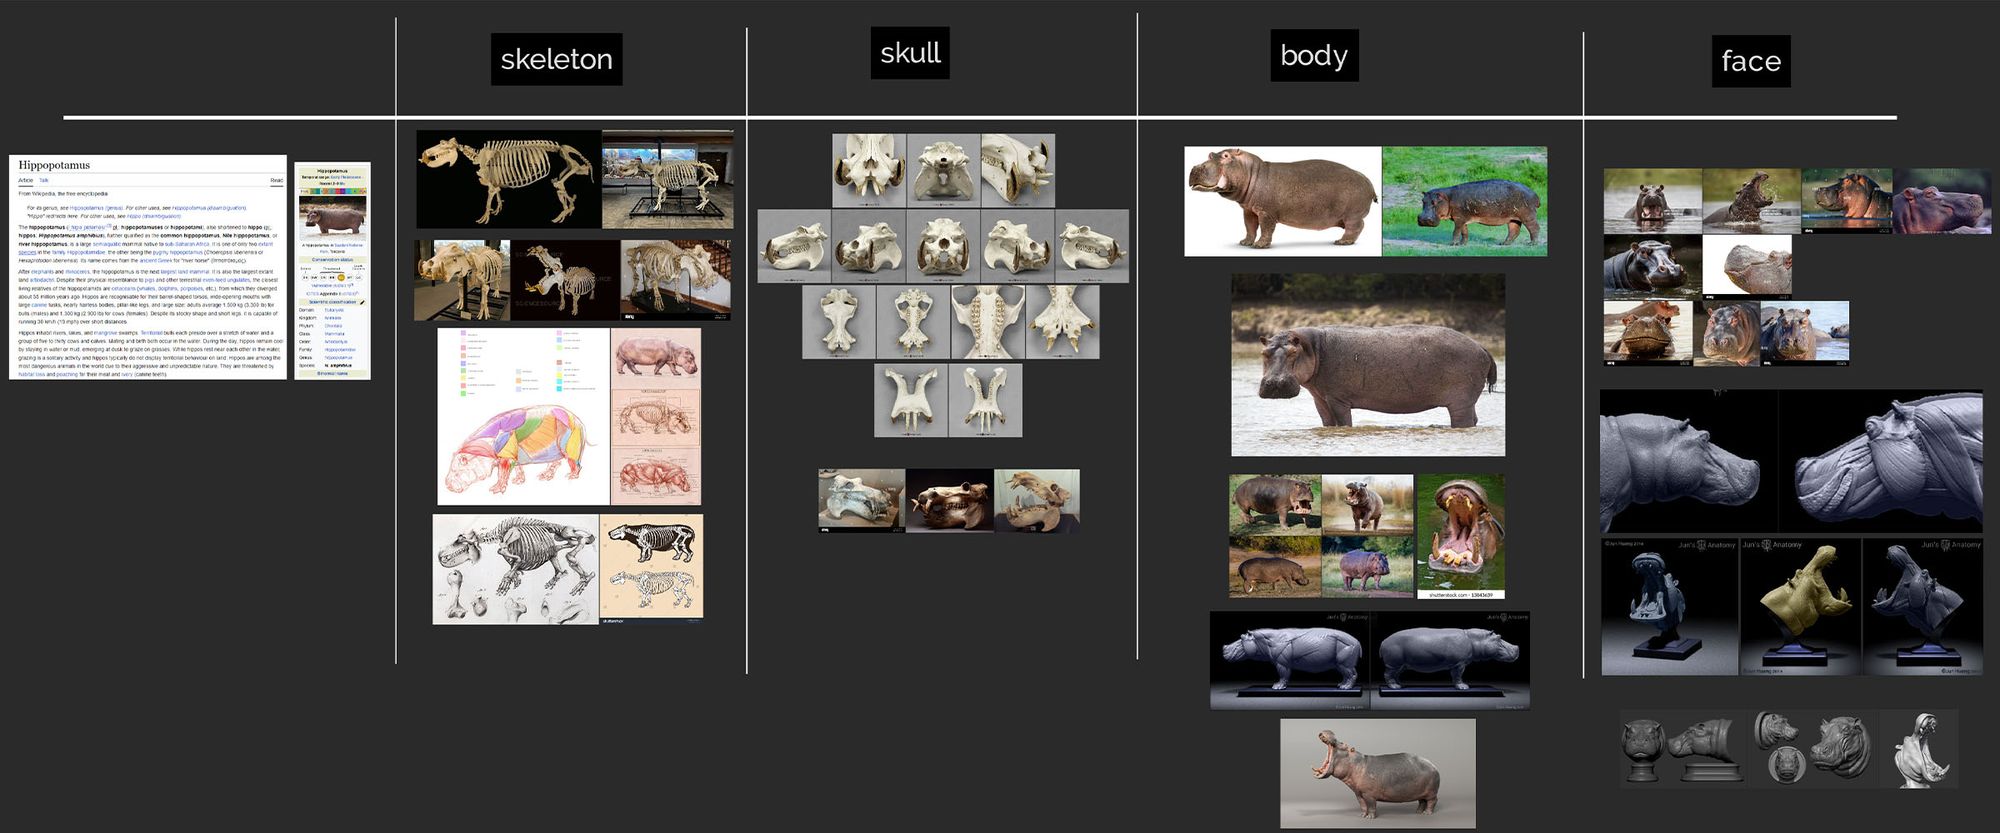
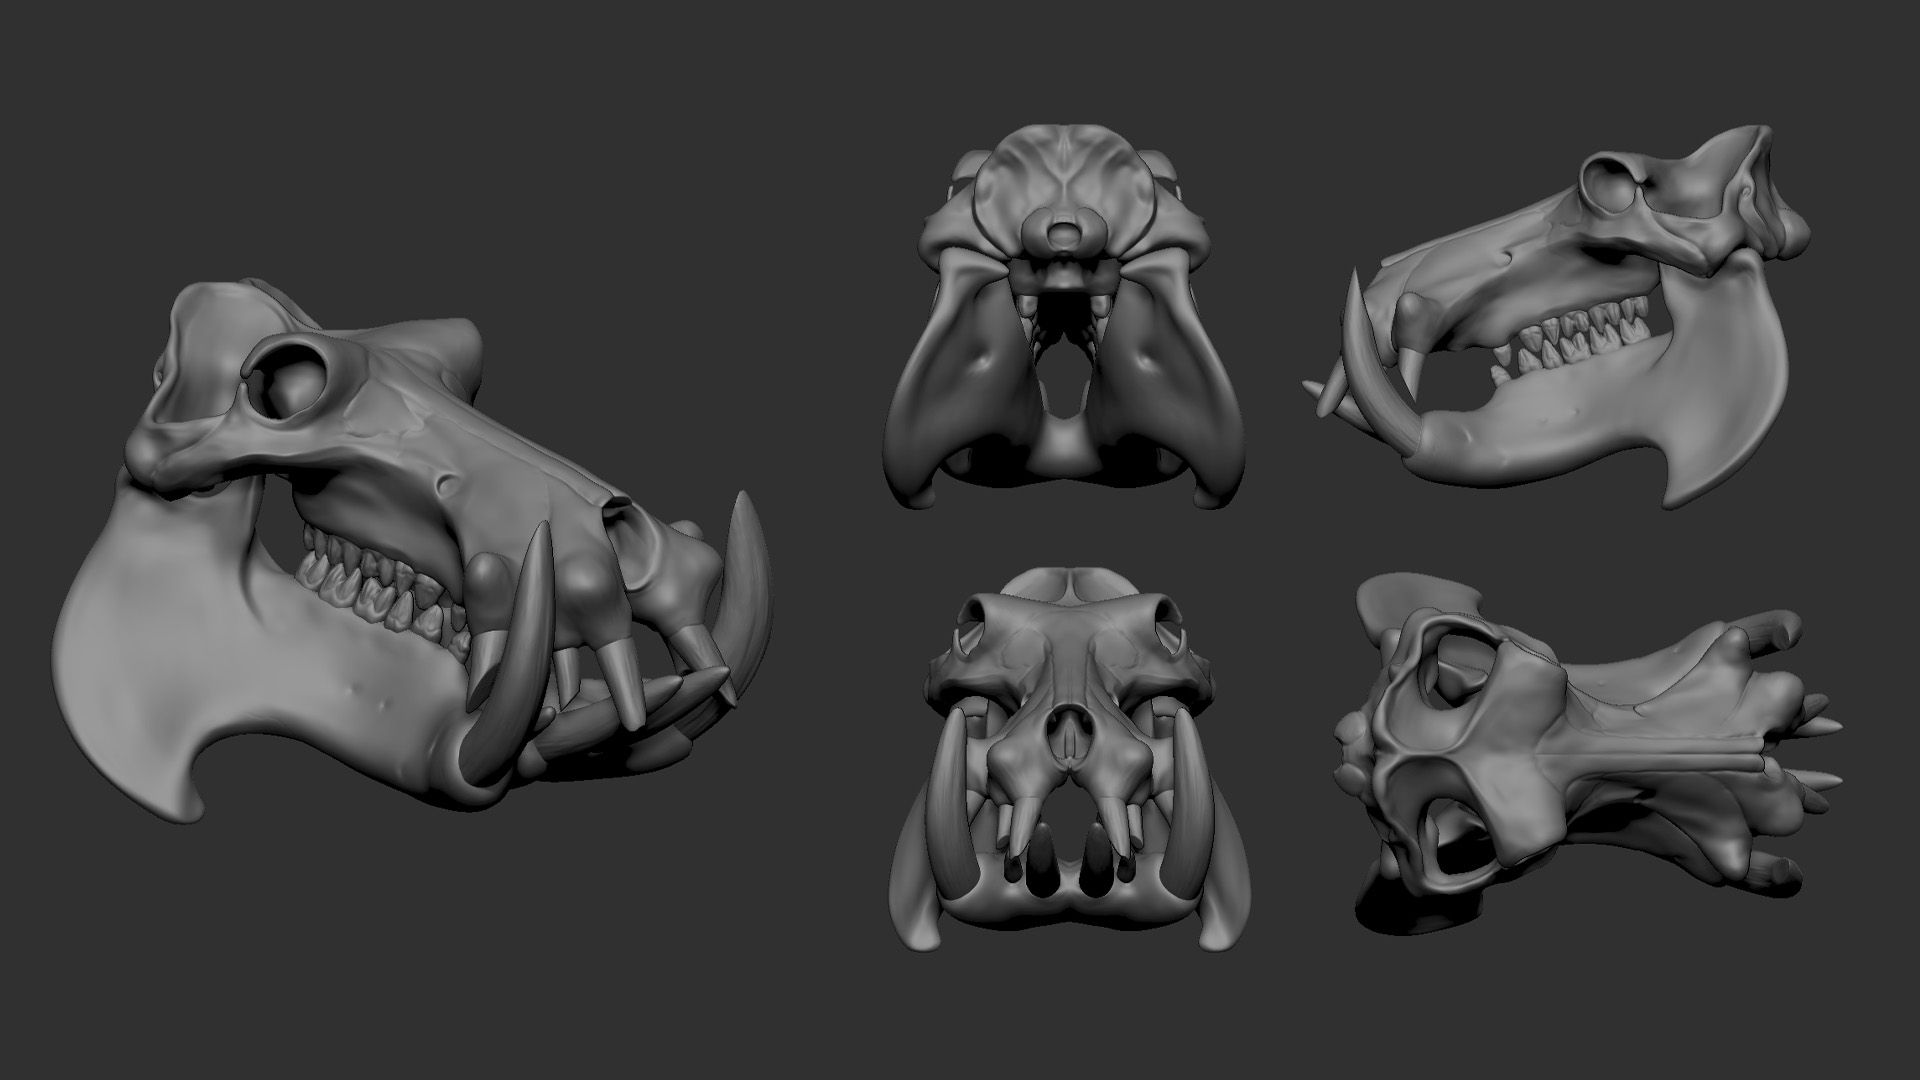
The first day of the sculpting workshop consisted of choosing a mammal, gathering references, and then sculpting the skull of the animal. The face is the most crucial thing to get right in nearly all projects since it's the primary focal point. In my case, the skull served as a foundation to lay out the anatomical landmarks.
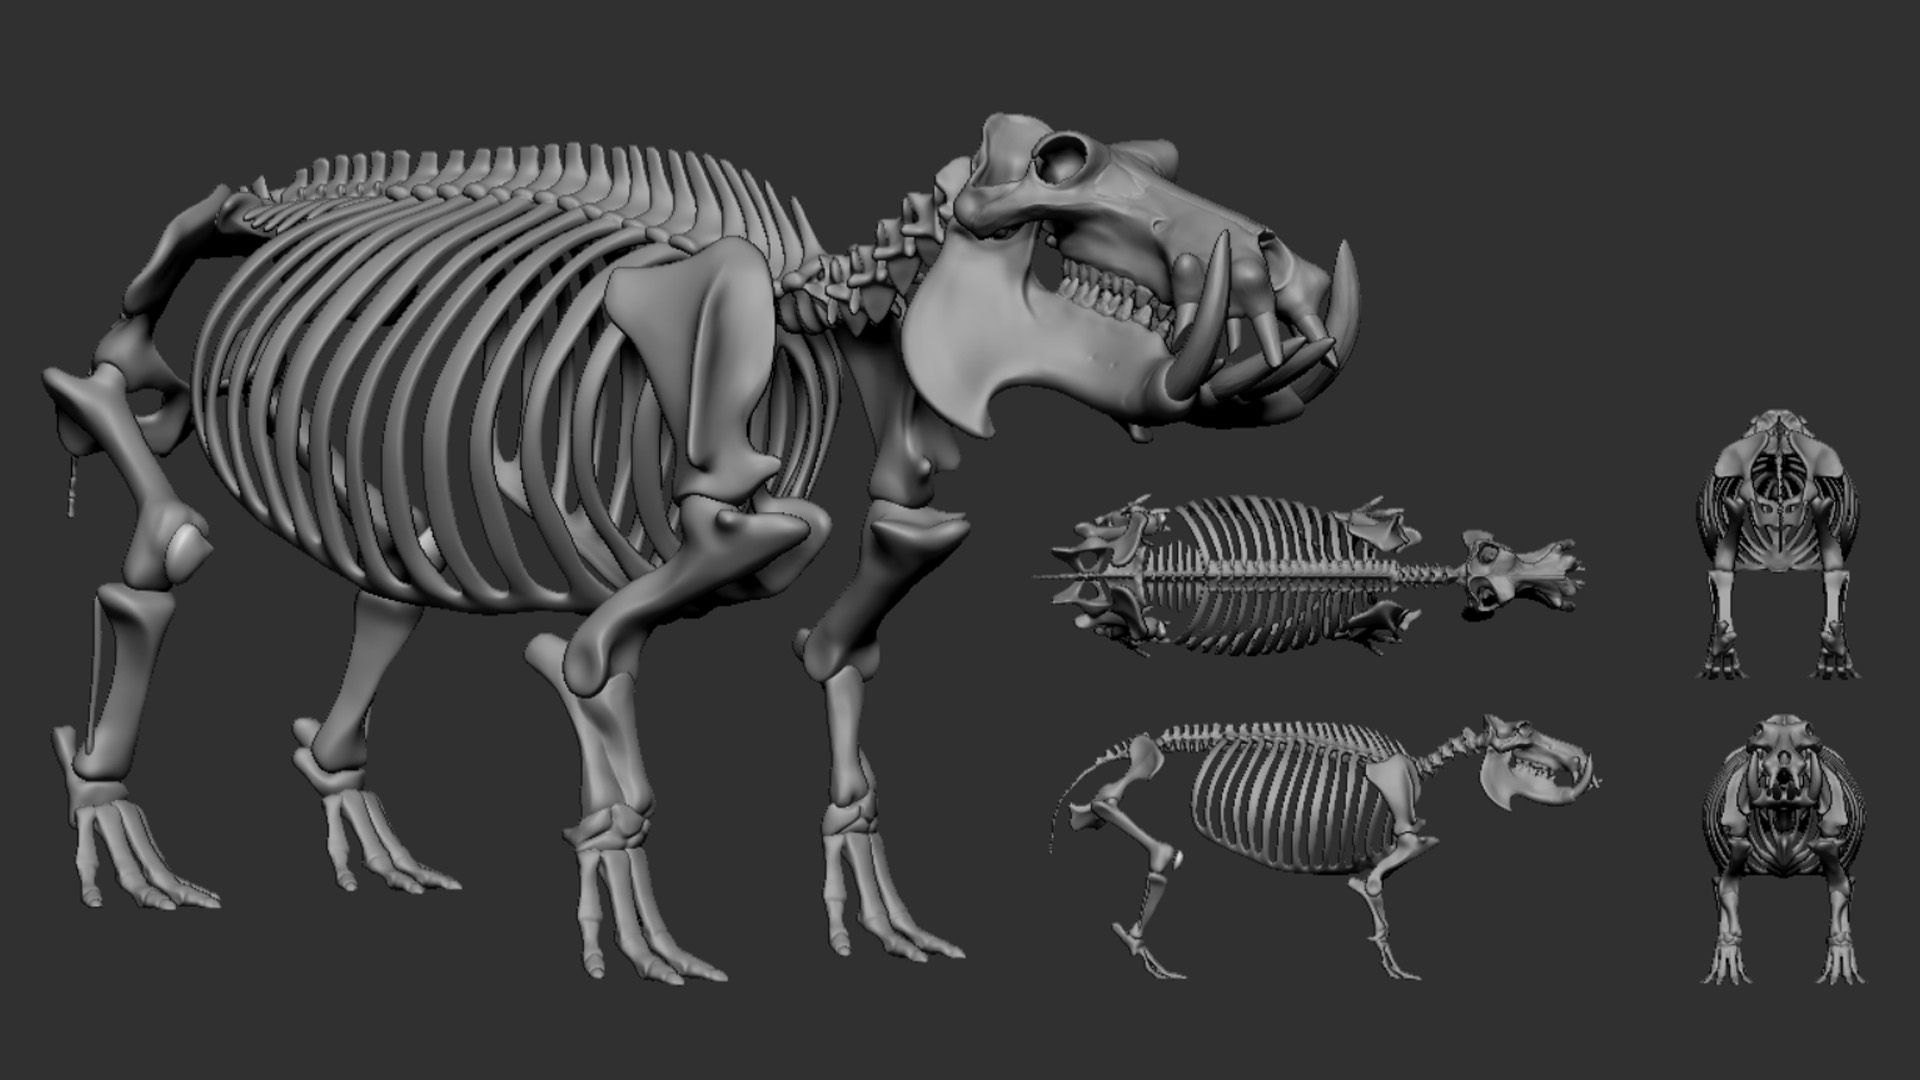
The approach for sculpting the bones was always the same:
In my opinion, going into subdivision levels early really speeds up the workflow. You are immediately working with a clean topology that can be exported for rigging and working on surface detail becomes easier. Manual retopo always achieves superior deformation but for the rigid bones that wasn't necessary.

After the Skull was finished, the second day was spent finishing the rest of the skeleton. At this point, it is important to be aware of the different joint types since all bones can be categorized by those types and their combinations.
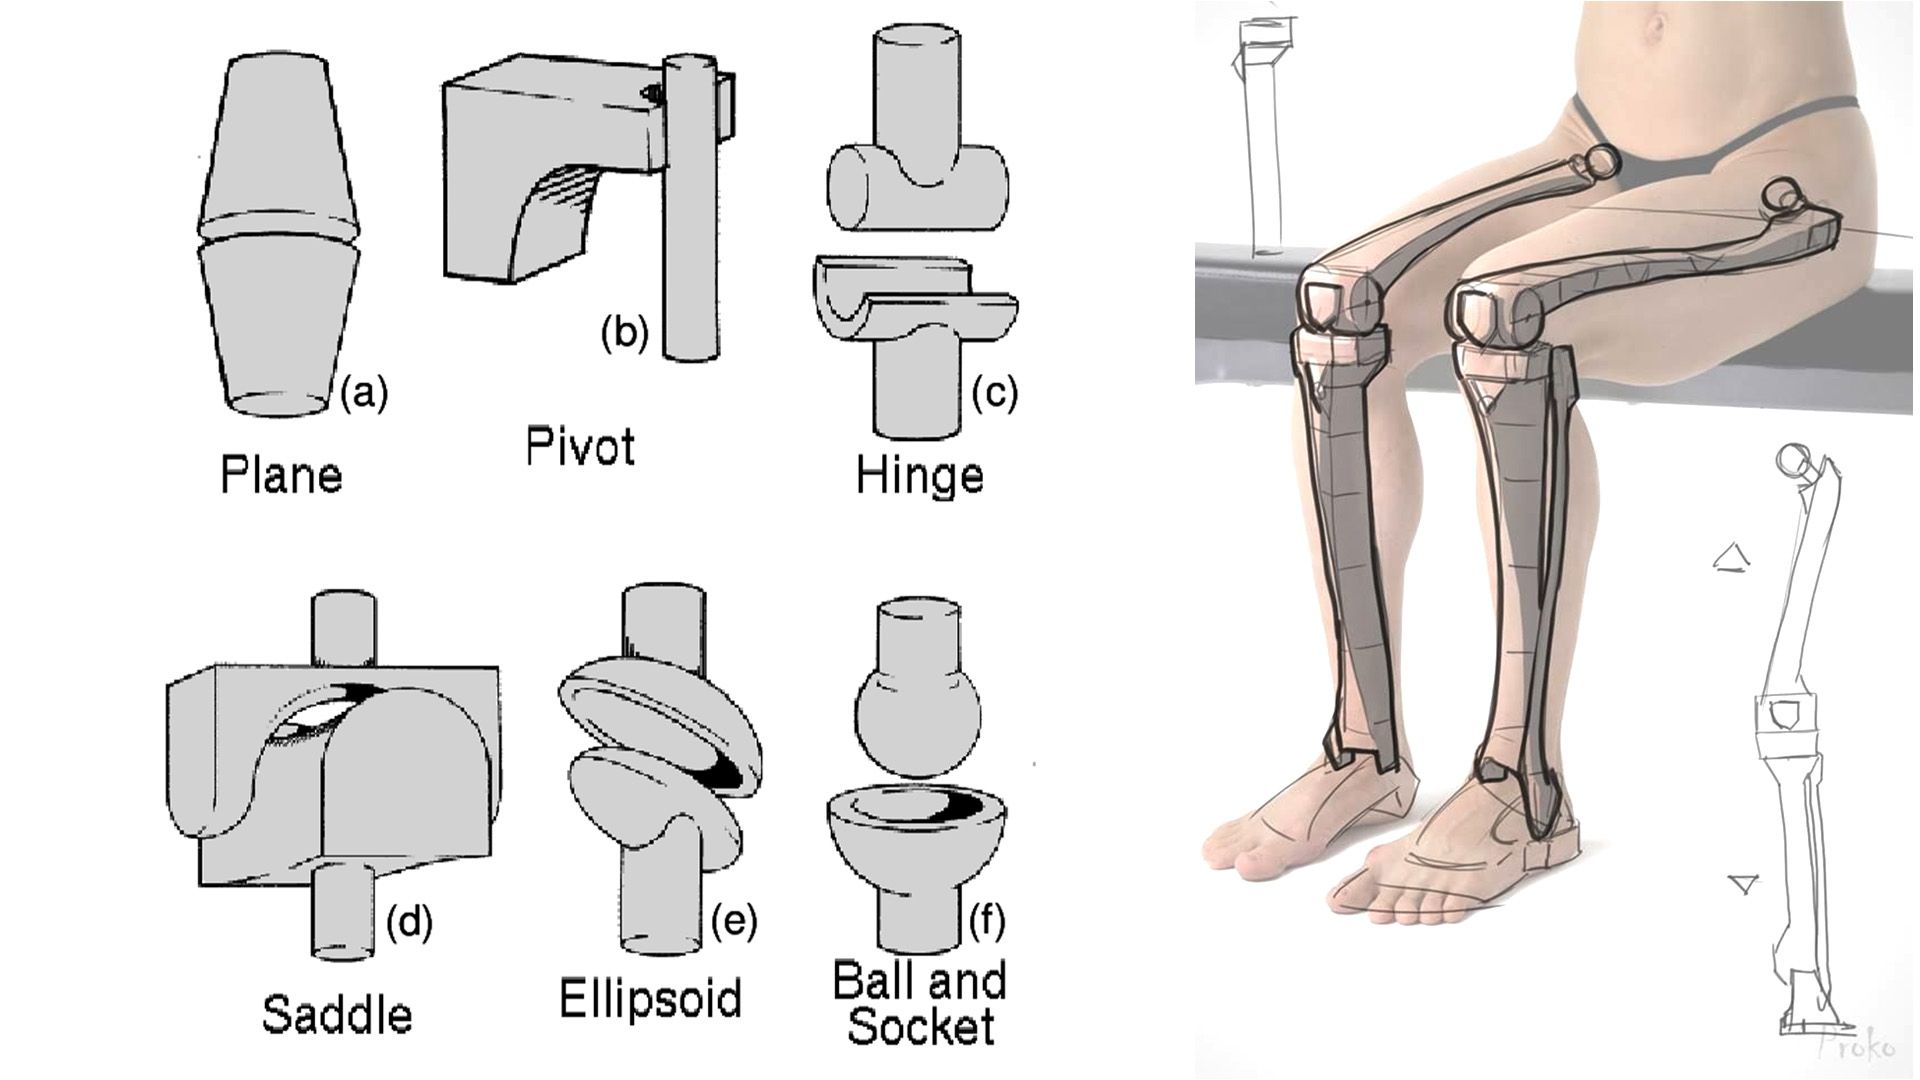
When sculpting bones it is crucial to first analyse their functionality since that makes simplification a lot easier. Breaking down the bones to their core shape really helped me to not get lost in detail and also made it easier to place the muscles later on. The exaggerated joints also helped with rigging since I was thinking about the range of motion early on.
On the next day, we started with the muscles and I was initially quite overwhelmed. Gael encouraged me by explaining that all mammals largely share the same bones and muscles and that a basic understanding of human anatomy can already be helpful.
He also provided some amazing resources about animal anatomy that ultimately gave me a starting point:
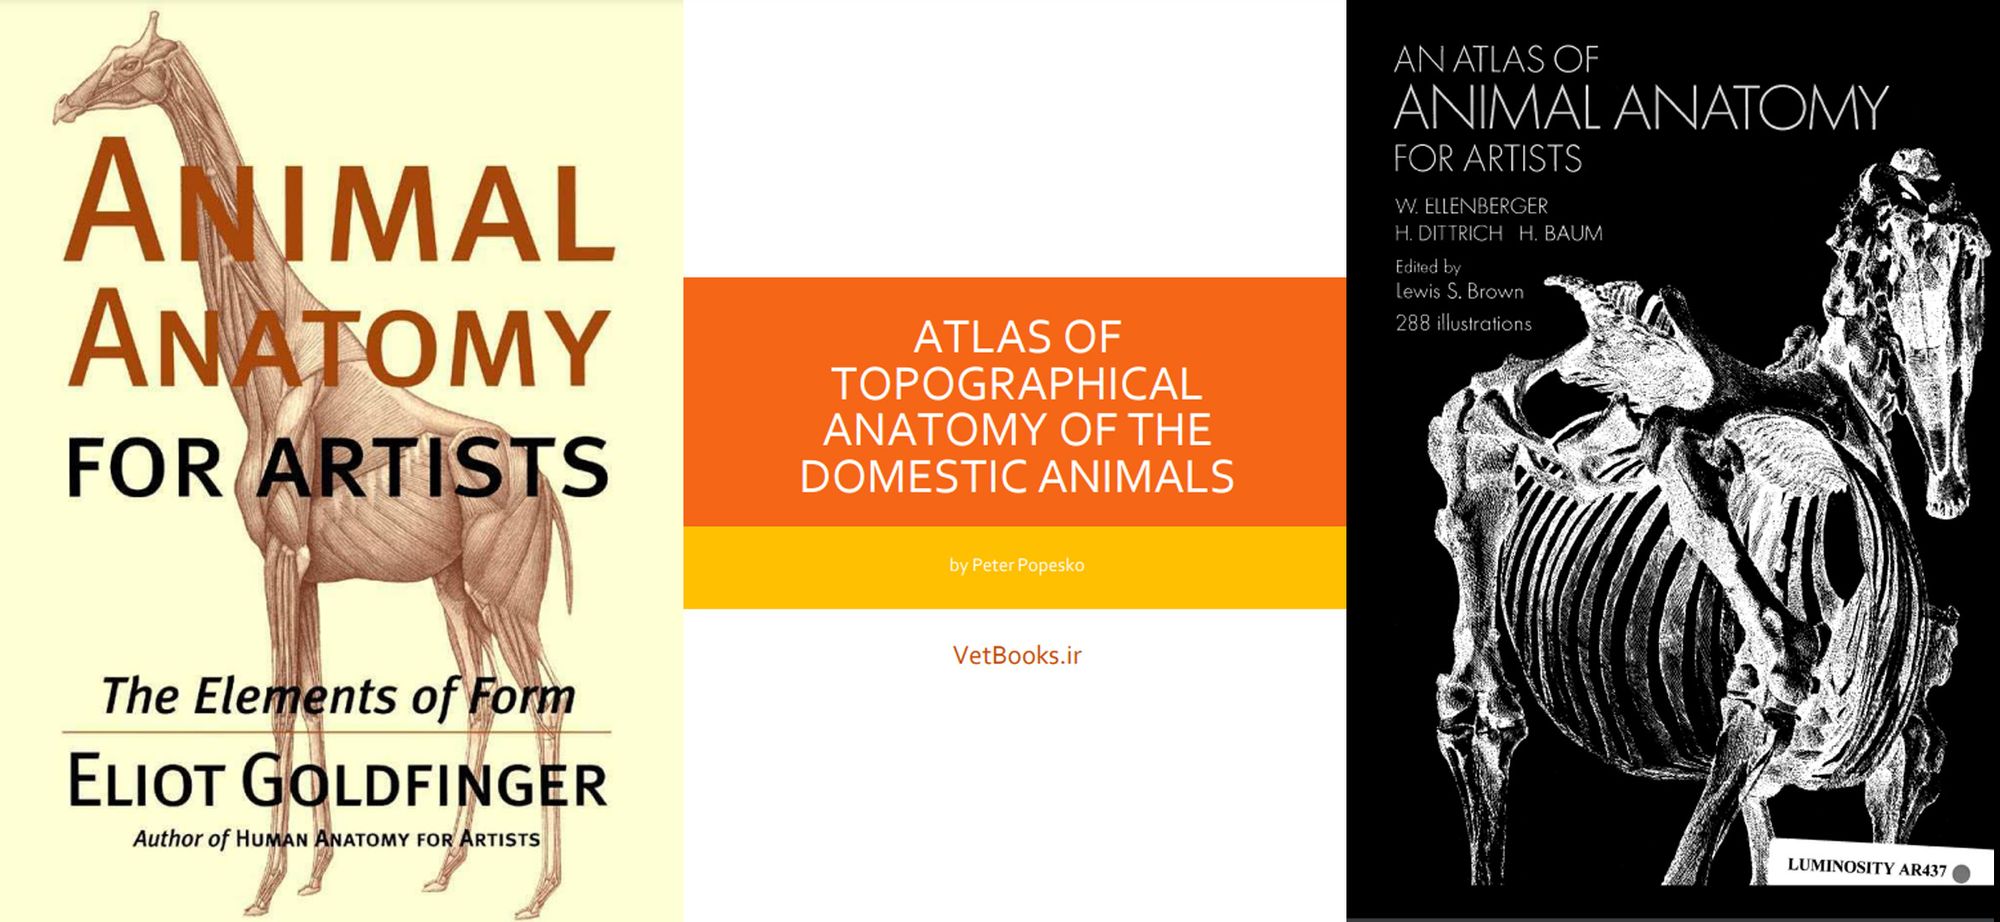
Those books are the foundation of animal anatomy drawings and can also be found online for free. Since my reference board only displayed the exterior muscles of the hippo, the first book was especially useful for its detailed description of each muscle.
I started by just going through the book chronologically and roughly blocked out the shapes with the same workflow as for the bones. Since mammals share the same muscle structure, I just had to adjust the muscle placement of the book which focused on dogs, horses, and cows.
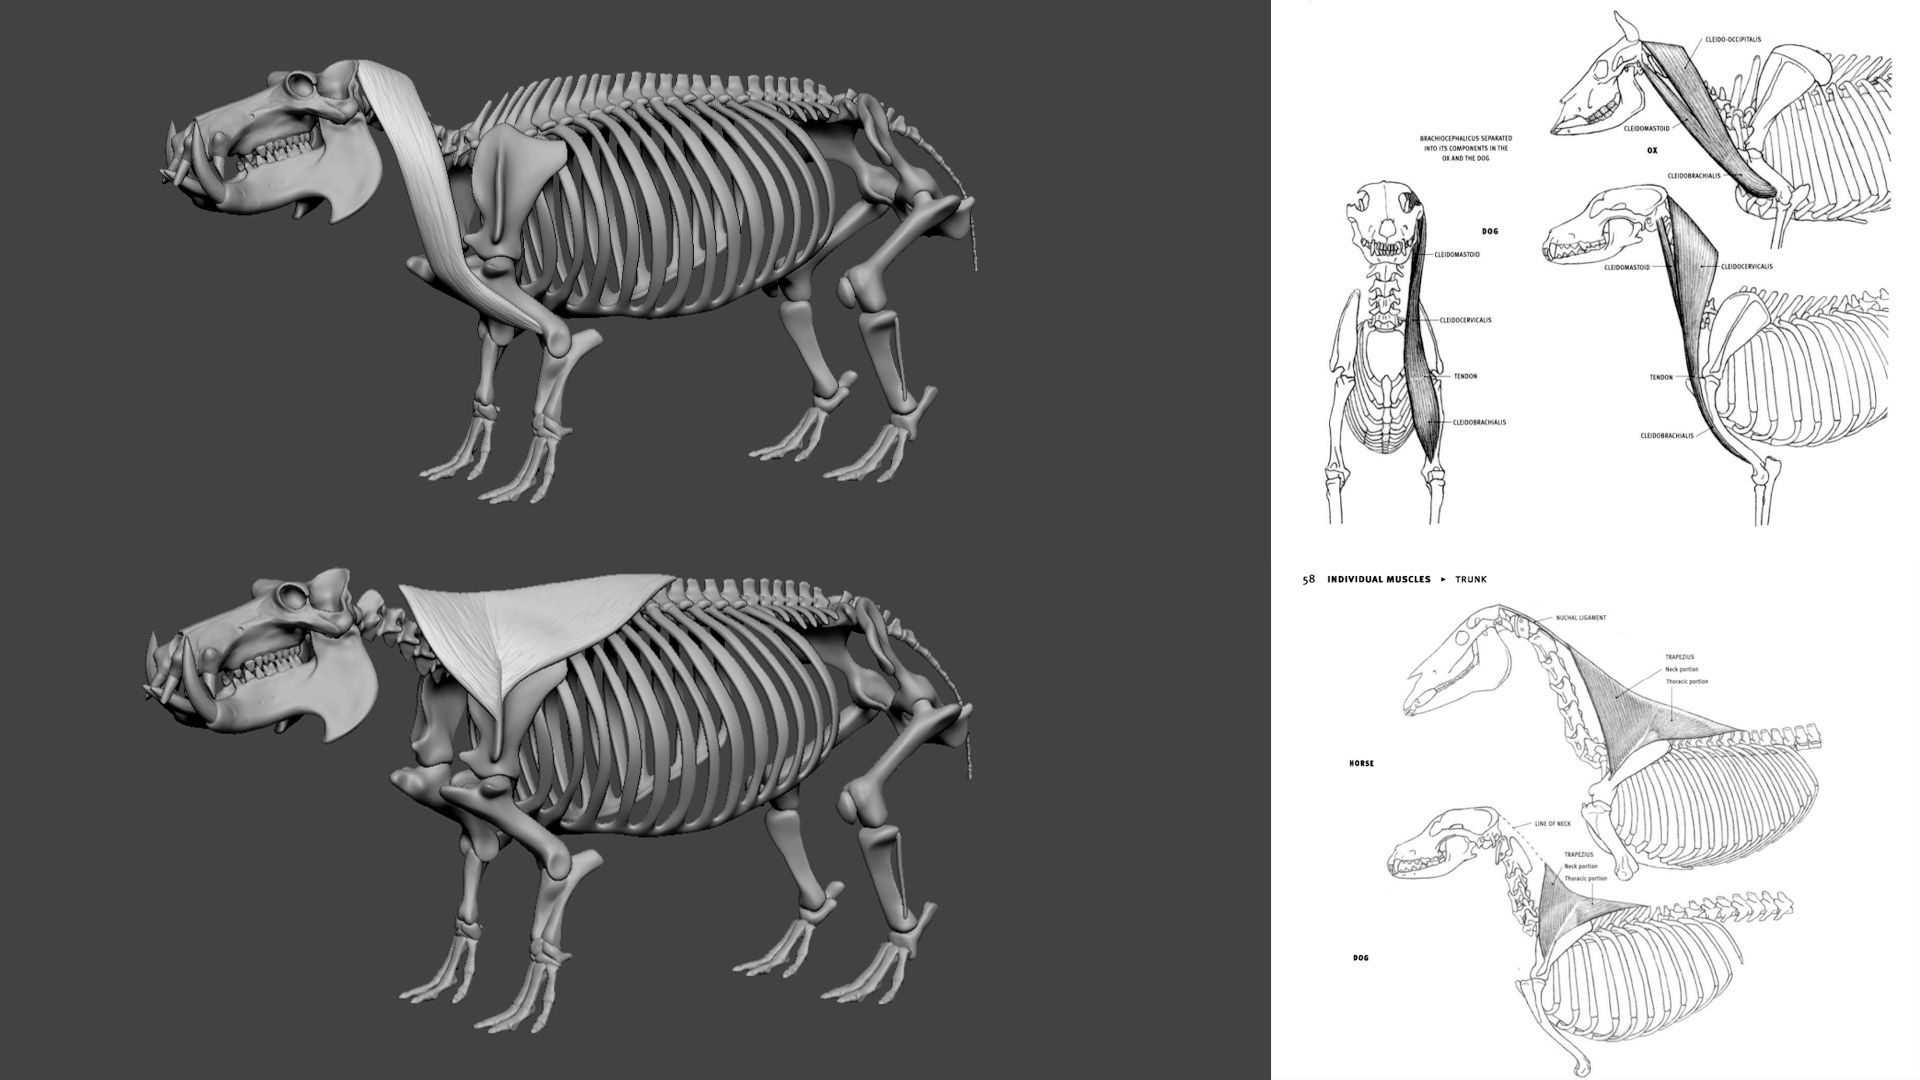
It was still difficult to nail the volume of each muscle to get to the final silhouette. That is where I went back to my reference board for tweaking. To speed up this process it helped to duplicate similar existing muscles and just tweak them instead of creating everything from scratch.
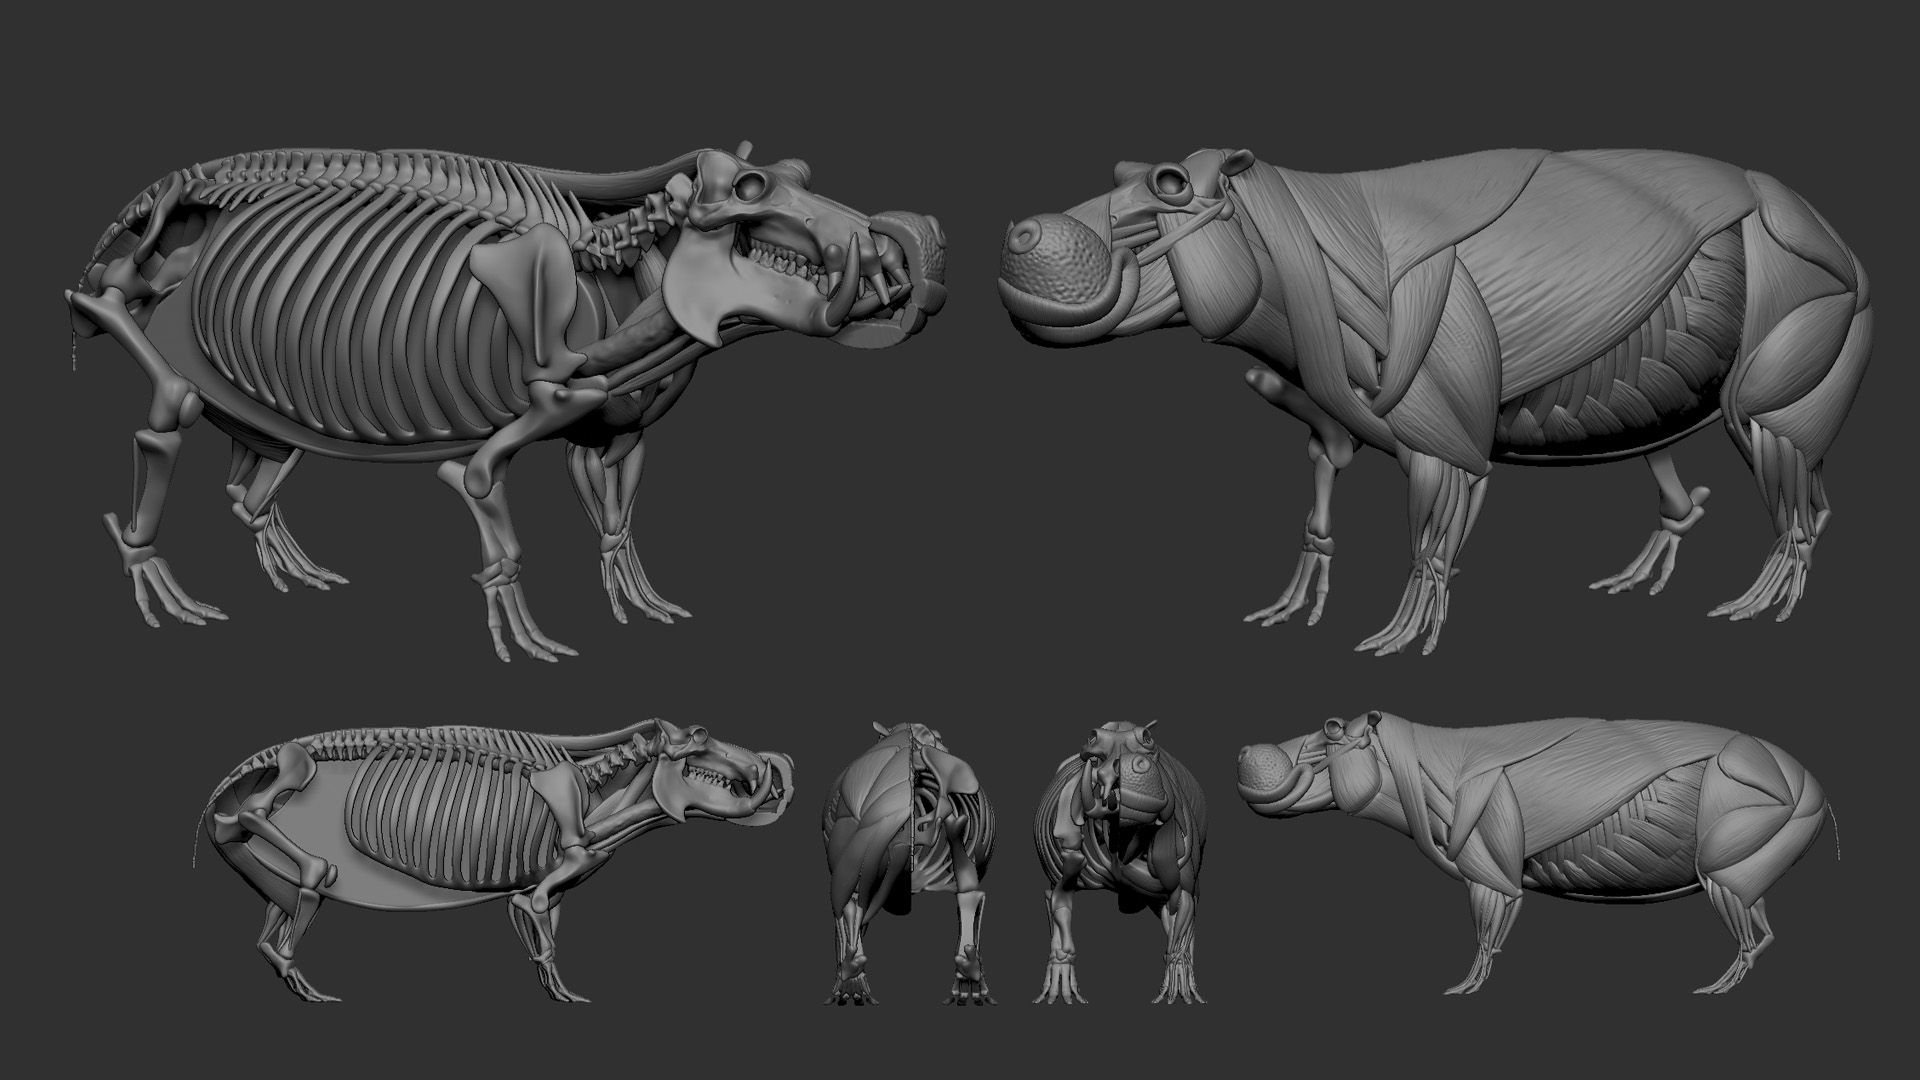
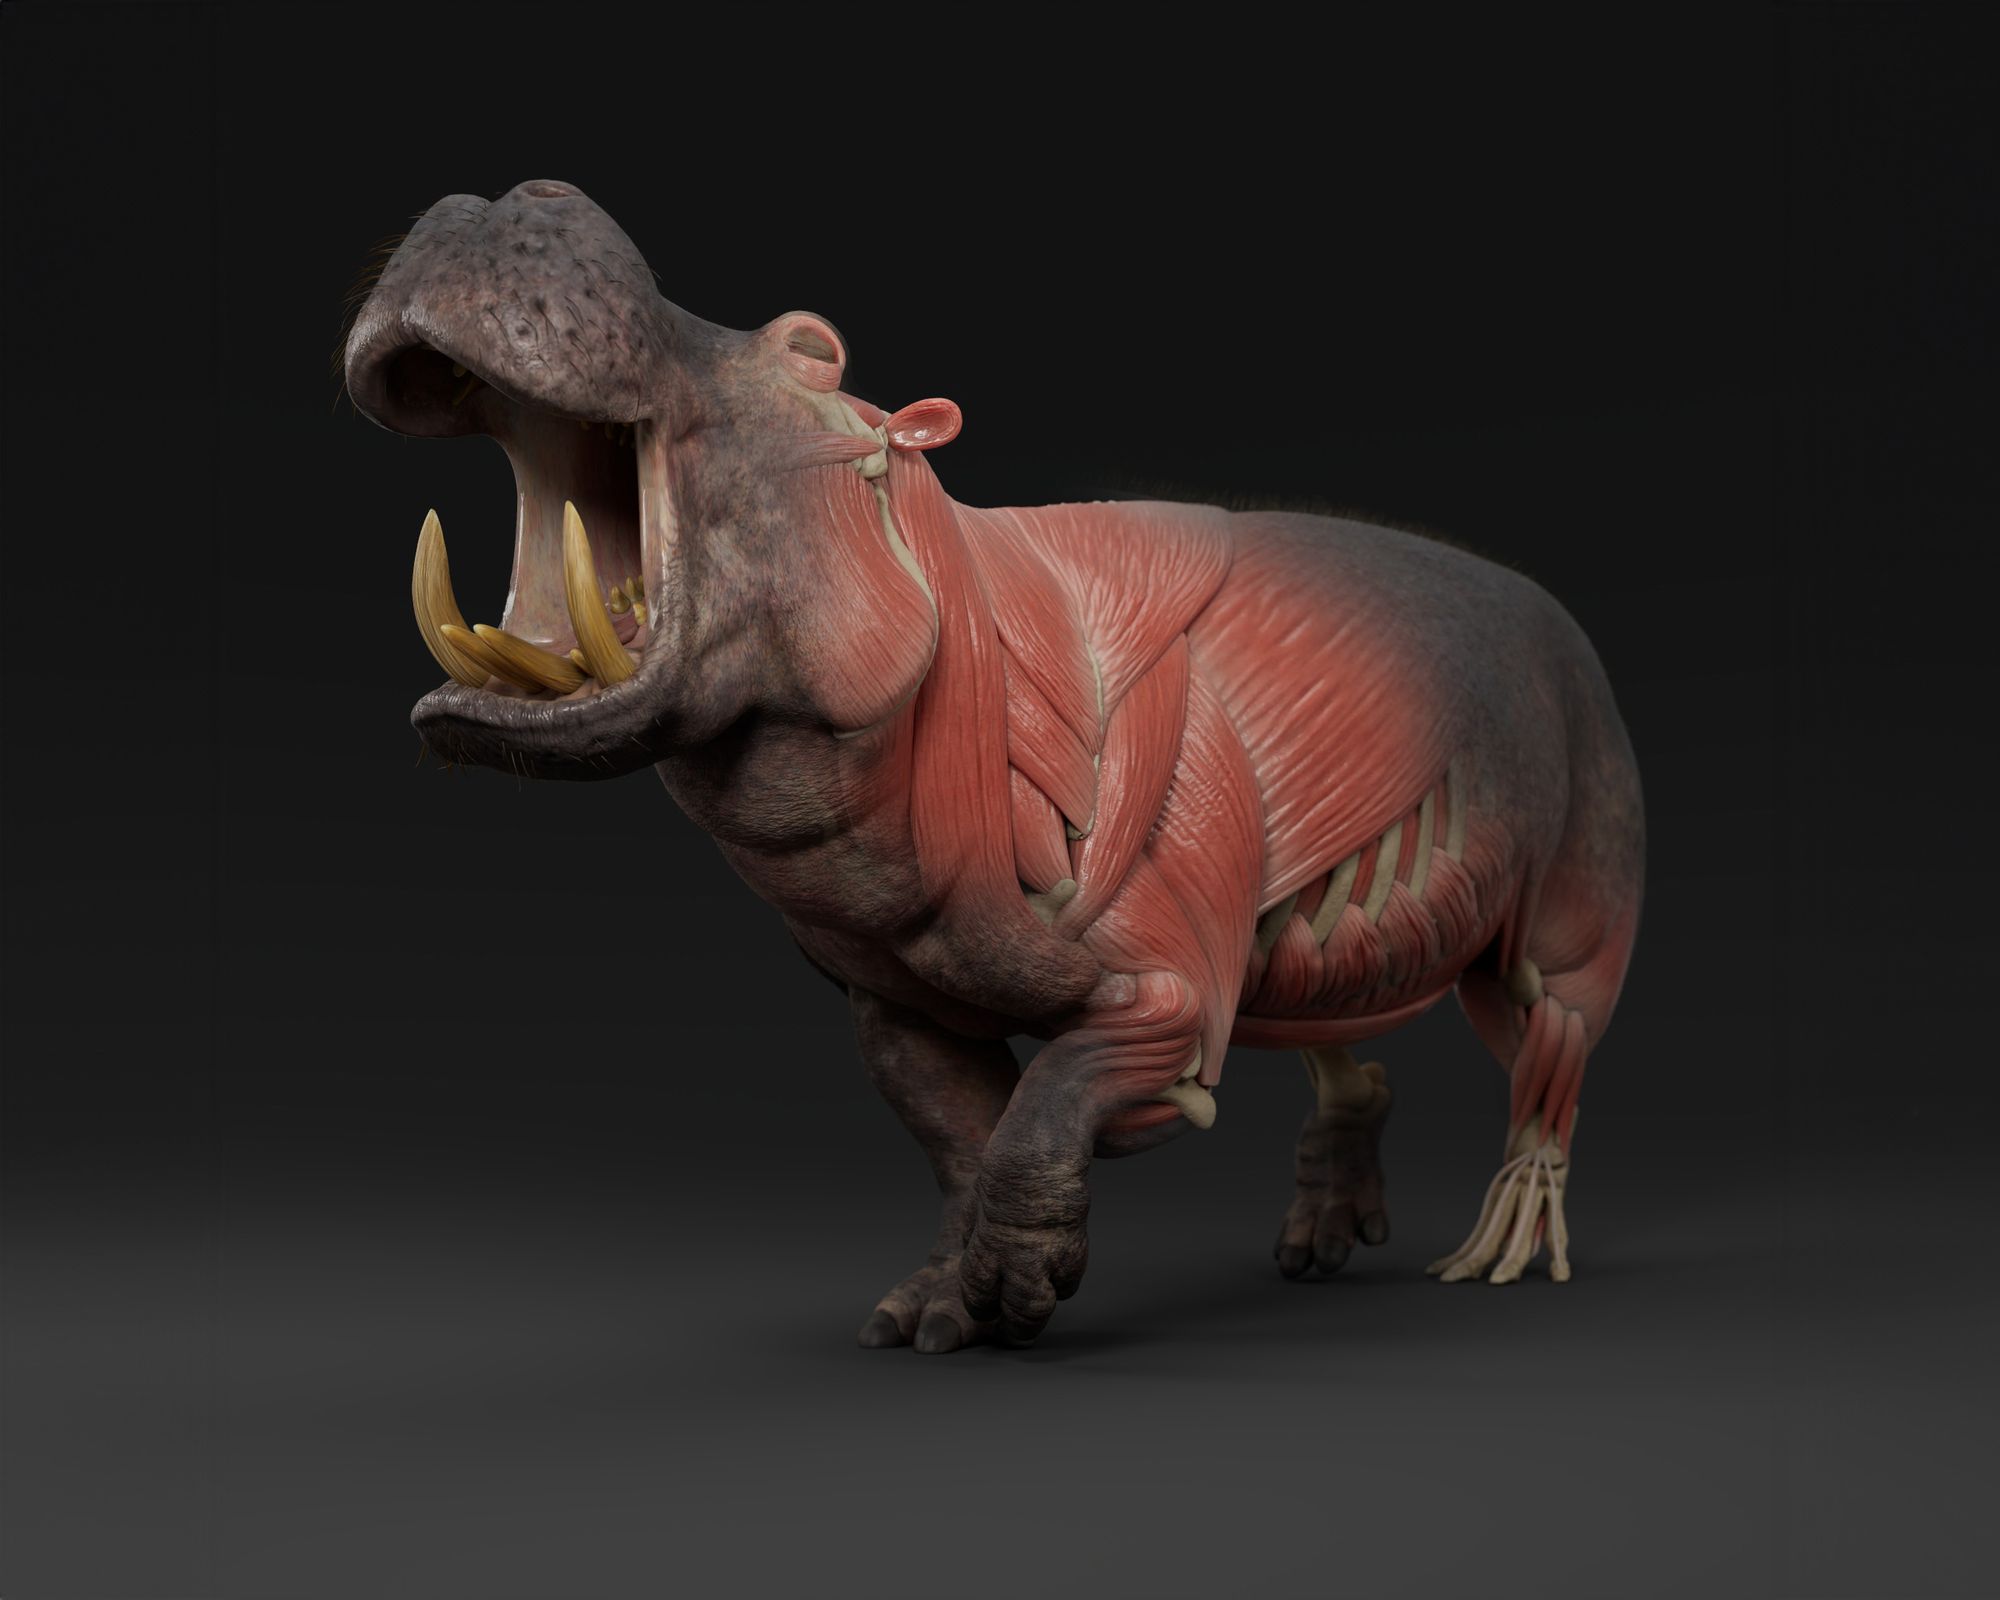
The last day of the workshop consisted of bringing everything together and working on the skin layer. During this step, the muscles were merged into one subtool and then dynameshed to create a watertight mesh. This process was done separately for the head and the feet since they needed more manual adjustments. When everything was merged, I started to fill in the creases between the muscles and added separate fat and skin volumes. This made the muscles much less visible since Hippos are generally not very lean. The underlying anatomy still made it much easier to work out the different planes and wrinkles.

By the end of the workshop, I was still in the process of dynameshing everything together. I really enjoyed taking on a personal project for a change and decided to spend the coming weeks finishing the hippo next to my other university work.
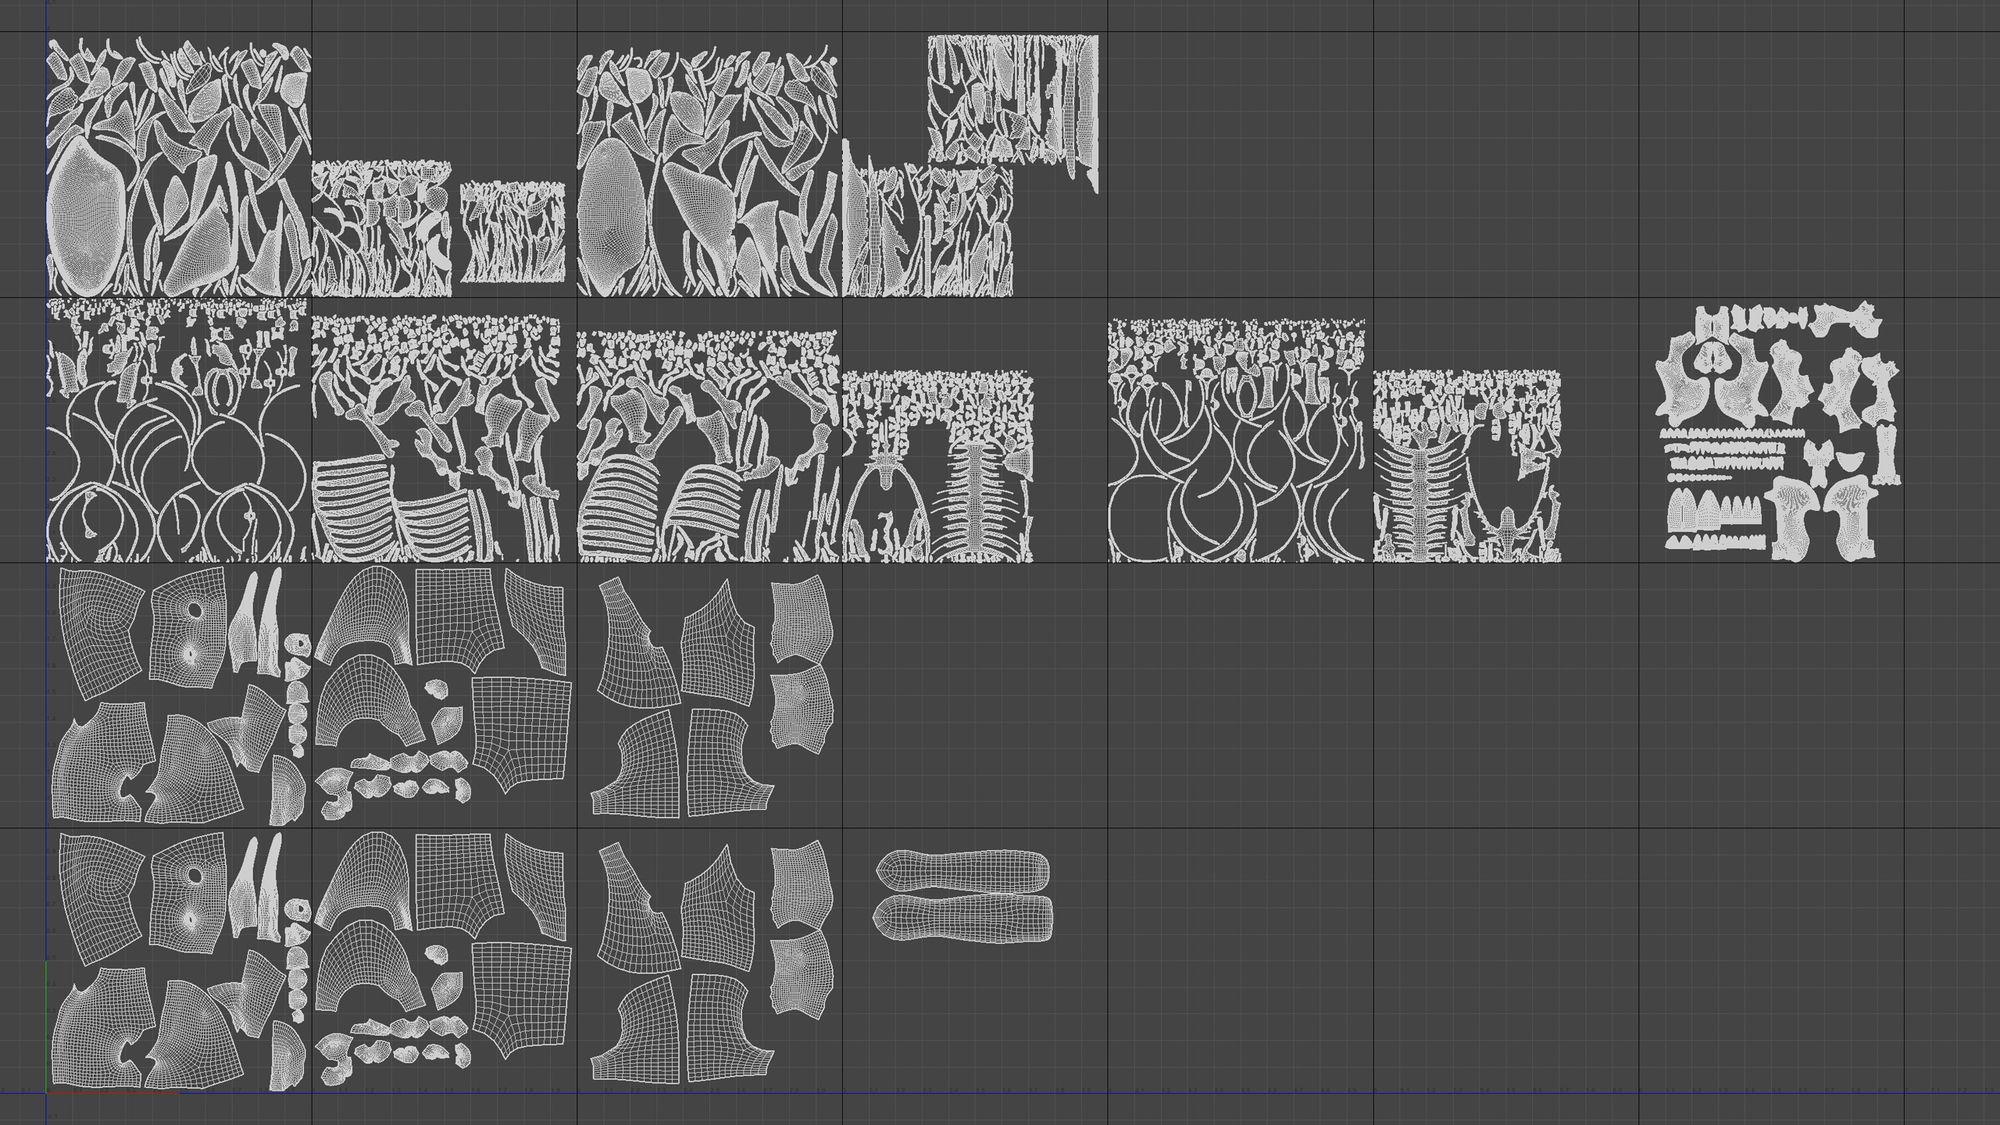
As soon as I had a solid base of the body I manually retopologised it in Maya since I was also planning to rig and simulate it. Whenever I do this I generally try to keep it as simple and low-poly as possible. By doing so the higher subdivision levels in ZBrush, which will be used in the rig later on, will have a very even topology. This is great for simulations but the lower subdivision levels can also help with weight painting.

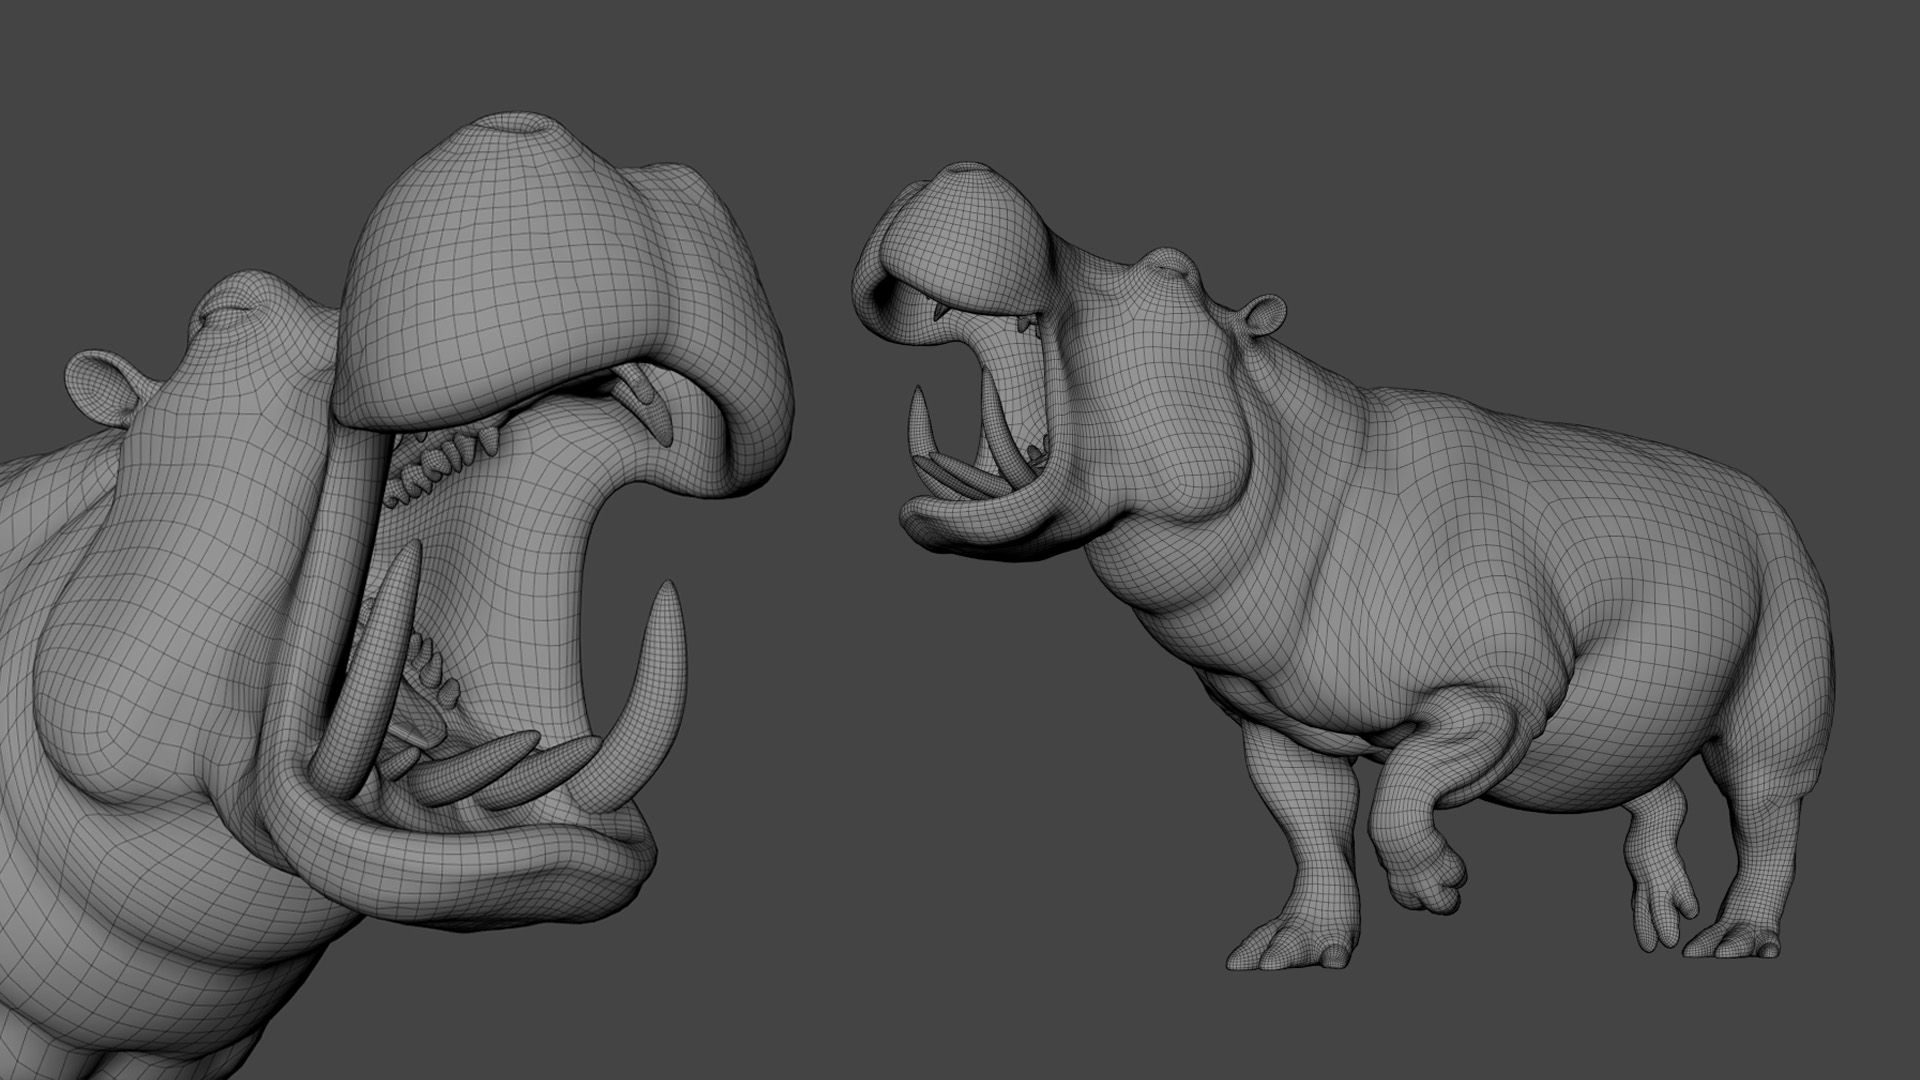
During the second week of the project, I finished sculpting the hippo and added some secondary and tertiary details in ZBrush. In hindsight, I could have spent more time at this stage to better work out the eye region and tail area but I was eager to go on to rig the hippo and I decided it was good enough.

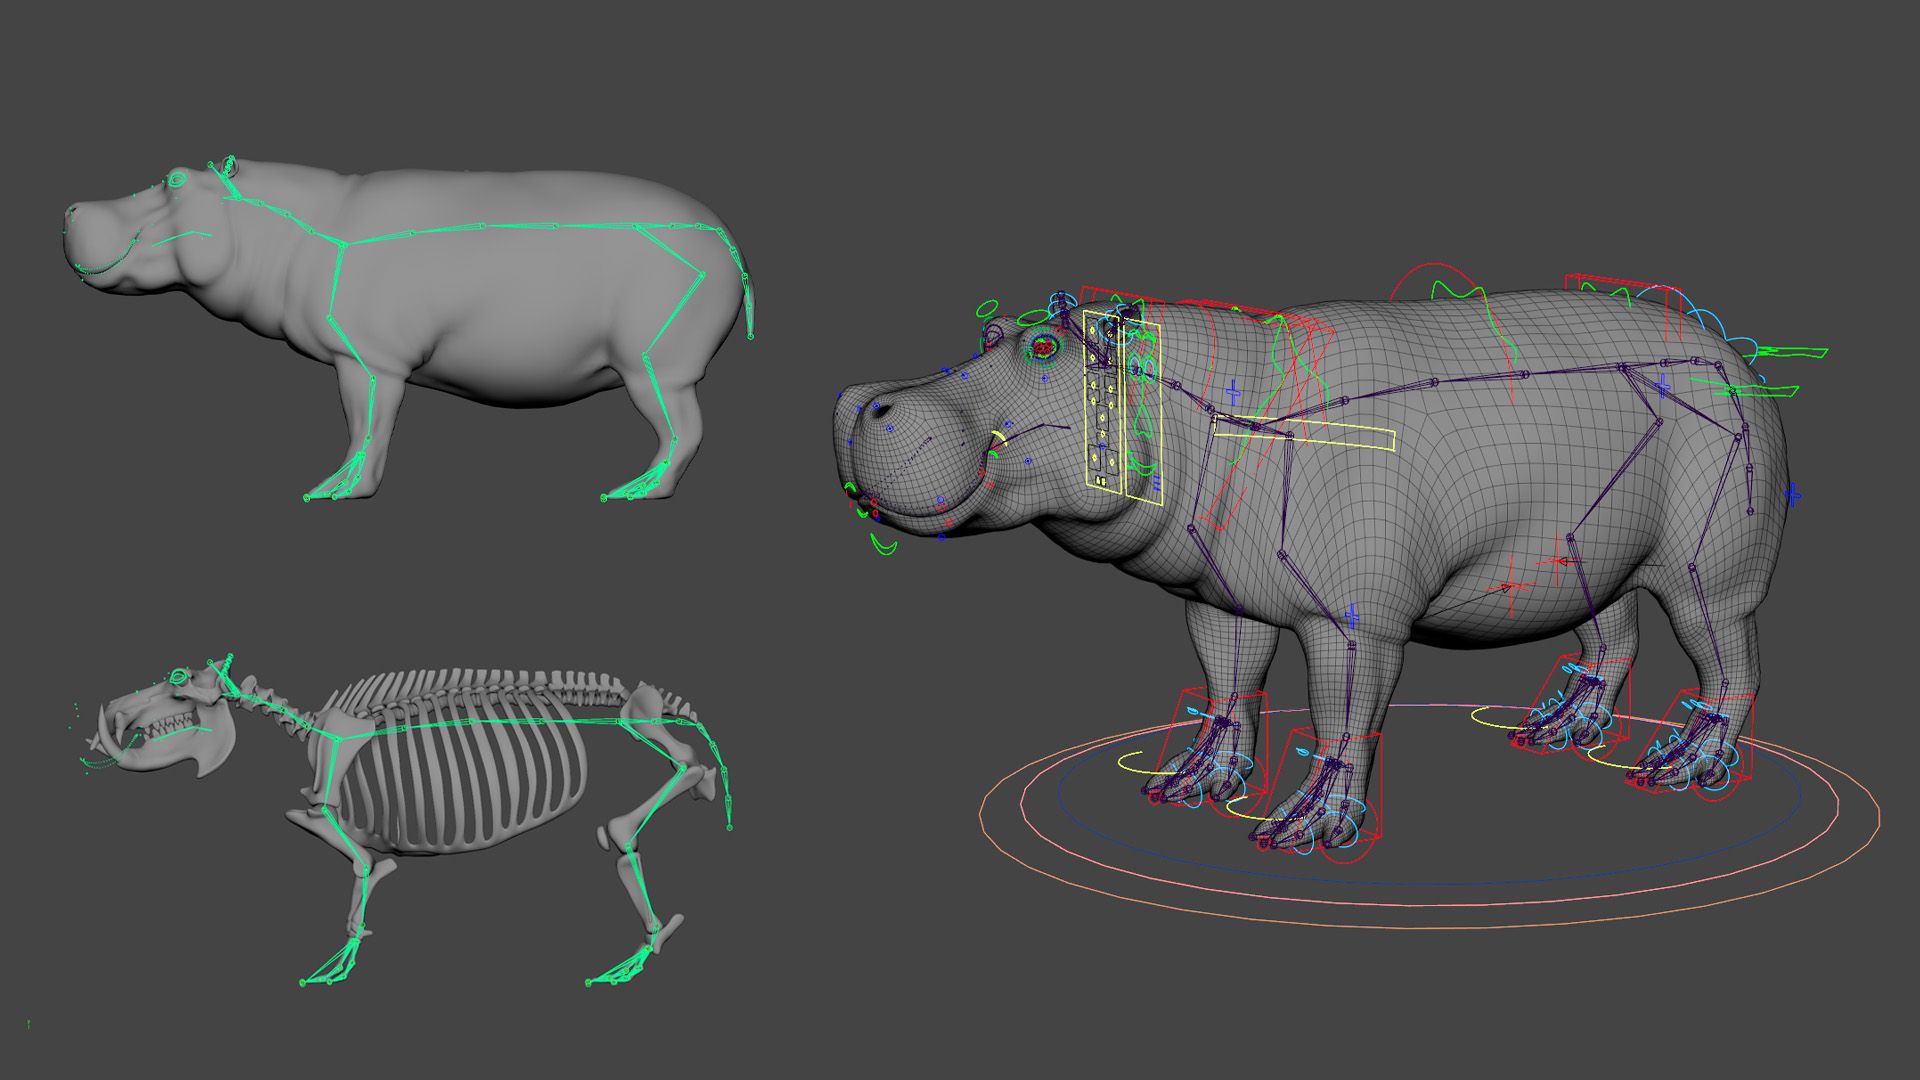
The rigging was done in Maya with the help of Advanced Skeleton. This auto rigger comes with multiple quadruped presets and has a lot of customisability. I also used its facial rigging system for the hippo. It is primarily built for humanoids but can also work with other faces if the topology is set up correctly.
Placing the joints was made a lot easier by just taking the skeleton as a reference. Only the spine was an exception since the joints there needed to be placed more towards the center of the hippo. After I finished weight painting the skin of the hippo I copied the weights over to the zremeshed muscles. To improve the deformations I used zwrap to wrap the skin mesh onto the combined dynameshed muscles mesh before copying the weights.
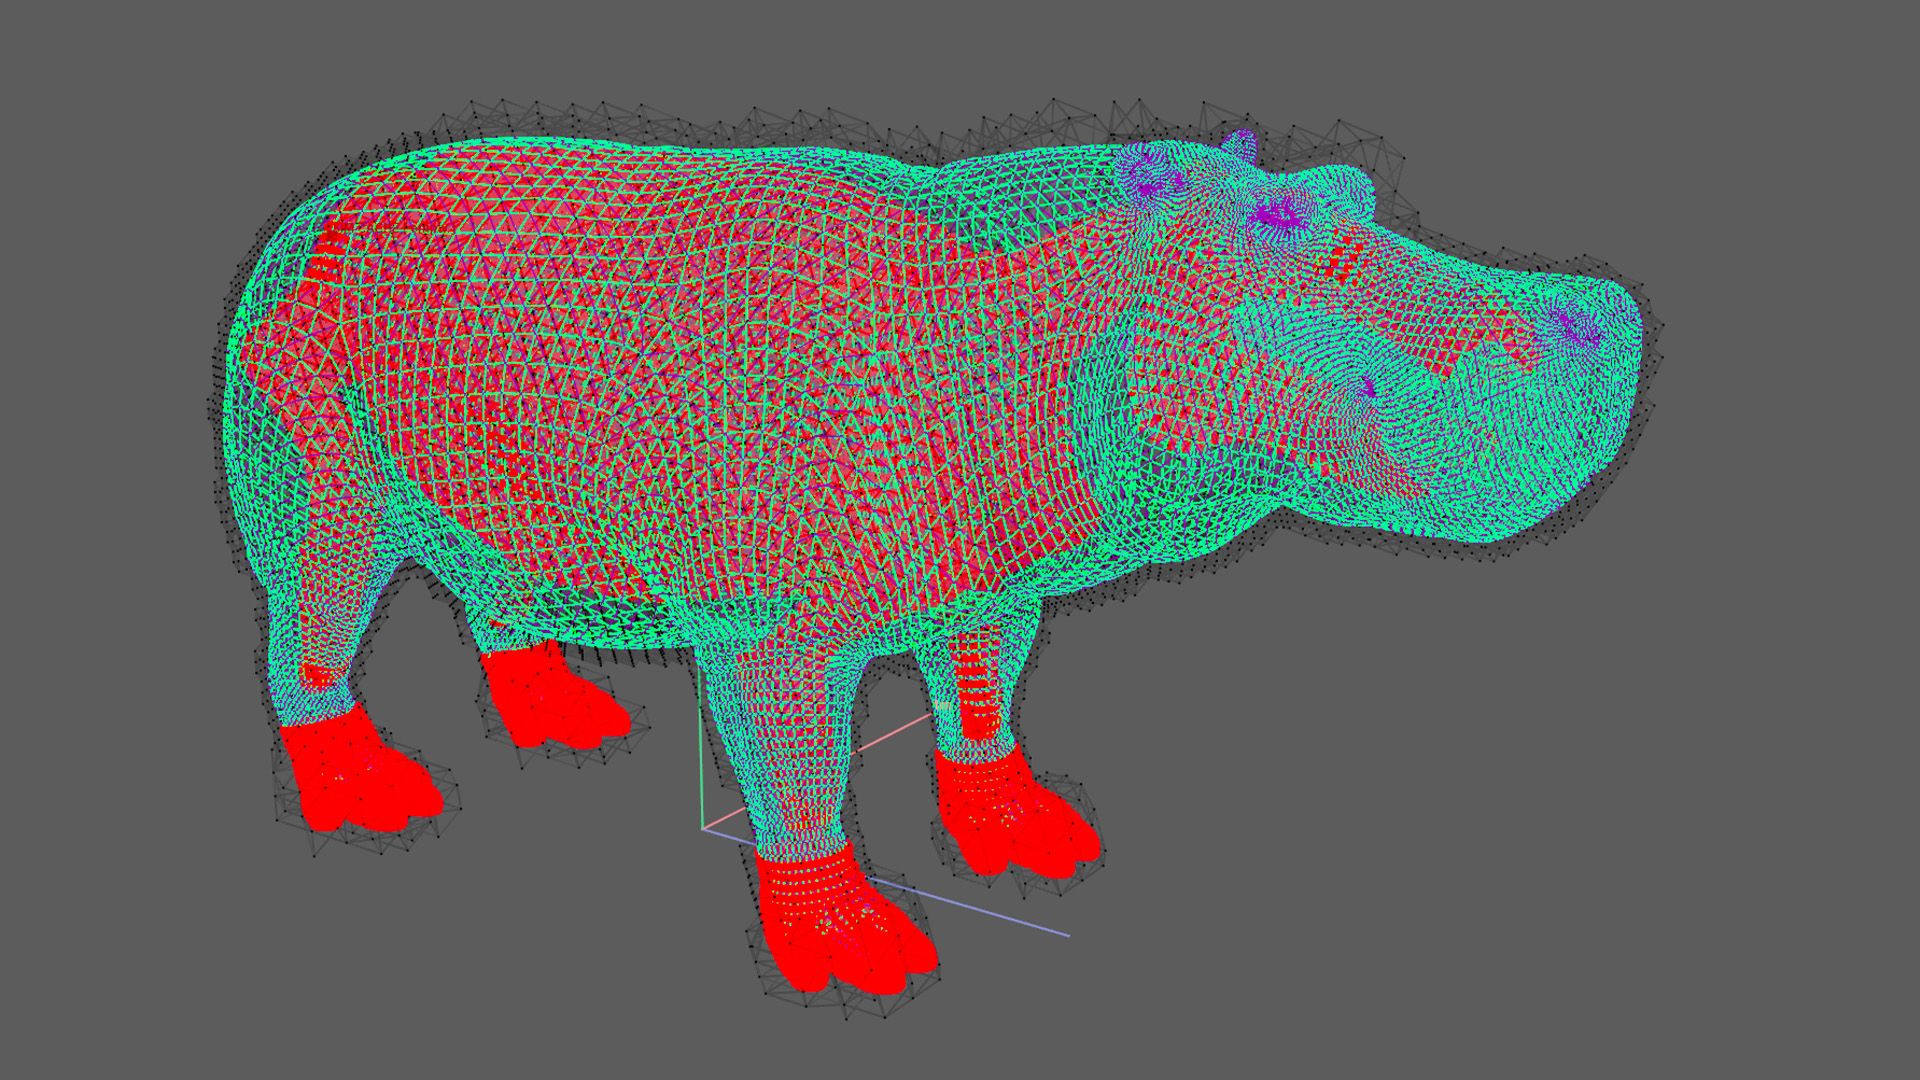
The muscle simulation was done with Ziva Dynamics which will be discontinued soon, unfortunately. I used a simplified setup by Andy van Straten that worked out great for me in the past. This setup works with one combined bone mesh and treats the whole body as a single muscle to create more of a jiggle sim. I based the bone mesh on my existing skeleton and later wrapped the muscles to the skin mesh to also make them jiggle.
My goal was to animate a walk-and-run cycle but before I started I spent quite some time searching for good reference clips. Fortunately, I found some, that showed the cycles from all angles.
Whenever I animate cycles I use a technique I learned from Martin L'Heureux that speeds up the workflow a lot. He taught me how to create different motions by only working in the graph editor and offsetting very simple curves. Explaining this workflow in more detail would require a separate article though.

It is a bad habit of mine to postpone texturing for as long as possible since it's the part I'm most uncomfortable with. For the hippo, I decided to use Mari for the first time. Gael Kerchenbaum had joined us a few months earlier for another workshop about texturing and lookdev in Mari so I once again followed his workflow. I projected Texturing XYZ displacement maps for the micro detail and used Substance Painter and ZBrush to bake utility maps and ISOs.
I ended up texturing the hippo two times since my first version turned out very flat. Earlier I had set up symmetrical UVs for the body to more easily copy masks in Mari.


The skeleton and Muscles were textured with Substance 3D Painter and I used auto UVs and smart materials to speed up the process.
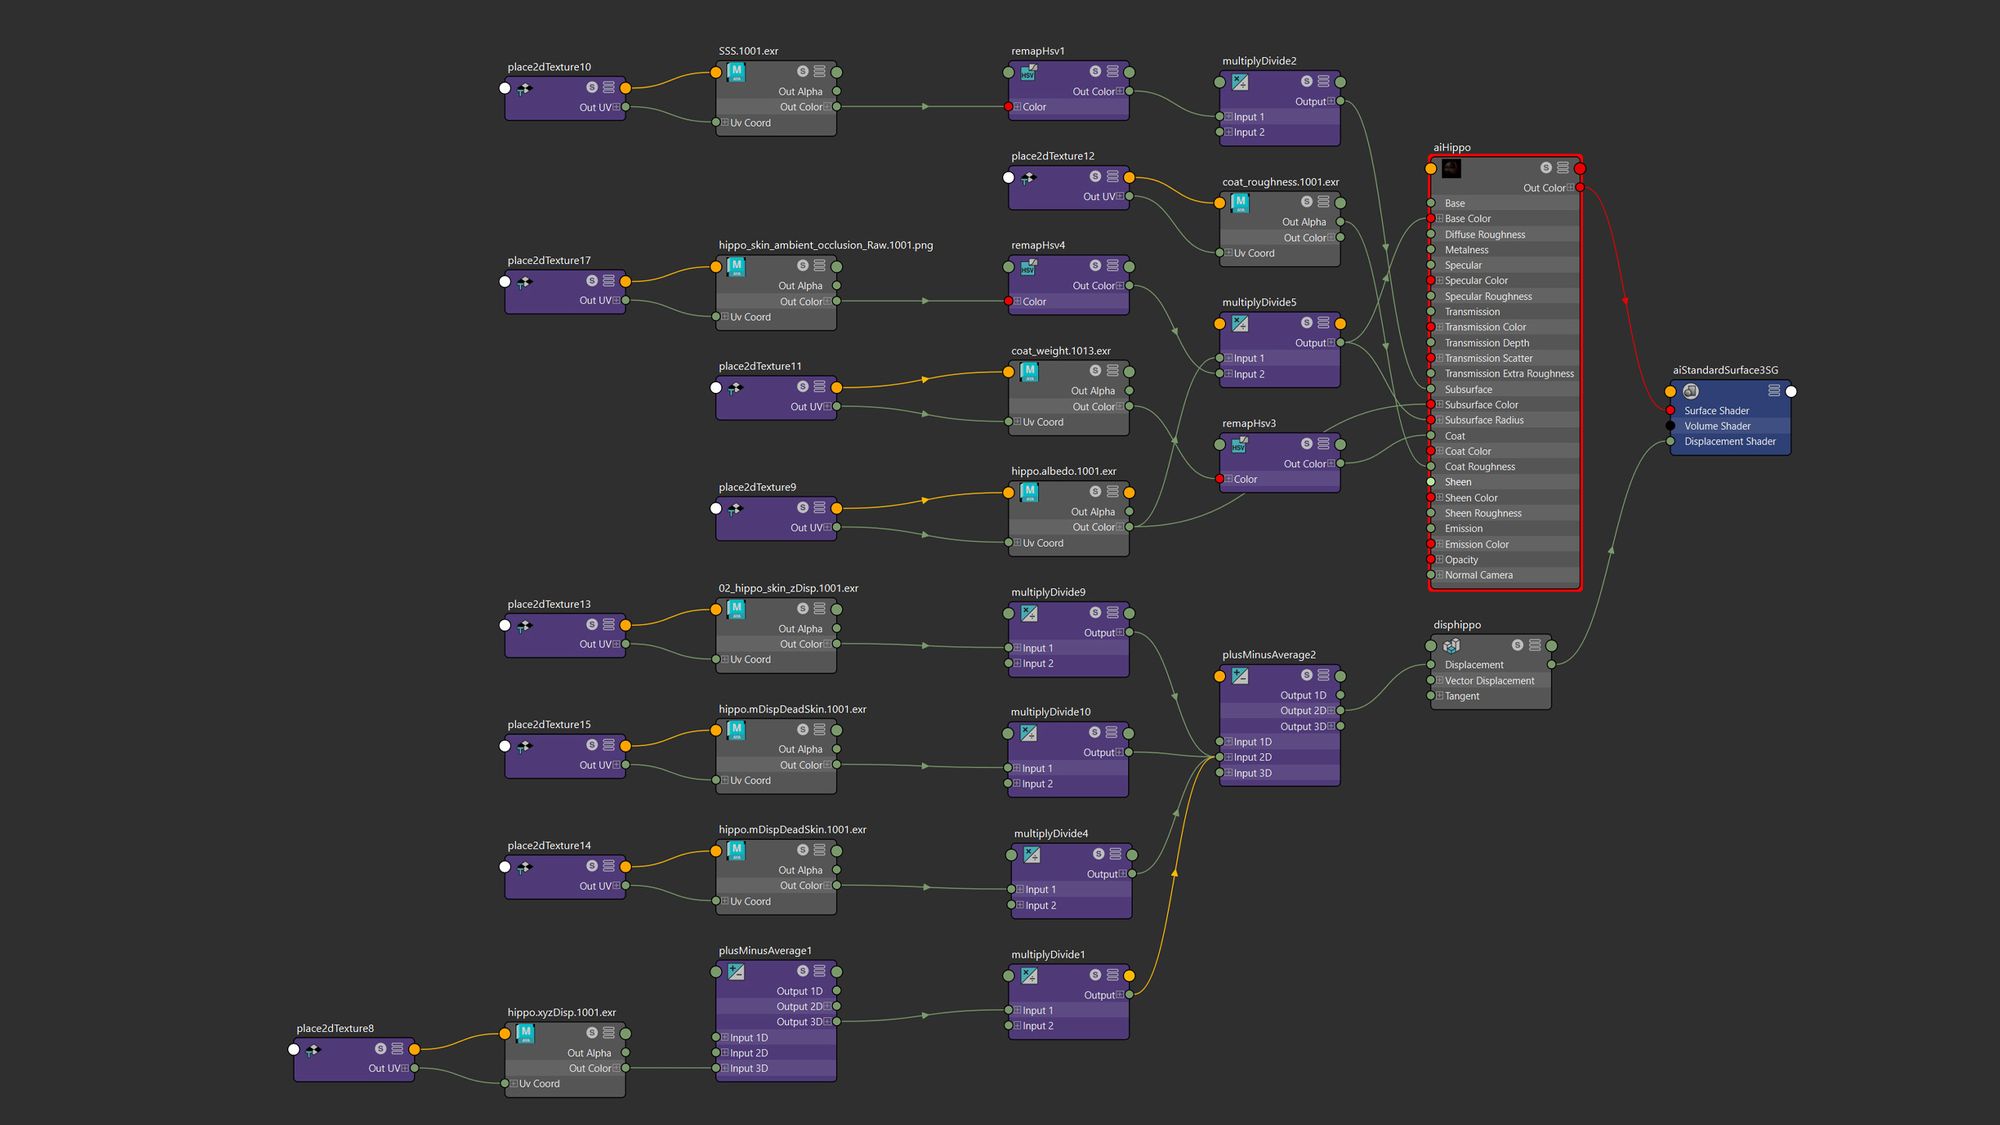
My Shading setup in Arnold also was heavily influenced by Gael's first workshop. He taught me how to tweak the separate Texturing XYZ displacement channels and how to correctly work with roughness and coat.
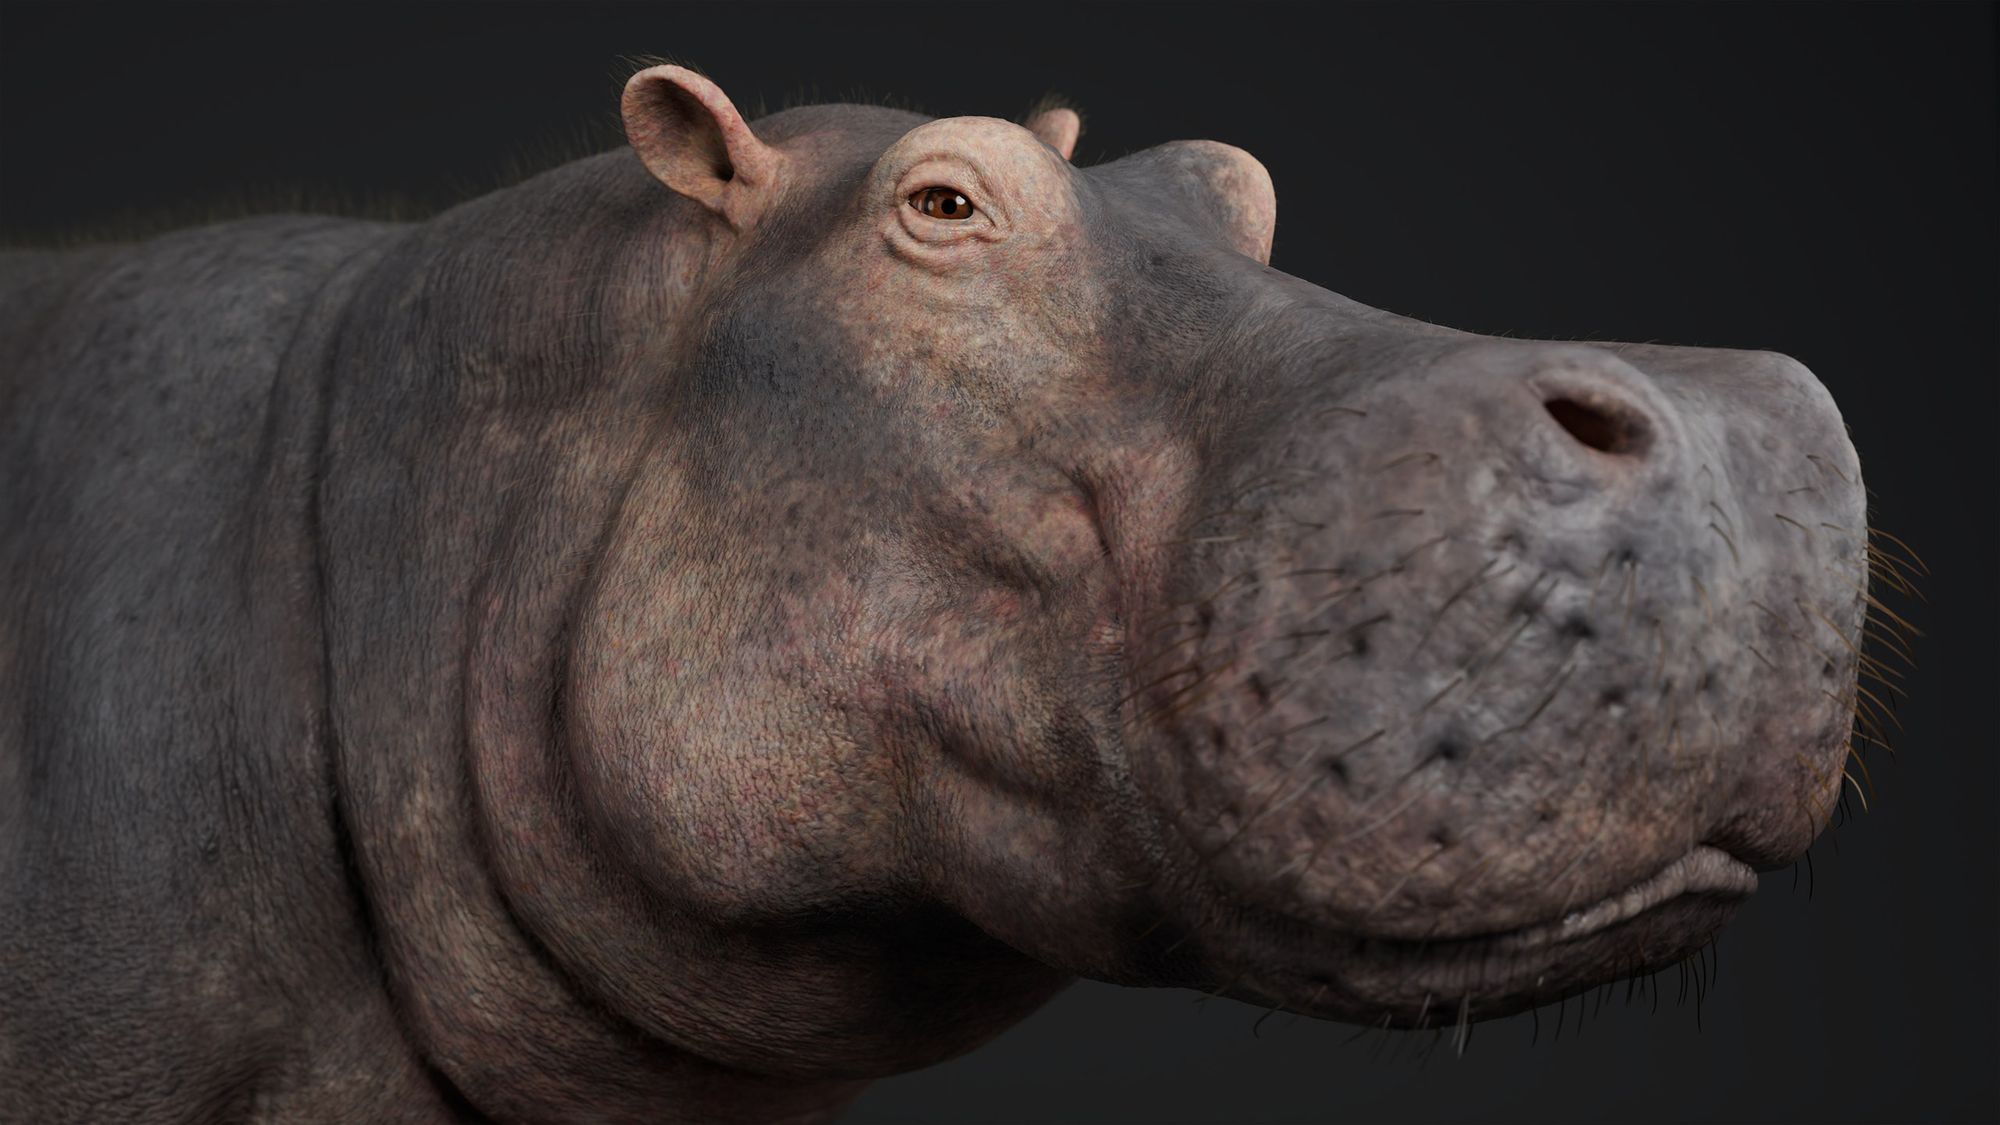

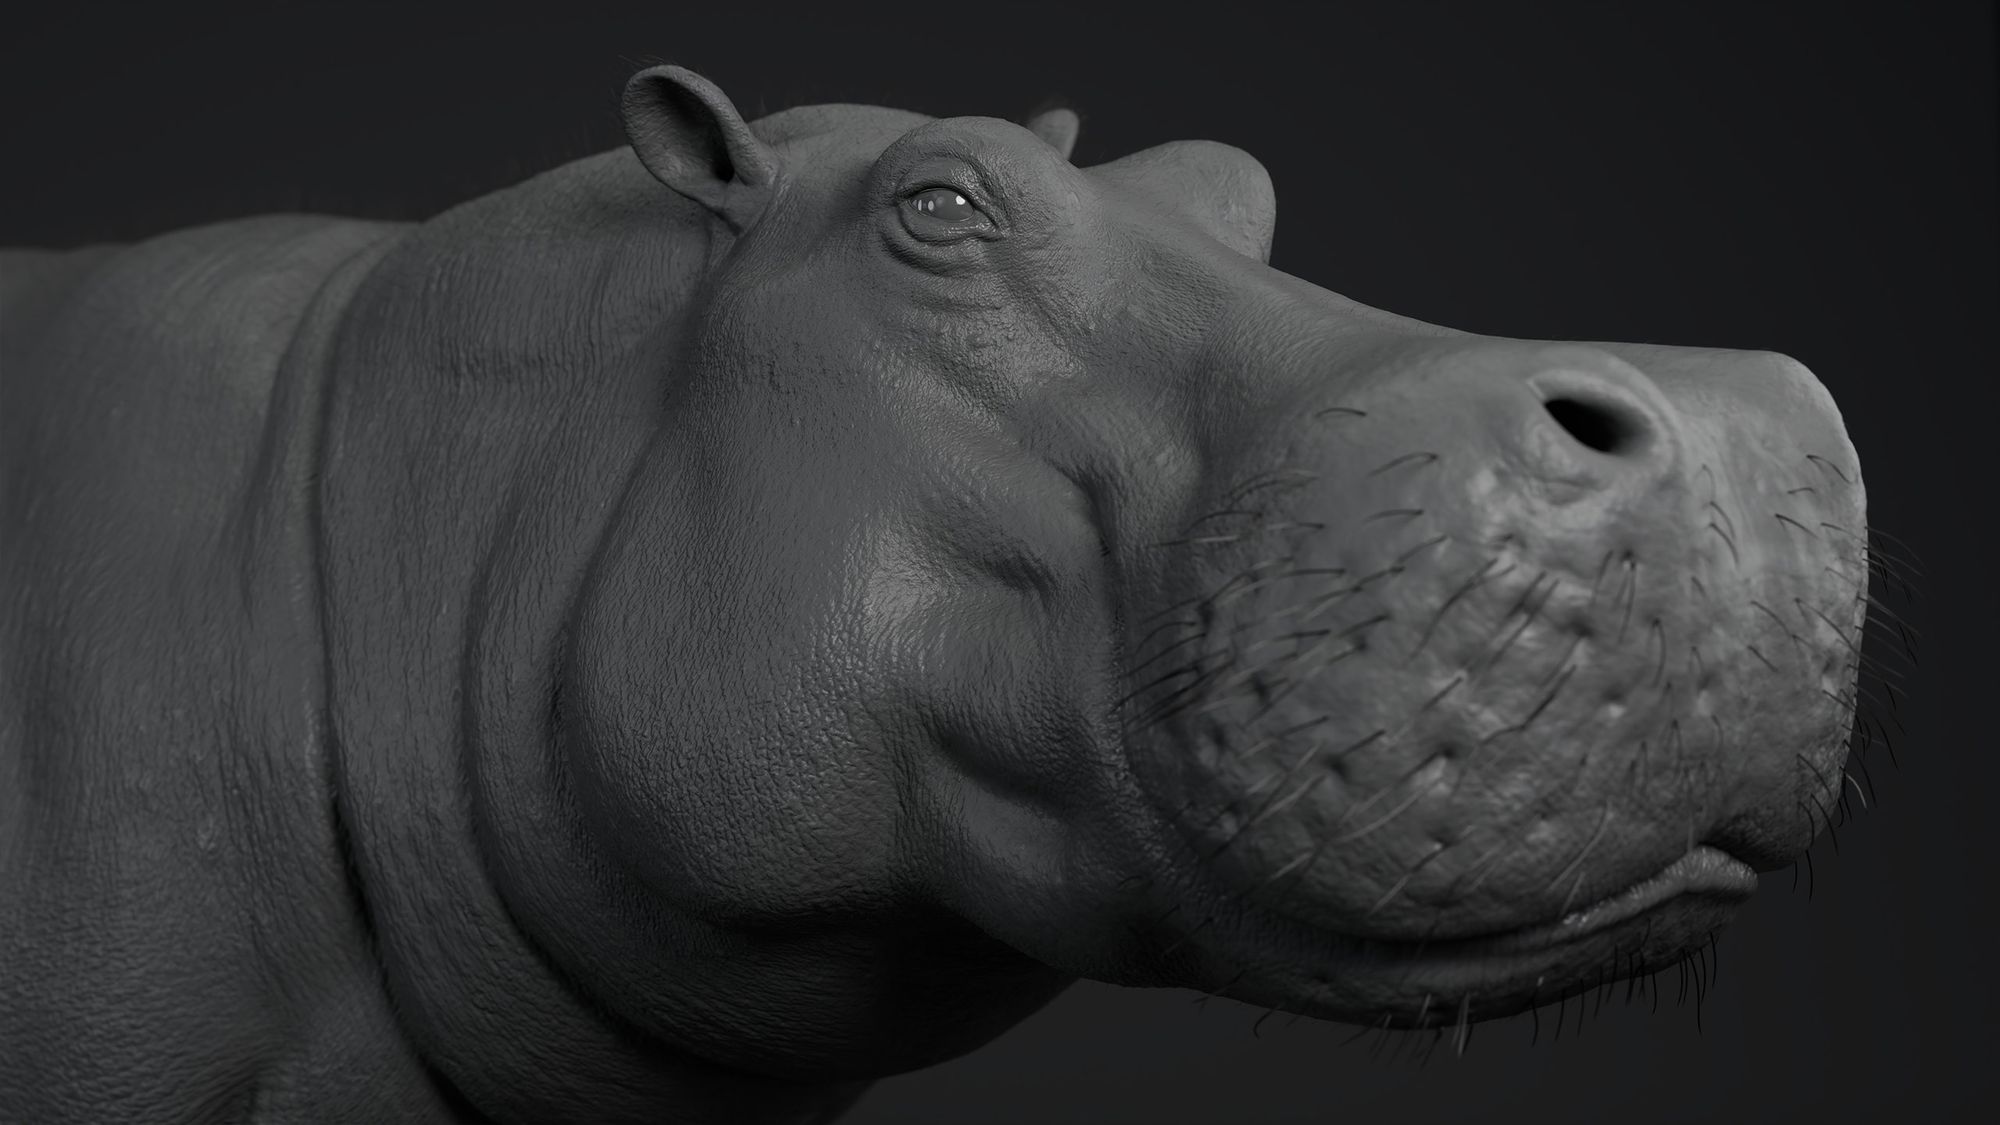


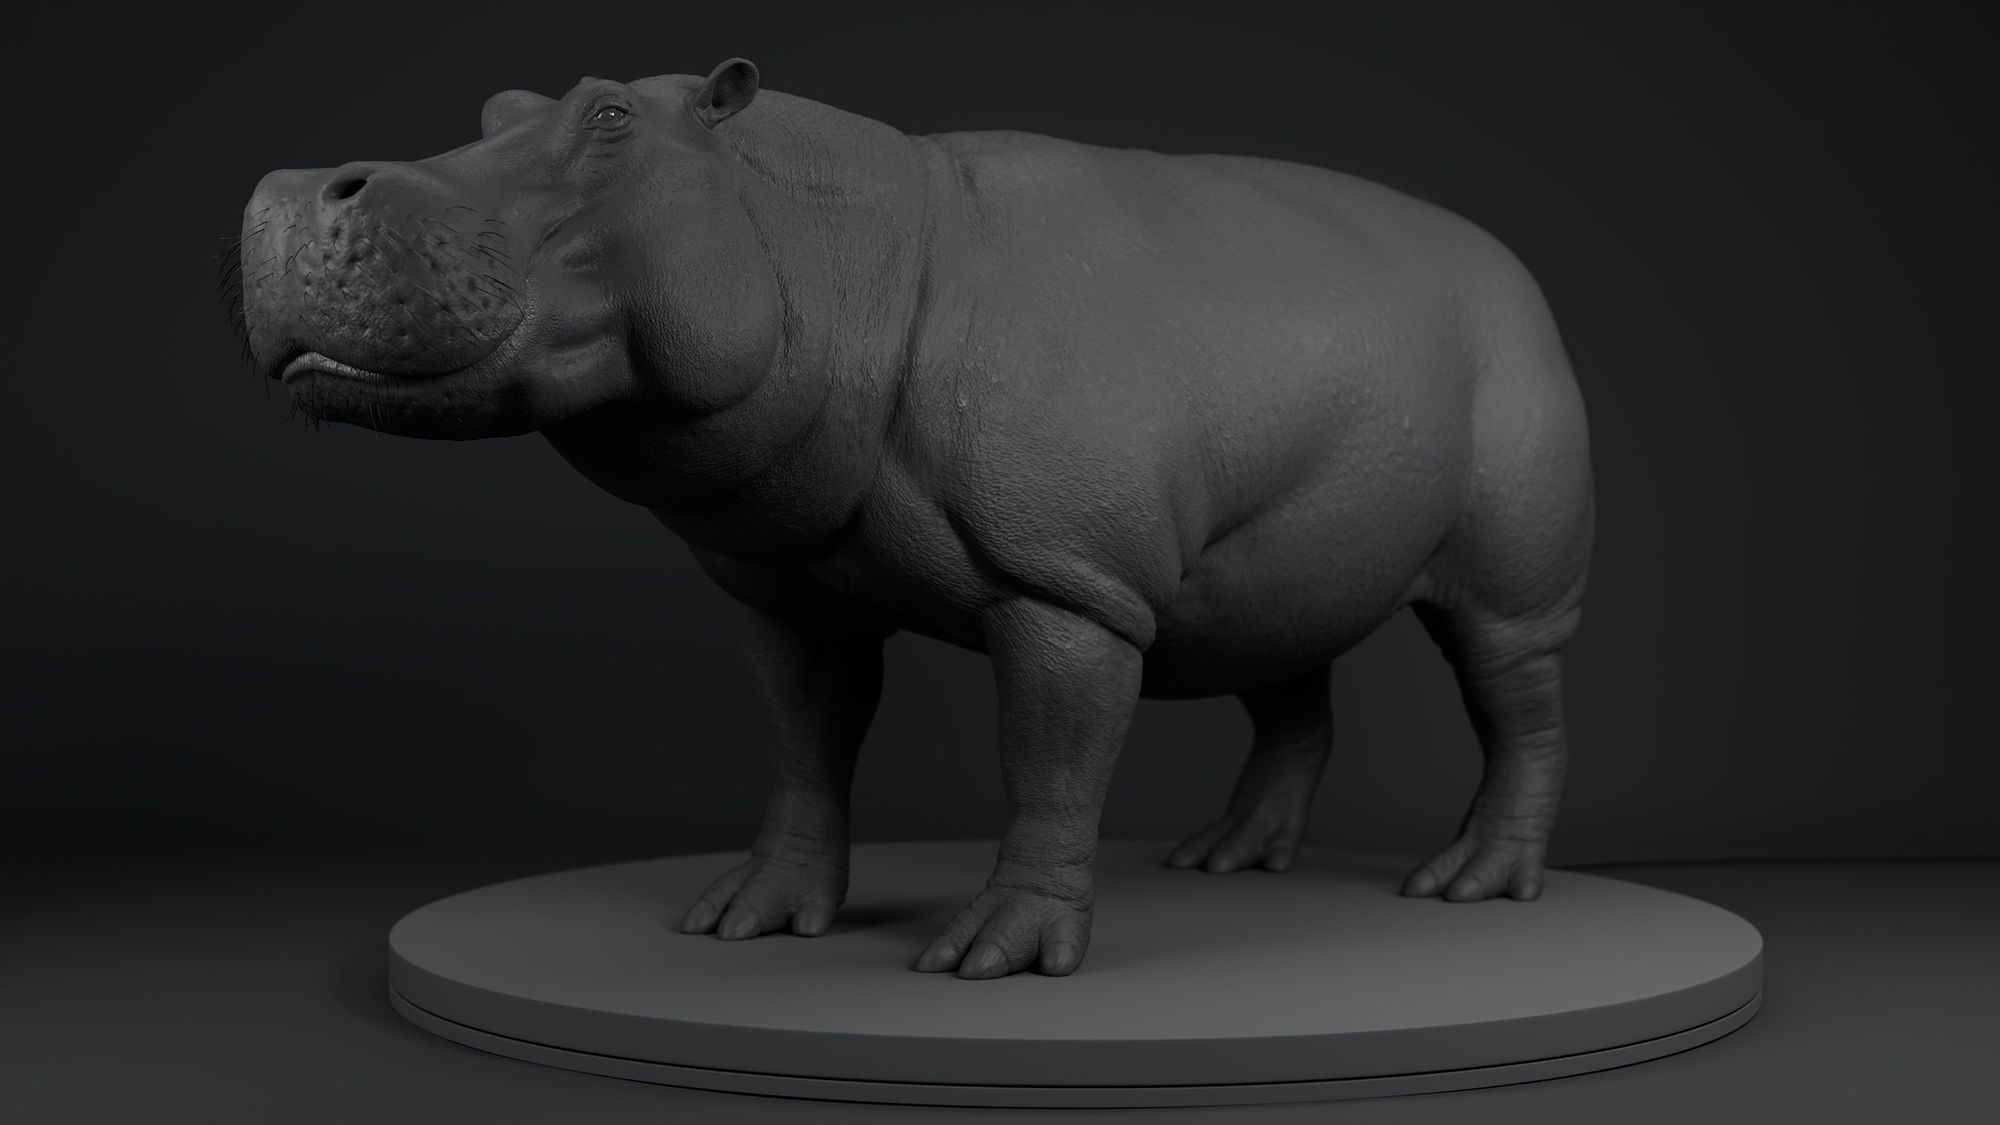
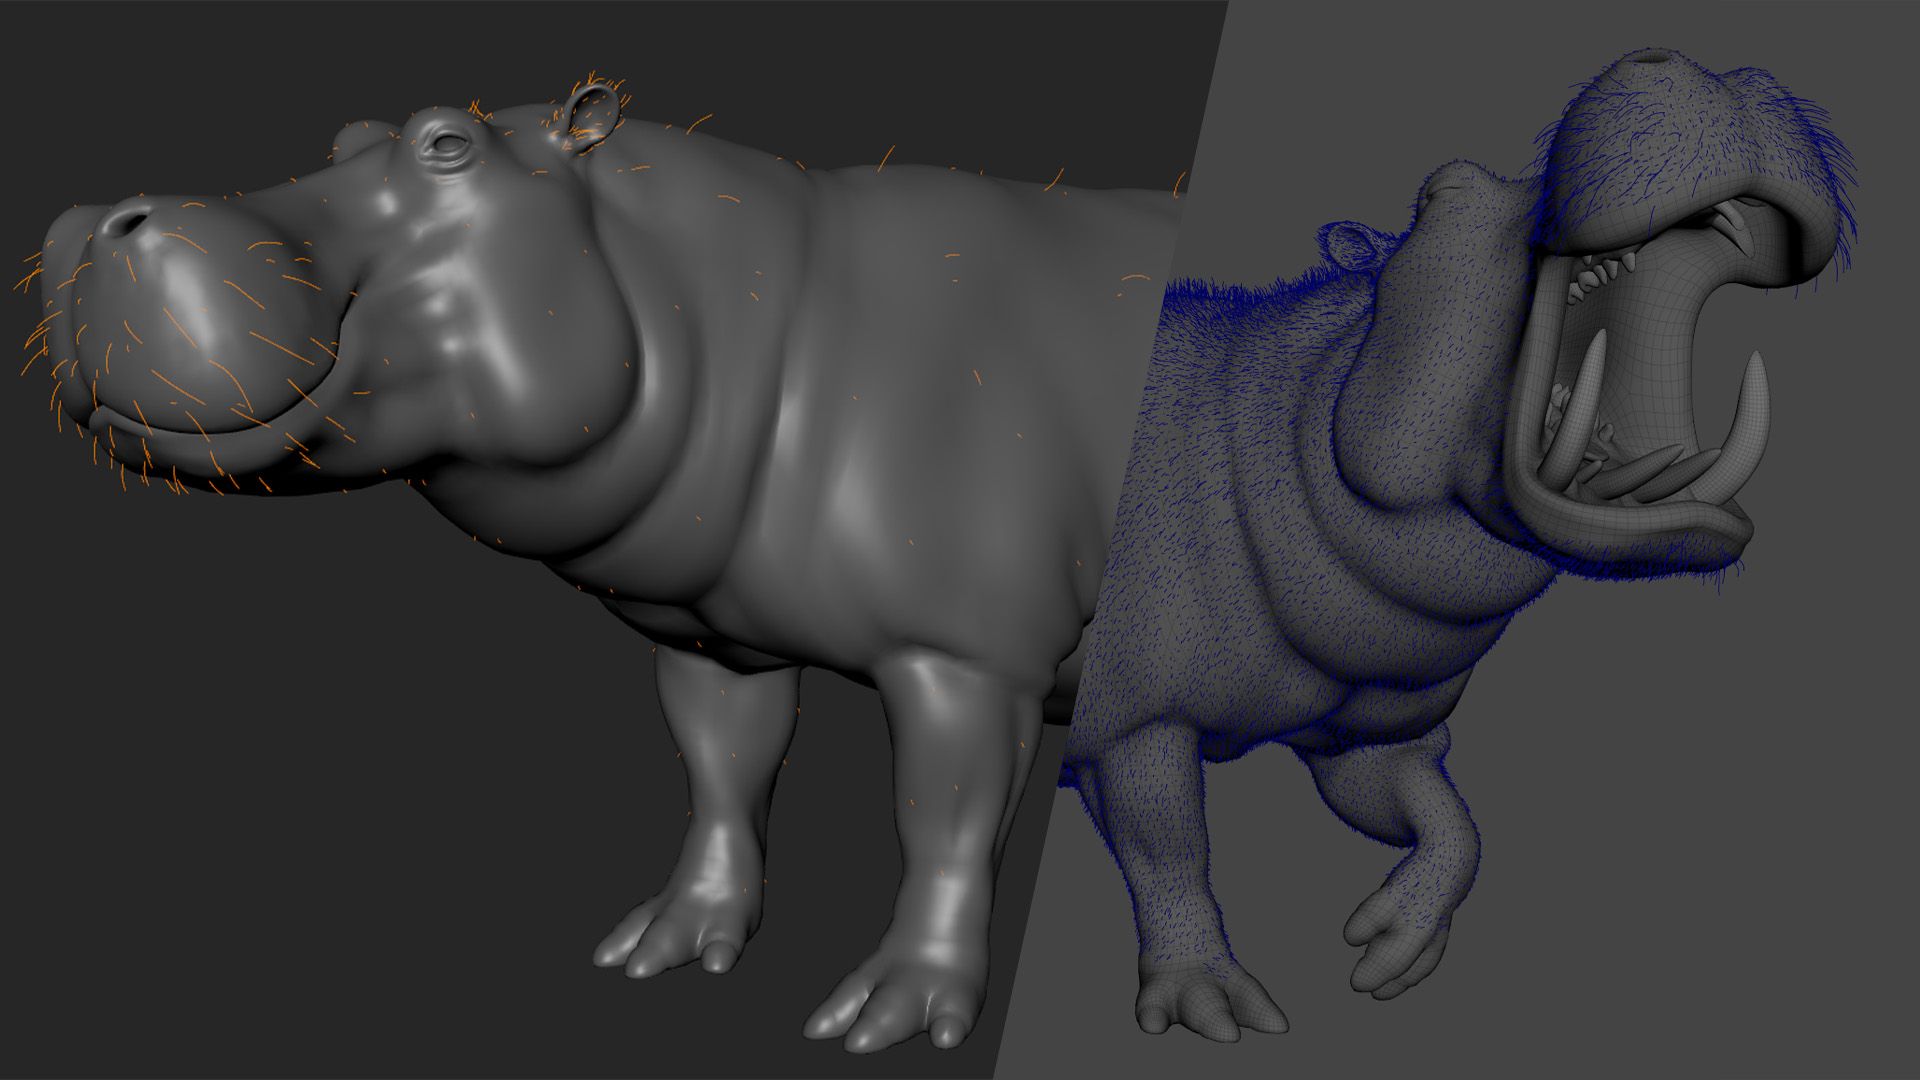
To add detail and break up the silhouette, I added some groom with XGen in the end.
To present the finished hippo I created a simple three-point lighting and look development setup.
To conclude my breakdown I want to thank The Rookies for the opportunity and I also want to thank Gael Kerchenbaum for his amazing input and guidance. Feel free to reach out through my Rookies profile if you still have questions or want to connect.