Hard Surface Modeling and Texturing Exercises: Creating a Game-Ready Hero Prop
Harry Crowe's latest project on The Rookies looks at the creative process behind a 3D hero prop.
Harry Crowe's latest project on The Rookies looks at the creative process behind a 3D hero prop.

Initially drawn towards the path of a concept artist, Harry Crowe's trajectory shifted during his university years as he discovered a newfound passion and proficiency in 3D art creation. Now a recent graduate of Games Academy Falmouth University, Harry is honing his skills as a 3D artist and building on his portfolio.
His latest project on The Rookies evolved from testing new skills, initially conceived as a humble experiment to create a high-quality hero prop, and gradually expanded into a diorama-like environment. Through this project breakdown, Harry shares insights into the creative process behind this humble 3D thermos!
I wanted to create a simple prop where I could practise texturing skills and improve my fundamental understanding of creating game-ready hero props. At the time, I had very little understanding of the hard surface workflow and wanted this to become a big learning experience. Despite ending up being a very simple coffee thermos, I decided to tackle it as an important prop, where in practice it might be the centre frame during a cinematic.
I wanted to make this prop after I was inspired by an Unreal 5 lighting course by FastTracks tutorials. One of the demonstrations in the course was lighting a coffee diner. As a massive coffee drinker myself, it seemed like a no brainer! I based my prop on many of the coffee thermoses I found on PicClick. My initial idea was that I wanted my prop to have a plastic cup with a handle and to have some noticeable areas of use and damage. I then gathered photo references of various kinds of thermoses: from plastic ones, damaged ones and metal ones. At this stage, I was mostly focused on gathering as much reference as possible, to see what kind of details I might want to add during the texturing phase.
During my search, I came across some Coca-Cola adverts. I really liked how they presented their bottles in a well-lit scene with a blurred background. I thought it would be really fun to present the asset like it was an advert for this new coffee thermos a person must purchase. This then became the main focus behind my overall presentation moving forward.

To start off I focused on making sure the thermos was simple. Making sure to not overcomplicate the blockout (which can easily happen). I experimented a lot with the thickness and height of the thermos, and by the end I was happy with the proportions. This very easily evolved into a simple mid poly, allowing the subdivision process to become much easier.

As I moved onto the mid poly stage, I ended up adding more edgeloops to hold the silhouette as I started to lose the shape I originally intended. During refinement, I would end up scaling the mug and screwcap to fit the model as well as making a thin plastic sheet that was glued round the back. This all came together to form one single asset.

Next up was the High poly. This is a stage I think beginners such as myself find really challenging. Over the course of this project, I ended up watching a multitude of topology videos and Pinterest boards. I found myself improving a lot when fixing issues and pinching, however what was not clear to me at the time was that the bevel width of your model determined a lot about the final look of your prop. If your bevels are very small, you end up having an object that still looks very low poly and filled with hard-looking edges as the baker would struggle to pick them up.

This is where the "chunkify" pass comes in: where you go through all your beveled areas and you make sure they are very noticeable from a far distance. Doing so makes it a lot more visible in the baker and is easily changeable if you go too far. Once this had been completed thanks to the mid poly already being created prior, the low poly was very simple and I ended up using most of it as the low poly. All that was left to do was UV unwrap as a 4k texture at 512 texel density.

The model at this point was almost complete! When looking back at my references I found some plastic seams where the mould was fused together. I sculpted these in ZBrush and created some in-edge damage on the bottom side of the metal. In these instances, I have found it’s helpful to keep checking your model with the normal and metal material/Shader. This will give you a clear view on how your normals could affect your end bake. When creating metals that have a relatively large surface area, it’s a great idea to use either Blender or ZBrush to sculpt in surface damages. It can really add character to exposed metal like this.

Before tackling the object’s main material, I set out on making the pattern found on the outer plastic. Making a texture like this can be easily done in Substance 3D Designer, but can also be replicated in Substance 3D Painter or even Photoshop. With patterns like these it’s important to really analyse the reference closely, looking out for how the pattern is repeating. Although the texture here is asymmetrical in the viewport, when tiling it tiles seamlessly.

Starting on this texture proved to be very challenging. I personally found Substance 3D Painter to be really difficult to navigate, and was having a really hard time building up layers. I reached out to members on the 3D Fast Track server for some pointers and advice on how to approach this. The most important piece of advice I was given was to view the layers like simple thoughts, and not to overcomplicate the layers unless I really needed to. As well as roughness and subtle colour changes being your greatest ally.
Following this I found the texturing process to be much easier and I ended up being very happy with the final result. I eventually went back to Substance 3D Designer again and created some Normal map labeling and price tag to paint on top.

Looking back on this project I wish I understood then what I do now about roughness values. When looking at a reference for texturing its always important to see how the light reacts to the surface of the object. Whether the highlights of your object is hard or soft. Picking out a reference image with a strong light hitting it is the best way to view this, as it gives a very good indication of the roughness value and can sometimes be the factor that sells the material itself. For final polish I added very subtle coffee stains over the areas it would make sense. Like the cream coloured cap and inside the mug.
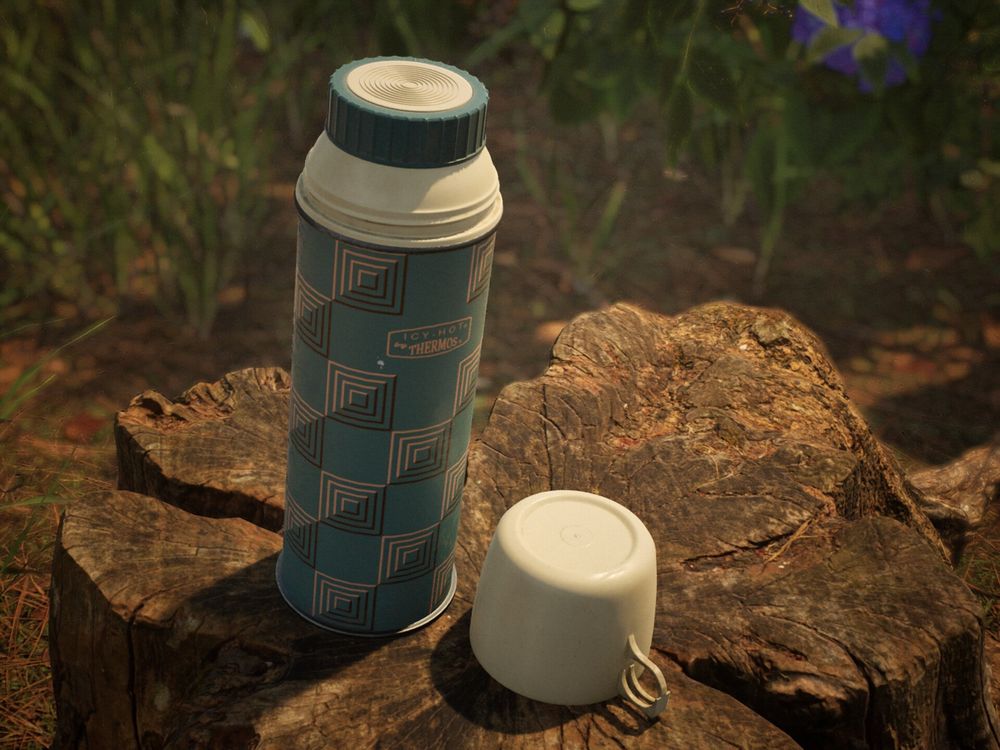
As the project neared the end of the texturing phase, I was not sure which route I wanted to go down for the final renders. My first thought was to make a cute little bench scene that the Thermos sat on. For this I created a little diorama scene with some Megascan trees, plants and filler props, intending to use them as a backdrop. From my time on the lighting course I set up a similar scene with all I had learnt and was quite happy with the results. I had multiple shots with other different lighting setups but it did not feel quite right. I felt that a lot of the texturing information I had spent time on was lost in the scene and I decided to try my hand at another renderer.

Once the Thermos was set up in Marmoset my first port of call was setting up a simple blurred background scene. I set the object up in a 3 point lighting setup used the Sky as a simple fill light. I set up multiple shots showing many of the details I thought deserved their own close ups. To make sure the overall asset could be viewed I set up a little turntable which is great for rounded objects like these. Looking back working in Marmoset was the superior choice in this case. A lot of the small and minor texture details really shined whereas before they were lost in the forest diorama.

When I was happy with the final renders. I output them out at 4k to get the clearest image possible. Before I finalised the project I put these renders into Photoshop. I always start with the camera raw filter. The amount of settings here is great at getting your renders to pop as well as any final tweaks to exposure and temperature of the image. This is also a great opportunity to create some technical renders to show off Texel density, Texture map images and wireframe! When creating assets like this with good texel density I like to show that off with a small gif. I was inspired to make this kind of video after seeing some other artists doing this in their asset breakdowns. This gif goes through the texture sizes from its highest in game size to something very low. With this asset the overall material still holds up, with only the text having any major noticeable change.

Once publishing my Thermos I found the thumbnail to look really lackluster. I decided to go back to my previous renders in my forest diorama and pick one of those. It was much more visually attractive and I decided to add it into the post as a whole to become a contextual render for where it could be seen in a realtime scene.

This project taught me so many new tips and tricks for making a hard surface prop. From all the projects I have worked on so far I feel this is the one that has leveled me up the most on skills and techniques. If I was to pick some of my main takeaways it would be to keep your layers simple and make sure to have strong bevels during a chunkify pass. As well as don’t be afraid to ask some of the basic questions when it come to the workflow of asset creation. It's sometimes not always obvious and having it pointed out to you can save you many hours or staring at images and videos trying to understand how someone came up with that solution.
Lastly I want to thank Joe Seabuhr and everyone on the Fast Track server for the valuable critique as well as all my friends and peers who offered pointers on the final stages of the project. I would not be where I am today without all your valuable support.
Check out more of Harry's work on his Rookies profile here.