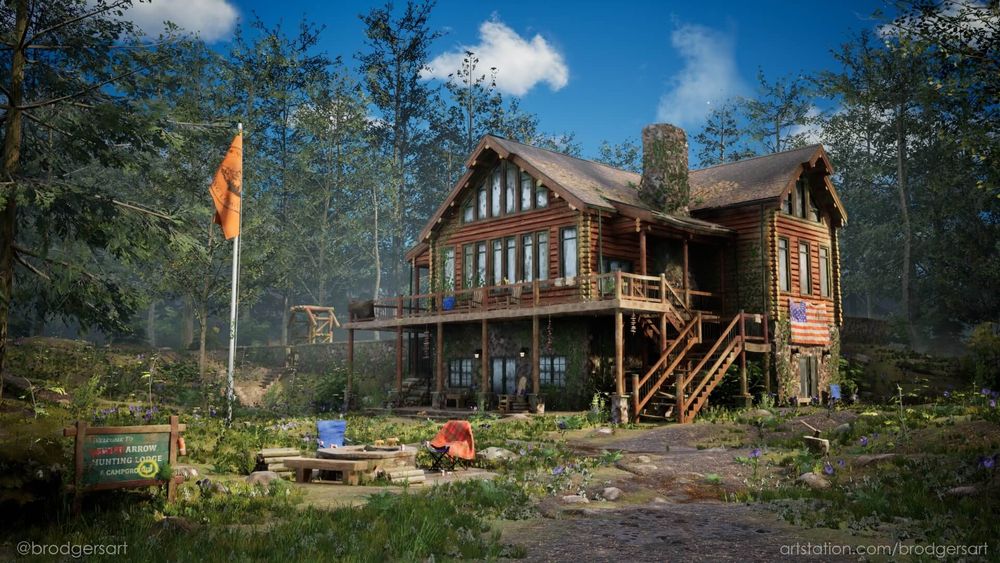
Creating a Real-Time 3D Tennessee Forest Lodge Environment
Ben Rodgers, a recent Game Art graduate from the University of South Wales, shares his latest project demonstrating his skills in developing detailed, large scale environments.
Ben Rodgers, a recent Game Art graduate from the University of South Wales, shares his latest project demonstrating his skills in developing detailed, large scale environments.

Ben Rodgers, a recent graduate of Game Art from the University of South Wales, is excited to share his latest article for The Rookies. Ben's final project, the Tennessee Forest Lodge environment, showcases his skills in references, blockouts, modular building, foliage, optimisation, rendering, and speaks to the significance of seeking feedback throughout the process!

My first step of any project is always gathering reference. I’m trying to decide on a few main factors.
At this stage I’m not looking for specific references, it’s more of an exploratory exercise. My PureRef file is constantly updated and refined as the project progresses. The image below is my reference at the end of the project. I have lighting reference, close ups of assets and materials, as well as my own concepts and other people’s paint-overs who were kind enough to help.

I knew the lodge would be the focus from the start, so made a model sheet to help me understand how I would build it in 3D. I planned to have smaller cabins and a larger space around the lodge, but decided to scale back during the project. Being flexible and open to changes is a good habit to get into. Knowing which areas need more time will help prevent projects from becoming overwhelming.

Creating block-outs lets me test different compositions, lighting and camera setups without committing to anything too early. I either create a blockout in Maya and take this into Unreal Engine or use the modelling tools within Unreal. I can use materials from Megascans to quickly build a scene. None of this will make it into the final scene but is a vital part of the process. This also goes hand in hand with the concept phase as I sometimes take screenshots and paint over. This is how I got the value study thumbnails.
At this stage I’m also making as asset list. This includes how I will be texturing each asset, whether it will be on a trim sheet, tiling texture or both. Once I'm ready to start building, I head into Maya.

Making modular assets has a slightly different process to bespoke assets. Each piece needs to seamlessly fit and snap together, to do this you can model to a grid.
This was something that took me a while to understand completely. This ArtStation Learning article helped it click for me. It goes over the whole process in detail, and I recommend giving it a watch. Modelling each piece of the lodge with the same sizes and pivot points meant I could mix and match quickly.
I also used world aligned textures. This kept textures seamless and really helps when building larger environments. Although it doesn’t work for everything. I had some issues on the roof tiles for example, as they were diagonal, the normal maps didn’t behave as I wanted. Knowing how to unwrap and keep textures seamless manually is still a necessary skill.
I’d like to quickly mention texel density. This article explains it very well, so I won’t go into detail here. Essentially you need to make sure the level of detail is consistent on all your assets. There are exceptions, but generally the world should feel cohesive with no areas standing out as blurry or too detailed.
To help me understand, I made a 2m x 2m frame and placed it in the scene. My chosen texel density was 5.12, this meant a 2048 x 2048 pixel texture would cover 4m in game. As my lodge pieces were 2m wide, I knew they would cover half of a texture map. Once I decided on the diameter of the logs, I could work out how many would fit into 4m tall.

It still sounds a little complicated even to me and I’m the one writing it...like I said, the article explains it better than I can.
I used Substance 3D Designer to make my tiling textures, and Substance 3D Painter for the trim sheets. I’ve shown the process I used to create the wood log material below. Using ZBrush wasn’t necessary for this, Substance Designer is more than capable to create a wooden log. However, I wanted to see if a grayscale map made outside of Substance 3D Designer would work as a base for my material. I’m glad it did as it's one more thing I can use in future if I need to.

I used Substance 3D Designer for my other tiling textures but followed the same format as this graph. My graphs are relatively simple. This is to prevent me spending too much time trying to get the ‘perfect’ texture. The game/scene is in third person, so the player camera will never get close enough to see fine detail. When deciding on texel density the player camera position is important. This will determine how much detail you need.
Using packed maps is one of the best things I’ve learnt this year. It saves texture memory and time when creating materials in engine. Packing maps is the process of taking grayscales maps and putting them on the RGB channels of one map. So three for one.

I use Substance 3D Designer to pack using the RGBA Merge node. A common setup is Ambient Occlusion in the Red channel, Roughness in Green and Height in Blue. I needed height for vertex painting, but any grayscale map will work. The fourth map is the alpha channel. Once in Unreal Engine you can plug the separate RGB channels into their respective maps.
Another way to save on texture memory is to reduce the size of certain maps. For example, these packed maps can be a smaller size than the base colour. The difference in quality was not noticeable in engine for this scene.

At this stage I had the first pass of textures in and I moved onto SpeedTree.
This project was an opportunity to learn a few new programs and techniques, game ready foliage being one of them. As this was my first time using SpeedTree I followed another Artstation Learning tutorial.
My first pass at the trees was not the best, I had an idea in my head of bright yellow aspen trees against a crisp blue sky. After some feedback from my tutors, I spent more time refining. Ultimately deciding to change to a summer scene with green leaves instead.
A great feature of SpeedTree is the ability to setup LODs when making the trees. LOD stands for Level of Detail and helps performance in games. When the player is close to the object, a high level of detail is loaded. The further away they get, lower detail models can be swapped in. For foliage this is important, as polycounts and the number of textures rendered can quickly increase.

I tried to keep the overall silhouette and avoid popping when setting up the LODs. I repeated this process for all the trees in the scene, of which there are three separate models.
For my foliage texture I took some tips from this article by Elias Tsirides. Instead of having one map for each tree it’s worth combining all foliage onto one texture. This included my grass and flowers. If I needed any specific changes, such as SSS, hue or the wind amount, I created material instances in engine.

Environmental storytelling is one of the reasons I got into gaming in the first place. I’ve always enjoyed games which show and don’t tell, Shadow of the Colossus and the Souls series are great at this. For my scene I didn’t go quite that ambiguous. Although, I used props to add some story and hopefully raise some questions.

I purposefully didn’t add too many story assets, as I wanted the viewer to come to their own conclusions about the residents of the lodge.
Ideally these two things should be worked out at the start of the project. While I had a good idea of my lighting and composition they could have been improved earlier. Luckily through feedback I managed to make some changes towards the end of the project. The below image shows my scene before and after reaching out for advice.

I used the rule of thirds in the final composition and tried to create triangles to keep the viewer engaged.

Another technique I was shown is to view the render in black and white, and flipped. This helps you see where the eye is drawn to and whether you have a good critical path to follow. I tried to make the foreground darker to frame the lodge. Viewing the scene in unlit mode in Unreal Engine (Alt+3) is also handy. It will show you if your colours work well together without the lighting affecting them.

For my lighting reference I used both nature photography and paintings. Ivan Shishkin’s work is great for this. Having reference here makes things much easier. I can compare shadow sharpness, the amount of fog and the colour of light. It's also useful to pick colours from the reference to be as accurate as possible.

I try to capture as close to the final render in camera as possible, but made a few tweaks in Photoshop after. I increased the contrast and vibrancy a tiny bit using the Camera Raw Filter. To do this, convert the layer you want to edit to a Smart Object by right clicking on it in the Layers panel. Then click Filter > Camera Raw Filter on the top toolbar. From here you can edit the image, add a vignette and toggle these on and off to quickly see the changes. You can see the before and after below.

This project improved massively due to feedback from my tutors, peers and those working in industry. I’d like to thank some people who took the time out of their day to help me and encourage you to take a look at their work.
Diana Karakushyan helped with the composition and lighting. Encouraging me to look at the work of painters for reference.
Elias Tsirides for their advice and feedback. In particular for balancing the scene and giving some pointers on the extra props.
Elisa Binz for general feedback and tips throughout the whole project.
I'm consistently surprised (in a good way) by how friendly and supportive people in the games industry are. My work wouldn’t be where it is without reaching out for feedback. I encourage anyone looking to improve their work to do the same. Art discords are great and can be a good way to show your work in progress to a wide audience. If reaching out to people individually, always be respectful. Remember they are taking time out of their day to help. Positive collaboration is great, but it has to go both ways, so be nice :)
Thanks for reading, I hope there were some things you found beneficial. Thank you to The Rookies for giving me the opportunity to write this article. It’s always fun being able to go a bit deeper into the process.
If you would like to take a look at more of my work, you can find me through my Rookies portfolio here and via LinkedIn.