
Creating a Stylised Environment in Real-Time: UE5 Workflow
Van Nguyen created a stylised environment in real-time for his final term of the Game Art Diploma at 3dsense Media School.
Real time environment in UE5
Van Nguyen created a stylised environment in real-time for his final term of the Game Art Diploma at 3dsense Media School.

Van Nguyen created a game environment project completed for the final term of the Game Art Diploma program at 3dsense Media School, spanning approximately three months. It marked Van's first experience working on a real-time environment in Unreal Engine 5 and also his initial exploration into game development for VR. Read on to learn how to create a stylised environment in real-time.
I am Van, a student from 3dsense Media School in Singapore. Since my childhood, I have been fond of drawing, taking inspiration mainly from Japanese manga and anime. However, much of my education was not focused on art. Prior to enrolling in 3dsense, I took a Bachelor’s degree in e-commerce and worked as an IT project manager for 4 years. Eventually though, as I found my job unfulfilling, I decided to pursue a career in art. I chose to enroll in the Game Art Diploma programme offered by 3dsense, a decision which led to an incredibly enriching learning experience.
This game environment project was done for the final term of the Game Art Diploma programme at 3dsense Media School, spanning approximately 3 months. This was my first time working on a real-time environment in Unreal Engine 5, and also my first time exploring game development for VR.
The experience was incredibly valuable for me as I learned the end-to-end process of producing assets for a game environment, from blocking out and detailing the assets in Maya, creating tileable textures and trim sheets, setting up materials and shaders in Unreal, to lighting and rendering using the powerful Lumen system. I also learned how to convert the environment into a playable VR space with interactive assets, which was incredibly fun.
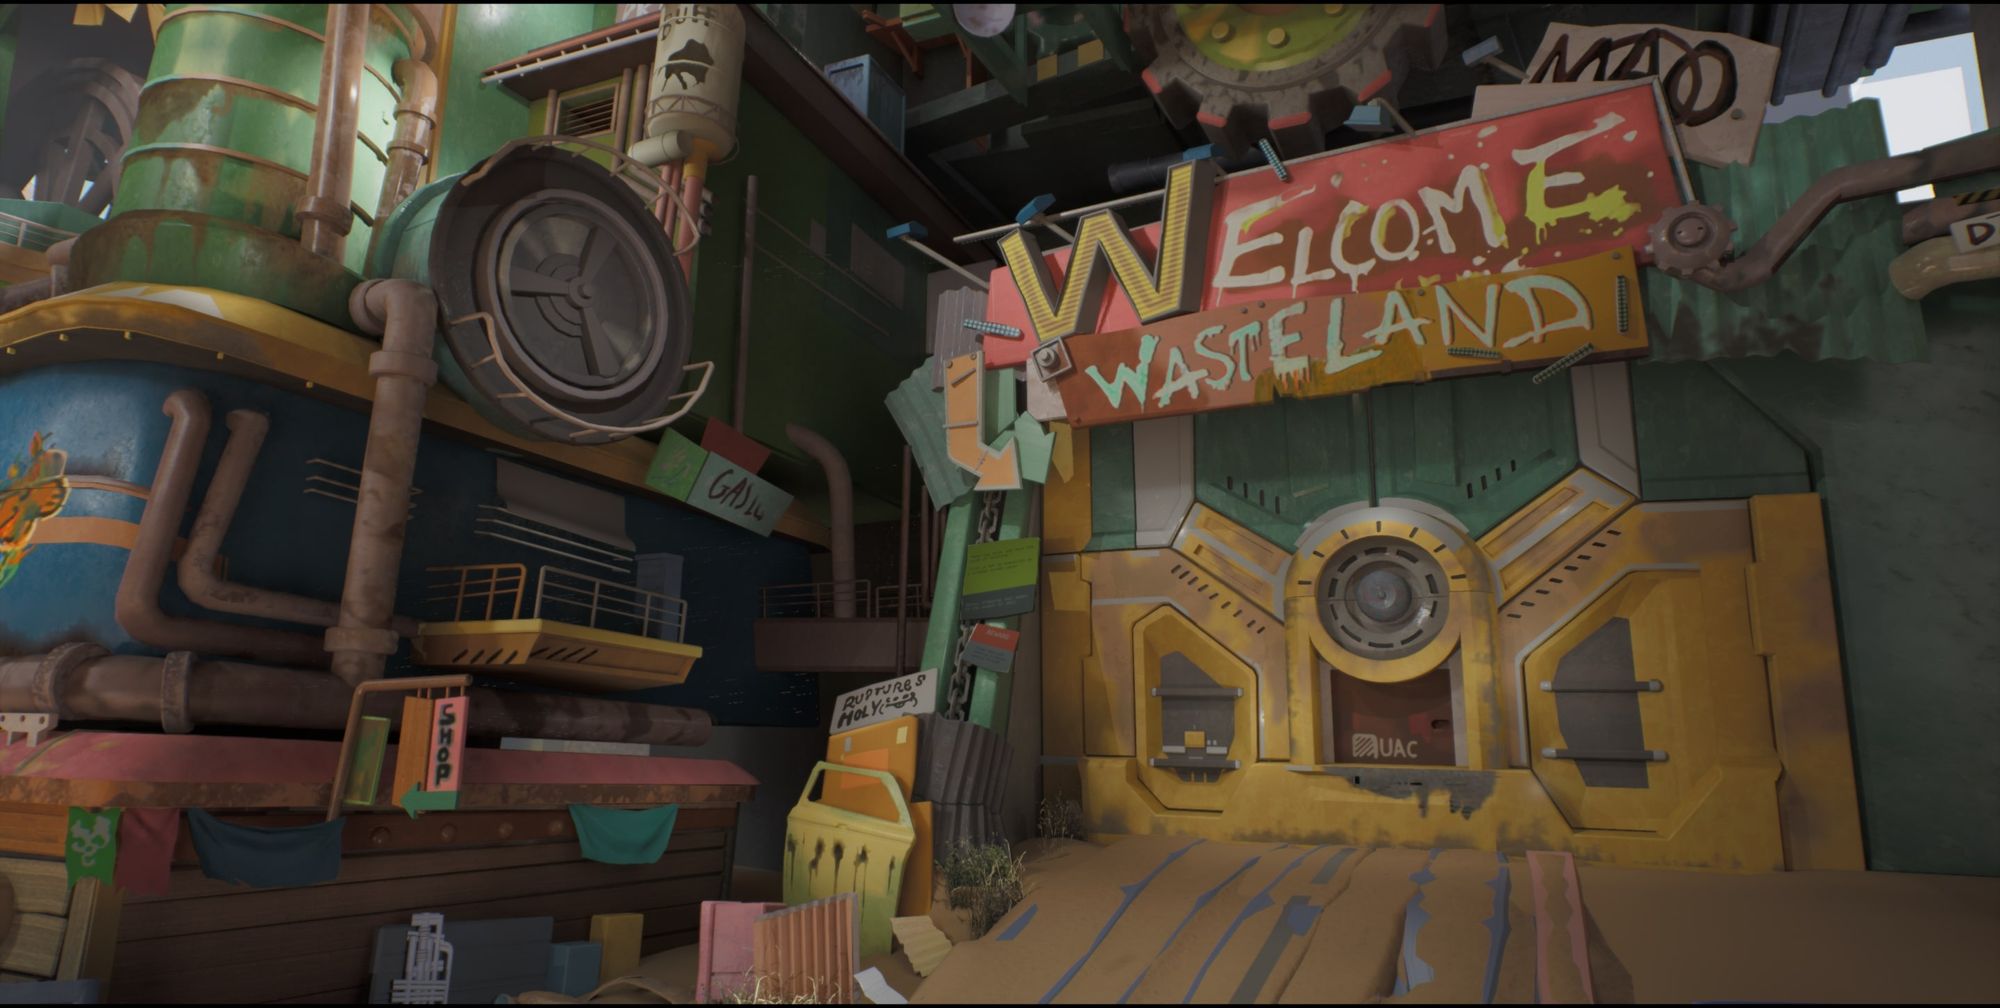
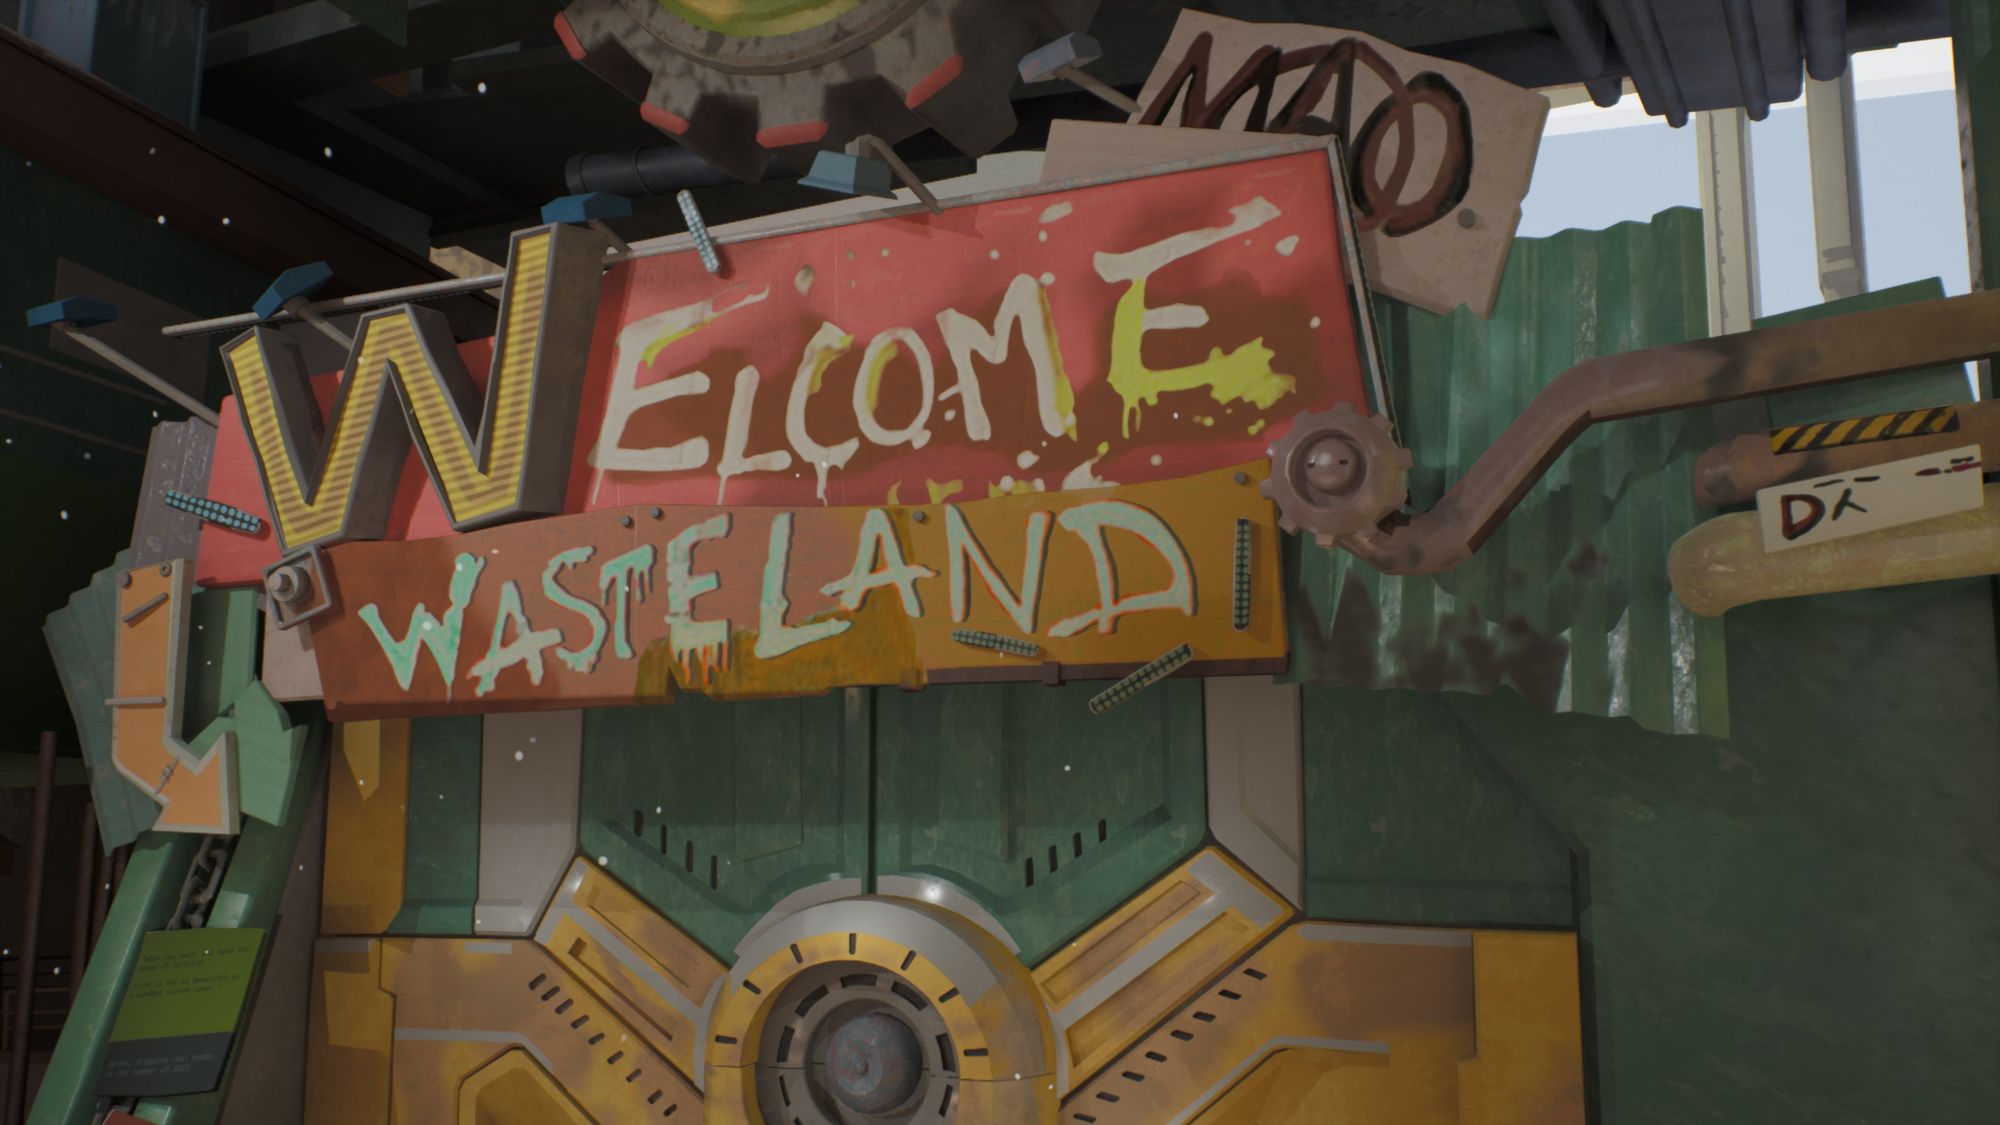
This environment was based on an amazing concept by Mao Dan on ArtStation.
I would like to thank my lecturers Venny Lie and Edward Lim who helped me through every stage of this project, Justin Chua and Julian Khor who gave me valuable feedback, as well as 3dsense Media School for this opportunity to learn industry-standard software and practices.
Lastly, sincere thanks to The Rookies for this opportunity to share my learning with their audience.
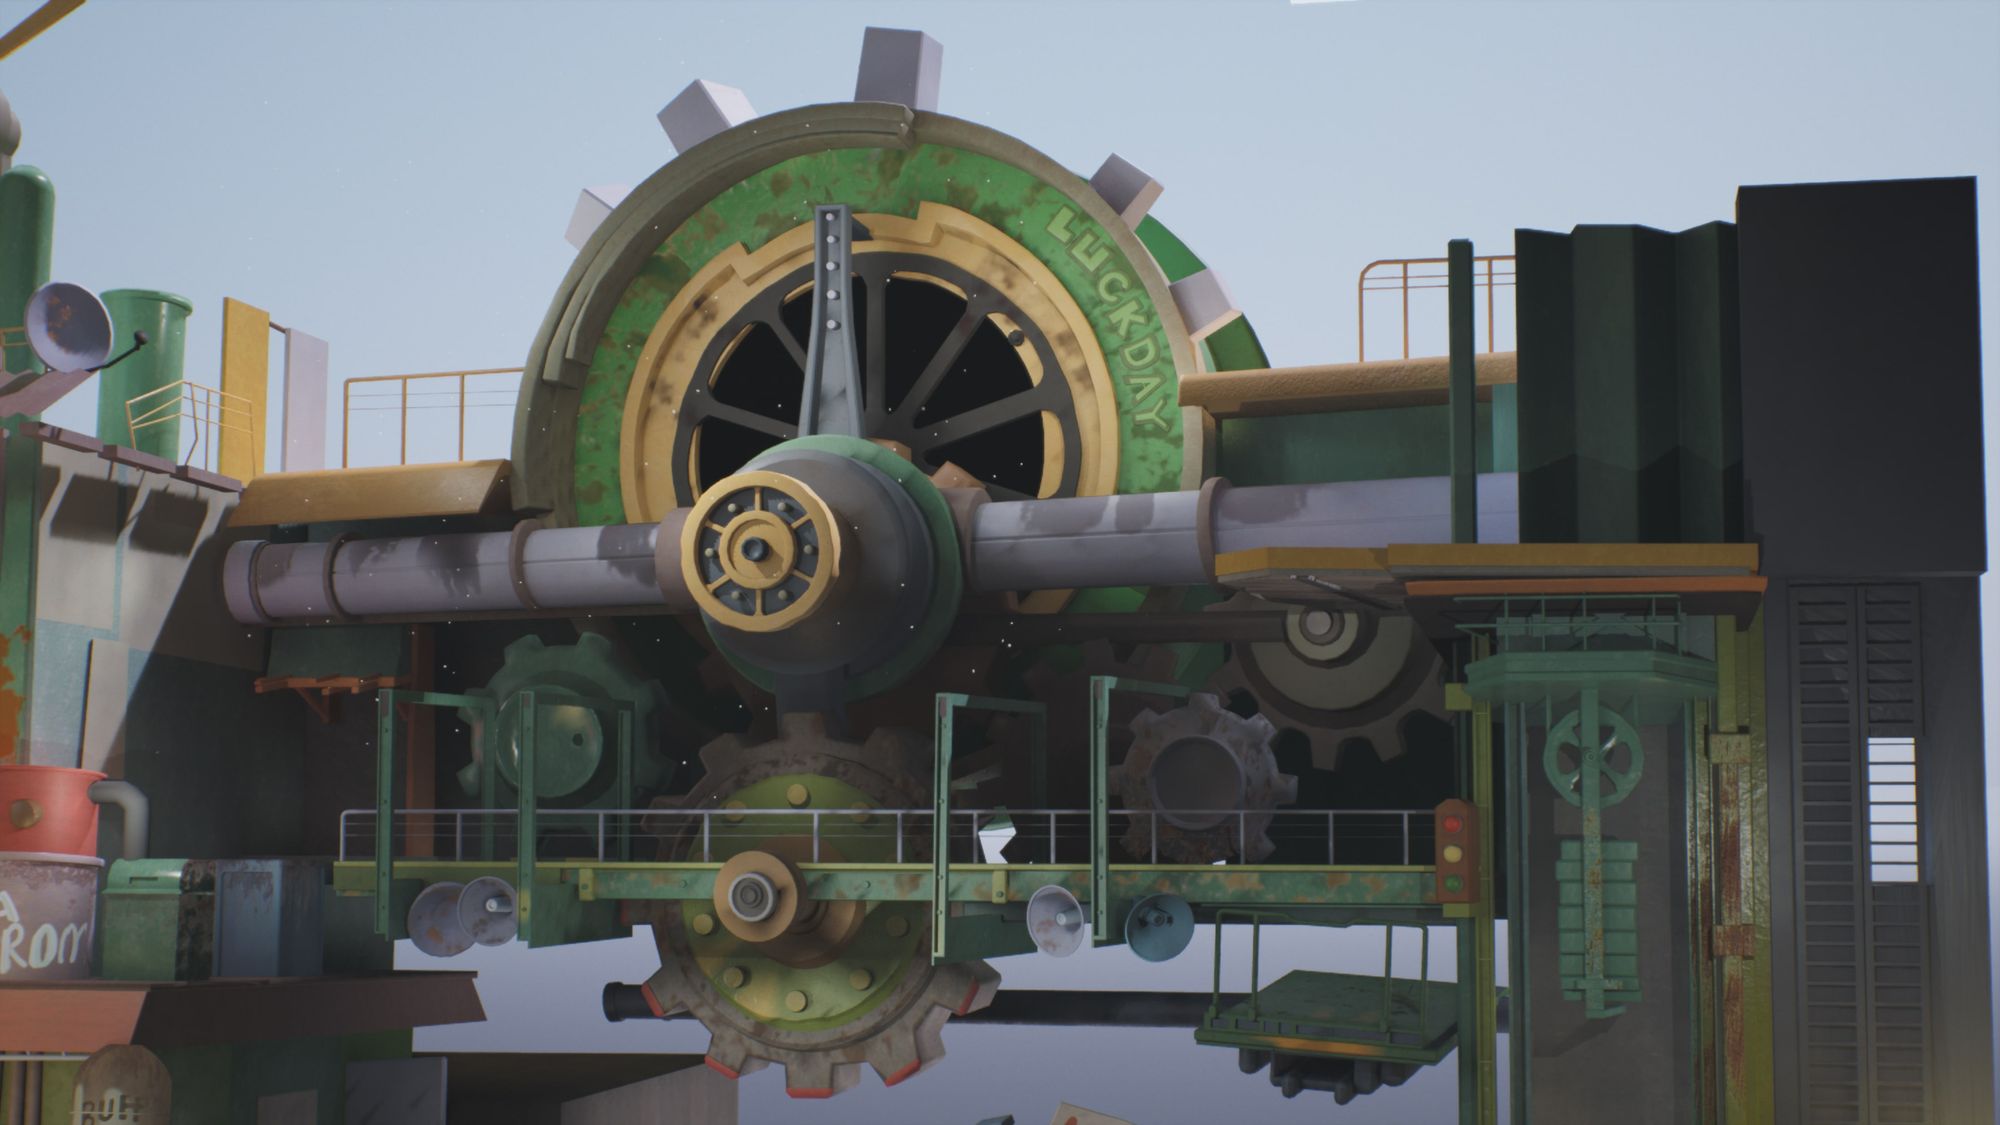
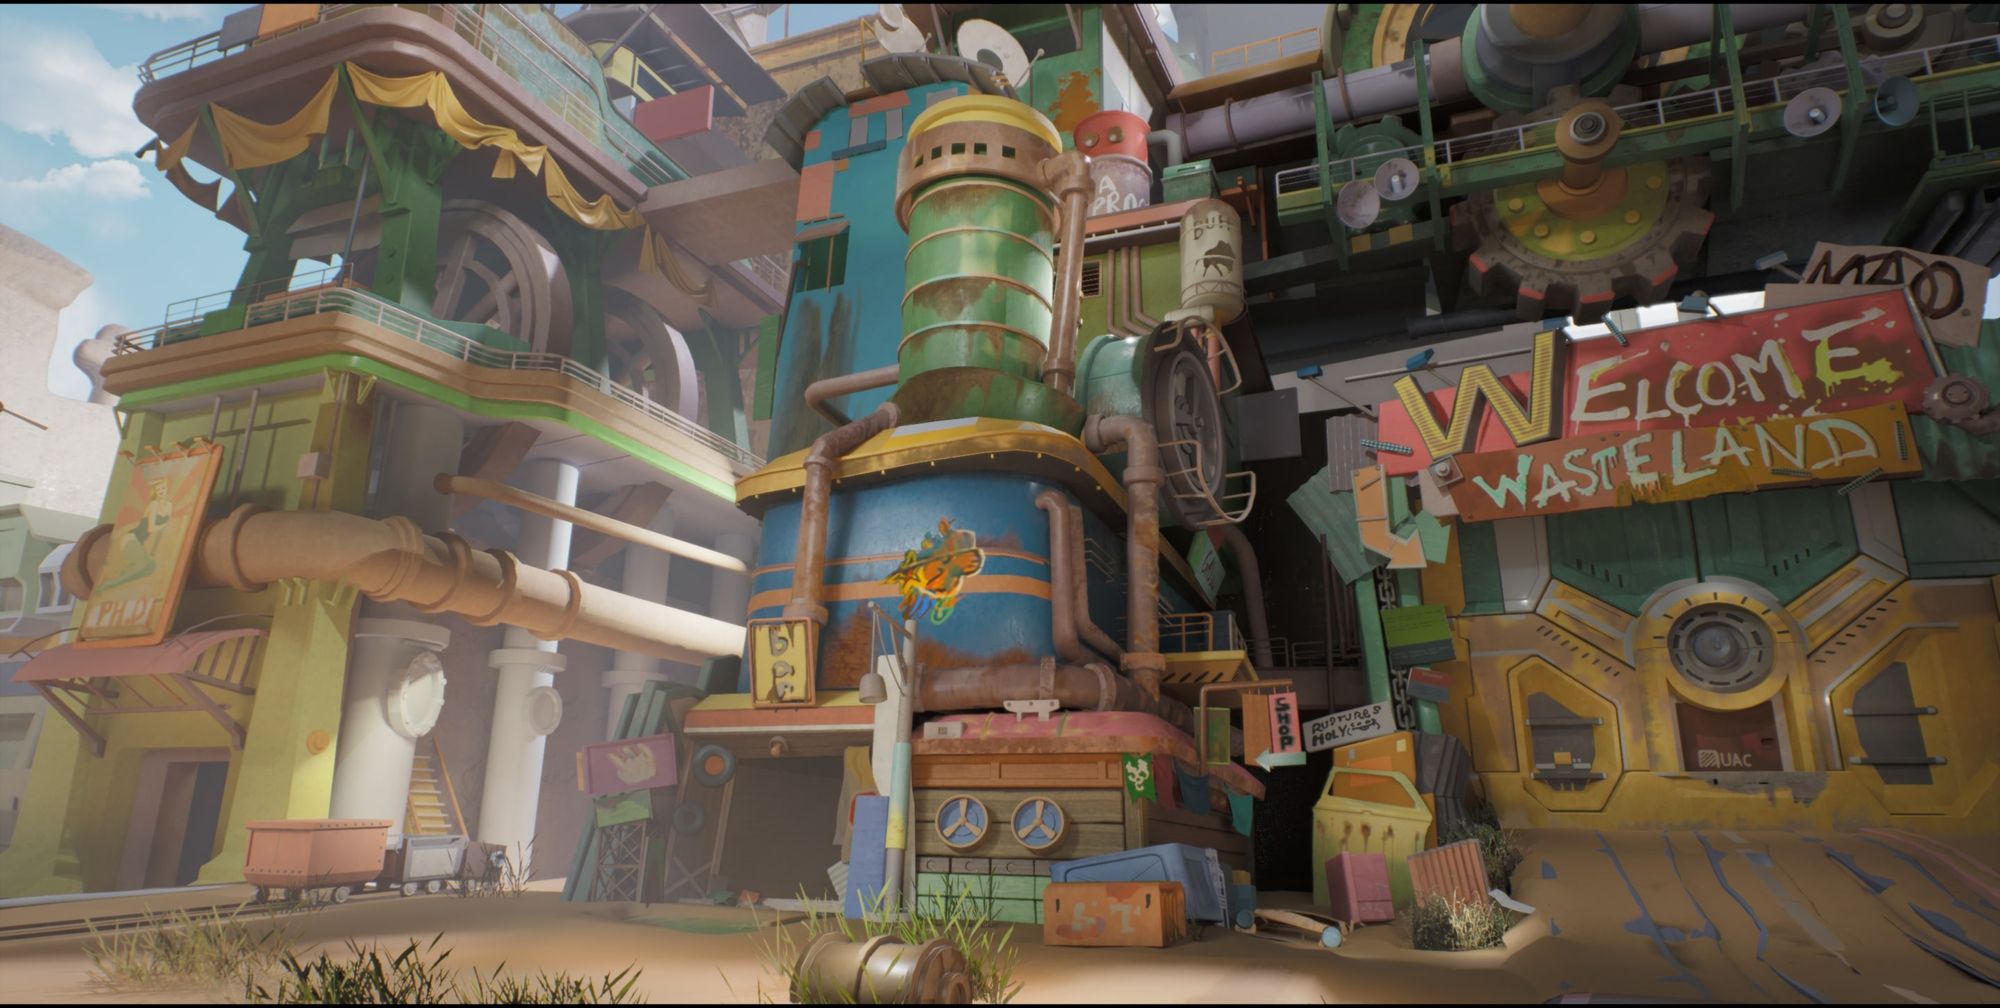
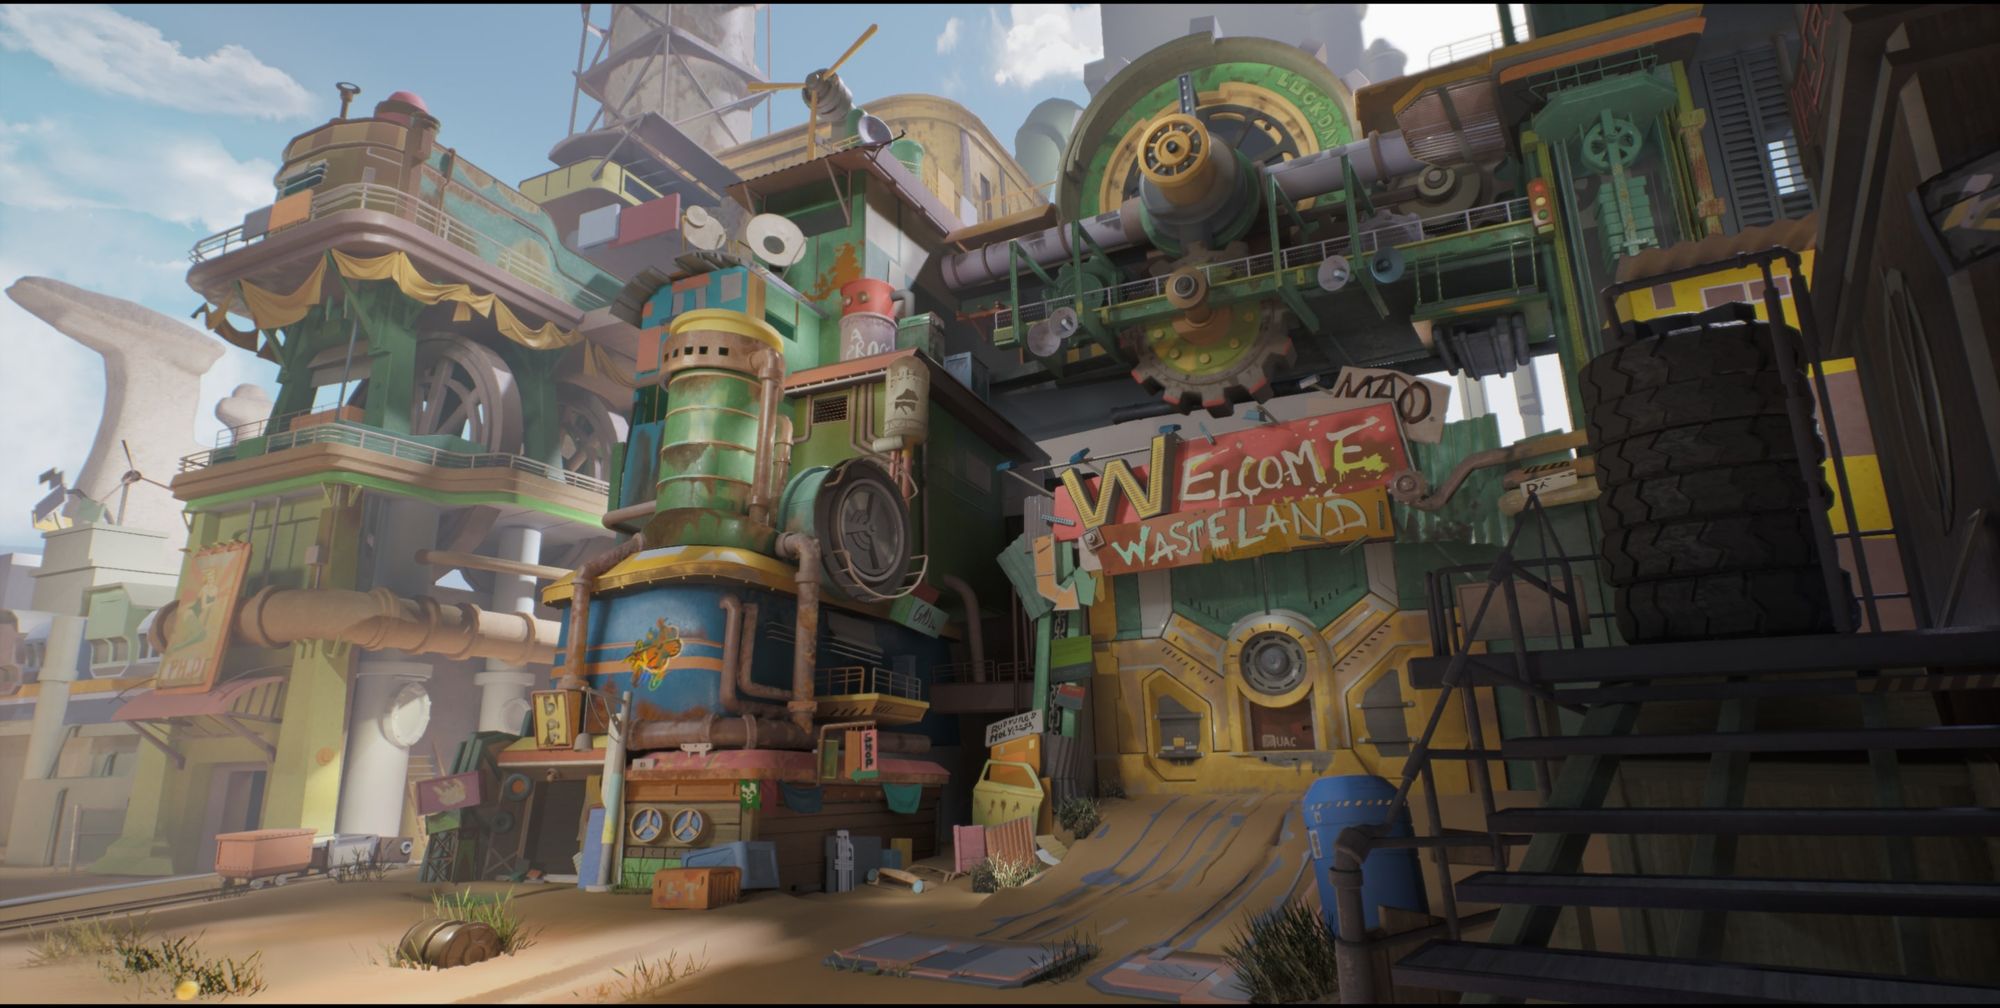
Here are the final renders of this environment:

Firstly, I gathered the relevant references for each asset. I looked for 3d references for the parts which are not visible in the concept, and look dev references to use as visual target for the final render.
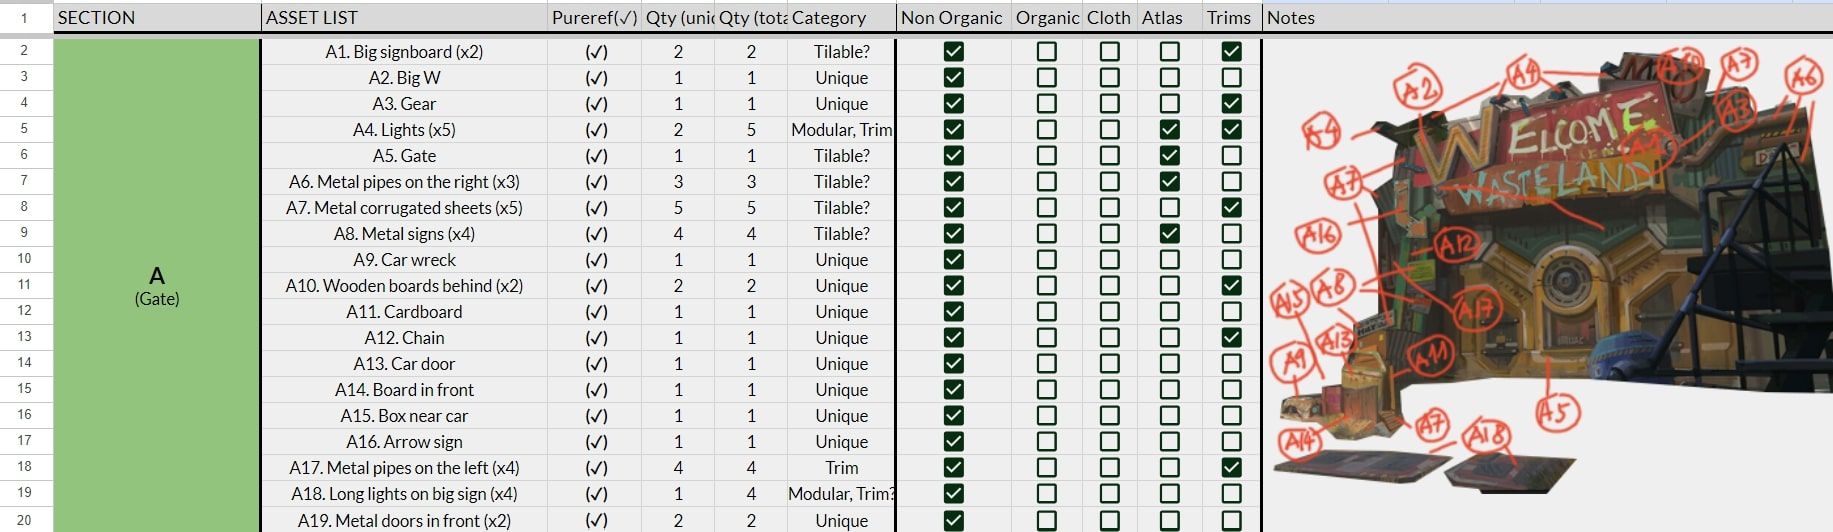
Here are my references for some of the assets:
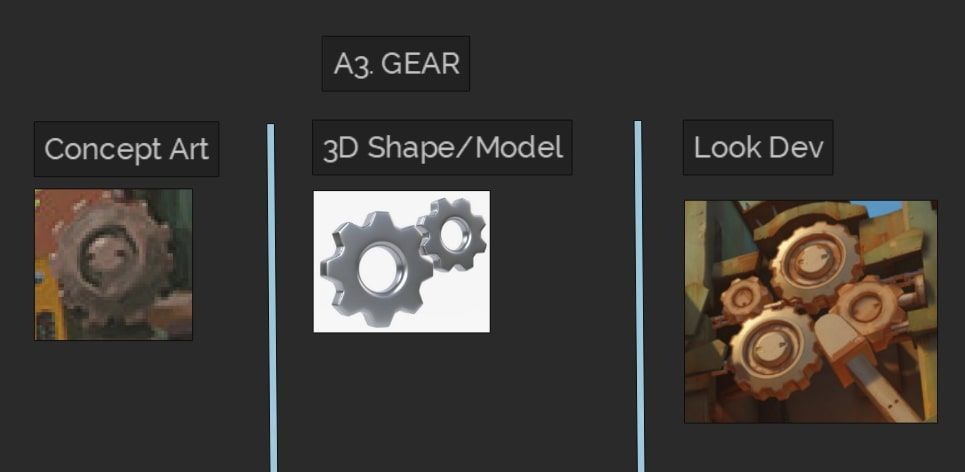
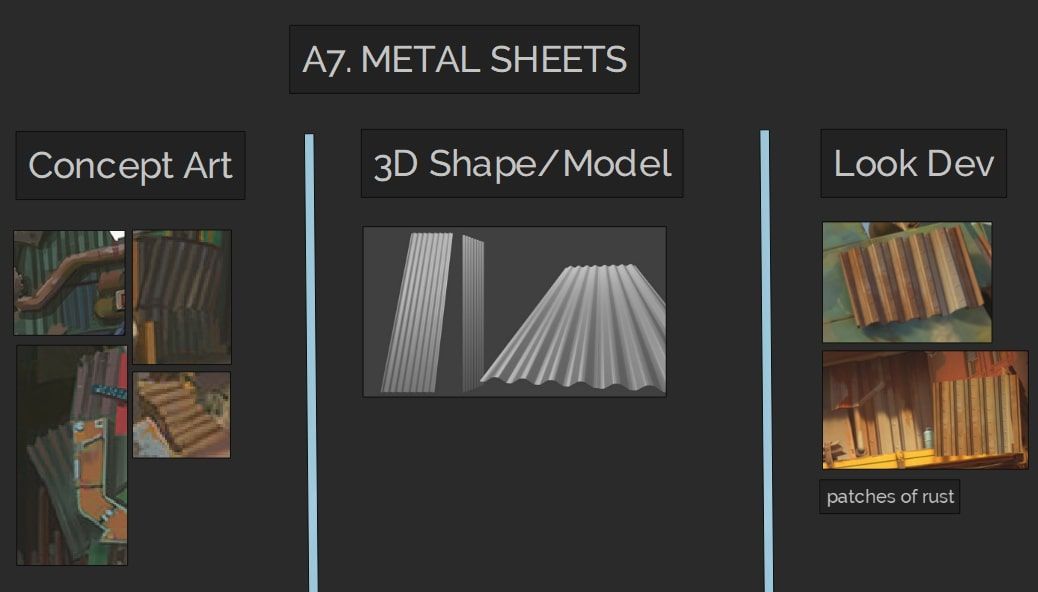
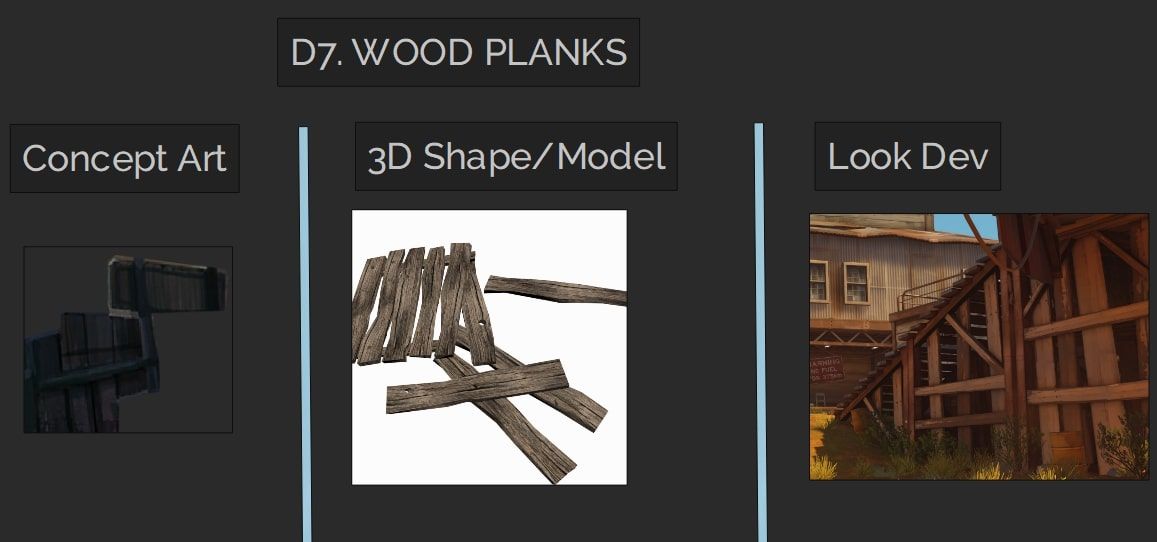
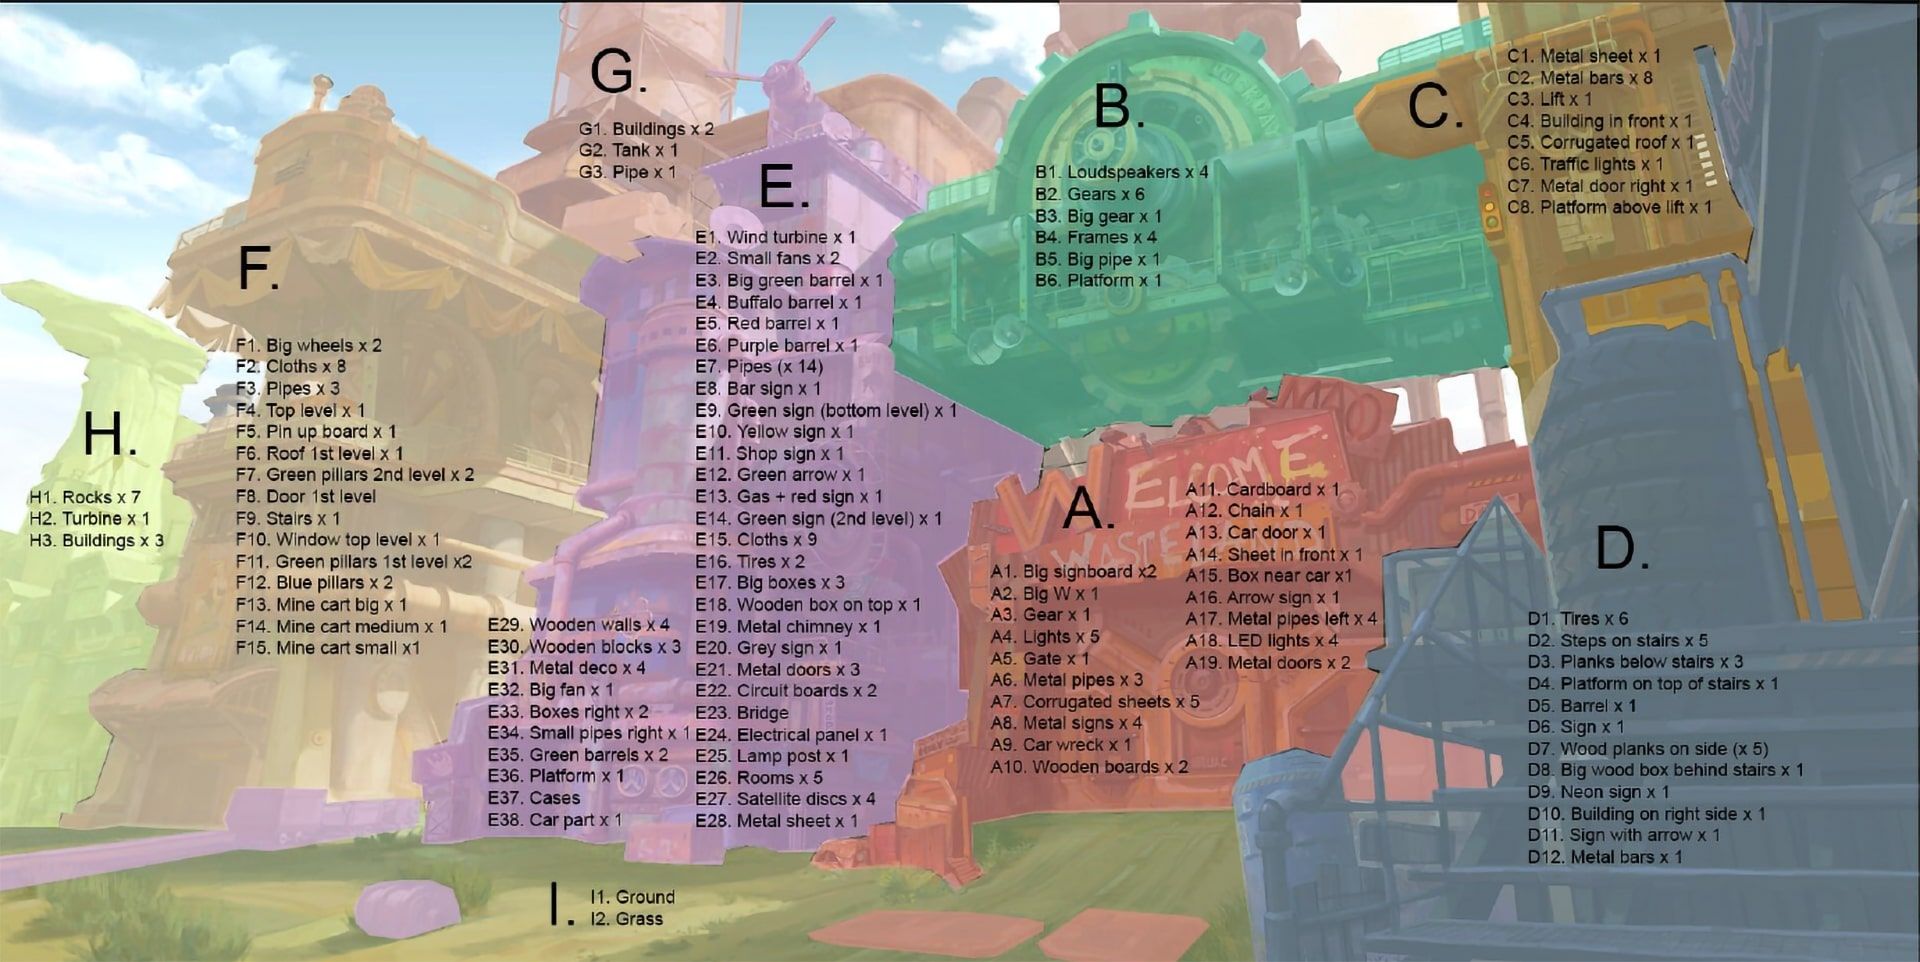
While looking for references, concurrently I also started to plan by breaking down the concept into smaller parts or regions. For each part, I identified the assets included and the quantity. I also took note of whether the asset is unique or modular/reusable, and whether it should be textured using tileable or trim sheet. This planning stage was crucial as it gave me an understanding of the scale of the project and helped me decide how to model and texture the assets.
I started the modeling process by matching the camera in Maya as close to the concept as possible, then with the camera and perspective fixed, I blocked out the bigger shapes to get the overall composition. During this stage, I also tried to achieve the silhouette for the main assets to be as accurate to the concept art as possible.
Establishing a suitable scale early in the blocking stage is also incredibly important, as having the wrong scale can affect the lighting down the line. I tried to achieve a suitable scale by using a 1.8m-tall human model as reference against the asset model.
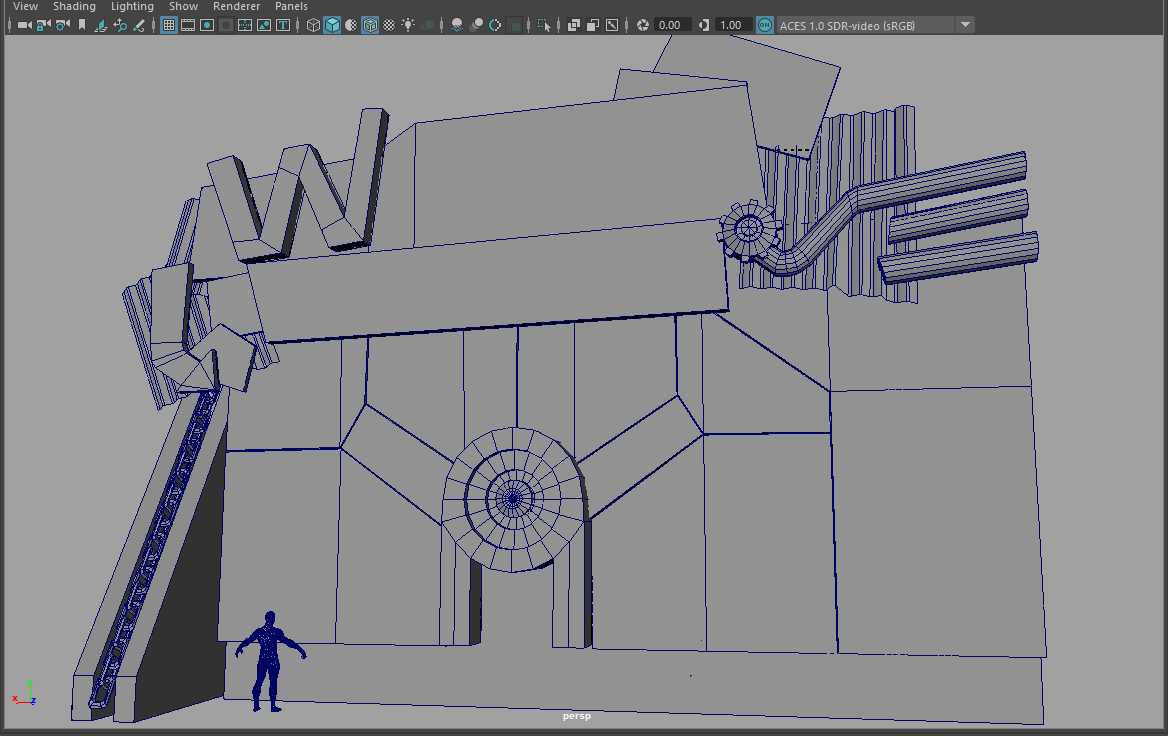
Final blocking:
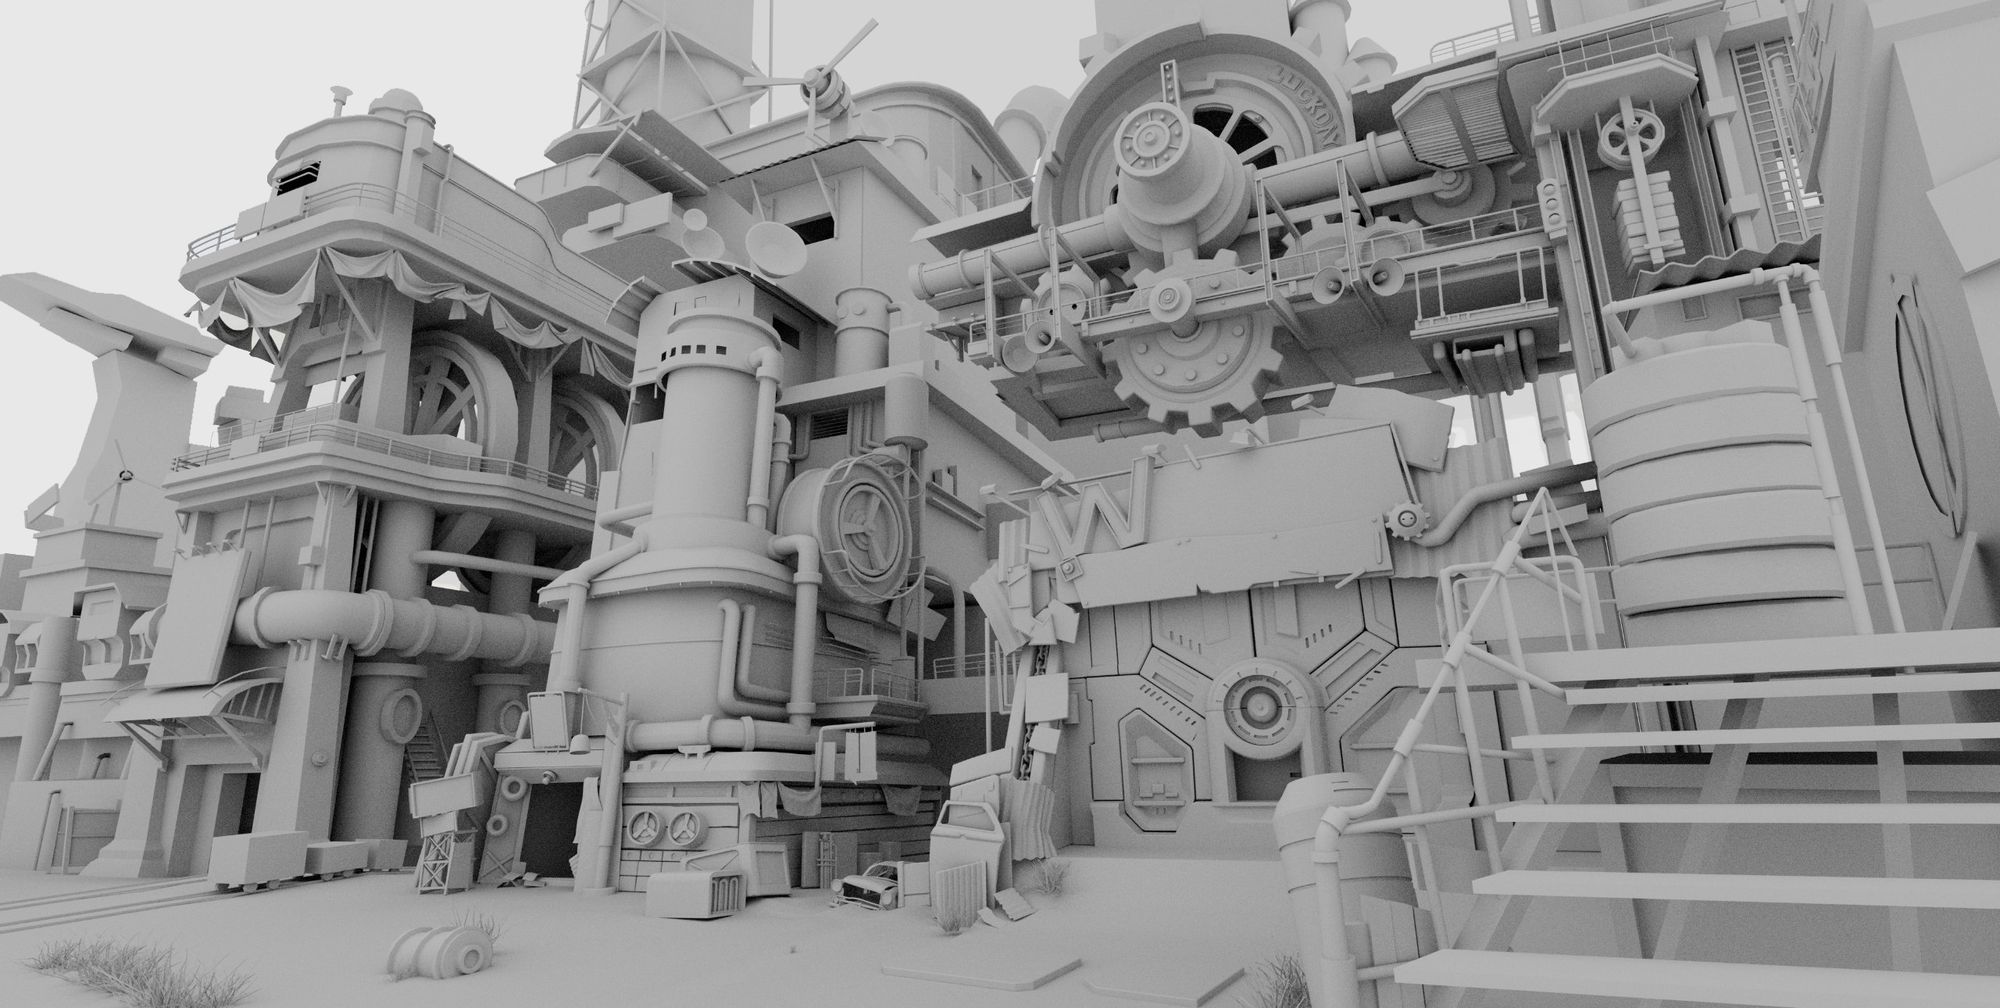
The detailing stage involved enhancing the details of the major assets, including parts that are not visible in the concept art. This is where having the right 3d references can come in very handy. During this stage, I also made extensive use of selectively beveled segments and softened edges to reduce the “blockish” look of the assets and make them look more hi res.
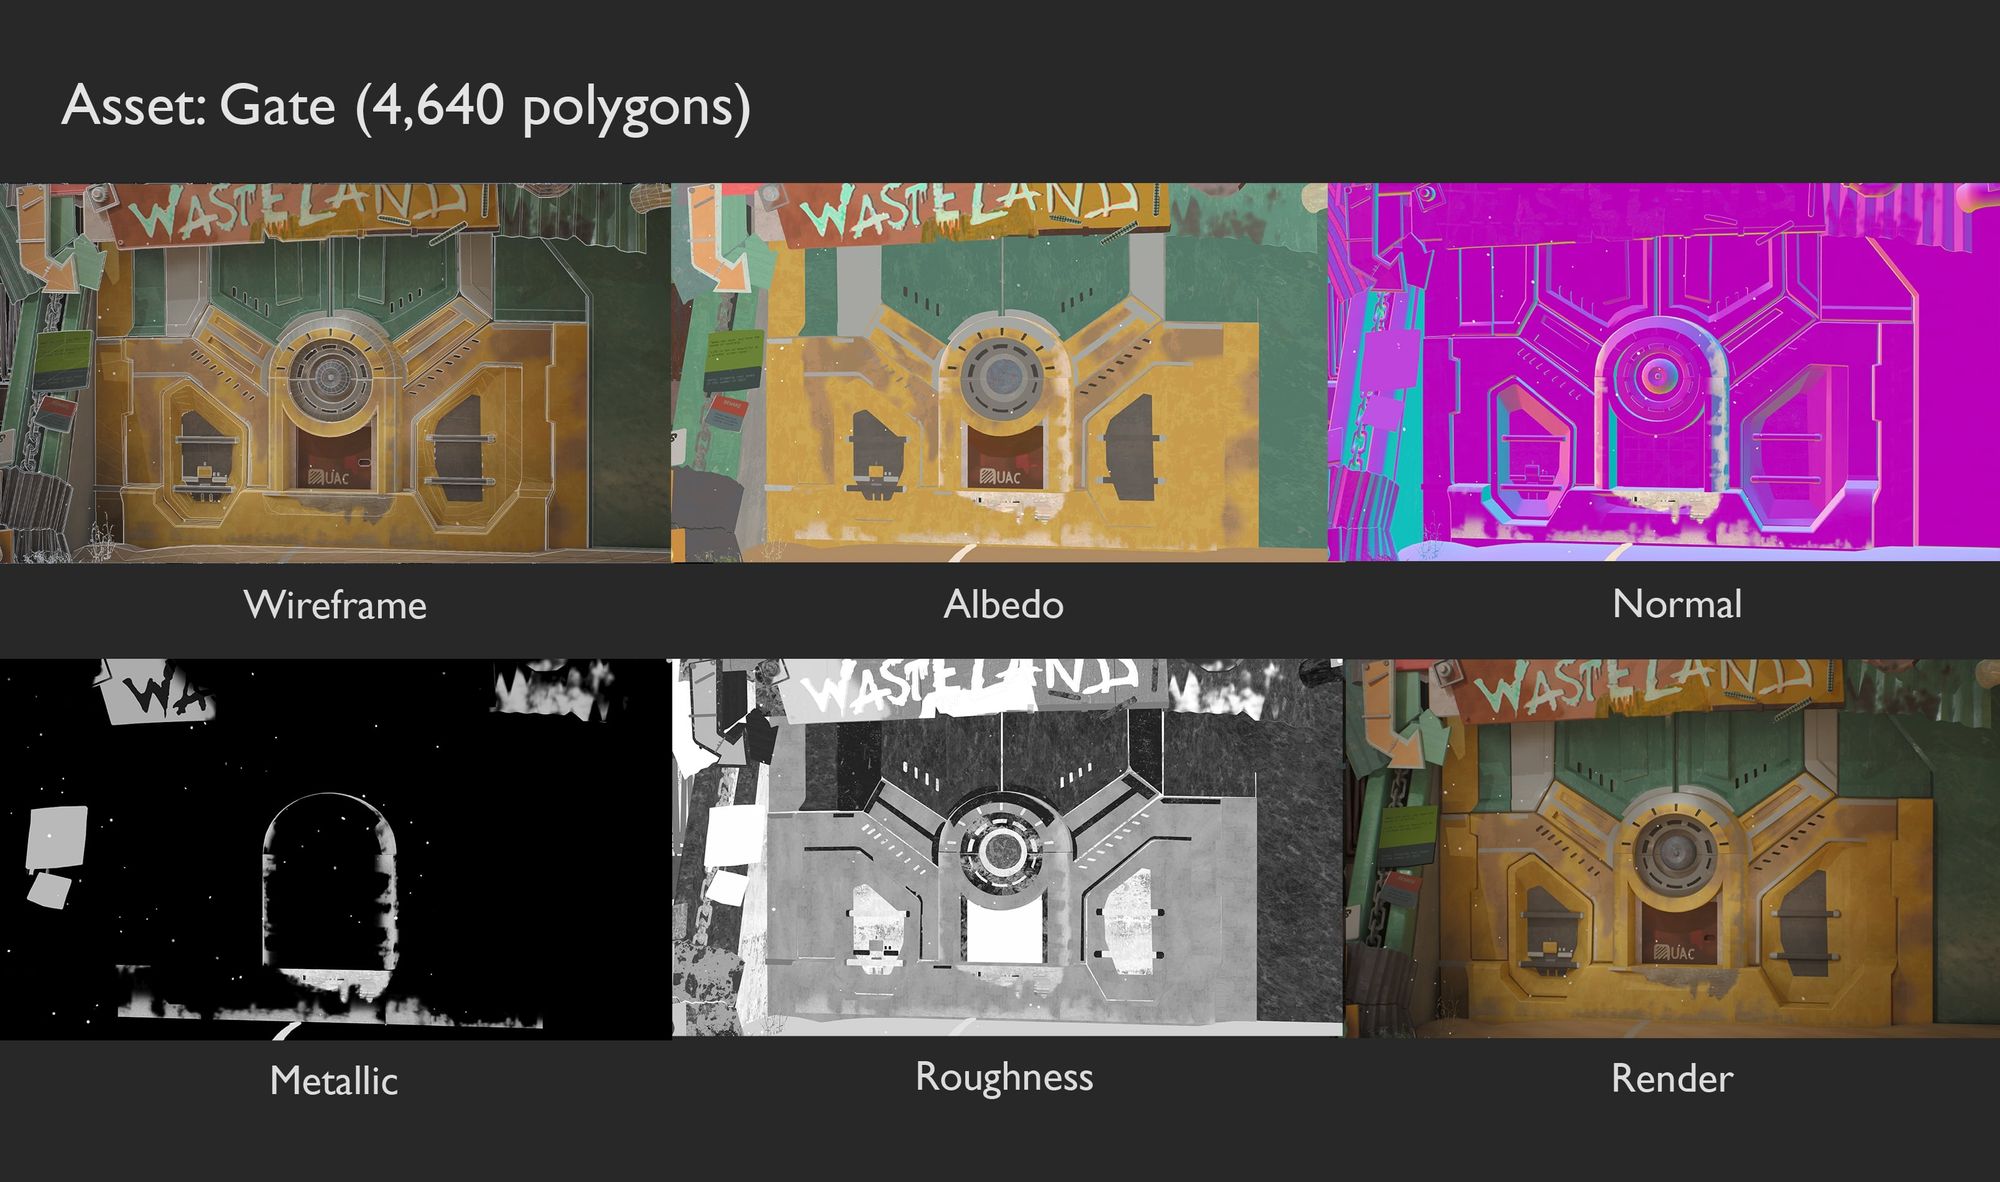
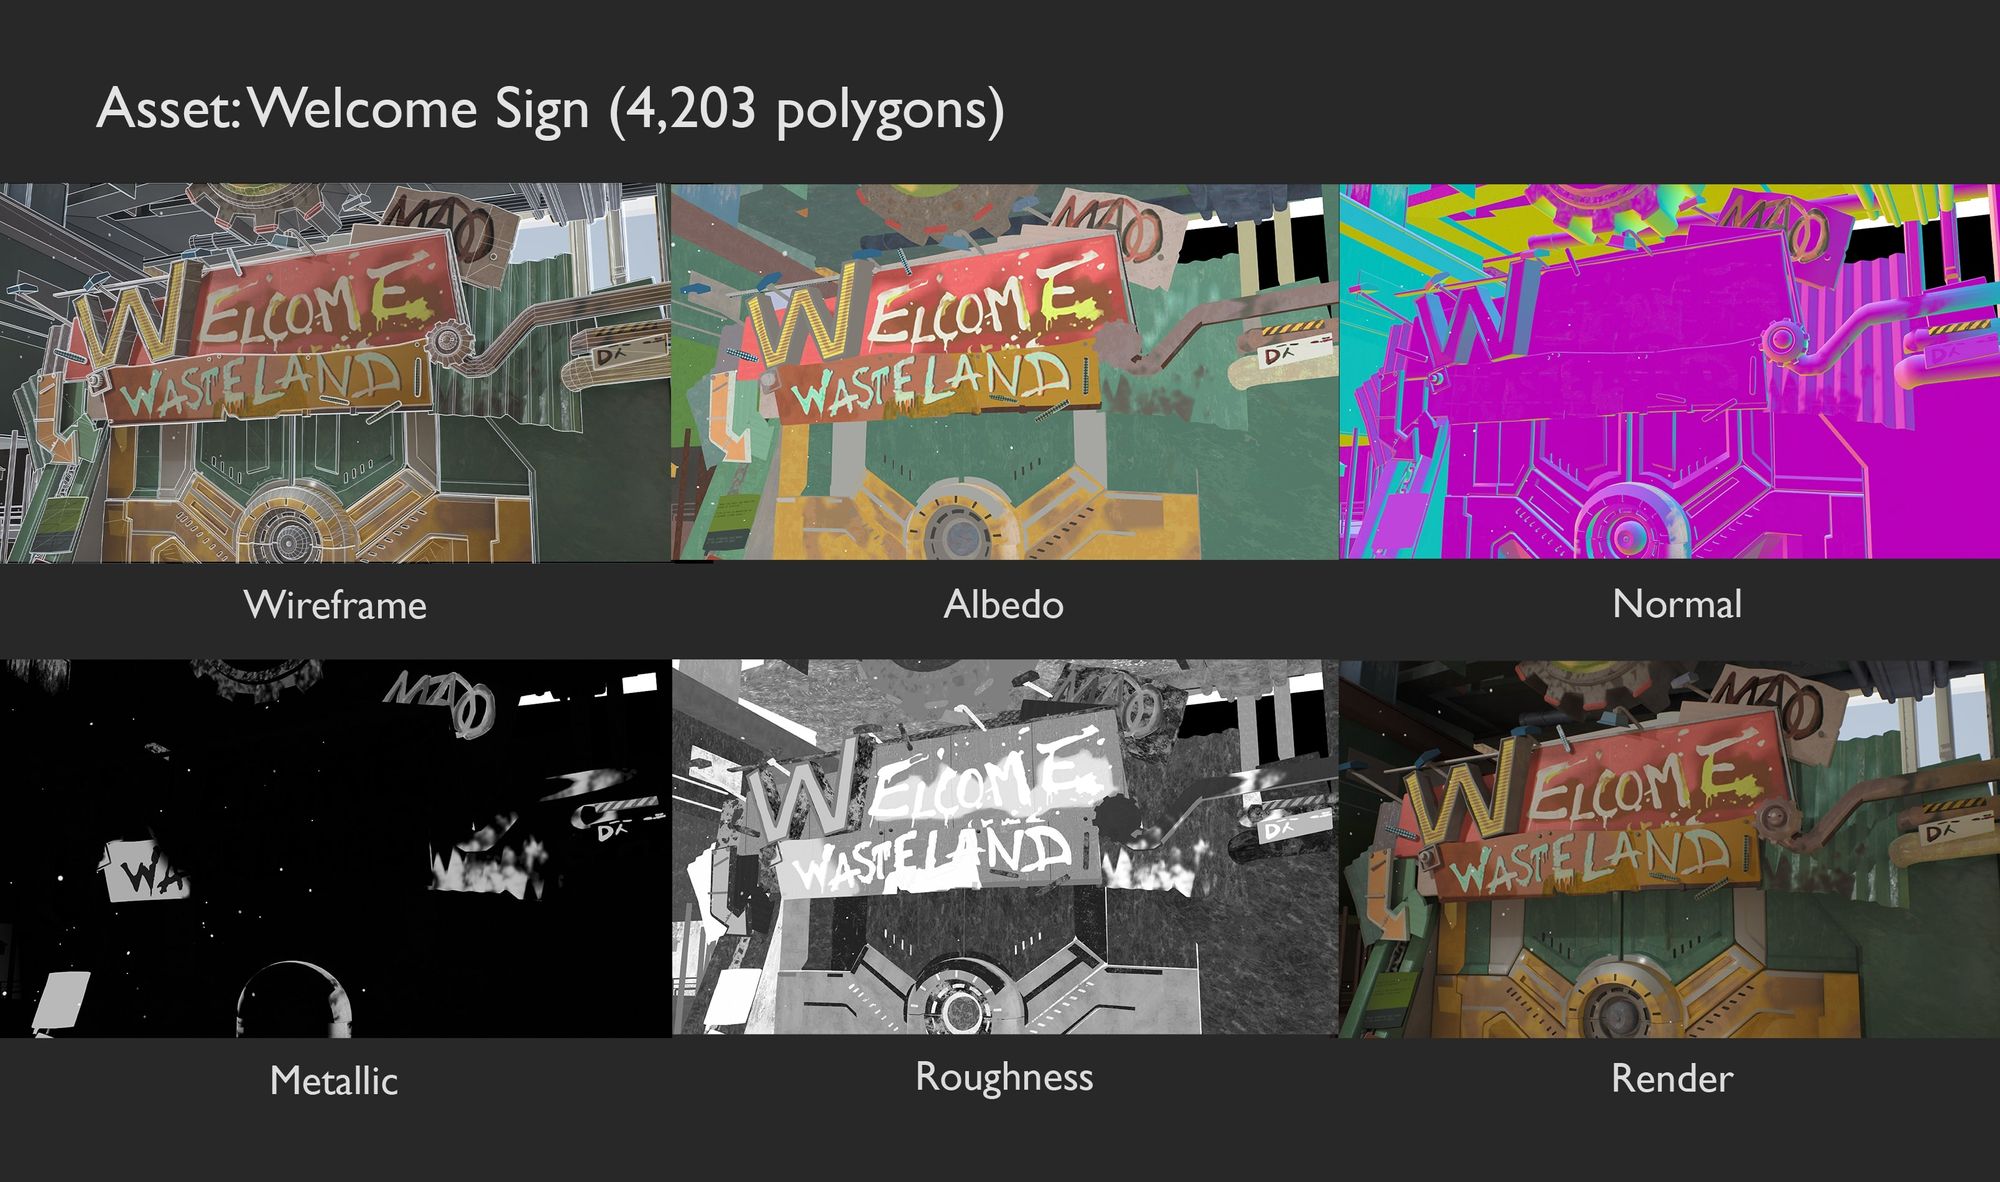
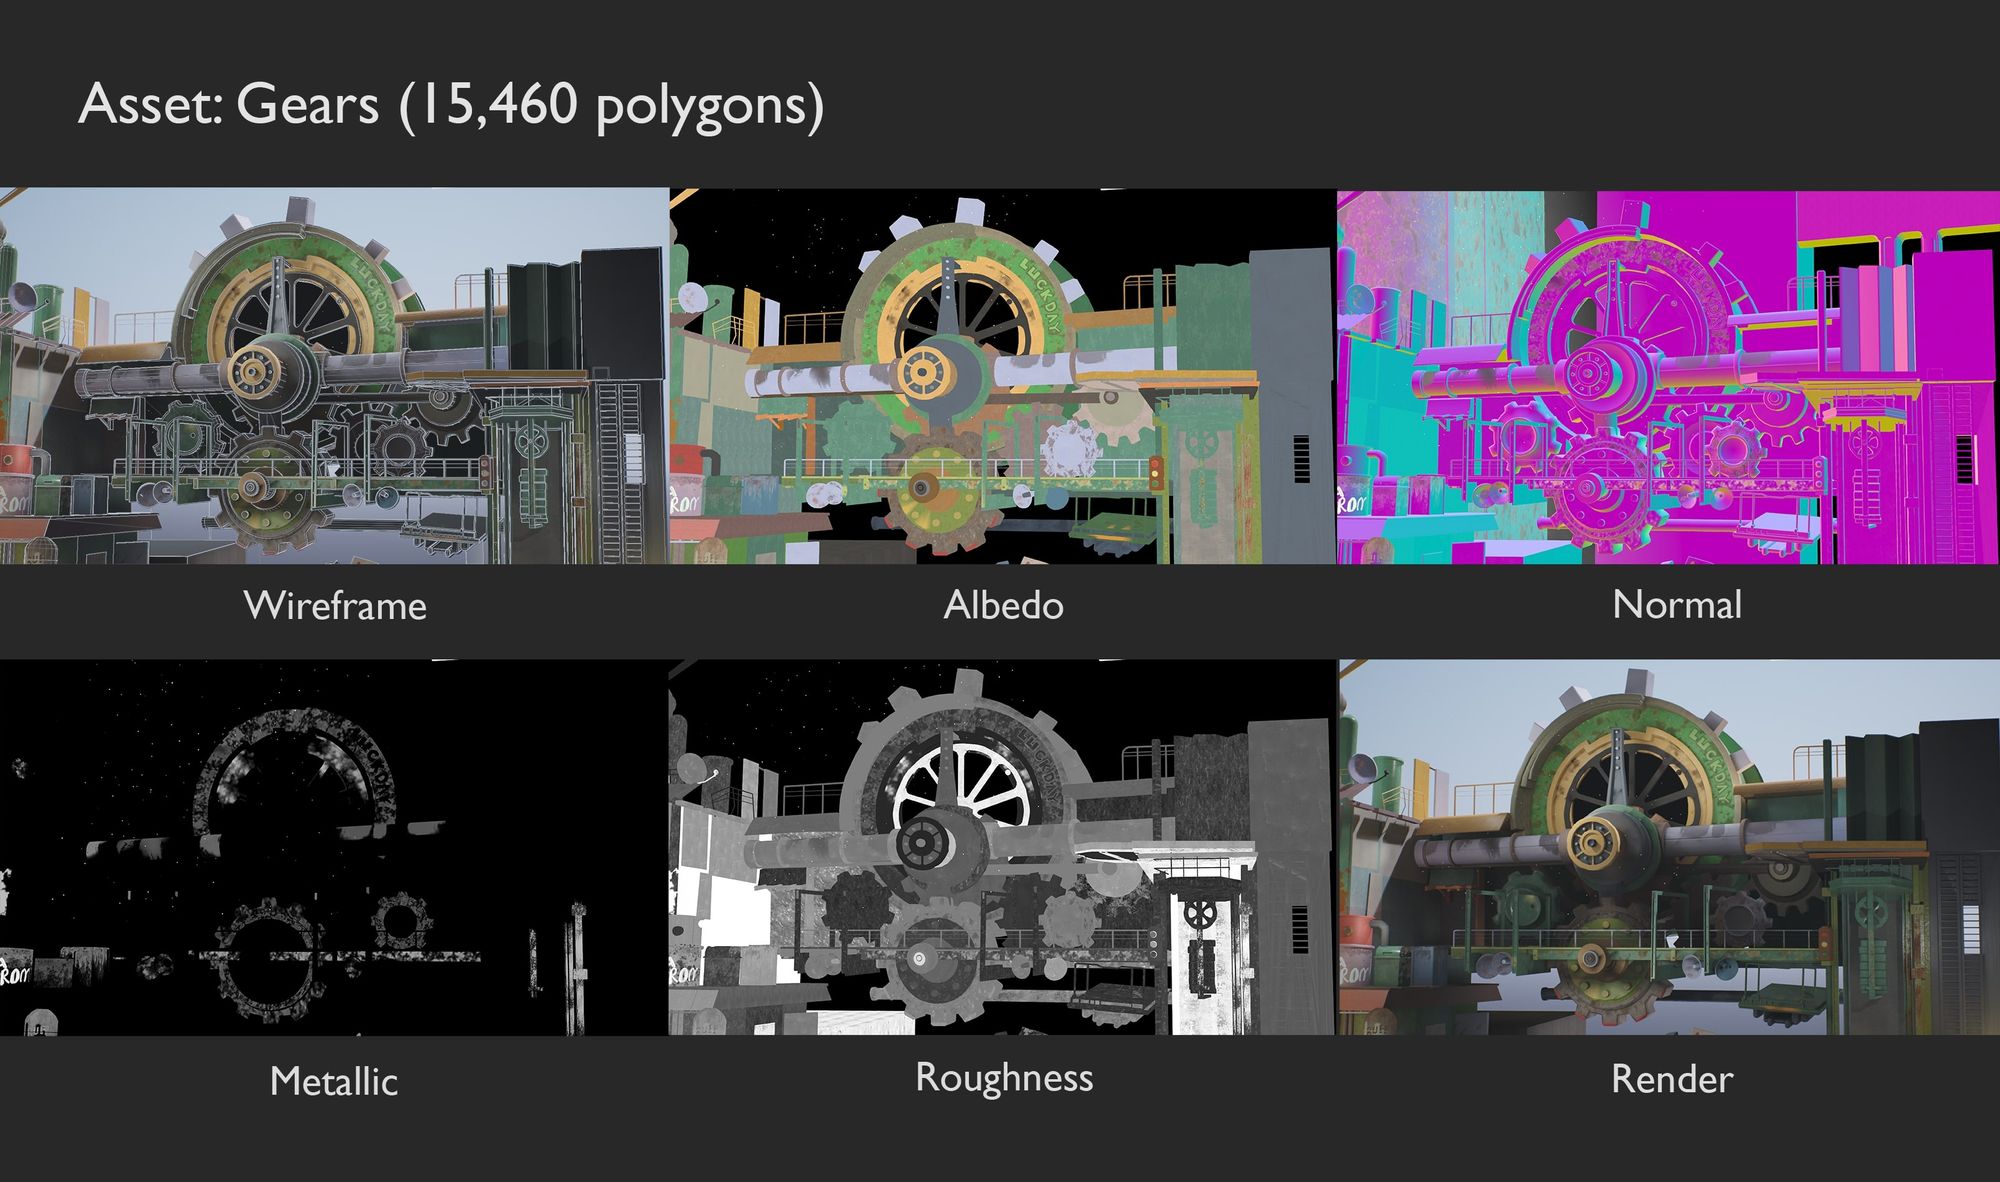
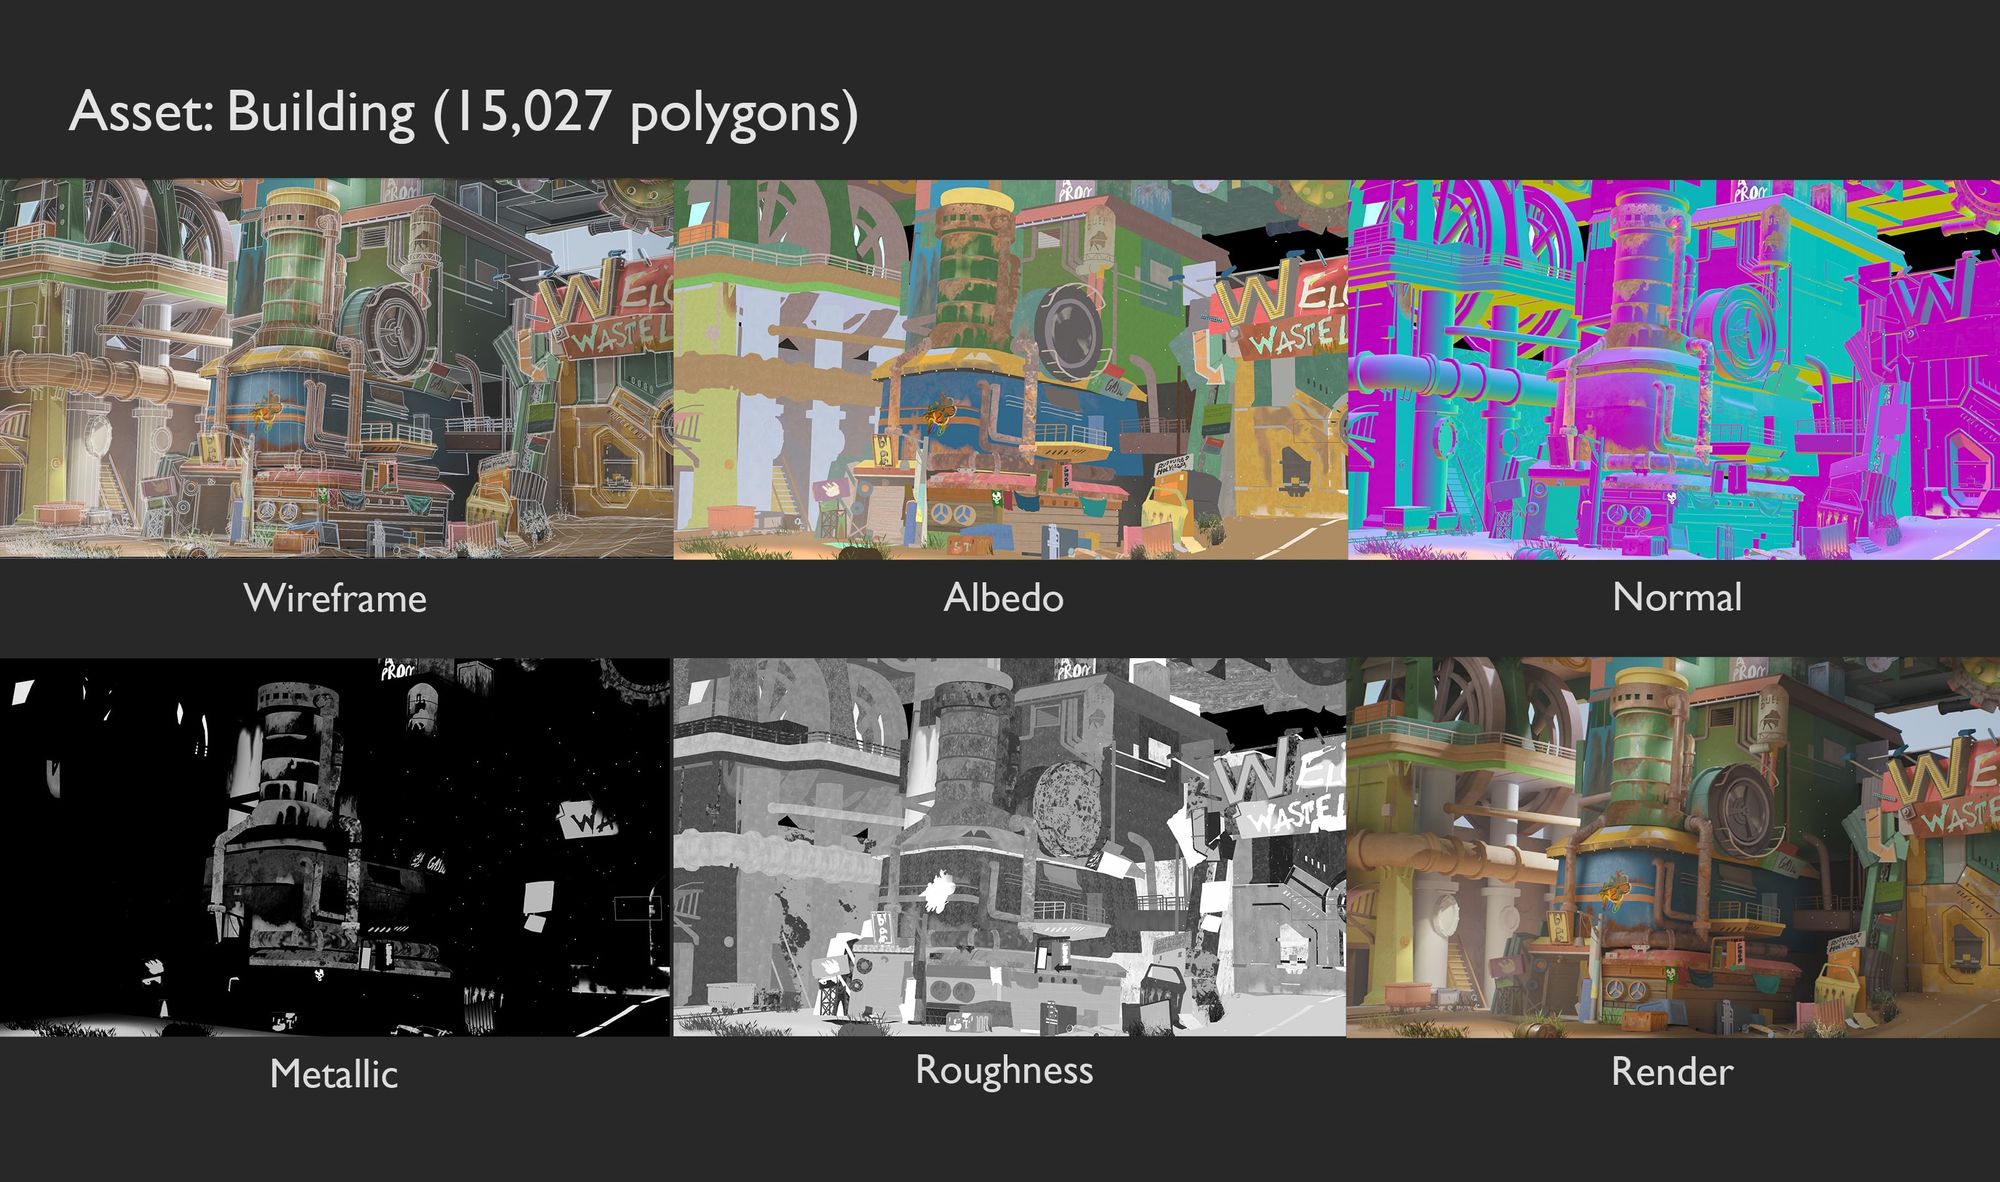
I started importing the environment into Unreal as early as the blocking stage, to test the scale and the overall lighting. Subsequently, I imported one group of assets at a time to start the texturing process. I would then make the tweaks for the materials in Unreal, make any necessary changes to the model in Maya, and re-import the assets back into Unreal. Quite a bit of back-and-forth between Maya and Unreal was involved in this highly iterative process to achieve the final look that I wanted.
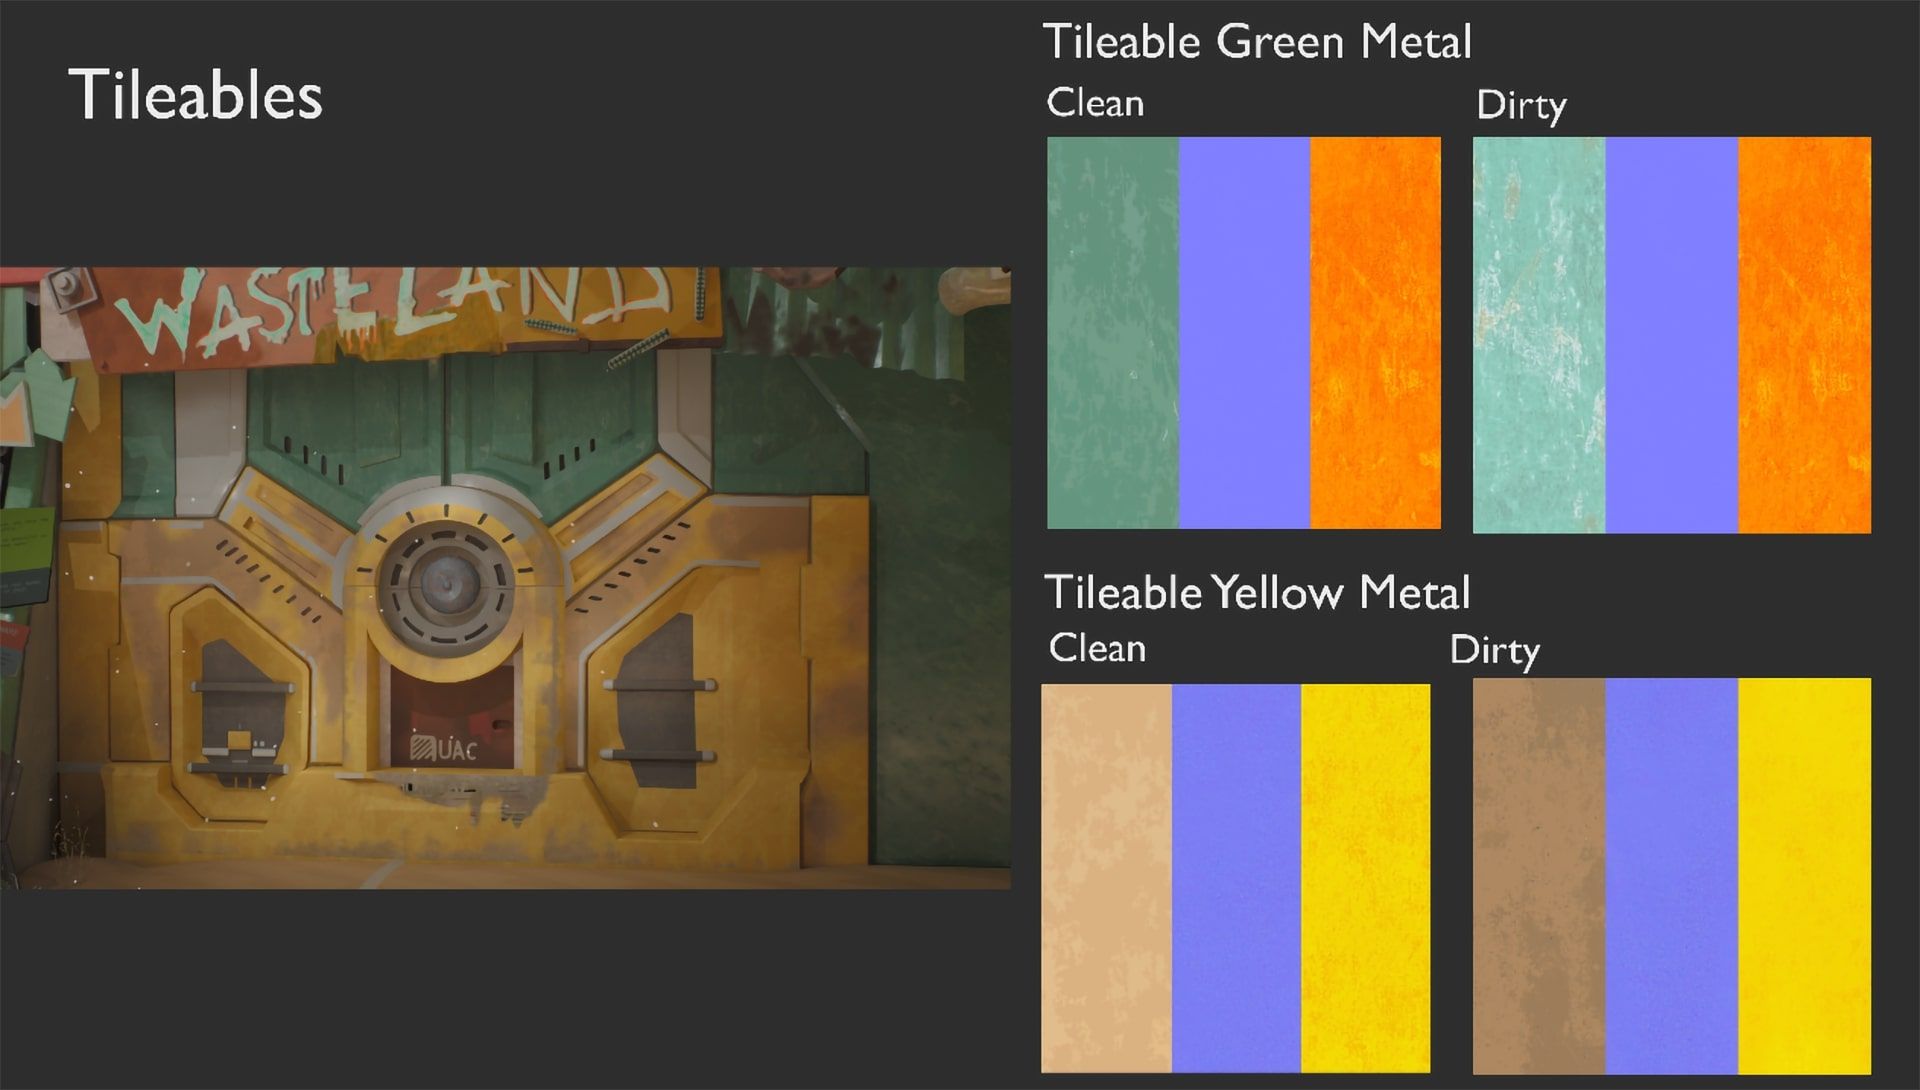
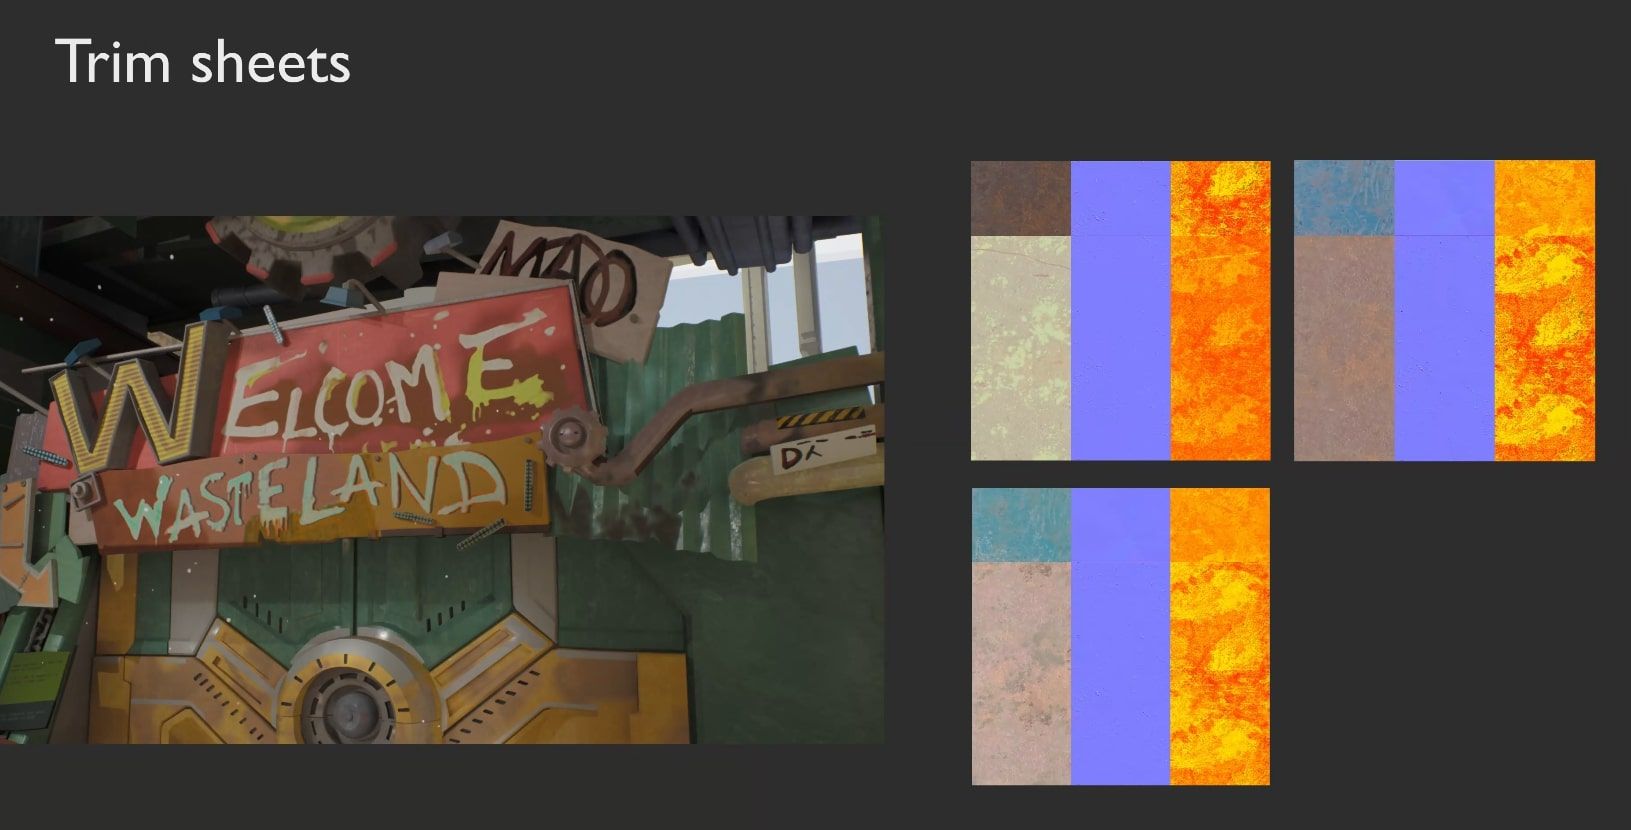
Given the massive scale of the environment, the majority of the textures I used were either tileables or trim sheets. I also learned to set up the linear interpolation (LERP) nodes, which allowed me to blend two materials in Unreal. This was especially useful in introducing variations to the materials which made the assets look more visually interesting and suggested weathering or rusting (such as for metals).
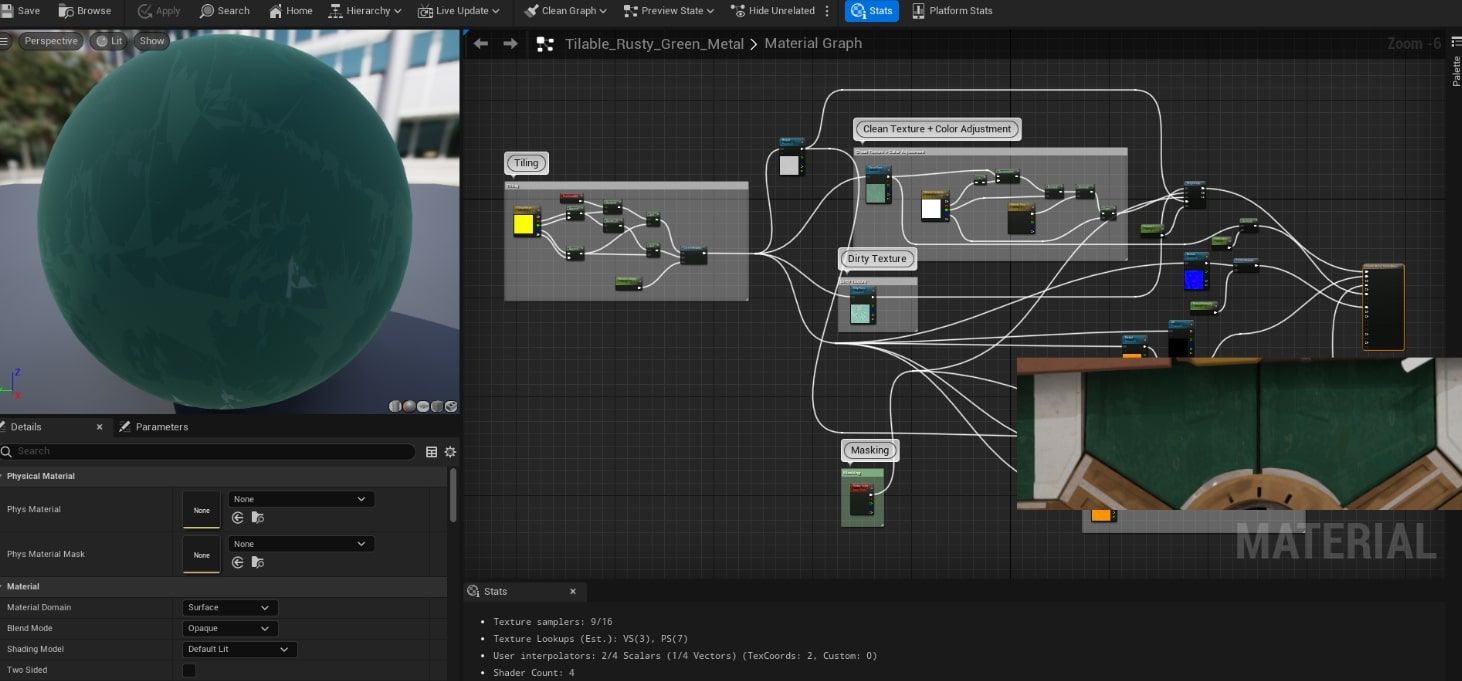
I used tileables and trim sheets extensively for this project. Most of the textures were created in Quixel Mixer, with some editing in Photoshop to get rid of the repetitive patterns and introduce some semi-stylised look to the textures.
I used a large number of decals to add more details to the assets, such as colour variations, dirt or rust.
I set up the Directional Light to establish the main light source first, then gradually added more lights to add focus to selected parts of the scene. I also used Exponential Height Fog to create a sense of depth, and additional fog cards to create localised foggy areas.

I also used the Post Process Volume to adjust the overall exposure, add some bloom and do some colour correction to the final render.
Final output:
This project was an interesting and valuable learning experience for me. I got to learn several new workflows such as tileables and trim sheets, and building a scene in Unreal Engine 5. Hope you enjoyed this project as much as I did! If you’d like, please check out my other projects via my Rookies profile here.