
Footwear Design: Creating Iconic Dr. Martens Boots in 3D
Judith Tymosiuk, a student at PIXL VISN | media arts academy breaks down her three-week project creating a 3D model of a Dr. Martens boot using Autodesk Maya, ZBrush, and Substance 3D Painter.
Judith Tymosiuk, a student at PIXL VISN | media arts academy breaks down her three-week project creating a 3D model of a Dr. Martens boot using Autodesk Maya, ZBrush, and Substance 3D Painter.

Judith Tymosiuk, a student at PIXL VISN | media arts academy, specialises in asset and creature modeling and texturing for VFX. In this article, Judith provides a breakdown of a project she worked on for three weeks at PIXL VISN. She takes us through the journey of creating a 3D model representing a Dr. Martens boot using Autodesk Maya, ZBrush, and Substance 3D Painter.

You might wonder, why did I choose a Dr. Martens boot?
I wanted to model and texture a shoe because it offers a chance to work with various materials like leather, fabric, and rubber. When deciding which shoe to pick, I did not have to search far. I looked around my own closet and found my old, worn and weathered Dr. Martens boots. They seemed like the perfect choice for this project, given their rugged look and personal significance.
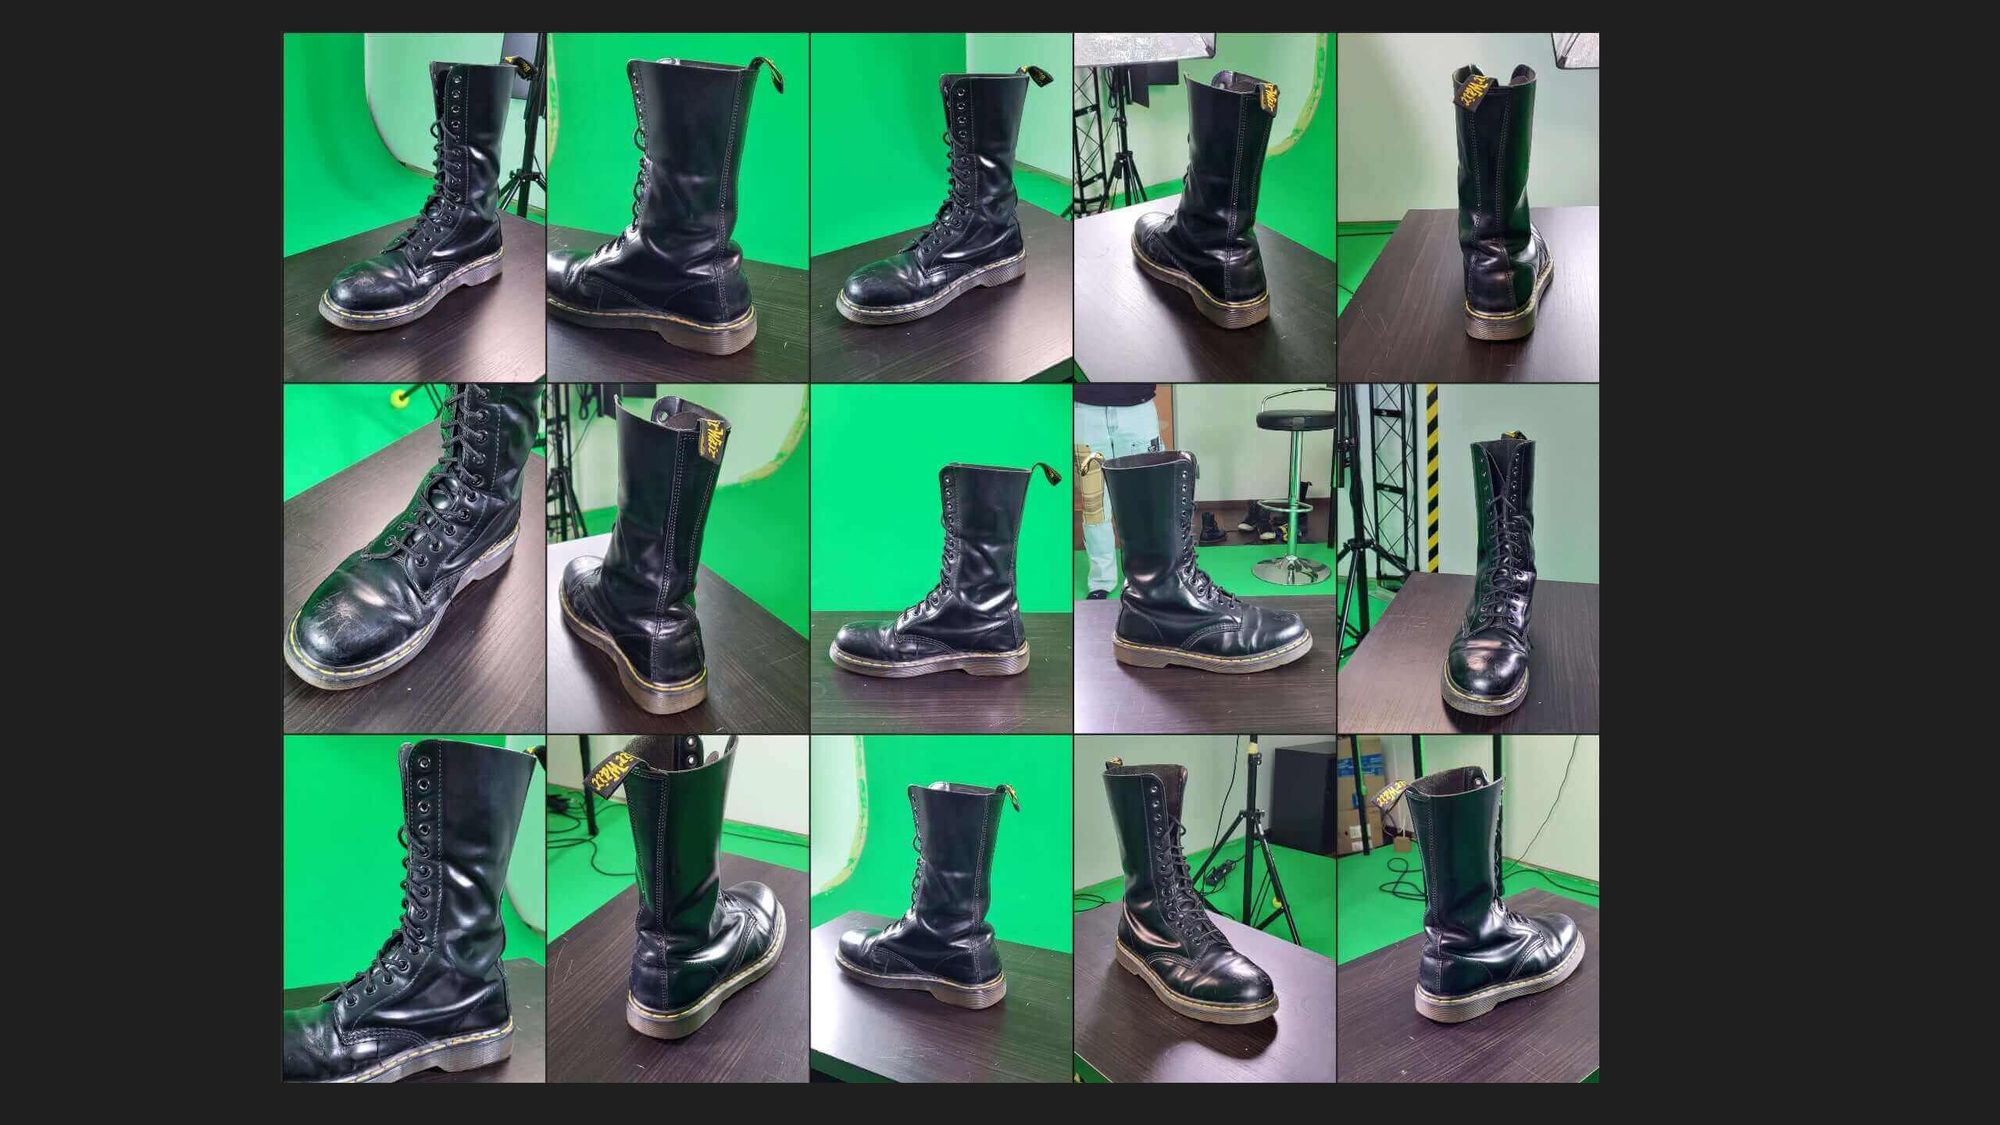
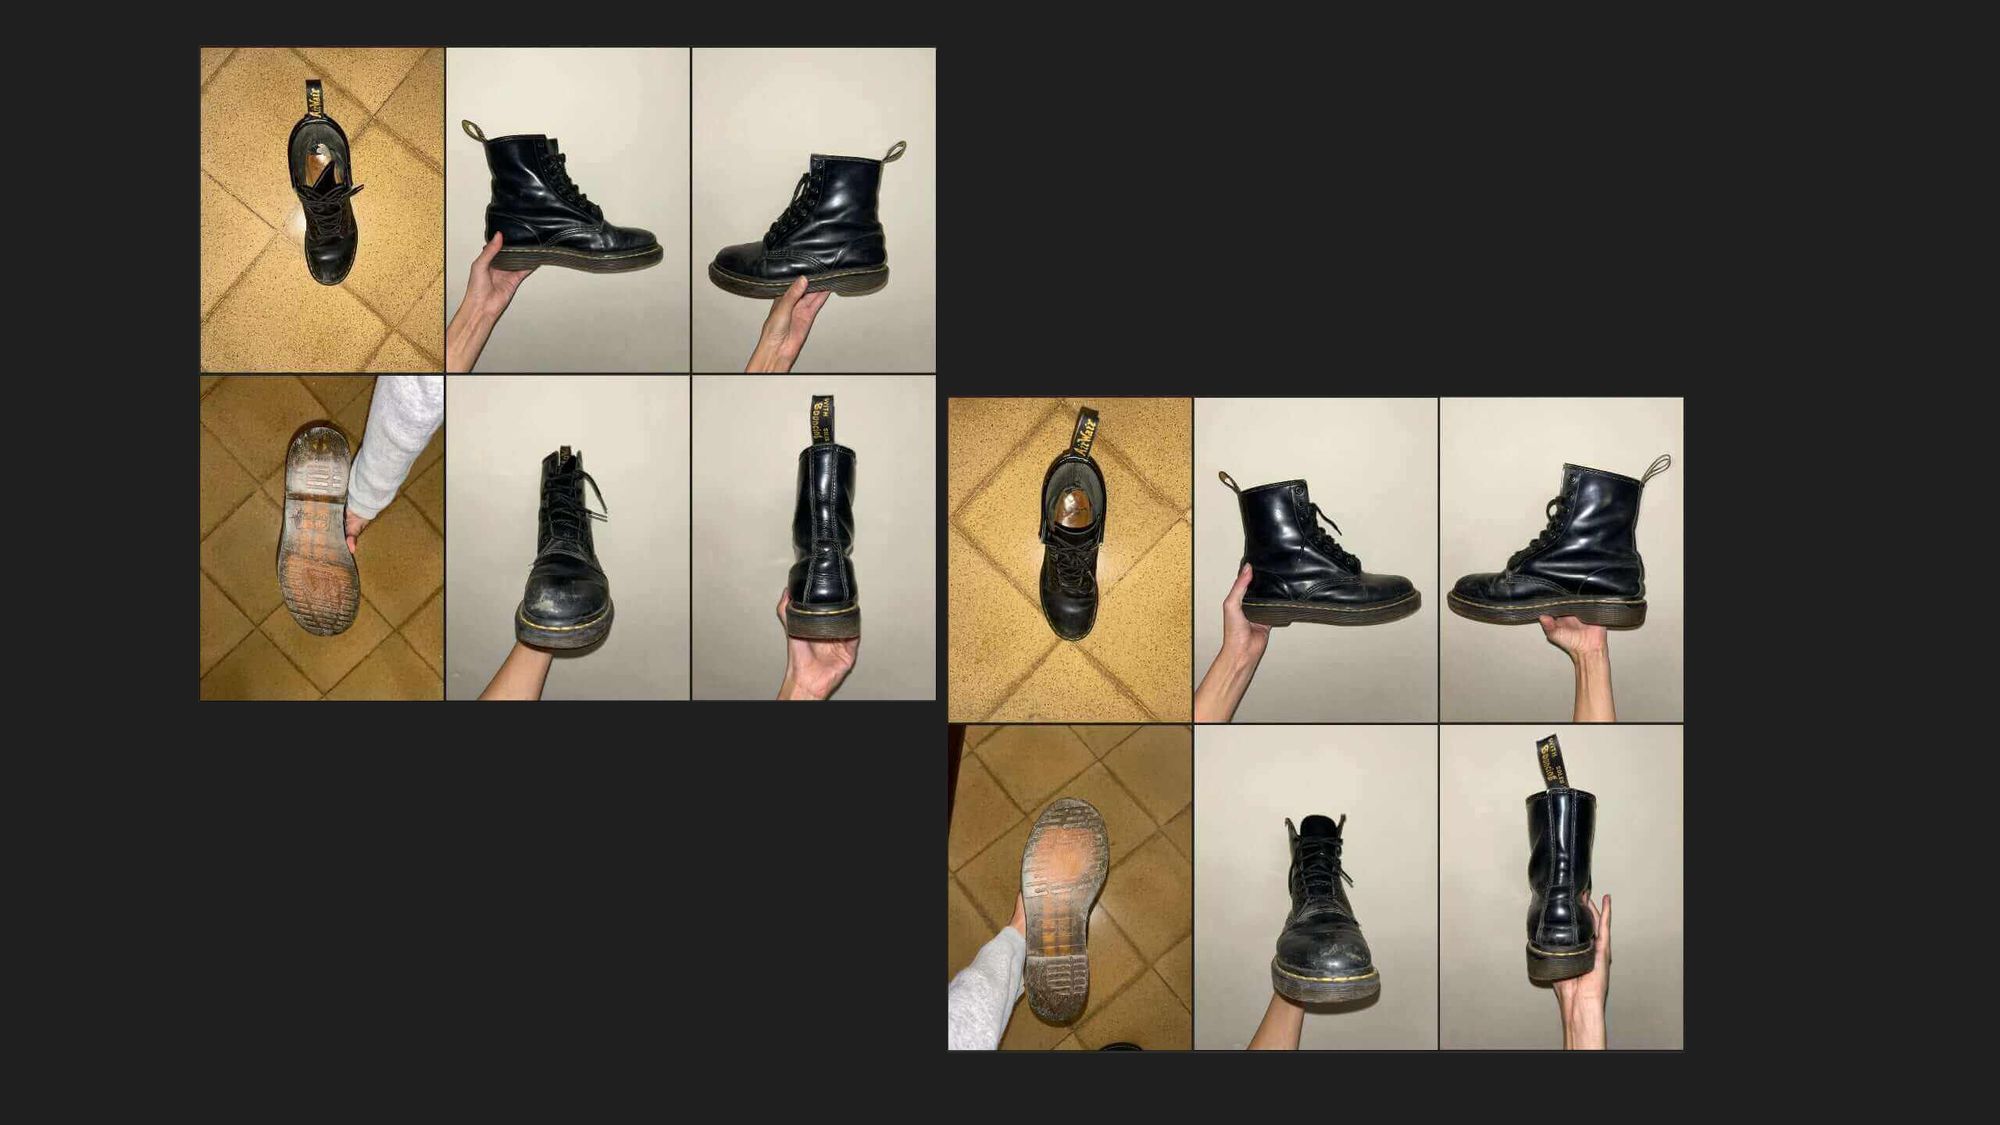
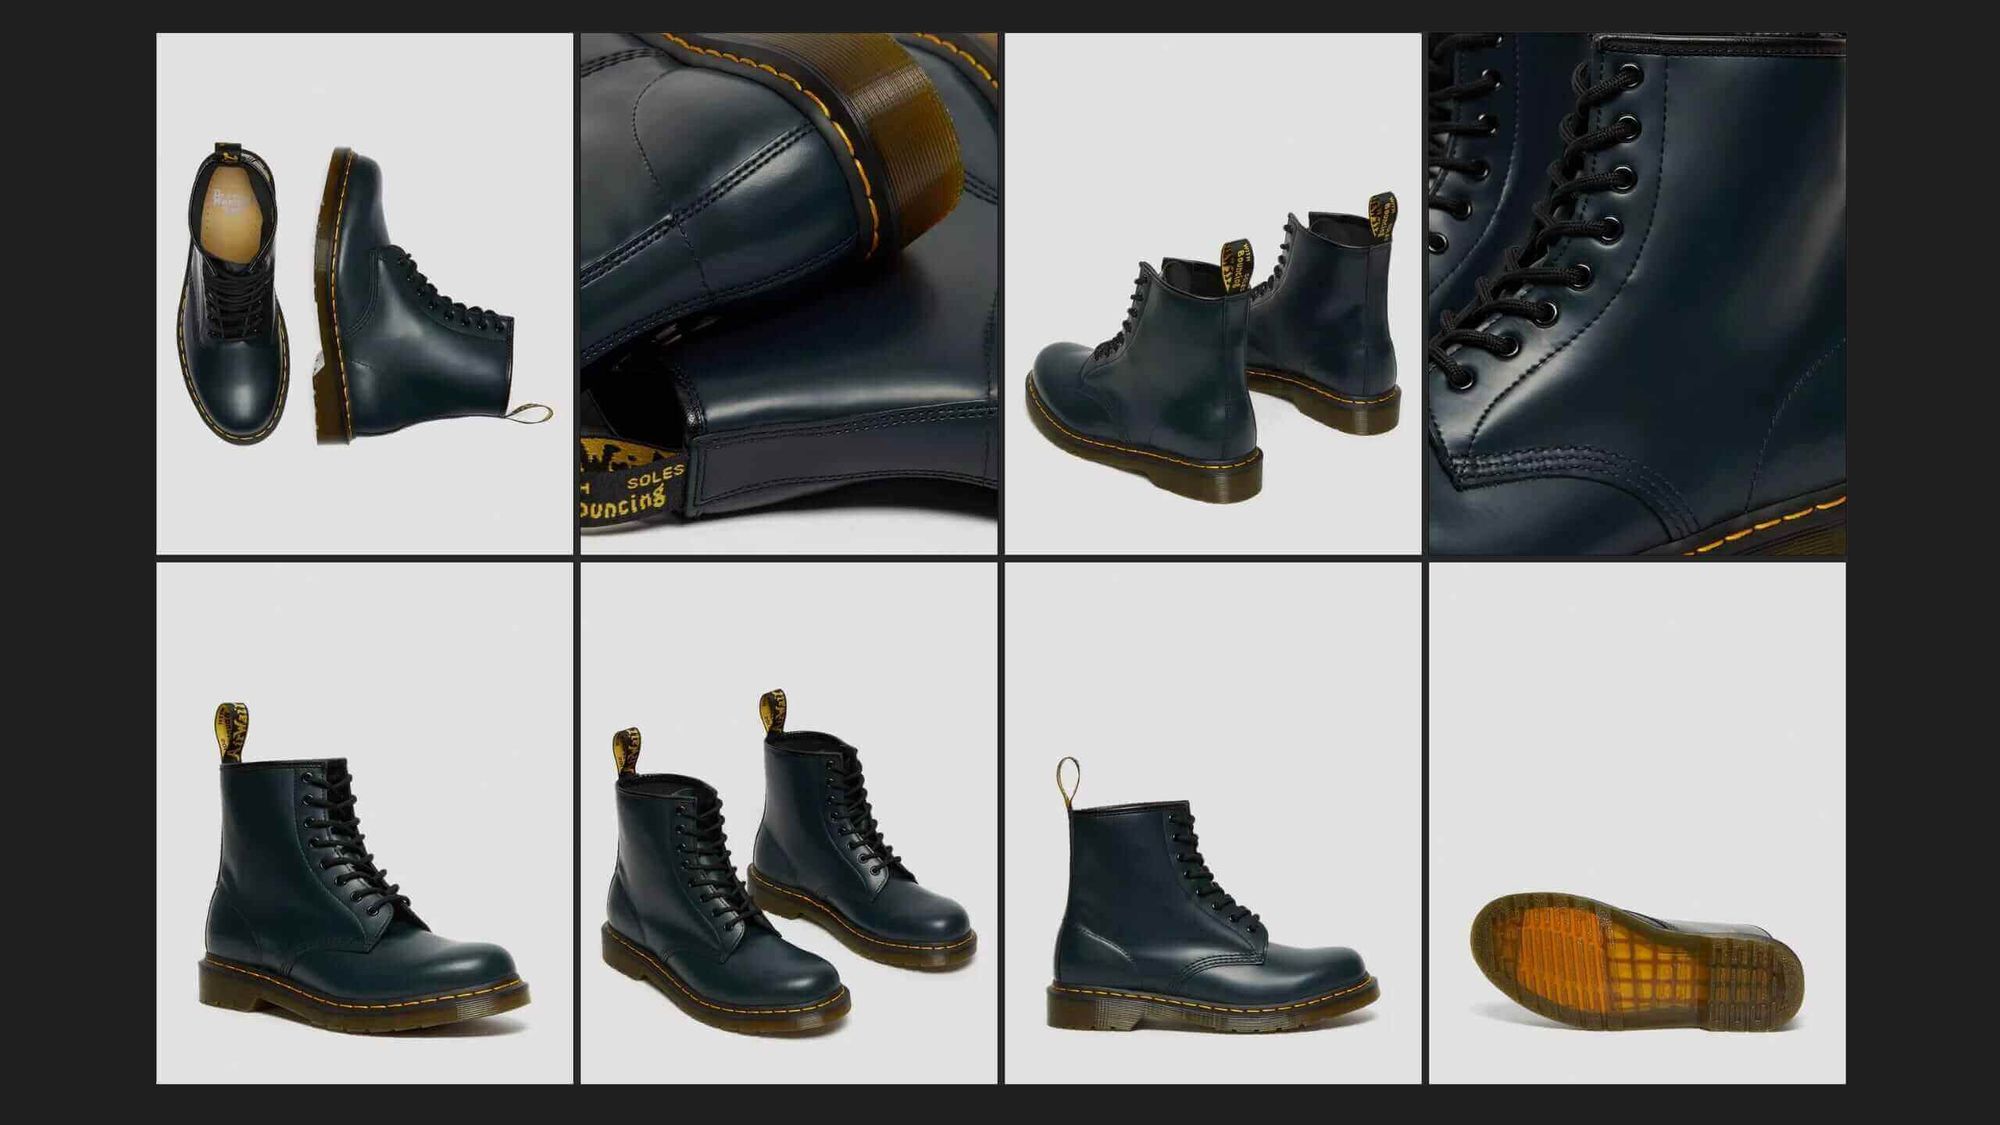
After selecting Dr. Martens boots as my object of choice, the next step was to gather reference images to ensure an accurate representation. This first step sets the groundwork for the following stages, providing a clear direction for the modeling, detailing, and texturing processes. To ensure a personal touch, I used my own shoes as reference alongside other images, infusing my own style into the project. Additionally, I went on a reference hunt on product websites, allowing me to see the shape of a new and clean shoe straight from the store. I realised that I needed specific references for the folds that form only after extended wear. Although I had Dr. Martens at home for reference, they were not quite suitable. The leather folds differently depending on the shoe's height, and mine was too tall for what I had in mind. Fortunately, being in an environment surrounded by fellow students allowed for easy exchange, and one of my peers kindly offered to provide photos of their own shoes for reference.

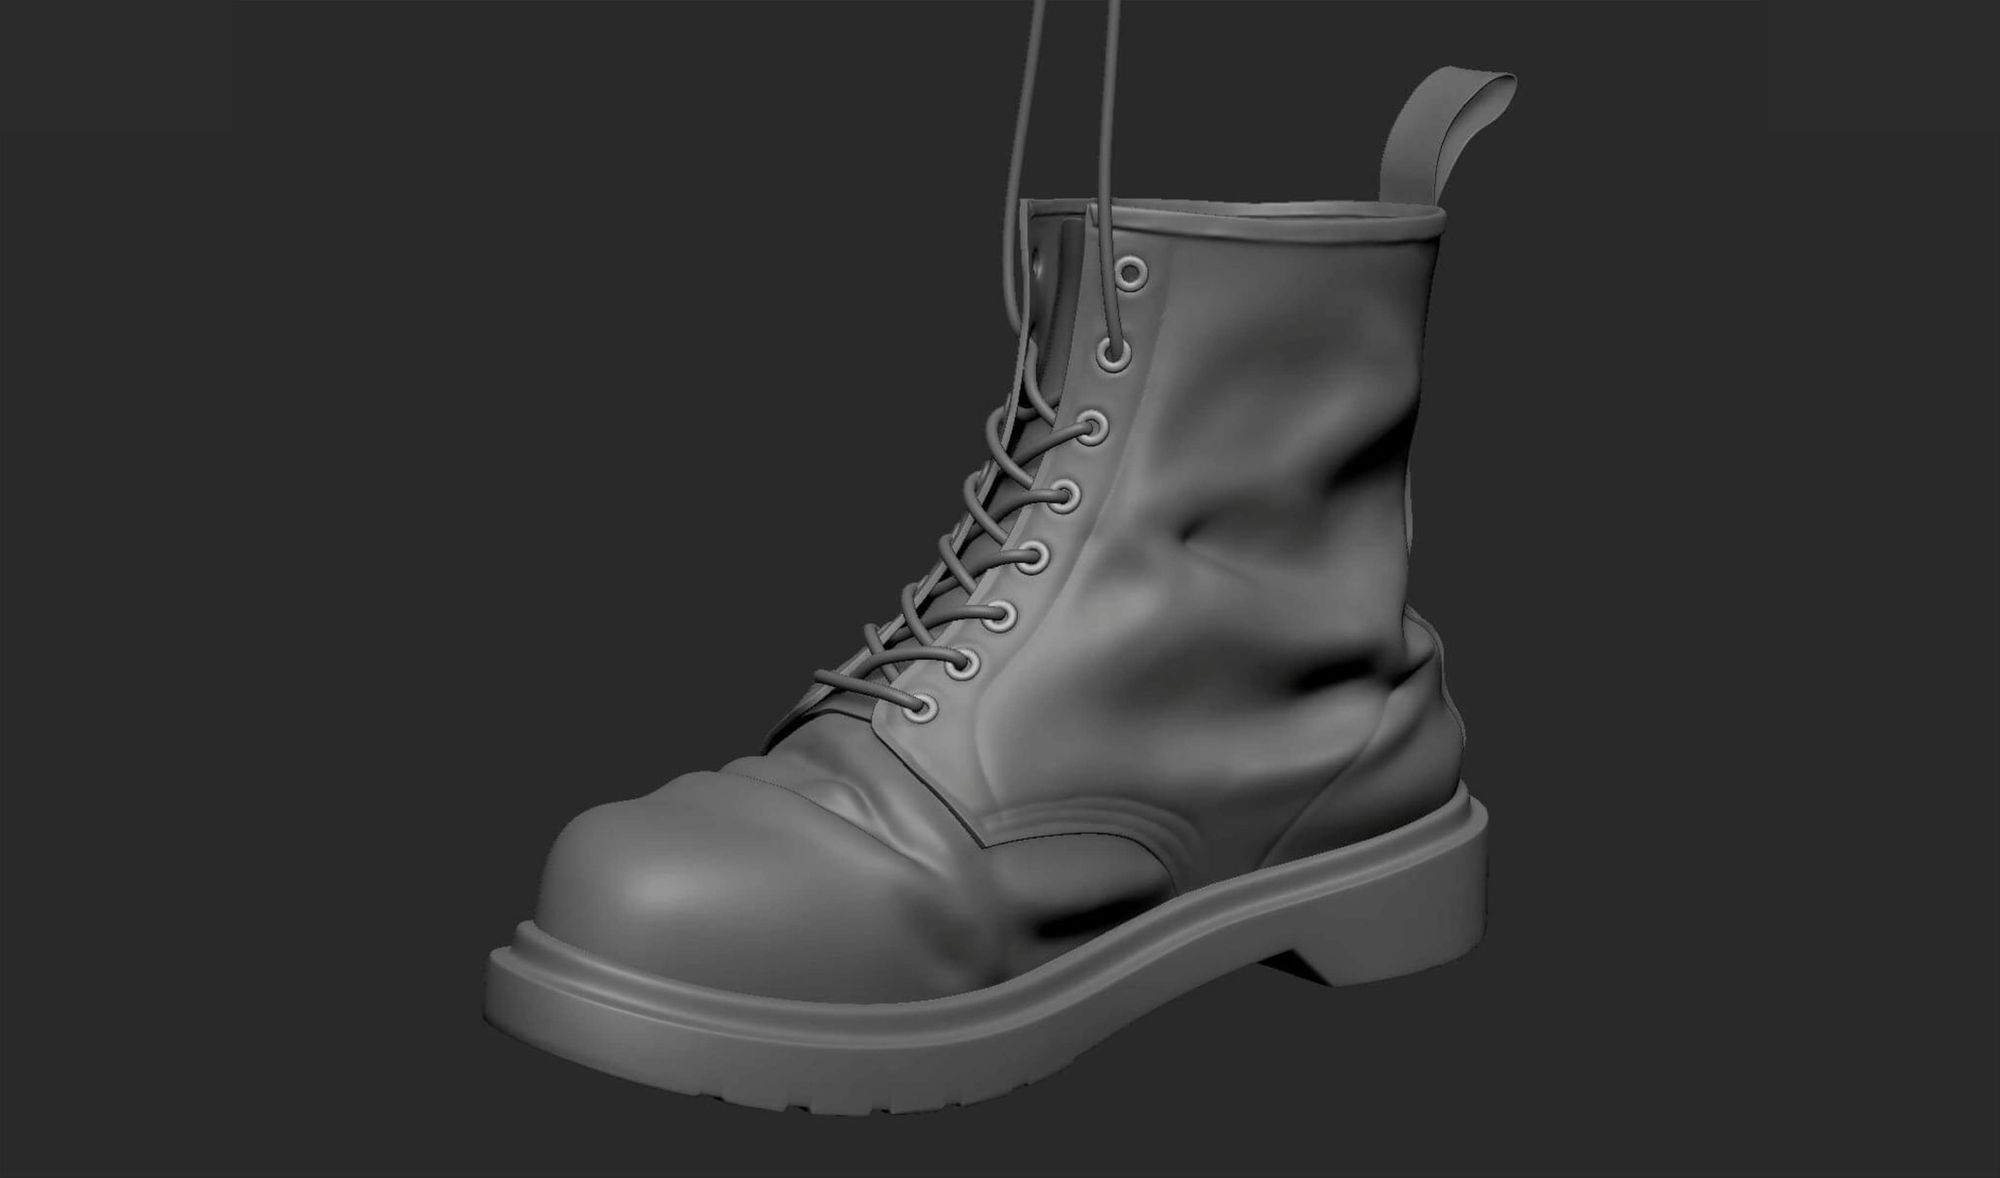
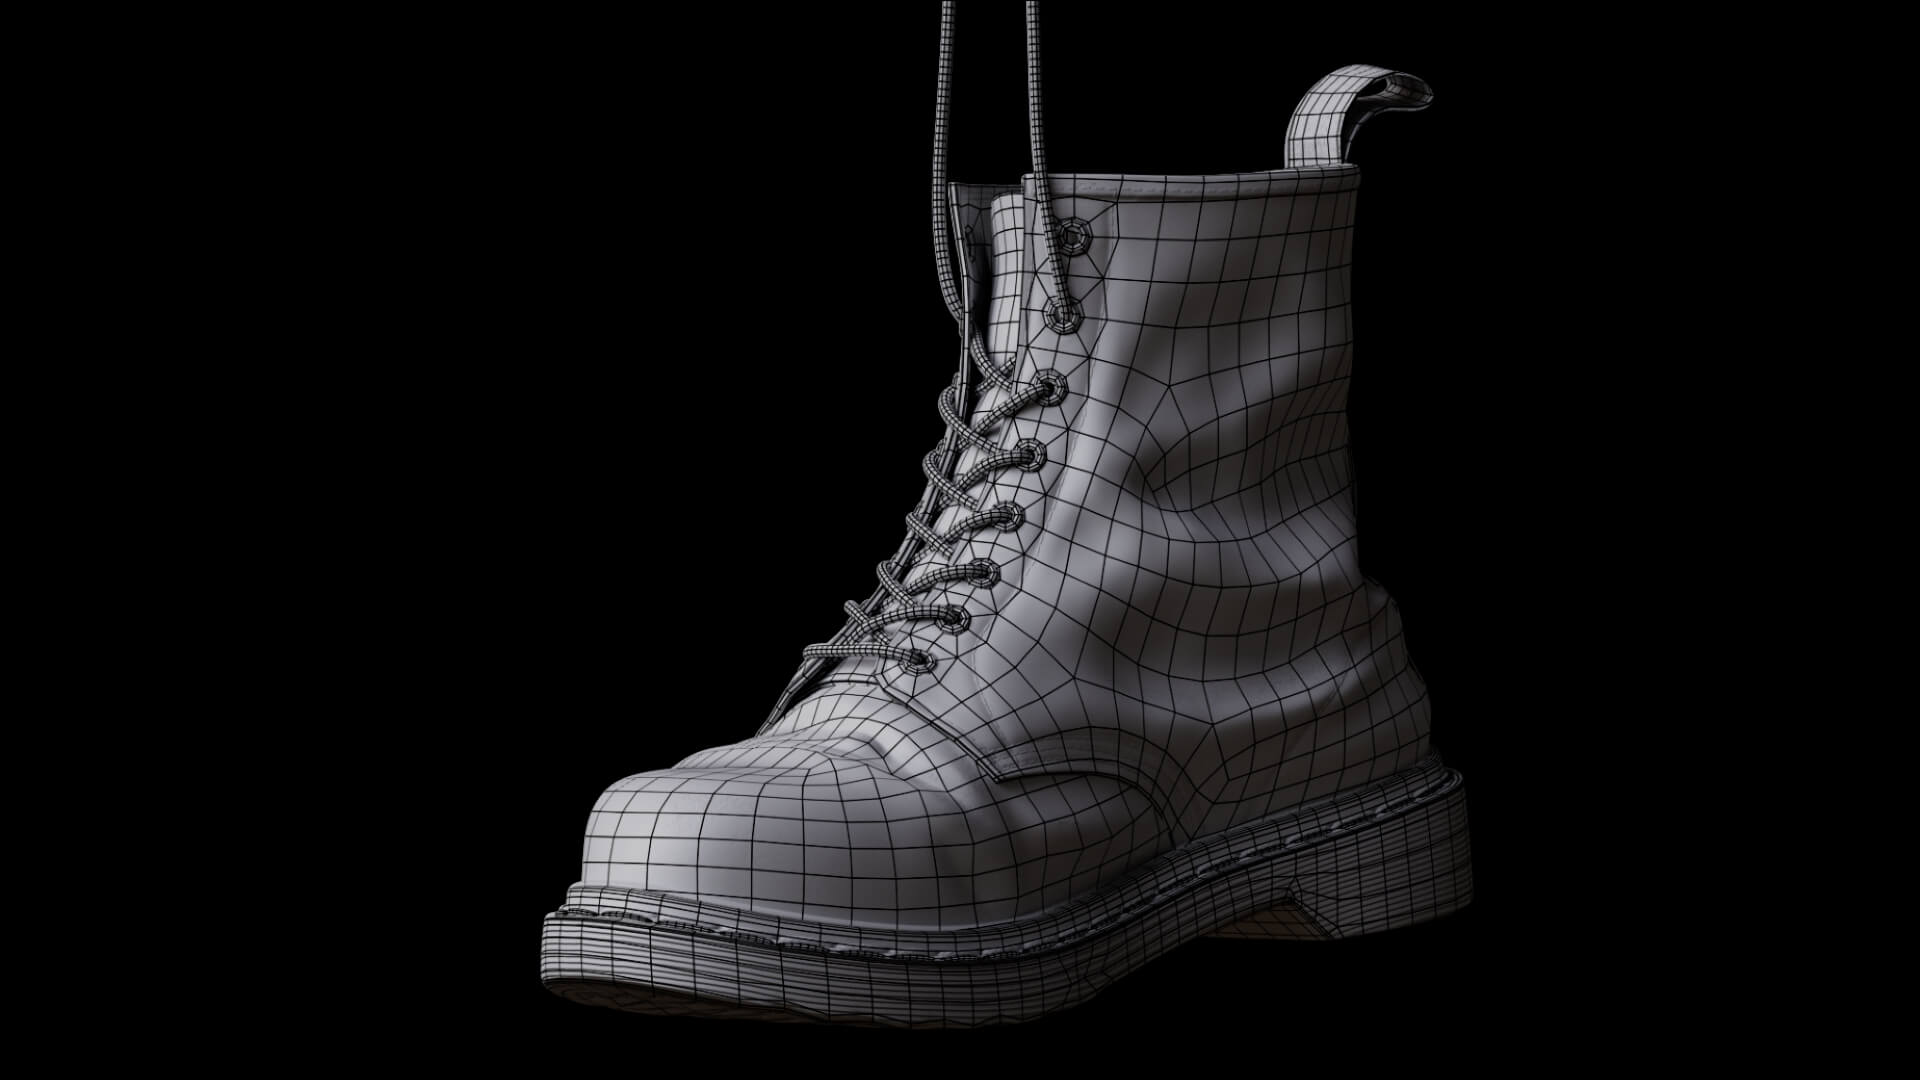
In Autodesk Maya, I began with the foundational structure of the boots. Initially, I created a rough block out to establish the overall shape, using reference photos to ensure accuracy in curvature. This approach allowed me to focus on achieving a 'clean' appearance before adding worn details and folds in ZBrush later.
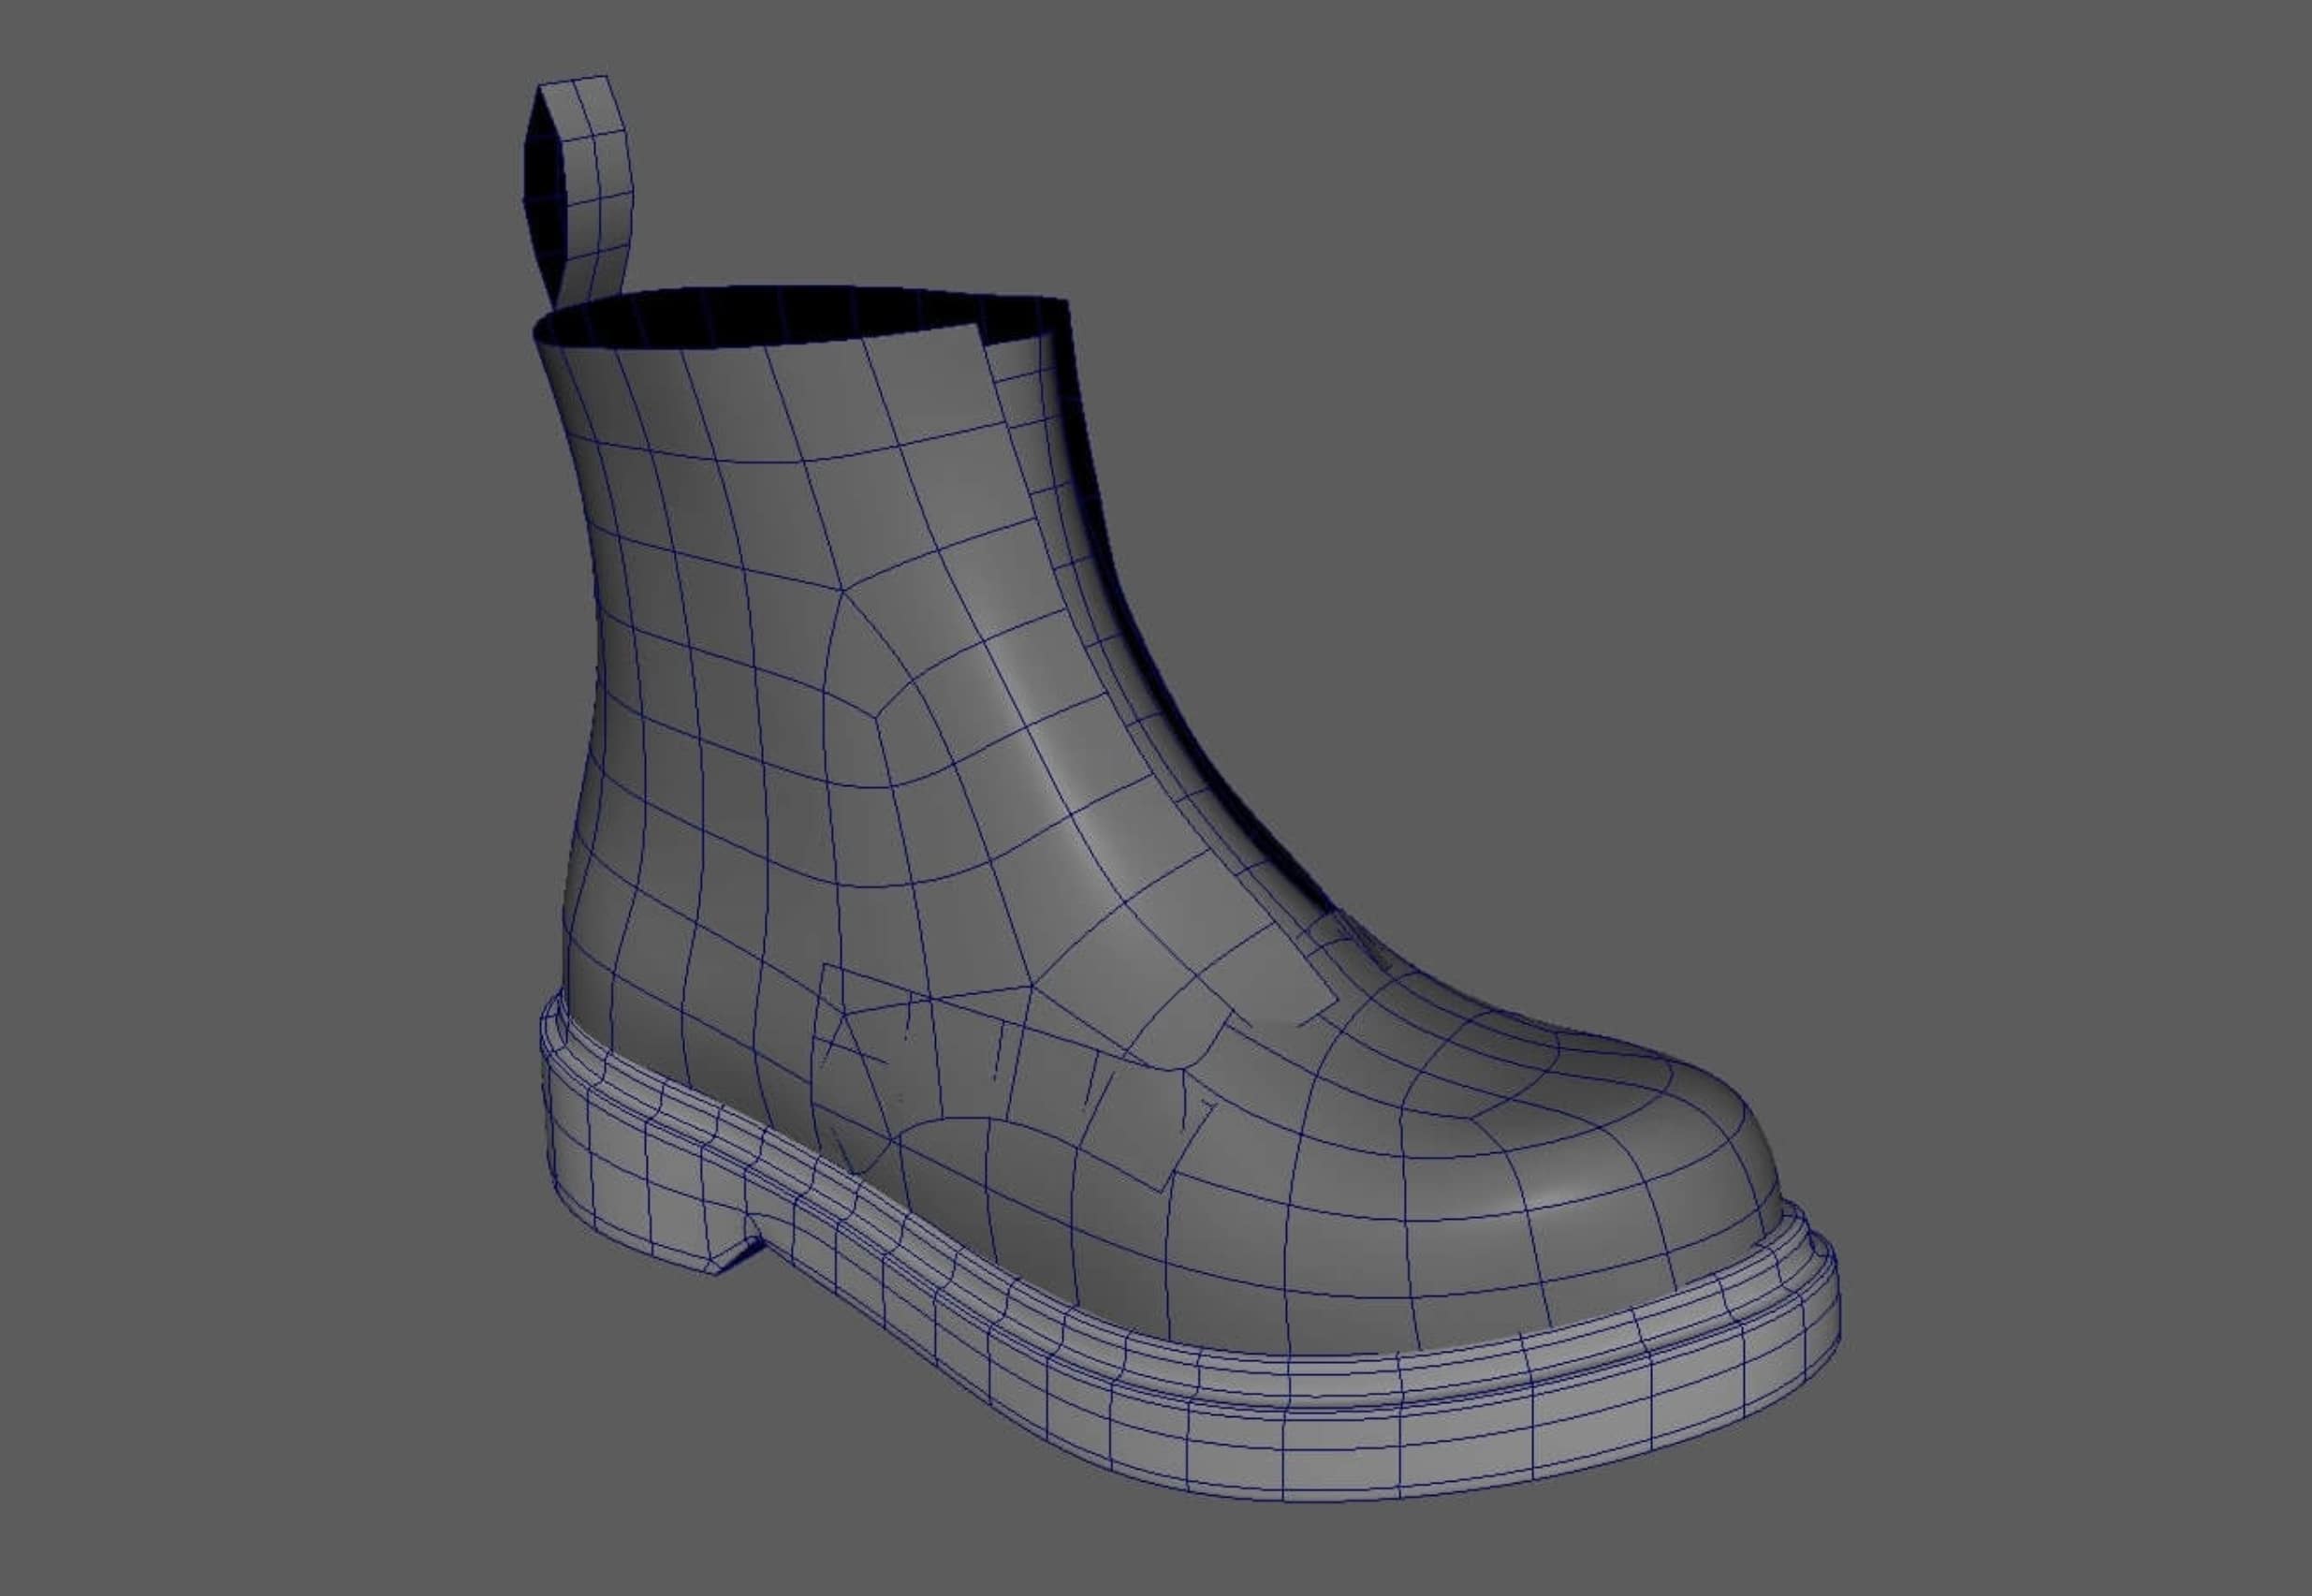
Once I was satisfied with the main shape, I increased the poly count. It took some back and forth to maintain a nice curvature without adding too many edges. It proved helpful to utilise viewport shaders like "blinn" as they provided a clearer representation of how the leather would appear and if there were any bumps visible.
After establishing the silhouette, it was time to separate the parts of the shoe that were not made from a single leather piece in the real-life version of the shoe. Since my edge flow did not yet completely align with the separation lines, I performed a quick retopology. This allowed me to simultaneously establish my desired polygon count.
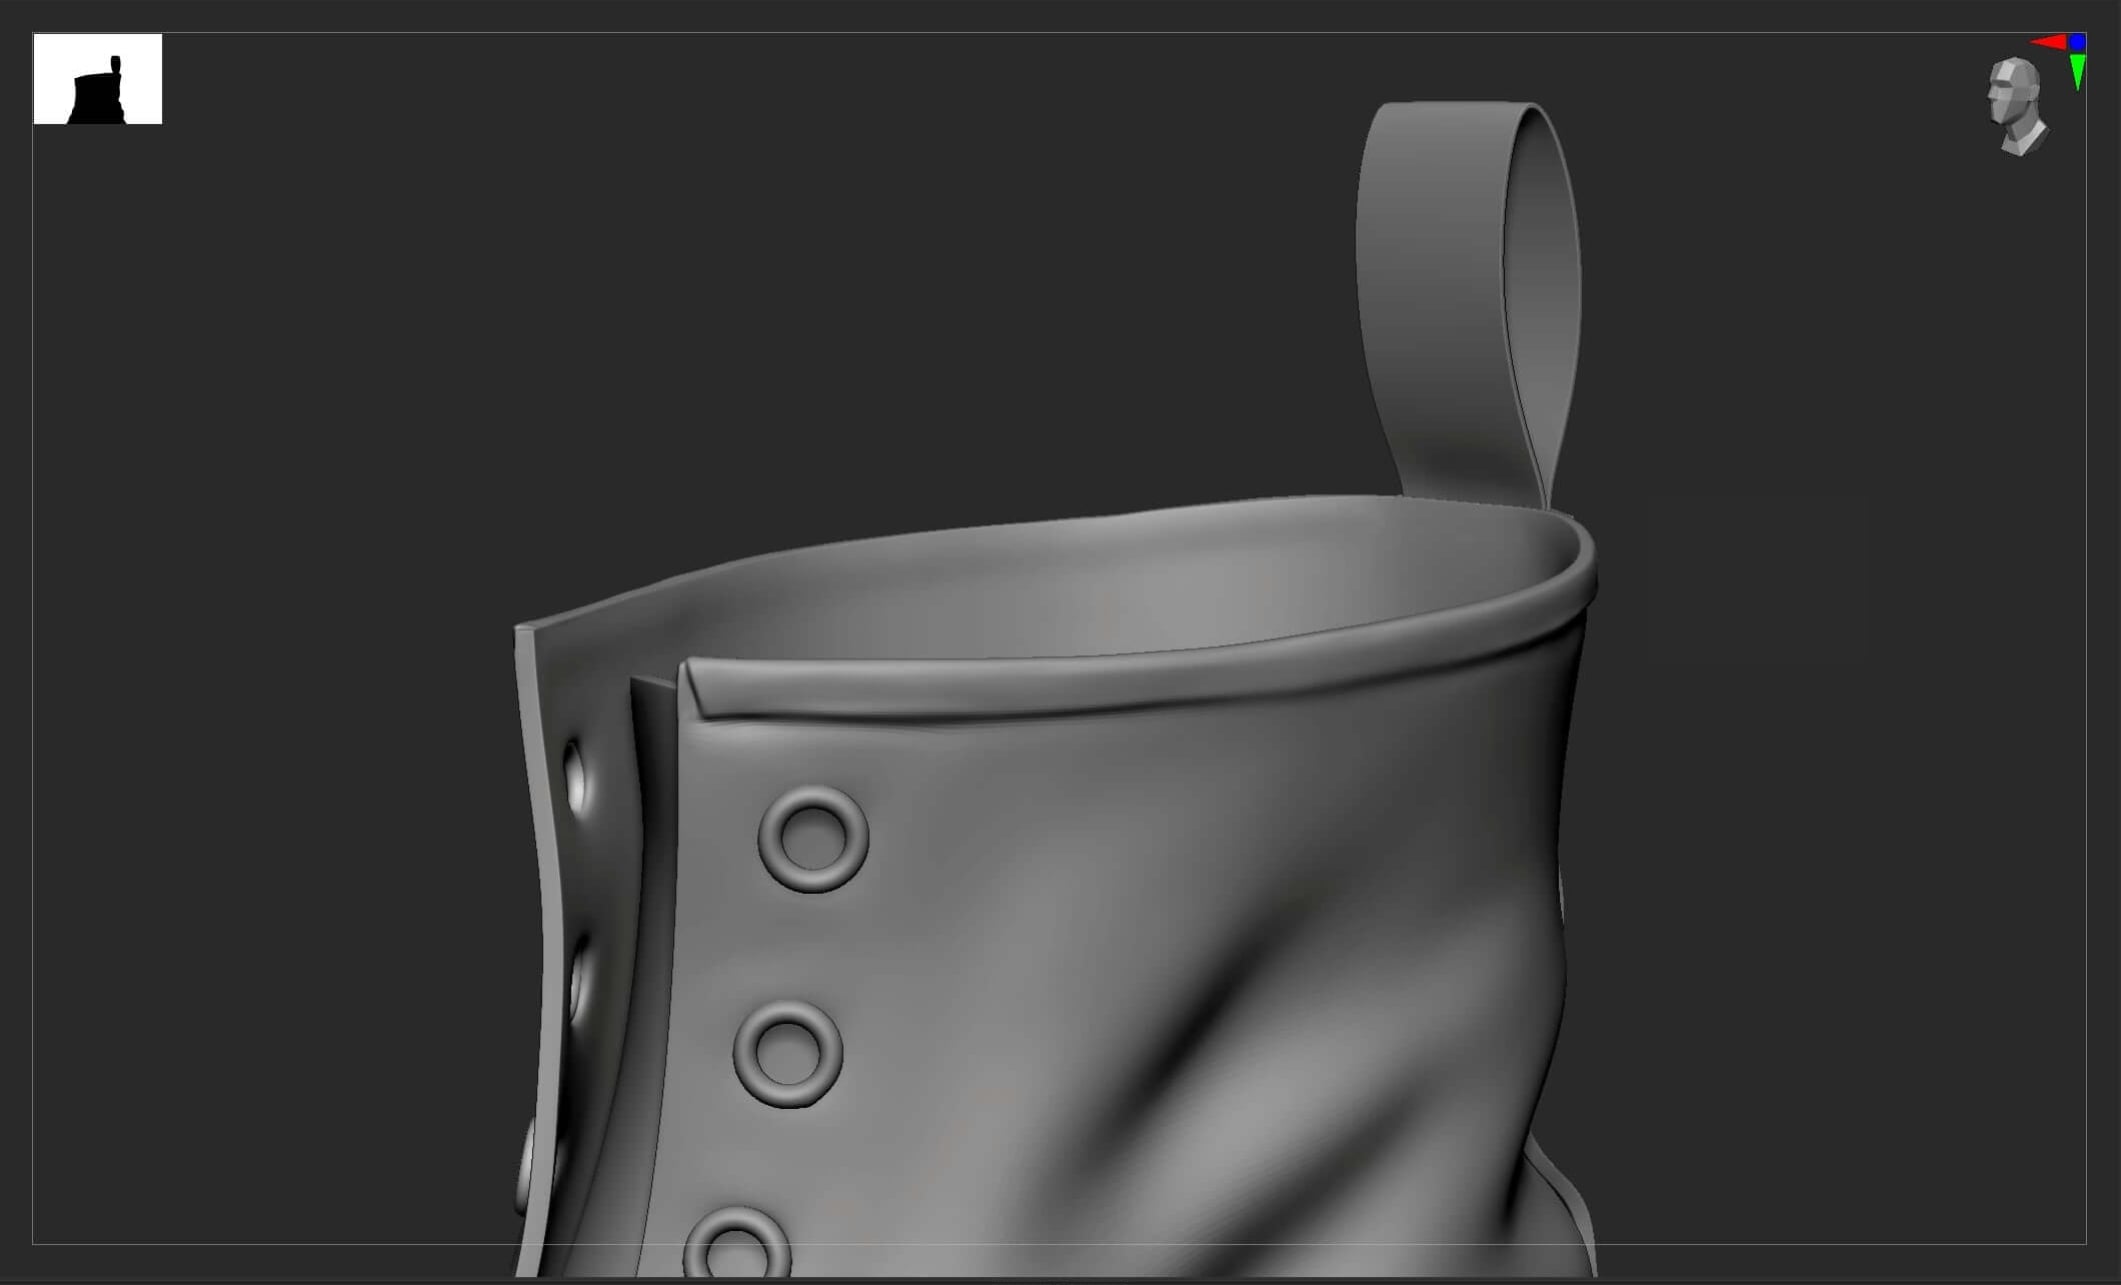
I then added thickness to those individual parts and shifted my focus to details such as the eyelets and the label in the back. The eyelets themselves were easily modeled, but placing them in the correct position proved to be a tedious task. I had to ensure they all had the right orientation and were positioned precisely in their designated space.
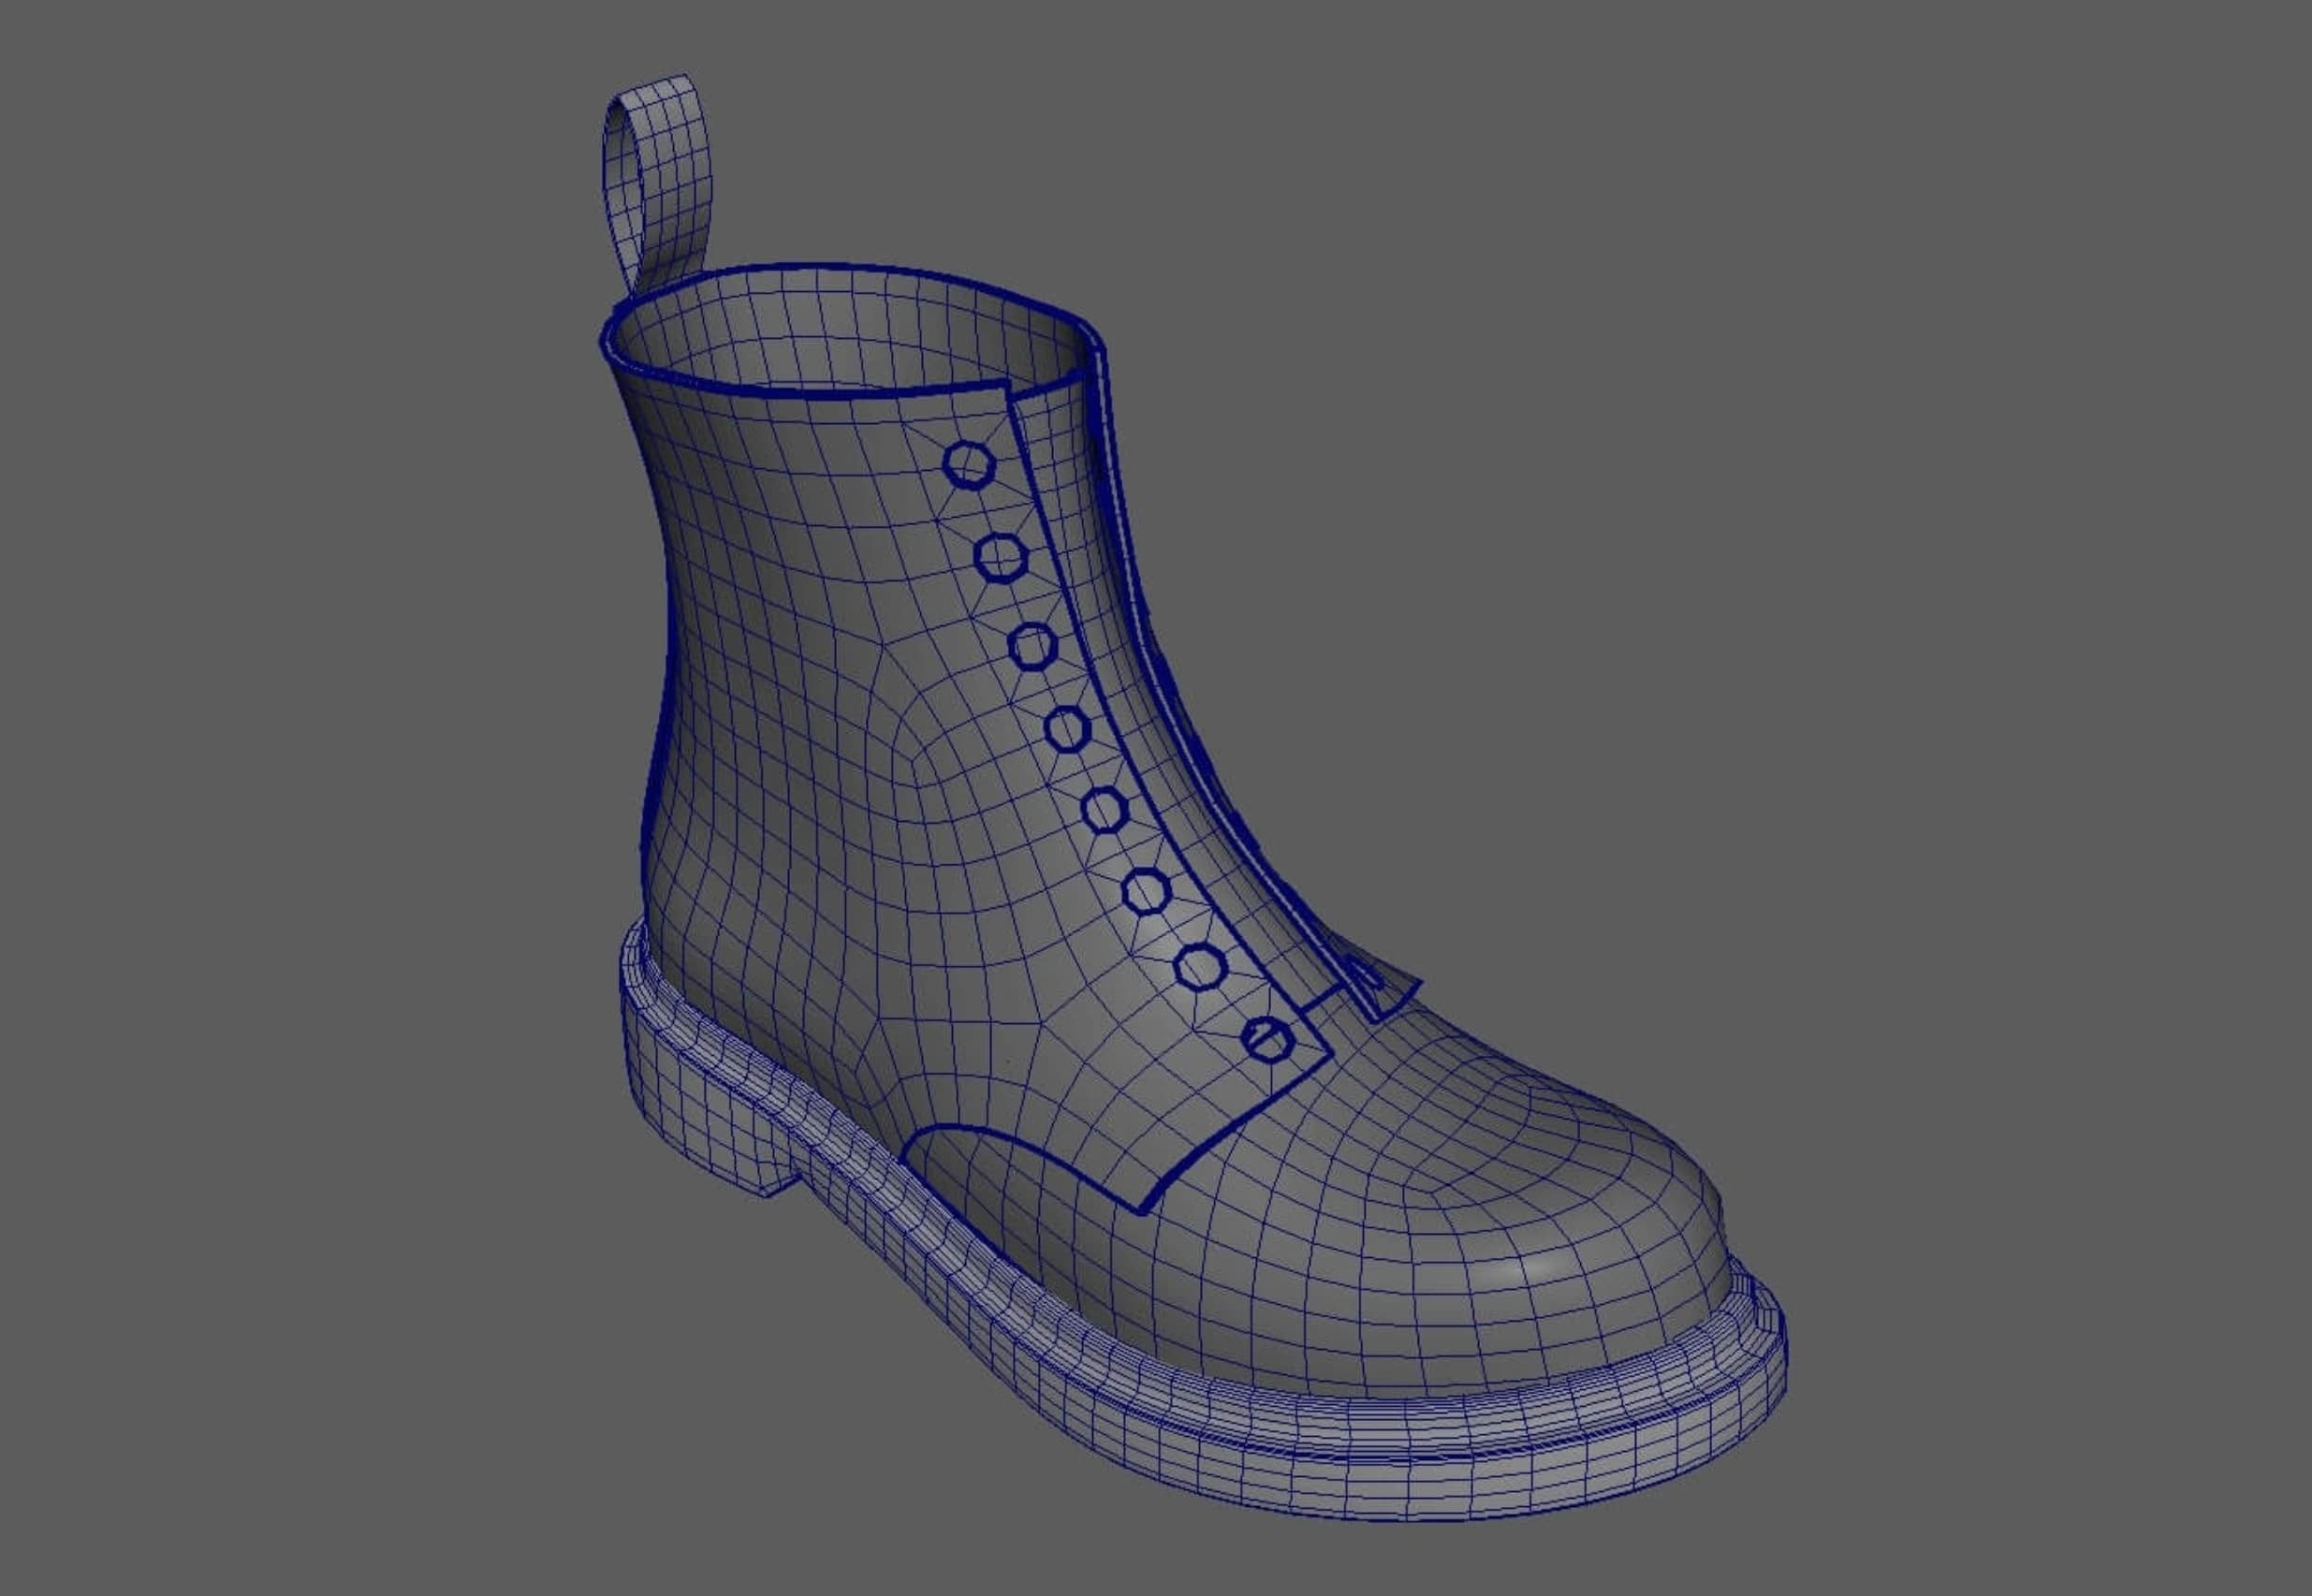

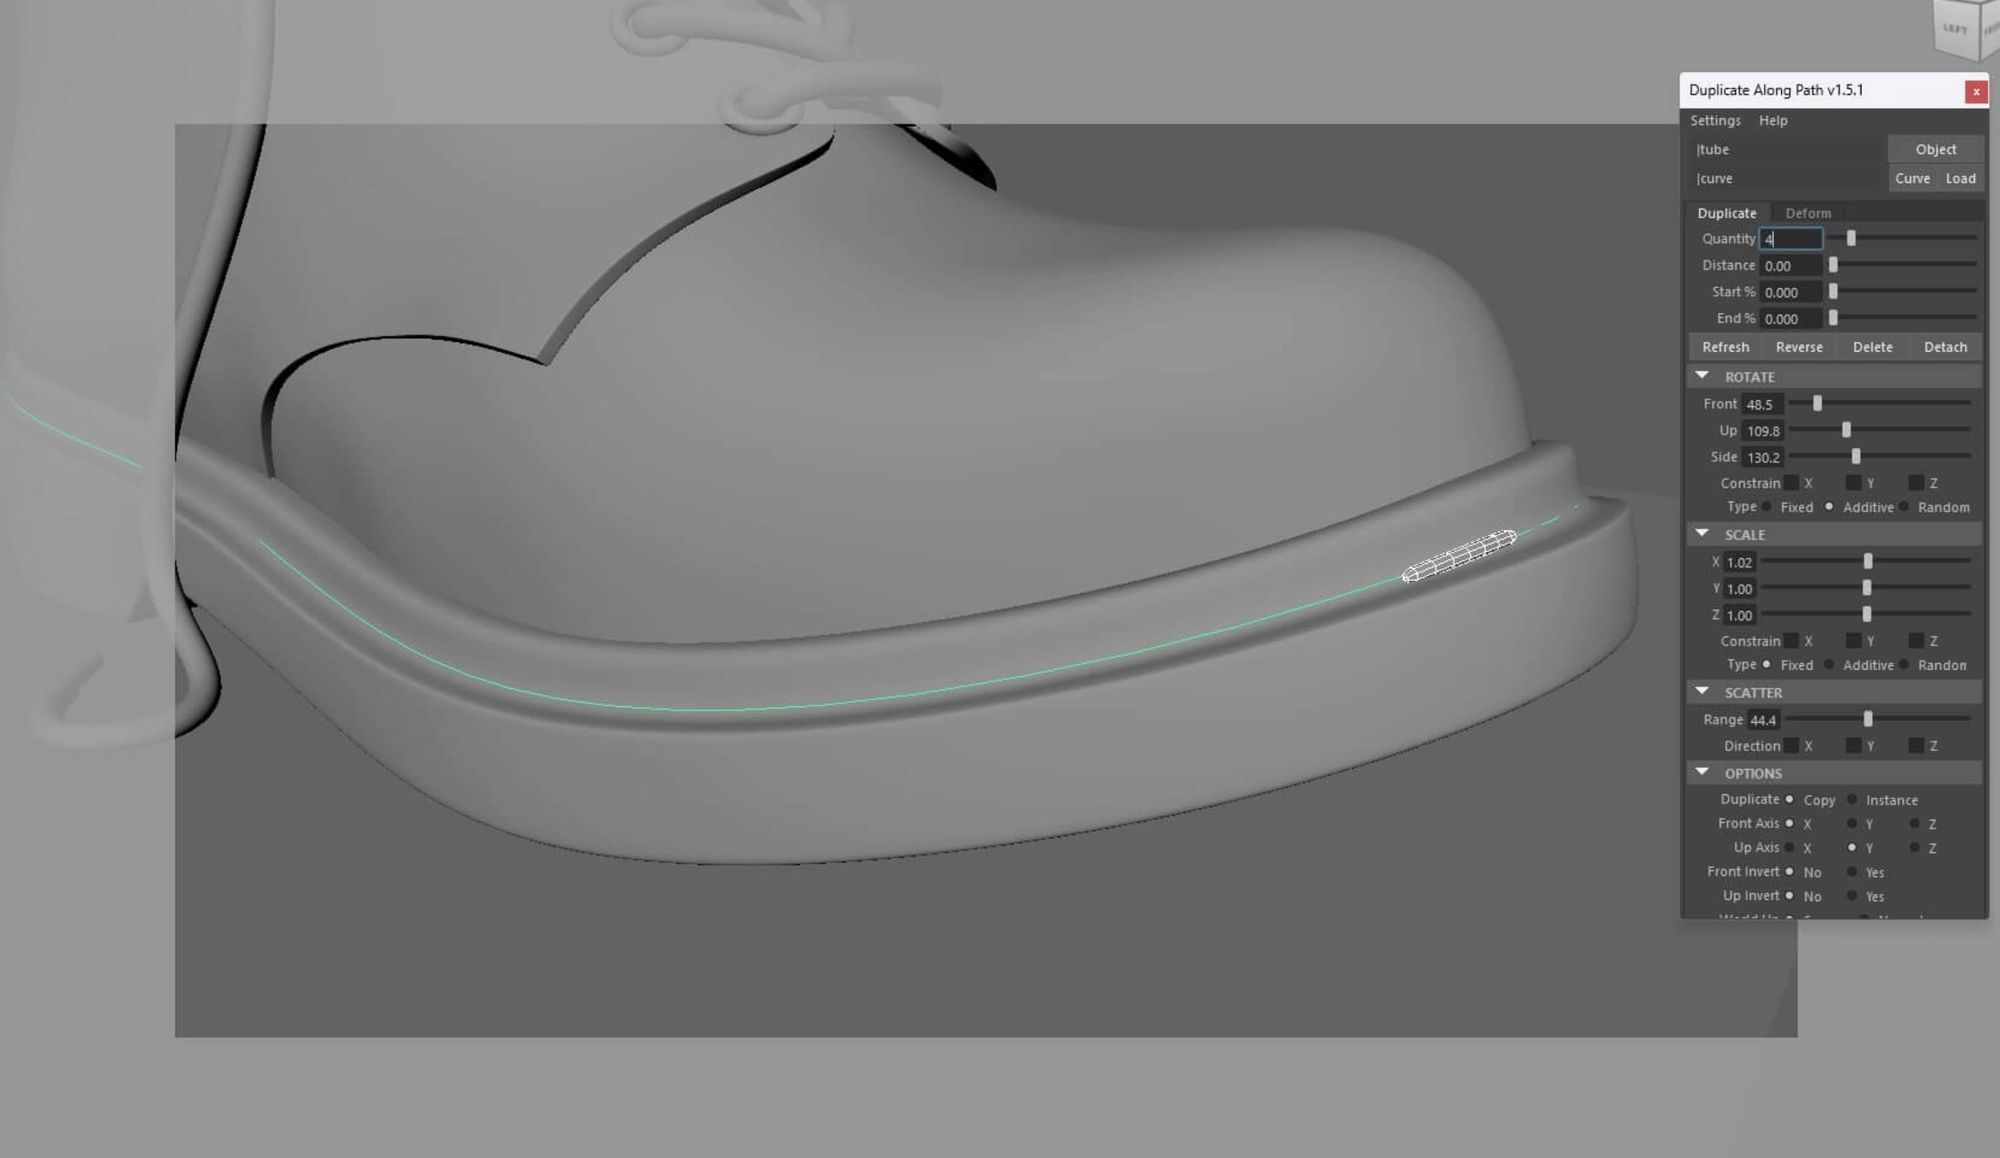
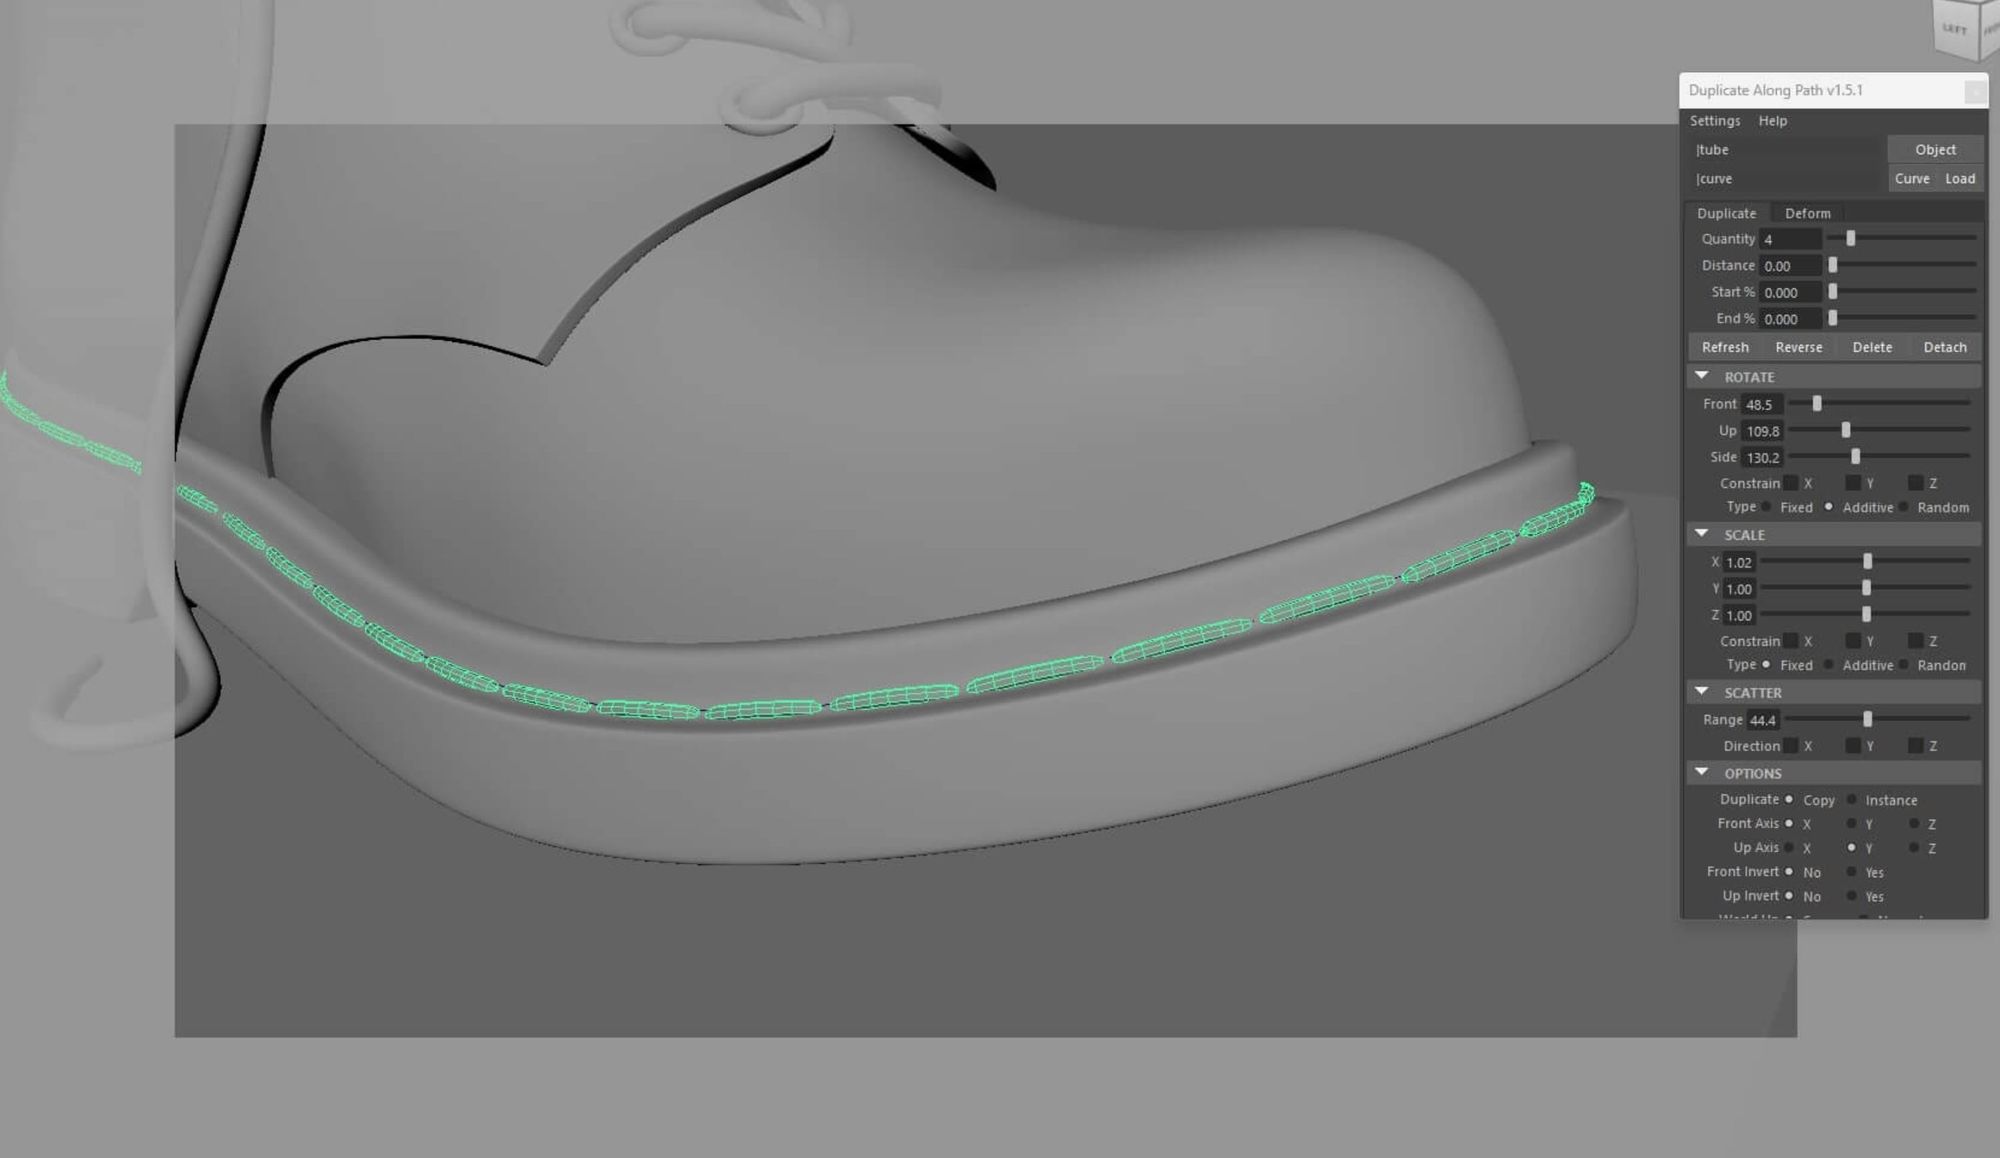
My initial plan was to have the shoelaces lying on the ground, as I envisioned the shoe in its final presentation. However, I knew I might change my mind later, so I decided on a procedural approach. I utilised Maya curves and sweep mesh to create the laces. Similarly, for the distinctive yellow stitches characteristic of Dr. Martens, I employed curves. I selected the edge of the sole where I wanted the stitches to lie and converted it to a curve. Then, I utilised a MEL script called "Duplicate along Path" to scatter geometry representing stitches along that curve.

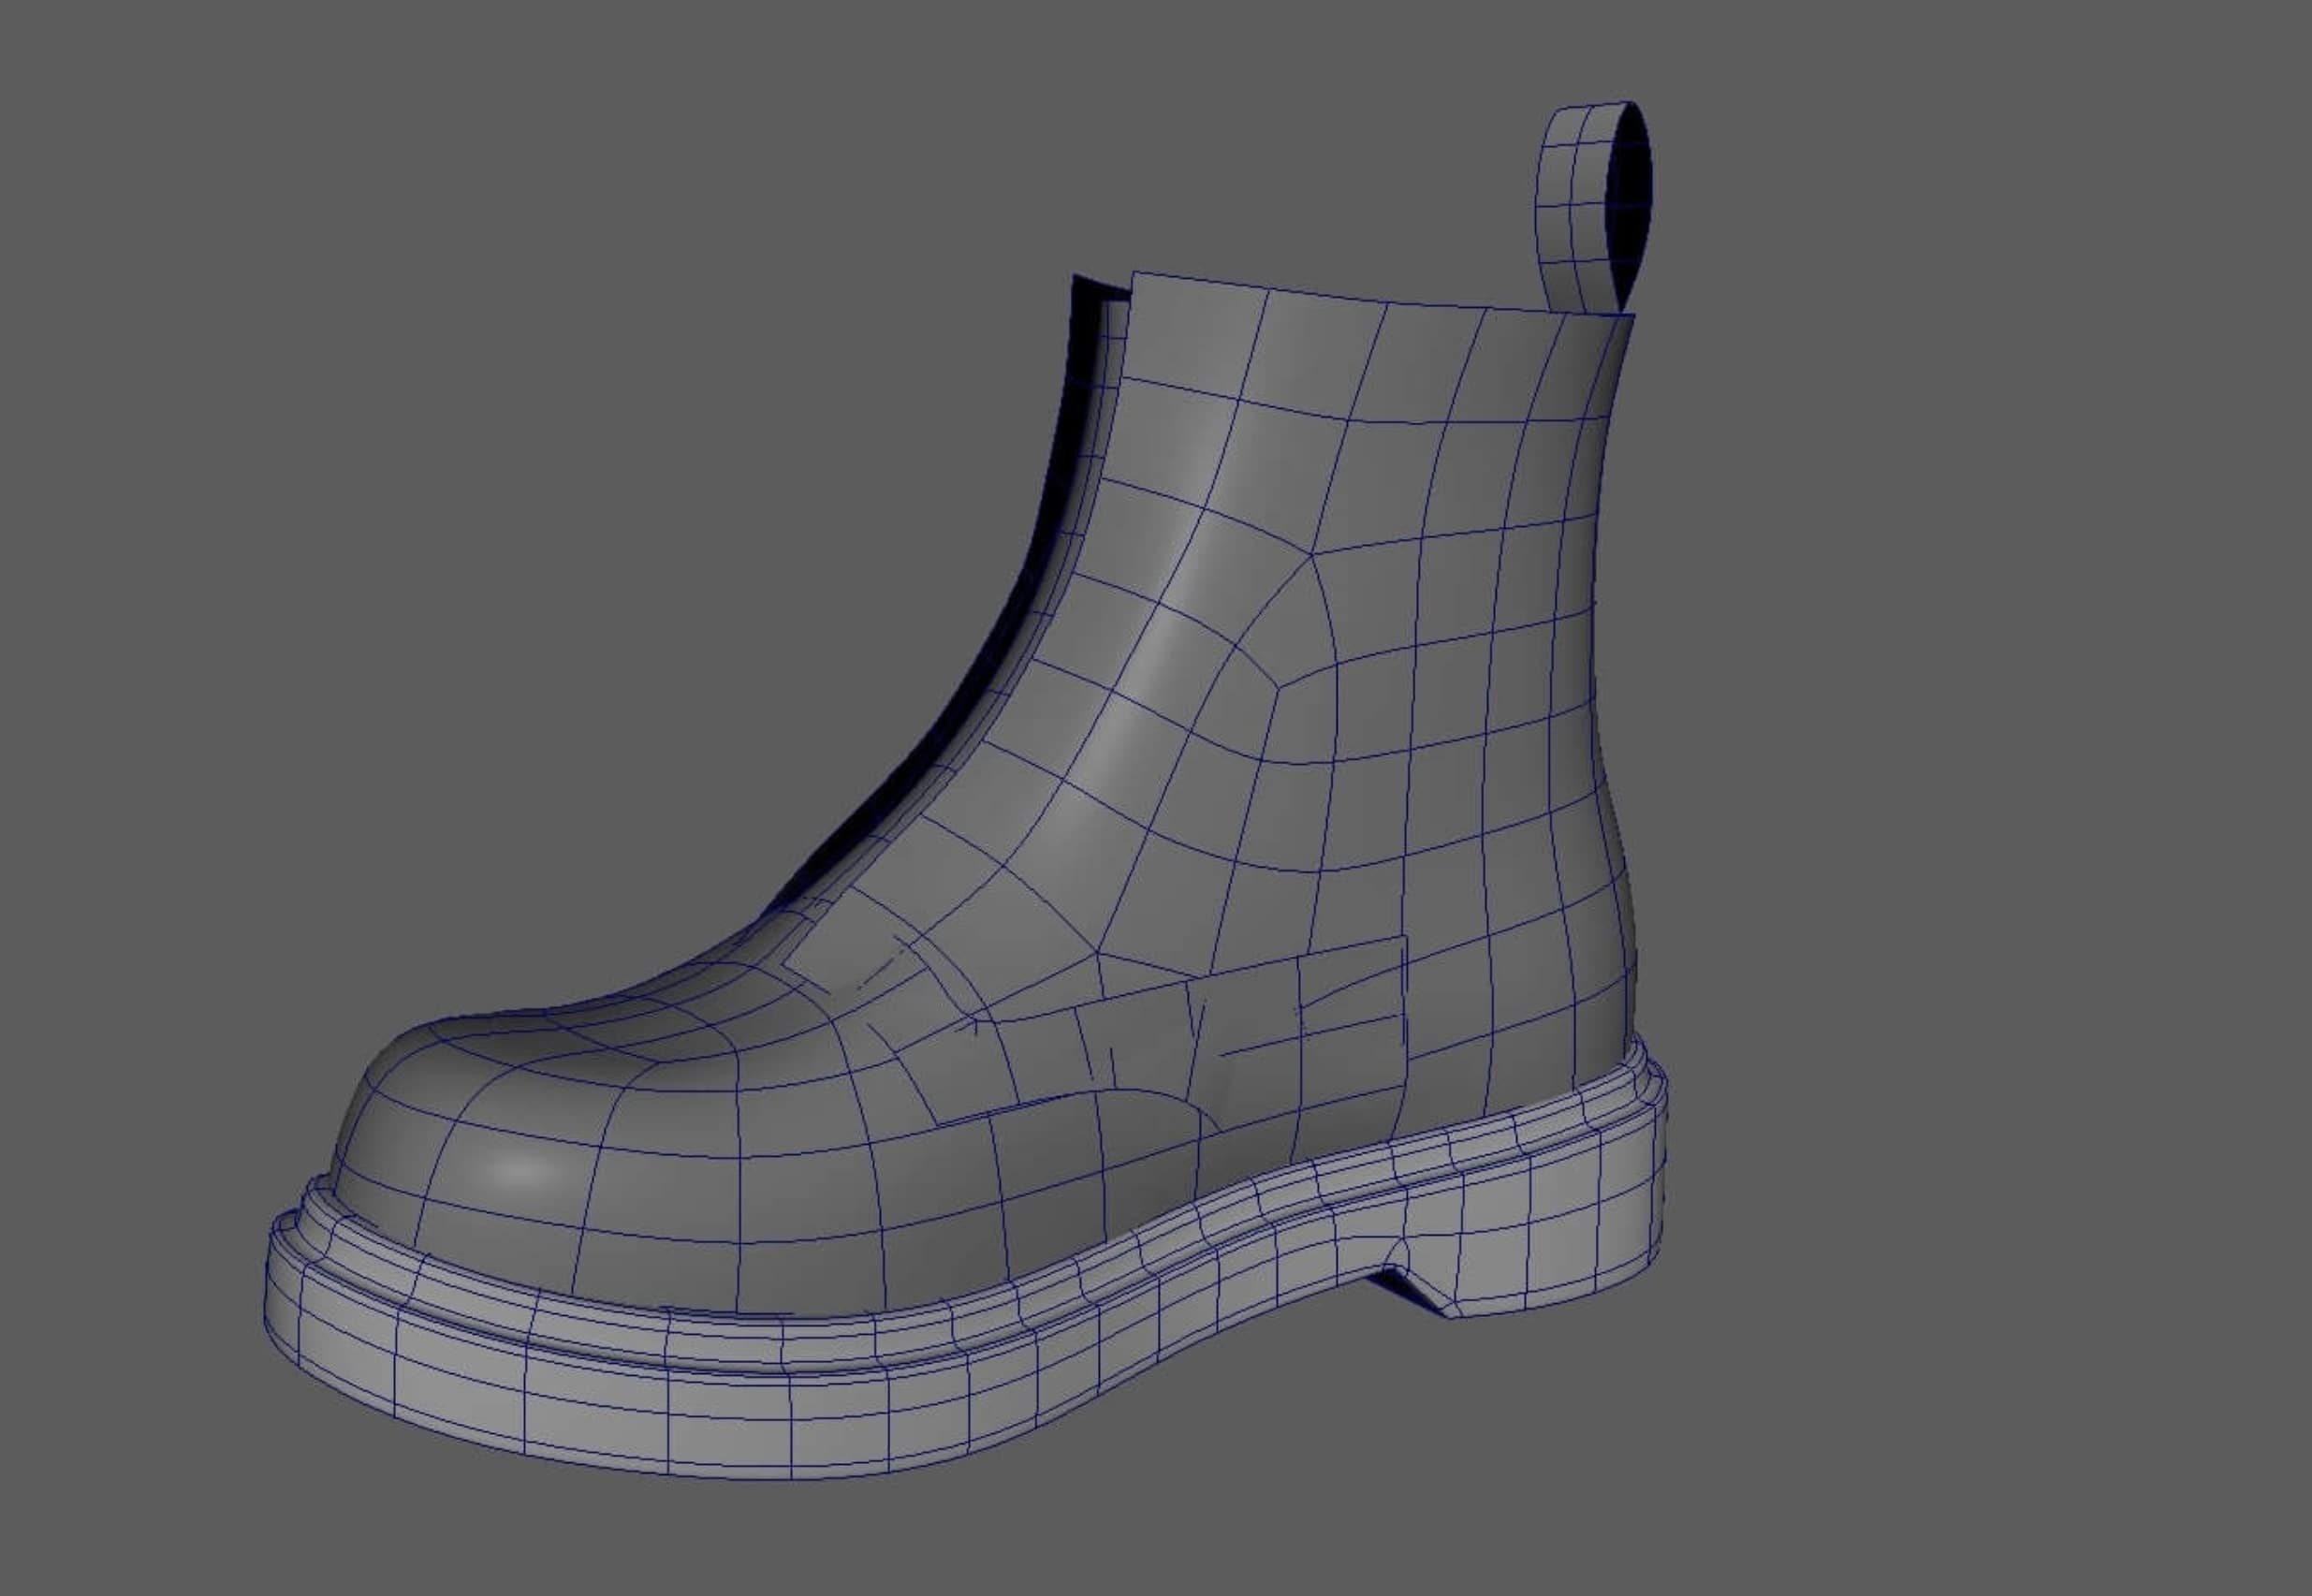
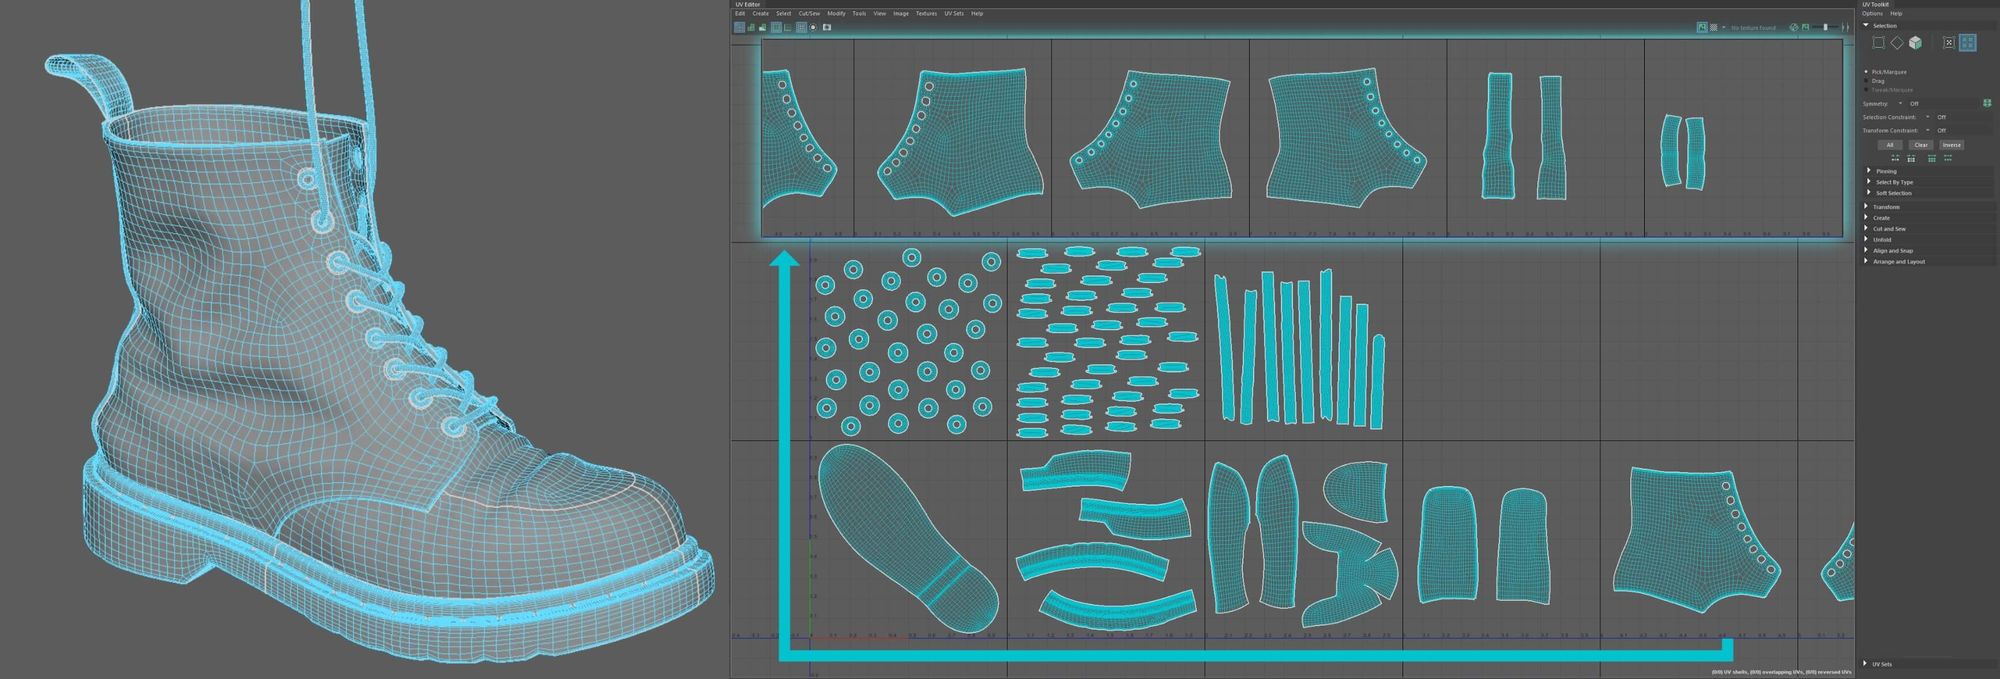
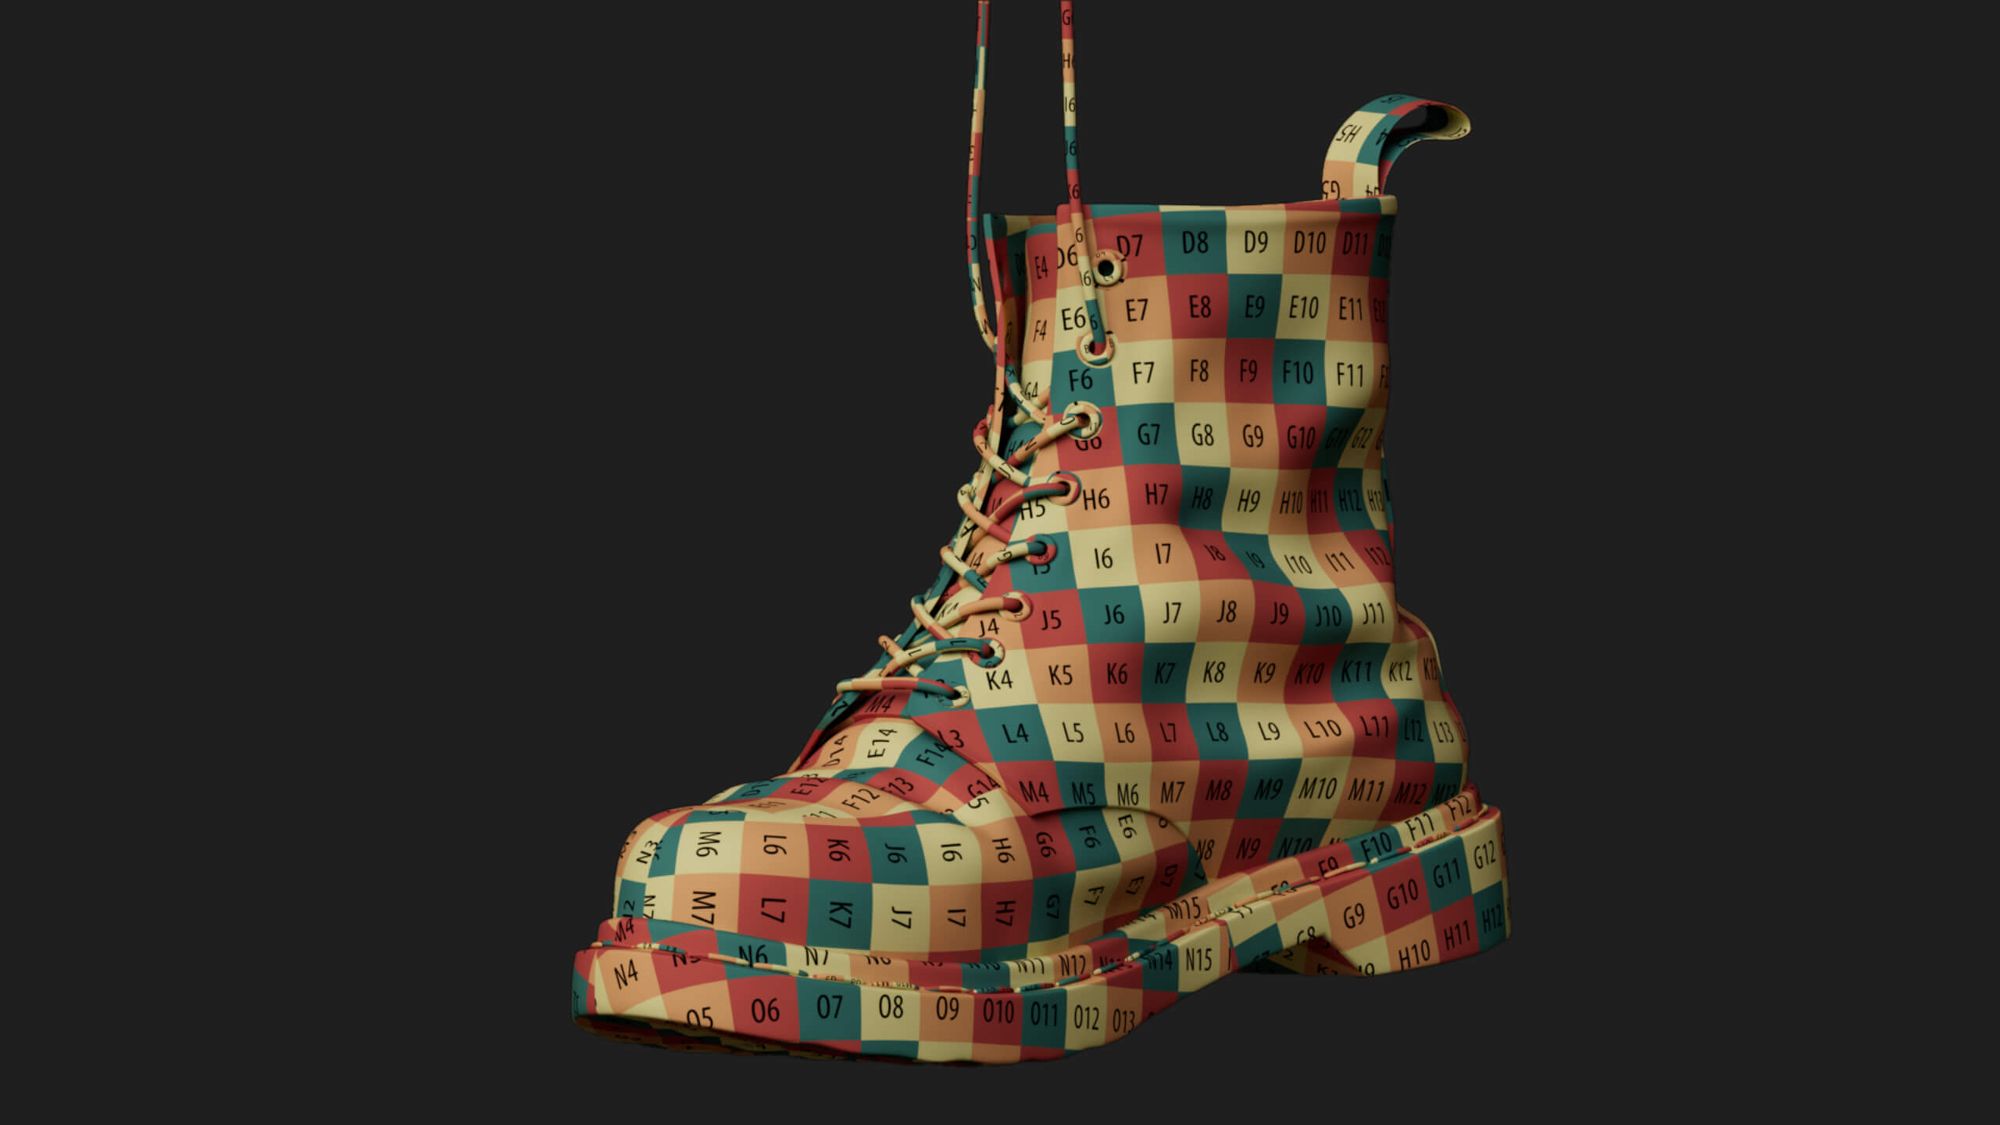
When everything was beveled and clean, I was ready to create the UVs for my model. In retrospect, this is where I would have worked differently with my current knowledge. I think I should have postponed that step until I had finished the sculpting process because the base model might, and indeed did, change. Therefore, I had to unfold and layout the UVs twice. I decided to use 13 UDIMs after establishing the rough camera shots.

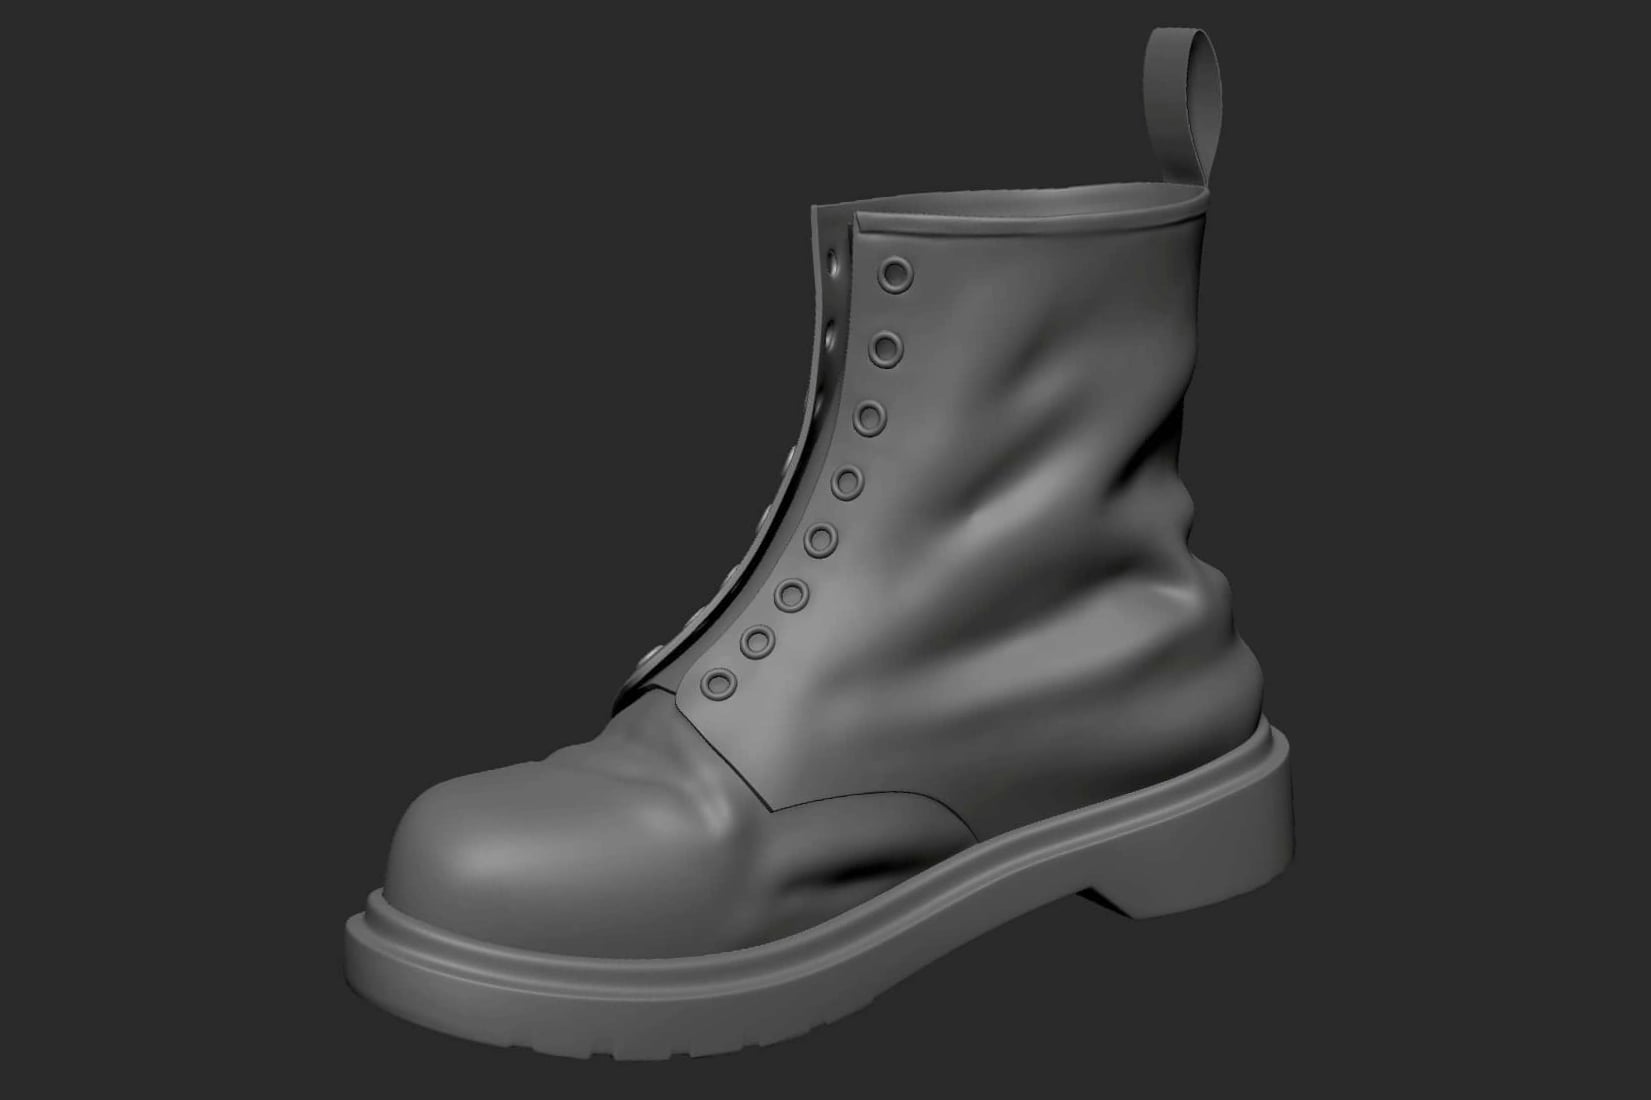
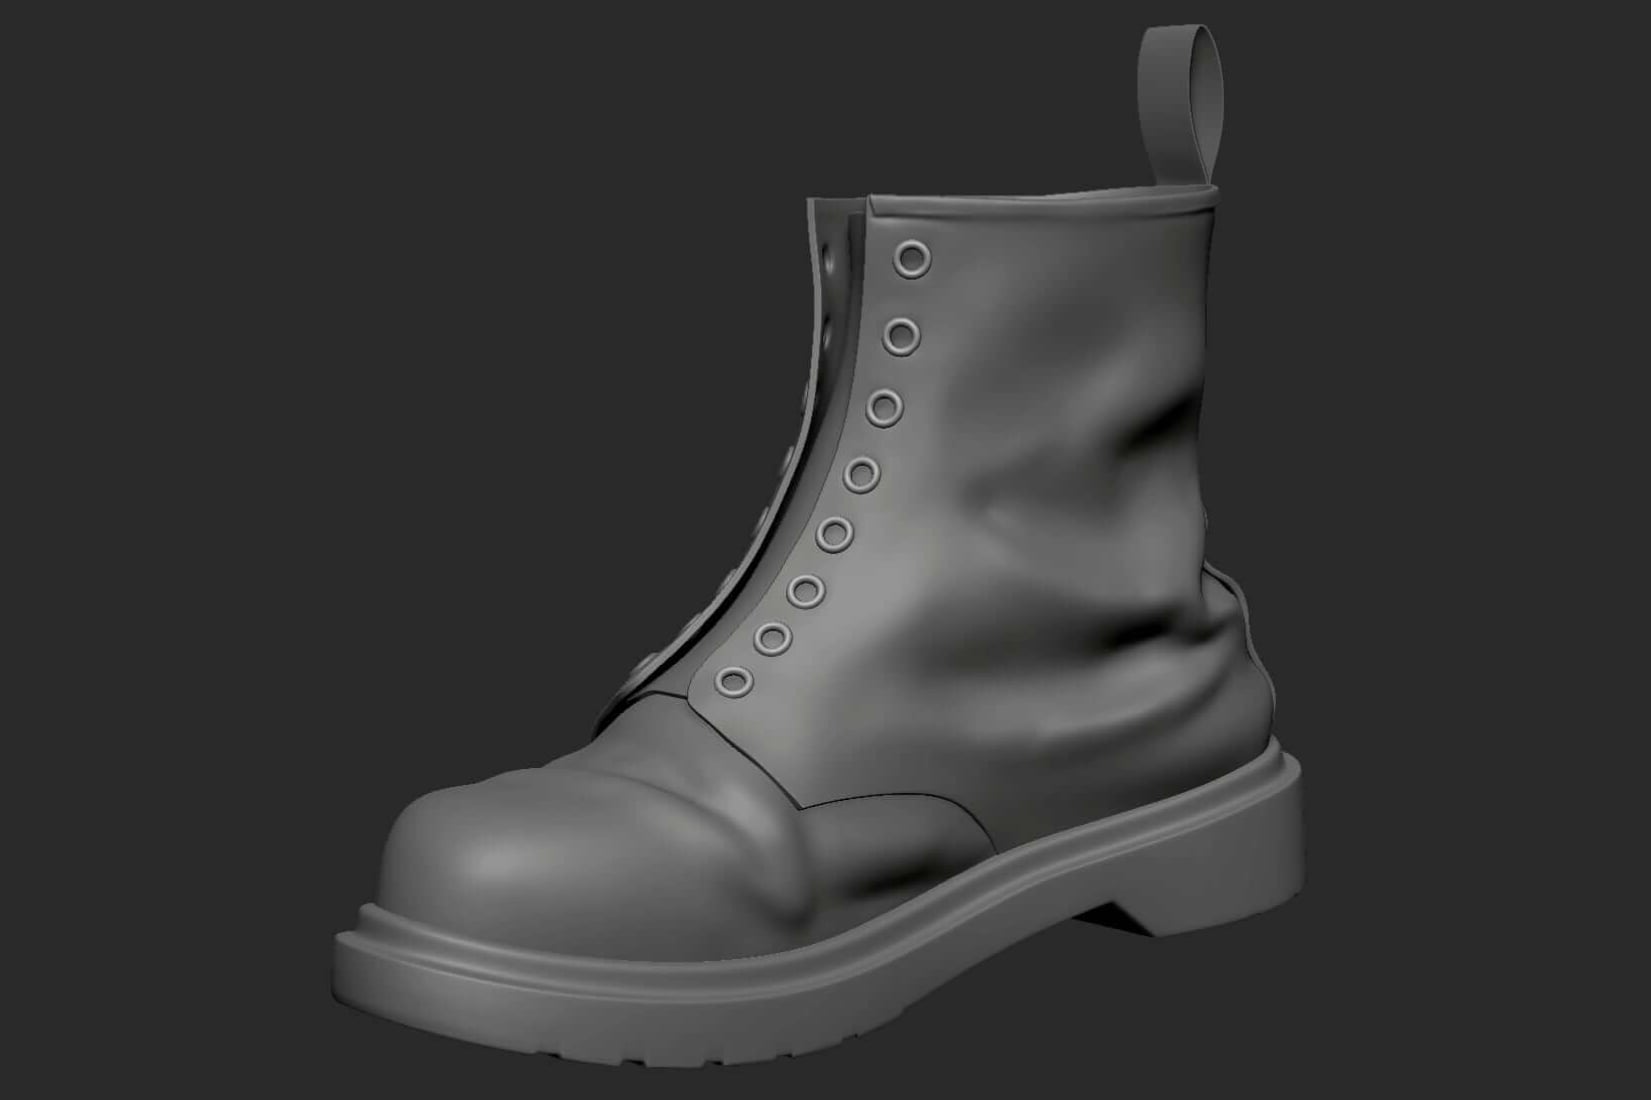
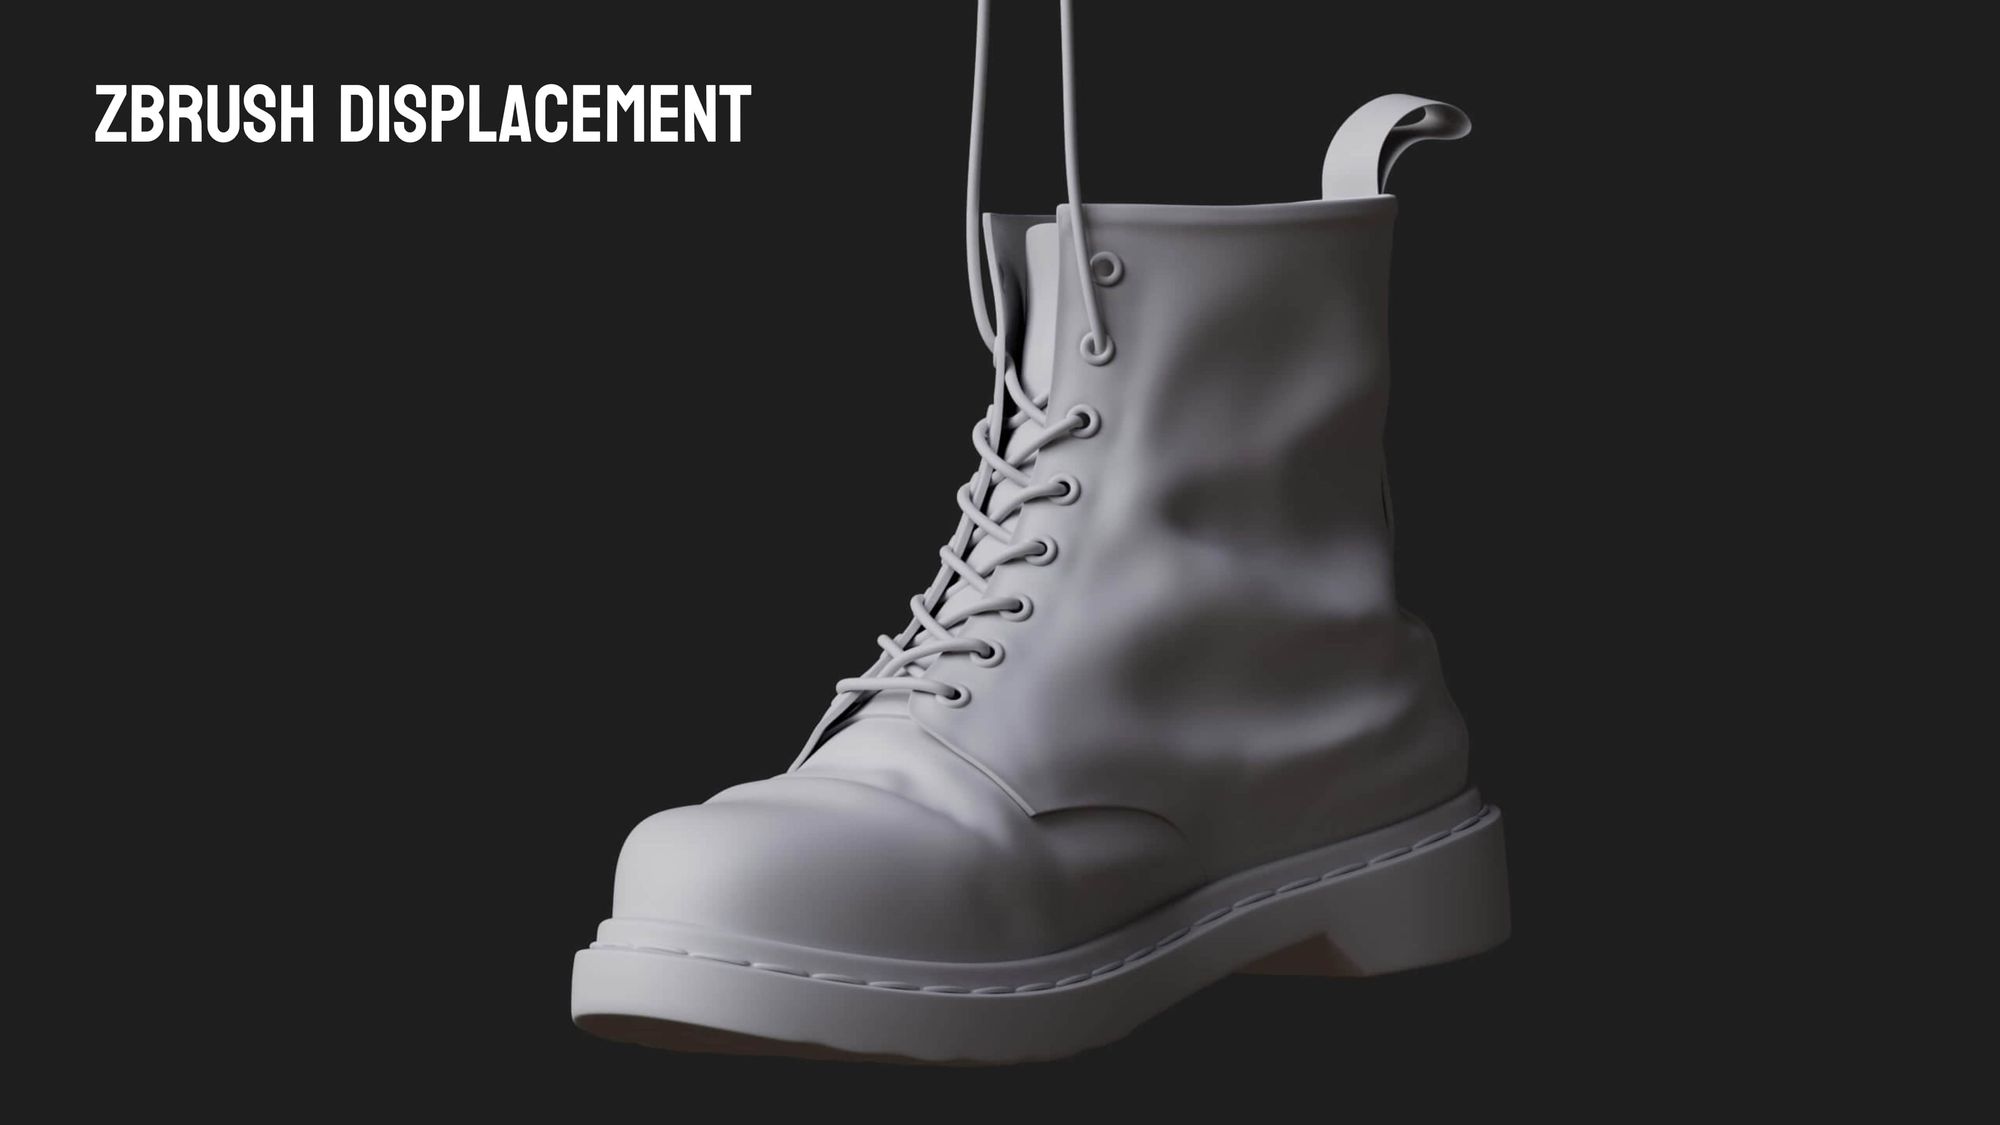
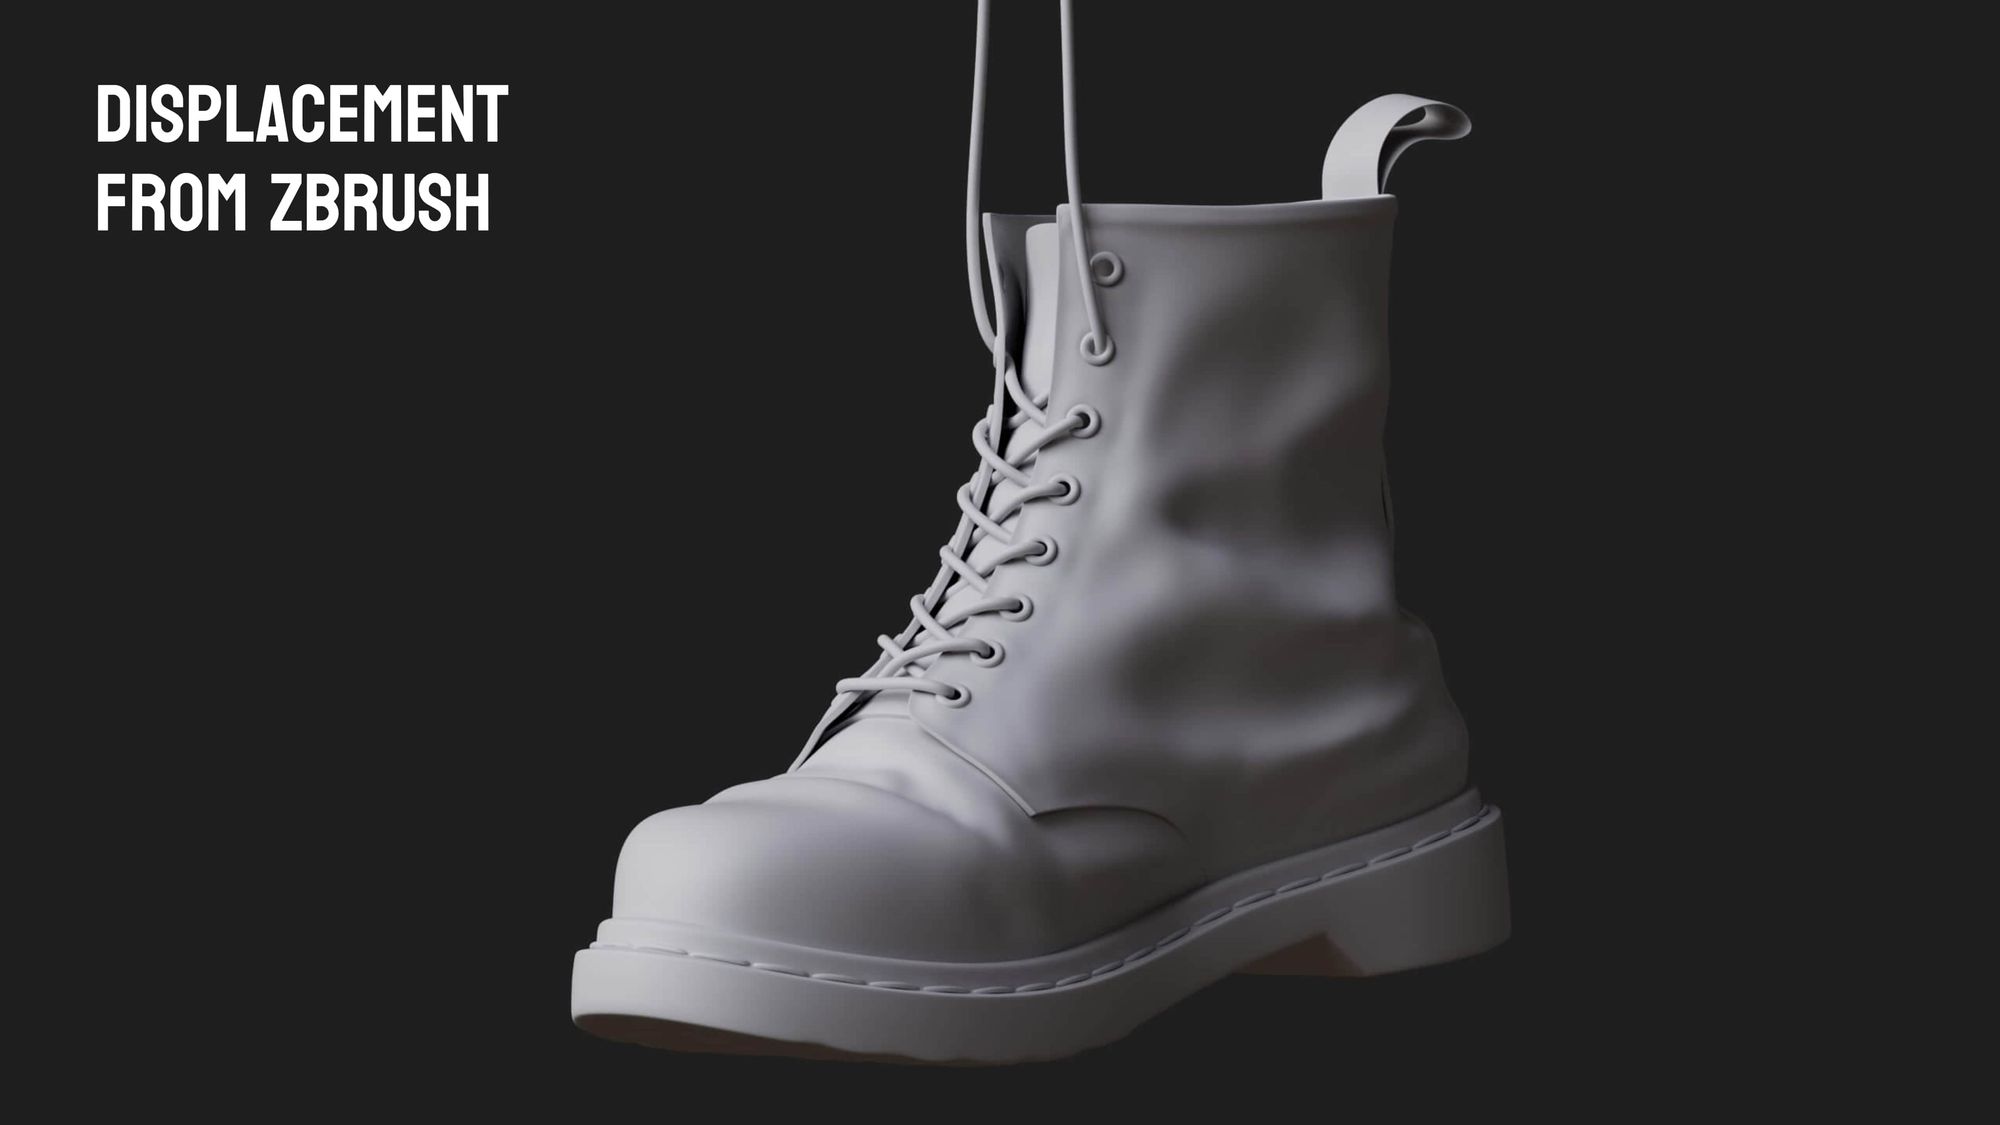
Having imported my model into ZBrush, I started to consult my references for the wear and tear. I studied the folds of the boots, taking great inspiration from the pair I was wearing daily at this point. Using the standard brush was my go-to and carried me through most of the sculpting process. I sculpted the folds using one main reference.
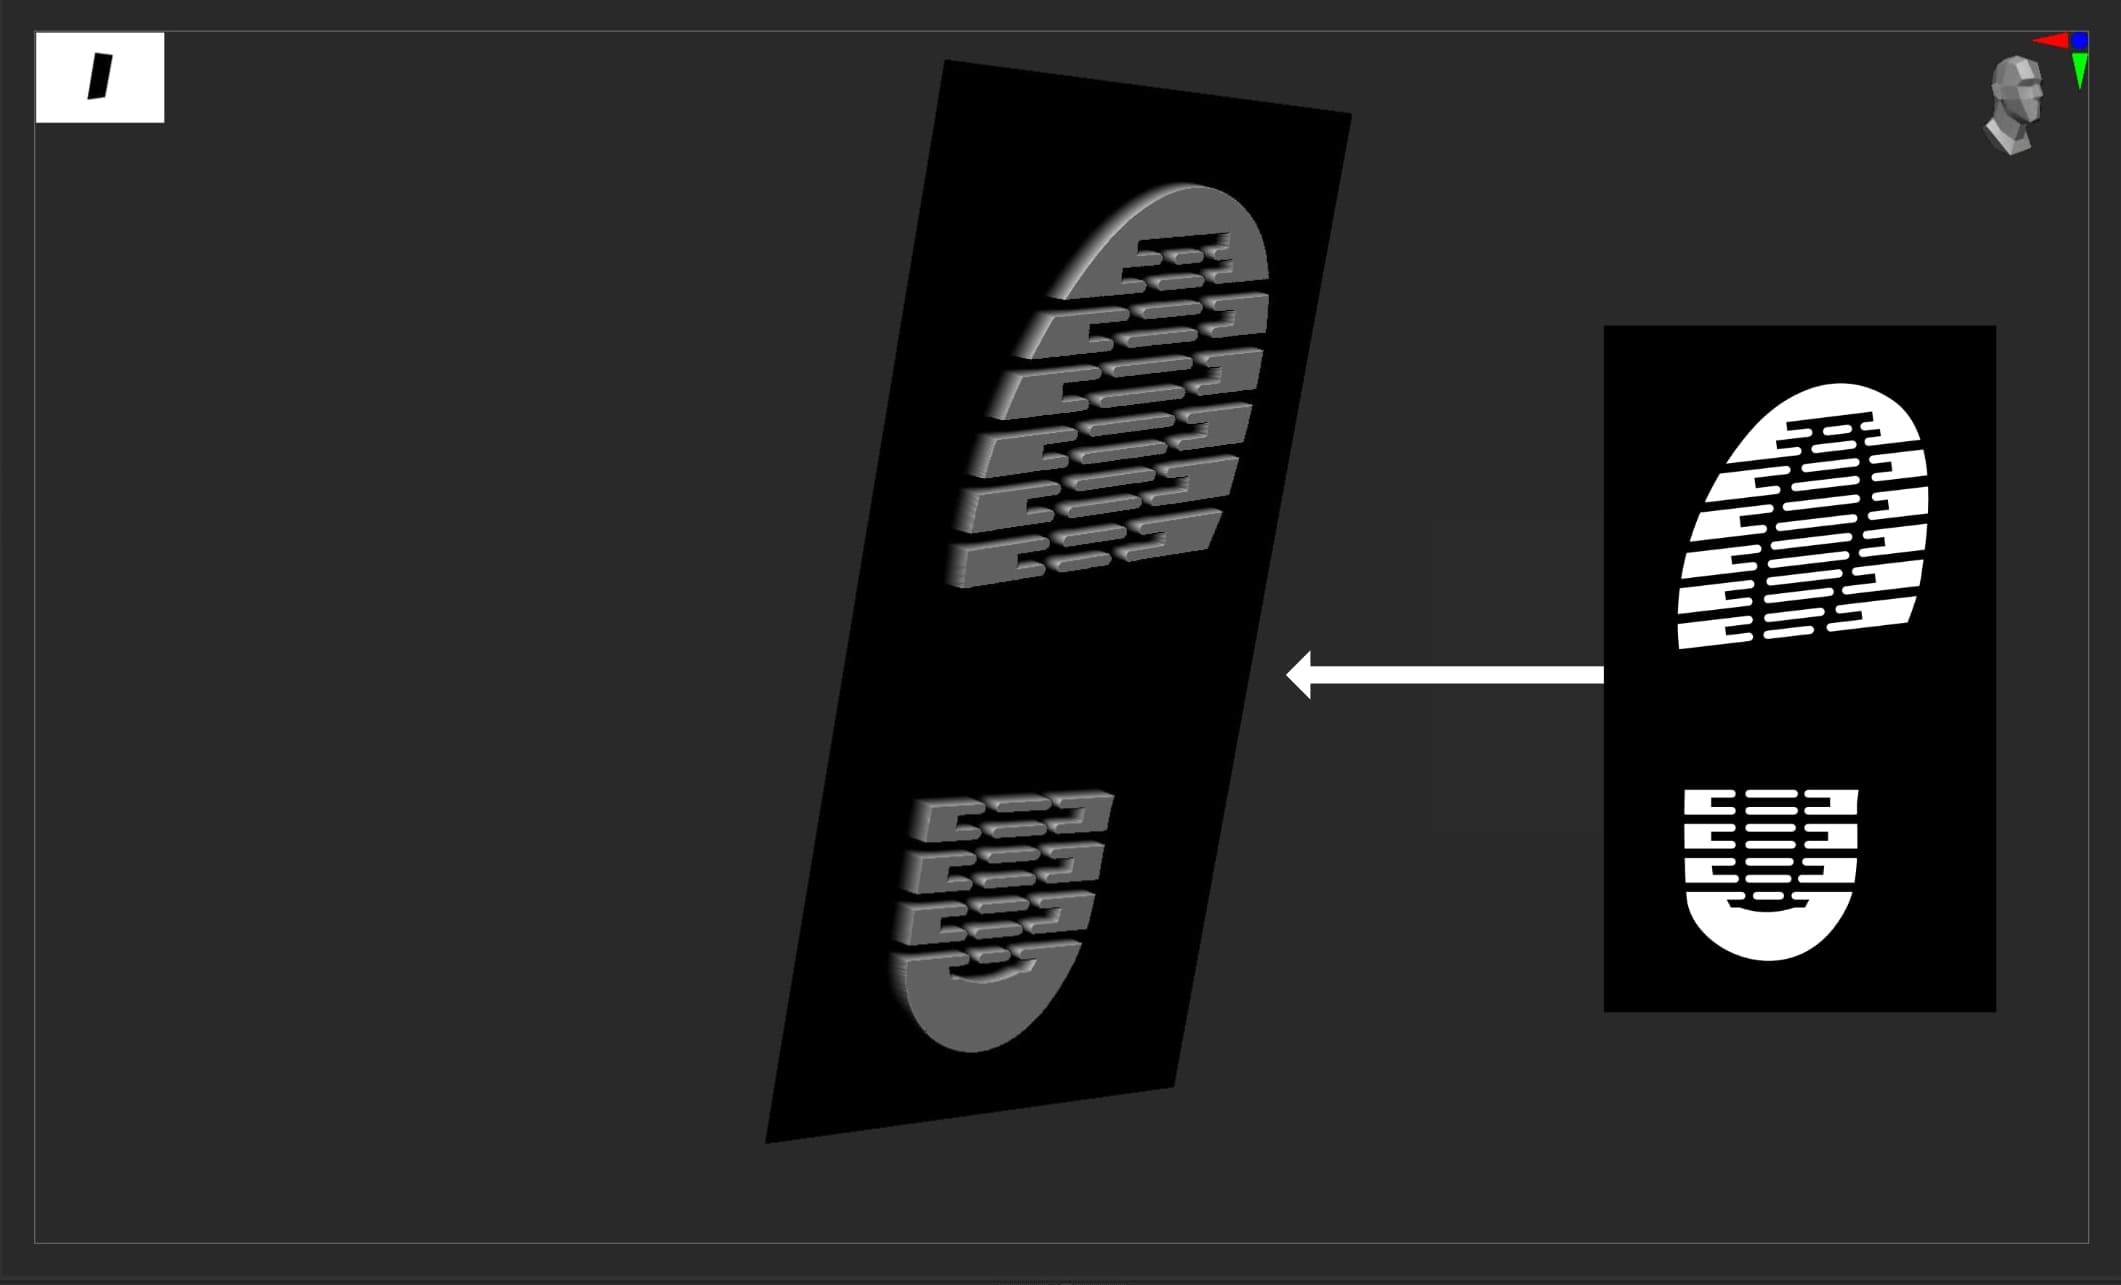
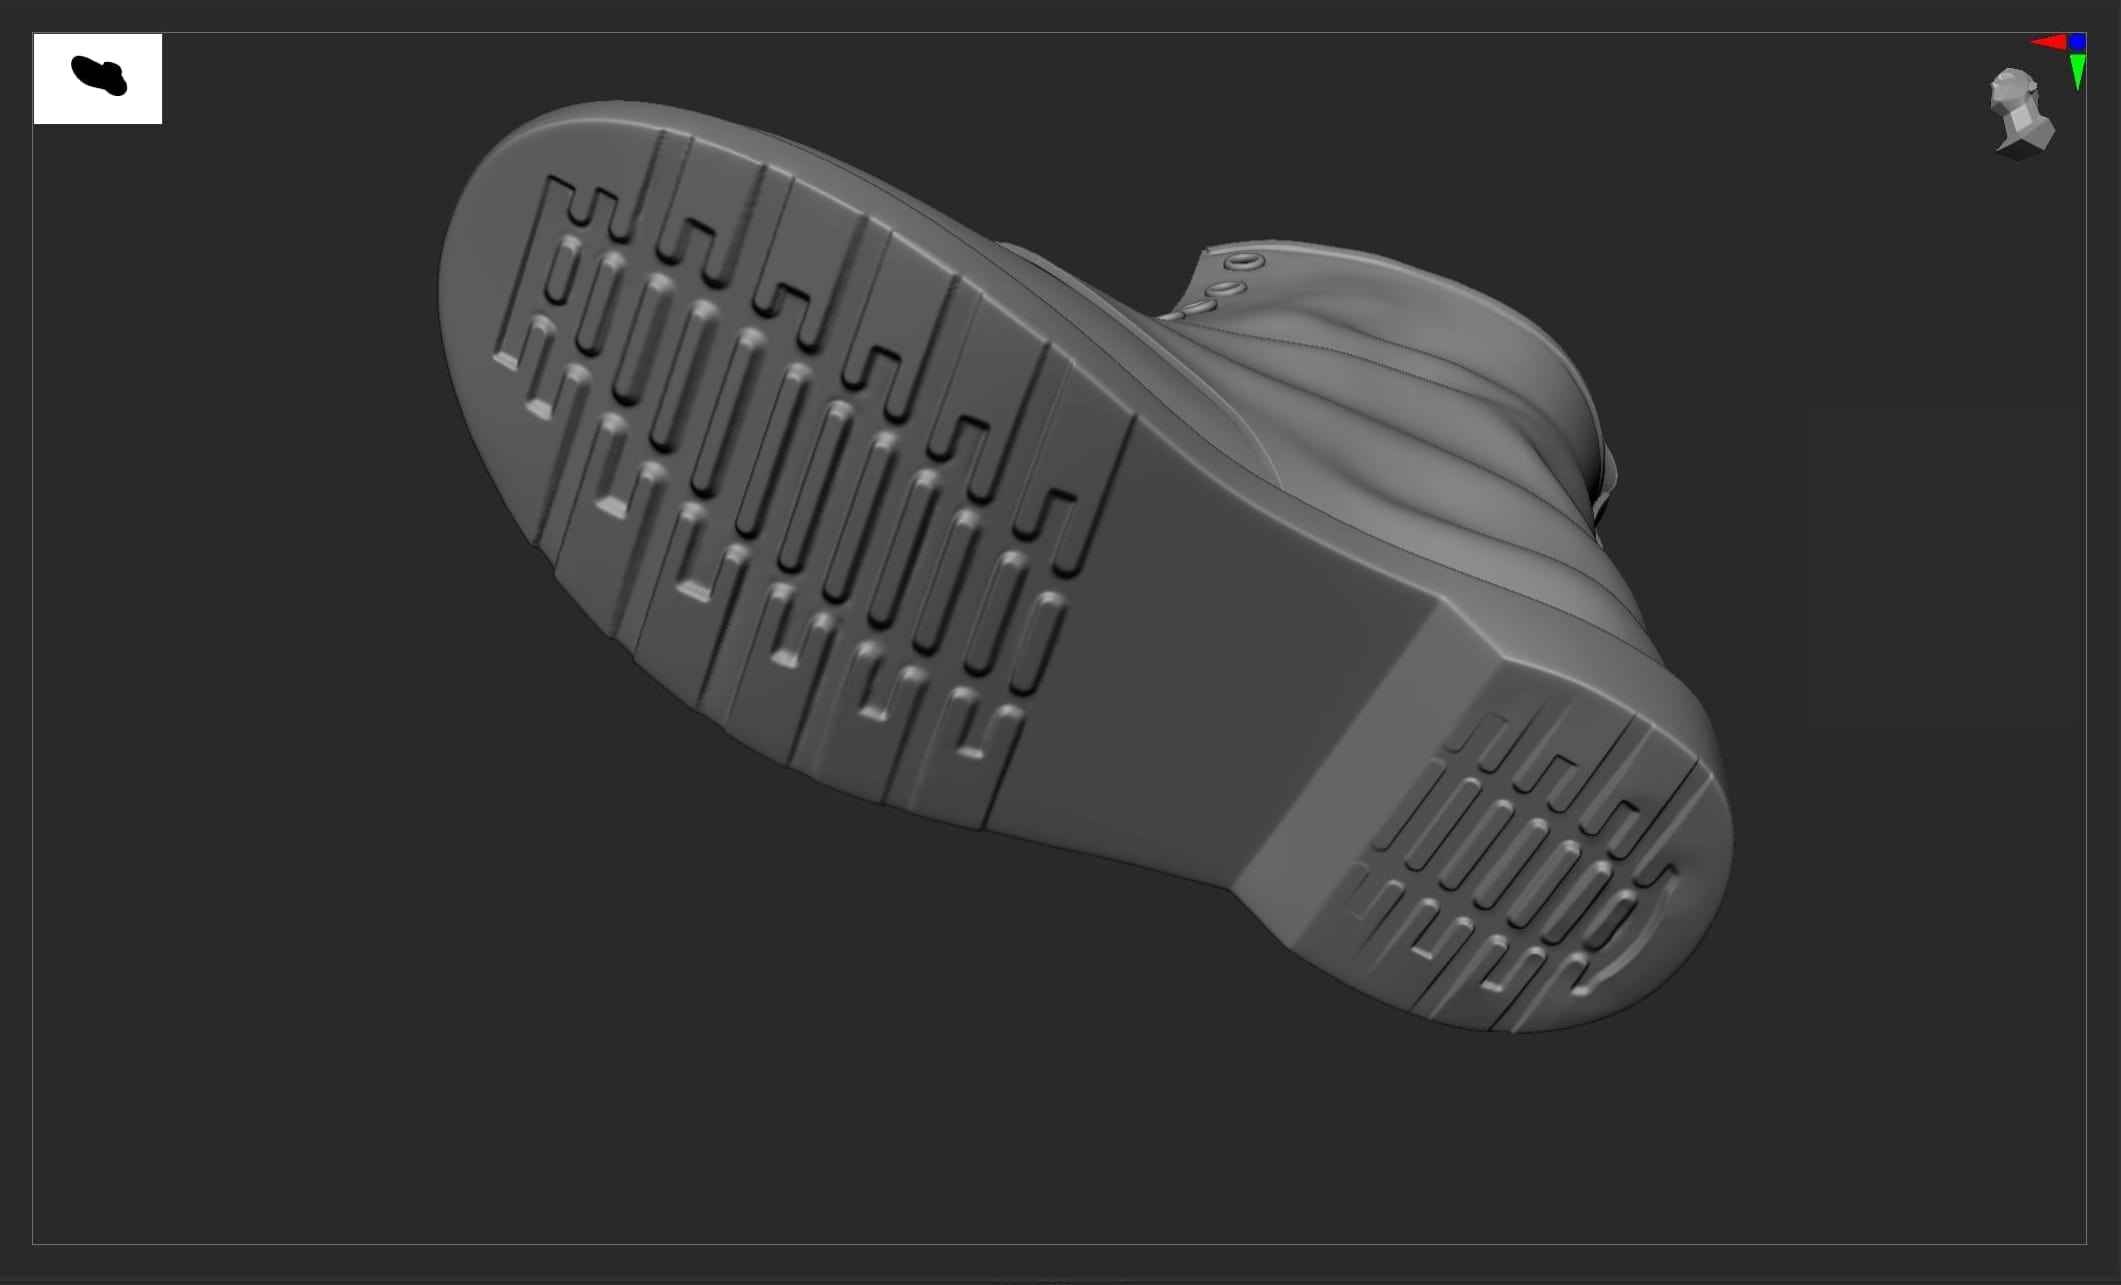
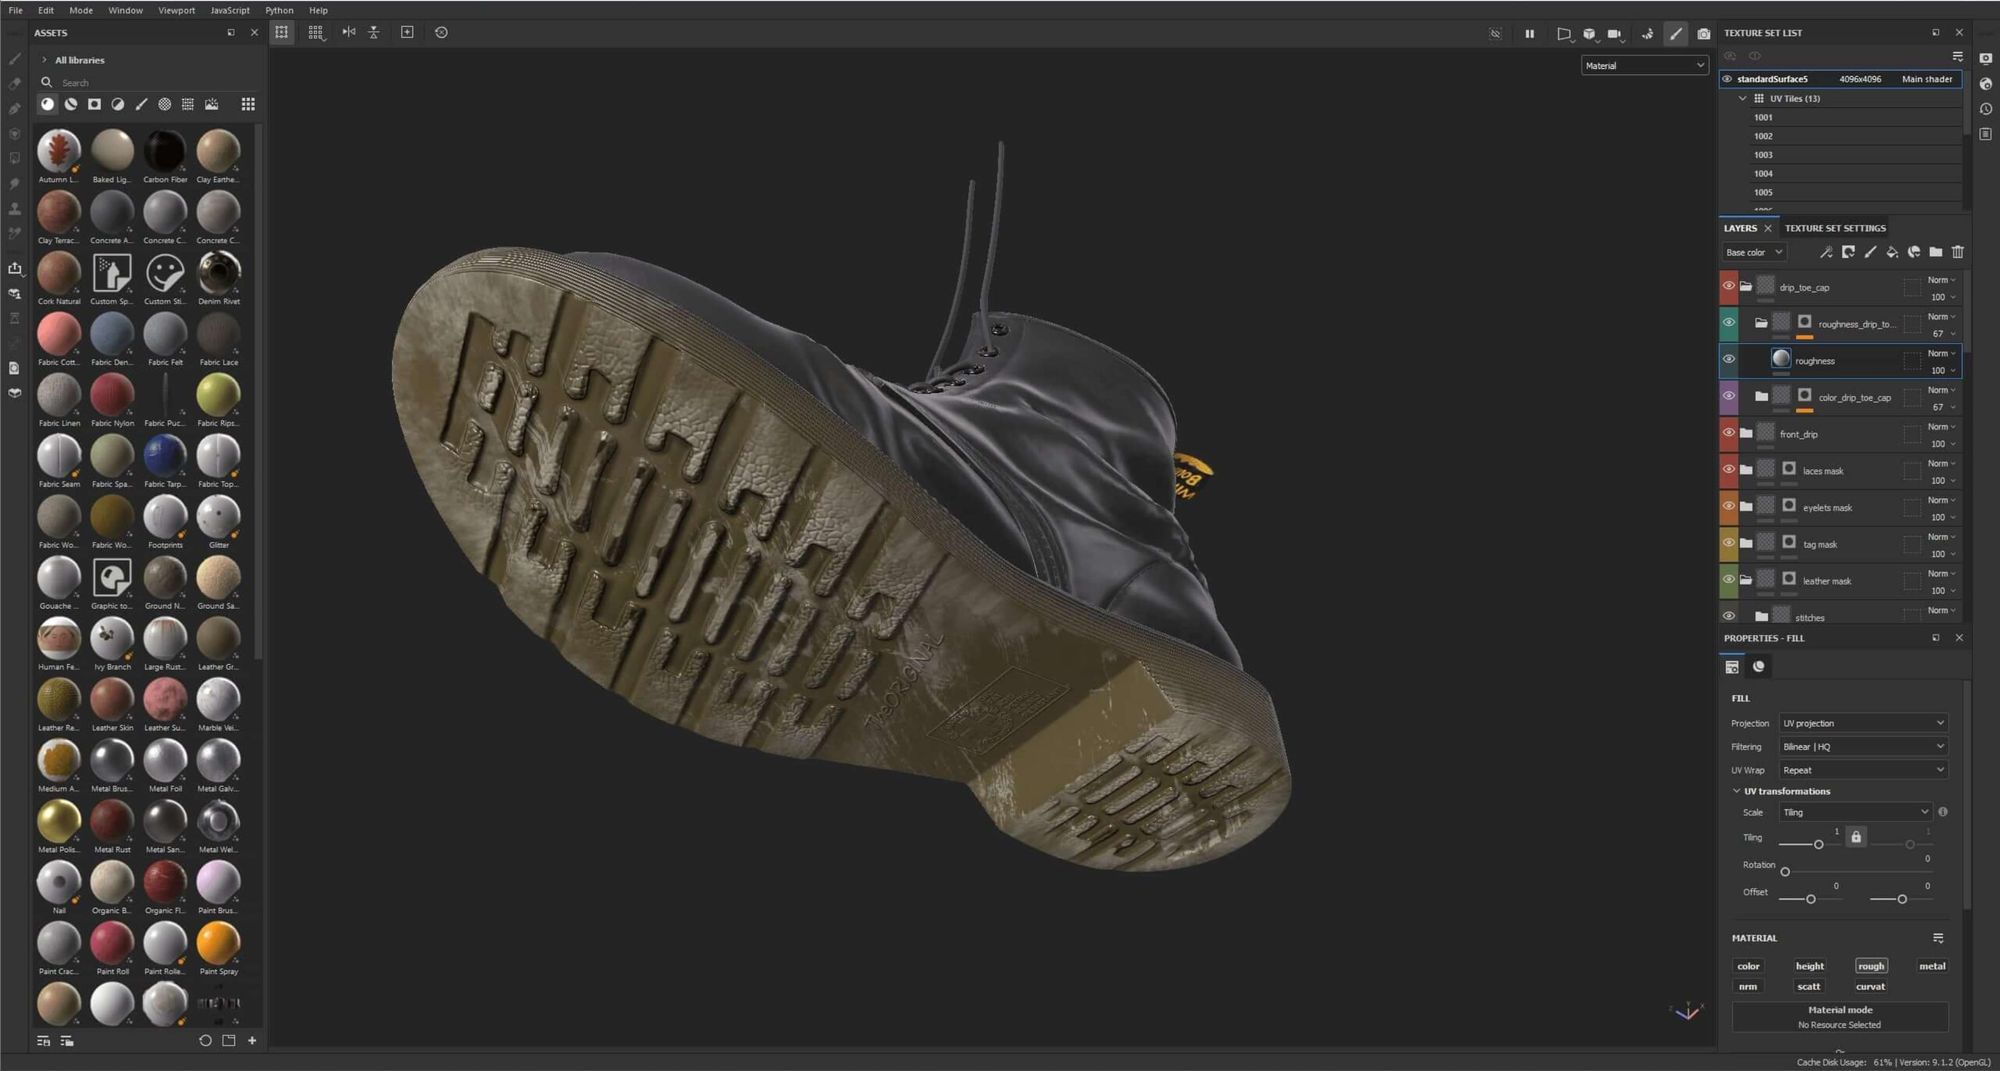
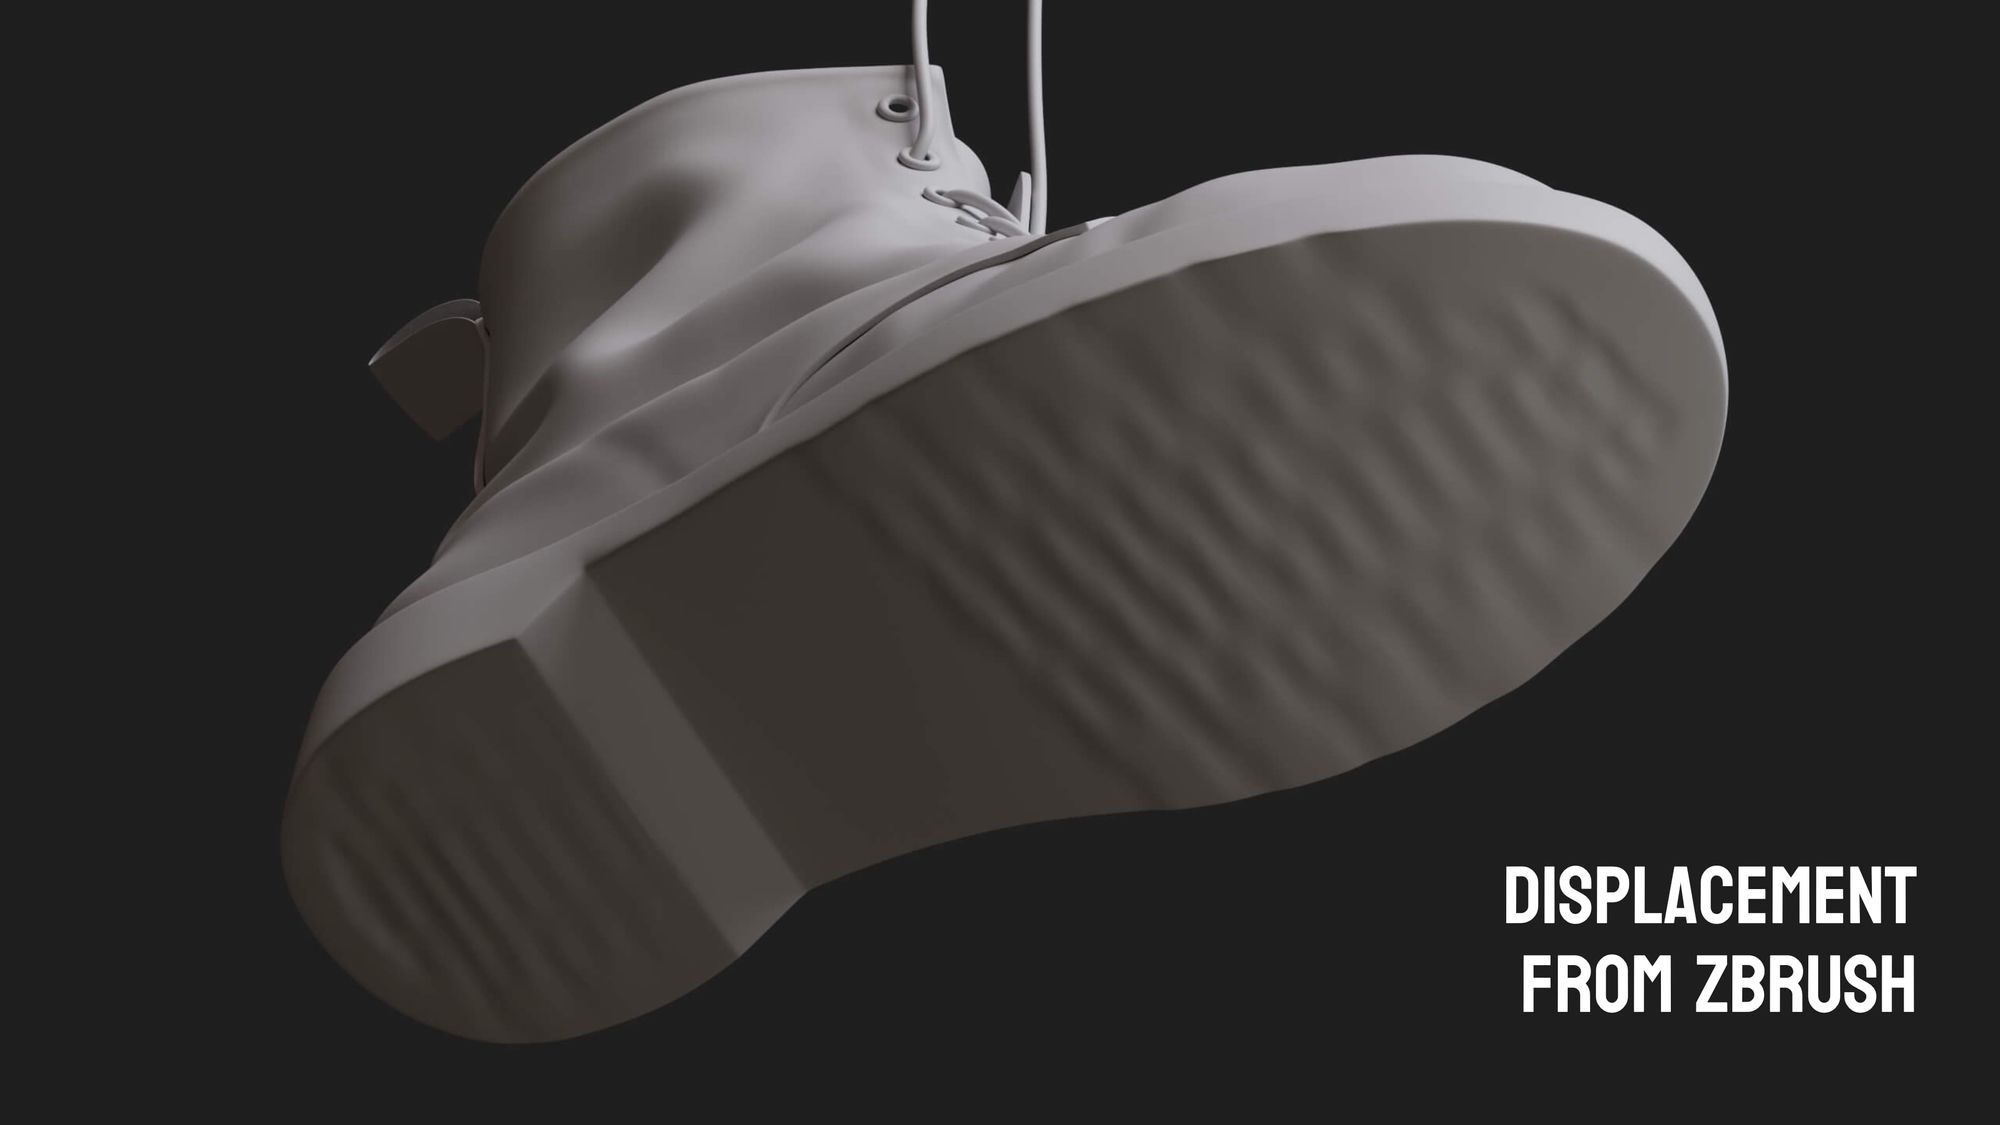
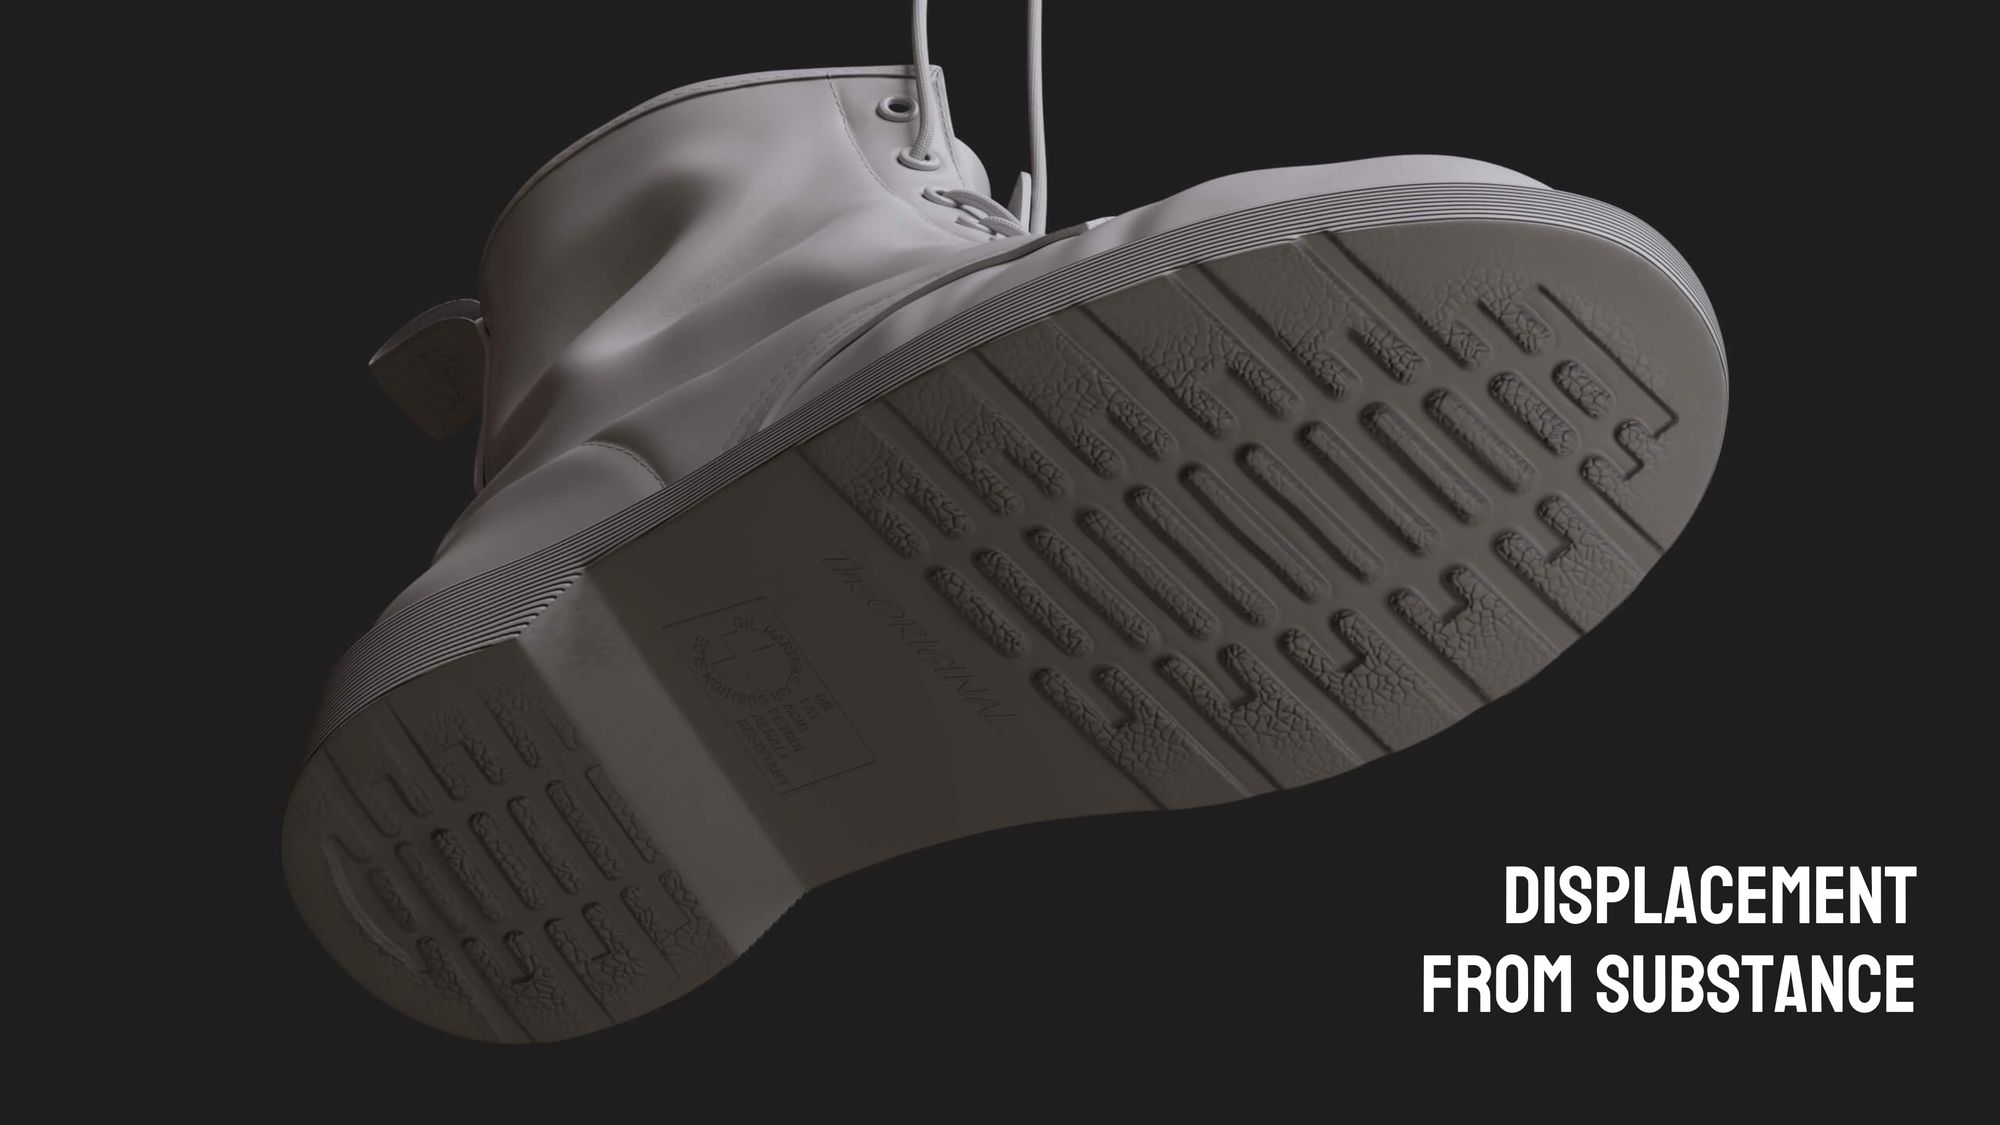
For the underside of the sole, I utilised an alpha I created from photos of the sole's underside as a stencil. I planned to use Substance 3D Painter's warp projection tool for the pattern on the edge of the sole, so I set it aside for the time being. Instead, I focused on refining the wrinkles, deforming the shoe's shape, and adding details, including the border at the top of the boot shaft. Looking back, it might have been better to add this part as separate geometry, but I managed to achieve the desired effect by simulating it with height and normal.
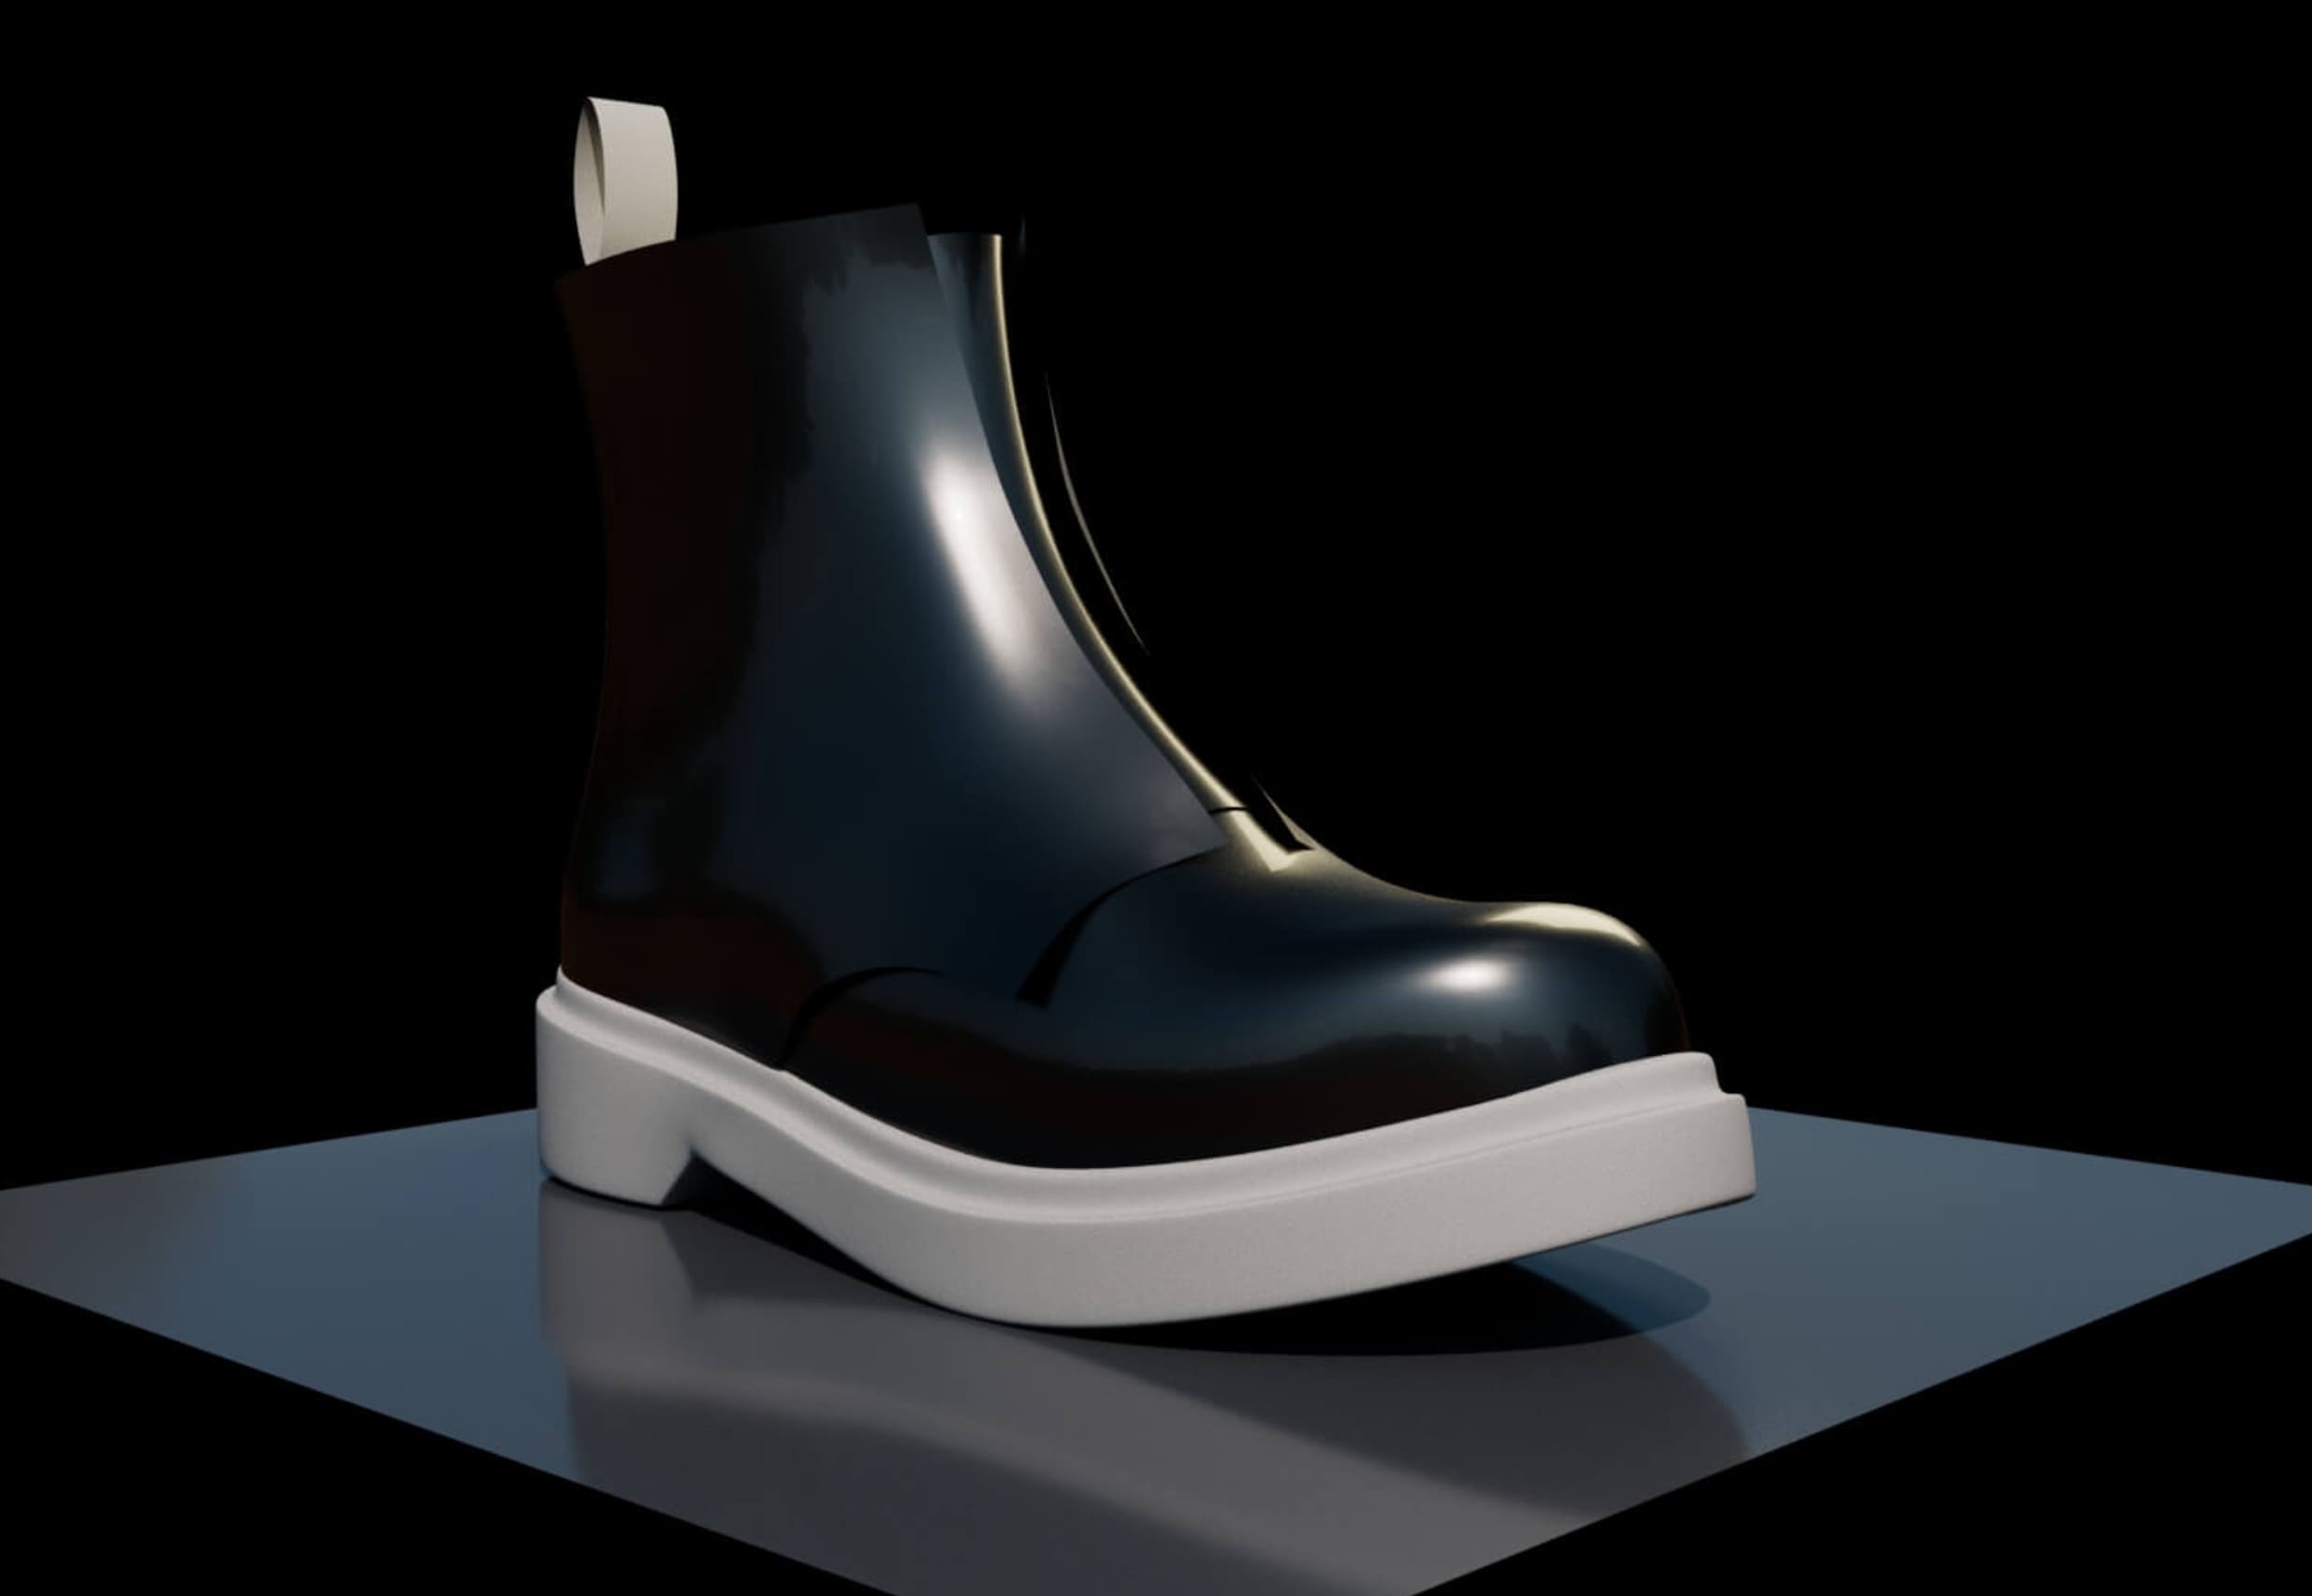
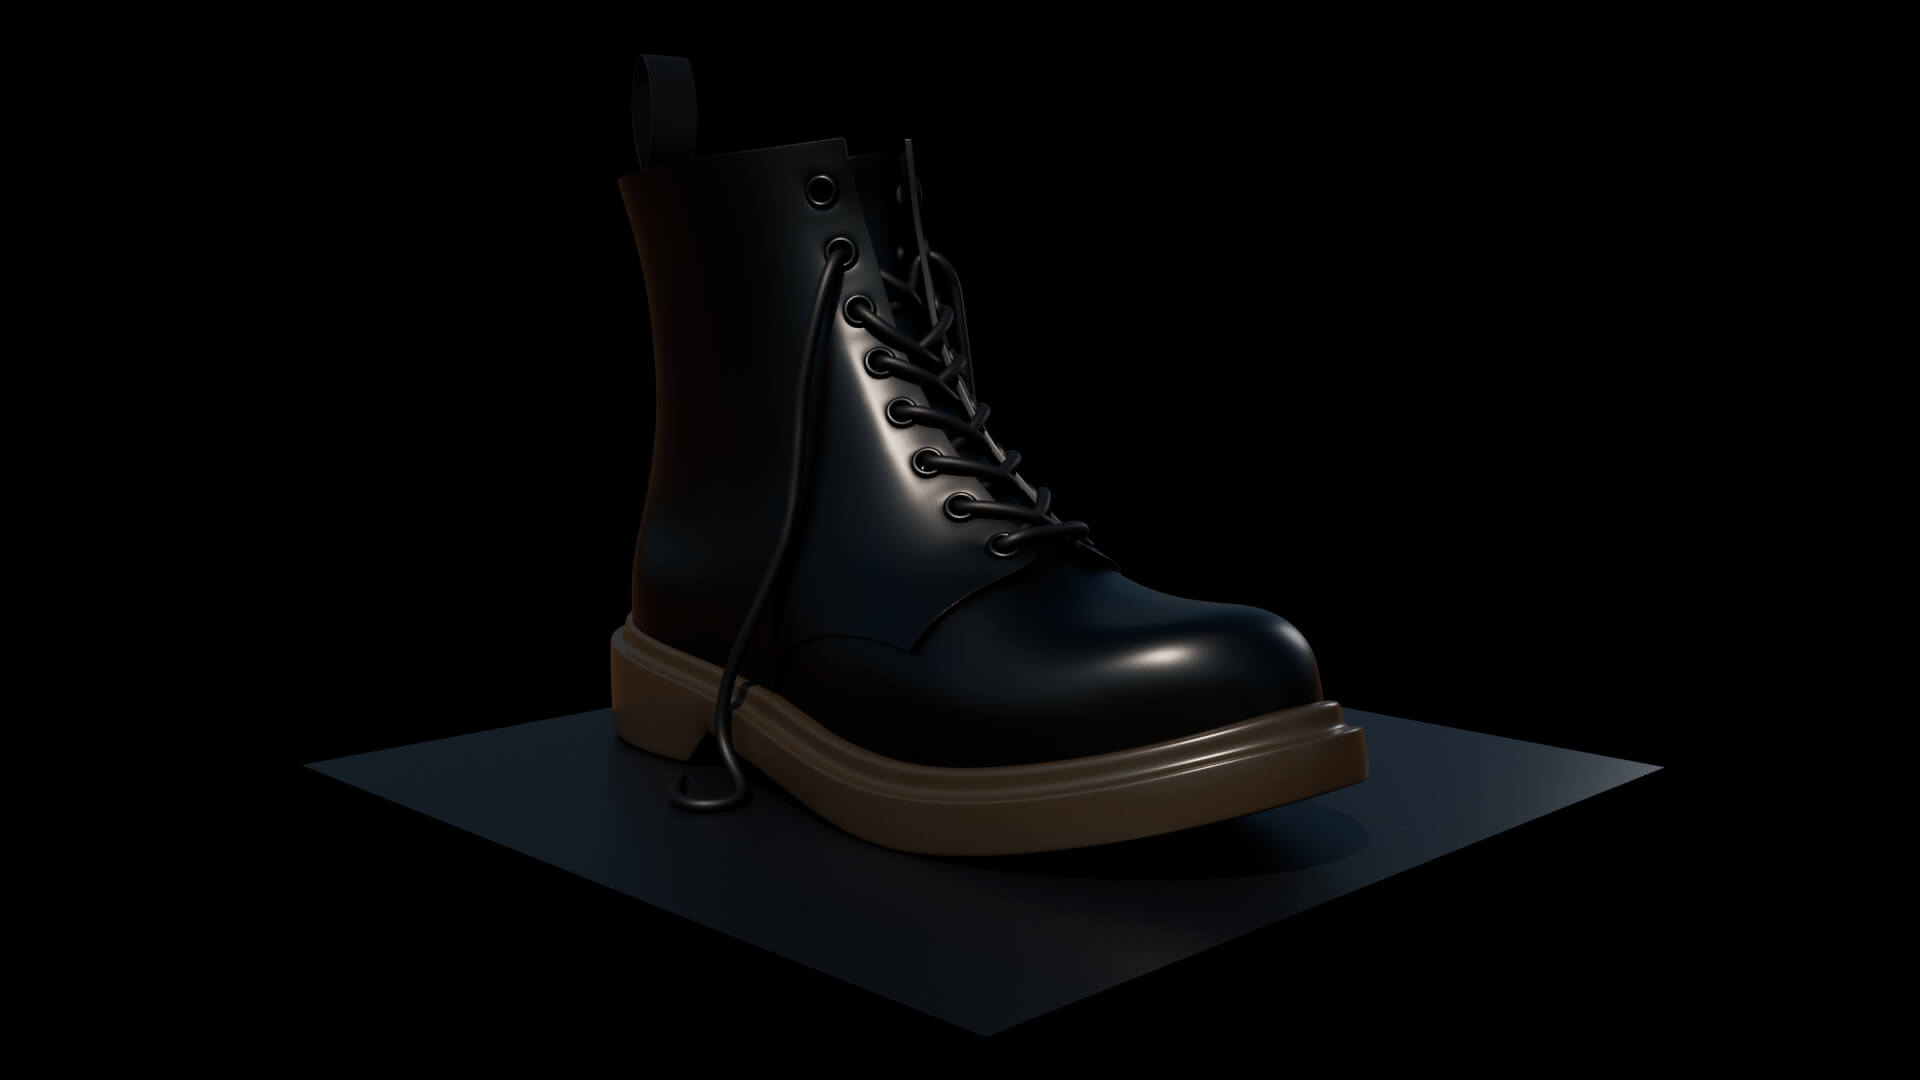
As I deformed the boot, I noticed that the laces no longer aligned perfectly with the shoe, and adjusting them in ZBrush proved to be challenging. I decided to export my low-poly model to Maya and made the necessary adjustments to the shoelaces there. At this point, I changed my mind about the presentation and opted to have the shoe hanging from an electricity line. My procedural workflow for the laces came in handy, and modifying the curve in Maya proved to be a straightforward solution.


Once satisfied with the sculpt, I prepared to bake the displacement map. However, I realised that the base mesh had deformed significantly, necessitating another round of UV unfolding to prevent stretching and errors in the displacement map.
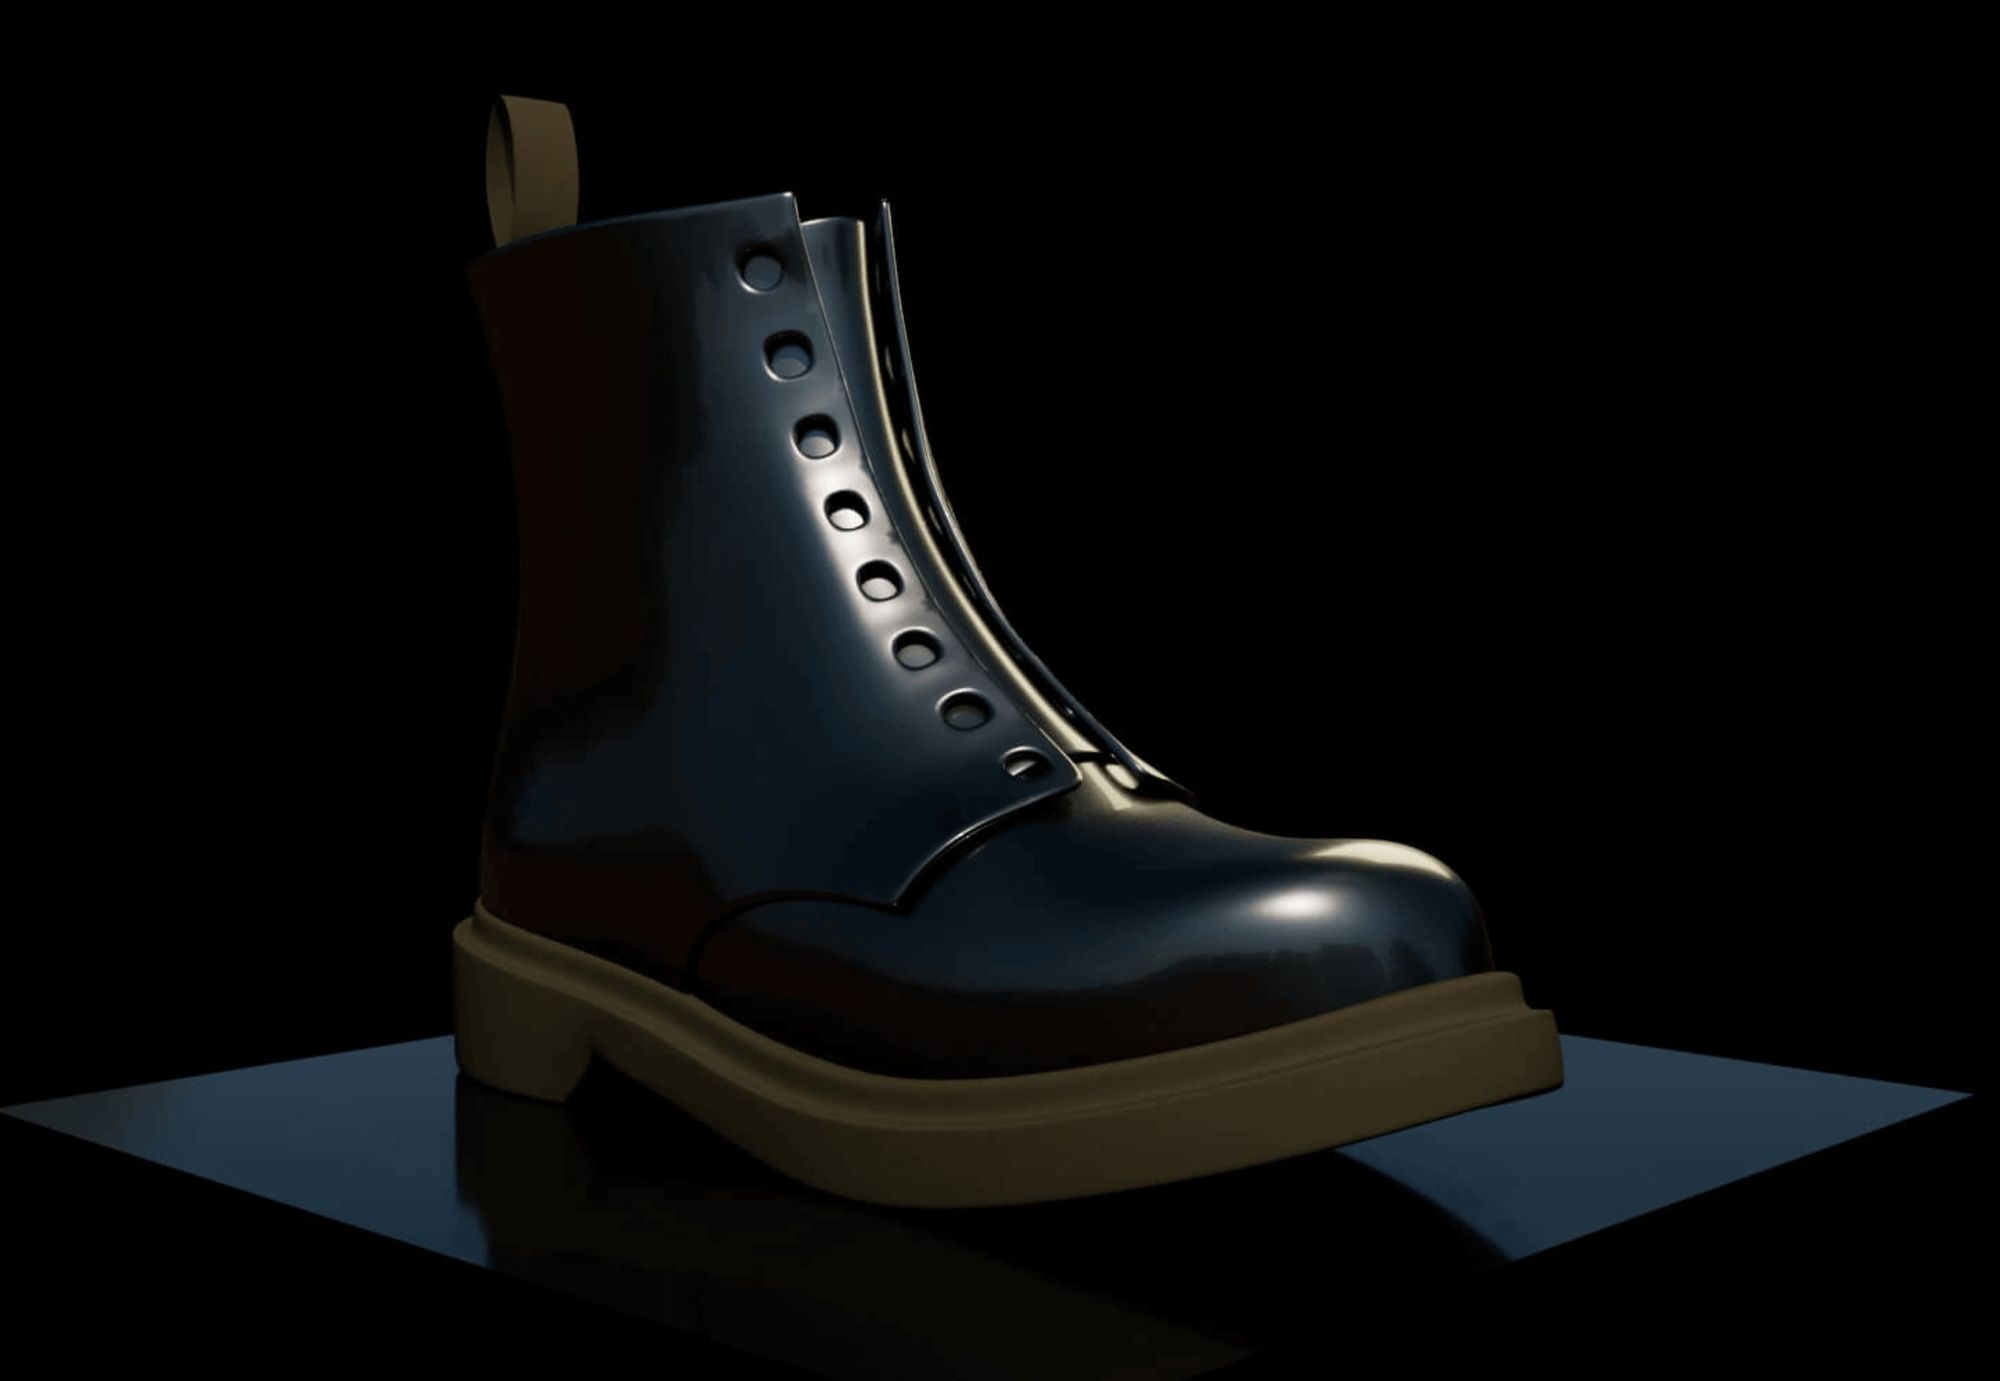
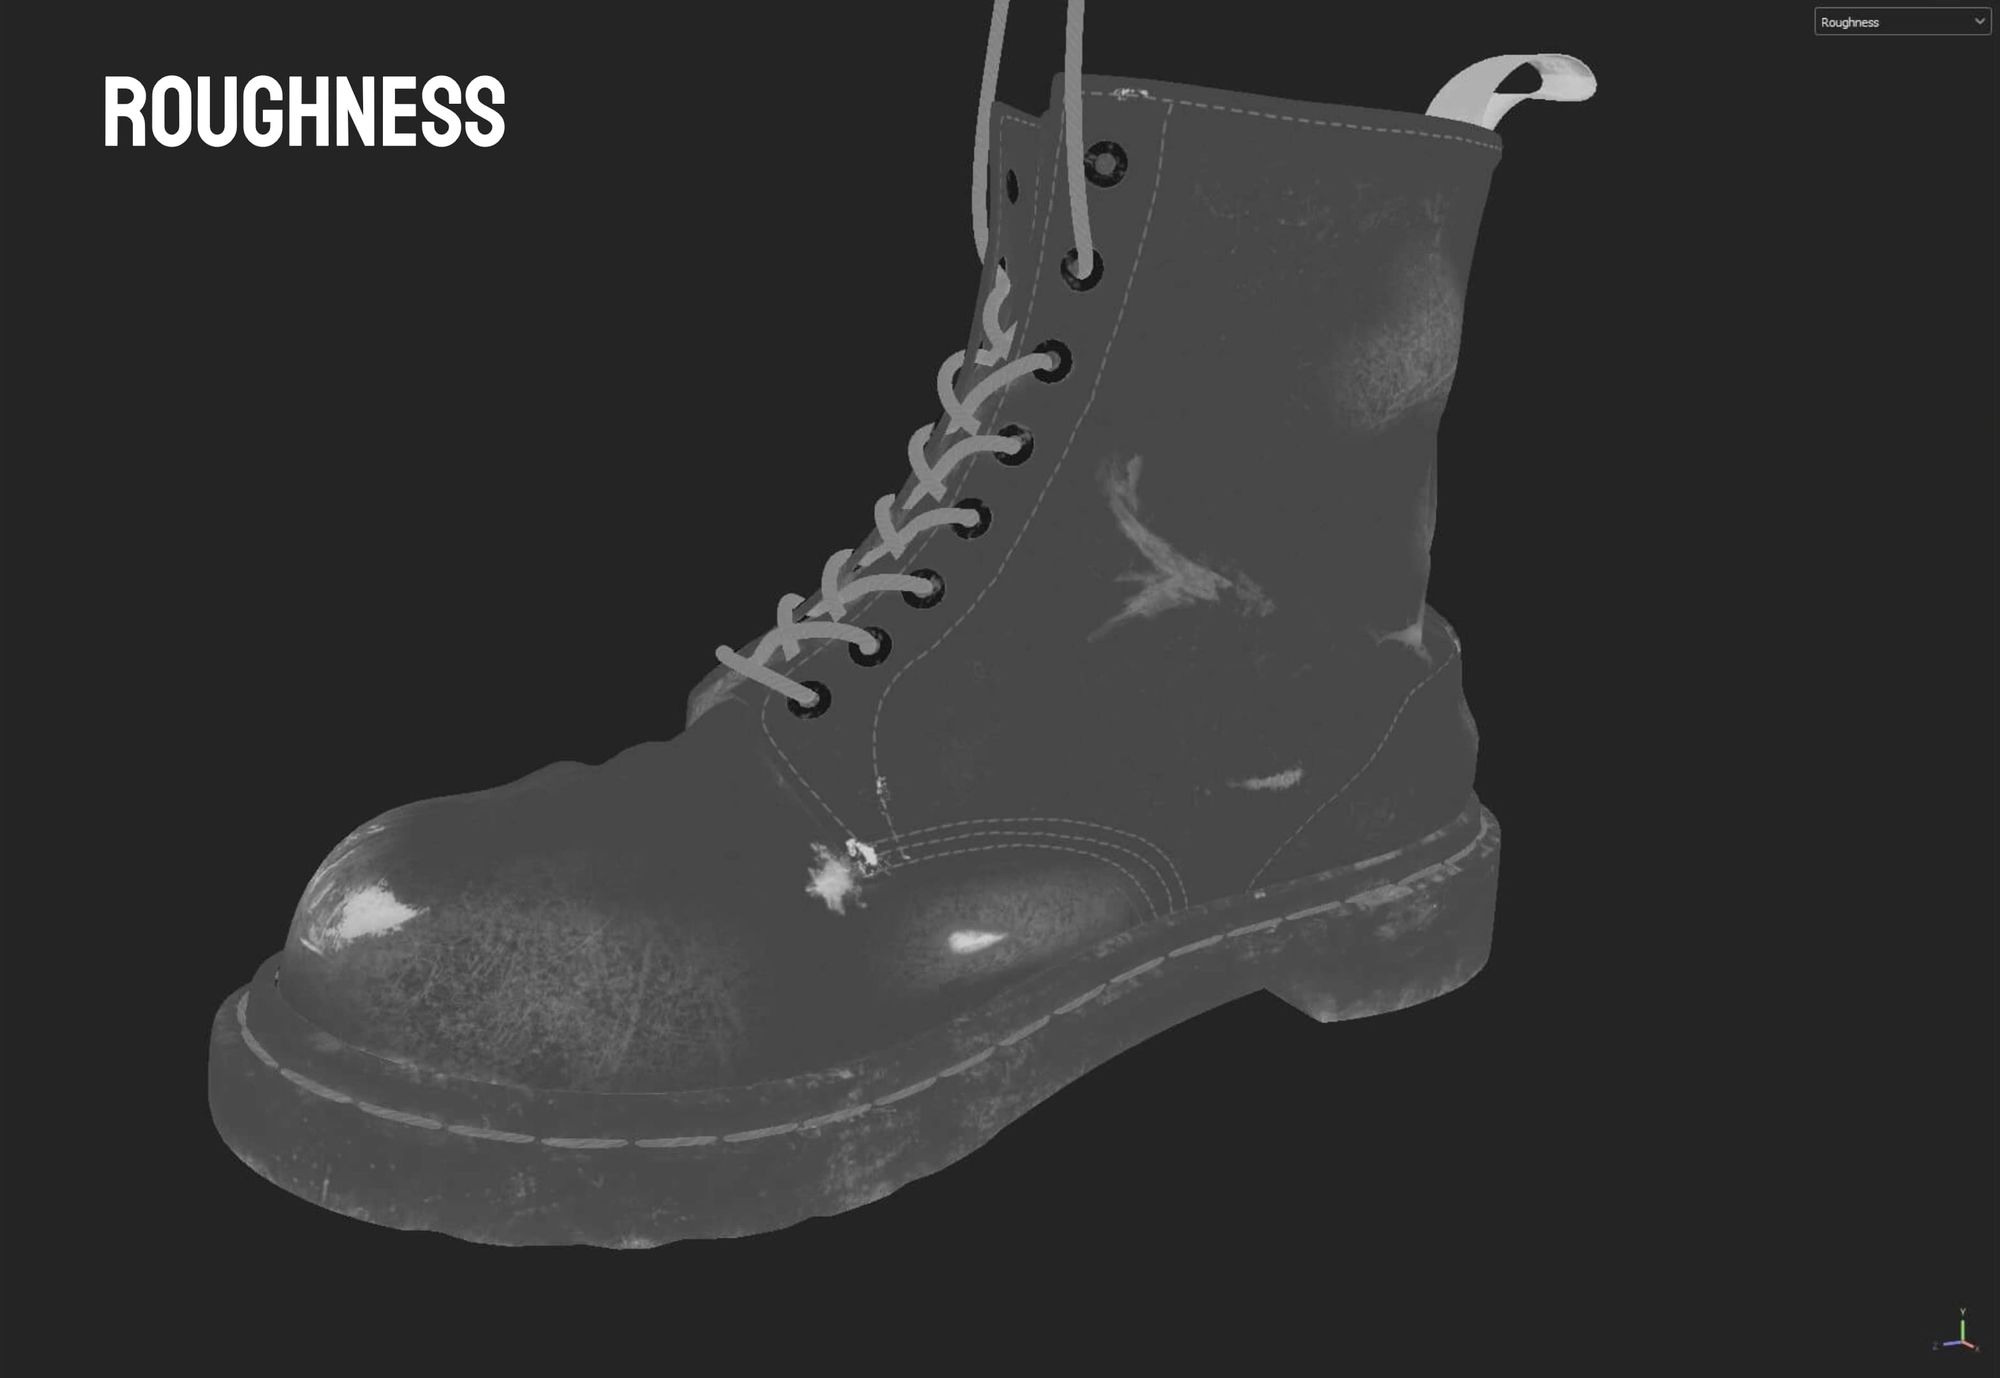
After checking the height map in Maya by rendering the boot in Arnold, I transitioned to the texturing phase.

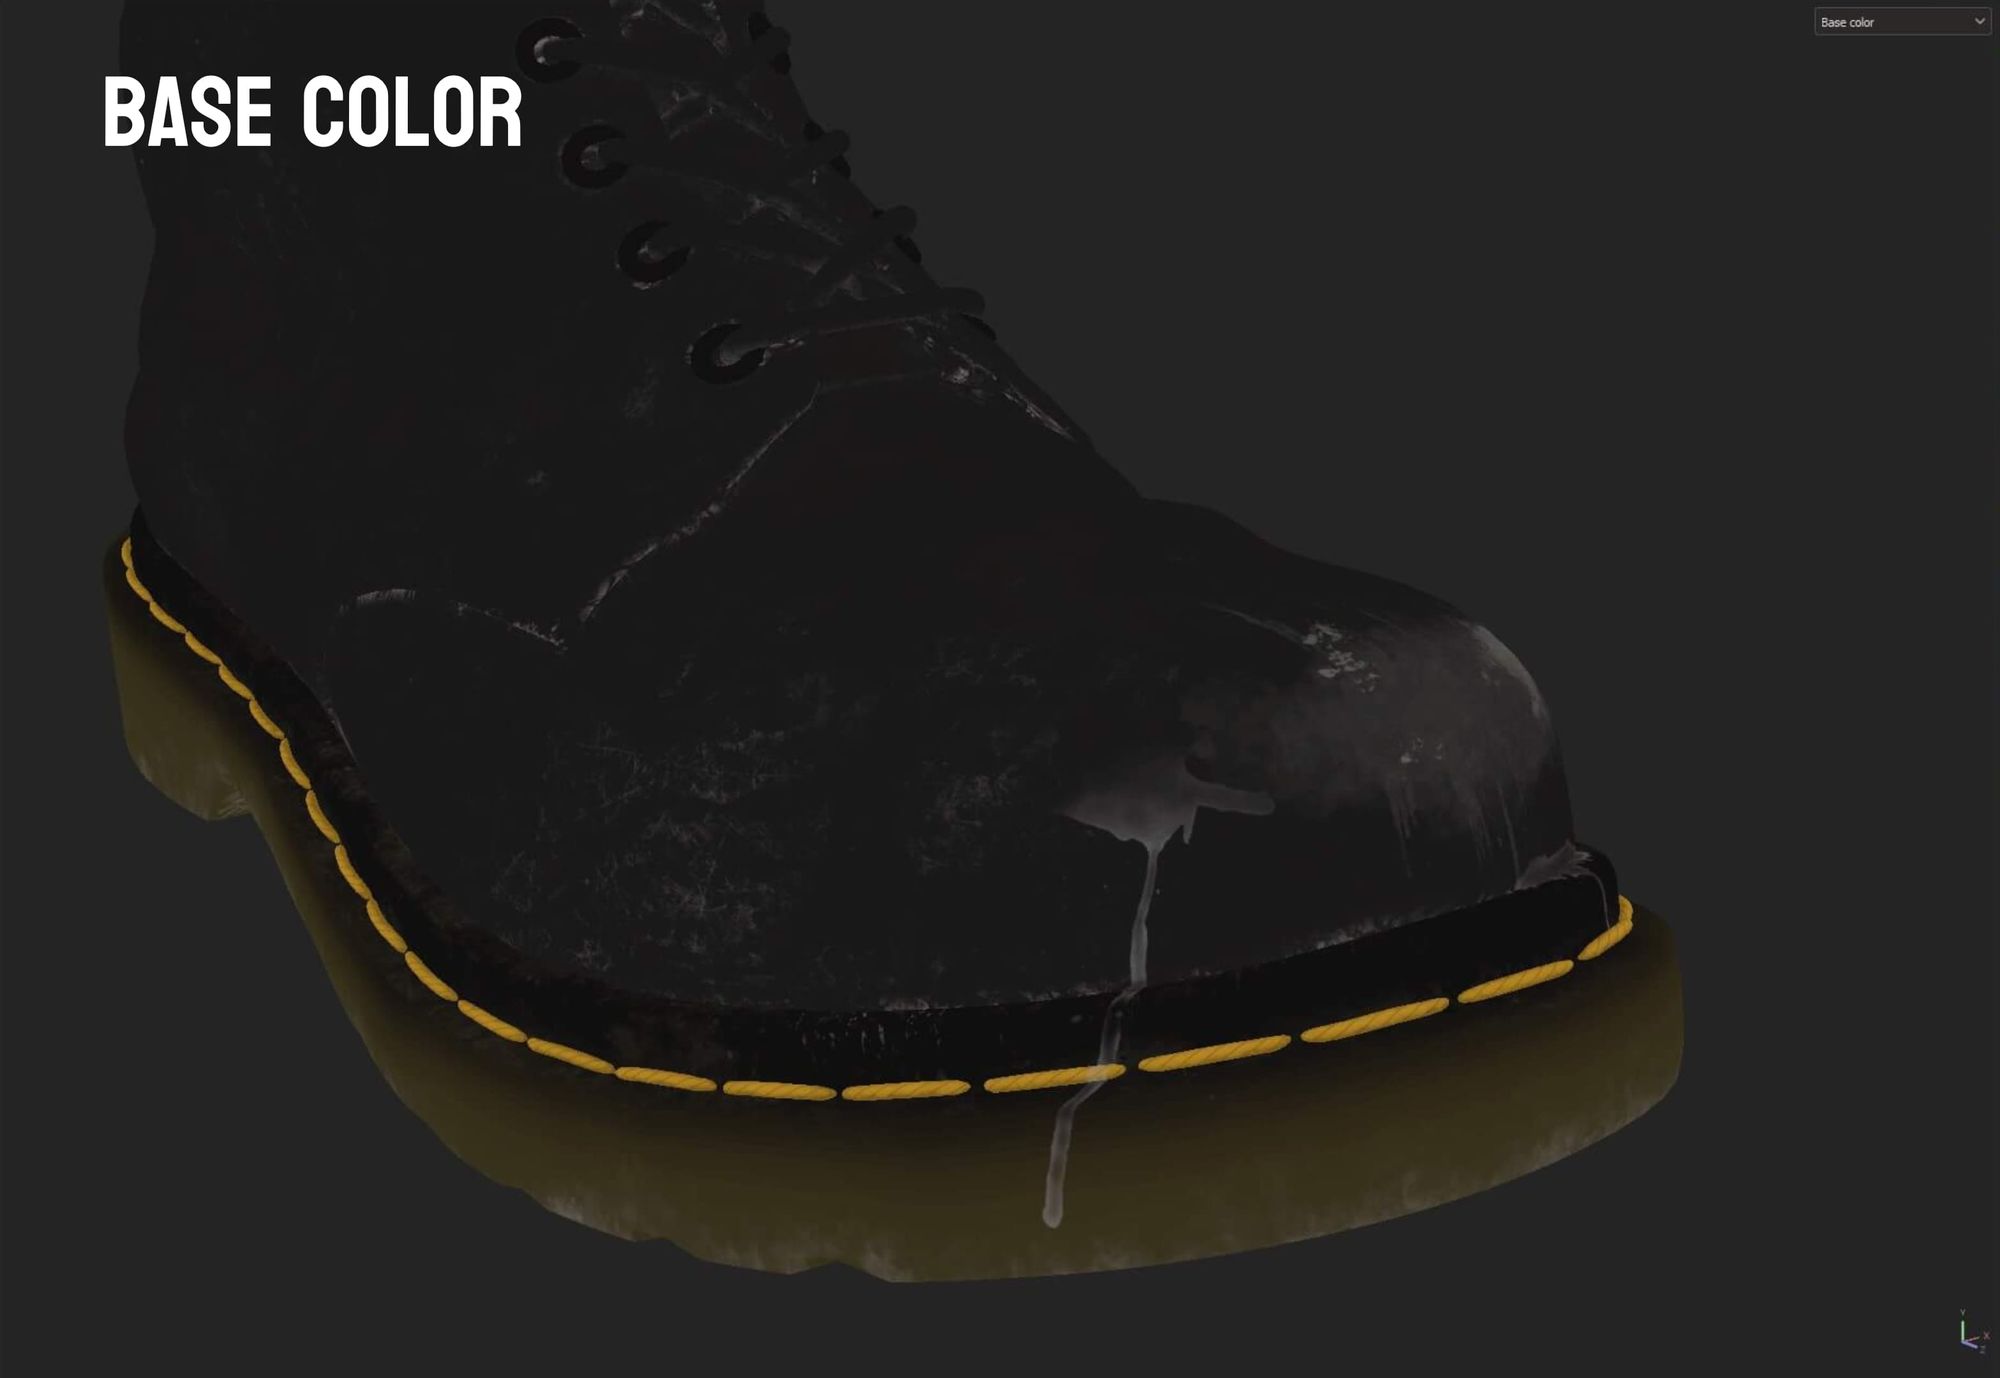
I added a base to separate the varying materials. Then, I focused on refining all the height details since the texturing needed to be adjusted accordingly. To ensure accuracy, I created a custom seamless texture for the shoelaces to closely match the lace texture. Additionally, I meticulously applied stitches along the seams and incorporated a thread-like texture to accentuate the larger stitches on the sole.
One of the challenges I encountered during the texturing process was finding a method to recreate the tiny wrinkles that naturally form in leather creases. After seeking advice from mentors and peers, a fellow student proposed a procedural approach using a noise texture. While this solution was not the quickest, the result closely matched my vision, making the extra effort worthwhile. I painstakingly painted masks for the wrinkled texture, utilising Substance 3D Painter's warp projection tool. Gradually, I progressed towards refining the base colour.
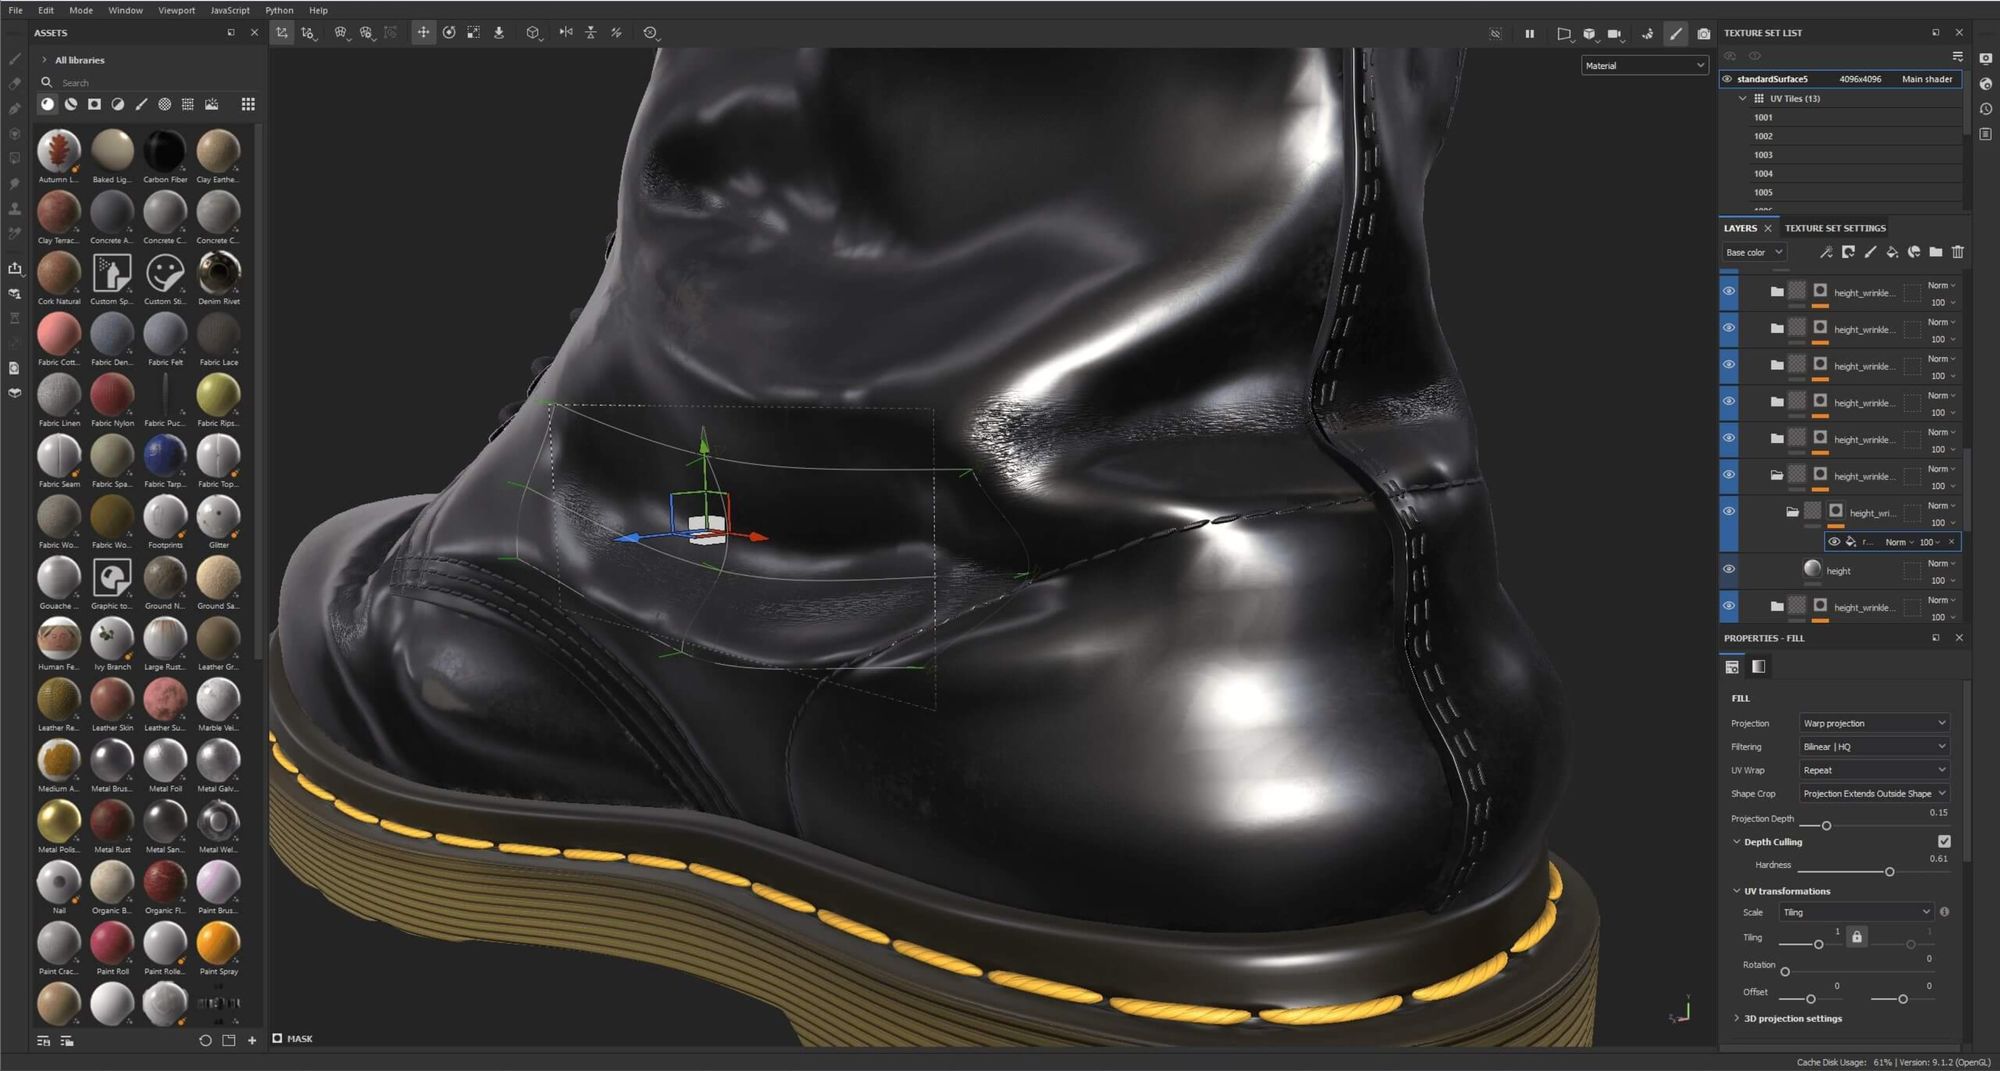
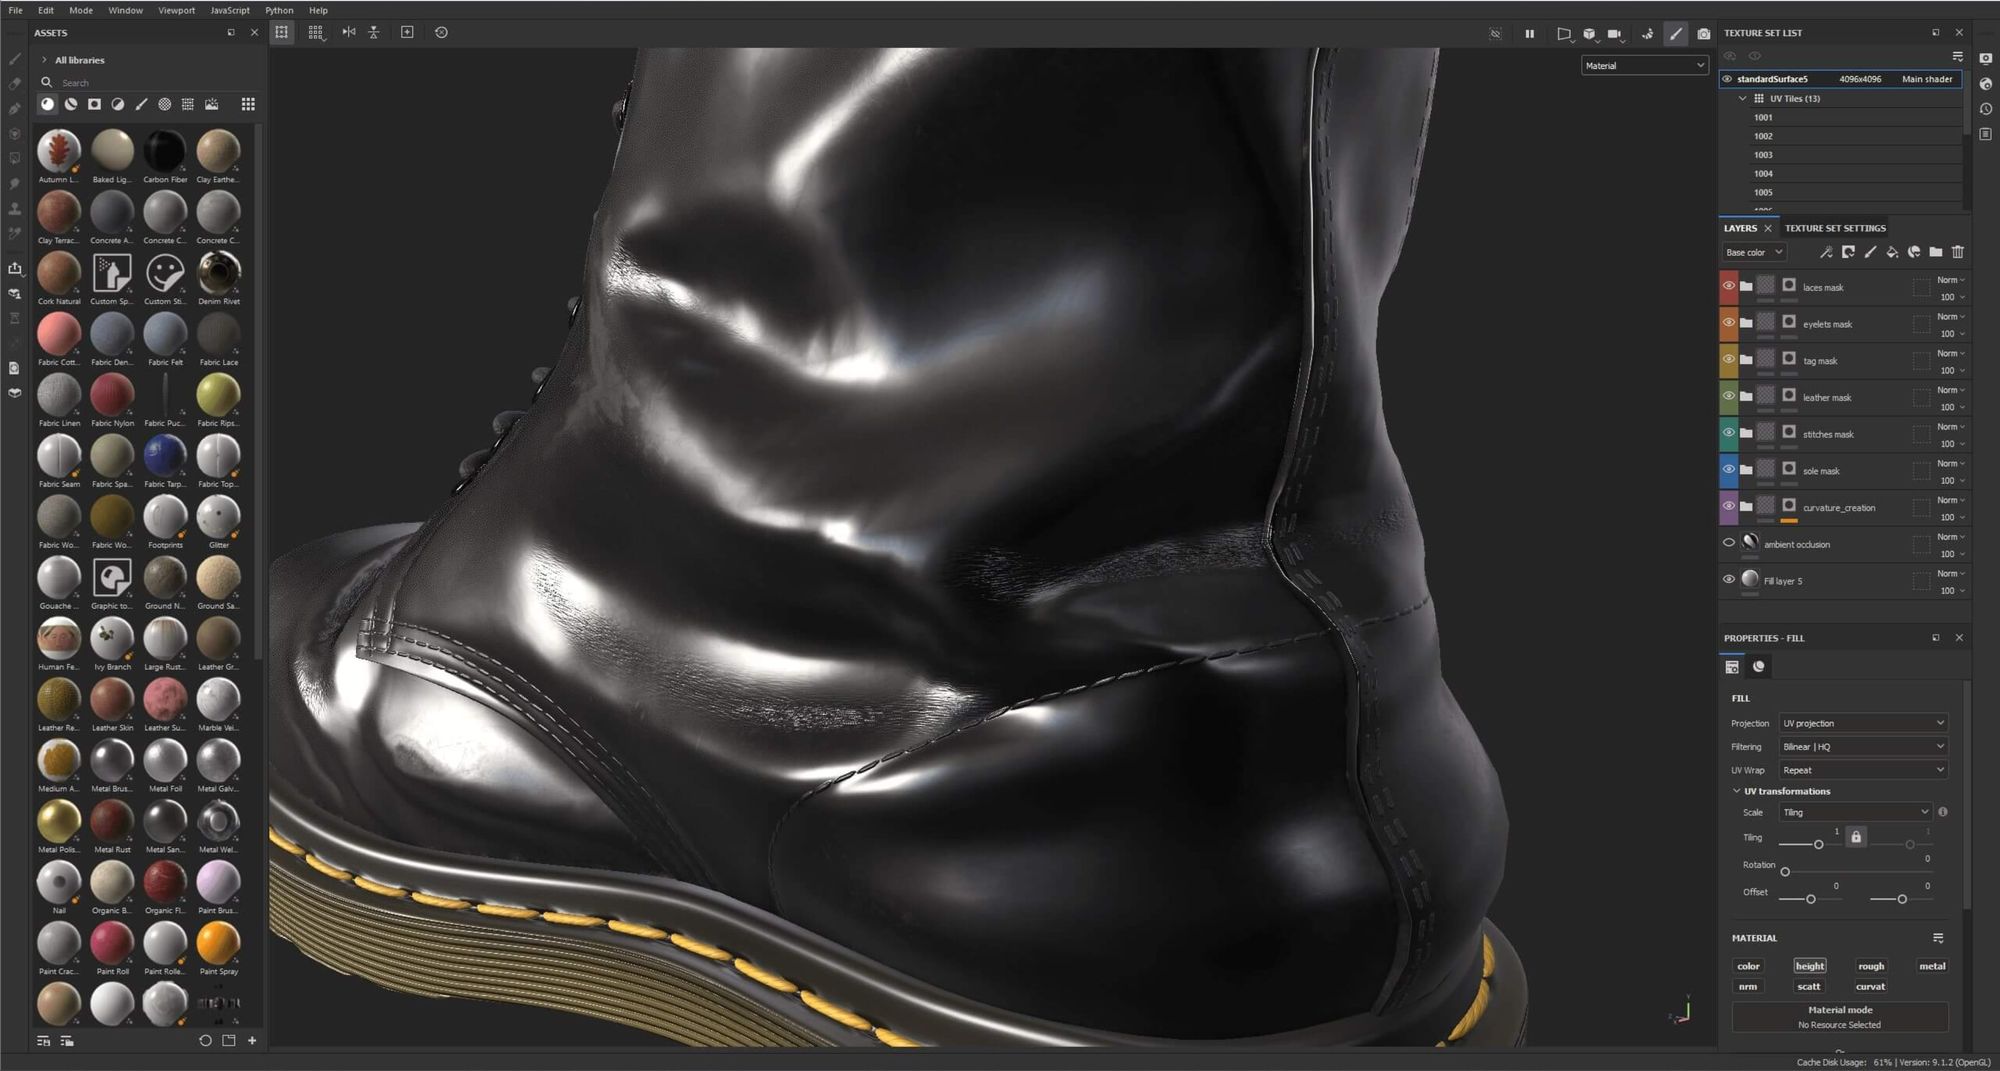
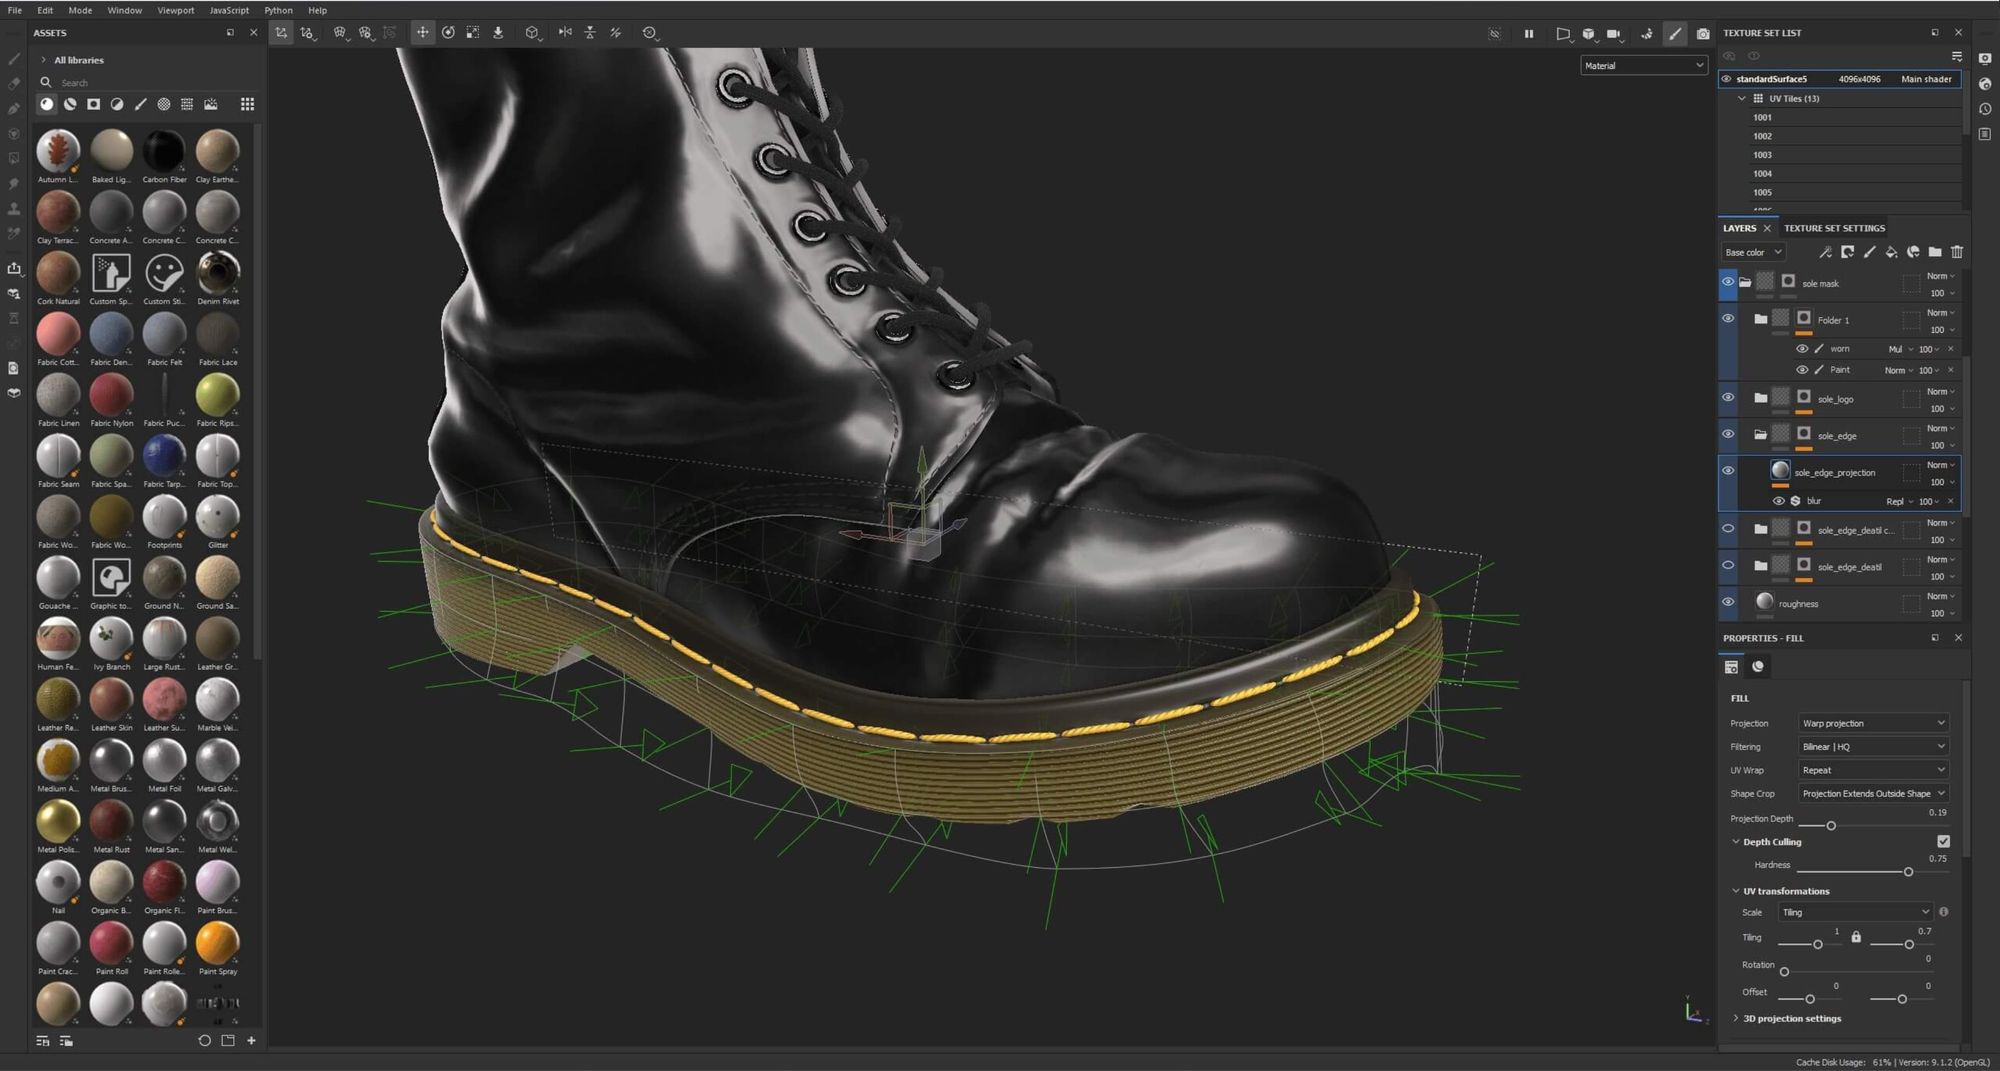

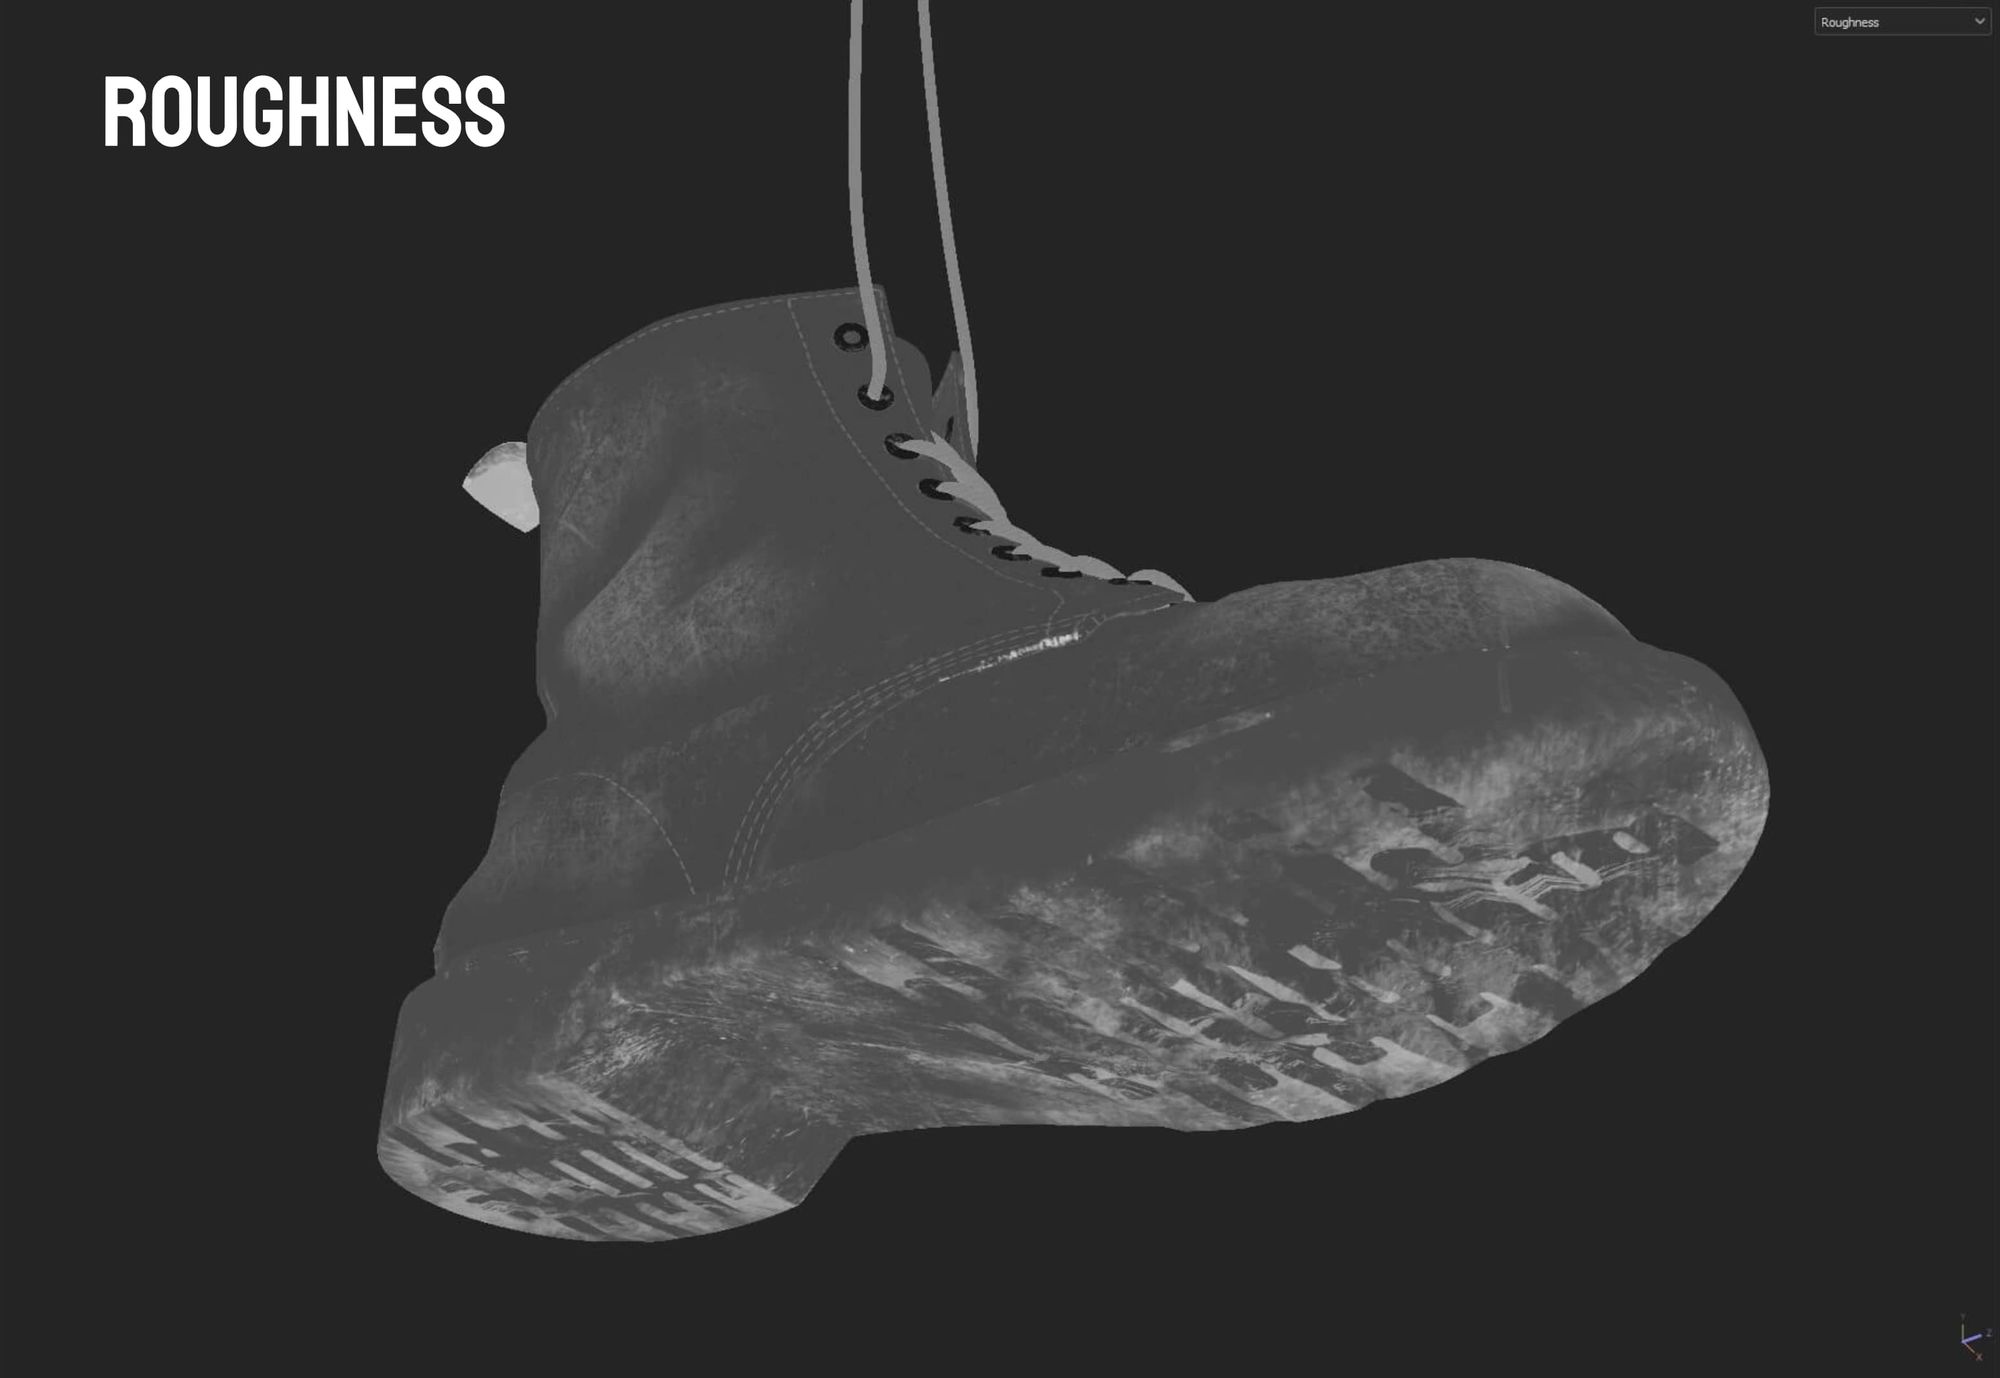
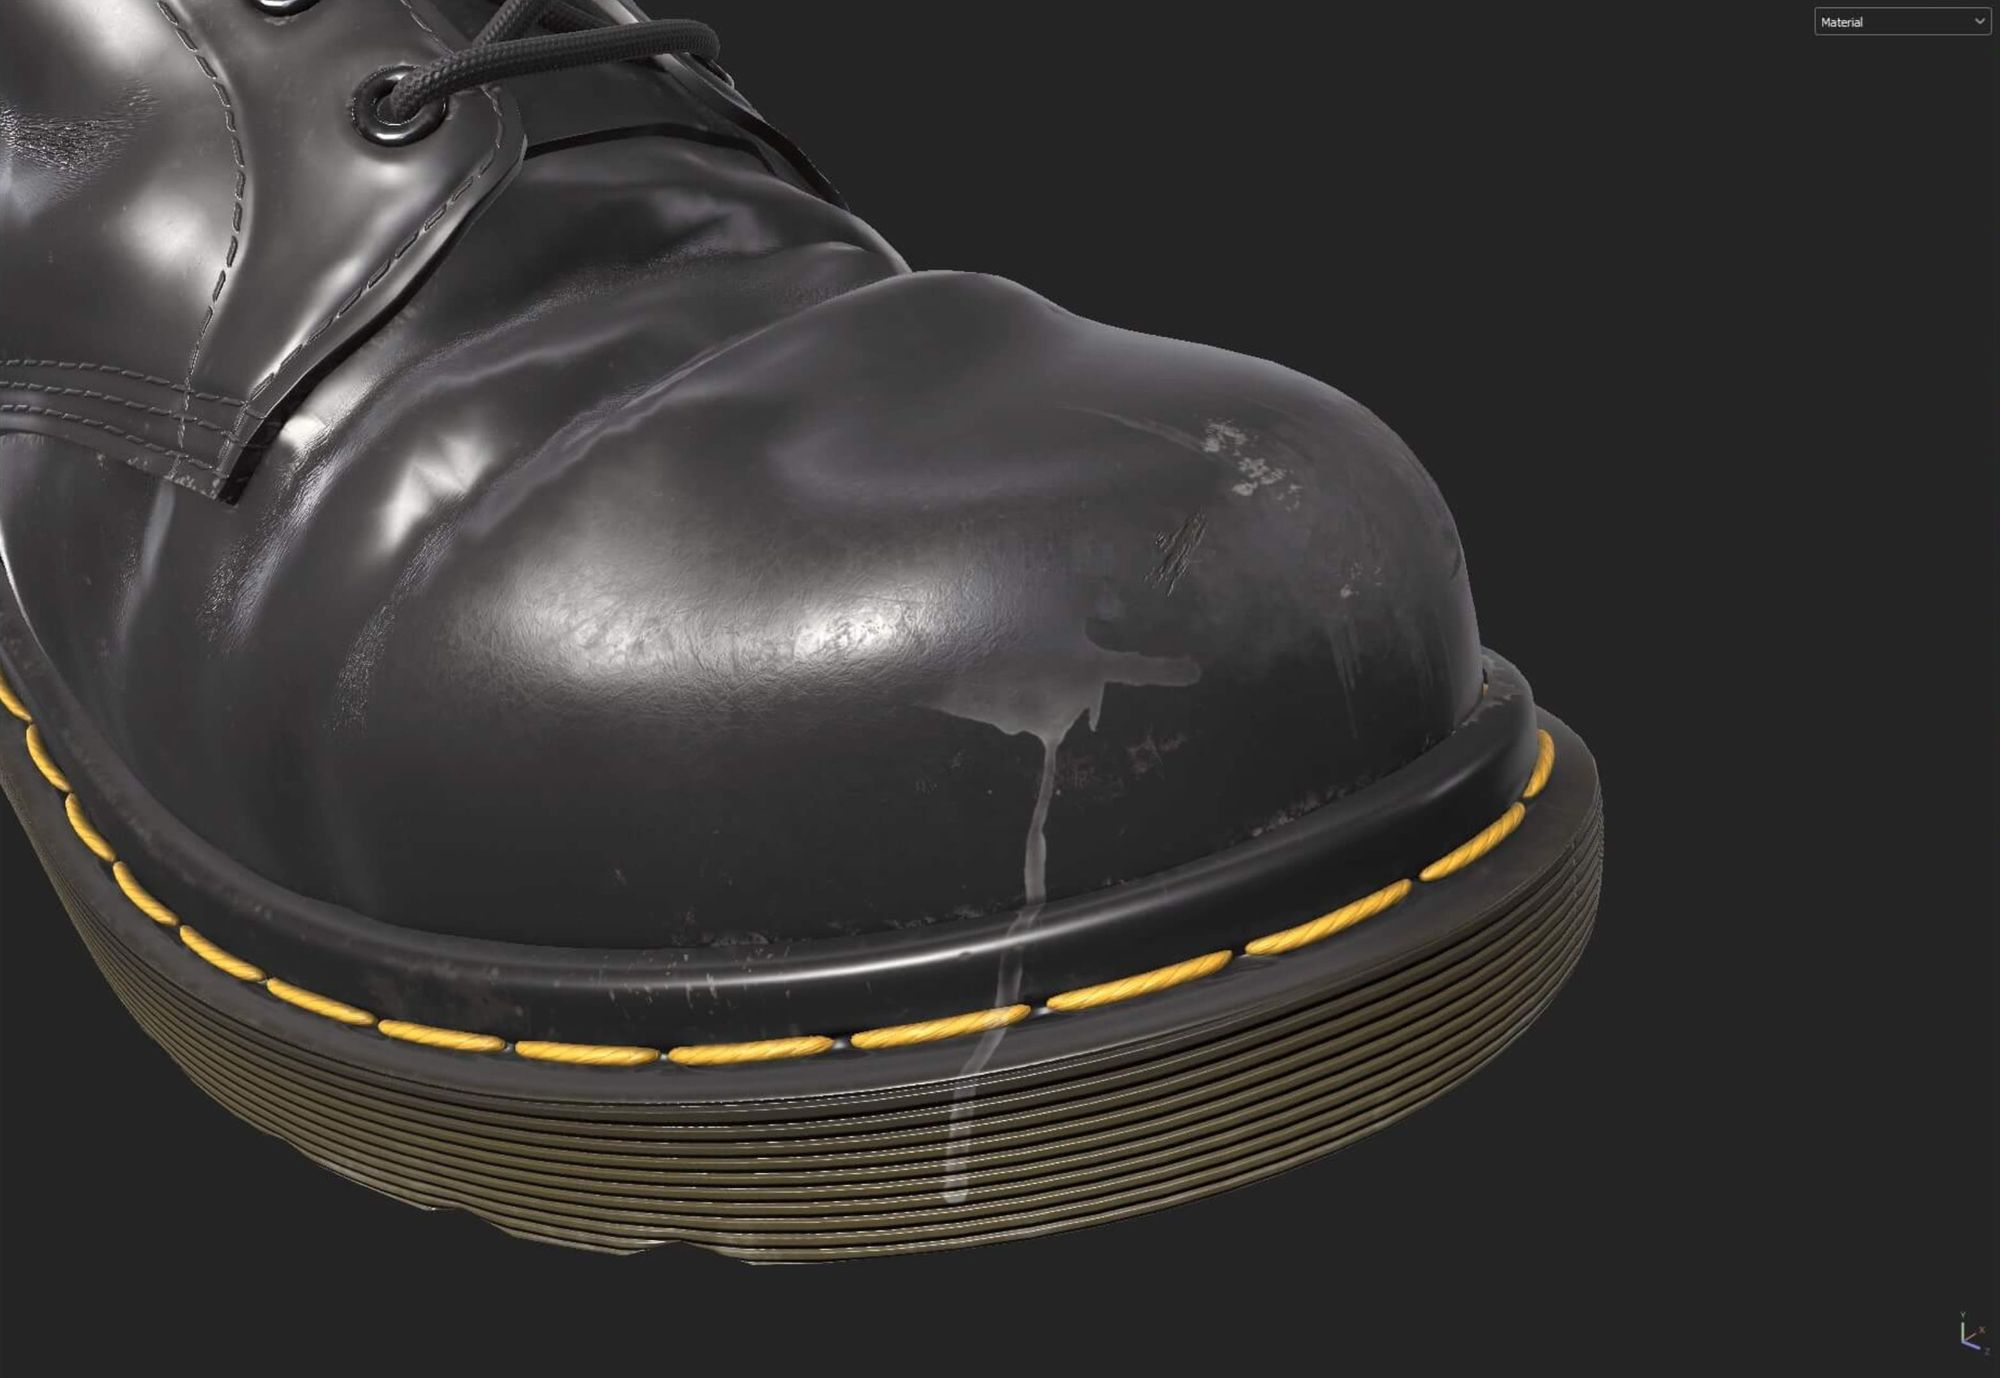
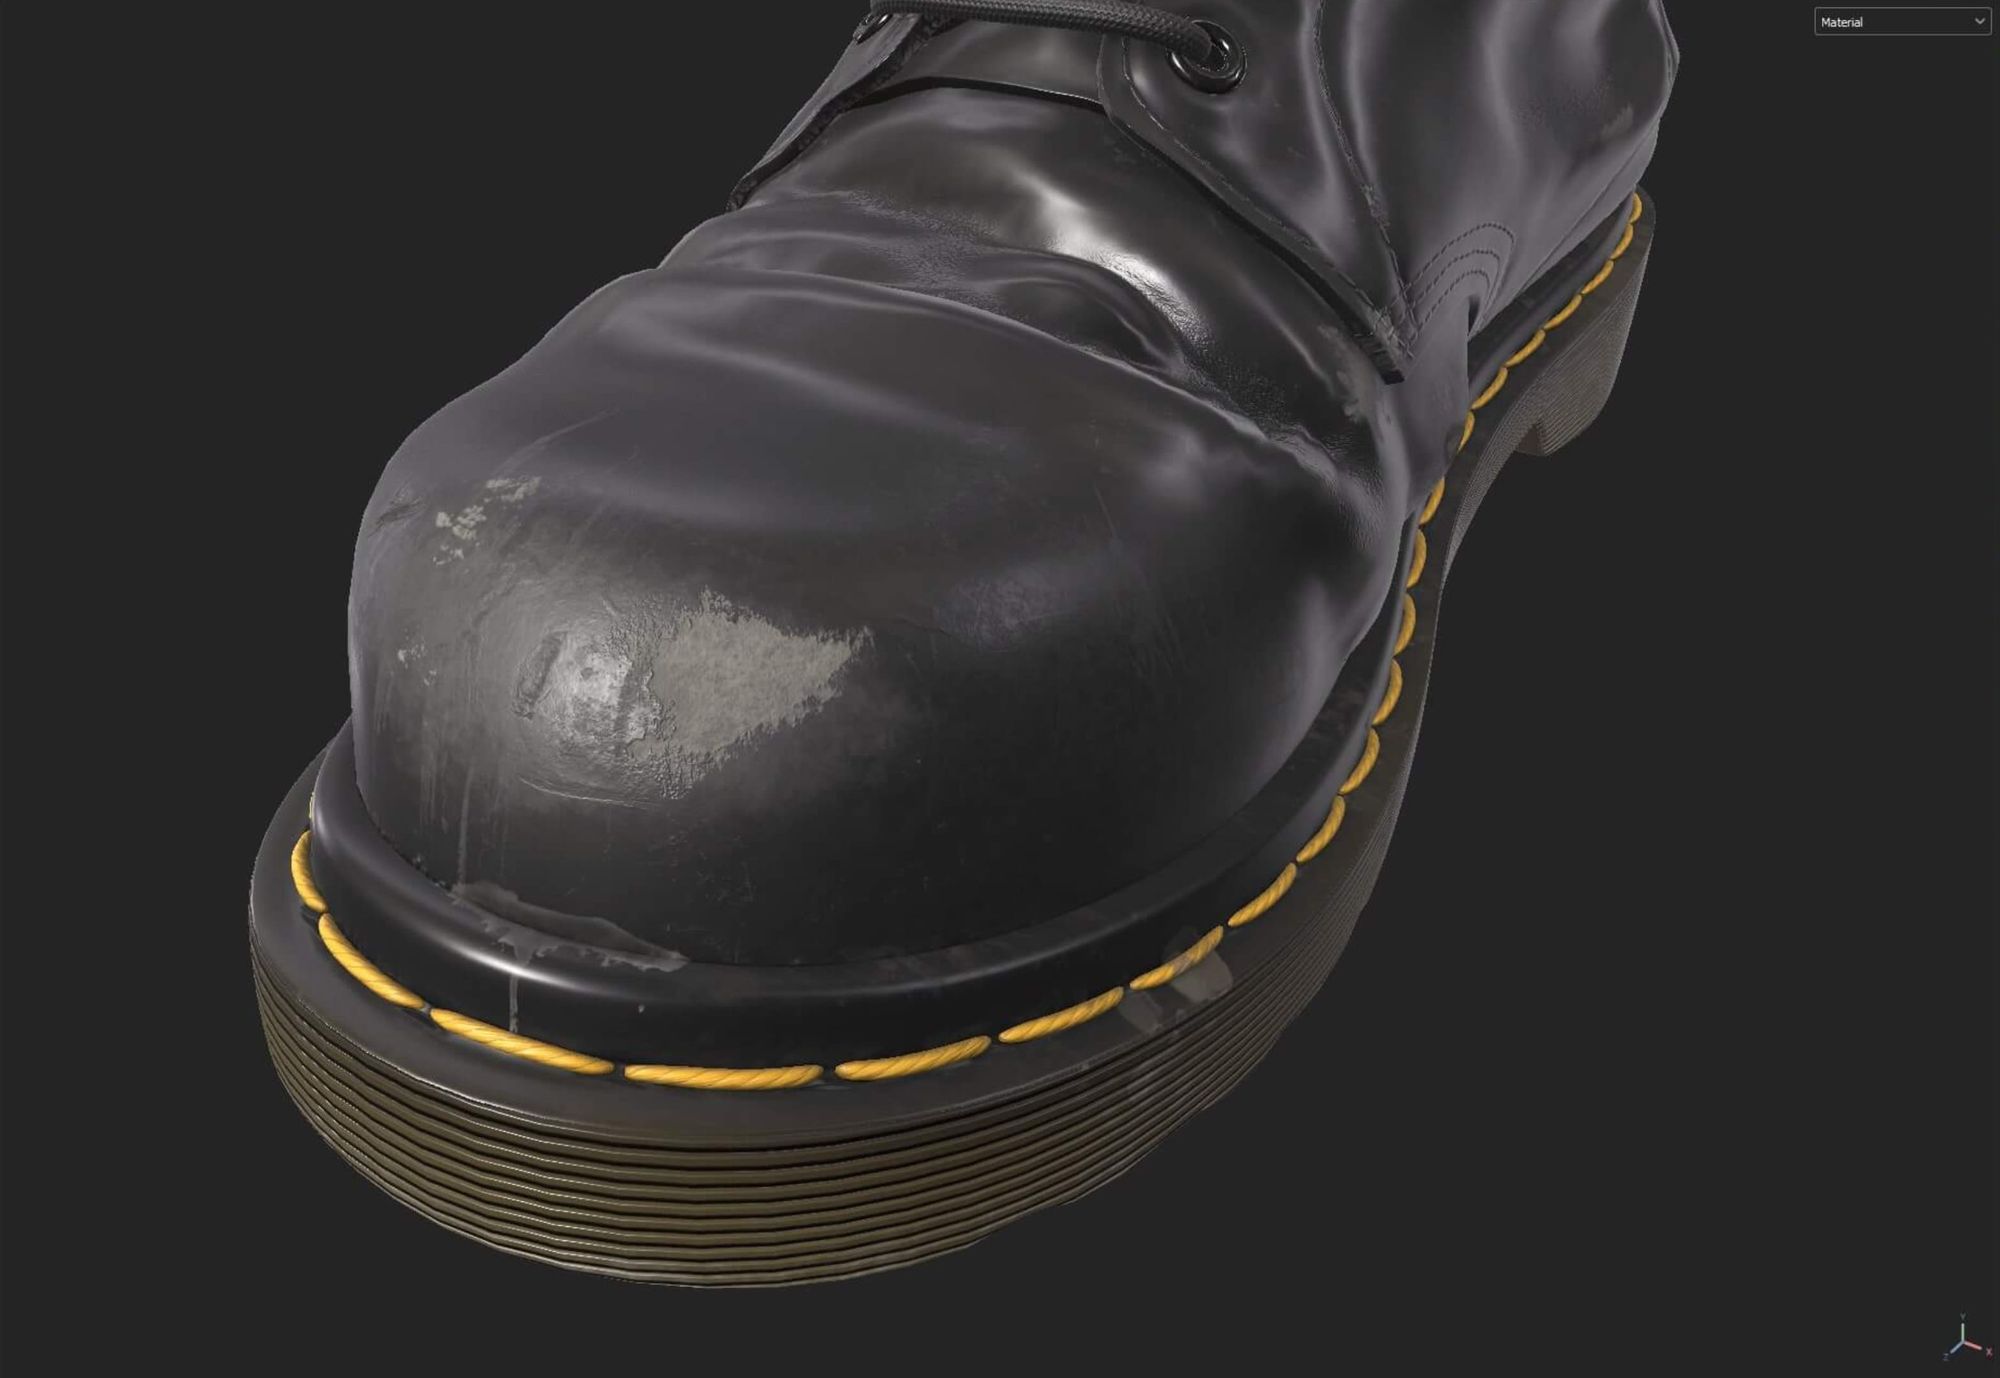
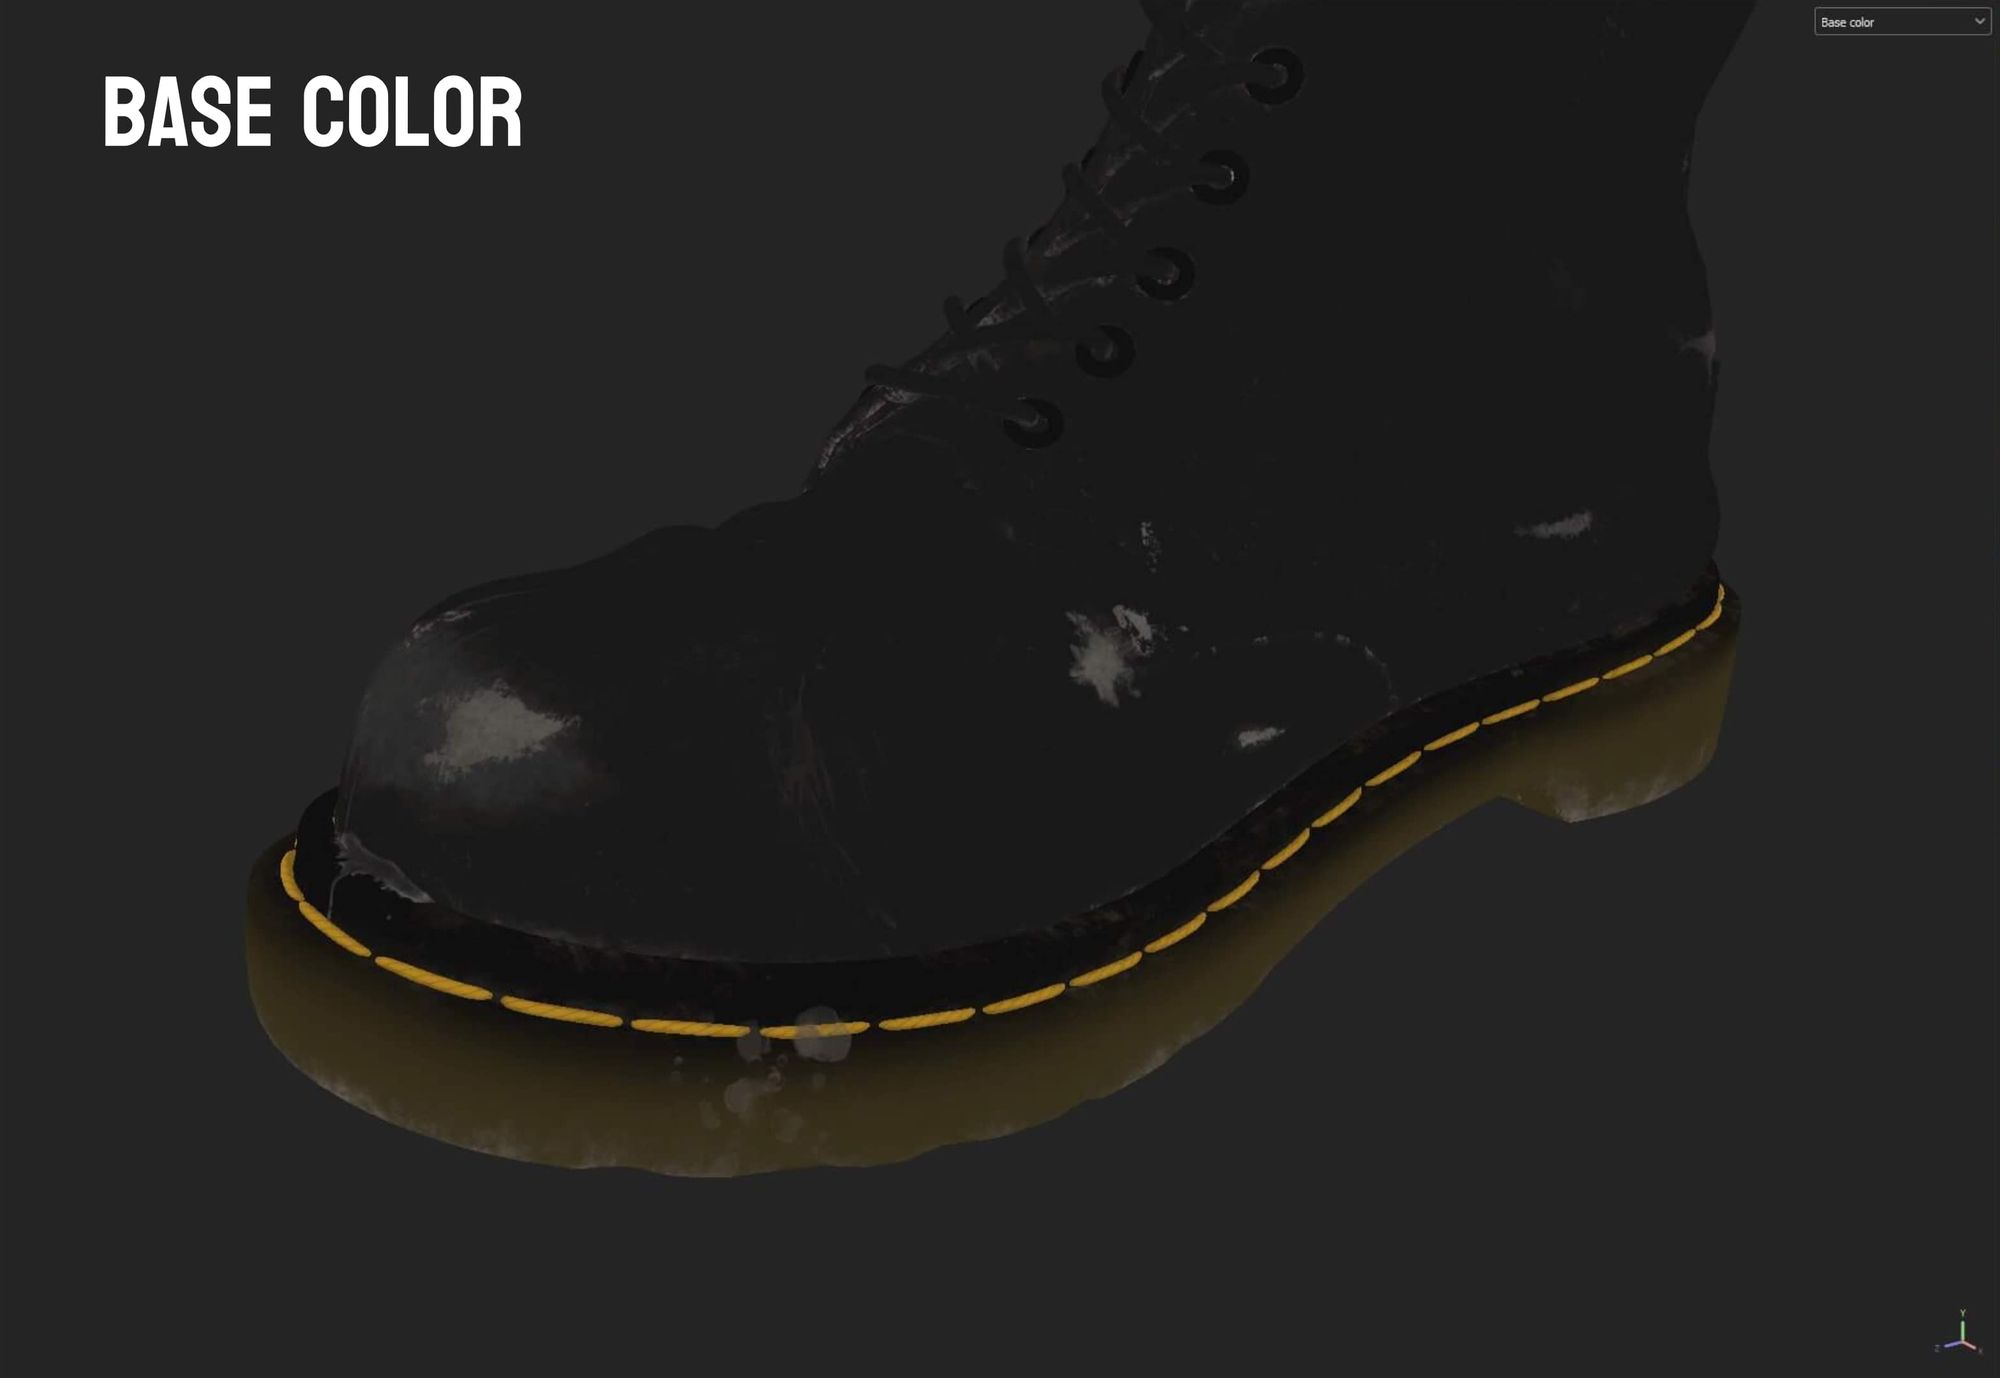
In the initial texturing pass, I focused on incorporating Subsurface Scattering into the sole to achieve a rubbery appearance. Additionally, I applied a black gradient towards the top of the sole. This helped enhance the impression of slight translucency. The warp projection tool proved effective for the sole's edge as well. It provided precise control over the placement of the lines I added in the height channel of the boot. Following that, I focused on addressing the dirt accumulation in the grooves and crevices, which required adjusting height, roughness, and colour variation interchangeably.
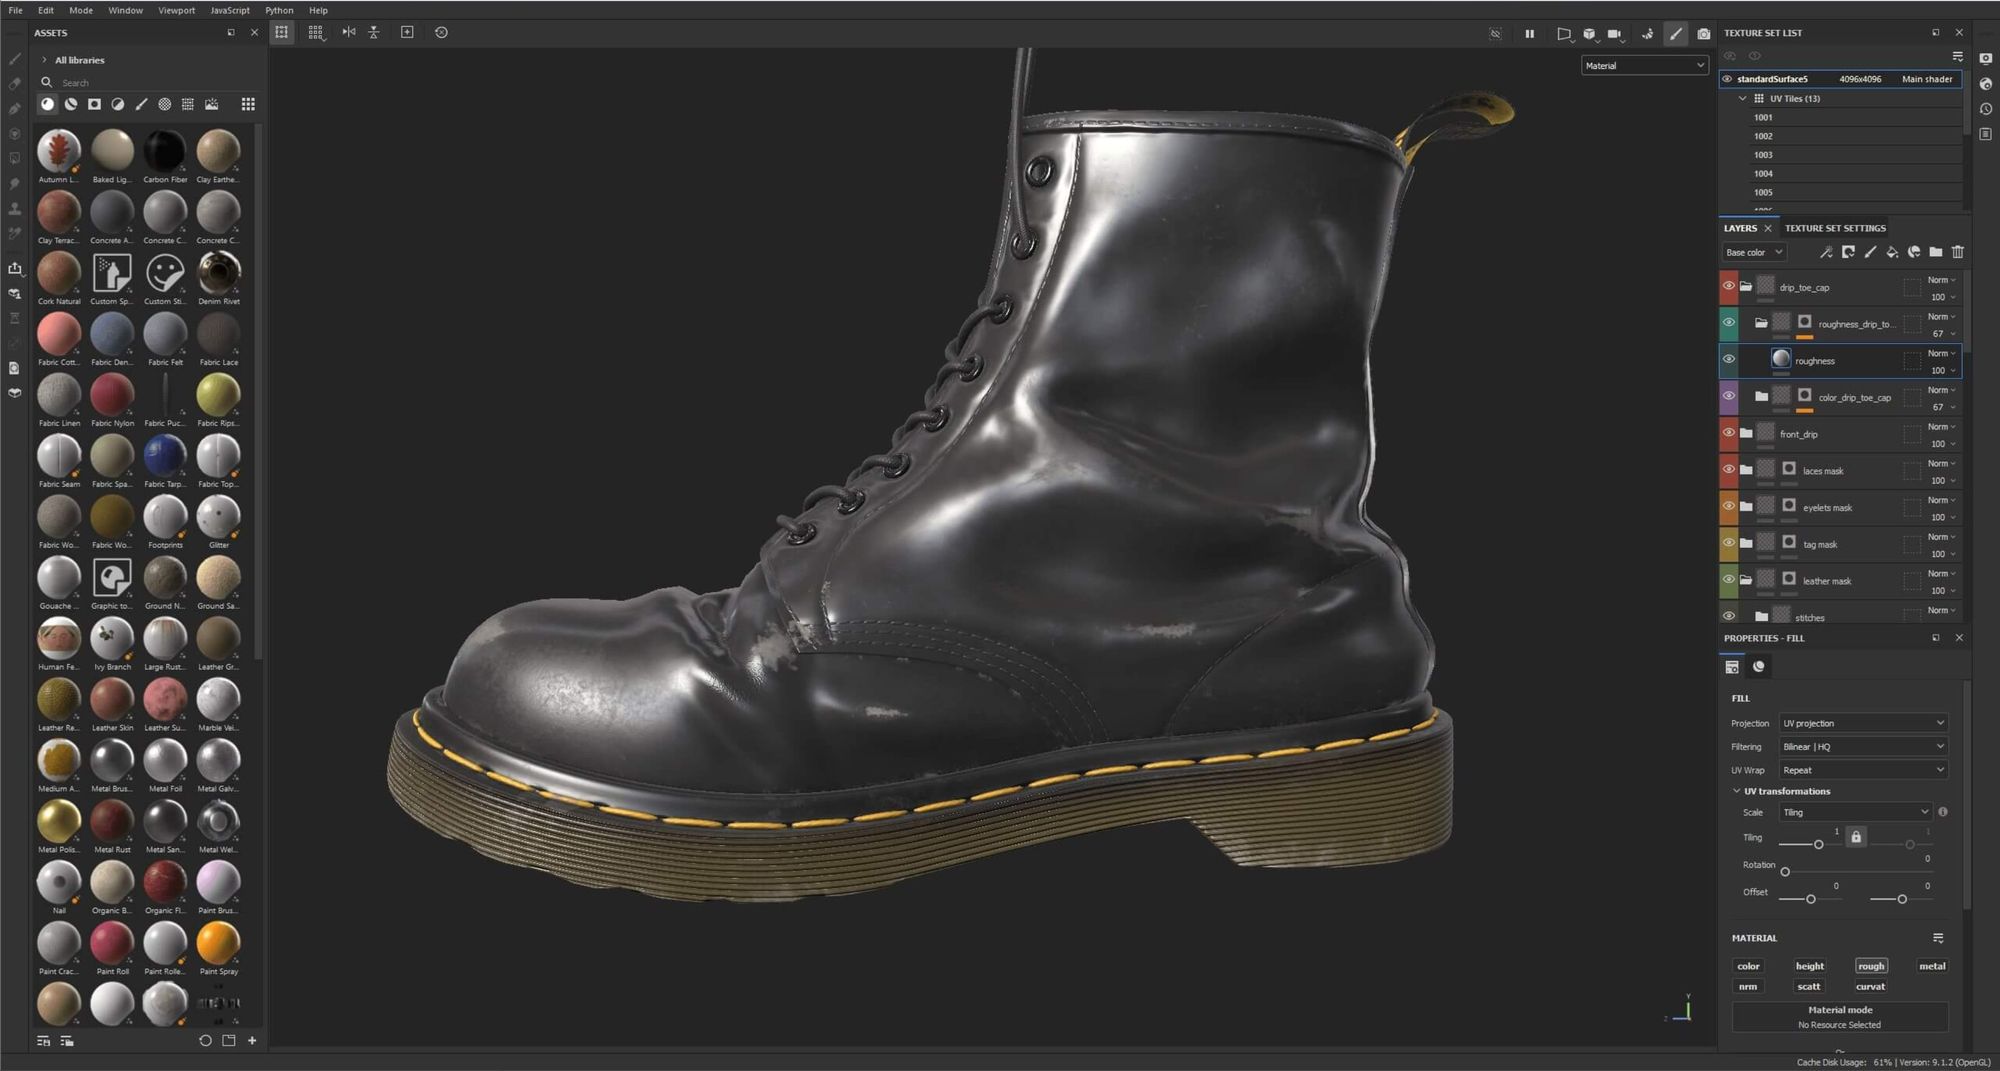
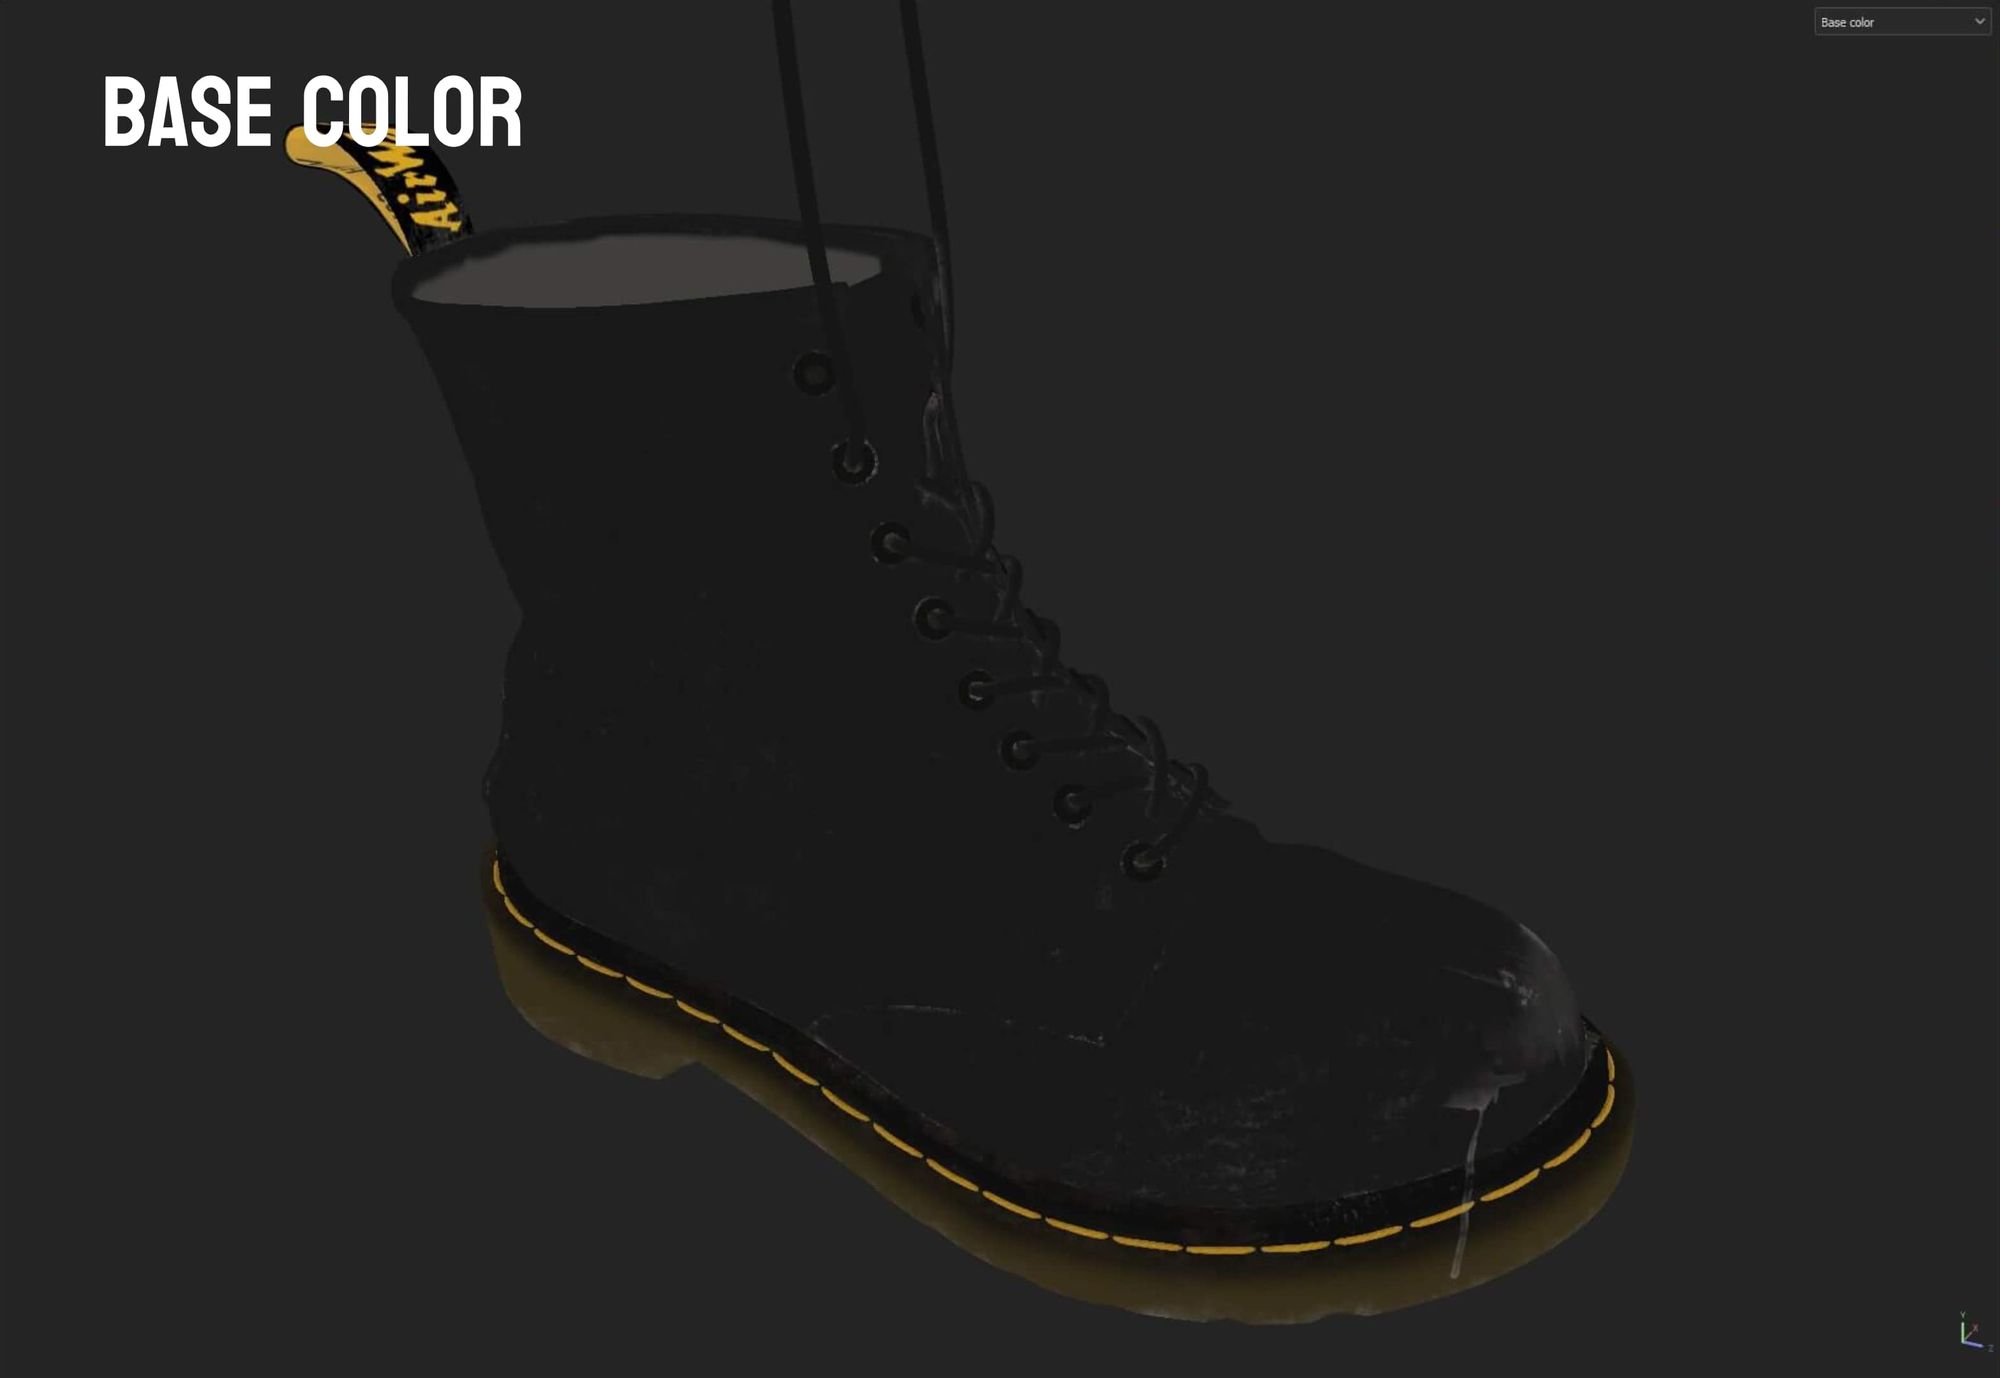
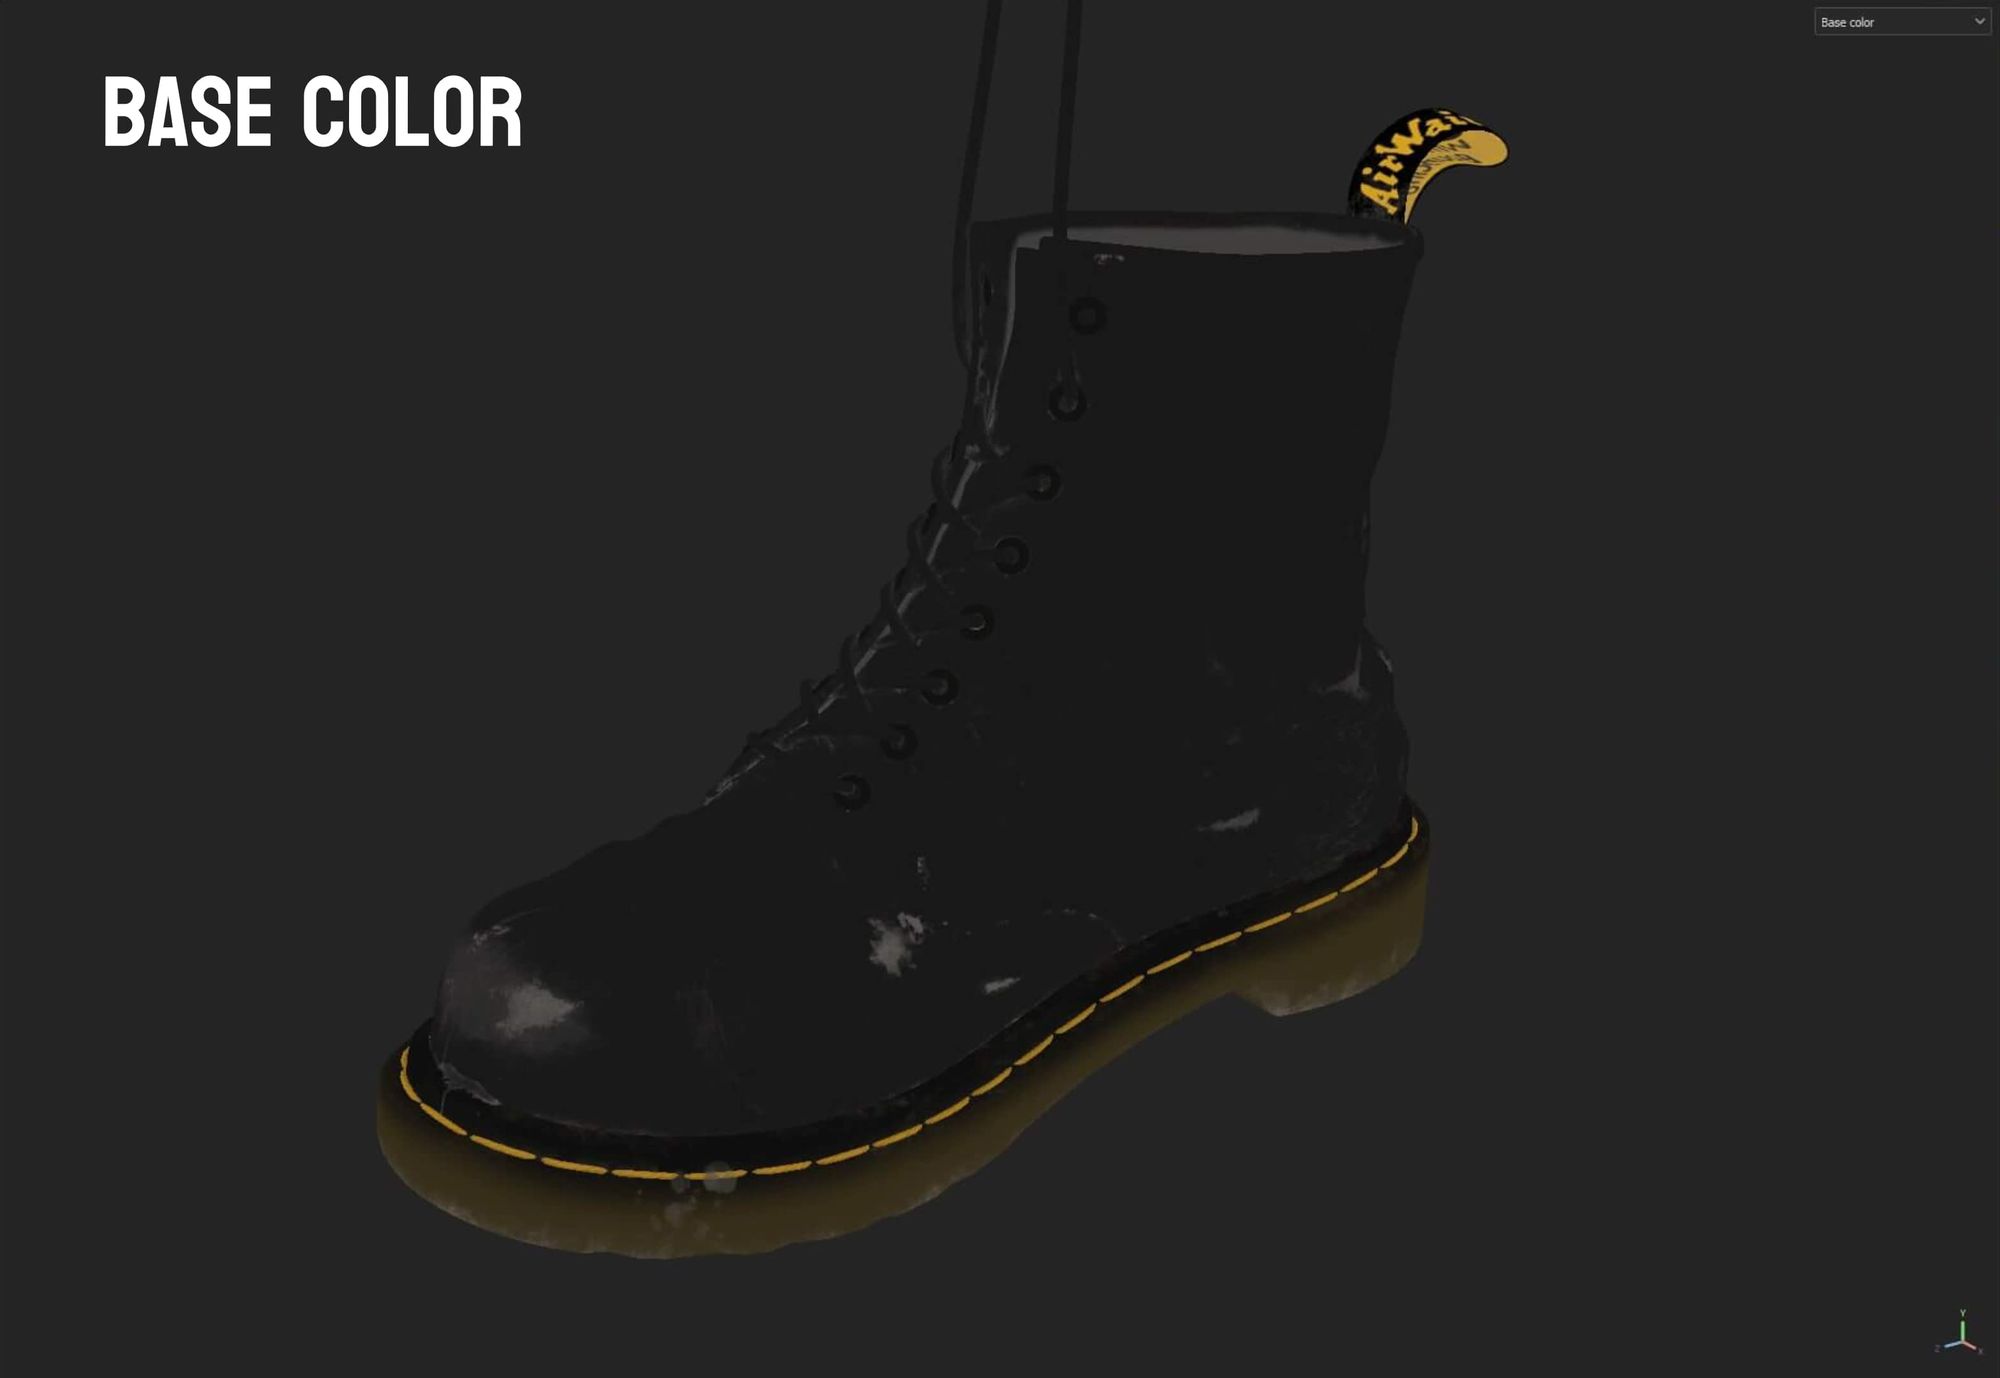
The leather material covering the main body of the boot posed the most crucial yet challenging aspect. After establishing a solid foundation of roughness and color variation, I meticulously matched the specular properties to closely resemble those of the real boots. However, the dark material made it challenging to discern the added details, so I adjusted the colour for better visibility. I planned to revert it back to black later for realism. Exporting my textures and periodically rendering a work-in-progress in Maya with Arnold proved to be essential. Unfortunately, time constraints began to impact the texturing phase, prompting me to prioritize specific areas of the shoe for the final presentation.
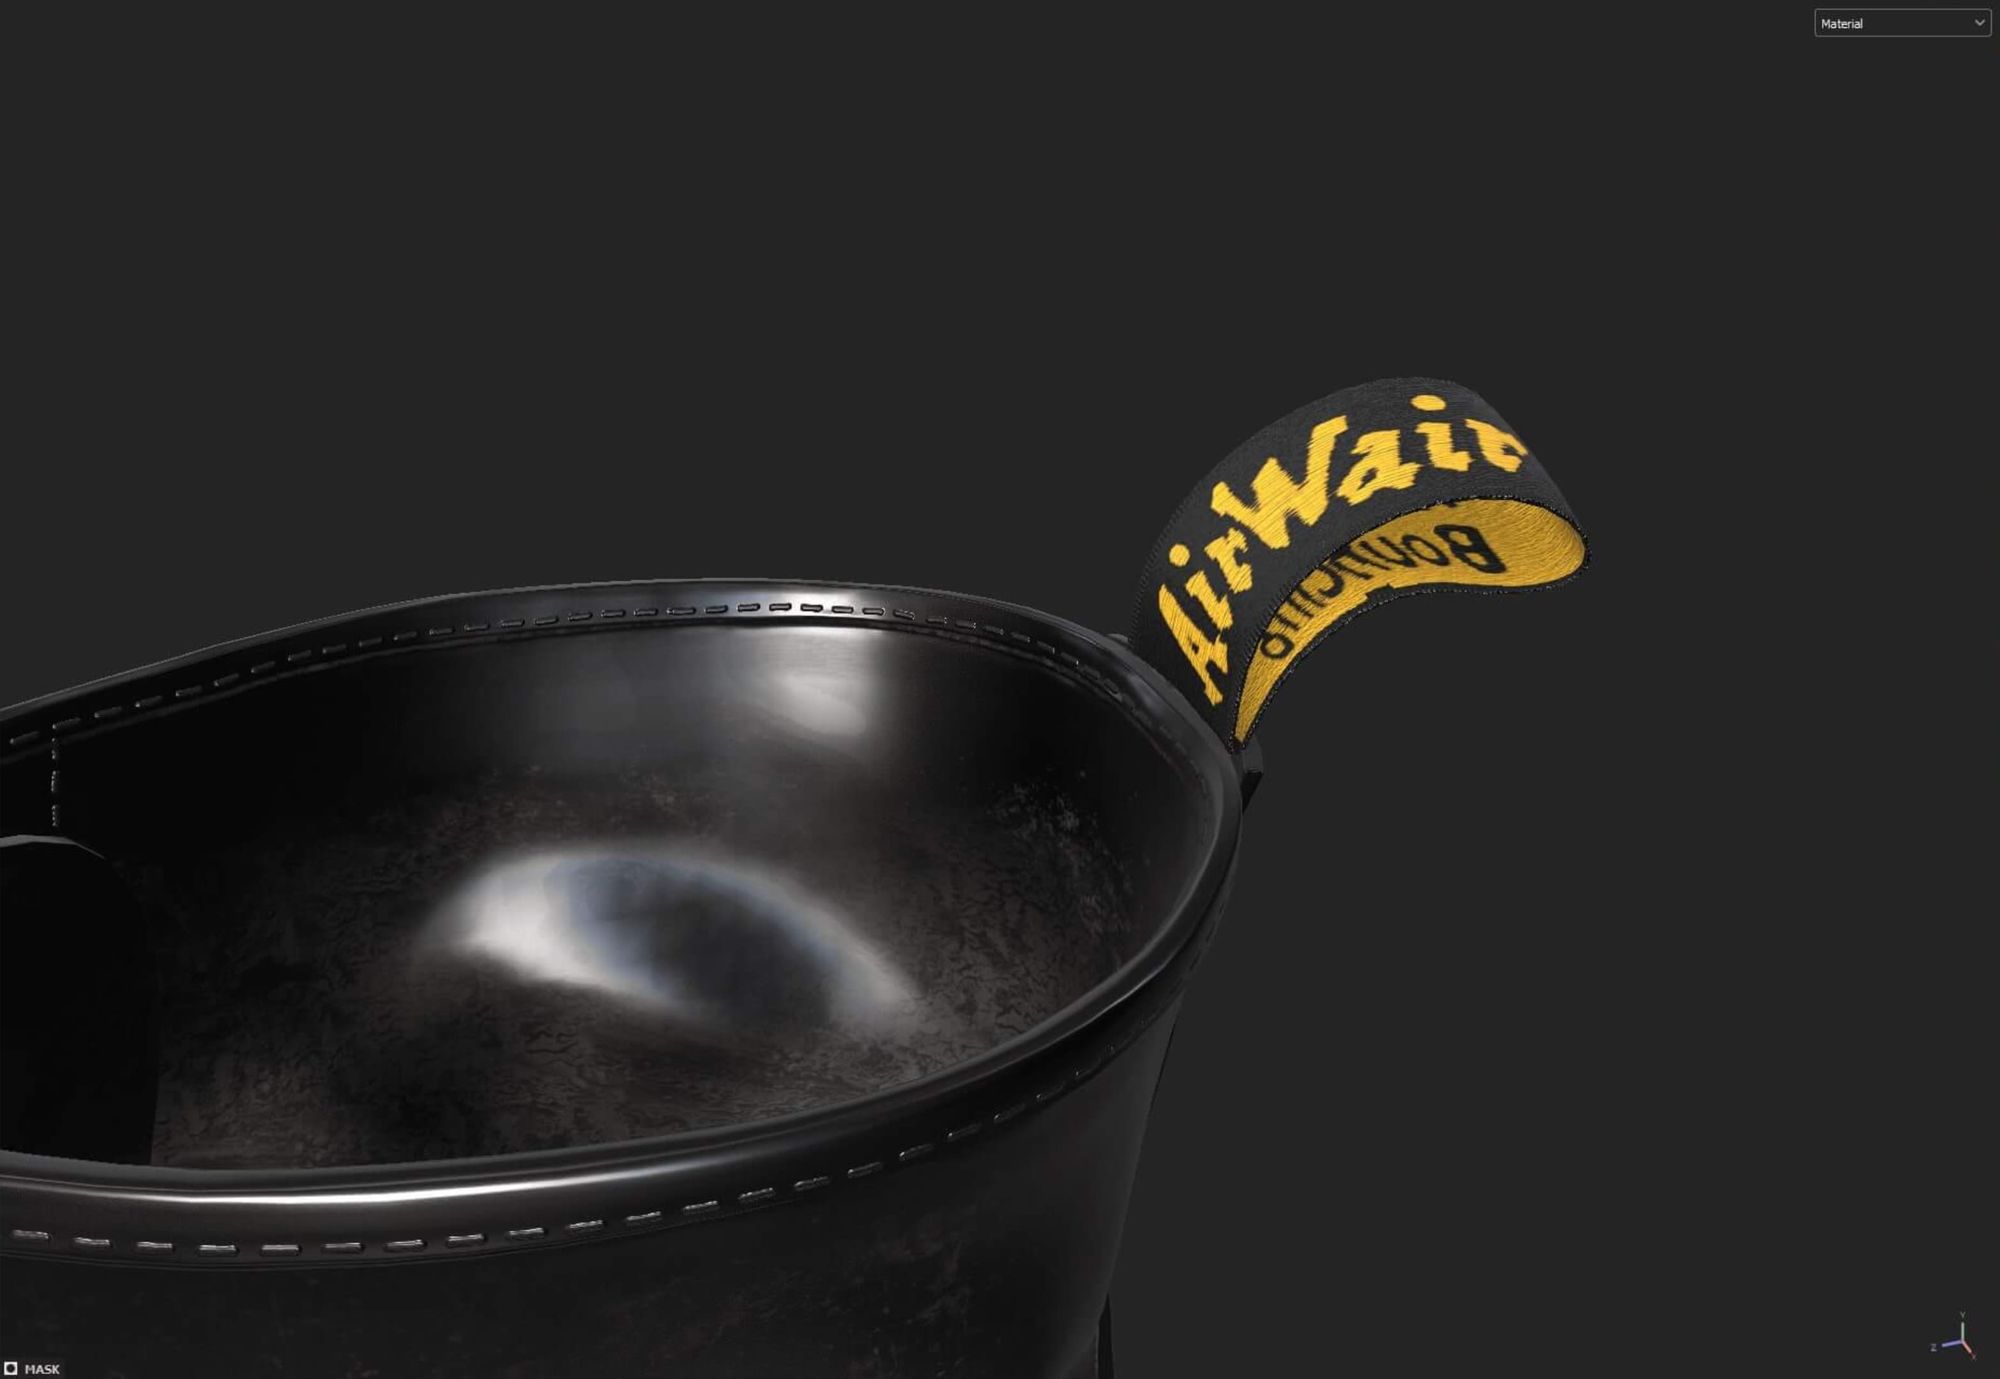
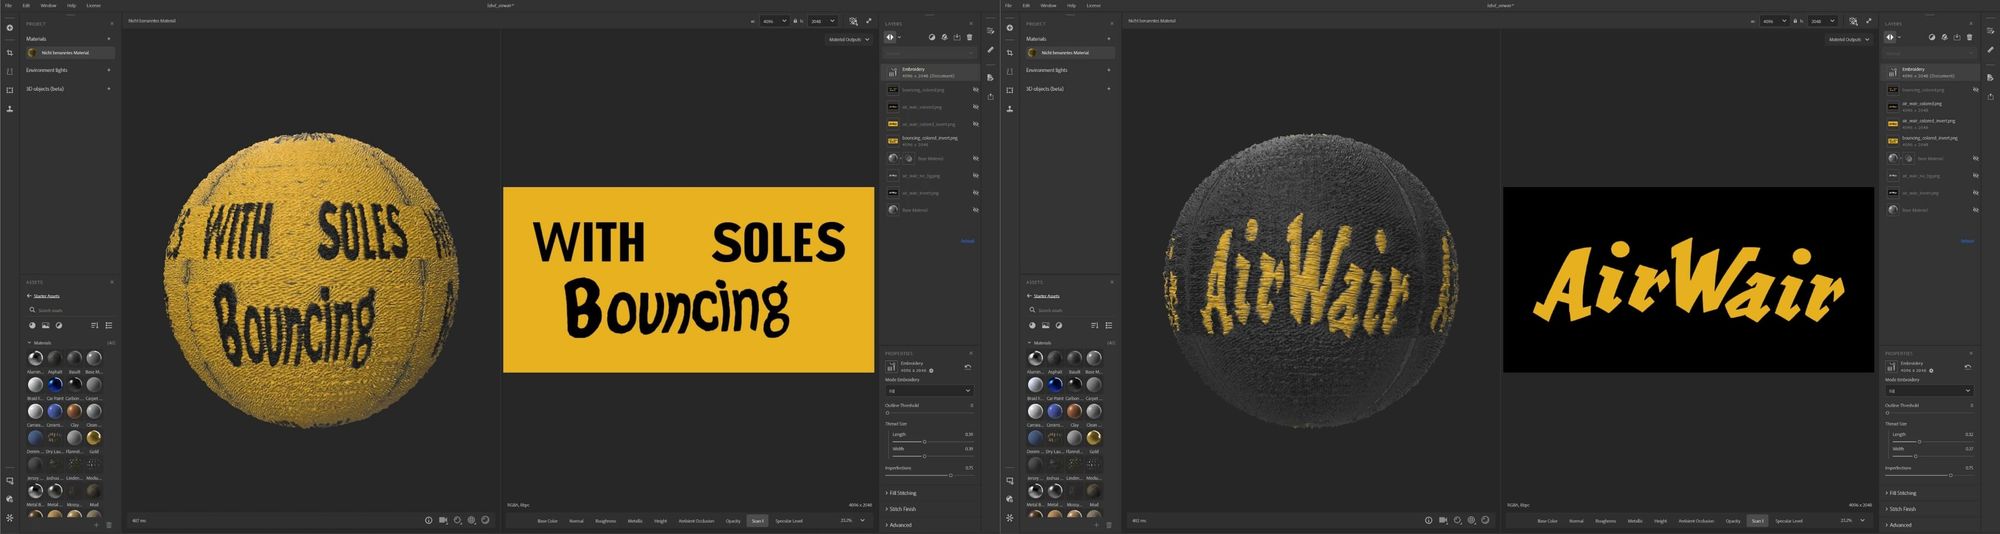
Recognising the significance of Dr. Martens boot labels, I dedicated special attention to capturing the embroidered look. Substance Sampler provides a fitting tool for simulating embroidery on diverse textures. To craft the logo, I used online images, tracing them to create a vector graphic, and then generated my custom material.
At the top of my priority list was the toe cap. Upon examining my shoes, I noticed it had the most captivating and intricate features in terms of roughness variation and dirt accumulation. Adding layers of scraped-off leather, smudged dirt, and weathered surfaces turned out to be quite enjoyable.
As the deadline came closer, it became evident that certain details of the shoe lacked refinement. Despite this, I knew it was crucial to move on to the next stage to finish within the given time limit.


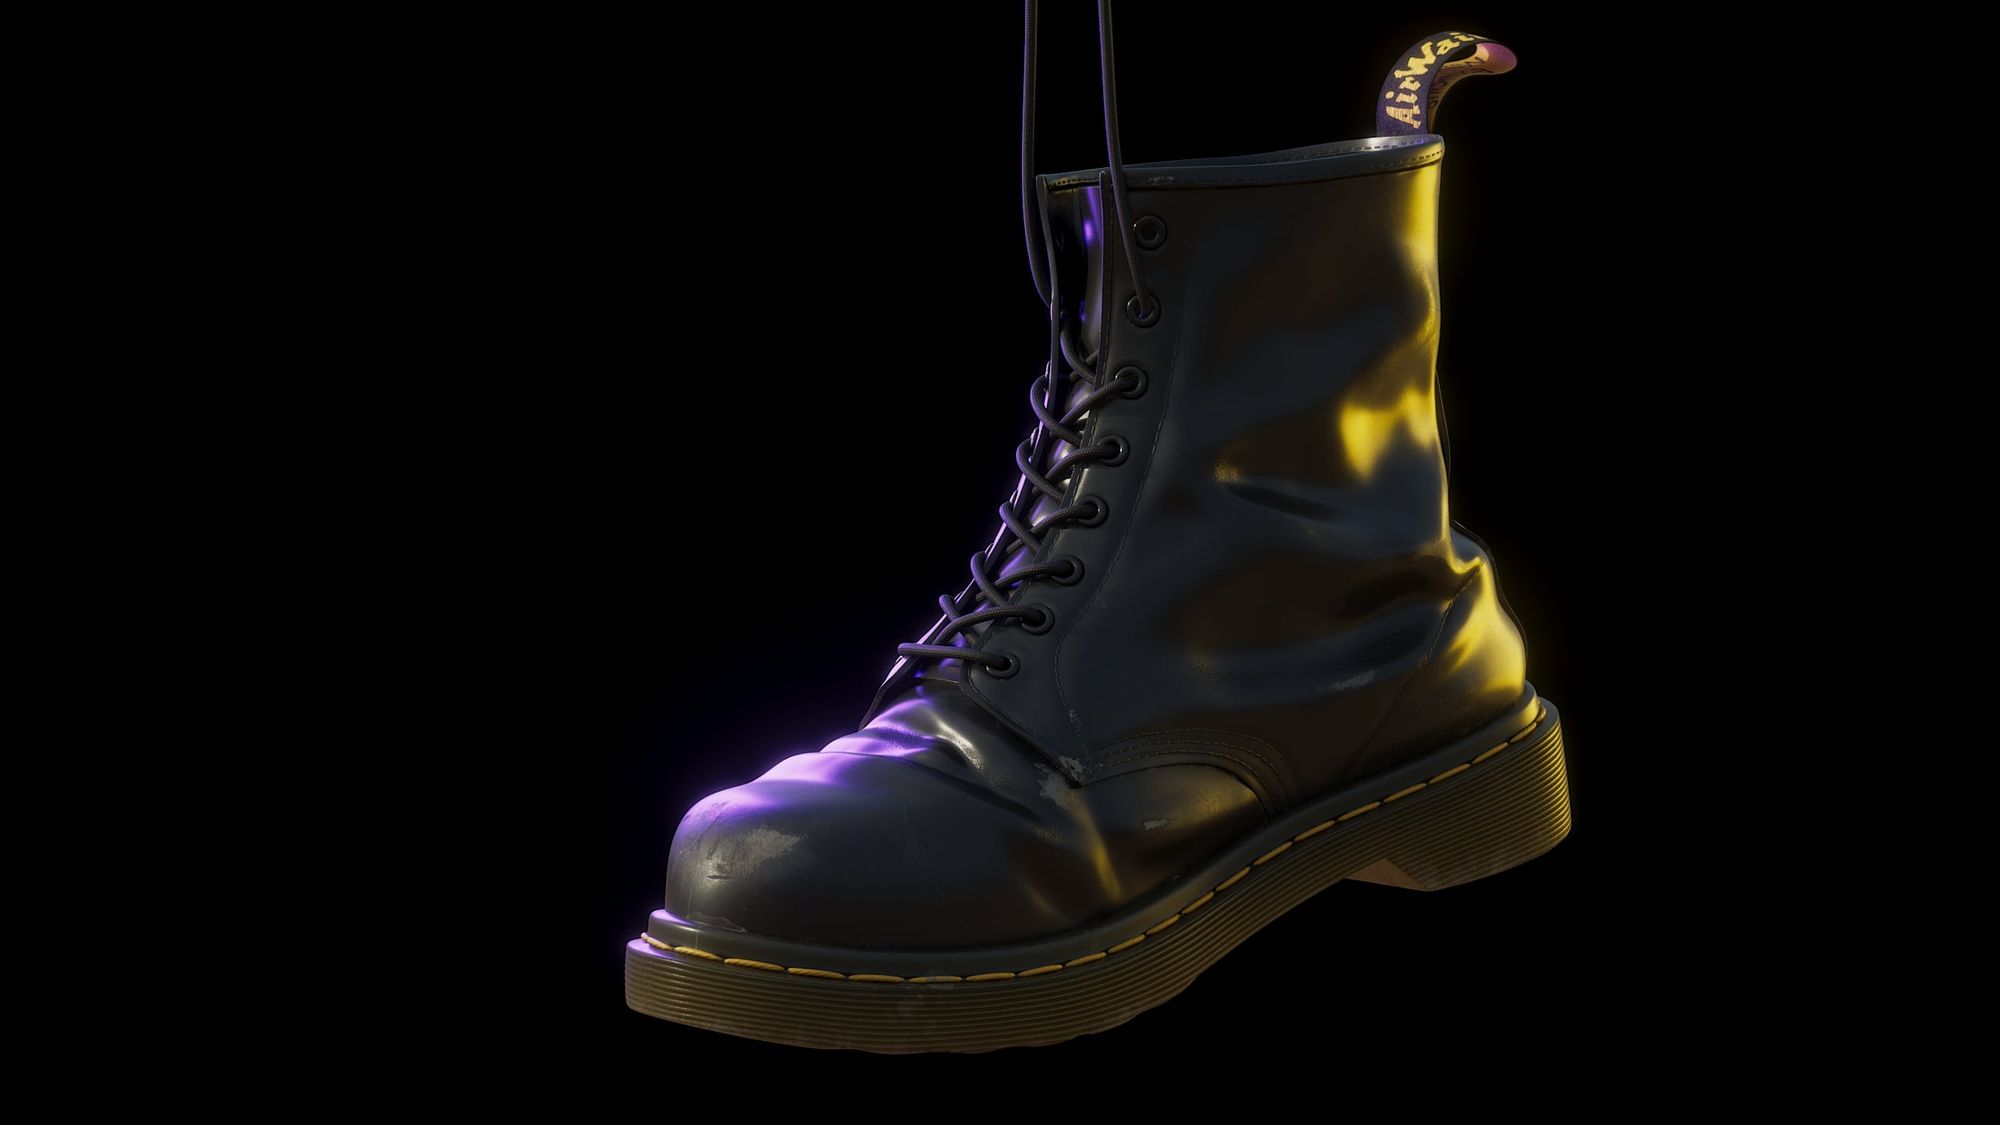
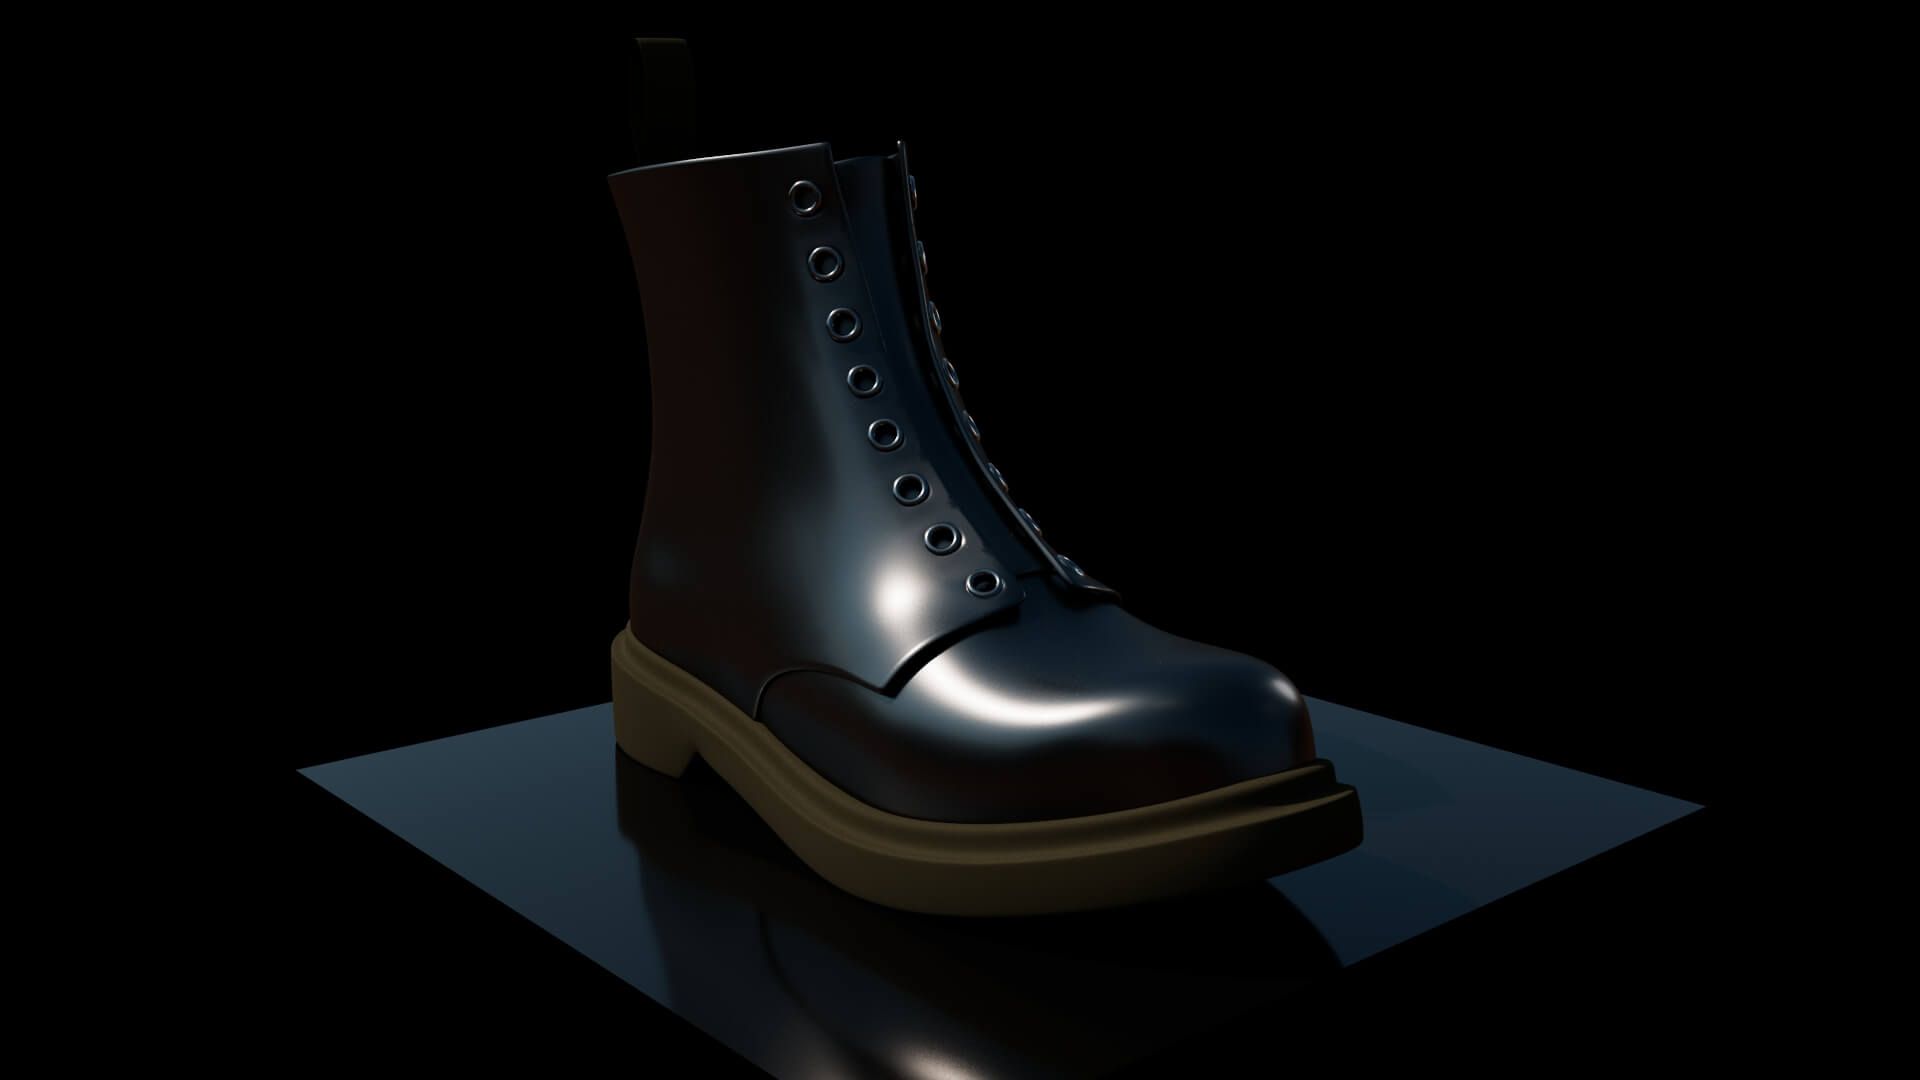
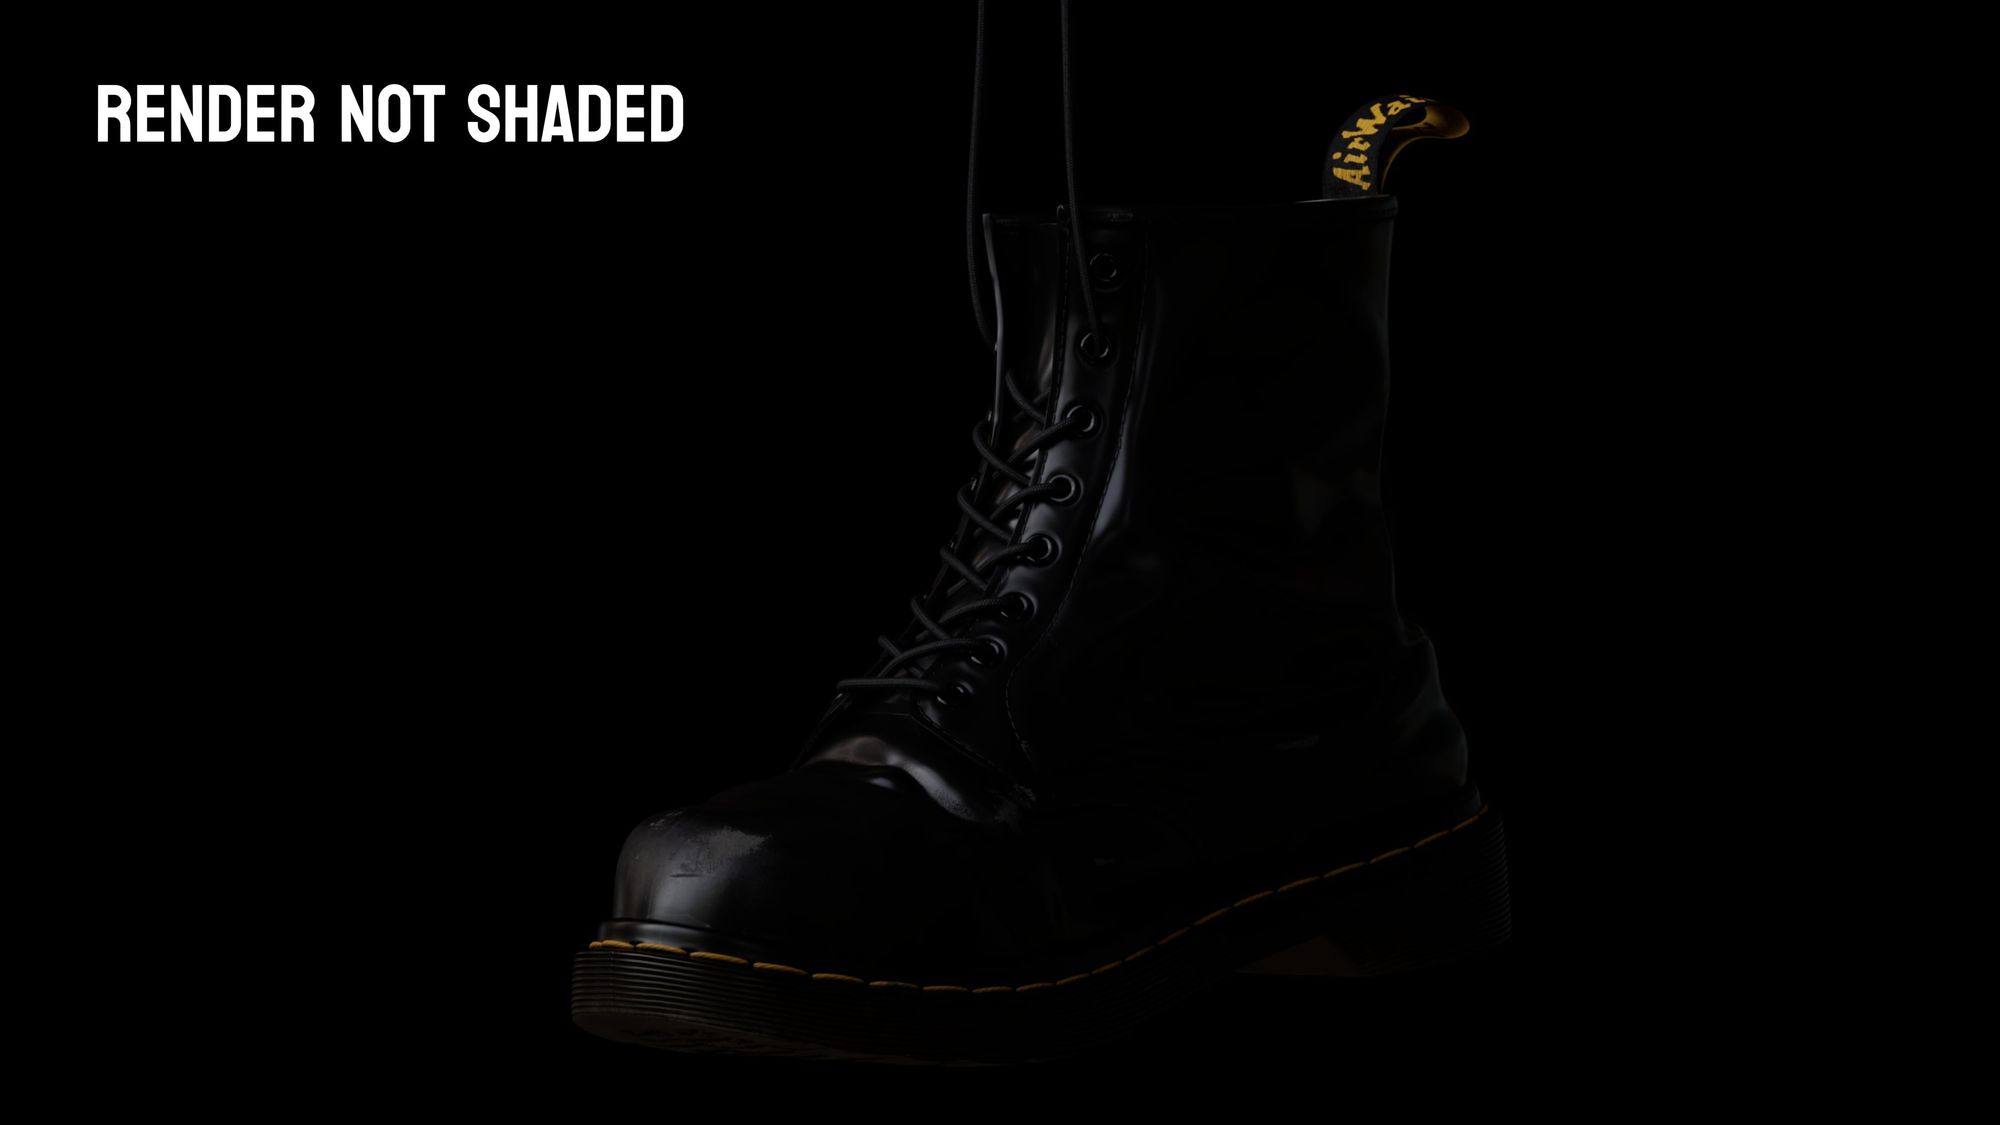
I selected a basic HDRI for neutral lighting and used it during the turntable breakdown.
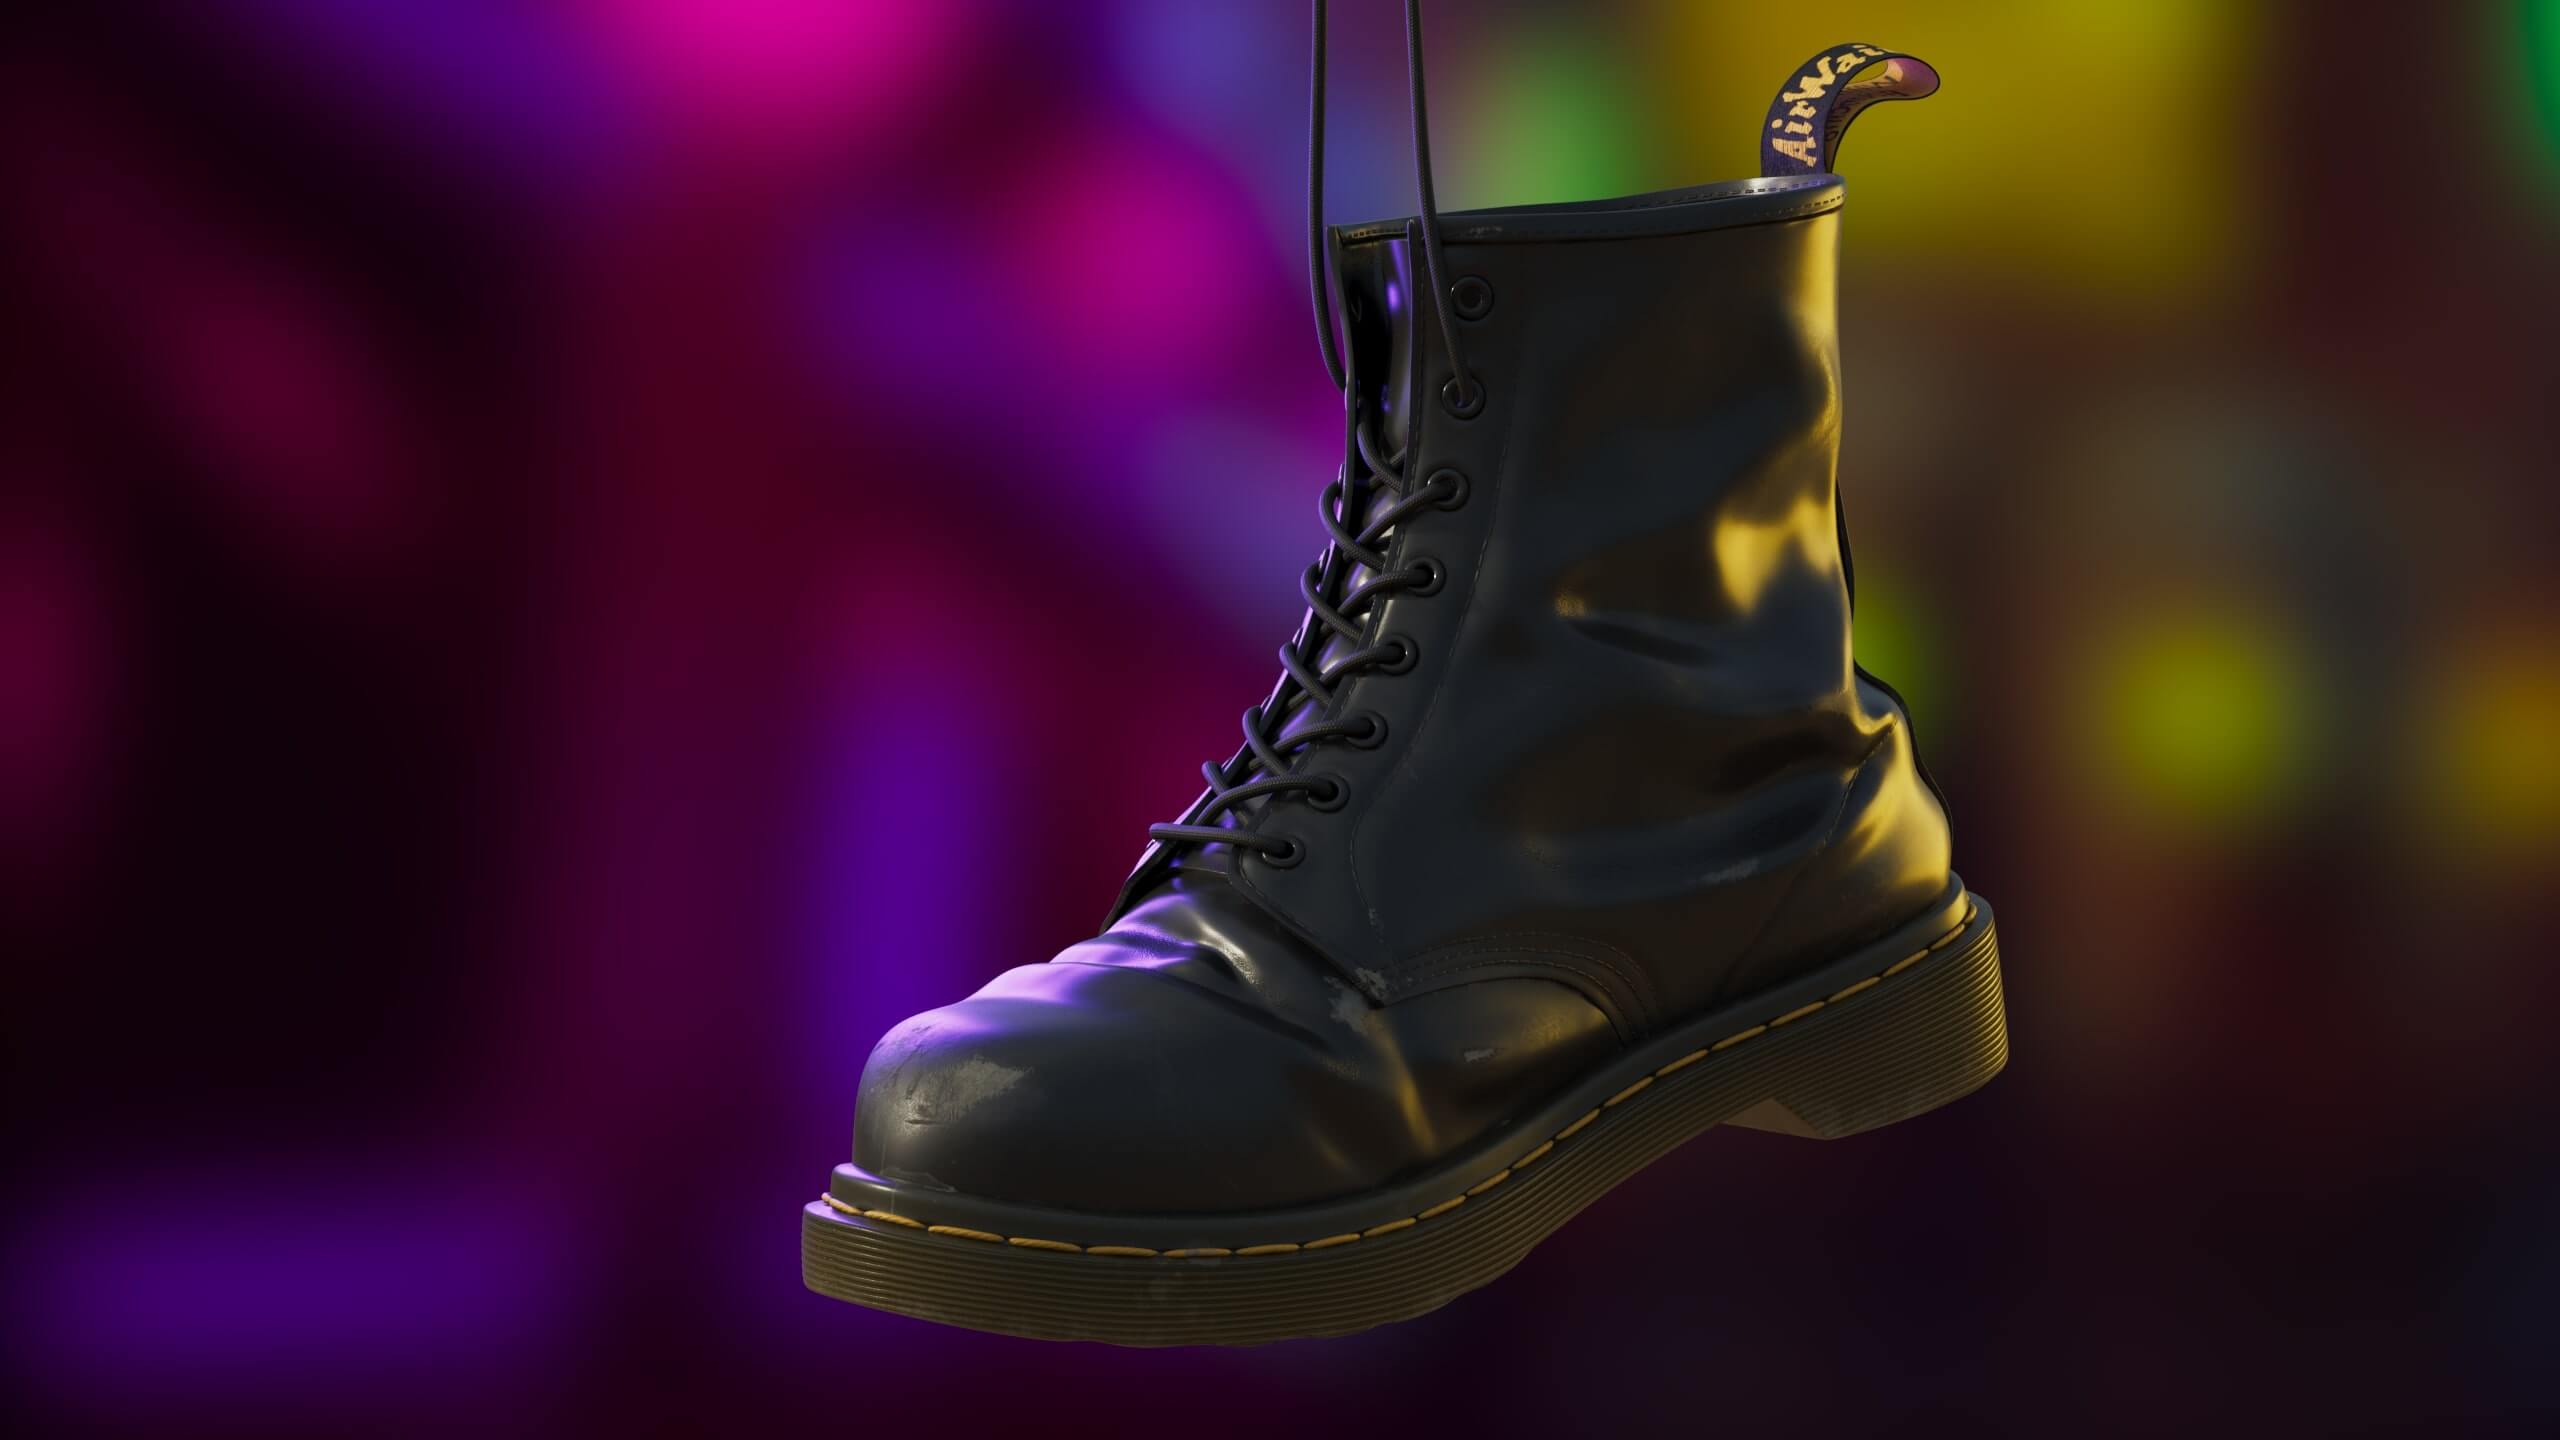
In Arnold, I set up the shaders and adjusted the texture maps using 'remapHSV'. For my main presentation, I decided to experiment with a distinctive style. I embraced a cyberpunk theme for the lighting, incorporating purple and yellow rim lights to set the mood.

Thank you for reading!
And last but not least THANK YOU so much to my classmates and mentors for carrying my through these projects and through my time here at PIXL VISN.
Keep practicing, stay curious, and don't be afraid to make mistakes along the way. These are reminders I give myself every day. I hope your artistic journey is as fulfilling and rewarding as possible.
Feel free to check out my latest blog posts on the Rookies here. If you want to keep in touch with my work or reach out to me we can connect via LinkedIn or Instagram.