Digital Costume Workflow Using Marvelous Designer and Adobe Substance 3D
Recent graduate, Ildy Izso of UTS Animal Logic Academy (ALA), shares details of her digital costume design workflow.
Recent graduate, Ildy Izso of UTS Animal Logic Academy (ALA), shares details of her digital costume design workflow.
Ildy Izso is a multi-disciplinary artist, specialising in 2D Art and Design, Costume Design, and Digital Clothing. Having previously studied production design, concept art, and costume making, Ildy has experience working as a physical costume maker and designer for film and theatre. In 2023, she graduated from the UTS Animal Logic Academy (ALA) with a Master of Animation and Visualisation.
During her time at ALA, Ildy collaborated on projects such as ‘Alone’ and ‘Coffee Brake’ using a pipeline similar to that of professional studios. Initially part of the Art Department, she later joined the Surfacing team to learn new skills. Under the guidance of creative lead Alex Weight, Ildy explored Marvelous Designer, leveraging their background in Costuming. Finding the software intuitive, she quickly mastered it and now enjoy using Marvelous Designer as well as Substance 3D to create digital costumes for various projects like the one featured in this article. Enjoy!
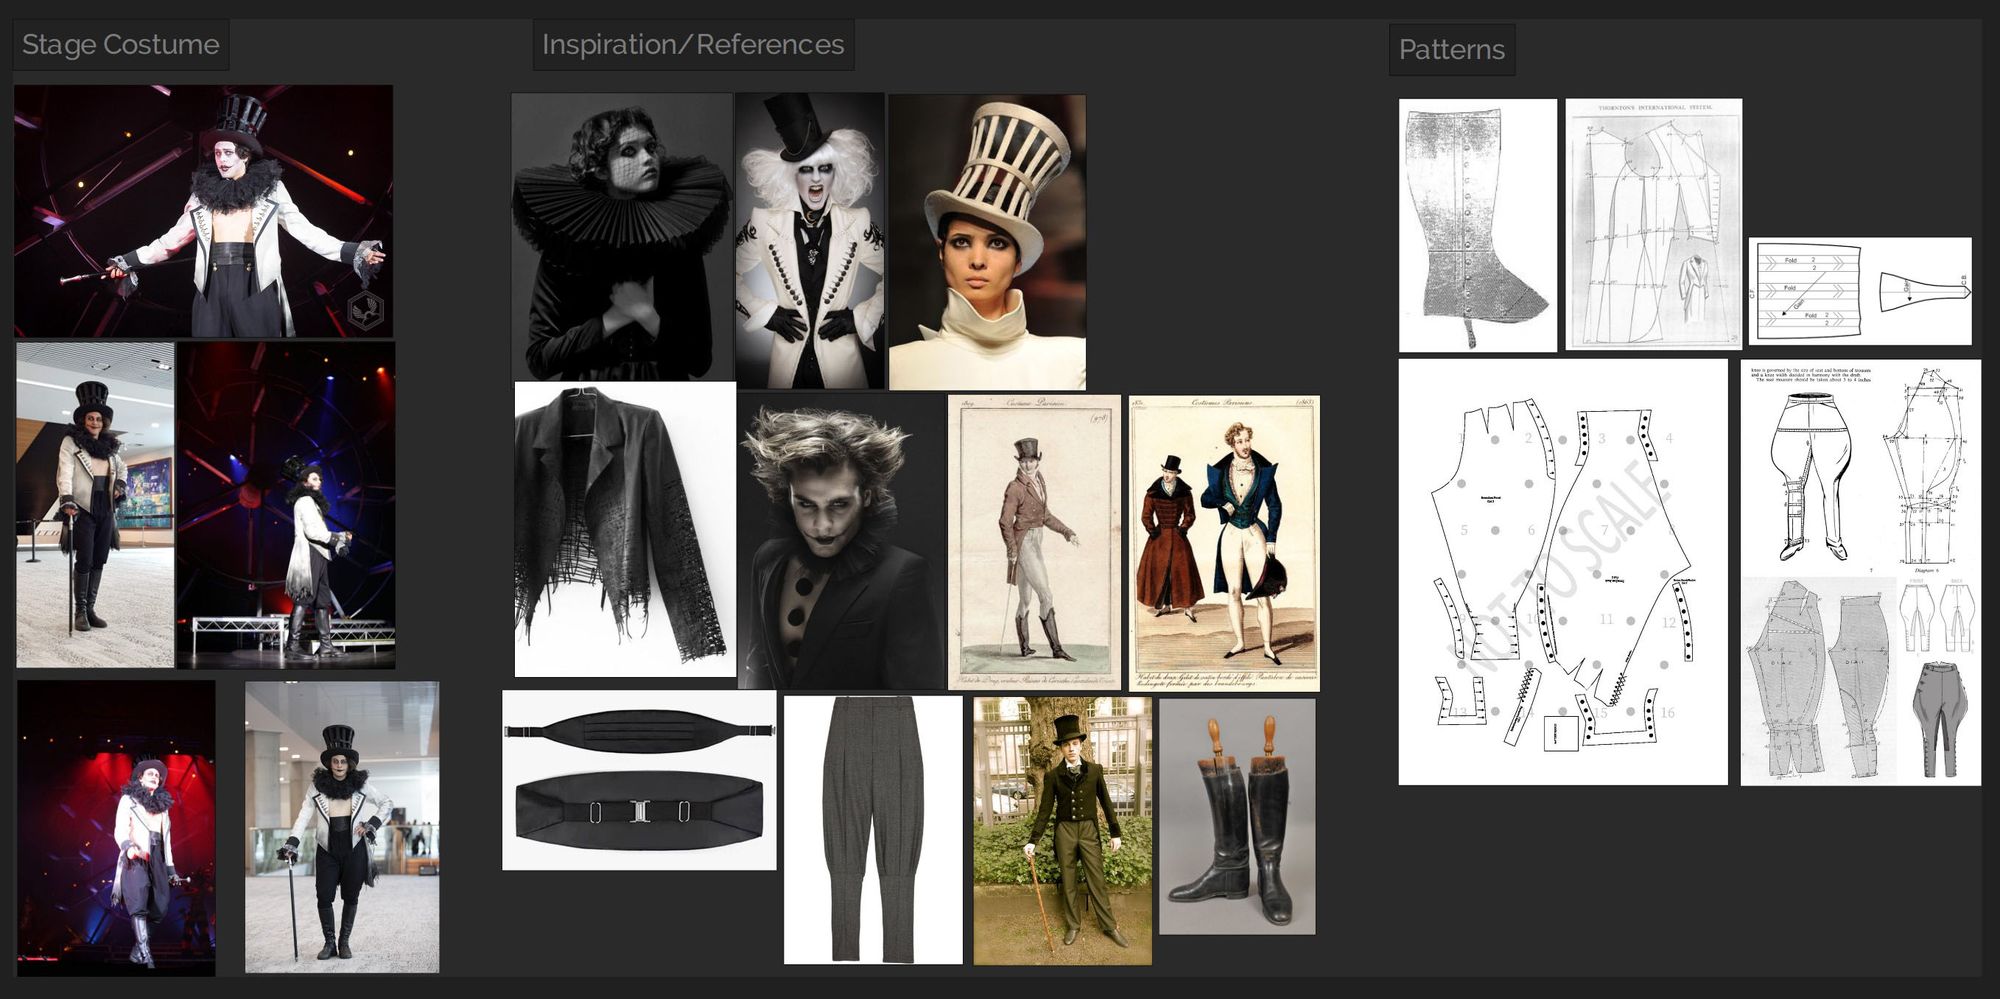
For this workflow breakdown, I’ve decided to recreate one of the physical costumes I made a few years ago for a stage production. I enjoy working with a brief or a description of the character, as it helps in understanding what they would wear and why. The Ringmaster character is meant to be a ghost of the past, someone who was cursed to haunt the abandoned circus.
The first thing I usually do is research. I knew from the brief that this character was alive sometime during the 1870s-1900s. He was the leader of the circus so he would have been dressed elegantly and according to his role. The Ringmaster is intended to be very theatrical and charismatic, but also a bit deranged.
I looked into historical menswear of the Victorian and Regency era, couture fashion and also found inspiration in Tim Burton’s work. I use Pinterest and Google Images, and I also have a small library of costume and pattern books I can refer to. Then, I set up a mood board with the references I find most interesting or inspiring.
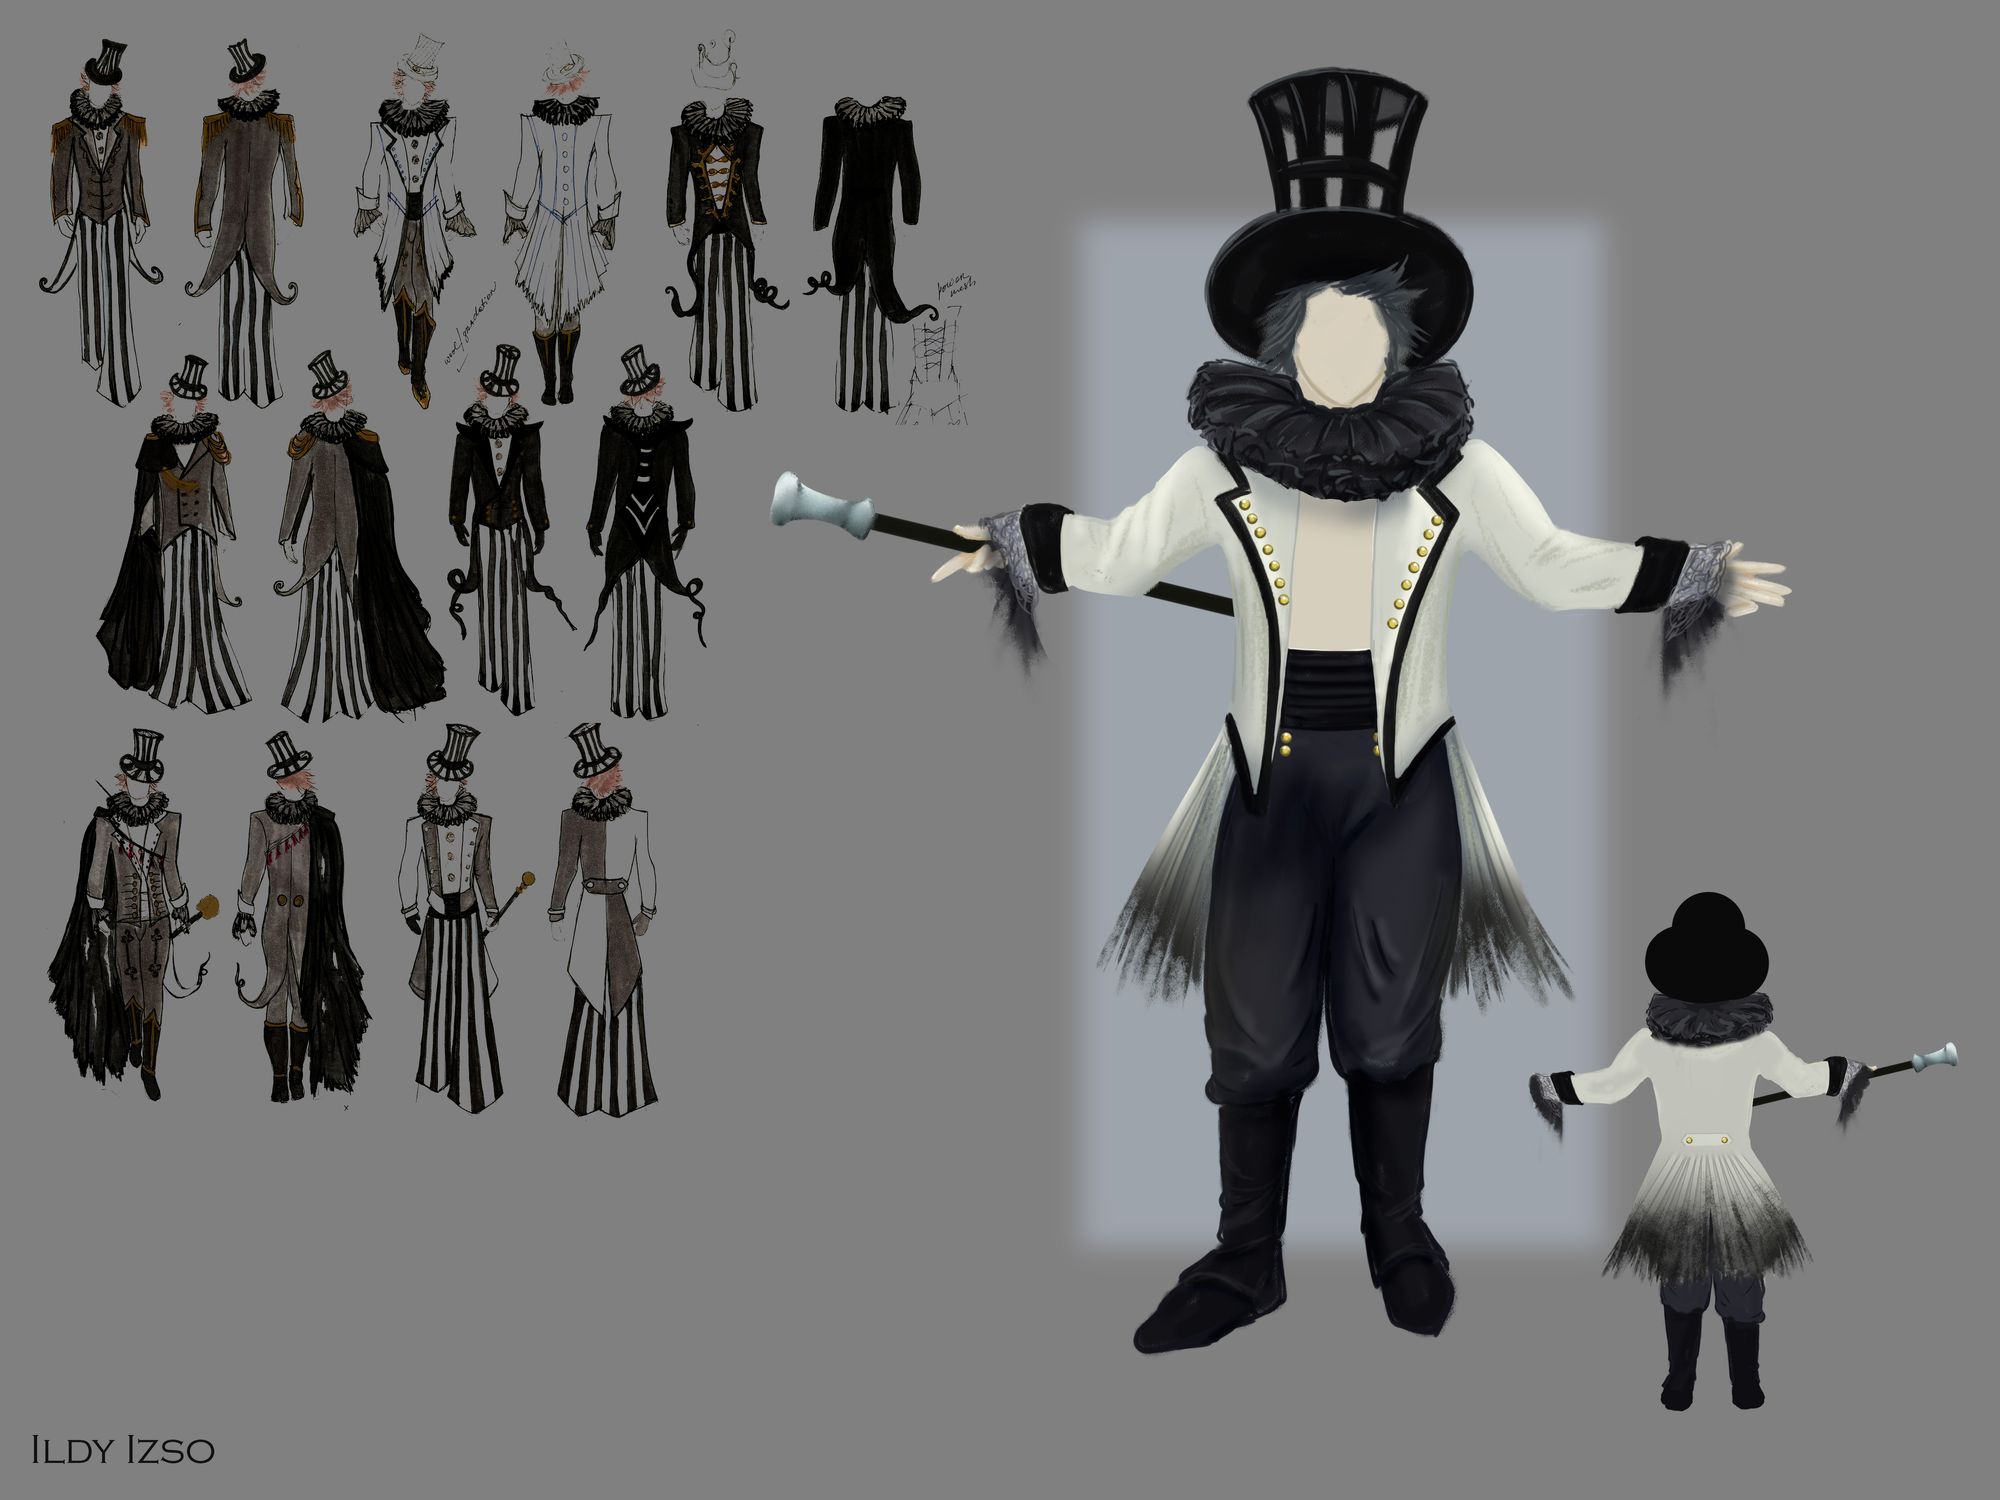
Once I have a mood board, I’ll sketch out as many ideas as I can and refine the design until I have one clear idea. In a production setting, I would also have a lot of discussions with the Production Designer and Director to ensure the design represents their idea of the character.
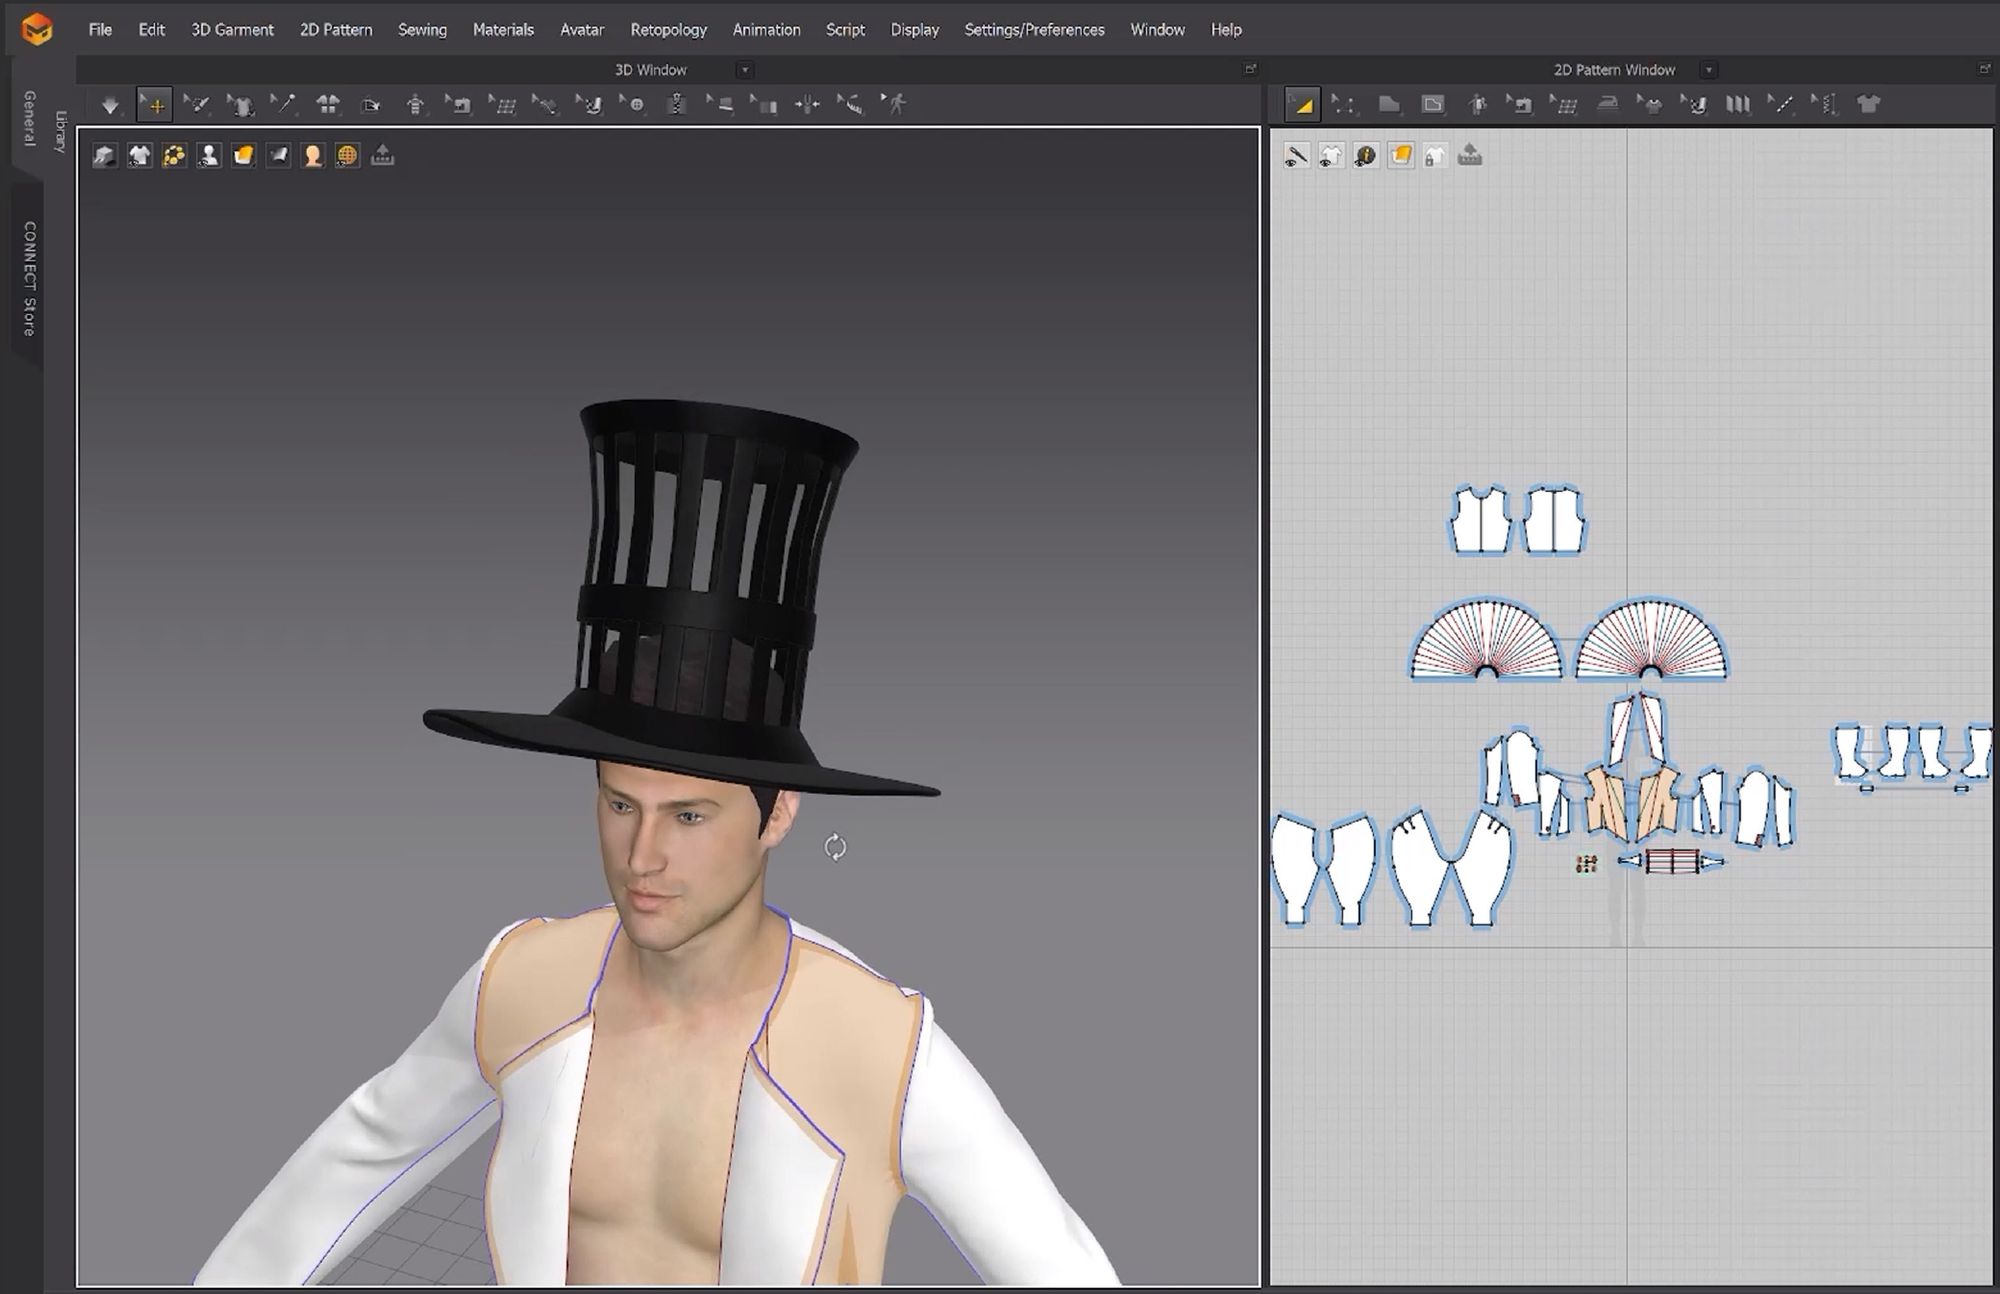
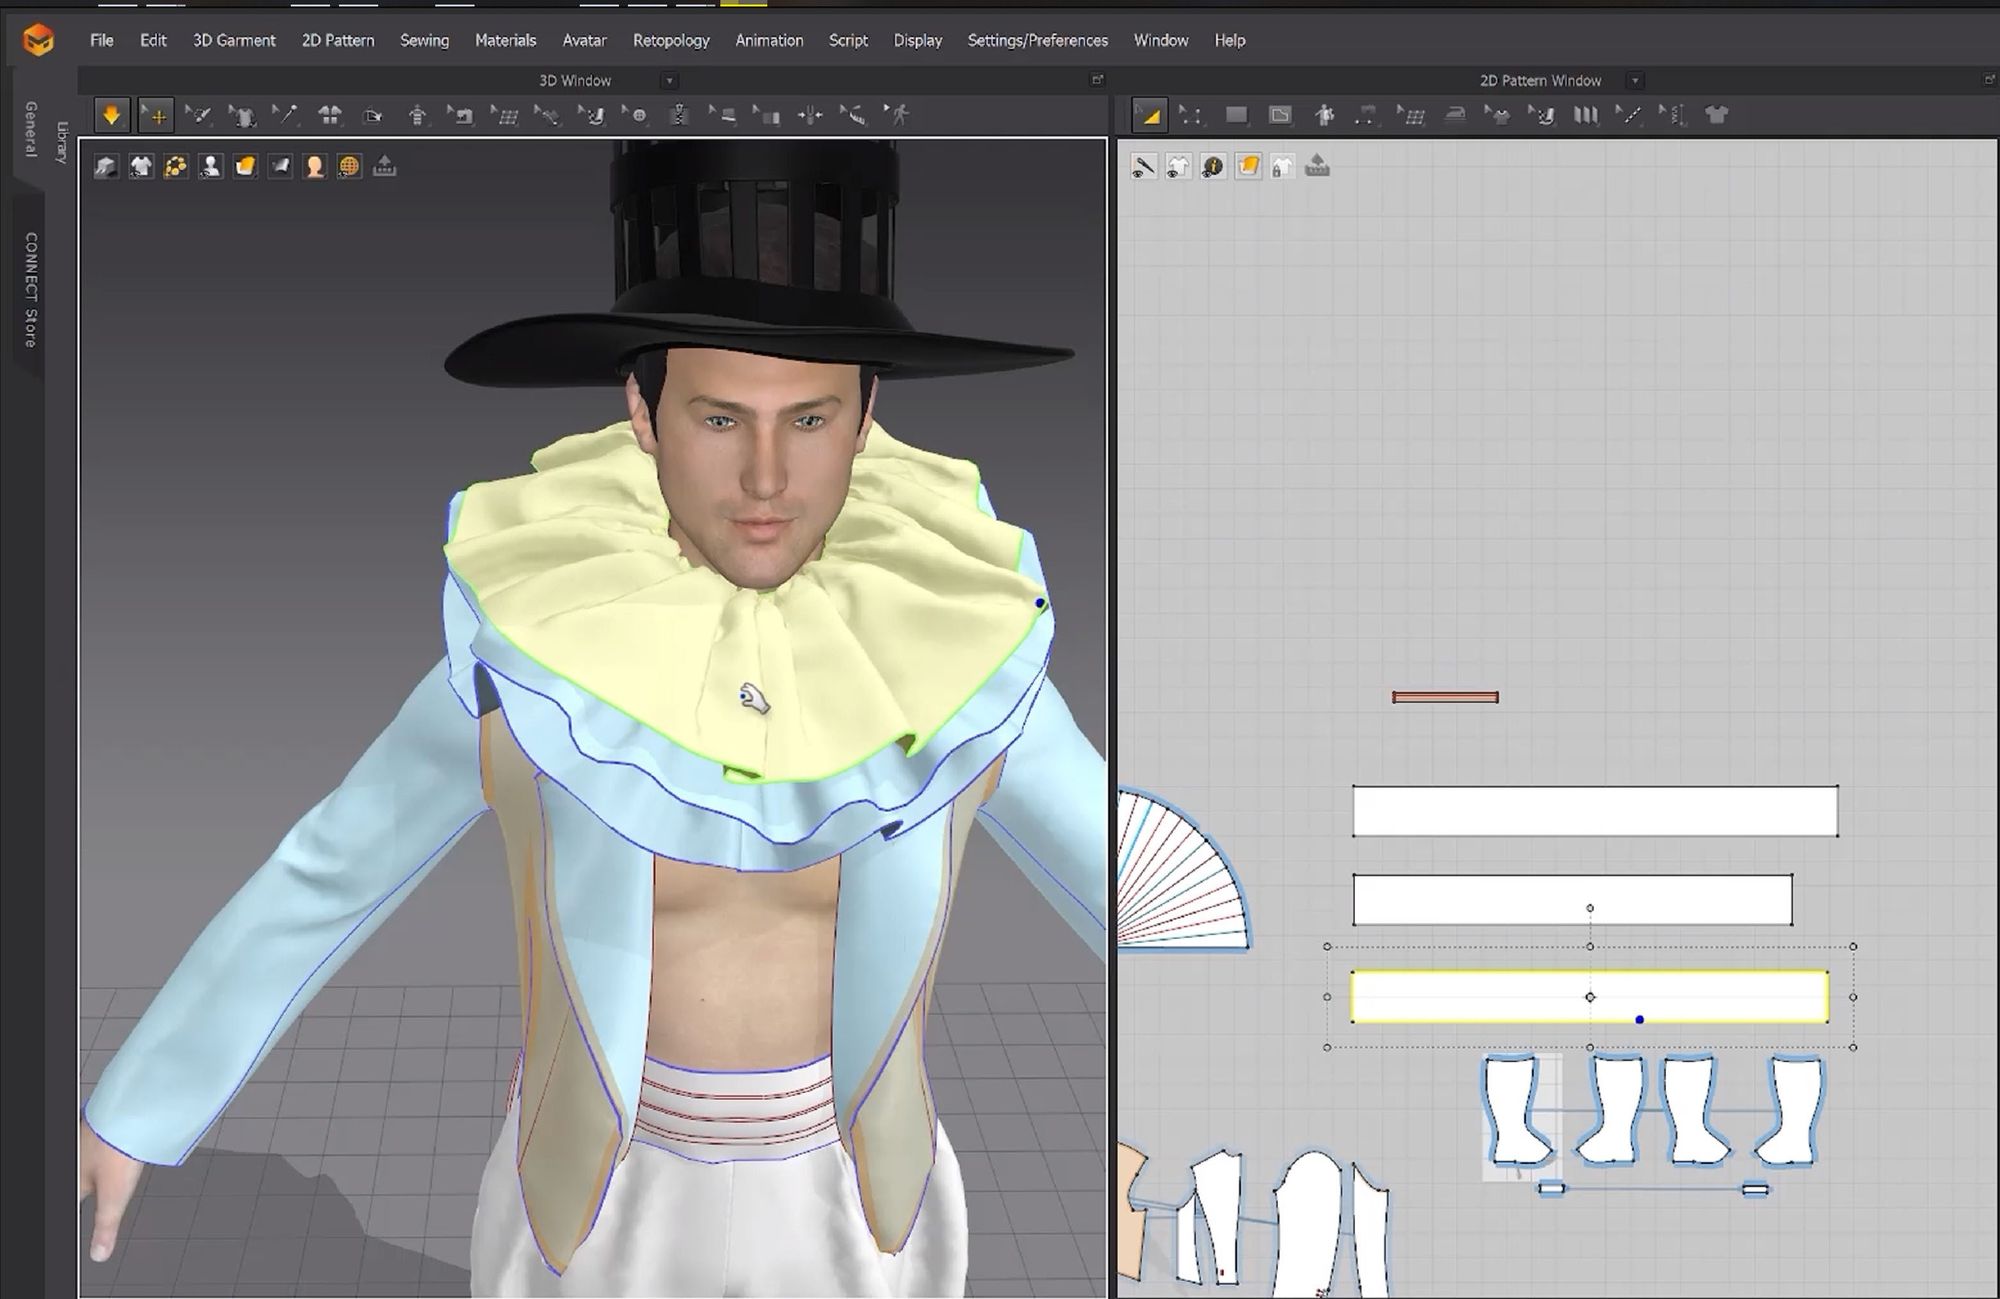
In Marvelous Designer, I often use the default avatars, but change their measurements to steer away from the traditional fashion look. I start with creating supporting garments that won’t be visible in the final outfit. I use this as a sort of foundation and it helps with keeping other garments in place.
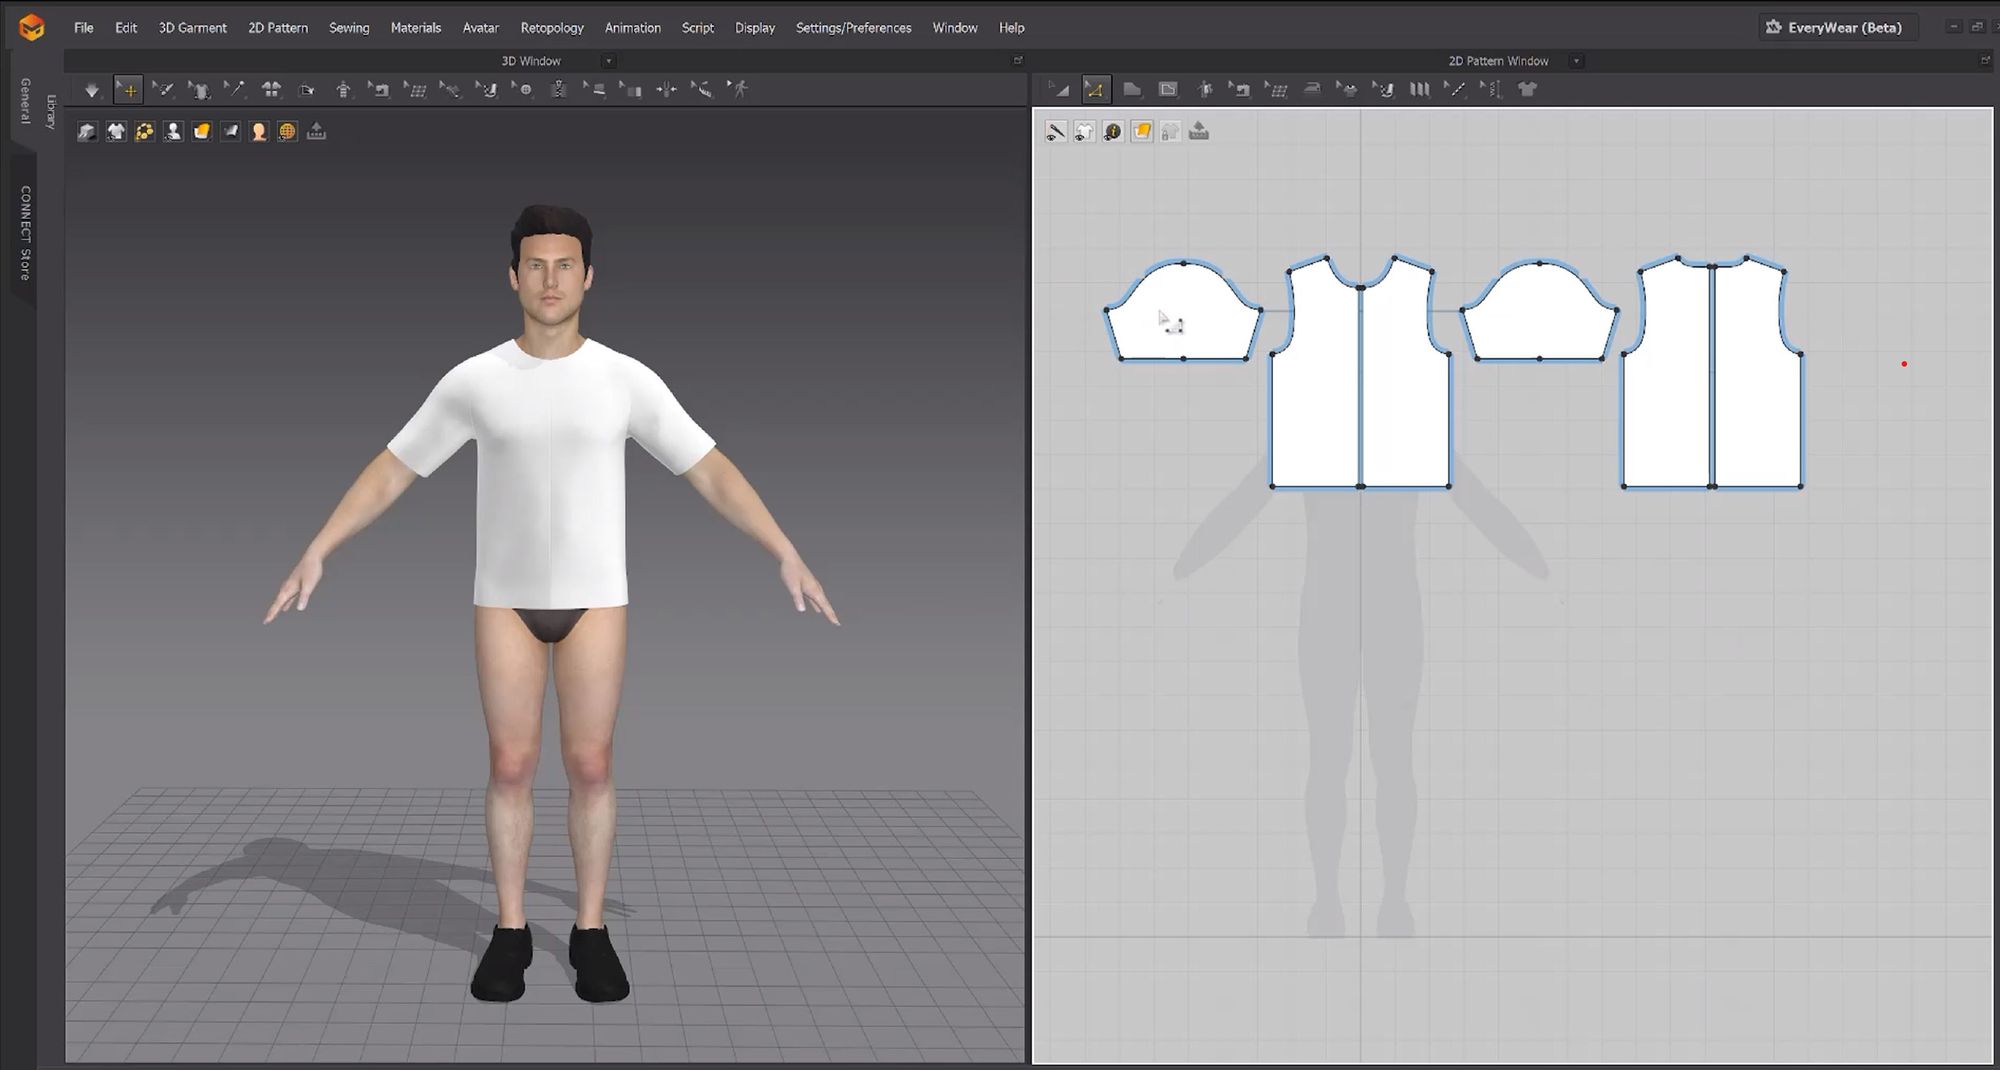
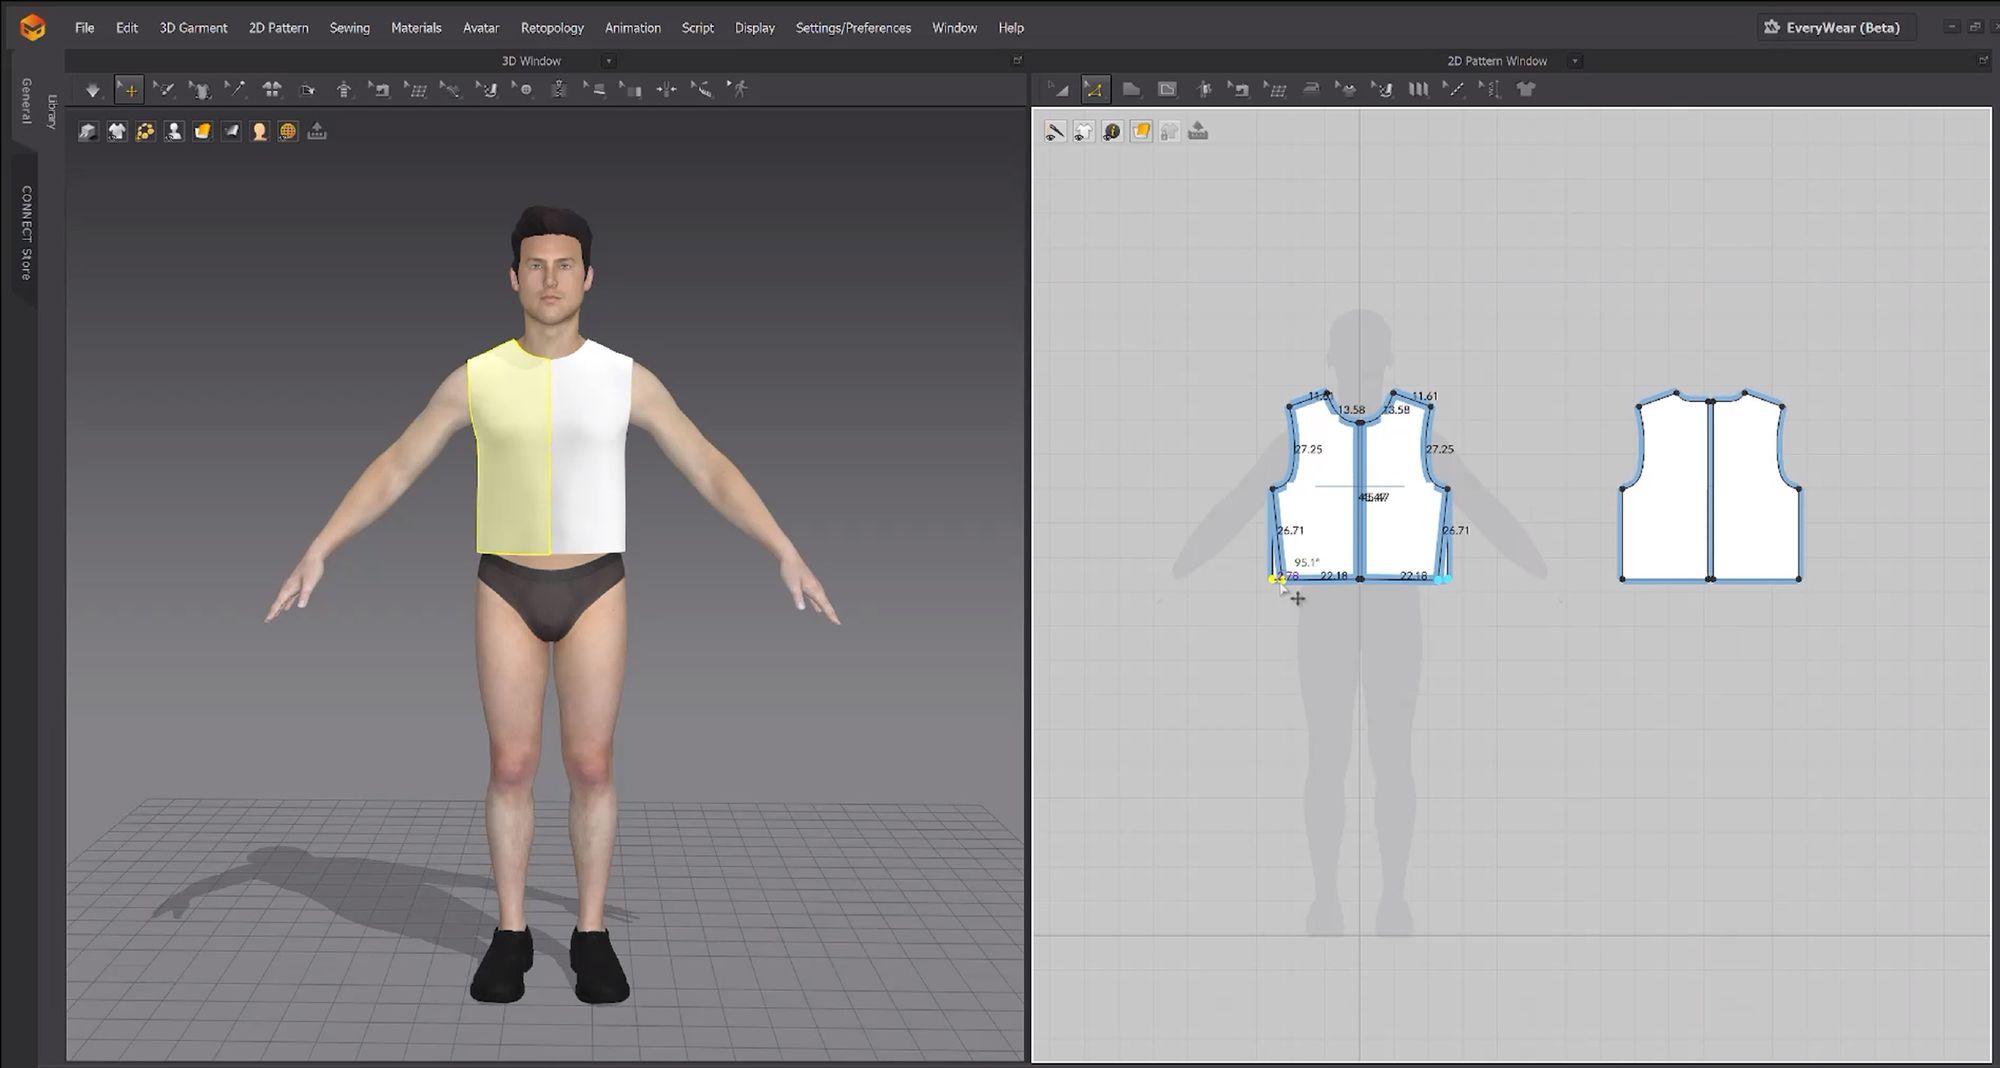

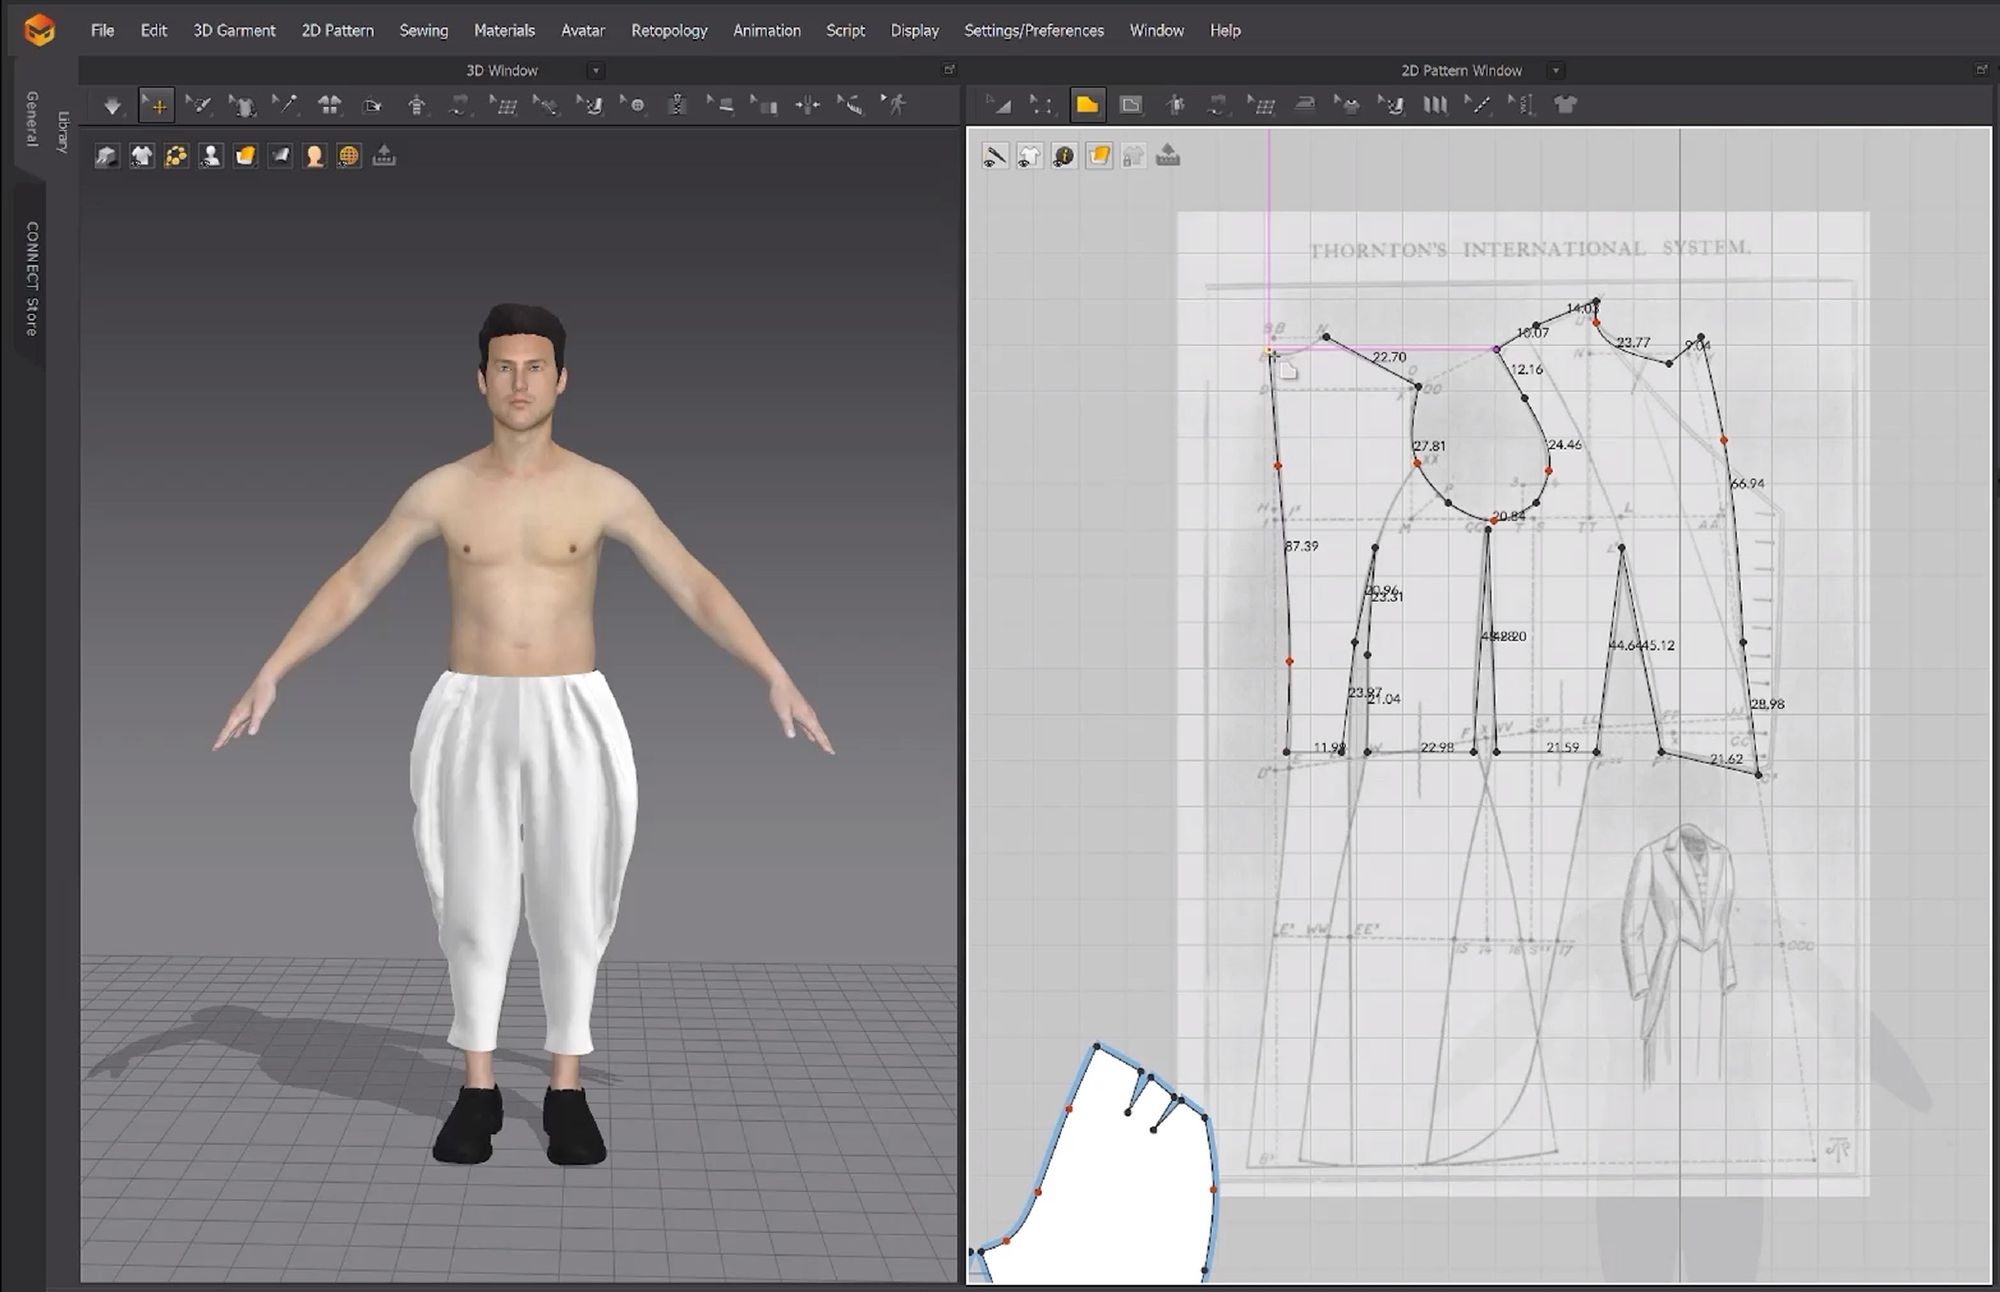
Most of the time, I can use the patterns I found during my research and trace them as a starting point, but they need alterations.
I often use the modular editor in Marvelous Designer for shirts and jackets, and the base garments can be very useful too.
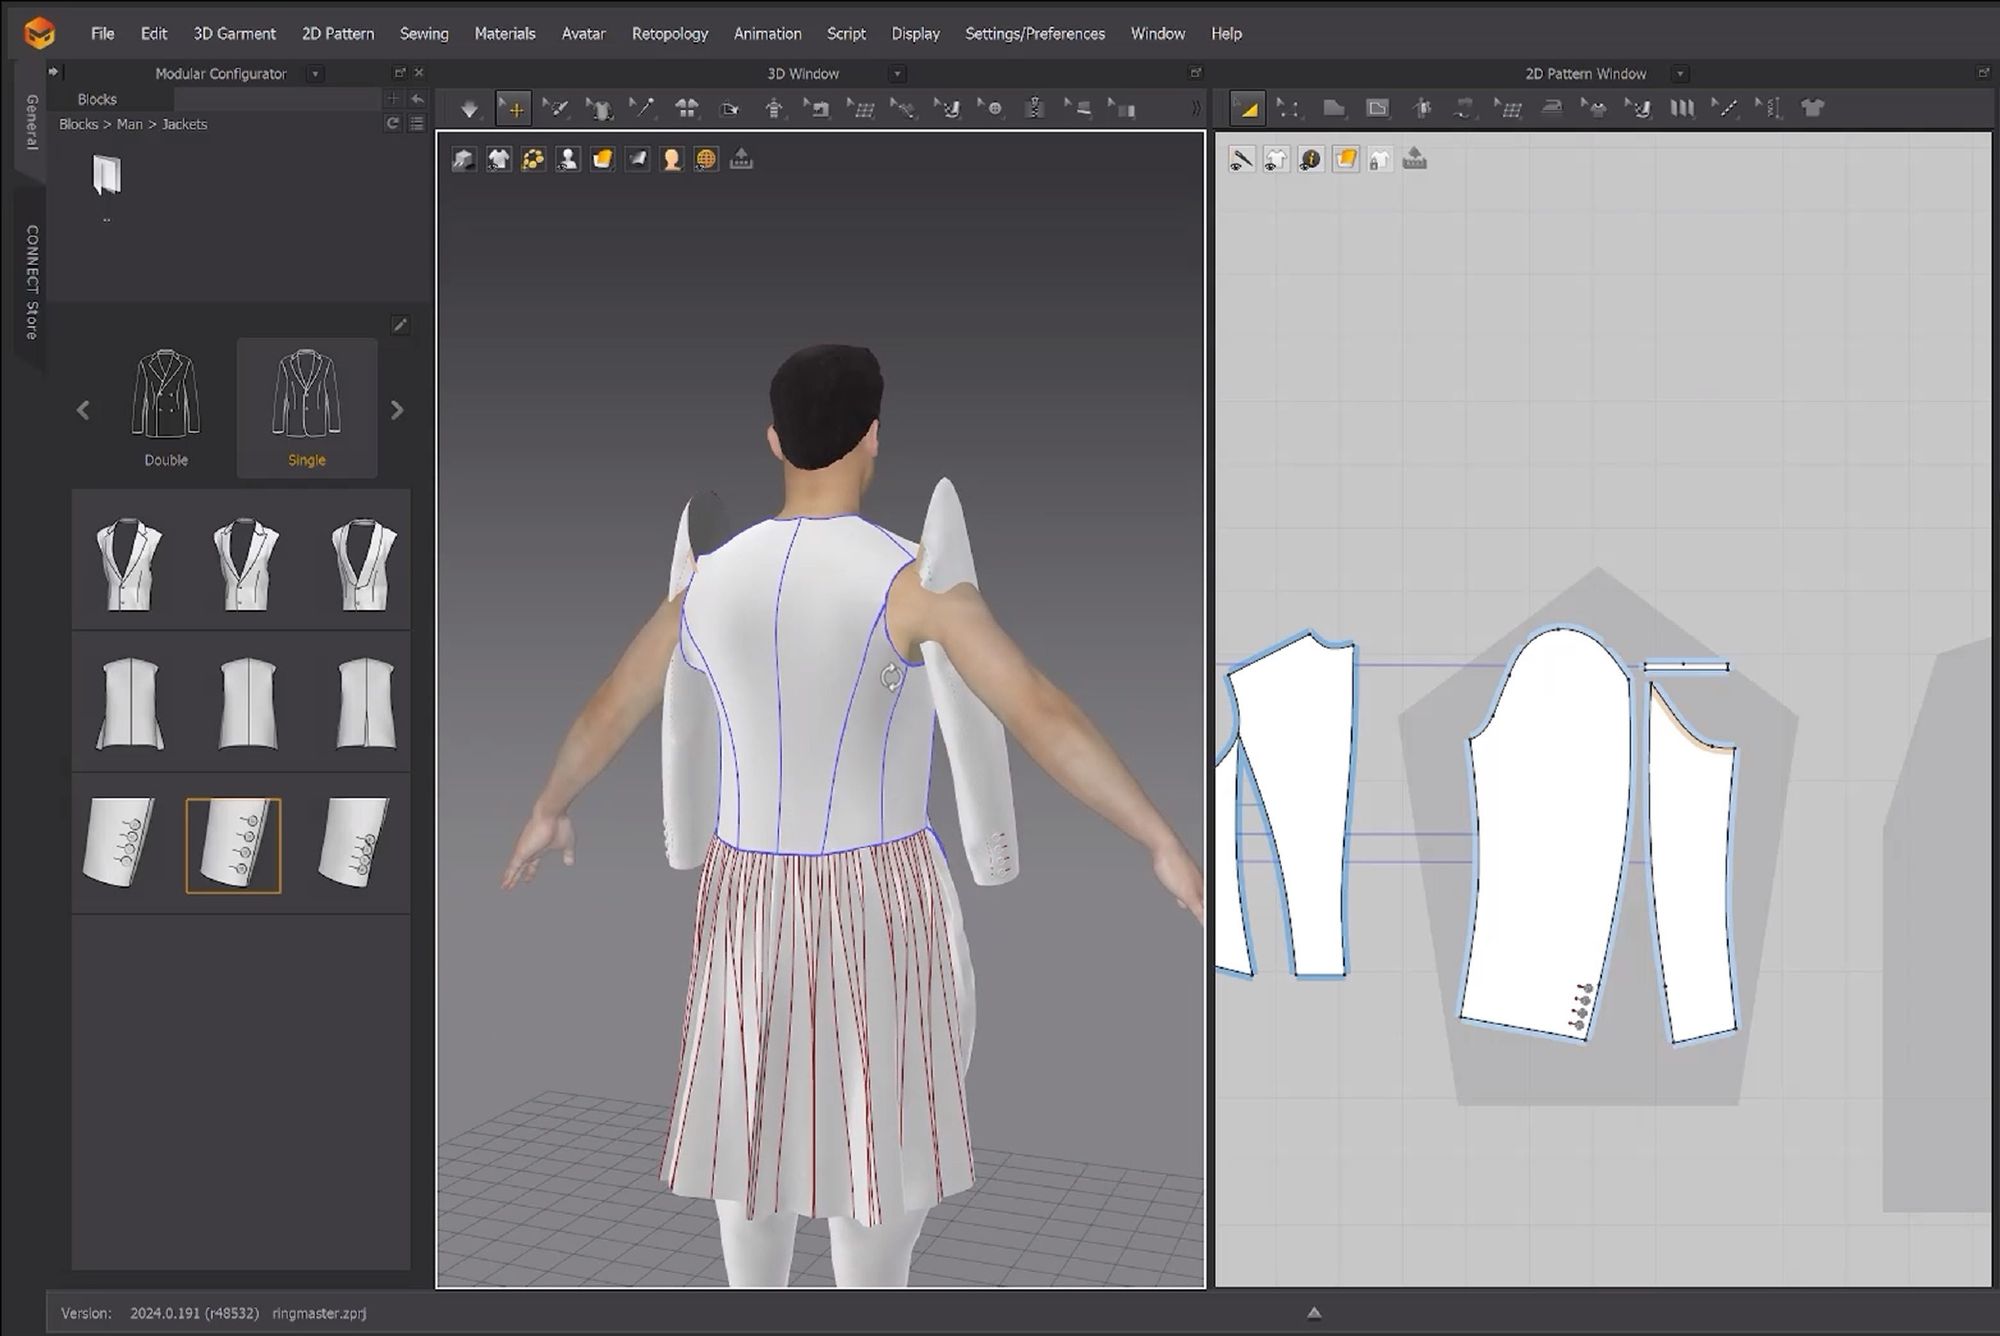
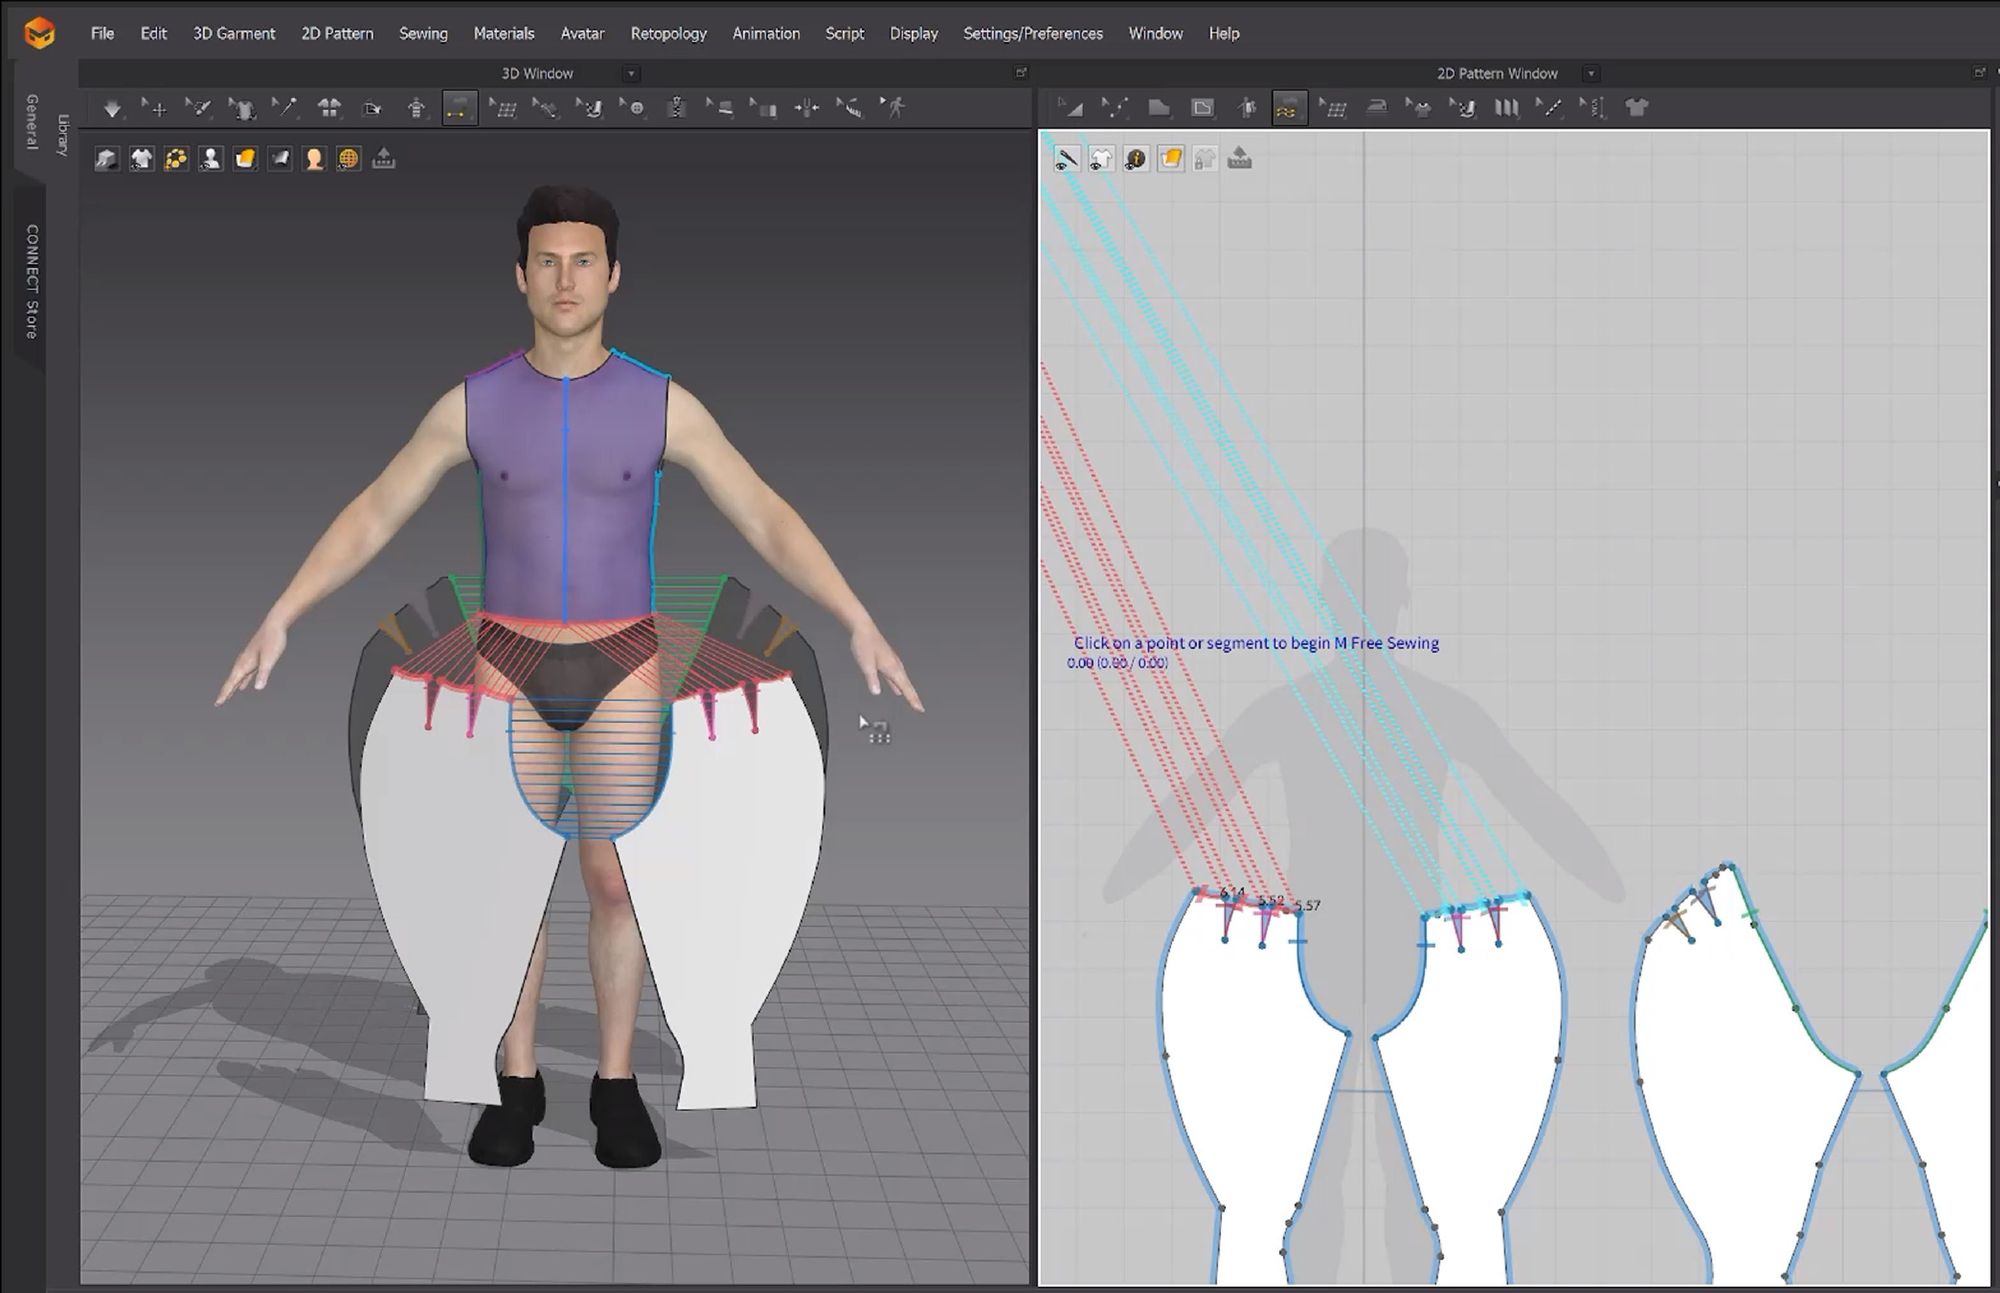
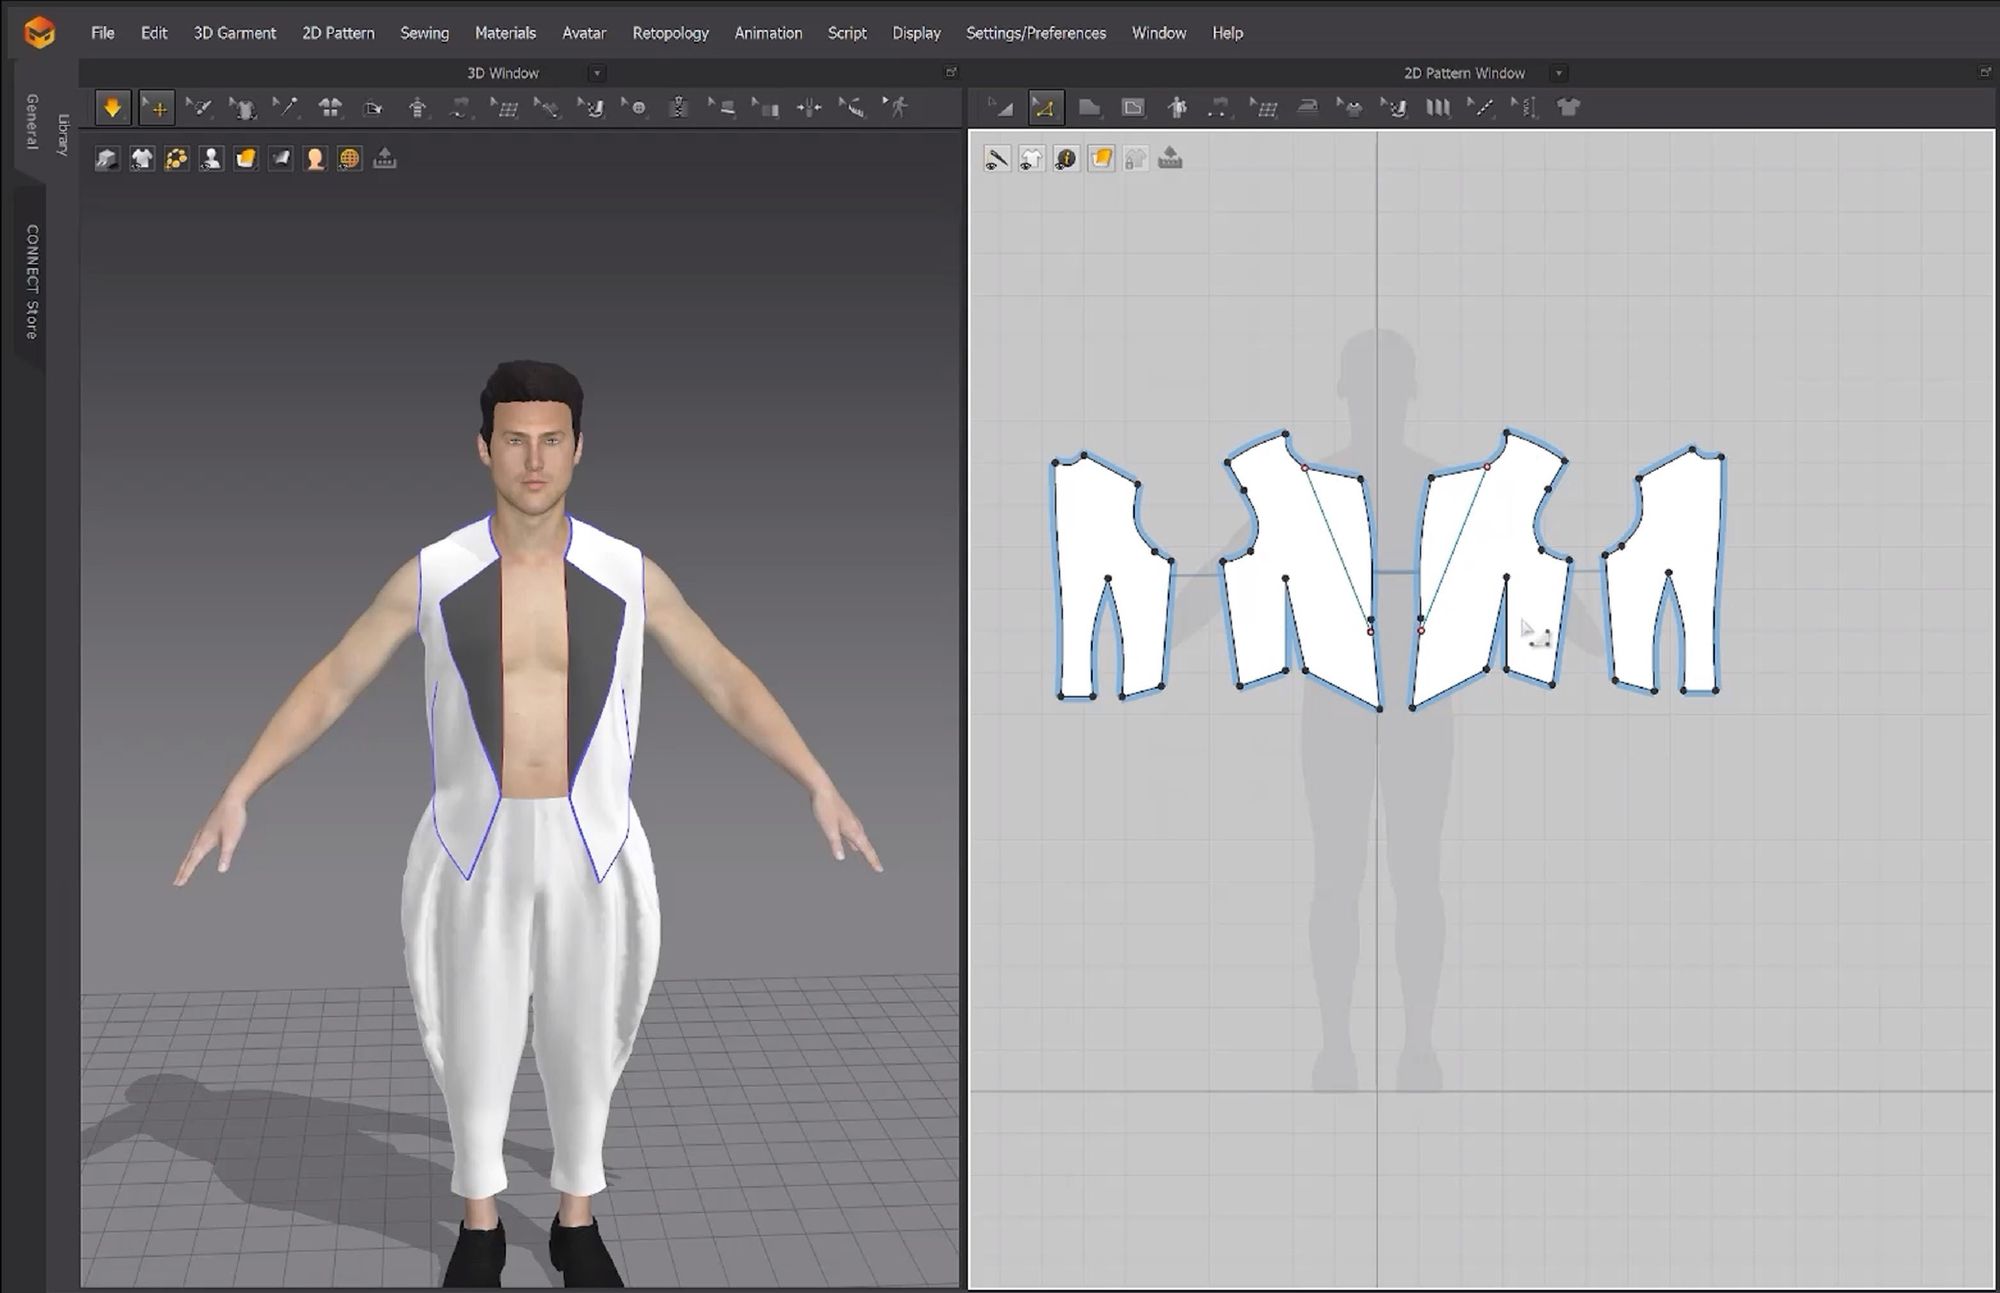
Once I have the base garment blocked out, I’ll do the alterations to get the shape and look I want to achieve. I repeat this on every garment one by one. This can be a long process and I make a lot of revisions as I go.
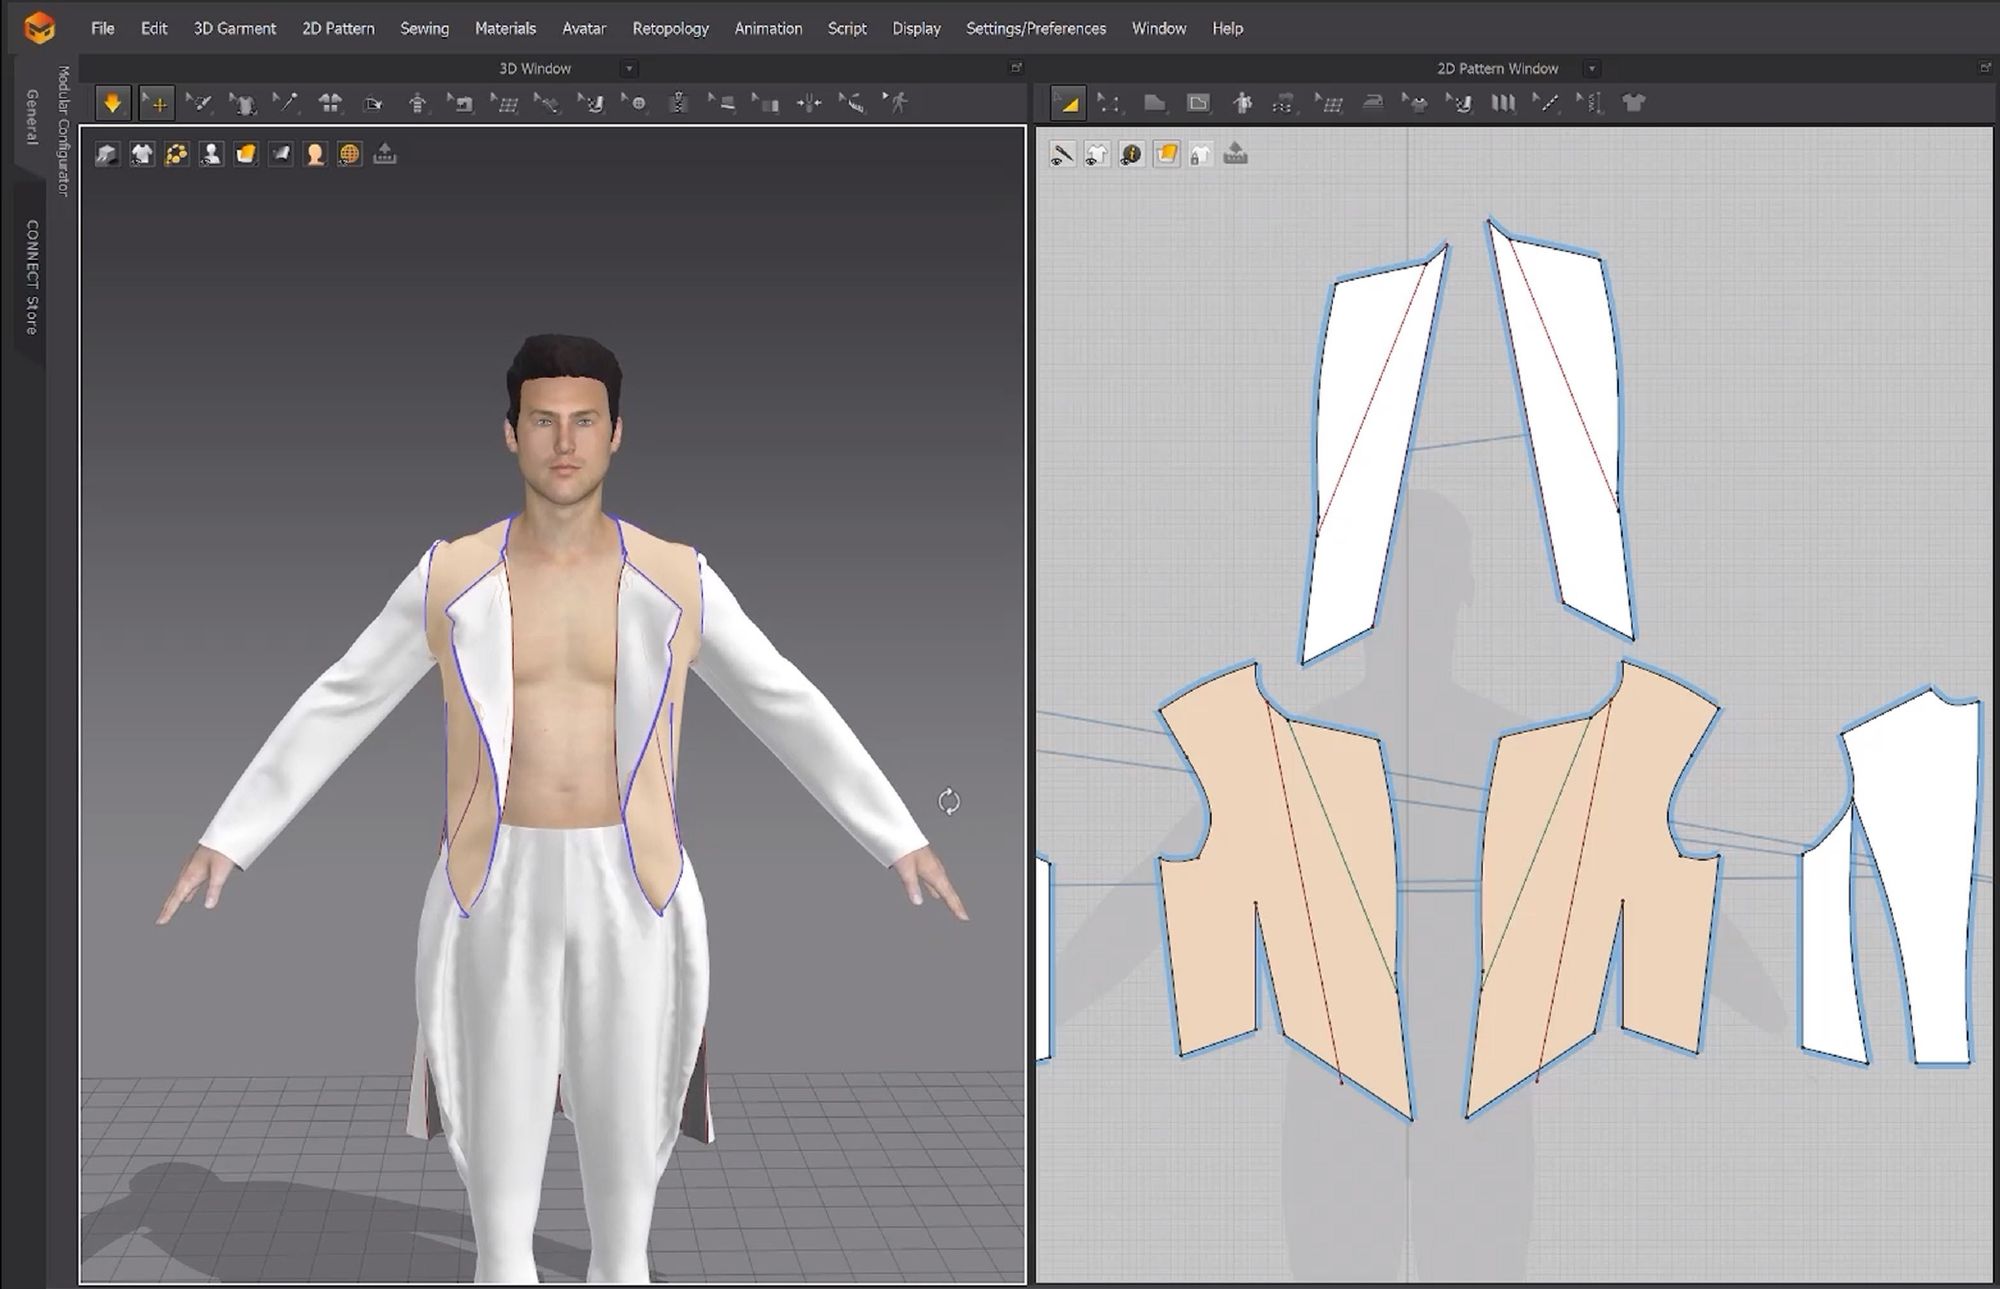
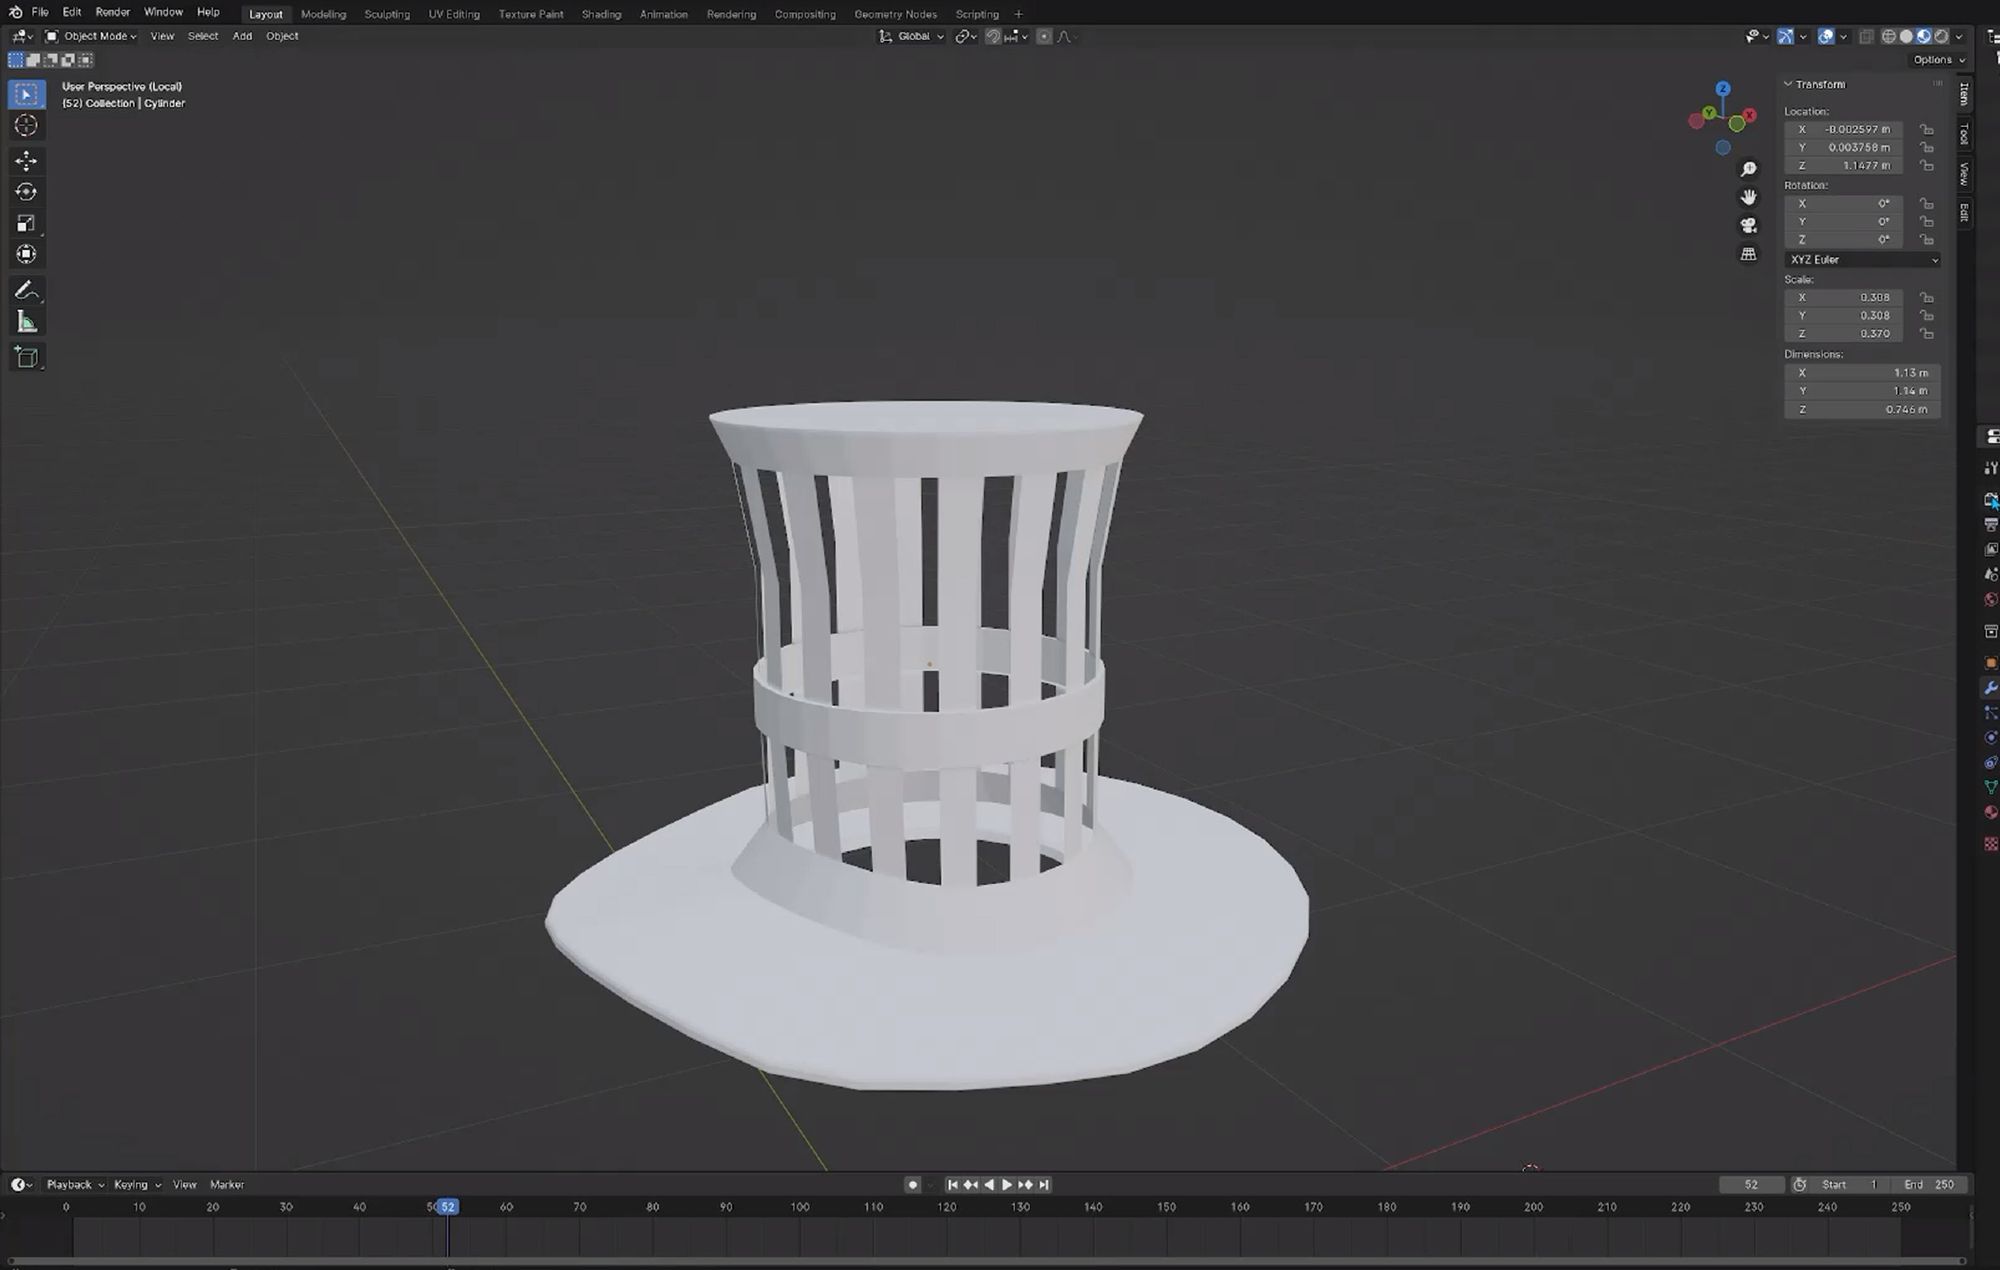
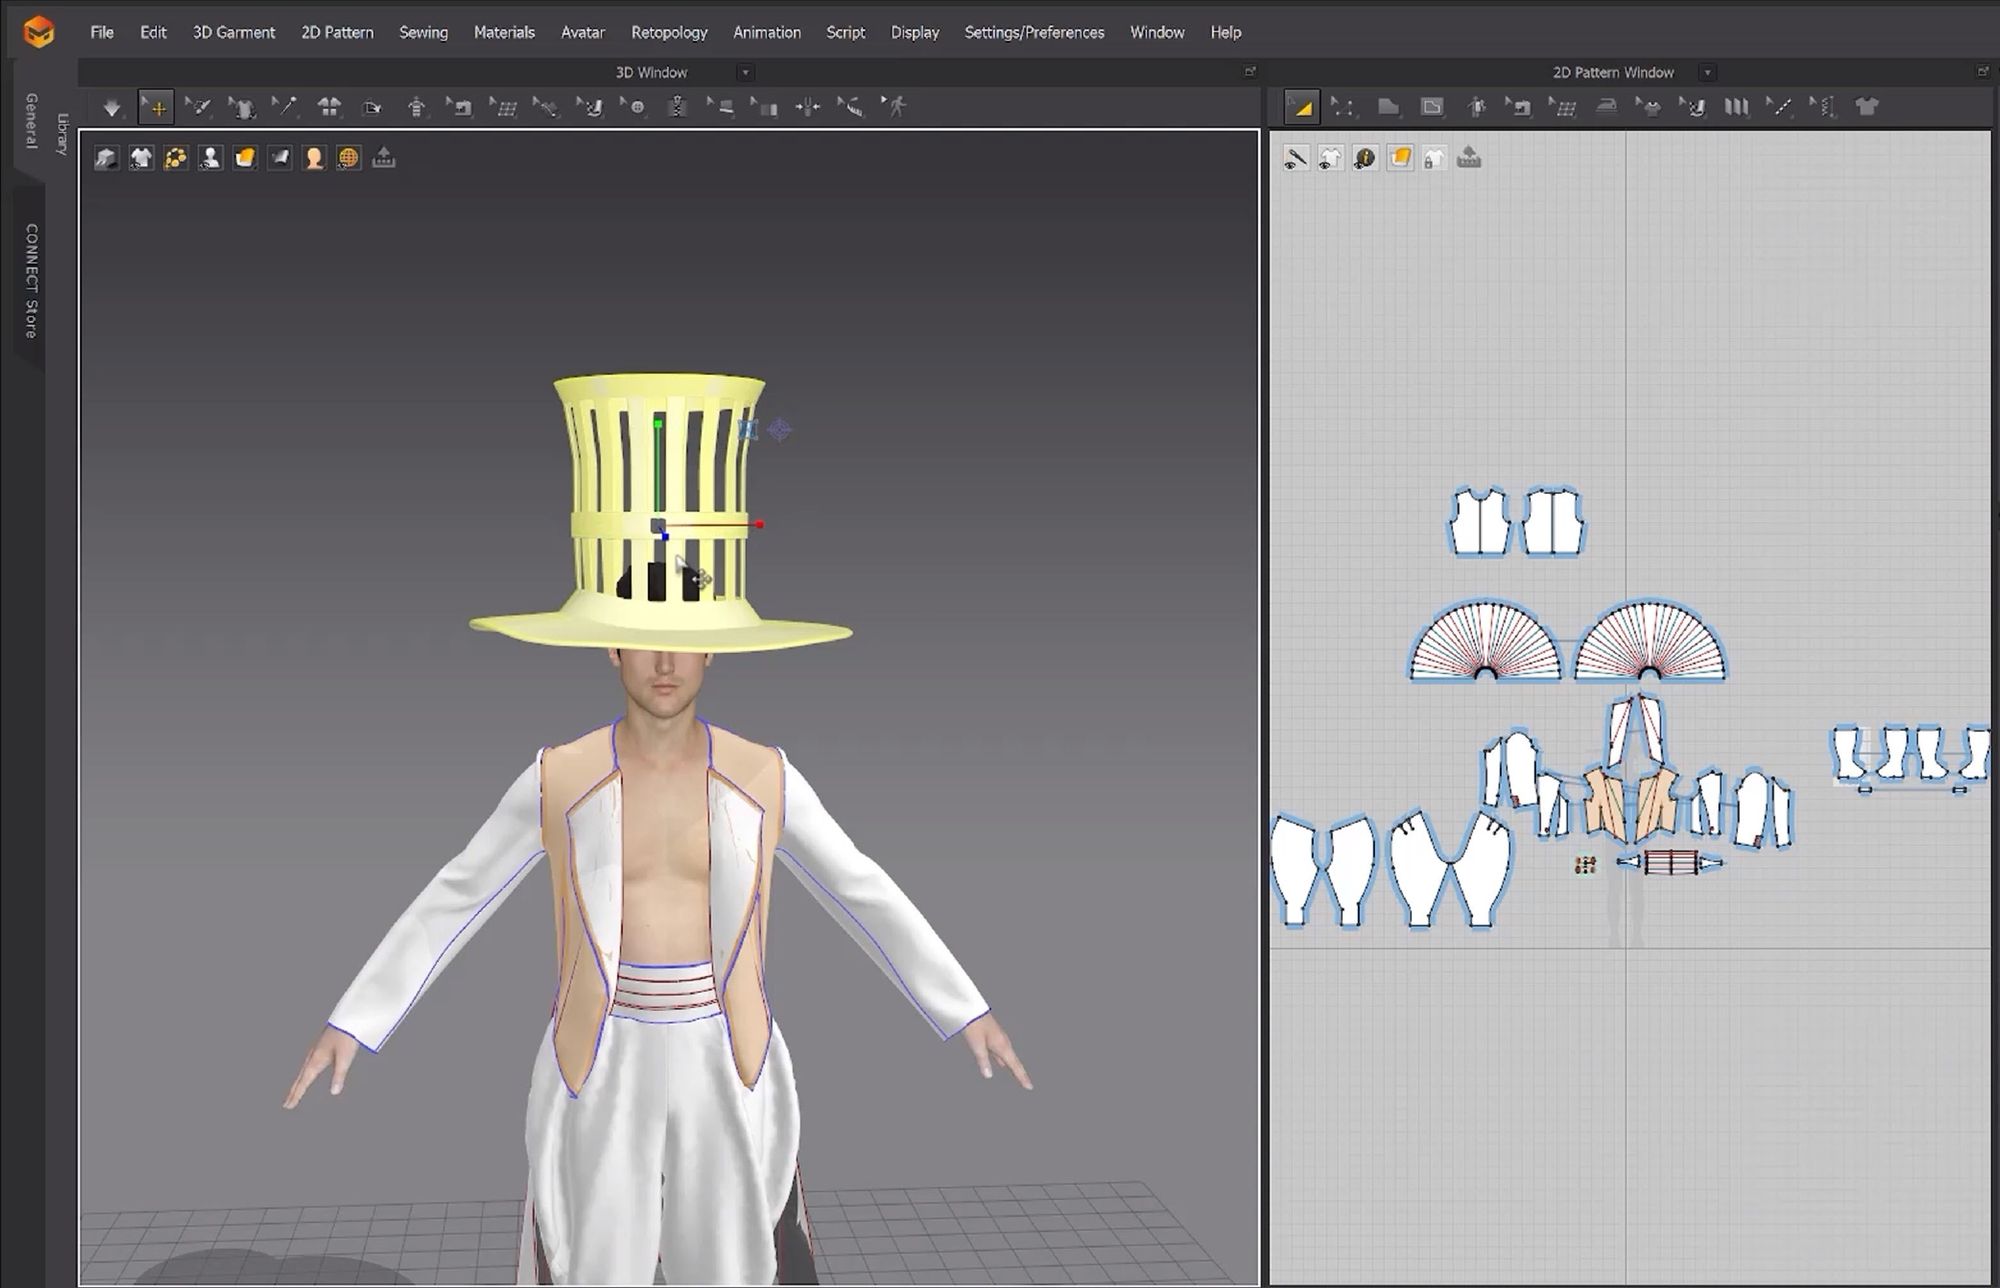
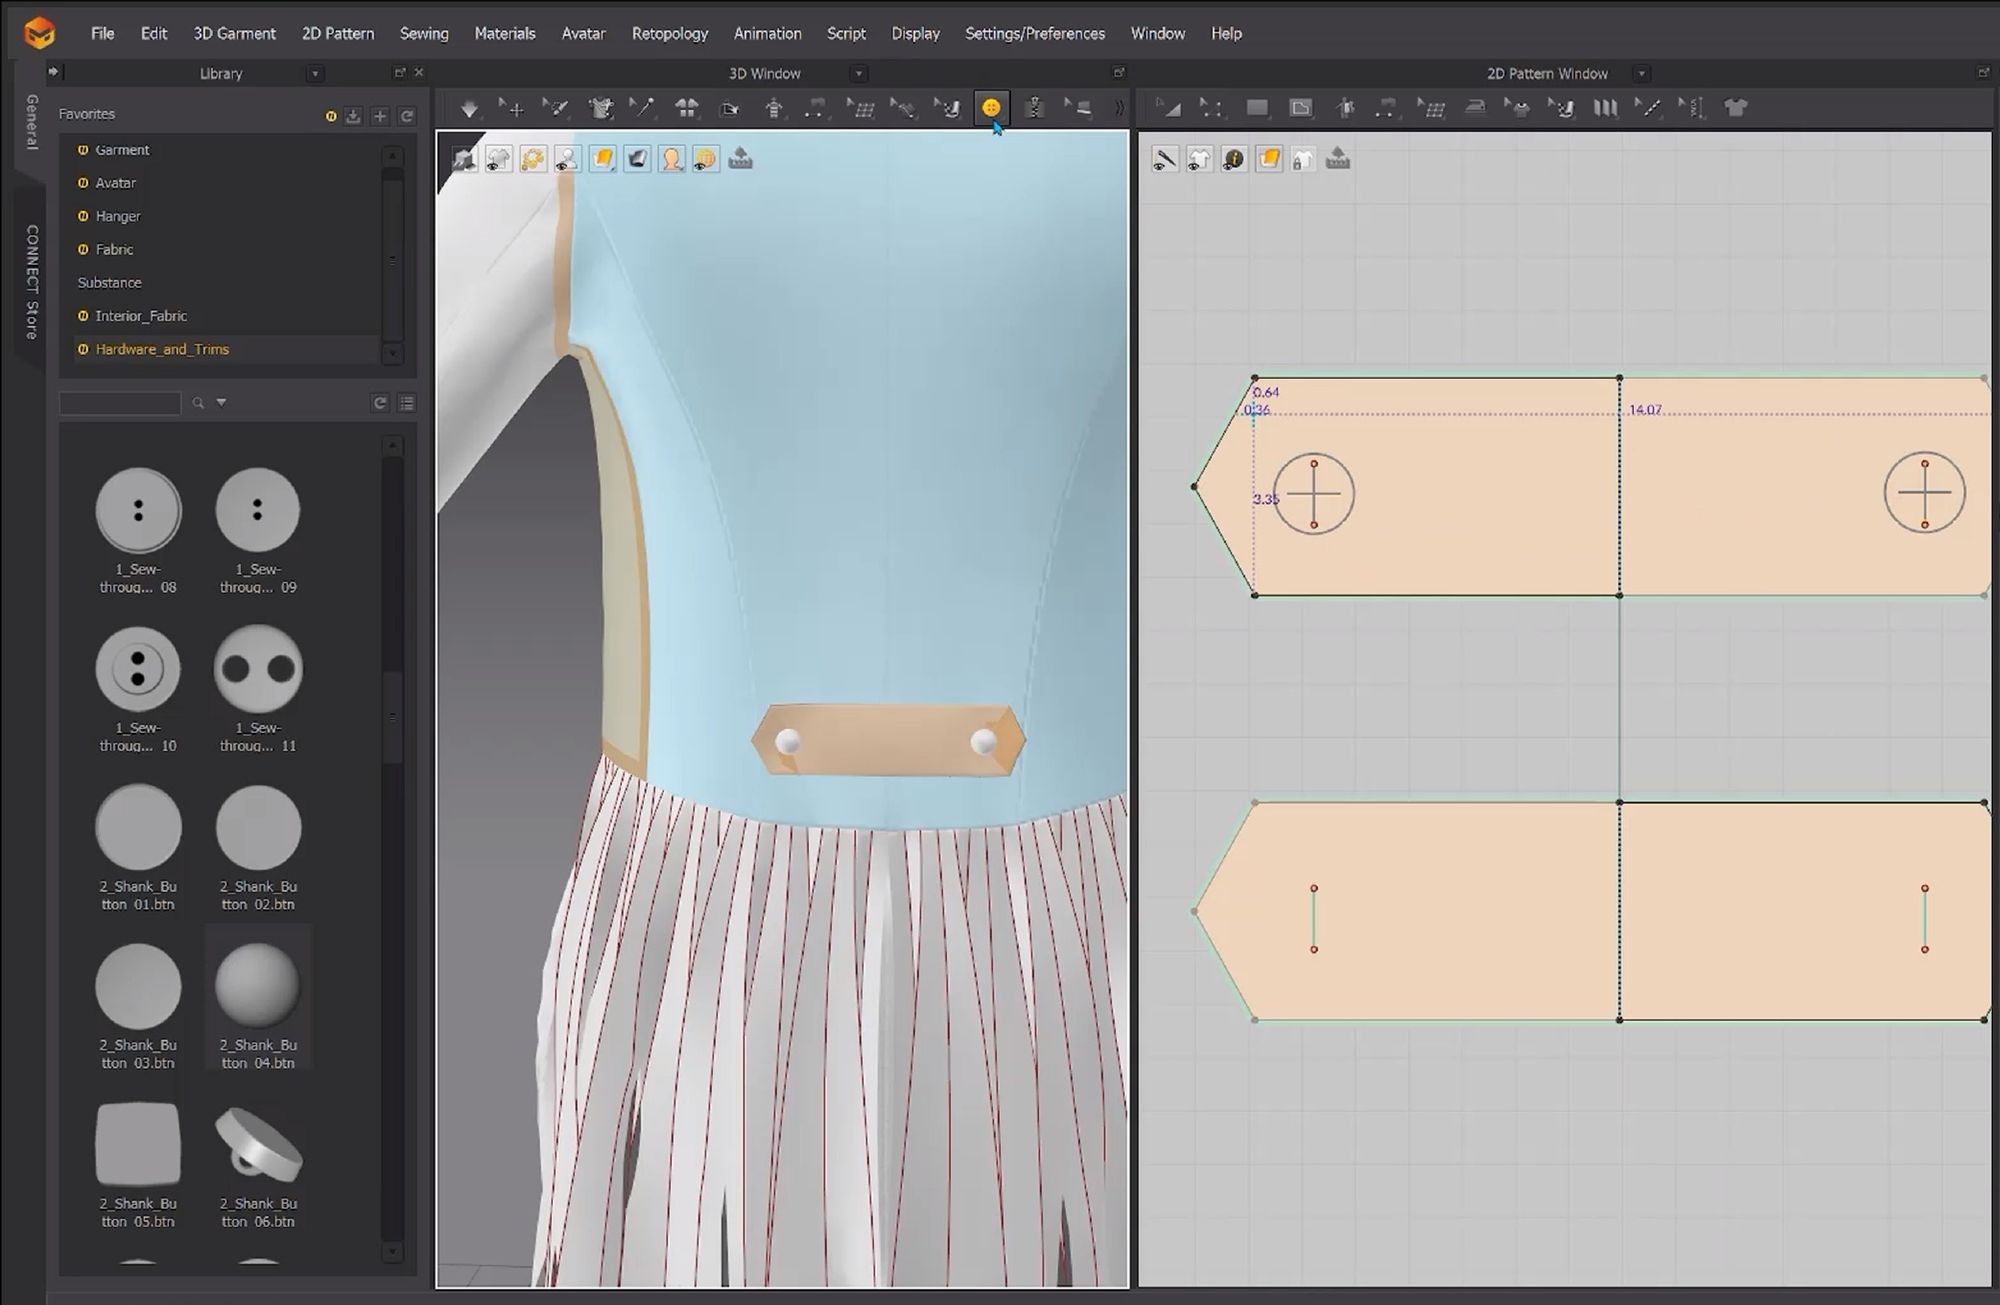
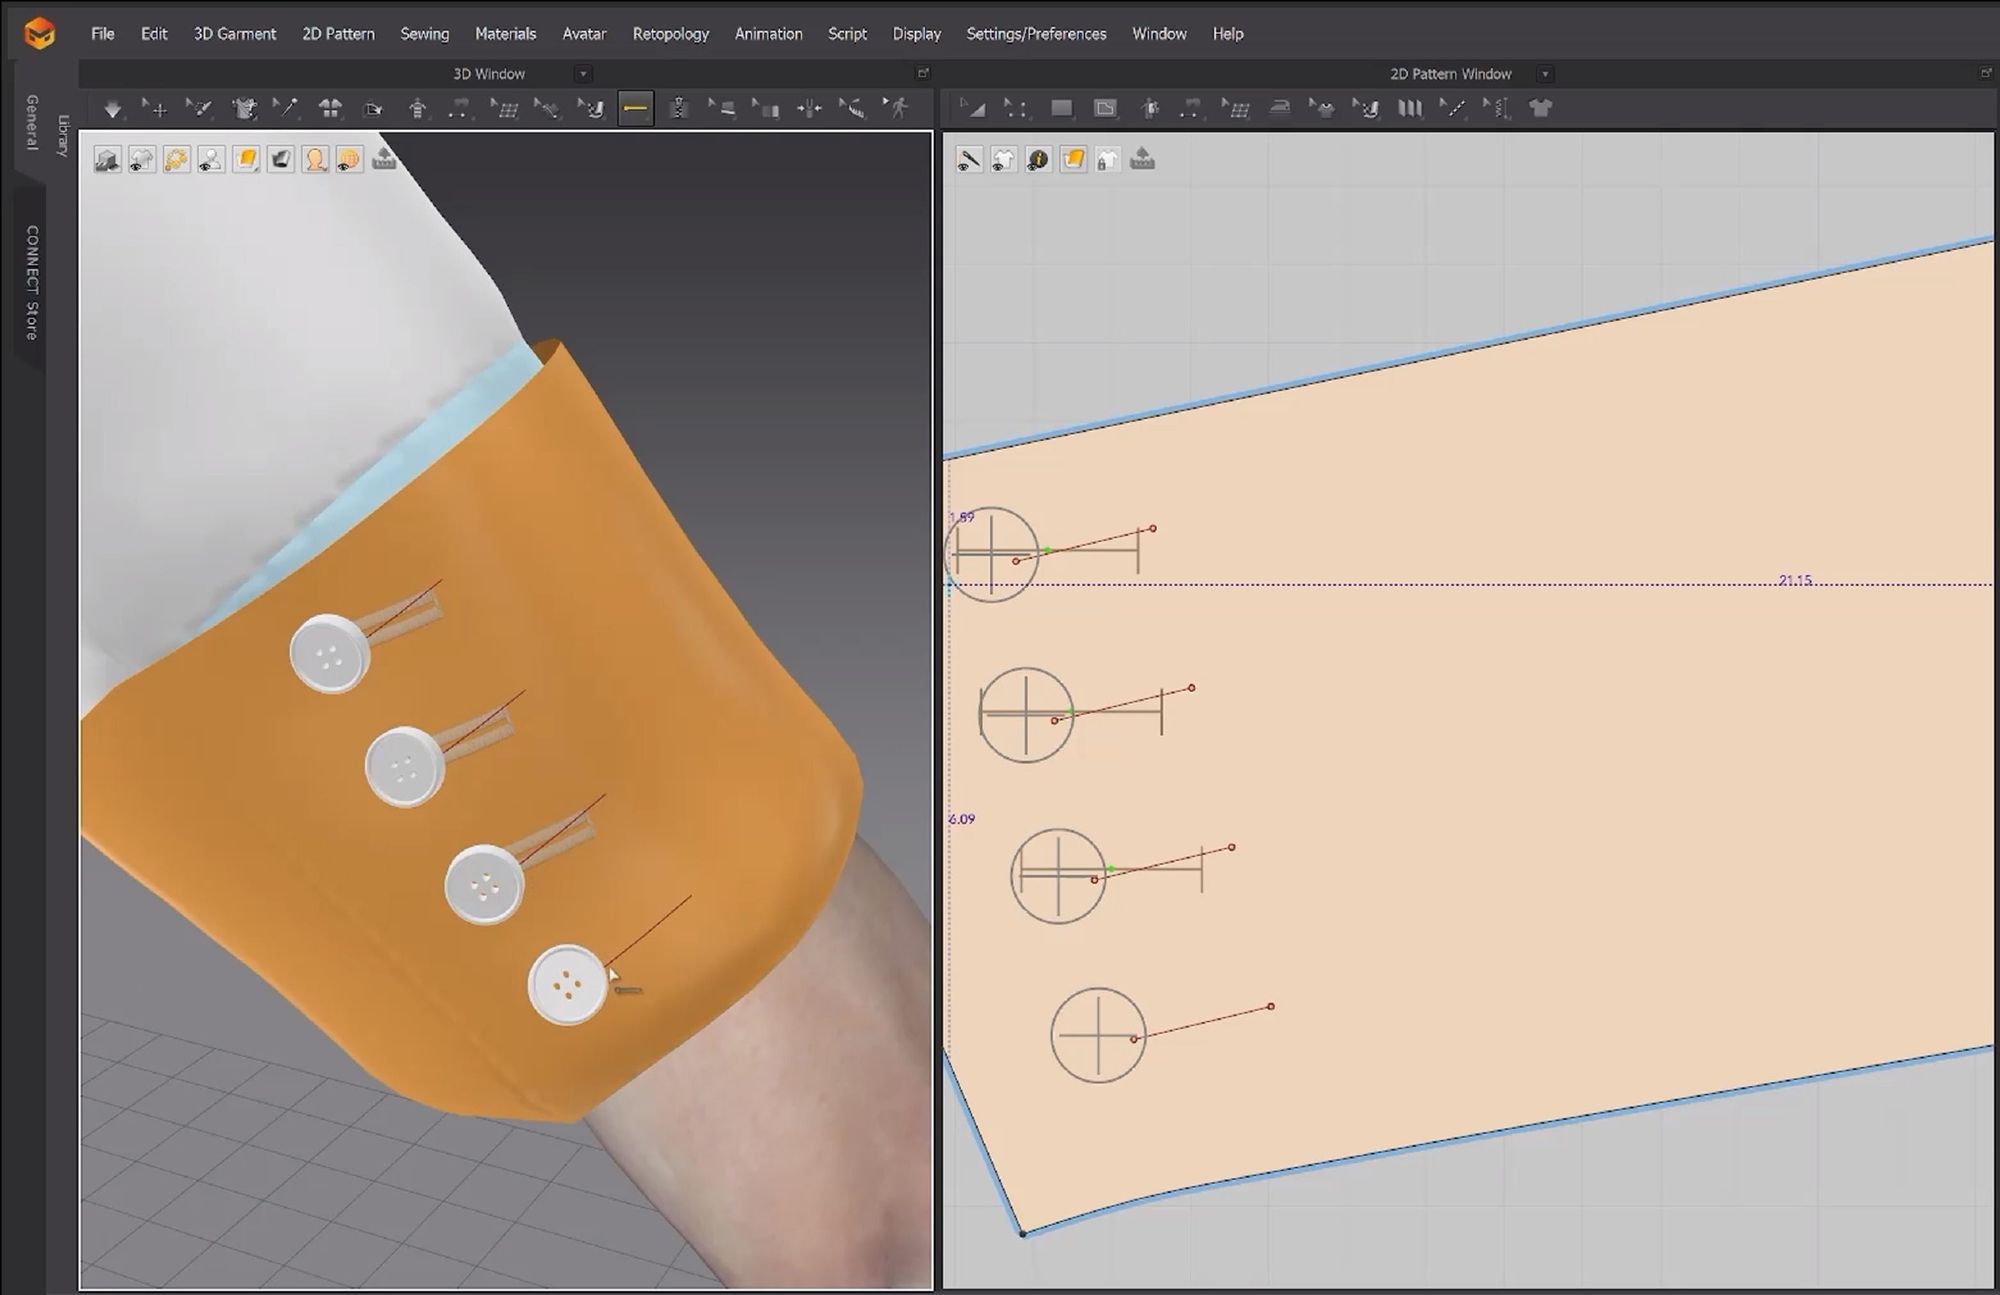
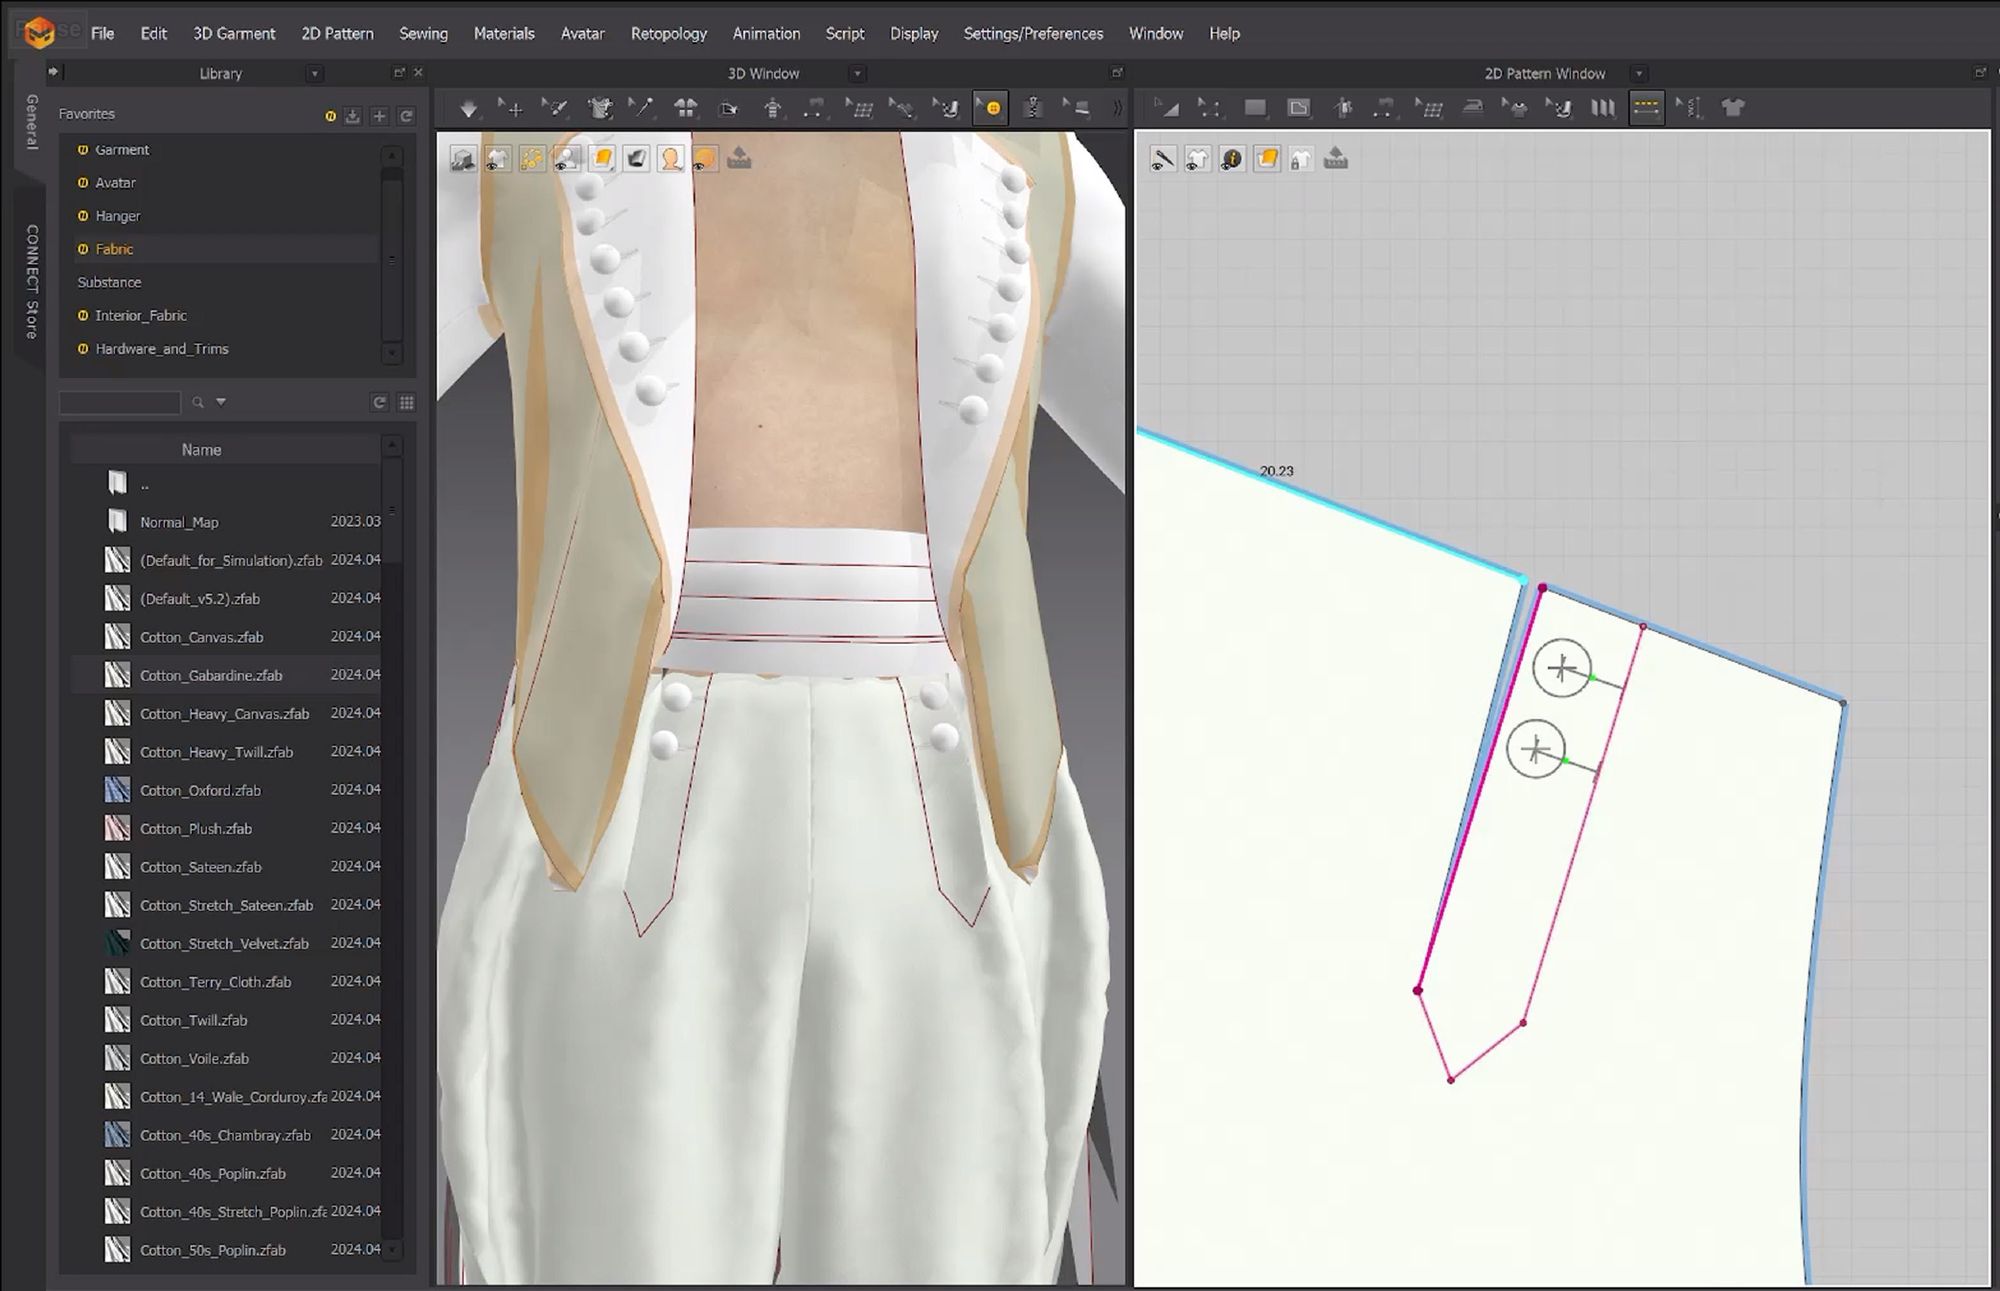
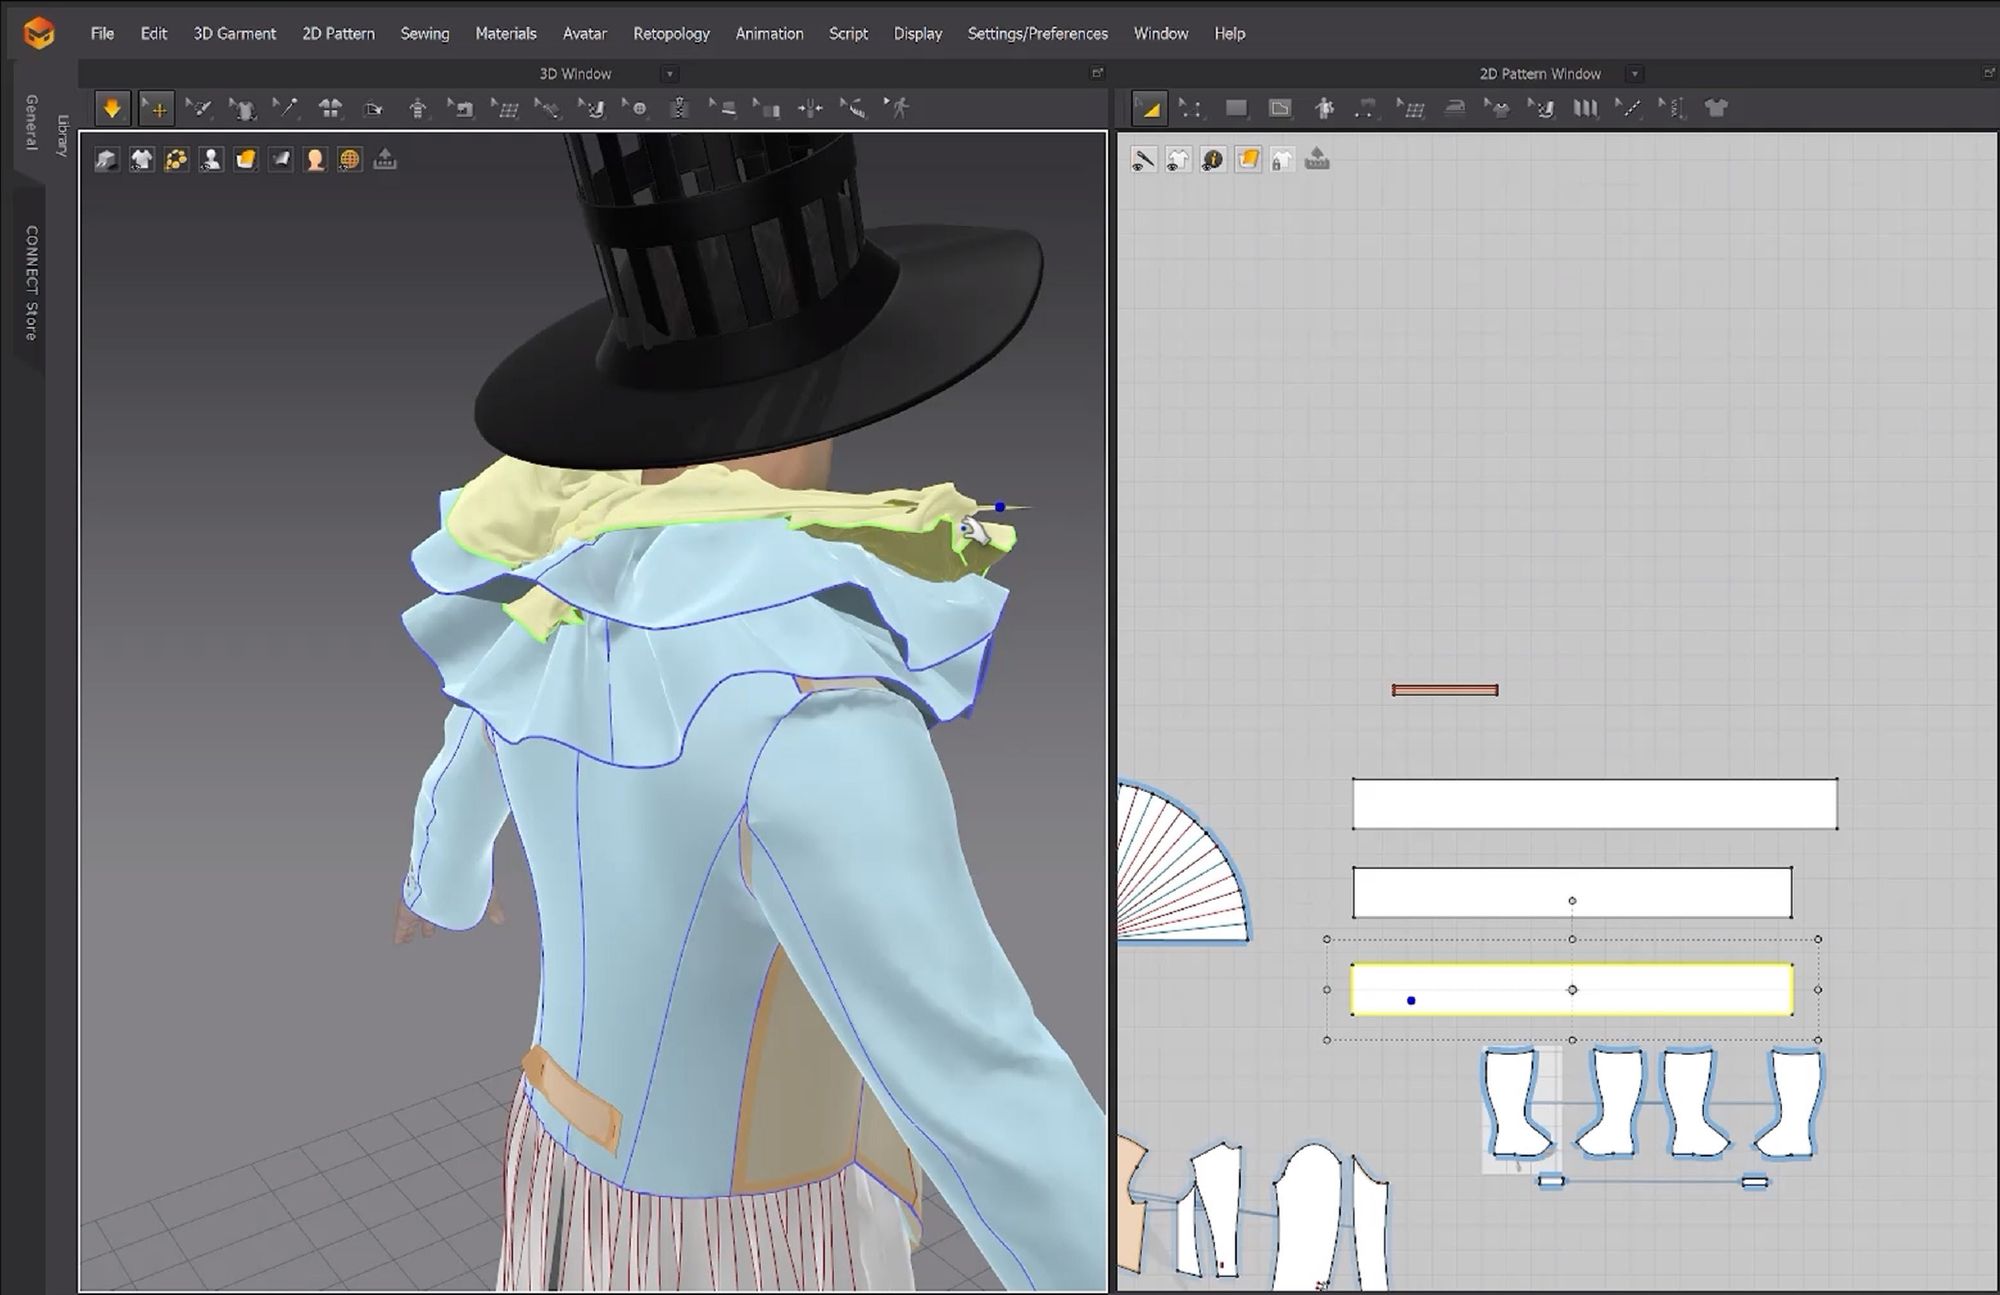
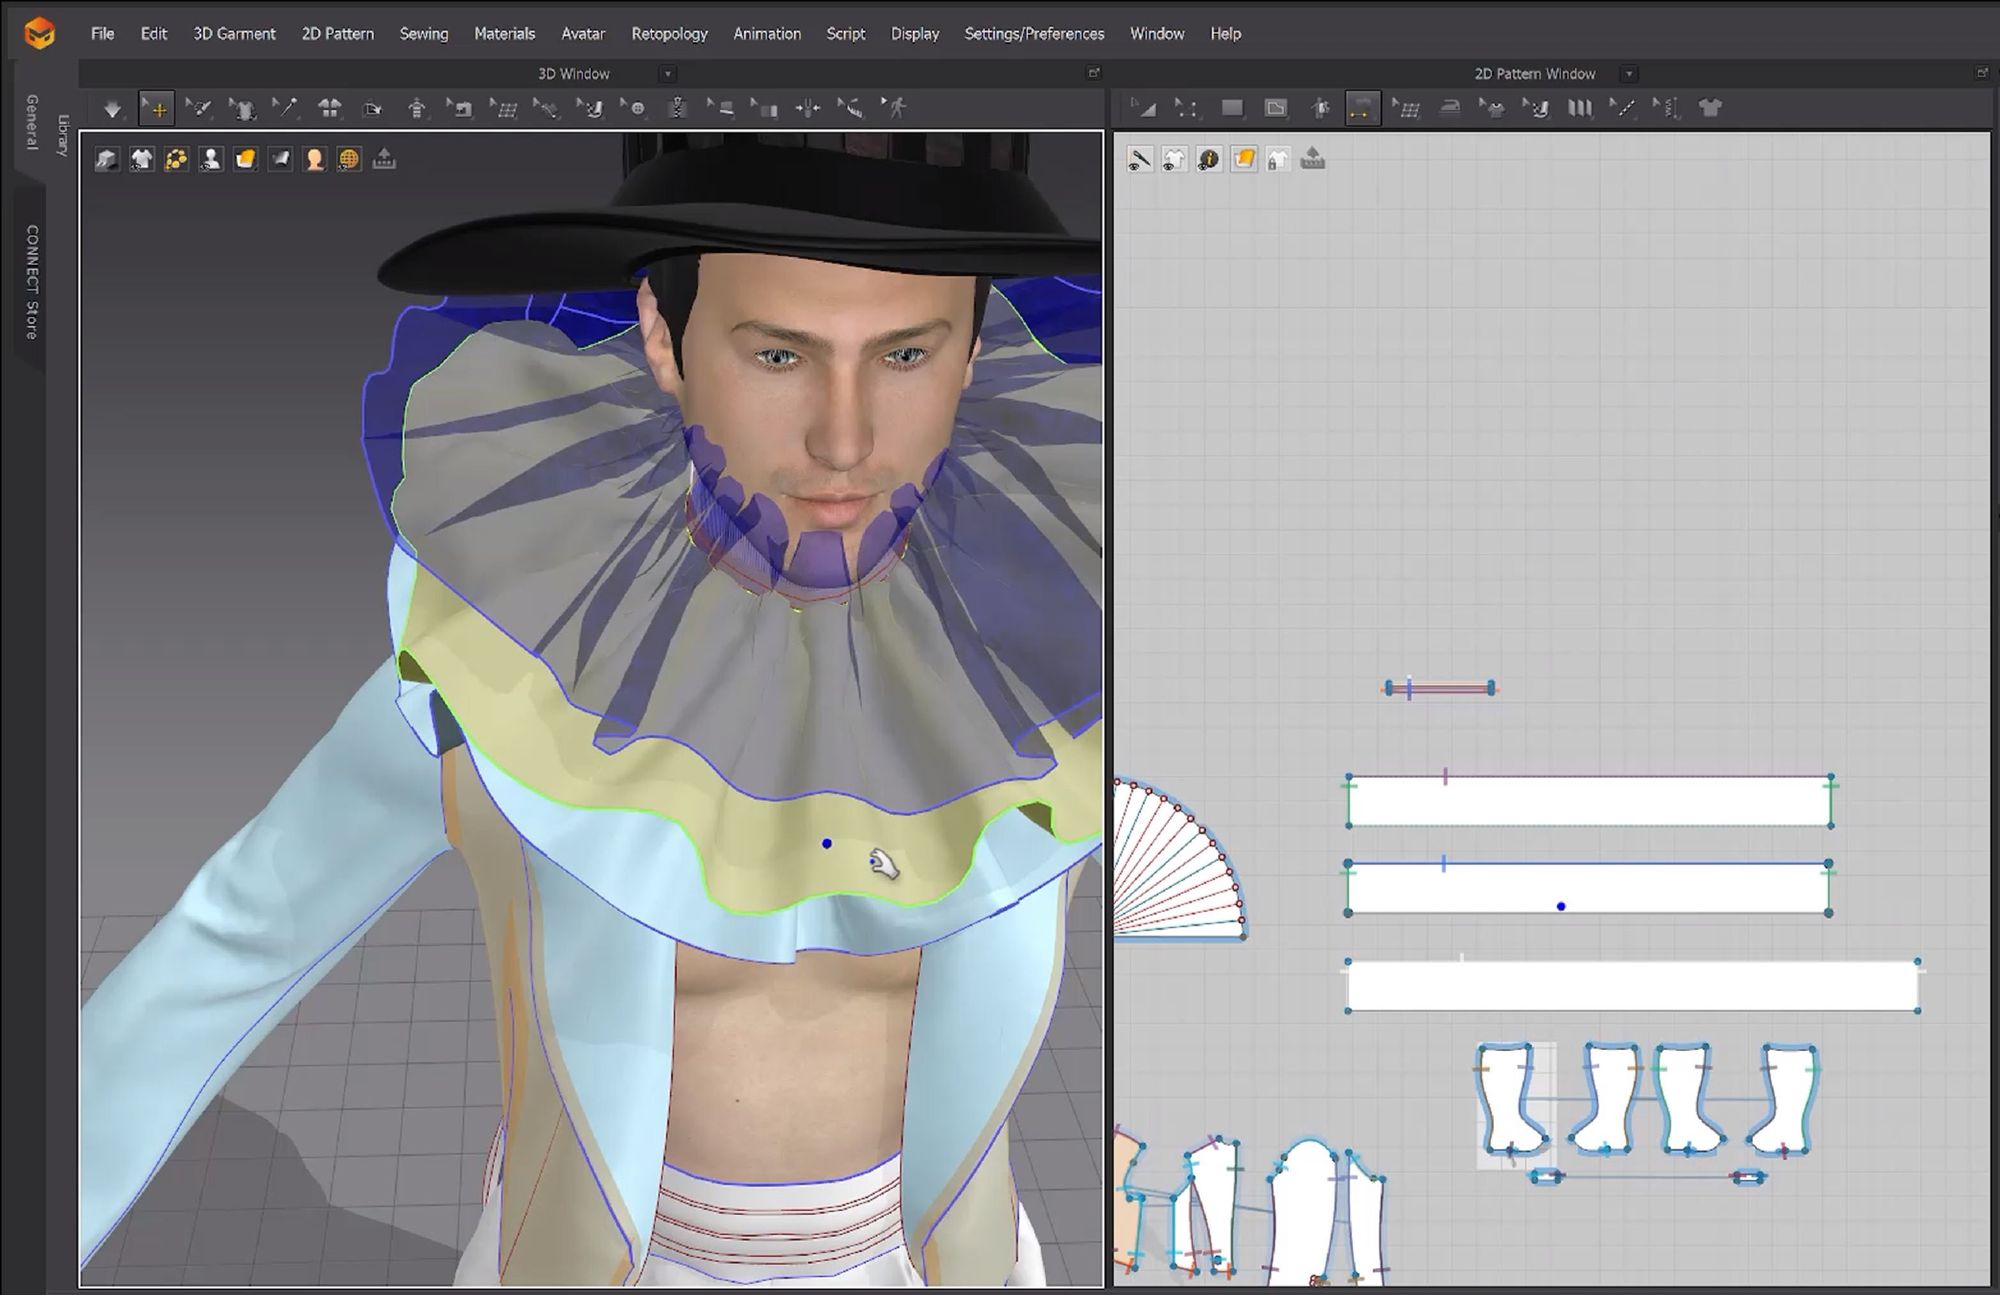
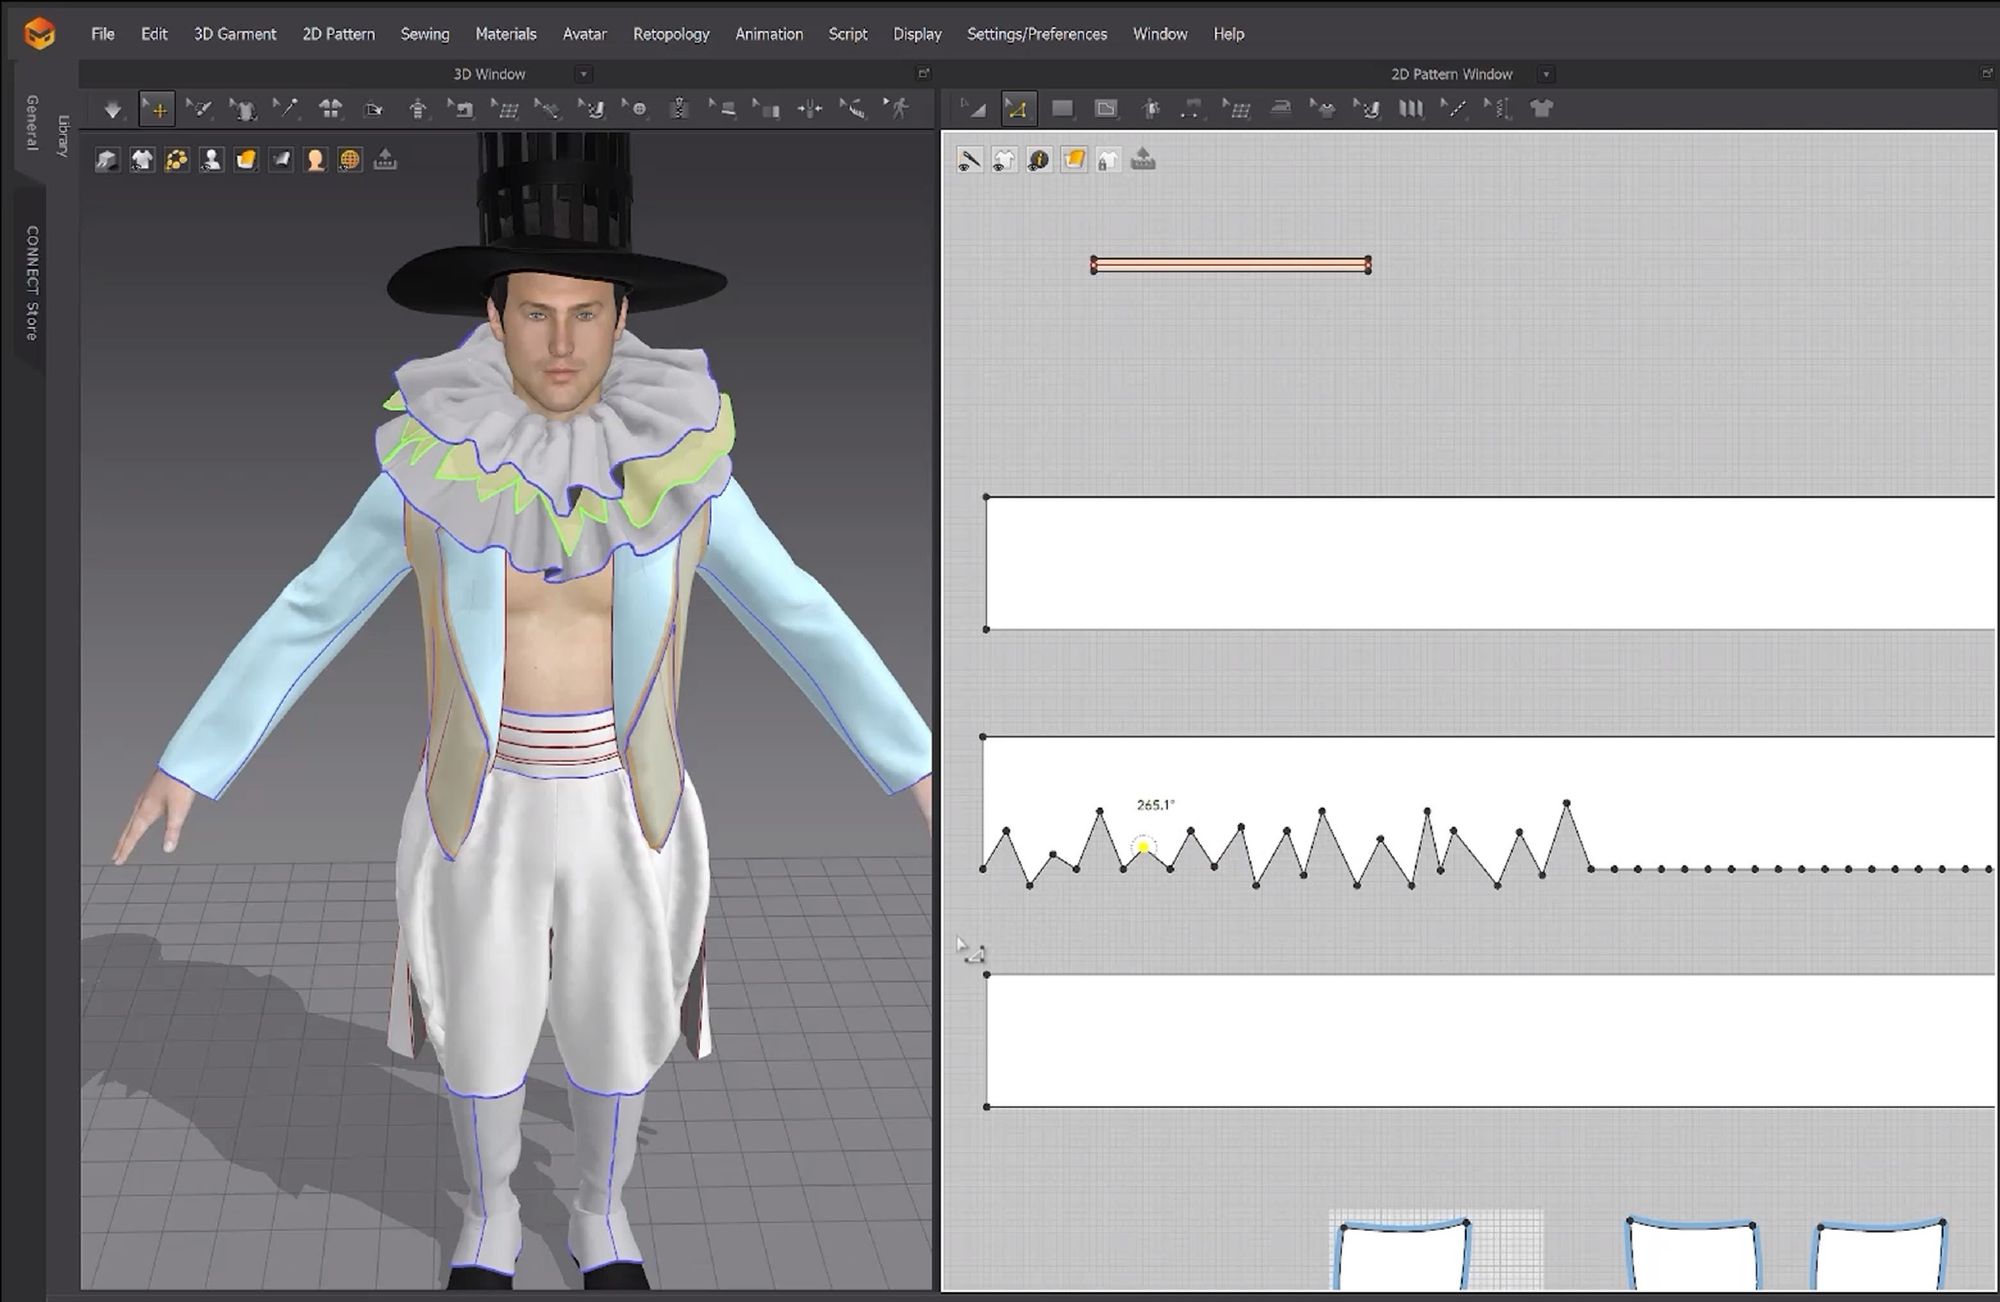
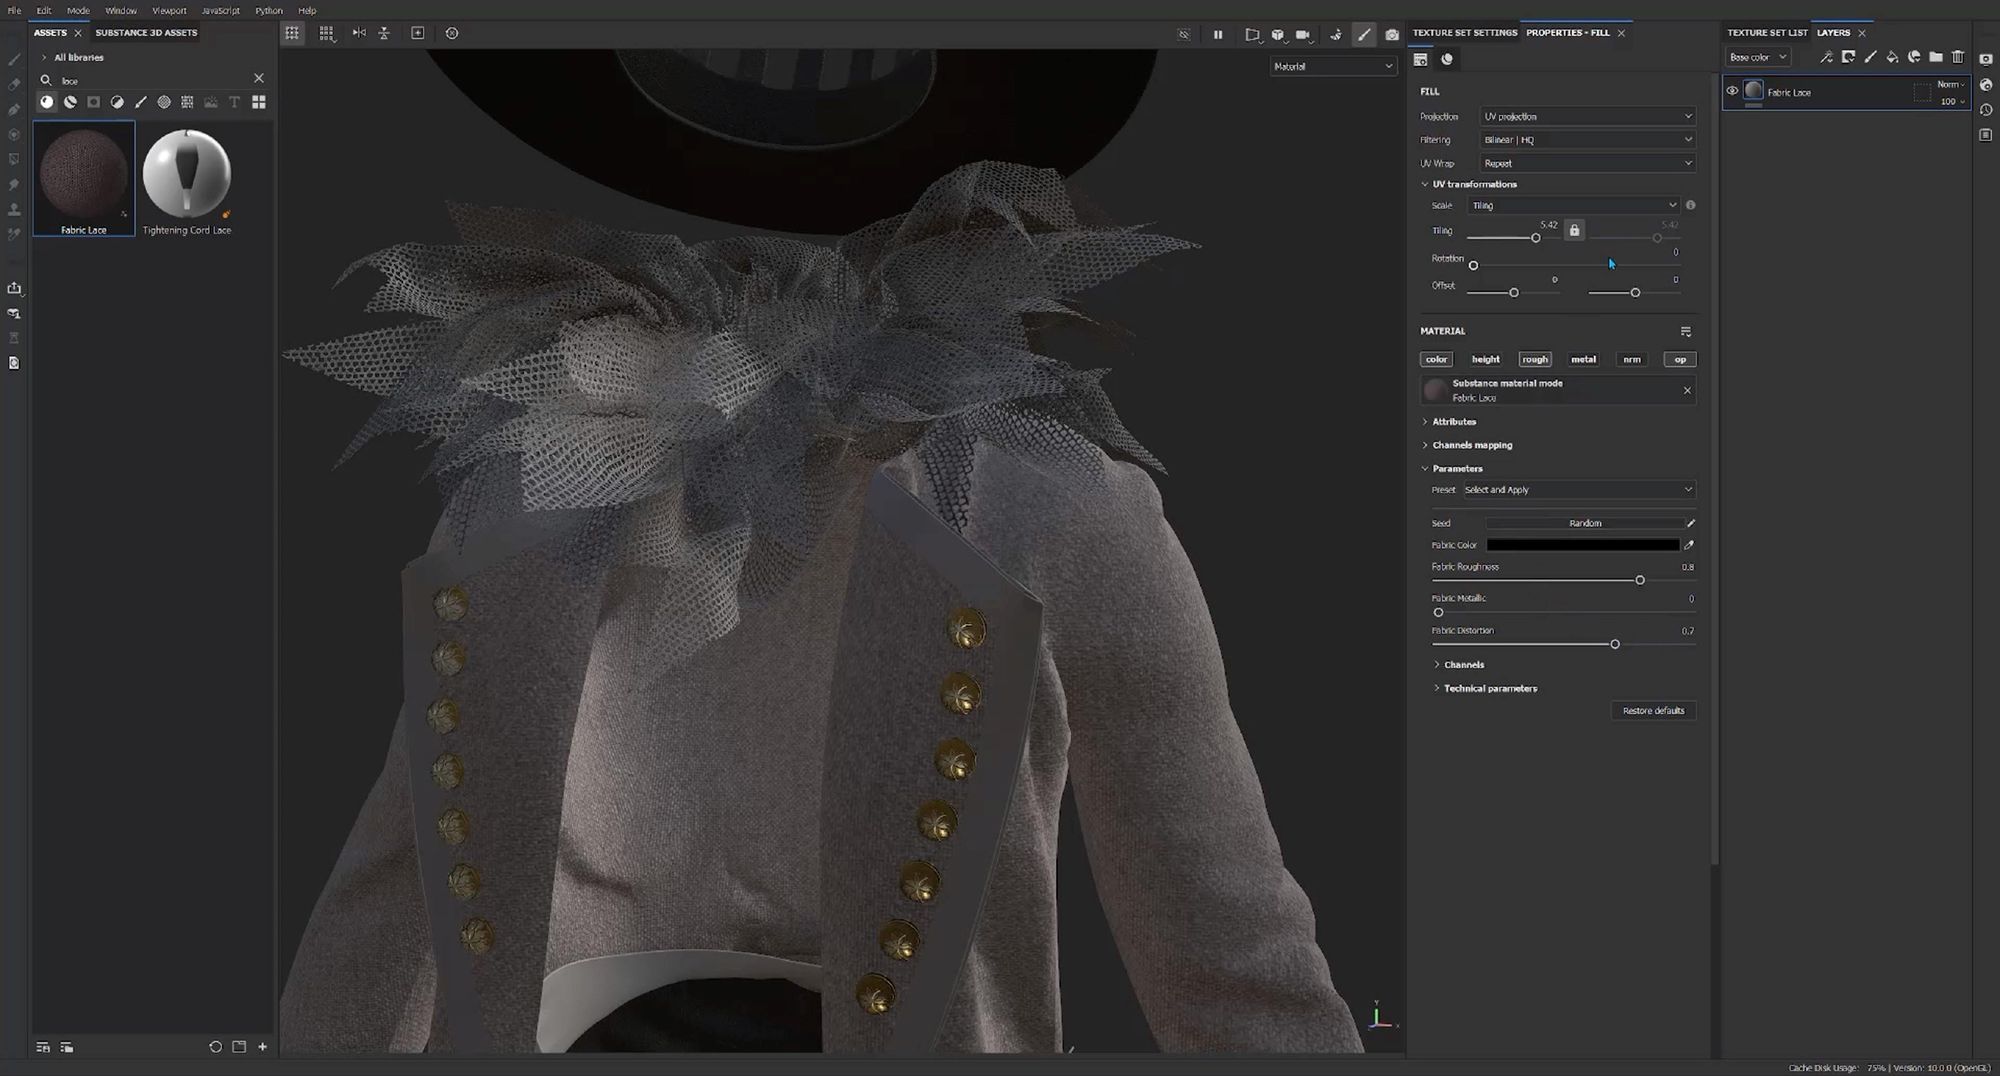
When I’m done blocking out the garments, I’ll start adding details and assigning fabrics to each of them, changing and tweaking the attributes. I have a good knowledge of fabrics from being a costume maker, which helps with getting the right look for the outfit, but I constantly go back to my references as well. If I know the garment will be animated or simulated, I spend a lot more time on this step to make sure the fabrics behave as they should. Sometimes it’s easier and more practical to make some of the objects in another software such as Maya, Blender or ZBrush, especially if they are solid or rigid. I created the Hat quickly in Blender and imported it into Marvelous Designer as an OBJ.
As always 80% of the time goes into the last 20% of the work. Even though this costume looks fairly simple, it still has a lot of details such as buttons, button holes, trims, and so on.

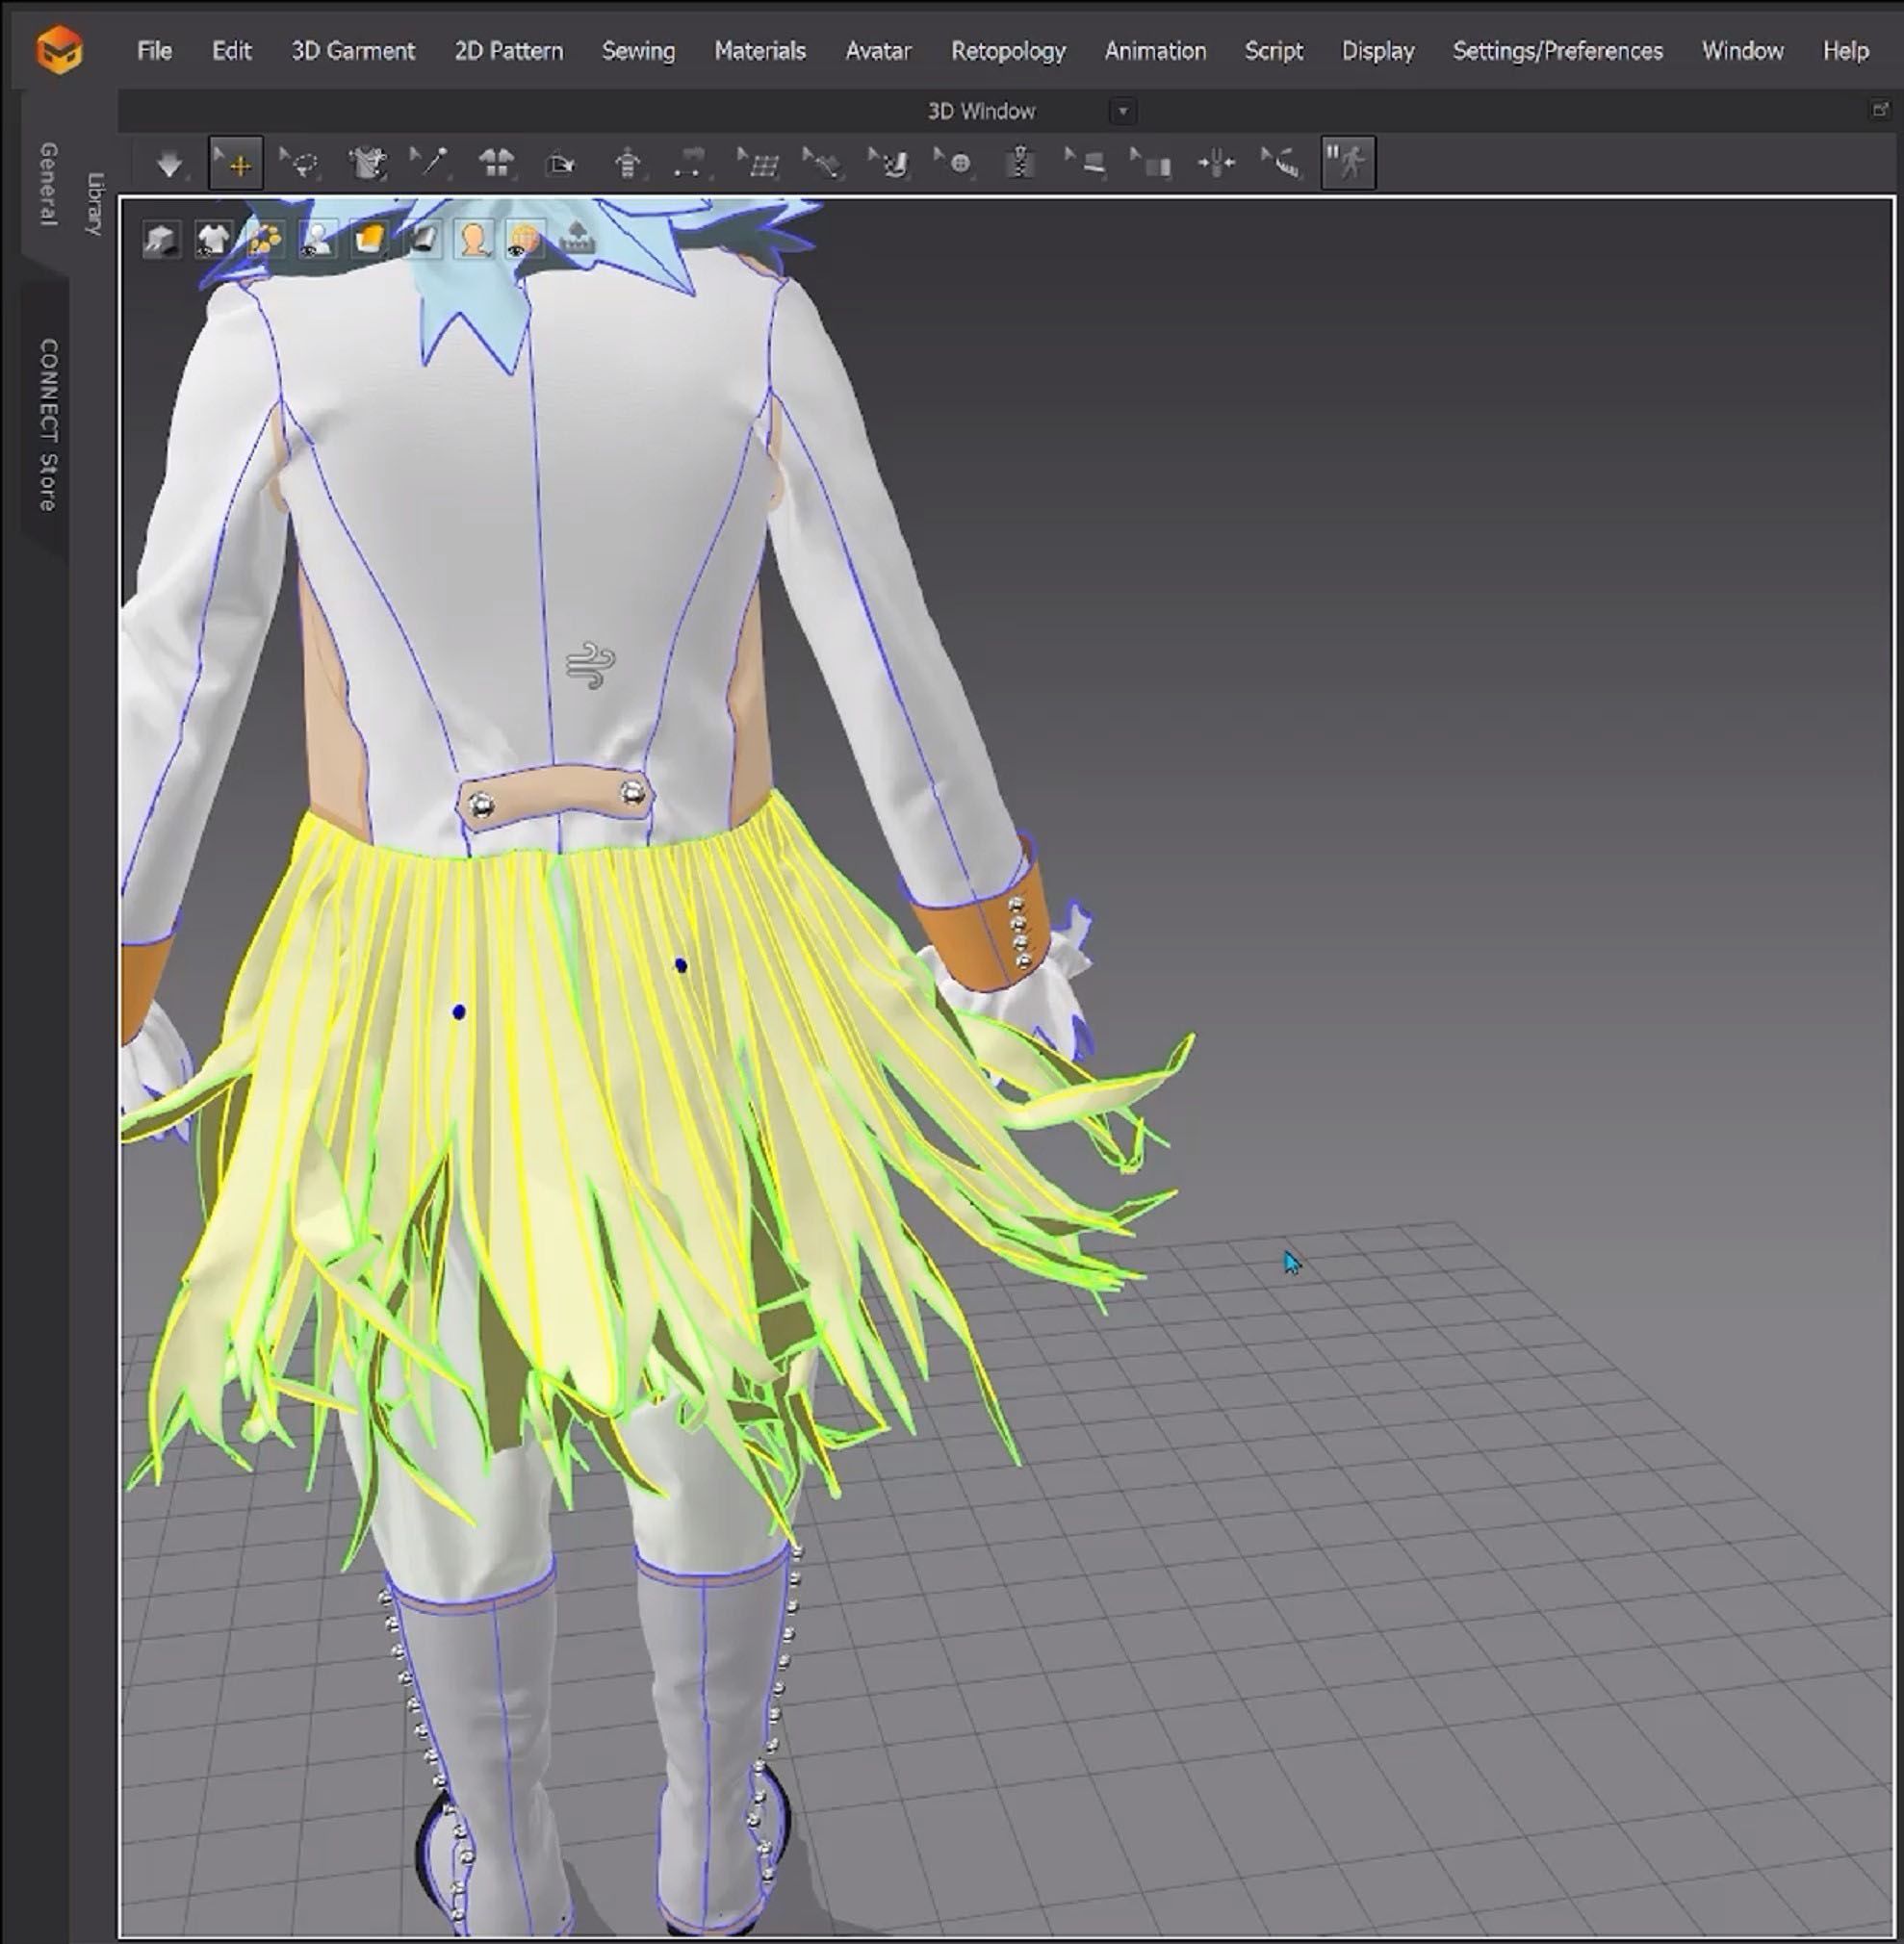
There are also always some problems I didn’t expect, for example in this project I spent a very long time on getting the frills around the neck right. I had constant issues with collision and had to experiment with the settings until I finally got it working the way I wanted.
Once I’m happy with the costume, I’ll pose the avatar and play around with wind and pins to make it look more dynamic.

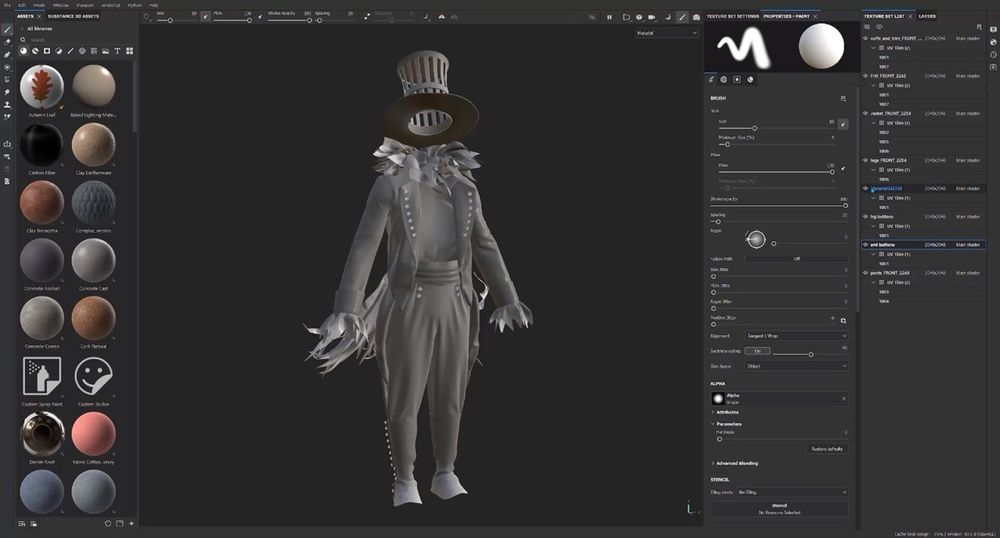
At this point, I assign separate fabrics with recognisable names to the pattern pieces and group them based on their materials. I organise and set up the UVs before exporting. I either delete the avatar from the scene or just disable it in the export settings since I only want to deal with the costume in Substance Painter.
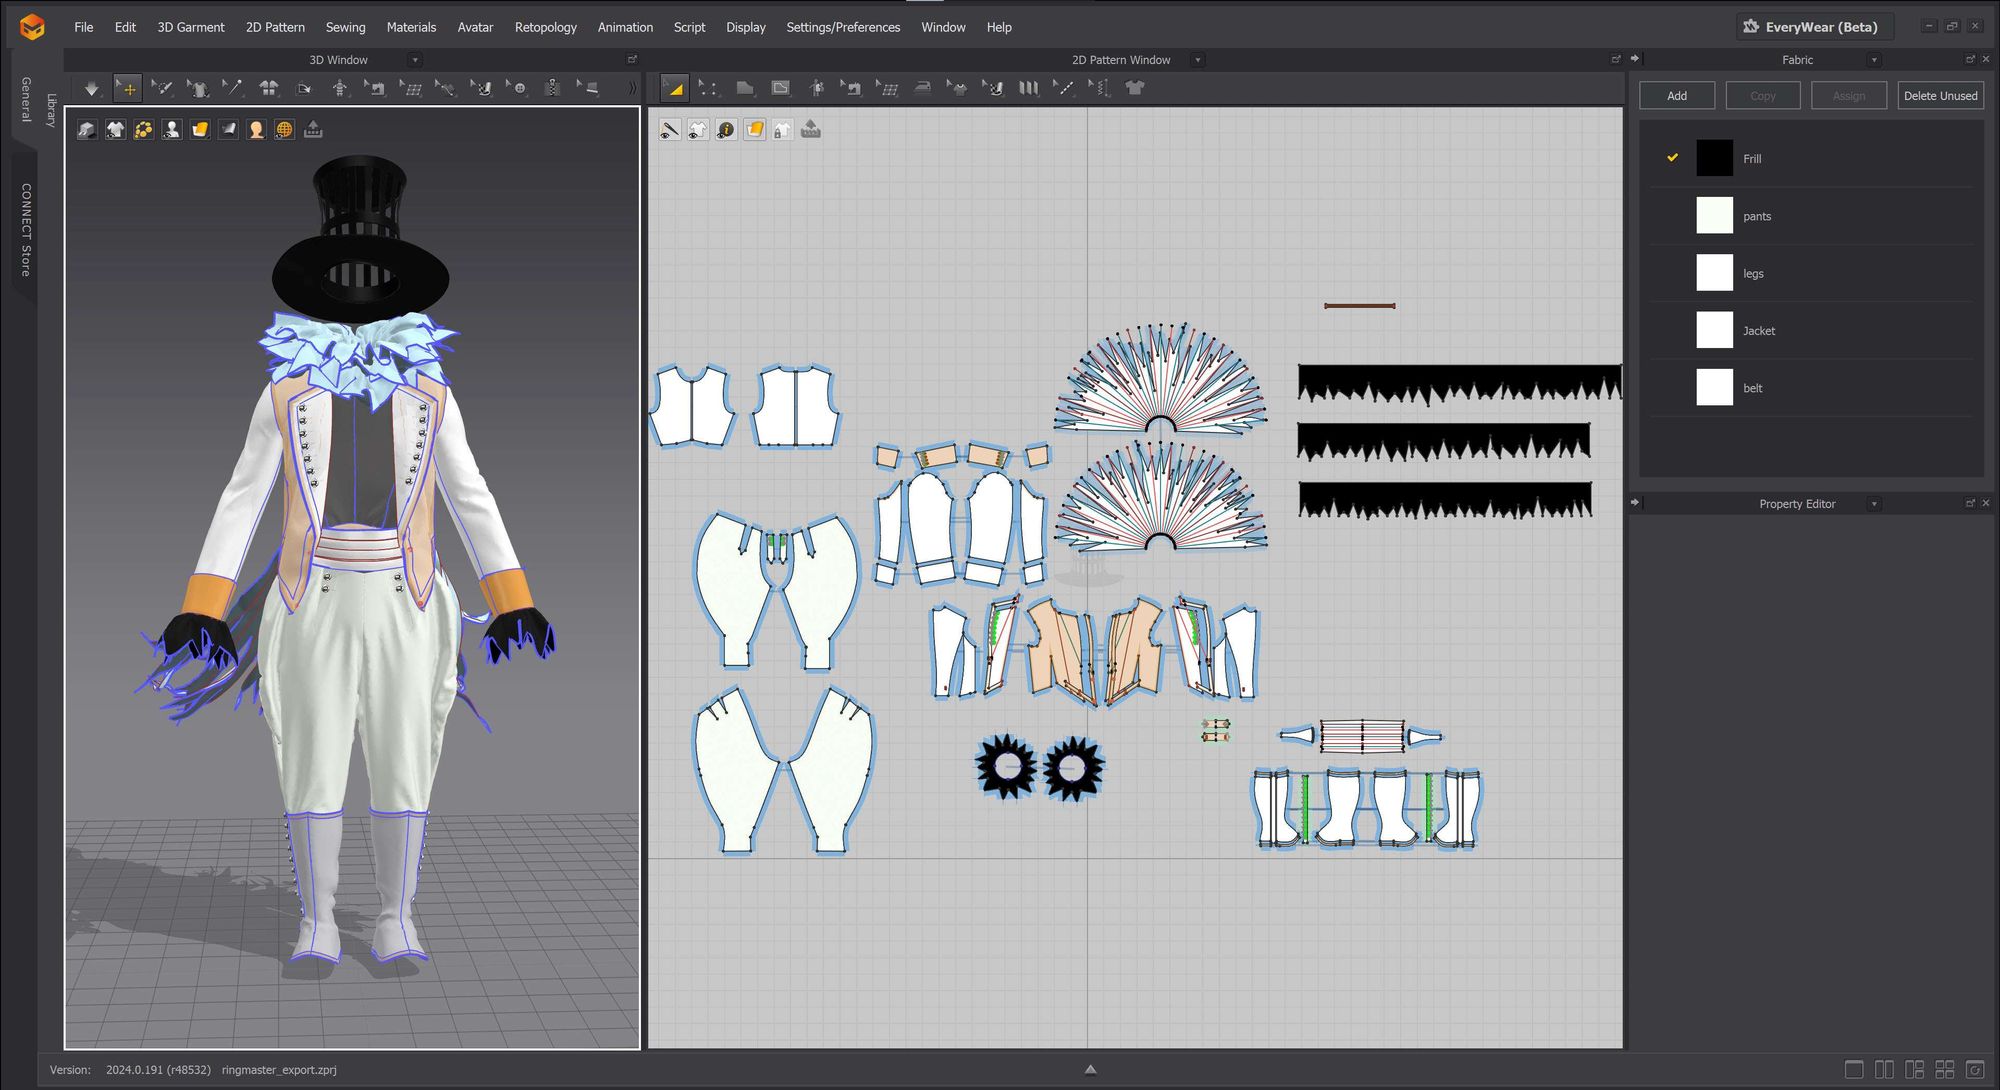
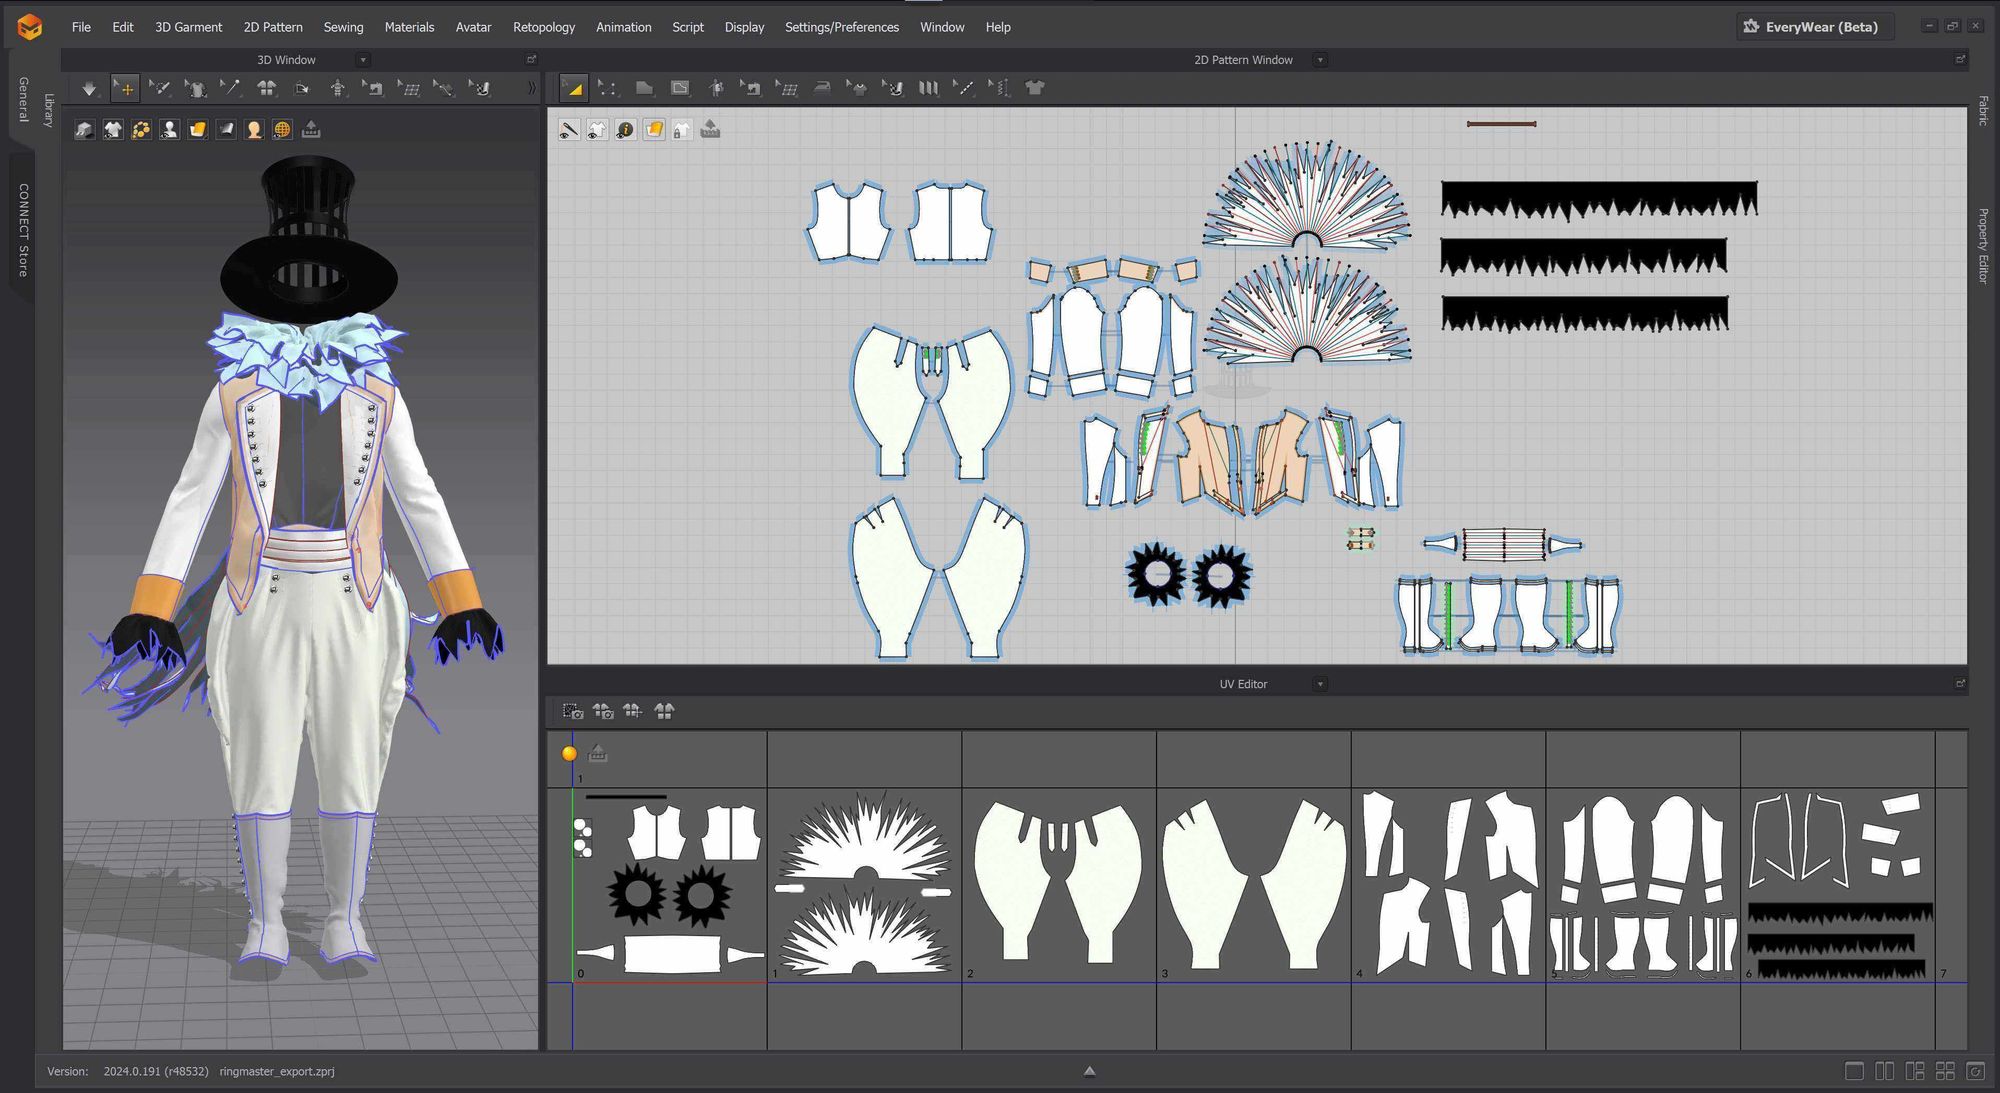
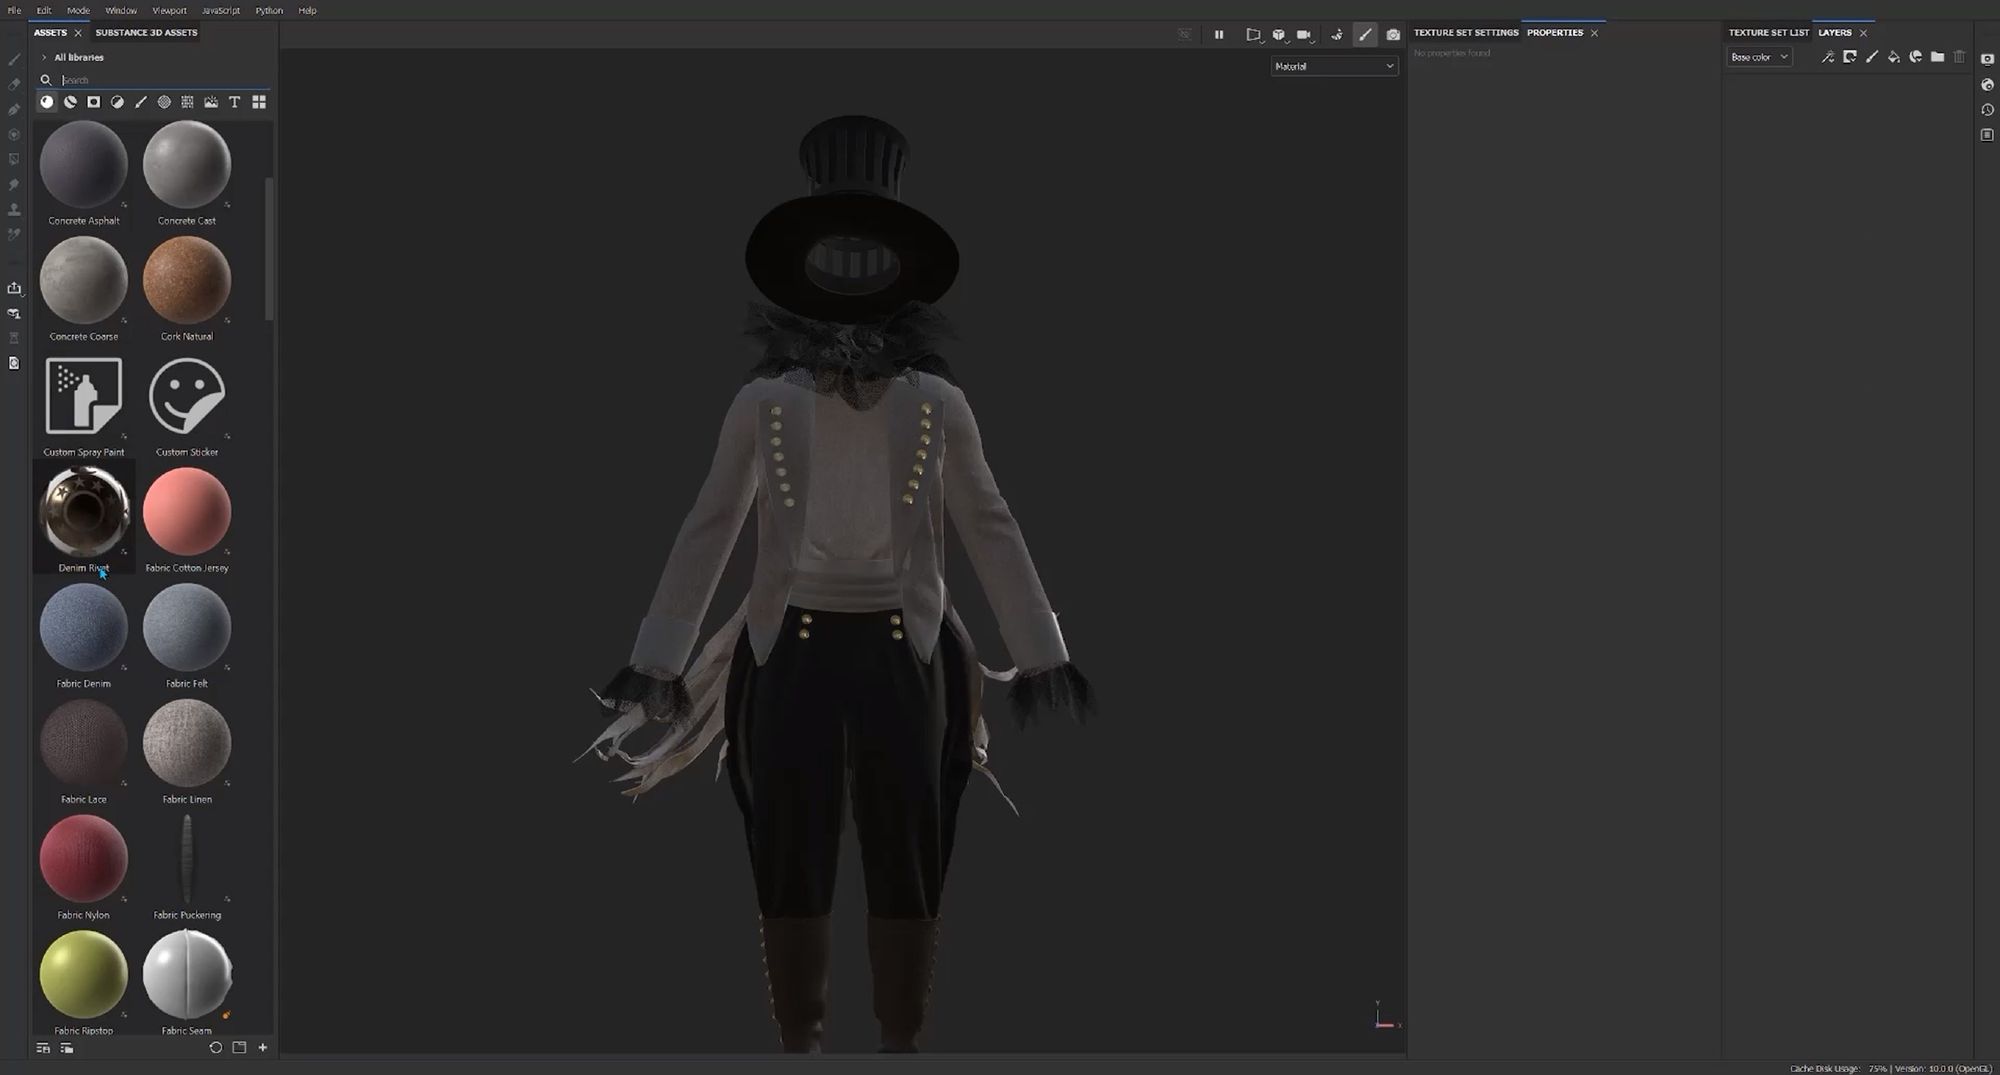
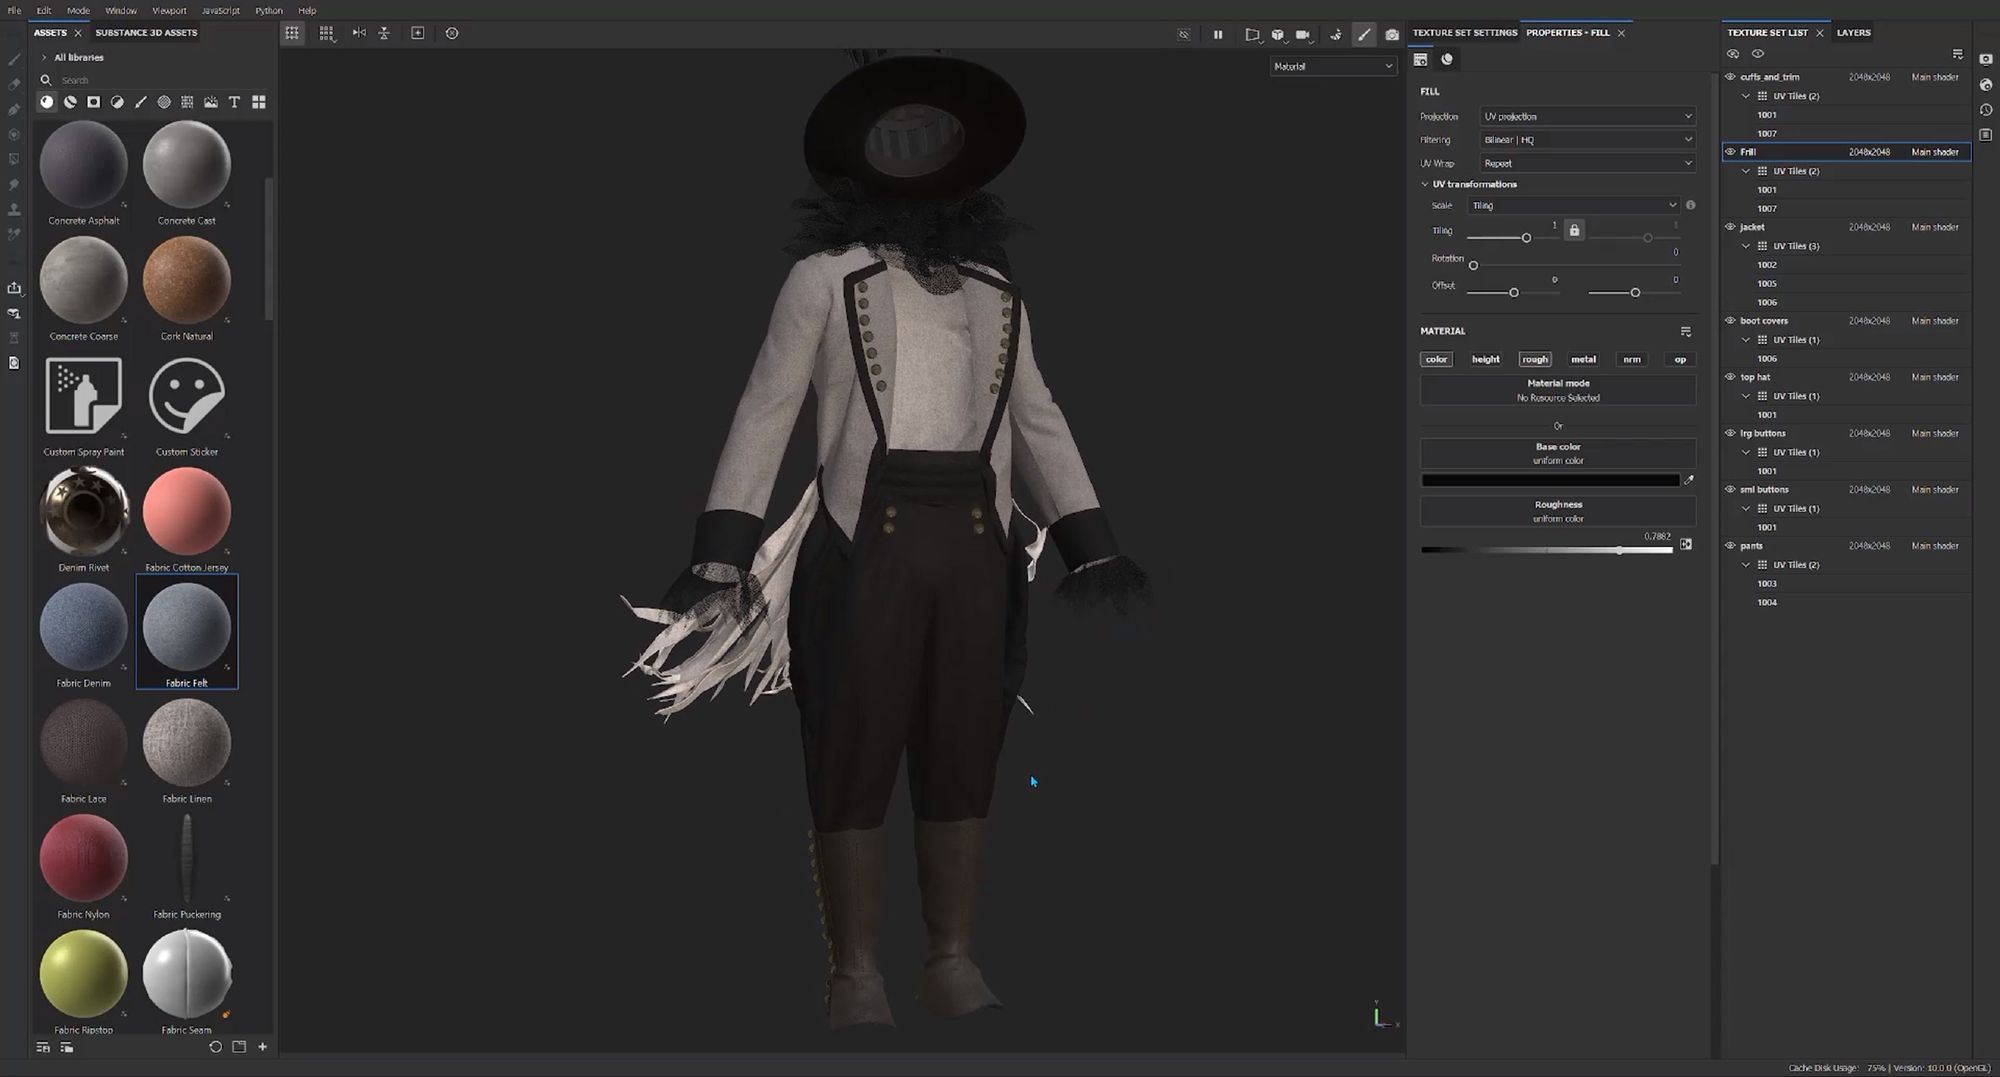
Next, I import my model into Substance Painter and bake the maps. I usually don’t use the Marvelous Designer texture maps, because I prefer to have the control that Substance 3D Painter gives me over the materials. I double-check my Texture set list to make sure everything is named properly.

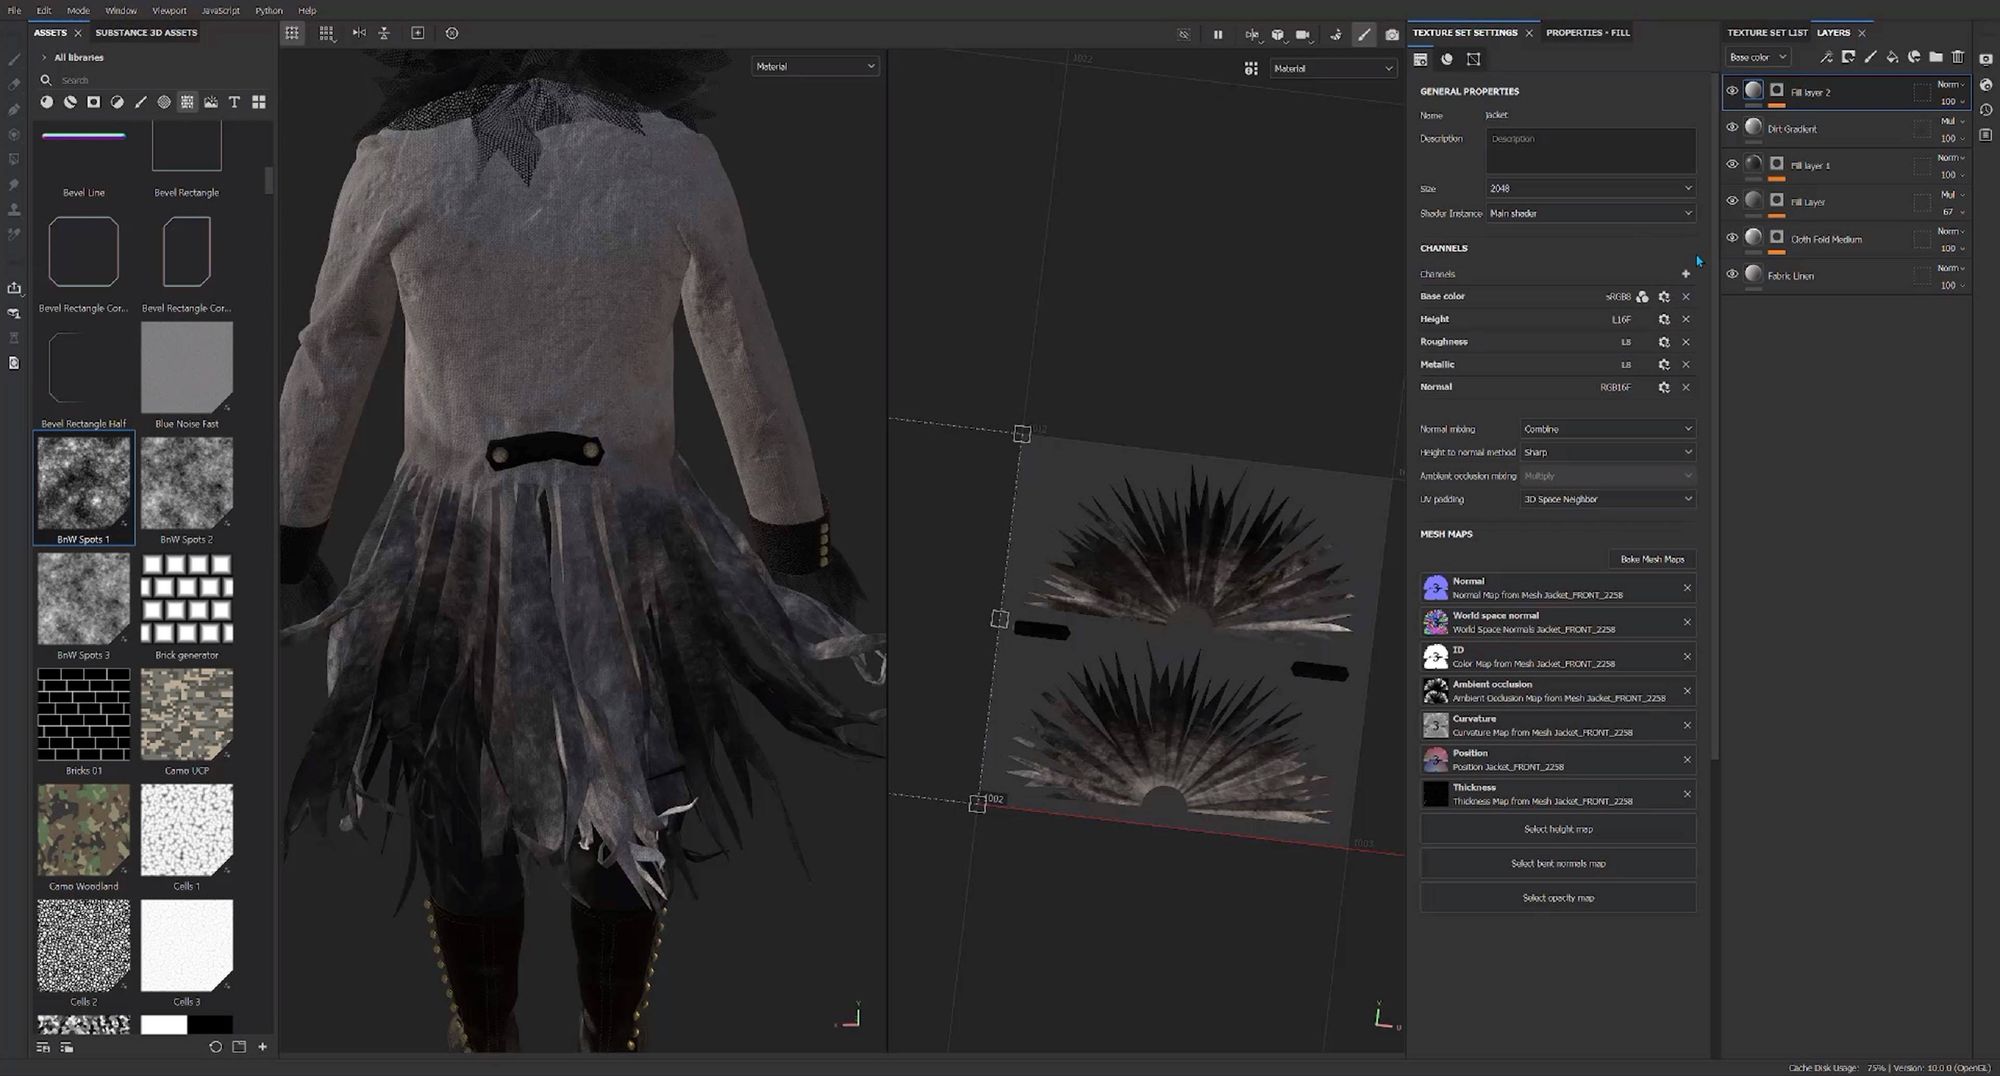
First I make the ‘clean version’ of the garment. In film and theatre, the garments almost always start out as brand new, and then they move into art finishing, where they get dirtied up, aged, and weathered. I follow a similar process in surfacing. I assign materials to each garment to get the base right, then I work layer by layer to create the grunge, wear and tear, and smaller details.
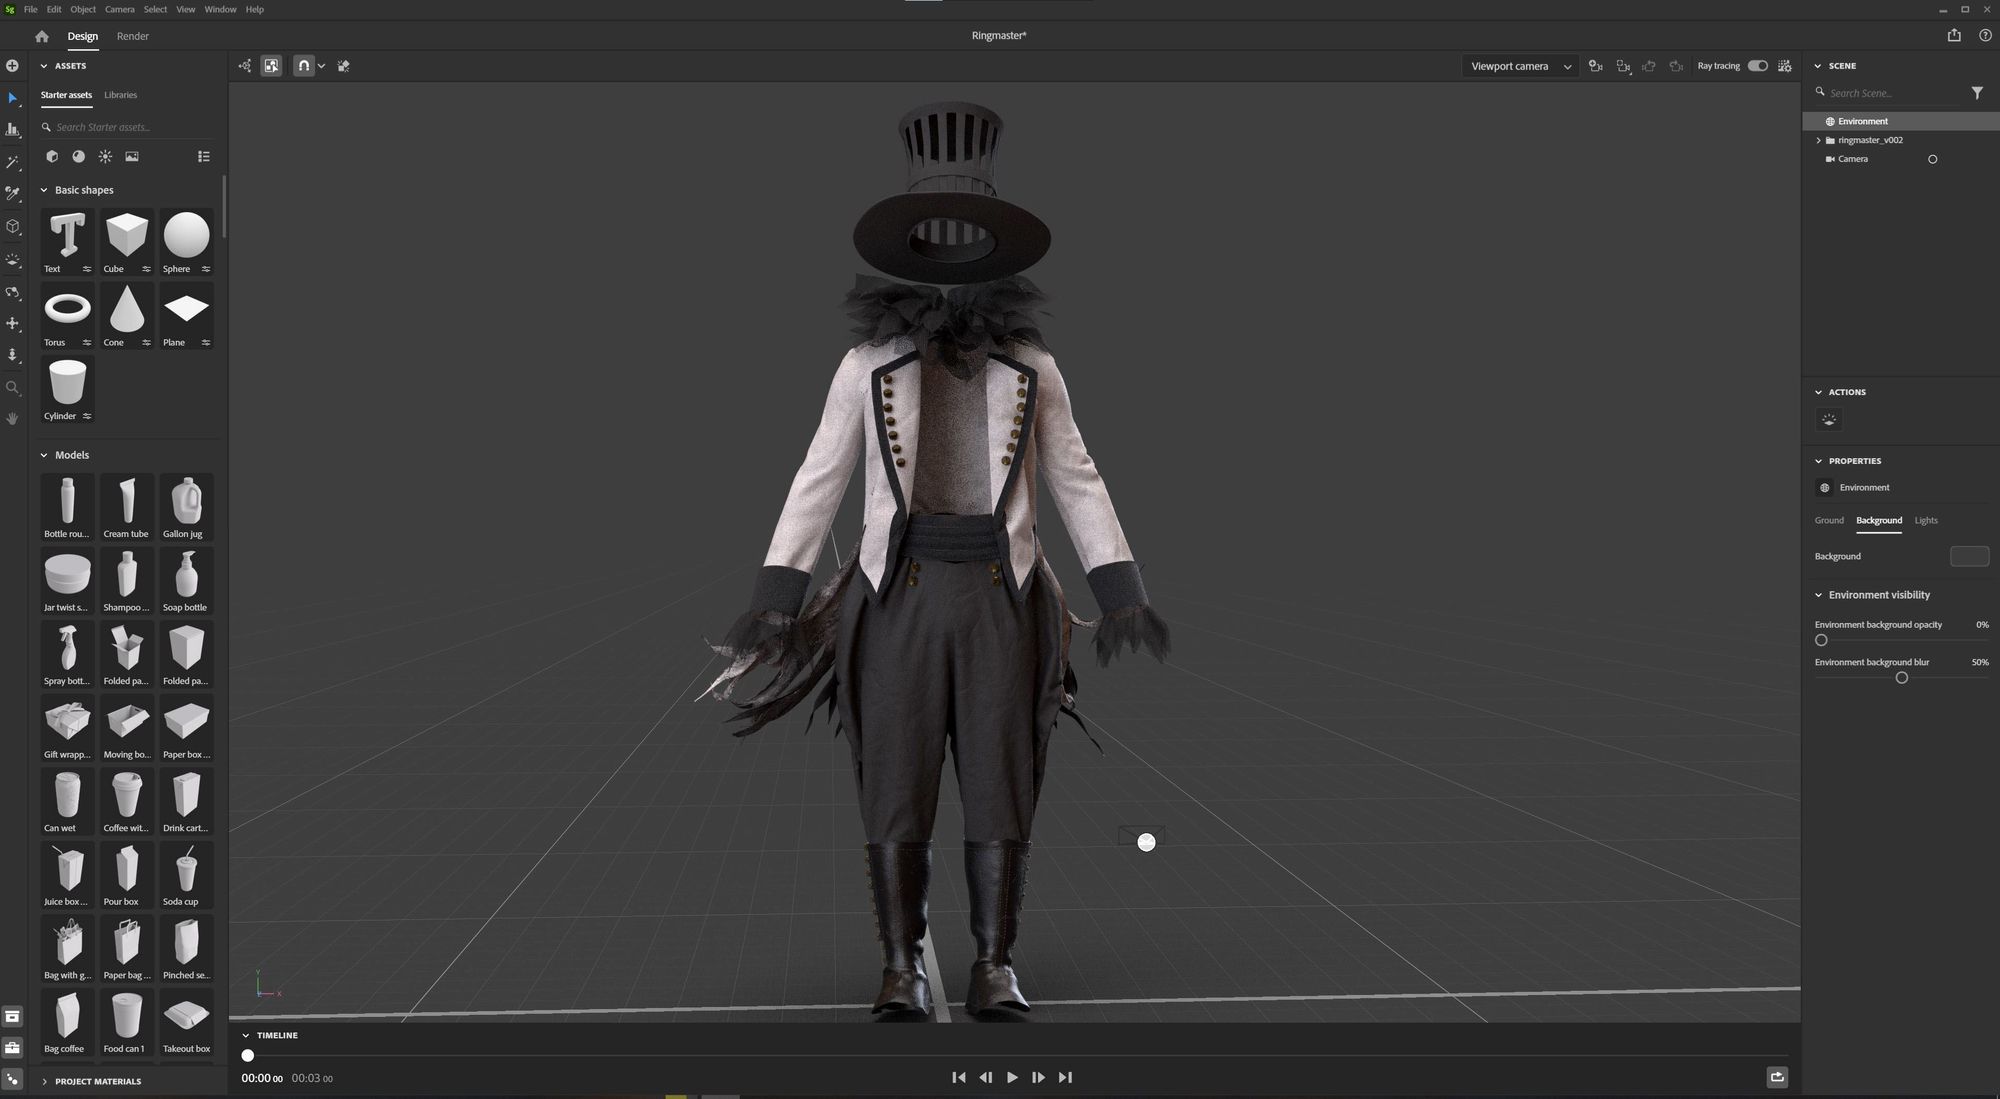
When I’m happy with how the costume looks, I export it to Substance Stager and do my renders.
I’m learning a lot with each new project and like to challenge myself with more and more complex garments. I appreciate any advice and feedback on how to improve my digital costumes and I’m also happy to answer any questions.
You can reach out to Ildy via her Rookies profile here.