Phoebe Koo is a final year student at The One Academy of Communication and Design, set to graduate in August 2024. In this article she shares details of one her final year projects: grooming a realistic 3D character.
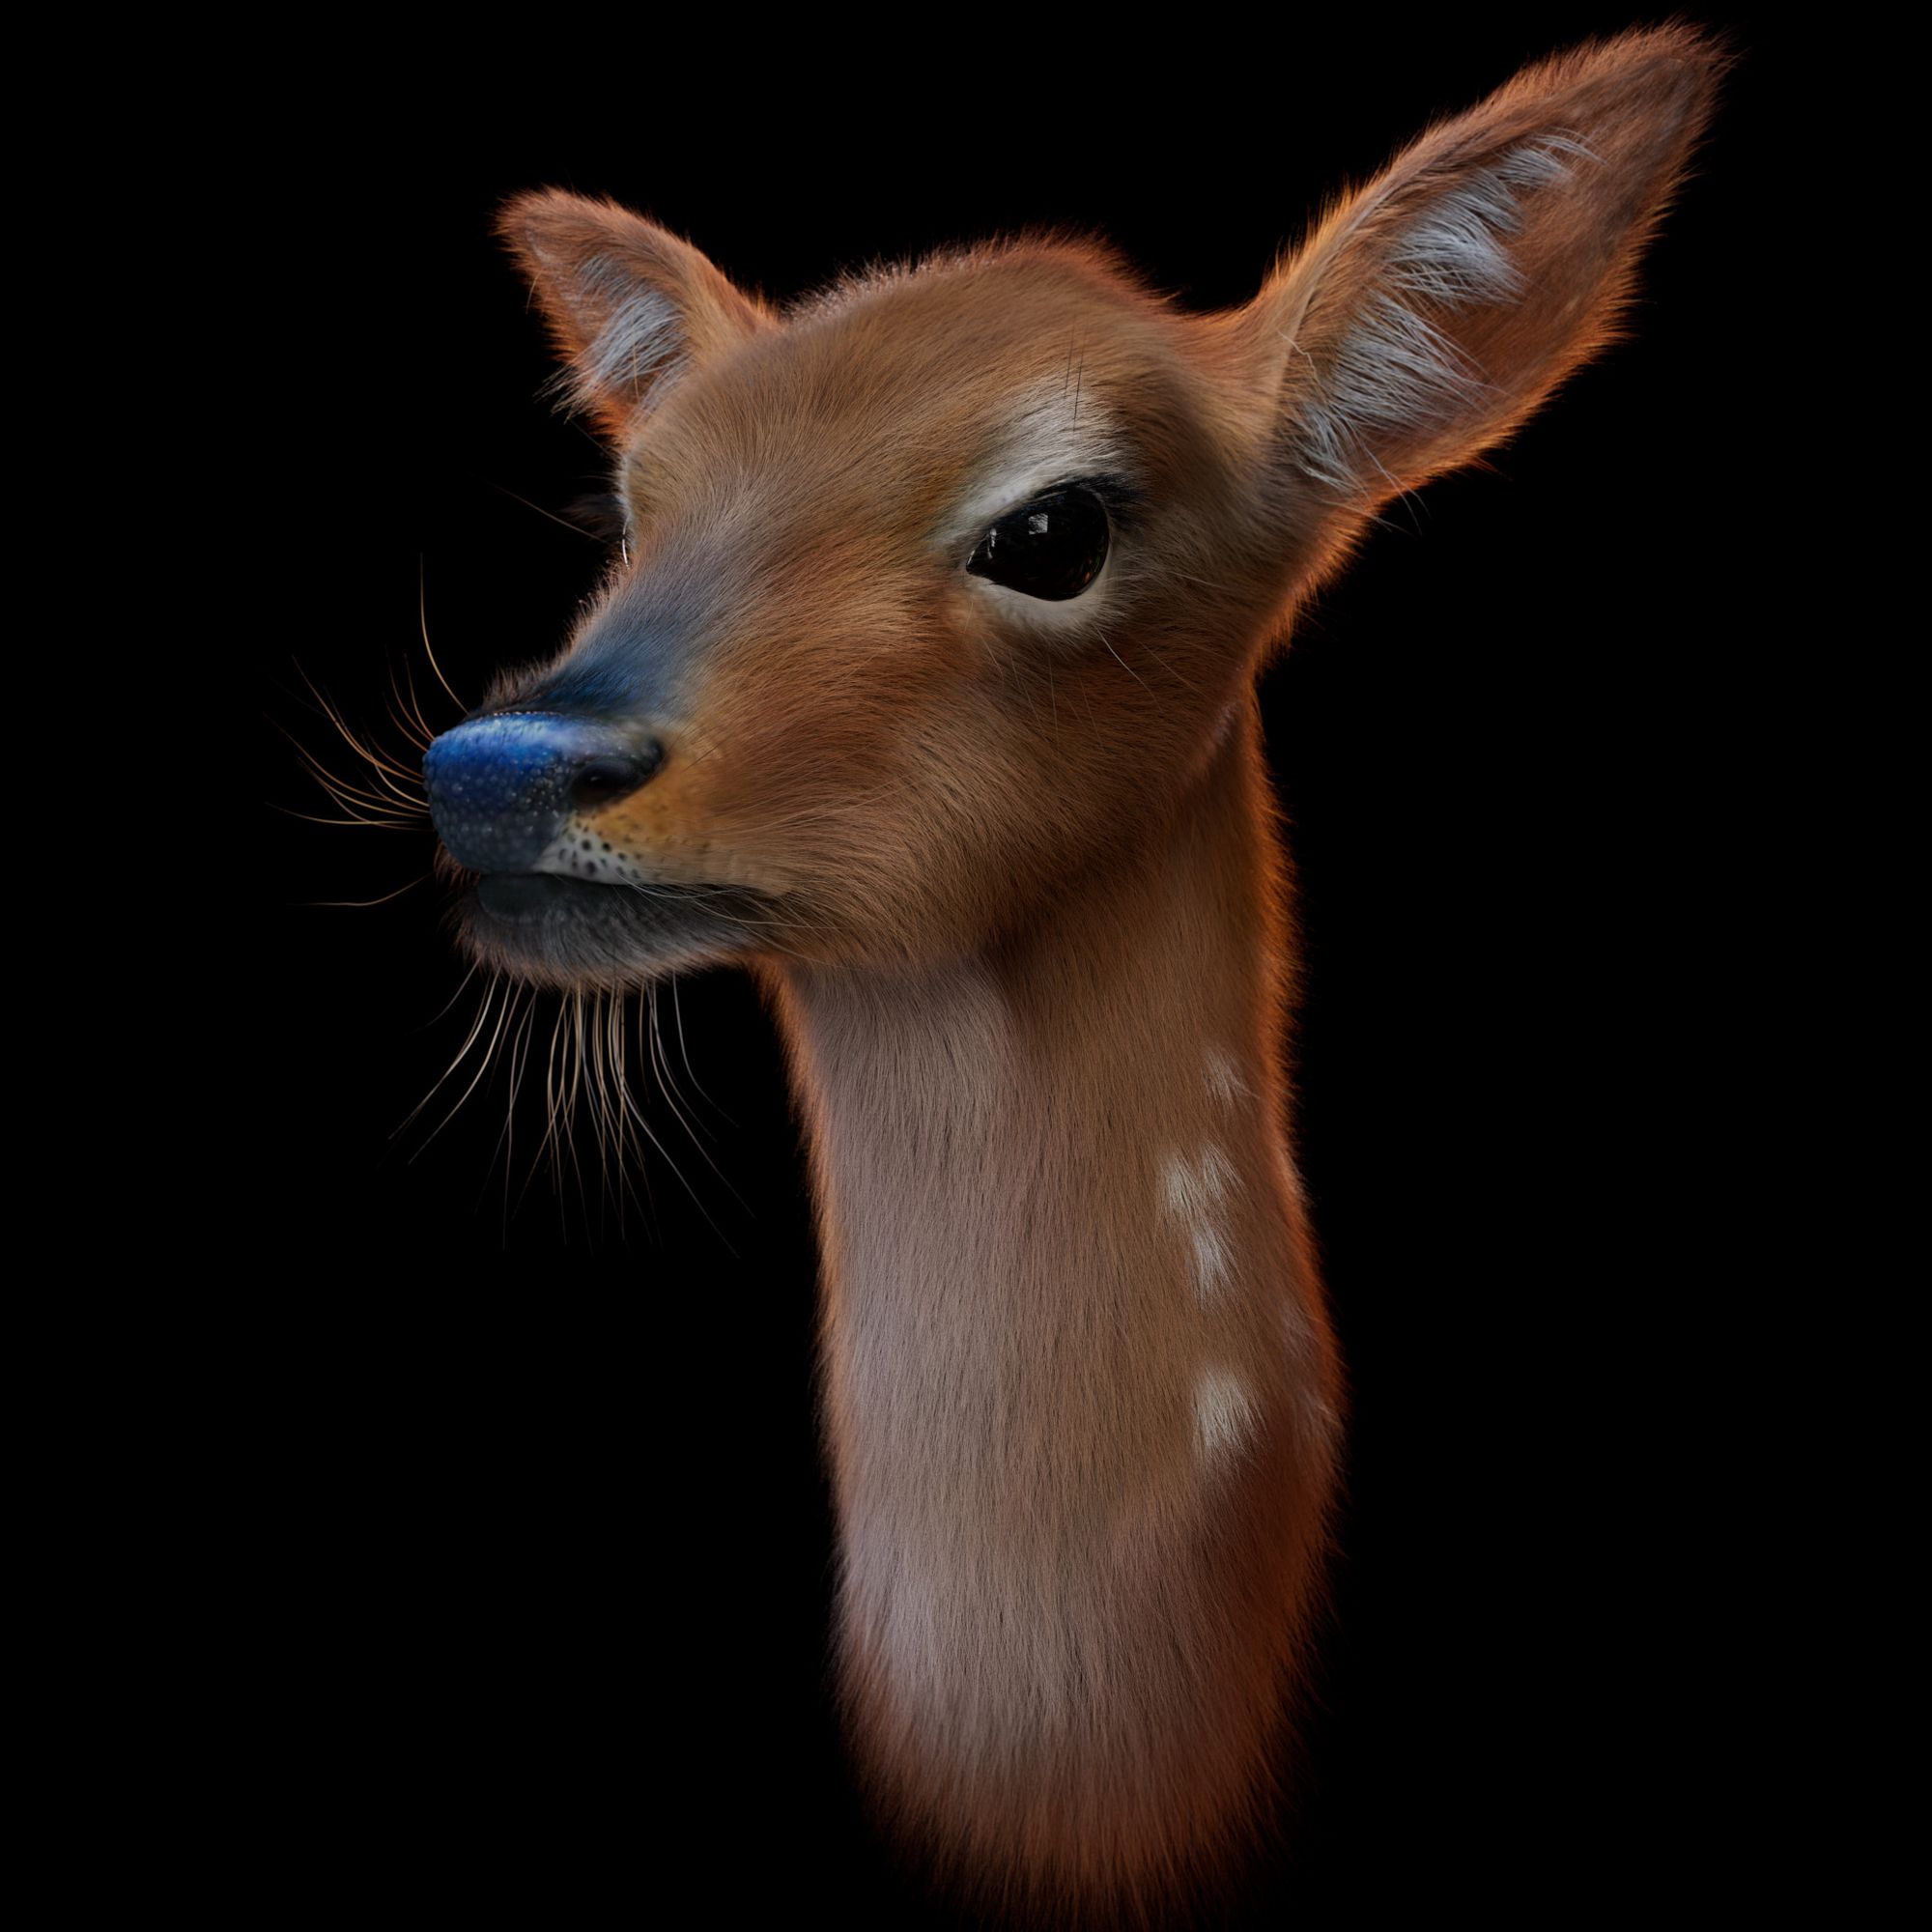
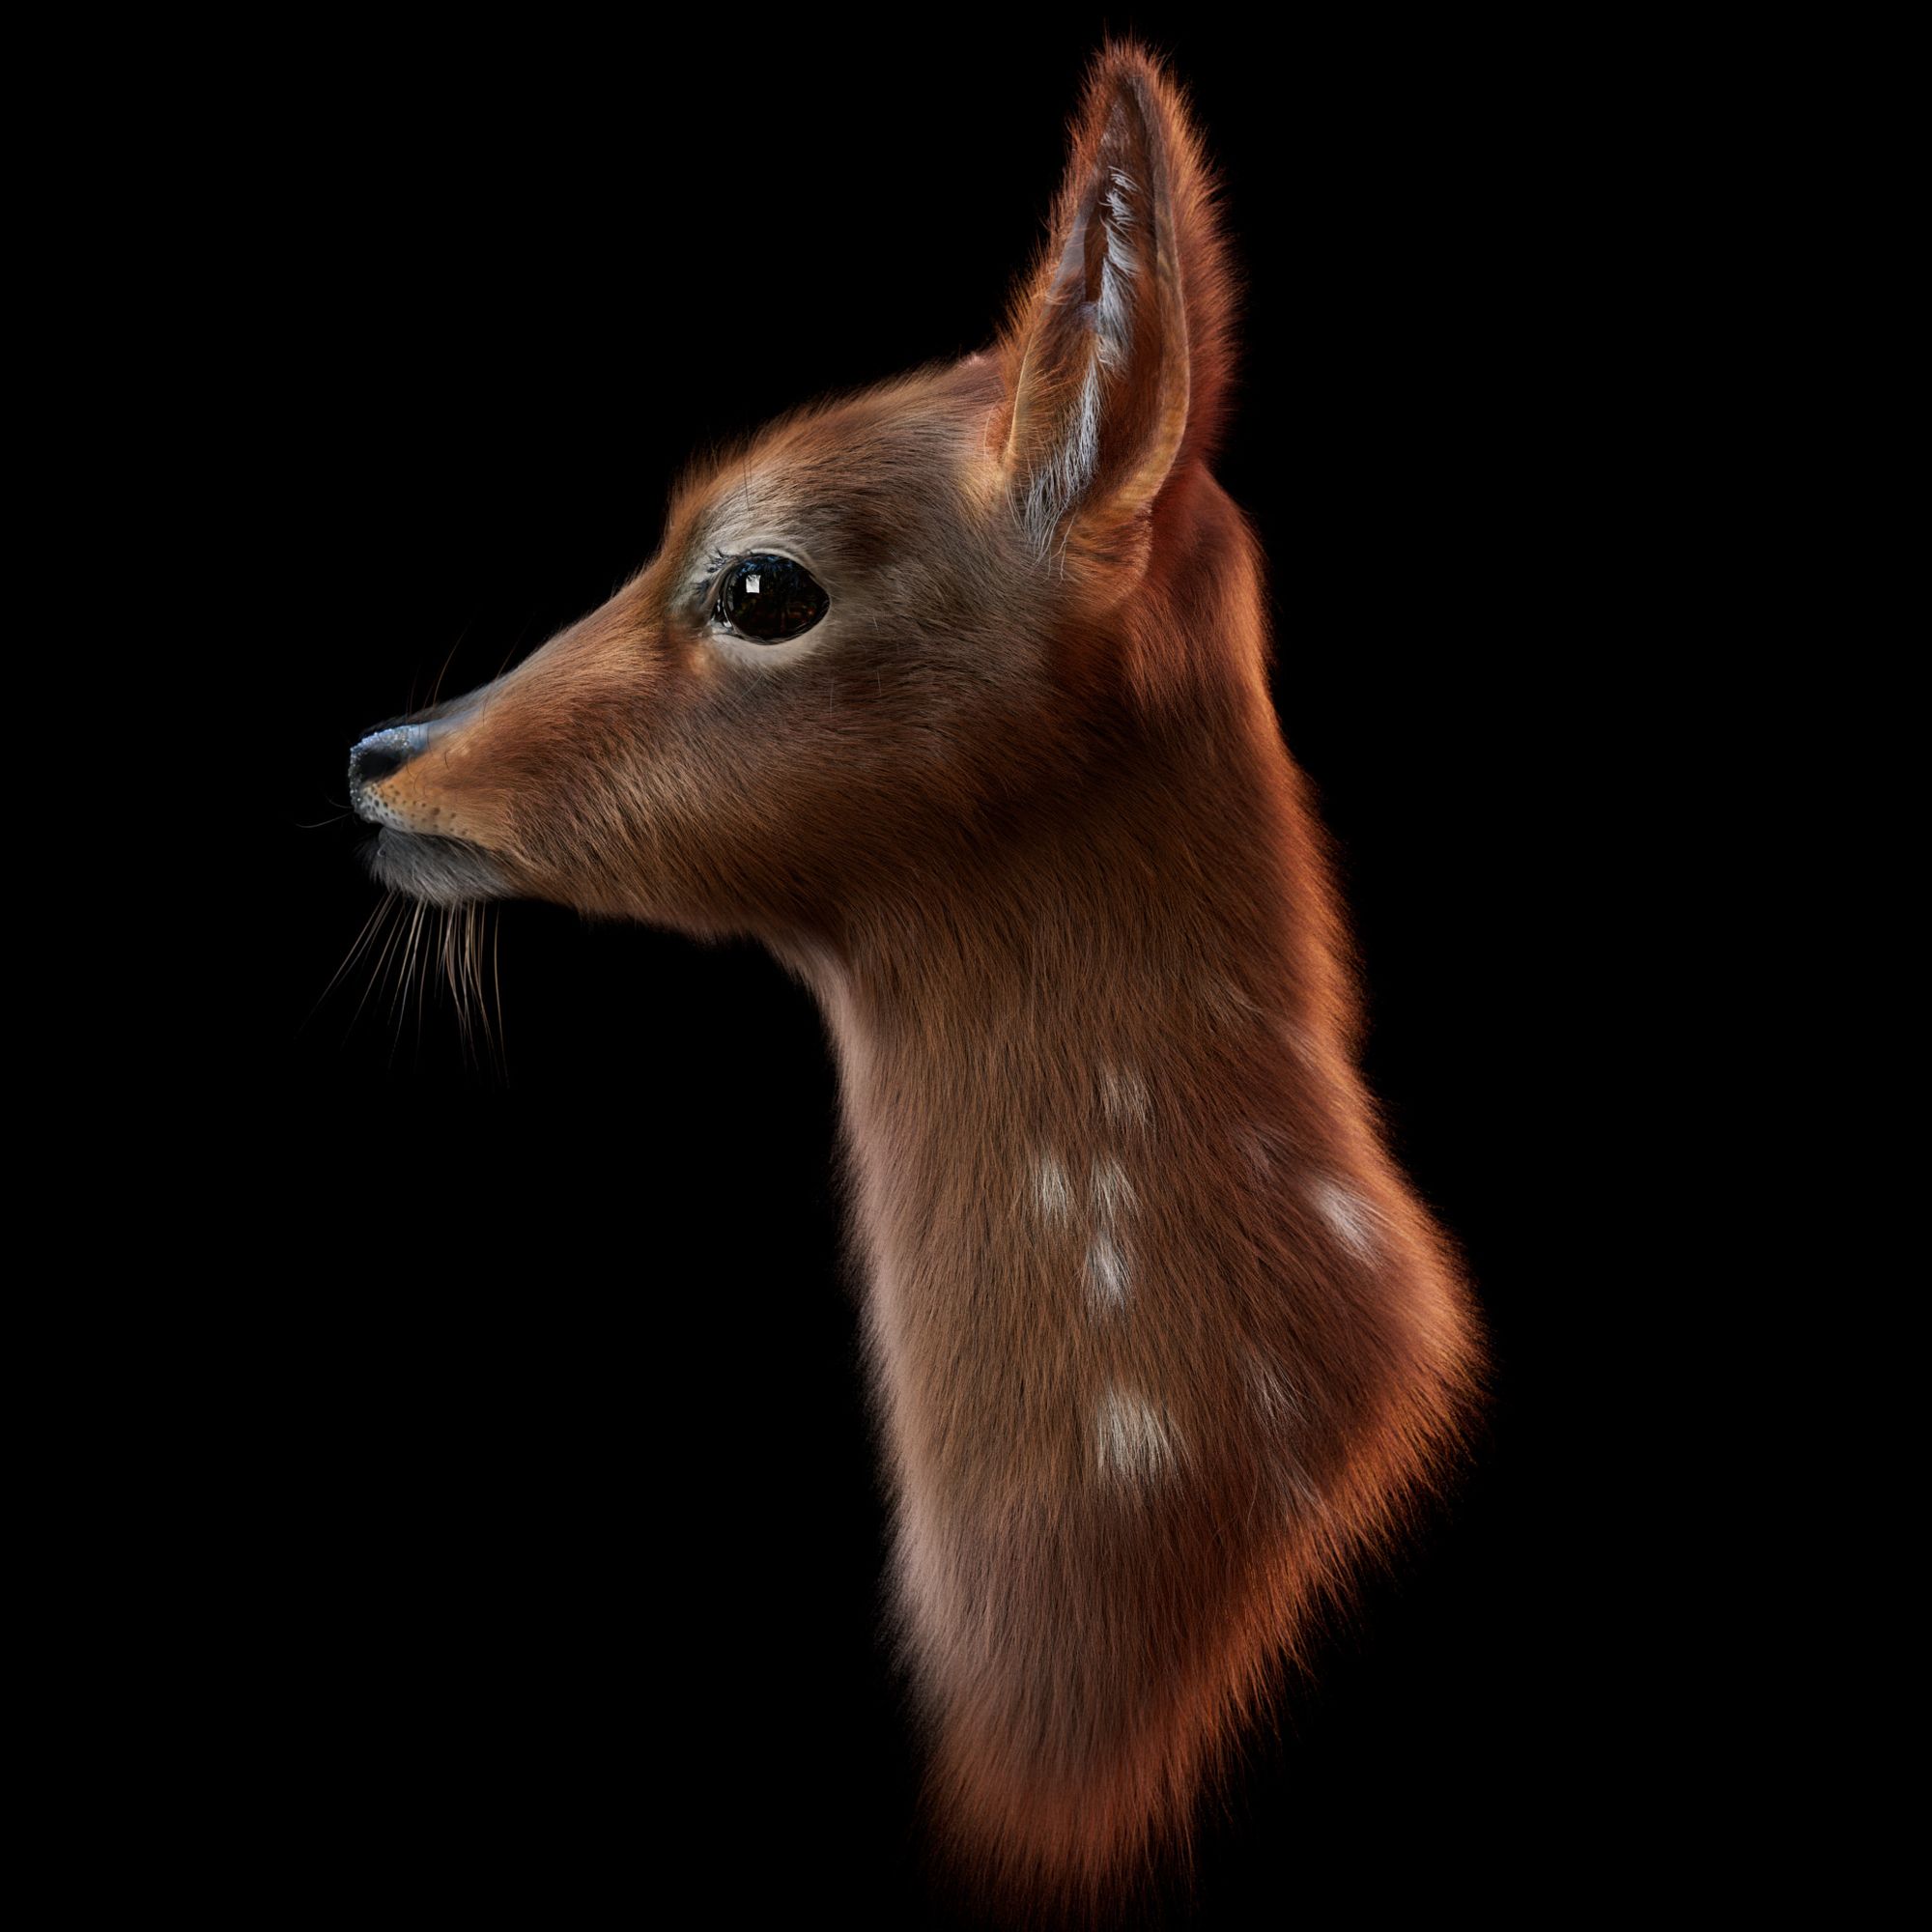
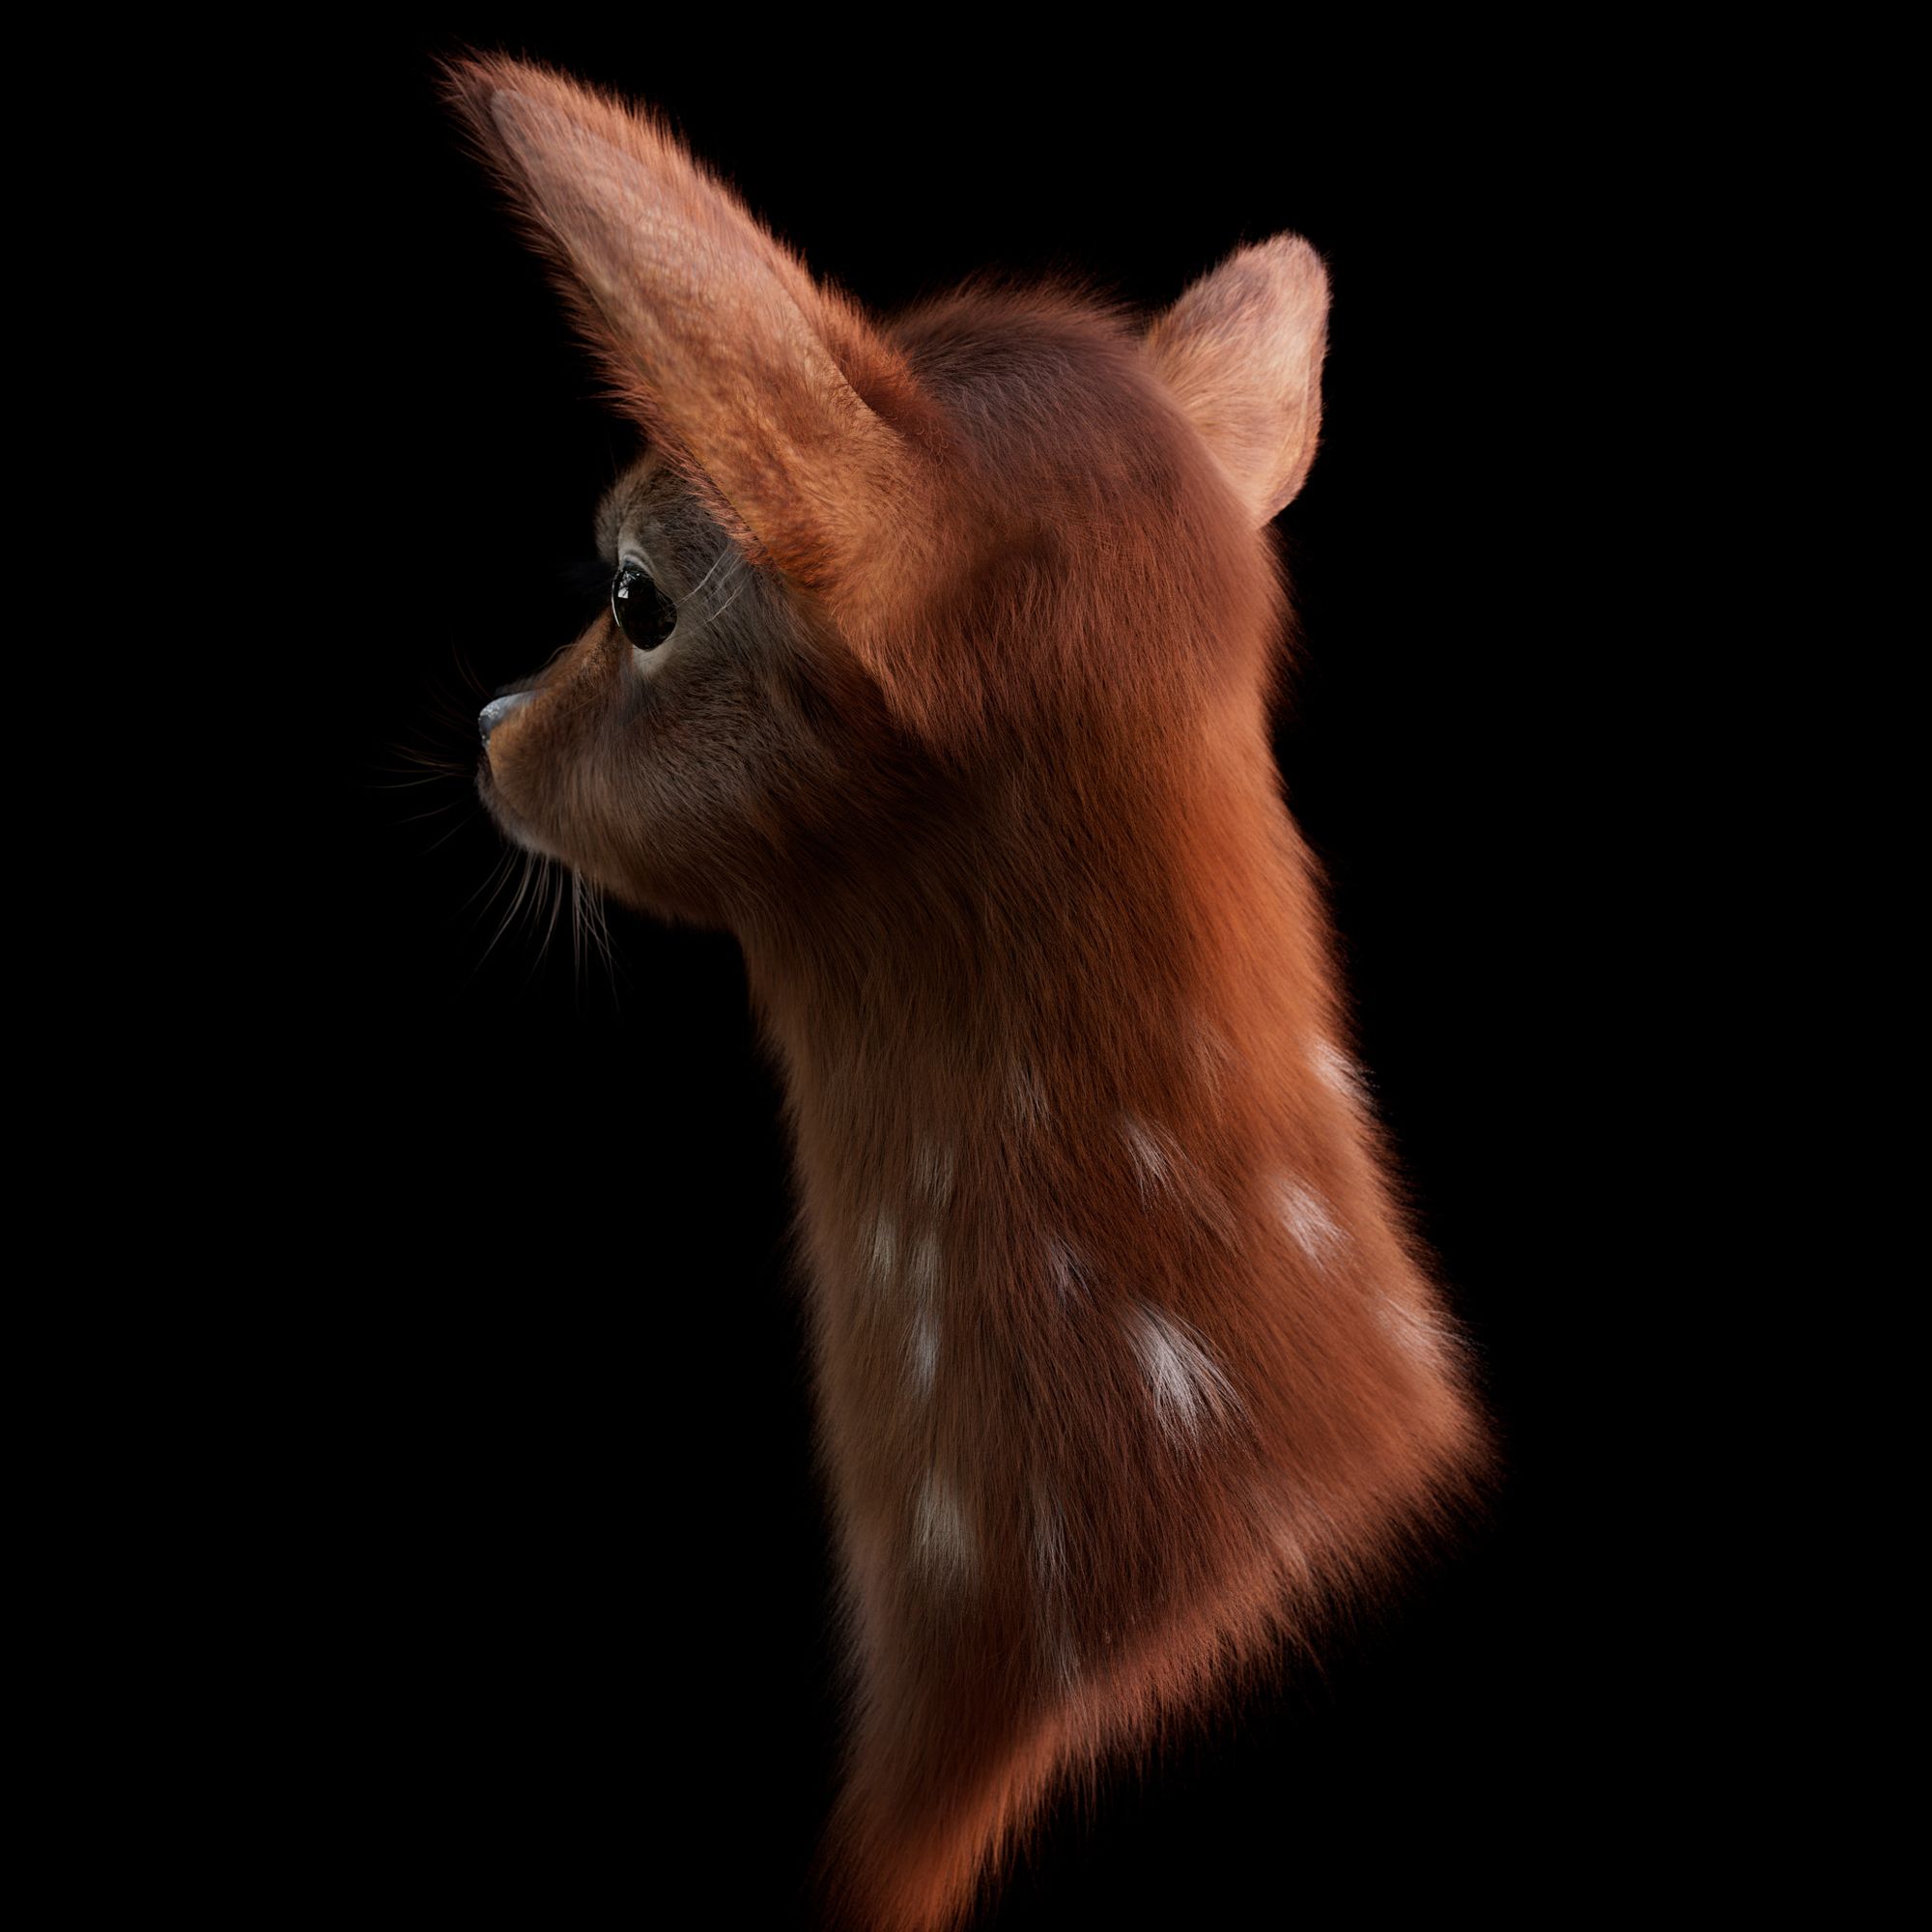
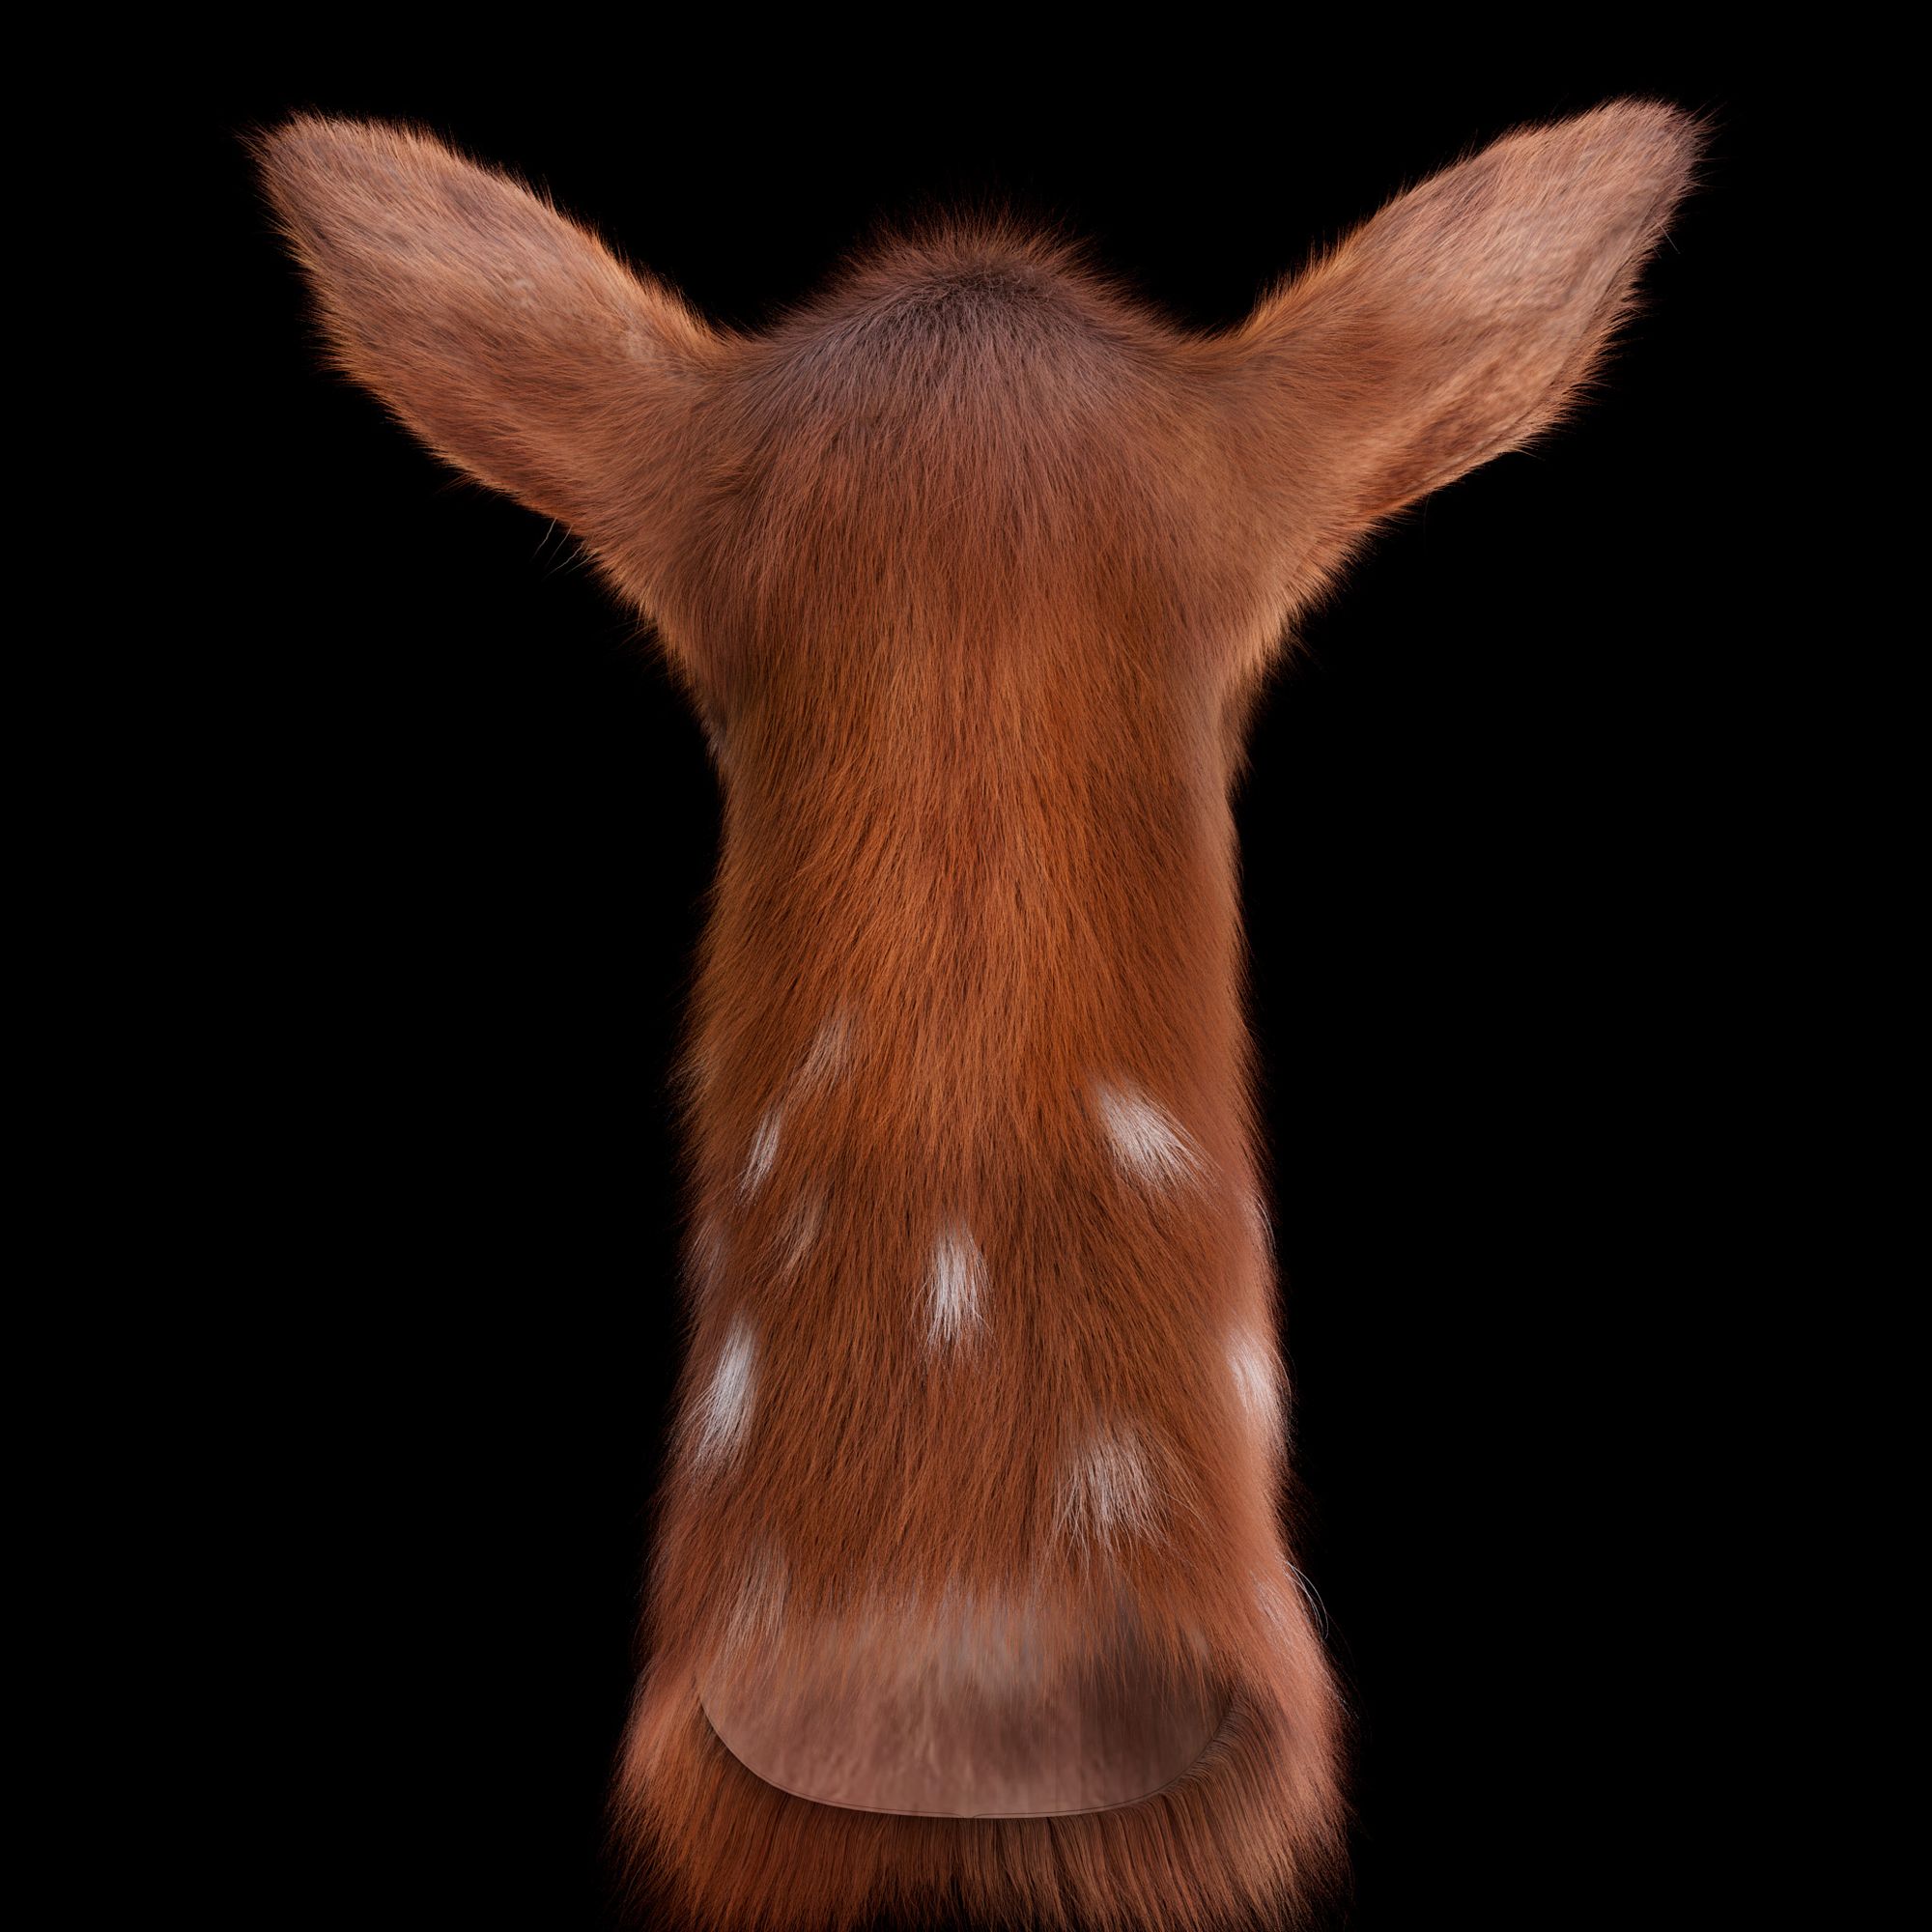
Phoebe Koo is a final-year diploma student currently enrolled in a VFX course at The One Academy of Communication and Design, set to graduate at the end of August this year. This creature grooming project marks her first experience in grooming with Yeti, serving as a small practice and learning opportunity. The entire project took nearly seven weeks to complete. The model, created by MSteph, was sourced from Resources and came with a well-unwrapped and laid-out UV. Apart from the model and UV, all other work was done by Phoebe. This project is an assignment for her grooming workshop, designed to support her final-year CFX project. In this article, Phoebe will share the progress for grooming a realistic creature.
If you don't stand for something, you will fall for something.
-Alexander Hamilton
Week 1: References & Analysis
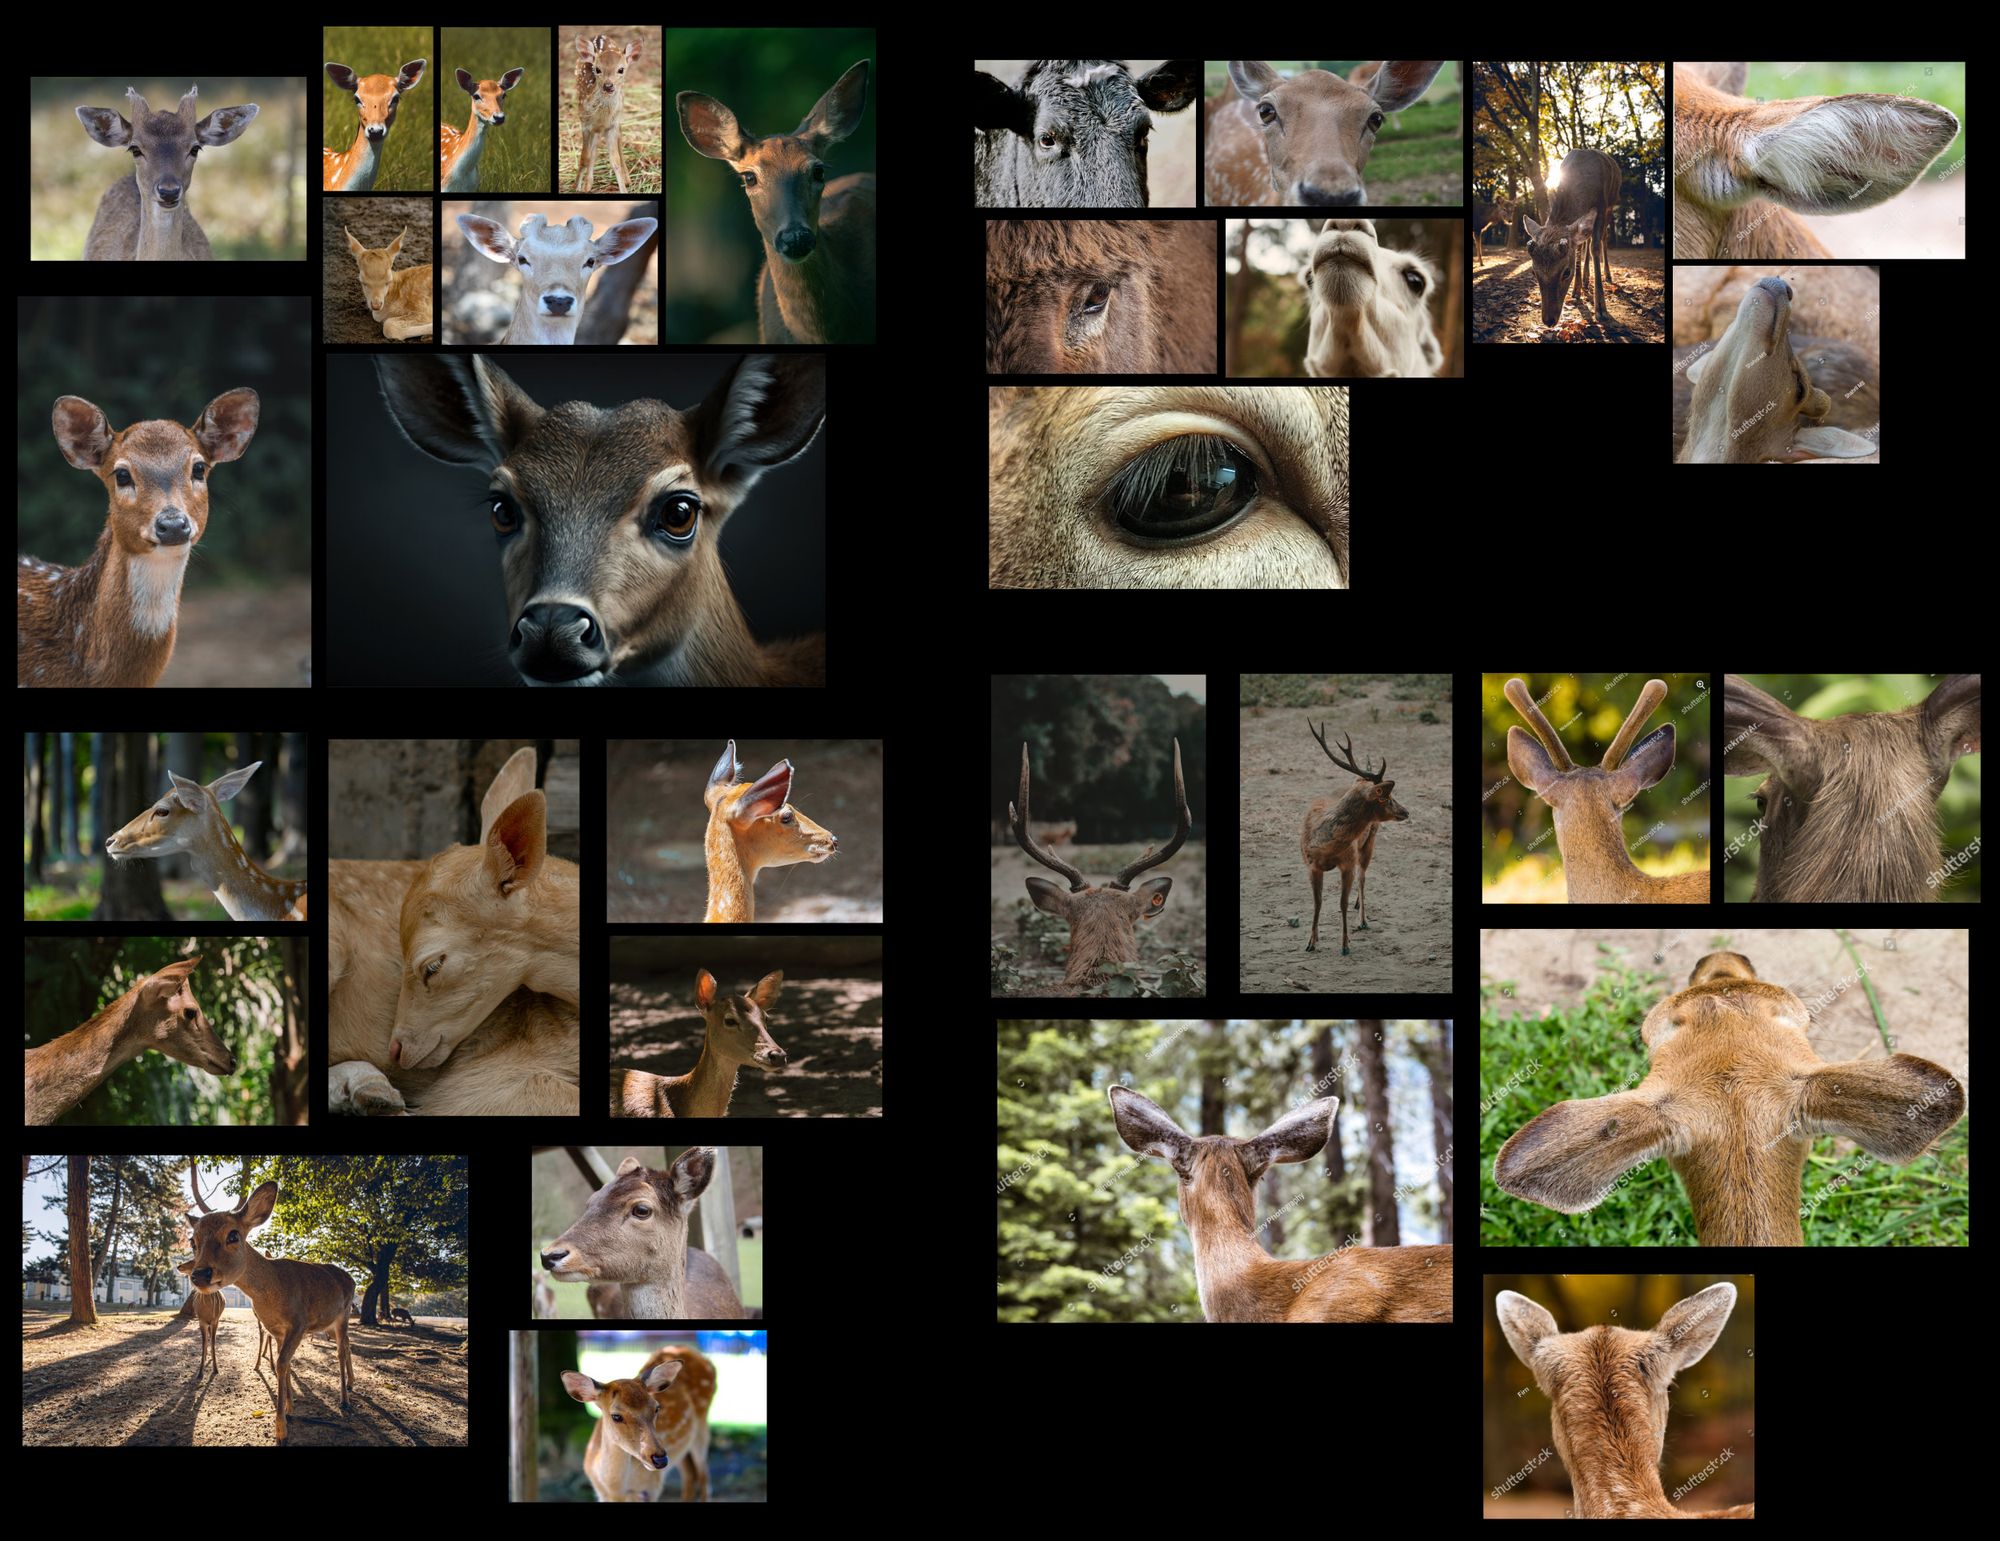
For the first week, I searched for references and did my own studies for the flow of the fur. As this is my first time grooming a creature, there’s a lot of analysis for me to do before I could start with the groom. I compiled all my references in pureRef as I feel it’s easier for me to check back on the references while working on it. I used Google and Microsoft Edge for most of the references, I also used pexels.com especially for the close up shots to get the high res details.
references in my pureRef boardanalysis that I've done in Photoshop
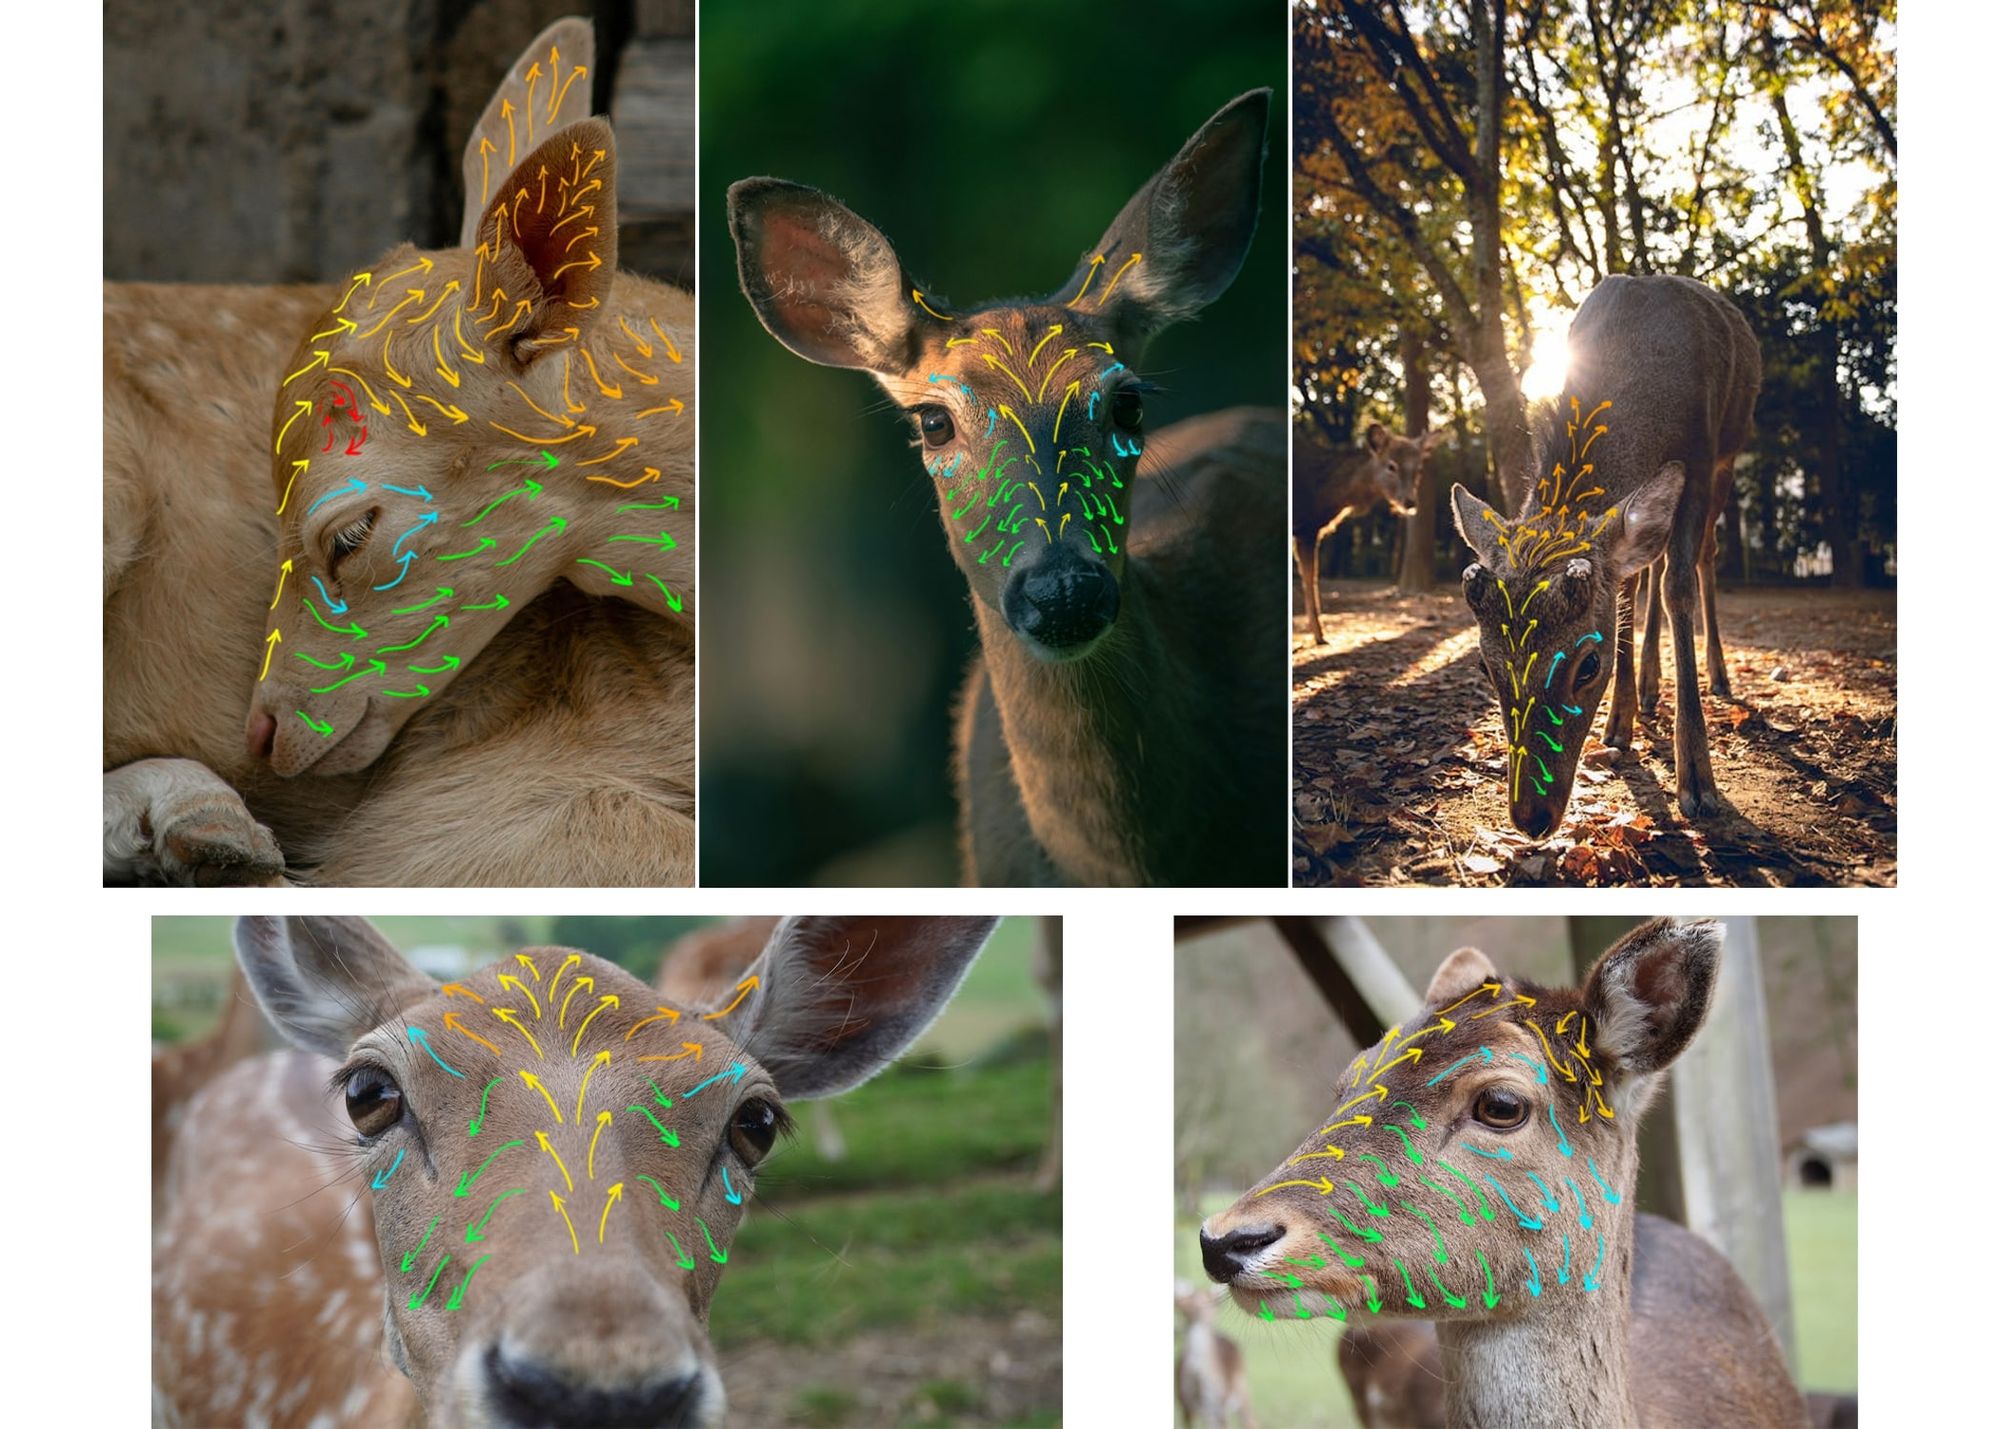
Week 2/3: Grooming
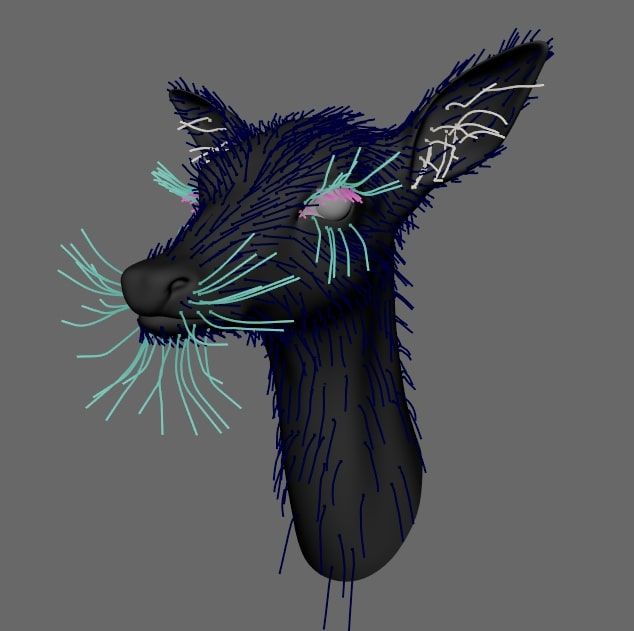
The first step in the grooming process was creating curves and guides. First, I increased the subdivision of the original model by four times to achieve a higher resolution. However, I only groomed on the second subdivision mesh to ensure the grooming process was not too laggy due to the high-resolution mesh. Typically, I use Xgen Interactive in Maya for human hair grooming, but this time, I used the Yeti Groom node to create the guides. I found that brushing the guides in Yeti was more challenging as I was not familiar with the tools. I separated the groom into four different nodes: main body groom, ear groom, whisker groom, and eyelash groom.
guides created in Yeti groom node
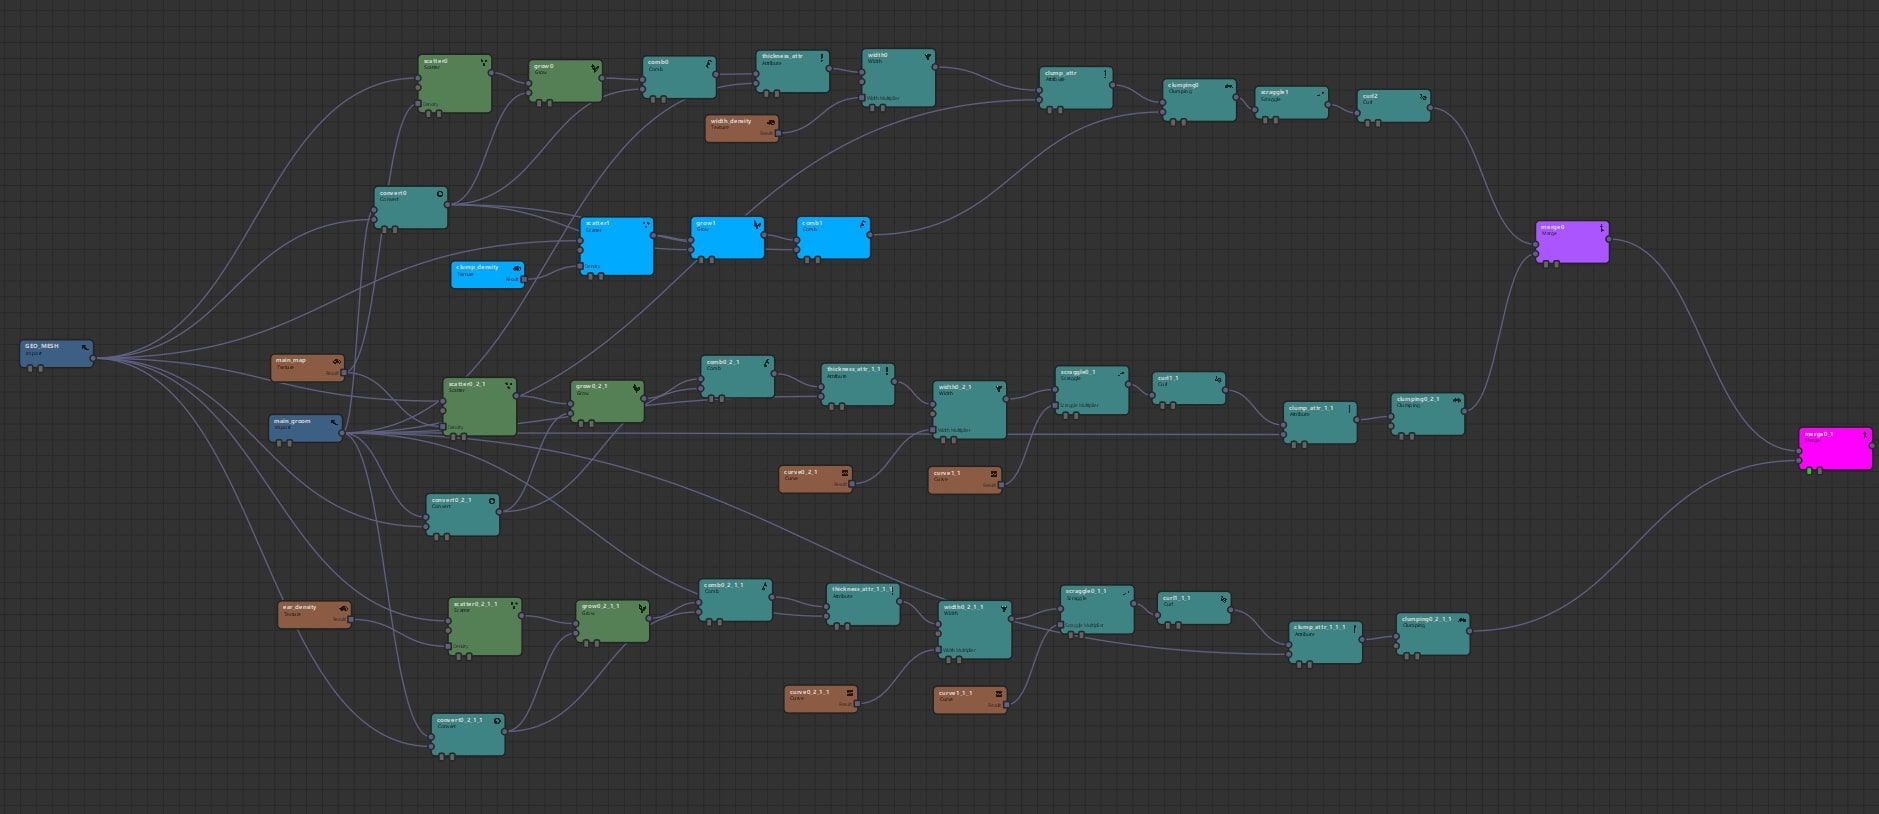
Week 3/4: Yeti nodes
After the curves were done, I started tweaking all the details using Yeti nodes. This process took around two weeks. Yeti has many advanced nodes that provide more control for the fur. Compared to Xgen, Yeti seems less complicated in terms of node connections, as I am used to working with node graphs. I separated the main body fur and the whisker fur into two different Yeti nodes for better control.
main fur Yeti node graphwhisker fur Yeti node graph
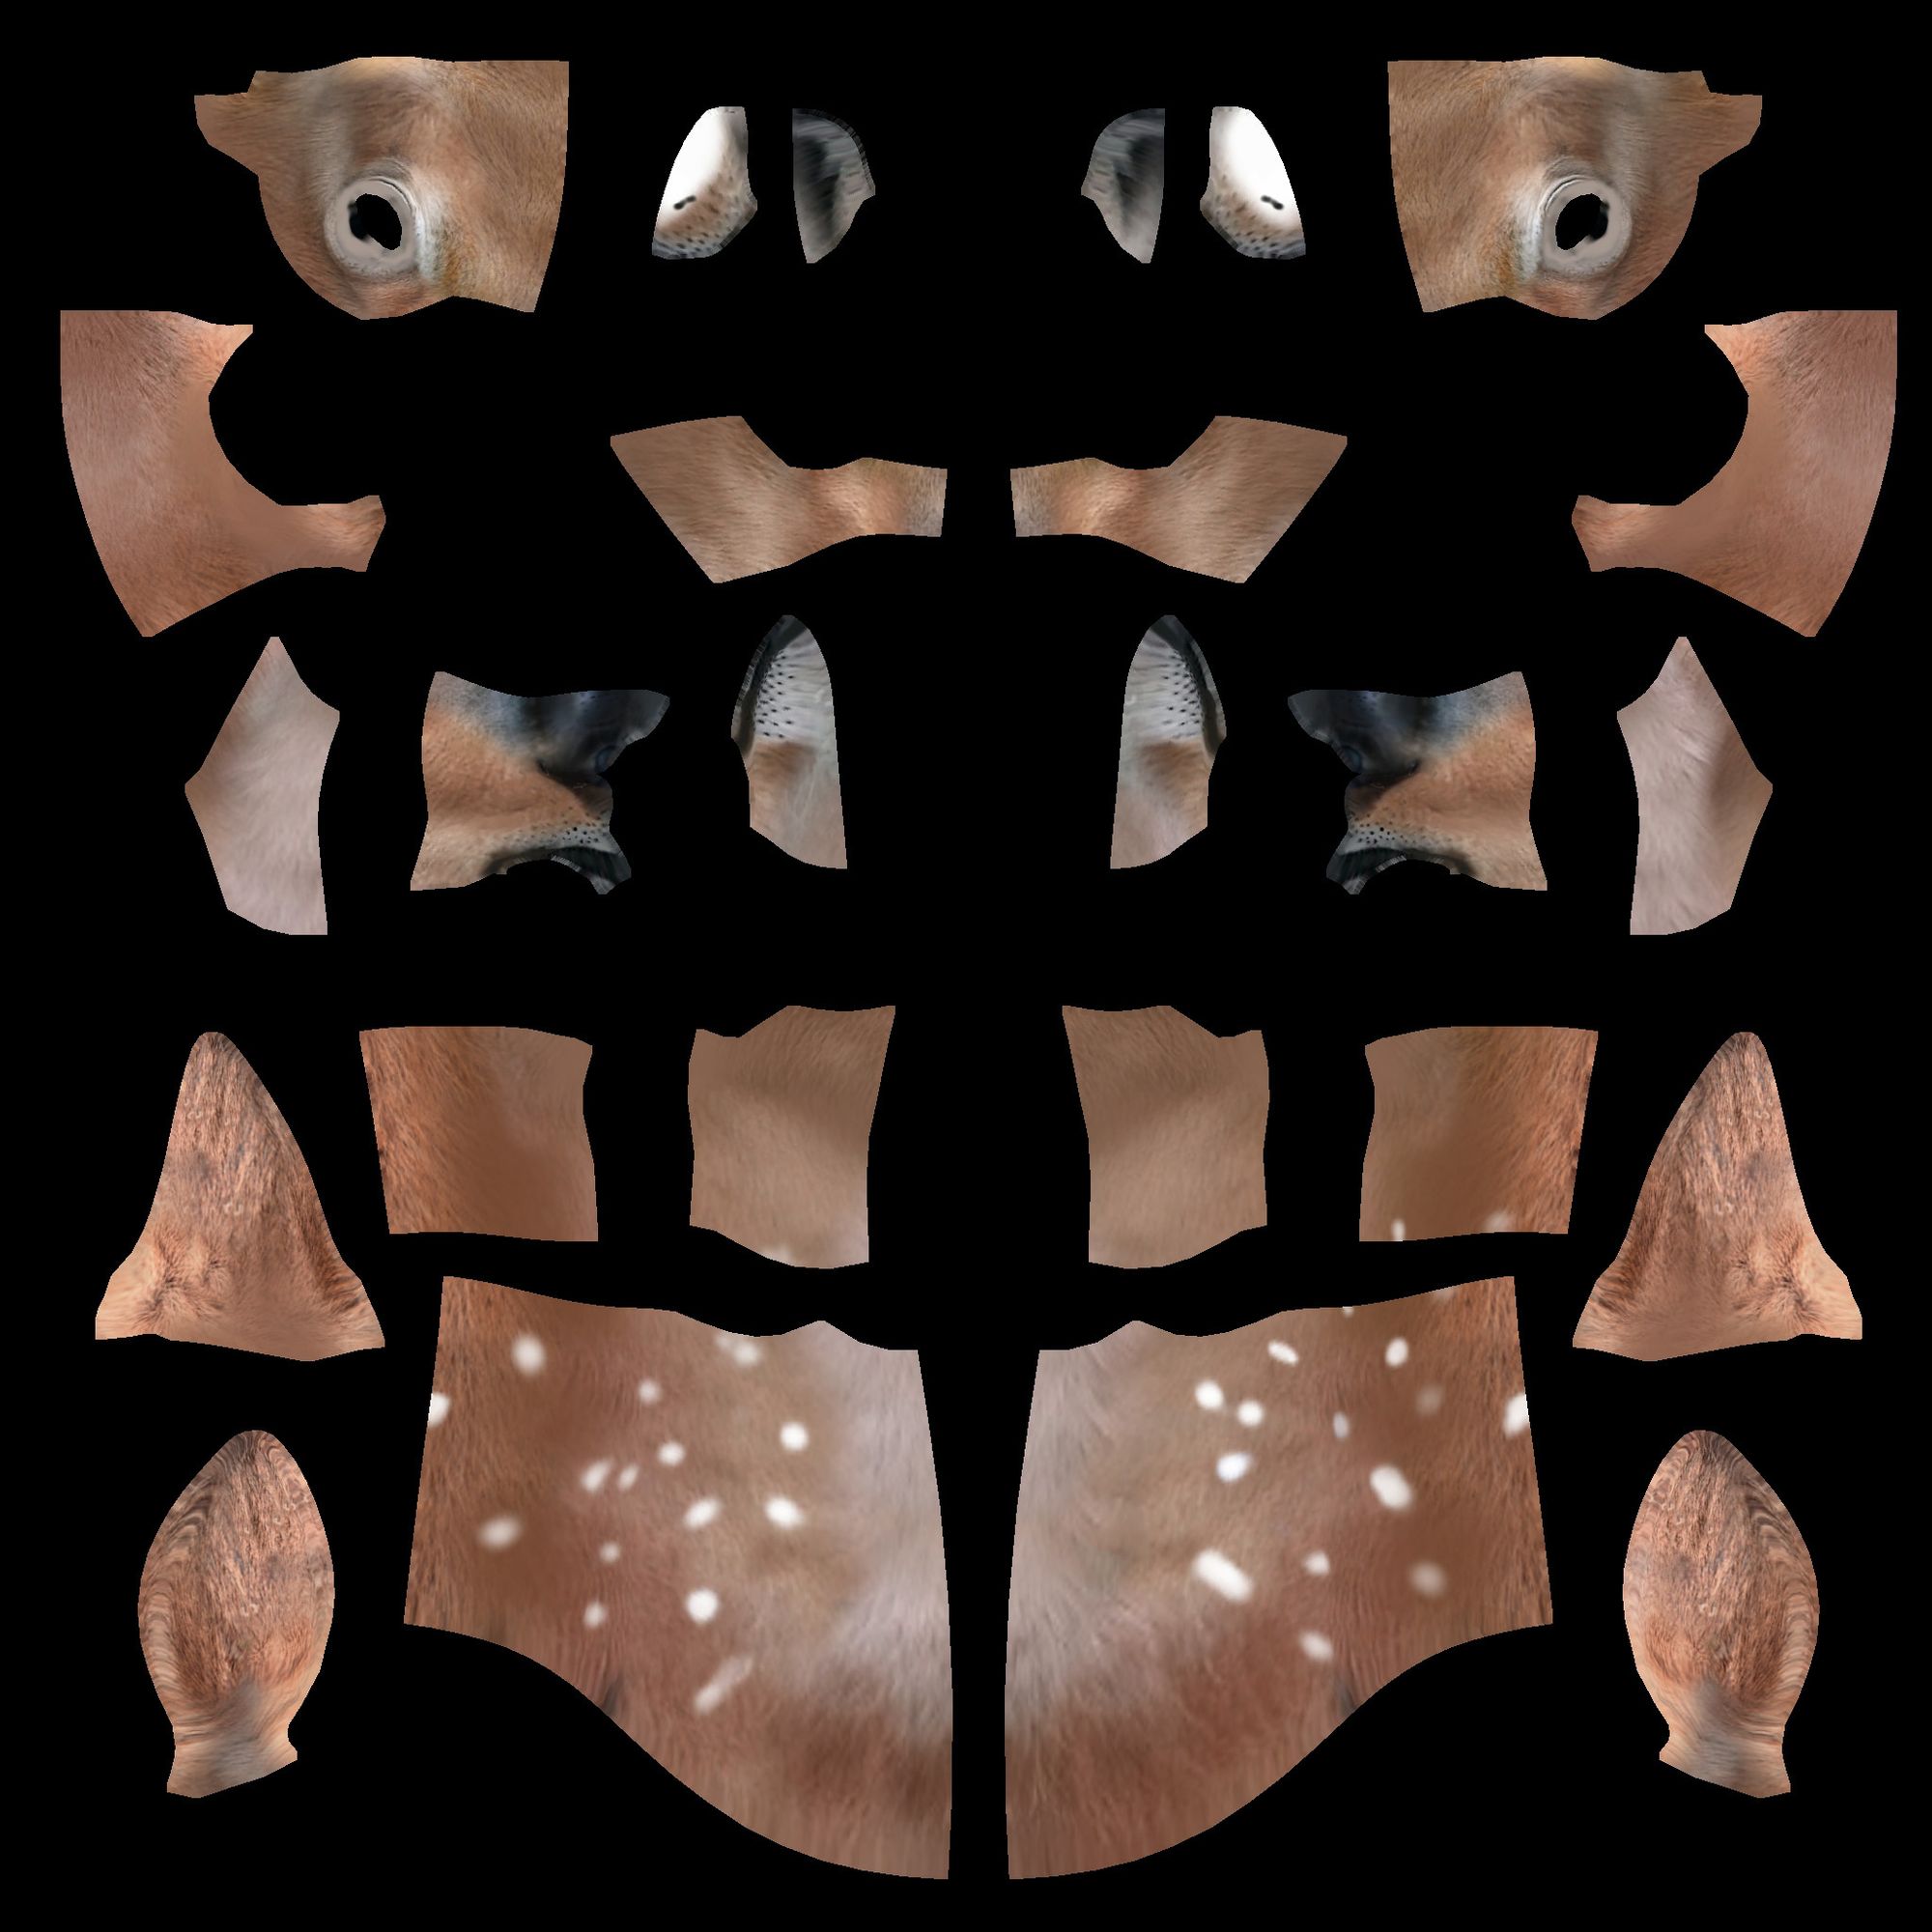
Week 5: Texturing and Shading
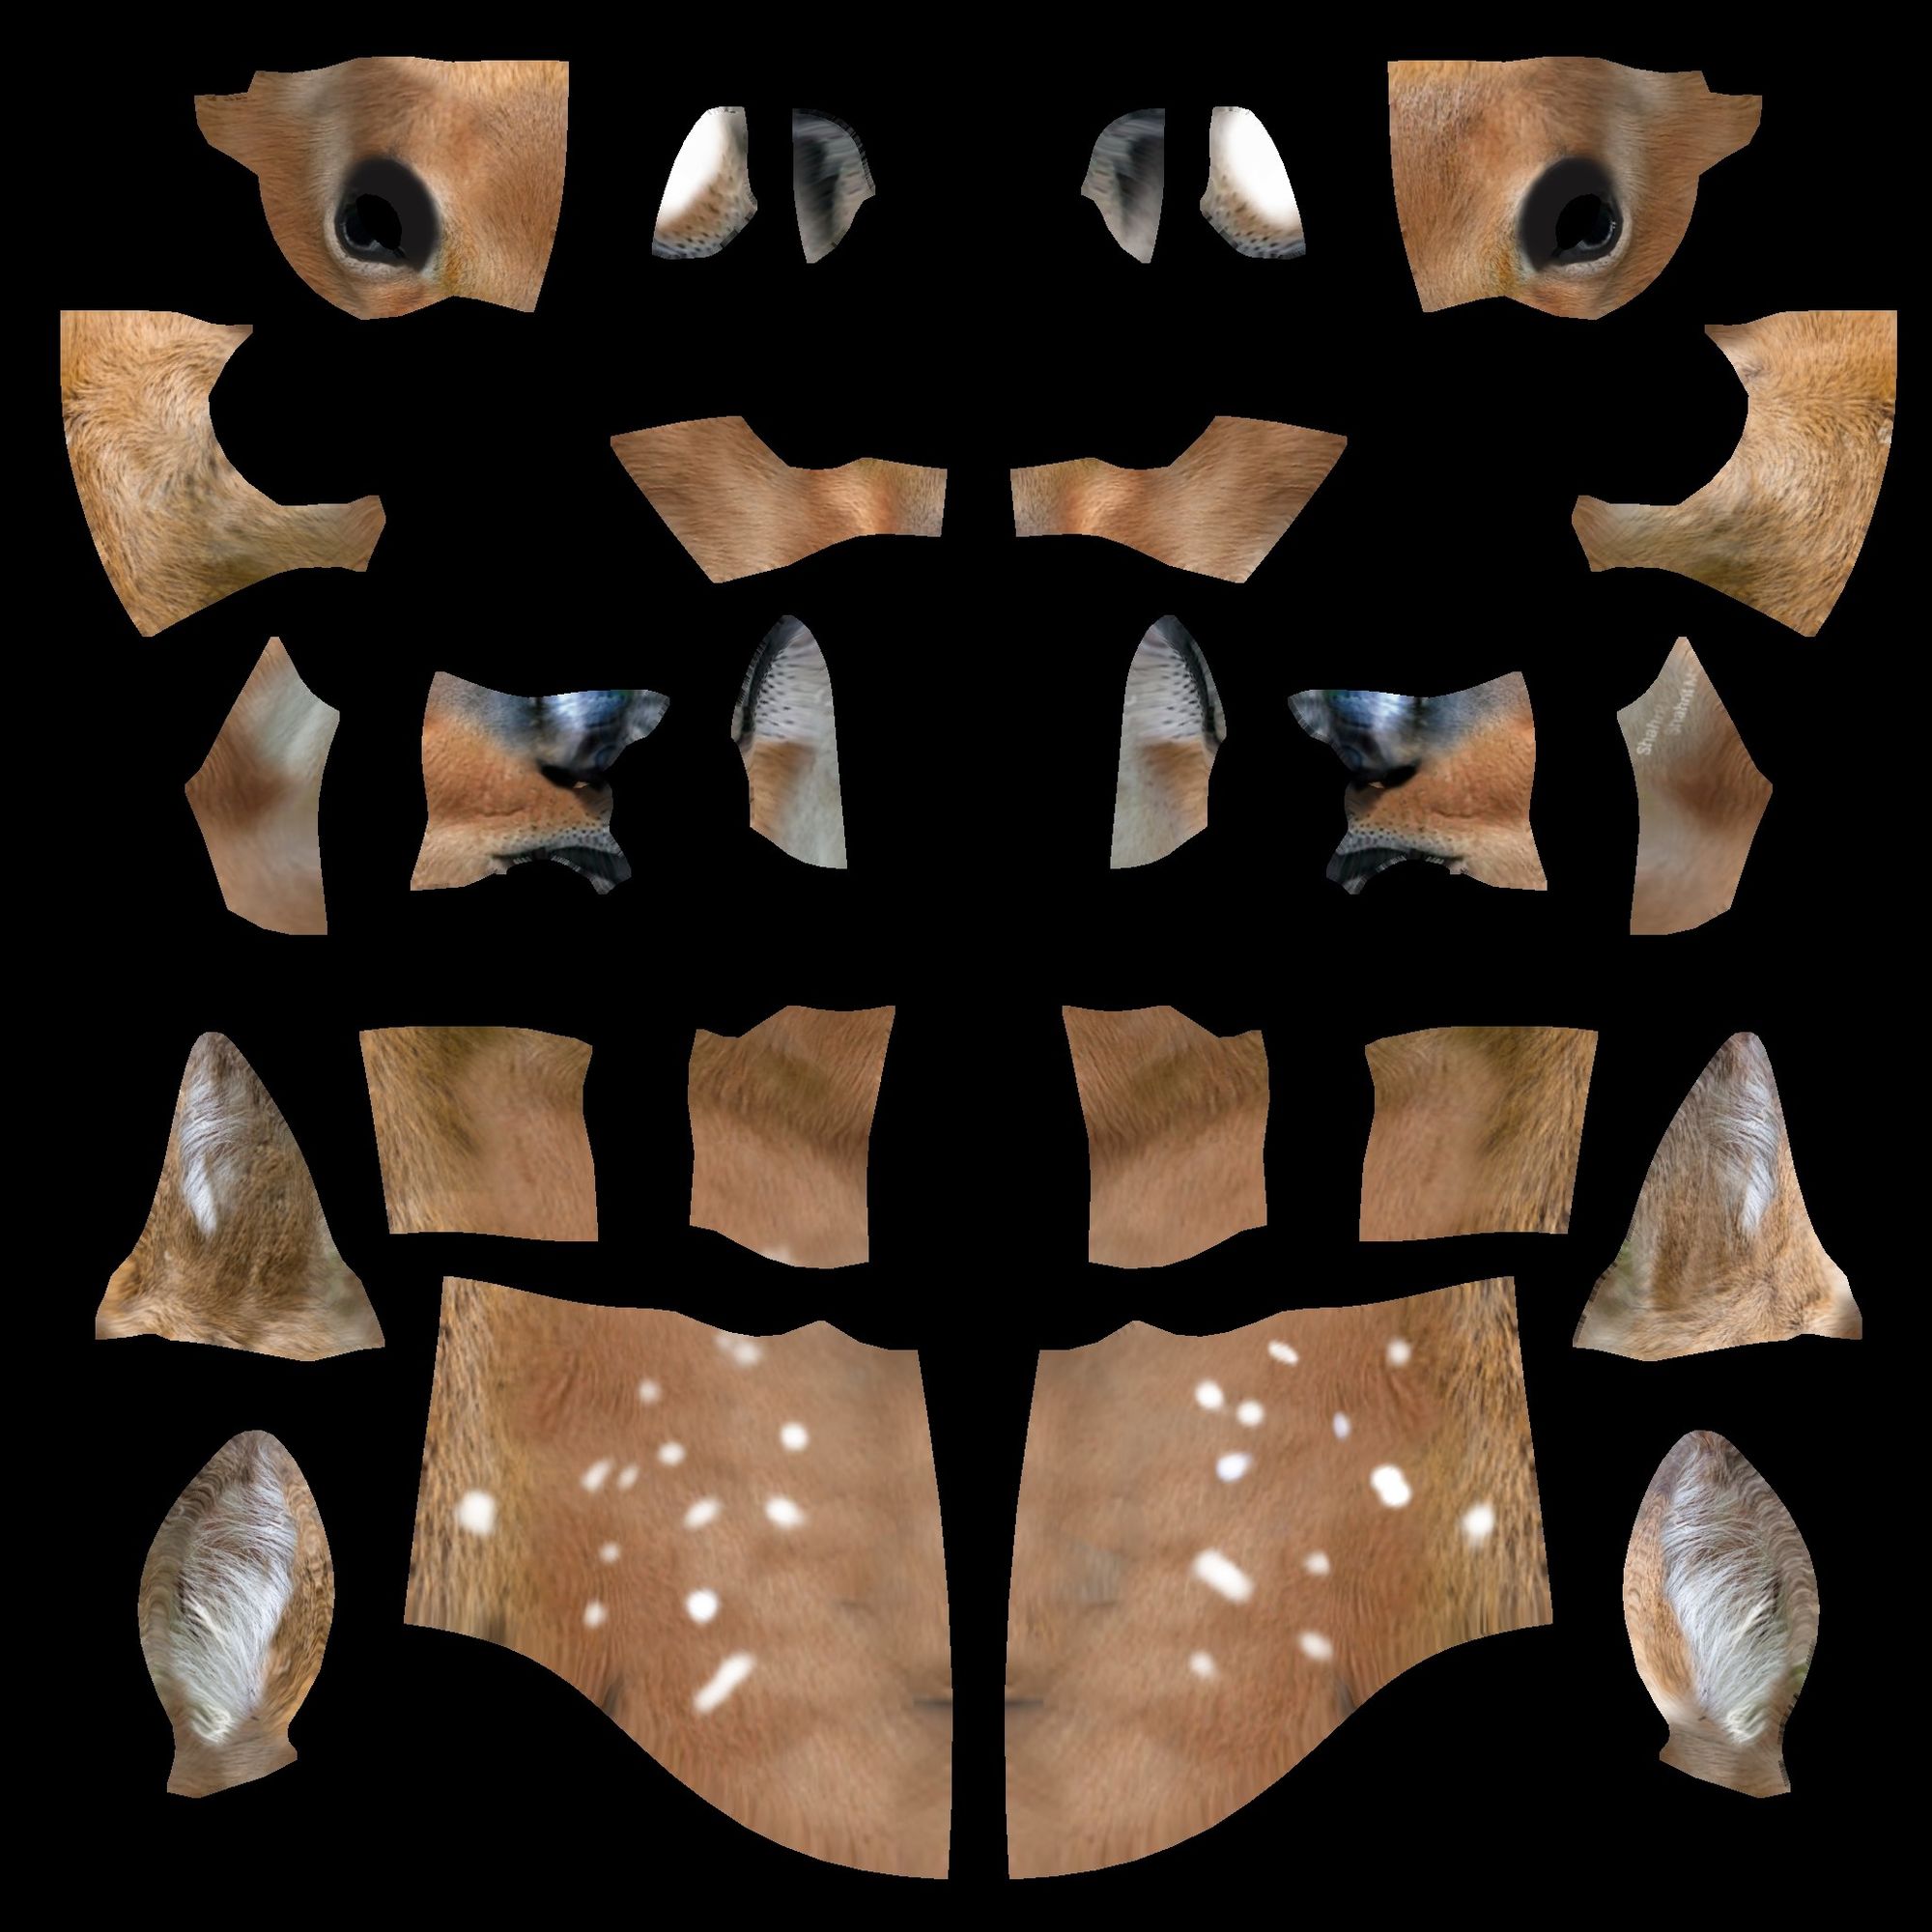
Meanwhile, I also worked on the textures in ZBrush during week 5. This was one of the most exciting parts for me. I really enjoy painting textures and plotting out the details using texture maps. I mainly used the projection method in ZBrush for the main texture. I created a separate texture for the whiskers and ear fur to add more variation. I also adjusted the skin texture in Photoshop to enhance some details. In total, I have three different texture sets for my Biche look dev.
Here's a quick preview of my textures in the Zbrush viewport:
fur texture (to be used in Yeti)
skin texture (base texture)ear & eye fur texture
final texture sets in UV map
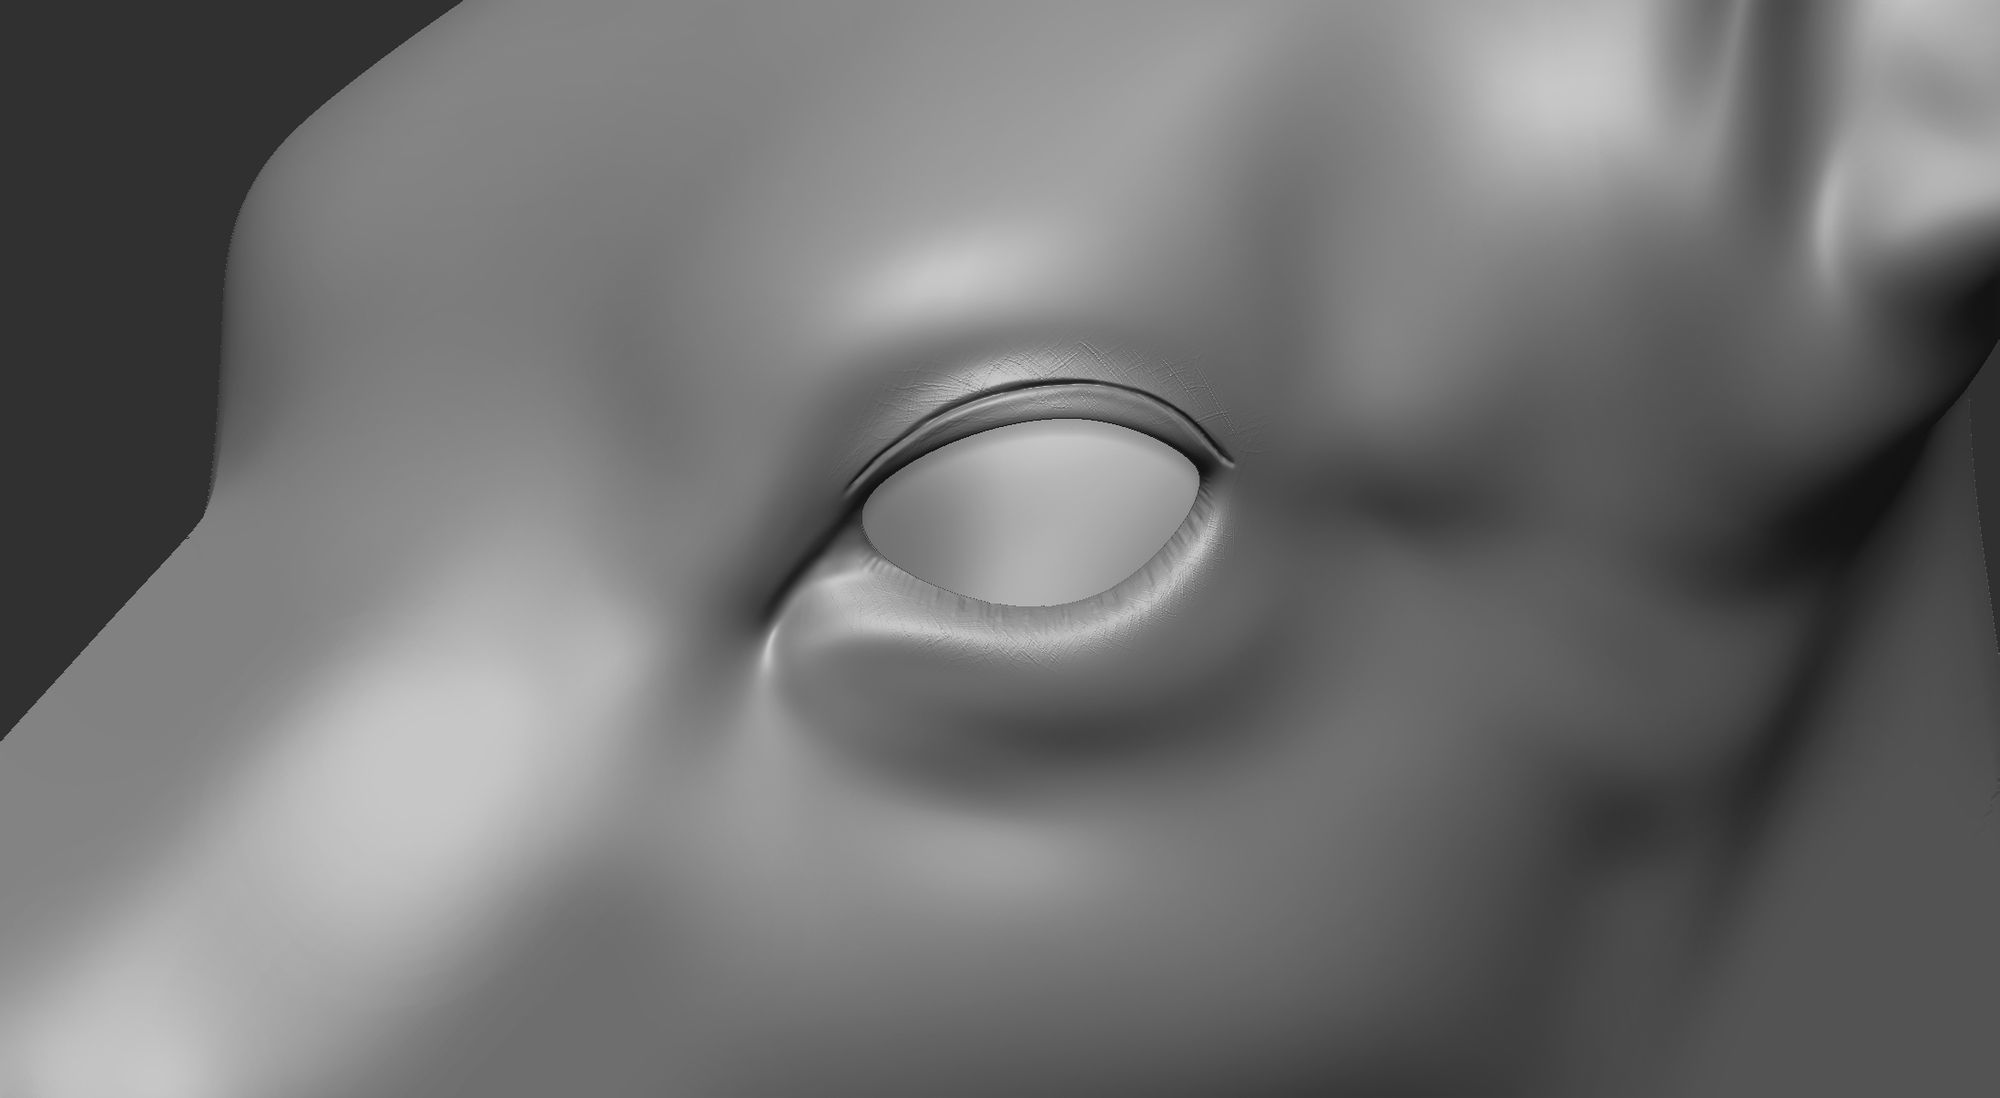
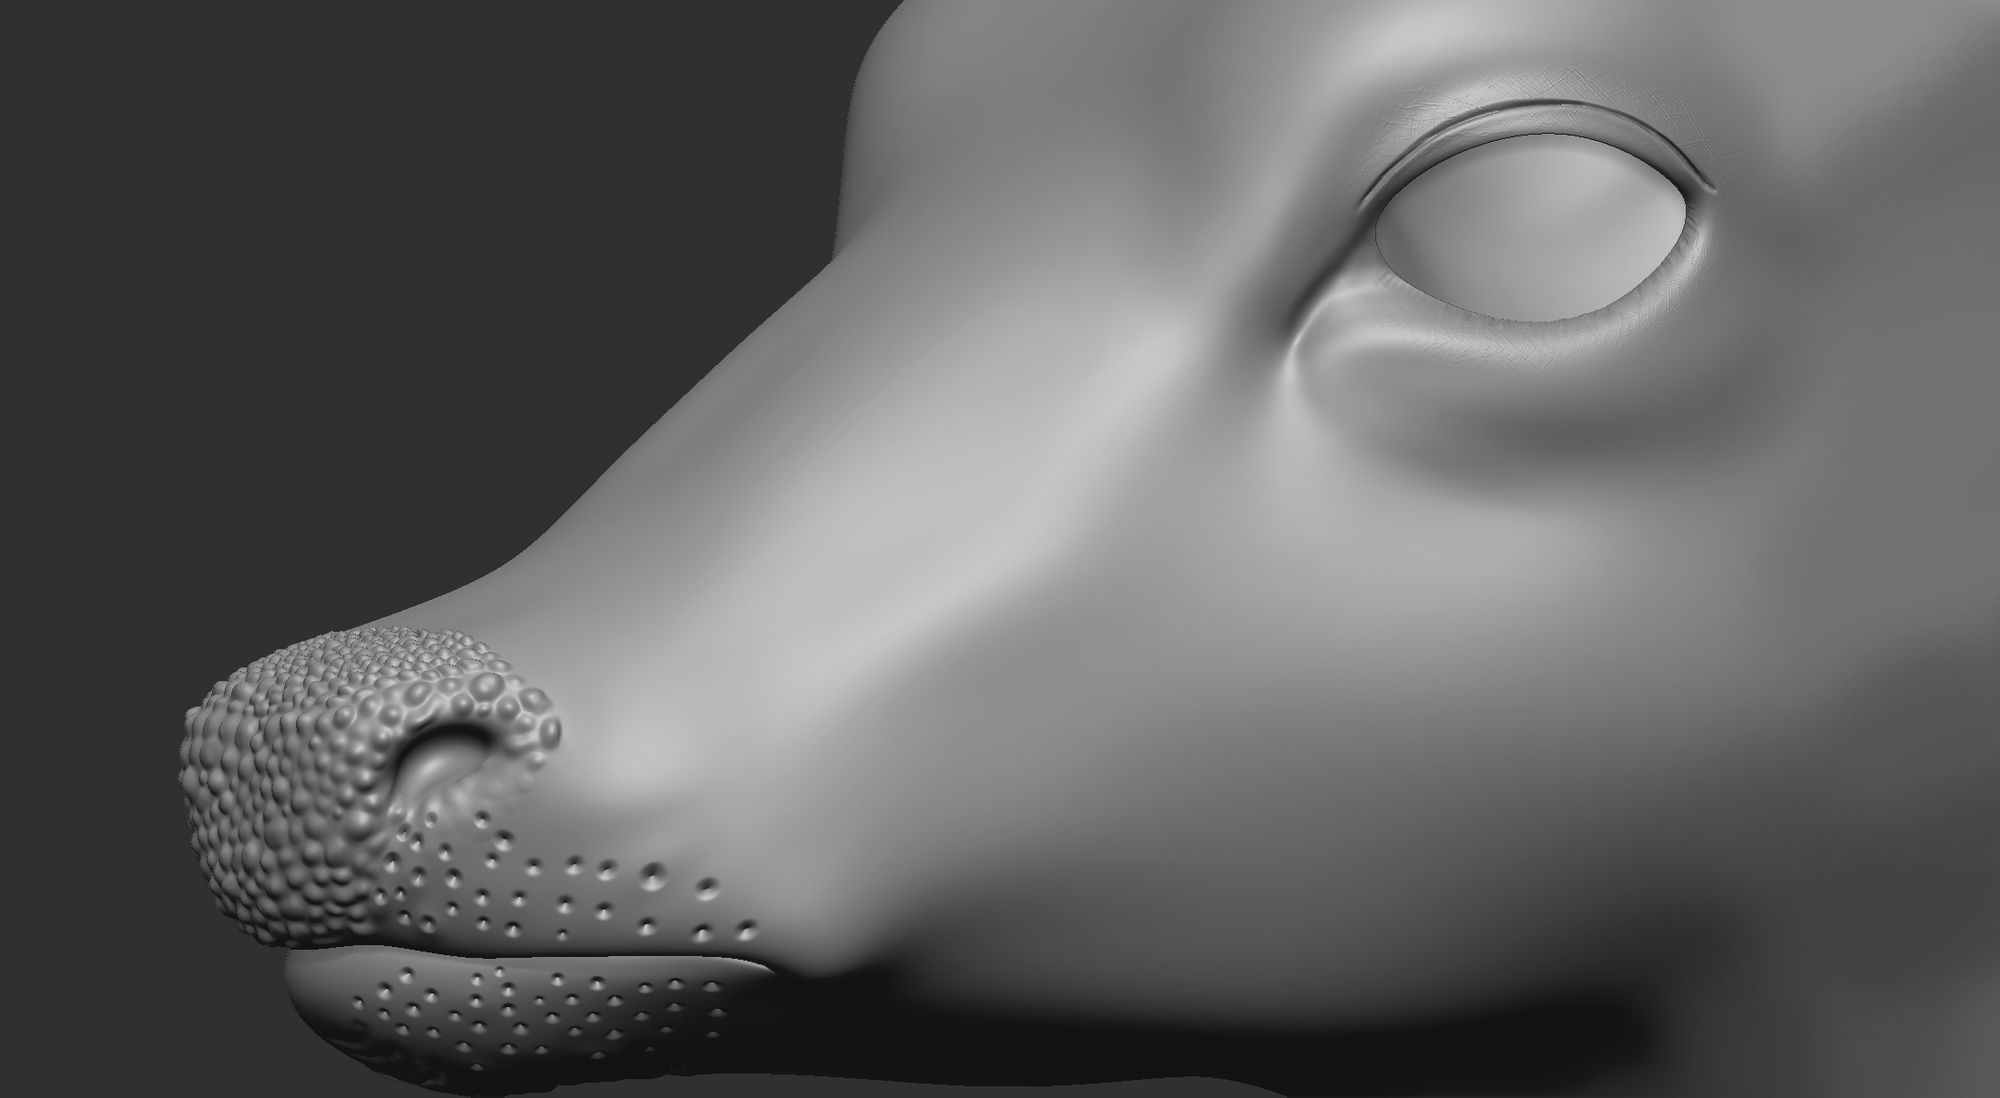
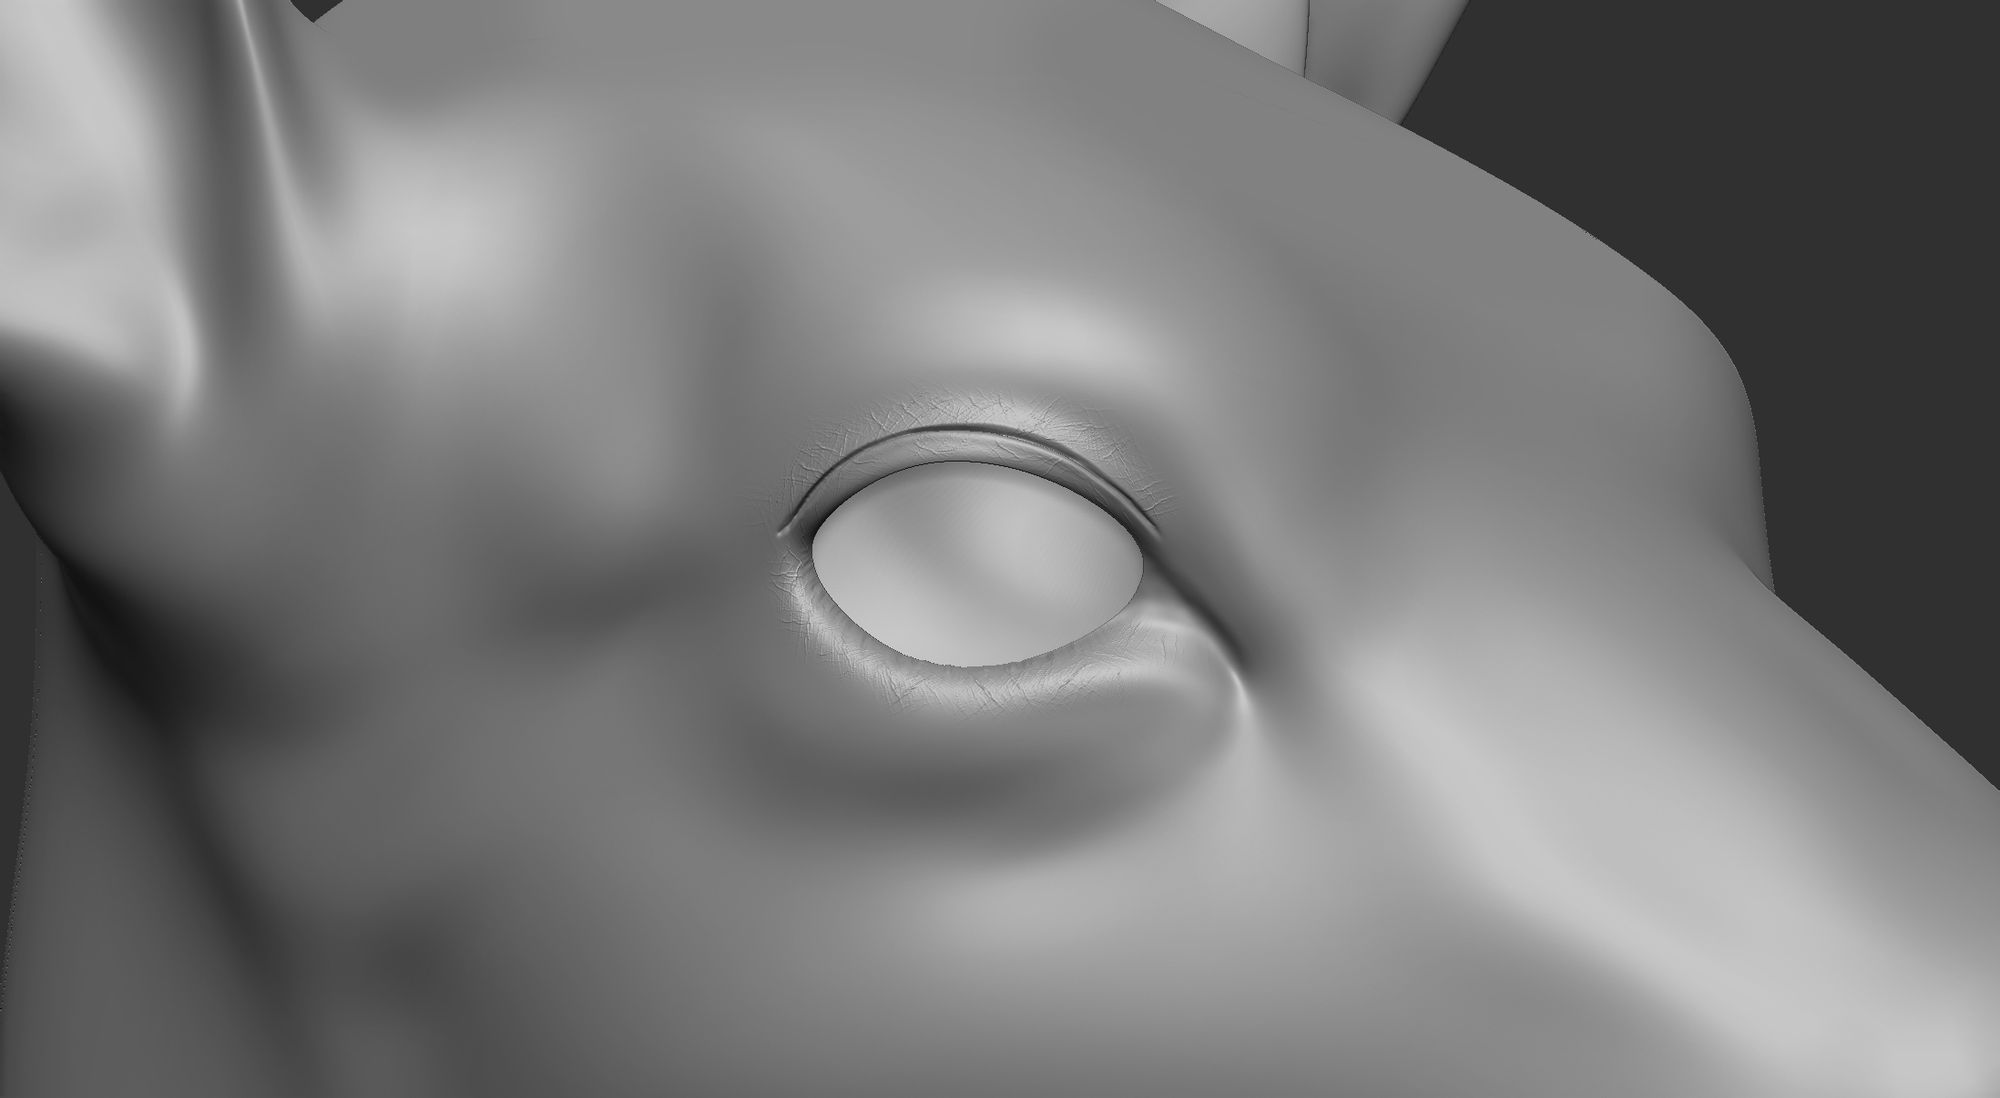
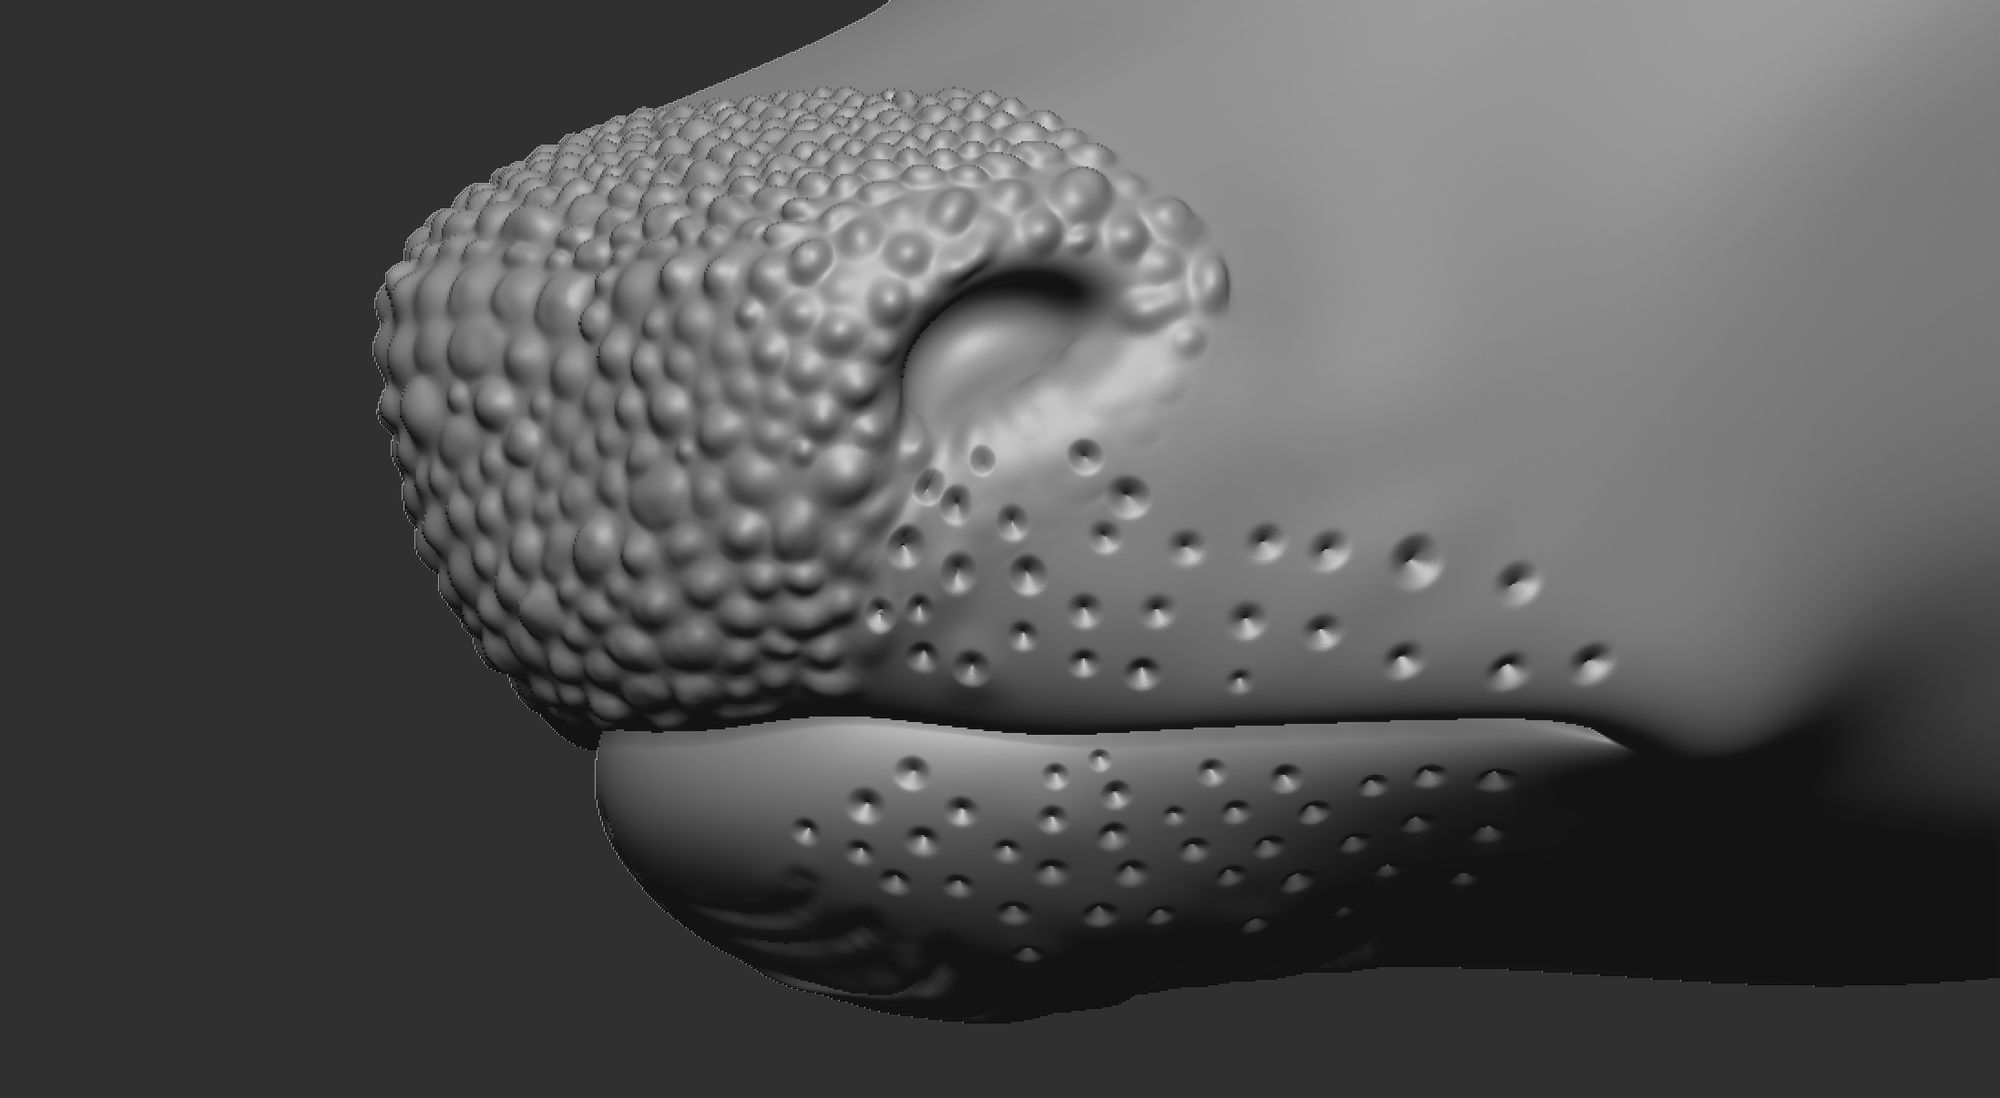
After painting the diffuse map in ZBrush, I exported the textures from ZBrush to Maya to start creating the shaders for rendering. Besides the diffuse colour, I also painted the roughness map, displacement map, and SSS map in ZBrush and Photoshop. For the nose and eye detailing, I sculpted the displacement in ZBrush and exported the displacement map to achieve a more detailed and realistic look dev result.
sculpting out the displacement in Zbrush
All the maps were then imported into Maya and ready to be connected to the shaders. The shader that I normally use is the Arnold standard surface since I would be using Arnold for rendering.
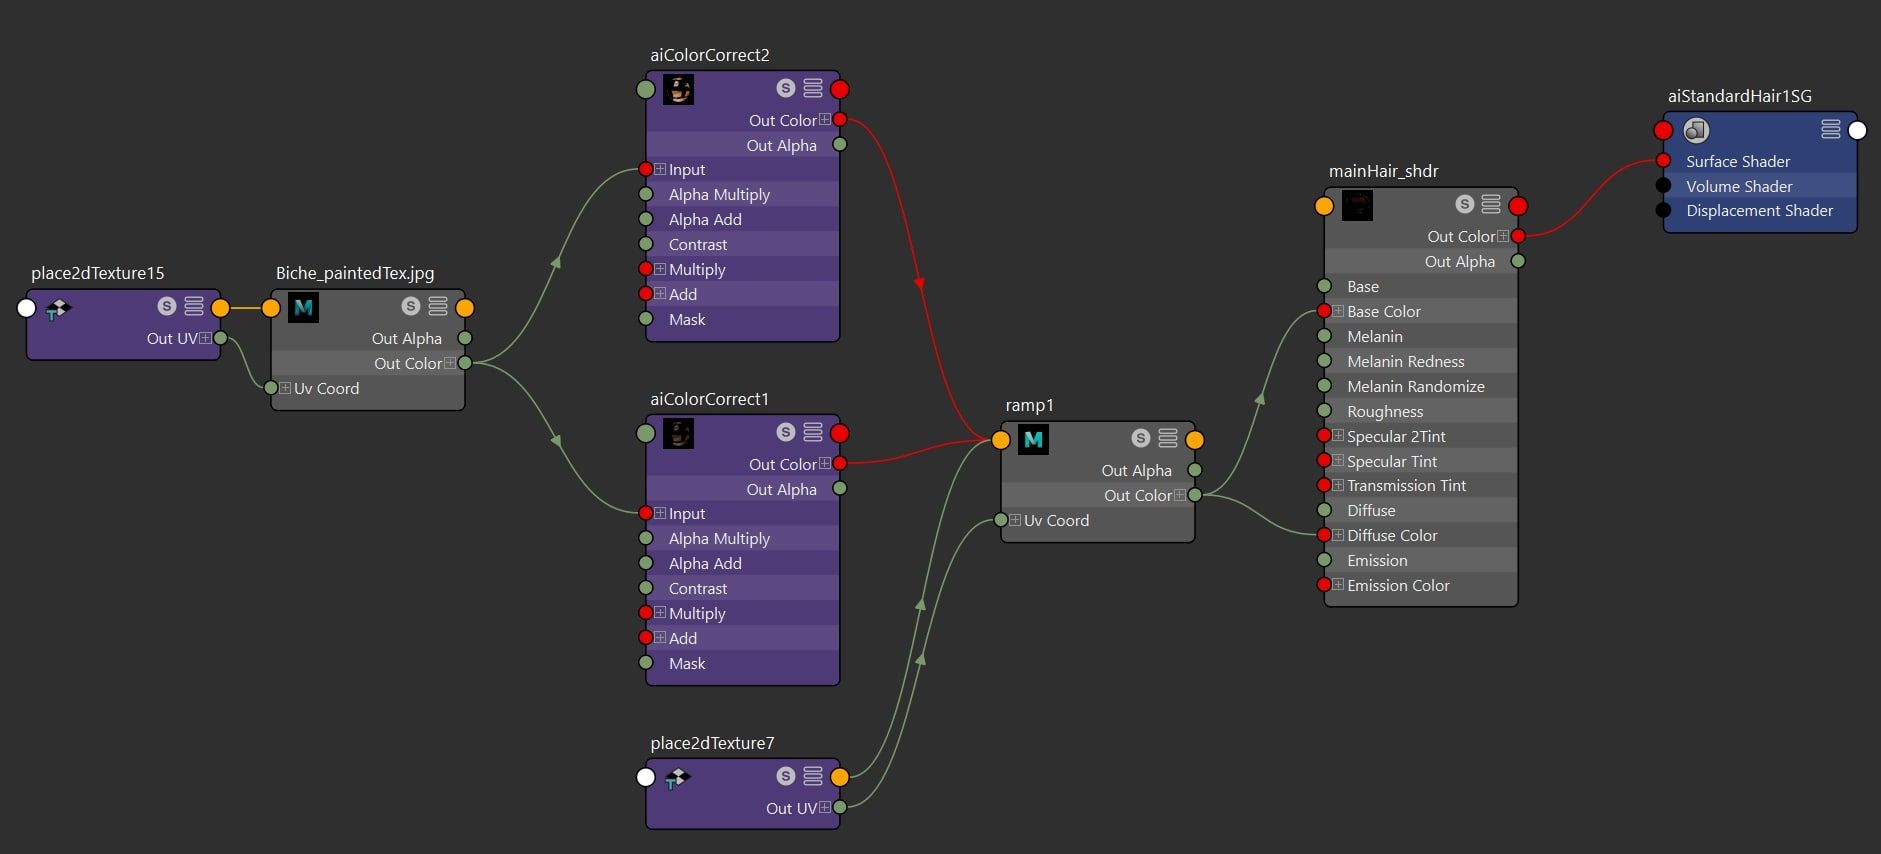
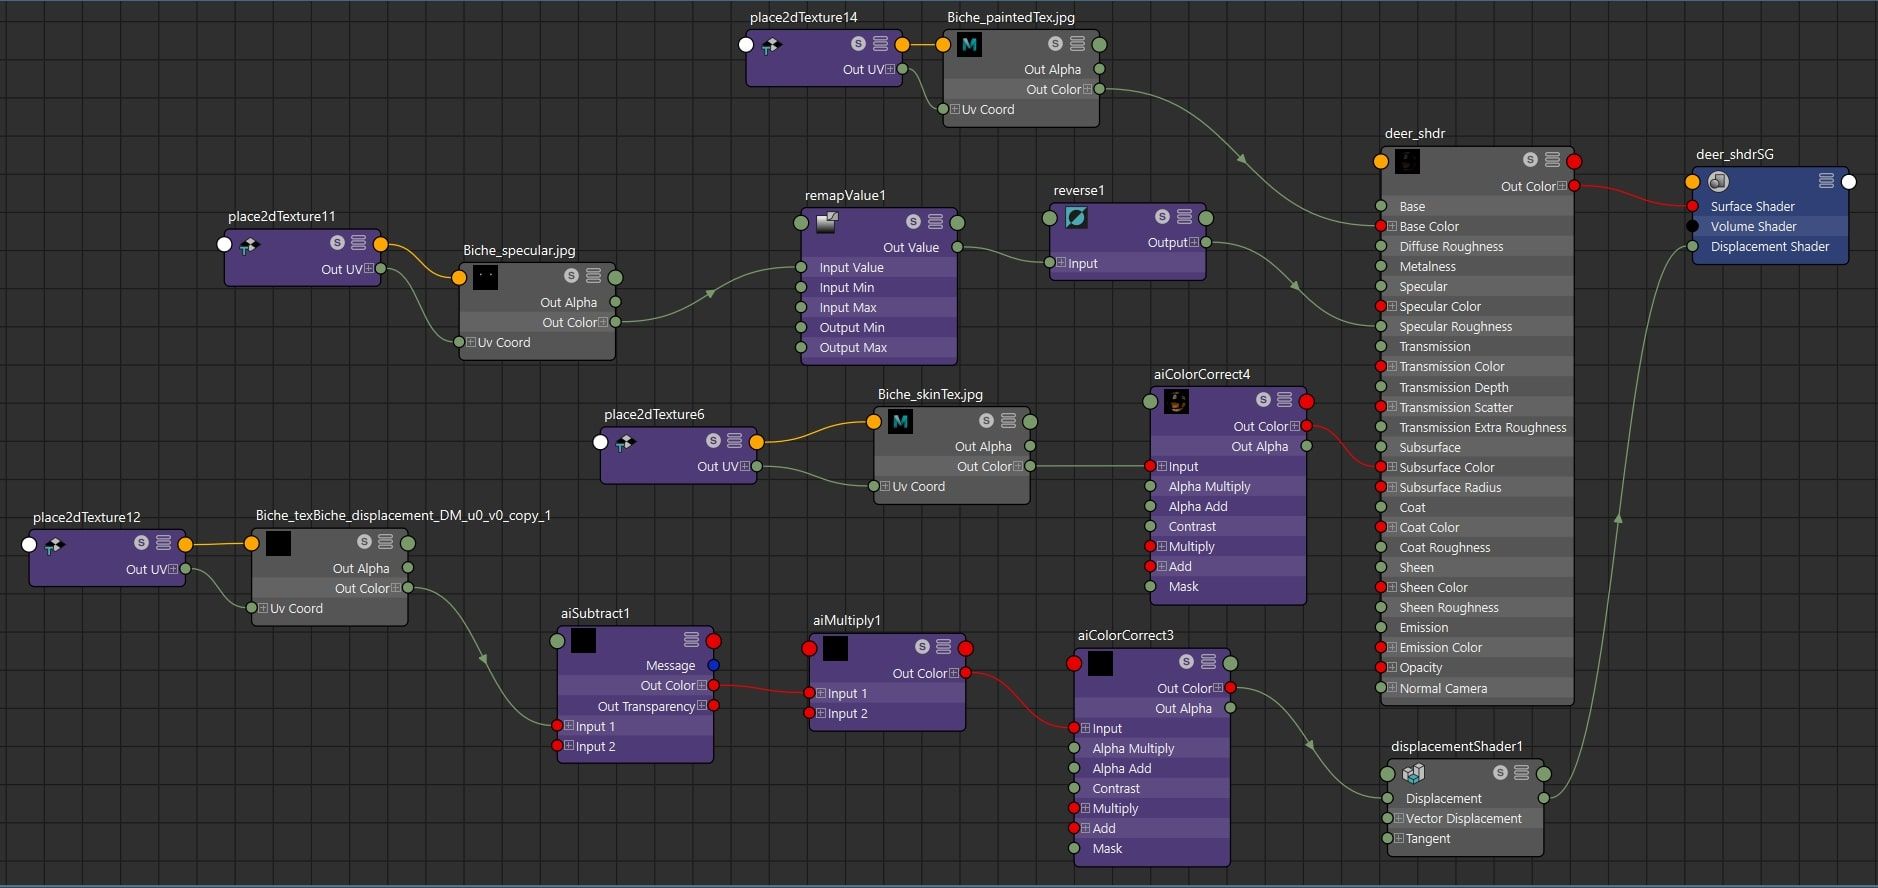
Below are the shader node setup that I created:
main fur shader nodeswhisker fur shader nodes
Week 6: Lighting
As most of us agree, lighting is the most important part of creating a nice-looking outcome. I personally enjoy the process of lighting a scene; it really enhances all the projects I’ve worked on. While working on the shaders, I also start placing the lights to check whether the textures work well in the render view. In this case, I’m using a three-point lighting setup, which includes a key light, a fill light, a rim light, and a dome light. I use a normal forest HDRI for the skydome. This lighting combination is one of my favourites because it consistently gives good results for most of my renders.
Week 7: Rendering and Compositing
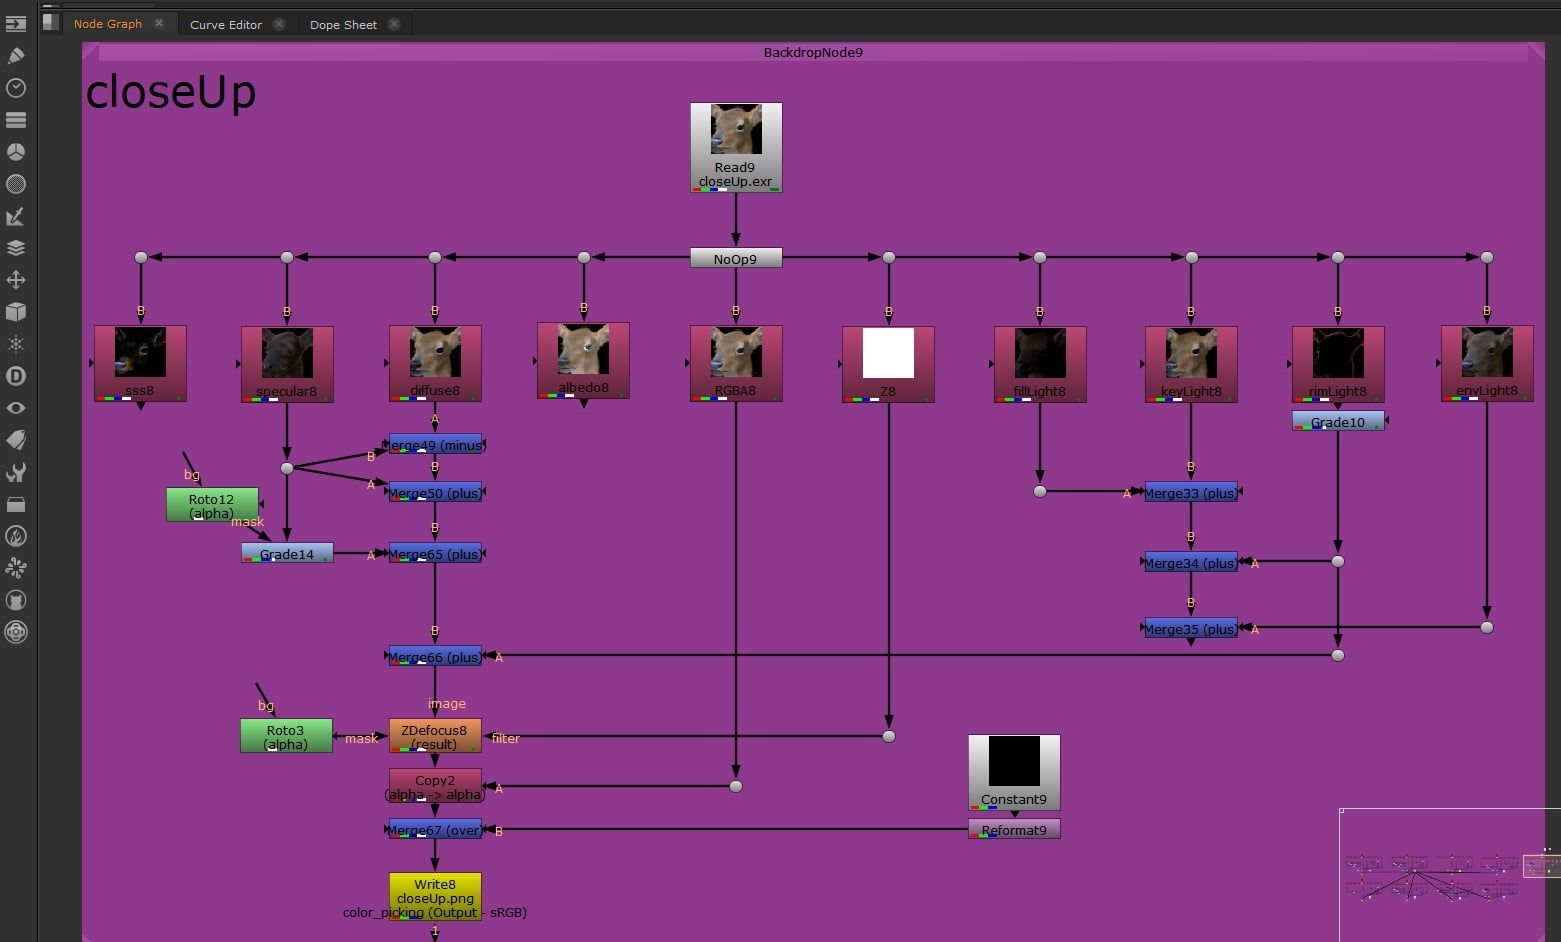
Once everything was fully set up, I started configuring the render settings and AOVs. The renders were separated into several AOVs such as diffuse, specular, subsurface (sss), Z Depth, and per light component layer. This setup allows for more control during the compositing stage. I set up cameras from different angles for the final renders. I rendered the multilayer EXR with an alpha channel so that I could easily change the background in the future. I used Arnold Renderer in Maya for the rendering process.
For the finishing stage, I used Nuke for compositing. With the help of the Z Depth pass, I was able to achieve well-defined defocused effects in my final outcome. I reduced the specular on the nose because it was set too high in the shader. I also made the rim light brighter to create a better silhouette for the creature. For your information, I used the ACEScg OCIO config for the entire workflow.
compositing setup in Nuke
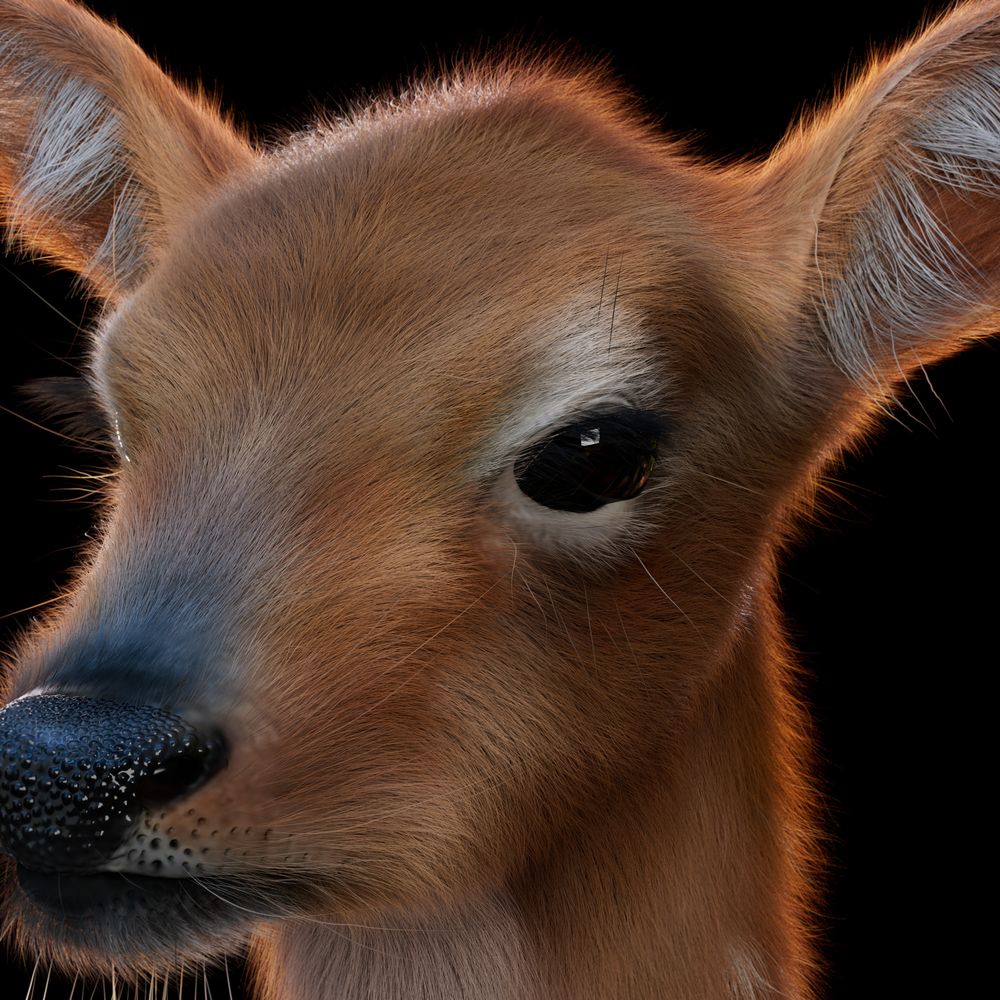
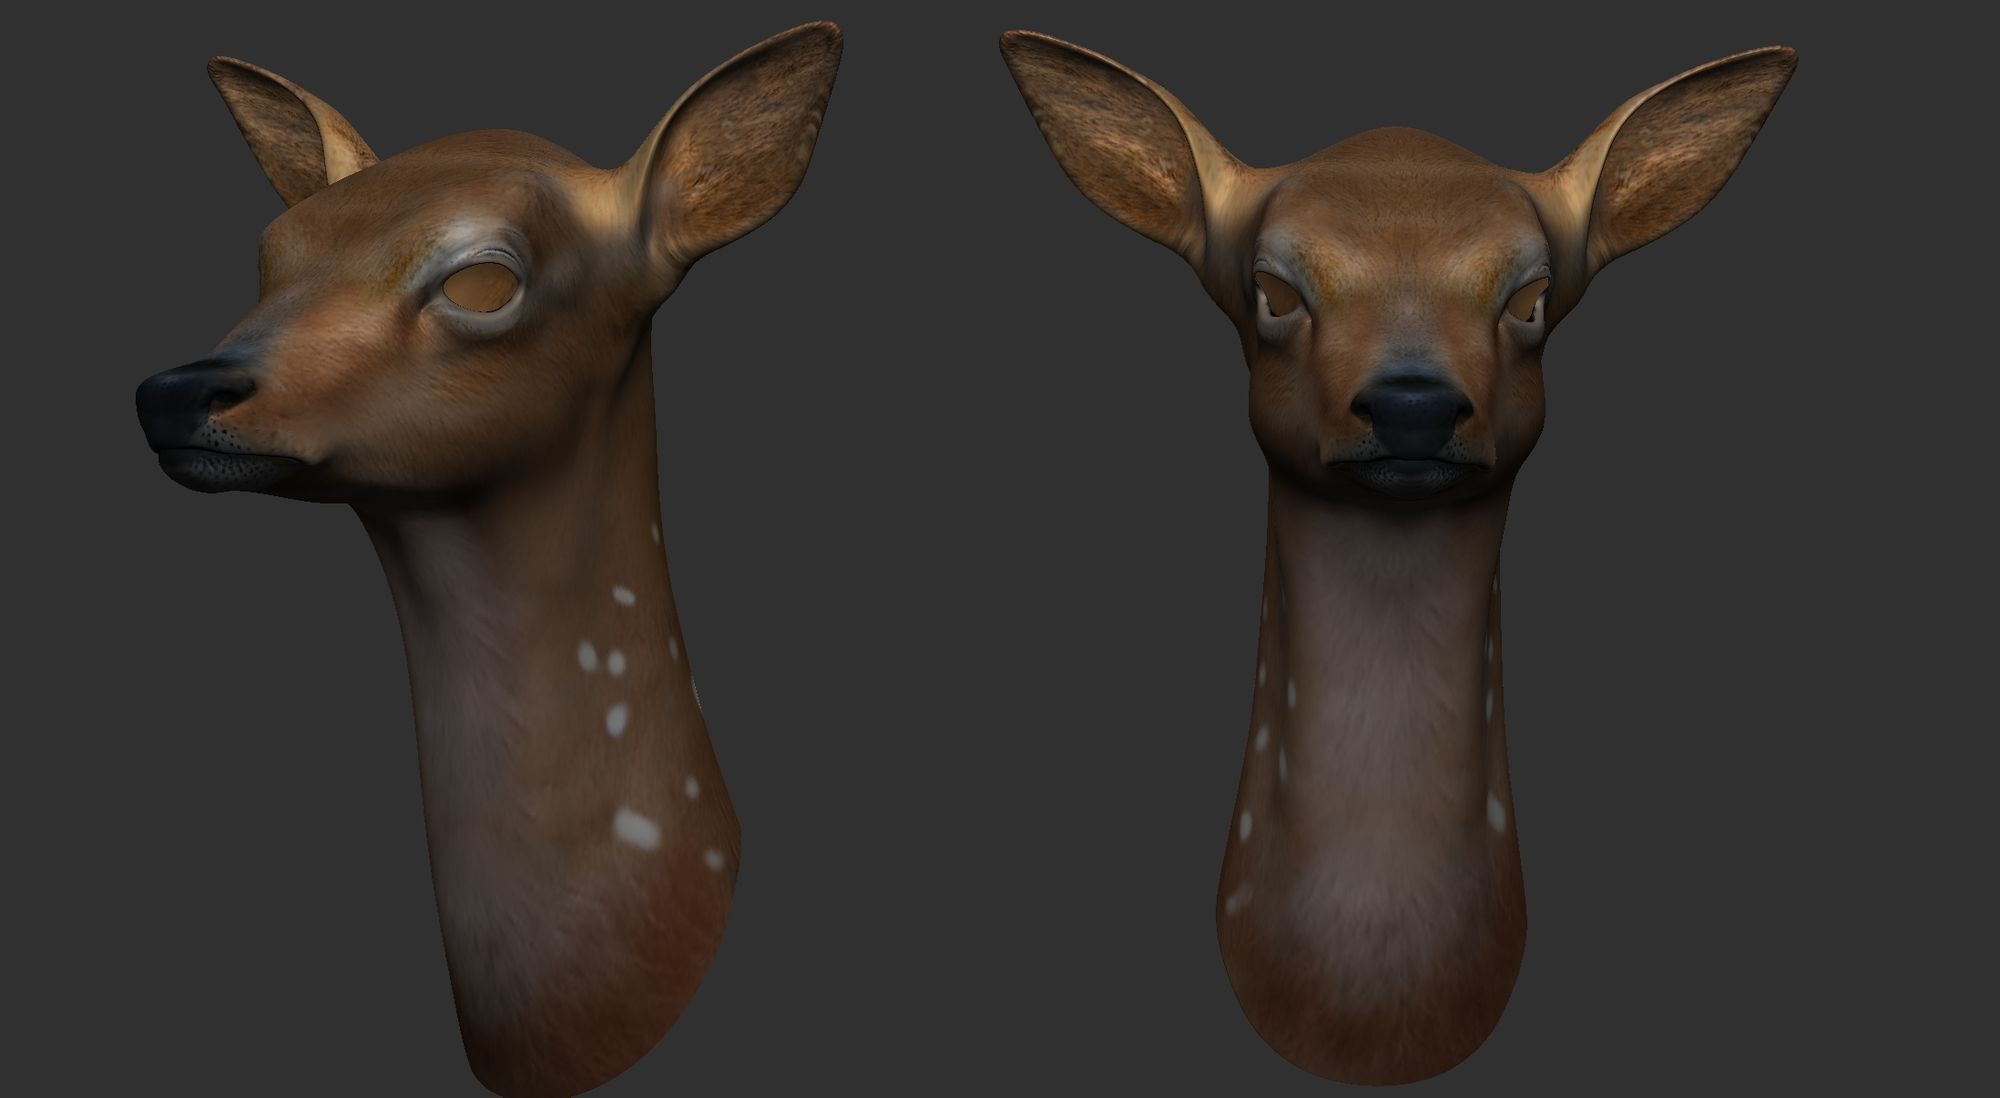
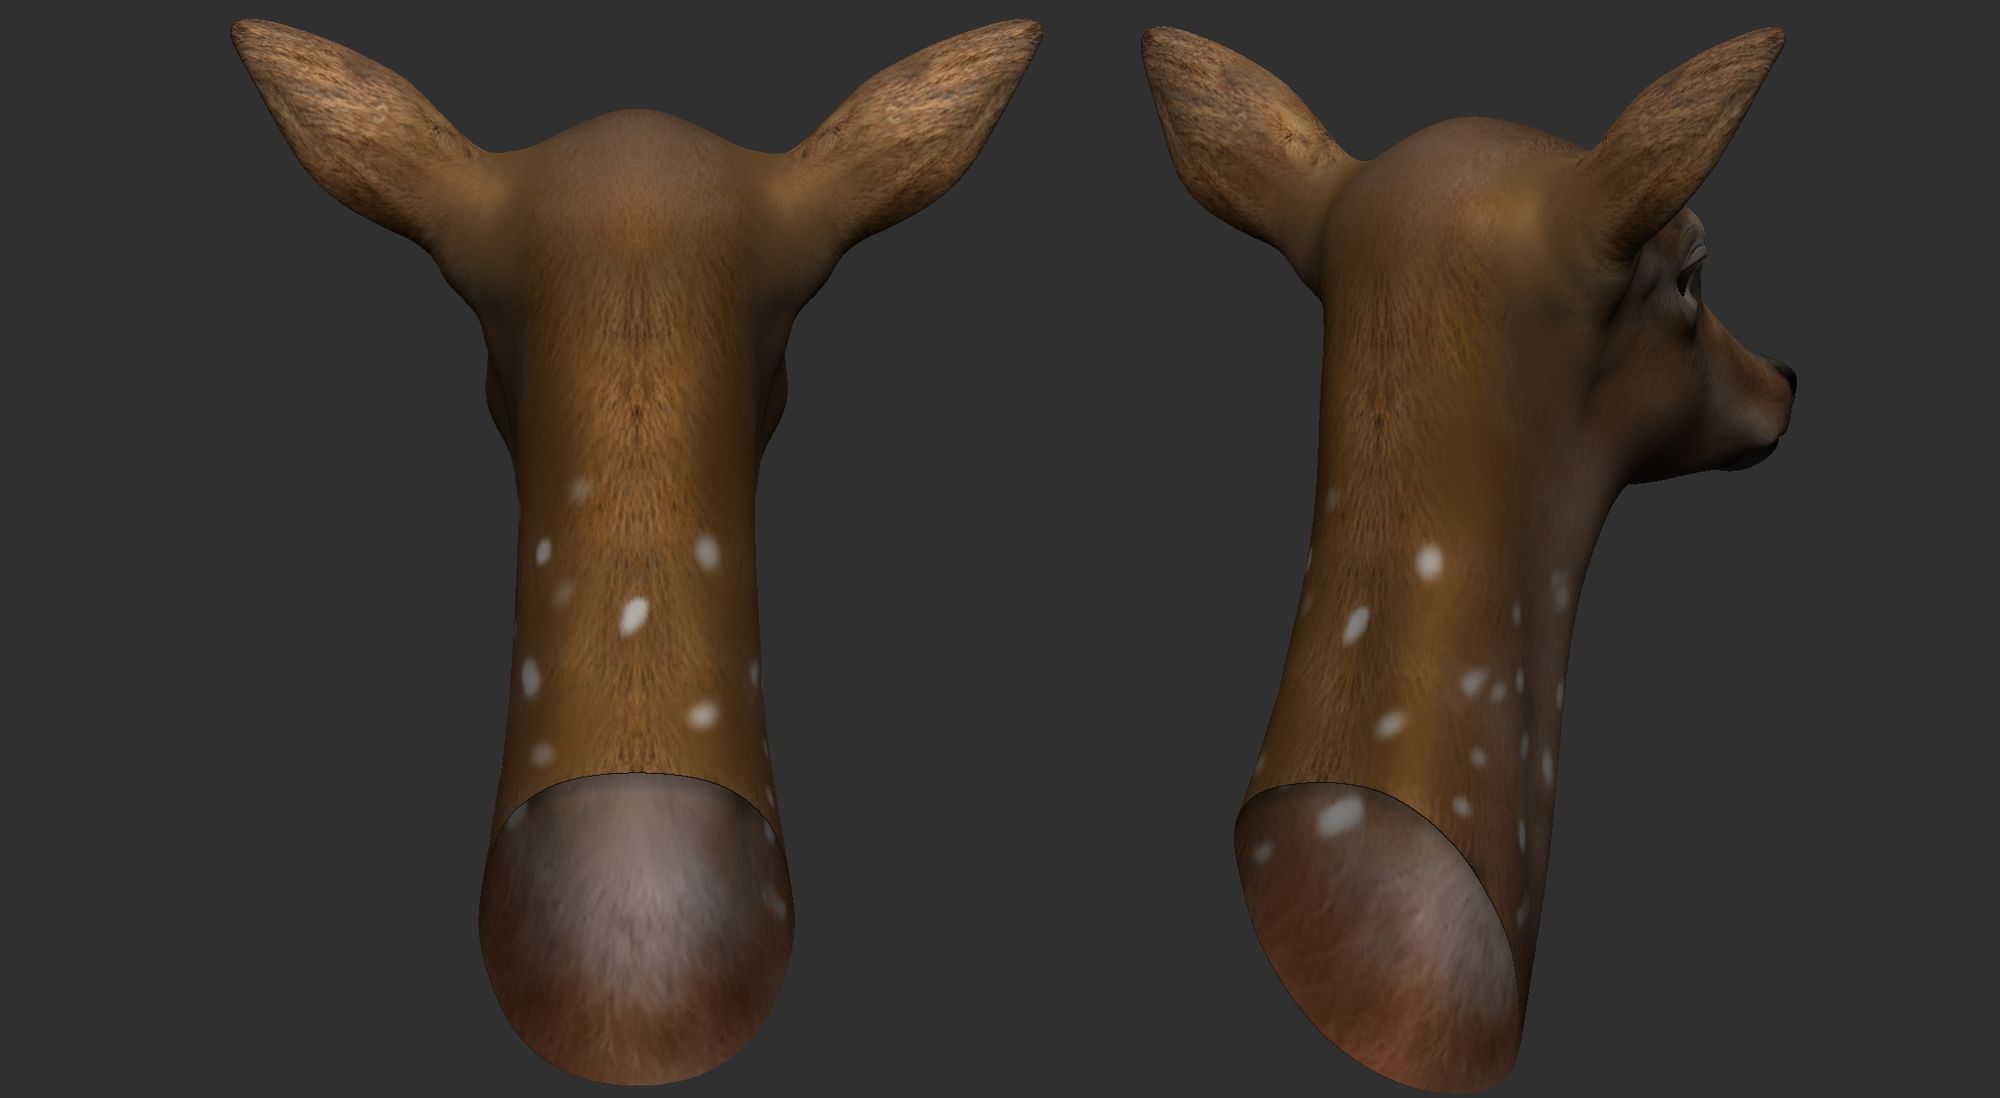
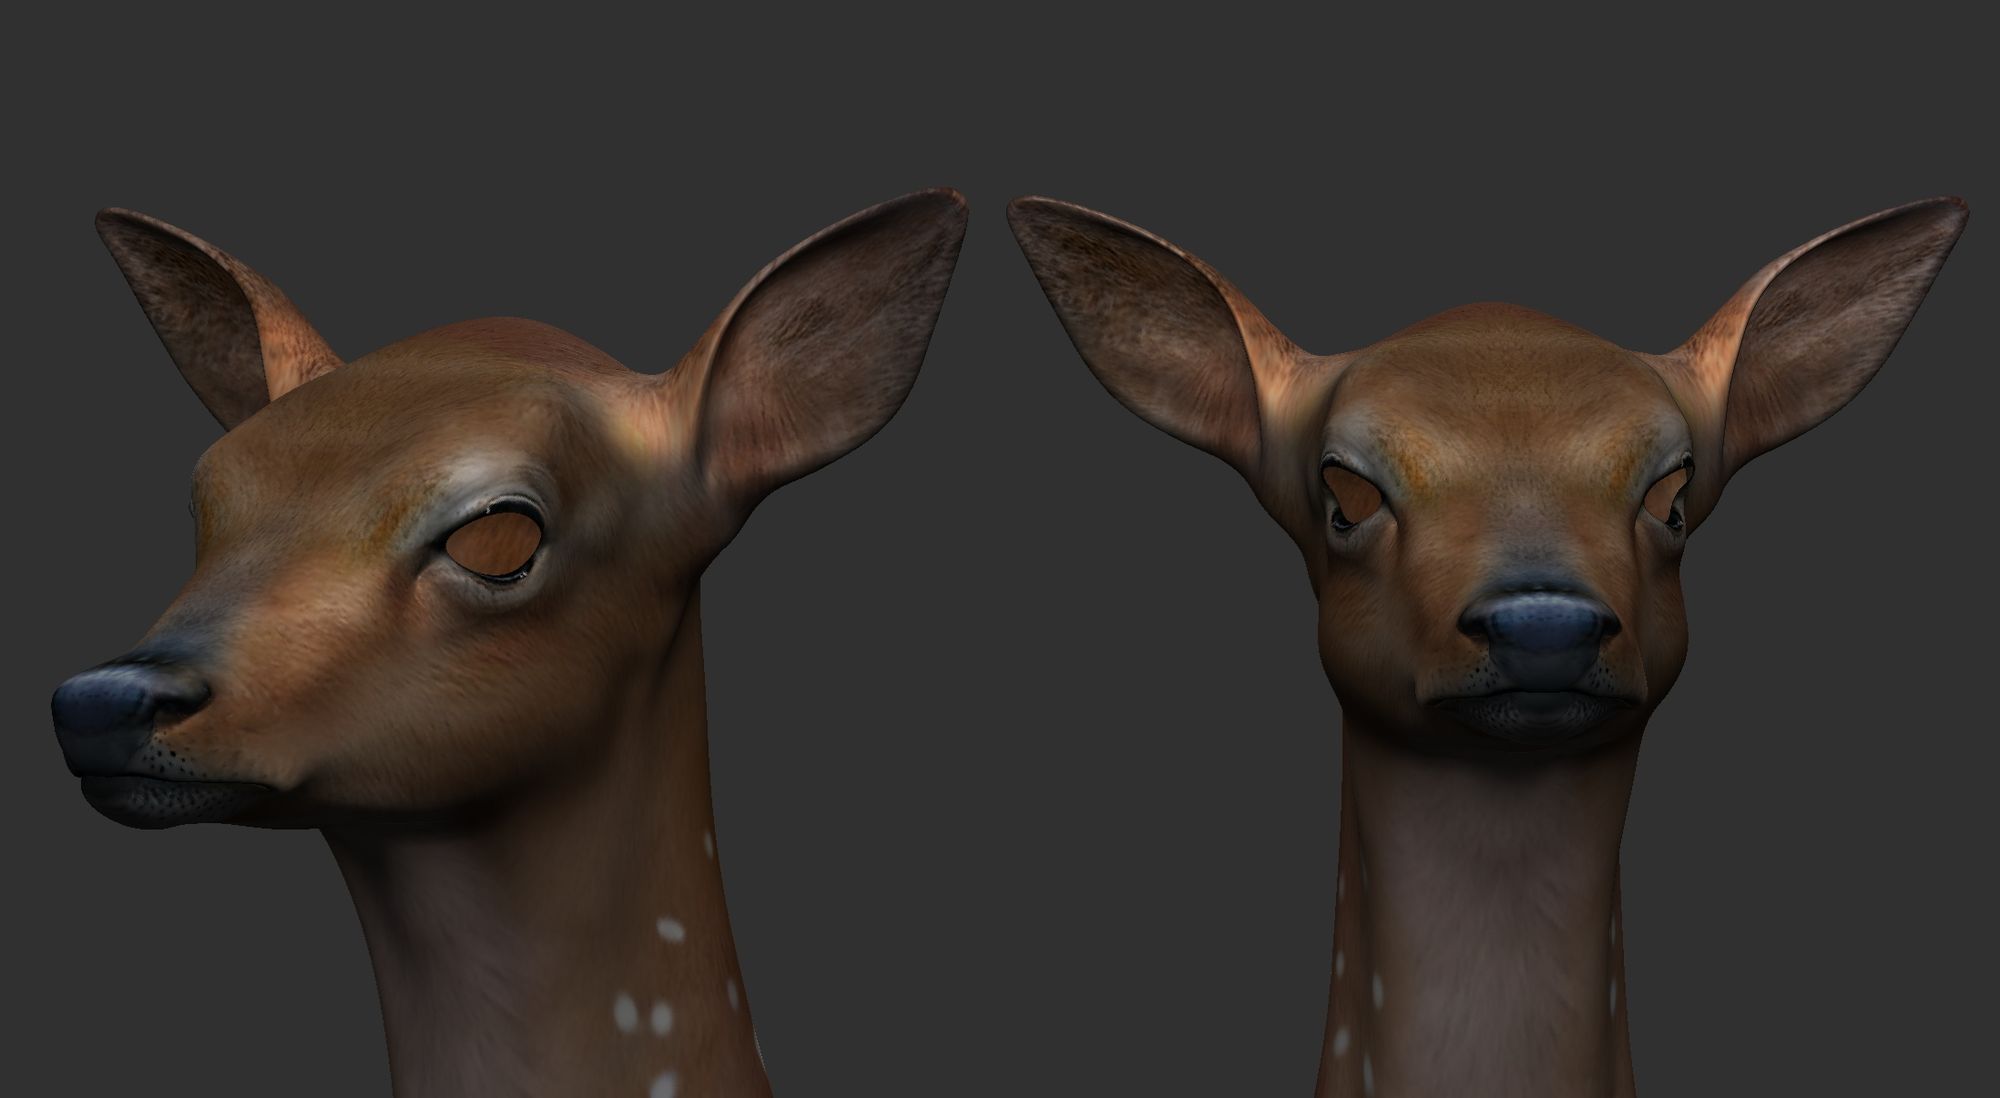
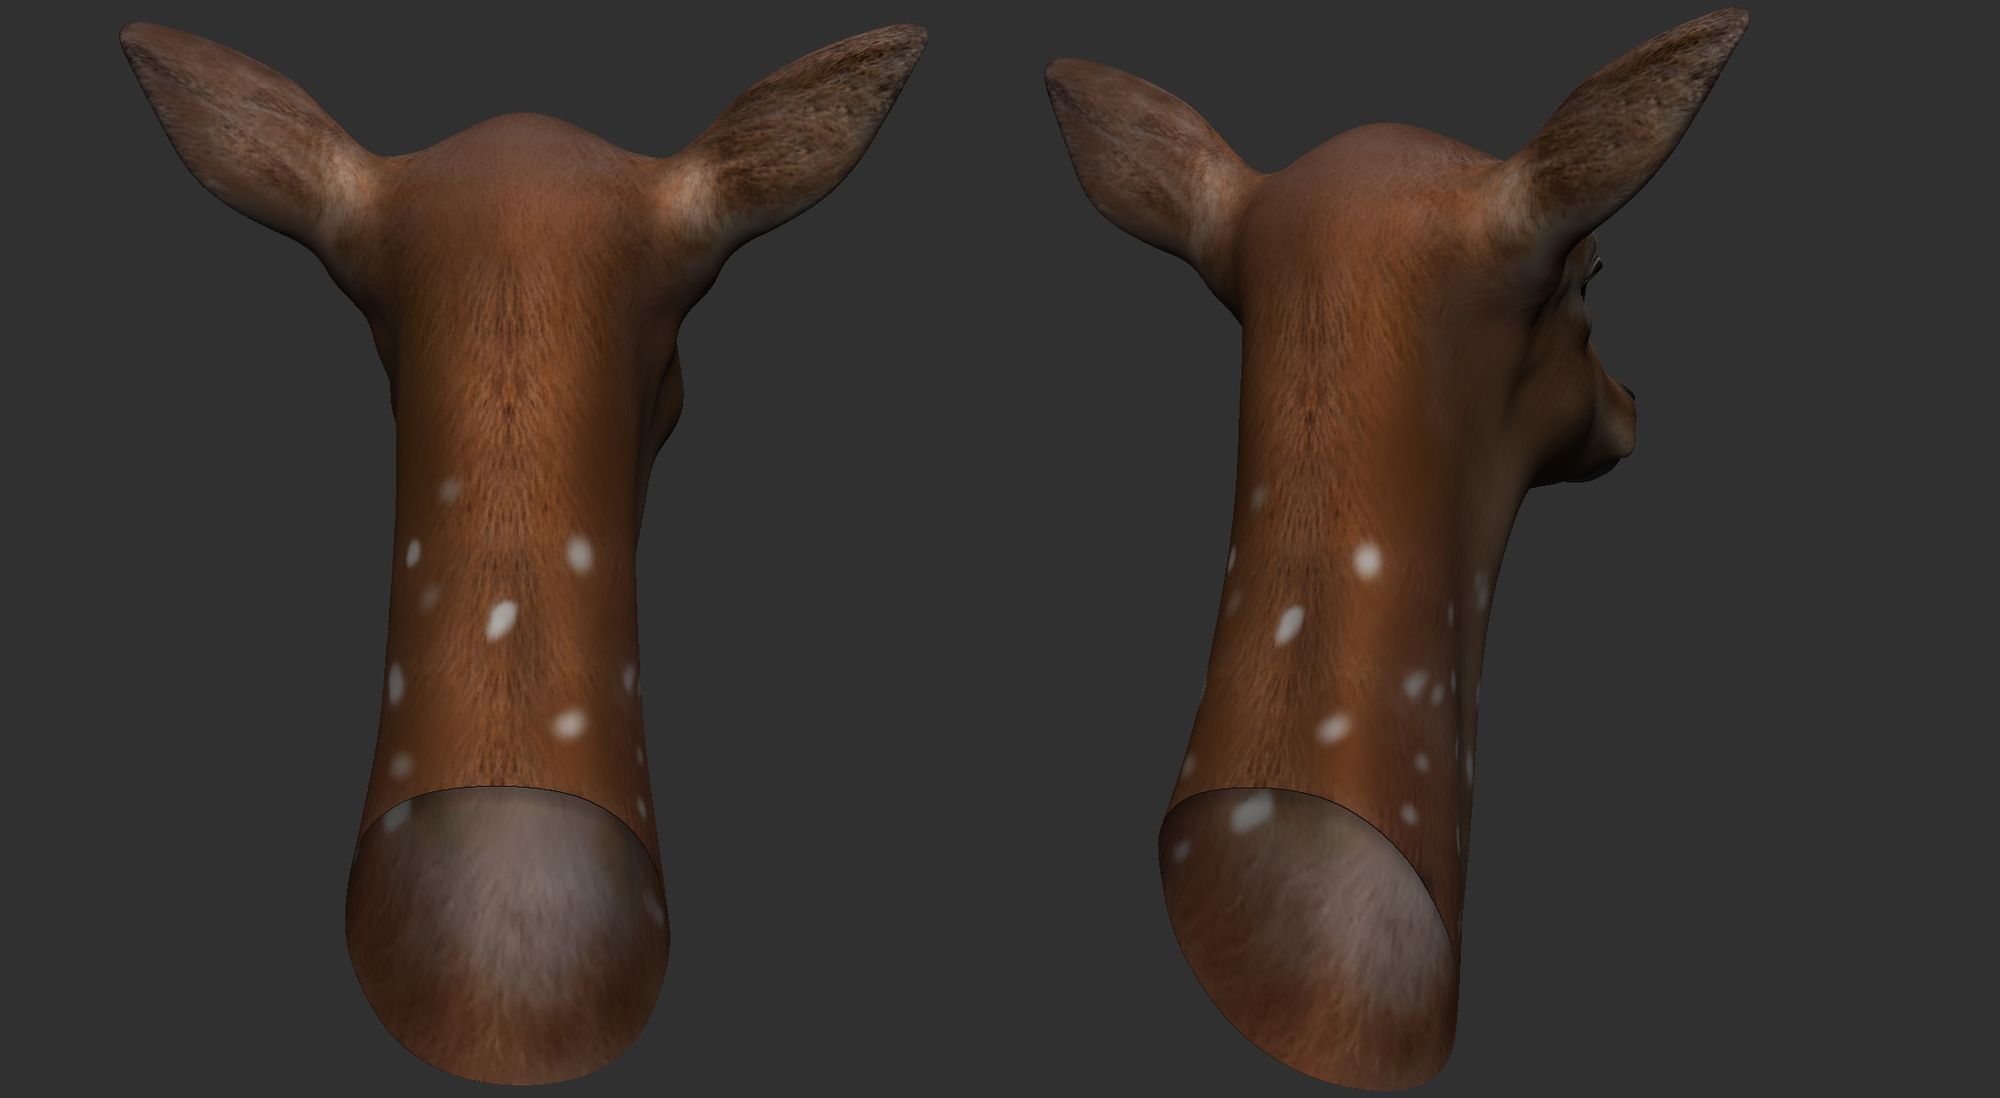
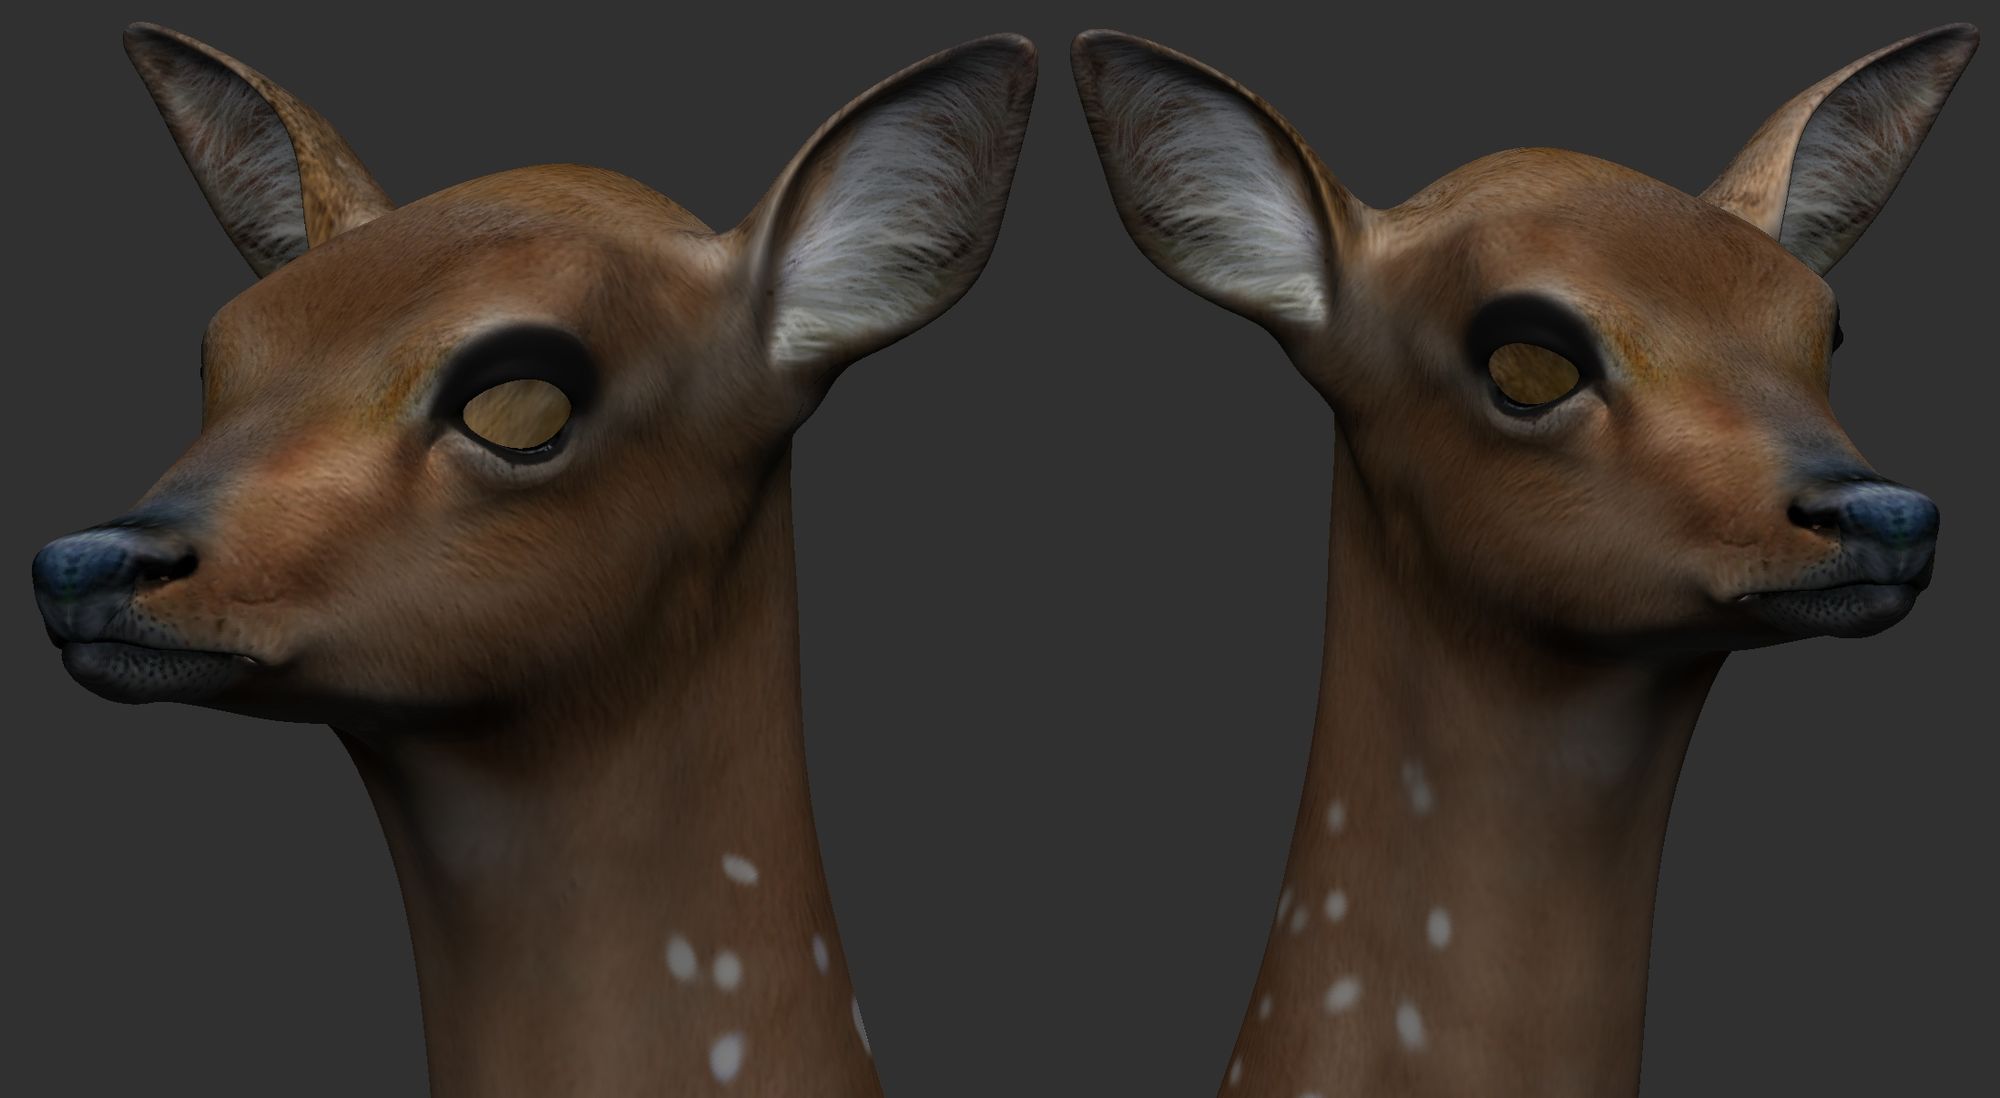
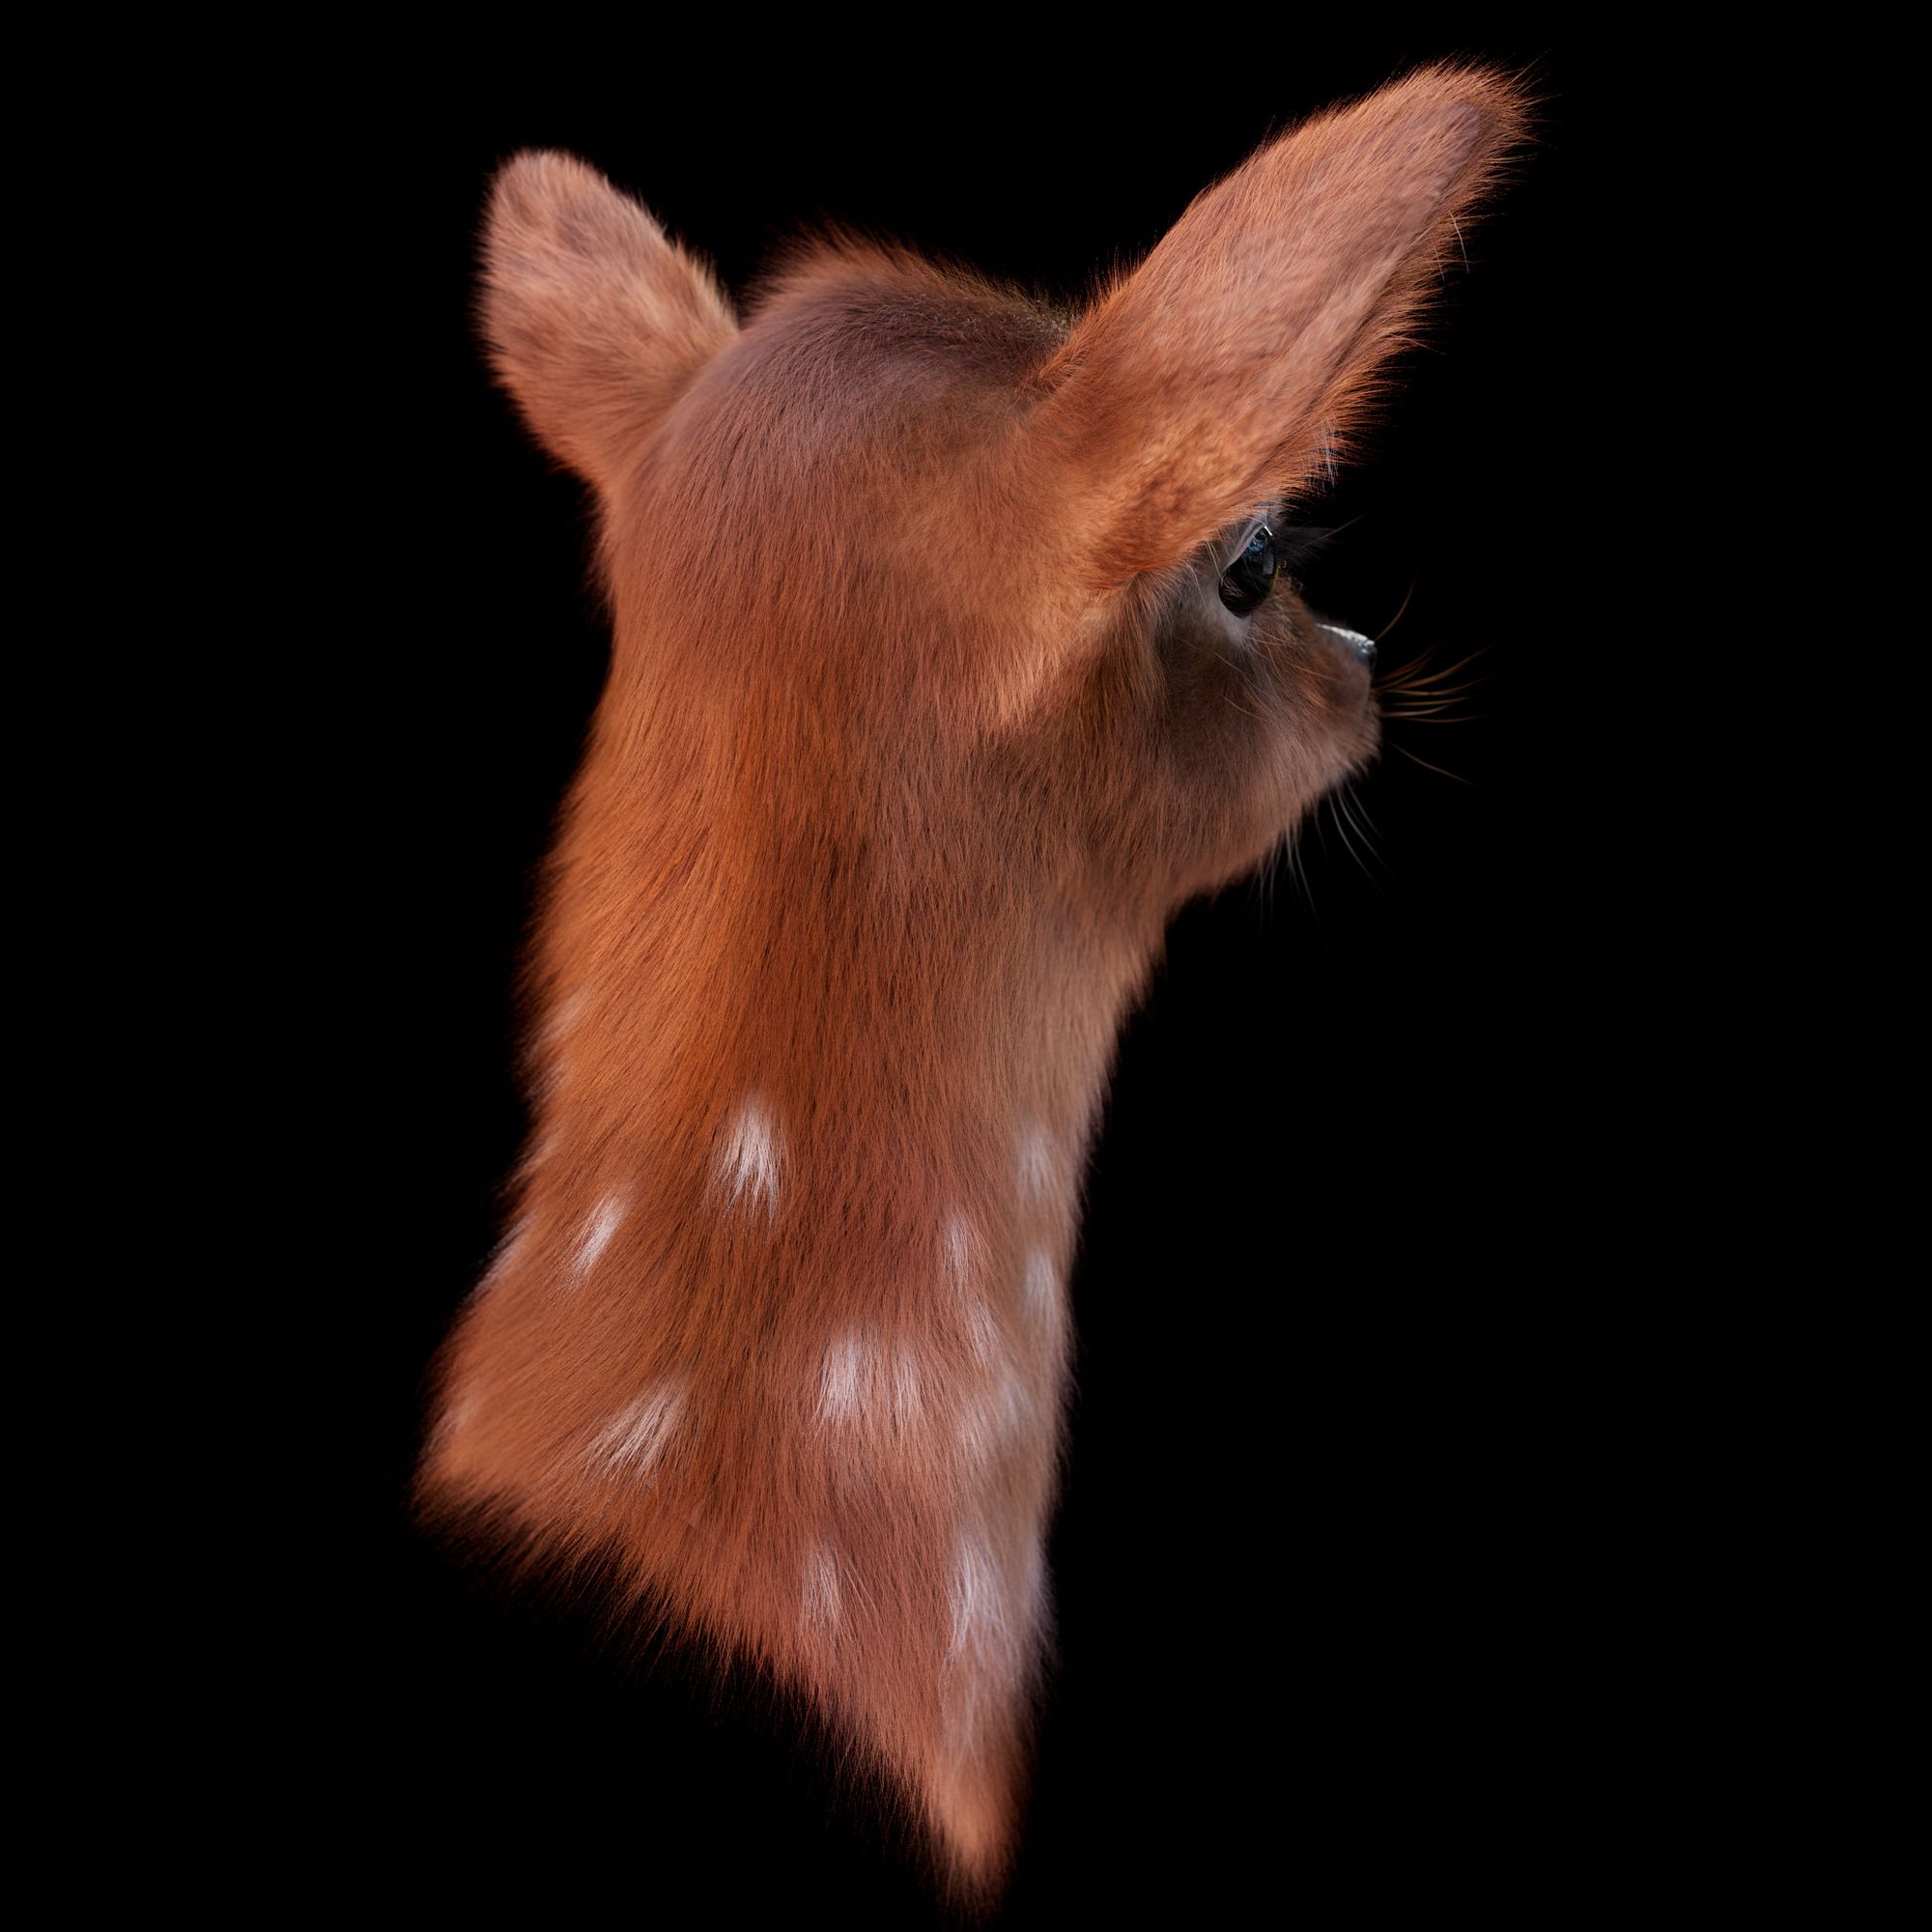
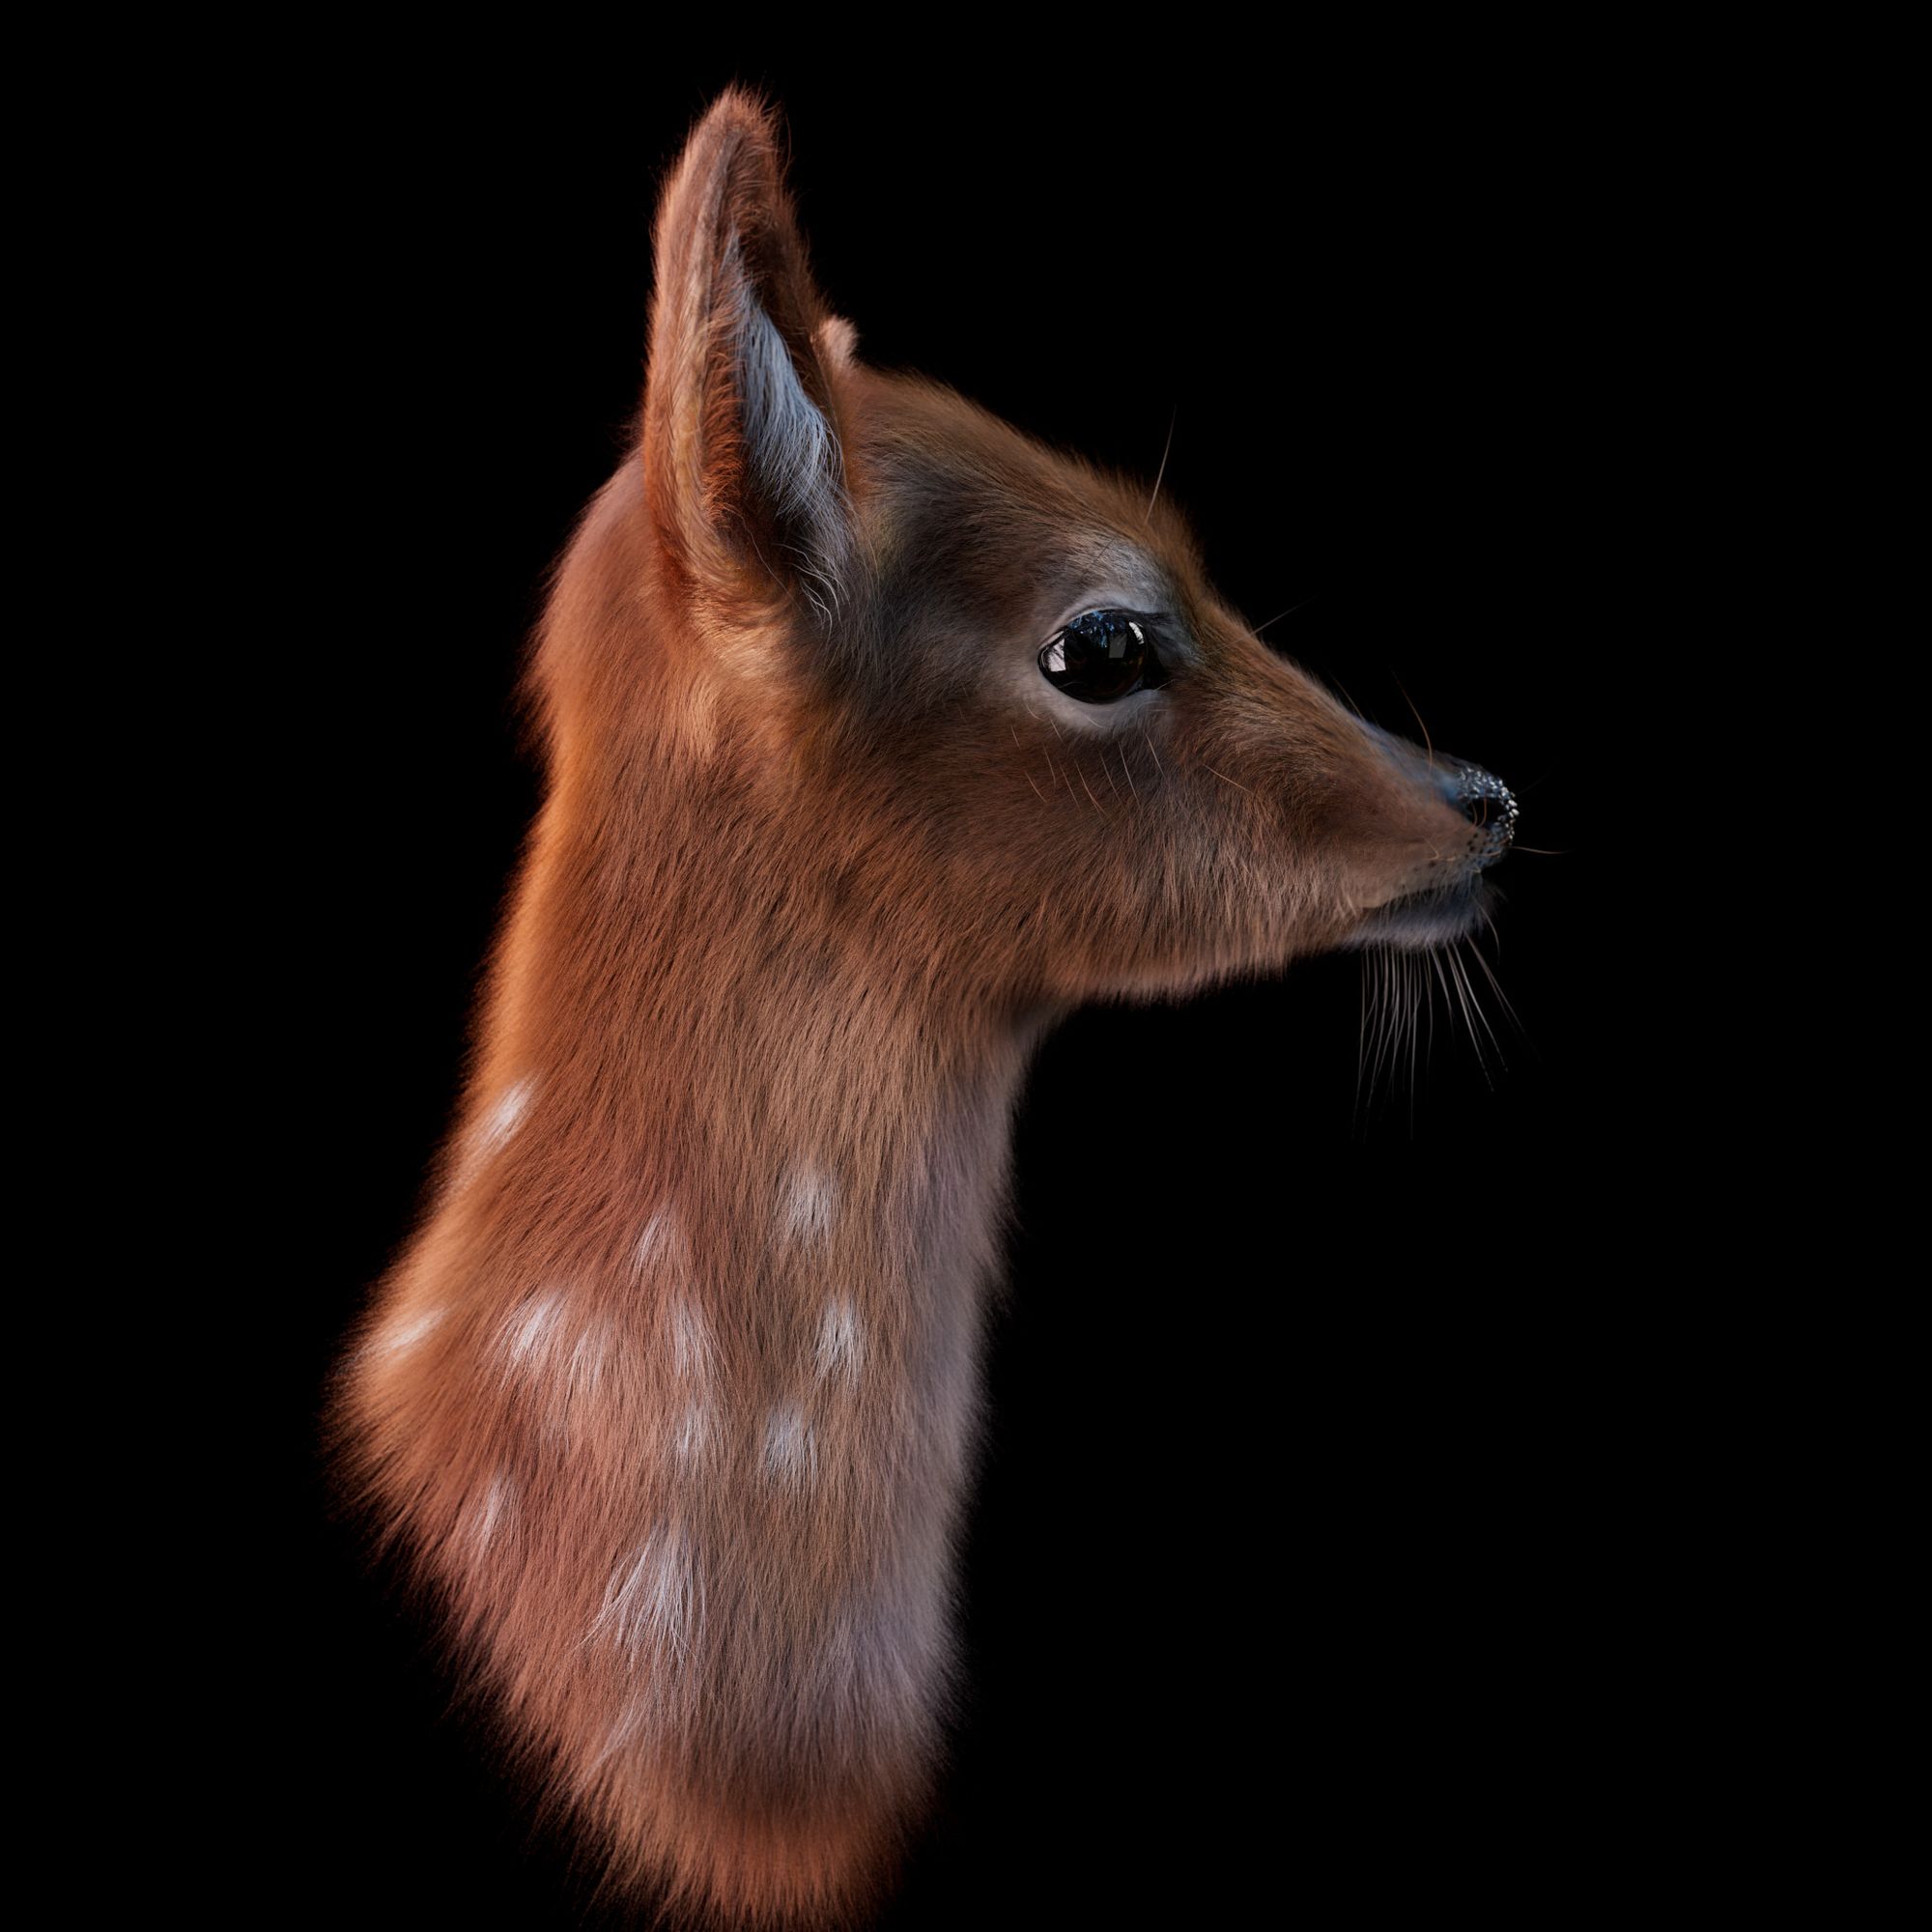
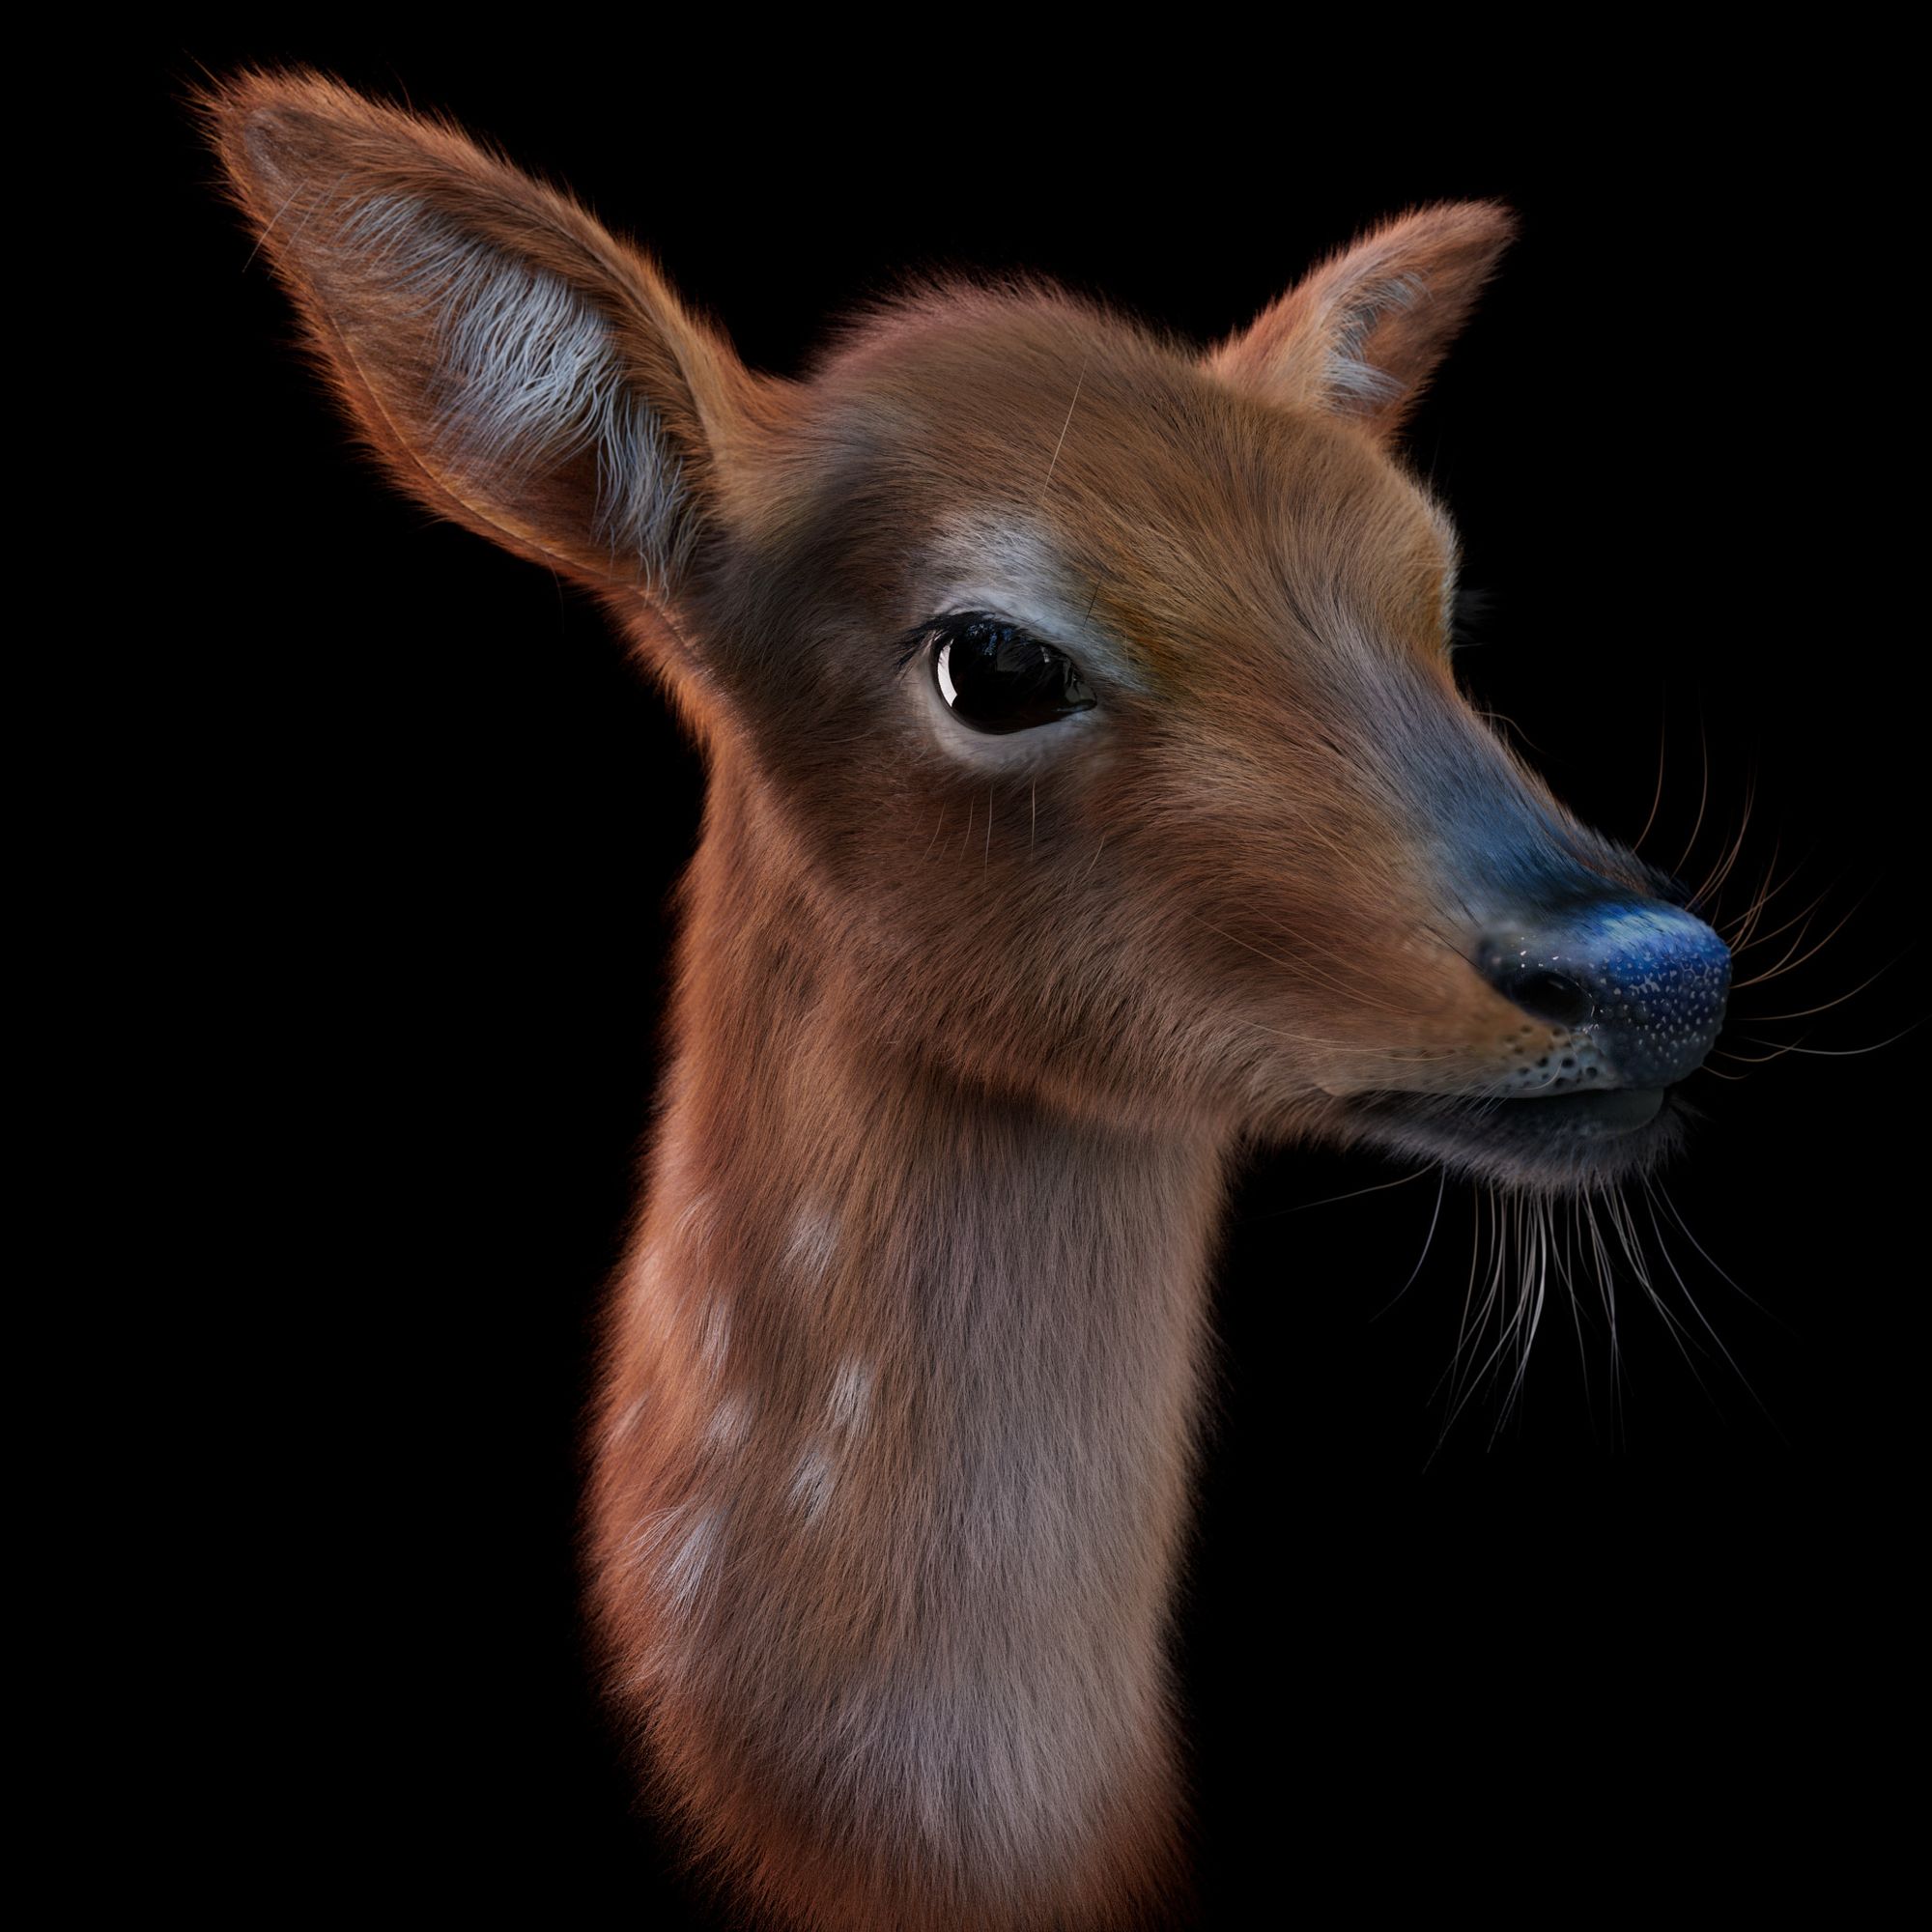
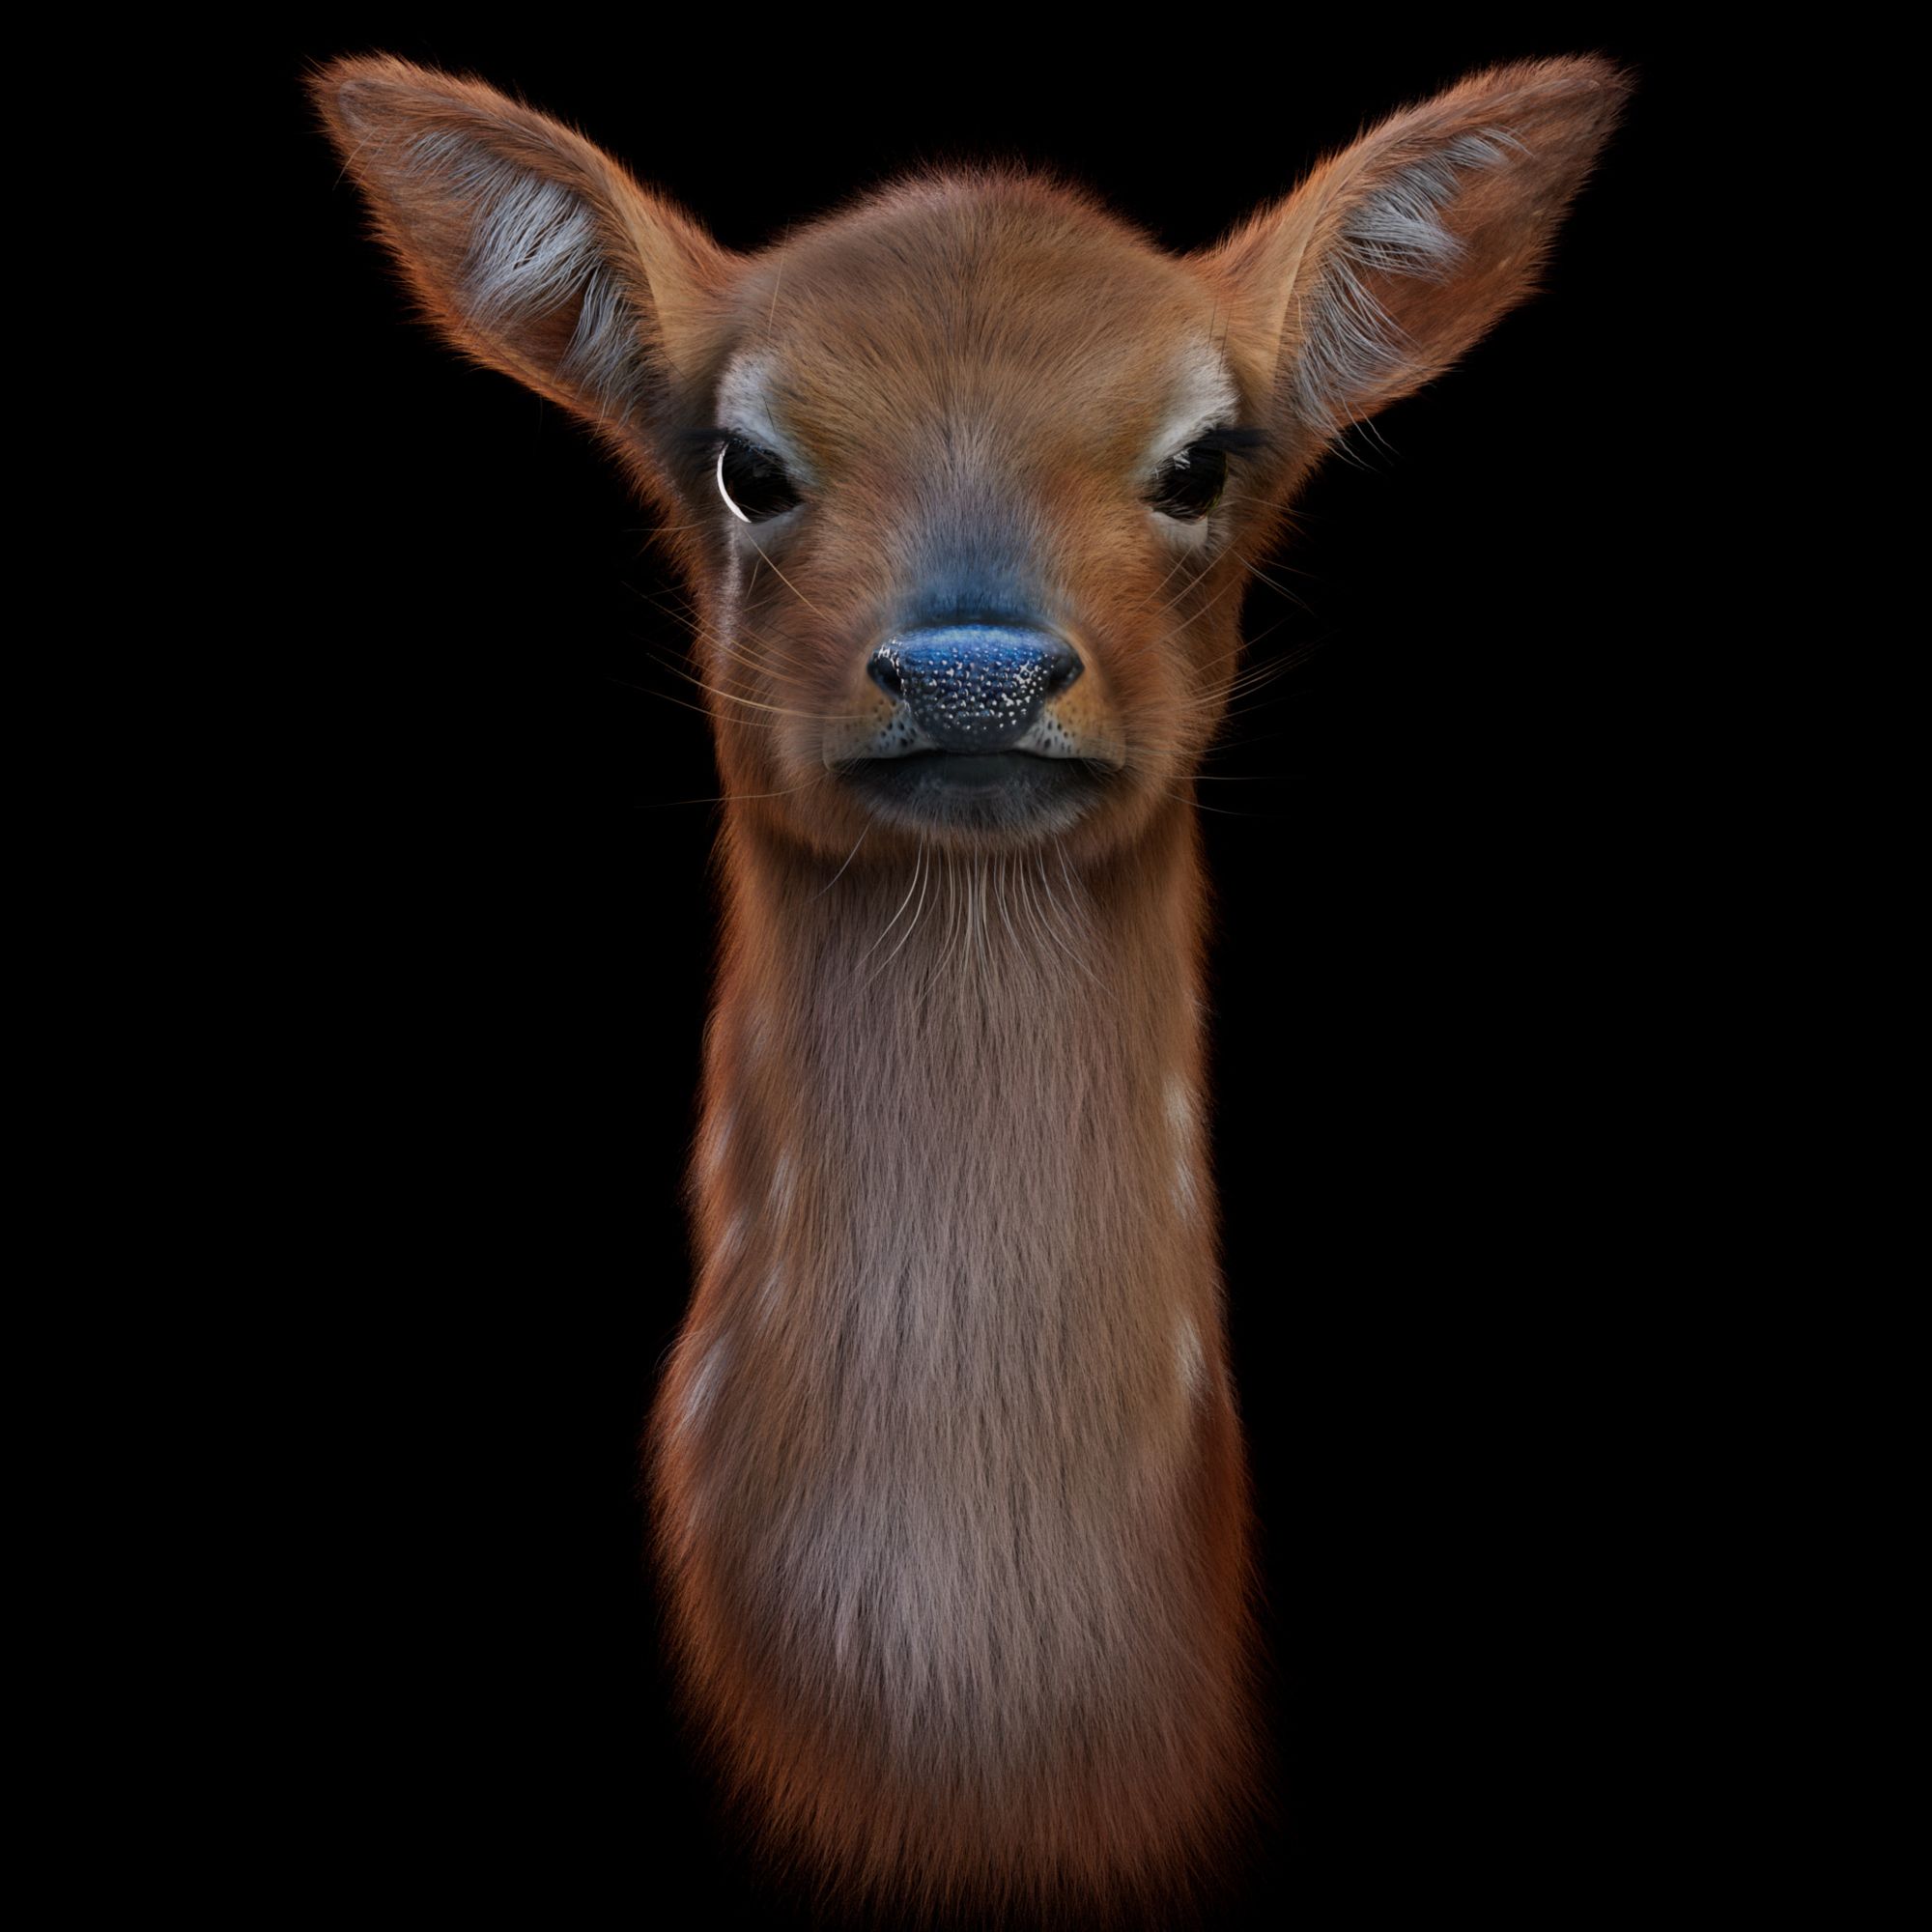
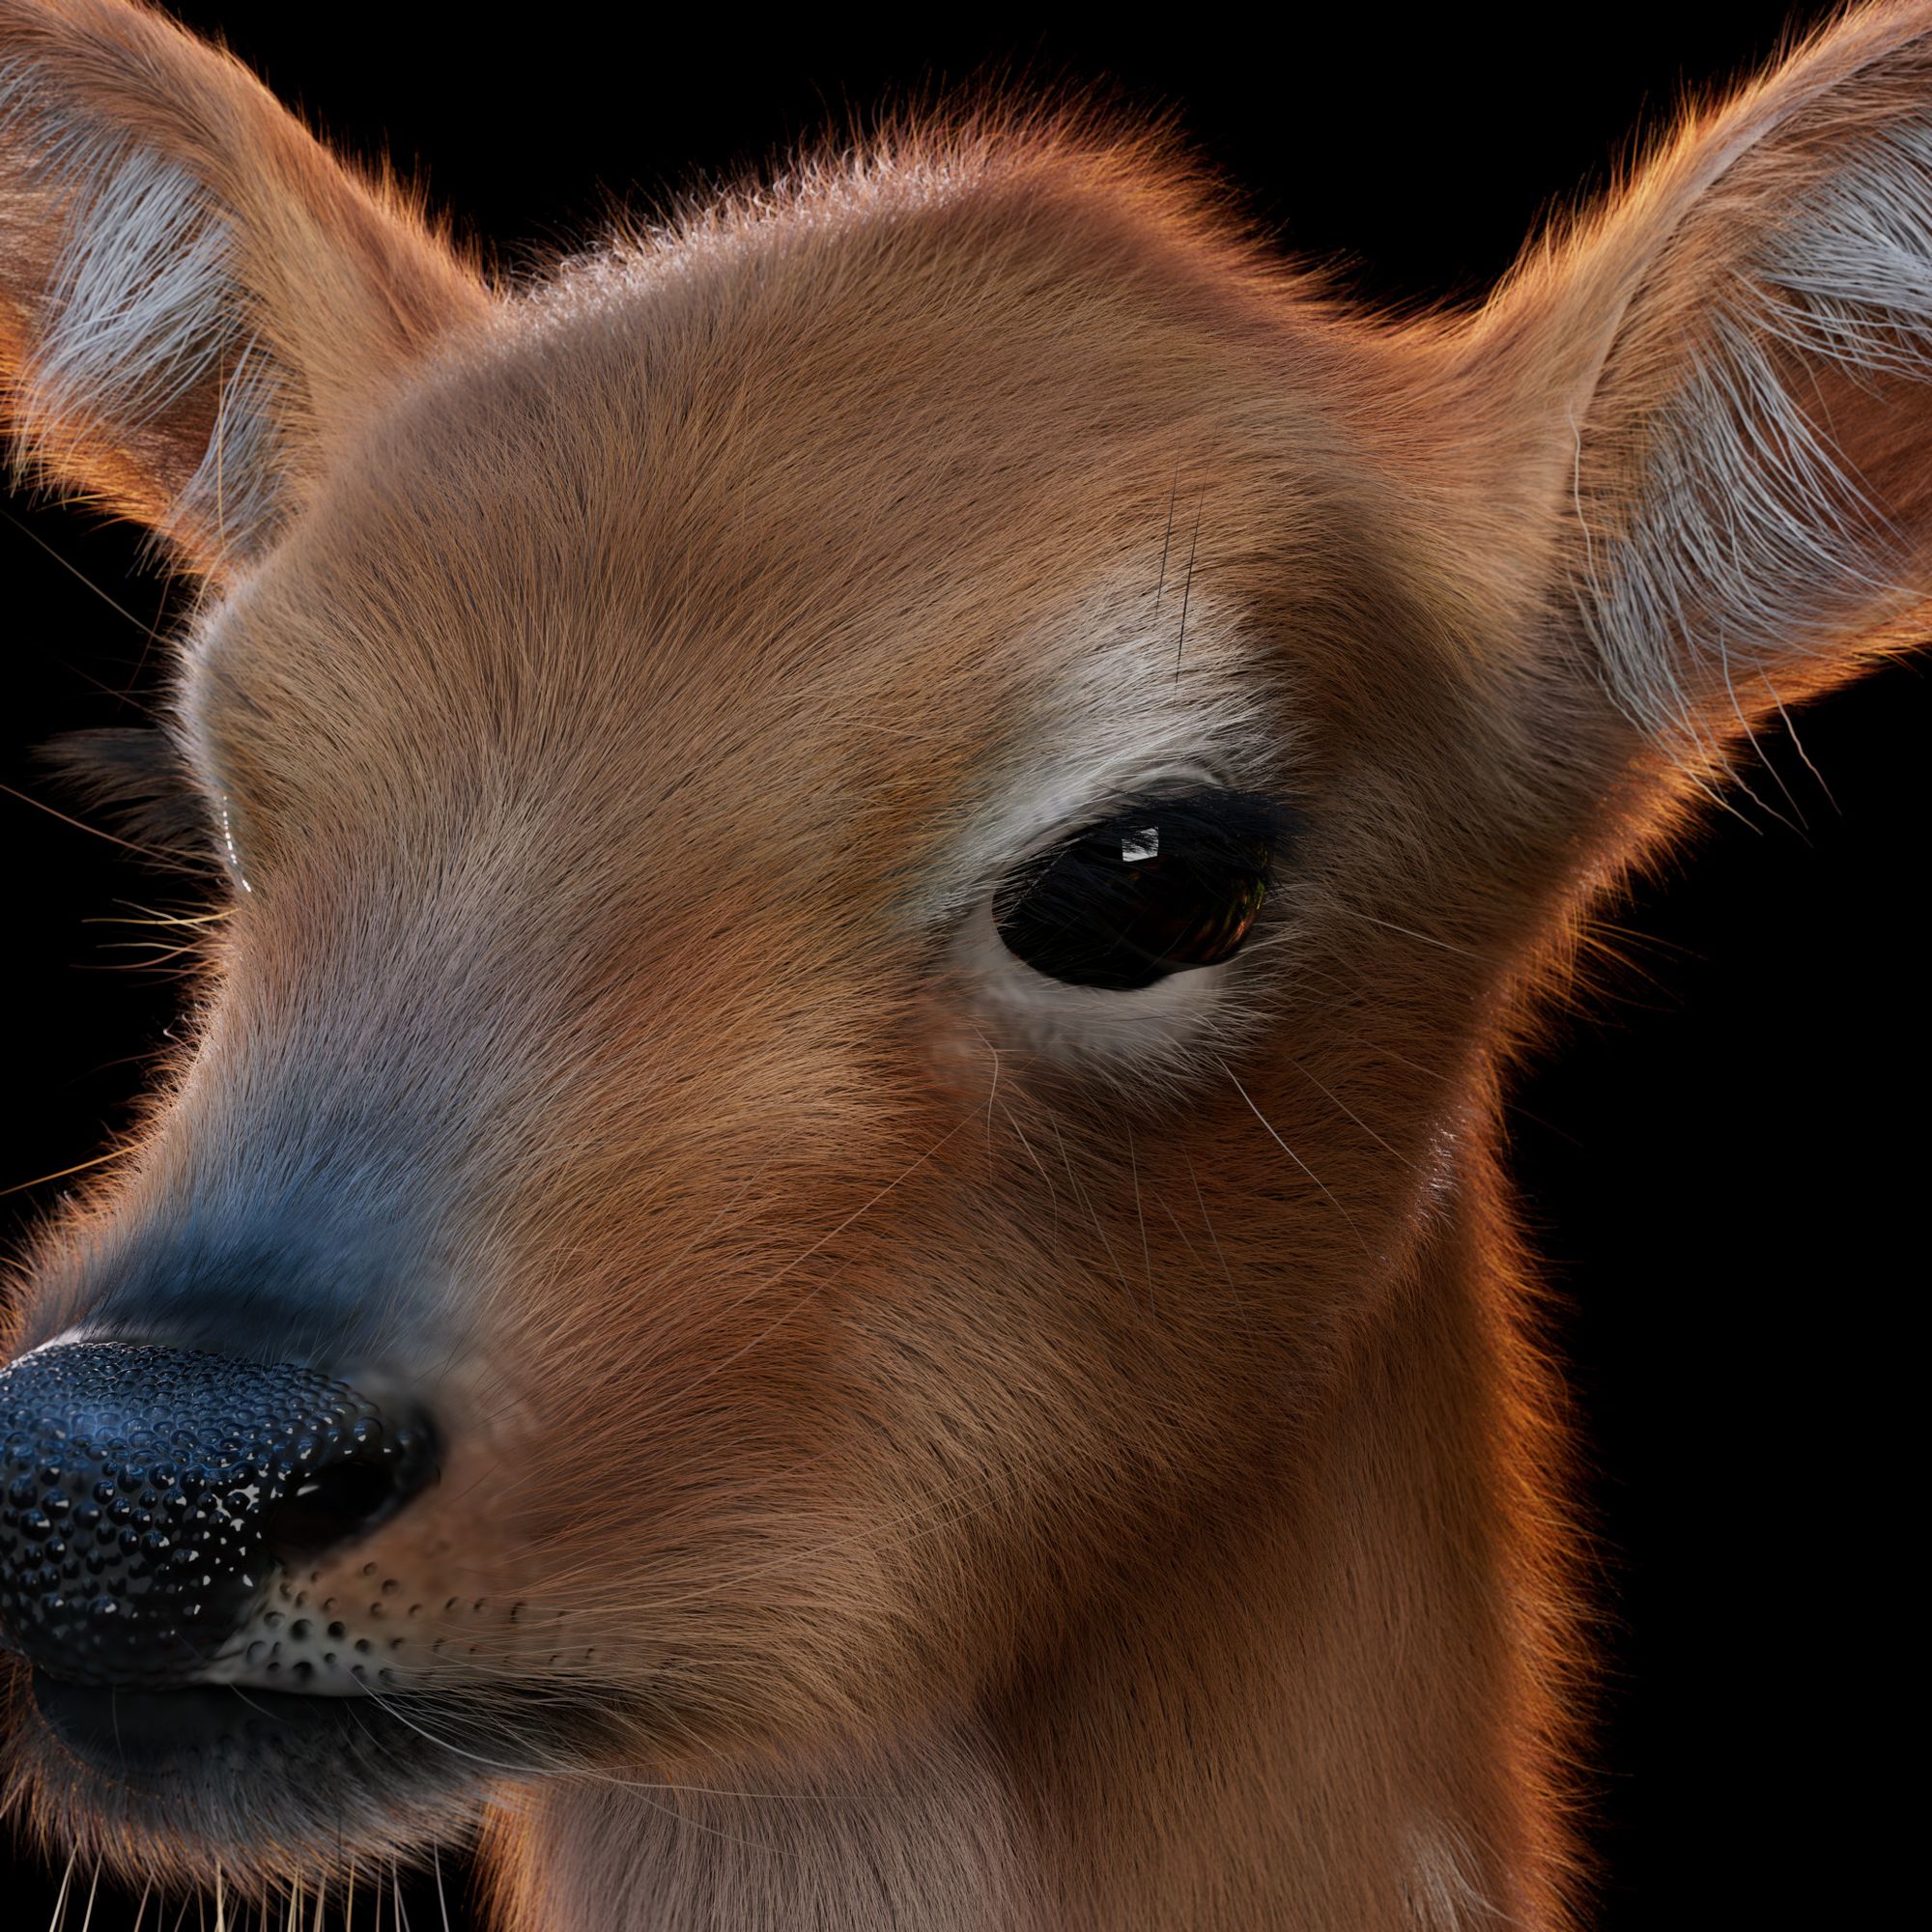
To finish up, here are some of my renders for this project:
Thanks for reading this article! Feel free to check out my rookies profile here. You can find links to my other project there. Hope you enjoy my artworks!