Lighting a Stylised Animated Shot With Iconic Characters
In this article, Forum shares insights, techniques, and lessons learned from inspiration to final render.
In this article, Forum shares insights, techniques, and lessons learned from inspiration to final render.

Forum Thaker, is a Lighting Artist with a passion for storytelling through colours. A graduate from the Academy of Animated Art, Forum explores the world of Tom and Jerry, and how lighting can transform an animated scene.
While not a master, Forum is learning and improving along with all of you! From finding inspiration to the final render, insights, techniques, and lessons learned will be shared in this article.
I often browse LinkedIn, seeking inspiration from the stunning animations created by recent graduates of AnimSchool and Animation Mentor. The industry is brimming with talented animators who generously share their incredible work, inviting us to bring their animations to life through lighting.
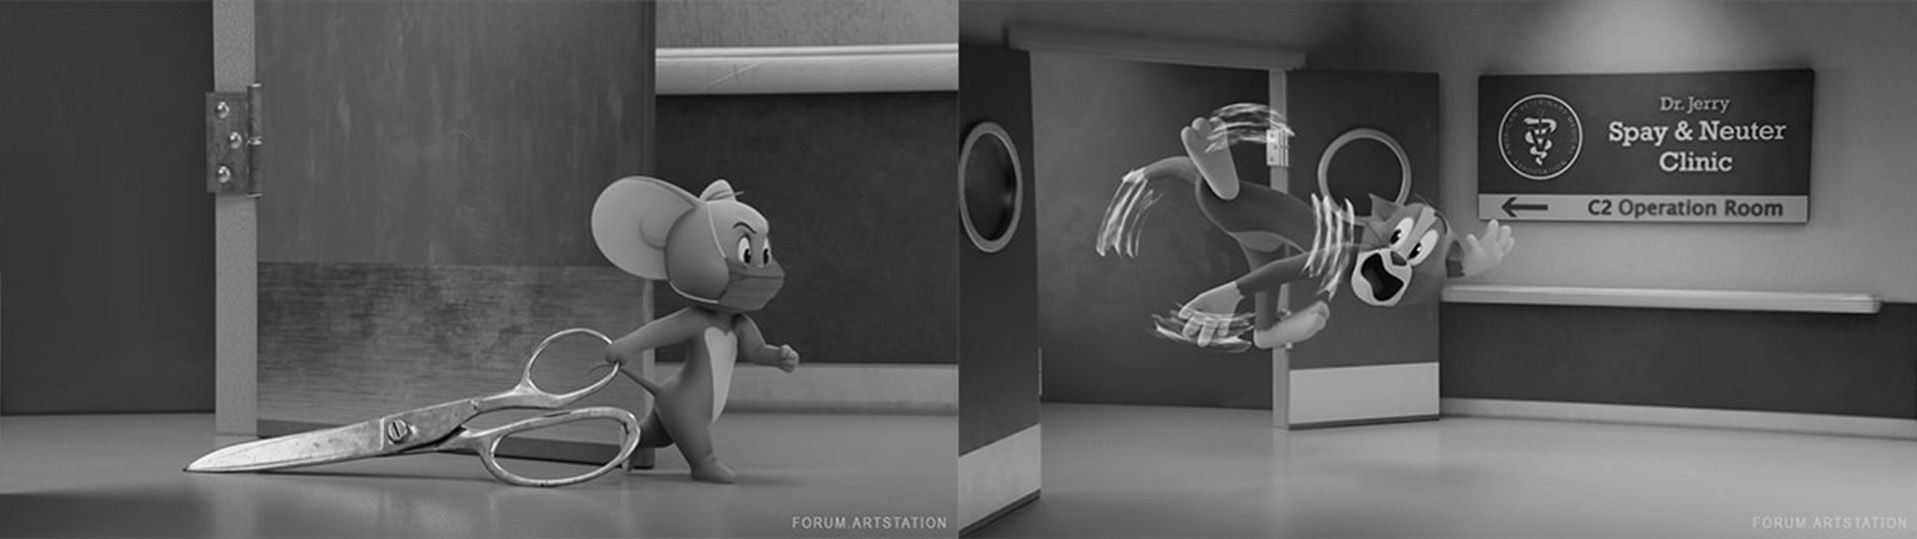
And from the moment I laid eyes on the mesmerising Tom and Jerry animation by the incredibly gifted Alexey Medvedev, I was captivated. The opportunity to work on such an iconic Animation felt like a dream come true. Who hasn't fantasised about contributing to the world of Tom and Jerry?
Check out the original animation here.
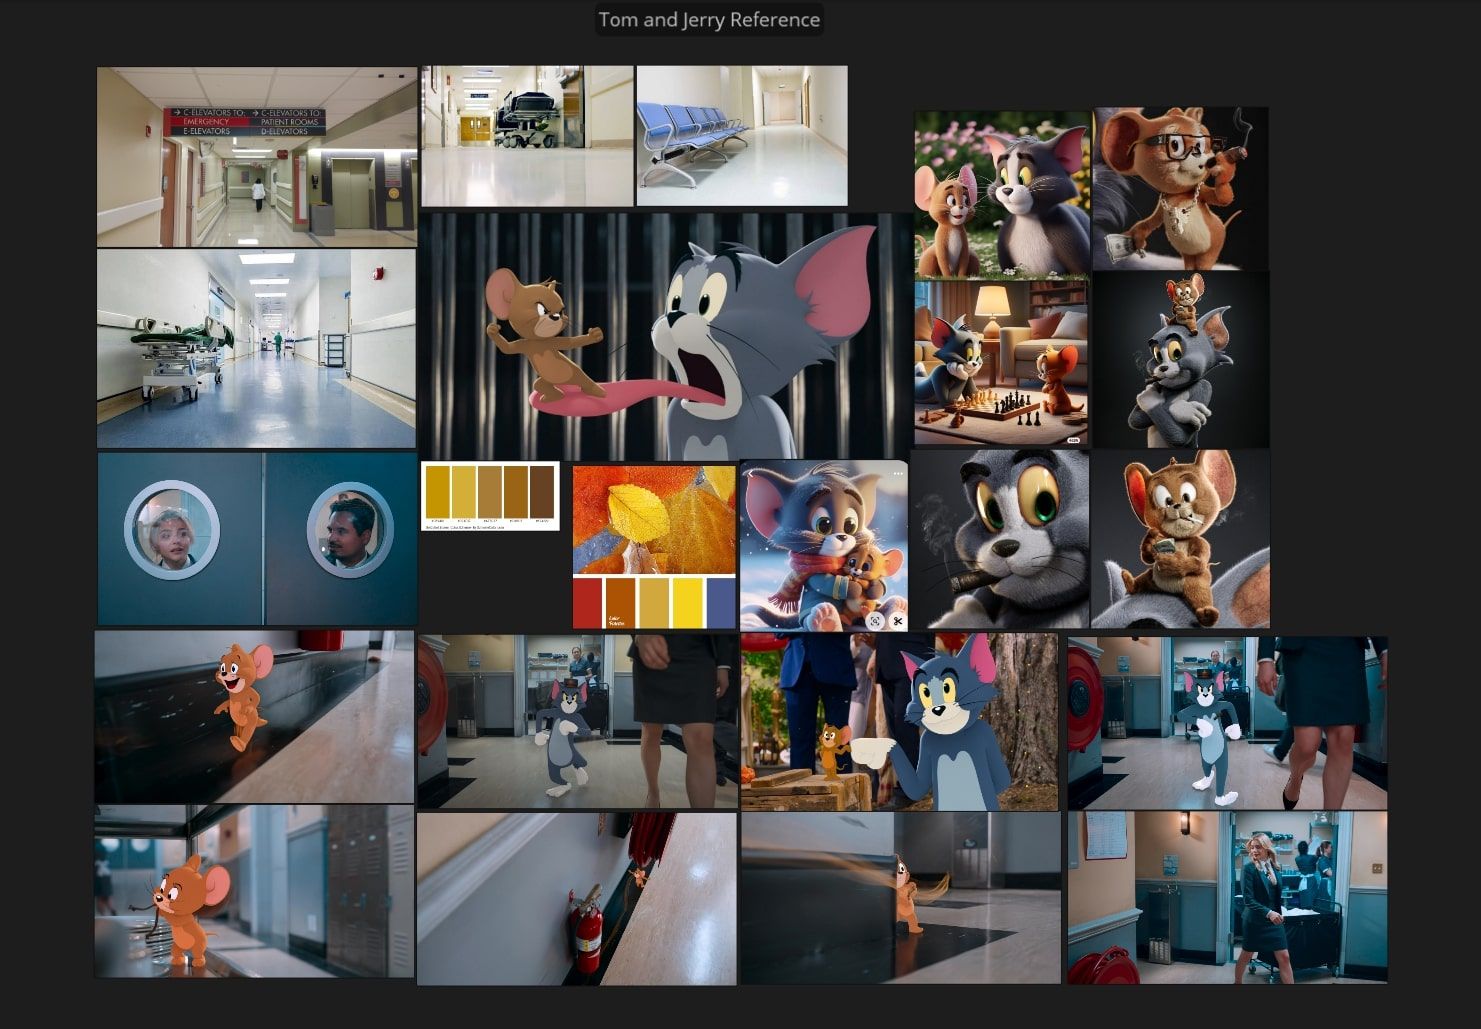
Looking for references is the most challenging part for any aspects of 3D animation and VFX. It's usually a good idea to gather a bunch of different concept arts, textures and images of artworks from films, photography, Illustrators and original cartoons.
Like most of you, I use PureRef to gather my references, study them and see what's been done, techniques used and how I can use these references to visualise and plan my shot.
In the initial stage, I focus on understanding the setup of the scene provided by the animator. This includes examining the referenced rig, layout, base textures, and grouping. Often, animators have already cleaned up the scene and organised the assets. It's beneficial to consult with the animator about any specific considerations and their suggested style or mood for the shot.
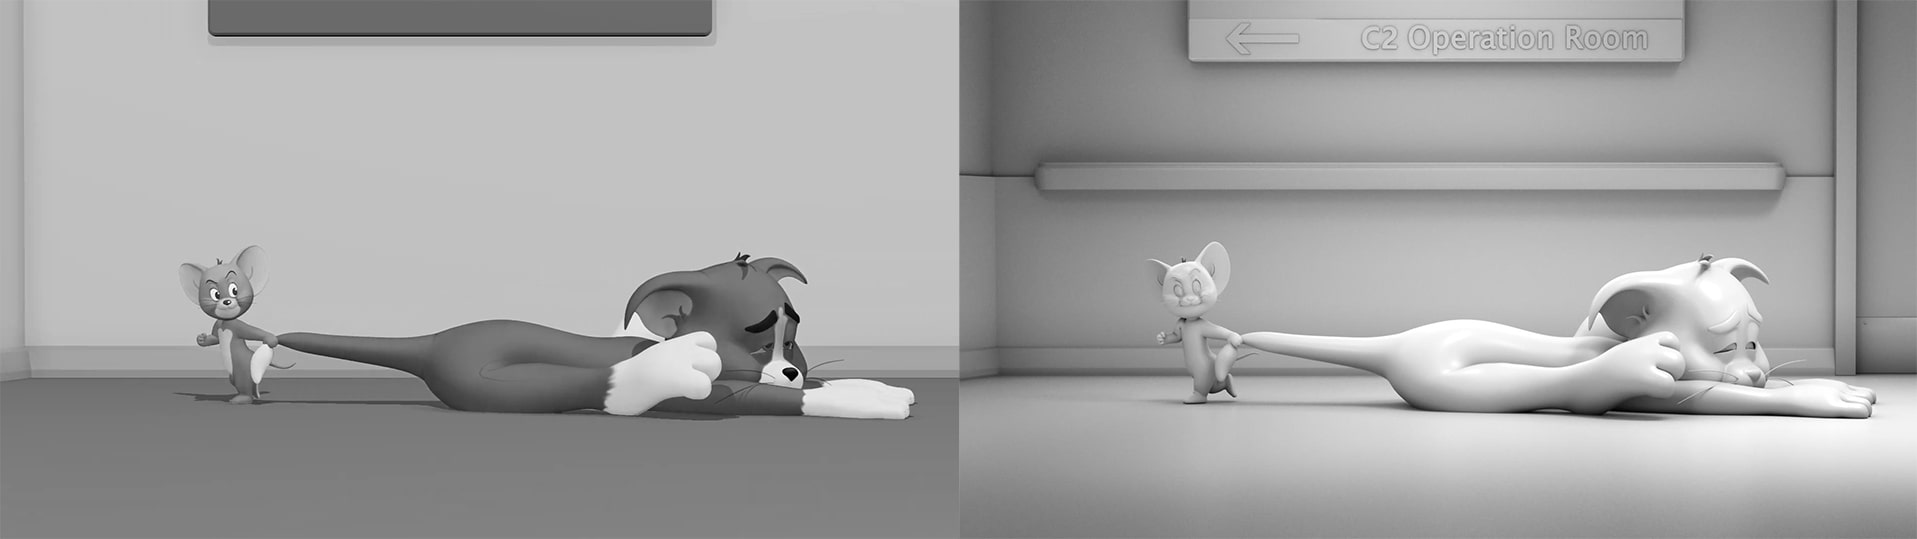
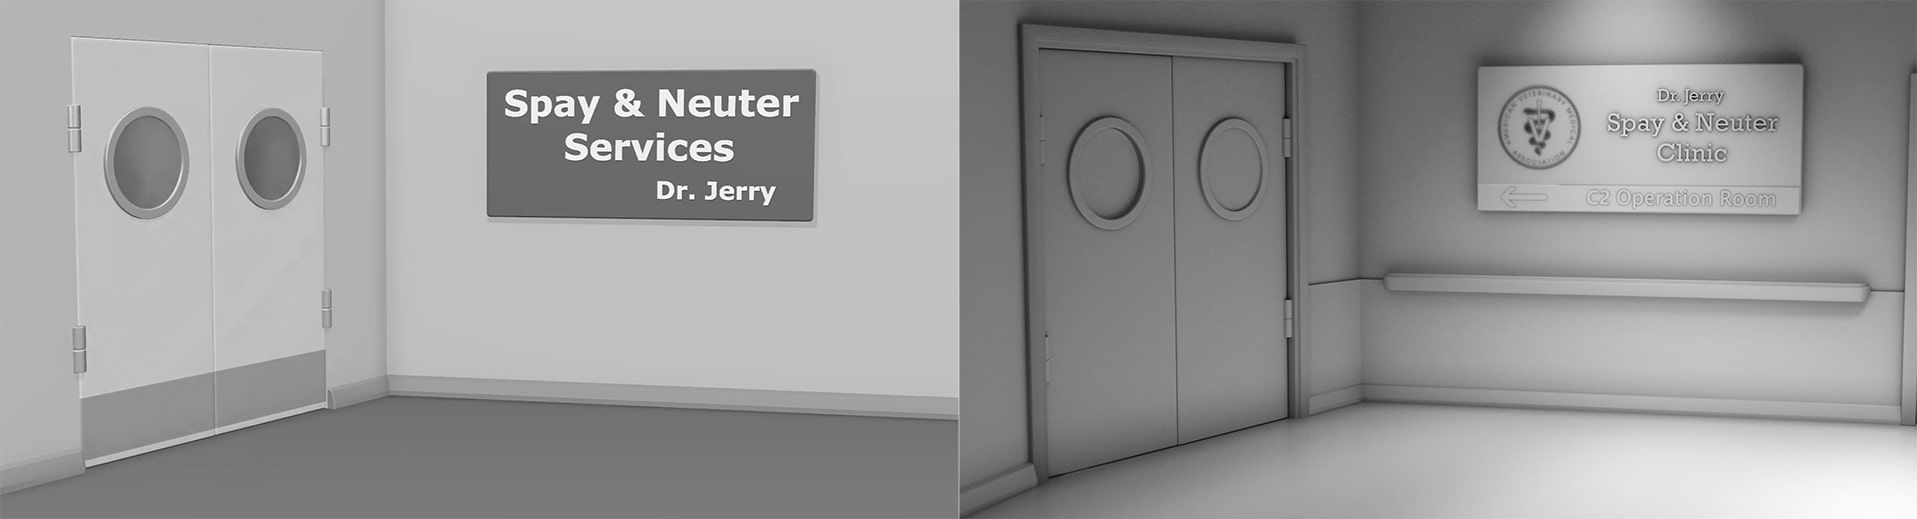
In my case, the scene was well-organised, and the animator was open to letting me experiment with my own style for the shot. I decided to enhance the layout by adding some models from Cgtrader. Here are a few layout changes I made to add more appeal.
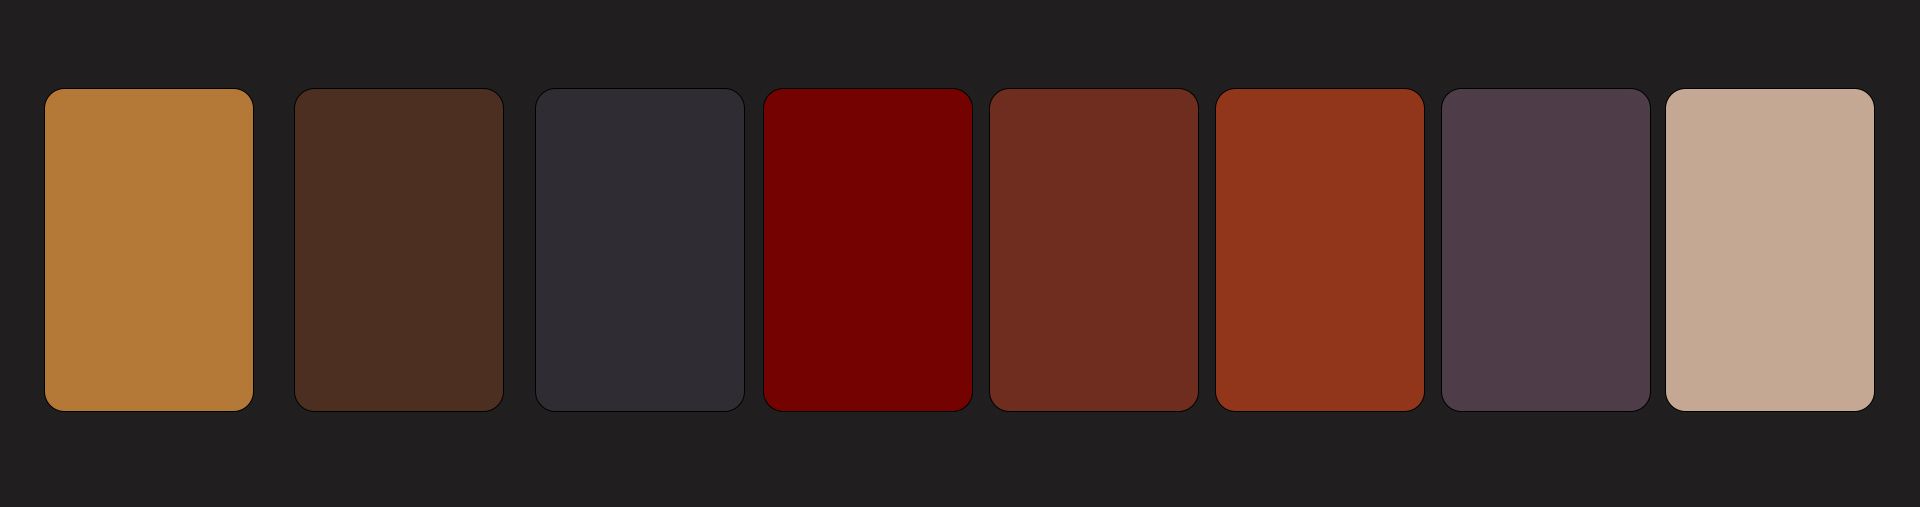
I wanted to infuse this shot with bright colours to enhance the playful experience and accentuate the dramatic mood at the same time. This was the color palette I used in my scene.
After deciding the base color palette, I moved on to shading and texturing of the scene. I did the texturing to add more details and variation to the scene.
Lighting is a critical aspect of 3D animation that can dramatically influence the mood, depth, and realism of a scene. Whether you’re working on a short animation or a full-length feature, mastering the art of 3D lighting can significantly enhance your final product.
Before diving into the technicalities of lighting, it's essential to understand the scene's context within the storyboard. What is the mood? What time of day is it? What emotions should the lighting convey? Answering these questions will guide your lighting decisions.
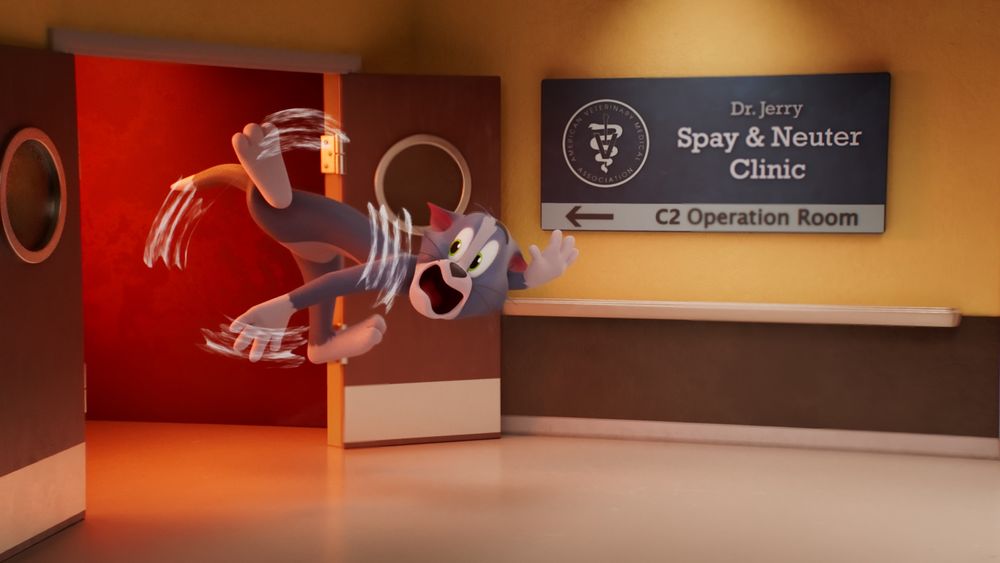
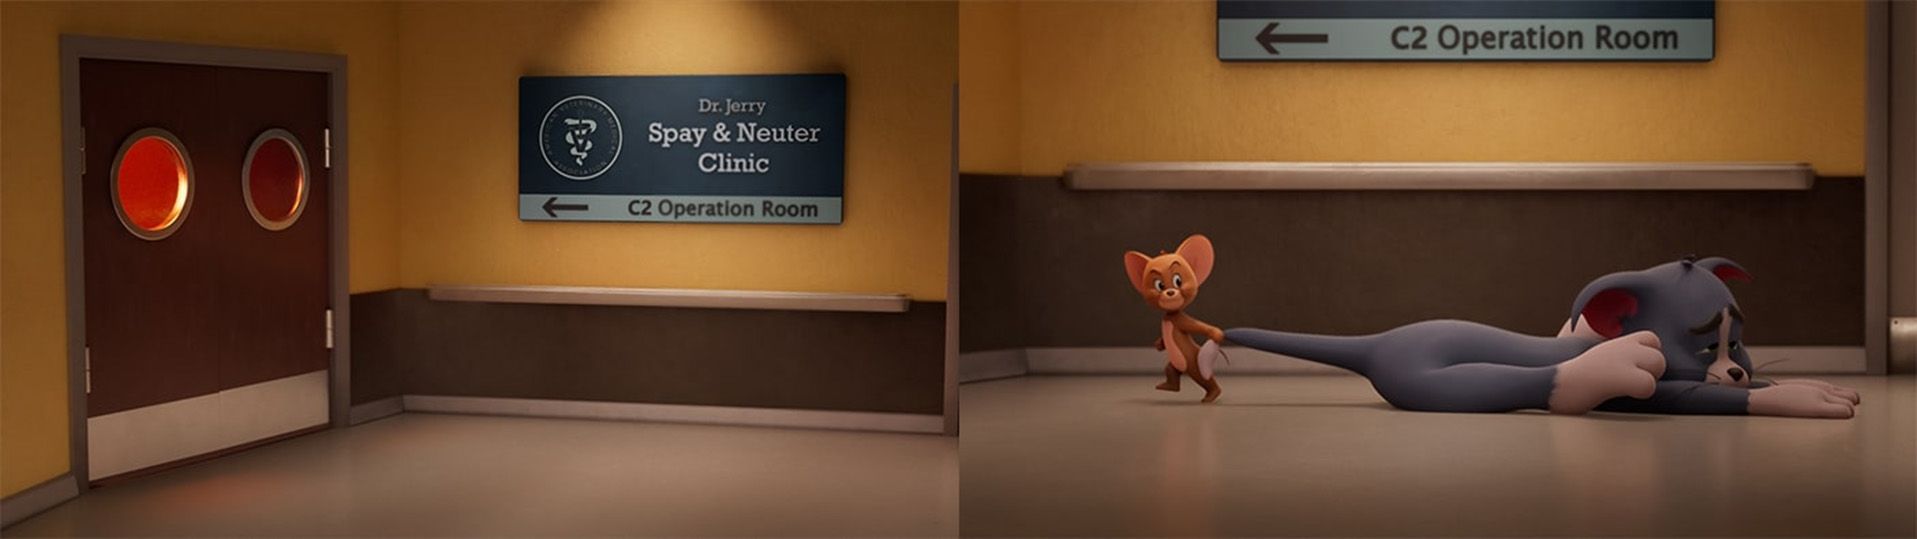
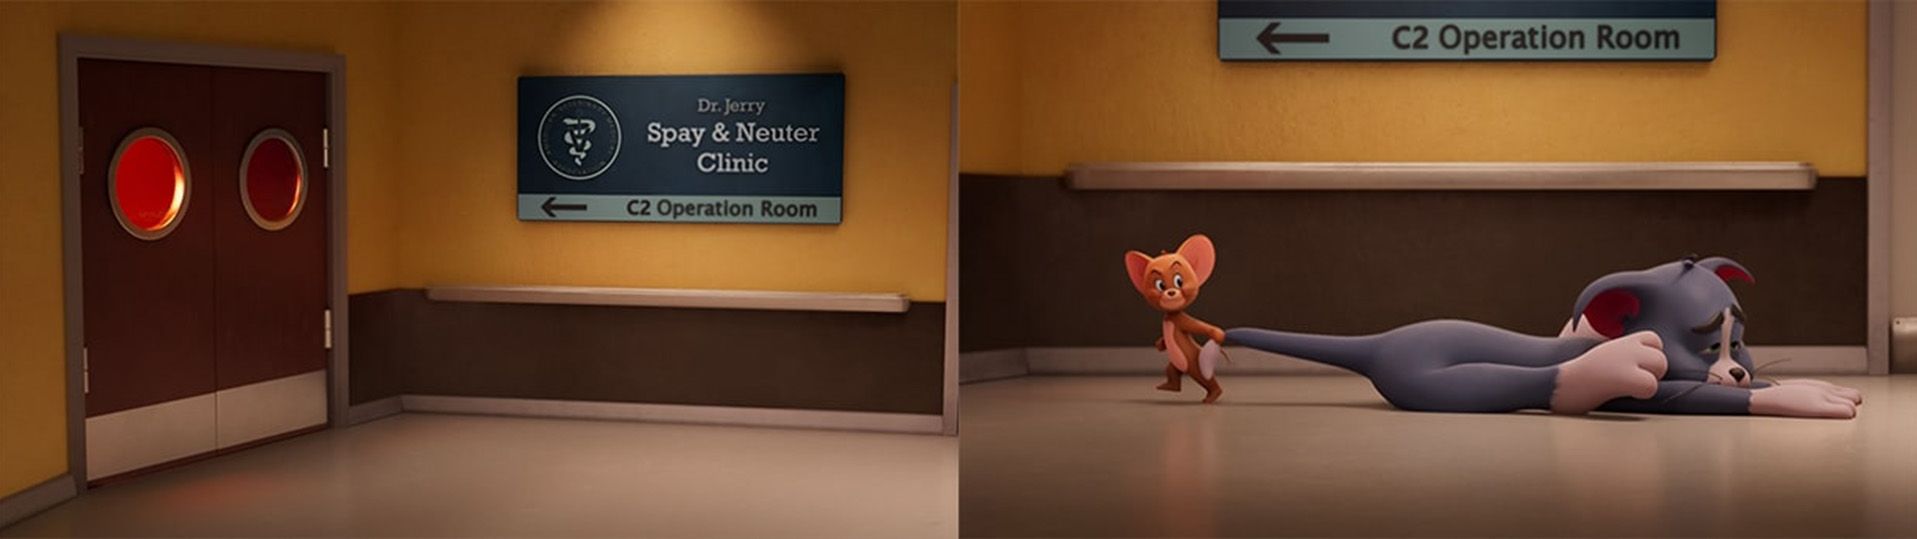
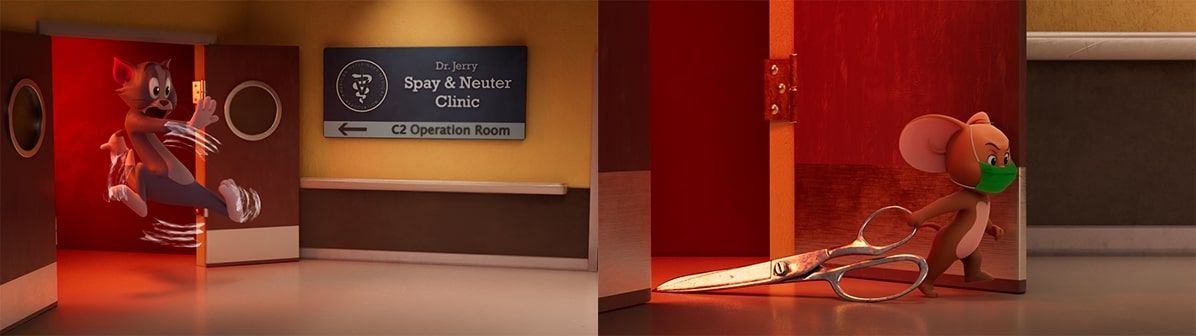
For this shot, I aimed to create a dramatic mood that highlights safe and danger zones. Tom is shown being dragged away from the light, symbolising safety, and into the darkness, representing danger. When the door opens, the red voluminous light intensifies the sense of danger, reinforcing this feeling as he exits.
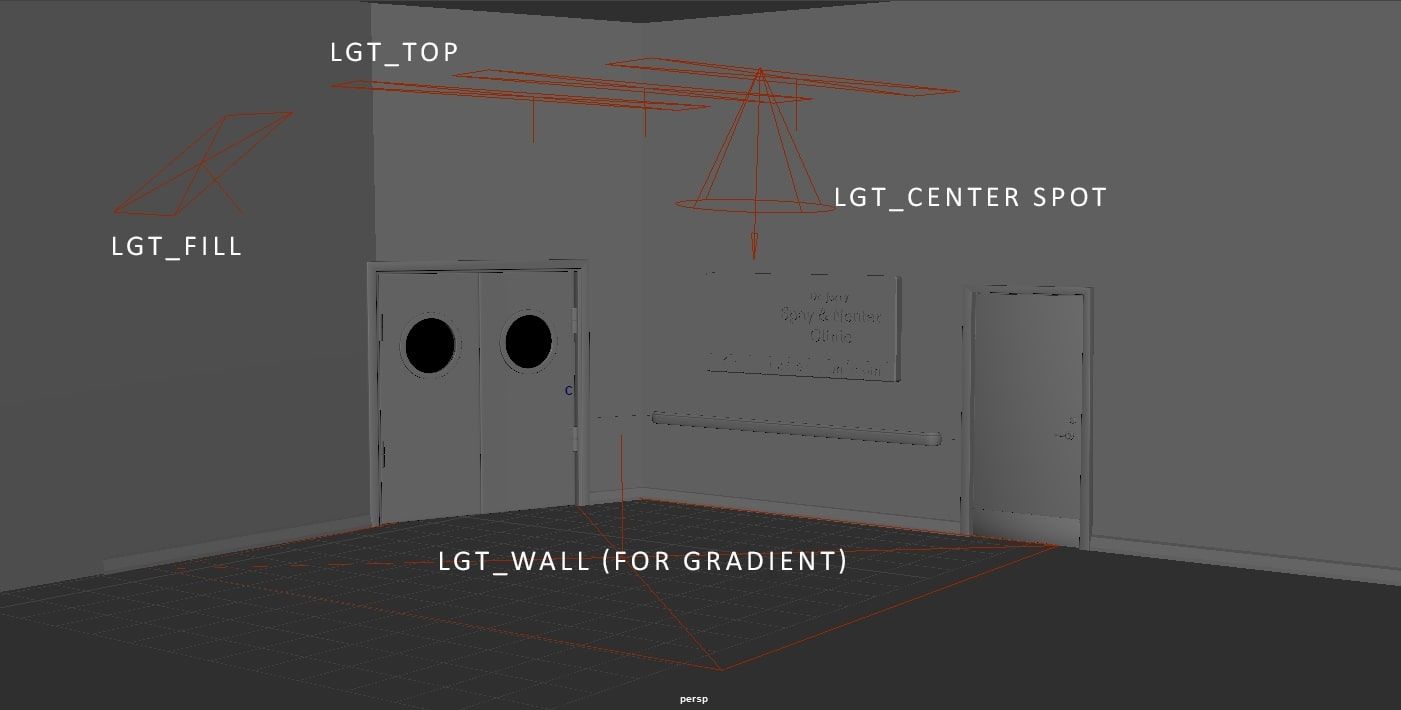
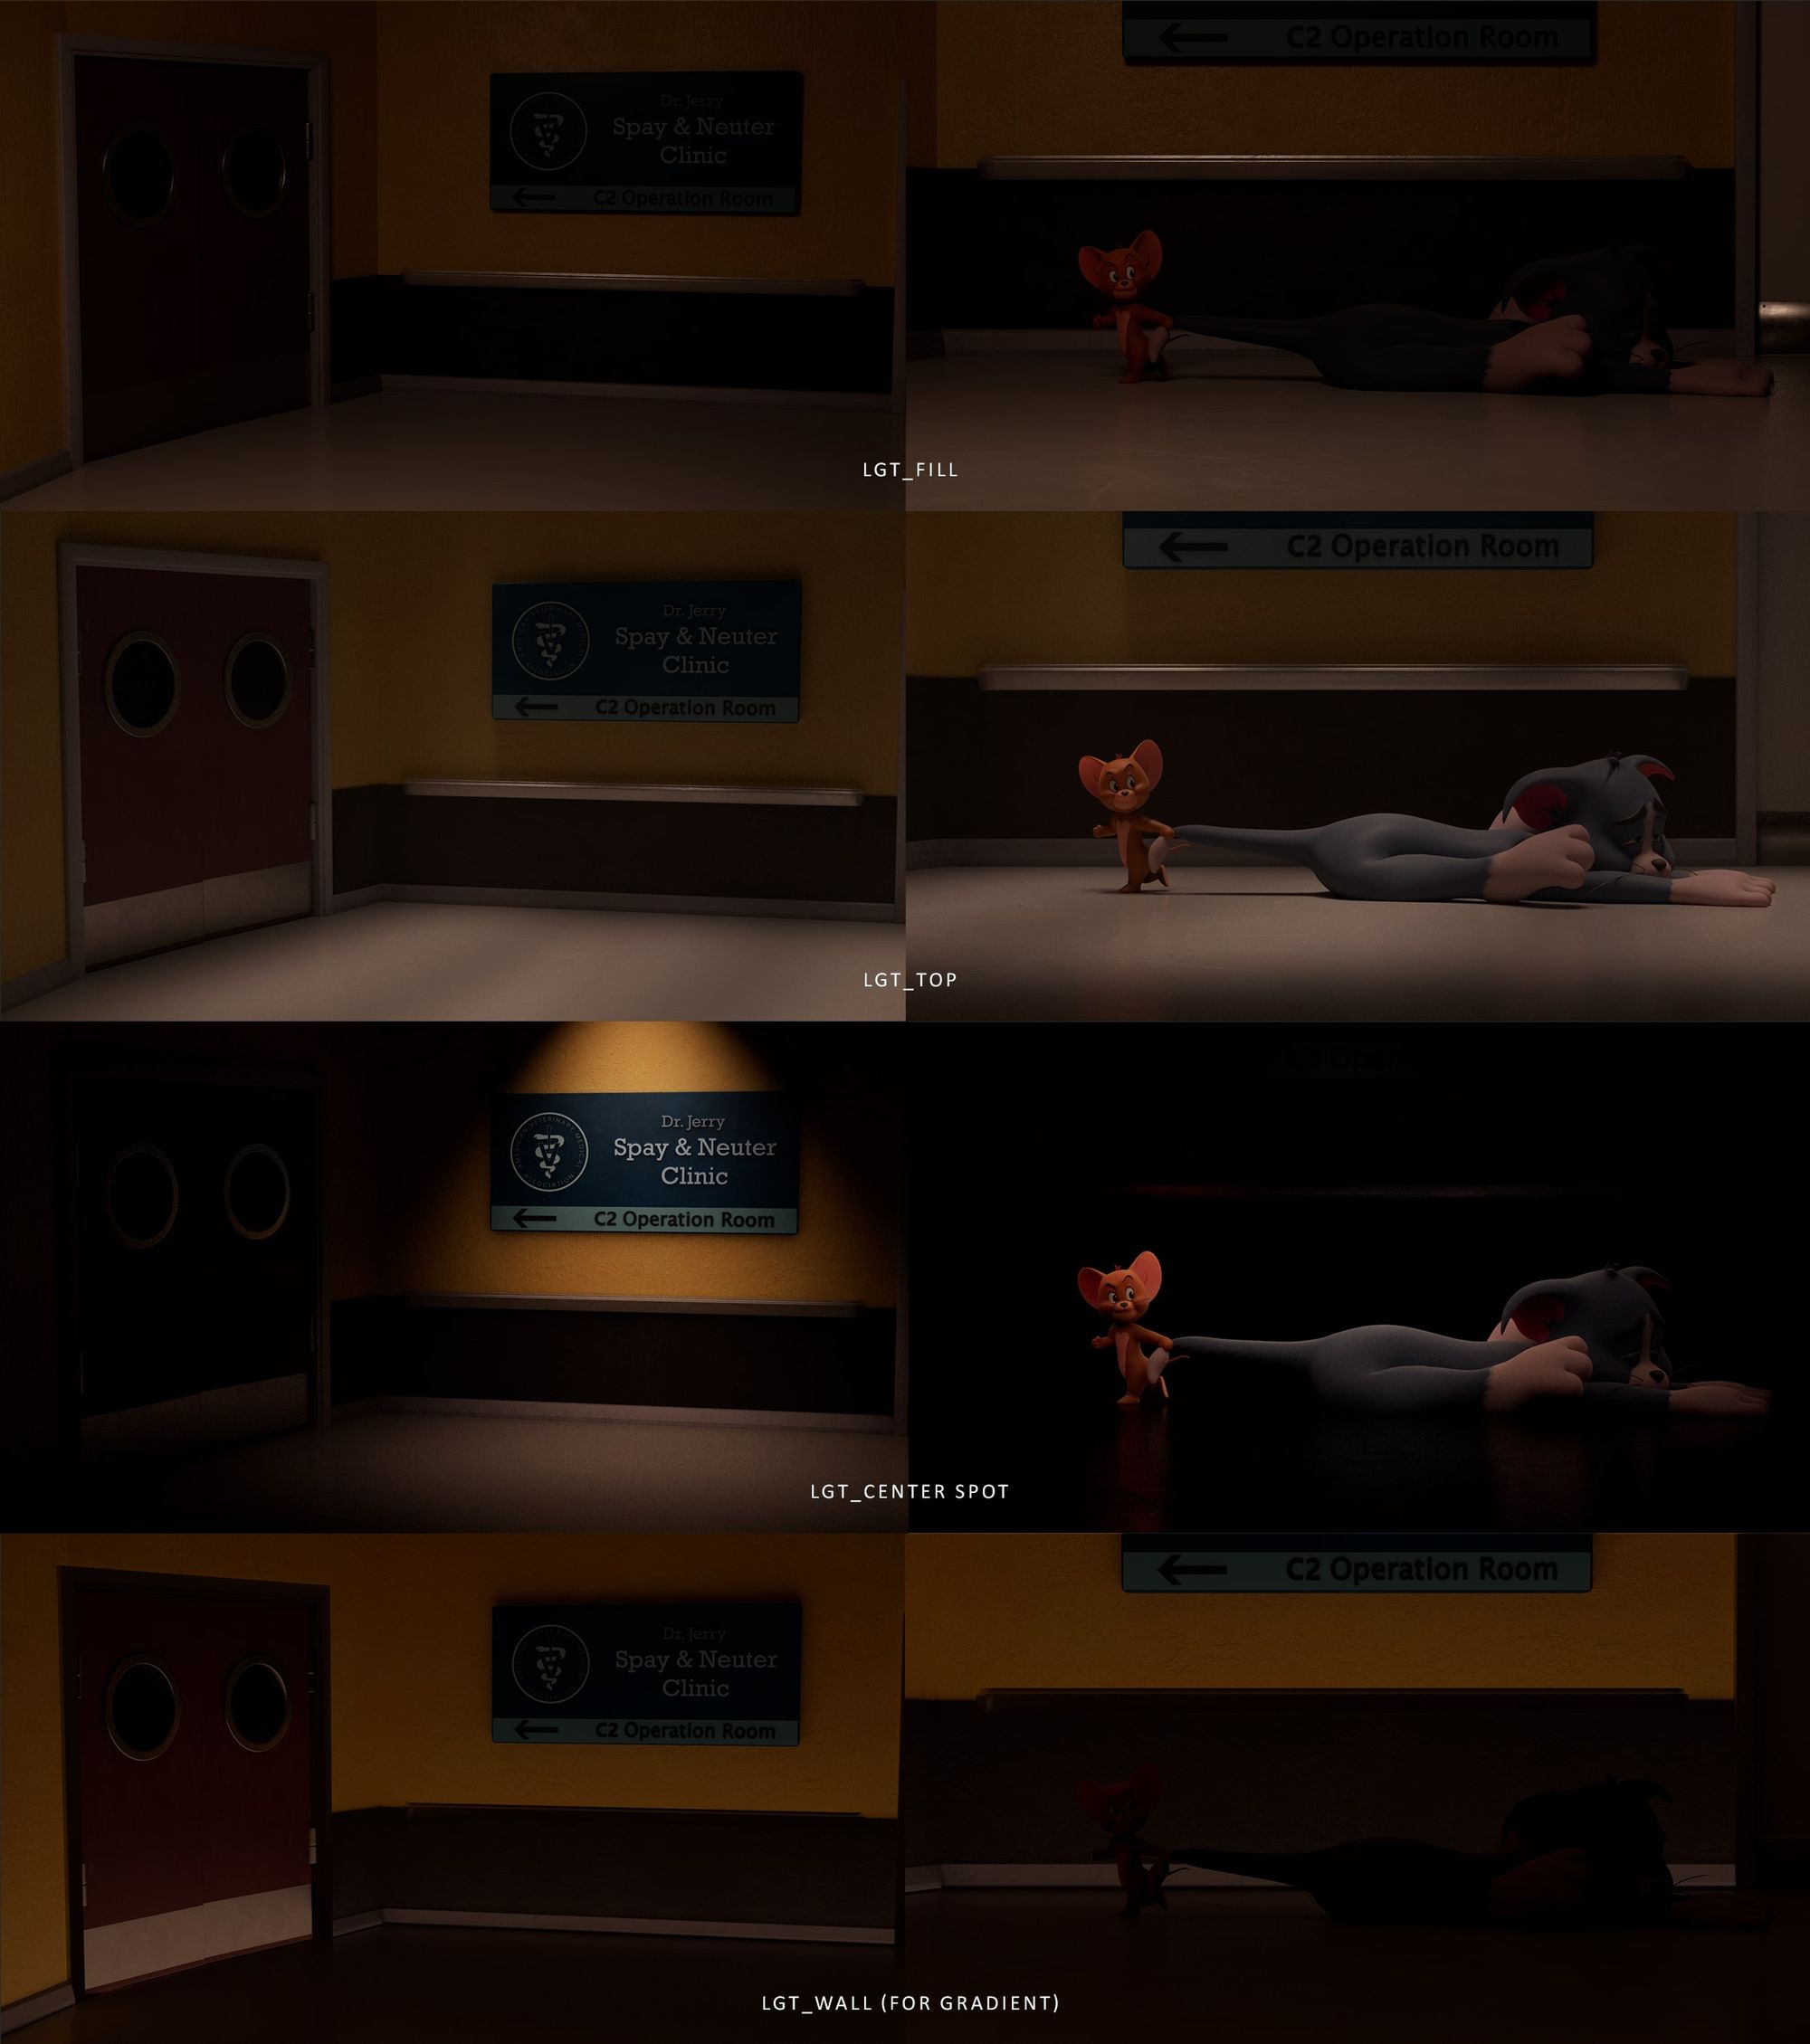
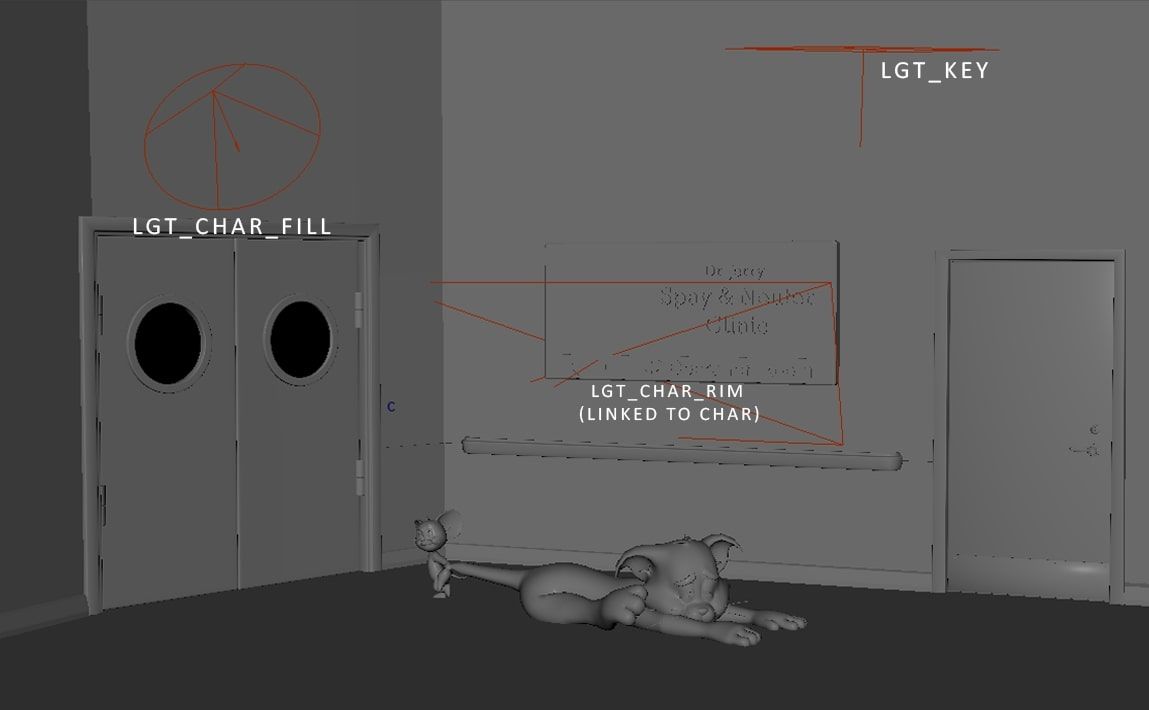
Once I was clear on the look and mood I wanted to achieve, I began carefully placing lights to evenly illuminate the entire room. Using physically based rendering such as Arnold and ACES as workflow, I was able to add natural bounce and global illumination, enhancing the realism and depth of the scene.
The 3 Tops lights - plays an important role in contributing to the interesting shaping on to the mid section of the plain floor and leading a pathway for the viewer eye.
The Center spot - was placed to add focus on the center of the shot and put emphasis on the signage later on when it was revealed.
The wall Light - was placed to add more gradient falloff to the walls and light the wall avoiding the noise in the corners.
The Fill light - was placed to give overall lift to the brightness value of the scene.
The Red Light - was placed behind the closed doors with peaks through the round door glasses, which worked well for me to give some visual clue of the danger.
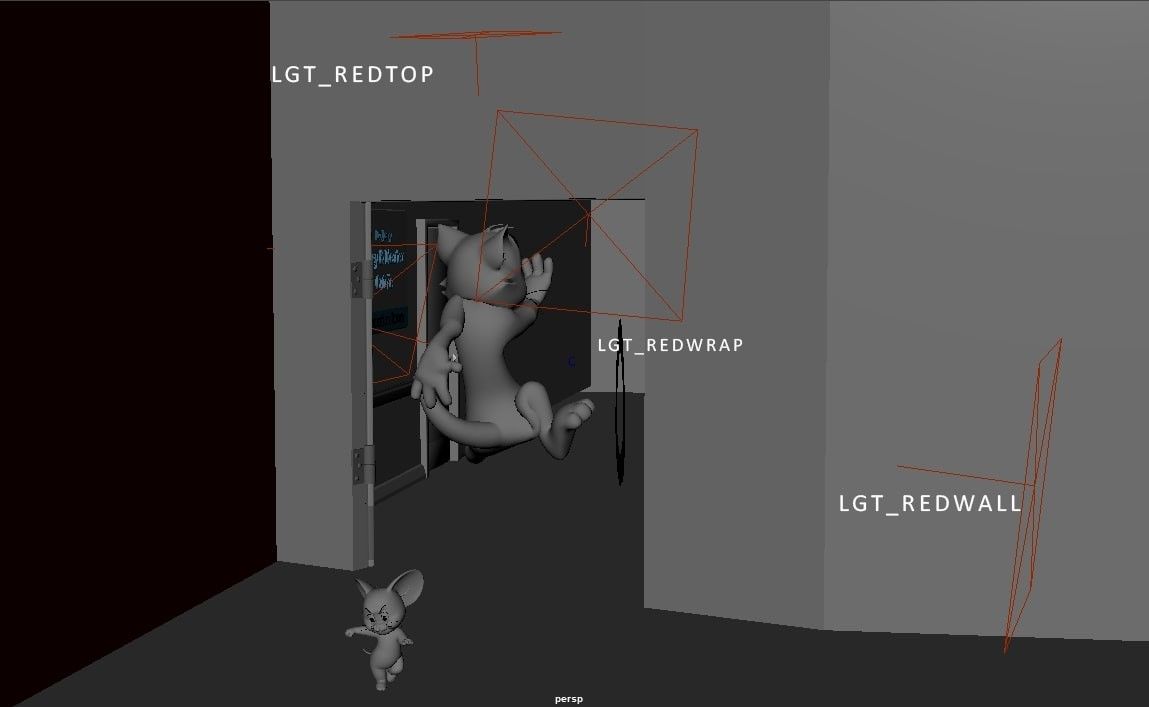
I then moved on to add the character lights per the plan adding Key Light, Rim Light and the Fill Light.
The Key Light - was placed on SR, leading the focus on Tom face and giving away that he is moving away from light.
The Fill light - was placed to give overall lift to the brightness value of the characters esp while they are near the door.
The Rim Light - was placed behind the characters to give nice shaping and falloff gradients.
Additionally, I added the red lights behind the door for when he enters and exits the Clinic.
The Redtop Light - was placed on top to act as the initial rim on the characters.
The Redwrap light - was placed to act more like a wrap of the Redtop light giving more shaping and influencing more of the characters.
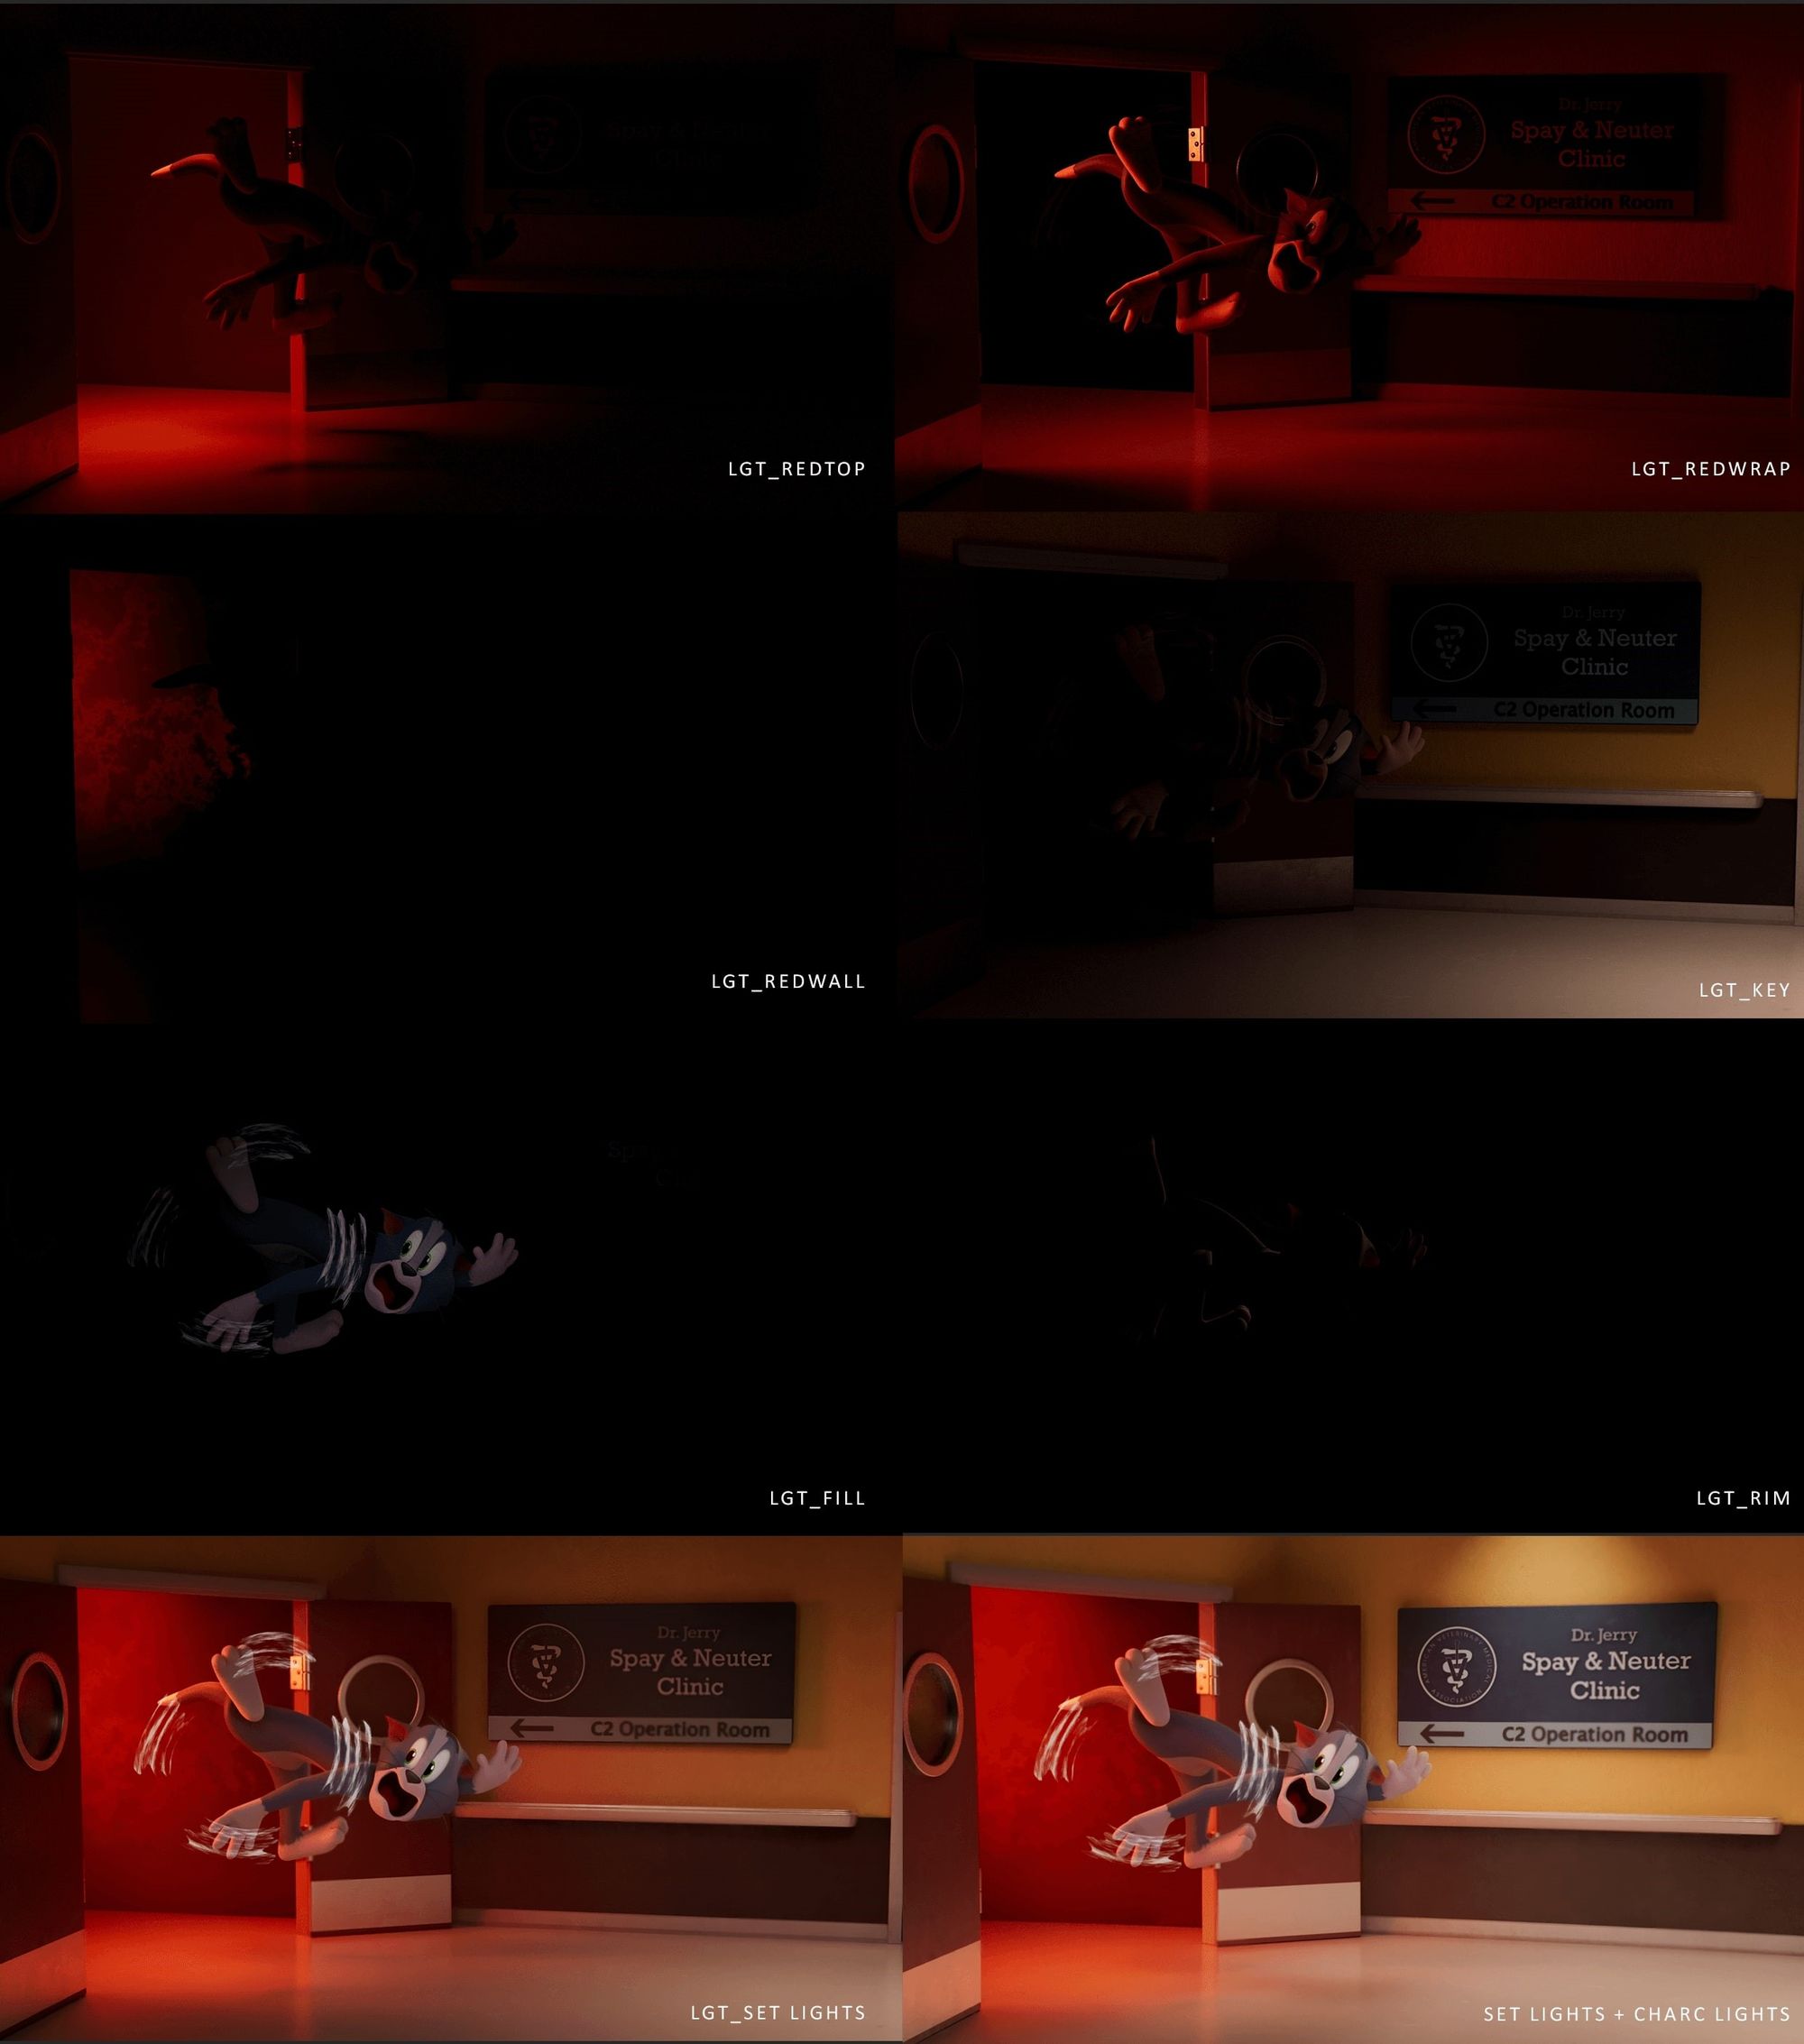
This was the primary lighting setup used to achieve the final look of the shot. Ensuring consistent and effective lighting across all frames was challenging, especially as each character moved from screen right to screen left and back again. Careful planning was essential, and having well-designed lighting for the wide-angle shots greatly contributed to the successful outcome.
In addition to strategic light placement, creating gradients and smooth fall-offs was crucial. The value structure played a significant role, not only directing the viewers' focus but also helping to separate the characters from the background.
Finally, it was time to relax and render. While this is the most tedious part of the process, the patience truly pays off in the end. I had to highly optimise my scene and render settings to speed up the rendering process and reduce the minutes per frame. With nearly 550 frames to render, along with additional AOVs, AO, Pref, and Cryptomattes, it felt like it took ages.
For this shot, I aimed to achieve as much as possible within the scene itself, leaving minimal adjustments for post-production. However, having the control and flexibility of multiple passes allowed for fine-tuning without needing to re-render. After making the final edits and adjustments, and incorporating constant feedback from industry professionals and colleagues, it was finally time to call the shot complete.
A special shout out to Juan Lopez for his unwavering support and expertise. His invaluable support, apt knowledge and technical skills contributed in making this project truly shine.
A heartfelt shoutout to the visionary minds behind the Academy of Animated Art - P. Jasmine Katatikarn and Michael Tanzillo. Your commitment to fostering a vibrant community of creatives has been instrumental in shaping this endeavour. Thank you for inspiring us to push boundaries and bring our wildest imaginations to life.
Overall, It is a great experience to bring Tom and Jerry to life in this 3D/ CGI world. Check out the full breakdown on my Rookies page. I really hope you enjoyed the article, and feel free to contact me on LinkedIn or via my Rookies profile here.