How to Create a Realistic Fish Model Using Substance 3D Designer and Mari
For her graduation short film, ARTFX SCHOOLS graduate Alexandra Ribeiro aimed to craft a 3D fish blending realism with a touch of magic.
For her graduation short film, ARTFX SCHOOLS graduate Alexandra Ribeiro aimed to craft a 3D fish blending realism with a touch of magic.
For this project, recent ARTFX SCHOOLS graduate, Alexandra Ribeiro, aimed to create a fish that struck a balance between realism and a touch of magic, fitting seamlessly into the universe of her graduation short film. As her inaugural venture into 3D animal creation, she felt a surge of excitement tackling the challenge of bringing this creature to life for her project.
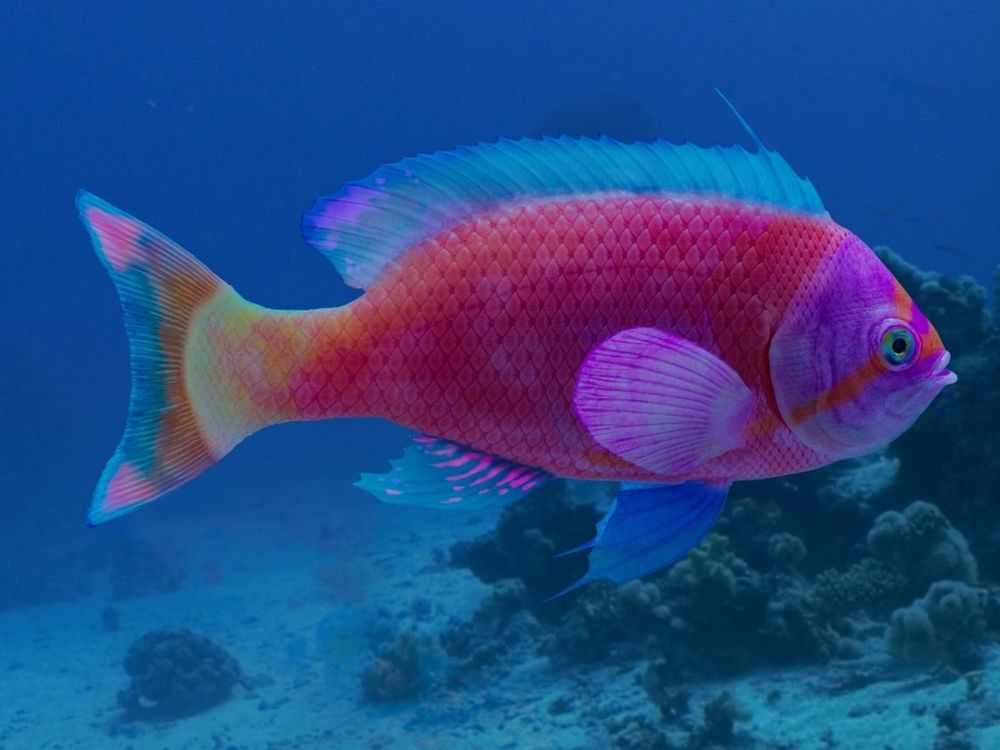
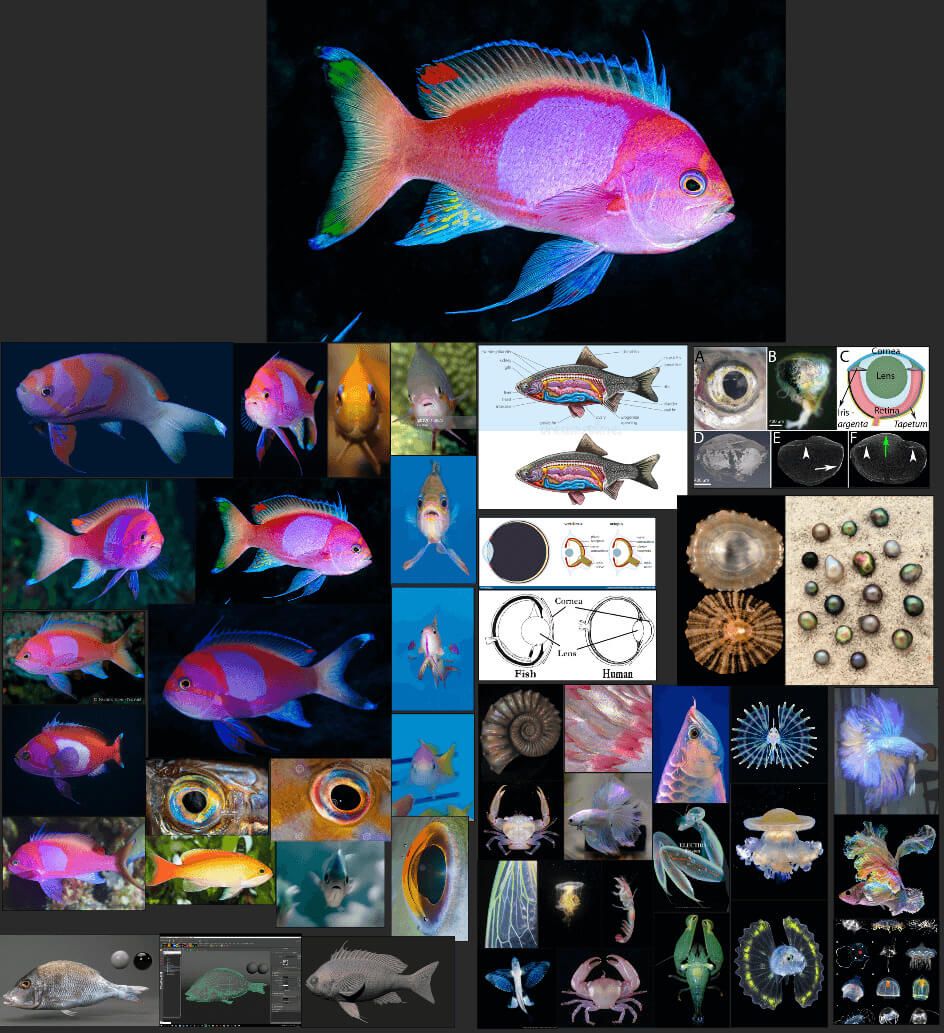
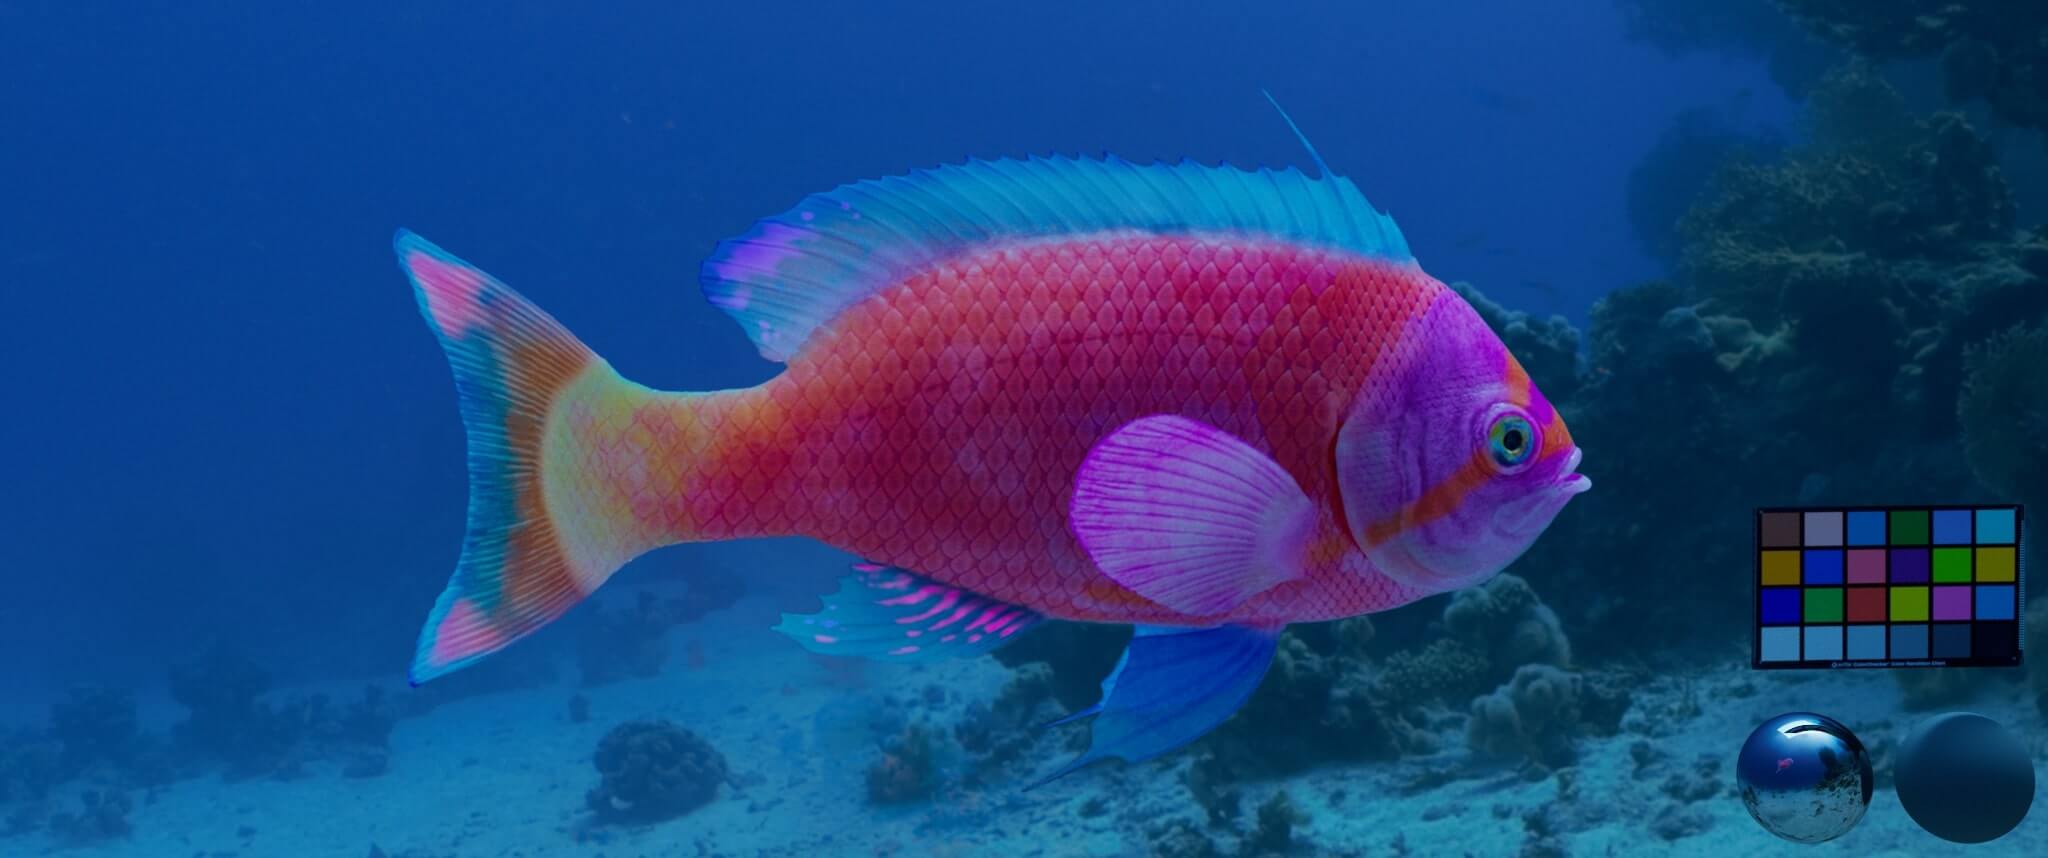
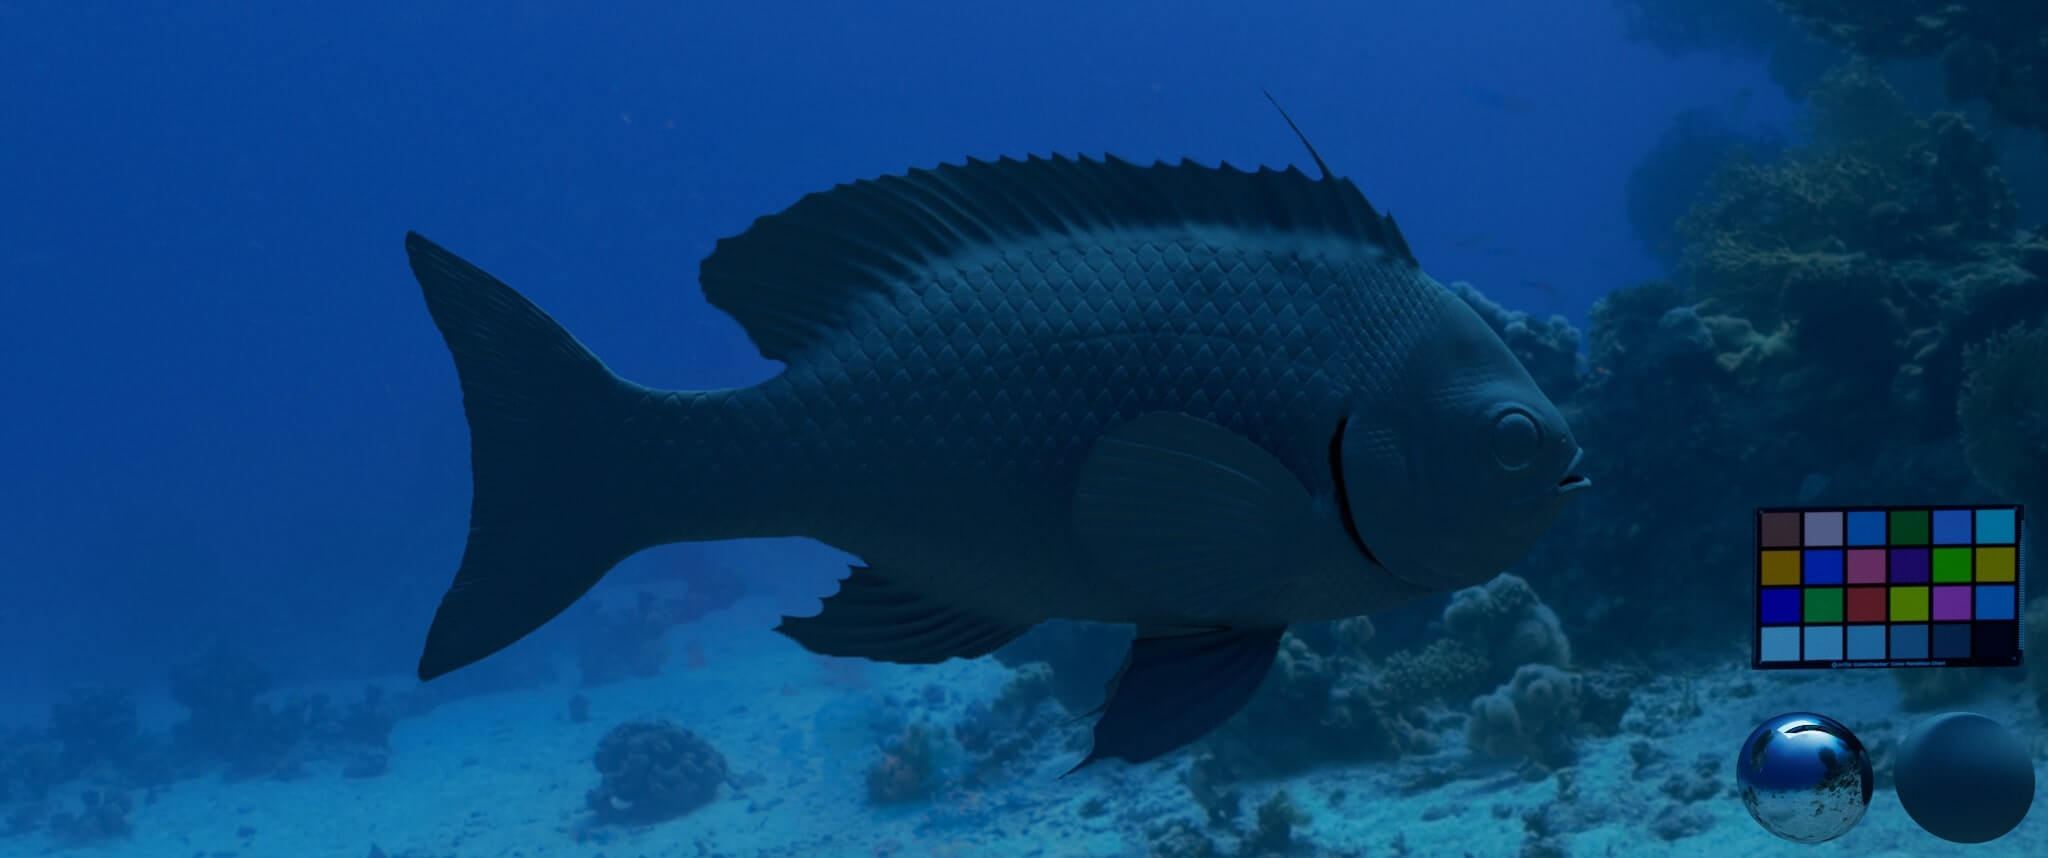
The most important aspect of this project was the references, as we don't see fish as often as we do humans, especially with the Squareback Anthias (Pseudanthias pleurotaenia) species.
A good place to find references for me were blogs written by fish enthusiasts and blogs held by aquarium staff that had this species.
After gathering as much reference I could find, I created a PureRef that had photos of the Squareback Anthias, 3D renders of fish for some retopology and sculpting references, and also some references for the lookdev. Since an important part of this project was not only the realism, but also the dreamlike aspect that was to be conveyed by the look dev.
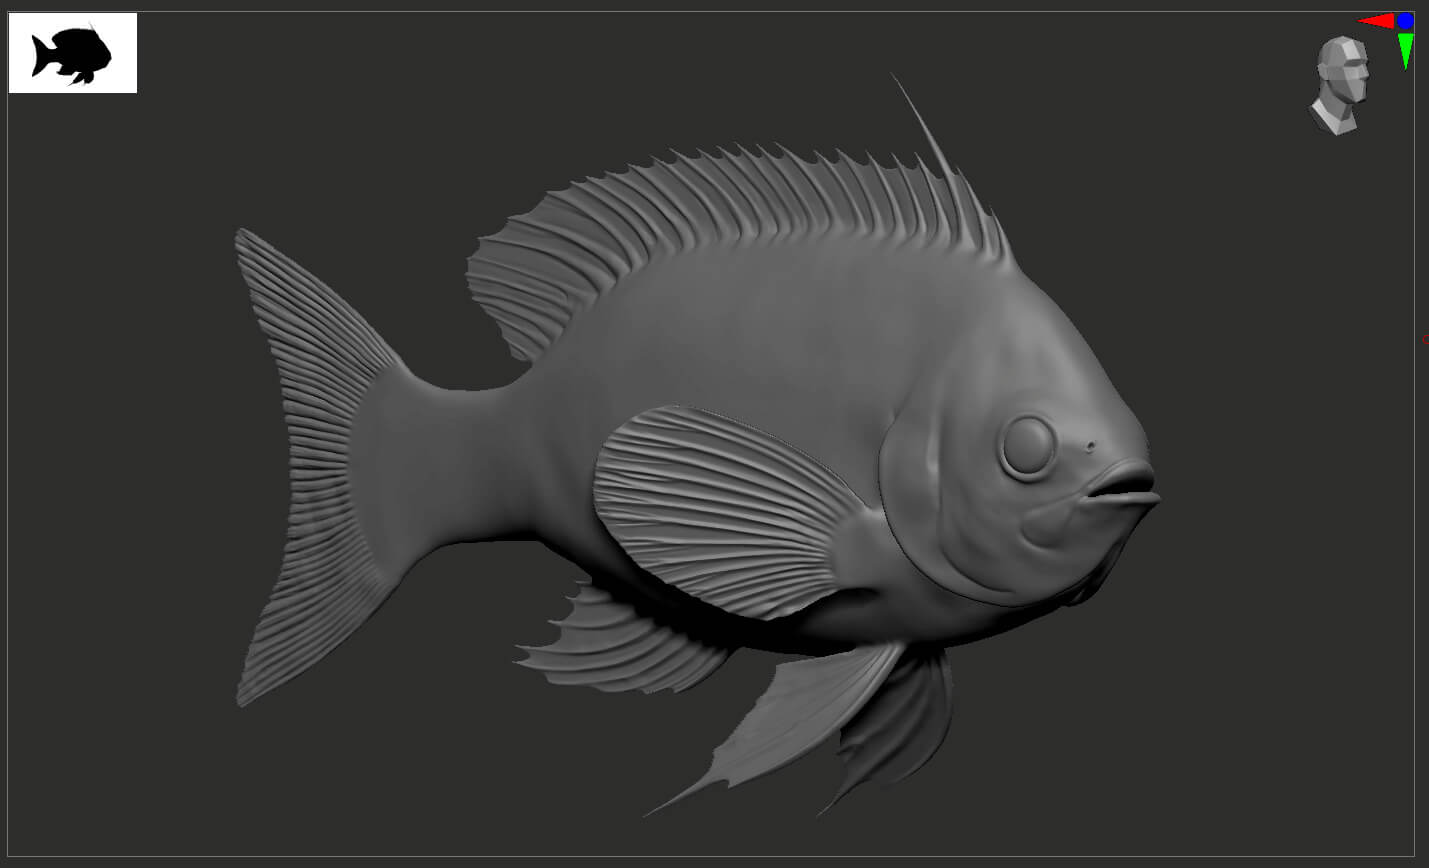
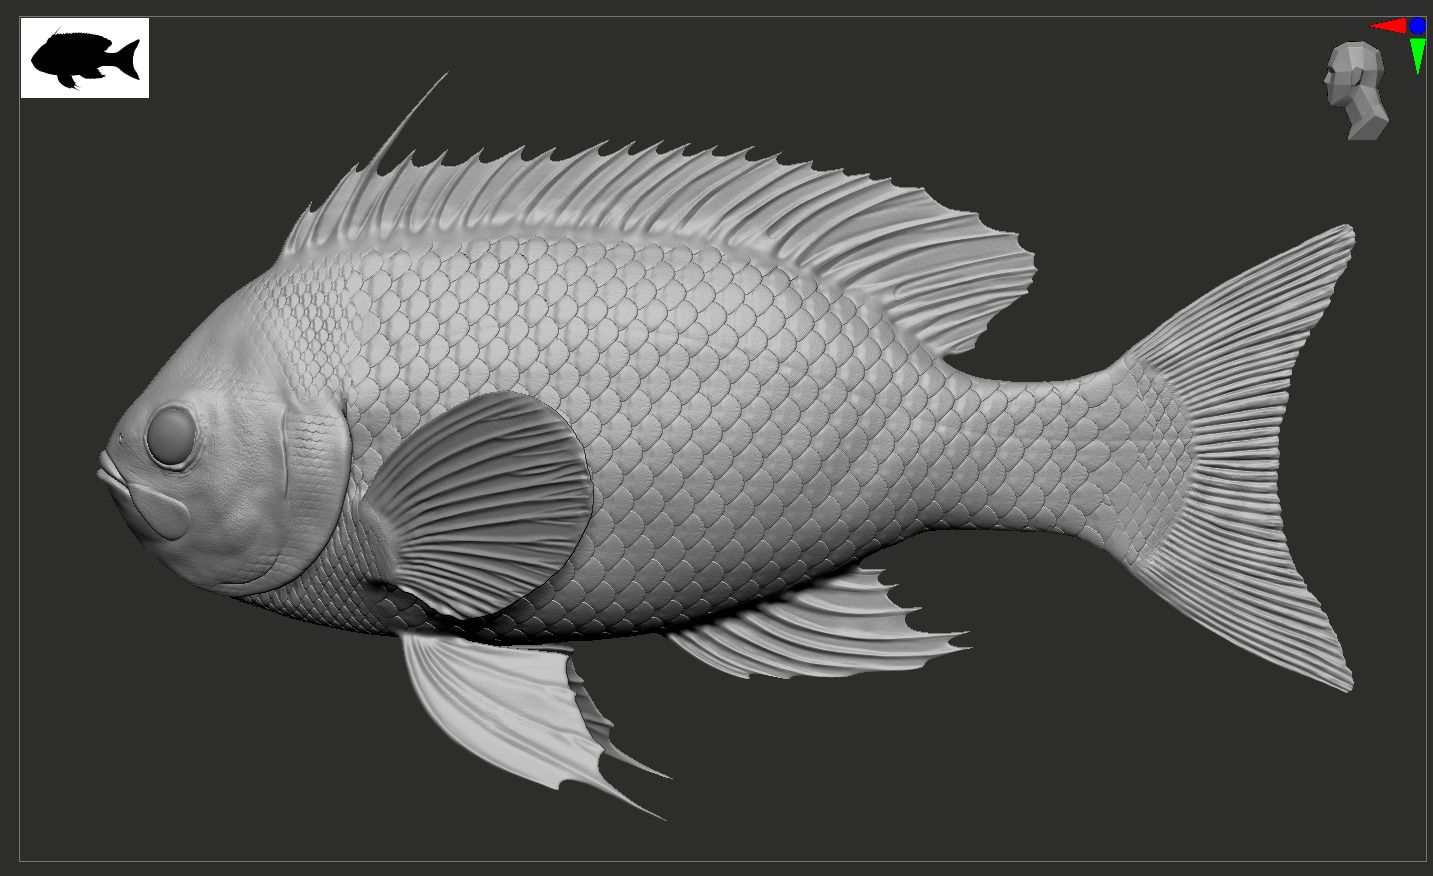
As soon as I had my references, I could start modeling my Anthias fish. I started modeling from scratch with a sphere in ZBrush, which I deformed a bit to give a basic fish shape.
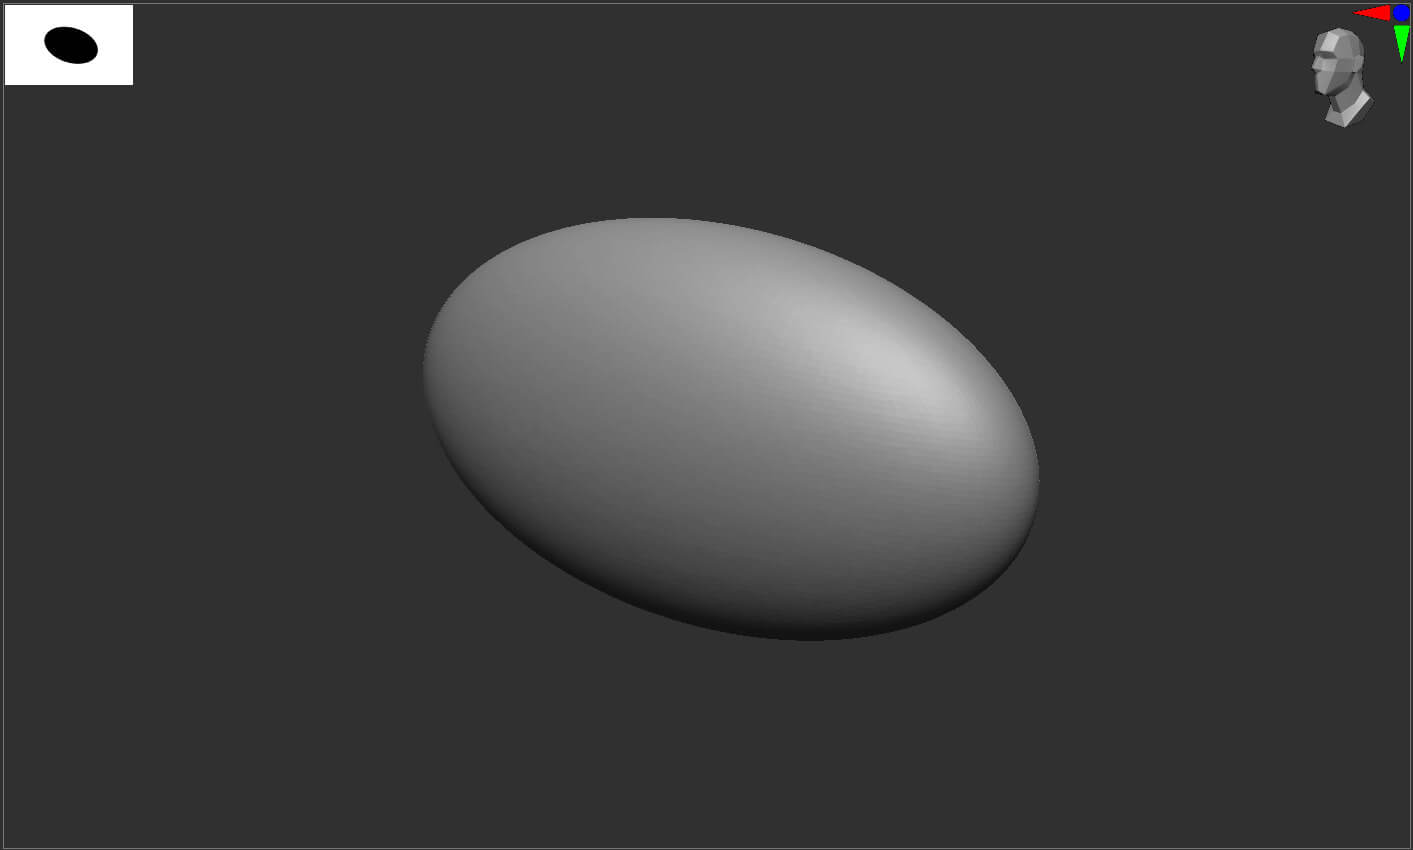
I started sculpting with this sphere. I tried to keep my base low-poly, but with enough polygons for all the needed details.
I created a base mesh for the fins in Maya with a plane and some spikes. Then, I took it into ZBrush to shape and detail it.
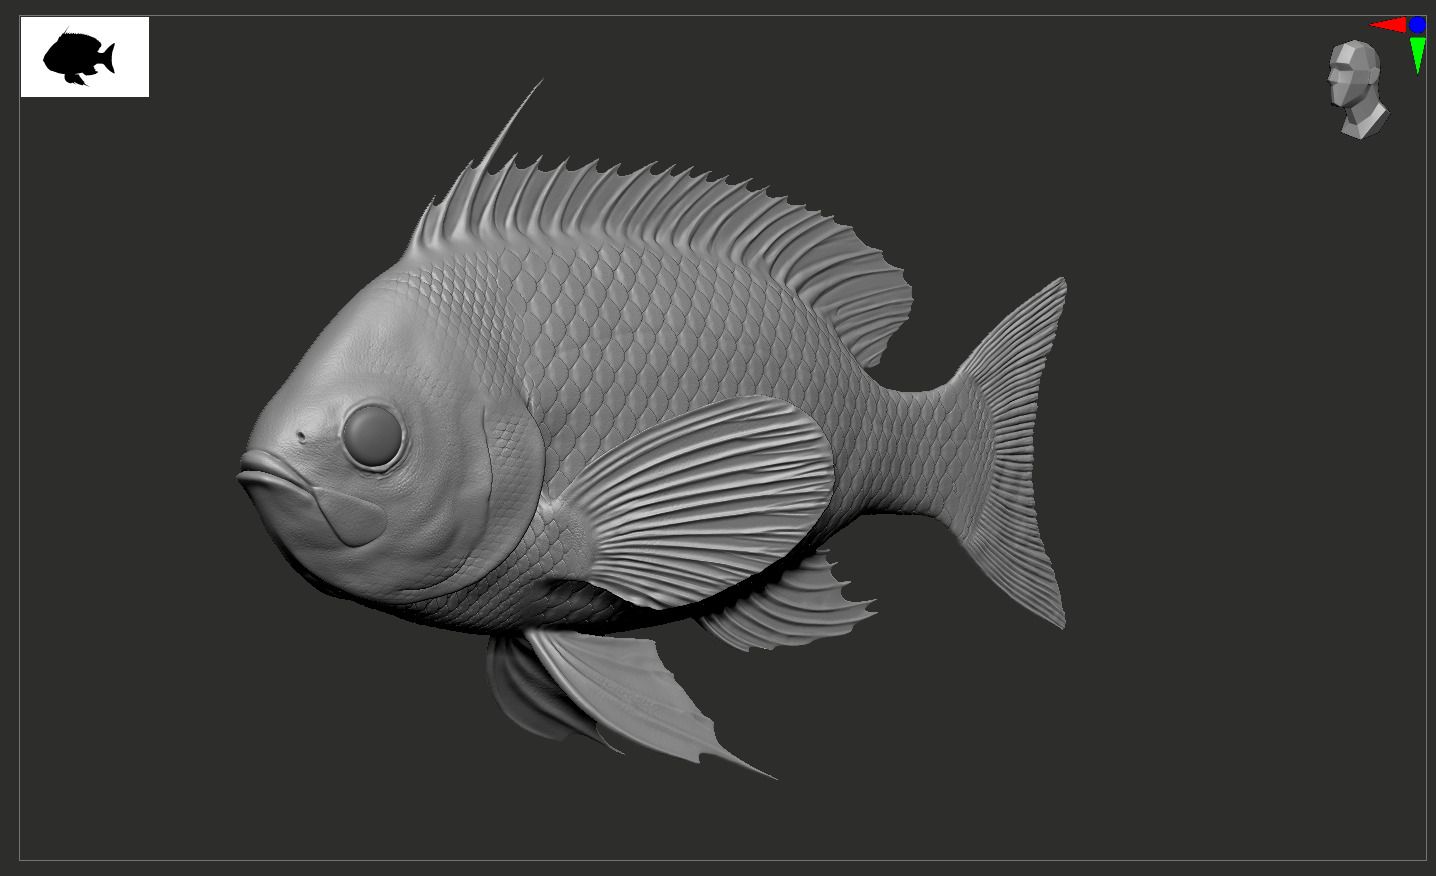
After finishing my base for my Anthias, I went into Maya and used the Quad Draw for the retopology. To keep the scenes light, I only did half of my retopology and did a symmetry at the end. For this phase, it was important to discuss the workflow with our Rigger and Animator Charles-Henri Maurin in order to ensure a topology that was coherent with the needs for the movements of the fish. After the topology was approved, I moved on to the UVs. I prefer to do retopology and UVs one after the other. I do them early in the process, to have the cleanest mesh.
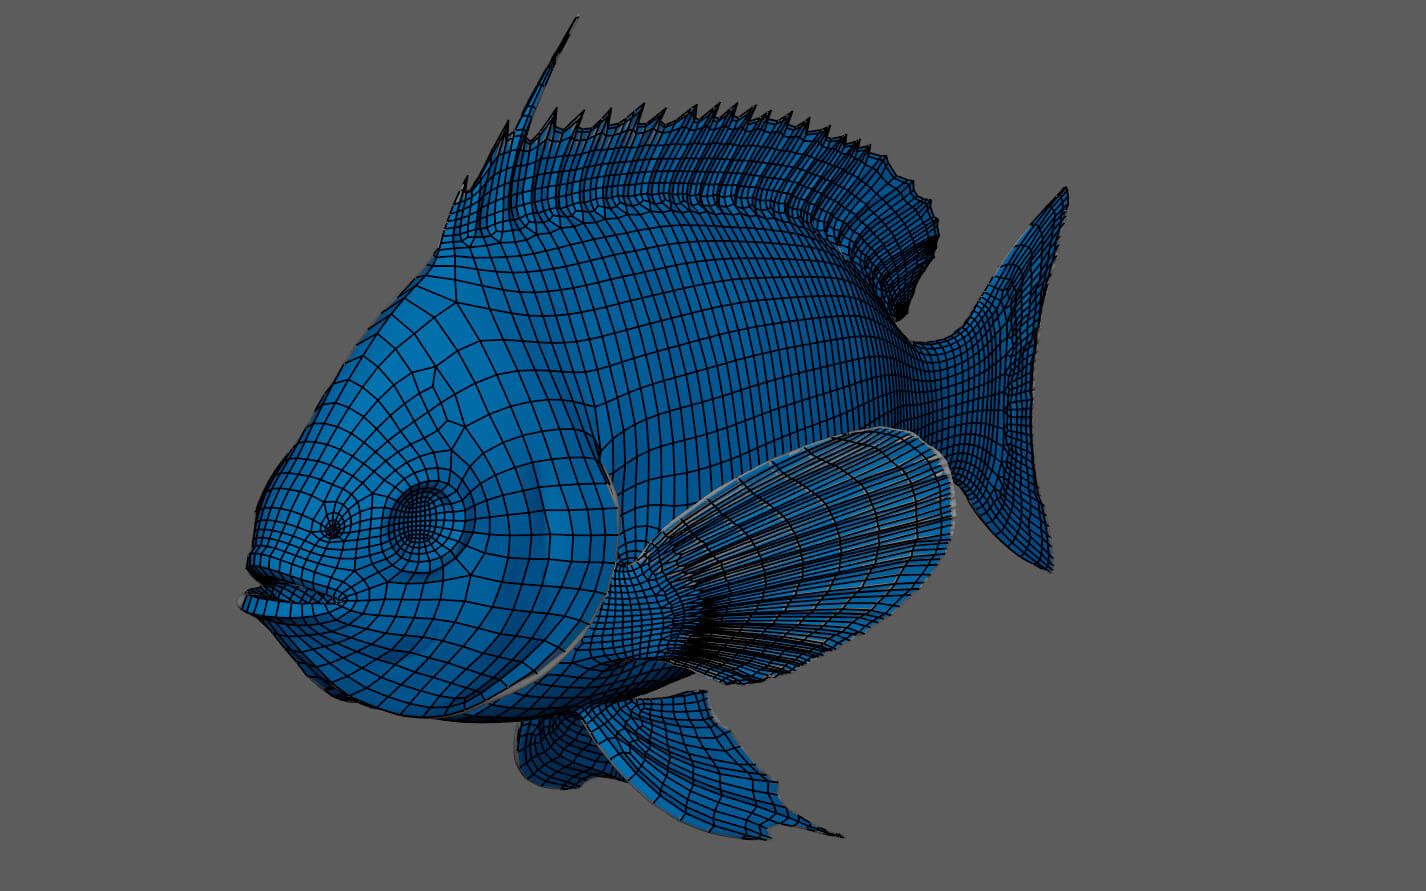
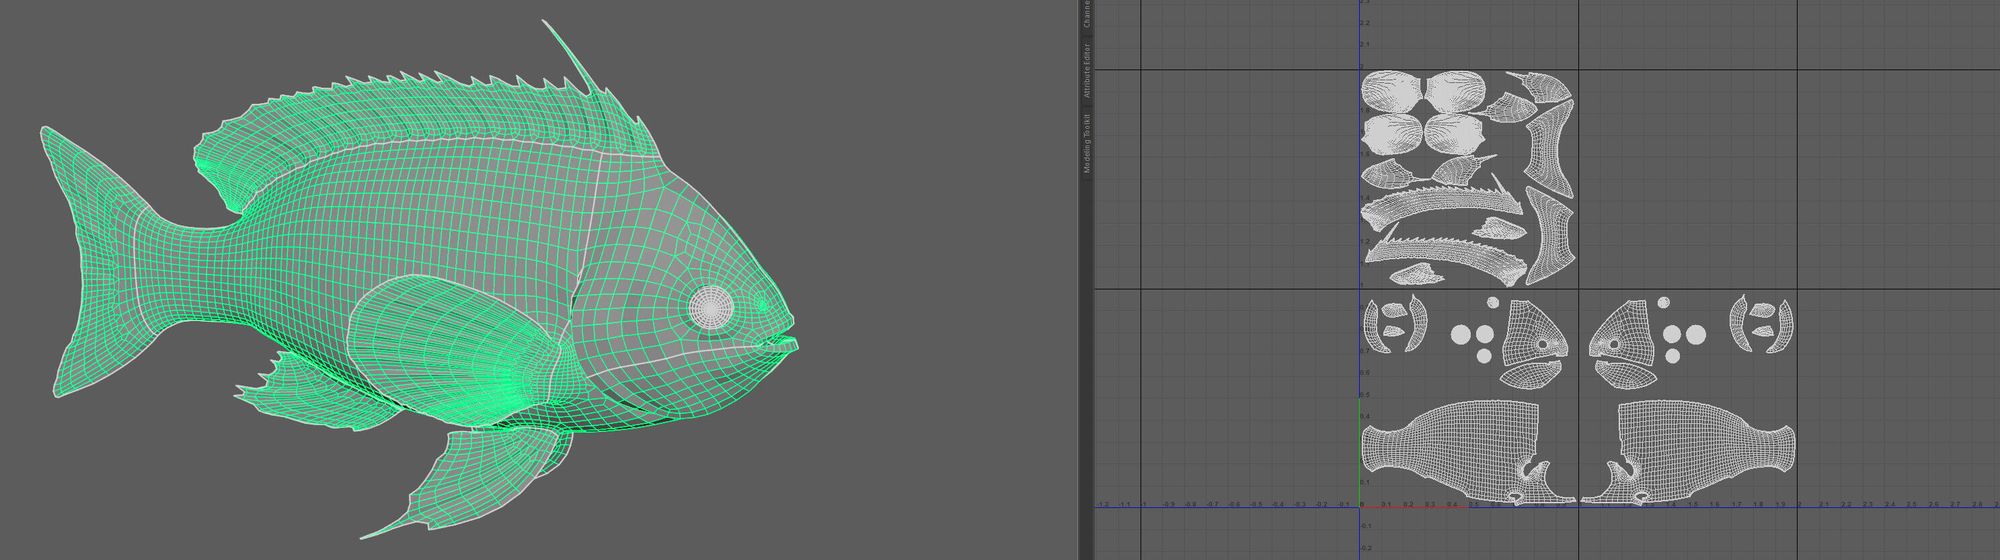
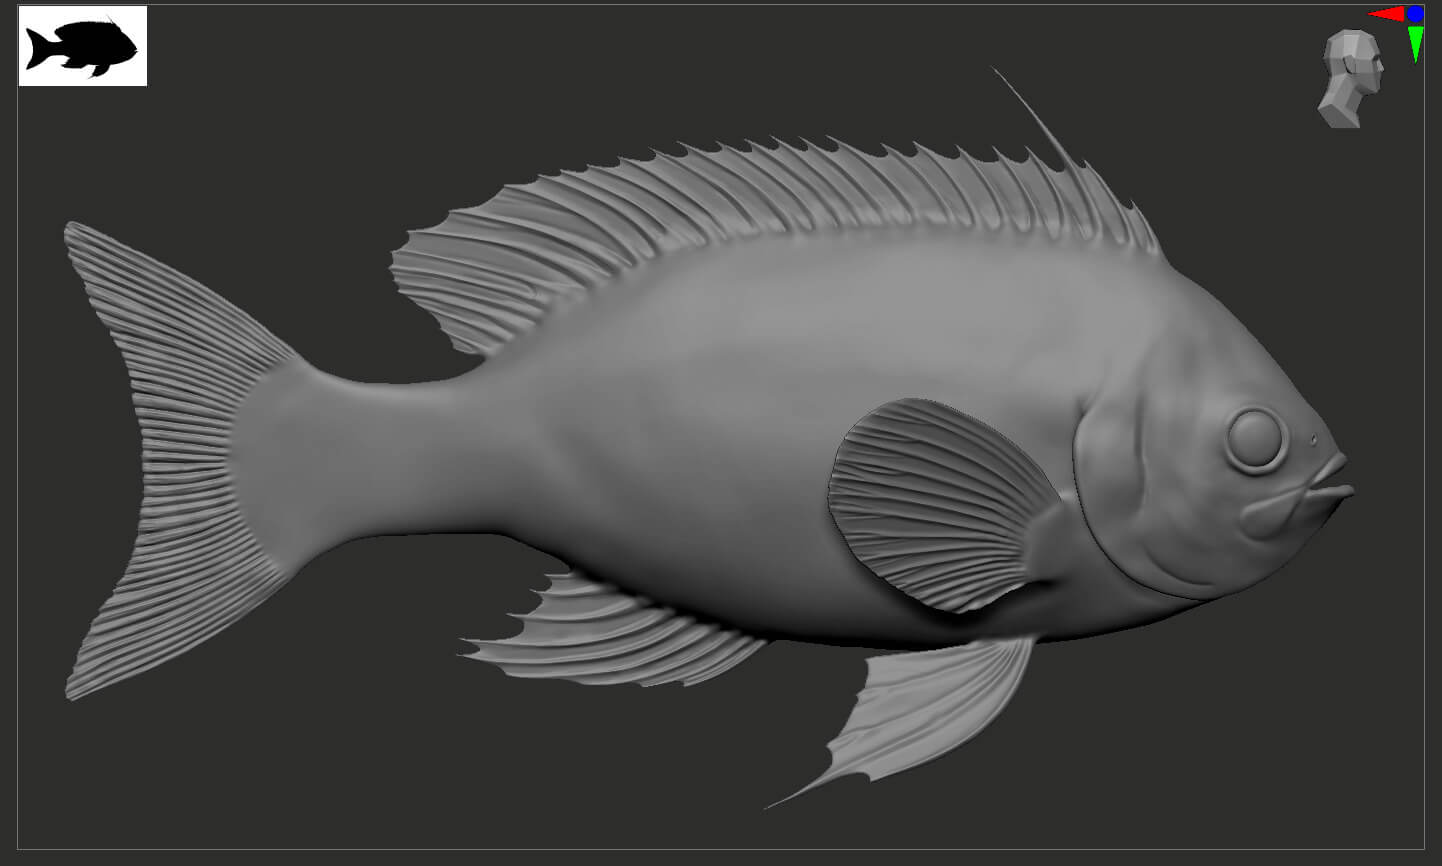
During the UV process, one thing I had to keep in mind was ensuring the body was unwrapped in a single pass, aligning it flatly and in the same direction as the scales to prevent potential issues. Following the retopology and UV mapping, I refined the mesh to create a high-poly version.
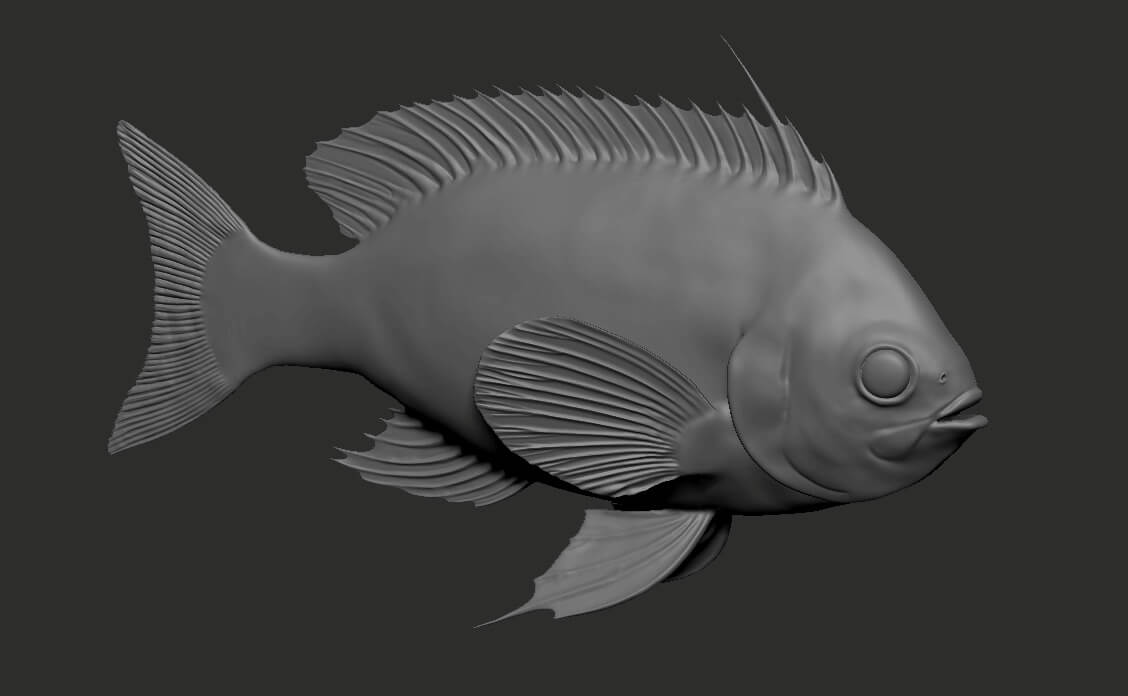
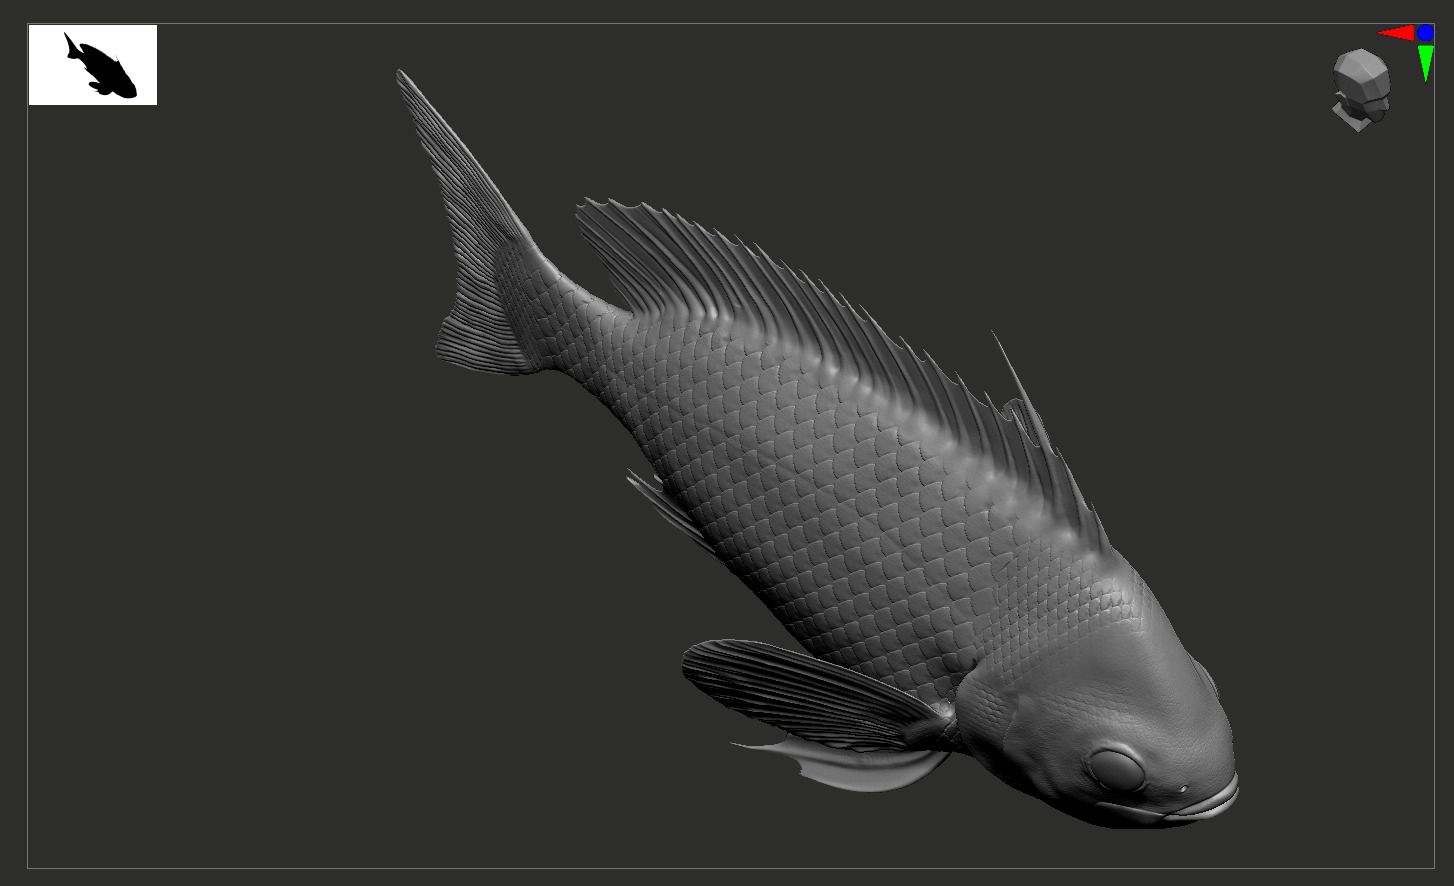
In this step, taking breaks and examining the model from a distance proved crucial to avoid overlooking mistakes that may have been made during prolonged work sessions. Additionally, I frequently sent screenshots of my work-in-progress to my phone, aiding in evaluating the silhouette and overall shape. Once satisfied with the fish model, I proceeded to work on the scales.
Using Photoshop, I crafted a scale pattern, but unsatisfied with online references, I purchased a fish for more accurate inspiration. The fishmonger, upon learning of my intentions, graciously provided cleaned scales, enriching my reference material and emphasizing the importance of authenticity in 3D work. Combining real-life references with fish pictures, I endeavored to create the most faithful representation of the species' scales.
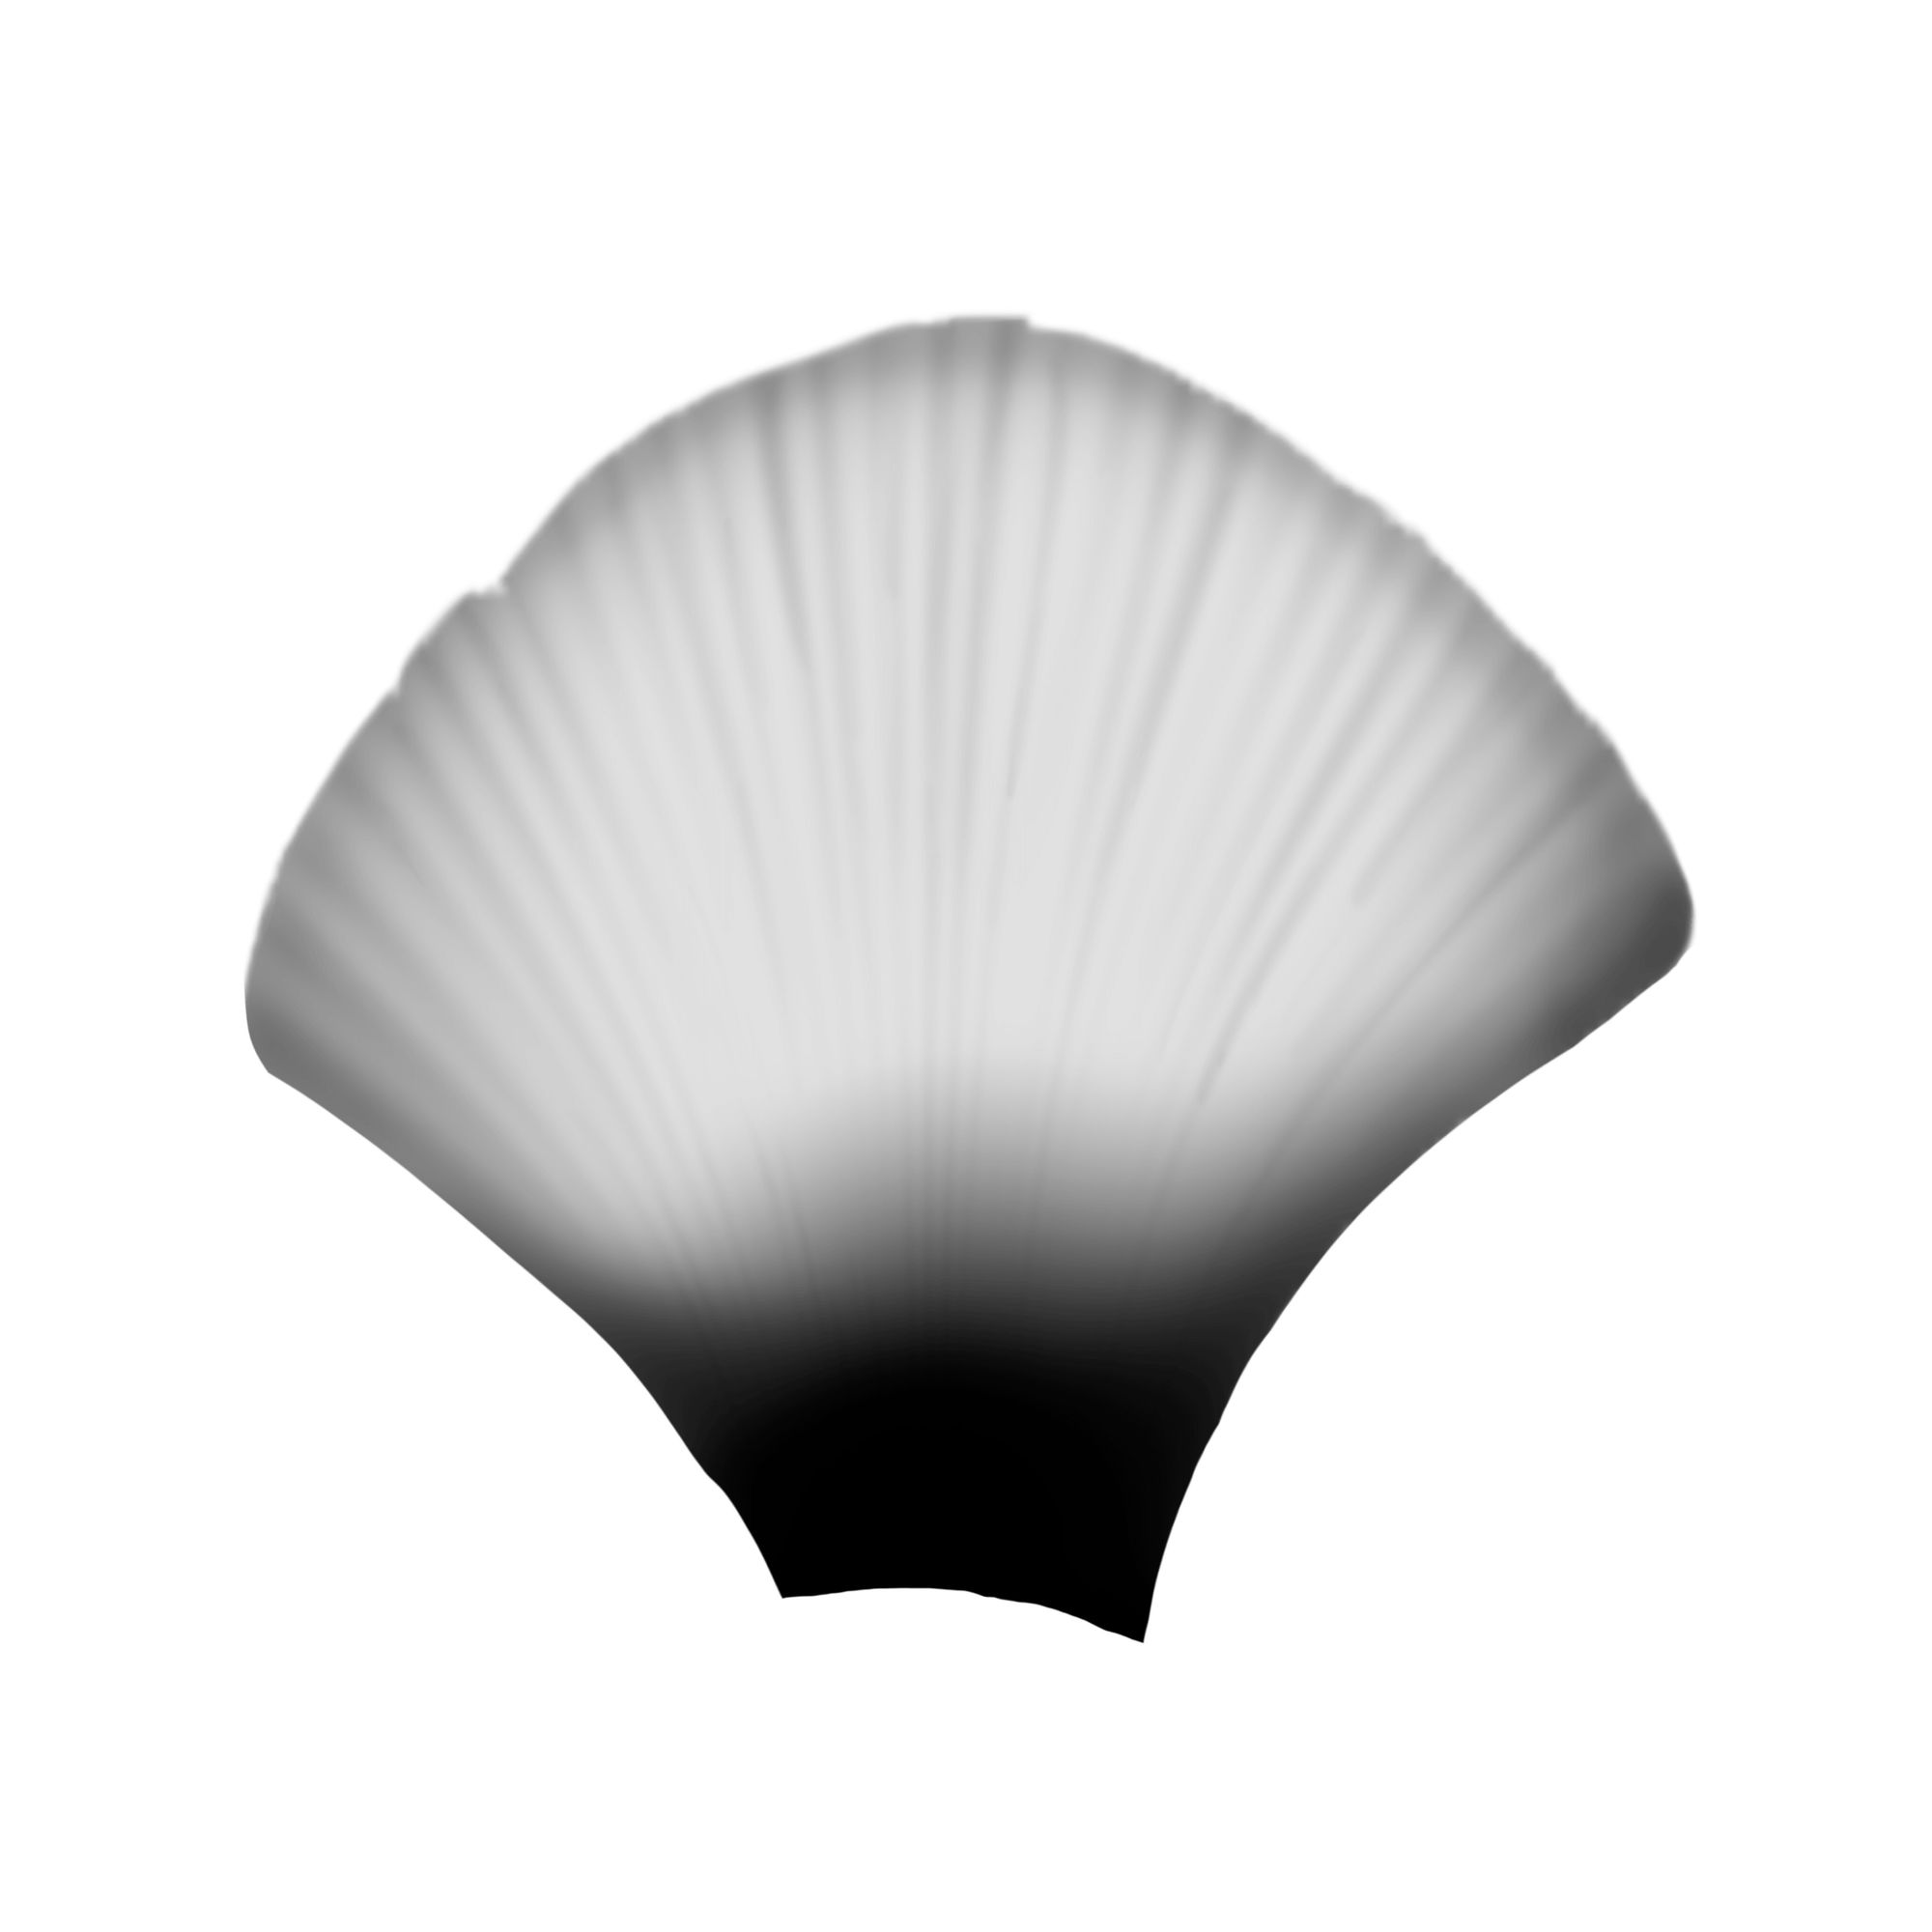
After my scale was created in Photoshop, I went on to Mari to create a procedural pattern.
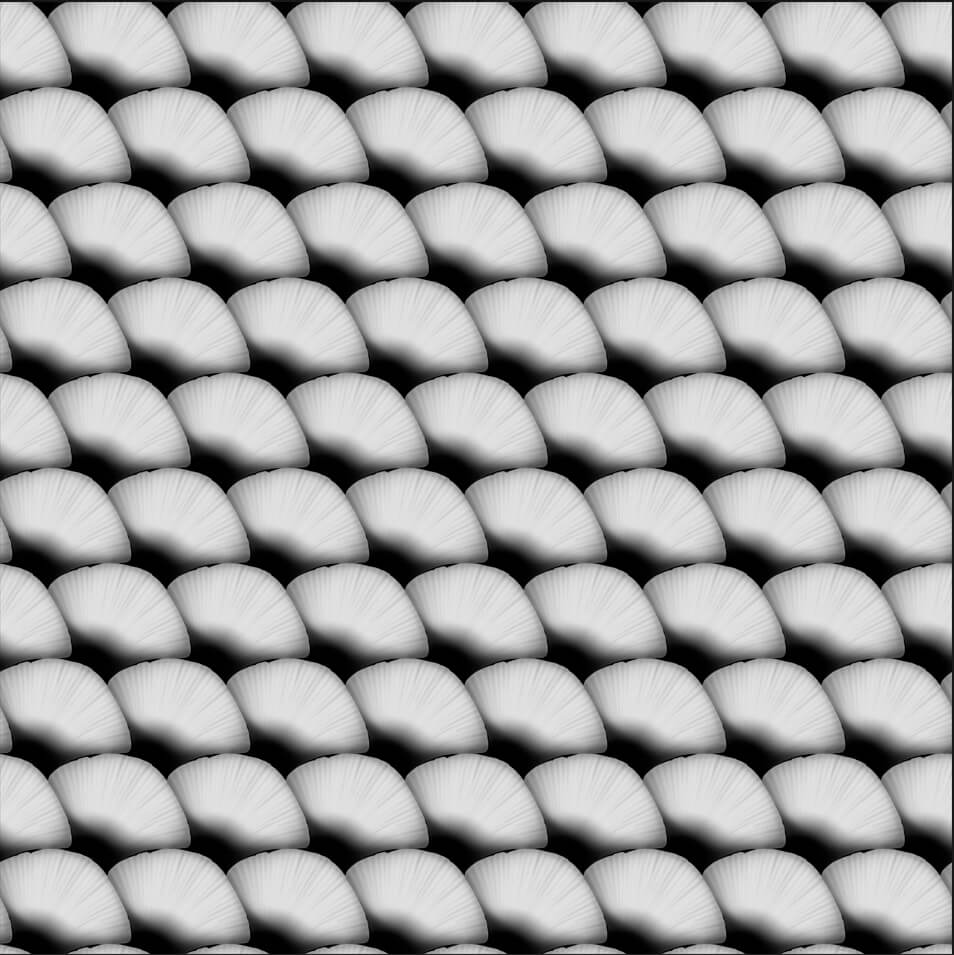
I projected the pattern into the fish body to get a texture map; the map I used in ZBrush to project what I had created in Mari and refine any parts that required more precision.
Afterwards, I used Substance 3D Designer to create a curvature map and a cavity map. Which I could change according to my needs. I then used these maps in Mari as masks for my texturing.
I did the texturing mostly by hand in Mari. I used the masks I made in Substance 3D Designer and some procedural masks following my reference.
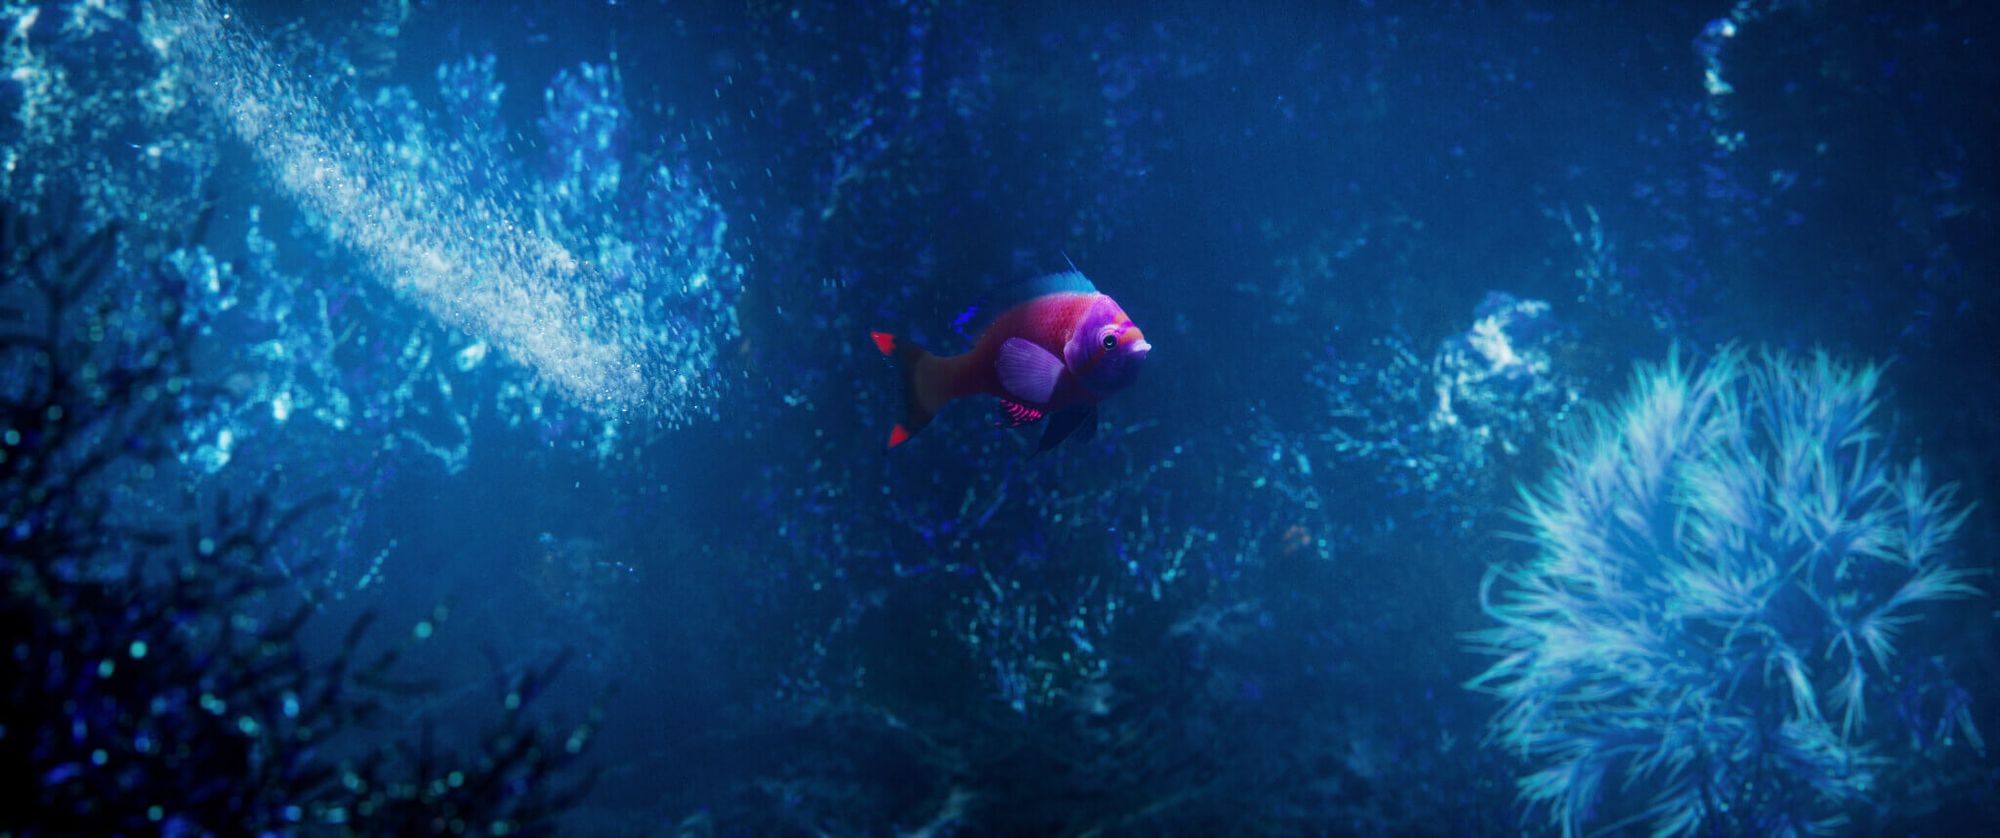
I also tried to exaggerate the colourfulness of the fish to give him a more magical feeling.
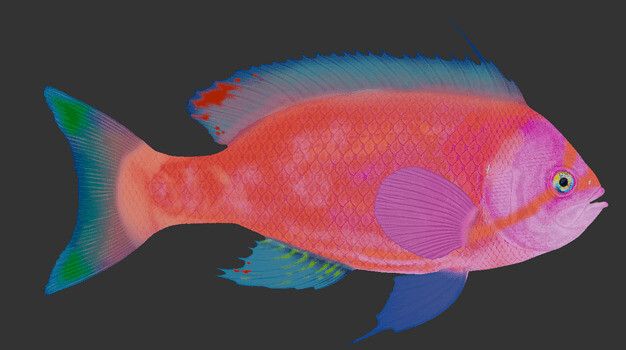
After several tests, it was decided to remove the signature white square from the scale pattern. In distant shots, it might have appeared as a rendering issue rather than a deliberate choice. With my texturing maps completed, I used Maya and V-Ray to finalise the fish and perform the Look Dev.
I conducted numerous tests to strike the right balance between realism and magic, aiming for believability. Balancing the specular was challenging; while underwater, the fish shouldn't have any specular highlights, but without them, the 3D render looked flat. To counter this, I opted to add a subtle amount of specular to enhance depth.
After achieving the desired balance, I applied a slight coat with colour variation using the Thin Film code in the OSL Shader in V-Ray, complementing the existing look dev. Additionally, I incorporated luminescent parts on the fish's body to align with the darker lighting in our film and match the overall aesthetic.
And here are some images of the Anthias Fish rendered in the movie sequences. I had the chance to make this fish for the Lumi short film alongside an amazing team: Élia Paoli (Environment Artist, DMP), Charles-Henri Maurin (Layout, Rig, Animation), Elina Roger (FX Artist), Lola Lemuet (Compositing Artist), Maiwen Sache (FX Artist) et Radhika Moghe (Compositing Artist).

Reach out to Alexandra via her Rookies profile here.