
Hello, my name is Sophia Eng, and I’m a 2D illustrator and concept artist from Singapore. I’ve always enjoyed taking photos of sceneries, and I was exceptionally excited when the chance came for me to create my interpretation of environment concepts. Hence, I would like to share with everyone my illustration workflow, and hopefully, it’ll be useful to you when you’re creating your environments.
Planning
My number one rule is that you should never start a project without proper planning and so Firstly, pick a topic for your work. You could be inspired by your favourite video game, movie or even just from something you read and you want to visualize it. After setting the theme, you can start looking for references! References are extremely useful for artists who are just starting out and do not have a strong visual library yet.
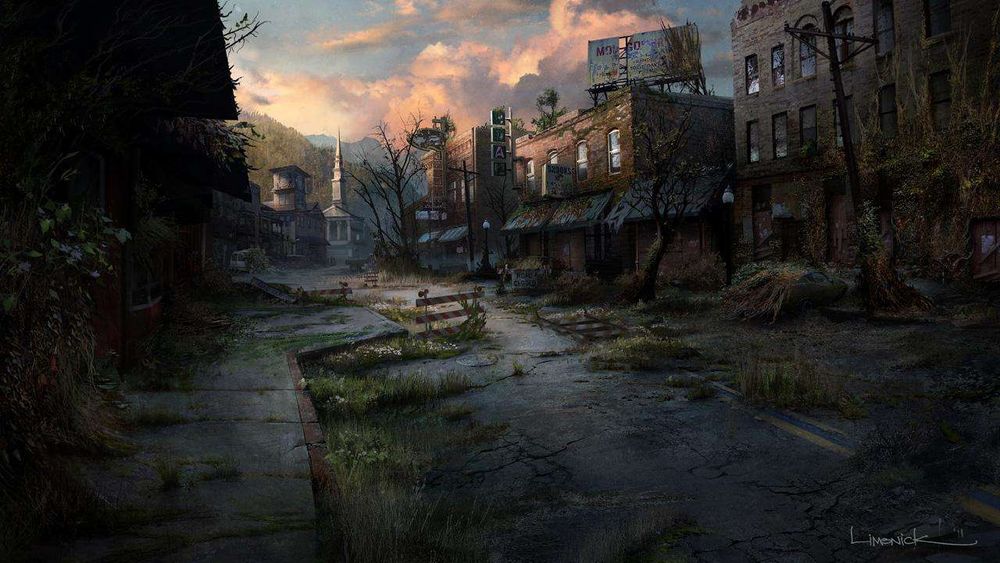
In my case, the theme was to create a hazy apocalyptic city set probably in the near future, and these are the two main references I used while working on my project.
My number one rule is that you should never start a project without proper planning.
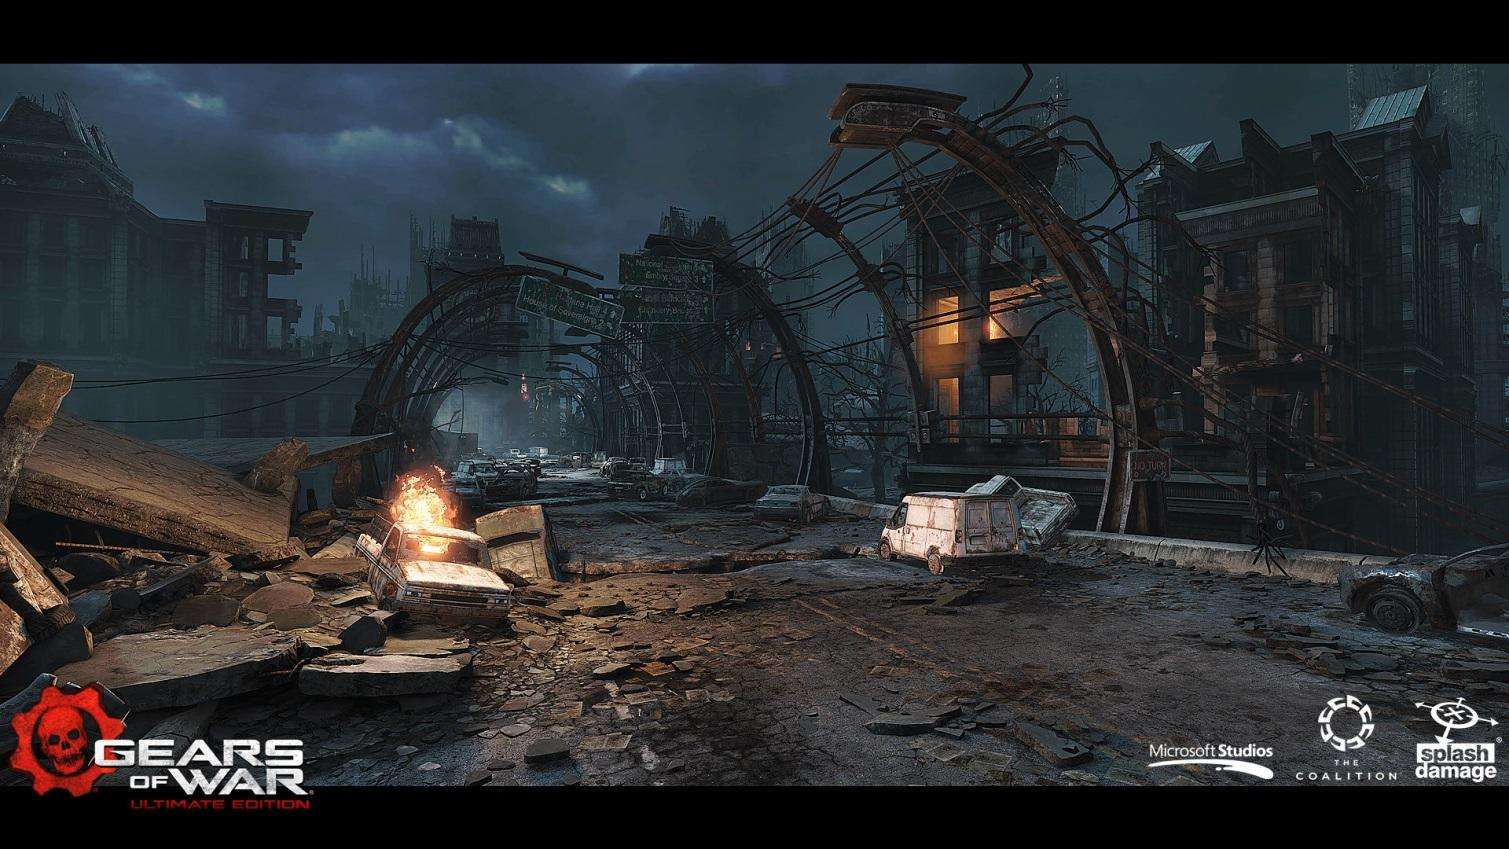
Gears of War environment concept by Ben Cottage

Last of Us environment concept by Aaron Limonick
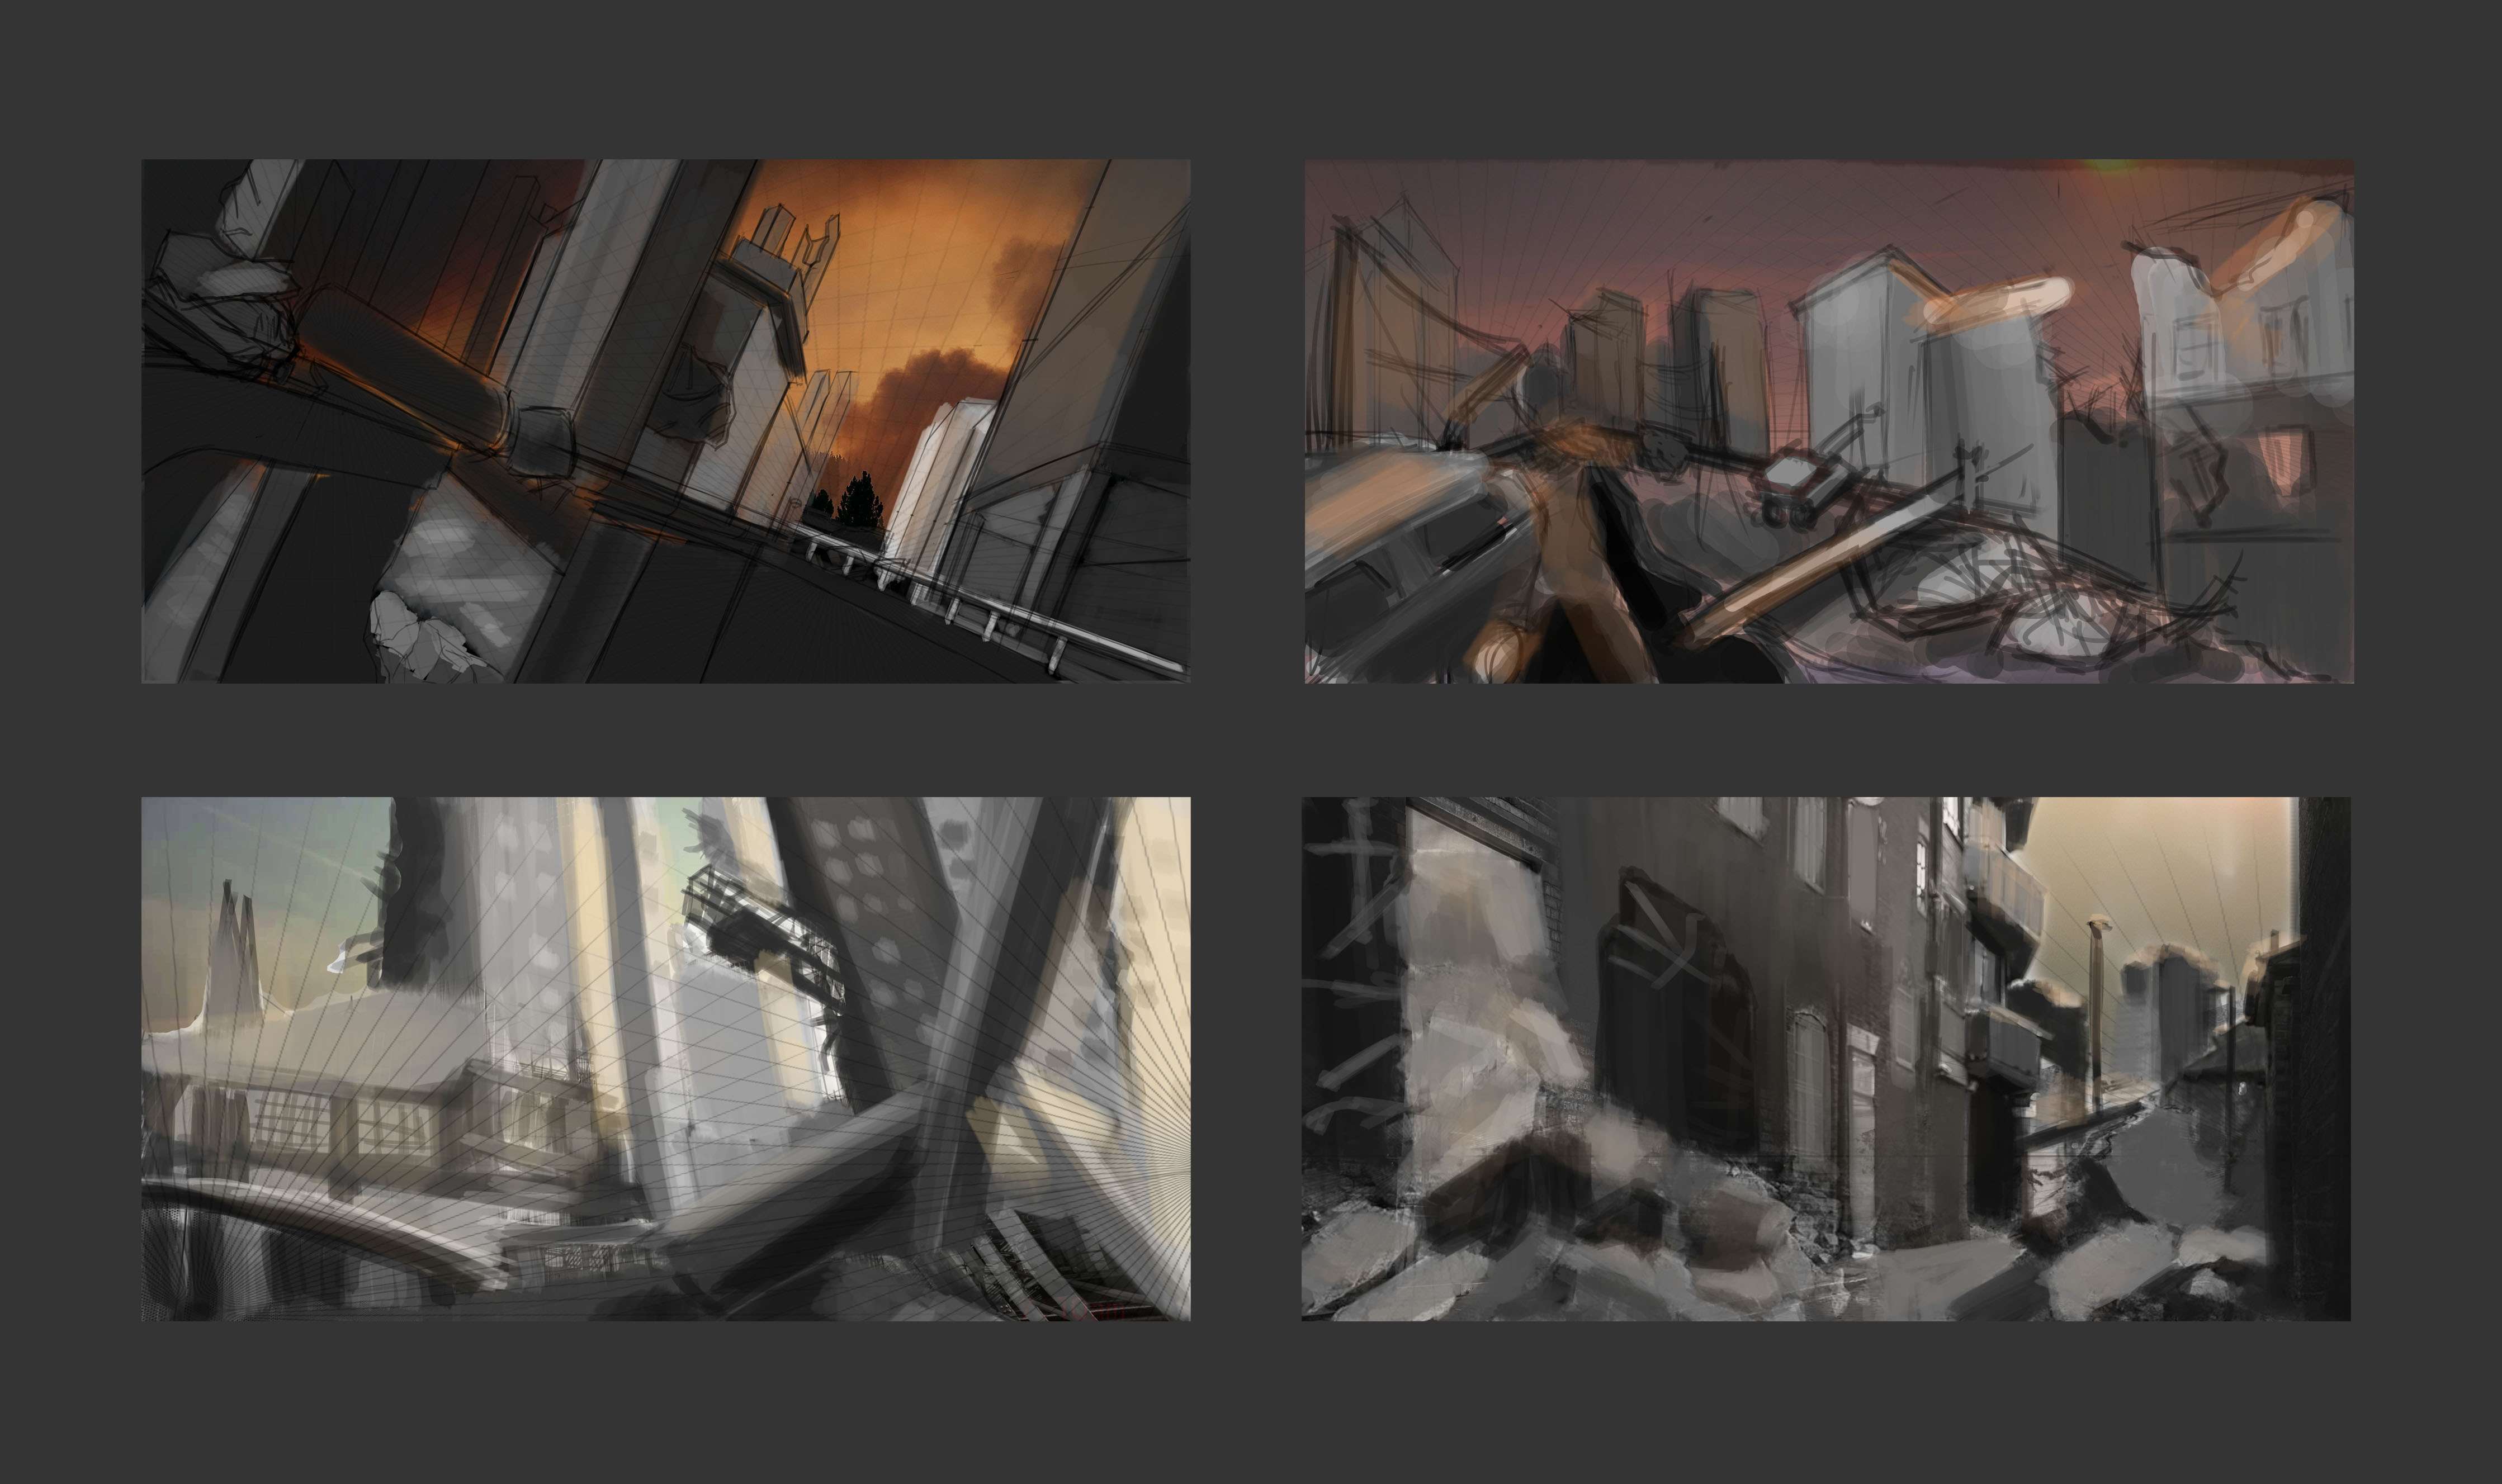
After you’re done with looking for references, you can move on to the next step, which is to create thumbnails for the finalized piece. I especially enjoy working on this process because it gives me the chance to discover interesting perspective and lighting setups.
Matte painting process
After going through the thumbnails, I decided to work on the first one you see above, because the shot had an interesting perspective that allowed me to show the entire street in ruins and also, the tilted angle created a sense of danger and instability. However, it was difficult for me to plot out the exact perspective points at this angle manually and so I decided to use Autodesk Maya to create an accurate blocking.
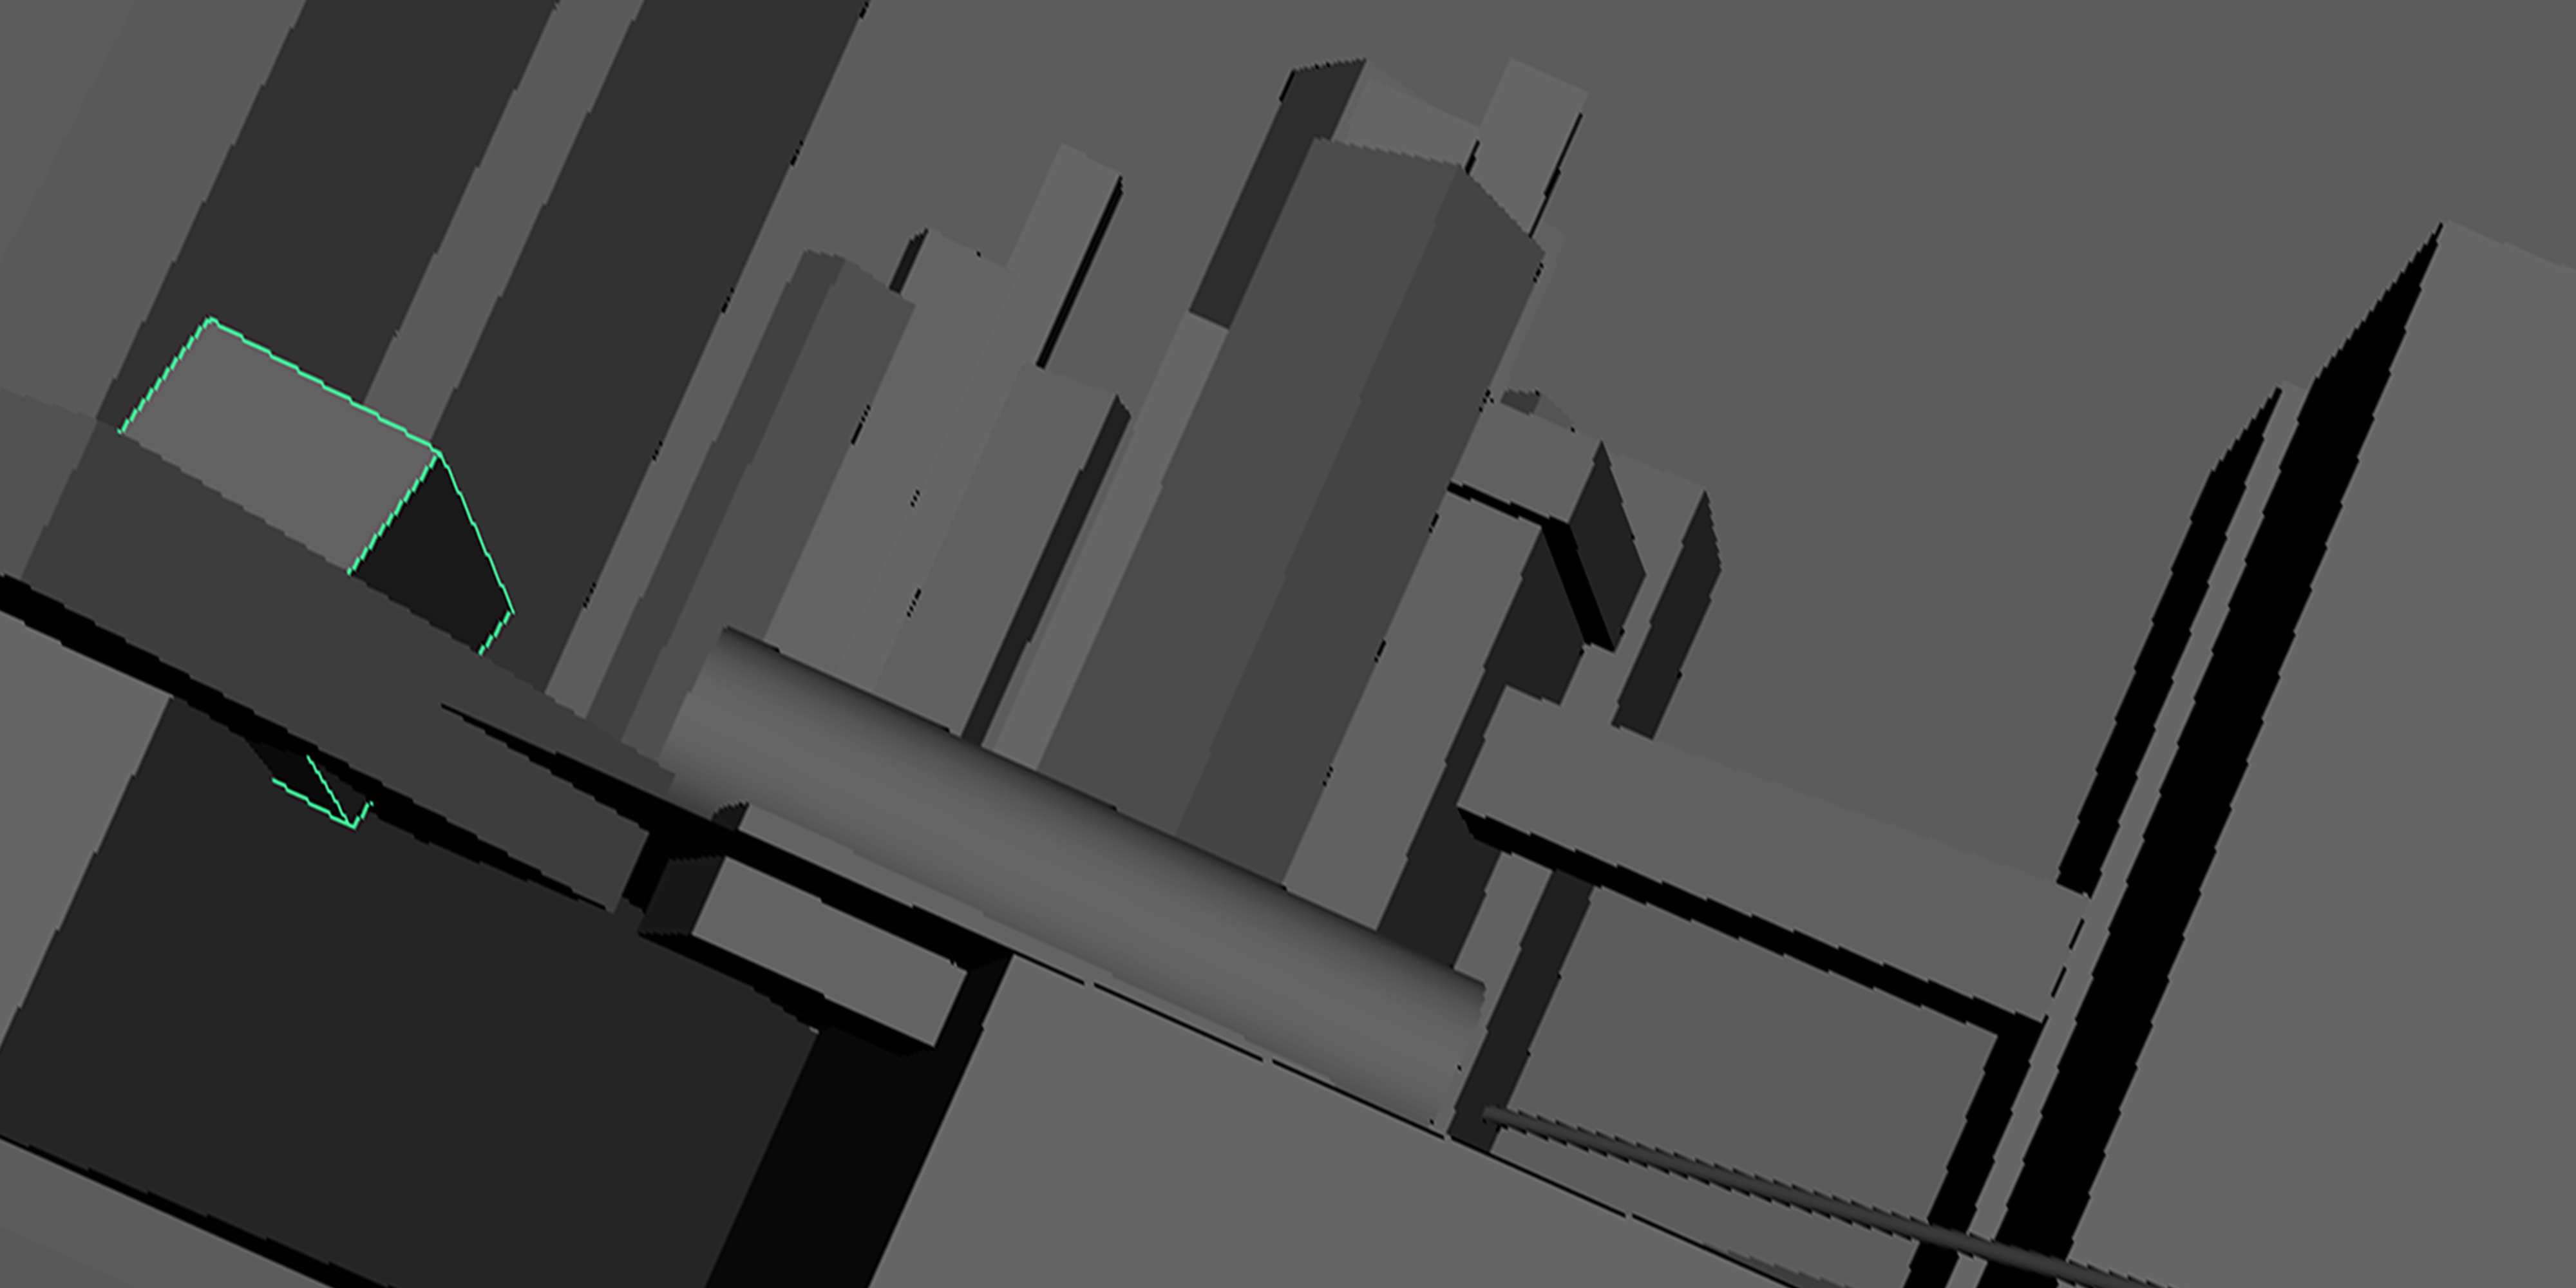
3D blocking
As you can see from the picture, the 3D blocking is just a rough guide to ensure that the perspective of your works is accurate. It does not require you to create all the intricate details because you will be overlaying photos on top of this layer in Adobe Photoshop.
Always start with the big picture before going into the details
Initial stage
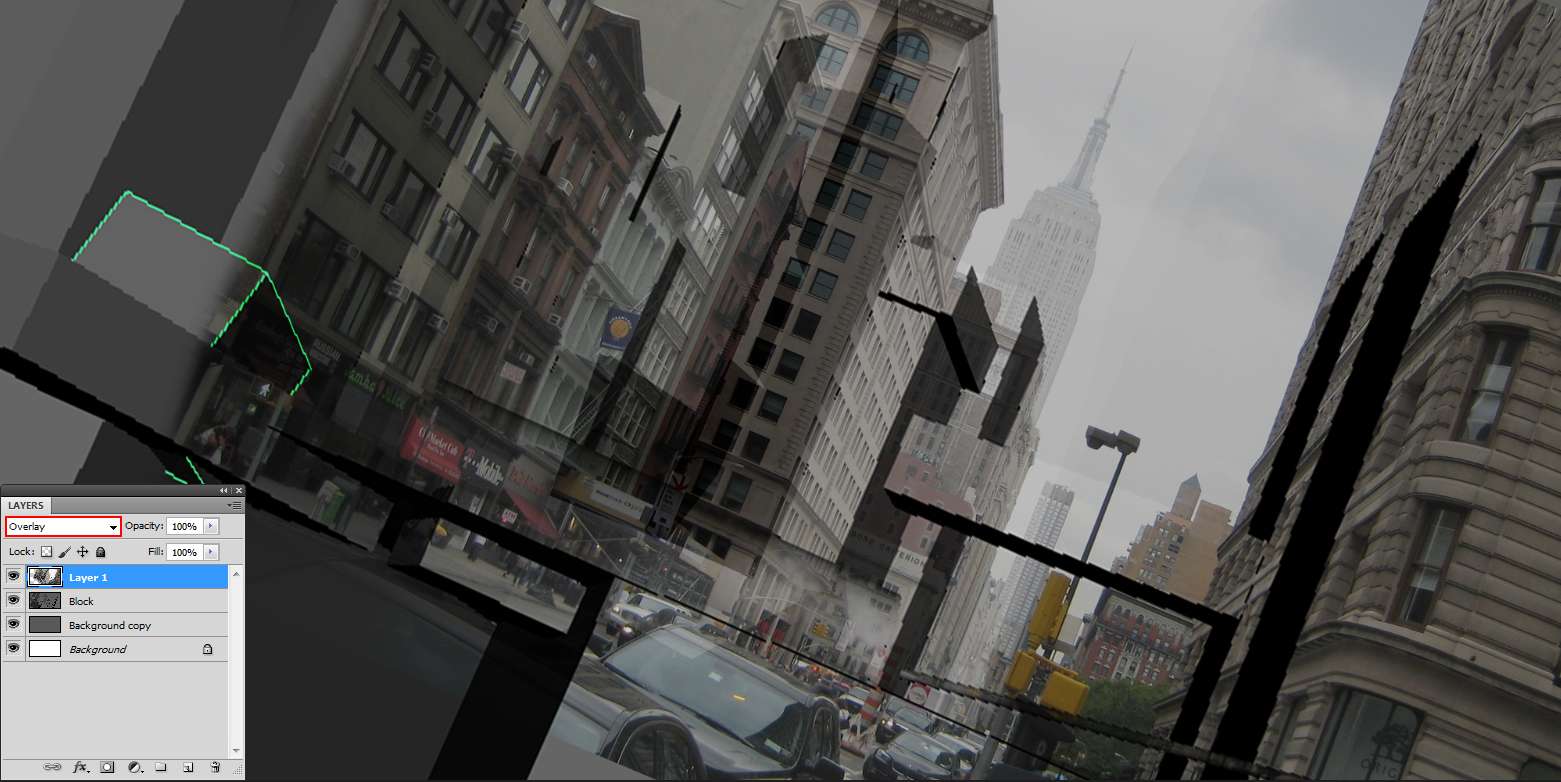
Always start with the big picture before going into the details. Hence, the first image I used was to establish how the outcome of the streets would look. And to help with the process, you can always play around with the blending modes in Photoshop to create the perfect effect for the photos.
Here’s a help link from Adobe to explain all the various blending modes in detail. https://helpx.adobe.com/photoshop/using/blending-modes.html
Background with details
After finalizing the overall outlook of the streets, I then moved on to adding the features such as the damaged buildings, vehicles and overgrown vegetation to give the work a more apocalyptic feel.
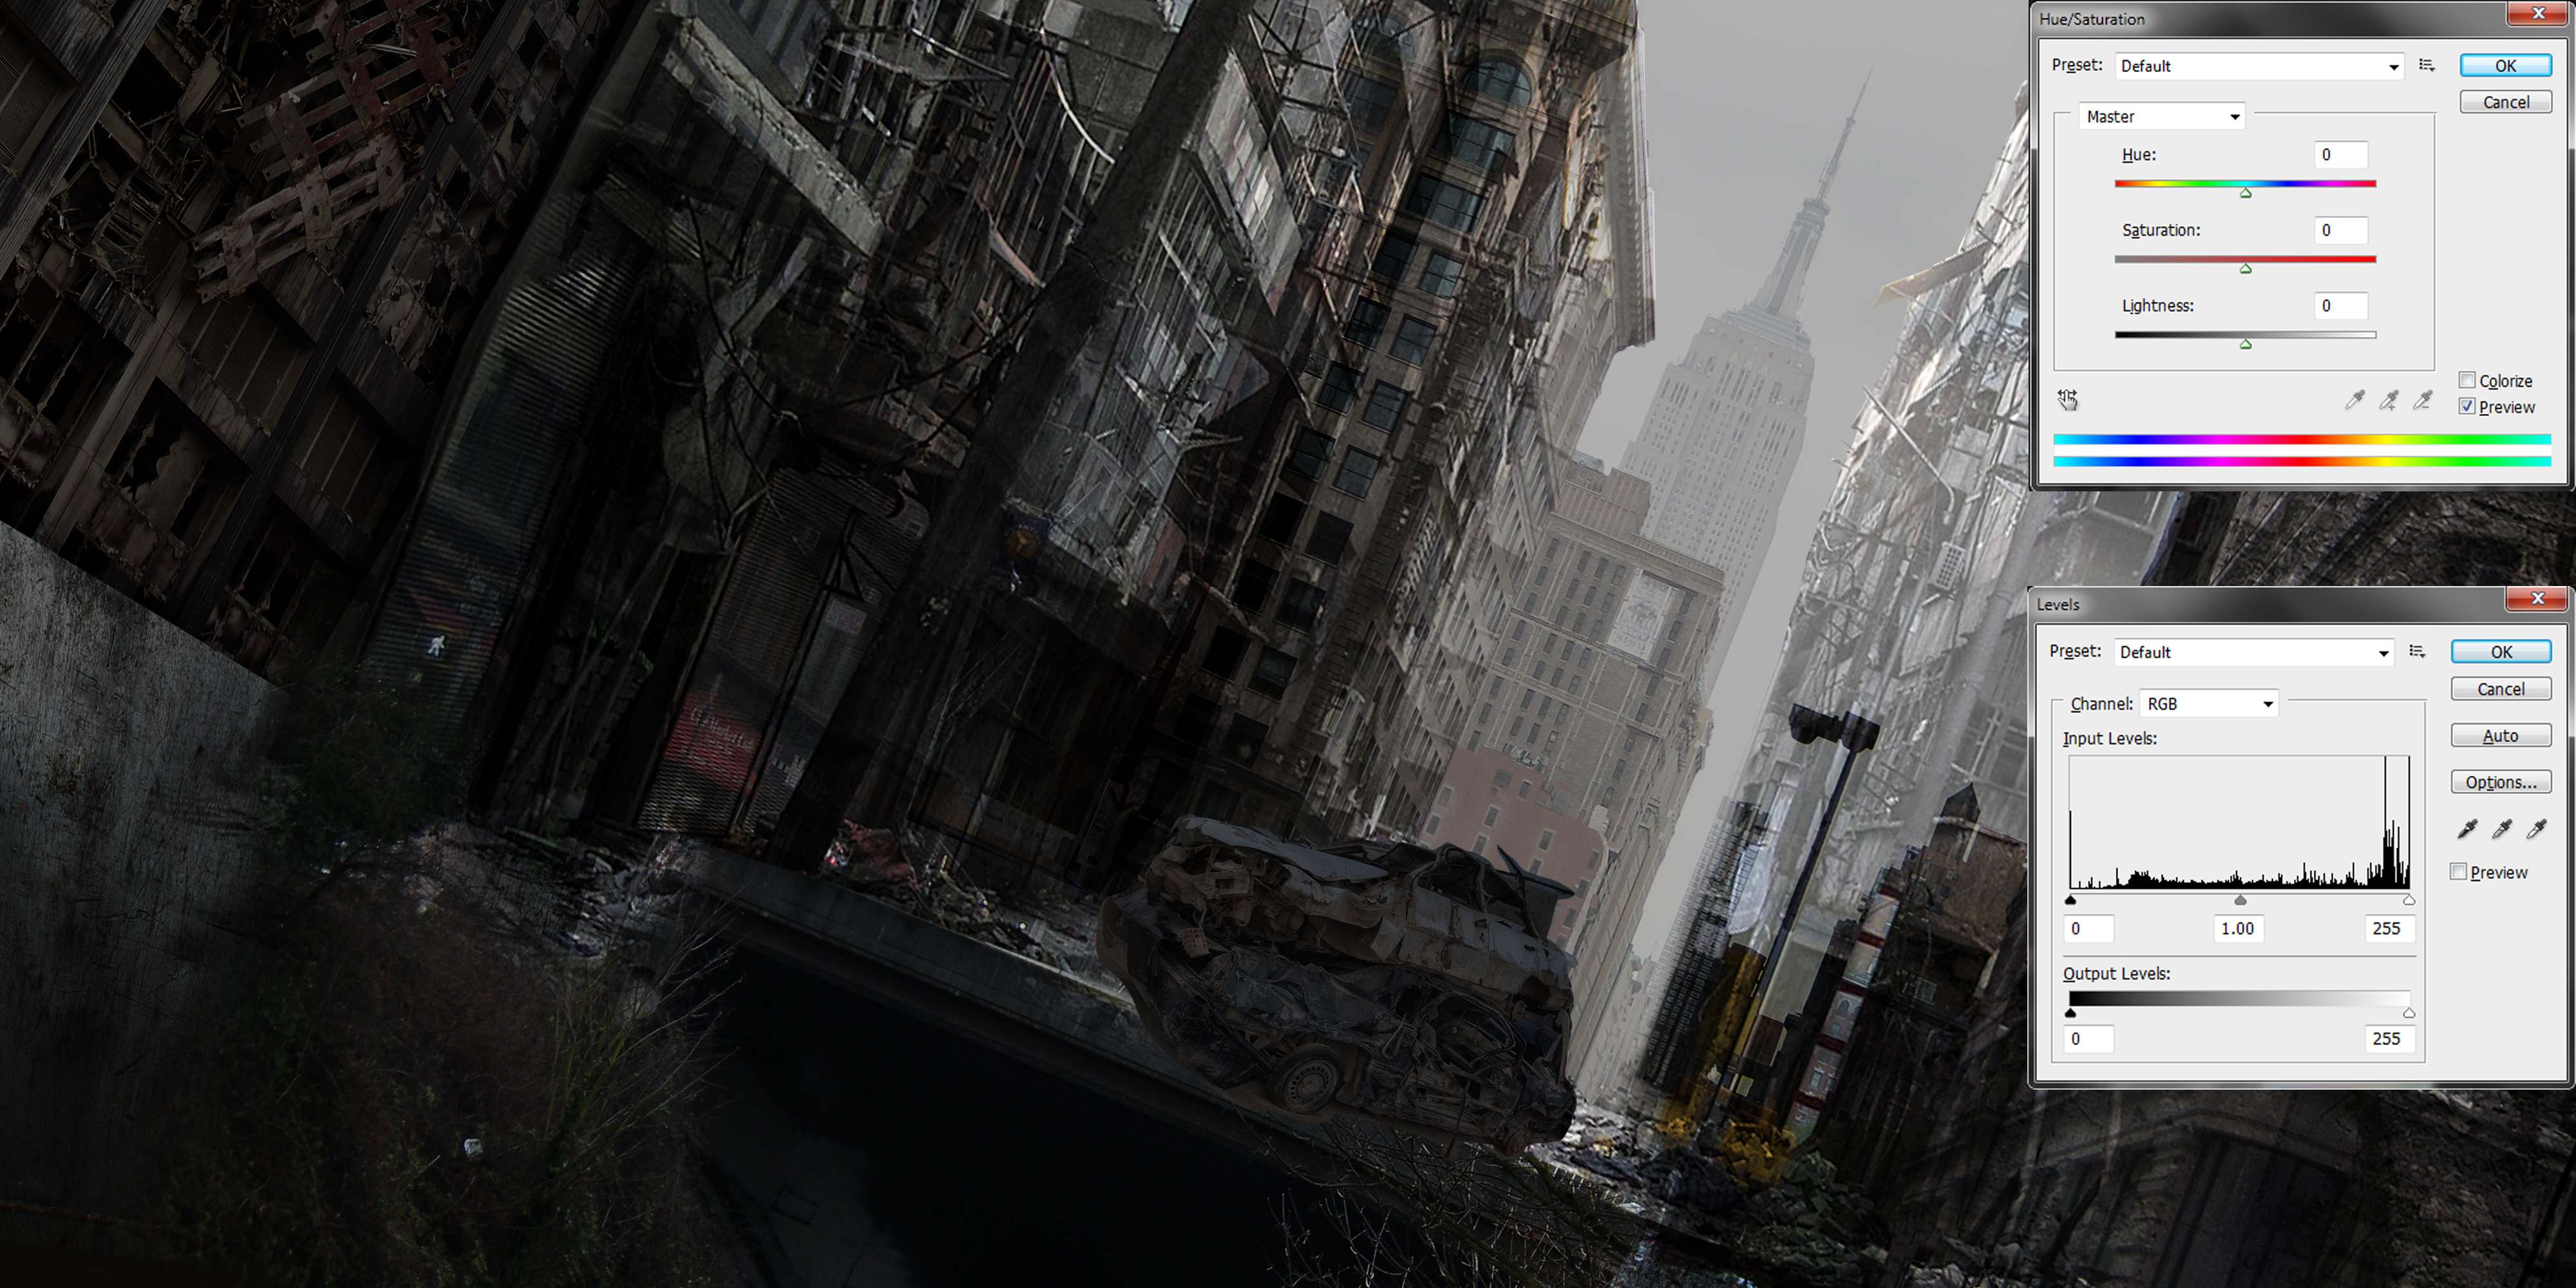
At the initial stage, the whole photo would look like it does not blend well together; however, this can be solved with the help of tools such as the hue/saturation and the levels options.
After tweaking with the hue/saturation and levels option
This process is the most crucial part of the workflow, and it takes up a considerable amount of time because it is not easy to coordinate images taken from various photos and try to make it blend well within a single image. Another important thing to take note of while creating environment concepts is the idea of the depth of field.
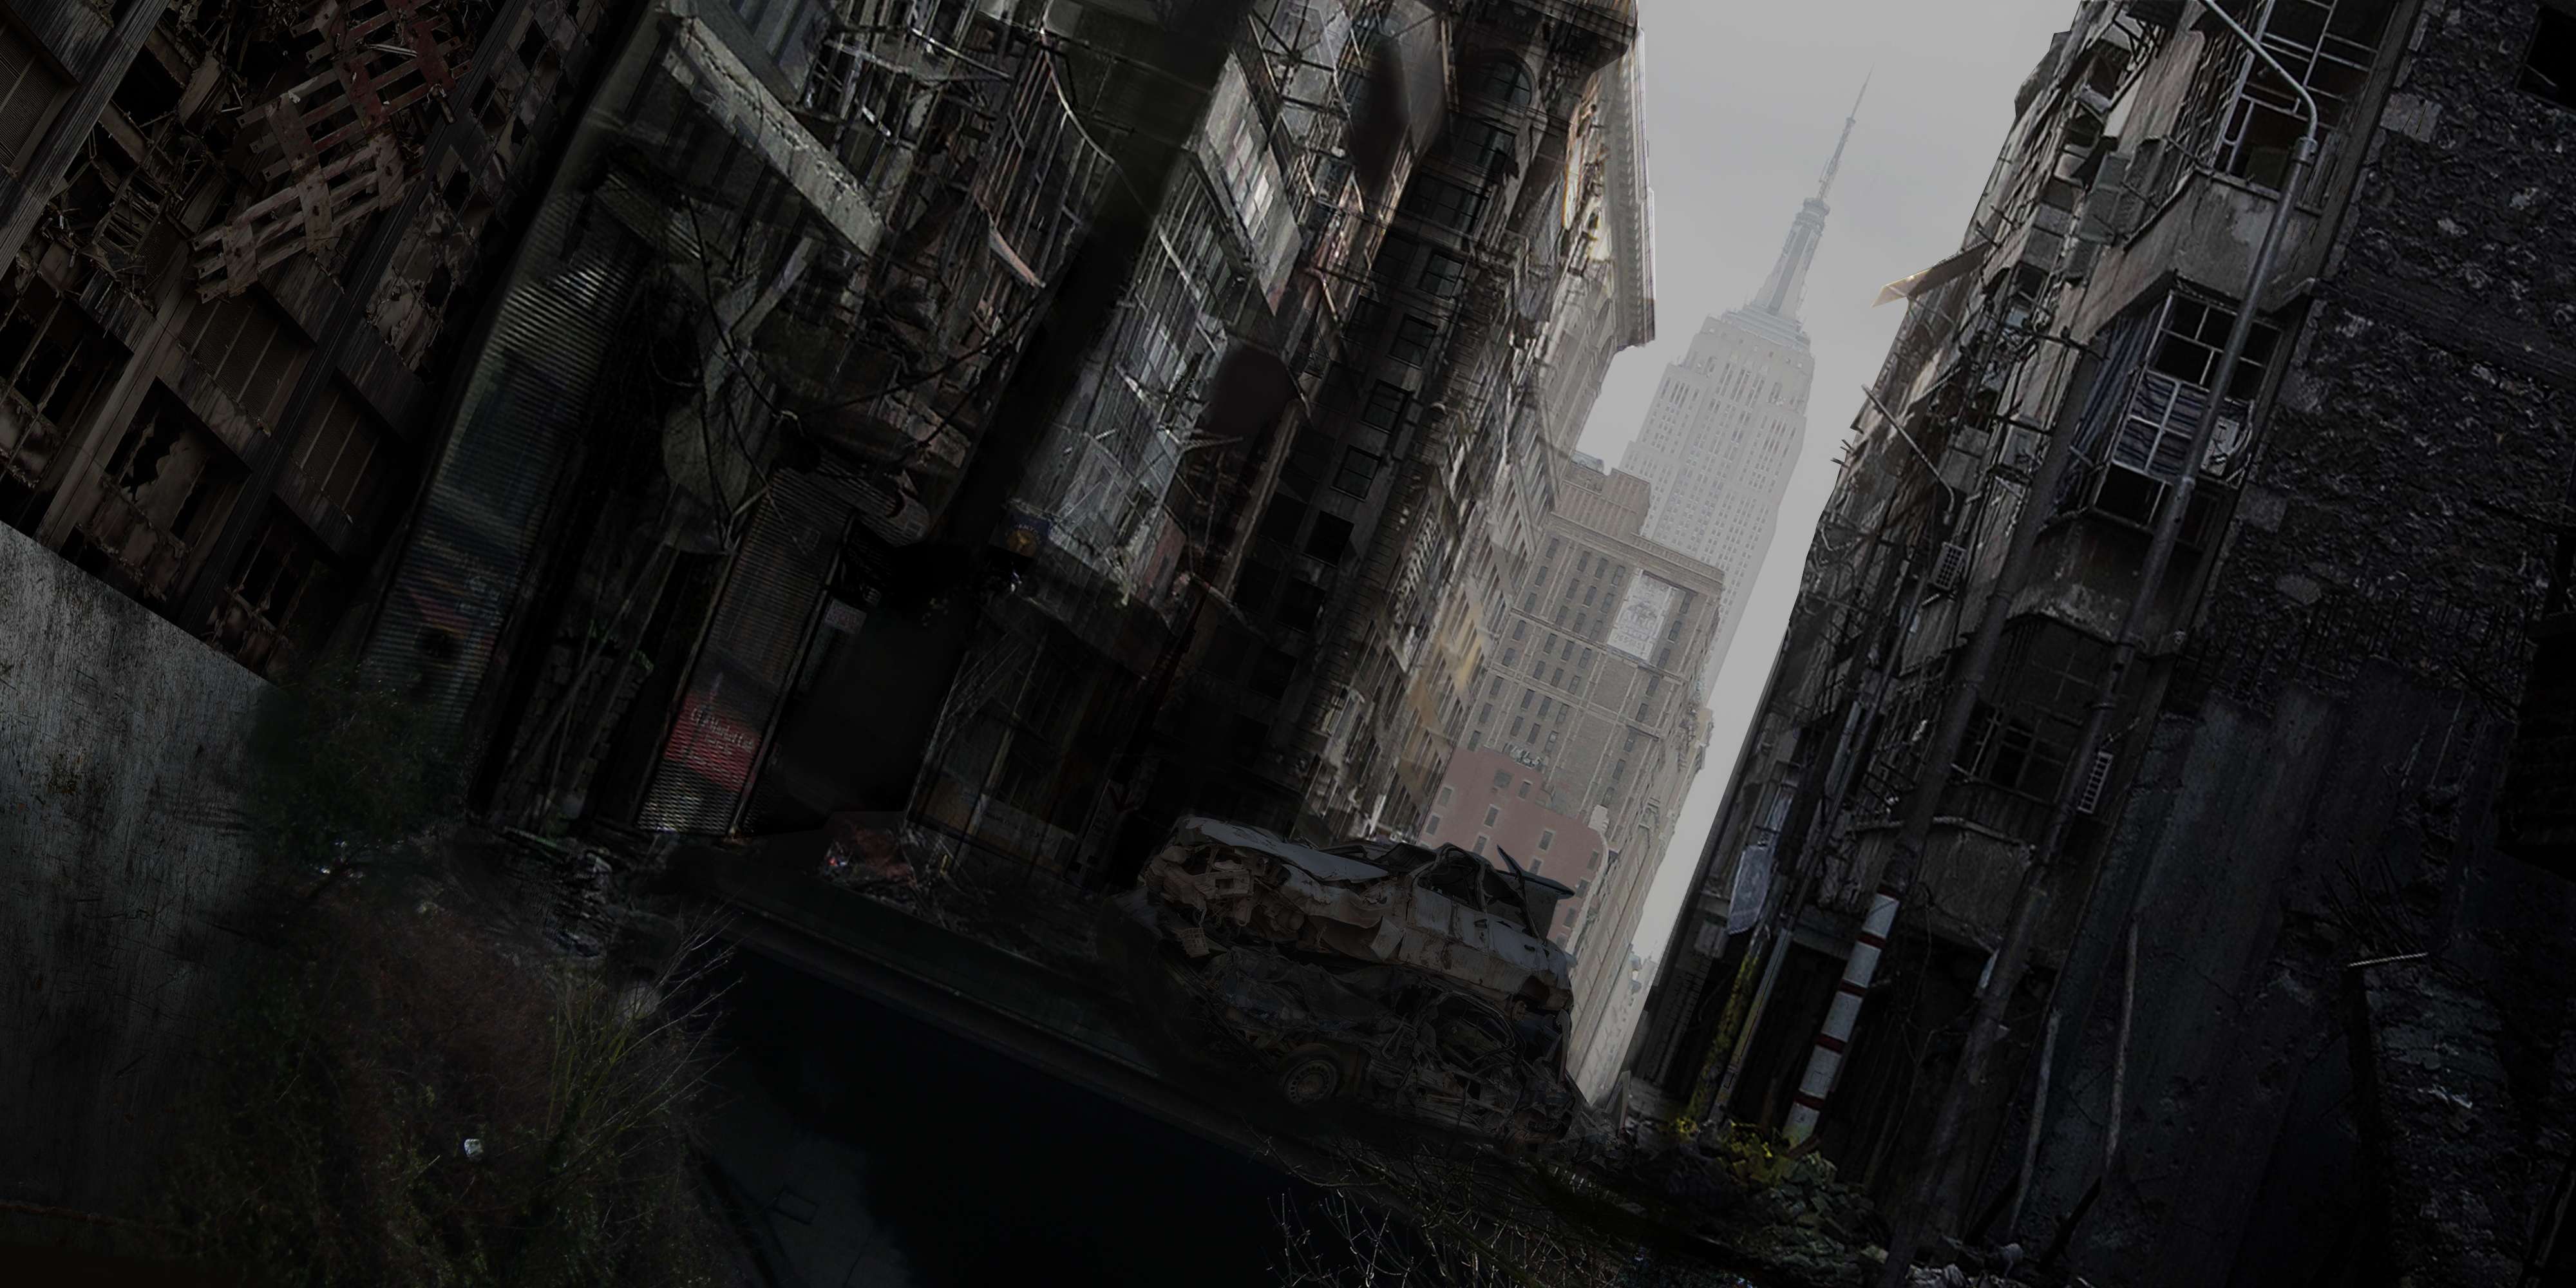
As you can see from my work, I raised the saturation levels and lowered the brightness to indicate that the buildings are closer to the viewer, and as the buildings get further behind, I dropped the saturation levels and increased the brightness accordingly. After you’ve completed this step, it is time to add the lighting setup to create the mood for your work!
Lighting setup added
As you can see from my working process, I try to keep the paint overs of the photos to a minimum and would only start doing it during the finalizing stages.
After adding in the lighting setup, I realized that the skies looked too bright for a dark themed work and hence, I painted in some smoke effects to the buildings in the background and the higher levels of the buildings in the foreground to give the viewers a sense of the hazy weather. And since this is an apocalyptic city, I also painted in smoke emitting from the ground to show the desolate and harsh living conditions.
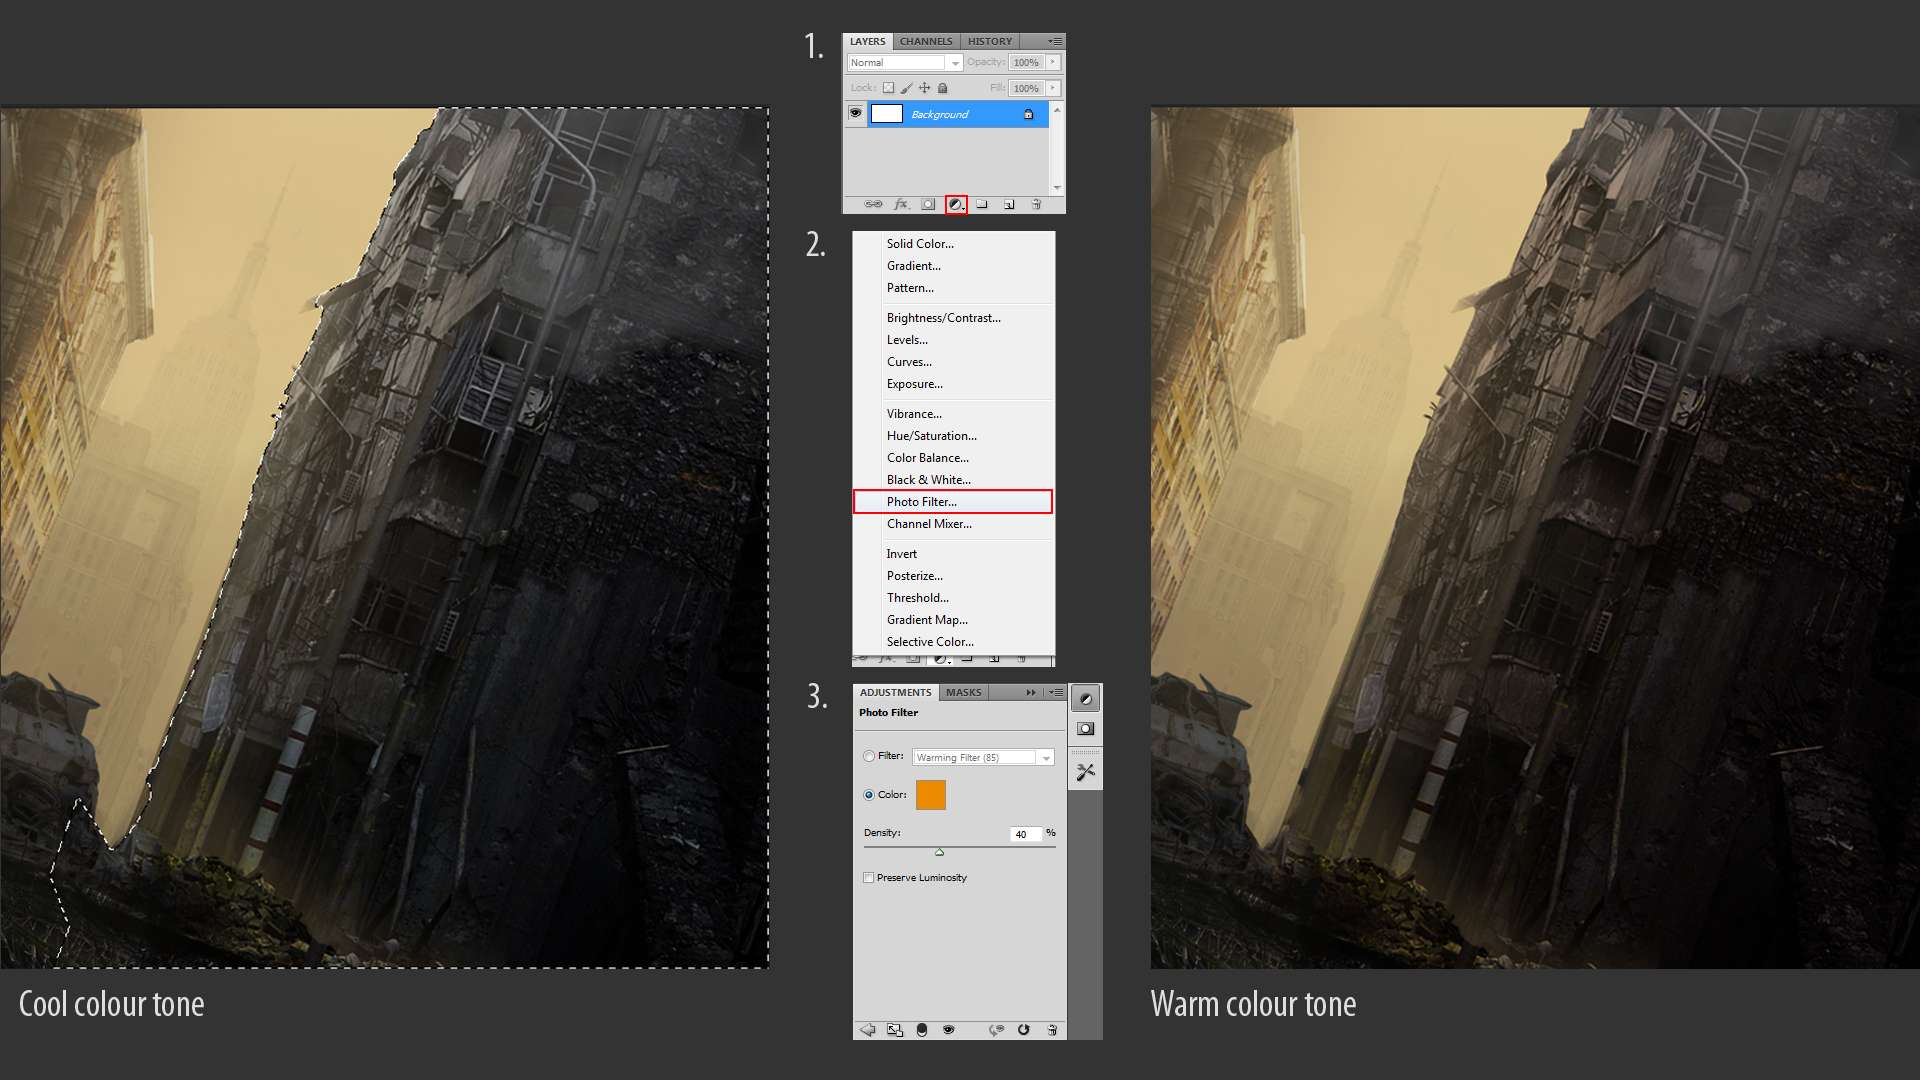
Colour shifting with photo filter tool
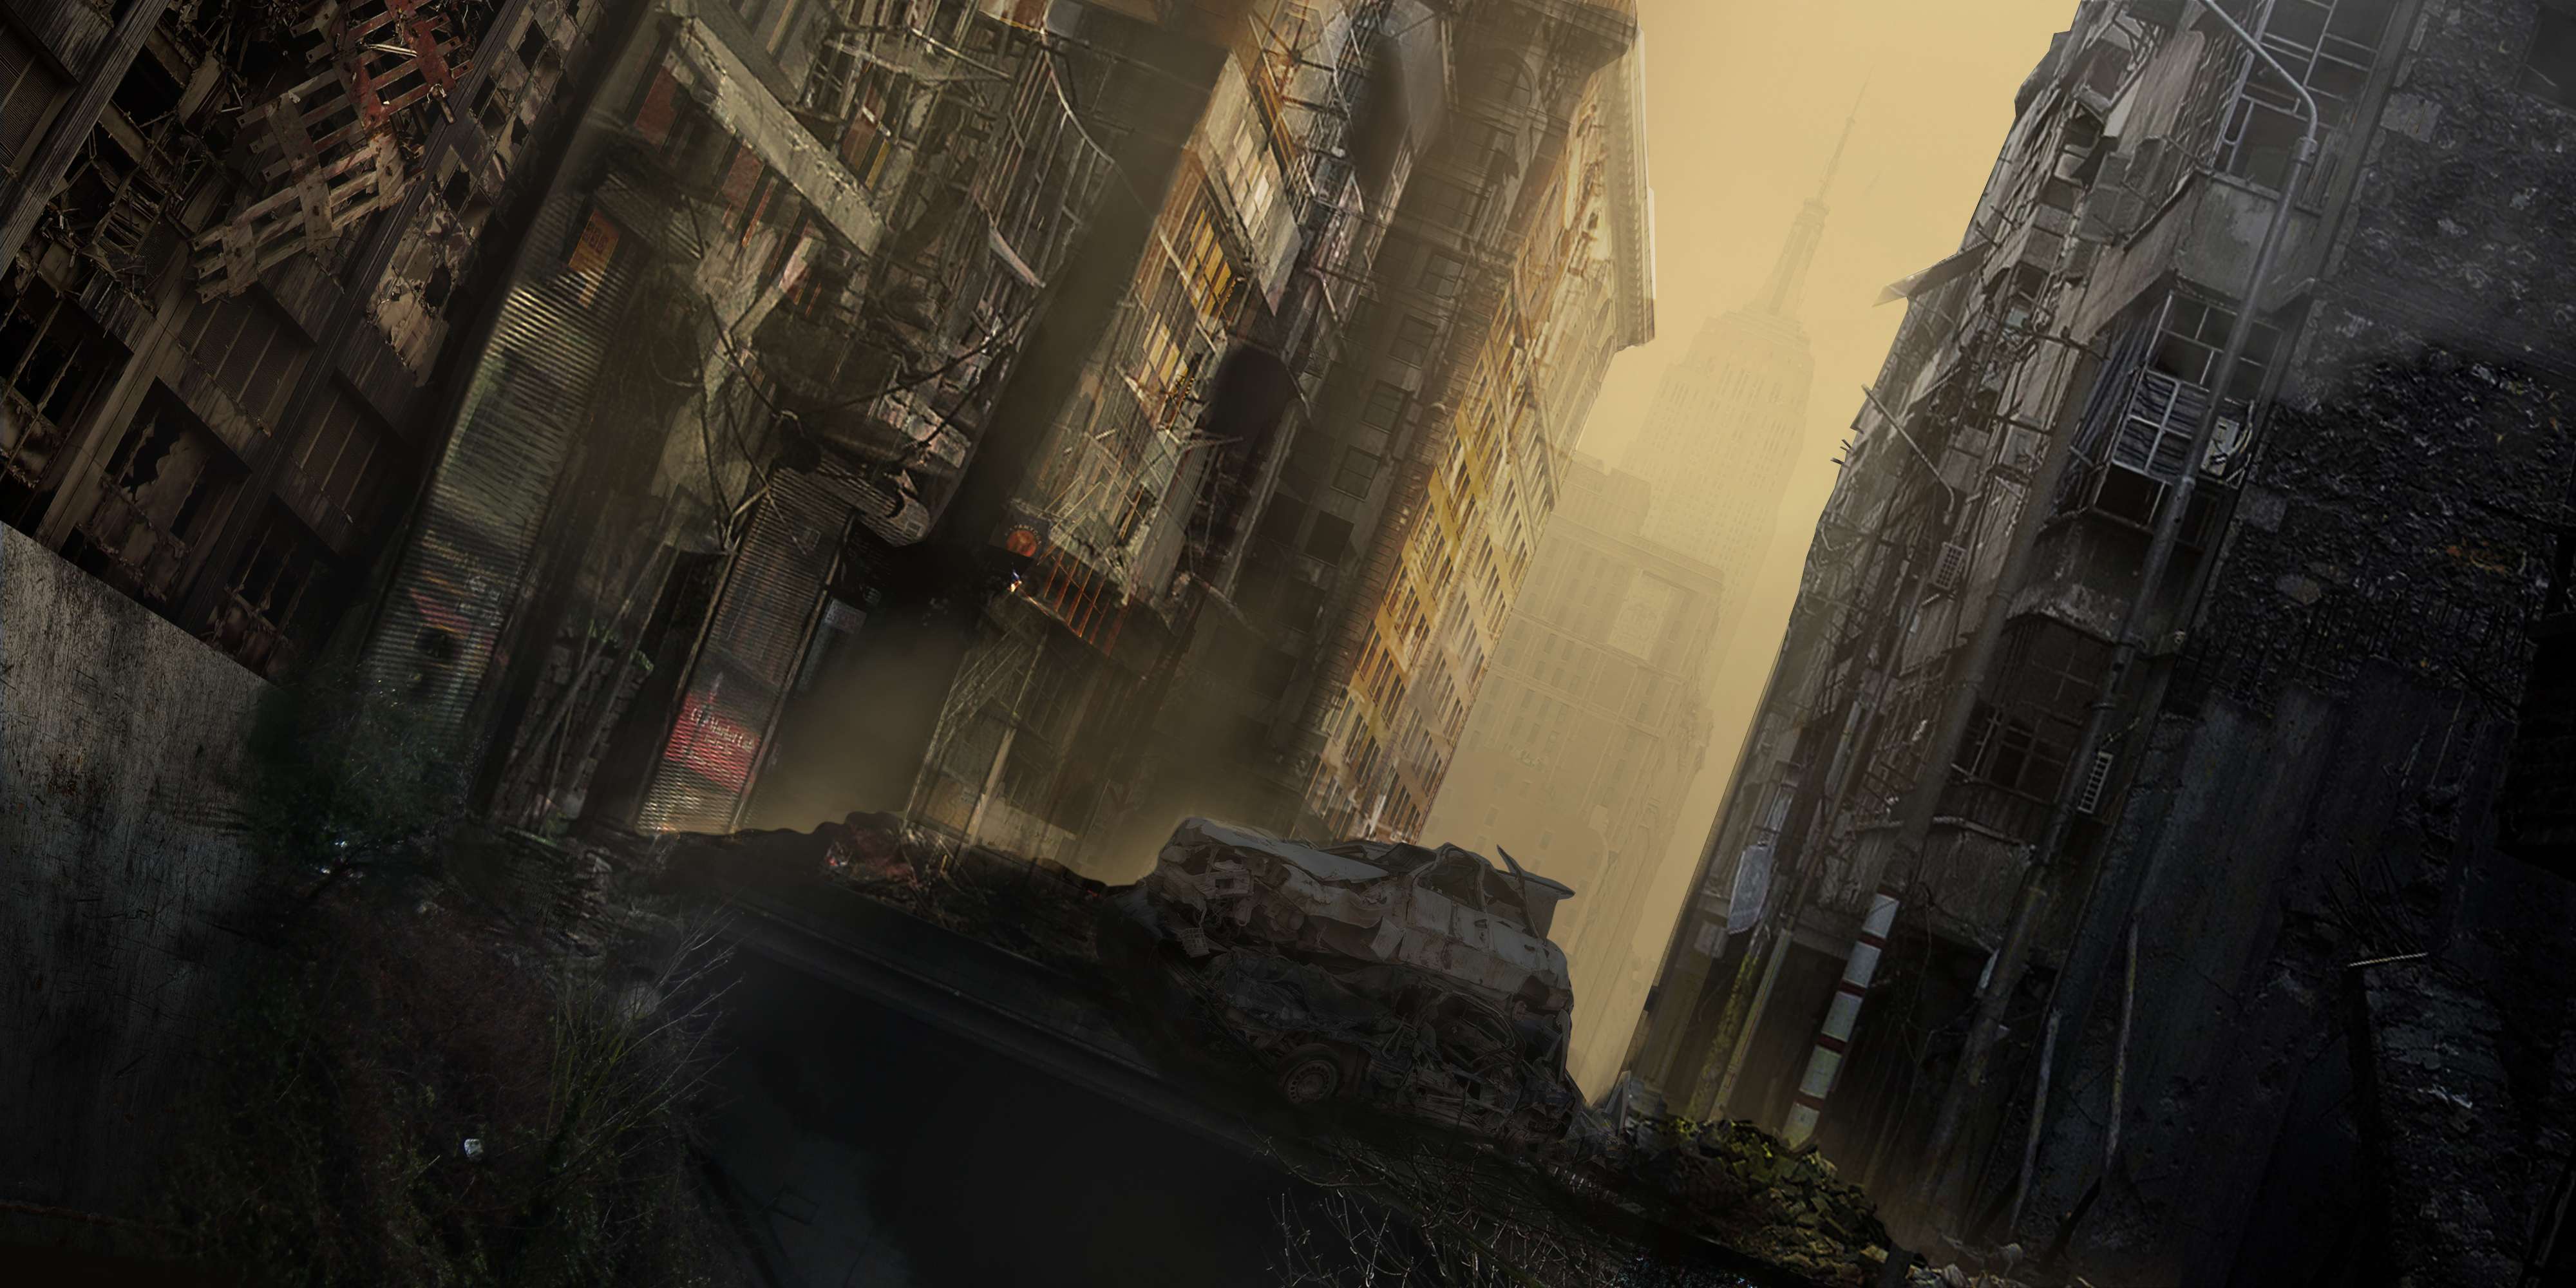
After looking at the finalized work closely, I realized that the building on the right did not seem to fit well as the overall image is in a warm color tone while this particular building was in a cool color tone. However, this was quickly rectified with the photo filter tool which is shown in this step-by-step tutorial image.
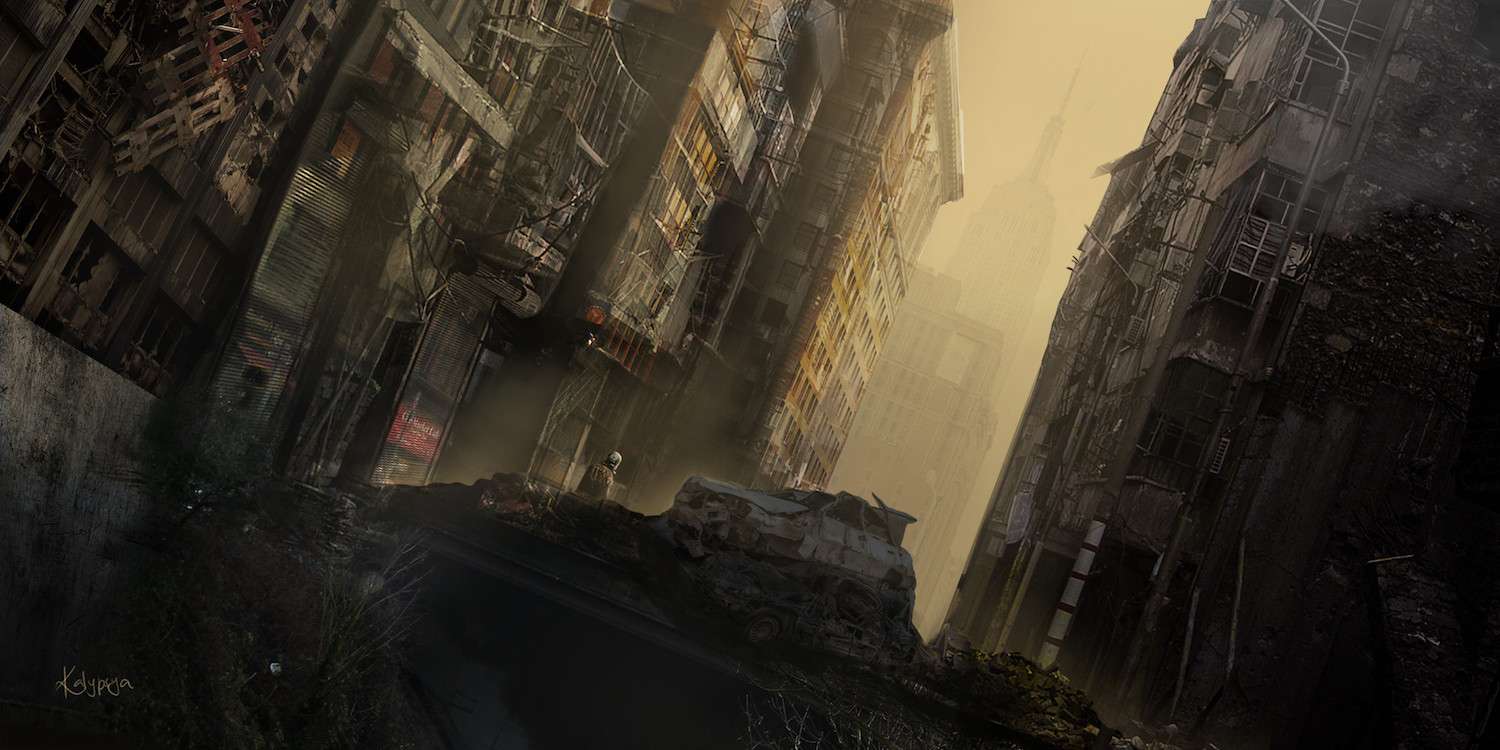
While going through my work, my lecturer also suggested that I add a subject matter in the foreground because the image looked like it was missing something especially when my lighting setup enhanced the focus. So I added a lone survivor wearing a heavy-duty gas mask which gave the environment a story telling element and in turn engages the audience.
And here is the final version of the hazy apocalyptic city!
Working on this piece was a real enjoyment because I’ve always wanted to tackle an apocalyptic themed environment. It’s not perfect and even when looking back at it, I feel that there is still room for improvement. However, I believe that we should not dwell too much in the past with all the “what ifs” because this might just hold you back from creating even greater work in future. I hope that my tutorial was useful and maybe next time, I would also be able to learn from a tutorial written by you!
Lastly, I would like to extend my gratitude to 3Dsense Media School for guiding me throughout my one year of studies and also to my lecturer Derrick Song, an amazing and inspiring artist.