
 Hello, My name is Jacob Zaguri, a model 84 imported from Israel and this is my complete guide to creating your very own Interstellar Helmet.
As a child, I was always breaking and fixing computers, it became second nature to me. I’m never afraid to try new techniques and technology. It’s a good ability to not afraid of a new software, method or pipeline. I’m always aiming to improve.
For those out there that they are in the middle of their career and are asking themselves like me, how can I be a better artist? My advice is like everything in life, it’s all about decisions and effort. Every day I wake up with a new idea that I want to create in CG but because I’m already committed to doing something else, I’ve made it a habit of writing it down and revisiting it later to see if it’s still a good idea and survives the test of time.
To sum it up, take a decision, put the time in to make it happen and the rest is history.
I’m writing this opening because I know as a CG artist you are always seeking after inspiration and your dream project and some of us are still at that point where we have to make a decision. For me, it was leaving everything behind and moving to Vancouver. It was a big decision but it’s helped me a lot in improving my skills.
To sum it up, take a decision, put the time in that to make it happen and the rest is history. For those who are in the beginning of their career (not necessarily young), or those in the middle of a project and feel stuck, do yourself a favor and spend less time on Facebook and more time on the actual work.
In this tutorial, I’m going to share my approach to designing and creating a 3D prop.
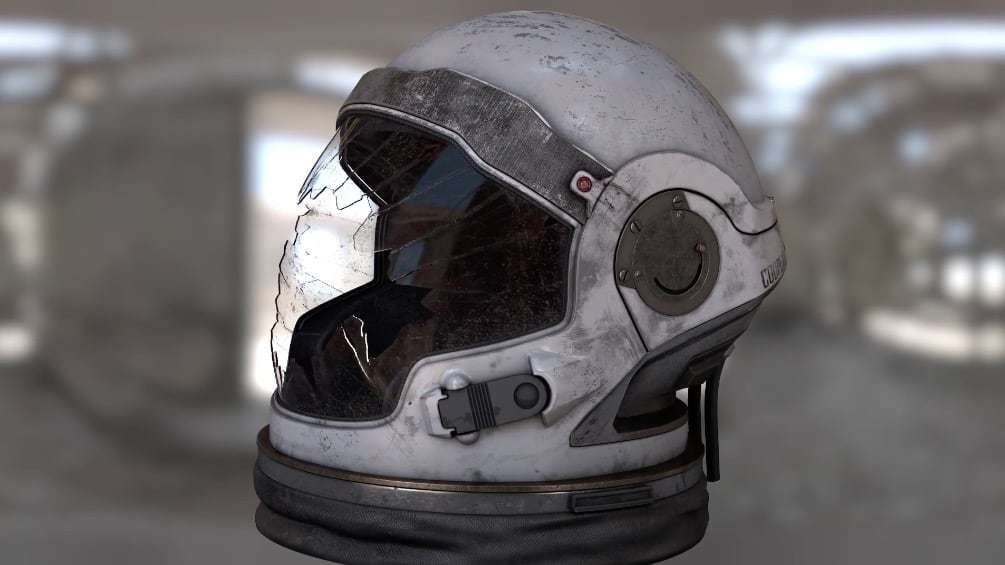
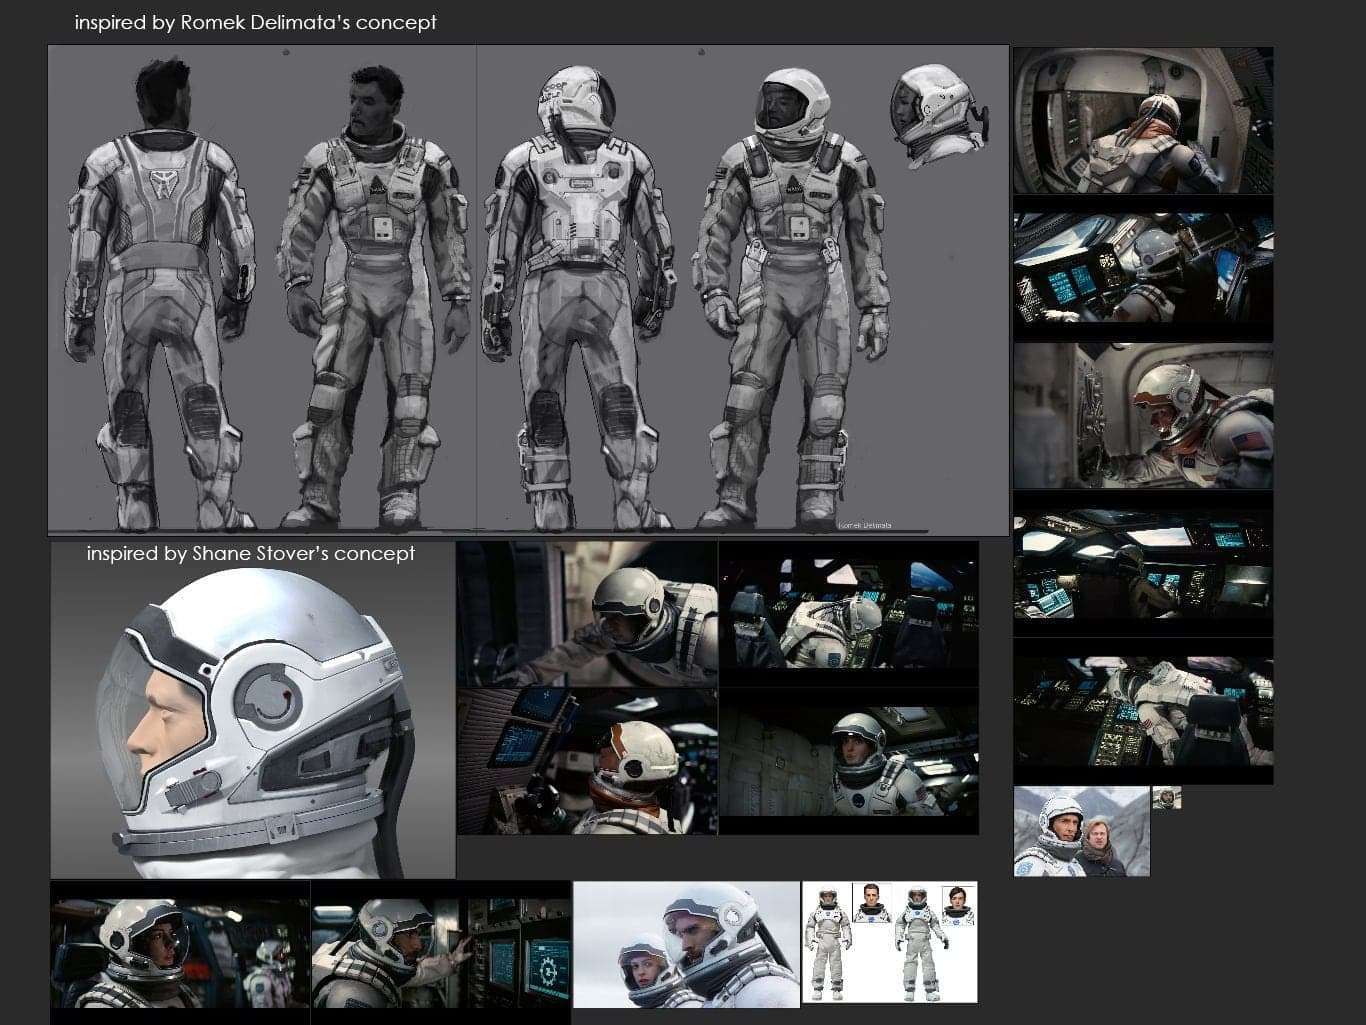
I planned to create this helmet for an astronaut’s face off in a space scene, inspired by Interstellar.(Romek Delimata’s Concept Design and Shane Stover’s Concept Design)
When I start modeling, I have lots of references from the movie and one concept drawing.
With poly modeling, I started with blocking big shapes and build proper topology. What I mean is objects with structure loops, supporting loops and flow loops.


How to model properly with basic principles and do an amazing job in the process is something I learned from Arrnimus 3d, a YouTube artist. I recommend checking out his YouTube channel, he is giving away pure gold for free.
Once I finished with the welding bridging and attaching and compiled my geo to one smooth mesh, I like to check my model to see if I have any mistakes like polygons faces with more than 4 vertex or any other mistakes which I look for by selecting the geo and go to check quadric.

Flip normals or double geo.

Once it’s all good, I have continued to render, a simple render just to see if I’m missing more details or the geo is not smooth enough.
I really like to work in a way of multiple passes on every step I’m doing, for me, it is a draft and slowly improves with each pass.
Once I’m happy with the object, I move to Unfold3d for UVing the helmet. I’m using Unfold3d just because is the best, and Maya and Max UV editor is very slow and annoying and the UV layout looks like software from the 90’s.
Planning the UVs is straight forward, I knew that my object will be in a close up, so my render resolution will be full HD (1920*1080), so my textures need to be double than that size.
I created 10 UV patches with each UV of different material so it will give me the ability to put 4K texture on each texture.

The second step was to bake AO, cavity, and play with Substance Painter, to generate a grunge edges look instead of painting it manually in Mari.
I like to create a basic design in Substance Painter and continue with Mari because it’s more flexible and easy to fix small details.
Once I finish importing the maps to Mari, things to check before starting to work are that I’m working on the right colorspace
They say God is the small details but if the big picture is not good enough, adding details will not fix it.
The problem with Substance Painter 2.1 is that even though it now supports multiple UDIMS you still can’t paint across texture sets. I can display the helmet and as a texture list I can give each part different material. When I need the material to be consistent all over the object, for example, dirt, I can create smart material and apply it on each part separately to look uniform.

Once I’m happy with the results, I export the maps using the Vray preset in Substance Painter and rename the files with Adobe Bridge batch rename tool. It makes it easier to import to Mari this way than to load each map to the correct UV patch number.
Once I finish importing the maps to Mari, things to check before starting to work are that I’m working on the right colorspace, that means when you create channel check it’s SRGB if its 8 bit and with color information if it’s grayscale channel go wild and use 16 bit.
With linear colorspace, I have the base design and now I am going to details. I like to texture in Mari in a way that I’m using procedural maps as a base since it’s easier to change and works faster.
Using the AO pass as a mask in between layers, I can achieve fast results and later, project big and small details. Once I’m happy with my bump, diffuse, reflection (spec), gloss (roughness), I export the maps as 8 bit TIF, with sRGB color space like my viewport in Mari colorspace.
I used Vray blend materials with id for each part just to give more variety.

To load udim in max you should use Vray hdri and instead of the number prefix just replace it with .udim .
Check that you have dots before and after. For example: D:testdiffuse.(Udim).tif

Another difficulty I had with this prop was to create the broken glass with the right thickness to achieve the color on the edge of the broken part.
So I did a small experiment as I wanted to know what would be better looking and faster to render:
One method is to use the alpha map as displacement map with water level option on to clip the geo to make it look completely transparent.


In the scene, I used Vray hdri plug to the dome light and Vray cam physical exposure, of 4 ISO 200 shutter speed 100.
Once I was happy with the renders, I started to set it up more efficiently and gave each material an ID number. In render element, I add zdepth, multimask, reflection, glass, diffuse, reflection.
Inside Nuke, I was tweaking subtle changes like the colour correction for the bronze overall contrast, sharpness and zdepth.
I hope this tutorial will help someone and thanks for your time.