
Before we get started, I would like to thank The Rookies team for this great opportunity to write an article about creating high quality architectural renders and my project, Her.
It all started when I finished my previous animation “Home” in June last year. People who know me, know that I am a workaholic and I cannot spend a day without working on 3D, so I felt a little bit empty inside not having anything to do. I started thinking about what my next project would be and as I am a fan of Scandinavian architecture and style, I decided to take my project in this direction again but with a twist.
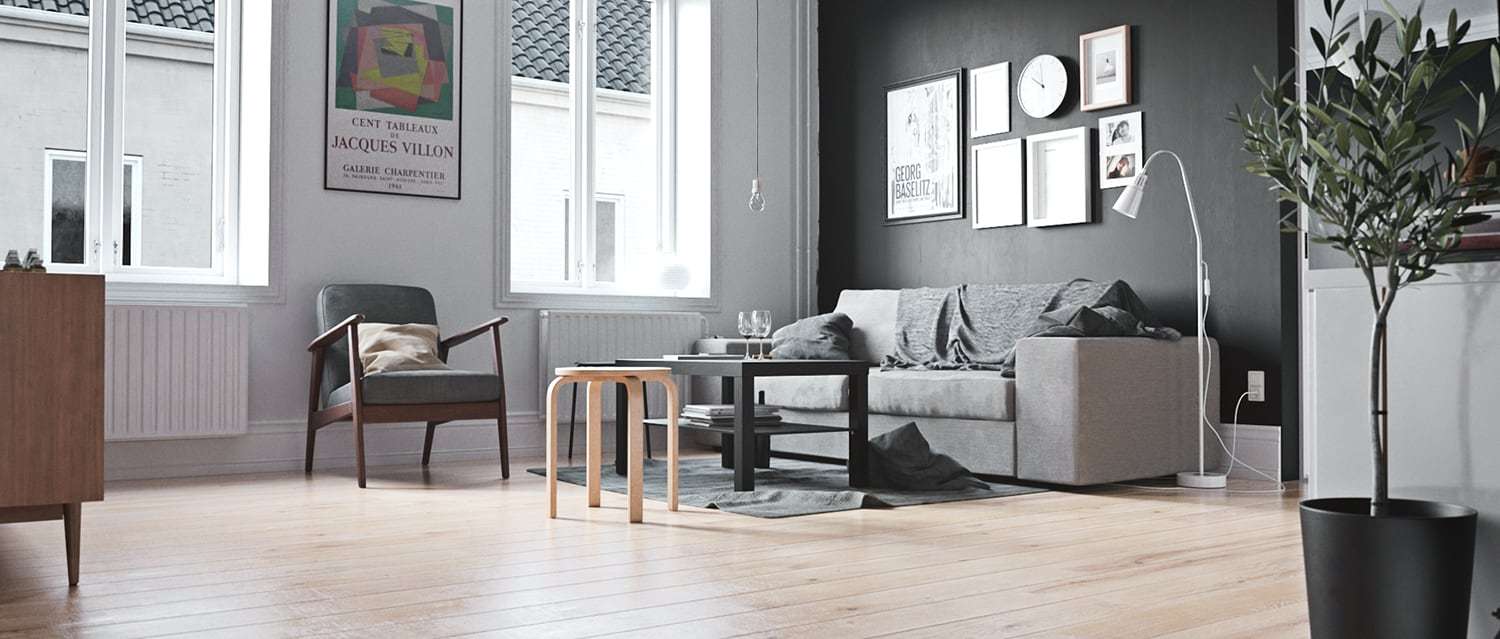
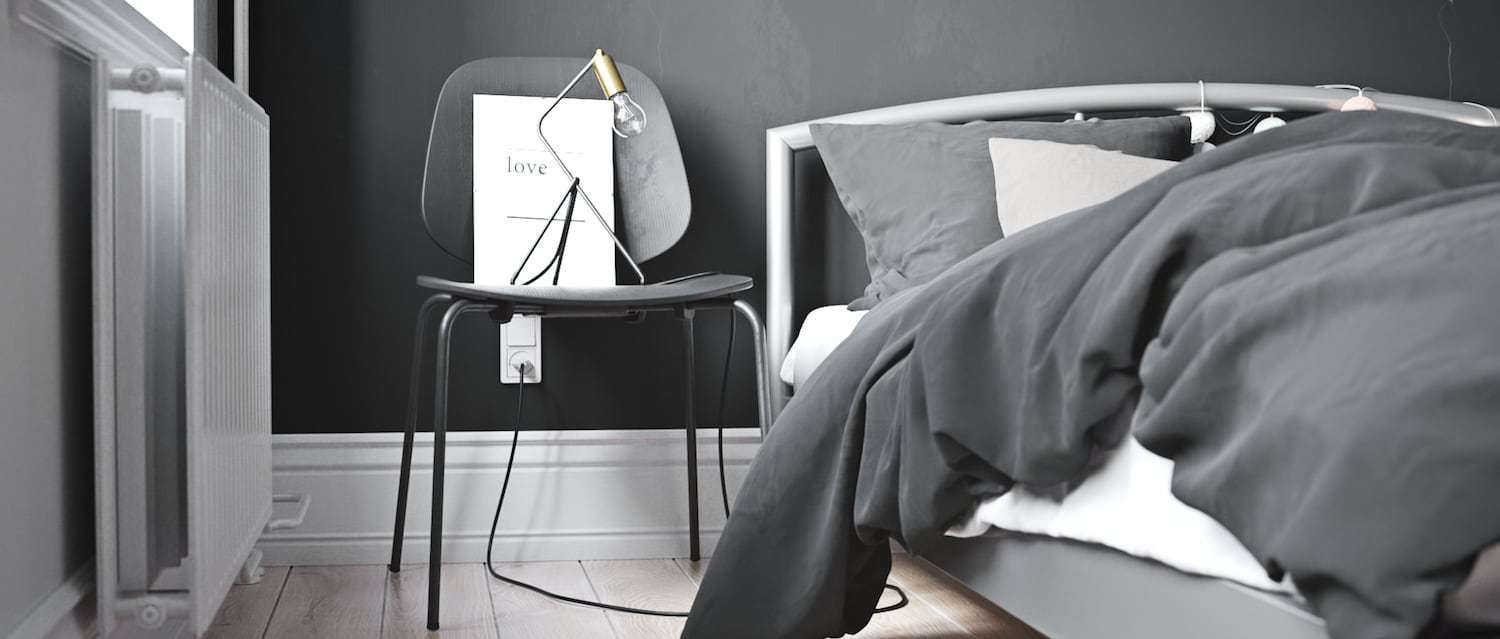
I always try to make my images look like someone is living there.
Most of the images you see online look like perfectly styled apartments by interior designers and this is not how most people actually live. I always try to make my images look like someone is living there, but this time I wanted to take it a step further and style an apartment, as I would do it or like someone who doesn’t know a lot about interior design, but who still has some “style”. I aimed for objects that most people could afford and this is where Ikea comes in! The furniture is good looking and most importantly, it is cheap so it fitted perfectly into my project.
Also, I wanted to share a story in the animation, some higher meaning you might say. I didn’t want to make “just” another arch-viz fly-through animation like I did with Home.
With every new project I do, I try to push myself to do something better than before.
From the very beginning, I wanted my girlfriend (Ania) to be part of the animation. I decided to dedicate this project to her for being the best girlfriend in the world and being very supportive of what I’m doing.
I am a very meticulous person, everything I do has to be perfect and I spent a lot of time trying to find the perfect apartment and style before I was satisfied. Long story short, I modelled a few different apartments before I was happy. That’s one of the reasons why the project took this long to finish.
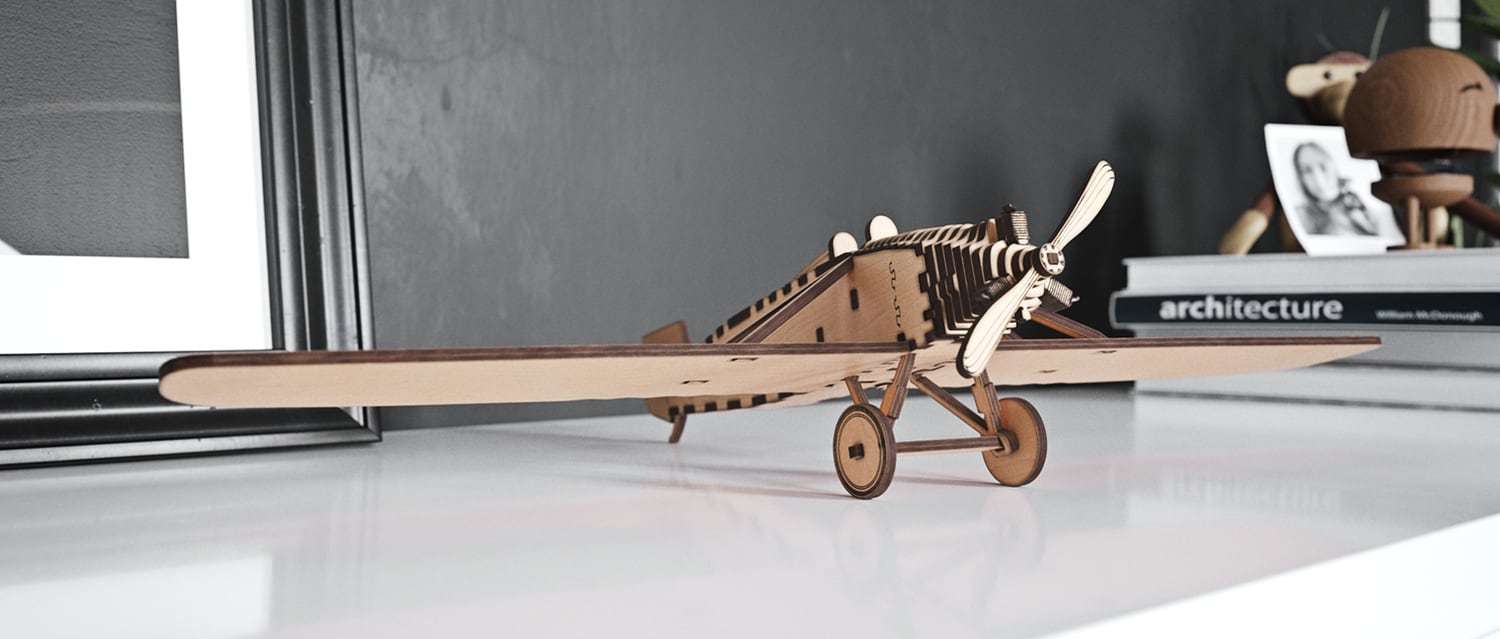
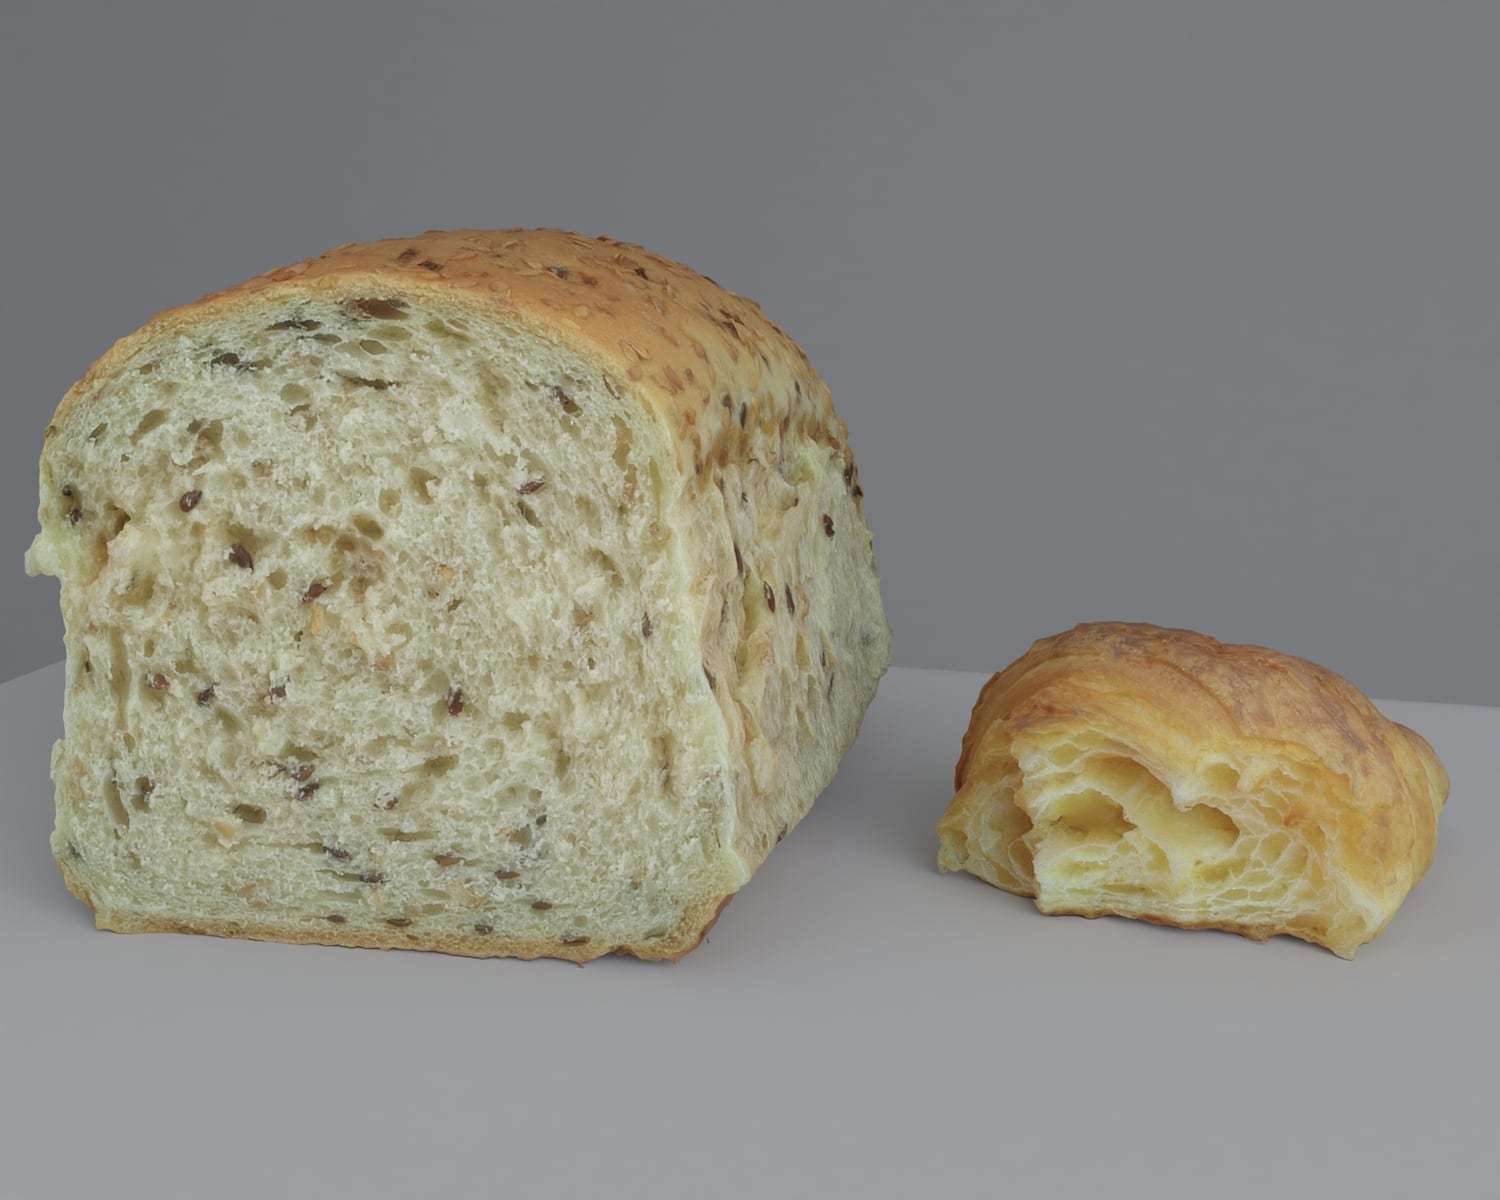
Everything in this project had to be made 100% by me, so no premade models were used in this animation
Modeling
With every new project I do, I try to push myself to do something better than before. HER was the most complicated and time-consuming project I ever made and another reason why it took so long was modelling. Although I wasn’t exactly sure what I wanted to do in the beginning, I knew one thing… everything in this project had to be made 100% by me, so no premade models were used in this animation.
I cannot tell exactly how many models I created, but I am sure it would not be a lie if I said more than 100. It may not look like that in the animation but, as I wrote before, the project was changed a couple of times and that means that there are a lot of unused models.
This may seem like a waste of time since you can buy great models online, but Time you enjoy wasting is not wasted time and if you can learn something new from it, that’s even better! One of my goals for this project was to get better at modellingand texturing/shading objects and that takes time.

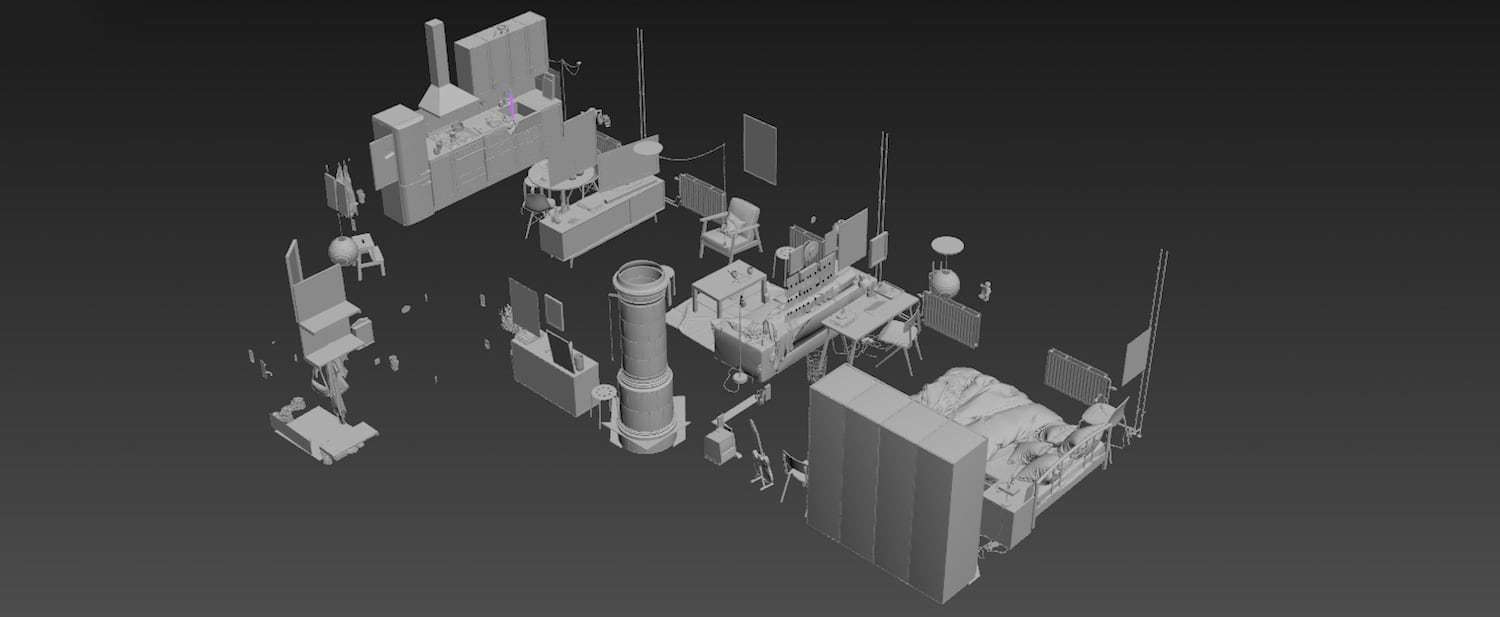
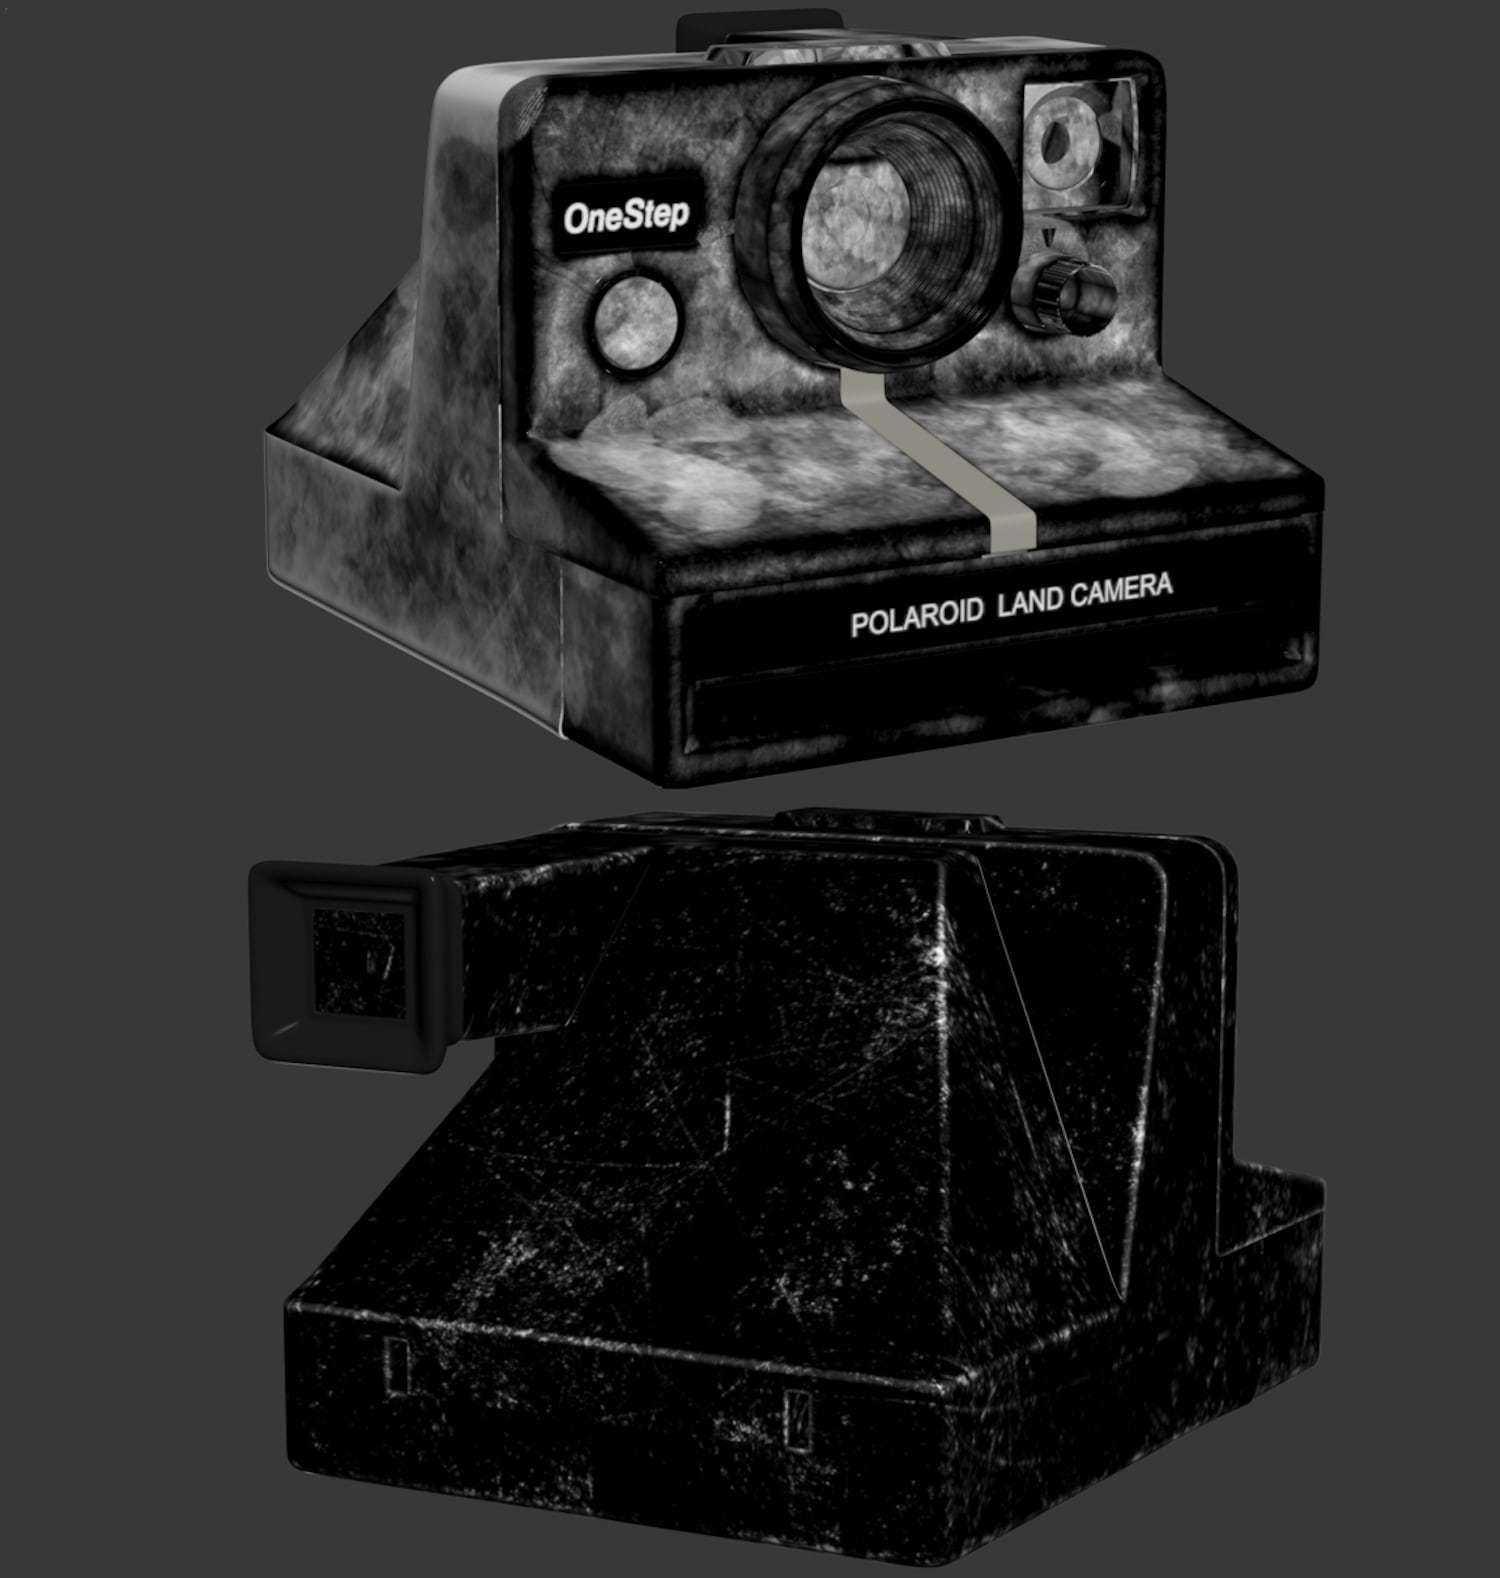
The main tool for modelling I used was 3ds Max, but there were moments when I needed to use Zbrush (mostly for re-topology/decimation and unwrapping) and marvellous designer, obviously for things like pillows, blankets etc.
For some objects in the scene that would take too much time to model or I simply couldn’t make myself do because of their complexity, I used Agisoft Photoscan.

Materials
I used standard Vray materials together with Substance Painter,which I used to create black and white masks later used as a blend mask for Vray Blend Material. I treated every model as a “separate small project”, therefore I used Multi/Sub-Object material with material IDs so that everything was perfectly organised.
About 95% of the scene objects have some amount of scratches/trace of use/fingerprints etc., so nothing is brand new.
It may look like it’s a lot, but when used in small amounts it can give pretty good results.
Lighting
At the early stage of the project I wanted to use some nice cloudy HDRI, but couldn’t really get the result I wanted, so I changed it to something different, V-ray Sky + V-ray Sun with light portals in windows. A few months after that change, I accidentally discovered that I forgot to turn on the sun and the only light source was the V-ray Sky, so it stayed that way till the end. Sometimes mistakes can be a good thing!

Rendering
For rendering, I used VRay (version 3.55.01) with Brute Force and Light Cache. I did not use any special settings or tricks, just (almost) standard settings. Because of the awesome (unchecked) “use local subdivs” option, I did not have to think about material/light subdivisions because V-ray would calculate everything for me! Otherwise, I think I would have spent a lot of time on that. The only thing I had to worry about was the colour threshold.
Another thing that I had to play with was Burn Value in colour mapping to avoid too many over-bright areas.
I also think that something worth mentioning is the depth of field since it’s rendered out directly from the VRay camera. I was planning to play with DOF later in the post-production process, but someone (Thank you Anders) changed my mind. I was a bit skeptical about this in the beginning, mainly because I wouldn’t be able to change anything later, but I gave it a shot and from now on I will always do that. Not only does it render a little bit faster, but also the quality of it is way better and I think you could never recreate that with zdepth pass.
Story
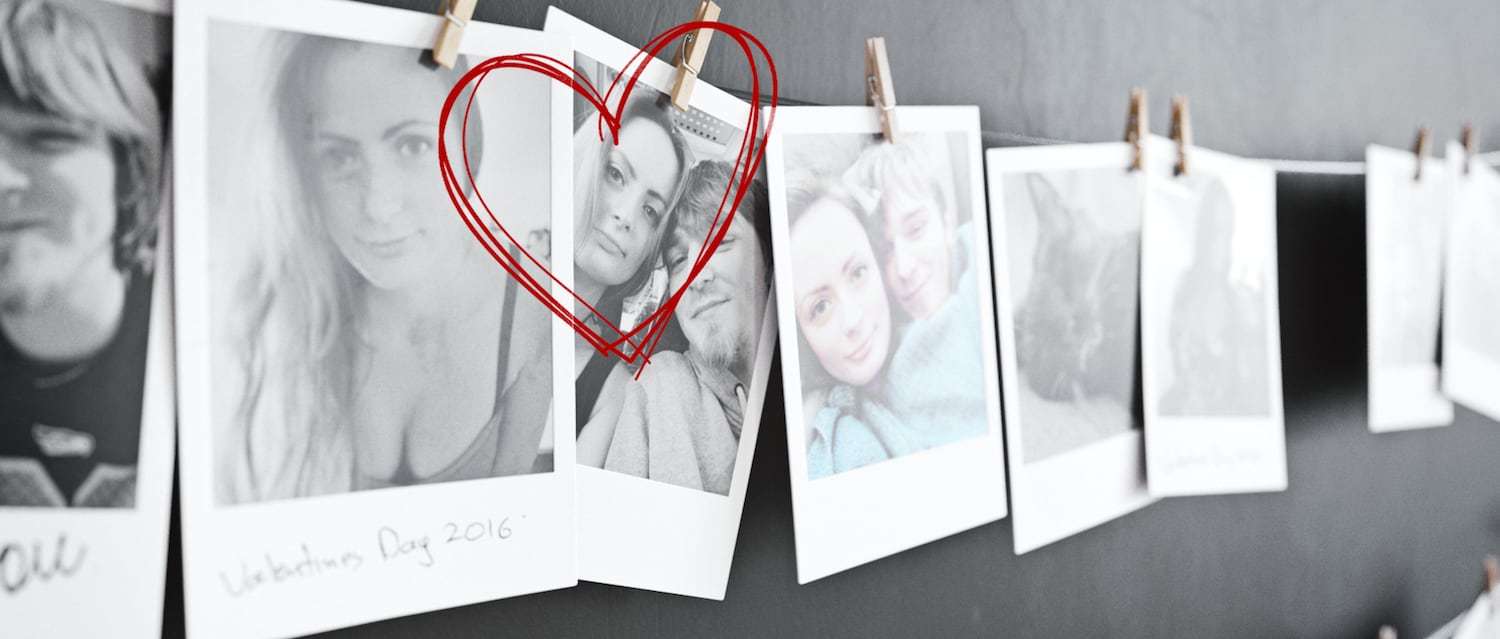
Now a little bit about the most interesting (in my opinion) part of this project, the story… HER is not only a project about a Scandinavian apartment, it’s more than that, I could even say that it’s a very poetic project. I tried to “design” the story so that everyone can interpret it in a different way, their own way. Most of the objects are not random assets, which are supposed to fill the apartment, they actually represent and mean something for my girlfriend and me.
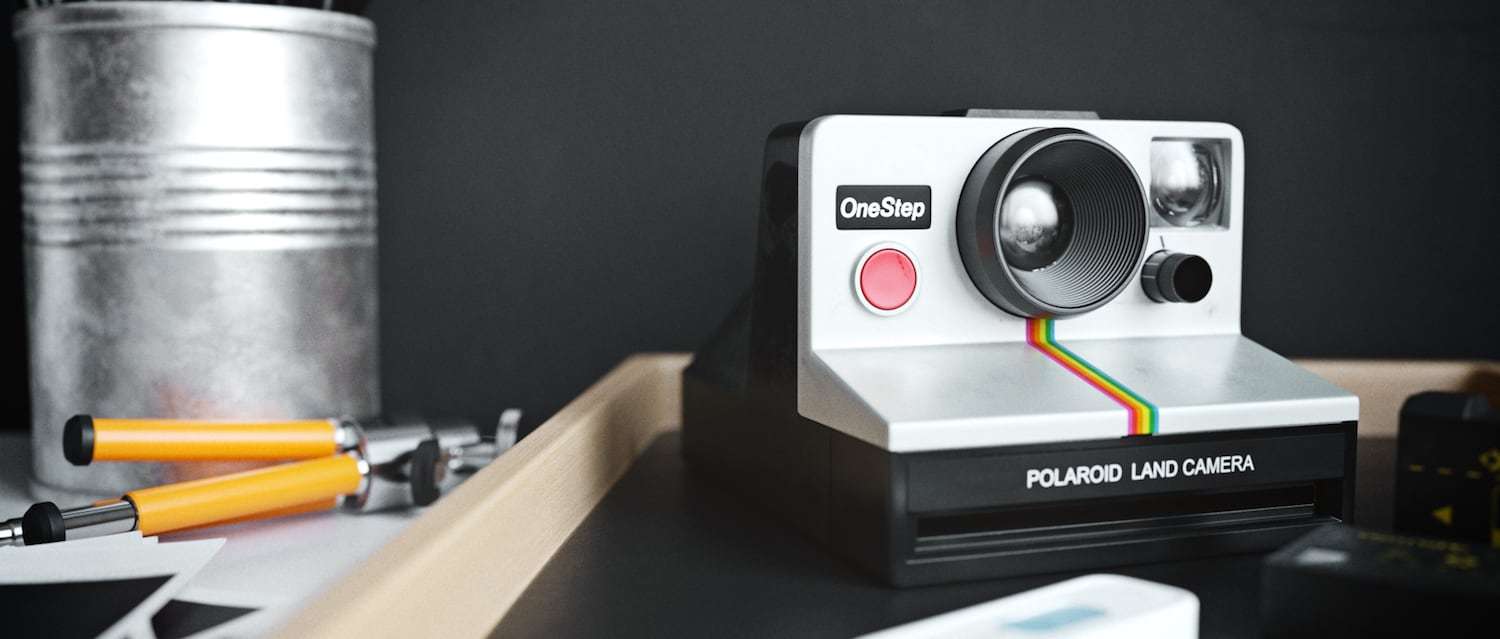
As an example, Polaroid photos obviously represent our memories/time spent together.
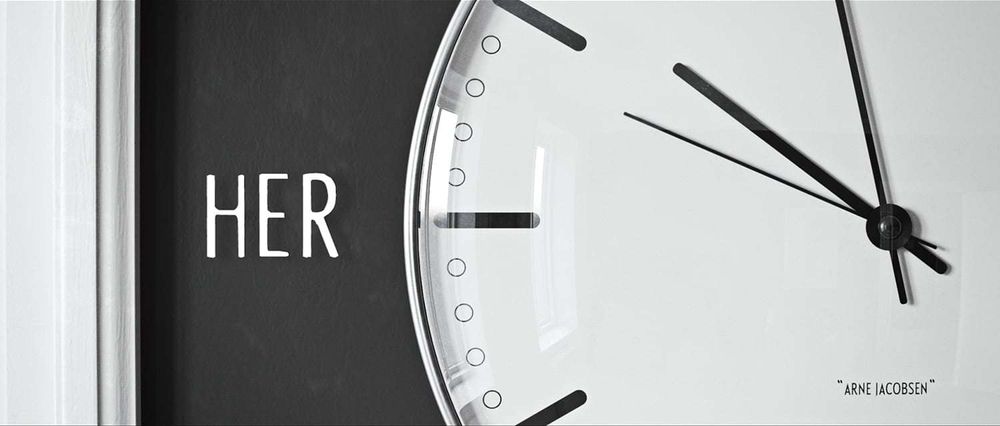
The ticking clock at the beginning and the end represents time passing being together. In the very last shot of the movie, four lights turned on as four years spent together.

If you look closely, there is even a message for Ania hidden somewhere in the animation (I won’t point where to look for it). Even the title I chose has two different meanings. “Her” as the animation is about her (my girlfriend), but in Danish it also means “here” as in “here with you”.
Post production
I’m not going to write a lot about post-production because there is not a lot of it. I tried to get as much as I could out of VRay, to avoid doing a lot in After Effects later. Somehow, I managed to do it and I am very happy about how the raw renders turned out.
The only things I corrected later were contrast/saturation, small colour correction, added vignette and small glow. I quickly made a short video showing the breakdown of a few shots in the animation.
Conclusion
As I wrote before, HER was the most complicated and time-consuming project I have ever made, but I’ve learnt a lot and I had a lot of fun doing it so I don’t regret any of the time I spent on it.
Thanks for reading!