
When I started my journey at**Think Tank Training Centre, **I didn’t know what to expect and I had no idea of the amount of work a demo reel required.
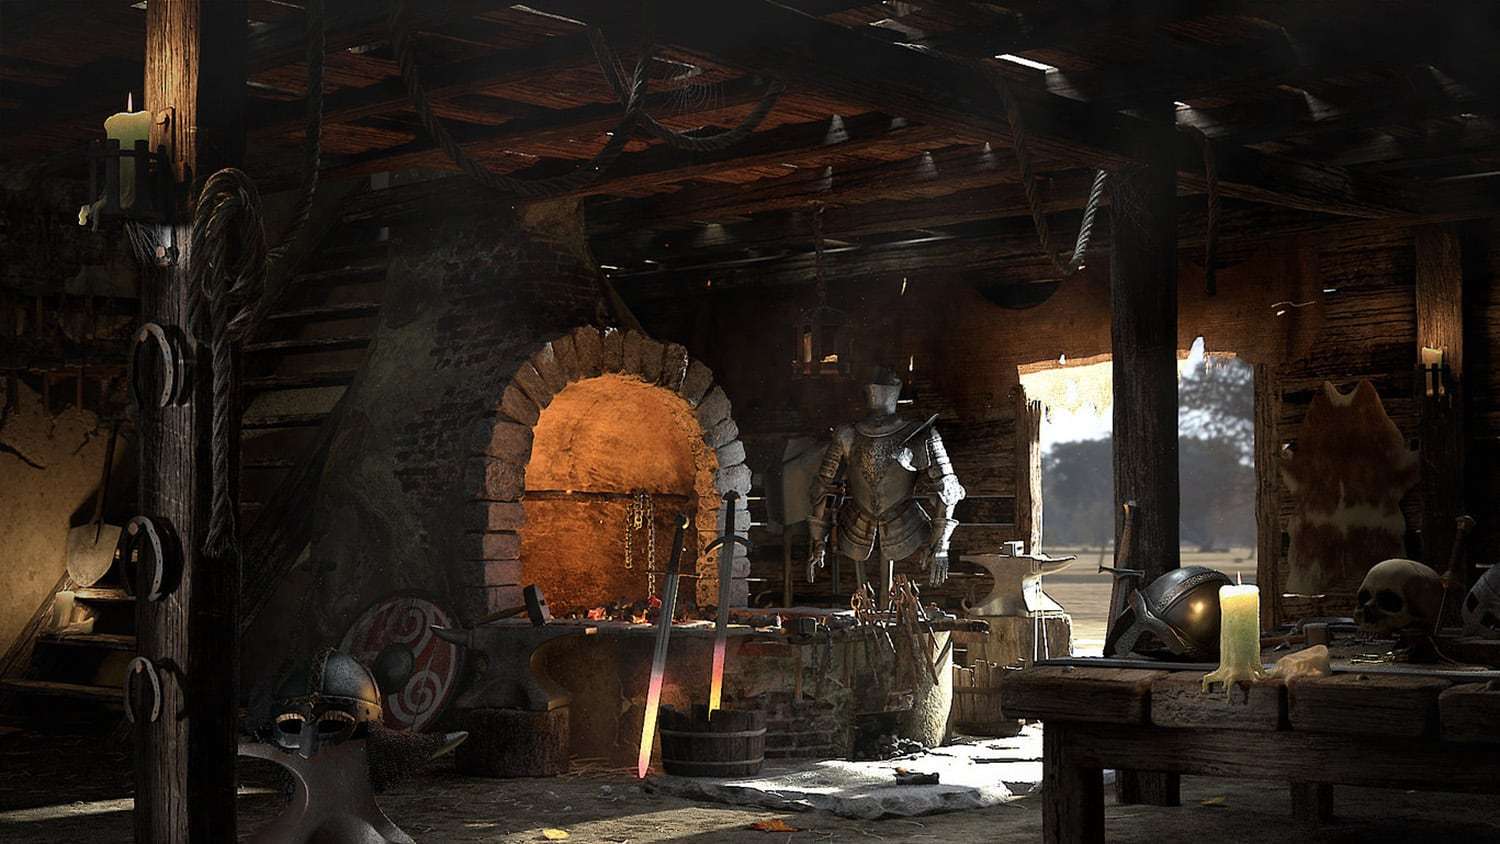
I knew I wanted to create something inspiring and even though I love Character Design, I decided to specialise in environment and props modelling because I wanted to create more compositions and scenes with movie quality assets.
I honestly believe that choosing the right concept is key to the success of your work. Pick something you like and be passionate about it, because you are going to work on it for a lot of hours!
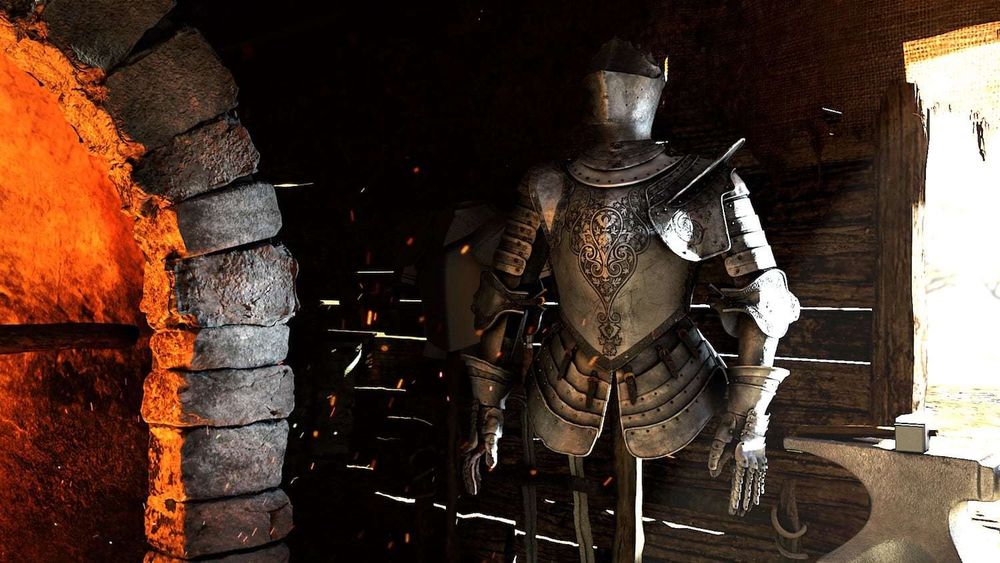
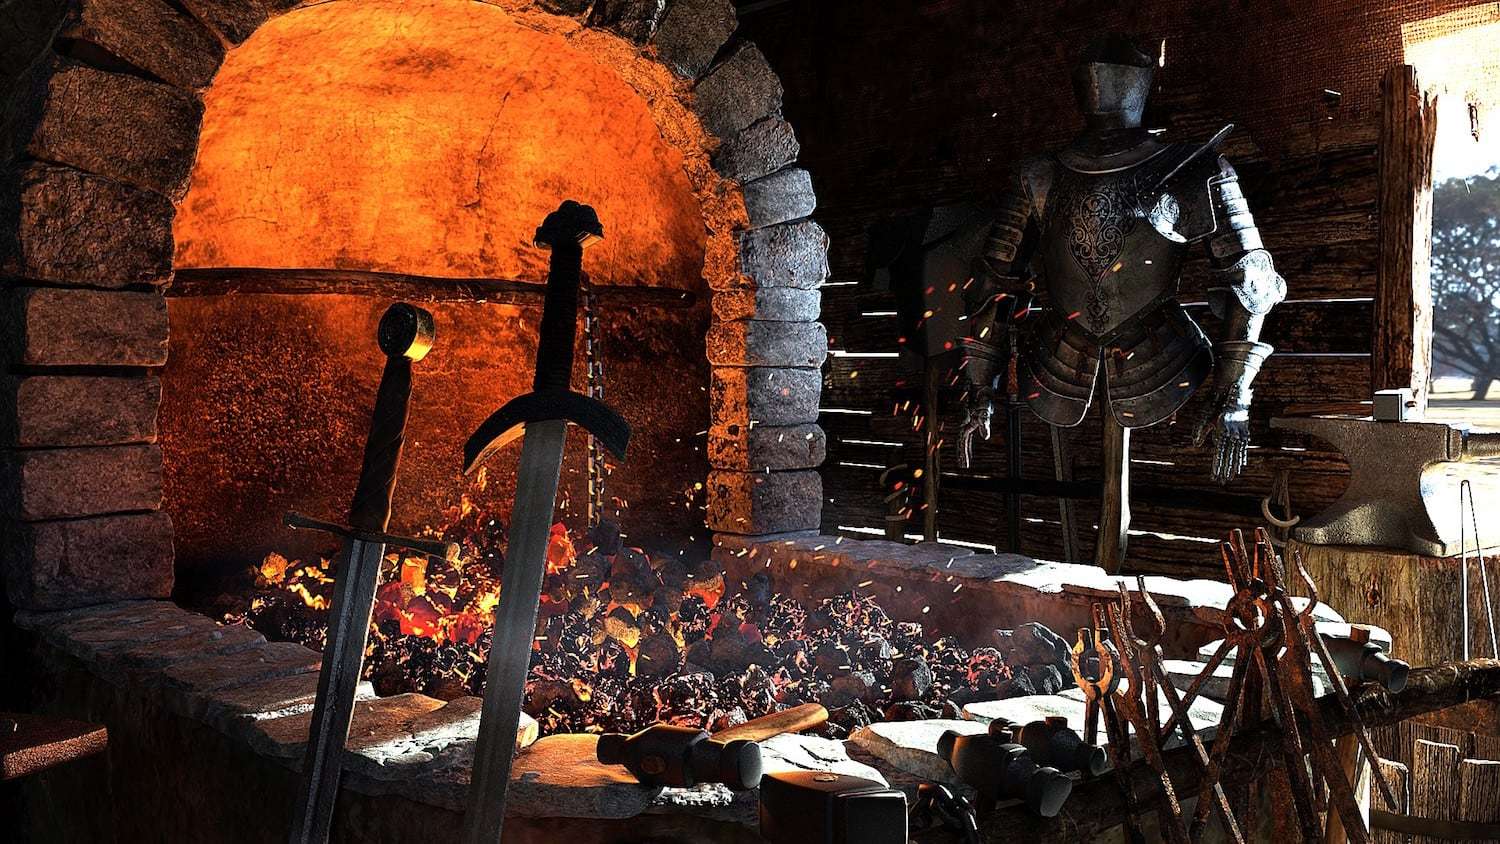
I love fantasy and I wanted to recreate a realistic setting with a strong atmosphere. All of this brought me to Andrzej Dybowski’s concept which was strongly inspired by the Witcher series. Remember to always contact the concept artist and politely ask if it’s okay to use their work. It’s a sign of respect and crediting another artist is always appreciated within the community.
Don’t spend a week sculpting something that you are barely going see.
When working on an environment piece, it’s very important to start from a basic block-out of the overall setting. You want to** do your best to nail the feeling of the scene without getting into details**.
Import your concept in the scene and try to play with the focal length to see how much you can match with the picture. Don’t expect to match it perfectly though, most of the time that is impossible!

Once you have all your UV tiles and outliner organized you can start bringing objects into ZBrush. Where to start?
Start by gathering references!
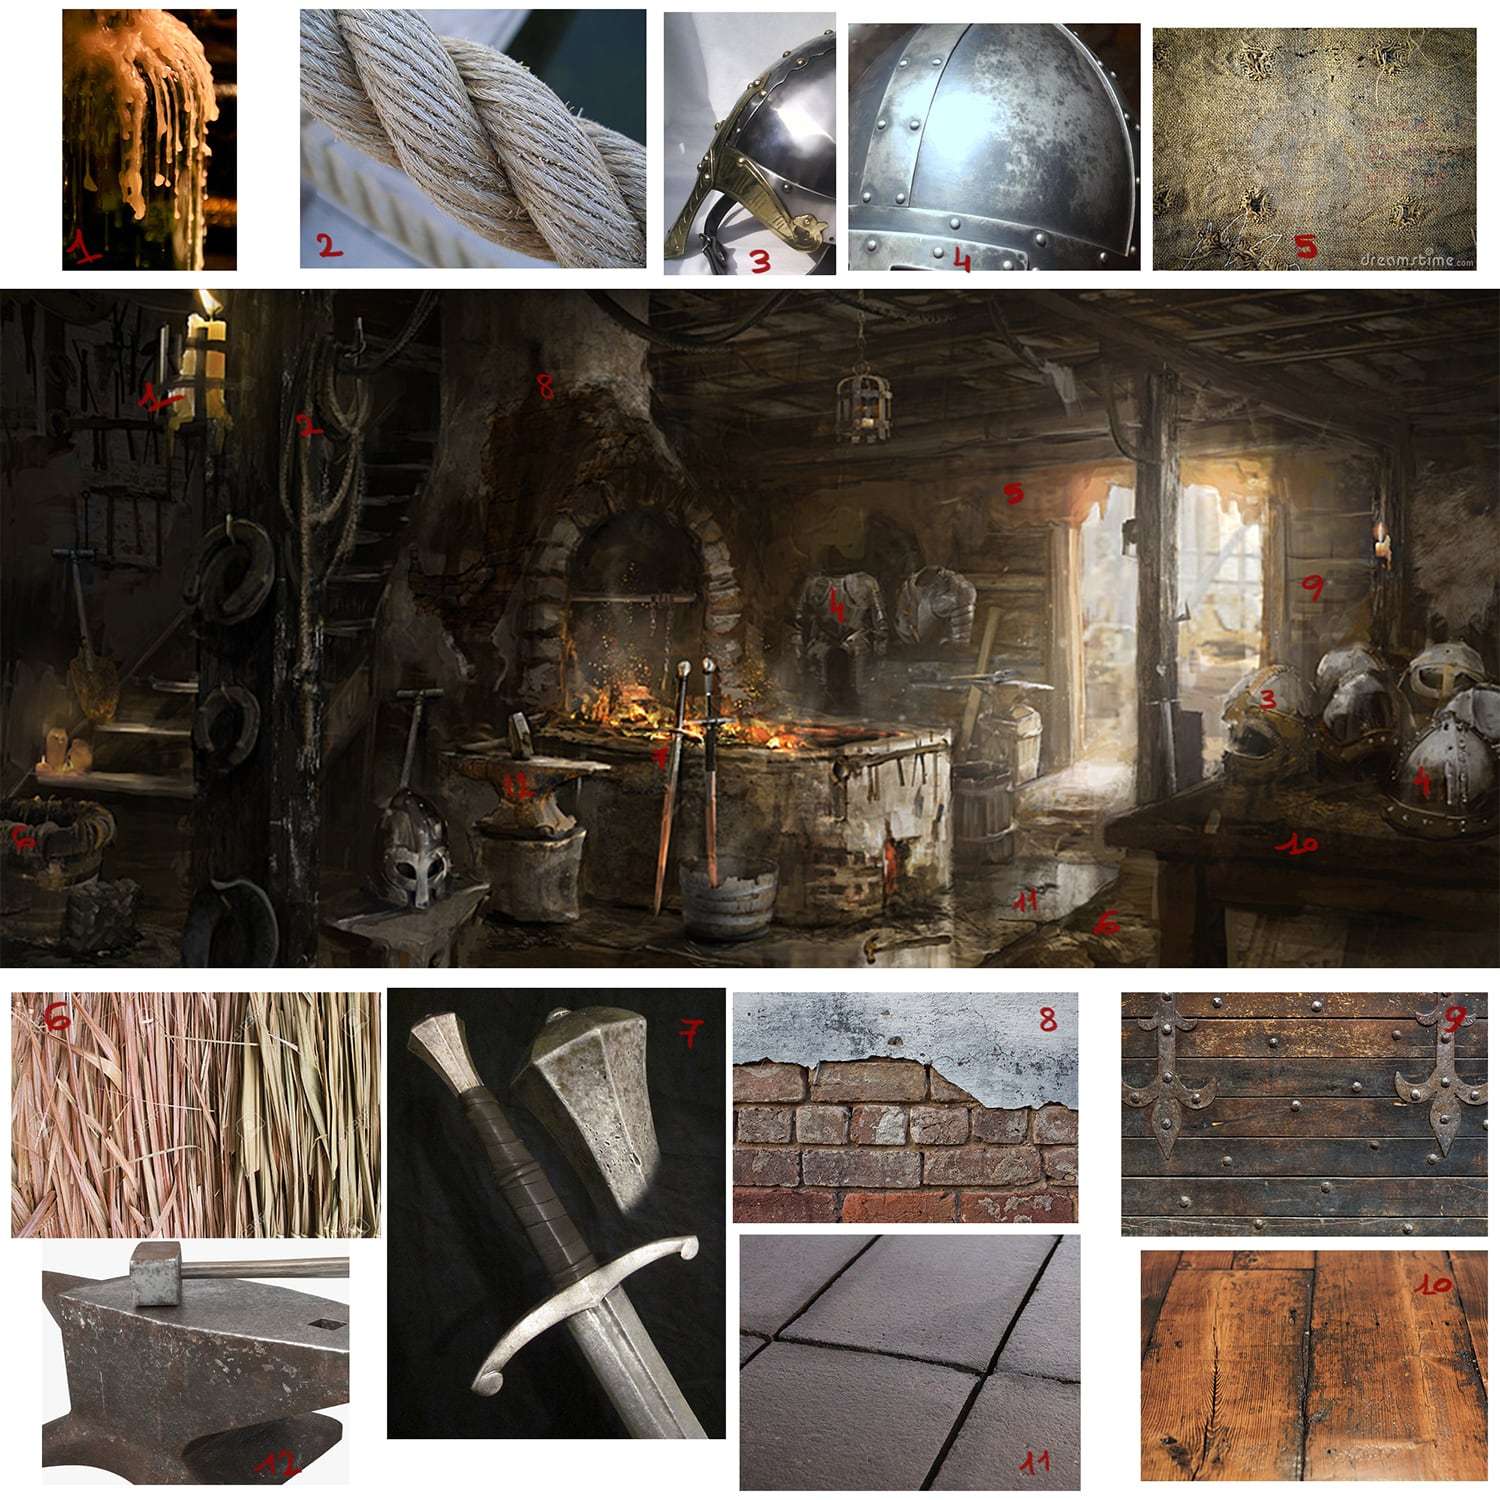
If you want to achieve a realistic look, using different photographs is very, VERY important (this goes for both modelling and texturing). Pay attention to the level of details you see and try to break up the surface into different levels of intensity. Also, don’t spend a week sculpting something that you are barely going see- time management is something you need to learn!
When someone critiques your work, don’t take it personally.
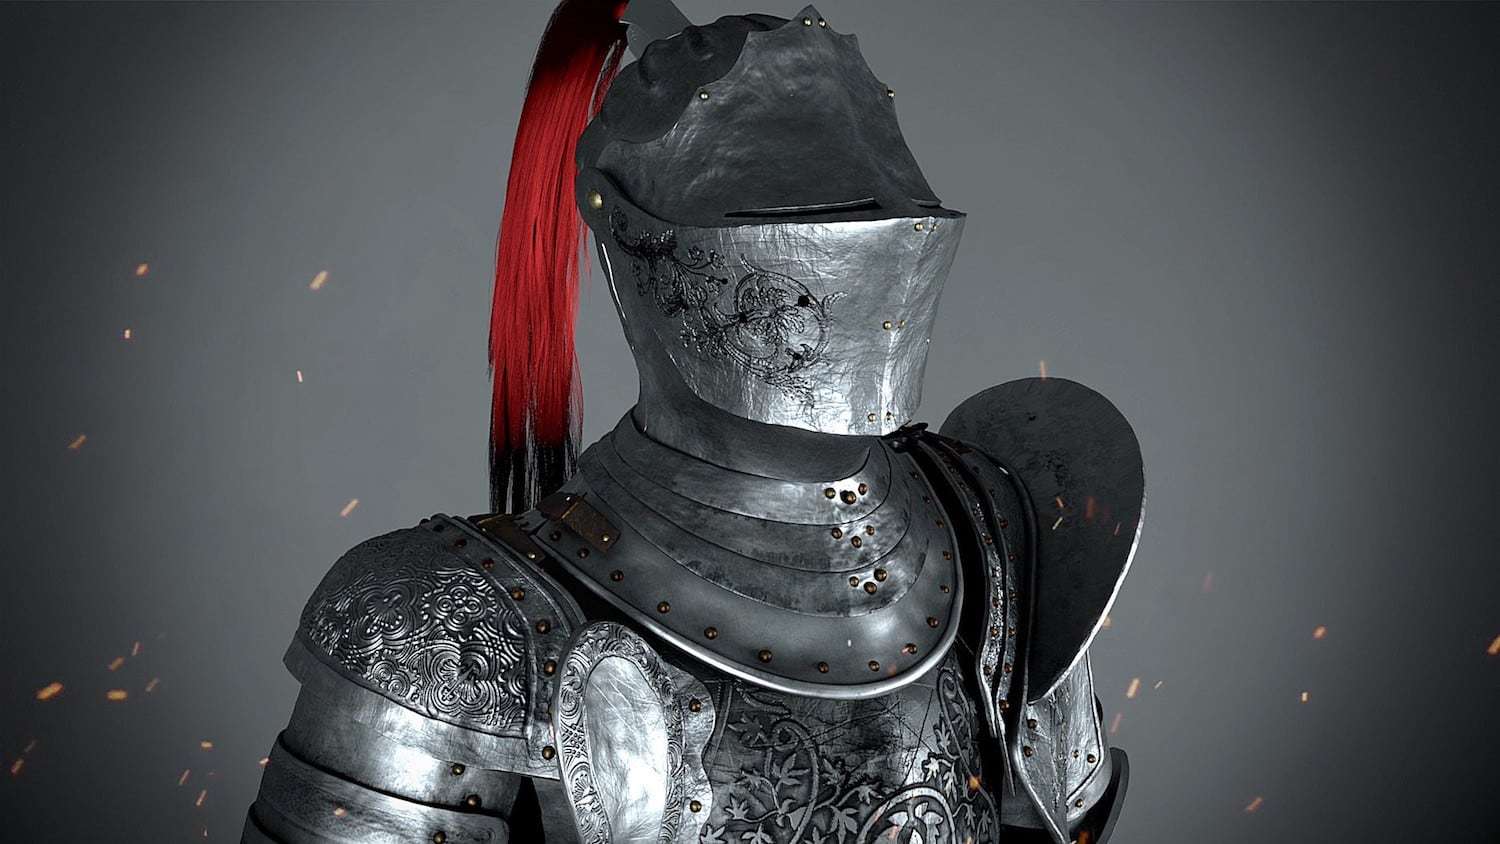
When I created the armour in the scene I started from a proxy created in Maya and then, with the uvs already unwrapped and laid out in tiles, I brought it into ZBrush. Because of the high amount of details I wanted to create, I had to split the model into many sub tools**. You want to avoid merging sub tools in ZBrush if you already have uvs – try to keep the geo together based on your tiles.
**
Once you reach the level of detail your looking for, export your displacement maps. A tutorial by Akin Bilgic, Accurate displacement workflow, is a great reference to get a perfectly working map.
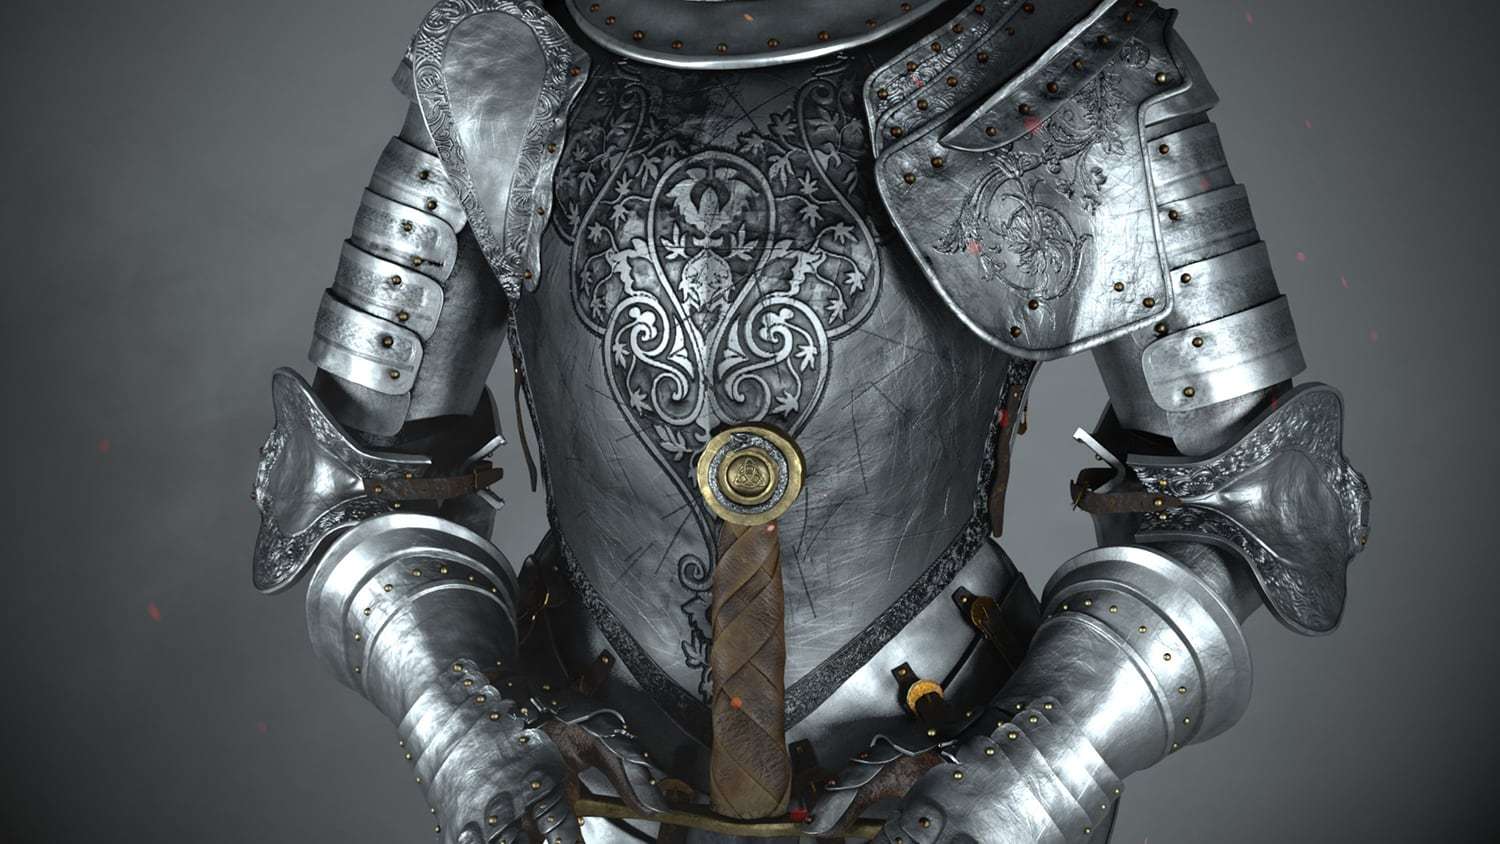
Regarding texturing, I used Foundry’s Mari, which works perfectly with high density meshes. I decimated my armour and painted my model using real photographs projections, curvature maps and ambient occlusion (both generated and baked into Mari).
Related link:Tips and Tricks on Creating Hyper Realistic Assets
One thing that is very important to keep in mind is always to experiment****! Remember that you are still creating art, so you can bend the rules, in fact, you might discover that a rock texture works perfectly as a breakup for a metal surface!
When it comes to shading and rendering, there is a lot to say and to learn. Watch tutorials and find out what the best way is to optimise your render time.
If necessary, you might have to reduce some map resolution or give up on some effects you could easily recreate in the compositing stage.
Do not to be afraid of compromising and **always ask for feedback **from your colleagues and people with more experience than you.
When someone critiques your work, don’t take it personally and **don’t get too attached to your art **because the best part of what we do is that there is always something more to learn!