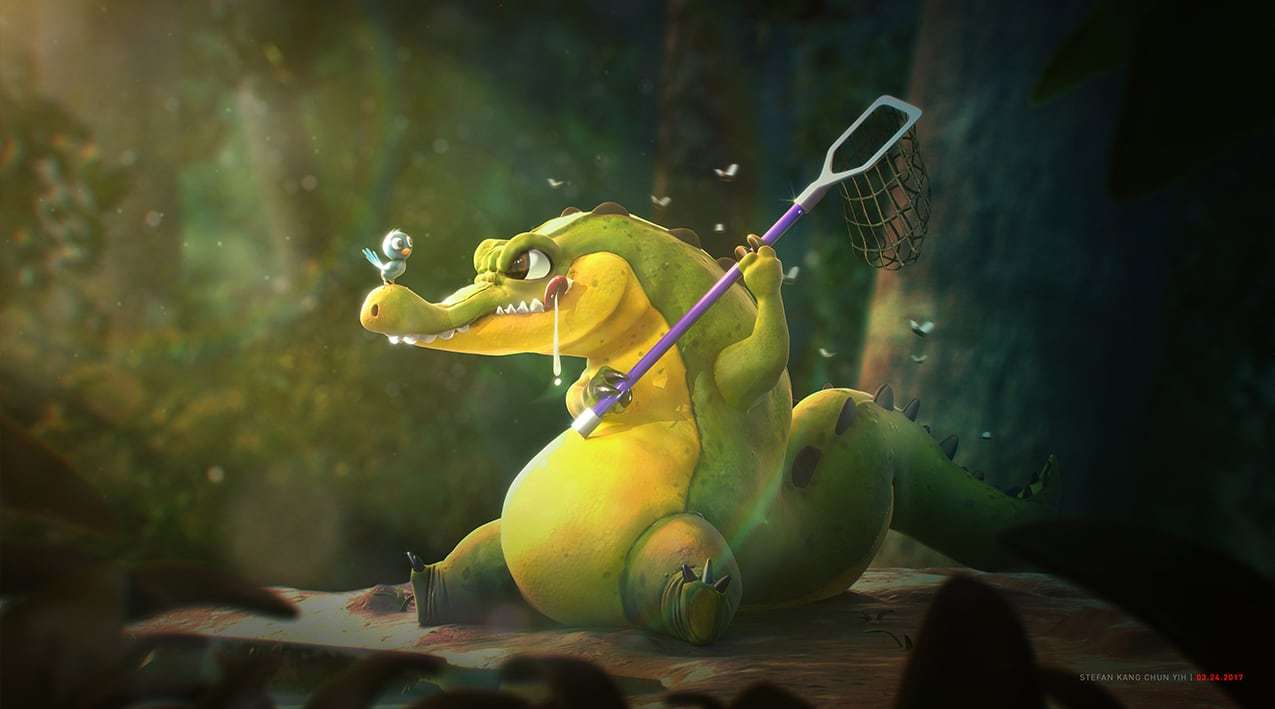

Crocodrile is an illustration of a very stylized 3D Disney character designed by Samuel Suarez.
The main inspiration from the illustration is the sense of naughtiness and the overall storytelling that’s illustrated. Every time I look at it, I recall a lot of childhood memories. Therefore, I want to captured that emotion and deliver the story to the audience.
Research & Reference board:
Before jumping into all the craziness and fun stuff, a reference board is something I liked to have first, even just a little research will help to make a clear idea of what the approach is. As you can see most of my reference are related to each other, more towards stylized, Disney type!
ZBrush Modeling
Before I start to block up the character with Zsphere, I use See-through in my ZBrush UI to see my reference board and concept art. I make use of my reference board as much as possible in order to understand the design and character of the sculpt. Once I’m sculpting I make sure everything sculpted is symmetrical, this step is rather important as it determines the overall perspective scale of the character.
Remember the concept is not going to give you a very accurate perspective but the goal is to achieve as close to it as possible. Depending on whether if you are doing the character for just quick concept purpose or an animation. In my case is to showcase the concept but if you’re planning to rig it you might want to sculpt it in a “T” pose.
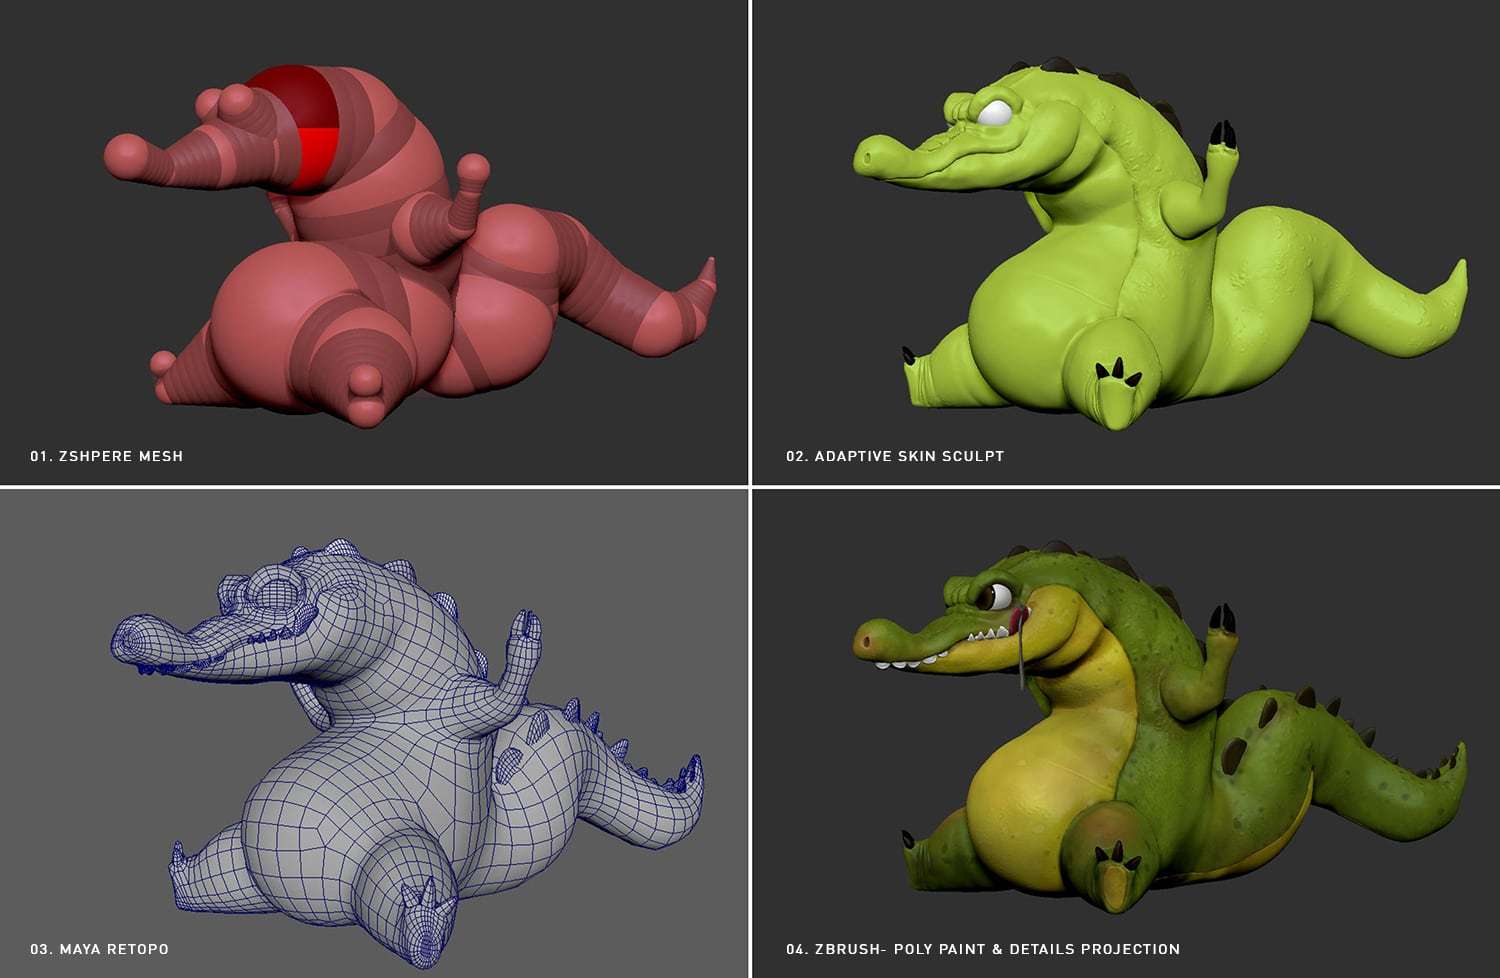
Make Adaptive Skin & Retopo
Once I’ve got a rough mesh for my model, I increase the polygon division with the adaptive skin feature and did a rough sculpting to get the details on the mesh then export it as an .OBJ format to retopo it in Maya.
the goal with stylized characters is to maintain a balance of realism and stylized
I’m liking to use the Maya quad draw tool (it’s more user friendly), combining with the live mode so that the polygon created can snap immediately on the high poly ZBrush model. Make sure you have no pesky Ngons in the new mesh created in Maya, and make Quad wireframes as much as possible. The process of retopo helps to decrease your file size, especially with a cleaner mesh, ZBrush can then calculate the model more accurately.
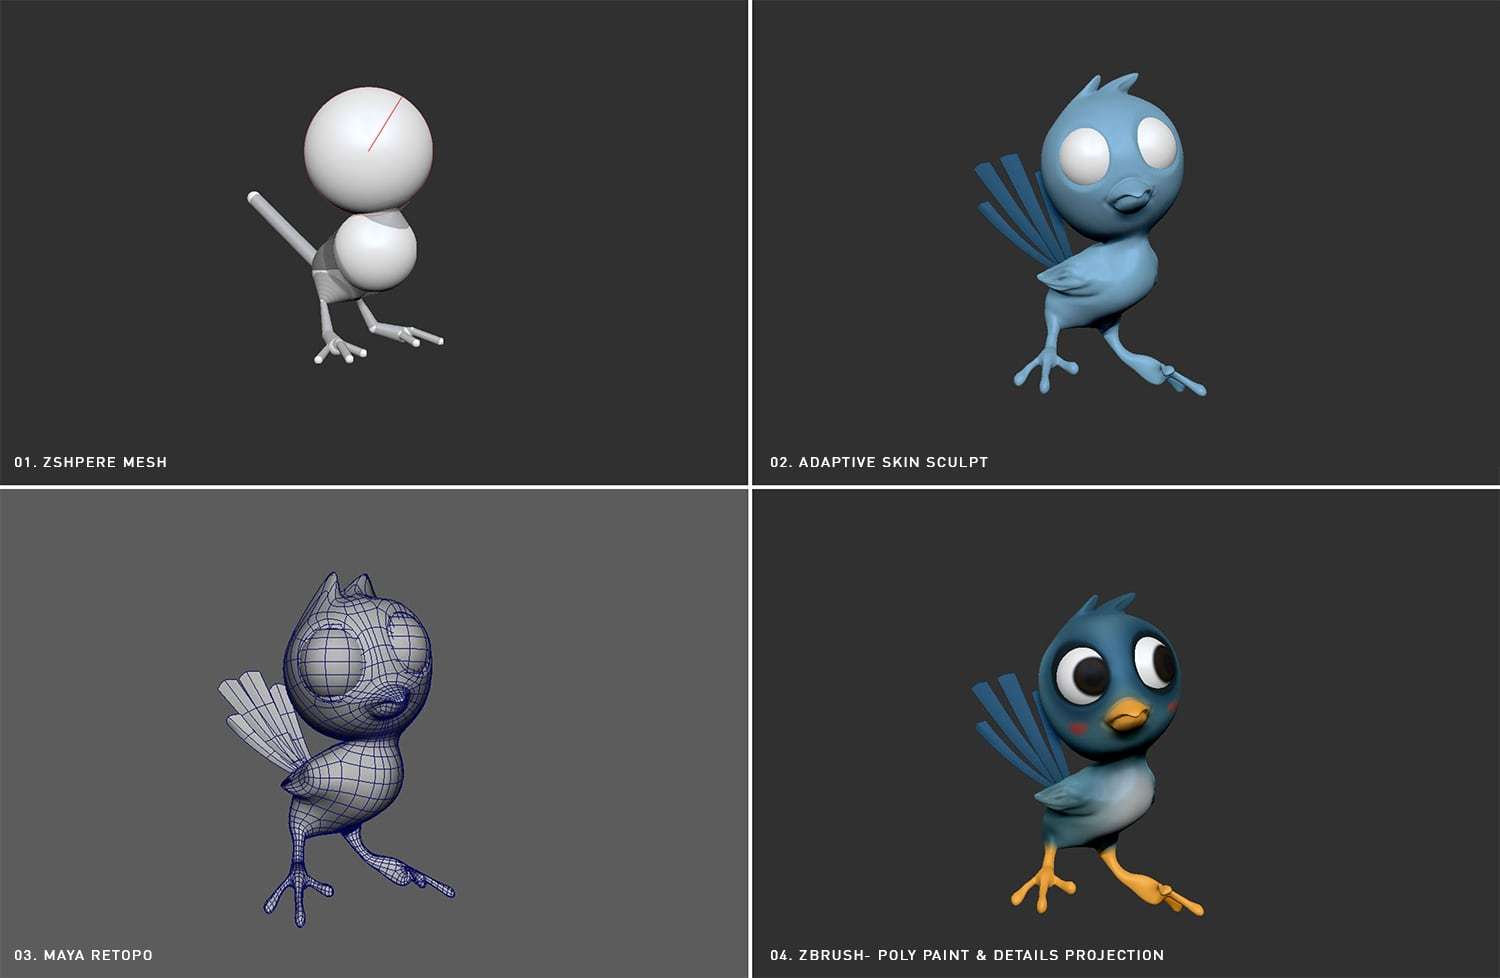
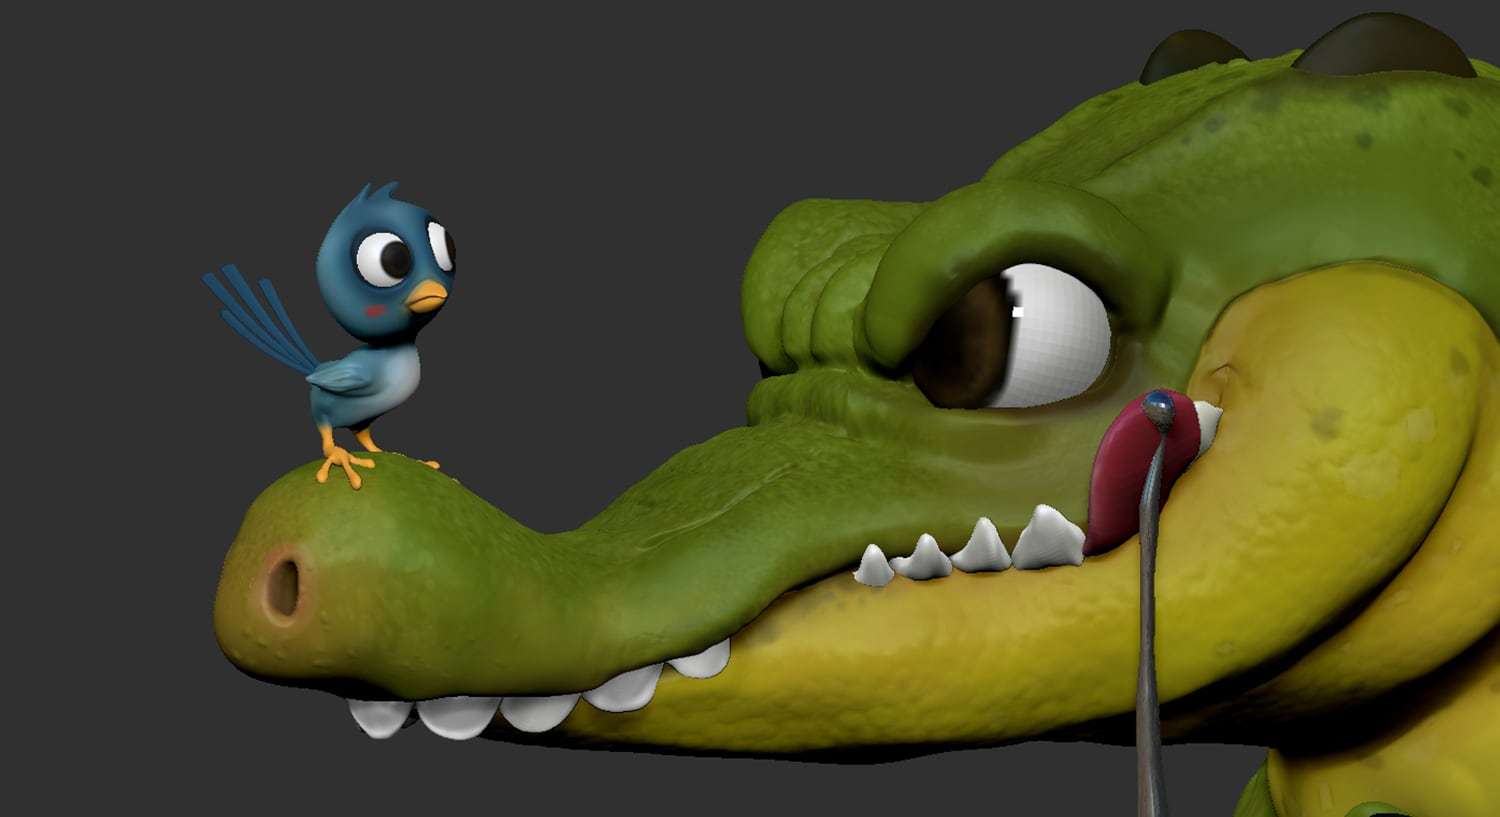
Details Projections & Sculpting
Next is to project the details back onto the cleaner mesh and refine the sculpt. I try to maintain the details on the skin and keep the model between a stylized and less realistic looking, therefore I didn’t really go too crazy for the realistic crocodile skin texture or the birds leather, I keep everything subtle and then poly paint it over in ZBrush. As the goal with stylized characters is to maintain a balance of realism and stylized.
Next is to project the details back onto the cleaner mesh and refine the sculpt. I try to maintain the details on the skin and keep the model between a stylized and less realistic looking, therefore I didn’t really go too crazy for the realistic crocodile skin texture or the birds leather, I keep everything subtle and then poly paint it over in ZBrush. As the goal with stylized characters is to maintain a balance of realism and stylized.
Polypainting
Polypainting is my favourite step in creating a character! The best thing is you can do a quick texturing without worrying about the UV yet. Colour plays an important role, especially into cartoon characters. My goal was to keep the vibrancy and good saturation within these characters.
Together with the skin material it gives me a rough idea of how the model will looks like merging with the painted diffuse in ZBrush. As you can see from the thumbnails, the process between this two character is very similar.
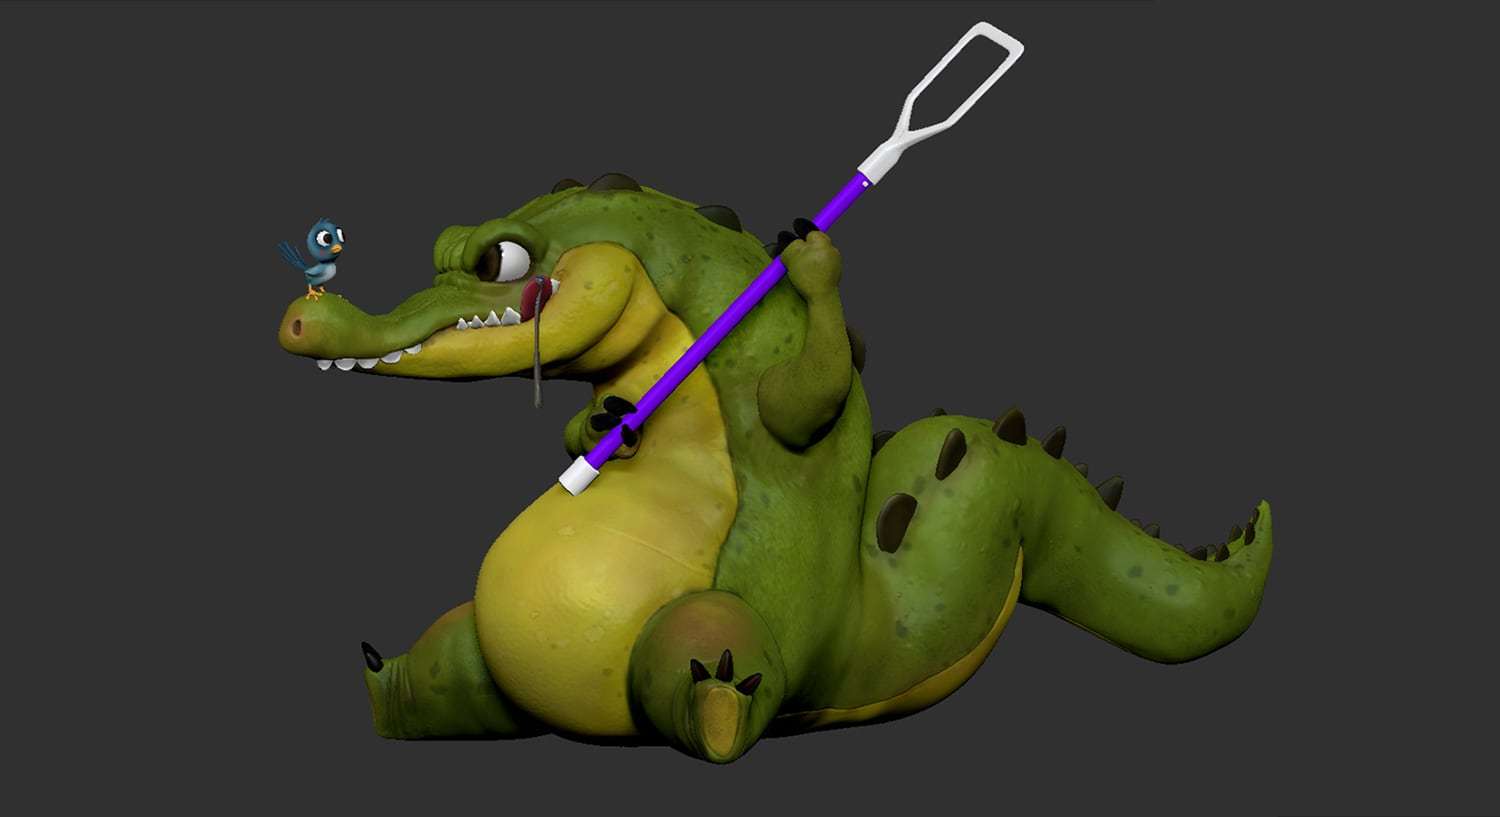
Transposing
Then the last step in ZBrush will be transposing the character to show their action before exporting out all the texture maps. Transposing can be tricky, most often will stretch out the character. So be patient, try moving it base on the joint ankle. If that stretch the character, don’t be frustrated. Spend sometimes refine it with the brushes.
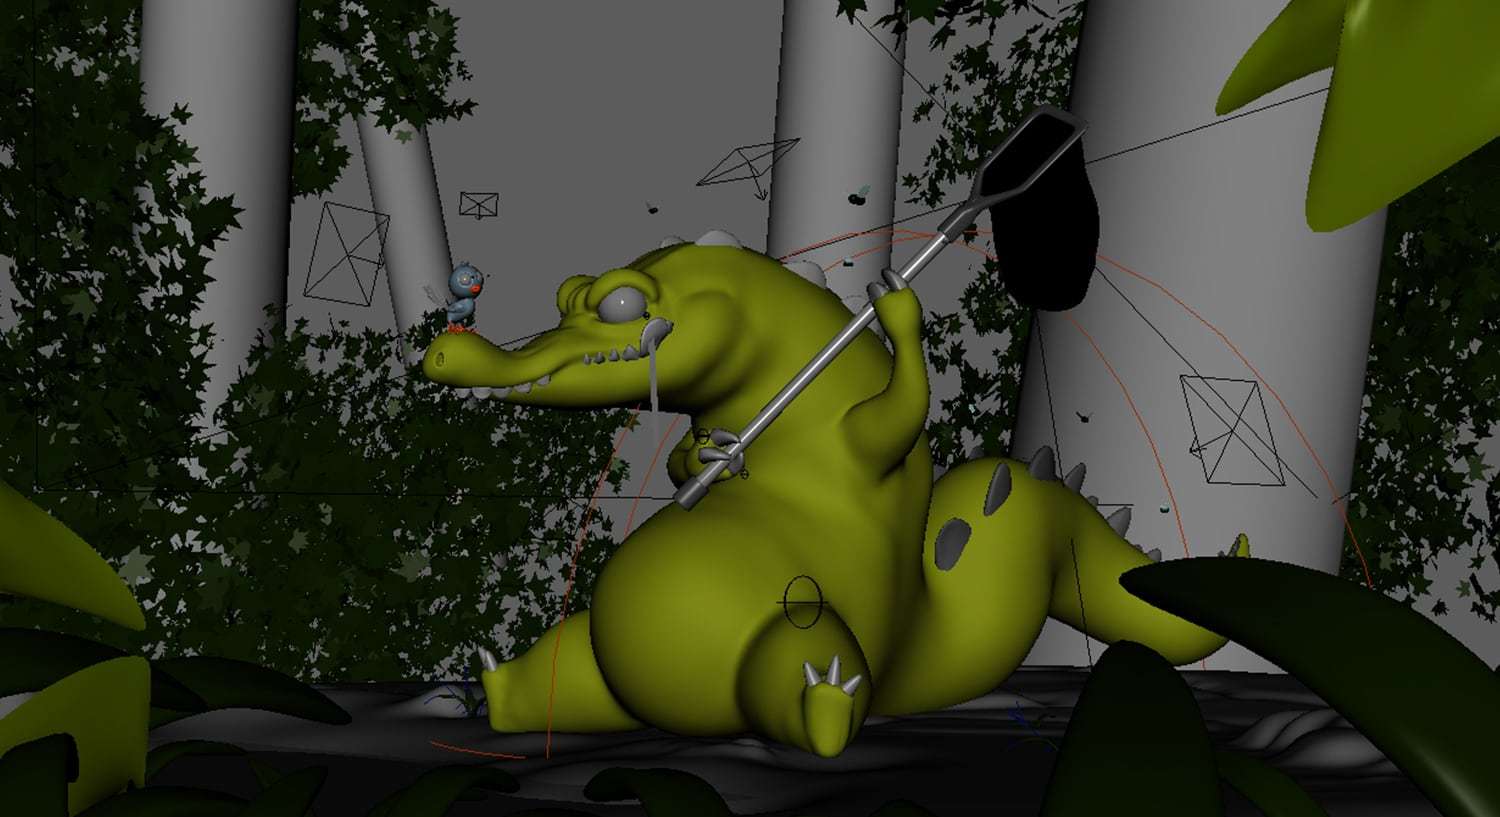
Lighting
With all the texture map exported from ZBrush, I created a very quick and rough environment for the model in Maya. even though the original concept art piece has no environments, it’s best to add a simple even rough environment to further help illustrate the artist idea of these characters.
Everything in the picture stands to tell a story, the particle dust appears to not just tell that environment is dusty and also to create a sense of magical feeling.
Learning from the futurist Designer – Syd Mead always did, create an environment to fit in his design so the illustration is more alive! Aside of all the craziness of sculpting, lighting play an important role into making a character’s emotion. Lighting convinces the audience that the story is believable.
With that, all I did at first was trying to mimic the light and shadow from the concept and then adapt the lighting to fit the environment I’ve put the character into.

Compositing
Final stage, Compositing. The beauty of compositing is once you have all the passes render out, you can refine a lot without jumping back to 3D application.
To me, compositing is where I always get to make the final decision to improve the shot! I love turning a 3D render as close to what was shot with a camera by adding things like Vignette, chromatic aberration, depth of field and lens distortion. Just so the audience can connect it to what they usually see on a photograph.
Everything in the picture stands to tell a story, the particle dust appears to not just tell that environment is dusty and also to create a sense of magical feeling. The sunlight here stands as a hope to the crocodile but also a meaning that the bird will have the highest chance to escape.
As you can see from the image above, compositing can tell a lot of from the visual of the story and deliver the final image to another level.
Here it is! I hope this helps everyone to get a general idea of the process to create a character from concept to the final compositing stage!