When I started my mentorship semester at Think Tank Training Centre, I had just a superficial knowledge of what it takes to create 3D game characters. I knew a bit of anatomy, a bit of draping, knew some ZBrush and Maya. Oh, and I have never done any serious texture work, ever.
I felt like I just left the training area of the game and I had to slay this huge boss right away. But I was eager for it. One of the great things about being in school is the motivation you get from the hard work of your friends and colleagues. I also had my mentor, Pierre Buorgeot and our growing community to back me up. So I wasn’t feeling overwhelmed but inspired!
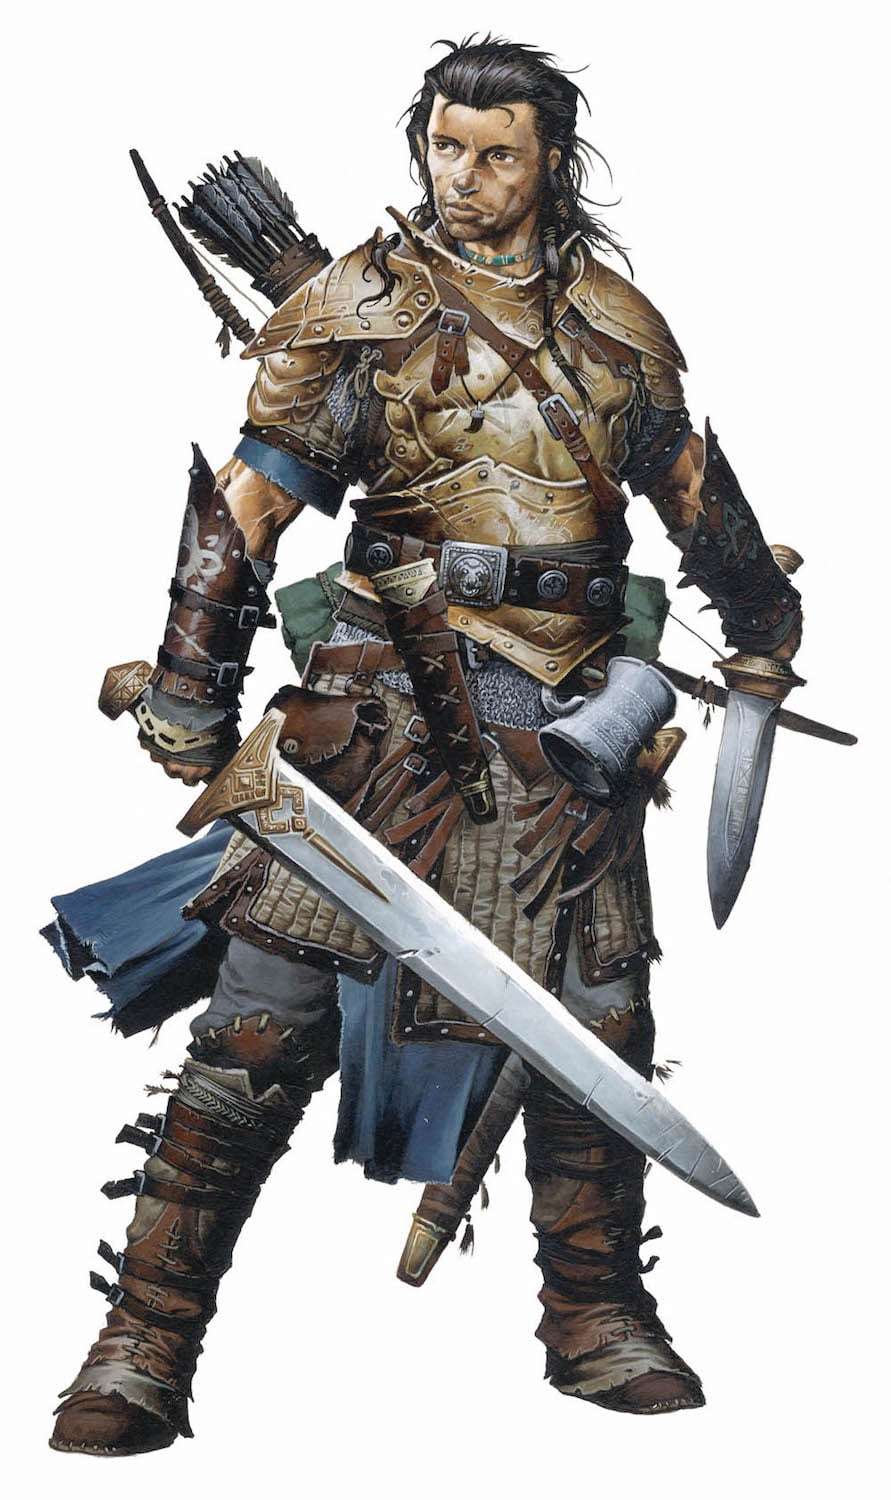
The key factor for me when I started my first character, the iconic fighter Valeros, was to take the whole process step by step. Which turn out to be one of the things I love the most about creating 3D art instead of 2D, every step is different and challenging by itself.
So I focused on each step at a time leaving the rest to take care later when I get to it. It’s good to mention that my mentor besides pushing the level of quality of my work in each step he also knew what was ahead preventing me to take turns that would compromise the character in the future.
One of the most important things I learn about sculpting details is always to beware not to let them look procedural
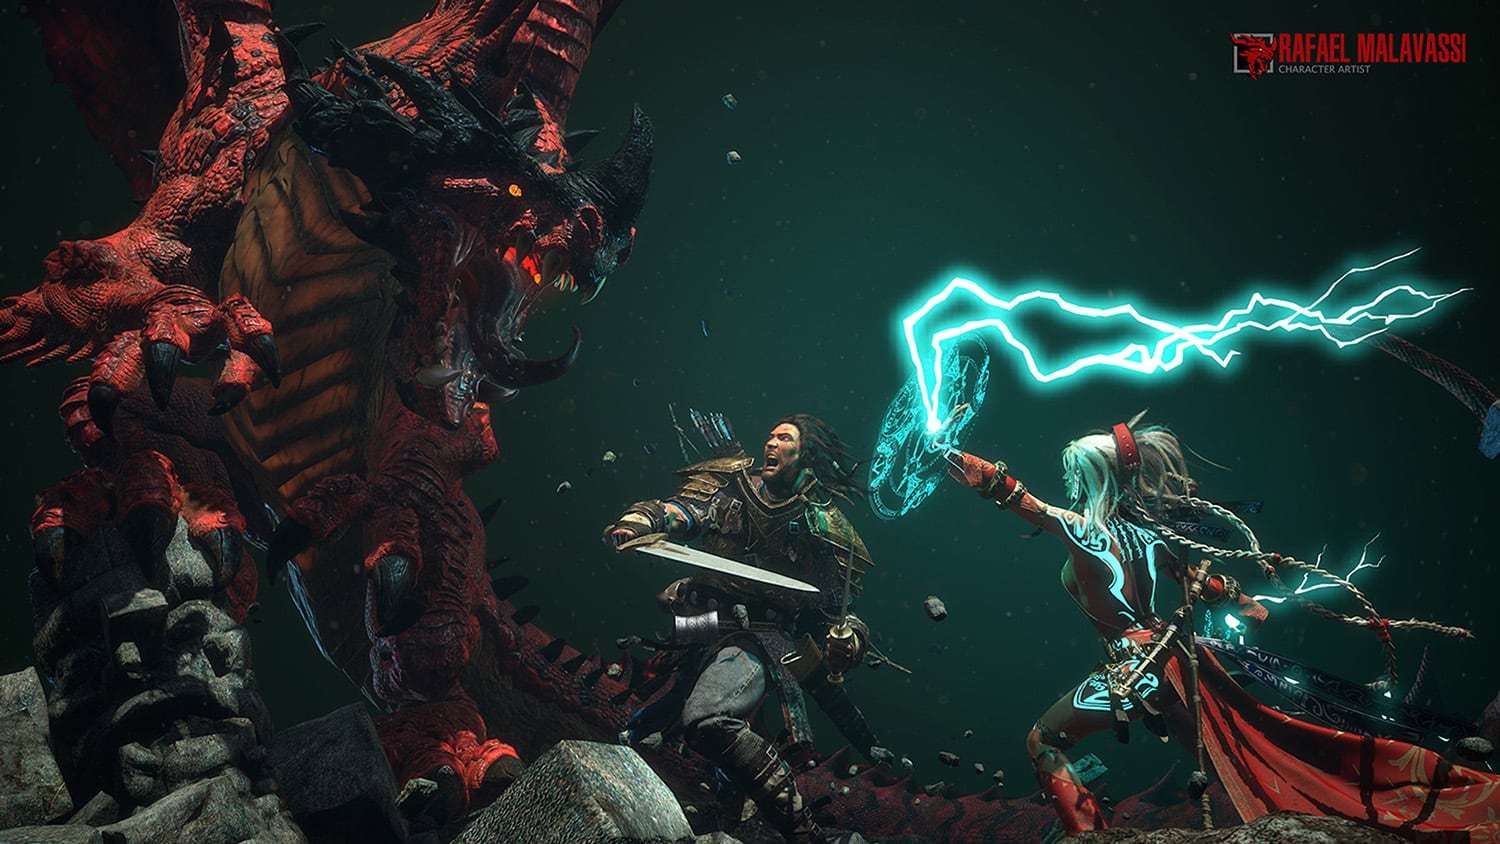
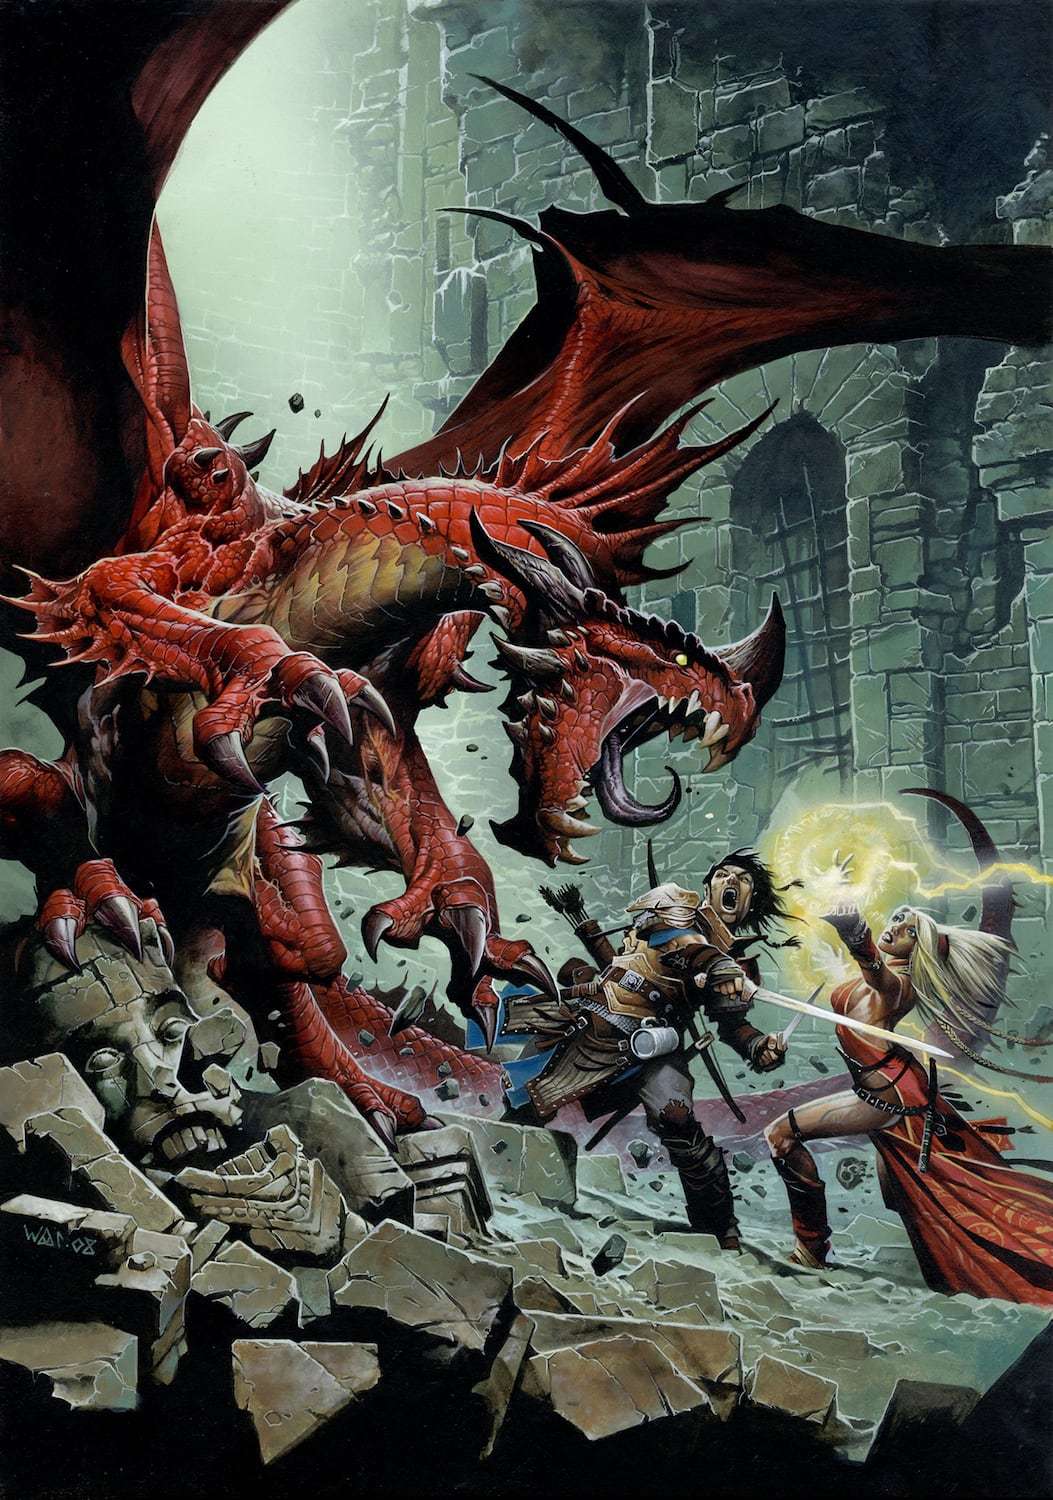
And so I started to level up before the big boss, to create my first character. The concept was already set, it was the cover art of my favourite RPG Rulebook, Pathfinder. It was not the best concept though.
It is heavy stylised, with the incredible art style of Wayne Reynolds, and I wanted to go for a more realistic look, using actor’s likenesses and realistic textures. It also lacked a reference for the Red Dragon. But I couldn’t see myself doing anything else and to be passionate about your project is a huge motivational factor. I believe that when in doubt always choose your passion.
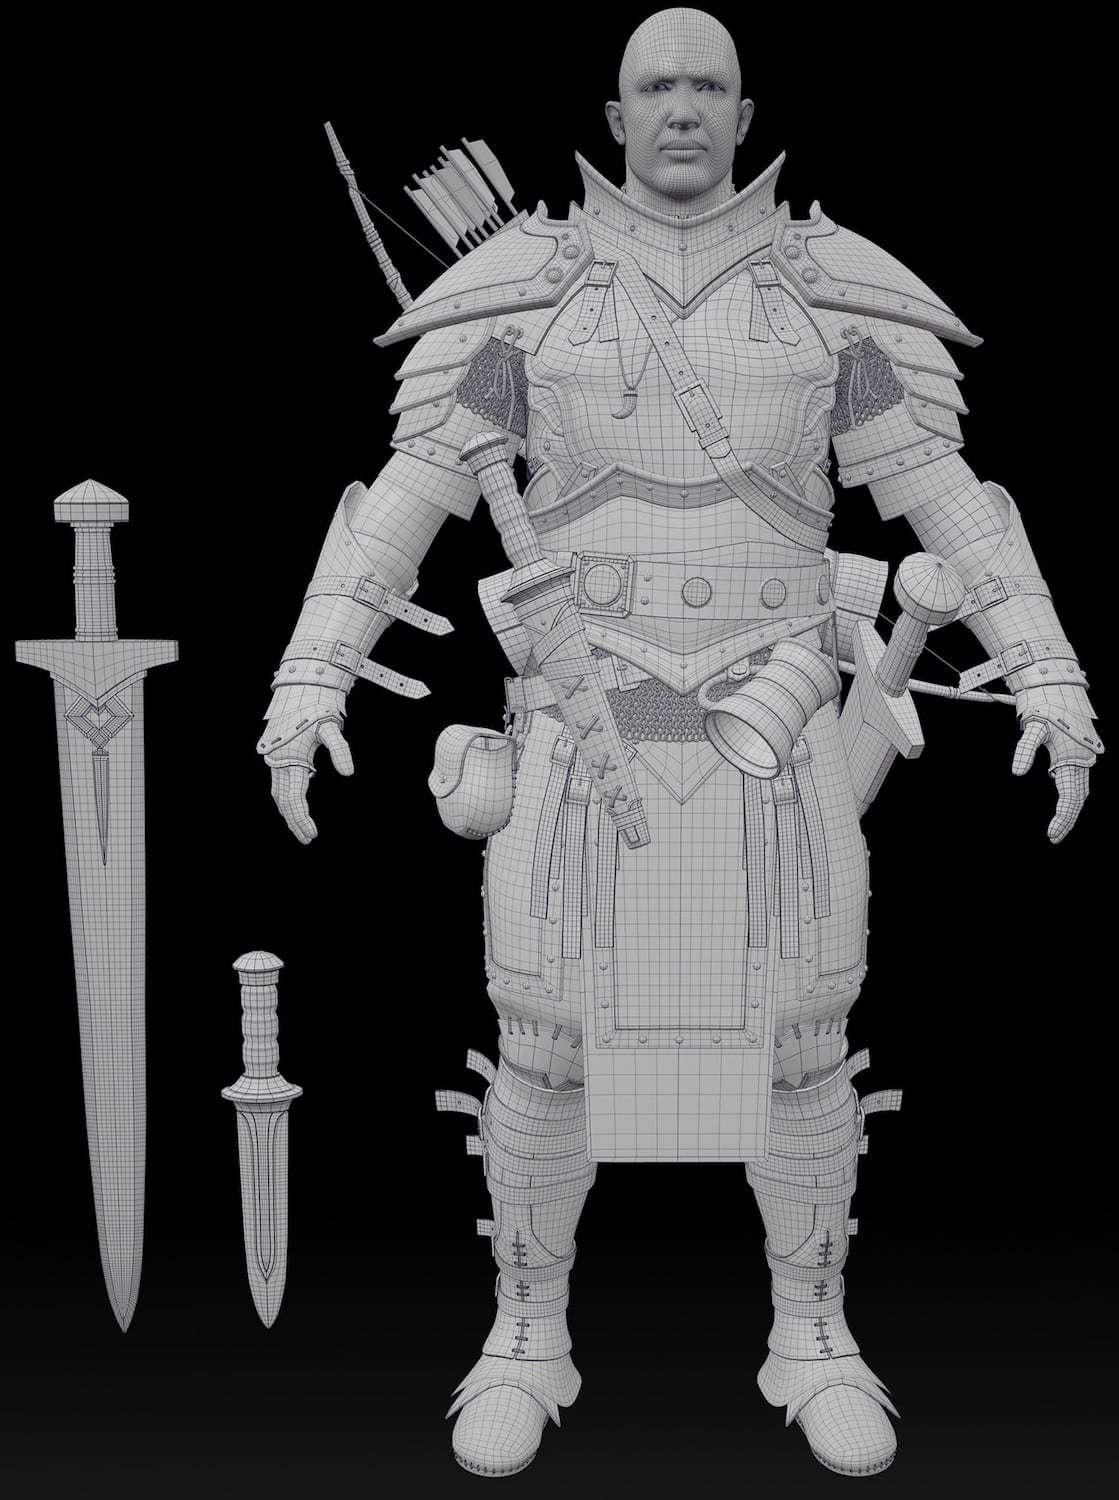
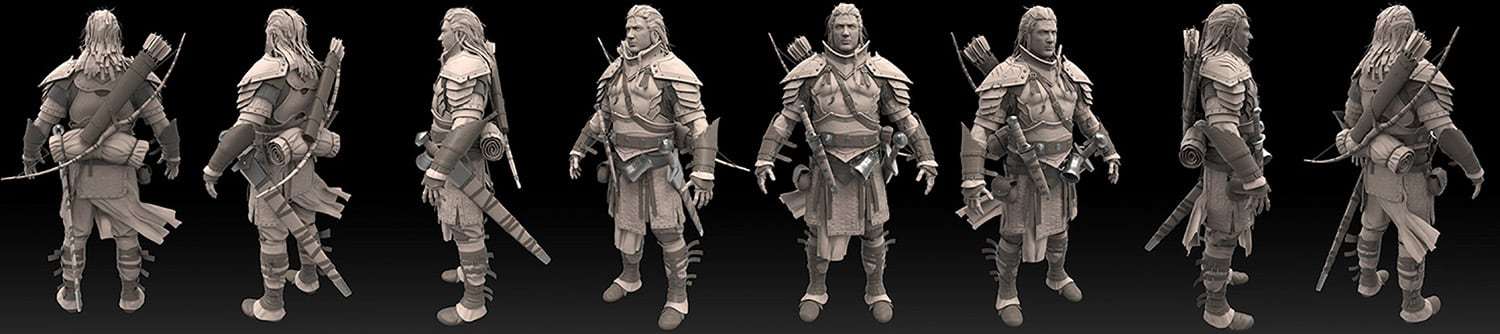
The first step was the block out. **I used both Maya and ZBrush at this stage, looking for the most efficient ways to get the proportions and major shapes defined. **
Extra care for good lines of action, giving a more “heroic” anatomy, and silhouette goes a long way here. Right after I jumped to create the pre-sculpt mesh, mostly done in Maya.
But most assets should be as close as possible to the concept of always keeping in mind the consistency in the thickness of borders and the readability of all elements. All has to be bold and readable!
Related Link: The Evolution of Rebel Fighter
After that, I exported all to ZBrush and started the sculpting work. For the body, I sculpted the major cuts and bends in the plate armour, the cuts and worn of the leather, the cloth draping, the anatomy of the arms and other media to fine details. I left the micro-details of the materials for texturing; some other artists like to do them in ZBrush as well.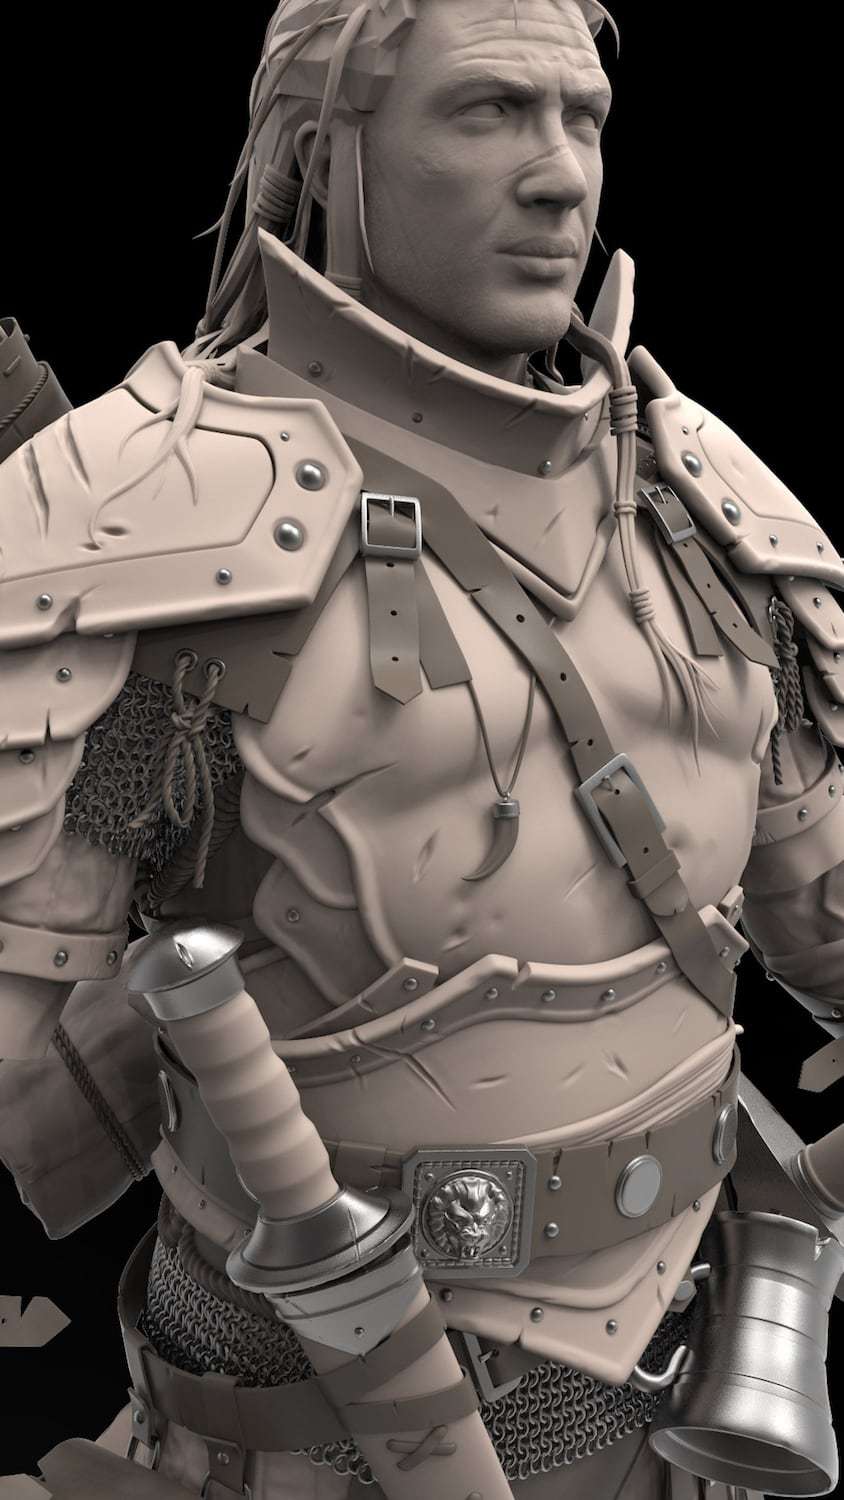
One of the most important things I learn about sculpting details is always to beware not to let them look procedural.
It’s best to separate them in big, medium and small details and place them together in a way that makes sense.
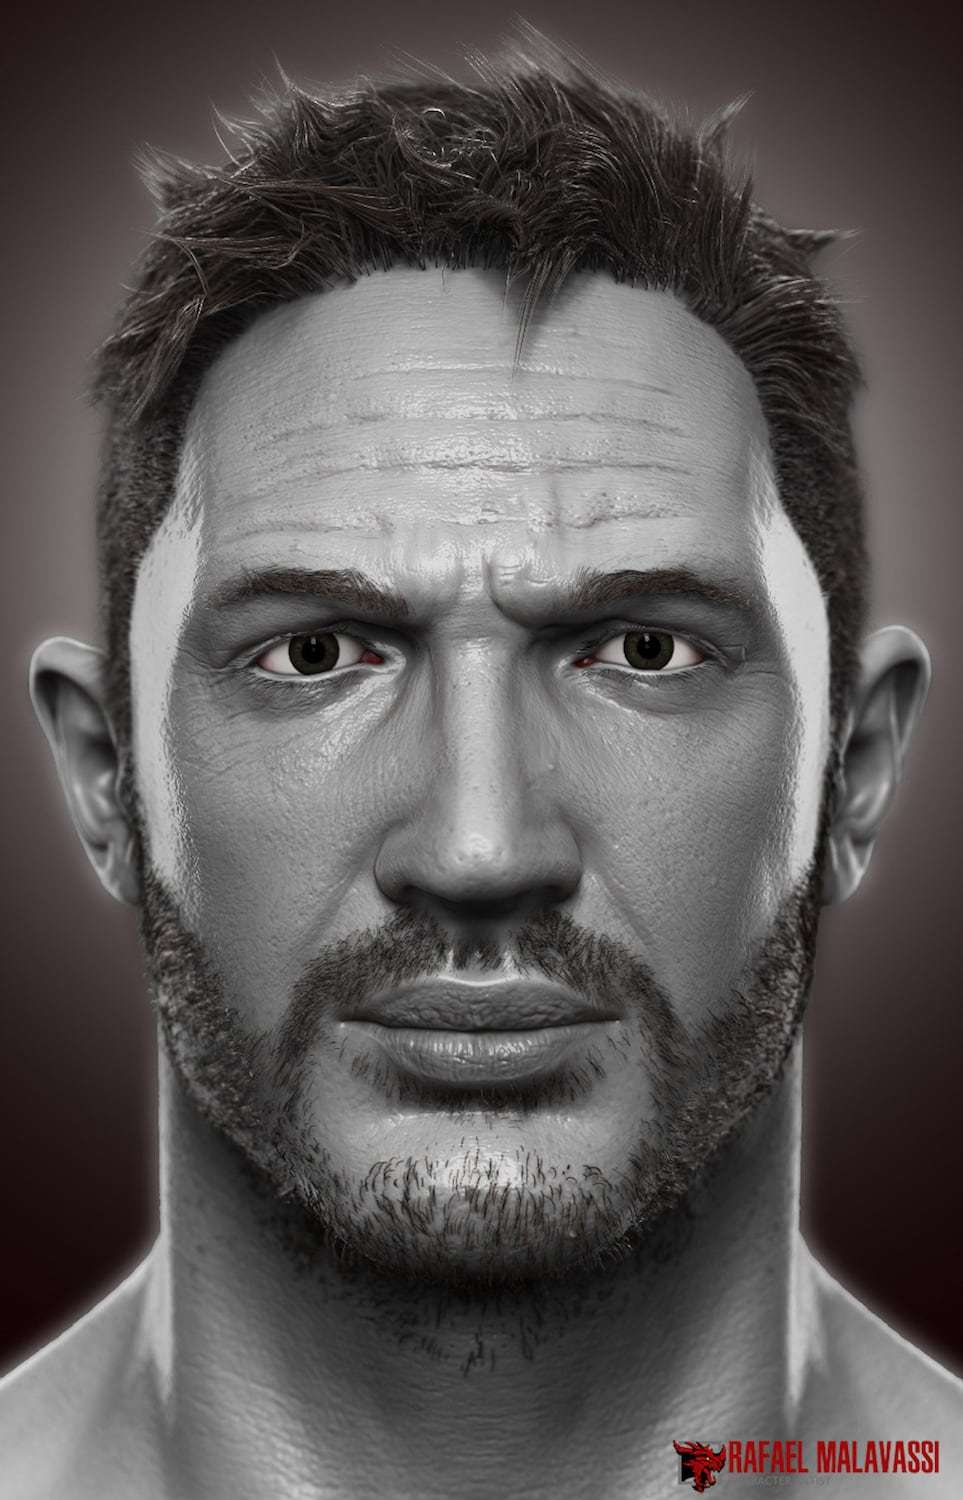
The sculpting stage also included my first likeness sculpt. I choose the actor Tom Hardy to be the face of Valeros. Likeness sculpt is a tricky thing that takes a long time to be done and is a great training for your artistic eye.
However, the most important thing to know is facial anatomy, starting with the skull, laying out the muscles and then proceeding to find the major proportions of each face.
After that you break symmetry and start to refine the shapes, things like the light in the references, makeup and photo manipulation are your worst enemies to nail a likeness in this stage. After all that, I proceeded to sculpt the wrinkles and pores, using the same idea of big, medium and small details.
With the sculpting, stage concluded it comes to the retopologize stage (hell). This is a very important part for the real time render pipeline, but it is not very rewarding because it feels you are redoing all the modelling. And that is essentially what you do, but now you have the high poly mesh as a base and this time you keep in mind the upcoming normal map baking, the poly count, and the proper topology for animation while maintaining a good silhouette and trying to hide the squarish shapes of the polygons on organic surfaces.
Related Link: Creating the ultimate digital double for Matt Damon
After some time Retopo was finally done, and I had both high and low resolution meshes for Valeros. Now it was time to start the texturing process. First I baked the normal maps, which technical aspects can vary from situation to situation. I used xNormals for the baking and photoshop for some fixing. After that, I get the normal maps into Knald, which generates great ambient occlusion, cavity, translucency and some other useful support maps for the texturing process, all based on my normal maps and my low res geo.
With all these maps and some material textures from around the internet, I started the texturing process in Photoshop while using Marmoset Toolbag 2 for the physically based render preview. The key here is to keep the layers and groups organised and use the blending modes, opacity, masks and adjustment layers to do the heavy work, very fell elements were hand painted.
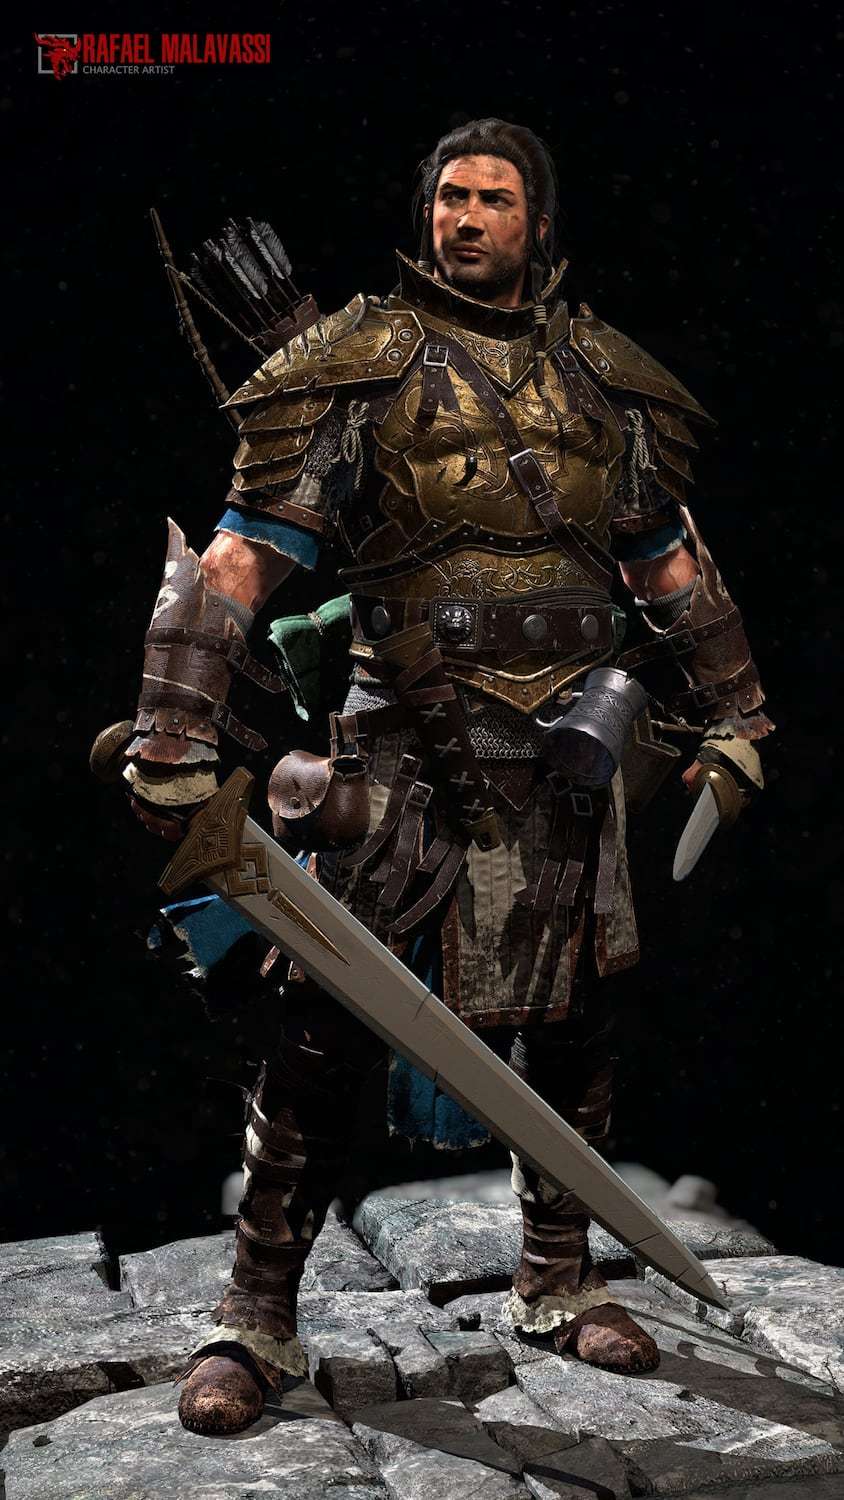
Alright! At this point, Valeros was almost finished! A friend of mine from school, Rahil Pai, did a quick rig so I could keep the proportions for the posing process and after a couple of days worrying about lines of movement and balance, I got Valeros in both poses I used for my demo reel.
One down, two to go! I could feel the improvement during this whole process; I was levelling up! That kept me motivated to tackle the Red Dragon and the iconic sorcerer Seoni right after. It took me eight months to slay this dragon, finish this scene. In that time I went from being just another student to a professional, but the grinding never ends.