
For this project, I used a model that I created for a client who wanted to visualize an empty space. I had rendered an empty model, but believed that this project had the potential to transform itself into something unique.
CREATIVE INSPIRATION
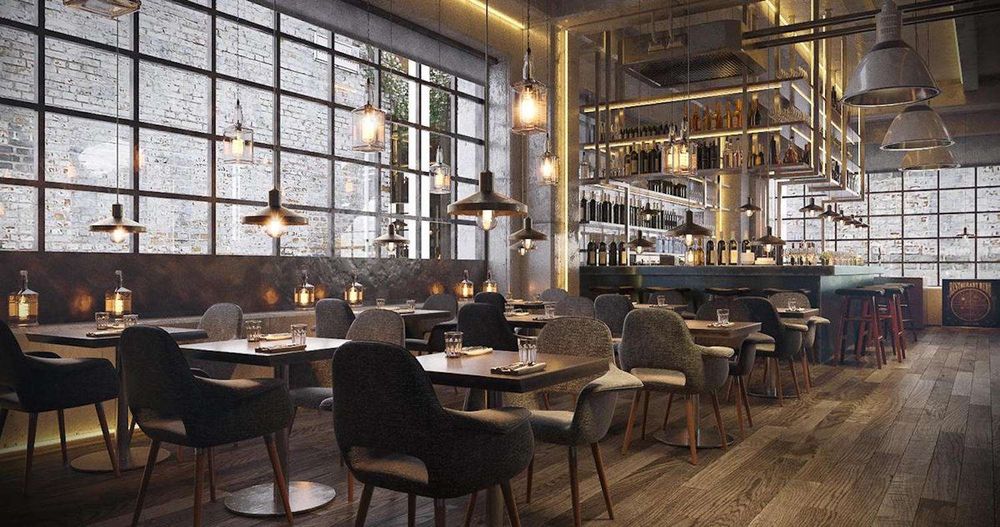
The large open space was an instant source of inspiration for me! I decided to add my personal touch, with an unrefined industrial look that included lots of metal and raw materials. I thought it would be interesting to contrast the cold space with warm elements; in order to achieve this, I added components that would make the space feel friendly and casual such as furniture, a bar, chairs, etc.
I have a go-to set of tools in 3ds Max that I always use simply because they are straightforward and suitable for all types of designs.
Pinterest and Google searches were invaluable in getting the creative juices flowing.
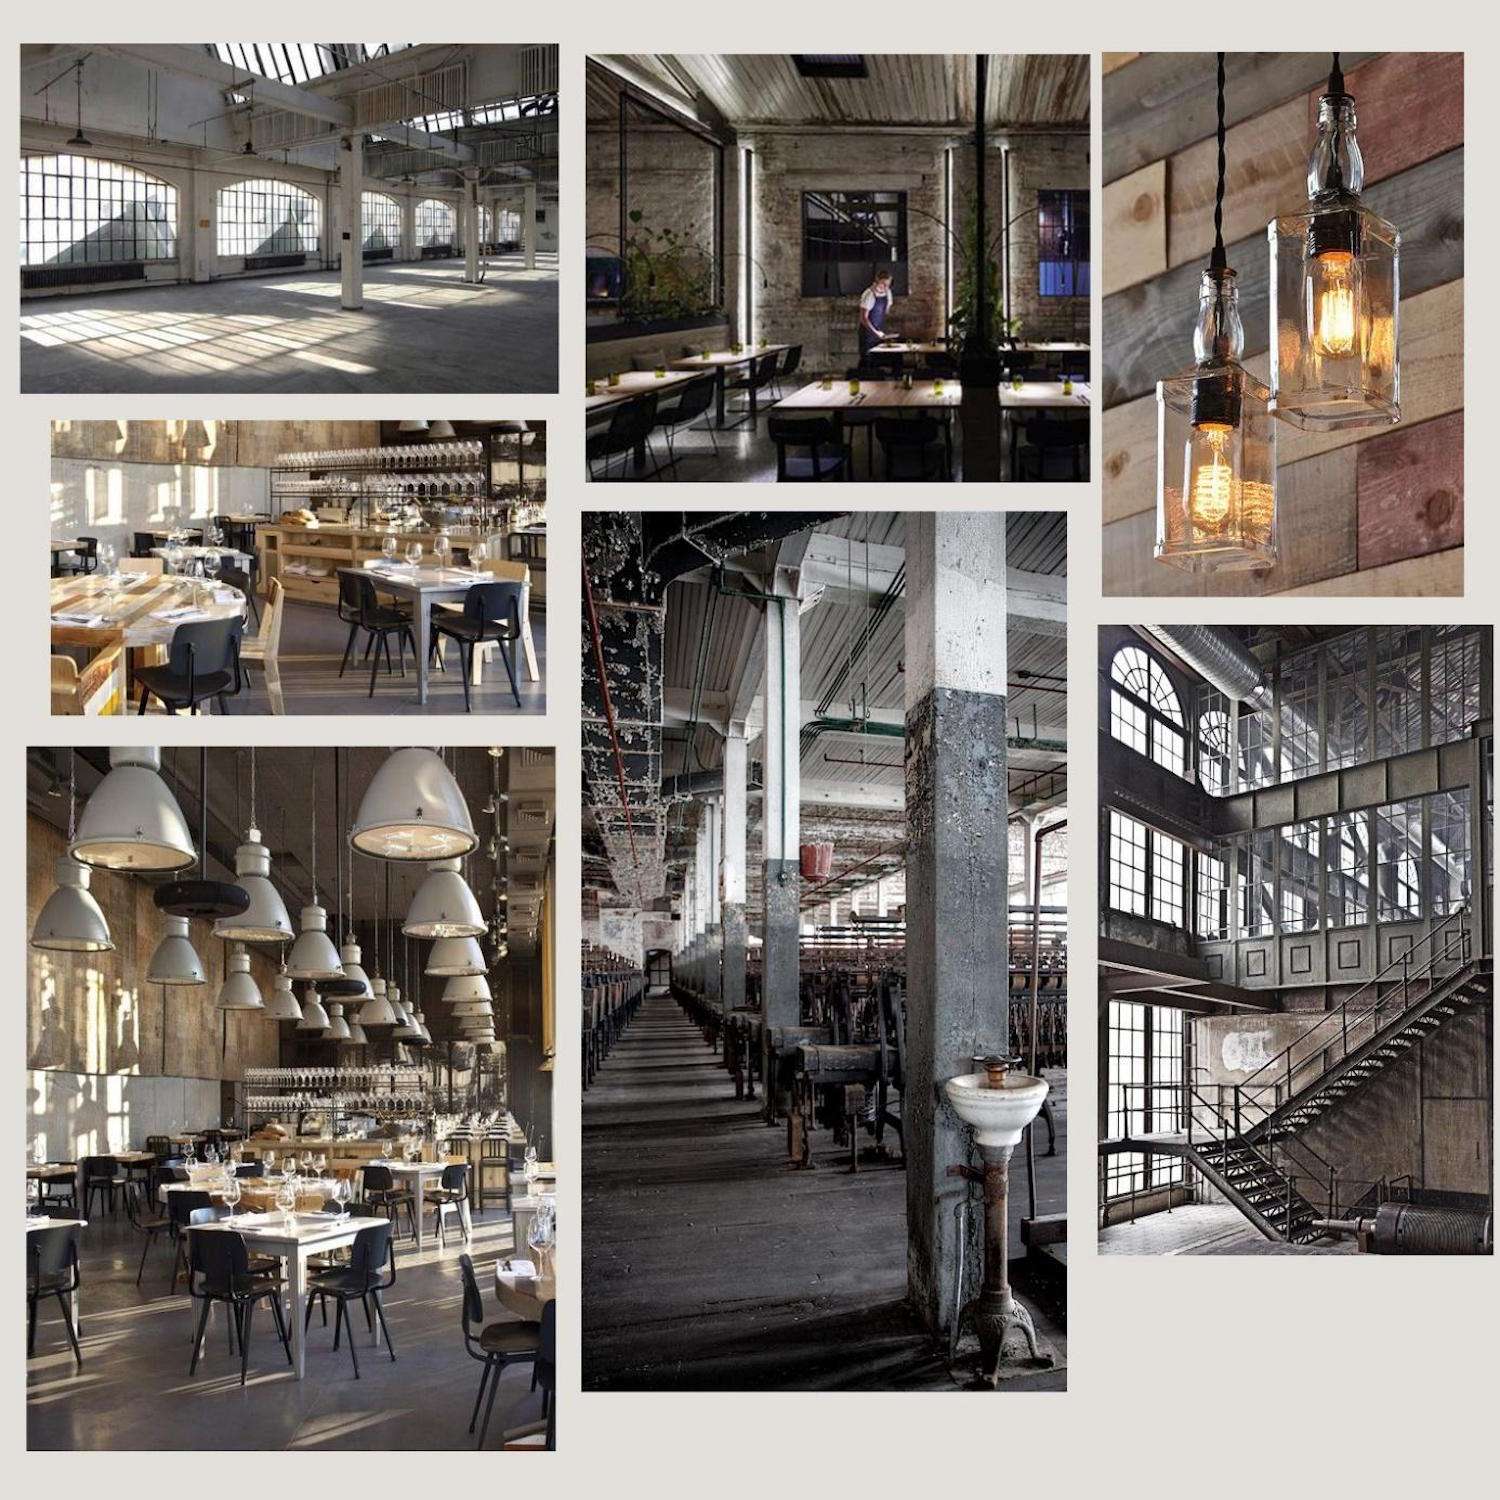 Image courtesy of Yanis Lachat
3D MODELLING
I modeled everything in the scene using 3ds Max, except for small accessories such as the forks, knives, and bottles placed in the bar.I have a go-to set of tools in
I have a go-to set of tools in 3ds Max that I always use simply because they are straightforward and suitable for all types of designs. I start with a simple box, and then build around it using cut, extrusion, slice, and sweep. For more organic shapes, I use TurboSmooth to achieve a softer finish. With 3D software getting increasingly sophisticated, I find the most basic tools to be the most efficient for my workflow.
 Images courtesy of Yanis Lachat
TEXTURING
In terms of texturing, nothing was too challenging within this scene. I used the standard UV mapping and unwrapping tools found in 3ds Max. Personally, I find the slate material editor intuitive to work with.
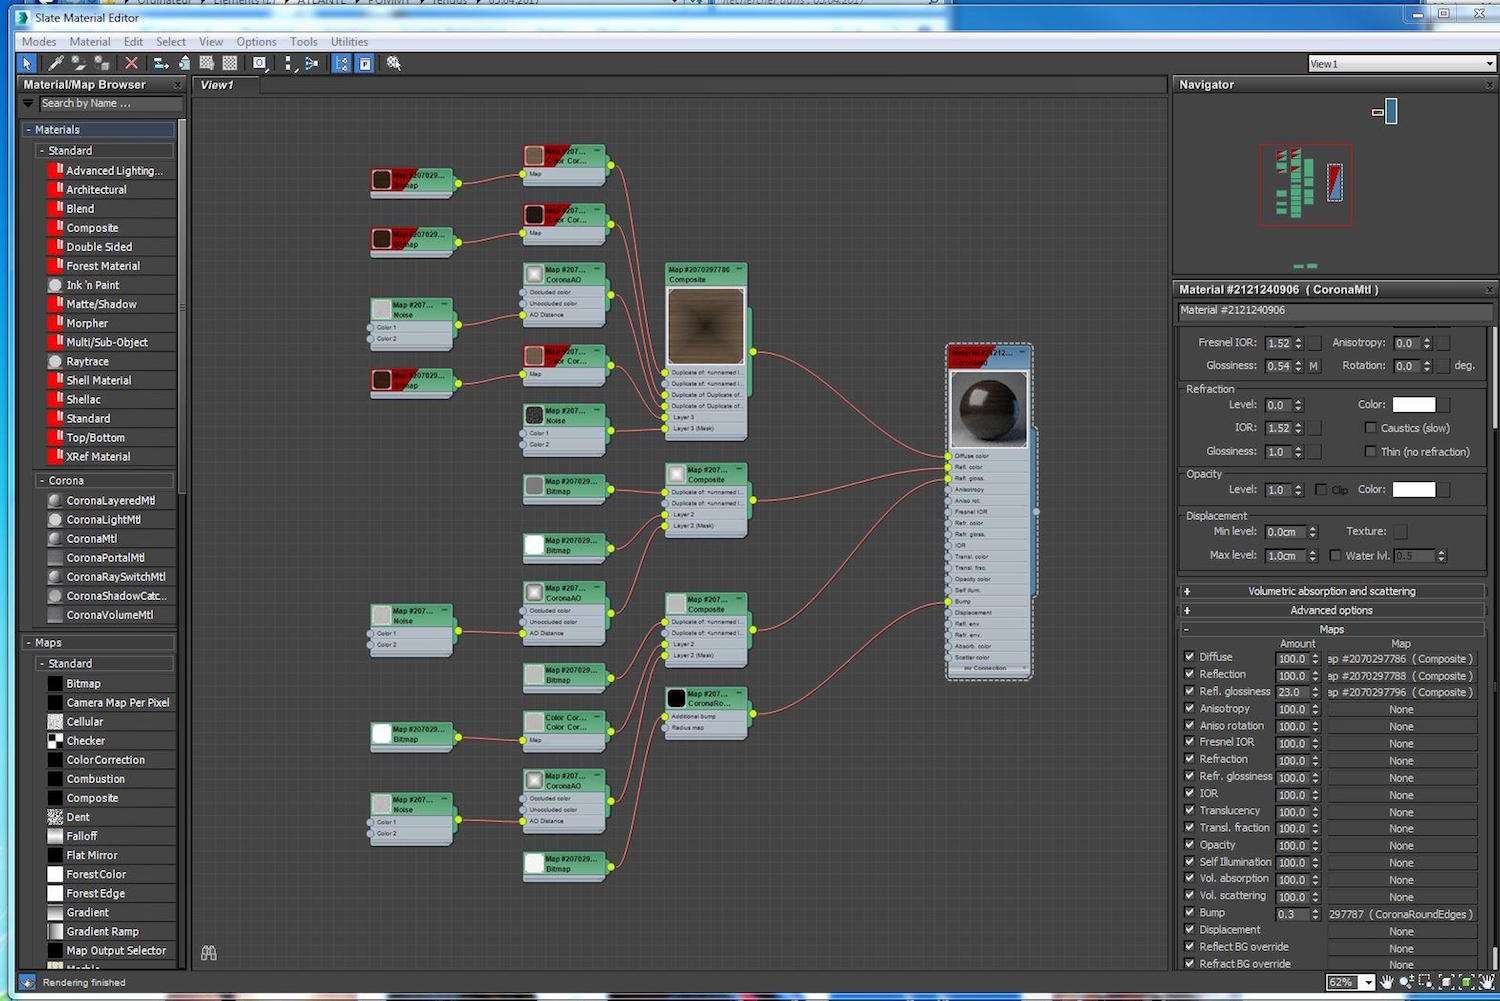 Image courtesy of Yanis Lachat
LIGHTING AND CAMERA
The overall lighting of the scene is derived from Peter Guthrie’s HDRI map, however, to create a sense of warmth, I added approximately 50 small lights to the space such as candles and bottle lights.
 Images courtesy of Yanis Lachat
RENDERING
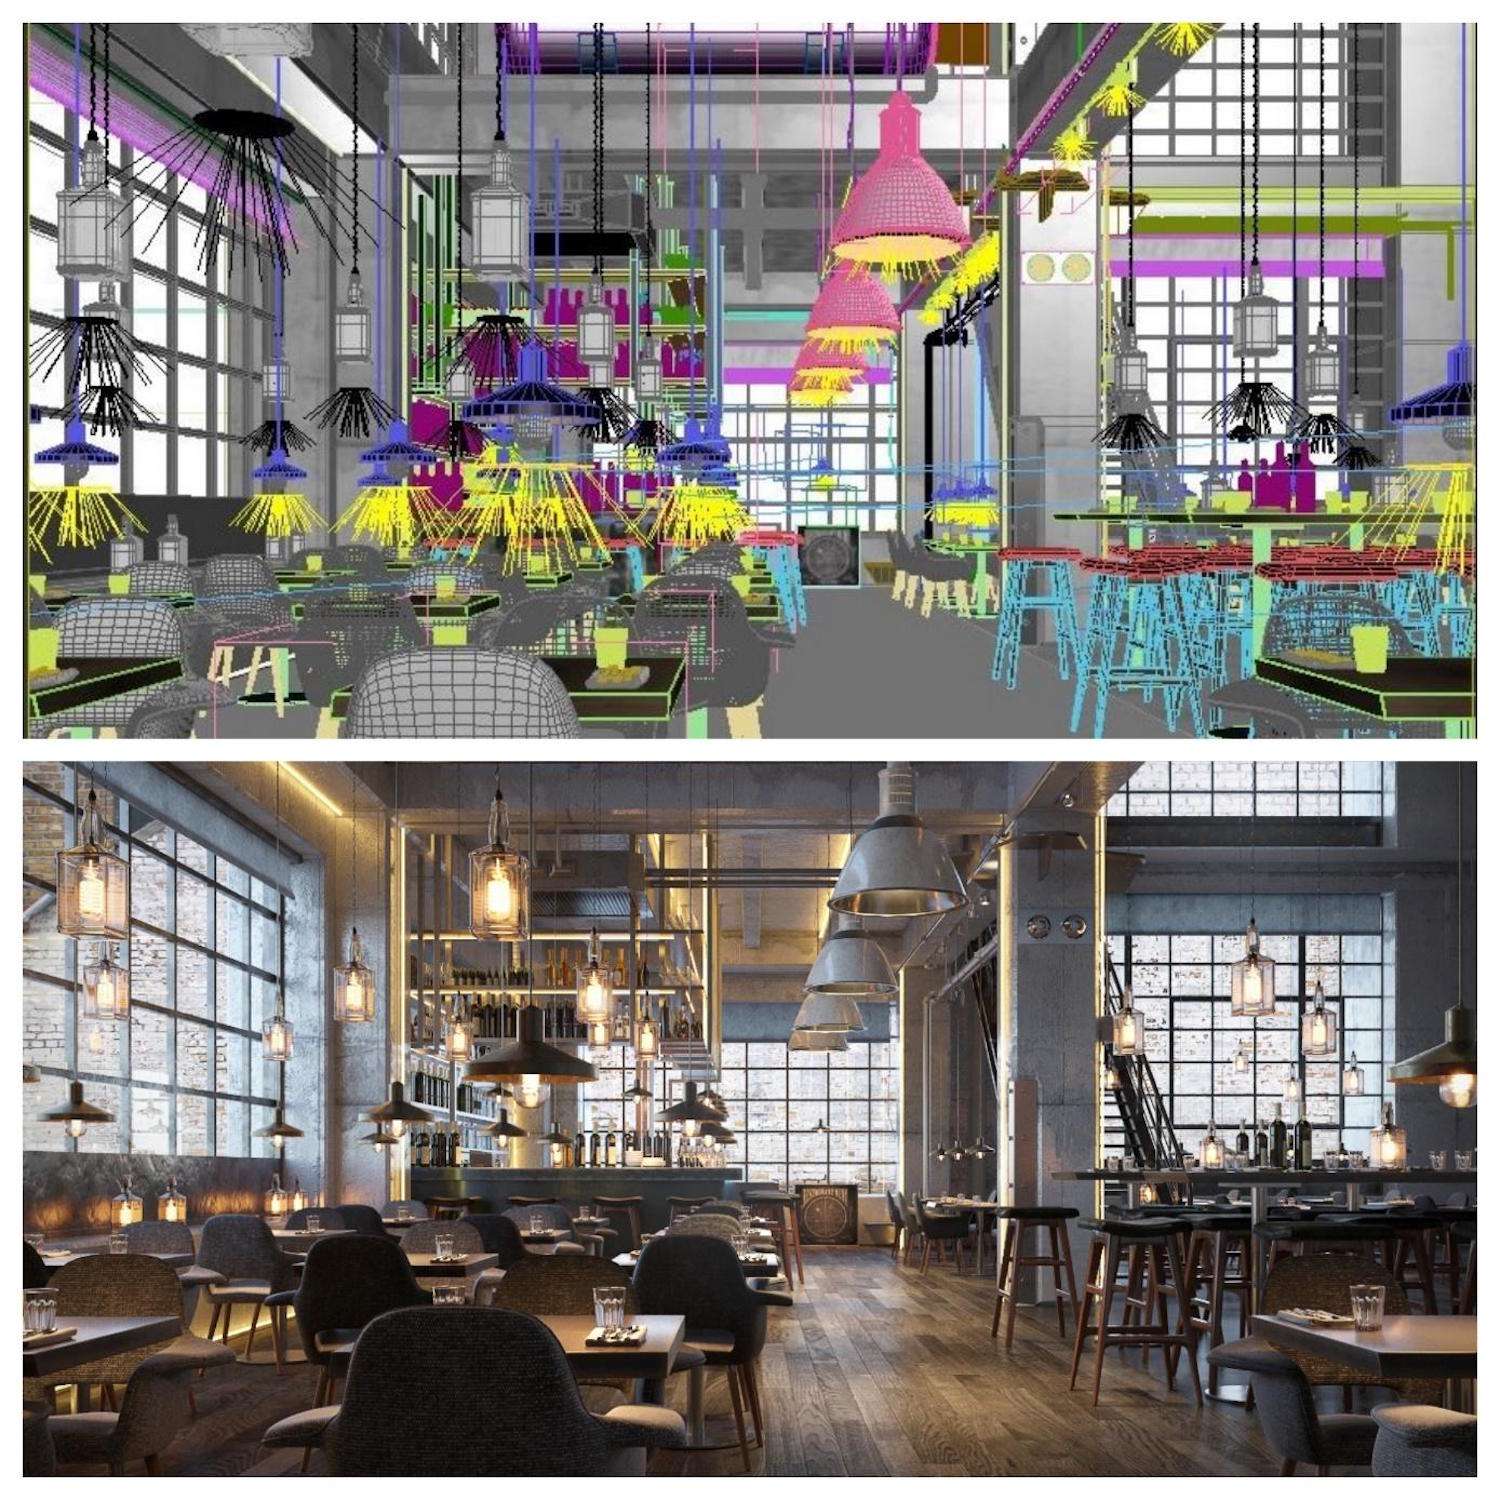
The renderer used for this scene was Corona. Isolating each element while working provides very fast rendering feedback, and I only pressed the render button at the very end. Usually, I render at 4000px which is standard for print but lower for web resolution. All in all, I didn’t have to spend much time tweaking parameters.
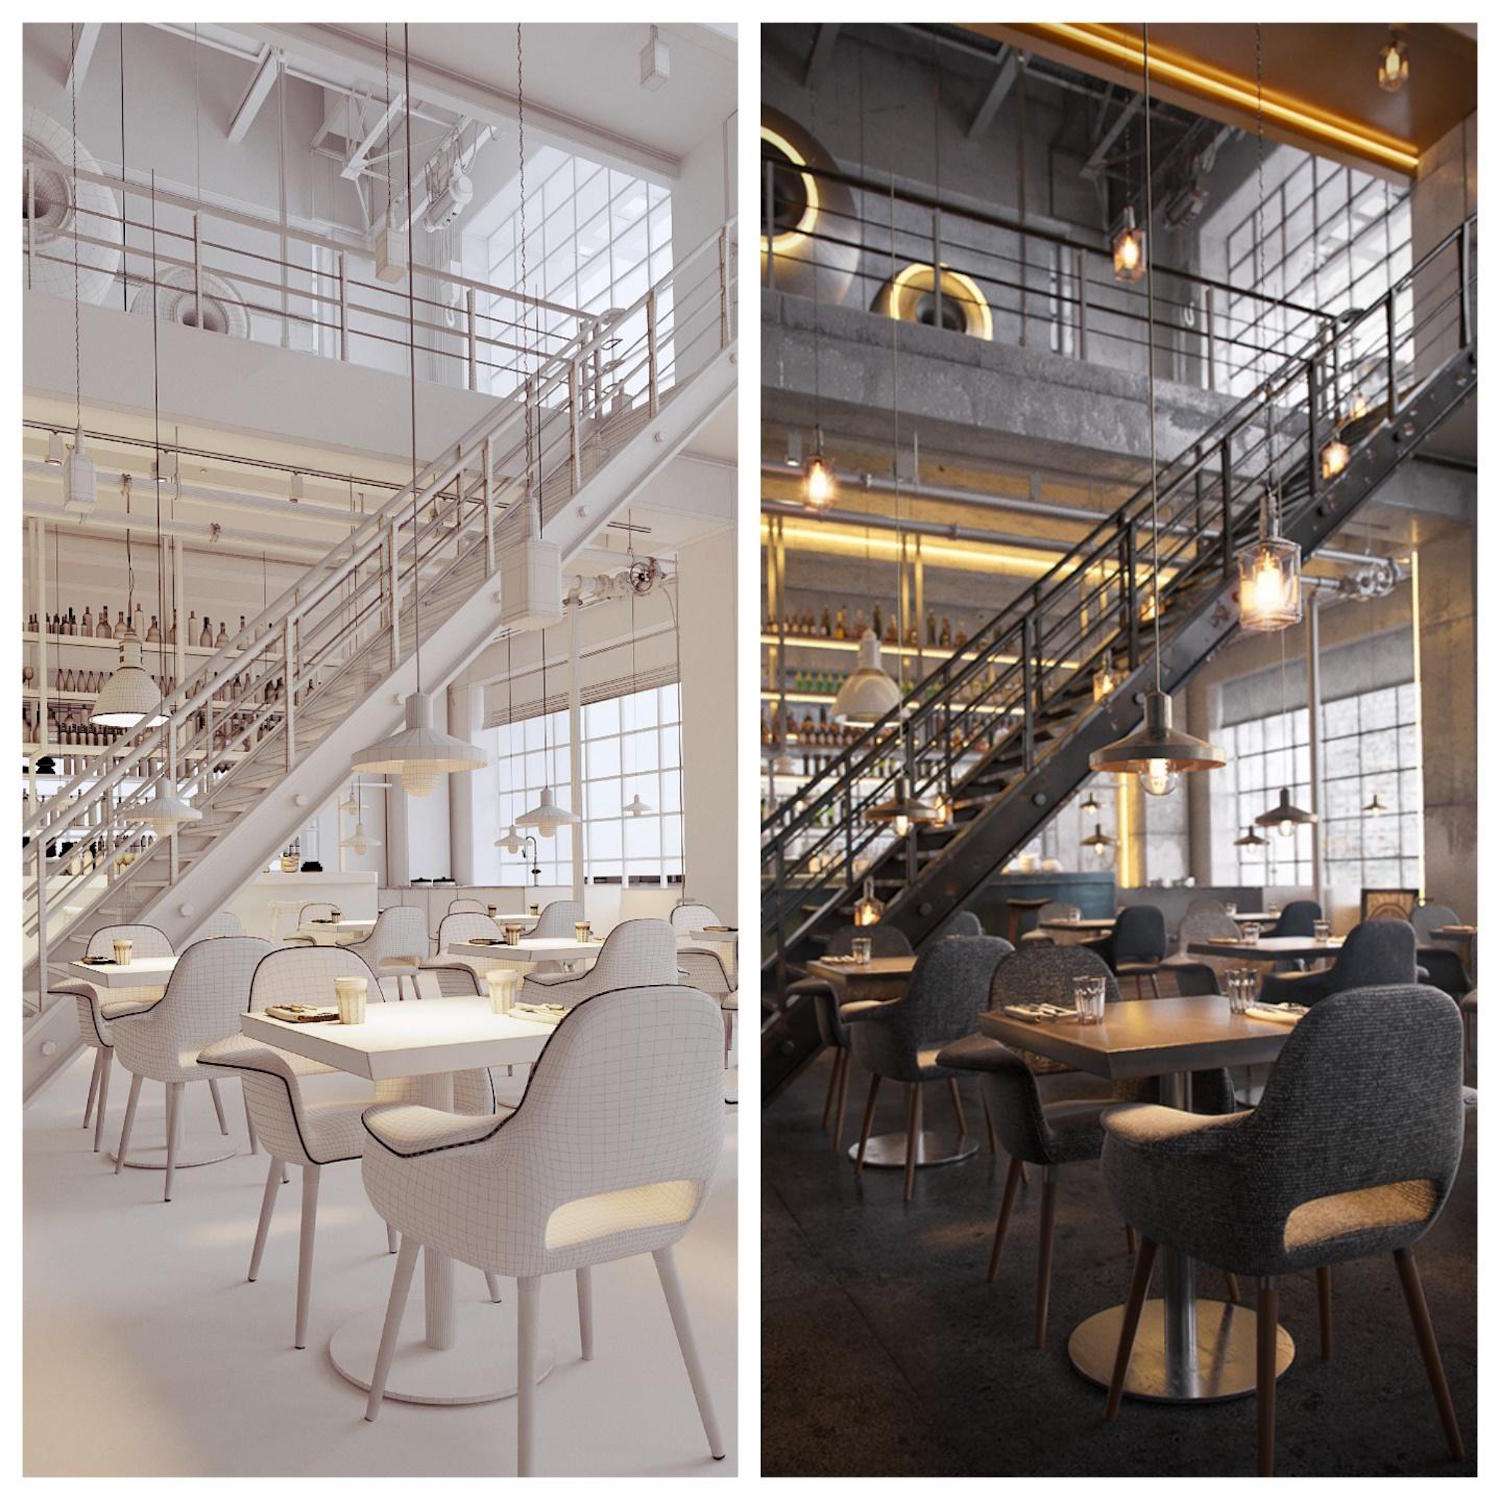 Image courtesy of Yanis Lachat
POST-PRODUCTION
The final render didn’t need a lot of post-production as the renderer includes an integrated LUT correction.Nevertheless, I always end up in Photoshop to add some finishing touches. I play around with the levels,
Nevertheless, I always end up in Photoshop to add some finishing touches. I play around with the levels, colors, add some vignetting, and include some chromatic aberration. Where needed, I slightly sharpened the image and played with masks to lighten or darken specific elements. Lastly, for a more filmic look, I used Red Giant’s Magic Bullet Looks and After Effects.
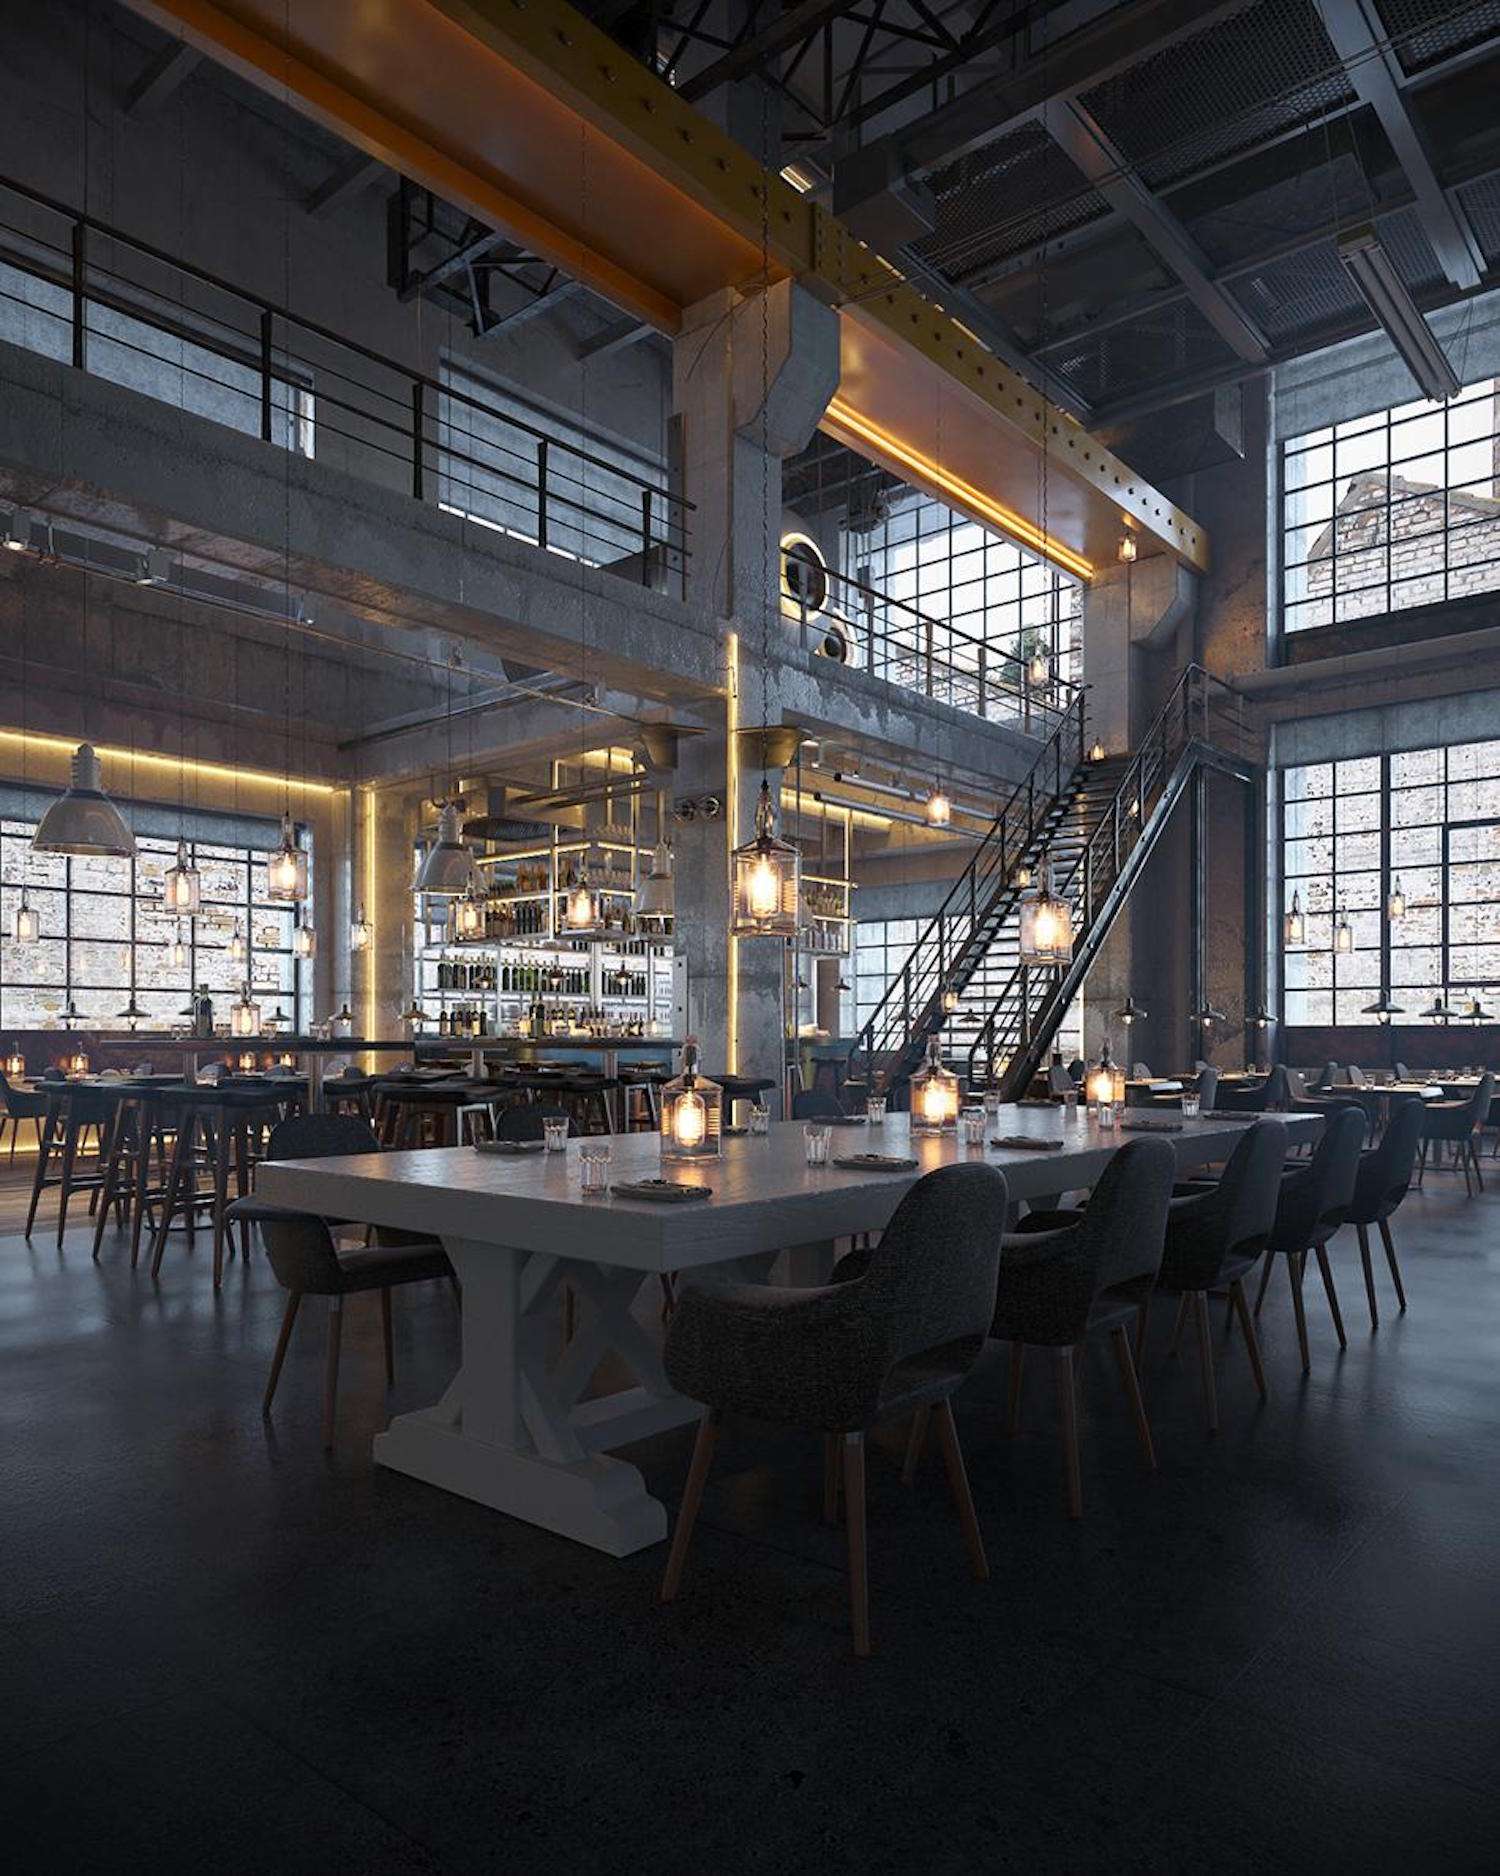
Image courtesy of Yanis Lachat