
Be it photographs, drawings or paintings... This article is inspired by those, like me, that want to appreciate and interpret the world in their own way, enjoying others art and, at the same time, giving your own perception of it.
For every project that you embark on, you need to interpret and adjust the way your concept looks to make it work in 3D. Understanding how its gonna read under different lighting scenarios, under the correct camera and so on. Every step is crucial to protect that what makes the concept so engaging in 2D form.
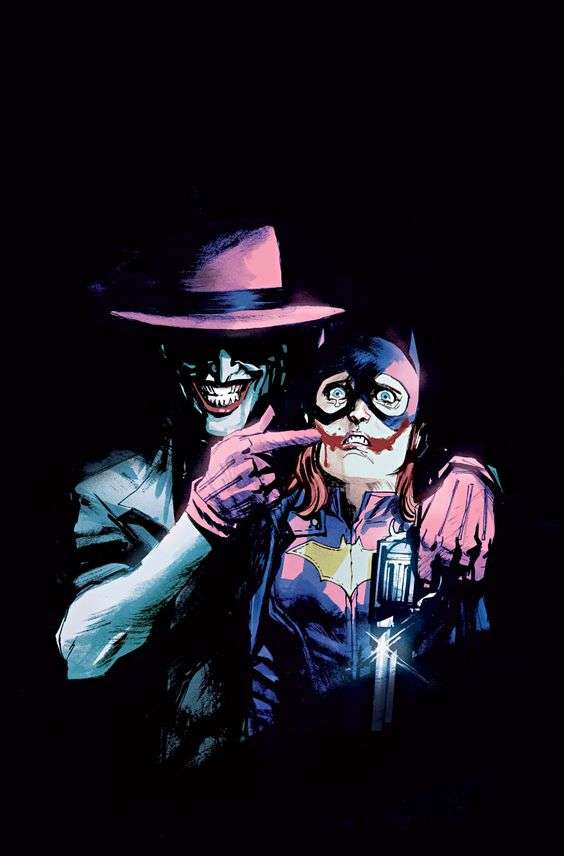
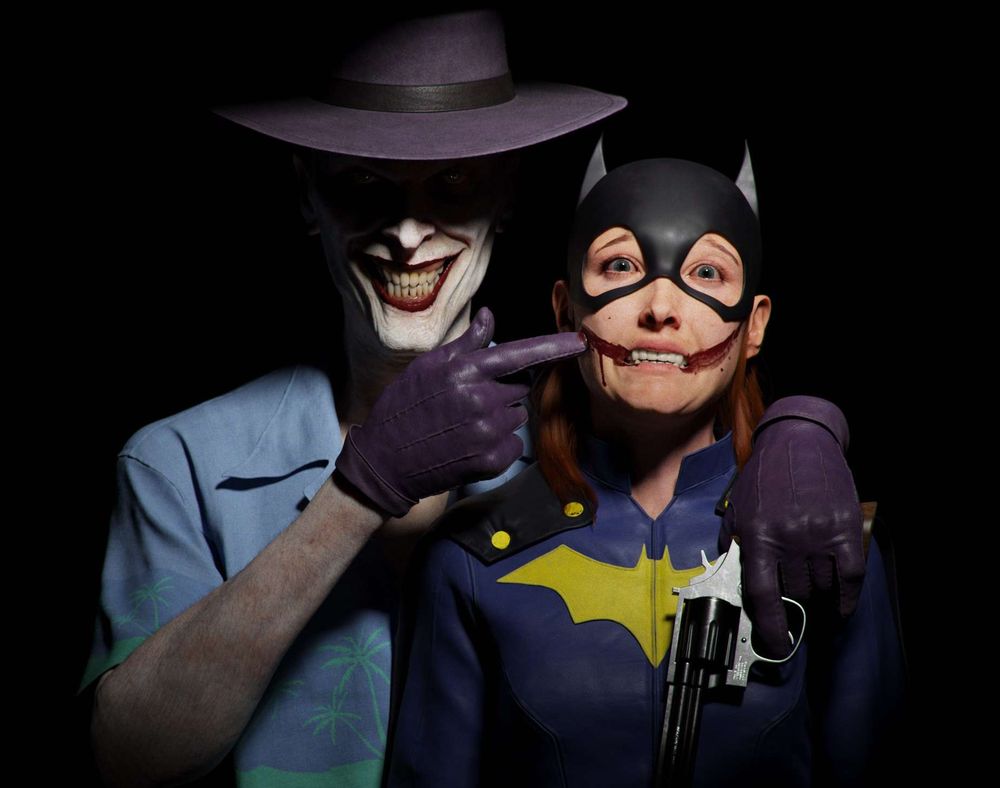
Concept by Rafael Albuquerque
PROCESS
1 - Research & Reference
Having a clear direction is an immense help when tackling a big project like this one. For me, knowing the look I wanted for the final piece was a tremendous ease while working on it. I knew I wanted this piece to follow a photorealism look while maintaining the proportions that this comic book cover has.
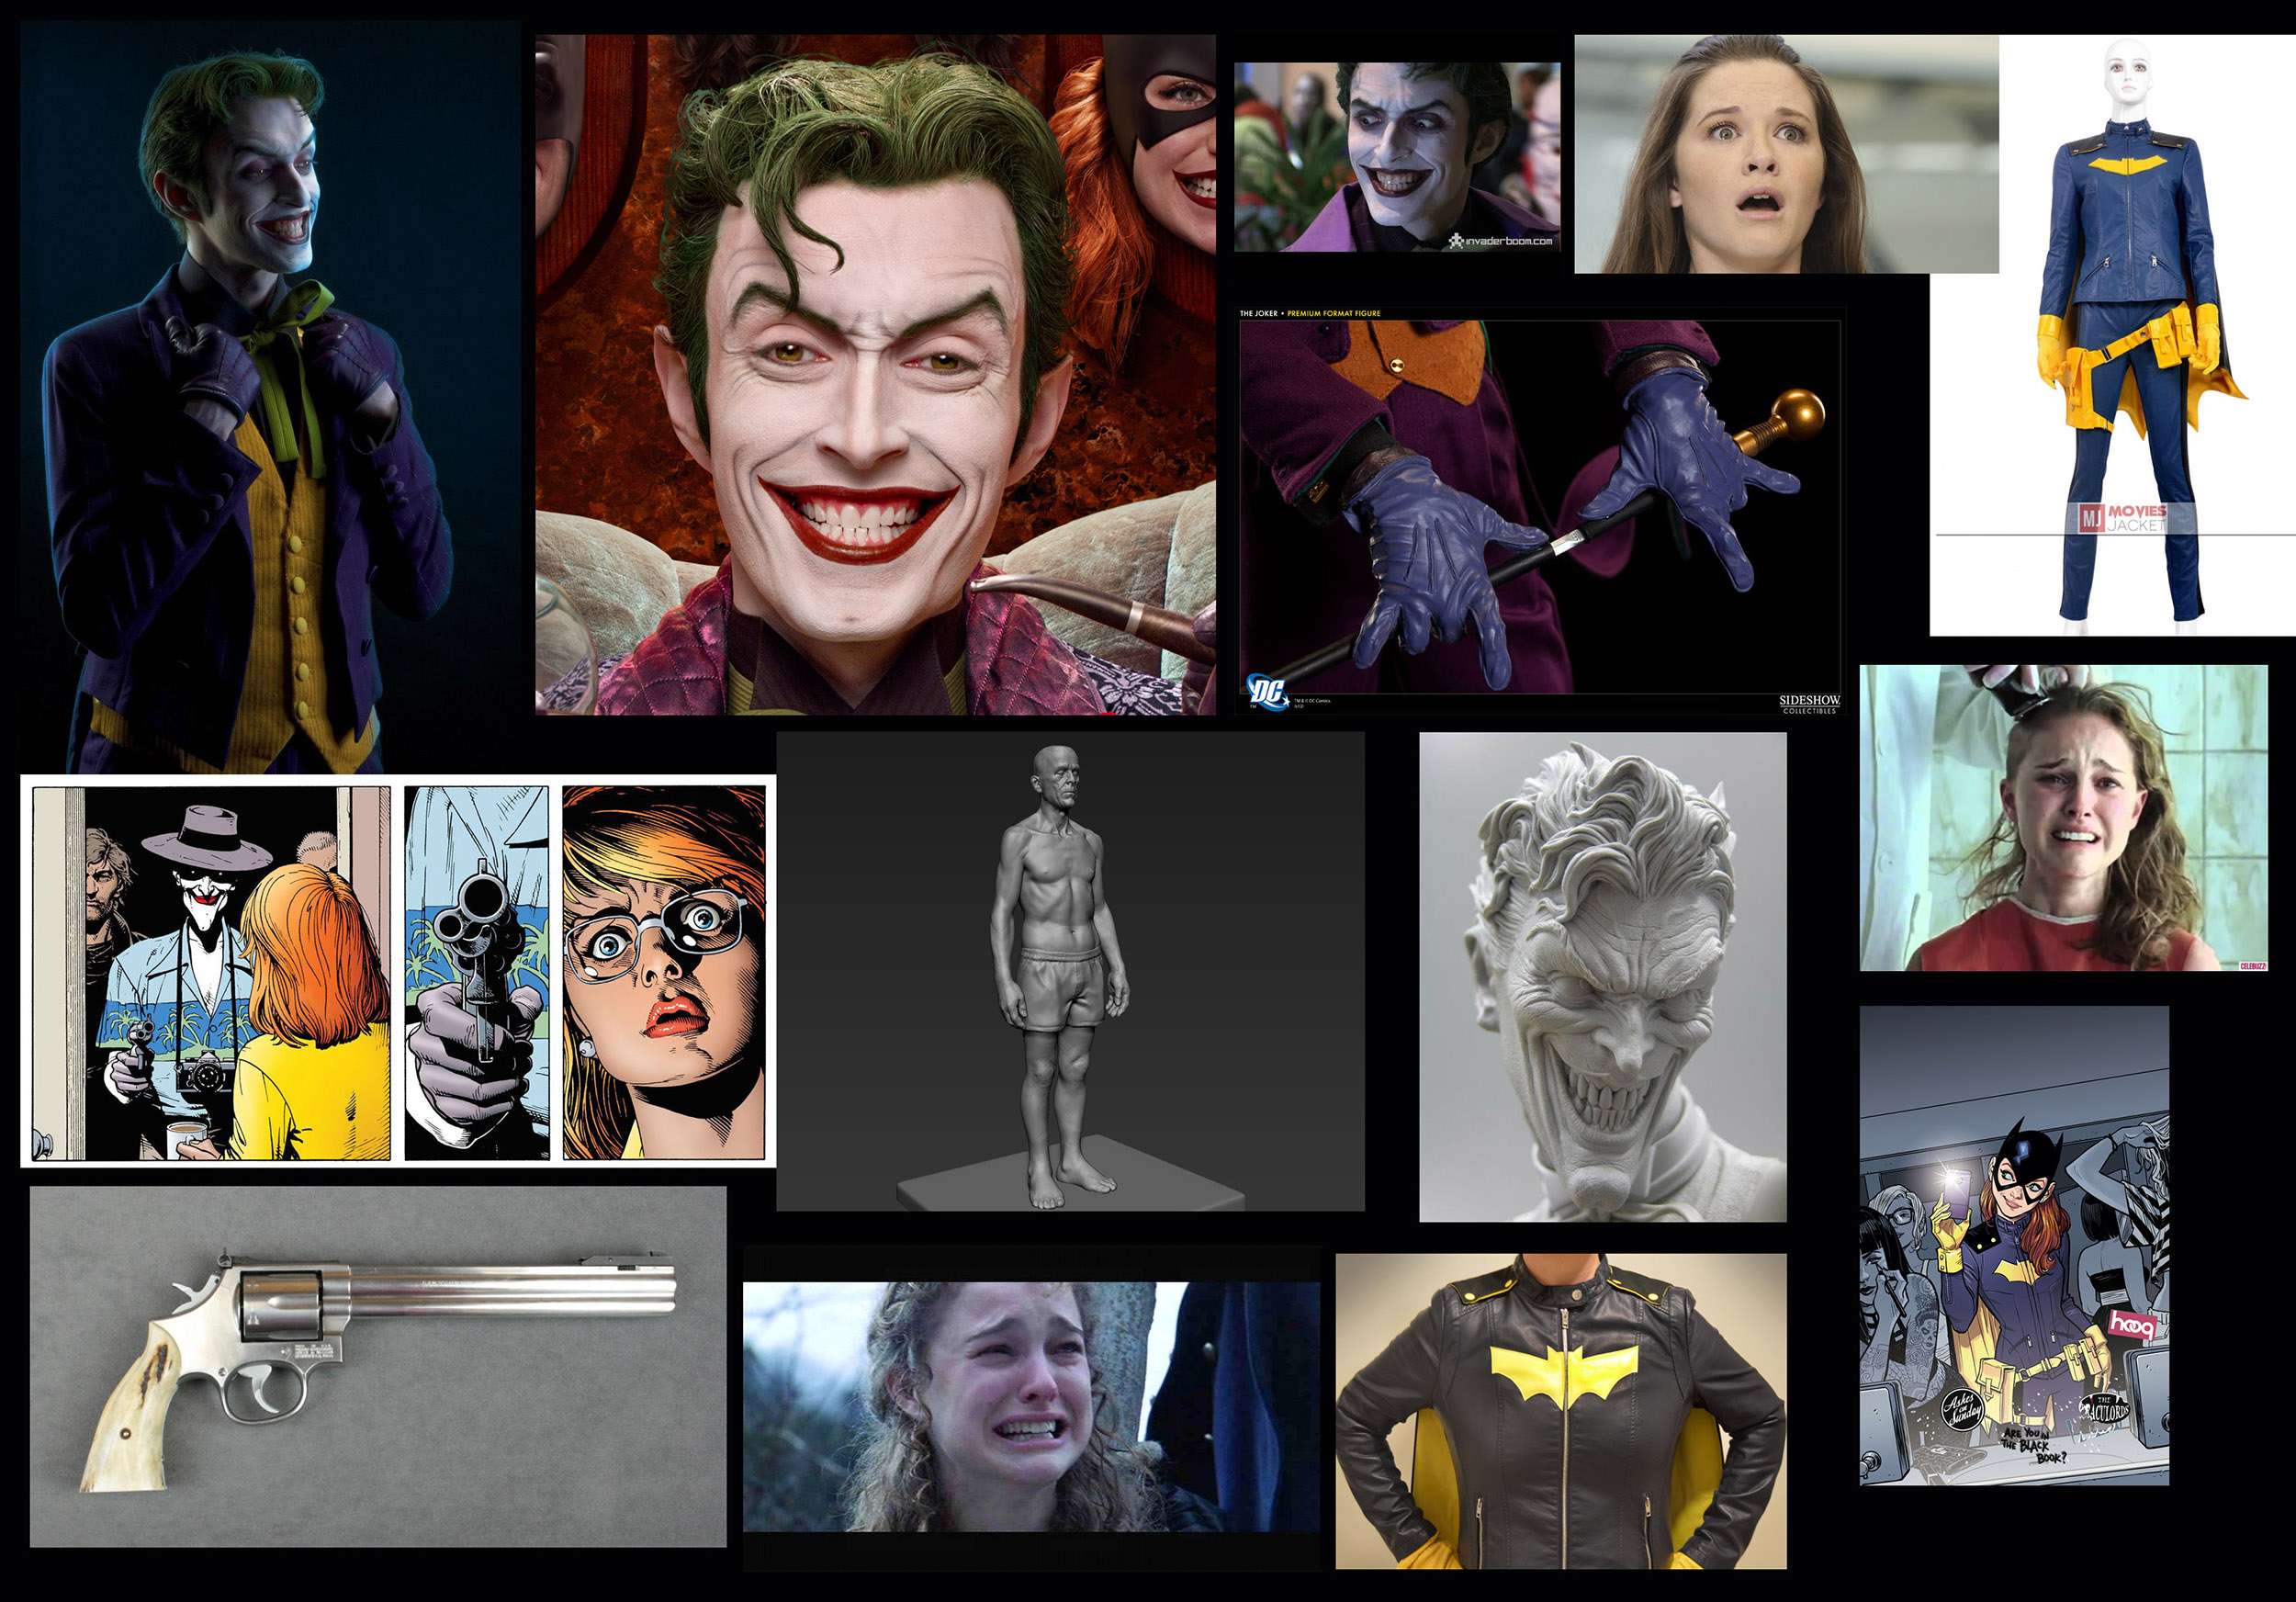
Another huge help, as always, is exploring into every aspect of the project.
Research and reference is the grounding foundation in which all the project lies, and can make the process easy or harder than it needs to be.
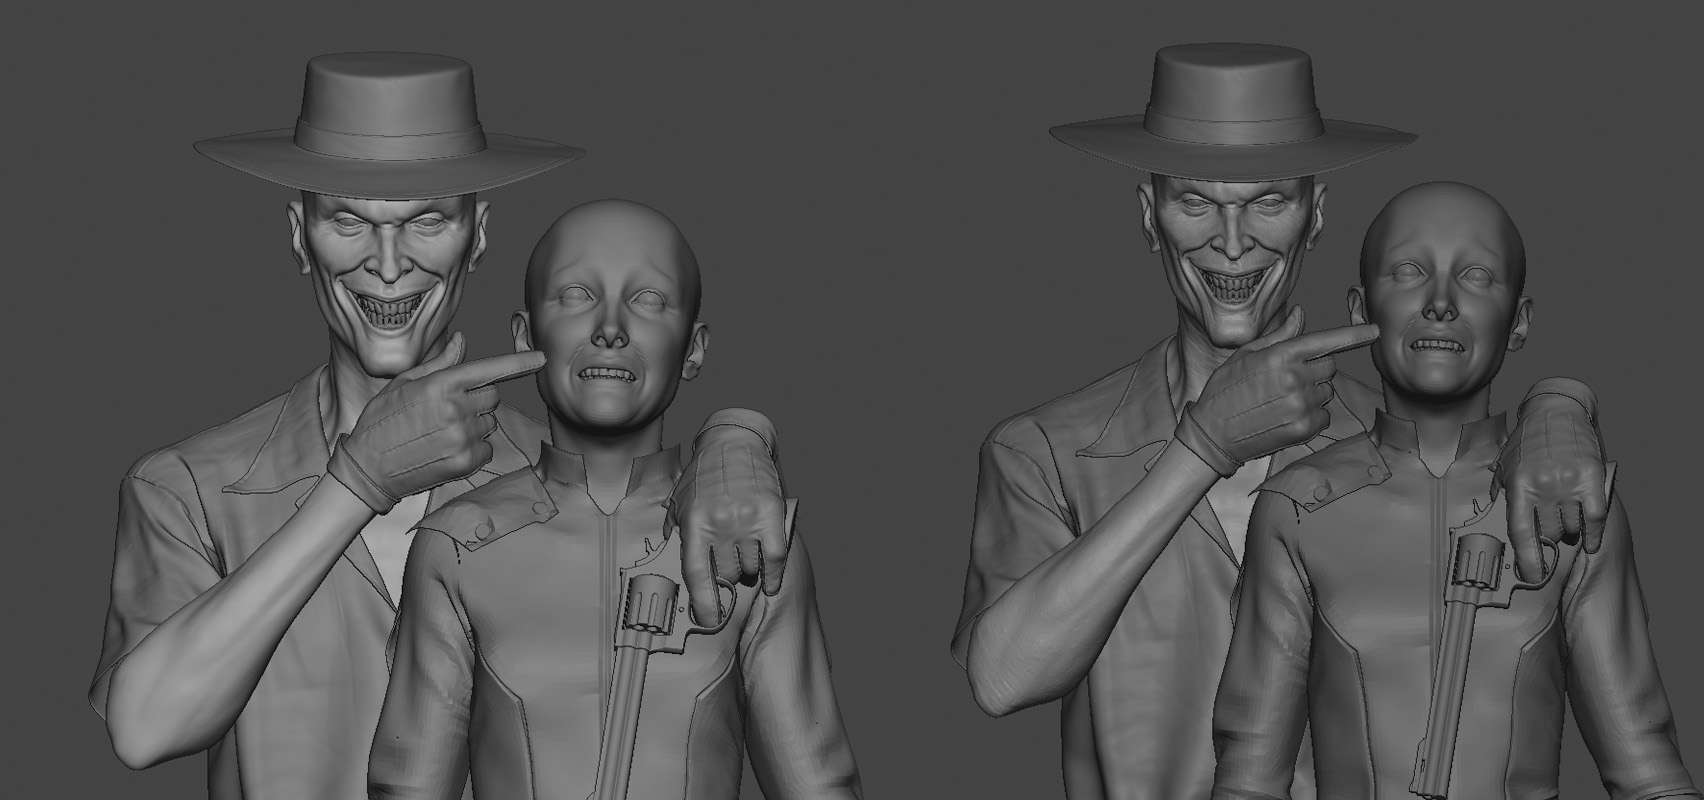
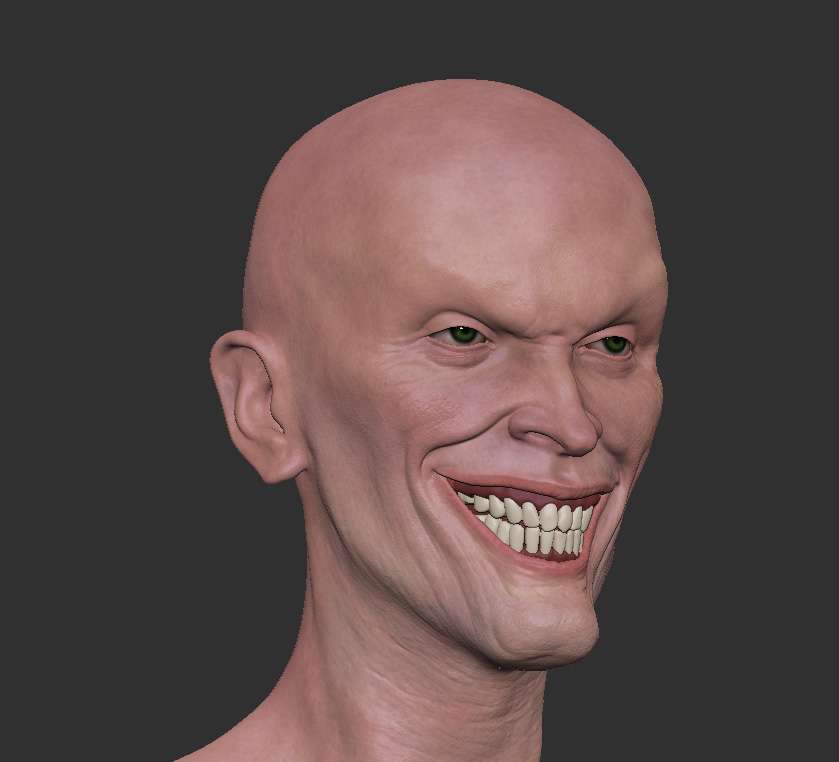
Yet, even with a strong research challenges will always show up in unexpected ways. From all the hurdle that this project brought, I can say that sculpting the Joker was the hardest of them all. Finding that balance between the realistic human proportions without losing his iconic shapes and angles, the faceting of his face, his unmistakable grin... Proved to be a daunting task, albeit a rewarding one.
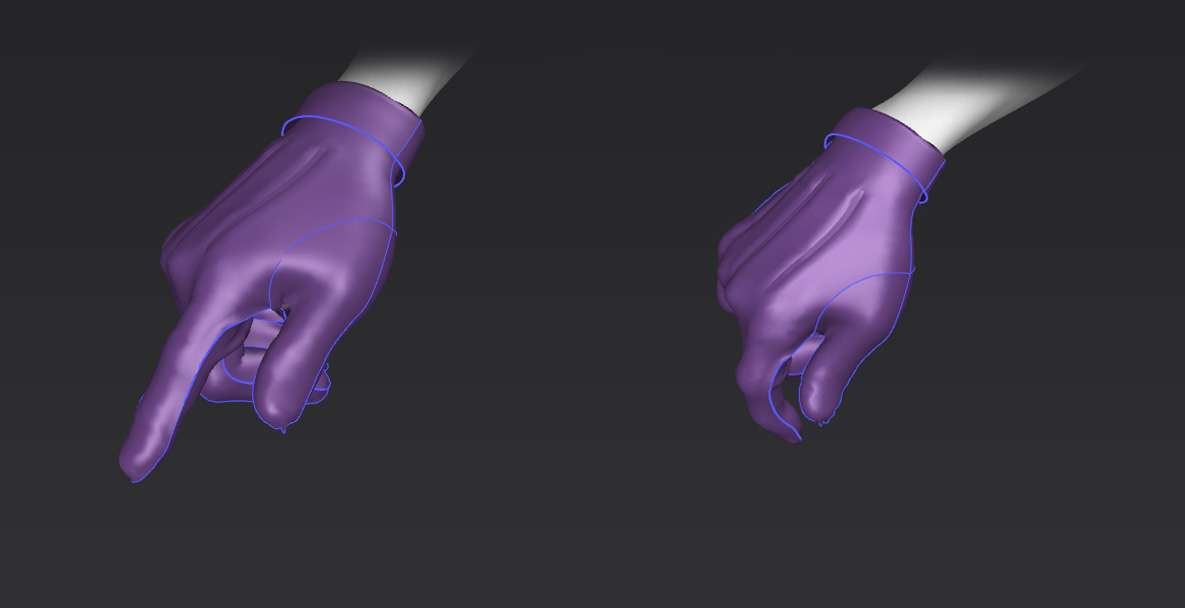
2 - Modeling & Sculpting
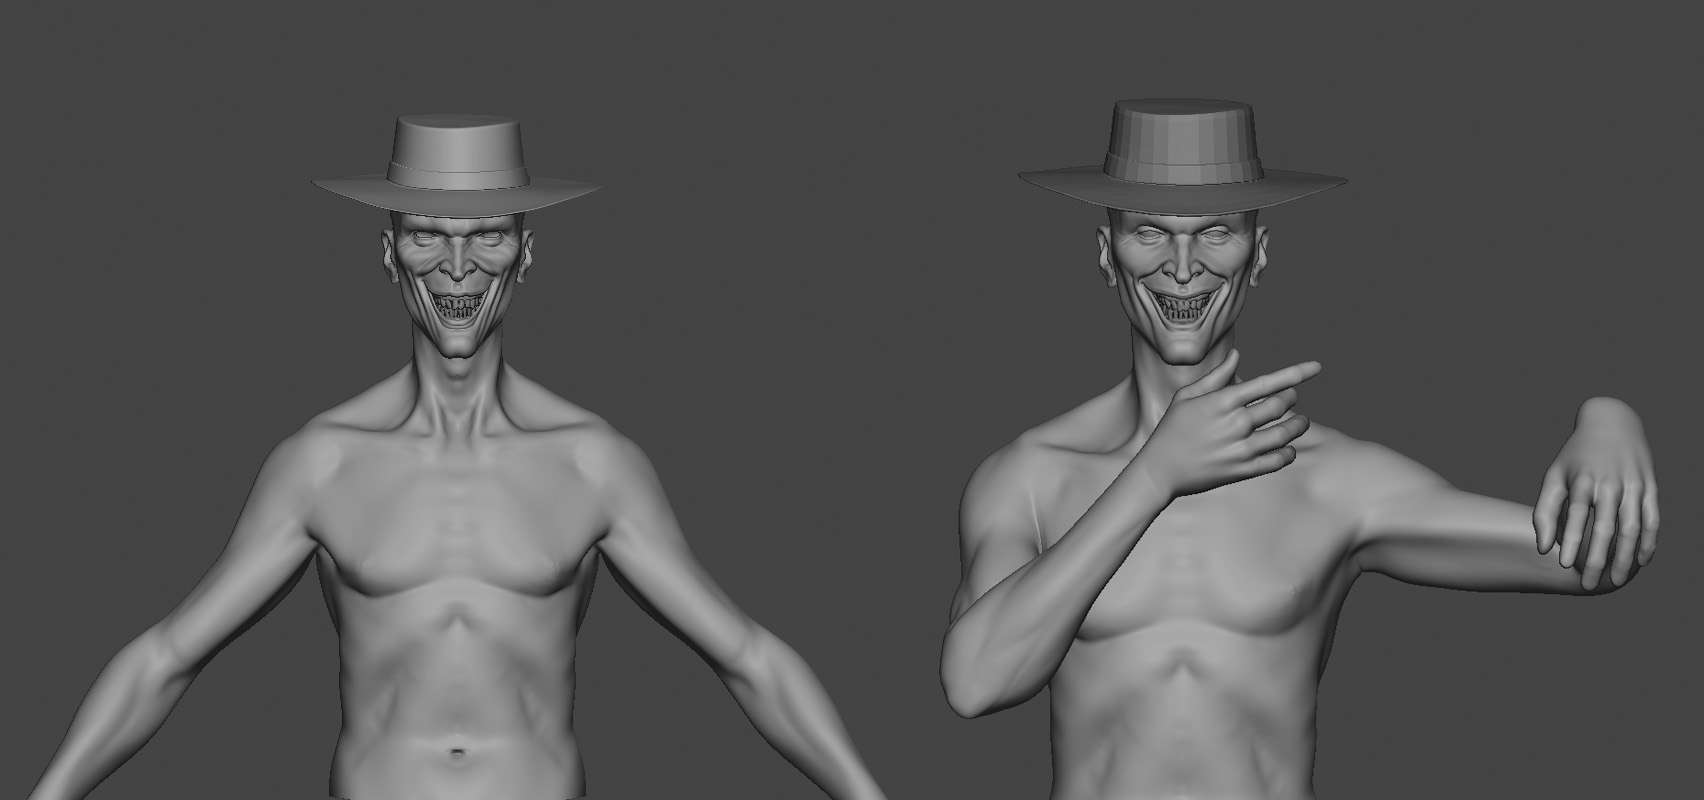

After gathering all references and research I started blocking things out in Zbrush.
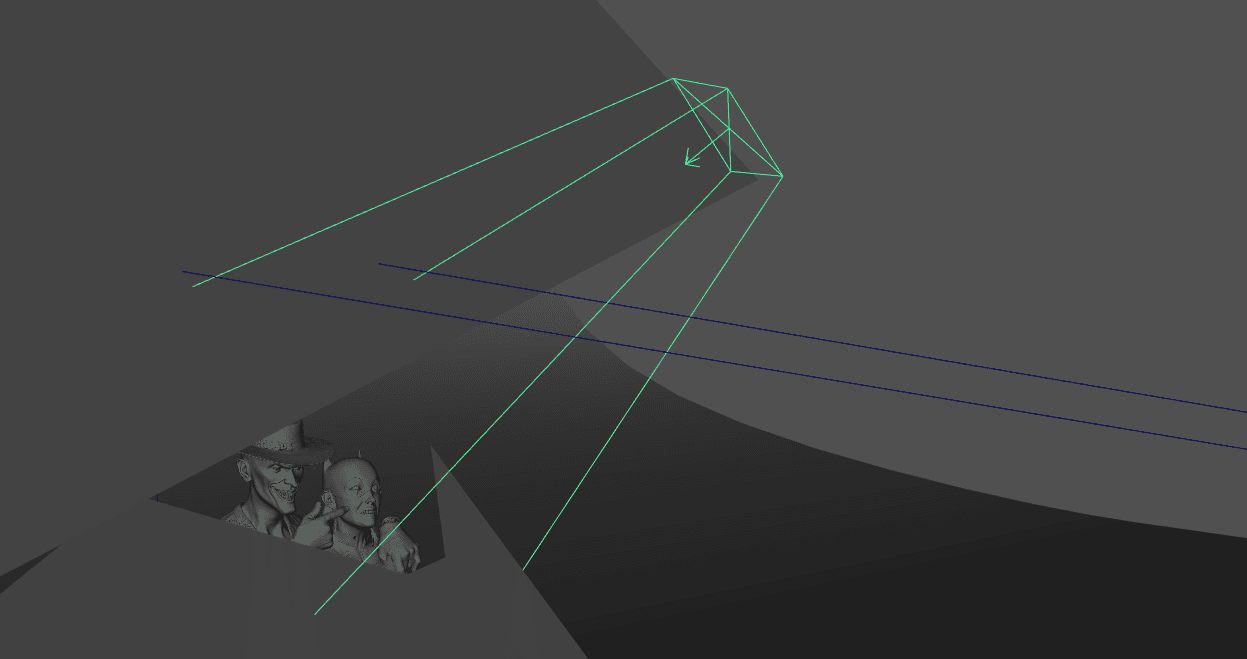
Tip: Whenever you are sculpting for an illustration piece, always check constantly with your 3D package (Maya, 3DS Max...) If the piece is working in render. I always have a dynamic relationship between Zbrush and Maya, checking shapes and proportions under the correct lighting.

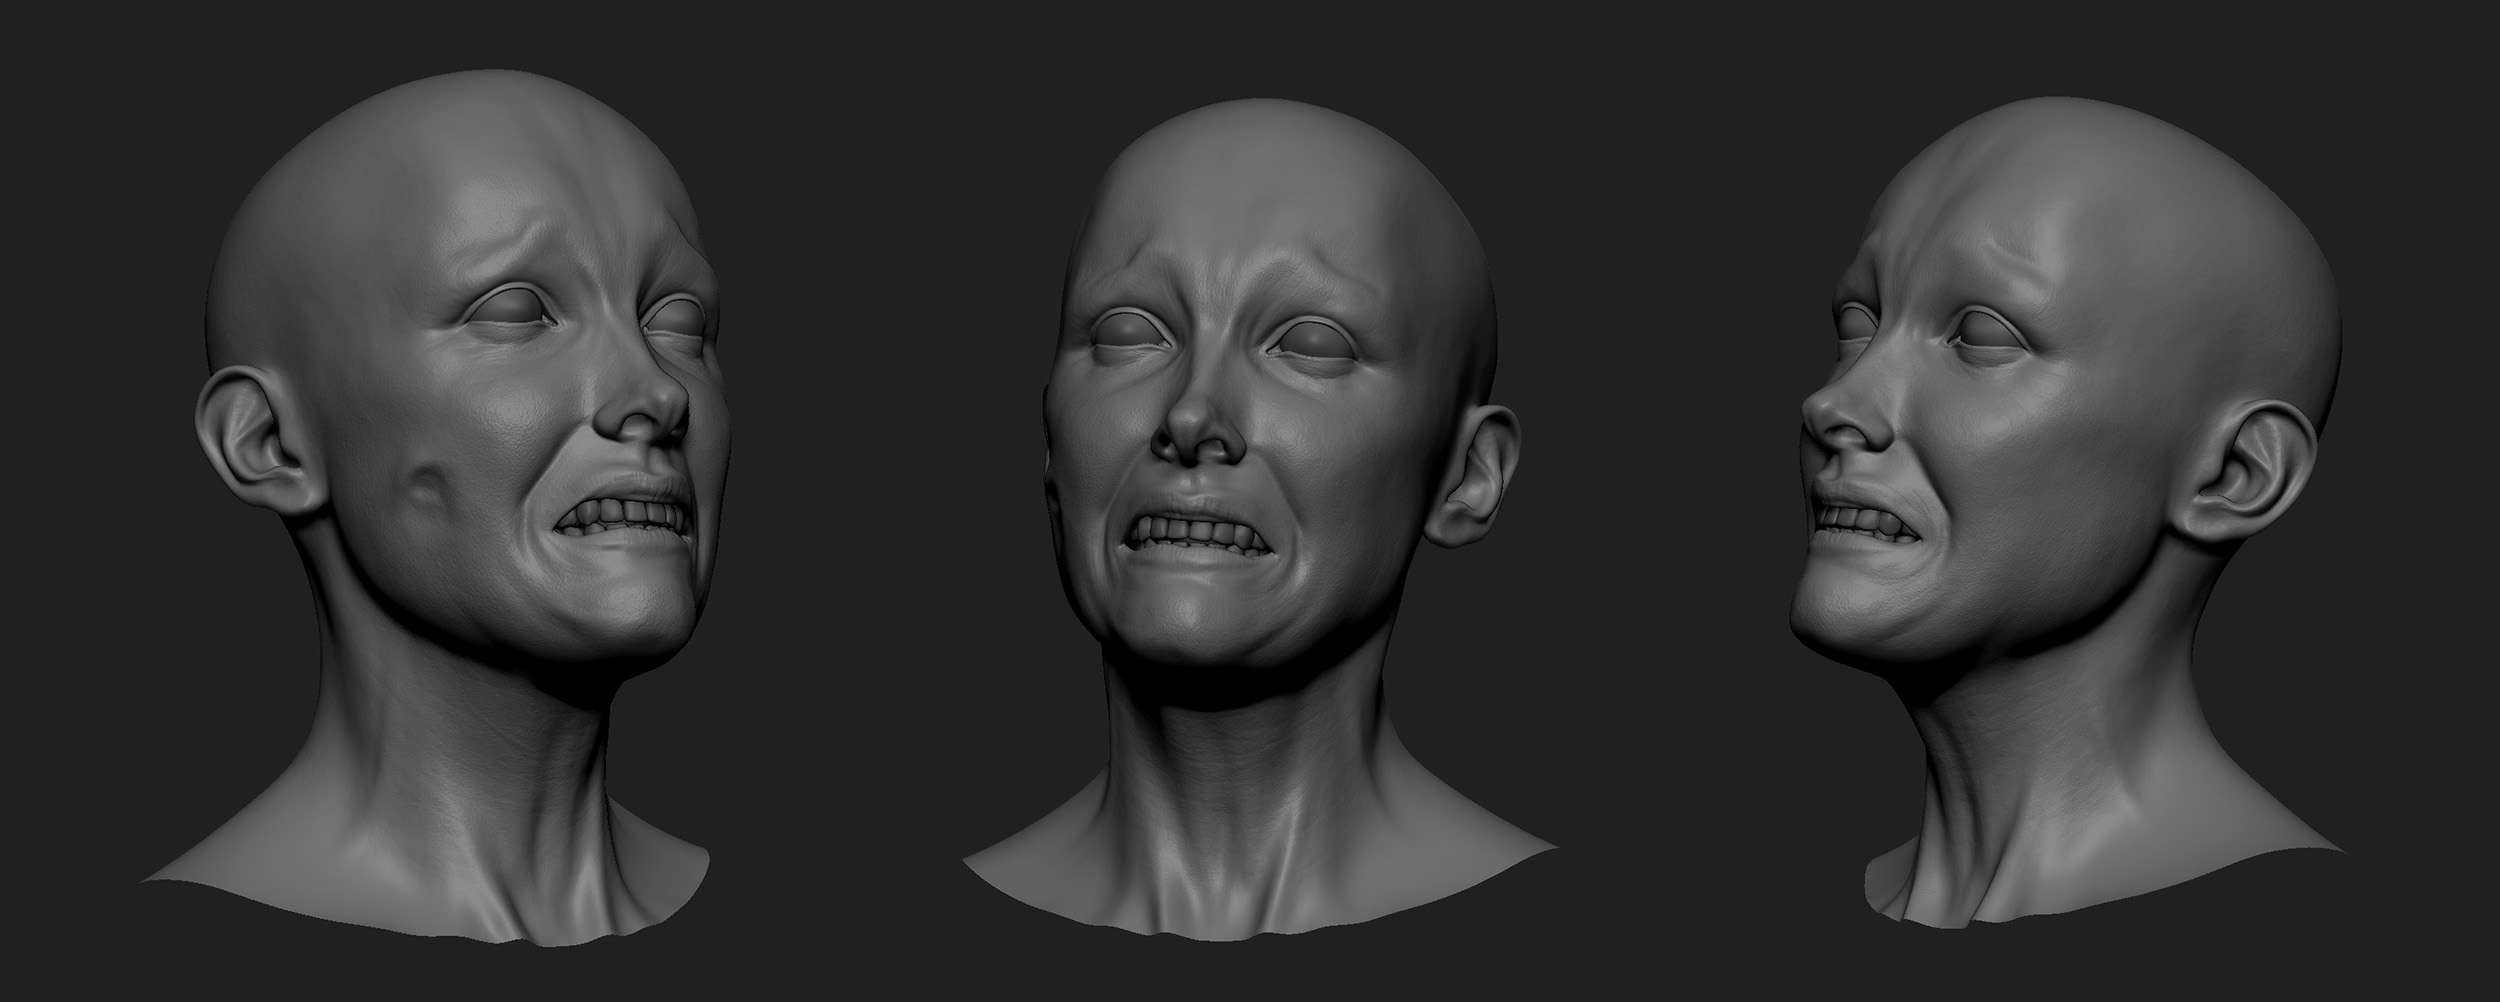
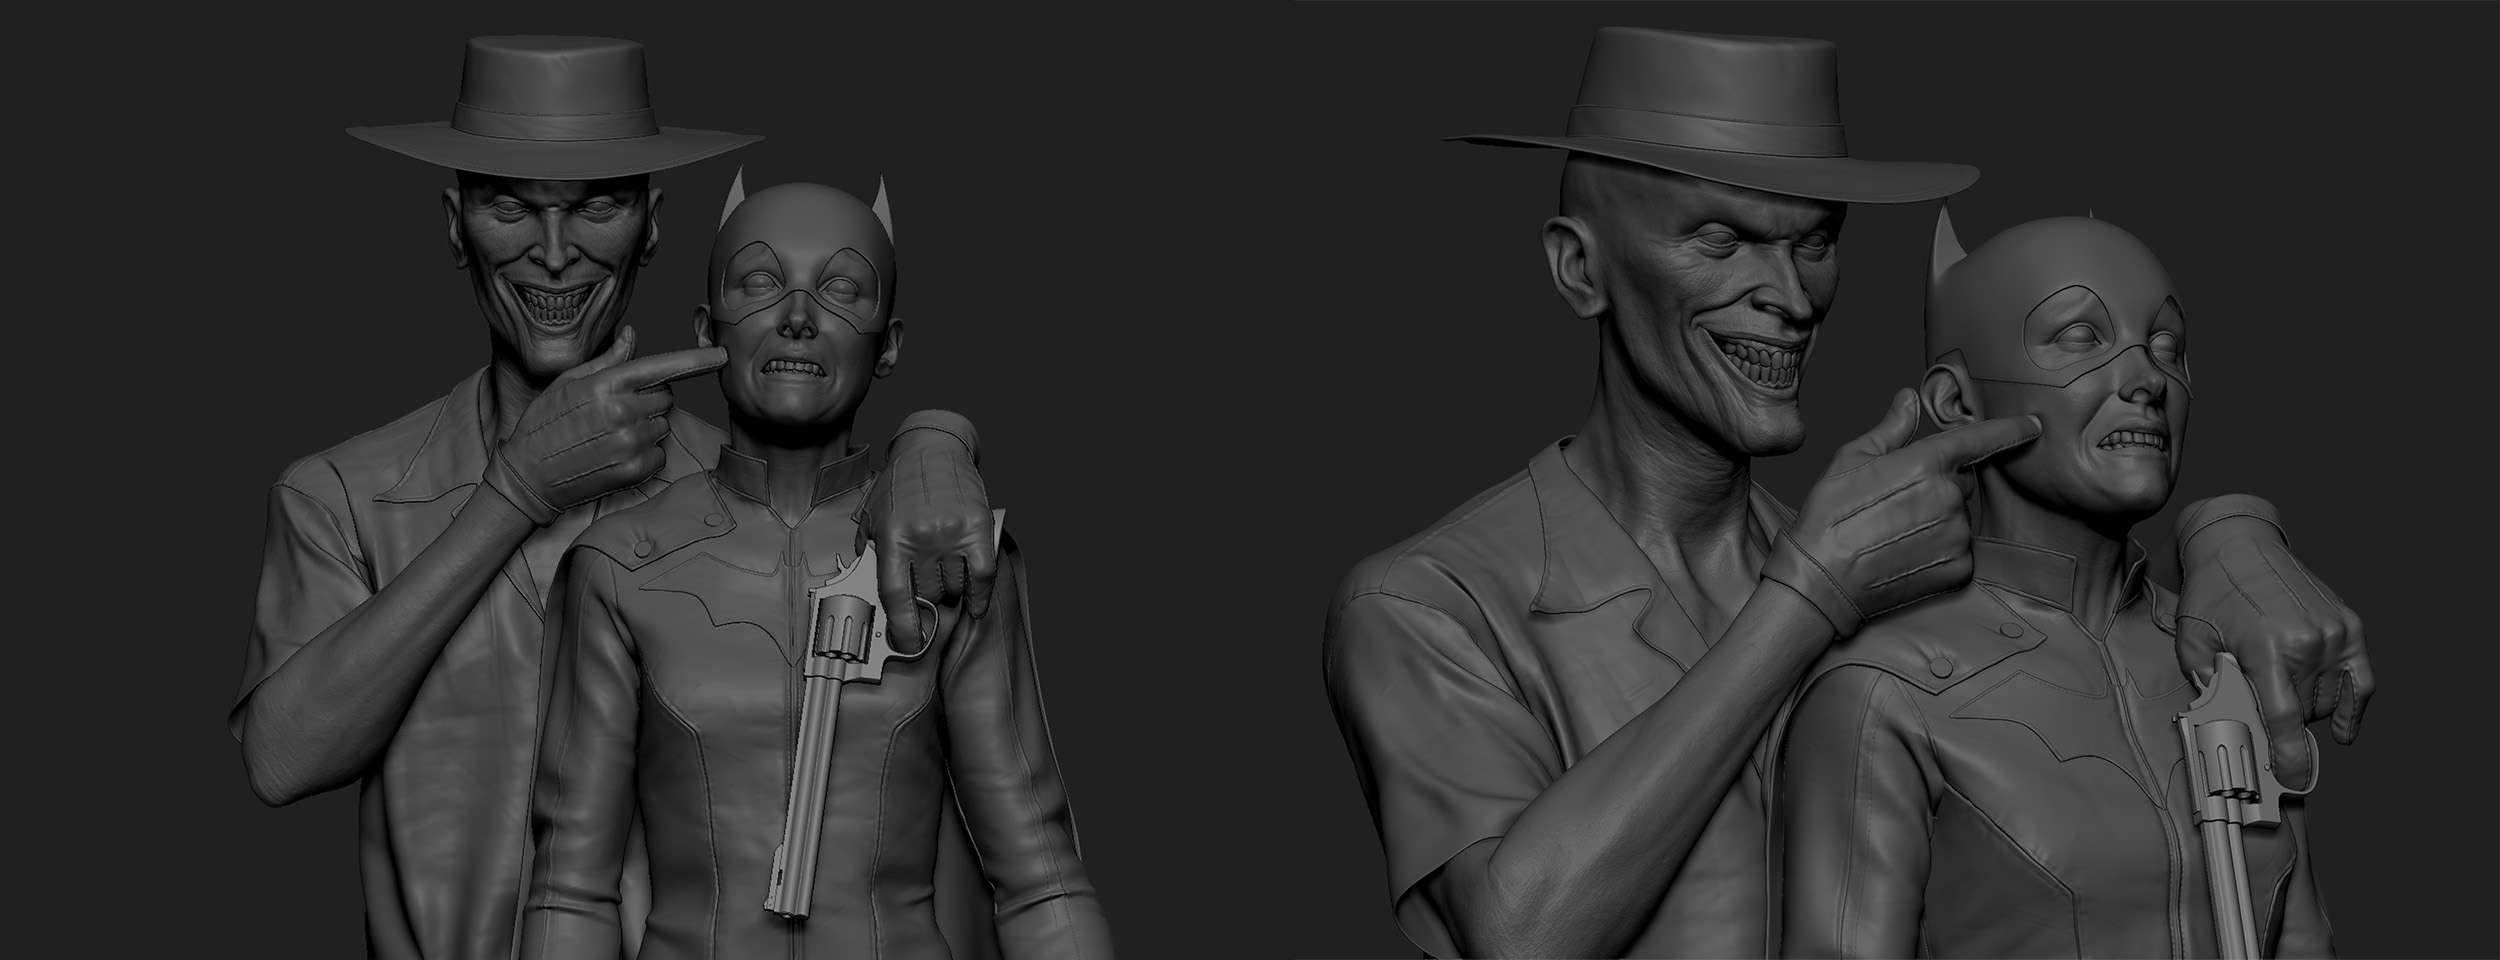
Sculpting is something I love and one of the things I adore the most is that it can change and evolve from project to project. In this ocassion, this project presented a big challenge, two extreme and opposite facial expressions.
Although different in a lot of ways, this project was tackled in the usual manner; major forms first, then, the rest. Once the primary shapes were done I jumped right into Maya to see if those same shapes were also working for the shot itself. After this kickoff, but crucial, step is done I can jump onto the following point, retopoing and detailing.
Even though you don't need to do such a clean topology for an illustration, we, as artists, should always try to stay professional and disciplined, in that sense I always try to keep every step I do as clean and efficient as I can.
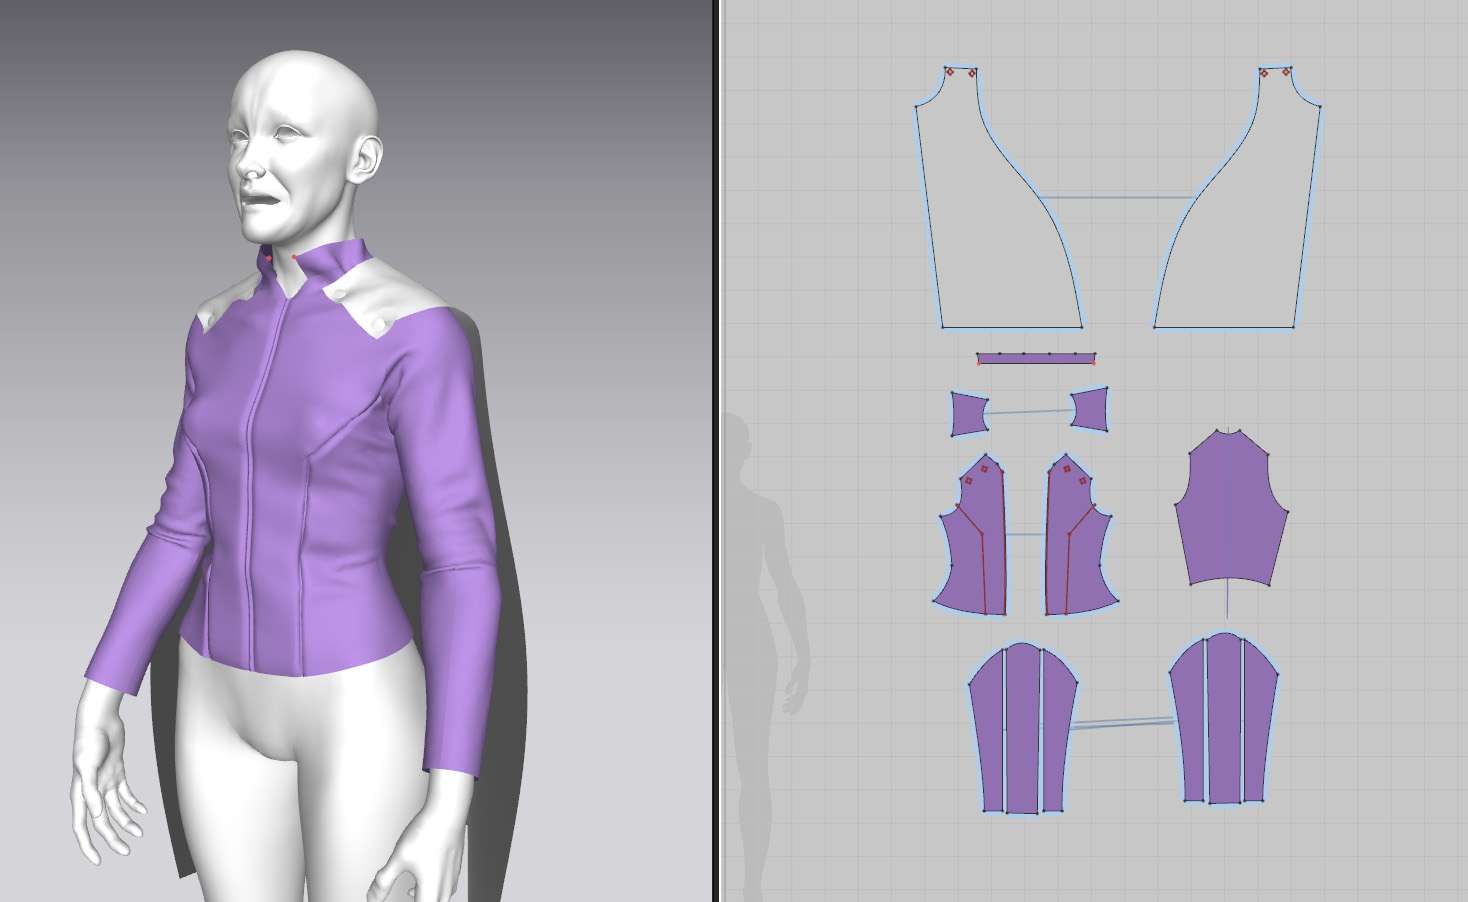
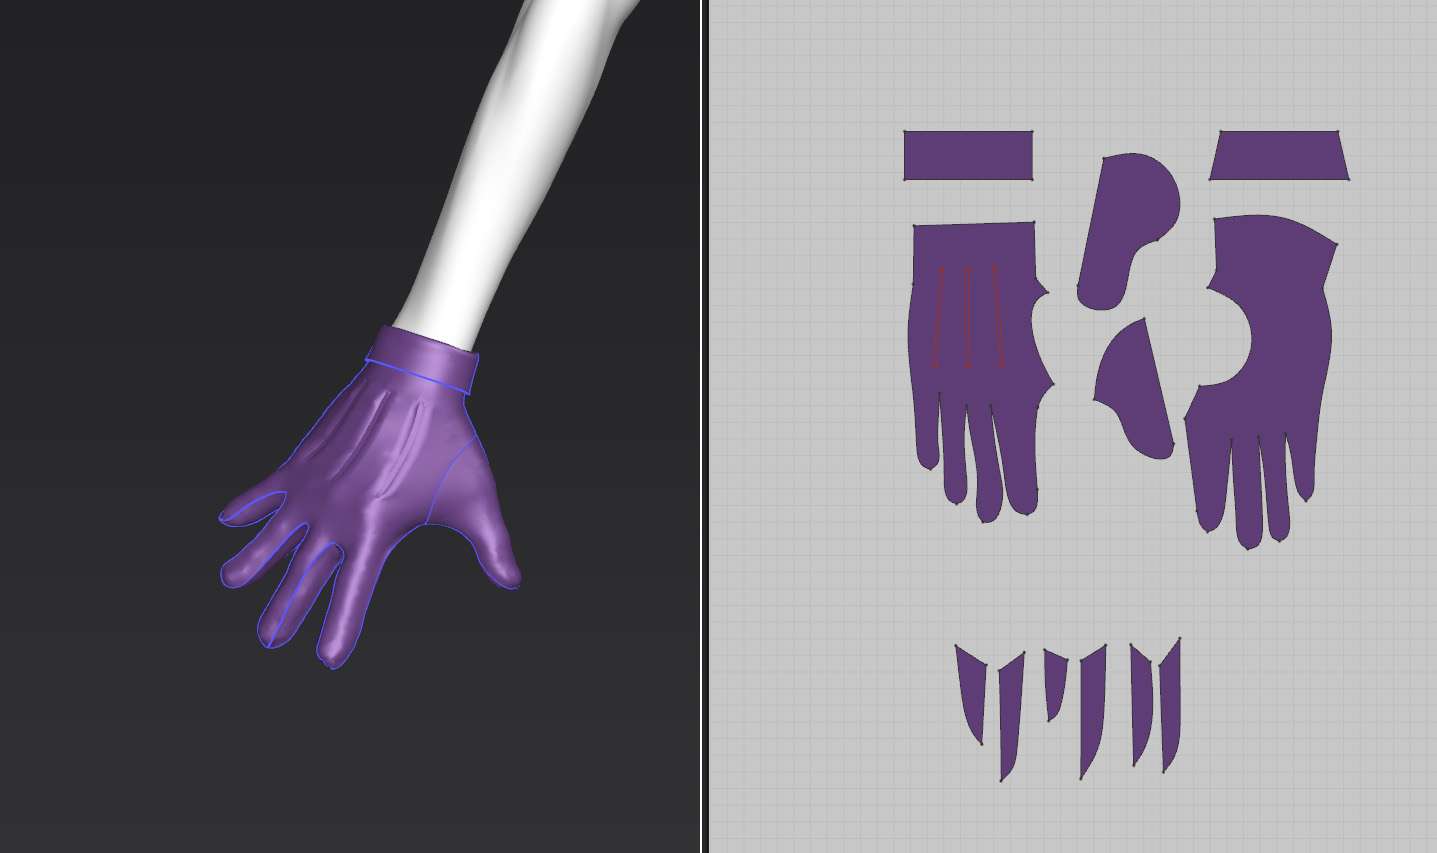
As I mentioned before, every project changes and evolves. For the clothing and drapery, this point is even more glaring. Every time I approach clothes modeling I try to tackle it with a empty head and see which is the best route for the piece in front of me. After that is settled, my experience kicks in to help me achieve the result at the end of such route.
For this project my process started doing a fairly quick mockup in Marvelous Designer. This allows me to keep sculpting the remaining objects with a clear idea of how they are gonna fit. After all the main modeling is grounded well enough I go back to MD to clean and finesse that starting base. Back in Zbrush, or even Maya, I make a clean topology of the simulated mesh in order to keep sculpting the final details.
One of the intentions that I always have in mind, which is even more obvious with MD, is to always push it to the point that is necessary and nothing more.
Using my time in Marvelous plus Zbrush efficiently allows me to save precious time and, as a result of this, the project progresses smoothly.
Marvelous Designer is an extremely powerful tool that I'm just starting to grasp its full potential; In the same note I find Texturing XYZ. It's in the same note because both of them allow you to push your art to the next level of realism but, in my personal experience, they always lack believability if left on their own.
For me, it's the mix of these softwares with manual labor that allows you to show that powerful harmony of artistry and technology, displaying not only a technically accurate piece but also natural, and thus, more believable.

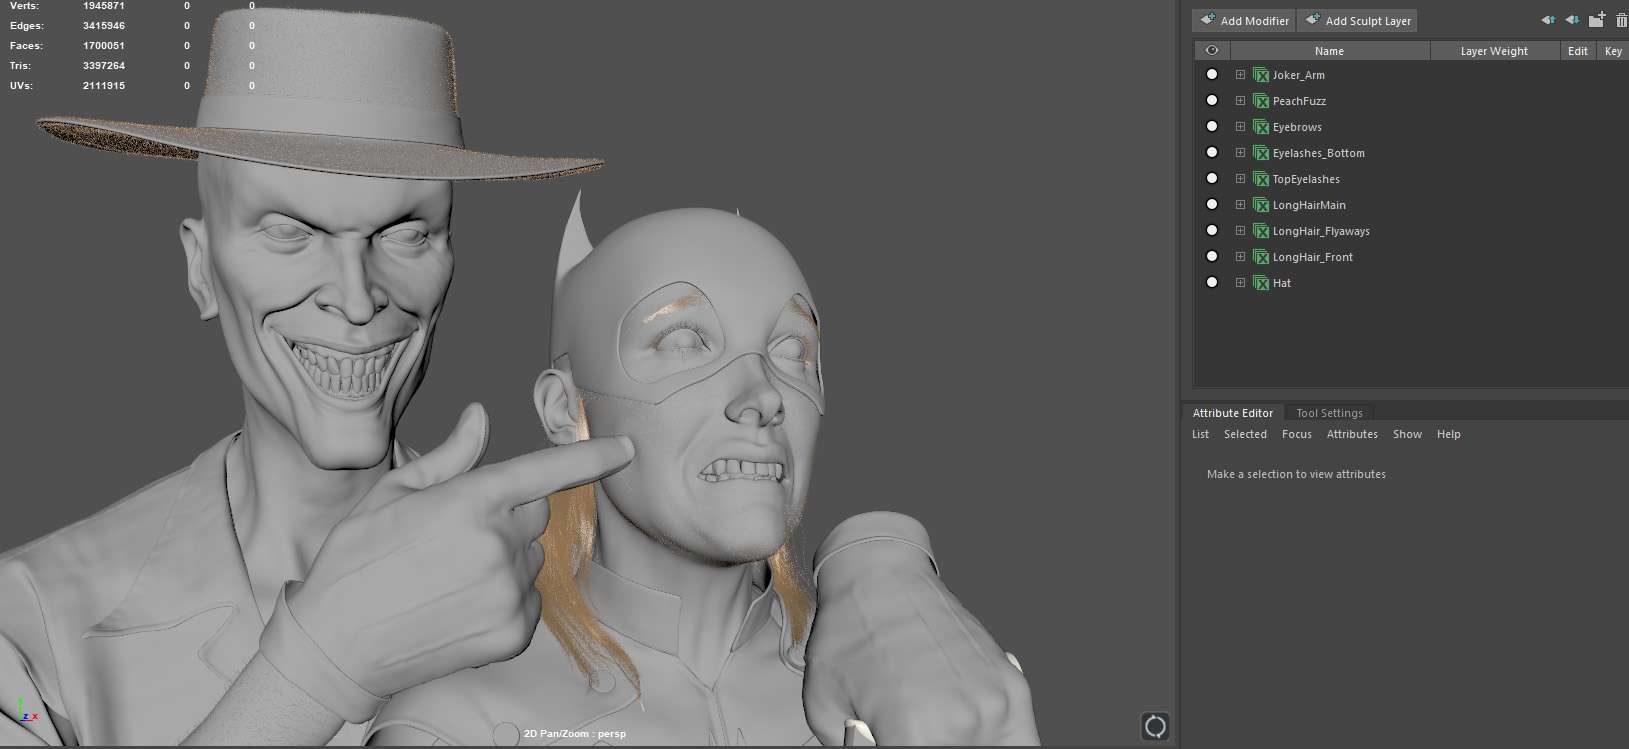
3 - Grooming
It is well known that even when you are prepared for a project, you will always encounter annoying problems and undesired suprises. For me, being up to date as an artist is key in order to minimize these encounters. Following my own advice I took this project as a chance to try and delve into the incredibly well updated XGen for Maya 2017.
Being an avid user of its predecesor (XGen 2016) I was astonishingly surprised by this new version. Interactive grooming, new tools, non buggy layer system, etc. This new system showed me the gravity of, not only being aware of the new tools, but also reminded me of how important the technology is for this industry.
Now that the technology wasn't a problem anymore I was able to focus on the art itself. Gathering a good selection of references from every angle and separating the groom into focalized groups made the work even easier.
4 - Texturing
As I mentioned with the grooming aspect of the project, is always important to keep yourself up to date and nimble when it comes to workflows, tools and softwares; this is even more obvious in my texturing process. My texturing approach has been evolving and mutating paralel to my evolution as an artist.
Polypaint screenshot
During the course of this piece I came to the conclusion that a software is as useful to me as to how fast it allows me to achieve the result I'm looking for.
Amid the creation of this exact project I found out that Substance Painter is extremely useful for props and clothing but, currently, nothing beats the power and comfort that Mari provides me while tackling organic surfaces.
Tip: Substance Source is an extremely valuable resource for physically accurate materials specially useful for specific fabrics and tileable surfaces.
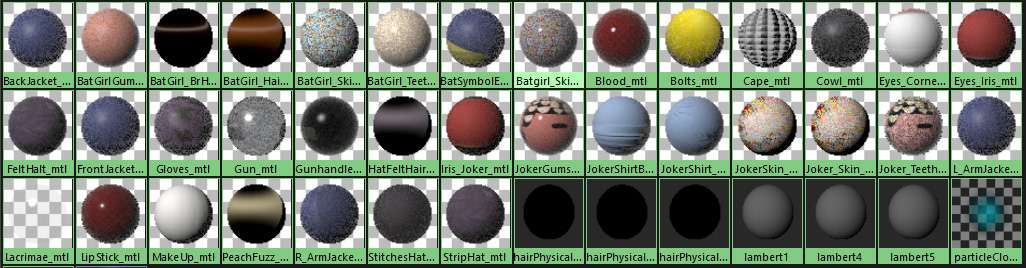
As far as how the process itself unfolded, it was fairly straightforward albeit a challenging one. During every project there is always a specific step that is gonna drag you out of the comfort zone, for this project, building all the shaders took that role.
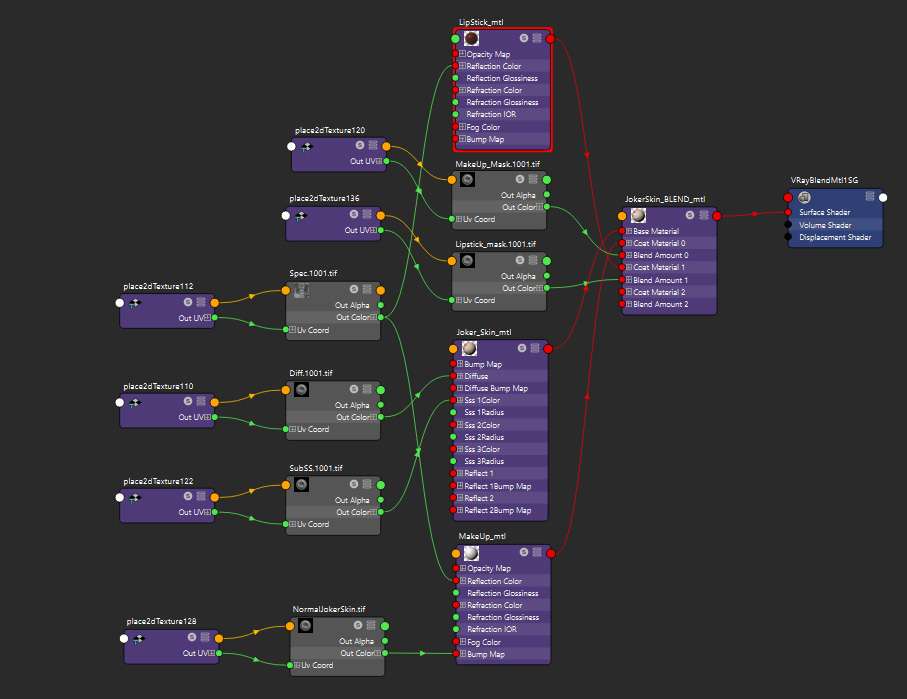
Besides some isolated situations, like Batgirl's hair, it was the skin that took the longest. The same way grooming presented an opportunity to try and update my workflow; in the shading side of things, it was time to leave the Vray Fast SSS2 behind and implement the new VrayALSurface. Again, it felt undeniable right from the start.
The VrayALSurface feels natural and accurate right from the start, without demanding a huge amount of adjustments afterwards. This simplified material allowed me to get a really natural representation with the use of just three maps: Diffuse, Specular or Reflection and Subsurface Color.
The comfort and ease that was provided by this shader was such that I switched immediately every SSS shader in the scene to the ALSurface, including both eyes and teeth.
Once again I was reminded how the incredibly important attitude of being flexible and fearless in your use of tools can change completely how a project unfolds.
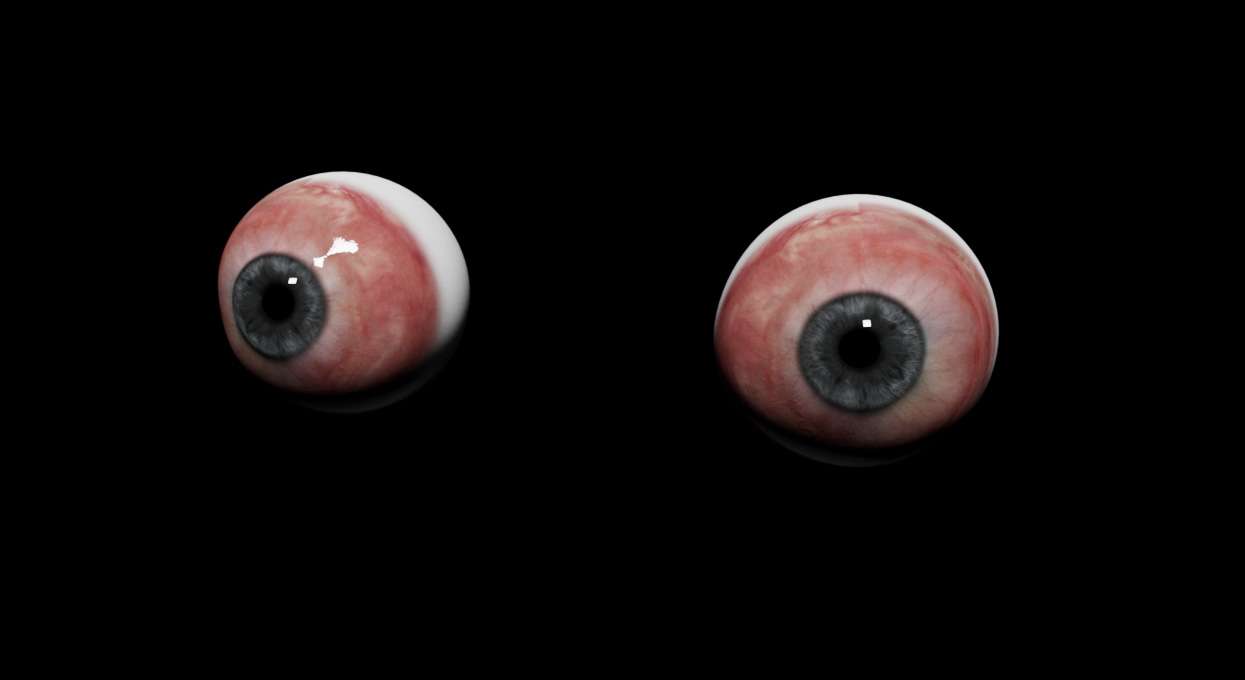
An outstanding thing that never ceases to surprise me about CG, and art in general, is that you never stop learning. Among plenty of other aspects, this project forced me to go to the next level specifically in the eyes.
I used to build the eyes in a very specific way that worked for me in the past, but in this case, it just wasn't working. That very moment brought me the opportunity to go back and study how the WikiHuman Project came about.
I do not consider myself a technical artist but even still, I realized, in order to achieve a certain degree of fidelity I had to slow down and invest, with effort and patience, the time to really study how things are and behave. For me, shading has always been an extremely gratifying part of CG. Tweaking a material until it looks just right is a fun puzzle I'm always glad to be a part of.
5 - Compositing
As a general rule, I try to count on my look development stage for the main bulk of my work, this allows me to simplify the comp aspect of the project and just relay on it for fine tweaks that pushes the final ten percent that makes the image stands out. For this project, that simplification was carried even further since the final artwork was a still image.
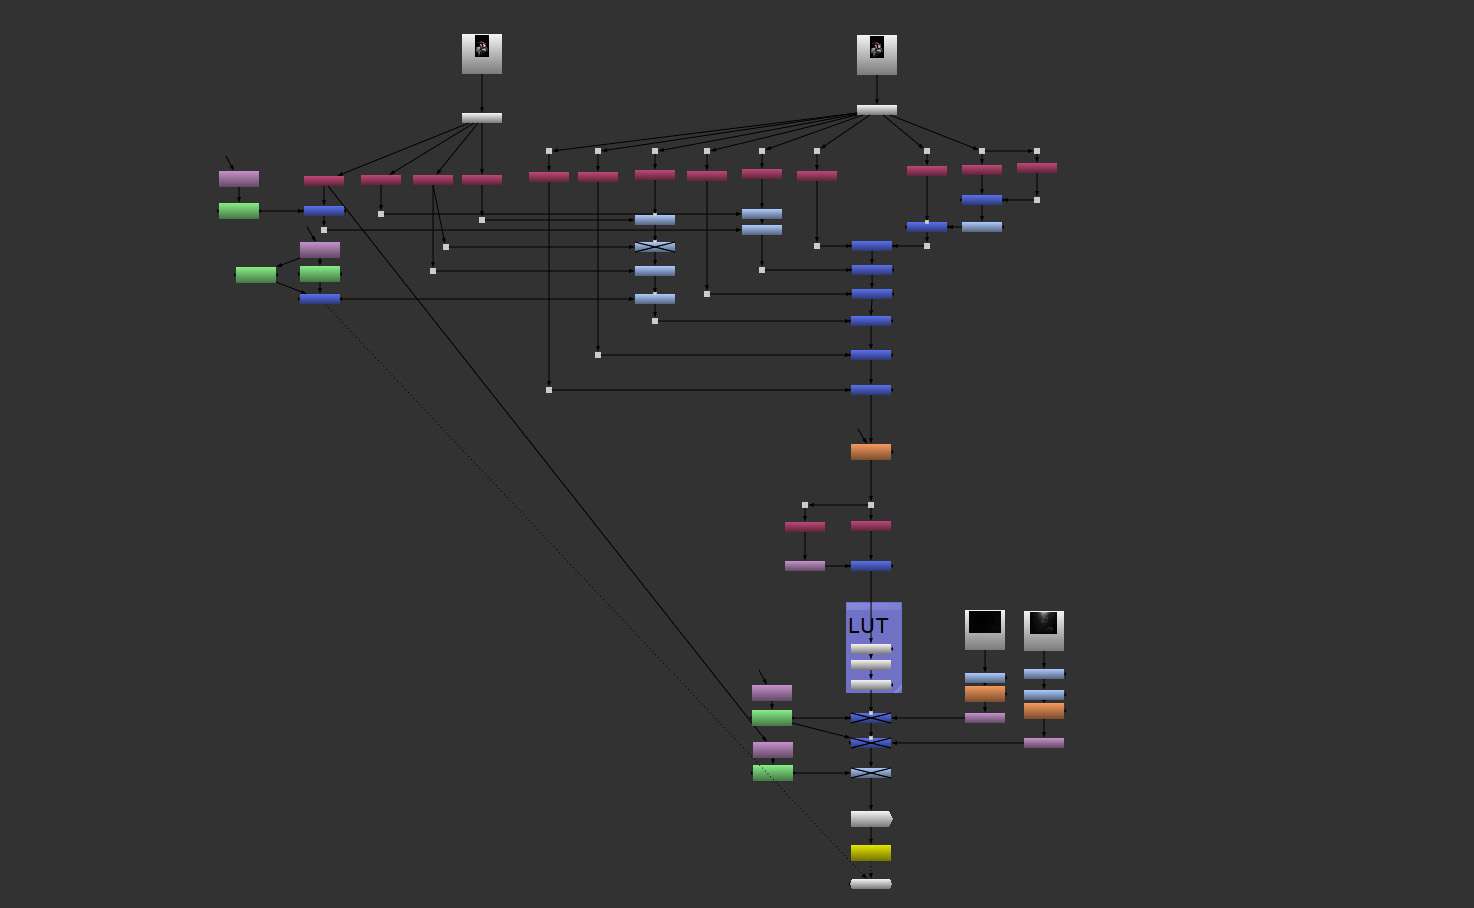
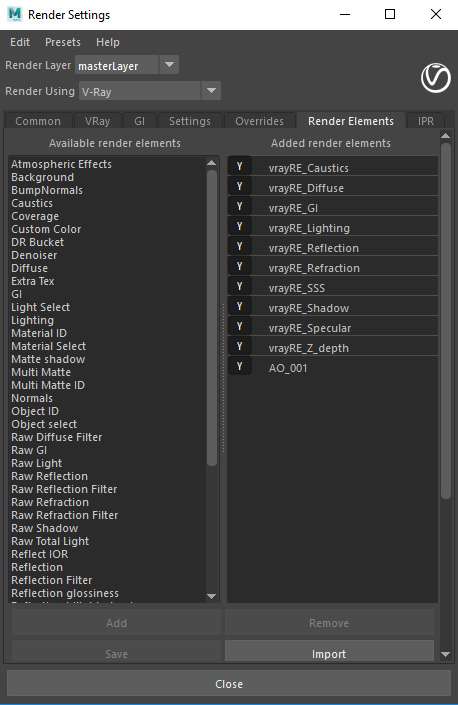
All the technical steps were done in Nuke, which is a standard in our industry right now. To extract each and every channel from Maya I used the shuffle node; that allowed me tweak any specific pass without affecting the overall image.
Grade nodes are very powerful to color correct certain aspects of the image like the Sub Surface Scattering of the skin or even how shiny the tear in Batgirl's face is. It also allows me to adjust the colors of certain materials; for example, Joker's teeth. The use of roto masks to isolate certain areas is also something pretty common that I also incorporated for this project.
This method allowed me to fine tune the final outcome of the image with definite precision and no effort at all, saving me precious rendering time.
Hope this small breakdown brought some new tricks and insights to any reader interested, or even a little bit of inspiration to your daily life!

Special thanks to Miguel Ortega & Cristina Camacho for all the guidance.