

Jack Gathercole explores the benefits of a using modular asset workflow while creating an accurate replica of Hannibal Lecter's Office and compliments it with a warmer, inviting colour palette.
Initial Research/Inspiration
The discovery of the “Hannibal” was very interesting due to the visuals and storytelling throughout the TV series(s). Creating replica assets within the scene was very important which caused the constant attention to detail.
Google Images and other sites such as Flickr & Pinterest were important when looking for initial research and reference imagery. See below for a mood board developed as early inspiration:

“Hannibal’s” TV director Bryan Fuller luckily released the design documents for the office set. The technical specifications aided in the blockout and early phases of planning this project.
Unreal Engine 4 - Basic Blockout
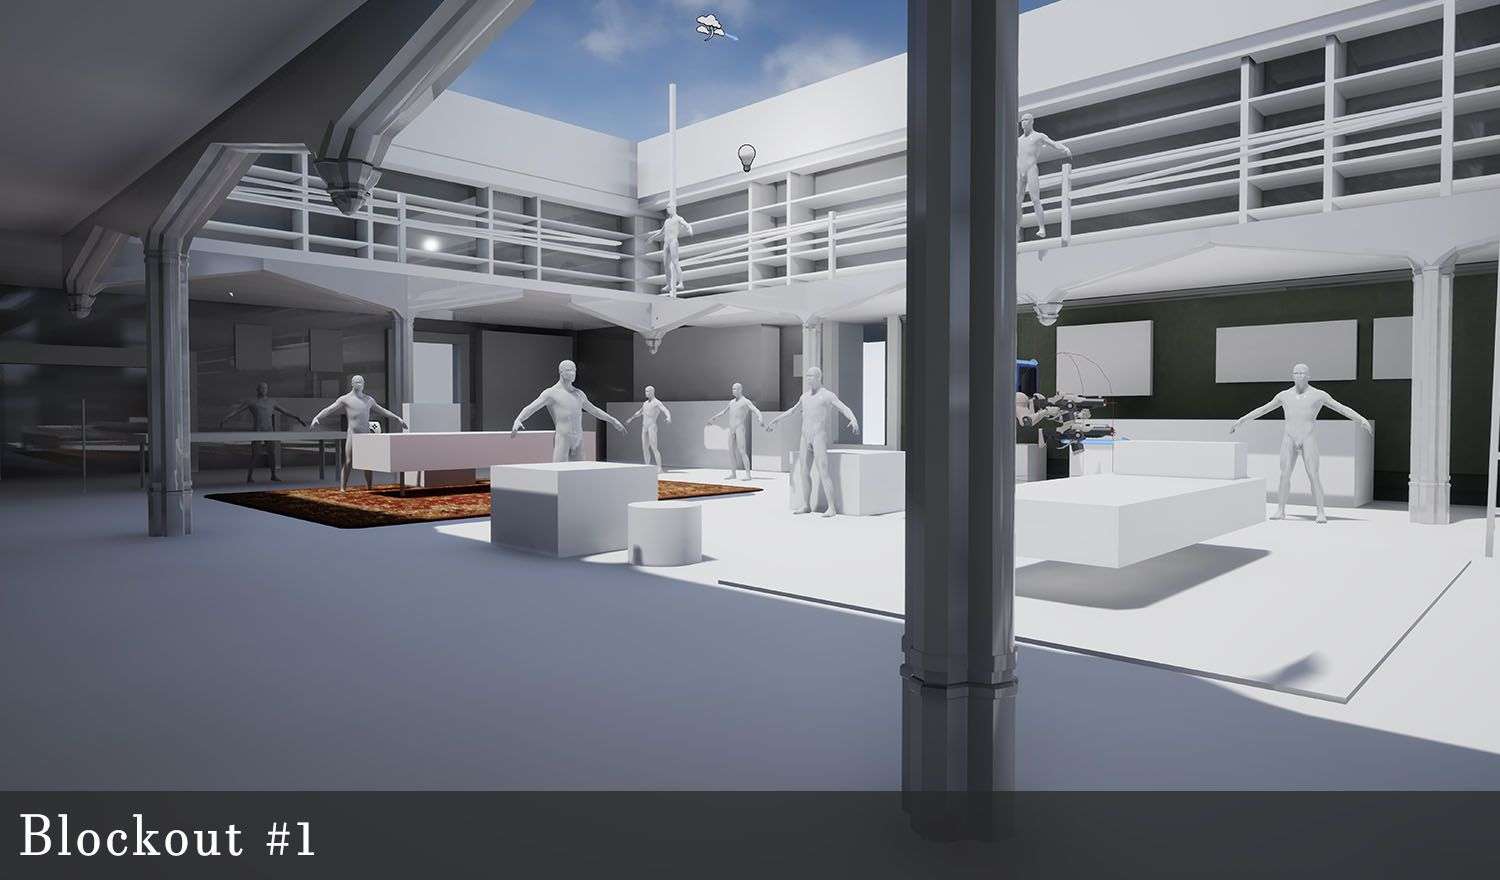
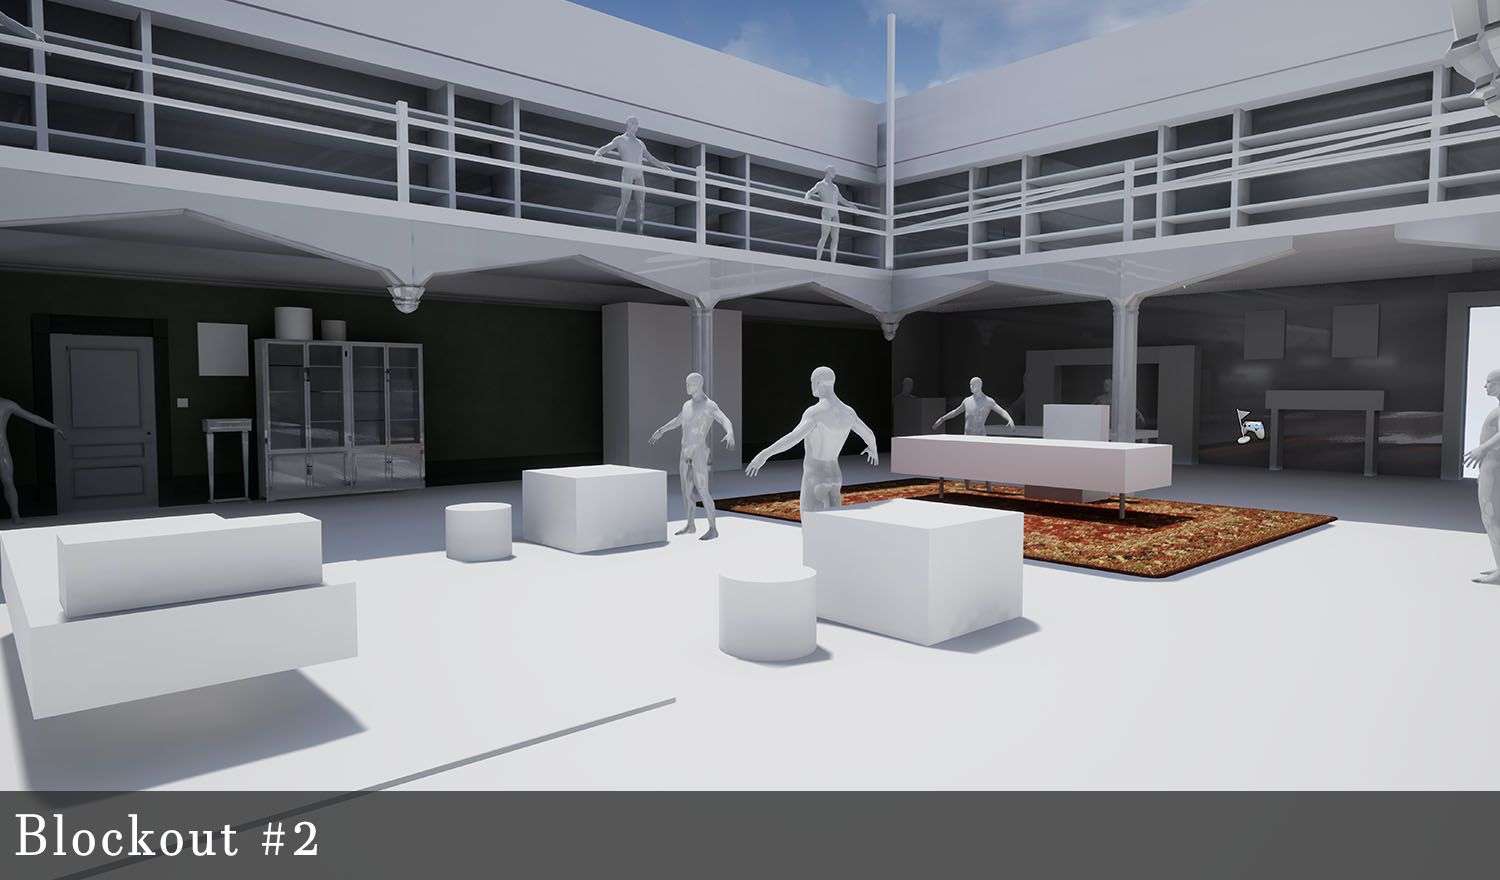
For any project, I begin with a blockout of the scene. (You can do this with the default geometry within Unreal Engine 4). This is to gain an understanding of scale for your environment. Comparing assets to an average human figure will provide a rough guide on what assets take the highest priority.
I began using a variety of the included Unreal Engine 4 geometry to act as placeholders for each unique asset, such as cubes and cylinders scaled to roughly the correct size. This method can be applied to projects with visual reference and those without. Using the provided measurements sourced online, I pieced together a rough scene layout.
Checking The Scale
A fellow student and friend of mine who has graduated gave me a tip about asset scales that may be of value so I figured it's worth sharing! So… now that you have placed your basic objects in the scene, it is best to check that the scale is correct at an early stage. Fortunately, the “Nickz_humanMaleAverage” model inside of “ZBrush” is perfect to compare your assets to a human figure. (Roughly a 6ft male character). This is already retopologized for you, I simply exported it as an .fbx file and place them around my scene.
Sooner or later, I realised that the scale of my project would not be achievable alongside other projects in a single semester. I then scaled down the size of this environment to display assets within one camera angle. It is strongly advisable to resize projects to allow enough time to produce a high standard of work in a smaller area if running low on time. I have learnt this the hard way before...
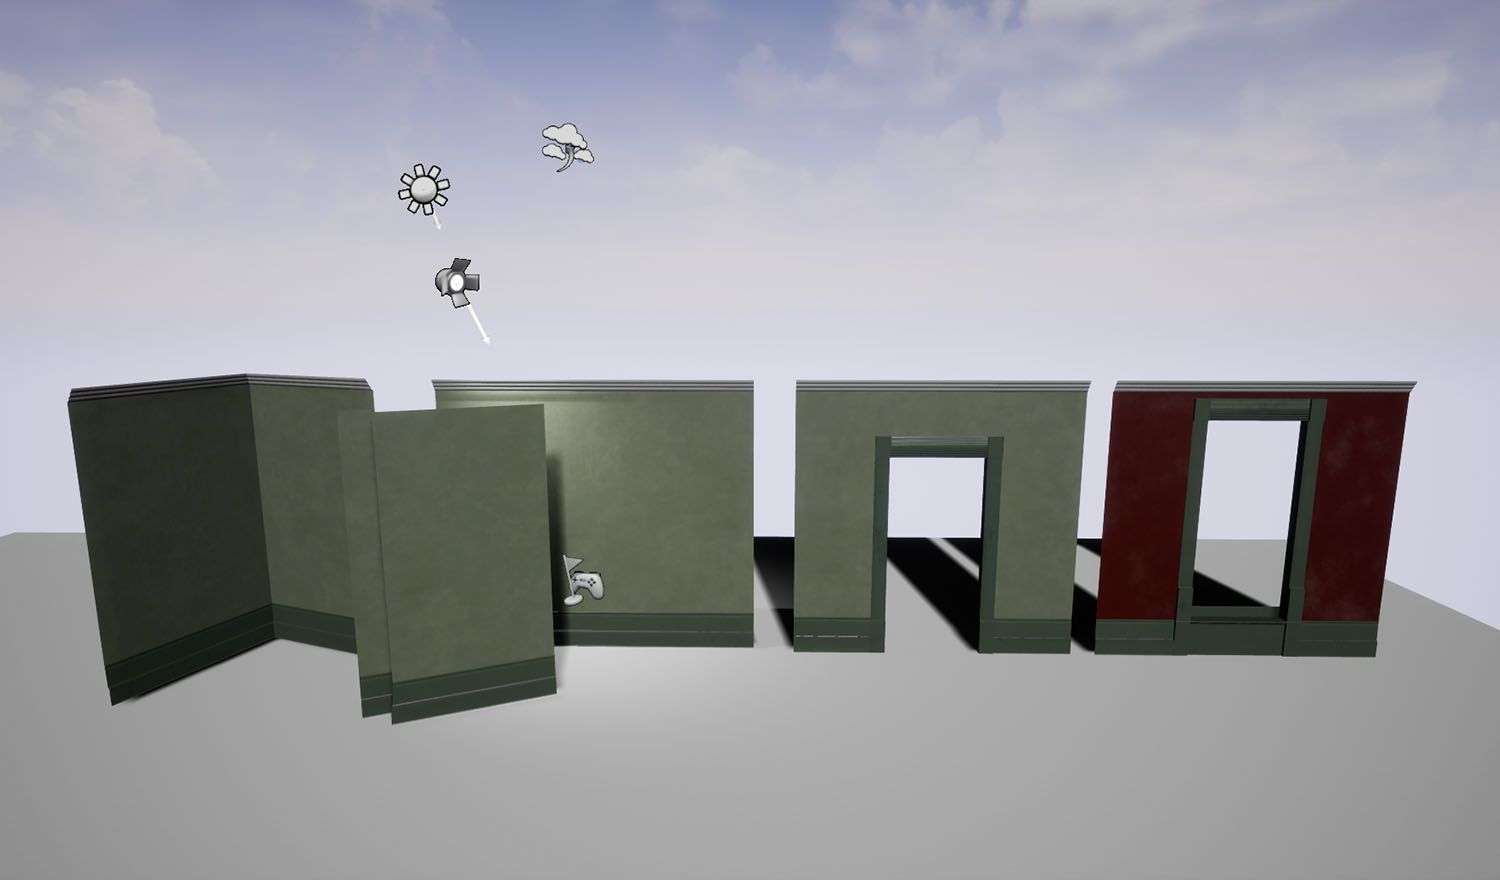
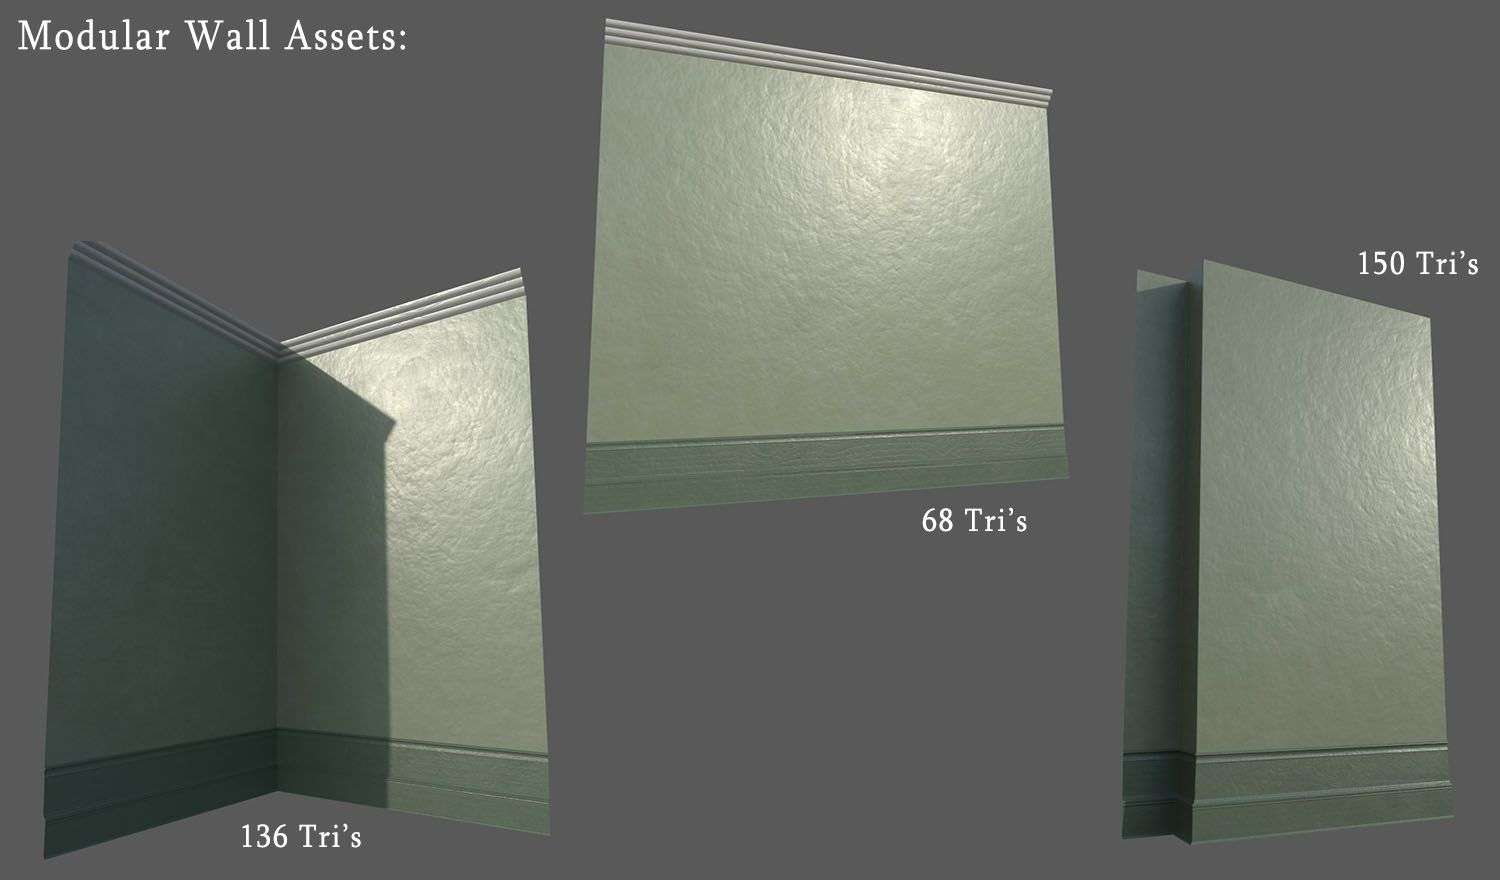
Modular Asset Workflow
To replicate the static objects shown on screen, attention to detail was very important. Modular assets was a clear method of approach as a lot of repeatable components are visible in this scene.
I personally use Autodesk Maya to model all assets in my projects, but have recently tried my hand at other software's such as 3DS Max. When modeling, the issue games artists face is creating high quality assets with minimal topology. But I also agree that you should not sacrifice necessary details to reduce the density of any model unless it is a very significant change.
The general pipeline I follow when modeling is altered for different scenarios. For example, I will bake down a high poly model onto a low poly version when using complex details, but for the assets that don't need this adding a bevelled edge will be fine. Click here to see a great guide on high-low poly baking.
Texturing in Substance Painter
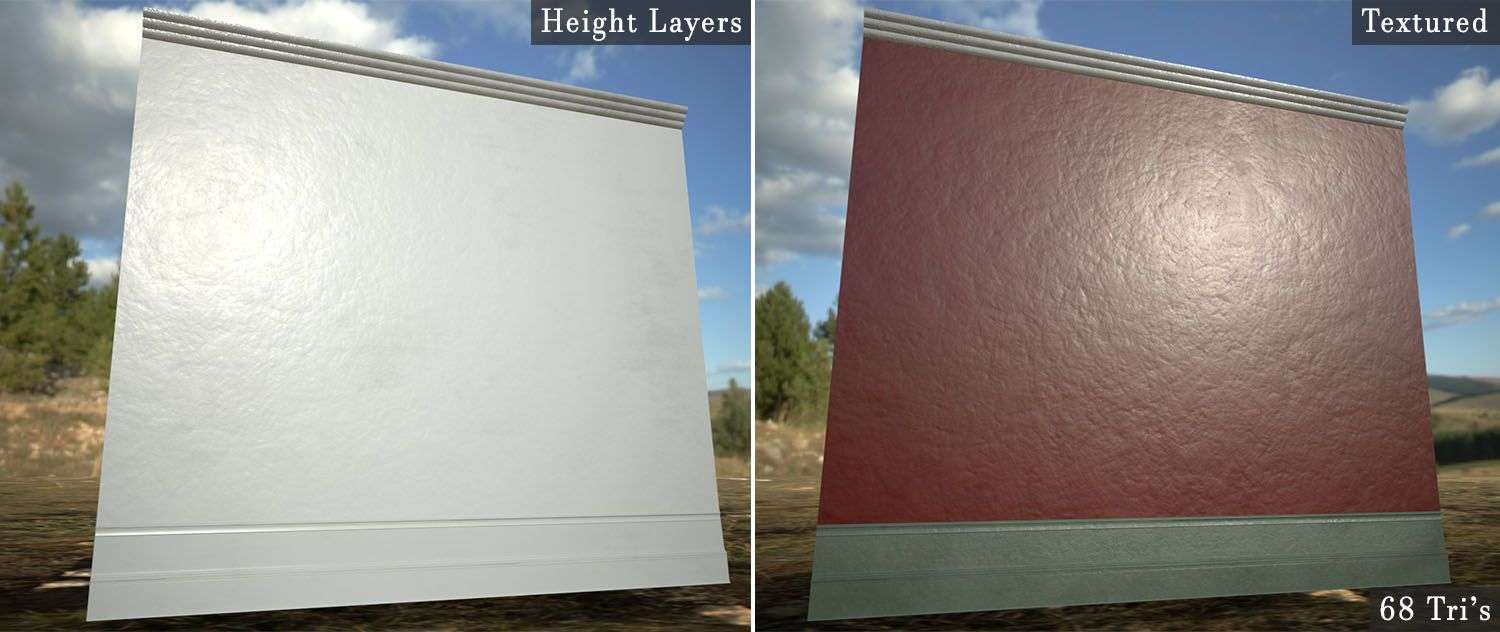
Substance Painter provides a lot of opportunity with the use of normal maps that can avoid unnecessary topology. To begin, always bake the maps that you need before any texturing takes place. I usually use “Normal”, “World Space Normal”, “AO” and “Curvature”. The others I don’t personally find any use for.
I began by forming height layers using different masks and intensities. This is useful to create surface roughness on each model. Use a few layers and build up some interesting details. When it's time to add some colour, it helps to blend different gradients of colour to add some lighter and darker tones even if its very subtle.
Then, repeat the same techniques for grunge and dirt layers as a finishing touch. You can also hand paint some roughness layers to give the light hitting the surface of your assets an interesting appeal.
Parallax Occlusion Material
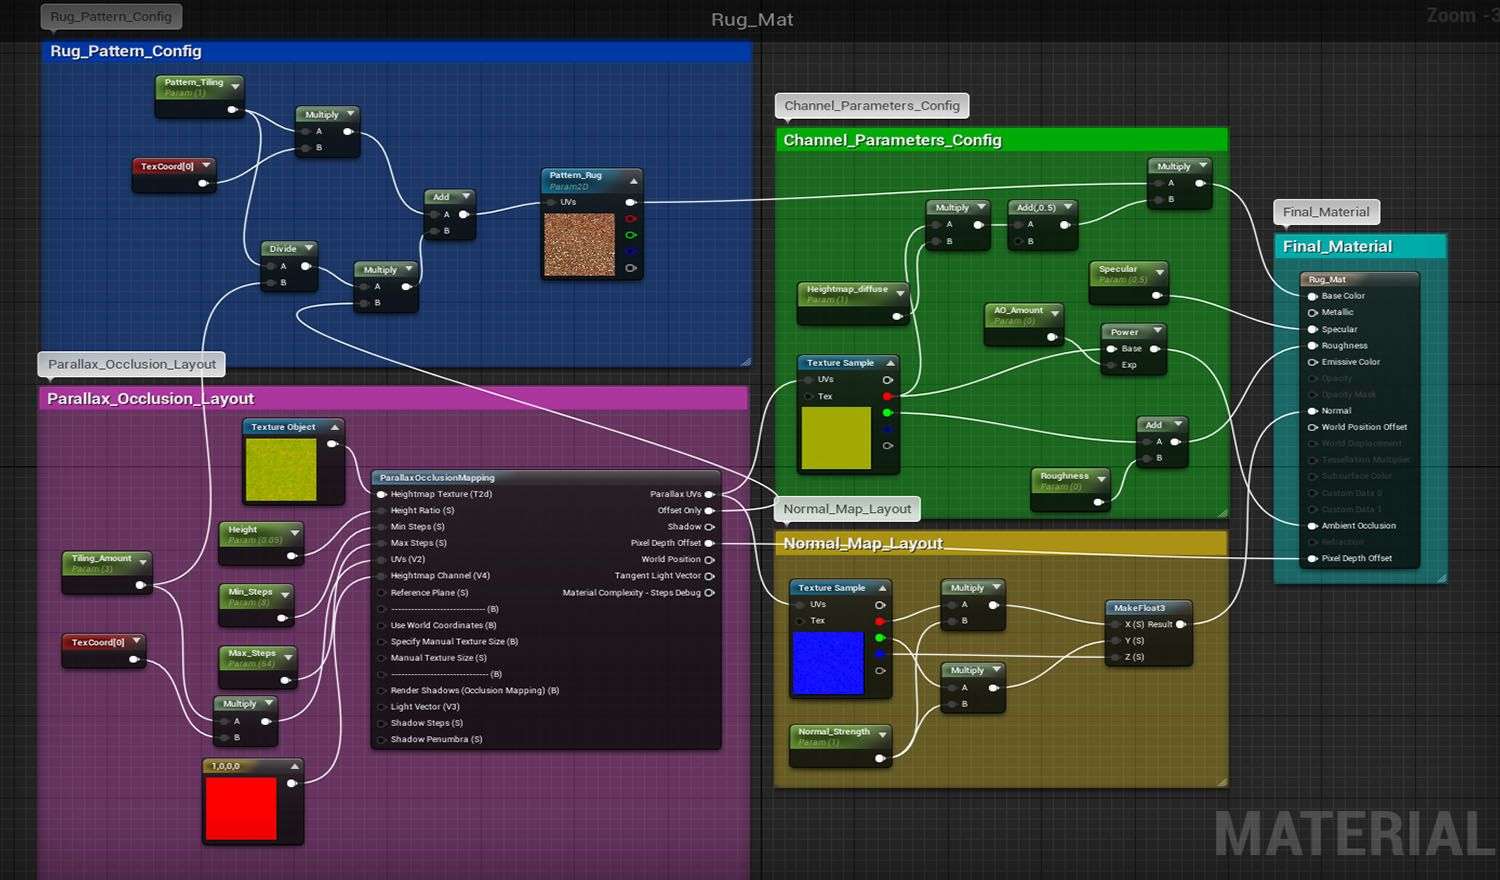
To create the rug placed beneath the desk, I learned how to create a material involving Parallax Occlusion.
Below is the tutorial I used for this material:
The material can become expensive if it is used in a large scene due to large amounts of tessellation. But as this environment in particular was confined, it did not affect performance at all. The material contains parameters so that settings can be adjusted to your liking along with the base image if you decide to alter the style of rug.
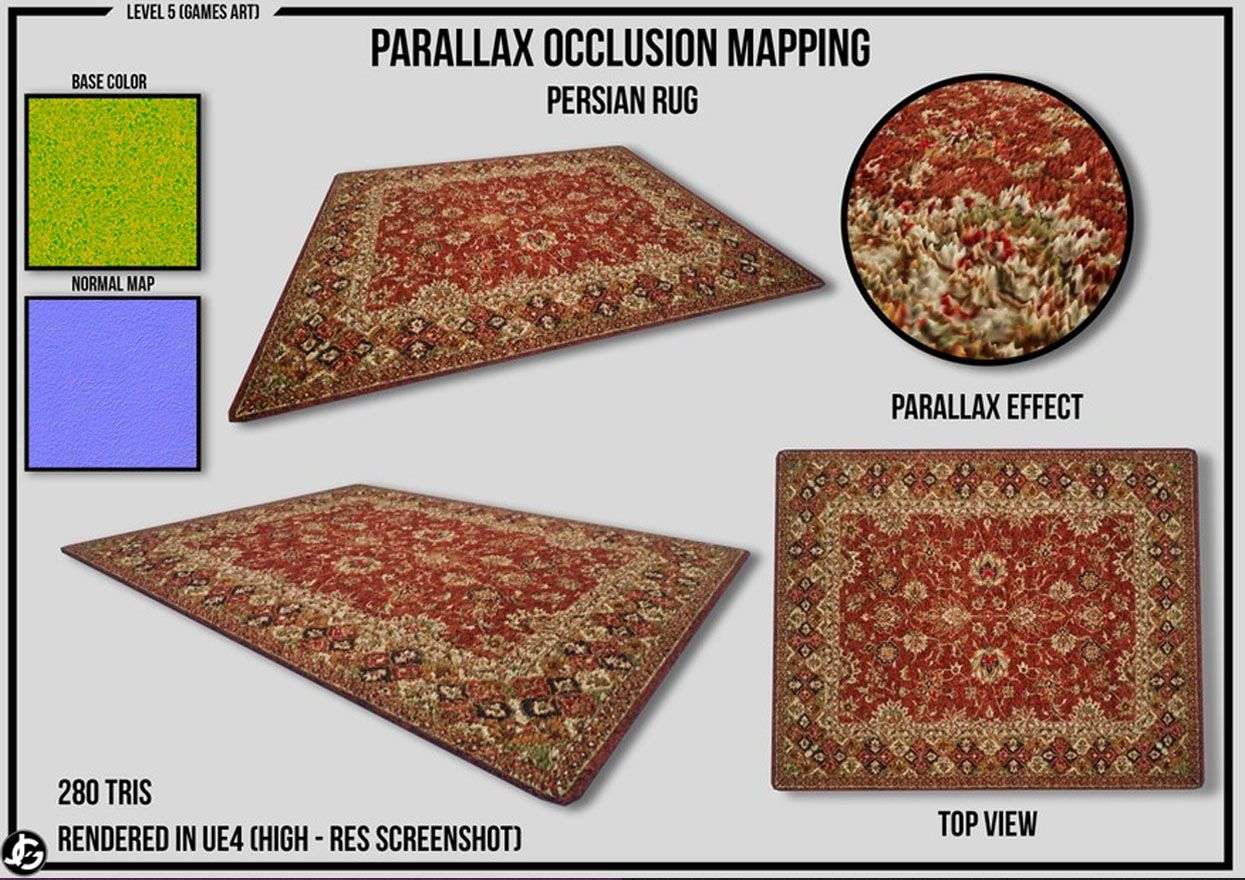
I was very pleased with the results of this asset and will use it again if possible for future projects that require similar materials.
Creating Mood Lighting
Below is a “Detail Lighting” screenshot of the office, it shows the complete project with shadows but removes textures. AO is also visible. This is a great tool to check that your lighting is correct and then make adjustments.
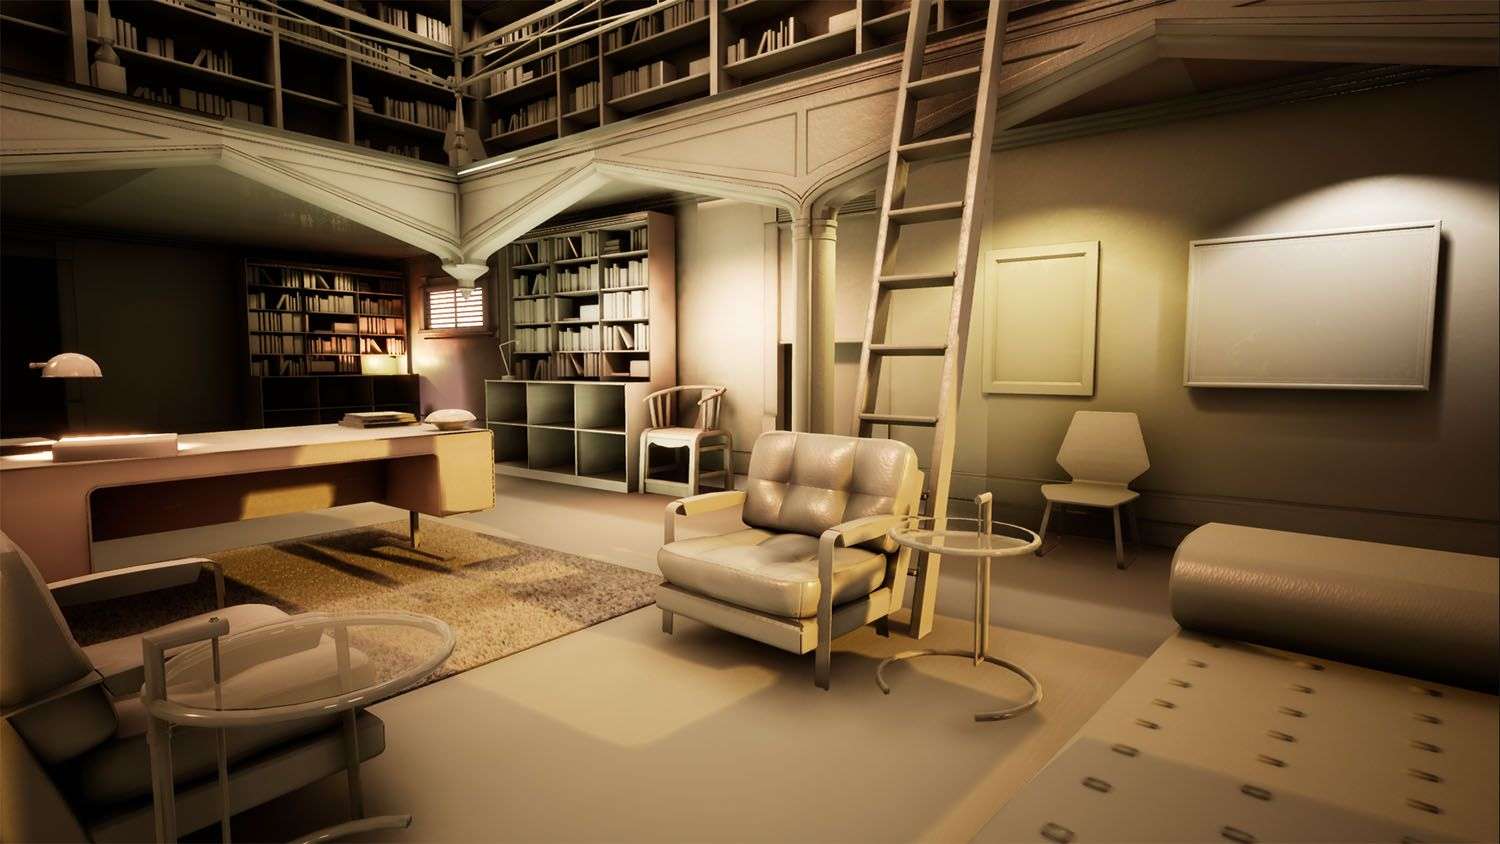
Although the office does show its lighting on screen, after trying to replicate this, I simply felt it didn’t give the scene any life. So… I tried to form a warmer colour palette to create an inviting appearance to this environment.
To achieve the result I was pleased with, I explored casting a shadow using a “Directional Light” from the window. Though it is very faint it does give a slight sense of an outdoor atmosphere. For the interior, I used a mixture of “Spot” and “Point” lights to create the ceiling lights with adjusted settings such as intensity etc.
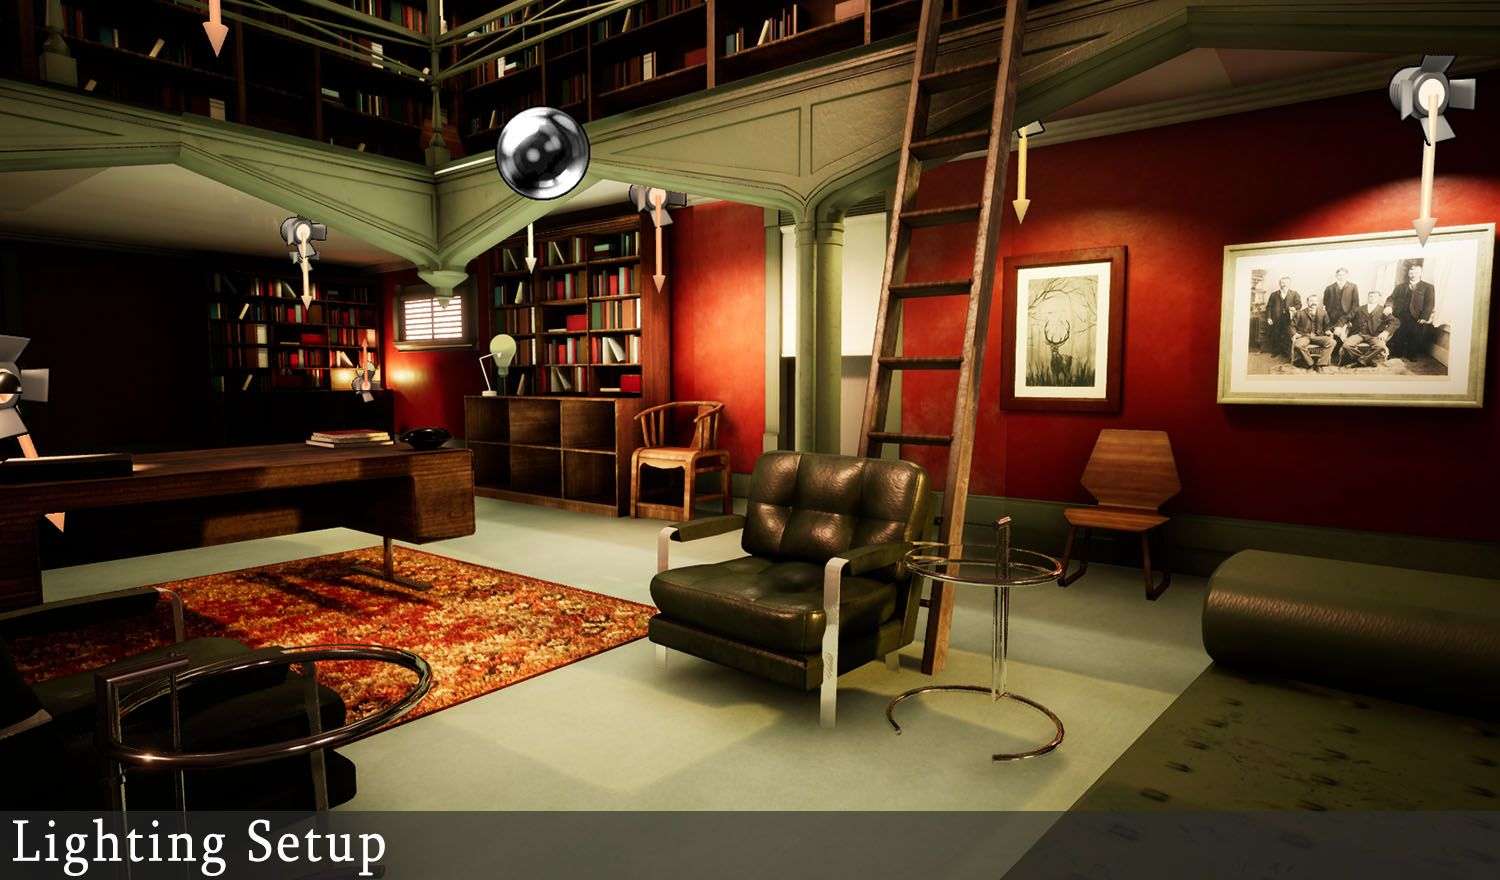
A small amount of lights were used to avoid any over saturated areas but to also match what is displayed in the reference imagery for this office.
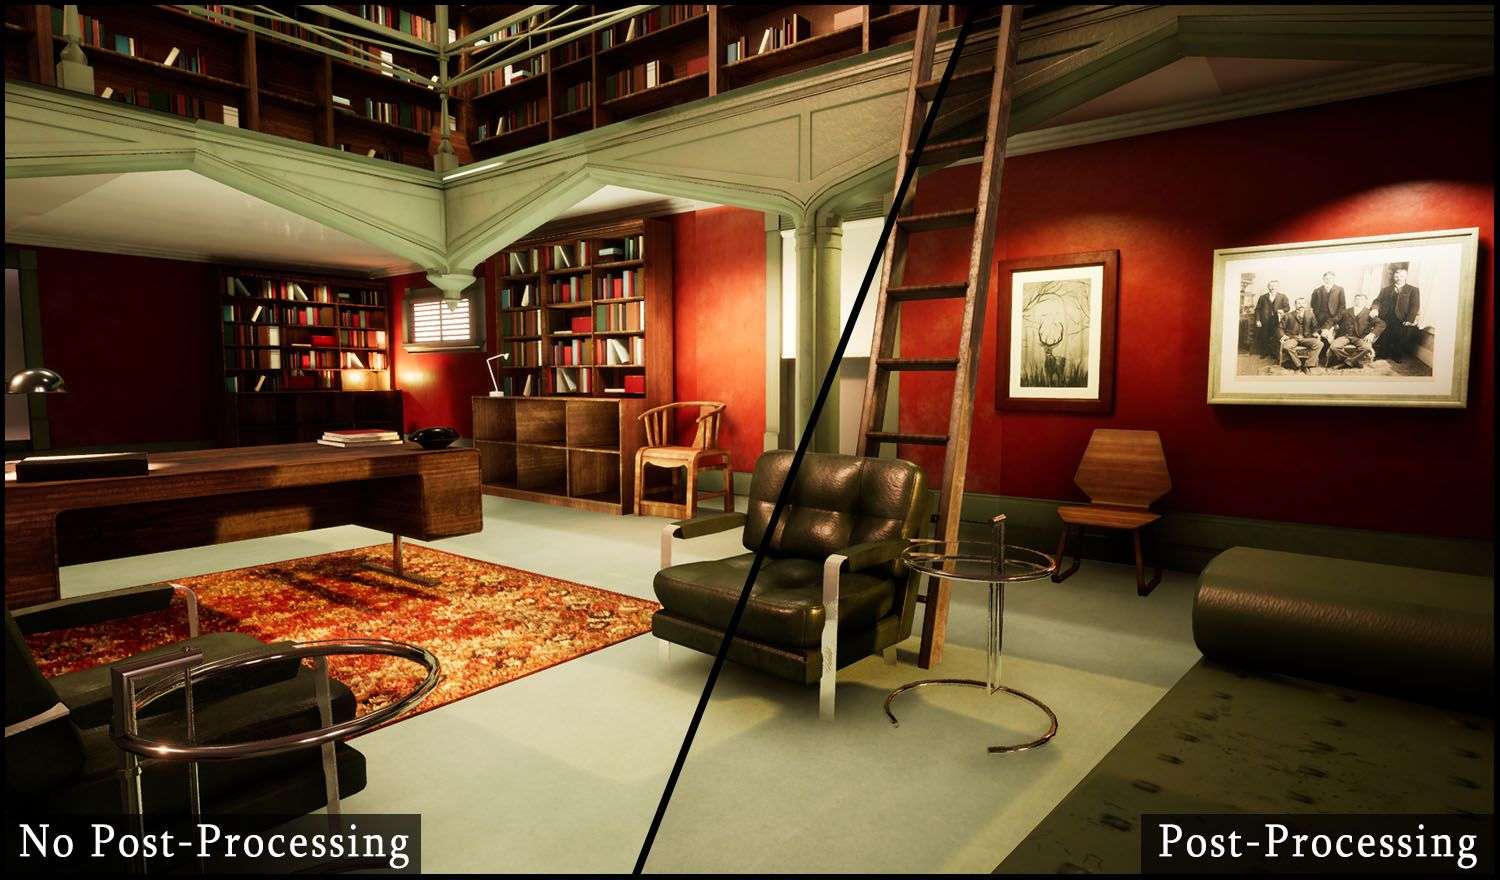
Post-Processing made a lot of difference towards the end result of this project. Highlighting the warm, vibrant values shown throughout was very rewarding and proved to be extremely useful.
Final Thoughts
I thoroughly enjoyed modeling this environment and learned new techniques to speed up and improve my general workflow towards modeling and texturing. The process of lighting the scene was very enjoyable as I was able to explore the use of different types of lights and the powerful post processing within Unreal Engine 4.
