
In this tutorial, I will describe the process I took when building my scene. I will explain my thinking process and decision making.
I will also give some tips and tricks that you can use when working on your own piece. I will cover aspects like concept, modelling, composition and lighting. I hope you will find it useful and interesting.
Concept
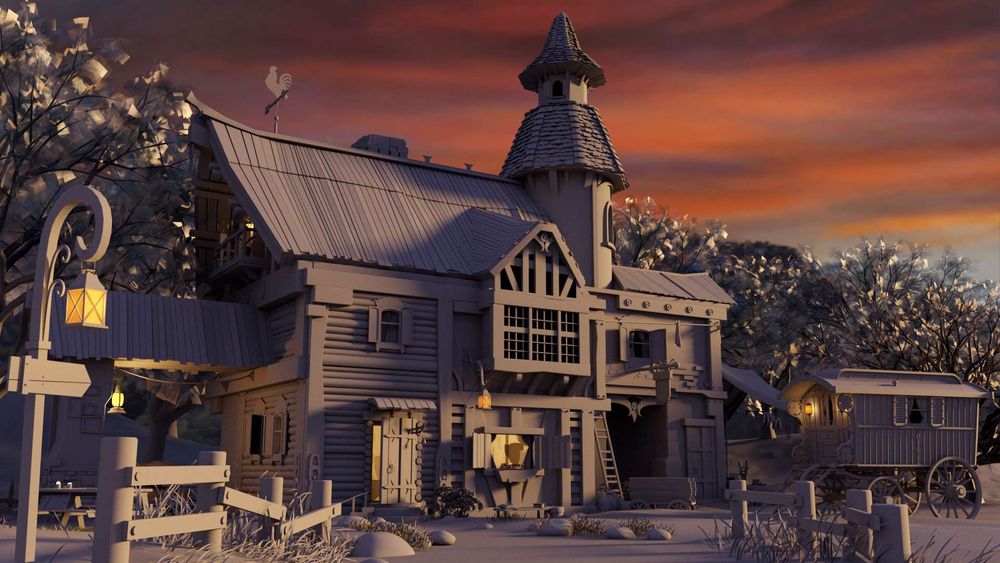
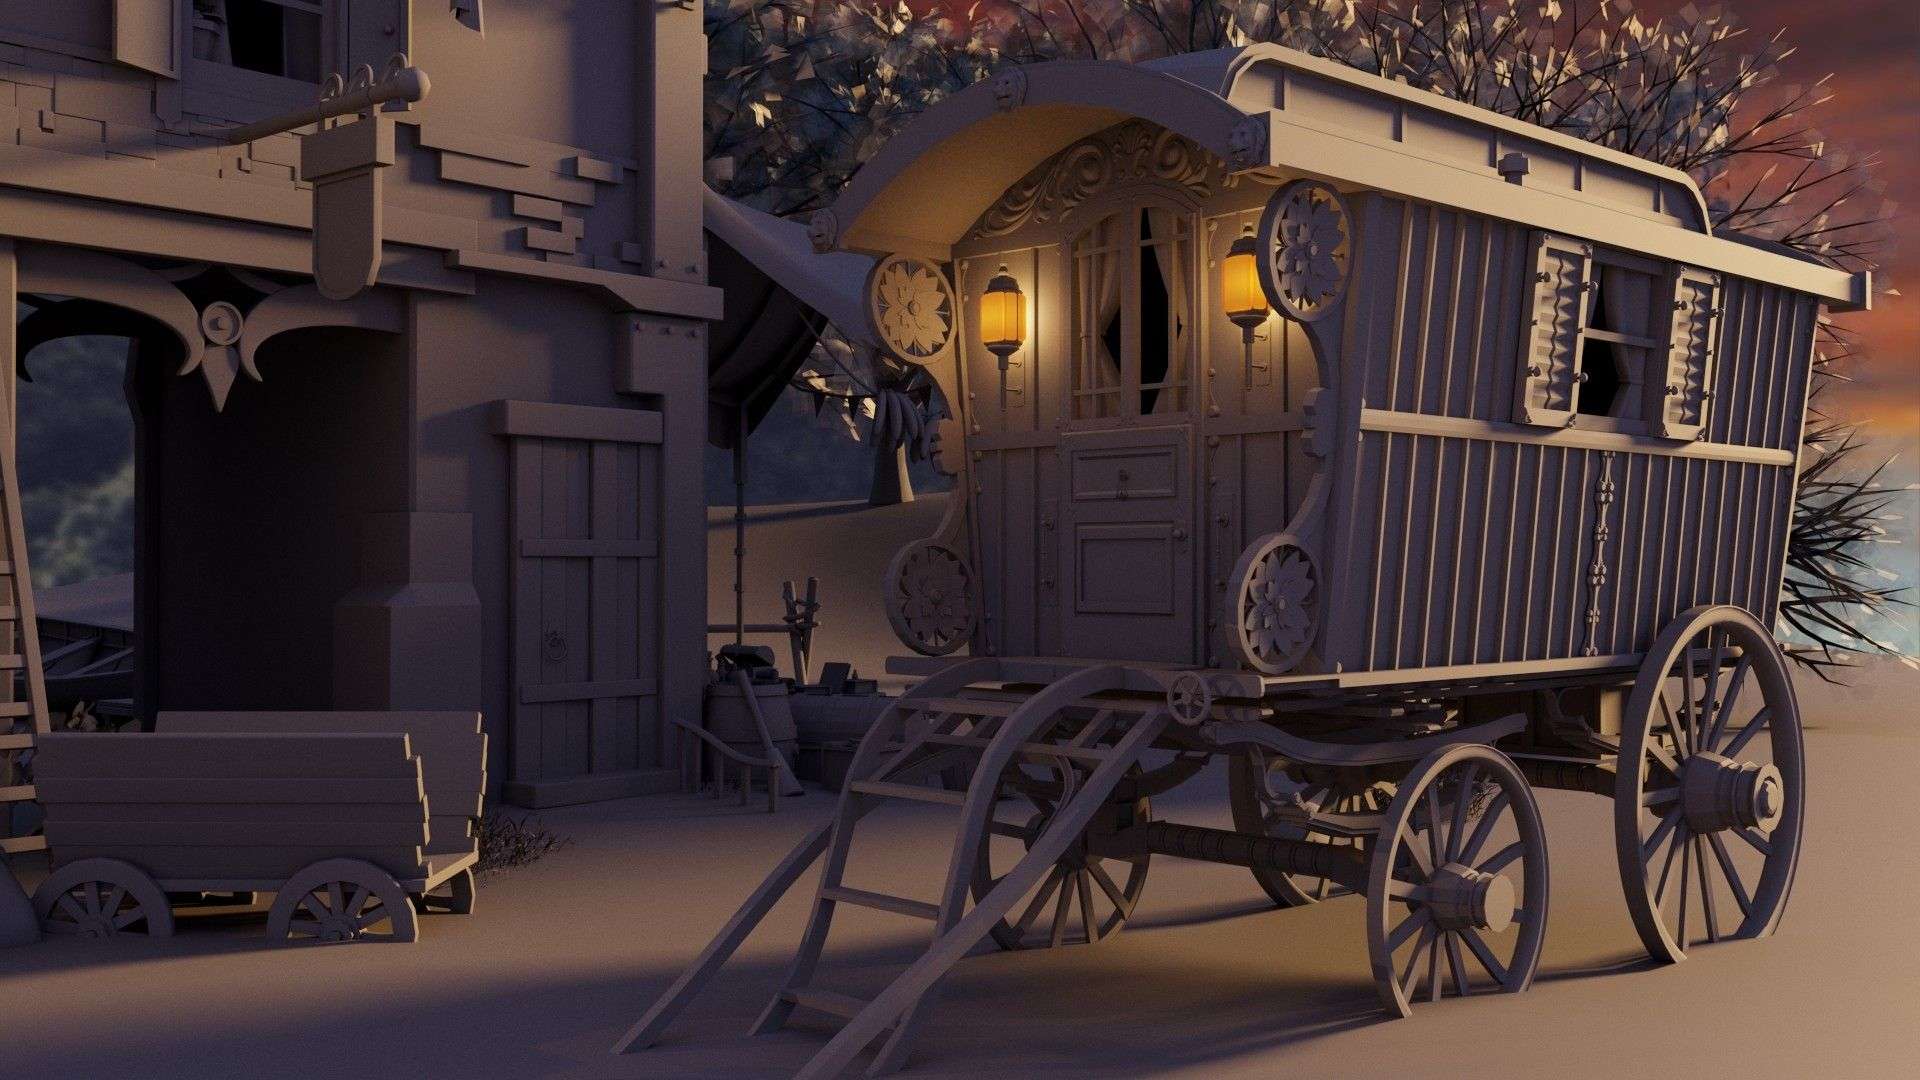
I wanted my house to have a character. Something that will make the viewer say 'I want to visit it'. I didn’t want just another medieval house. My idea was based around a gypsy theme. Colourful, wicked, dramatic.
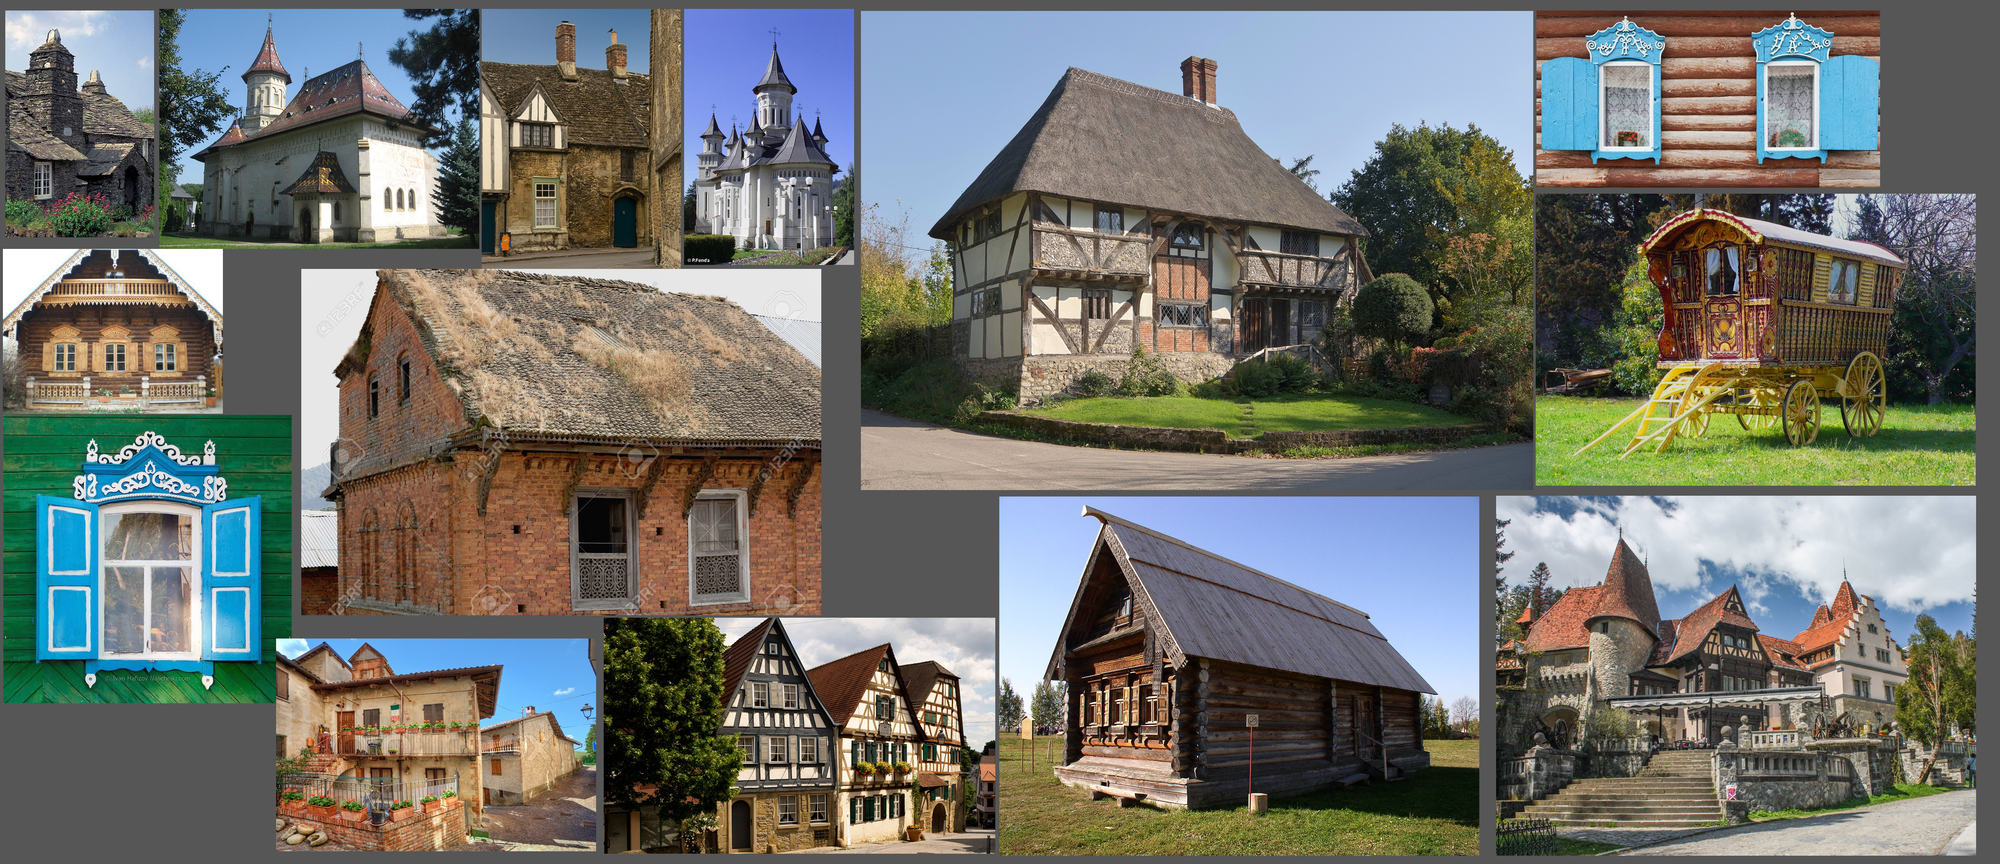
I started researching existing designs. I quickly realised that to make my idea work, I will have to combine different architecture styles from different cultures. My choice fell on Romanian, European, Russian.
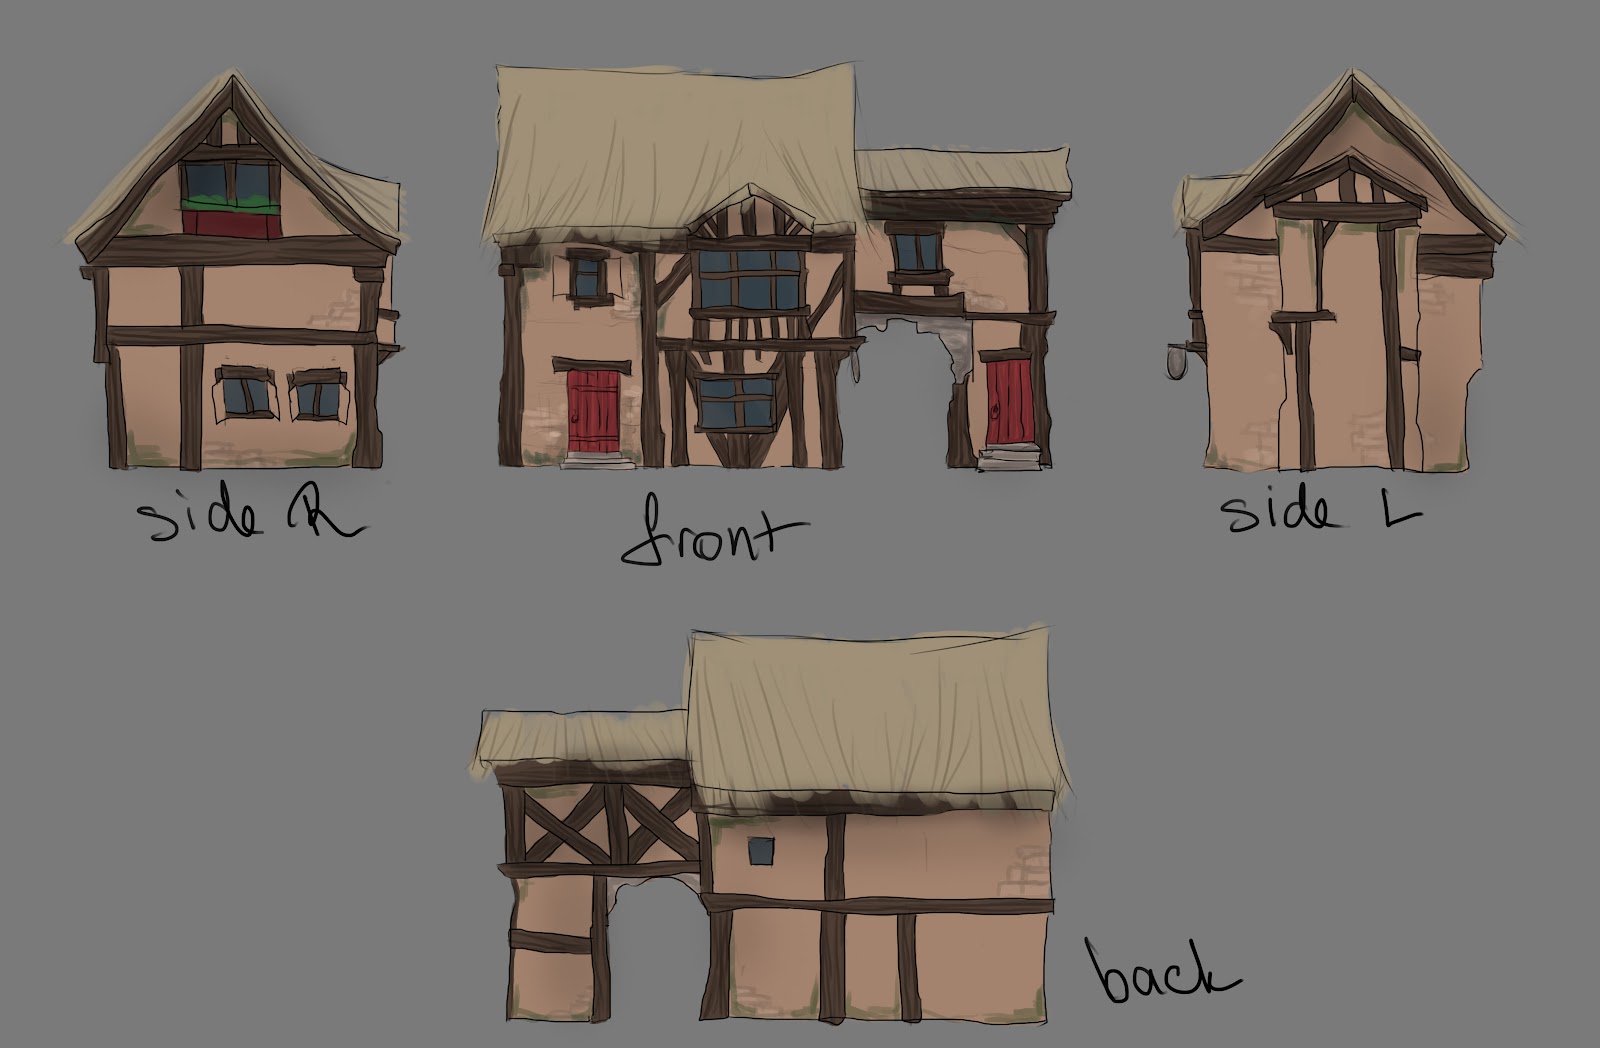
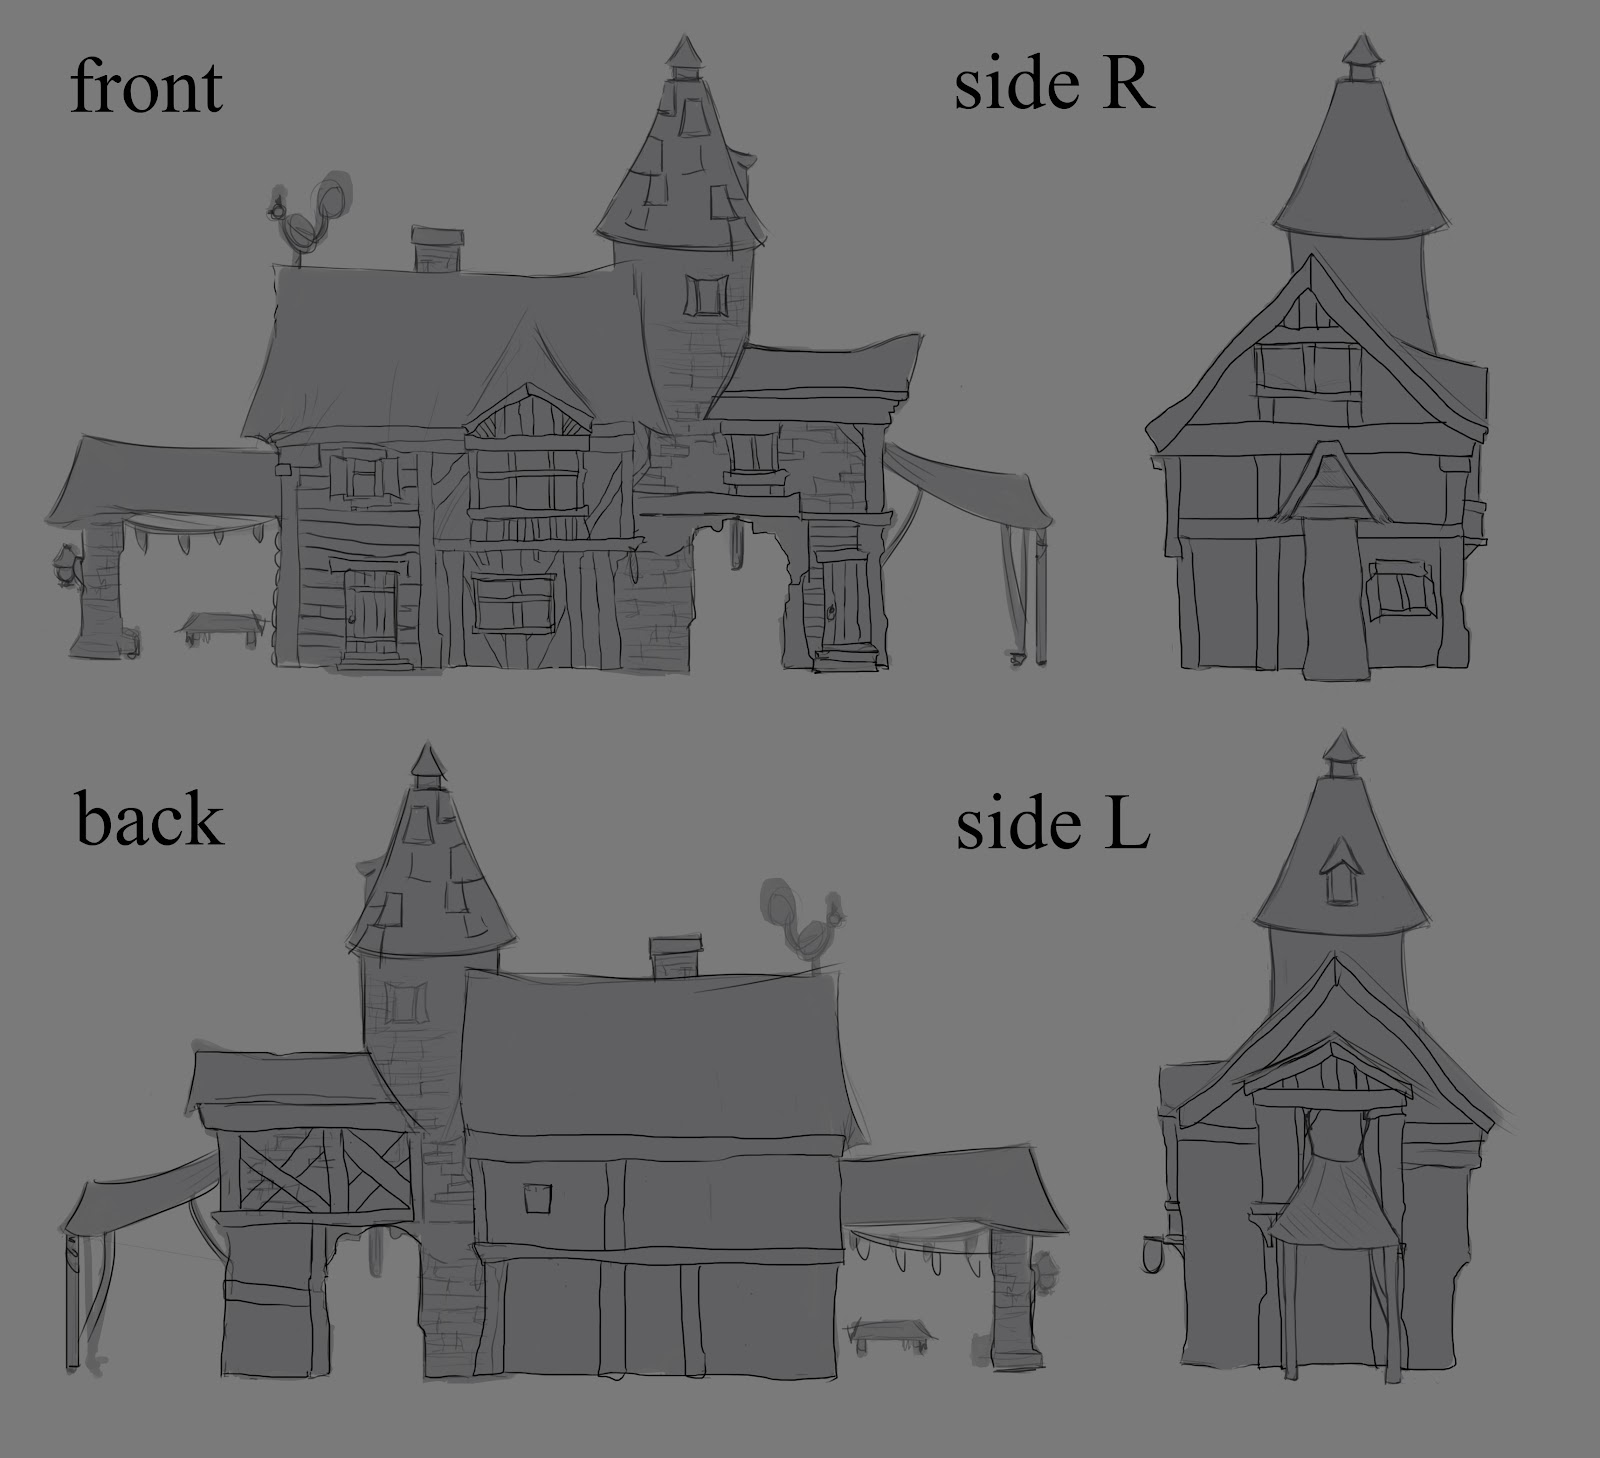
I drafted my first concept and...it was a little boring. It was too square and simple. To break it up a little I have added a tower, a tent on the side and a gypsy wagon. The tent ended up being the most fun part to work with.
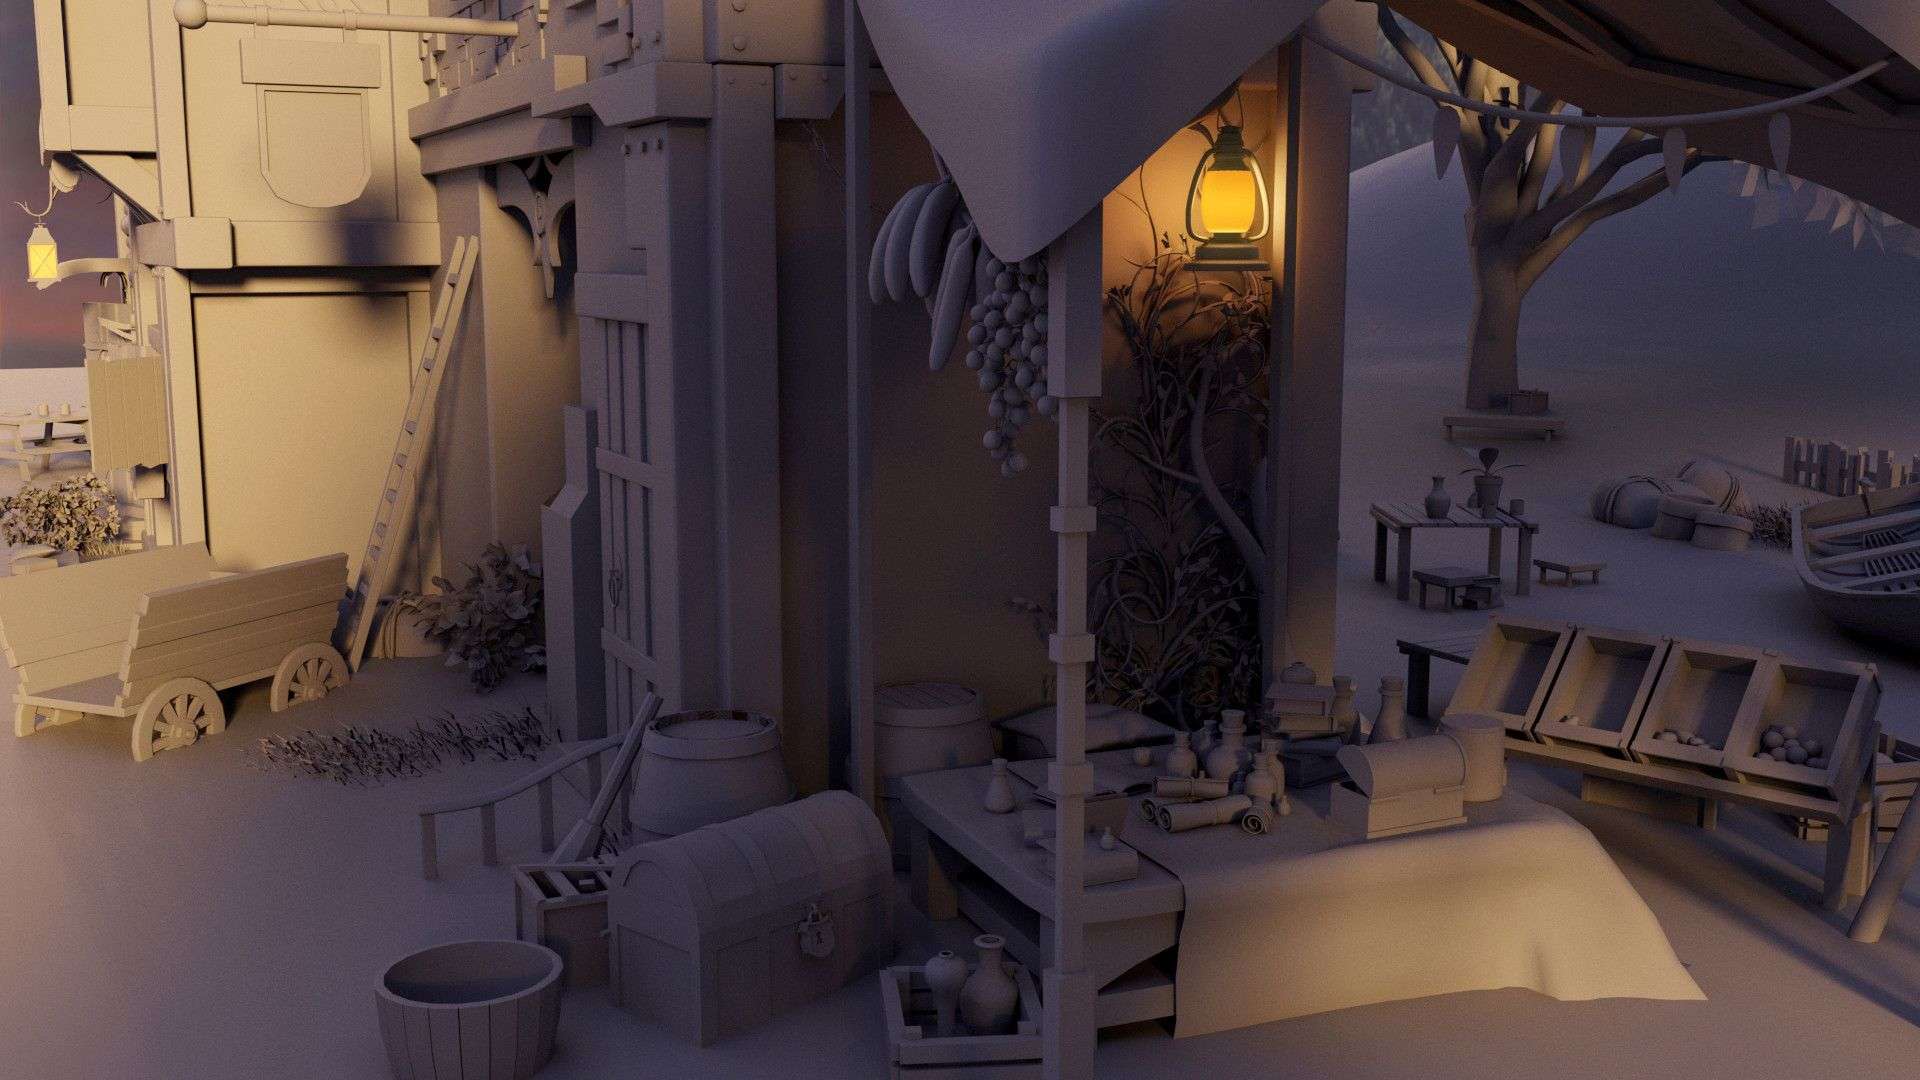
Later, during the modelling part I populated it with potions and books, converting it into some sort of an alchemy market. I also came up with a material board. This helped me to identify the texture and details that were going to be used during modelling and texturing.
Before
After
Modelling
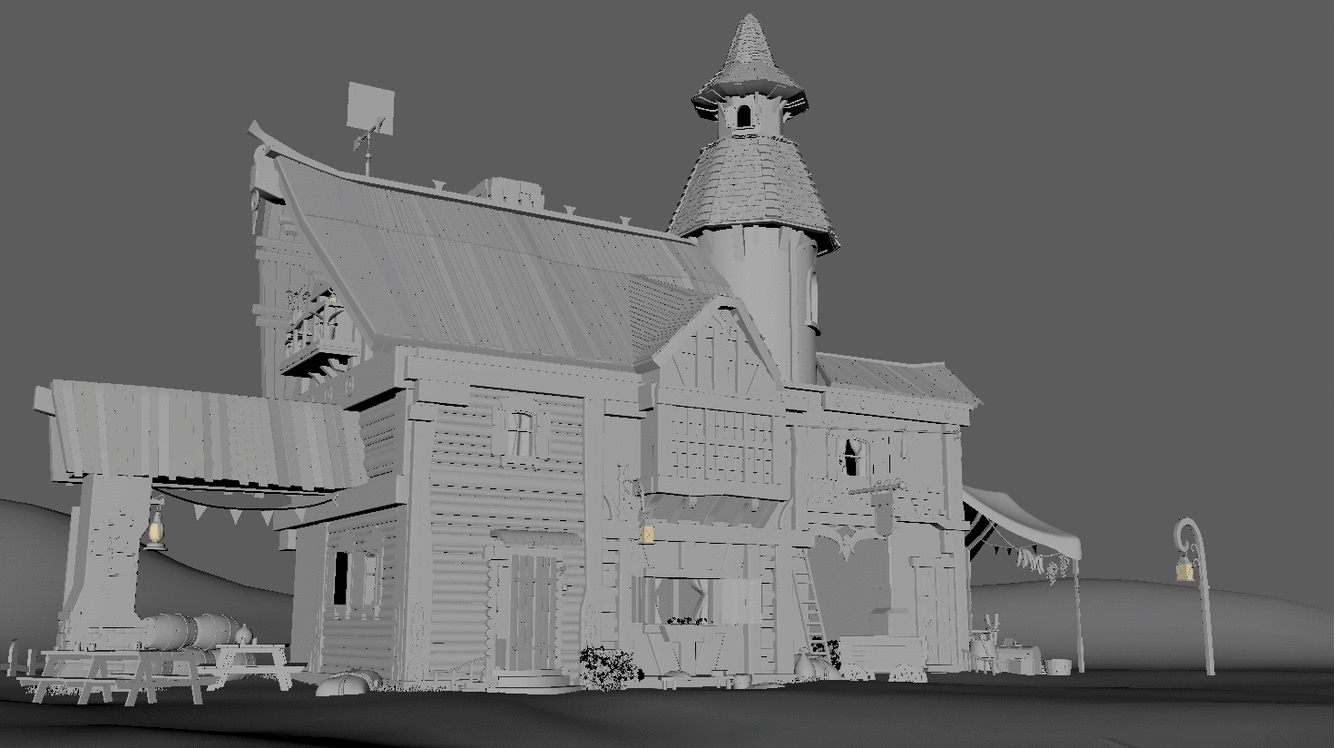
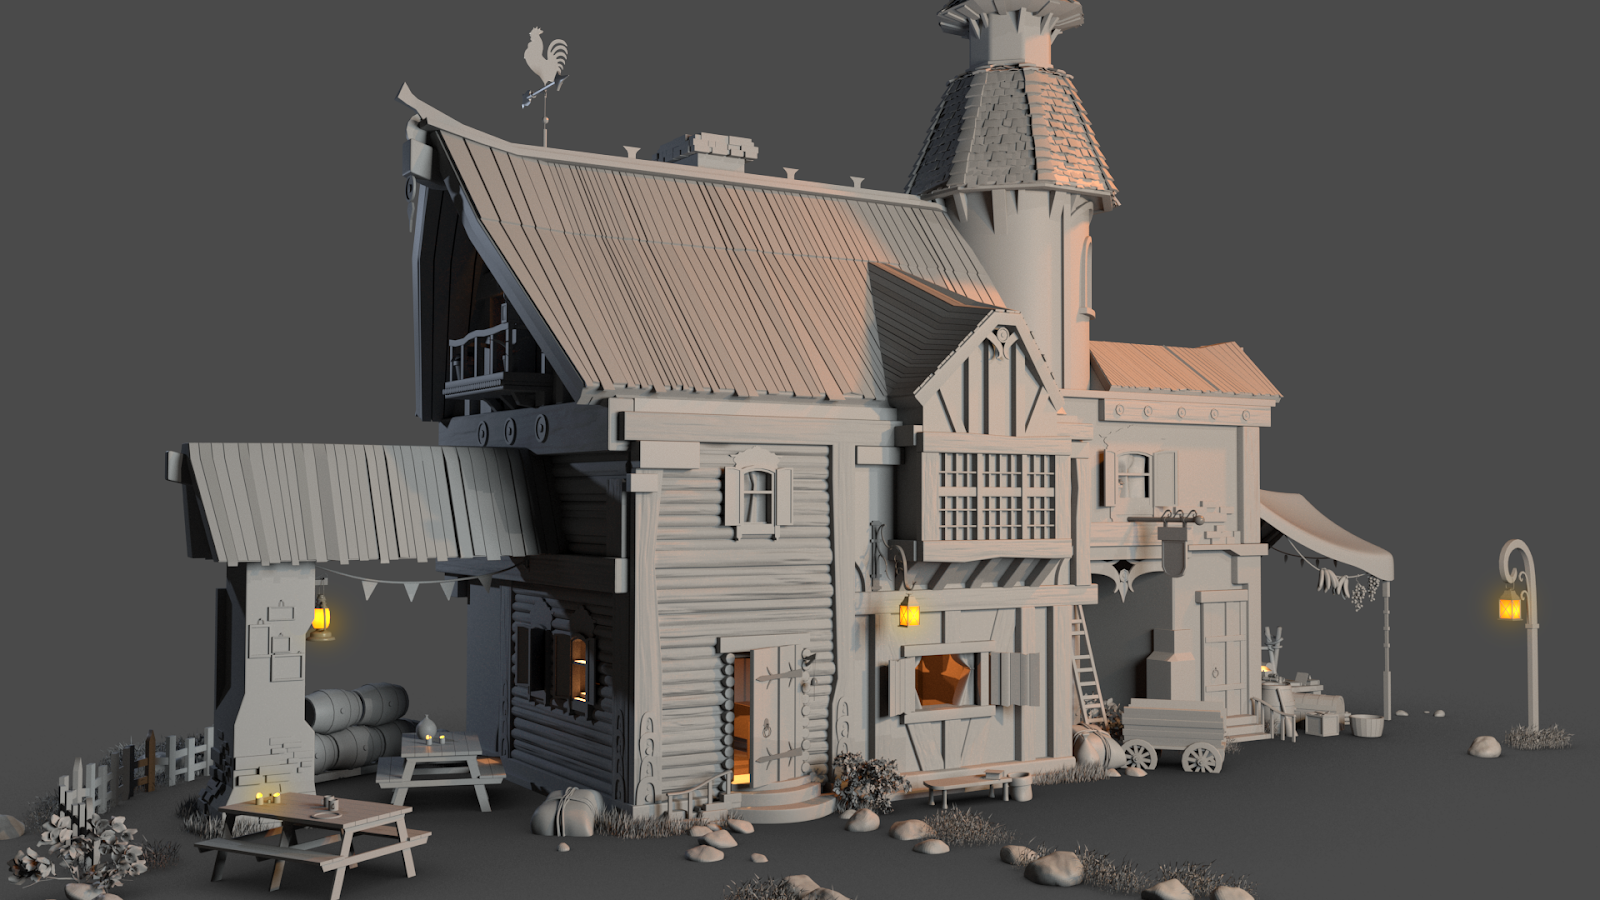
The modelling was done in Maya. I wanted to keep the geometry as simple as possible. When making environments, the challenging part is to have a plan or at least an idea of how you are going to texture it. I wasn’t sure if I wanted to have a stylised or a realistic piece. In terms of looks so I kept it somewhere in the middle.
Don’t spend a lot of time modelling something that is not going to be seen. Focus on what is important.
Most of the pieces you see there were done from the cube or cylinder. I first started with blocking the house. I drew the orthographic views of my concept and I tried to stick with it for as long as possible. Once the blocking was done, I started to add secondary details like logs, roof and shingles. I added props like candles, potions, mugs etc. This is the most exciting part of the modelling, in my opinion. You get to dress your set exactly as you see it. After that, the scene looks more alive and lived in.
The fourth step is to add vegetation. In my case, I used a content browser, a built-in tool in Maya. The only problem was, it was not compatible with Vray, so I had to convert everything in polygons. A good tip here is to keep all vegetation on a separate layer. That way, you can turn it on and off when you need it and it won't slow down the process.
As a second option, you can export it as a proxy. That way, you can add more stuff using low poly geometry and it will only show the actual models during render time.
Unwrapping these kinds of pieces will take a long time if you don’t do it as you go. Once you duplicate something, make sure it’s unwrapped. You don’t have to pack it yet, simple and clean UV’s will do. It might seem unnecessary and boring (I know, we all hate unwrapping) but it will save you so much time in the long run. Also, keep the duplicates in the same group. That way you can keep track of where you have repeating or shared UV's.
You have to keep polycount in mind, no matter what industry you are in. In film and animation, the polycount might be a bit higher than in games, but there you have to keep in mind what shot you are modelling it for.
For example, don’t spend a lot of time modelling something that is not going to be seen. Focus on what is important. There are so many things that could have baked down in my scene but it wasn't supposed to leave Maya, so I decided to keep it for the sake of details.
Composition
You want to make sure you present your work in the best way possible. In my case, I didn't make a turntable for this environment because it was too big. Because of that, I had an opportunity to show my environment from the best angles possible.
That is where the power of composition comes into play. Think about the rule of thirds and guiding lines.
You want to guide your viewers throughout the shot. For example, in my main shot, I decided to add the fence that leads to the main house.
I have also added a sign in a shape of the arrow that points to the main building. All these things were done on purpose. Same goes for other shots. Don’t be afraid to frame your composition, add things that are normally not there or remove the obstacles.
When I was composing the shot for the market (right side), I had to hide the wagon because it was way too distracting. A good thing to do is frame your scene with are leaves and flowers, but make sure it is modelled well.
Lighting
When you want to showcase your model, lighting can either kill it or empower it. Usually, you want to go for the second one.
Because I have so many lanterns in my scene I decided to go for the sunset feel. That way, I can create a warm and cosy atmosphere while having interesting shadows.
For the main source of light, I used direct light. When you work with direct light it's important to work with rotation, as scale and position will not change the settings. It is also important not to overdo it.
Keep light simple and realistic. Often times I see scenes with 10 or more key lights. That is simply unnecessary.
Make some test renders as you go. You might like your scene in IPR but once you fully render it there are bits and pieces that need to be fixed.
Before
Before
After

Final Thoughts
I hope these tips were helpful. Remember, the most important thing is to have fun with it!