
In this article Siddhartha Valluri walks us through his entire design process, tools he used and techniques he developed along the way. During his time at FZD School of Design he challenged himself to explore his storytelling and technical abilities.
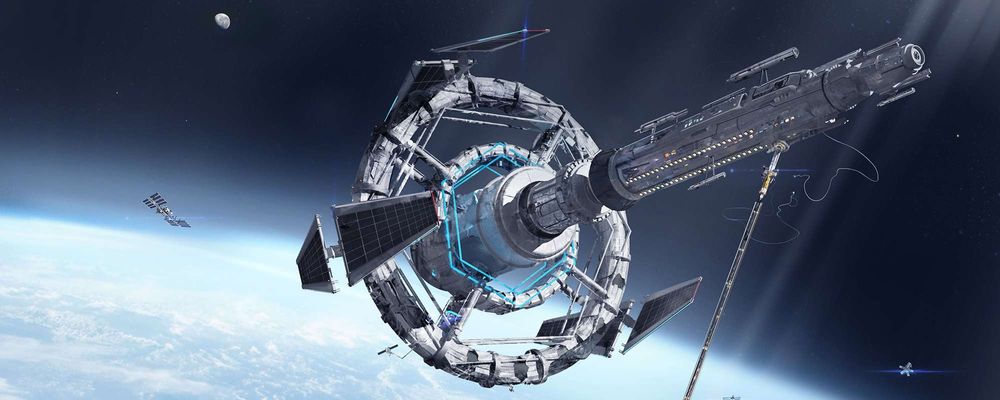
For this project - Strangers in the Ocean, I decided to create a series of keyframes depicting key moments in a journey of discovery and exploration. This journey would take us through the solar system.
By the end of the project, these seven weeks proved to be fun and challenging where I got to explore and push my skills in ZBrush and Blender (Cycles) rendering engine.
It was important for me to create a roadmap so as to have clear understanding of the entire scope of the project. The process started with creating a brainmap.
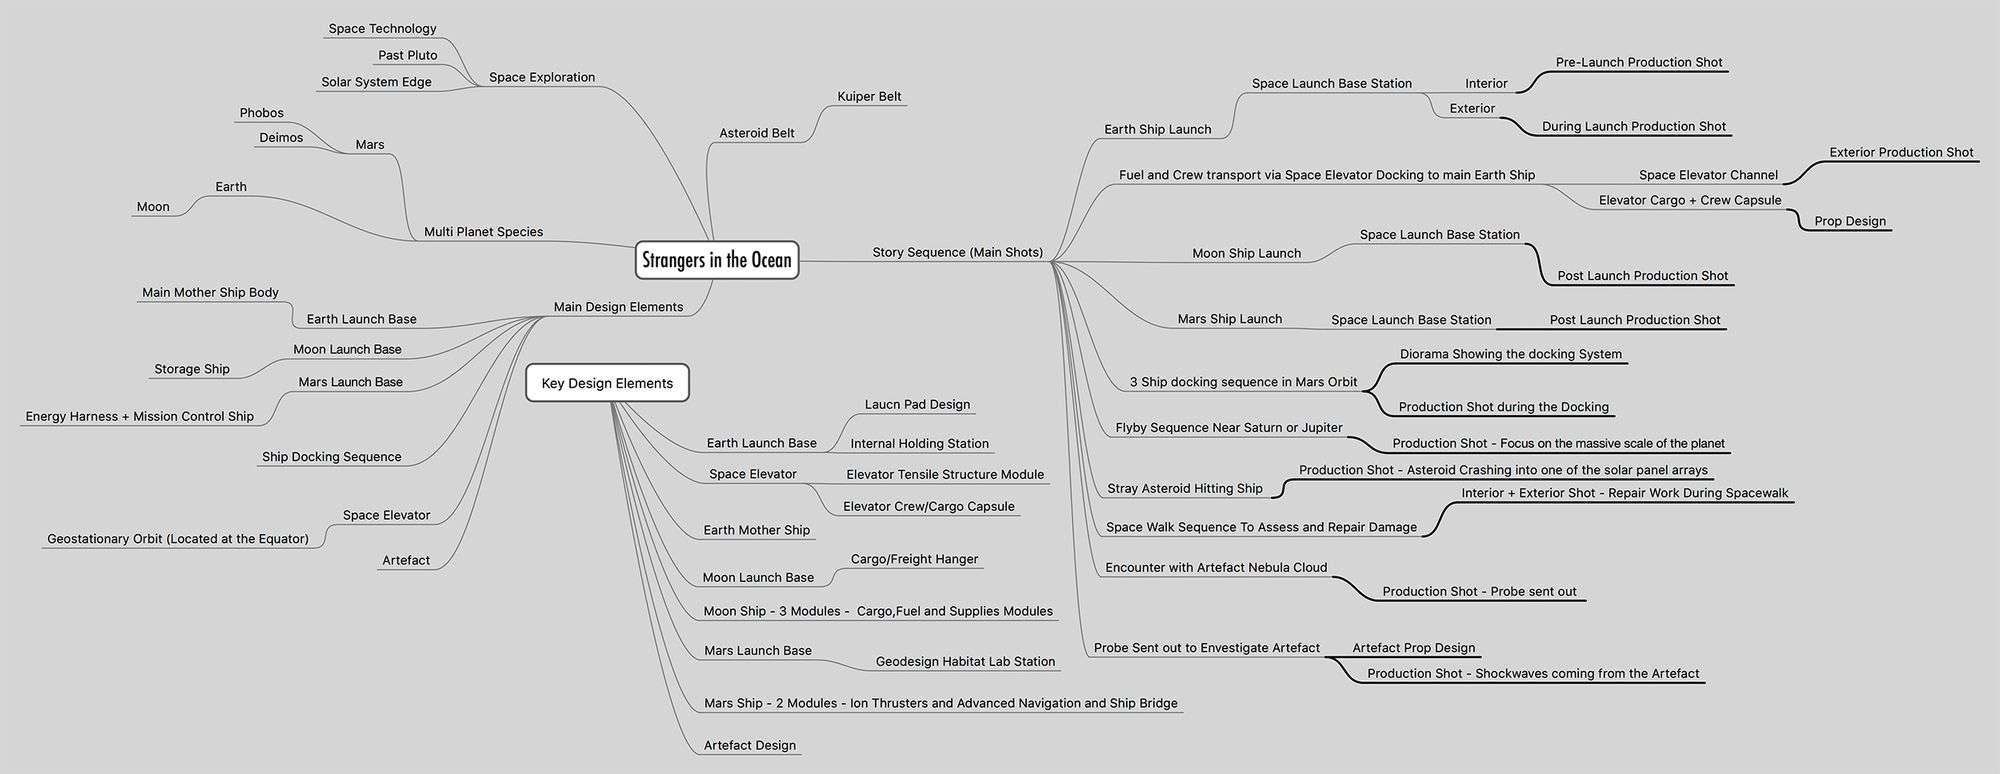
This enabled me to visualise very rough compositions of what the scenes could eventually look like. Of course even though the brain map contained a whole bunch of ideas, at the end I directed all my attention towards three main elements.
The following designs were three main elements that tied the story together :
- The Mothership
- Earth Launch Base
- Martian Outpost
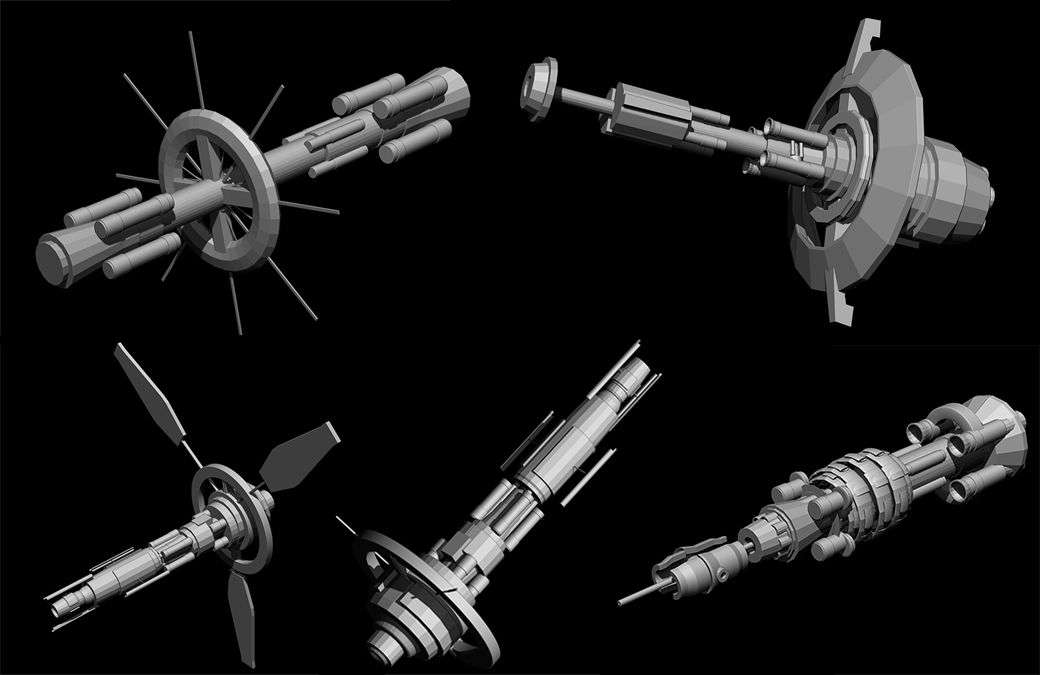
I started the design of the Mothership by creating a few variations of the form by blocking them out in ZBrush. This was followed by a quick lineart pass to compare the designs and see which one worked best. After combining the best elements I started working on the final model of the ship.
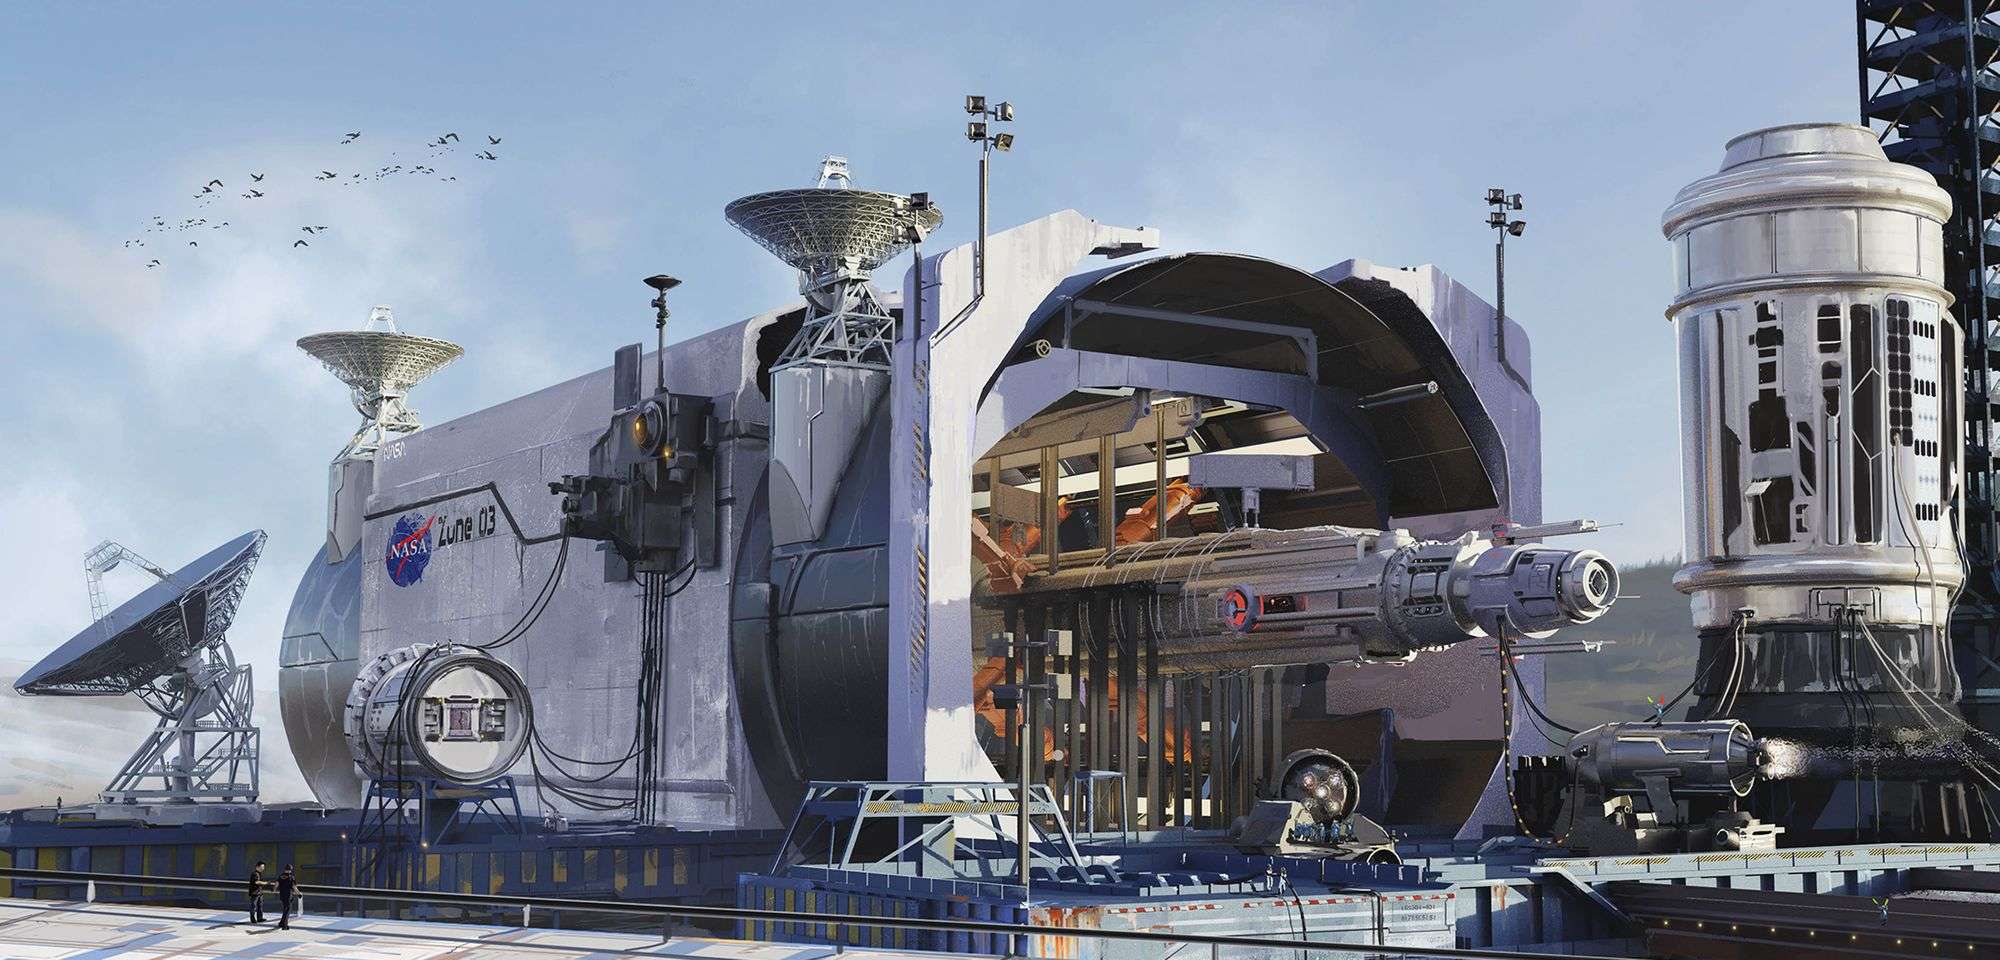
I then moved onto designing and creating the earth launch base. This space was designed mainly as a functional space. Thus the focus was on creating a large tunnel like structure, which could serve as a construction and maintenance bay.
“Building a vessel of life, to sustain, to propagate and to move forward. As the vessel launches, a new life emerges into this world, an infant in this infinite universe to travel through the cosmos.”
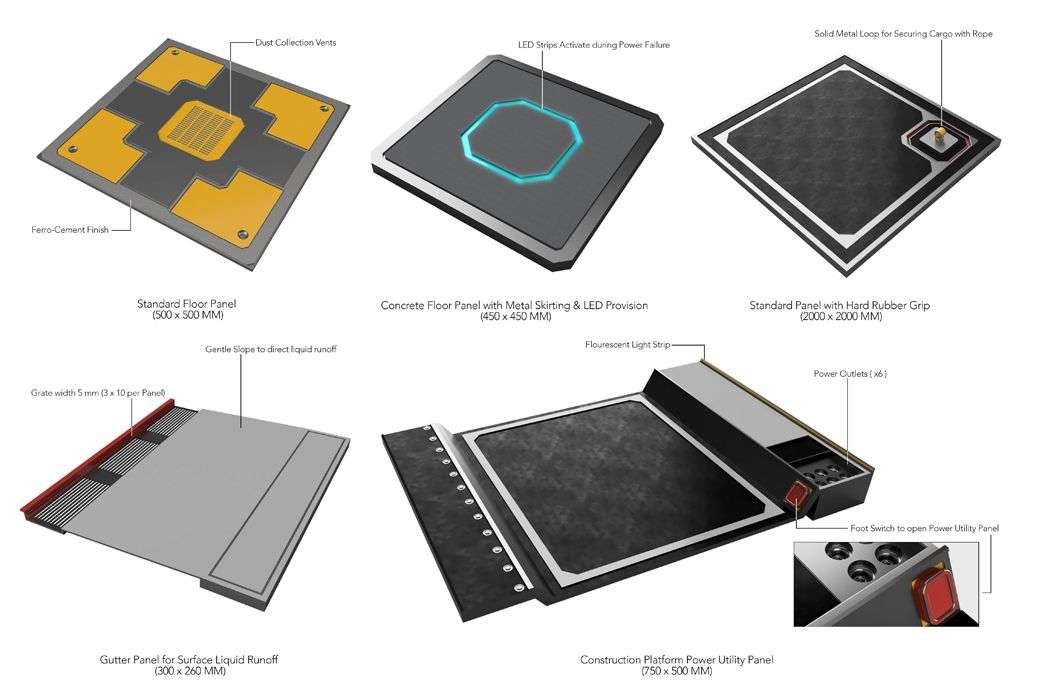
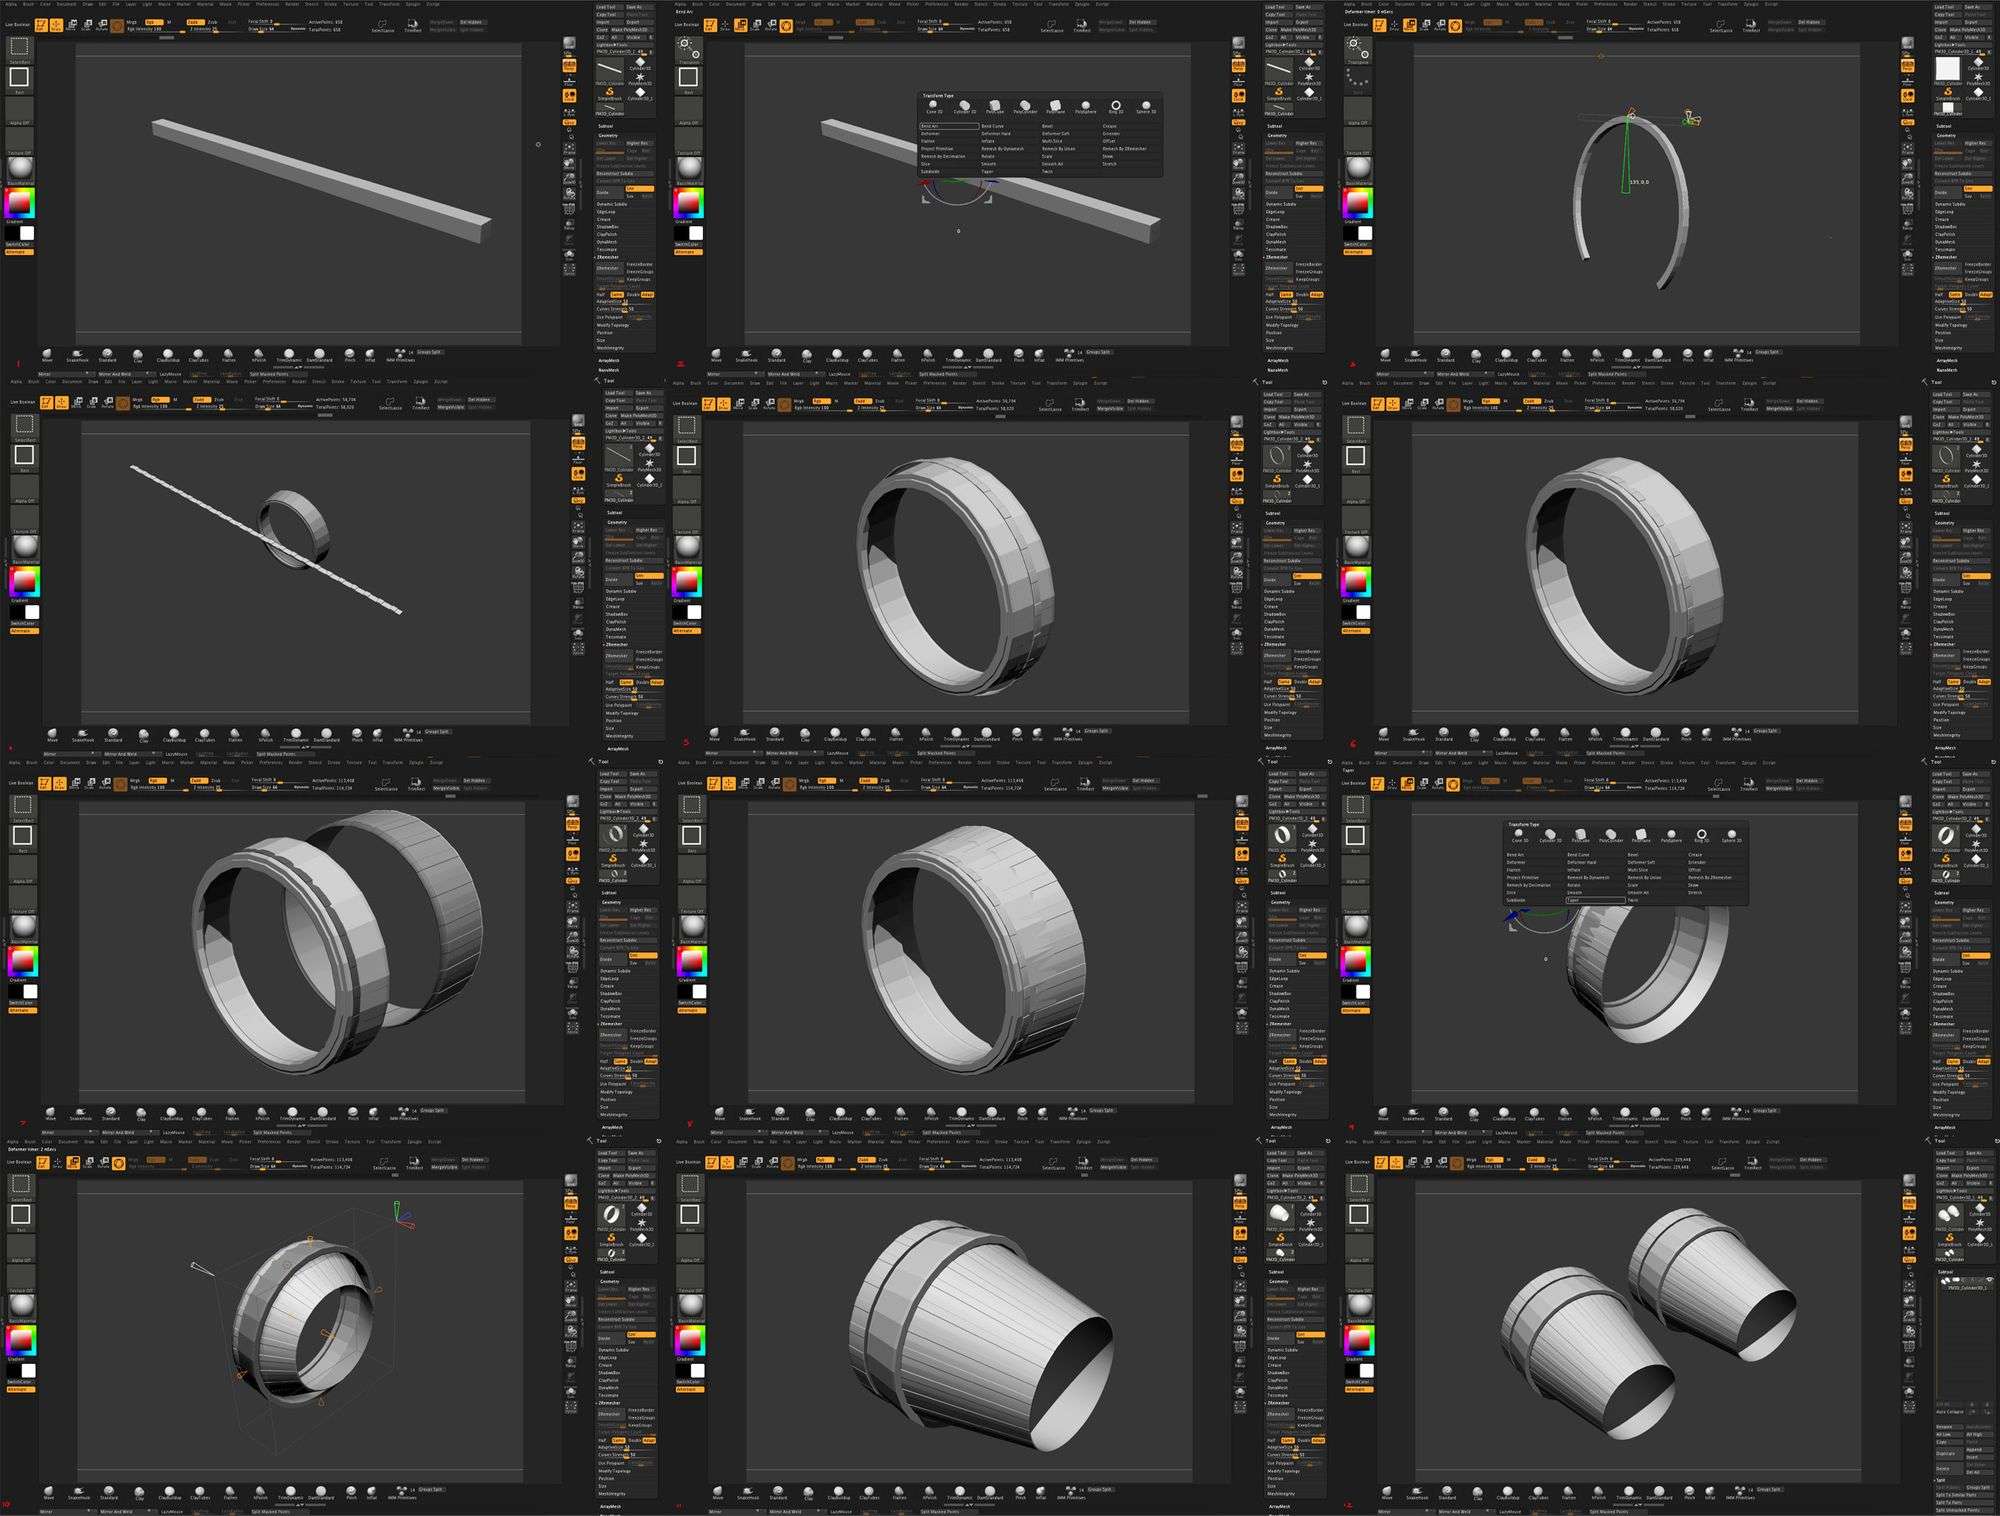
After designing the large scale space I focused on the tiny details. I started working on a variety of panel designs for this space to add further value and realism to this design. These were modelled in ZBrush and rendered in Blender 3D (Cycles).

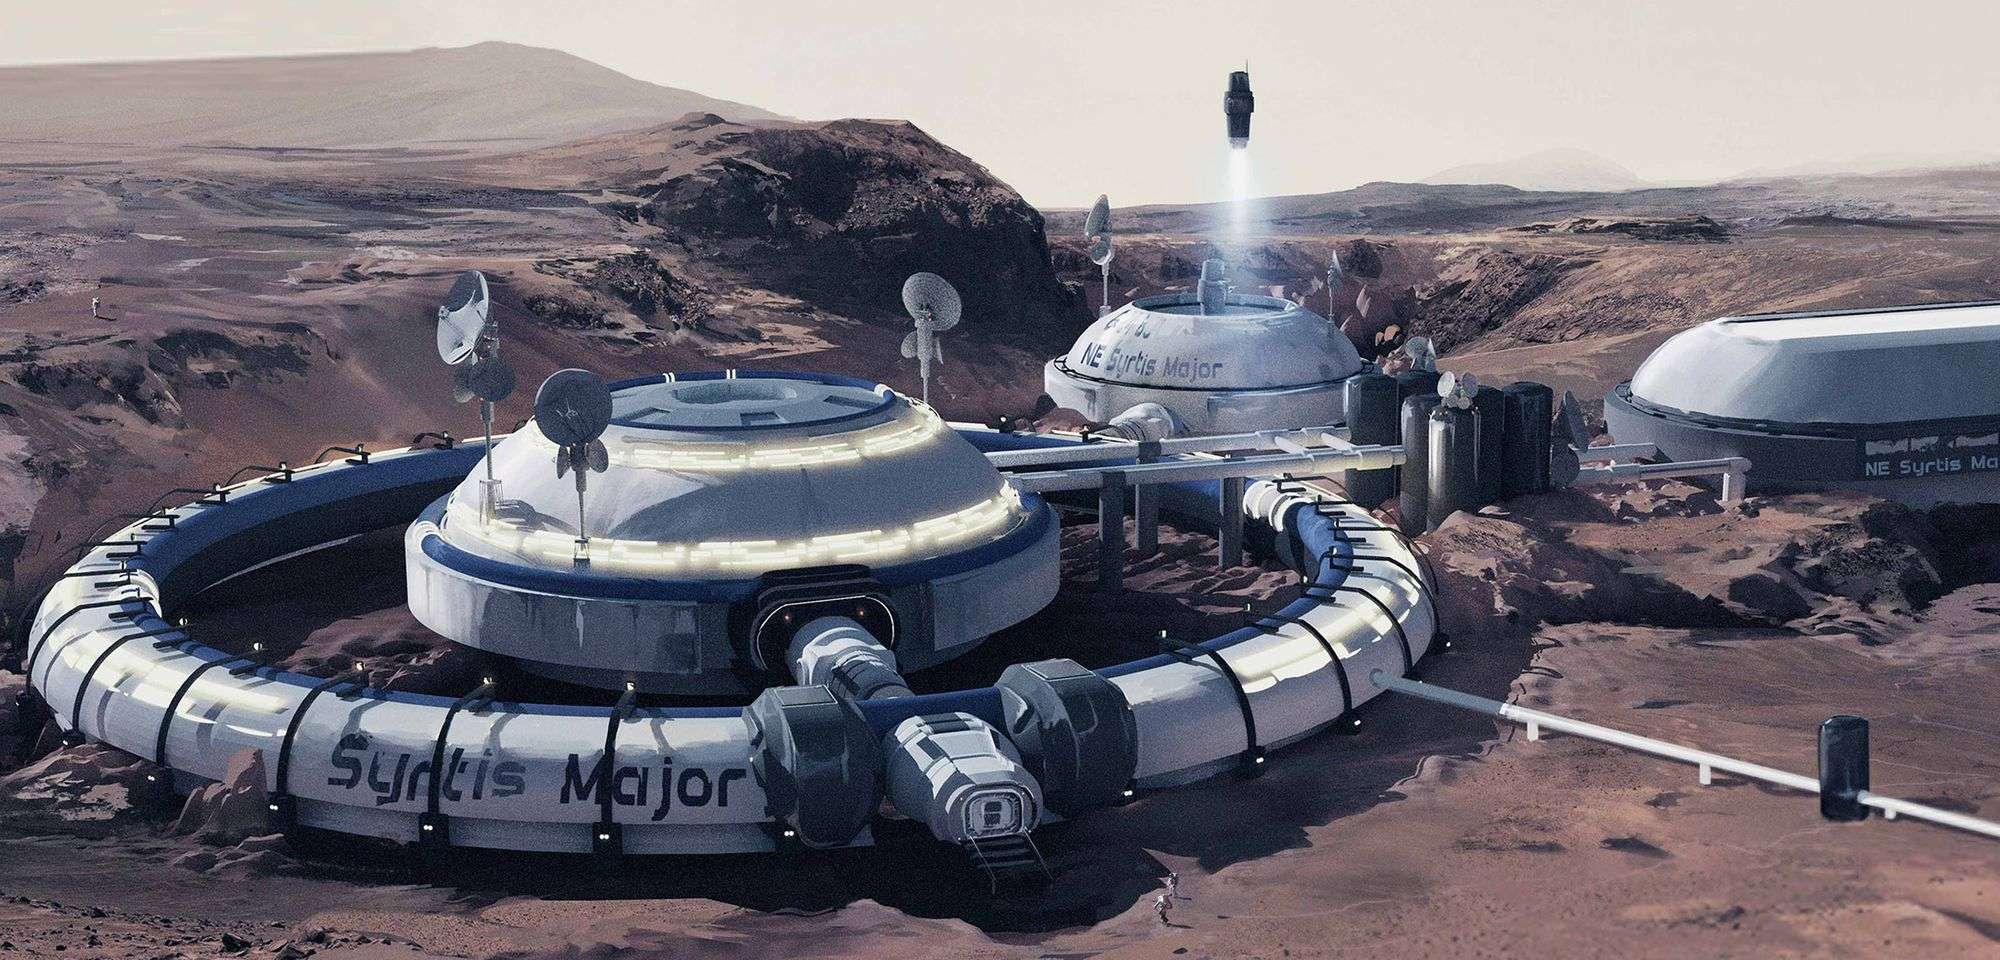
The process for designing the martian outpost followed the exact same workflow. The focus was on creating a design language that was unique and different from the shapes that were explored so far.
That way I could create a distinct language for the colony that the martian settlers would have created over time.

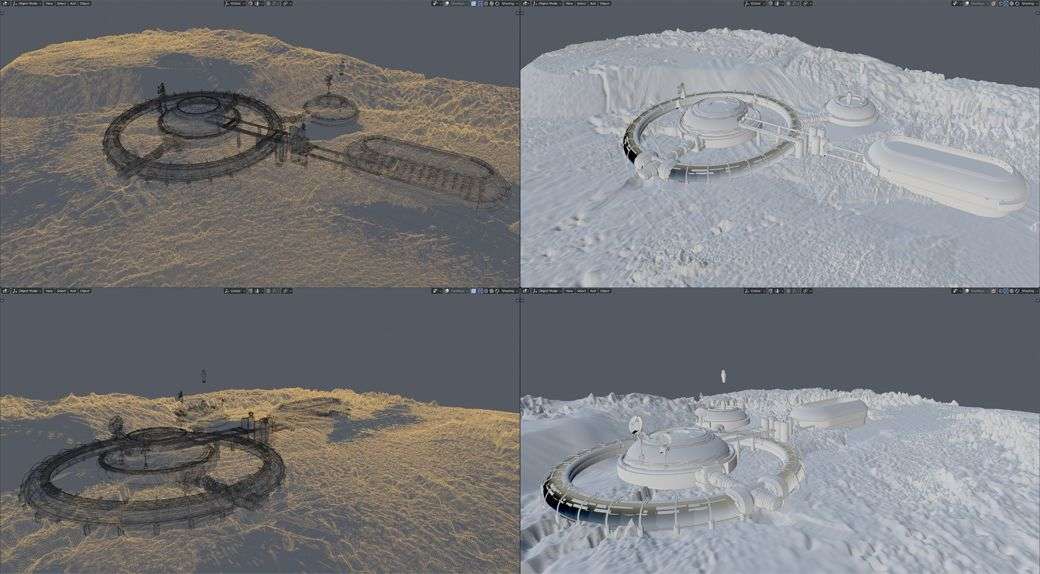
I sculpted the terrain in ZBrush using the default brushes along with the aid of some Terrain Maps. Sculpting this terrain aided me during the painting process as I had a decent base to start photobashing on.
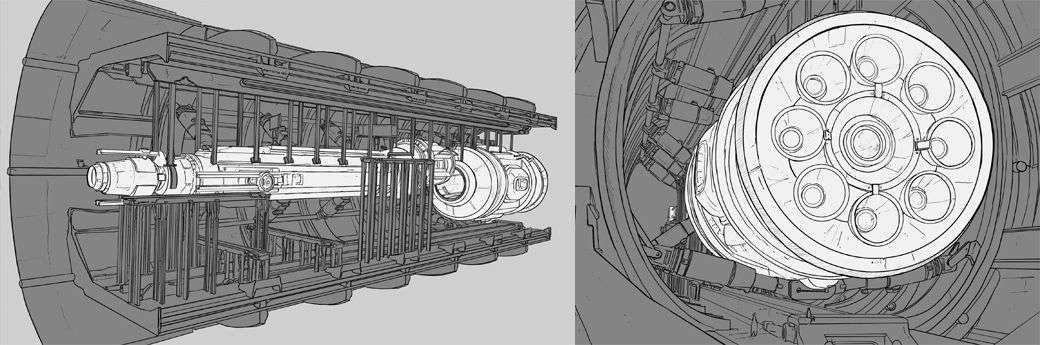
I focused on creating a lot of thumbnail sketches before moving onto the 3D modelling. This way I could play with proportions and create a variety of ideas to discuss with the art director before finalising a particular form.
Throughout this project I was able to learn a lot of quick tricks and techniques in ZBrush and Blender (Cycles). This happened while experimenting during my time off and searching for solutions on the internet.
I especially would like to thank Creative Shrimp (Gleb Alexandrov) and Blender Guru (Andrew Price). Their video tutorials have been vital during my journey of learning Blender.
Creative Shrimp’s Youtube Channel : https://www.youtube.com/user/GlebAlexandrov
Blender Guru’s Youtube Channel : https://www.youtube.com/user/AndrewPPrice
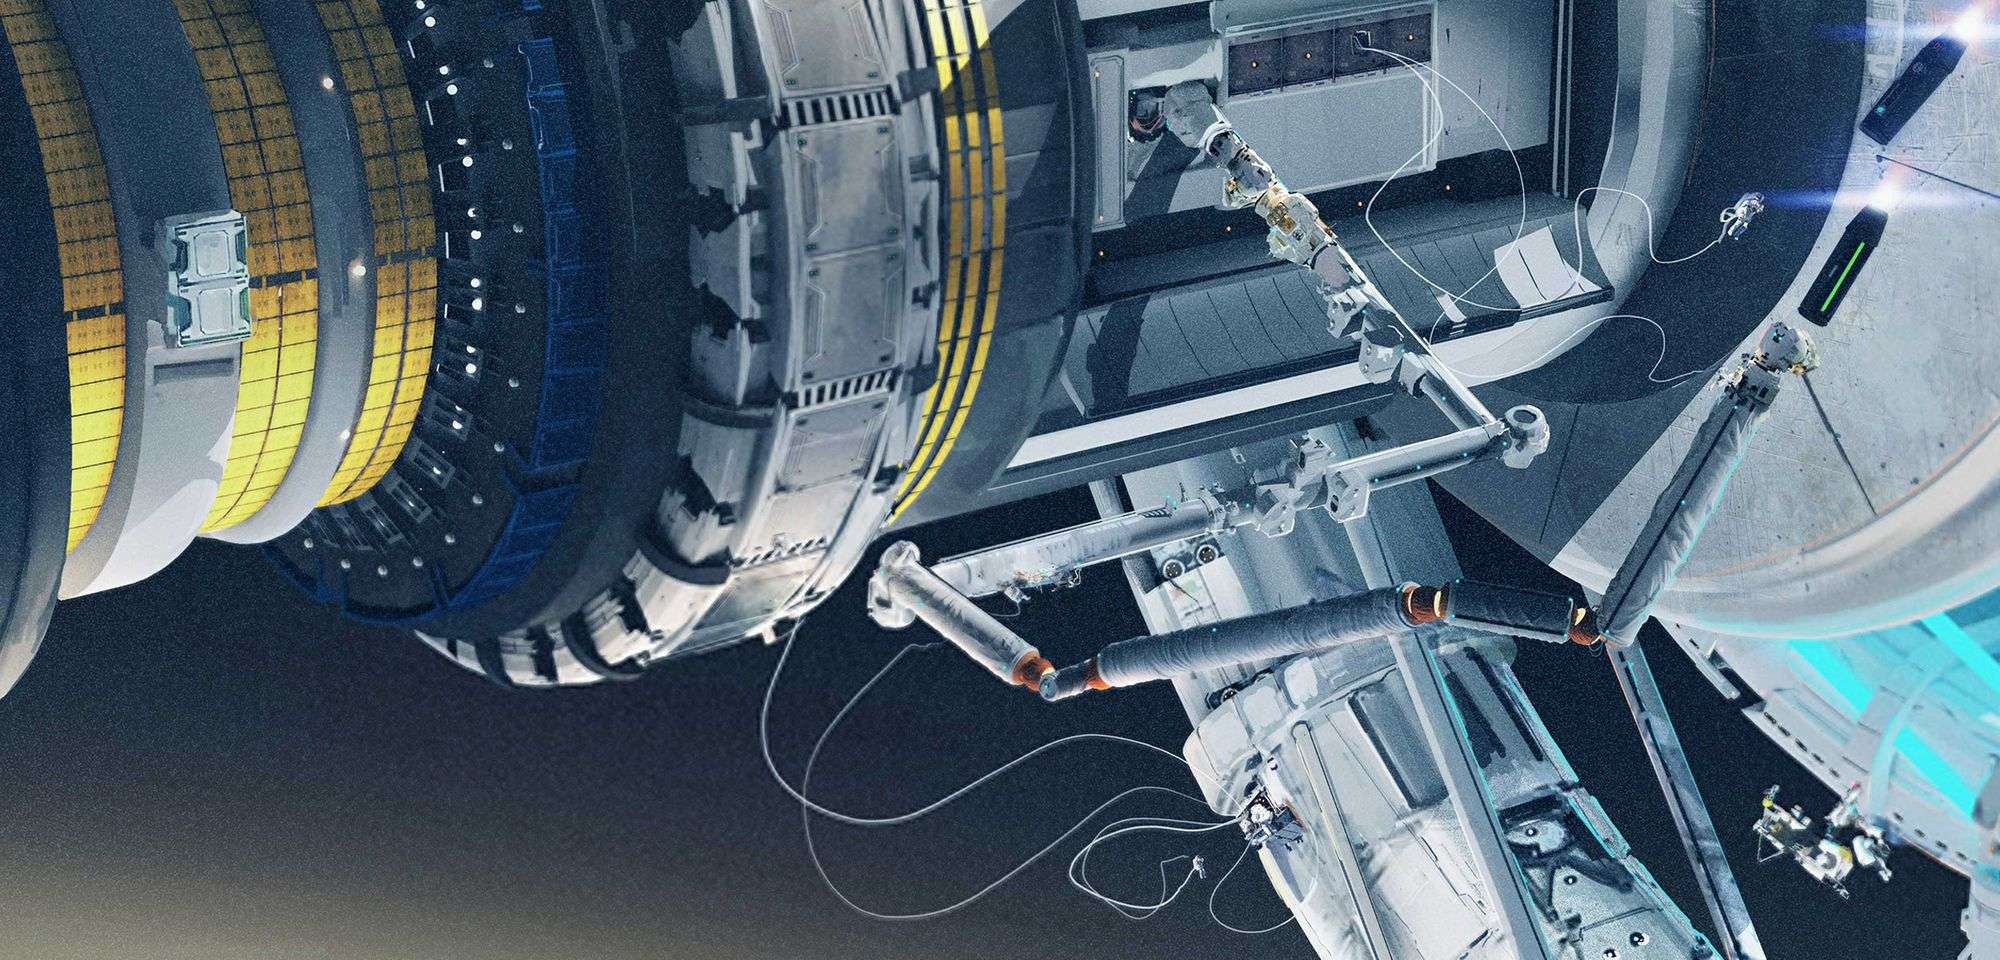
I really wanted to create a shot where the camera was really close to the mothership while some sort of docking procedure was taking place.
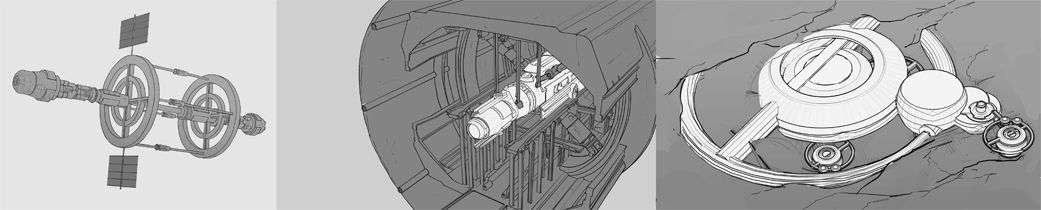
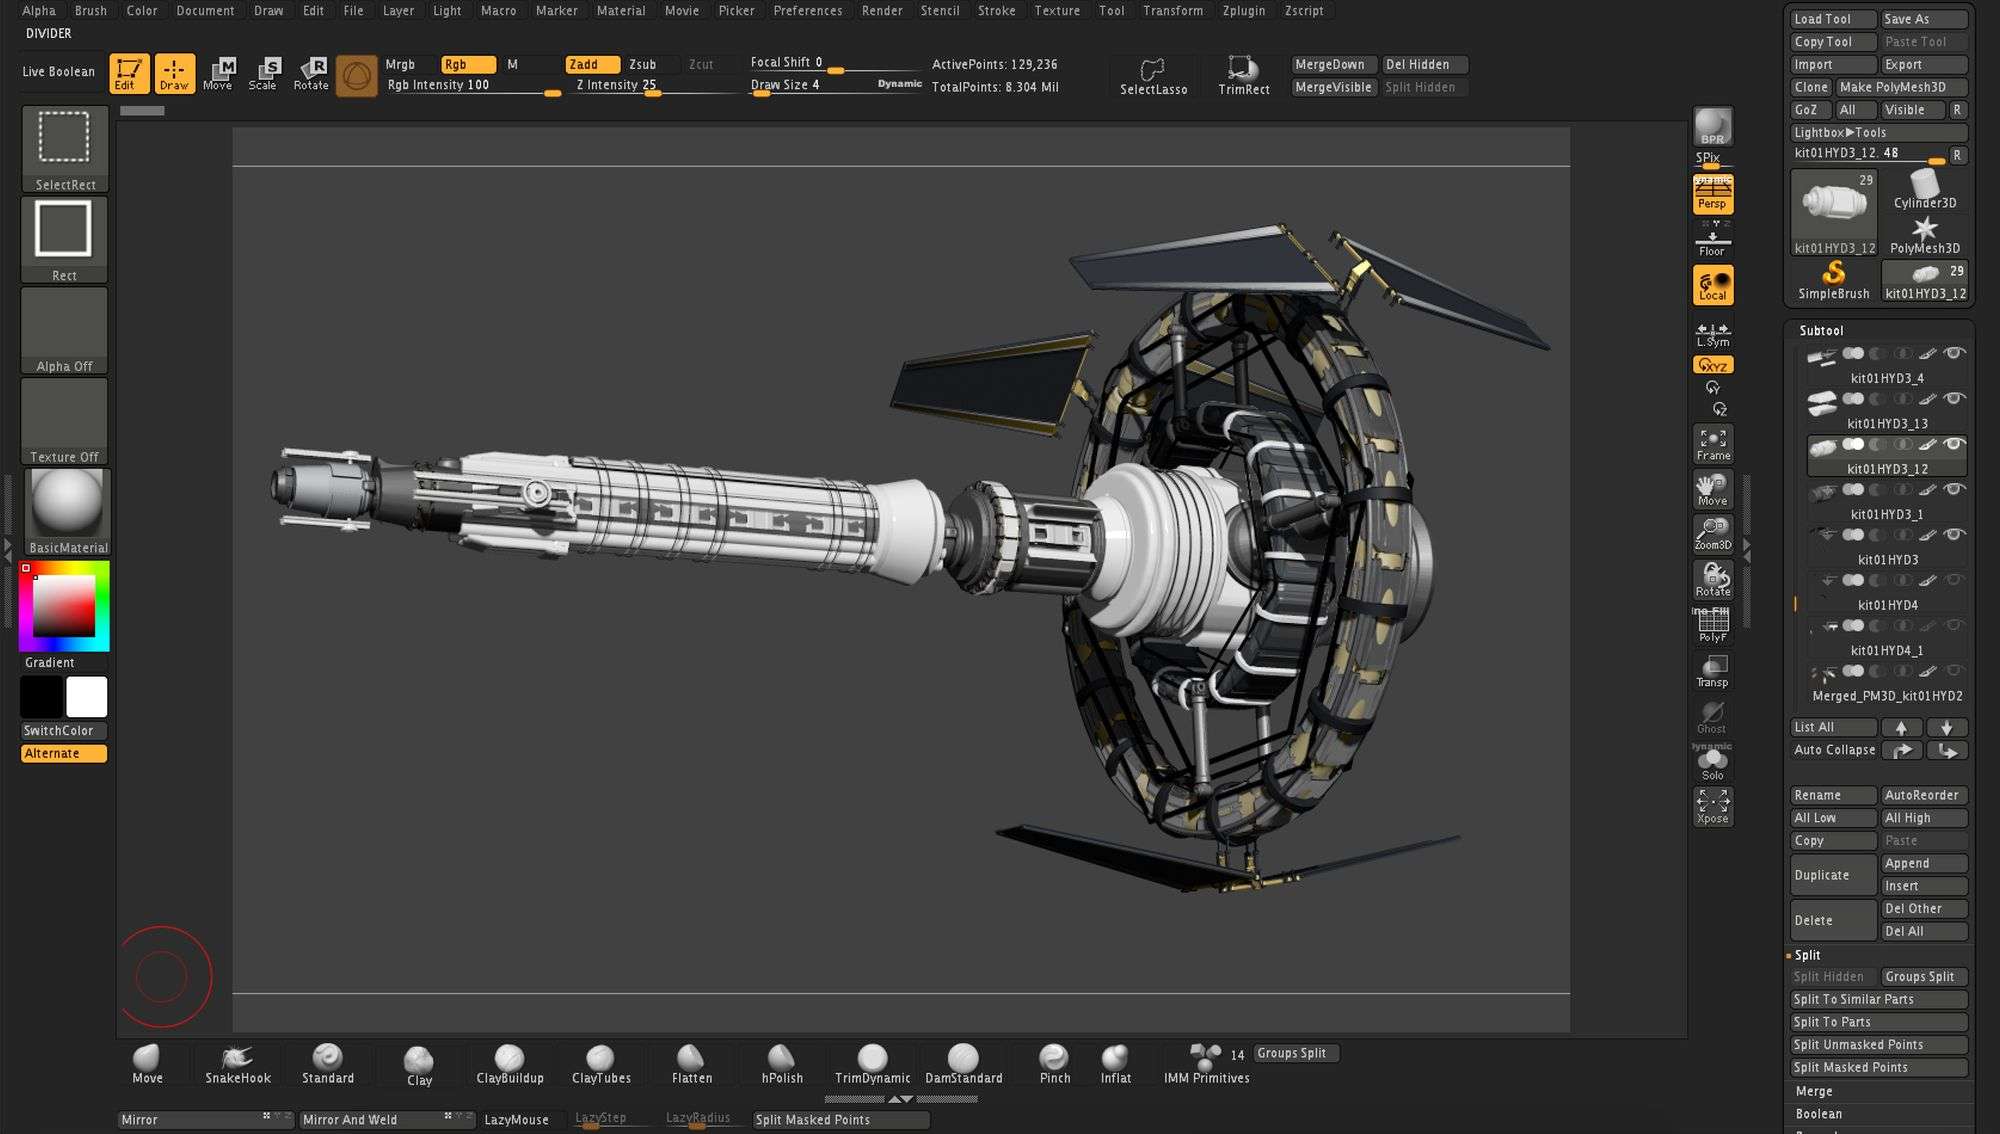
This led me to explore some of the Modifiers in ZBrush. These modifiers allowed me to create a very detailed model for one of the central components of the mothership
I also played with density of parts to create an aesthetic and believable component for the ship.
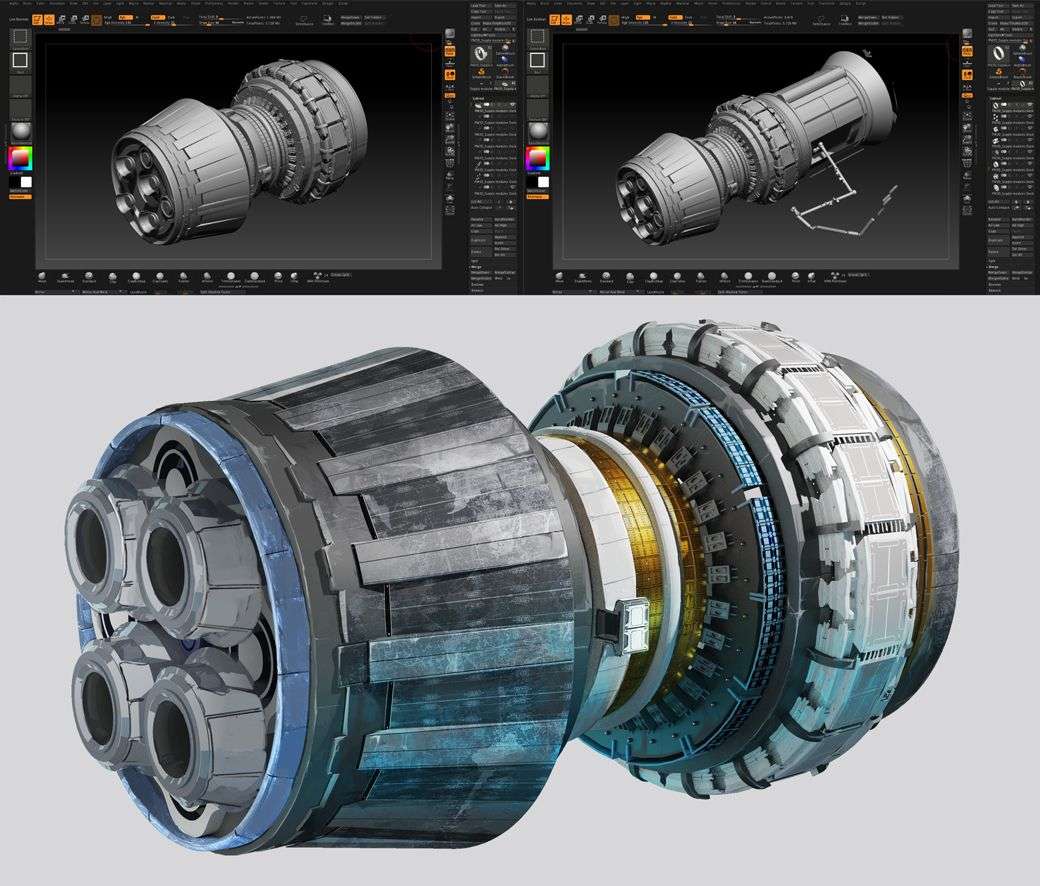
Once done with the model, I used it to quickly mock up a scene in Blender. I then created a basic light set up which would be used as a guide as I added further detail to the painting using photo textures.
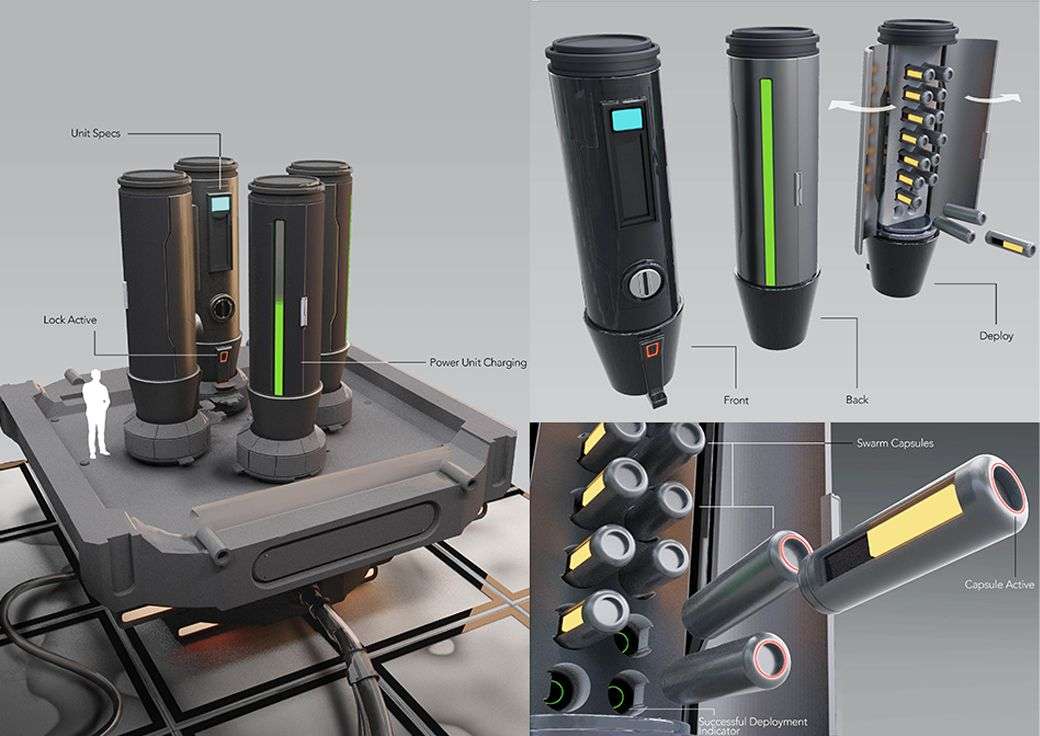
This painting also features one of the smaller prop design that was created as part of the project. I wanted to dive deep into its design to add further believability to the project as a whole.
This small prop was a cargo module designed to be launched from Mars and dock with the Mothership. This docking procedure was to take place in Martian Orbit.
Apart from the technical side of things, a strong emphasis was also placed on the narrative of the images. It was very important for me to create a believable and cohesive set of scenes which conveyed the story without any words attached to them.
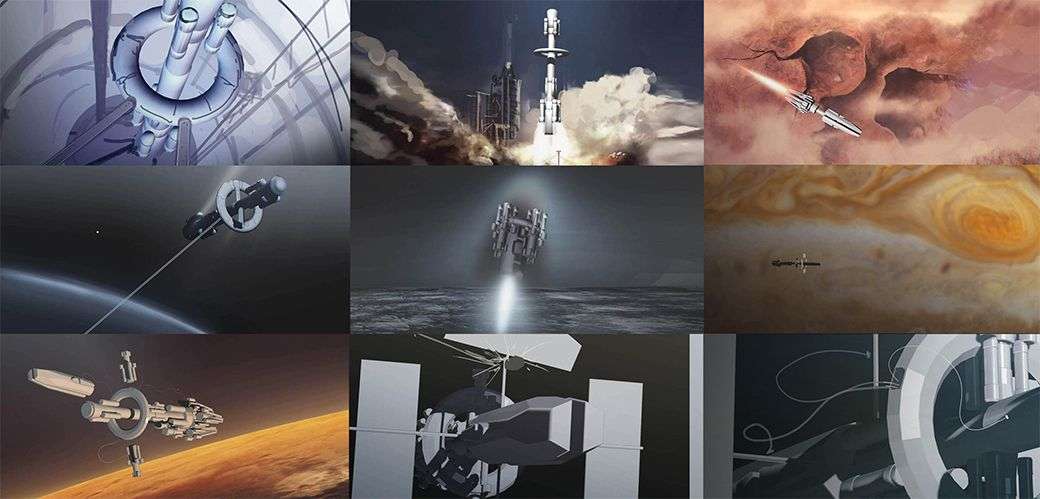
A key part of that objective were the next set of images. These four shots did not contain any new aspect of the design. These instead were created purely from the storytelling point of view which drove the over arching narrative forward.
The first shot which was heavily inspired by the movie Interstellar, features the mothership flying past Jupiter. The aim of this shot was to emphasise the sheer scale of the planets and the journey that was in progress.
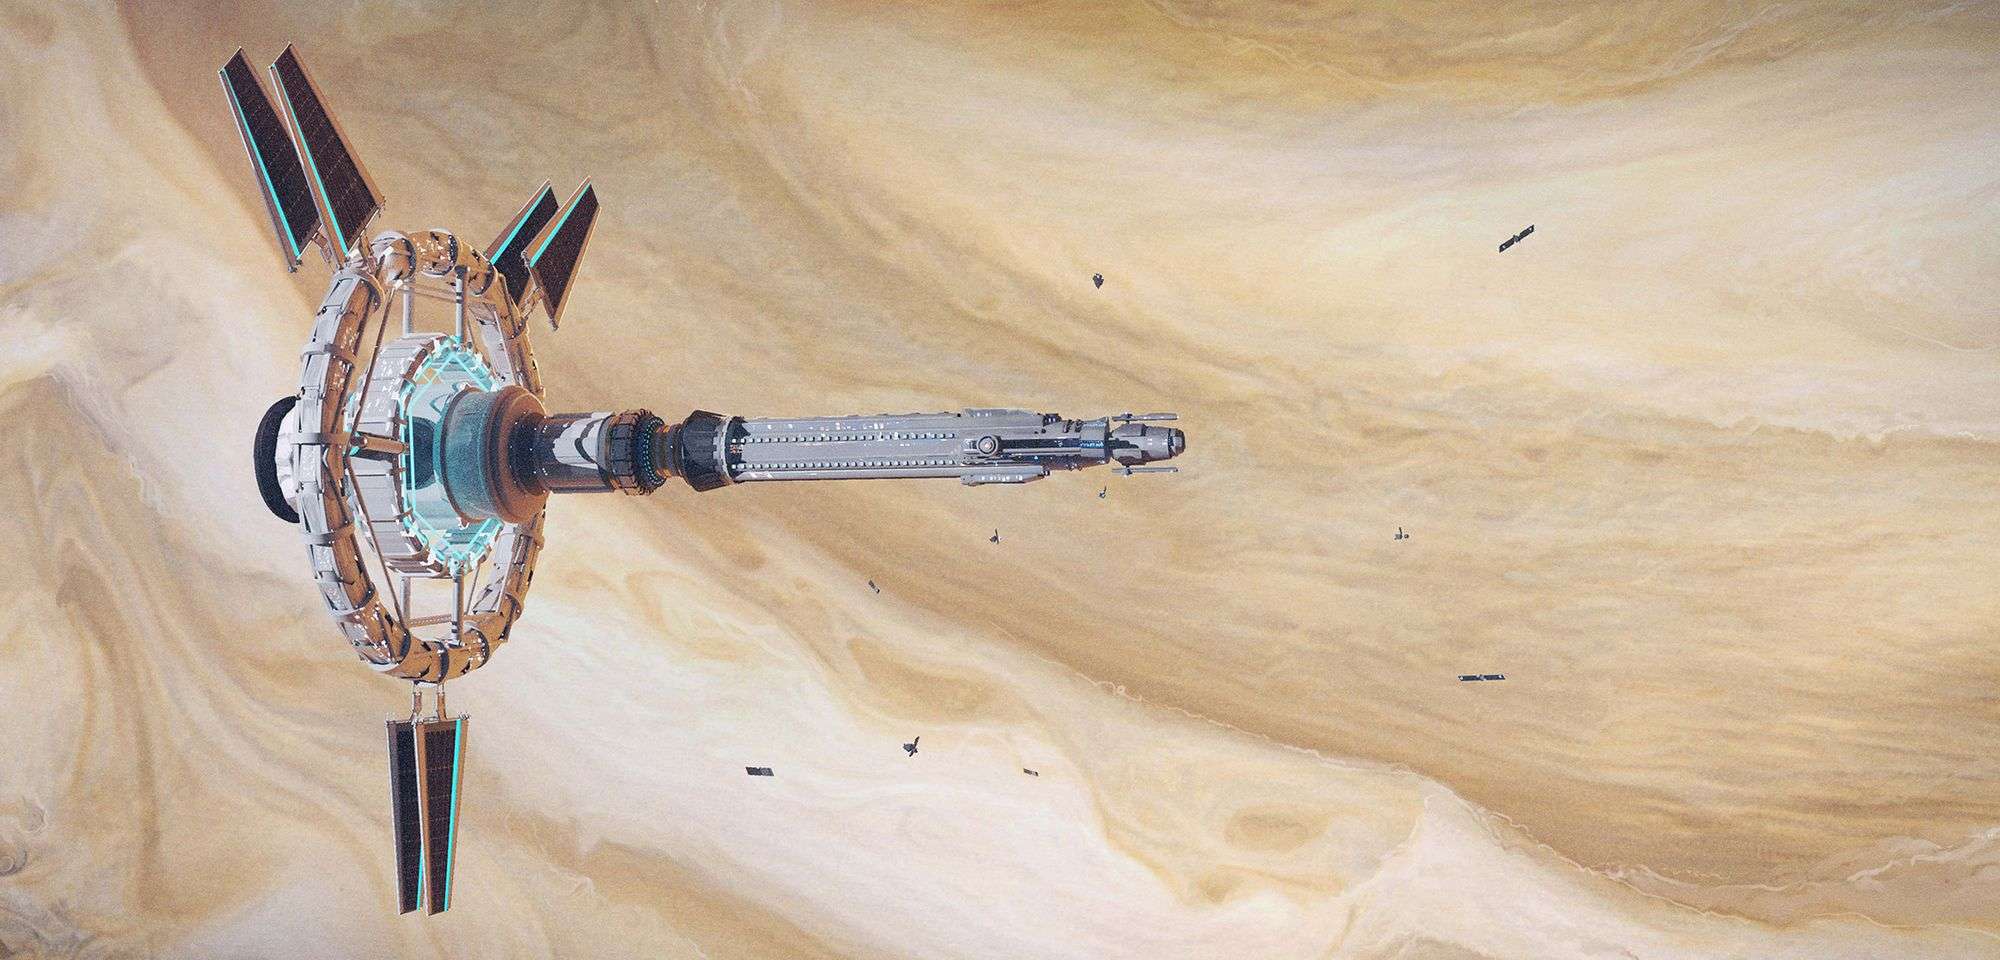
“At the end of it all, we’re a mere speck in the endless ether of life. Gaining new experiences as we move forward, but still insignificant.”
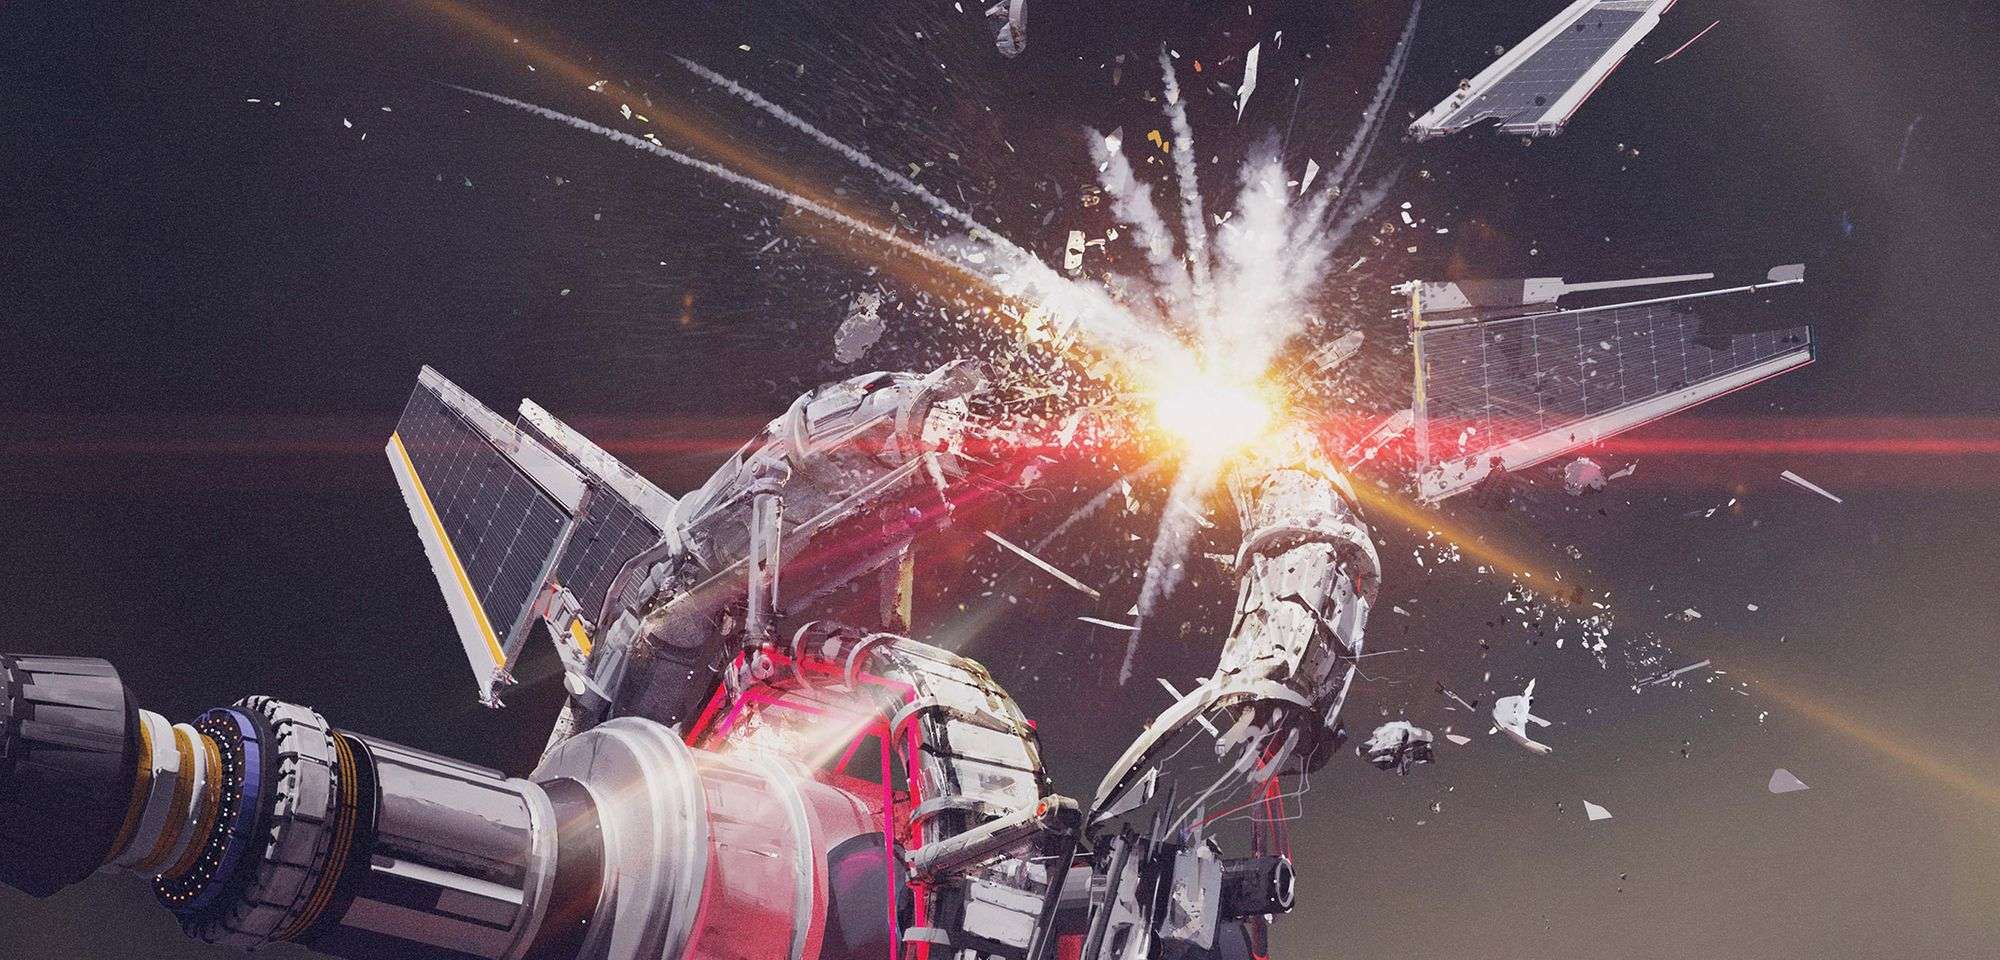
The prime objective with this next shot was to create a feeling of chaos and destruction. As with any story arc, a test of character inevitably presents itself and this is how I chose to portray it.
I chose to continue the warm lighting from the previous couple of scenes with increase in the amount of red present in the scene. This was done to introduce a sense of danger into the scene. This colour scheme would contrast that of the final two scenes to create a sense of disconnect.
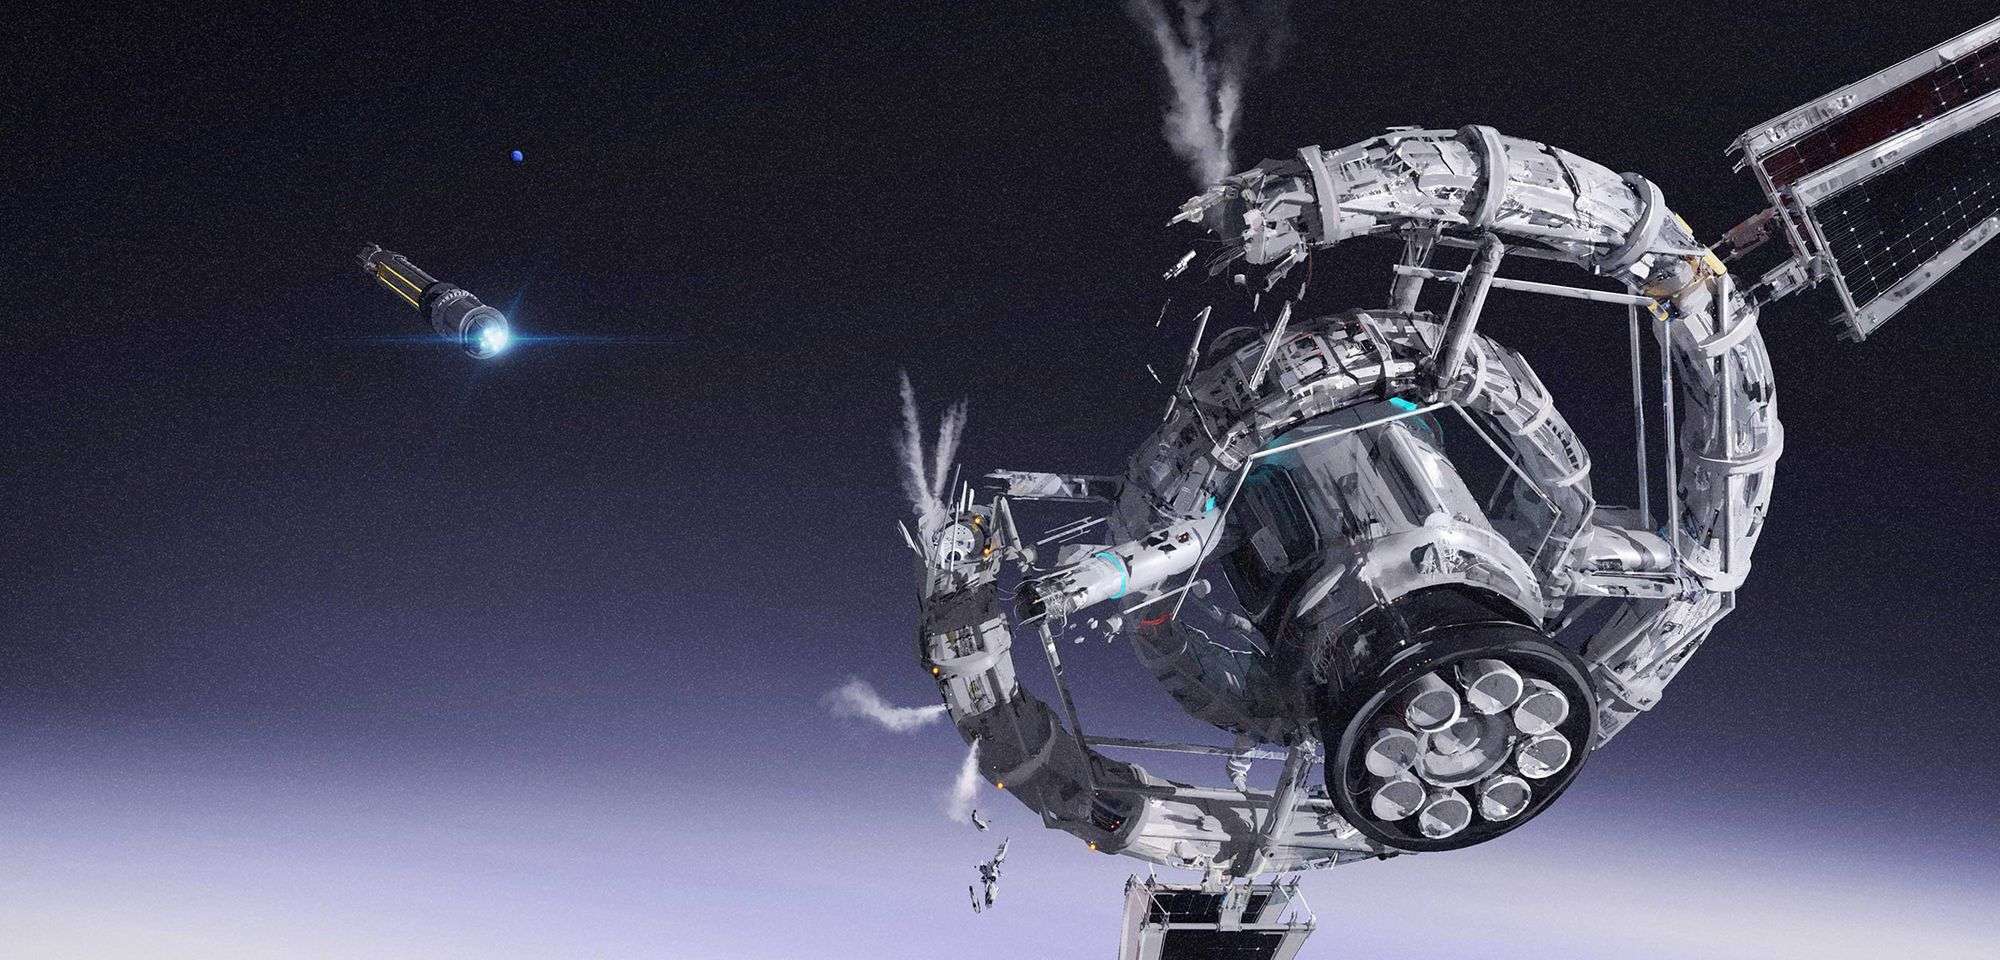
The motive behind the penultimate shot of this narrative was to reinforce the sense of abandonment I mentioned earlier. After the majority of the ship is destroyed, the crew aboard the ship have to make the tough decision of cutting that part lose.
I chose to keep the abandoned portion of the ship in the foreground to further emphasise the hardship that the ship had to undergo. Further by hinting at the planet in the distance I wanted to show a glimpse of their journey to come.
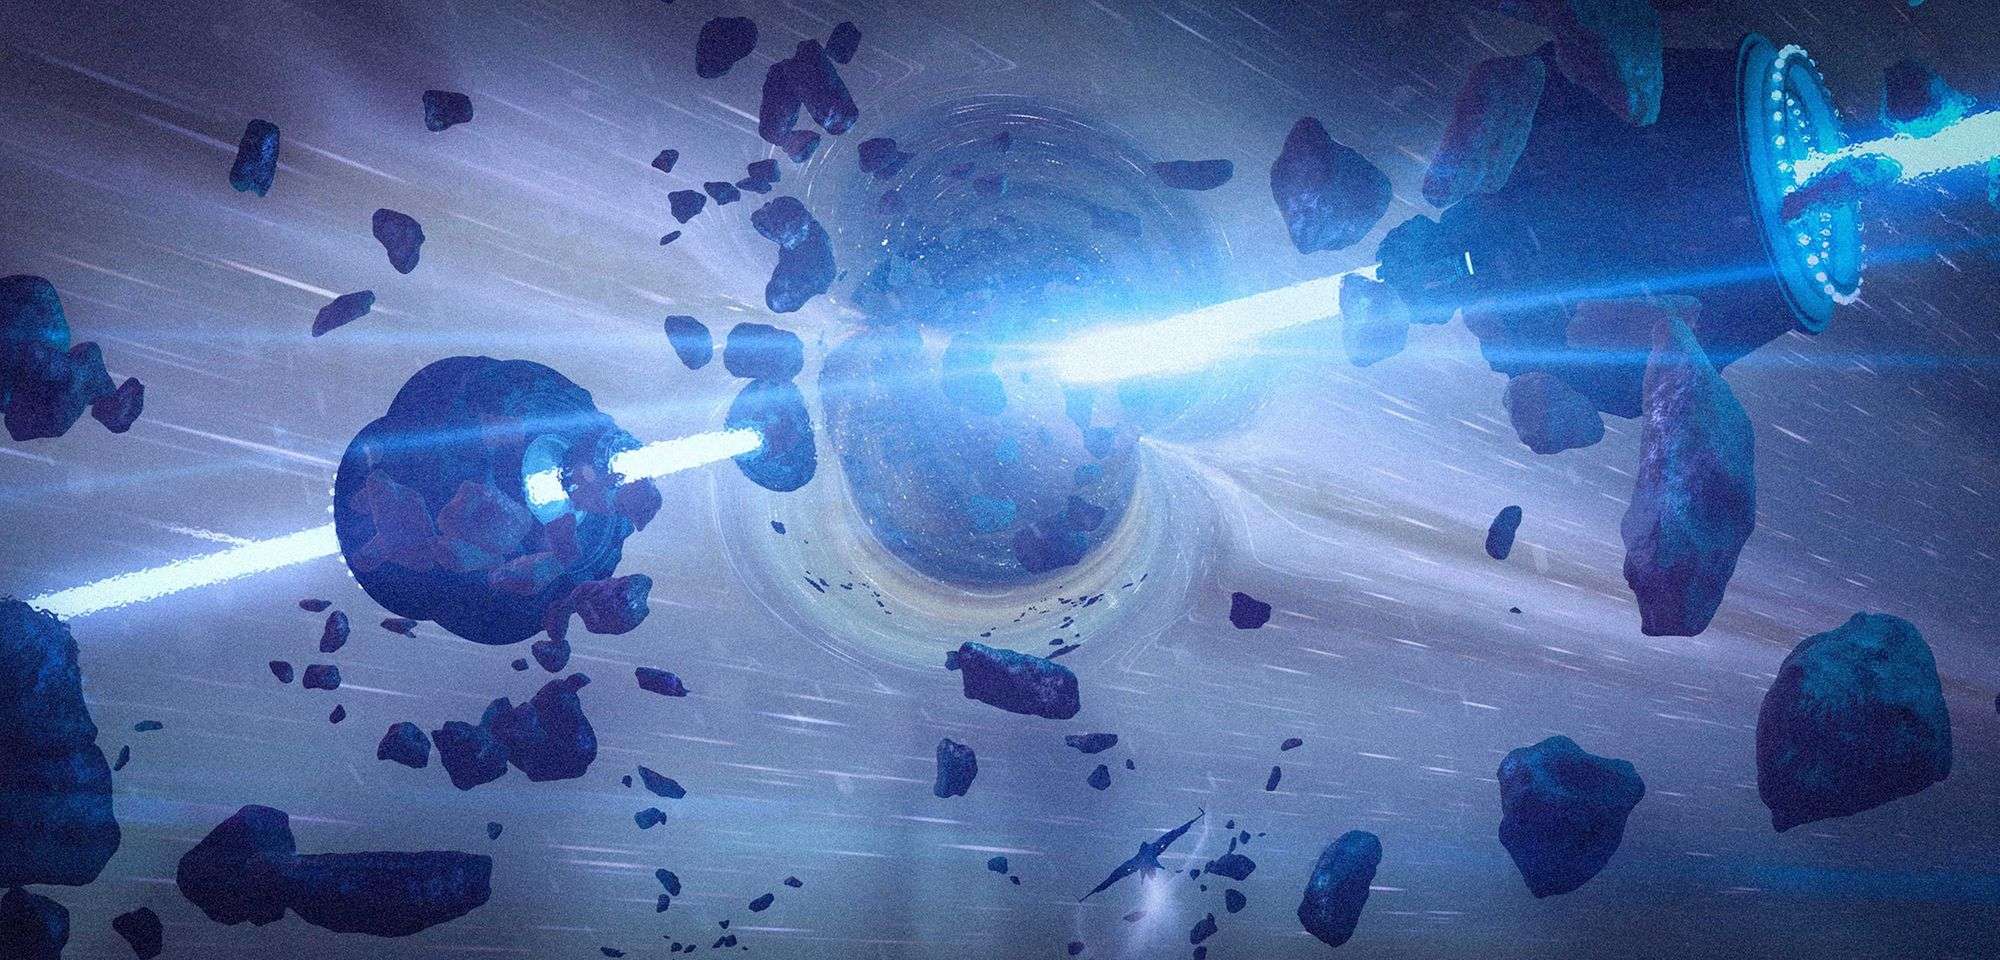
The final shot was an experiment of sorts. In terms of storytelling I wanted to create an abstract ending to the story left open to interpretation, while also hinting at a small jet sent as a recon vehicle from the main mothership.
The reason for introducing the jet only in the final shot was to allow room for further exploration. This would allow me to eventually continue the story forward.
In terms of the technique involved in creating the shot, a very heavy emphasis was placed on understanding the Node Tree in Blender. The idea was to create an interesting pattern depicting a wormhole of sorts.
The primary guide for the node structure was obtained from Gleb Alexandrov’s Tutorial. After that I played around with the settings some more to finally arrive at the result I was looking for.

I spent a fair amount of time designing and refining the shapes even though the jet makes an appearance only in the final shot.This process started with creating a series of quick thumbnails to explore the shape language.
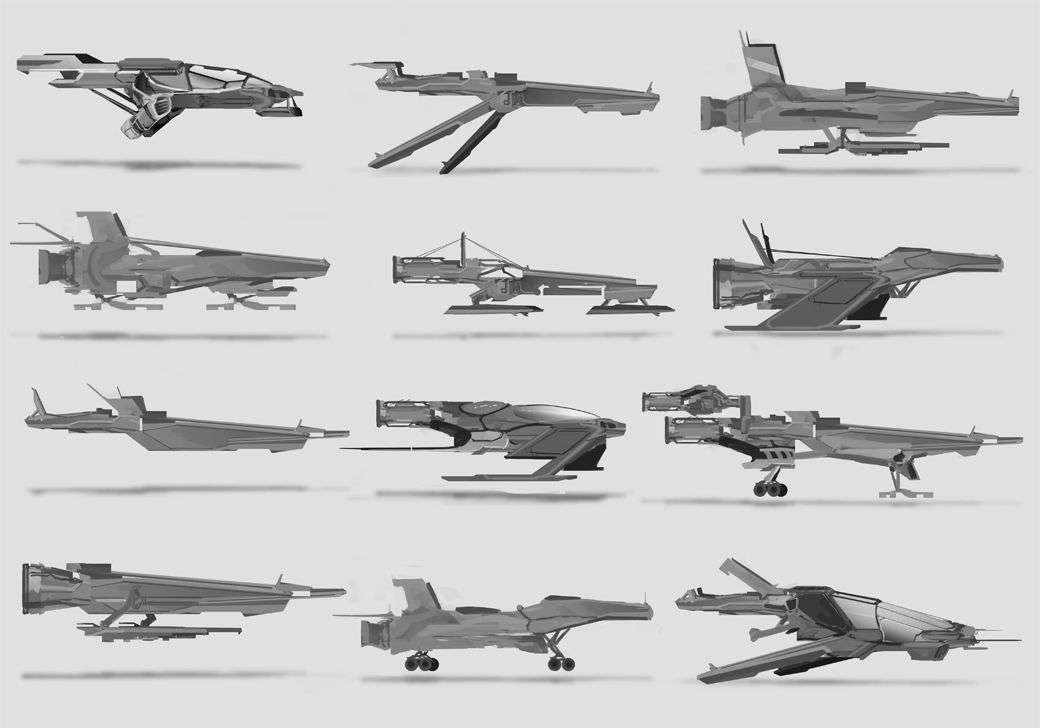
After picking out some of the shapes that I felt were working well, I created line drawings of the jet. This allowed me to solve some of the functionality and aesthetics of the jet.
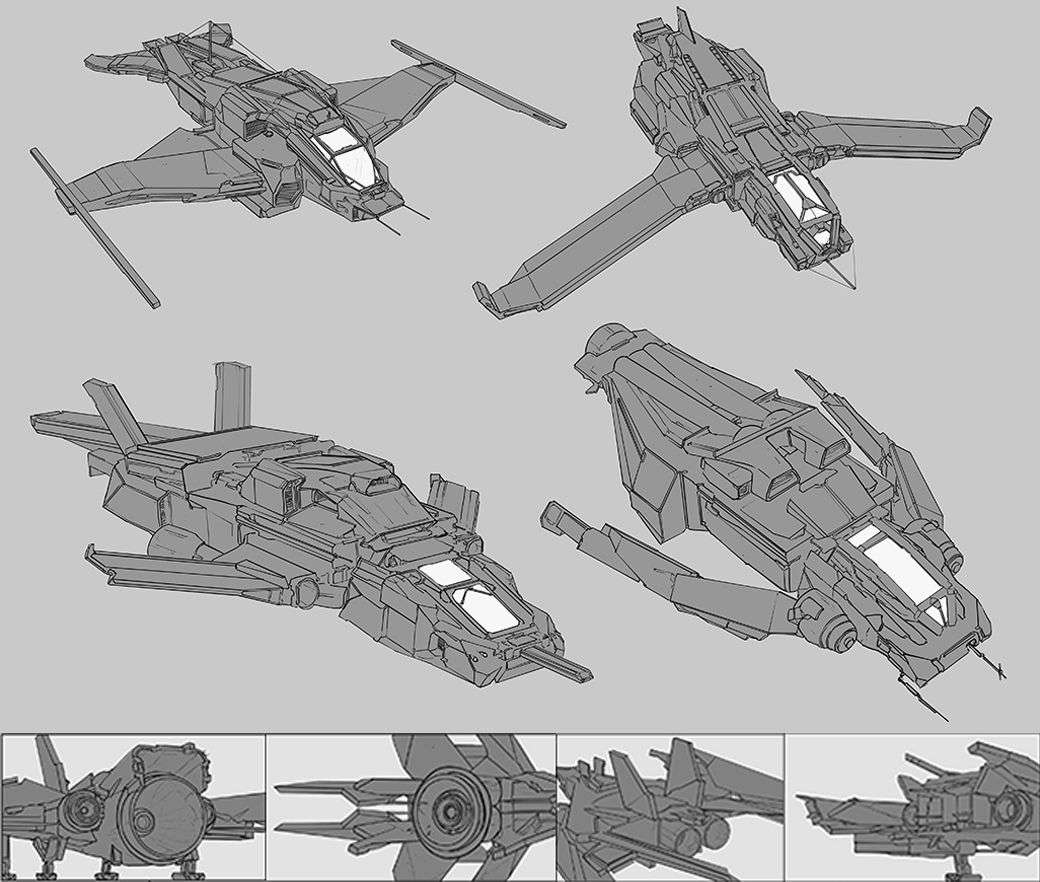
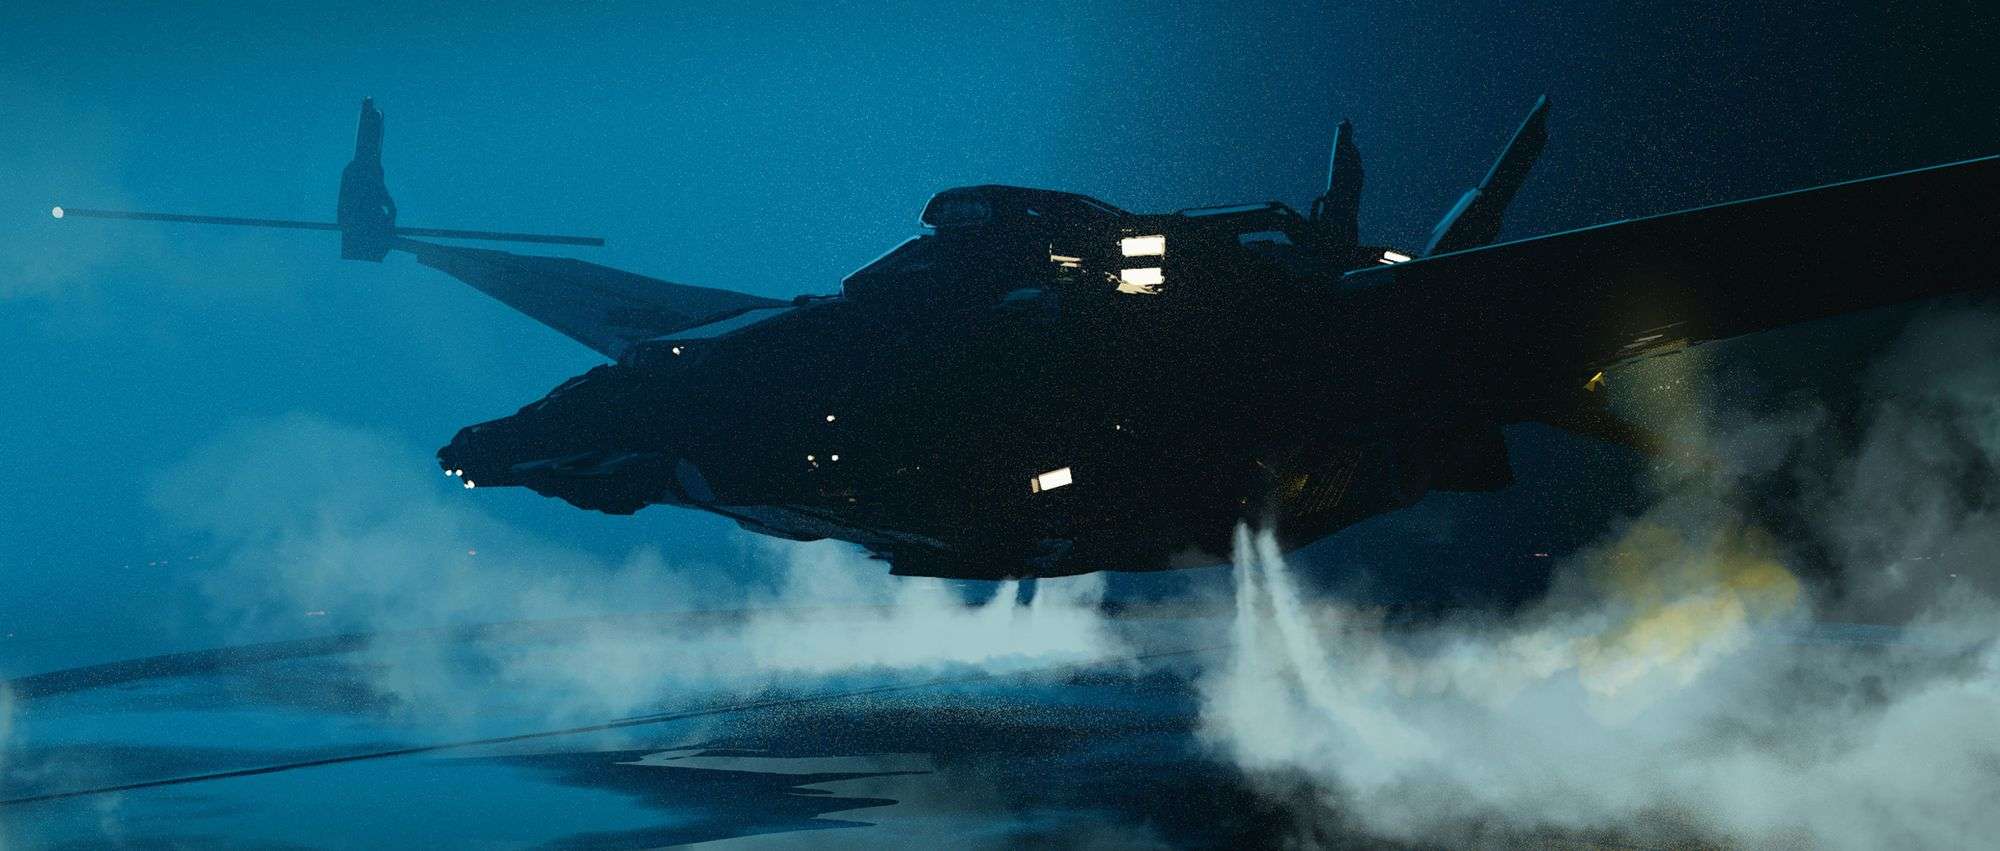
Once the shapes were refined I kitbashed a model of the jet in ZBrush. I used this model to play around in Blender and create some moody and cinematic shots as bonus content for the project.
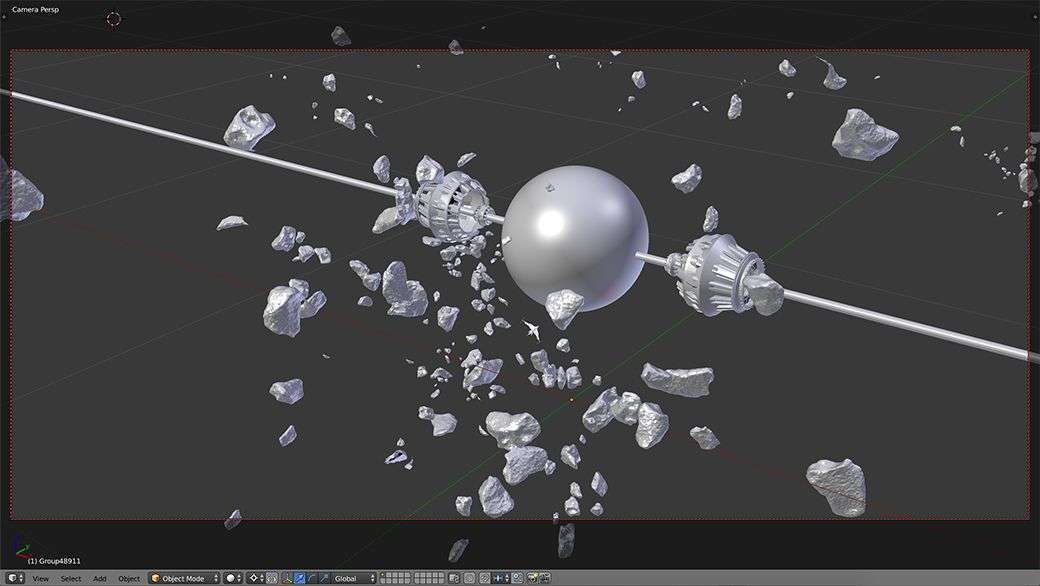
Finally to conclude the article I’m sharing some screenshots from Blender. This would allow the readers to see the way the lighting was set up to create some of these shots.

This was the first time I was breaking down a project of mine. The motive for readers to get a deeper insight and understanding of strategies involved in creating a narrative of this kind.
I hope the content of this article was useful to you readers in any manner possible. It was very fun revisiting these scenes and trying to deconstruct my own thought process.
If you have any further questions or queries I’d be happy to answer them at [email protected]