
In this article I want to talk about my personal animated project “Lost Fish”. Since I was young, my dream was to be able to create my own animated short film. And now, I'm very happy to present a major step towards my dream - “Lost Fish”. It's not easy to create an animated short on your own; this is why I want to share some tips I developed along the way so you might have an easier way to your dream!
Introduction
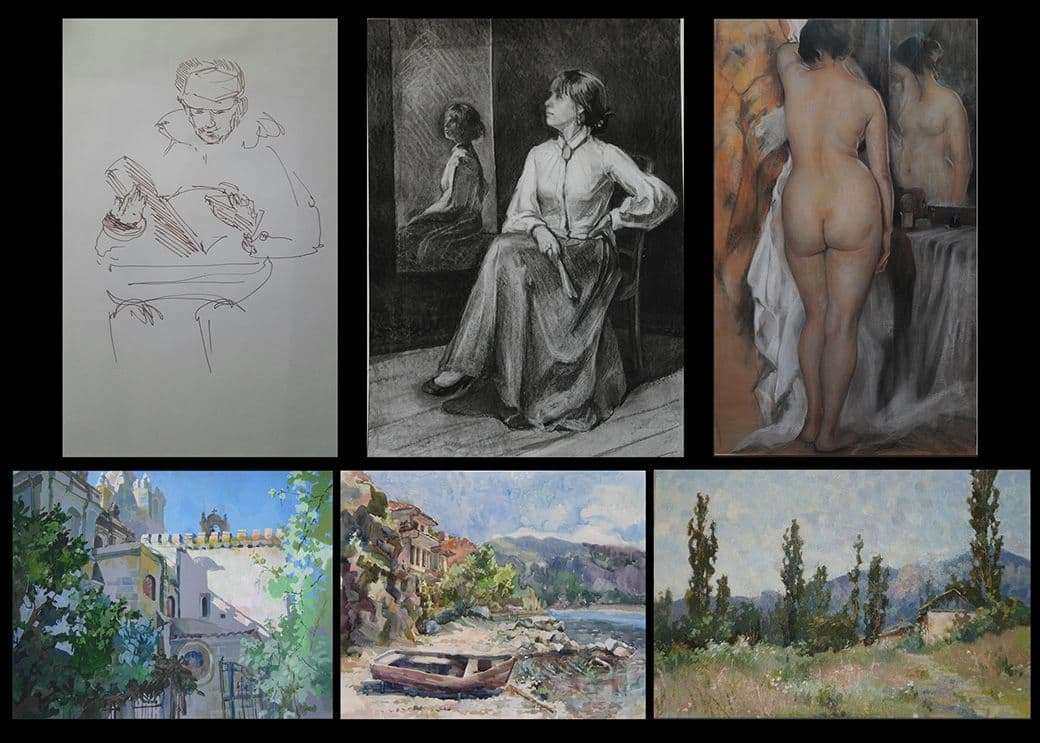
I’m currently working in the industry as a Visual Effects Artist. Prior to CG Art, I was a Traditional Analog Artist for over 15 years. My major was in Art Restoration. At the Gnomon School of Visual Effects, Games + Animation, I got my second specialization as a 3D Generalist. I believe that having a strong knowledge of Fine Arts gave me a huge benefit in 3D. I think that as a CG artist it’s important to keep working on your analog studies, such as figure drawing or color sketches from nature.
Since I started in the VFX industry I have made significant contributions to numerous award-winning television shows, films, video game cinematics, and music videos.
I have worked on star-studded motion pictures such as The Best of Enemies, starring Academy-Award nominee Taraji P. Henson and Academy Award winner Sam Rockwell. Slated for an April 2019 theatrical release, the film is executive produced and directed by Robin Bissell (The Hunger Games, Seabiscuit) and also stars Anne Heche, Wes Bentley, Bruce McGill, John Gallagher Jr., and Nick Searcy.
My other major achievement includes my work on some of the highest-rated primetime television shows currently on air, such as Golden Globe and Primetime Emmy Award-winning favorites Counterpart, The Detour, Superstore, Black-ish, The Walking Dead, and Arrested Development.
I was also a VFX Artist on Grammy award-winning band Imagine Dragons’ music video for “Zero”, written for Disney’s major motion picture Ralph Breaks the Internet, starring the voice talents of Oscar-nominee Taraji P. Henson, John C. Reilly, Gal Gadot, and Sarah Silverman. As of November 2018, “Zero” has been viewed more than 15 million times on YouTube.
Tip 1. From Inspiration to Idea
Creating a short film, even a personal project, should be a clearly thought-out process. The film you’re creating should tell a story that will affect the viewer in some way. You must be able to answer the questions “Why do you want to share this story?” and “What is it going to teach the viewer?”. The story should have a valuable and important message. In order to get those answers for myself, I need to get inspired - to have an idea that gives me an extreme drive, an idea that will keep me up through the night working on my project, an idea that I want to share with the world!
My inspiration came to me from an analog artist I admire, Sergey Kolesov. His art has such strong storytelling points, it feels almost alive! His most impressive piece to me is “The Mermaid”.
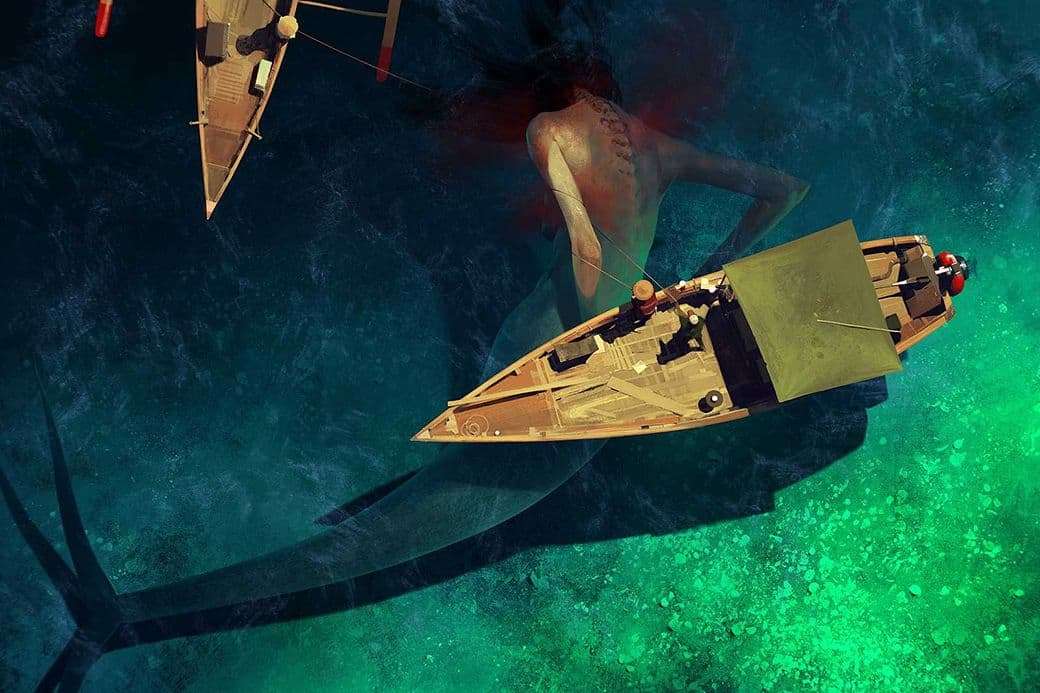
This image gave me an idea for the story I wanted to tell, about struggle, willpower, and hope, about rough times in life when you feel that there is no way out, but keep fighting for yourself and possibly winning. I felt connected to these emotions and wanted to share them with others.
Tip 2. Ideation/Reference Search
The ideation stage is one of the most important in the development process. Bad art still can bring an amazing story to life, but a bad story will never get better simply through great visuals.
Ideation is a moment when you have an idea what you want to say, but don’t have a clear understanding of the visual representation or storyline yet. This is the moment when looking for references becomes crucial.
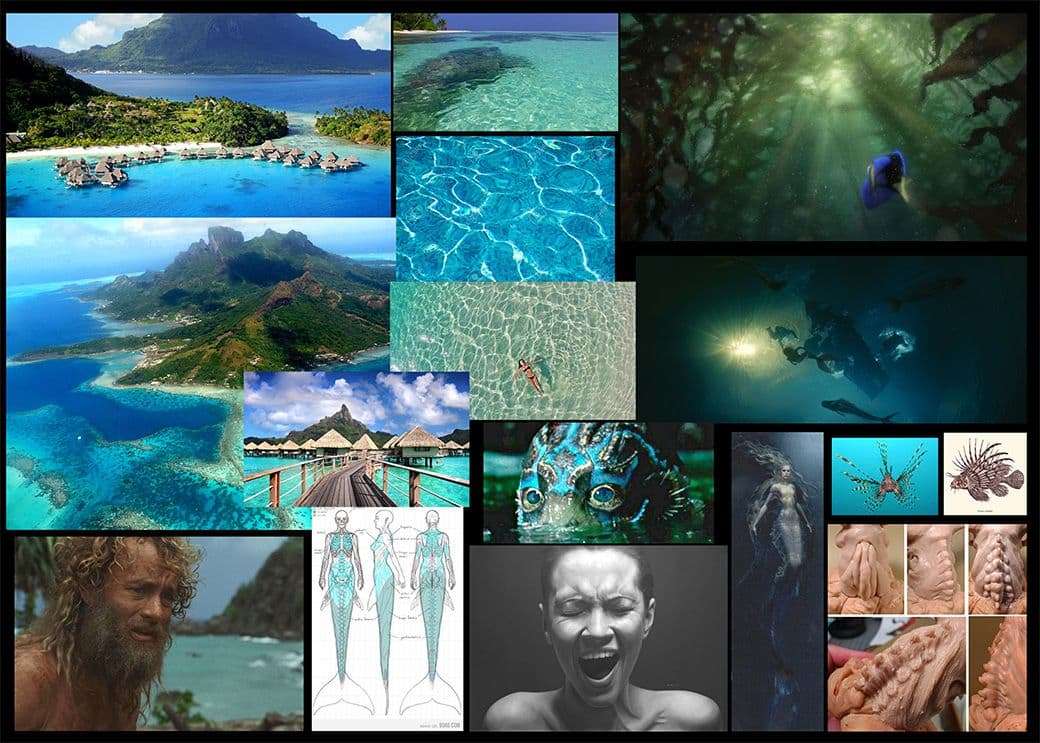
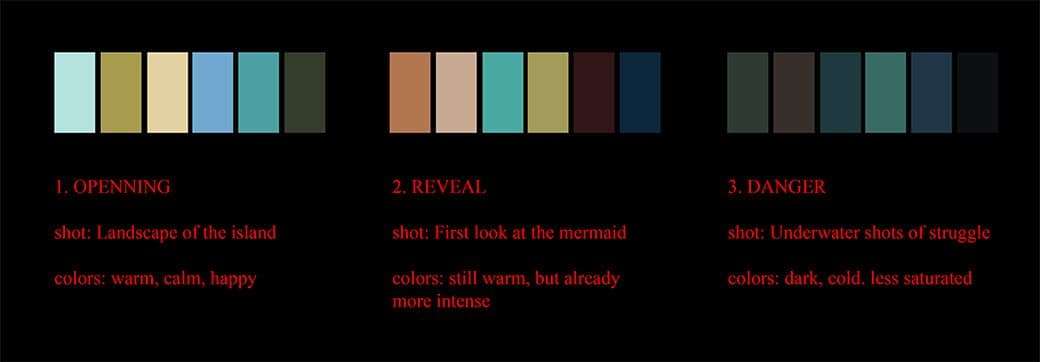
For my project I gathered all sorts of references and did some research, including: the place where the mermaid could live, references for her body and textures, underwater references, color combinations from some movies I liked and so on.
Looking at all the images, I started getting the idea of what kind of visuals I wanted to have in my short. It is important for me to visualize to whole project in my head first. Sometimes this visualization doesn't have all the details, but it has the light and dark contrasts, color palette, and the mood. This leads to the next step - storyboards.
Tip 3. Storyboards, Animatics, Playblasts
Storyboards are important for the sake of managing the project. Instead of jumping right away into CG and doing work that won’t be used, or redoing something over and over again, I spend quite a lot of time working on storyboards.
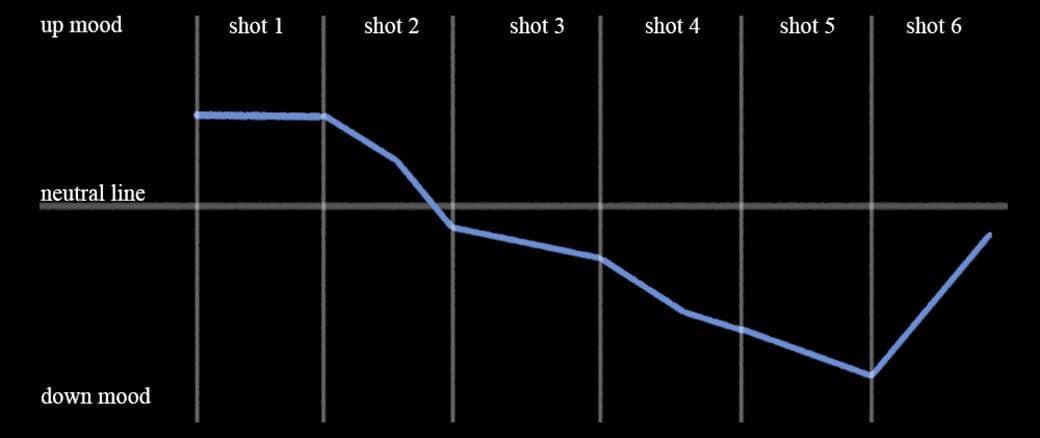
After the first version of the storyboards were completed, I moved to the animatic. An animatic is basically storyboards in motion. This helps to figure out the pace for the shots. My storyline changed a lot from the first version:
At the beginning I was also considering working on the longer version for the story. I wanted to build up more of the mermaid world:
However, eventually I decided to go with a shorter version. The main reason was my goal was to complete the project in 3-4 months. A realistic number of shots to complete within this time, for me, was 5-8.
When I am working on any personal projects, it’s crucial to set a specific goal of WHAT I WANT to achieve, and WHEN.
My goal, aside from storytelling, was to create spectacular visuals that demonstrate my skills in CG as a Generalist. Setting realistic goals for a project is a big part of success. This is the best way for me to be able to complete the project, and not to bury it among the “that was a great idea but didn’t work out” ones!
As a result of my development, I’ve decided to go with the version listed above:
You can see that some shots have been moved around. I felt that if I ended on the wide shot on the mermaid from under the water with the camera zooming out, it would feel like the mermaid is dying and there is no hope left. Finishing on the close-up of her face, fighting for her freedom, leaves the viewer with a stronger message of hope.
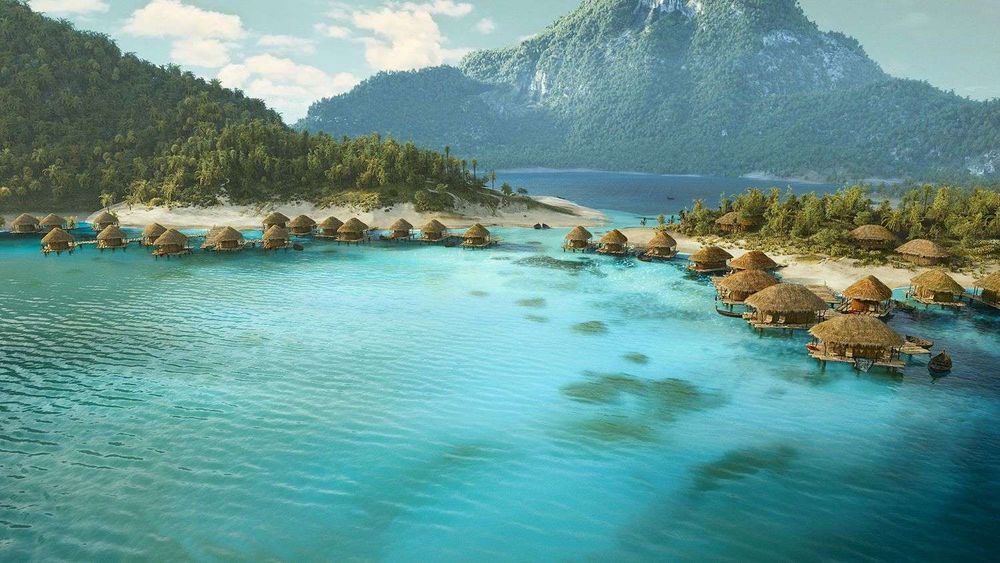
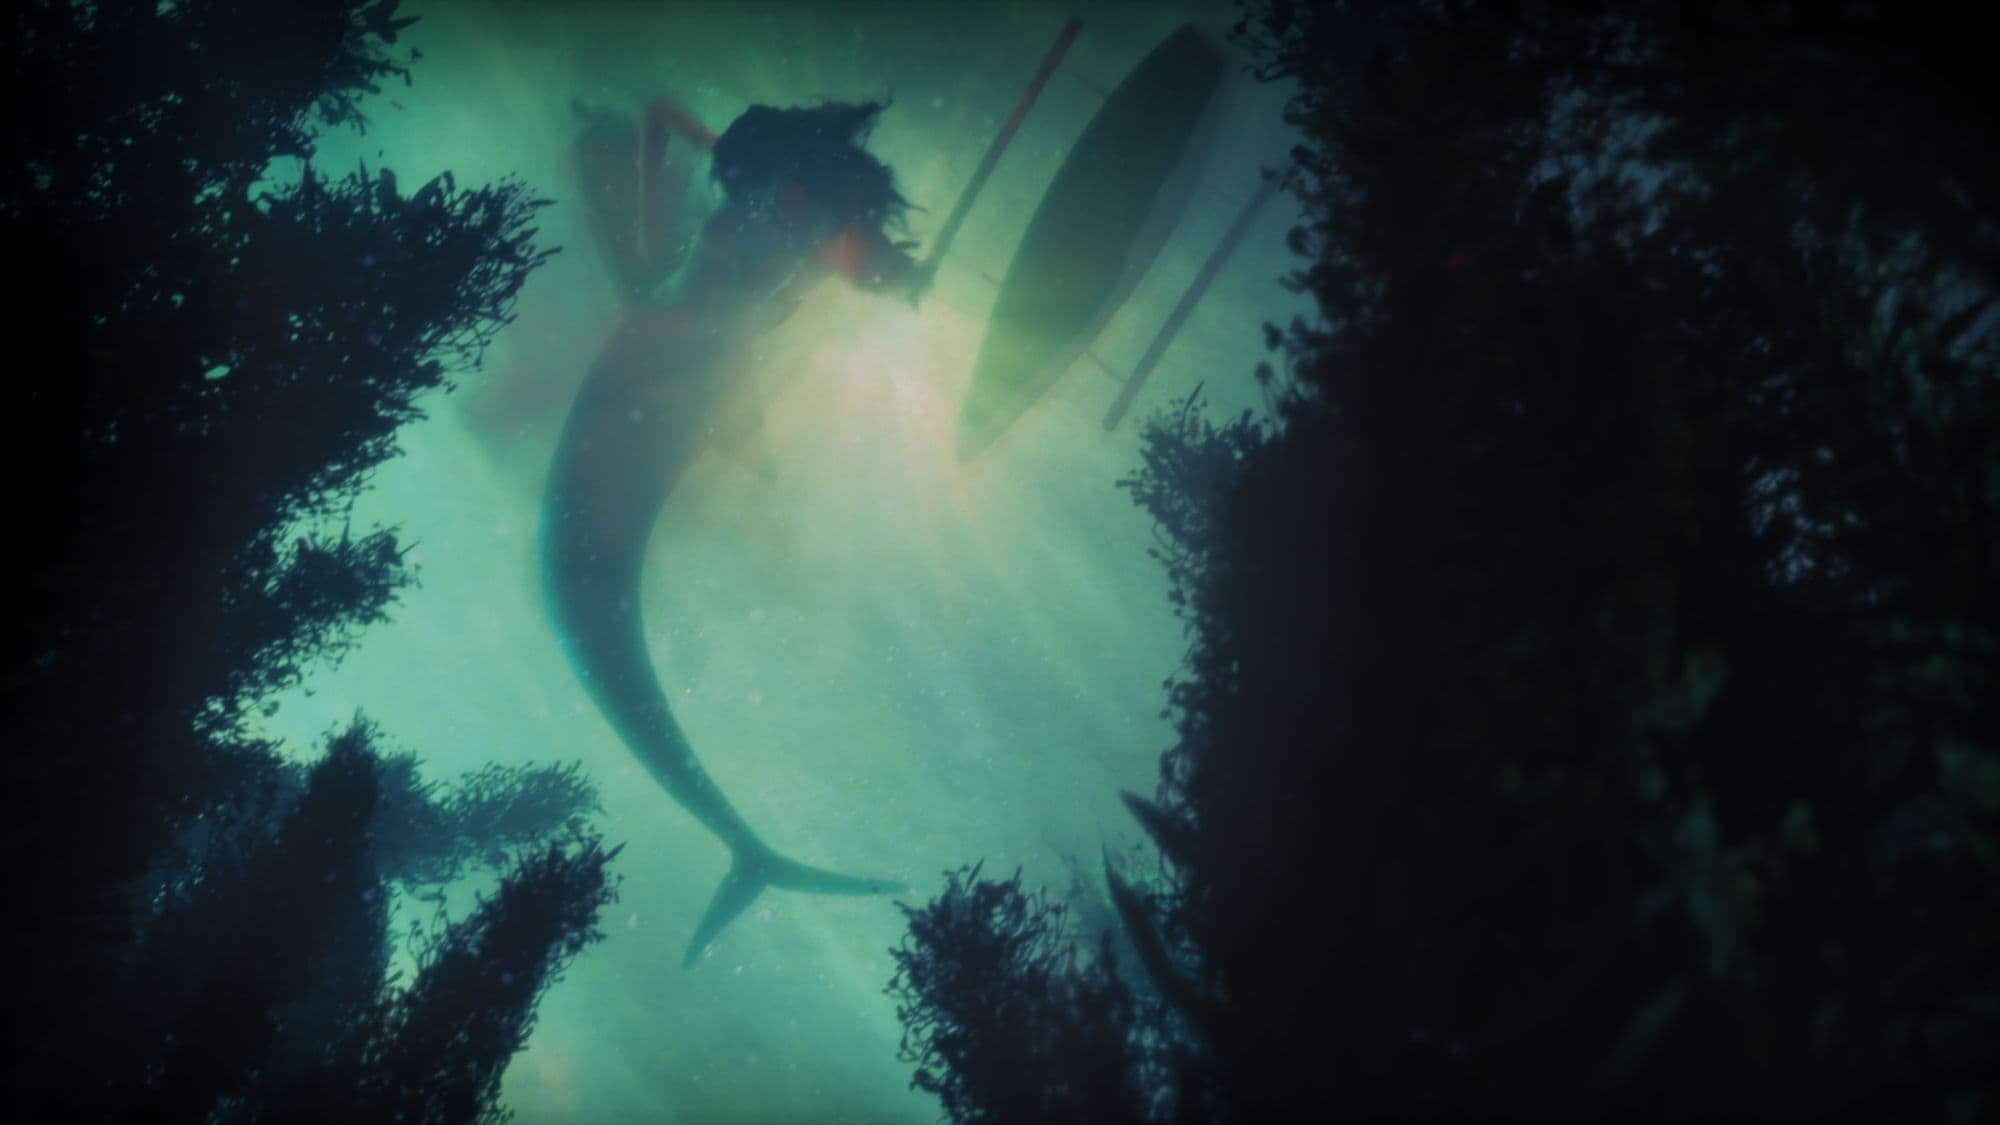
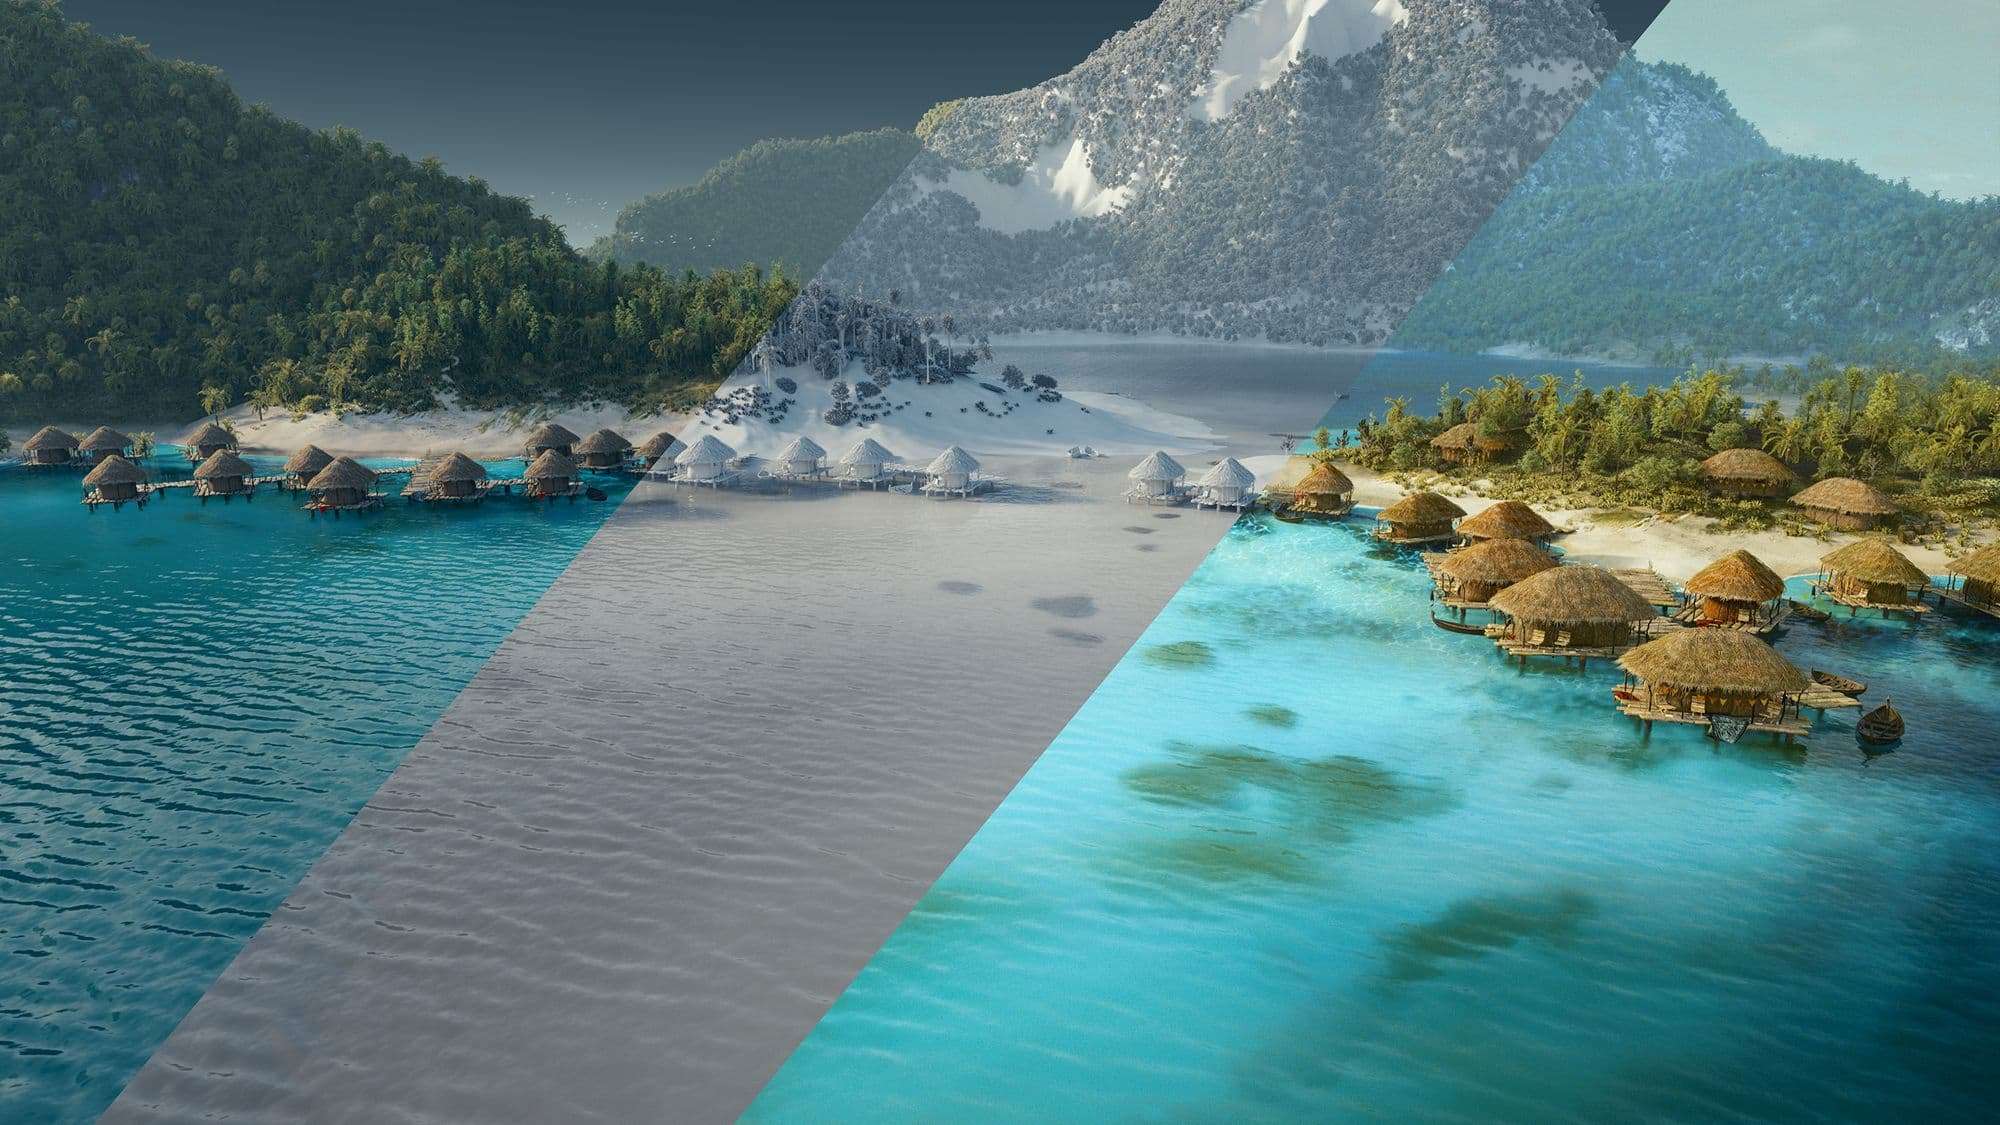
After I locked down the main locations of the shots - the island overlook, the mermaid reveal based on the Sergey Kolesov concept, and the underwater shots - I started working in parallel with the storyboards on the color boards:
Tip 4. Final Visualization
In the latest animatics I already had some shots close to final stages in CG. I think it is important to take 1 or 2 of the most difficult and critical shots and work on them in parallel to the developing storyboards.
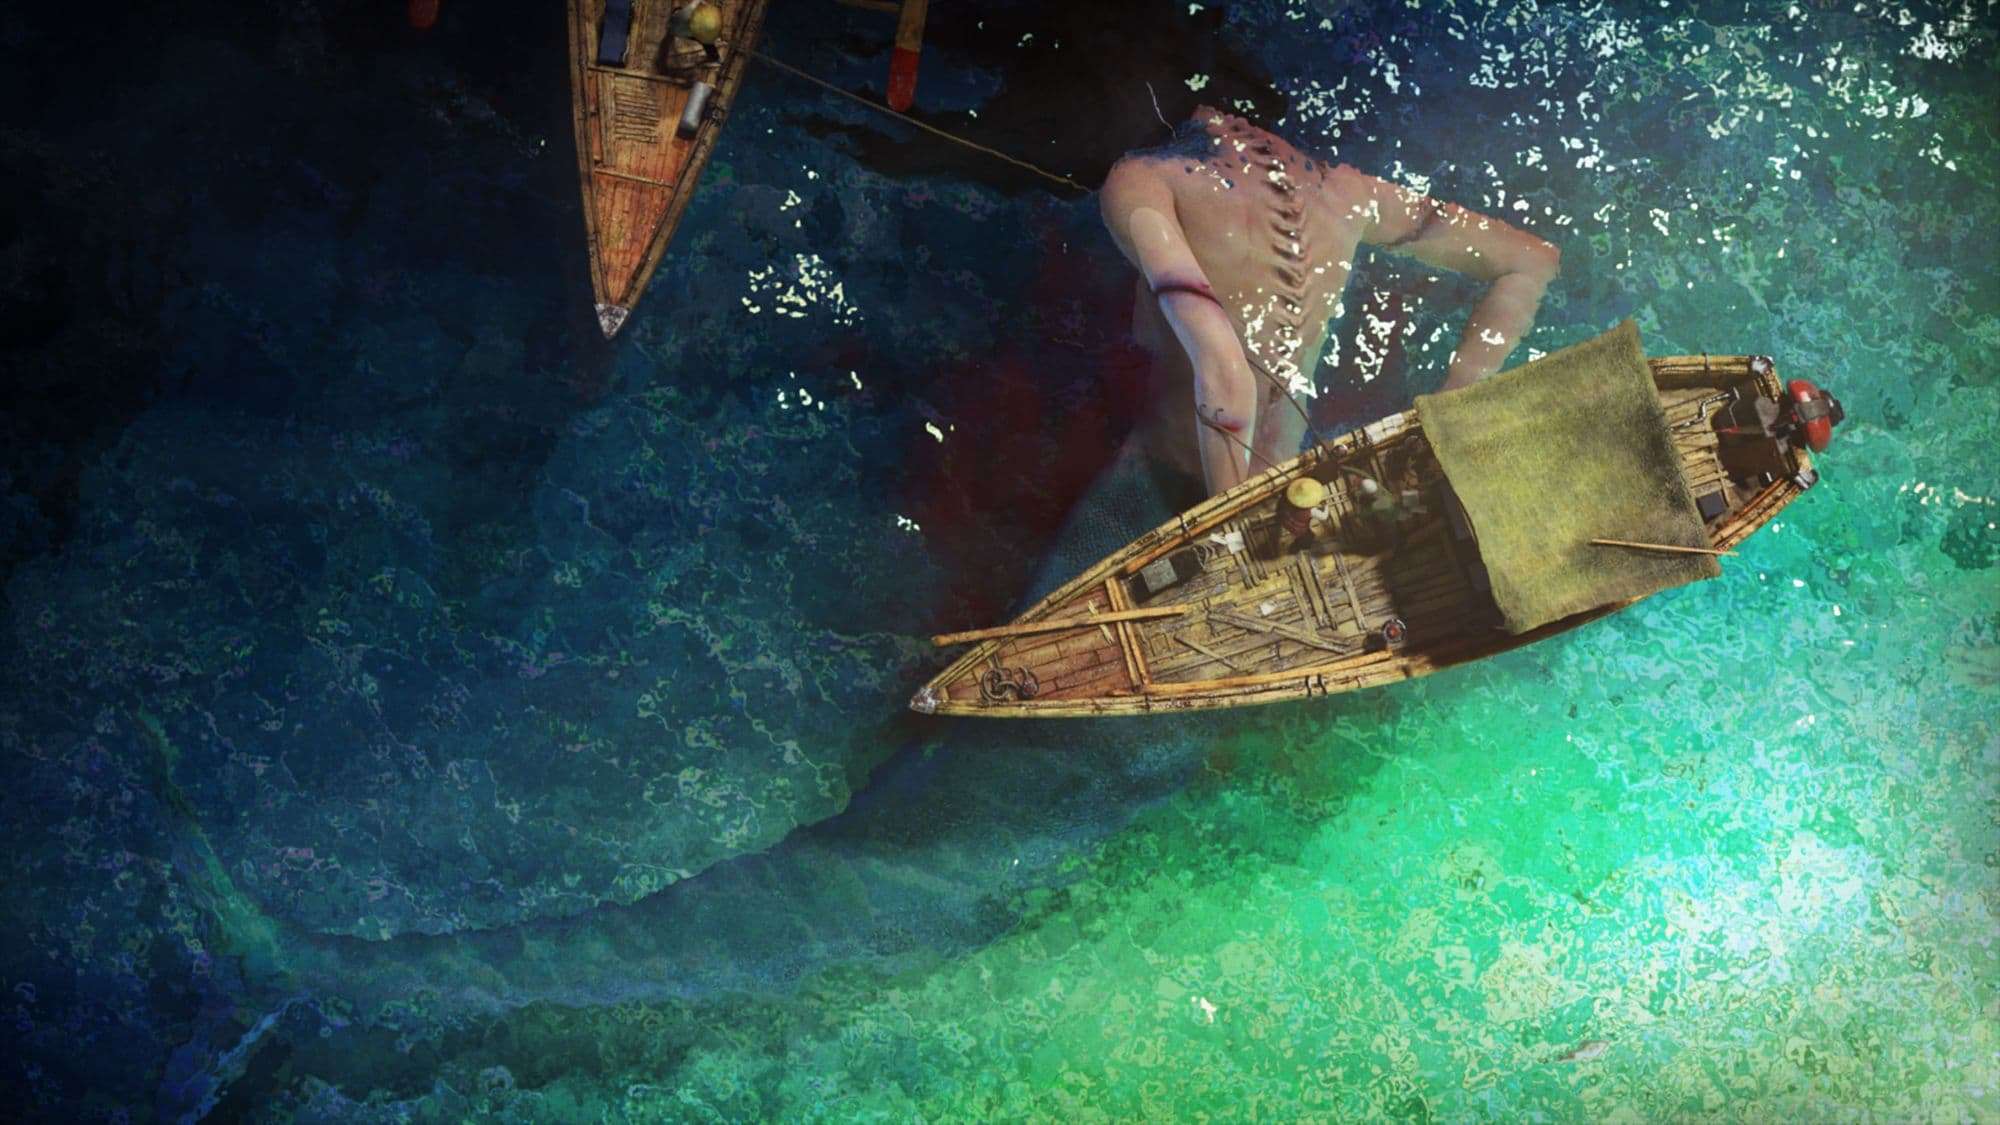
I chose to work on the opening shot of the island overview and the mermaid reveal shot.
The first shot was pretty challenging technically. The island is a full CG open environment built in Houdini using SpeedTree asset and ocean simulation. I expected to have a lot of troubleshooting moments that needed to be worked out by the planned deadline.
Even though I hadn’t locked camera yet, I still could start working on the scene, solving the problems that occurred along the way, such as having so many GEO, variation in the vegetation, speed and form for ocean sim, render time and so on.

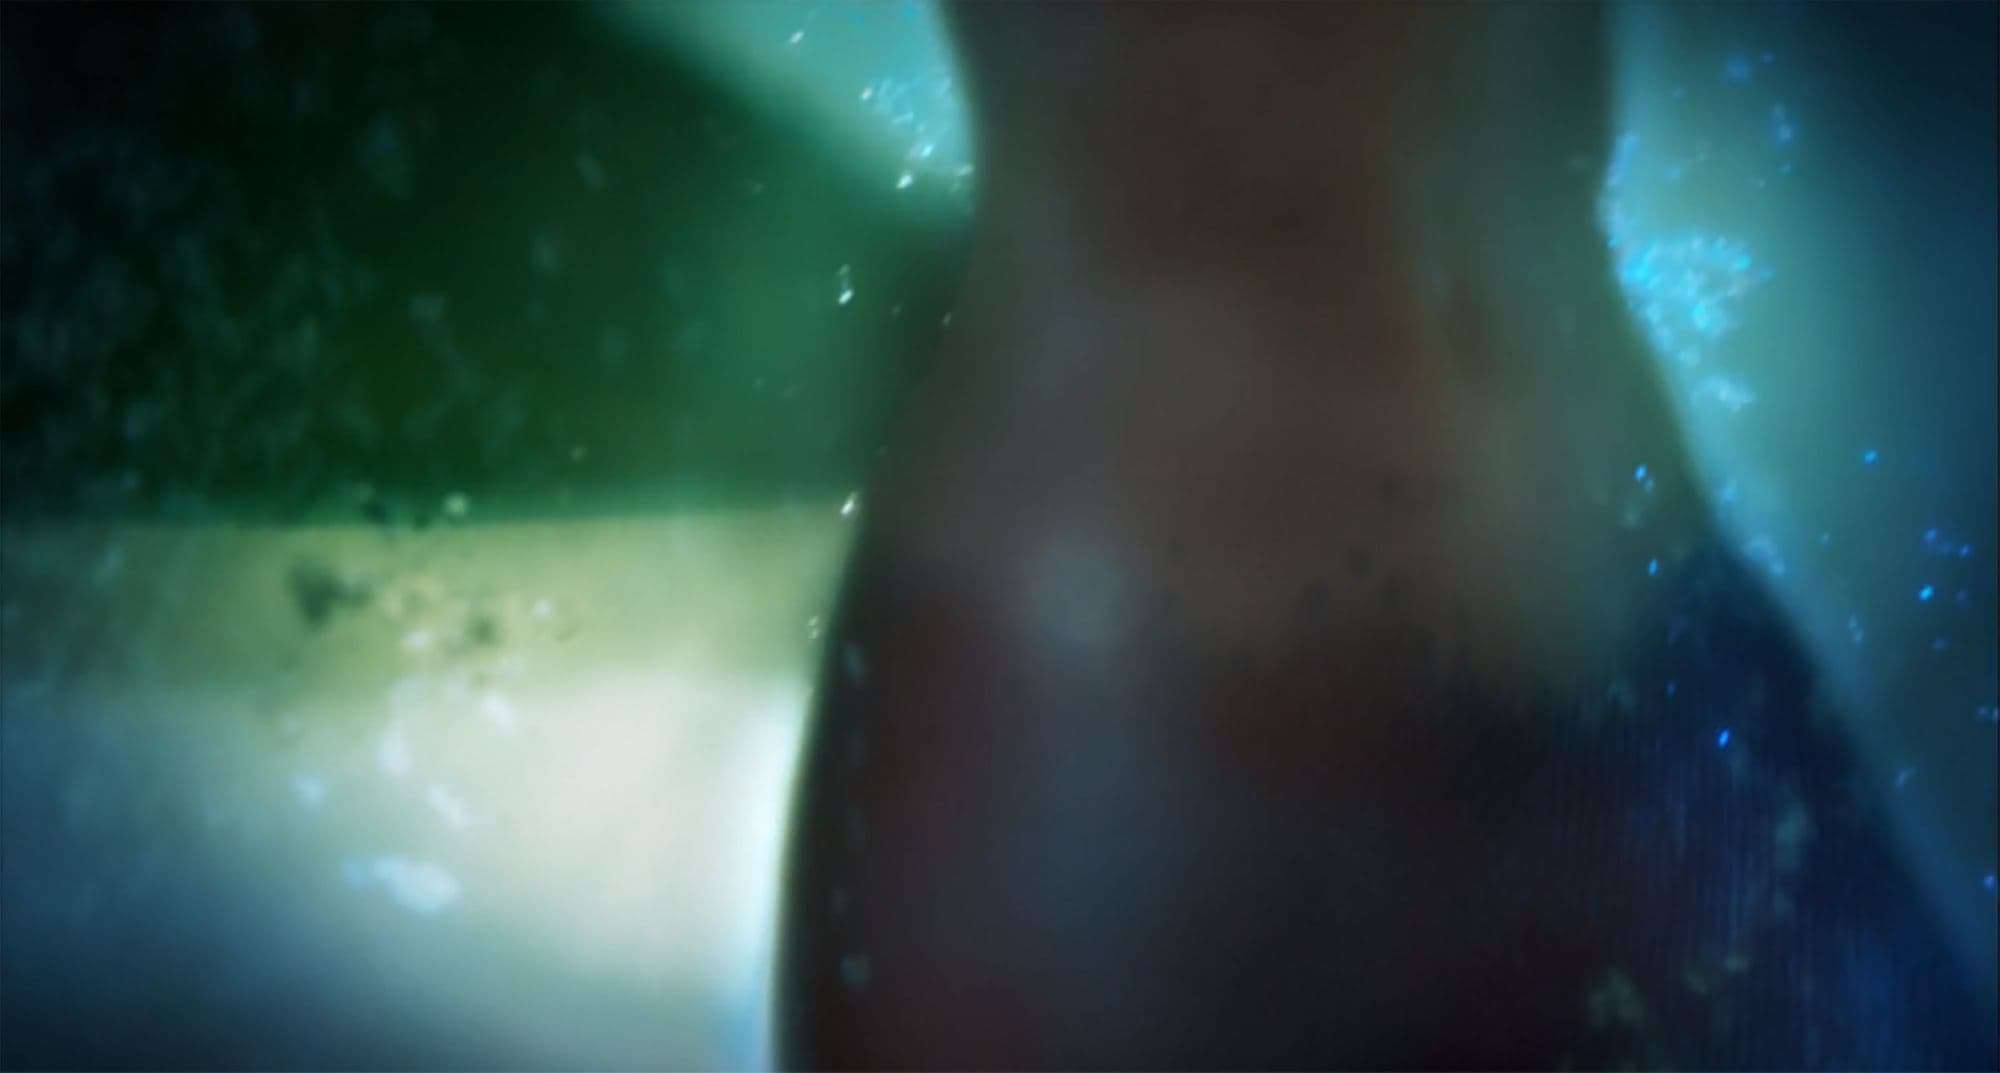
Another shot was the mermaid reveal, based on the concept. From the beginning, I knew I wanted to use this shot, so there was no reason to postpone the work on the scene. I wasn’t sure how I would get around some technical moments, such as rope rigging, how having so much refractive surface in the shot would affect render time, hair animation, and so on.
Another reason to start work on a couple of shots earlier – aside from having enough time for troubleshooting - is personal visual stimulation. It is important when I can see progress in my own work. It emotionally helps me to move forward to completing the project when I can see some results. It’s hard to visualize final projects from storyboards, but when I start seeing nice renders, it feels much more satisfying!
Tip 5. Musical Inspiration
Although I am a visual artist, I get a lot of inspiration from music. I was very lucky to find a young compositor, Nikita Kamenskiy, who agreed to collaborate with me by writing amazing music for “Lost Fish”.
Even when I’m not collaborating with a composer on a project, I try to find music first for the video/scene I’m working on. It helps to shape the mood for the scene, and lock timing for animation and pacing for the whole project. When your animation is in tune with the rhythm it feels more organic for the viewer.
Tip 6. Reviewing Playblasts and Render Sequences
Once I finalized my storyboards, it was time to start working on the rest of the shots. At this point I already had made good progress on the first shot with the island and the second shot with the mermaid. Other shots were easier to assemble because I already had modeled GEO. The mermaid was modeled and textured with the understanding that the character would appear in multiple close up shots.
The most important issue was to make everything move in a cohesive manner. The best way to understand if all animation works together is to see playblasts and render sequences as soon as possible. To make the process faster at the beginning I was doing just grey scale playblasts.
However, not everything can be previewed in a playblast. For instance, I could see the ocean animation, but I couldn’t see how the ocean surface looked when it moved and reacted to light. After I locked down the character animation and animation for the objects, I moved right away to previewing render sequences.
There was a big question of how long the renders of the ocean would be and how much noise it will have. However, all the test rendering of the refraction with Redshift was pretty fast and clean! It’s hard to manage a big amount of rendering frames if you don’t have a big render farm, but there is a way around the by rendering low resolution images at the beginning of the process, and one or two high resolution frames to figure out final render settings.
Tip 7. Start the Compositing Process Early On
I believe that the earlier you bring renders to Nuke the better. It can speed up my work tremendously. It also gives me an understanding of how renders look as final images and what I can do more easily in comp, versus spending a lot of time trying to achieve something in 3D and then rendering it out.
With that in mind, I rendered all elements I might need in Nuke in multilayer EXR. My base set up is: Diffuse, GI, Lighting, Specular, Reflection, Refraction, SSS, Self Illumination, Atmosphere, OA, World position, Zdepth (filter on), Velocity, Multimatte or Cryptomatte, Light Selects per light or group of lights.
This is the base that I extend sometimes if I need something more specific for the image. This example is for V-Ray. However, most render packages have similar or alternative render elements available.
Tip 8. Ask for Help
Sometimes my imagination runs ahead of me, and I trip on some technical problem. Usually with some research I’m able to solve it, but sometimes I need to ask my fellow artists for help. Someone may have had that experience already with the specific problem I face.
The visual effects industry is a fast-growing creature. Every day new updates or plugins appear. This is why is it crucial to keep learning as much as you can from other artists and to share your knowledge and experience. This is the way to move forward and to create more amazing content for people to enjoy.
Moreover, I also believe it is great to ask people to collaborate. In my specific situation, my skills as a CG generalist include modeling, texturing, shading, grooming, lighting, and compositing. Effects is a whole other wild beast. I did all the additional effects in “Lost Fish” on my own, such as the hair animation, ocean simulation, cloth simulation, bubbles, and dust. But the blood spread in shot 2 is a hero FX that was very important to me. I decided it would be best for me and my project to ask for help from a friend who is an FX artist, and he did amazing work!
Animation as well is not my main focus. Nevertheless, I did all the additional animation myself for the boat and the ropes, including rigging, and minor character animation and rigging.
However, for the fisherman animation I used baked animation from Mixamo, which is very helpful for personal projects! Furthermore, for some of the shots for the mermaid hero animation I asked for help from a friend who is an animator.
All those actions helped me to achieve the result I wanted with less time and struggle, and a better end result. Having effects and animator friends is the best advice for CG generalist artists!
Tip 9. Final Color Correction across all Shots
One of the last steps is an overall color correction. When all my renders were done and mostly composed, I brought all the shots together in a separate Nuke file, created a node “contact sheet,” and looked at all of them together.
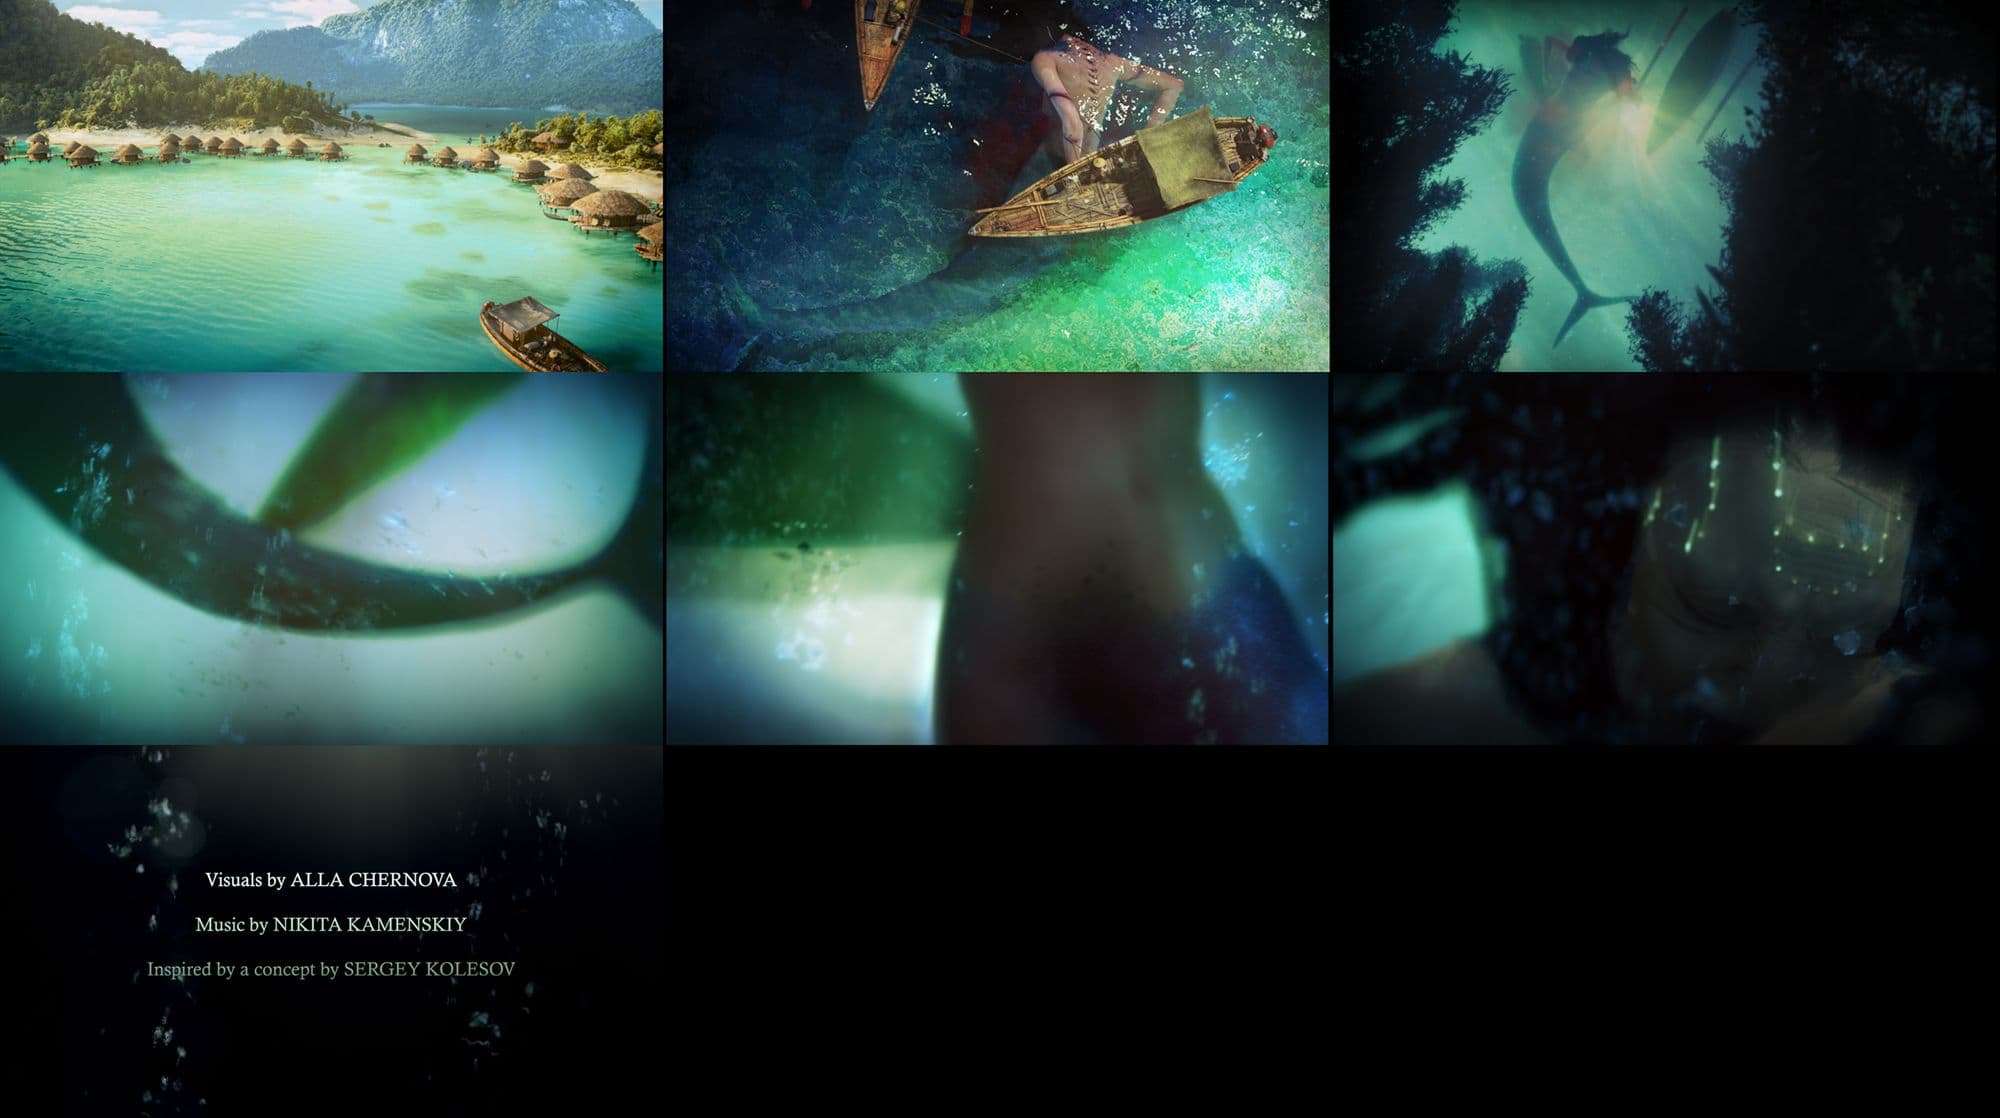
This helps to understand how shots work together as a whole picture. By putting them together I realized that the first shot with the island looked disconnected. I decided to add the boat to the shot to connect it logically to the next one. All of the shots needed slight color adjustments to match each other, and to clearly illustrate the colors in the story.
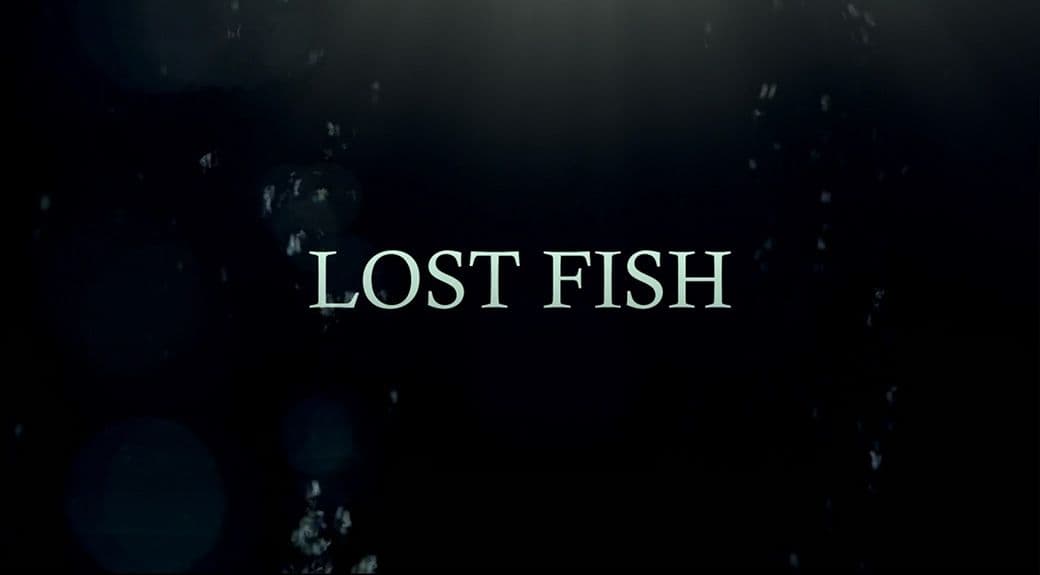
Tip 10. Title Design
There were three moments to consider when I put the short together:
1. How the first shot starts
- I decided to start the first shot from fading out of white. It makes it feel like emerging from a dream where images start appearing in your imagination. Moreover, bright white also can symbolize bright sunlight, appropriate for tropical places.
2. How the last shot ends
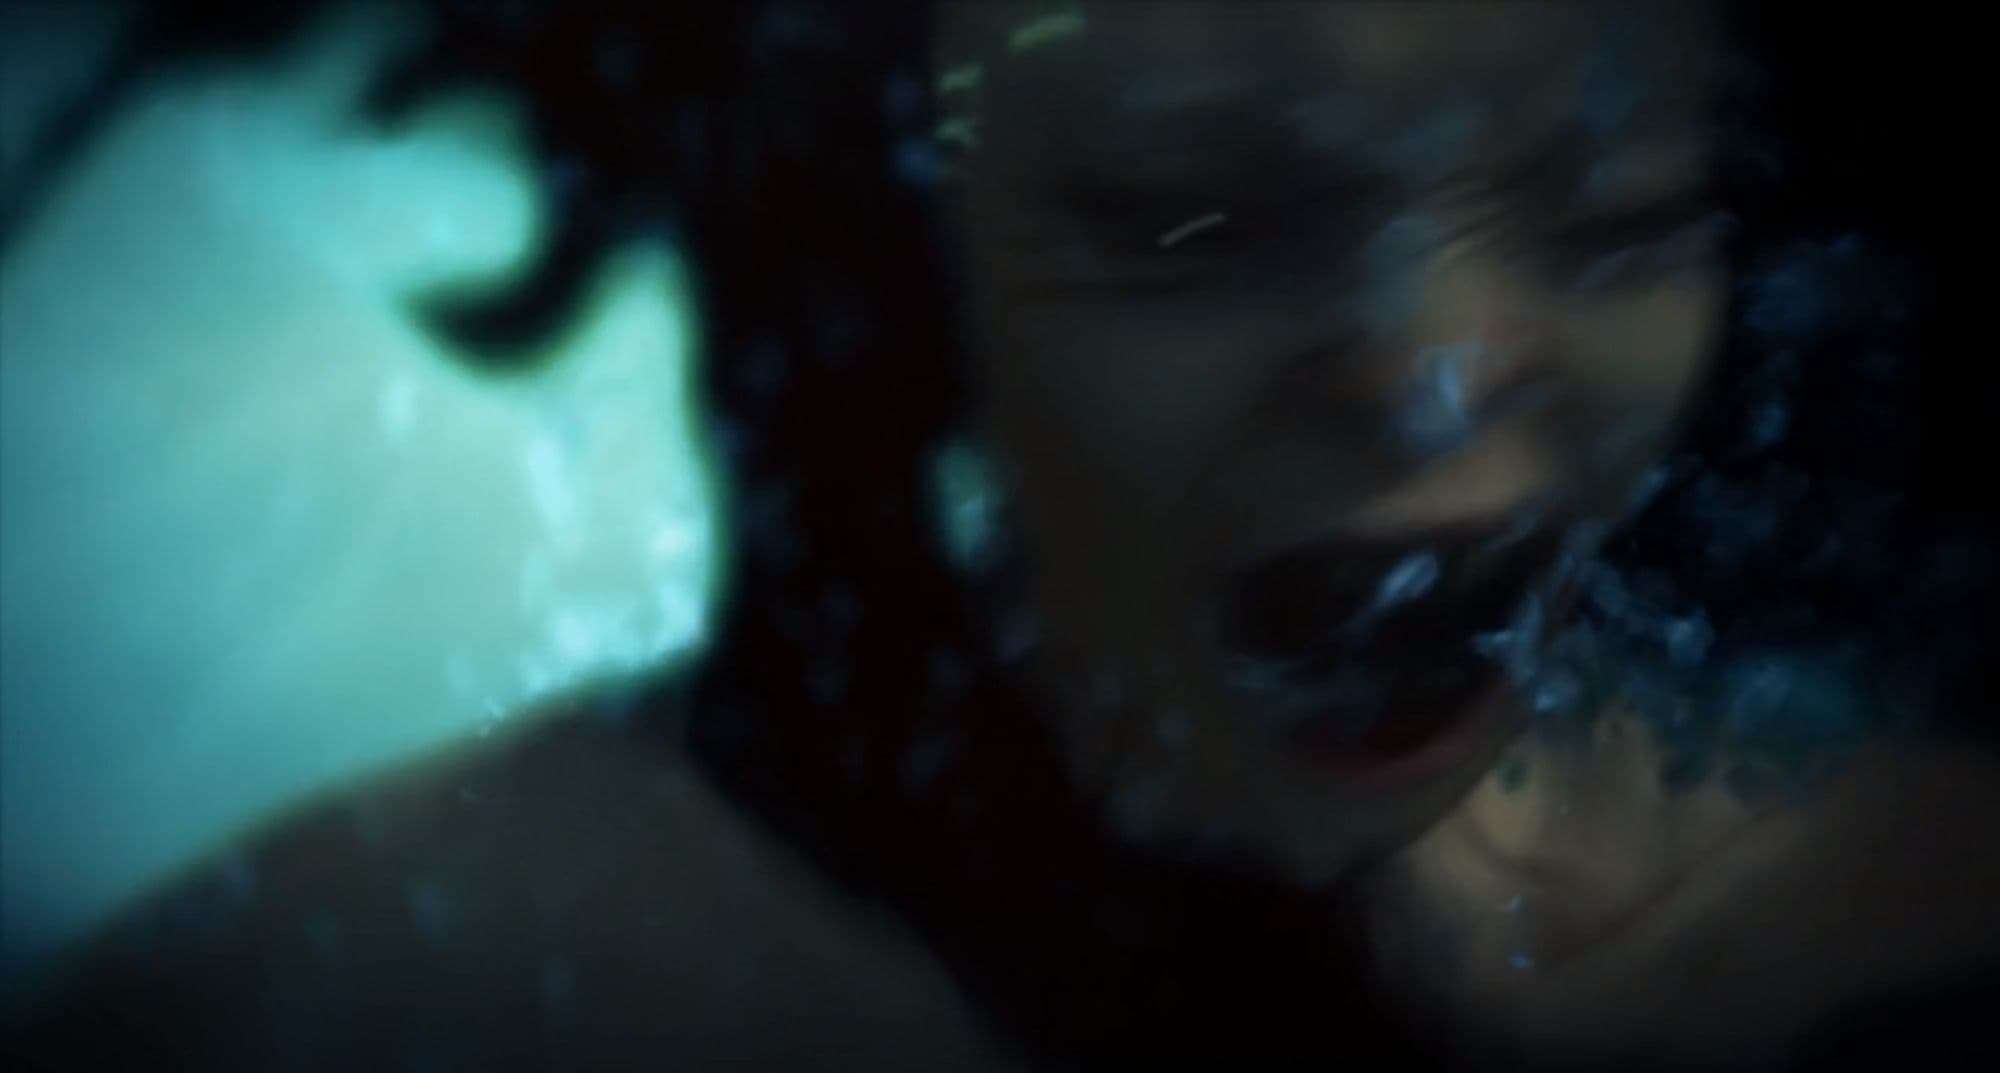
- The end shot has a hard cut to black. I felt it went better with the intense moment of straggle the mermaid is going through.
3. Title design
- For the title design, I wanted to imitate an underwater world, using faded sun rays from the surface and bubbles to connect it to the main theme of the short. Titles were added to the contact sheet with the rest of the shots, to get color correction.
Conclusion
Inspiration. Without strong inspiration it is hard to persevere on a huge project. Find something that I can't leave without finishing, something that is a dream for me to achieve. This will give me energy to complete the project.
Multitasking. Being able to work in parallel on multiple tasks will speed up and enhance my workflow. It’s a very good skill to have. Usually at work I am working on more than one task or sometimes more than one project at the same time, and being able to keep count of what I’ve done and manage my time will come in handy. For a personal project it’s good to work on multiple things at the same time too. For example, create storyboards and at the same time start developing the shot. Model, texture, animate, and render at the same time, so I can gauge what needs more work and what works fine.
Clear goals. Setting clear, understandable, and realistic goals helps to manage time on a project and lead it to completion. Setting unrealistic deadlines will stress me out and could force me to quit the project. Moreover, a realistic understanding of my speed is good for freelance work, when I can clearly express to the client how much time I need to complete the work he/she is asking.
Hope you found my article useful and enjoyed it. Good luck with making great art!