
Hello, my name is Pablo Munoz Gomez and I’m a concept and character artist based in Melbourne, Australia and I am also the founder of ZBrush Guides . In this article, I’m going to give you an overview of how I created my Uncle Fester character in ZBrush and show you a couple of tips and tricks that I think you’ll find useful.
First, let me give you some context so you can understand my motivation for doing this piece. I needed to create a series of custom ZBrush alphas and brushes to detail skin for my characters and speed up my workflow a little bit. In order to test the ‘portability’ and usefulness of the custom brushes I had to test them in a real scenario (not just applying them to a plane or a sphere), so creating the Uncle Fester character from the Adams family was a great option instead of making just another generic bald head.
References
I wanted to go for a realistic look but slightly stylised. I grew up watching Adams family, the three stooges, Gilligan's Island, and those sort of shows, and for some reason, I always thought Larry Fine (from the three stooges) would have been a great cast for Uncle Fester, so I based the expression and facial features of my character on Larry Fine.

I collected photos of Larry Fine, as well as different versions of Uncle, fester portrayed by other actors like the original Jackie Coogan and the more recent version of Christopher Allen Lloyd.
To collect and arrange my reference use an awesome free software called PureRef, which is, in my opinion, the best tool to work with references.

Sculpting the head in ZBrush
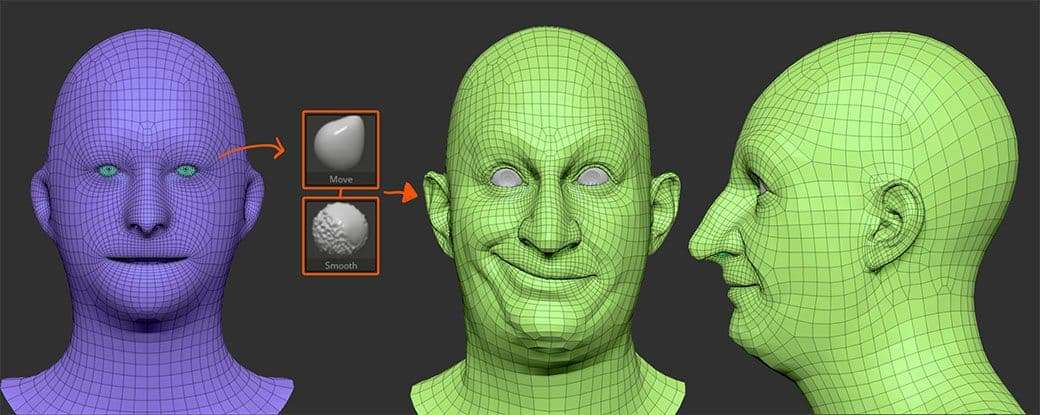
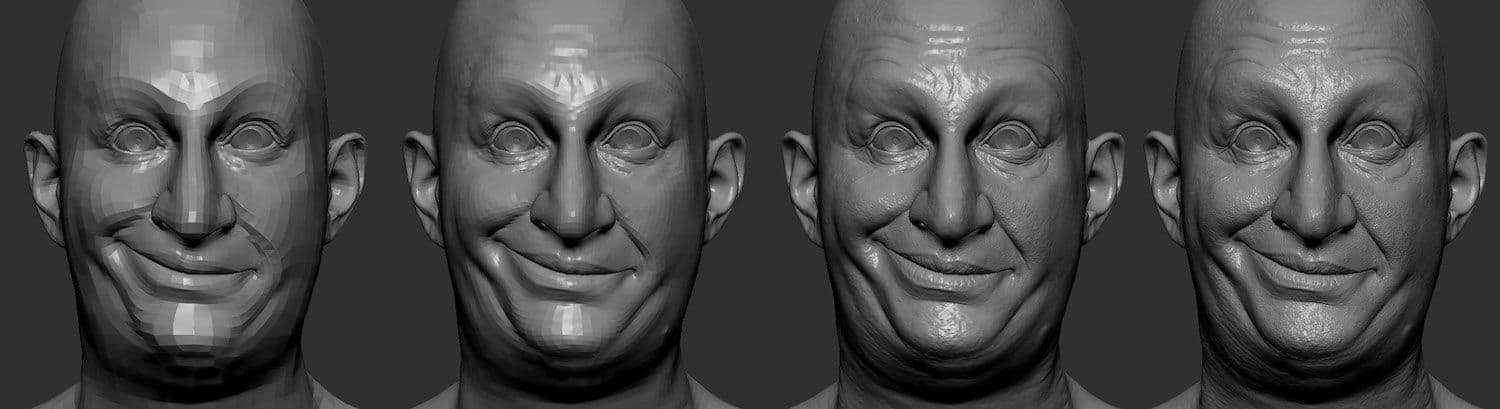
The first step is to work on the primary shapes, or in other words, to block out the main volumes and get the silhouette and proportions right. During this first pass, I use a generic base mesh and limit my toolset to the move and smooth brushes (for the most part) until I get something that roughly captures the gesture with very few polygons.
Limiting your set of tools can help you focus on a specific task. For instance, if I start using the Dam_Standard brush at this point, to carve in wrinkles, I might find myself adding details without establishing the form first.
TIP: when copying from references if you can find out the focal length and camera from the image you could match it with the angle of view in ZBrush, but as a rule of thumb: Always sculpt with Perspective ON
First pass on likeness and developing the expression:
Secondary and tertiary shapes
Once you have a good base, you can use any sculpting brush to tweak the shapes and define volumes a bit better. I like a combination of the clay build up brush to add volume quickly, and the smooth stronger brush to maintain the surface clean.
One of the advantages of working with subdivision levels is that you can work on the forms at the first or second level and slowly work your way up in subdivision as you add more and more details. Form and silhouette are the most important things, adding details is really easy if you have good foundations.
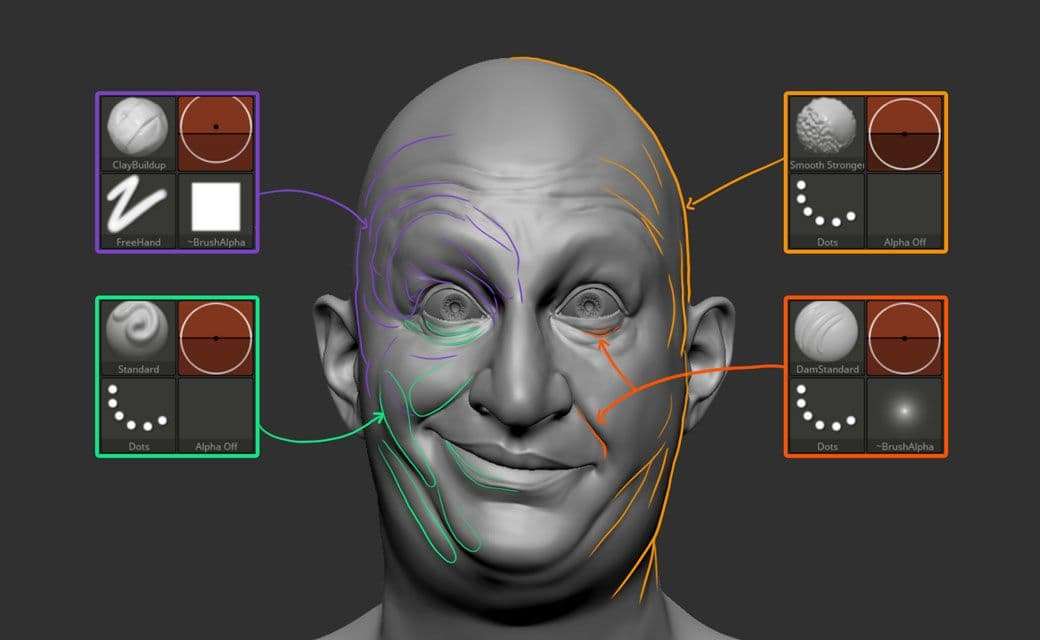
Adding details with custom brushes
At this point, I have a solid base, and I can start testing the custom brushes I created to detail this character. The brushes are manually sculpted alphas with stretched pores and skin patterns, and a few sculpting brushes that generate various effects like bumps or pores.
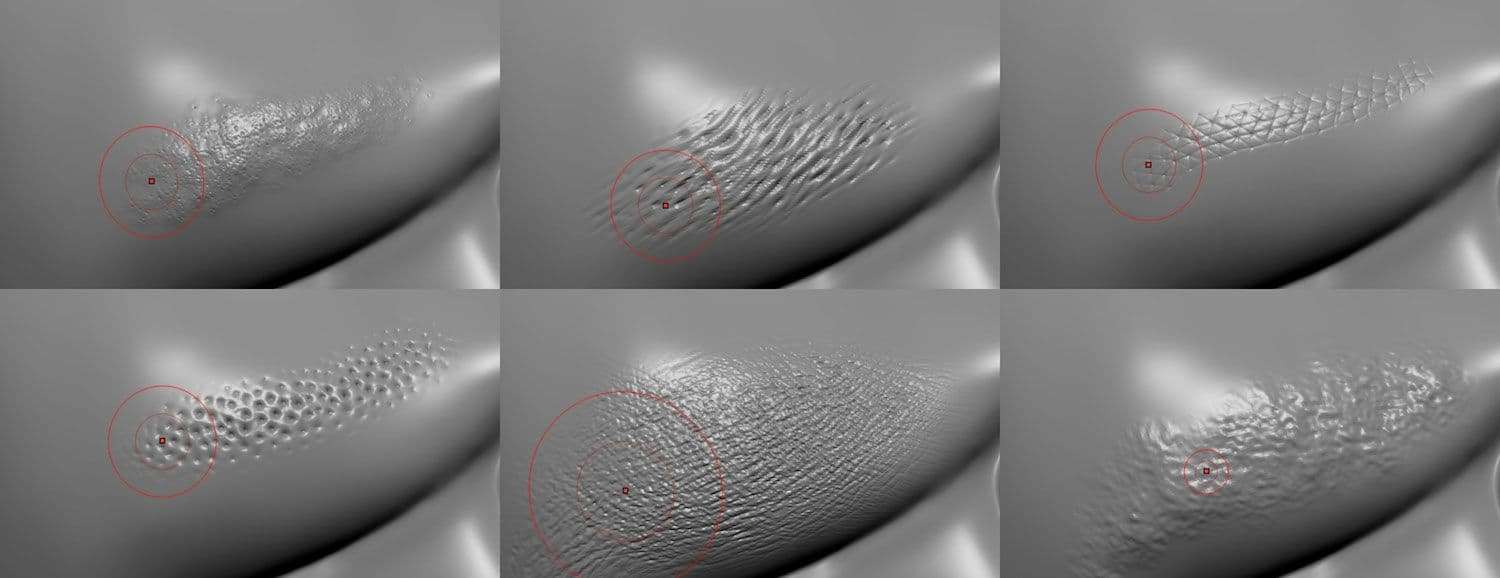
As I mentioned before, if you have a solid base, adding details is very easy. The trick is to be patient and pay attention to the type of alphas or patterns that you are adding, to make sure they match the area of the face. For instance, the skin around the chin is very different than the pattern in the nose or eyelids.
TIP: keep an eye on details to make sure there is a flow and they have direction. Also, the details will react to the expression, with this character, the smile is causing some stretching in the pores around the right cheek.
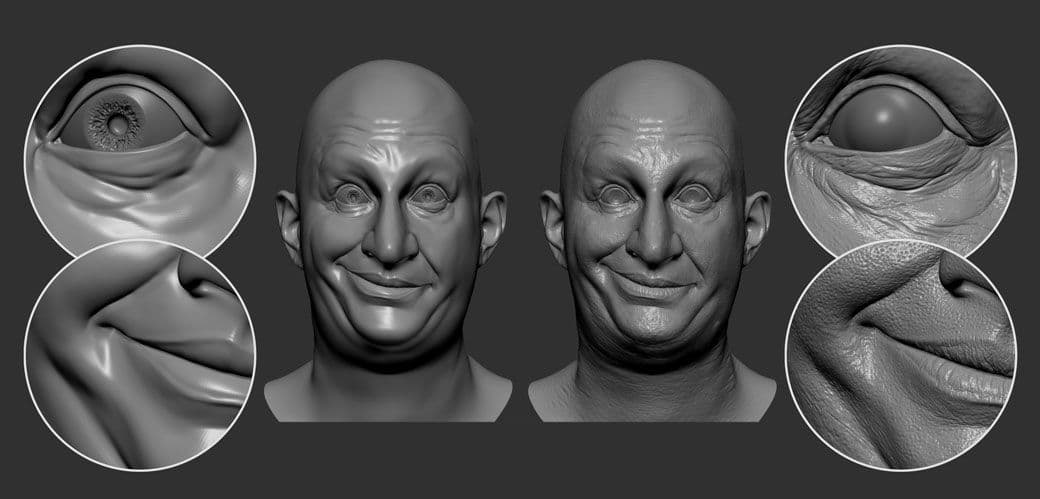
The image above shows the smooth model at level 4 on the left, and on the right, the final and detailed model at level 6. If you get closer the difference is evident, and once you start playing around with the shaders, the roughness of the surface added by the sculpted details is going to matter.
However, if you look at the two heads side by side, you read the FORMS equally. This is why I think is so important to focus on trying to communicate the forms before the details.
Final sculpt and texturing
For the clothes of the character, I used a sphere with Dynamesh to sculpt the jacket. I didn’t spend too much time on the details for this piece as the effect of fabric was going to be produced through texturing using Substance Painter.
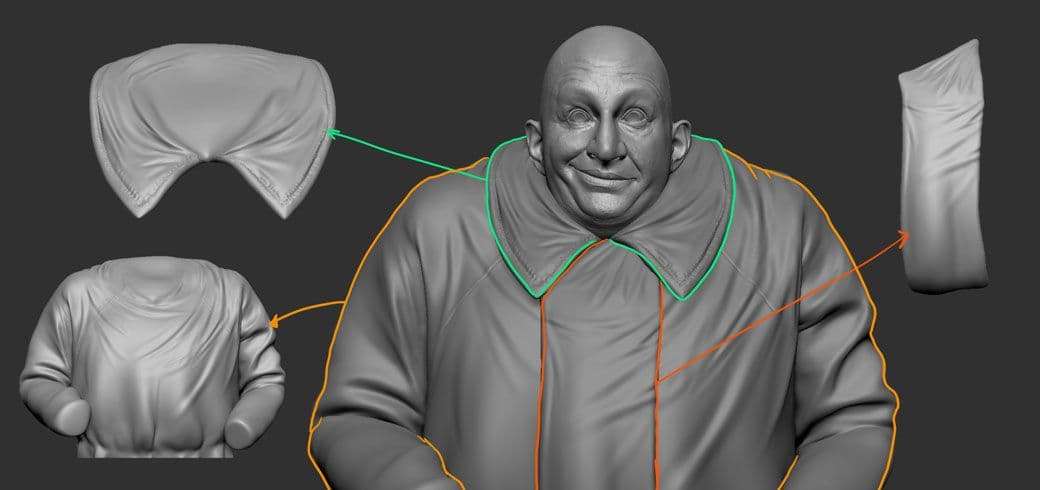
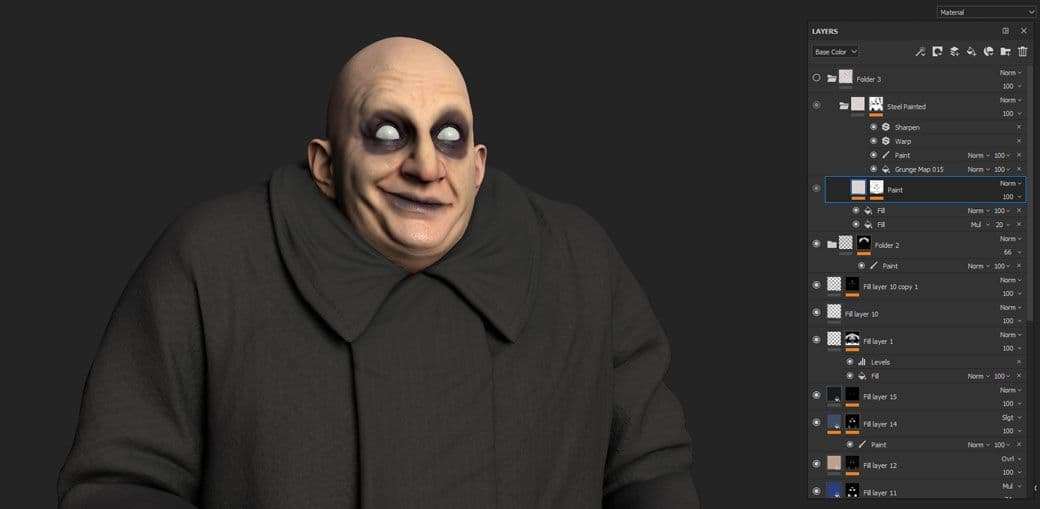
For the textures, I used Substance Painter and manually painted the skin and base color for the clothes. For the face, most of the details where done in ZBrush so I took advantage of that in substance to generate masks based on the cavity map and AO.
Once I was happy with the textures, I exported an 8K map for the head and 4K for the rest of the pieces.
For the final render, all the details in the clothes come from high-res normal maps exported from Substance Painter.
TIP: Treat texturing the same way as sculpting. Start with the main areas of color and work with large brushes, as you add more details on new layers and smaller brushes, the complexity of the texture will develop like the sculpture does in the subdivison level workflow in ZBrush.
Rendering
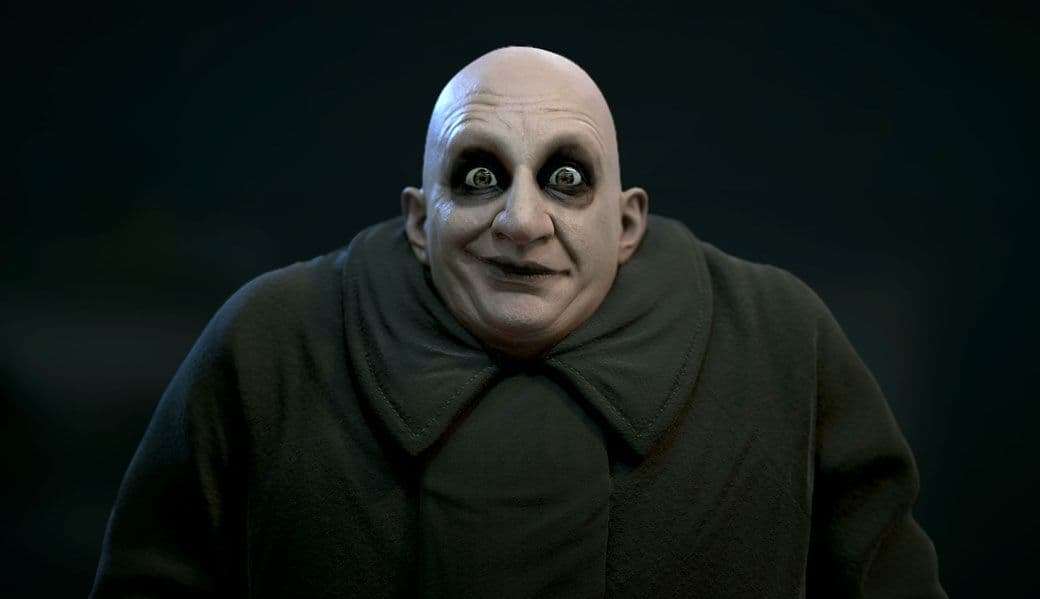
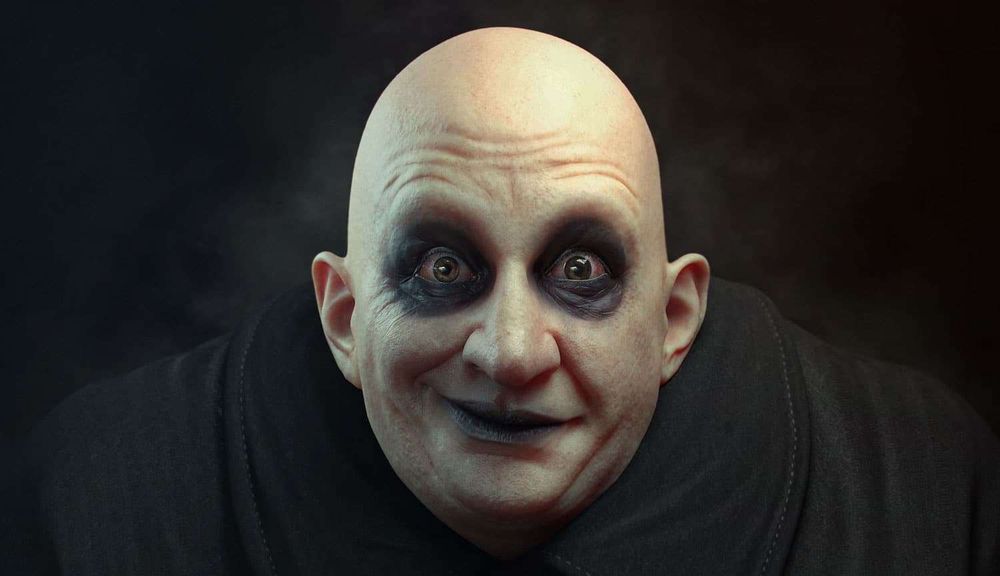
For the rendering of this piece, I used Arnold for Maya. The set up is very simple: I exported a low-res version of the model from ZBrush as well as an 8K displacement map for the head. In terms of lighting, I used an HDR image to get some initial ambient light and reflections.
Then I went with 3 area lights, the primary source aimed at the face from the top, a secondary fill light from the left of the character and bluish bounce light from the right to clearly separate the silhouette from the background.
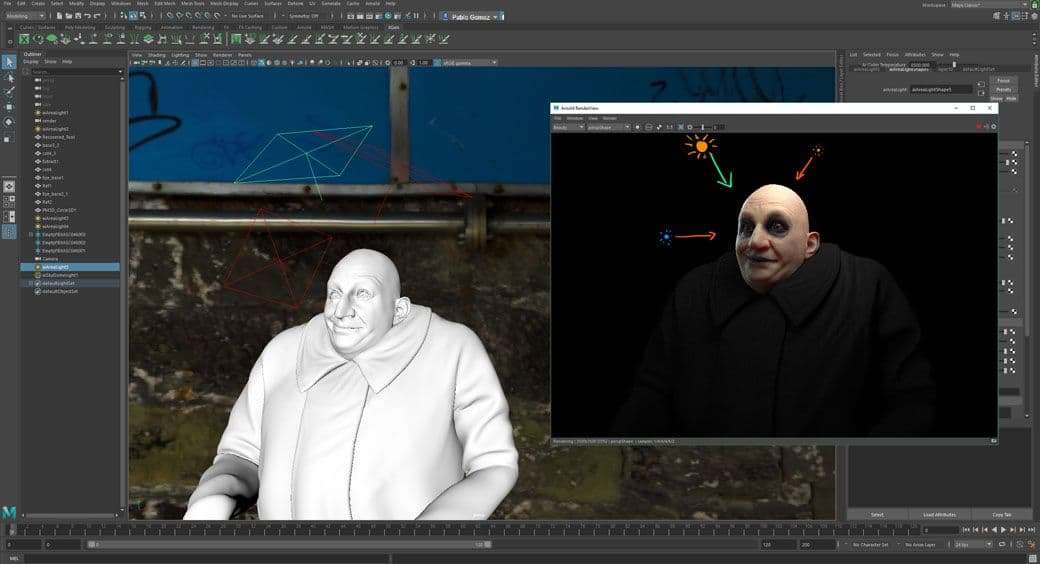
I also played with the intensity of each light so there is a nice fade to dark towards the bottom of the clothes which helps to accentuate the head as the focal point in the composition.
Compositing
For the compositing of this pieces, I took the render from Arnold into Photoshop to tweak the contrast, colour balance, and curves as well as some paint over effects like the smoke and a subtle gradient in the background.


Final thoughts
For the final image I went with Arnold mainly because I hadn't used it for a while and wanted to polish my skills with it.
Ultimately, if you are organized and save your work incrementally, you can go back a few steps and set up the model to render it in other platforms like Keyshot or Marmoset Toolbag.