
The Beginning
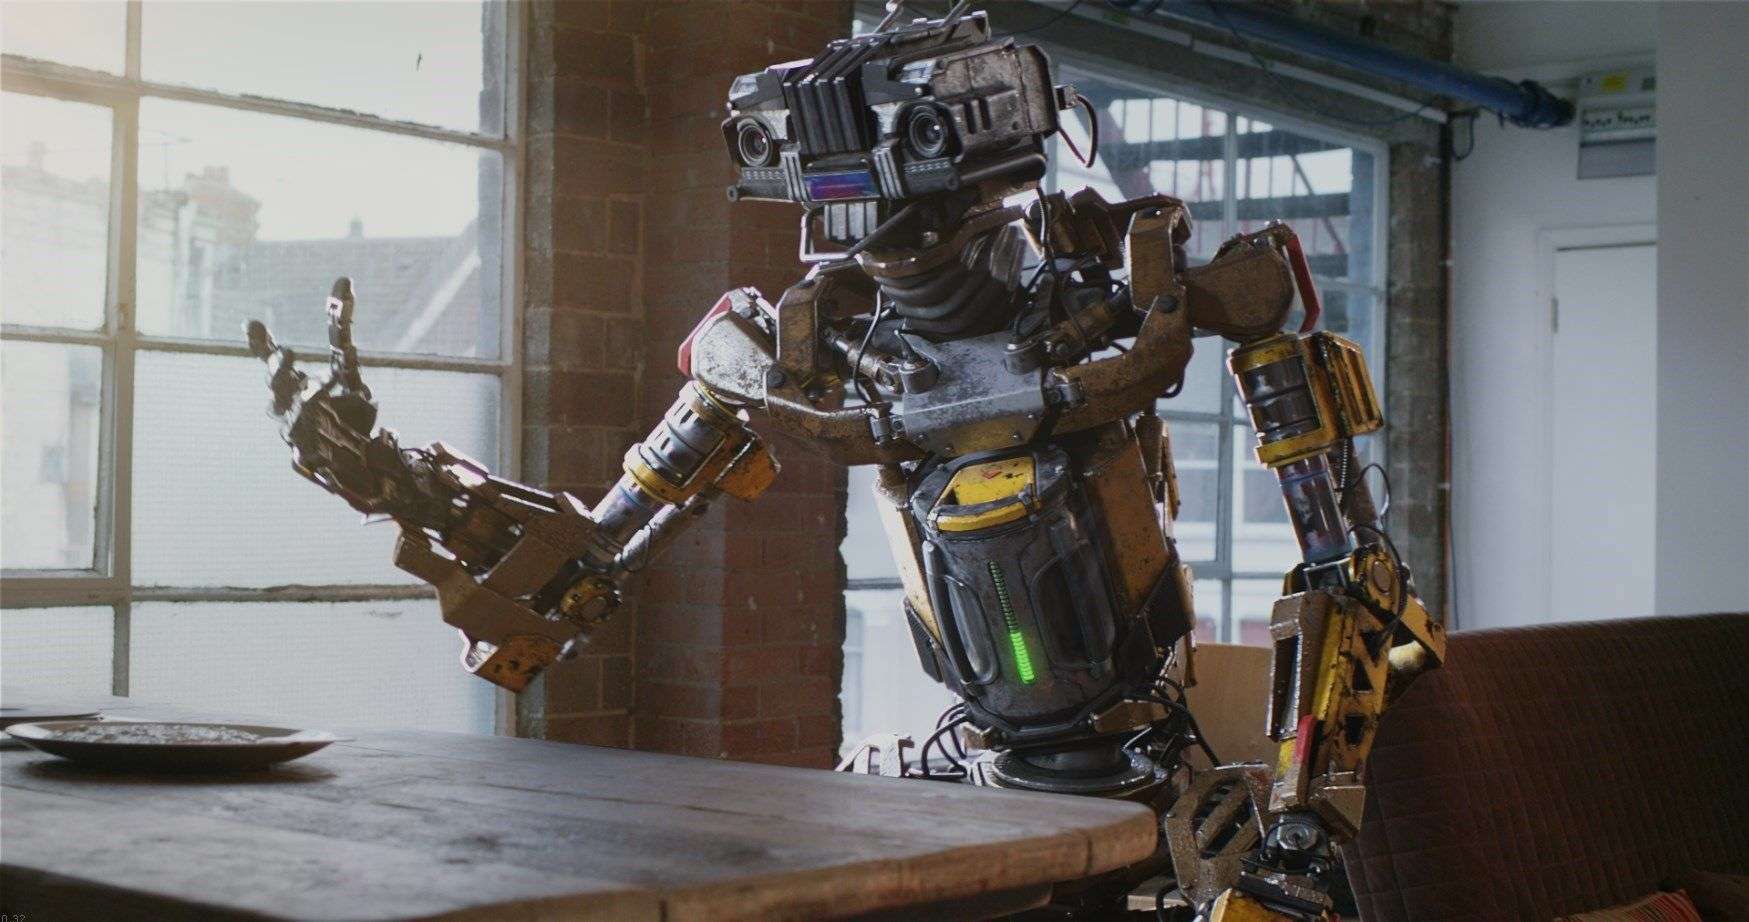
AF26 is a shot that is originally from an independent short film. It was completed as a collaborative effort among artists and producers across the globe online. The original short can be viewed here. I was involved as the lighting lead to set up the hero light rig as well as doing shot lighting for the project.
Fast forward 4 years, I want to make an own iteration of this particular shot, by redoing the lookdev, lighting, and compositing, to put it into my demo reel.
In the blog post, I will share the workflow and some tips & tricks of creating the shot, particularly in the context of lookdev, lighting, and compositing. A bit of background information of hardware and software used as below.
Software: Maya, Substance Painter, V-Ray, Nuke
Hardware: PC with AMD Threadripper 1950x, 32 GB RAM, GTX 1060 (6GB VRAM)
Modeling & Rigging
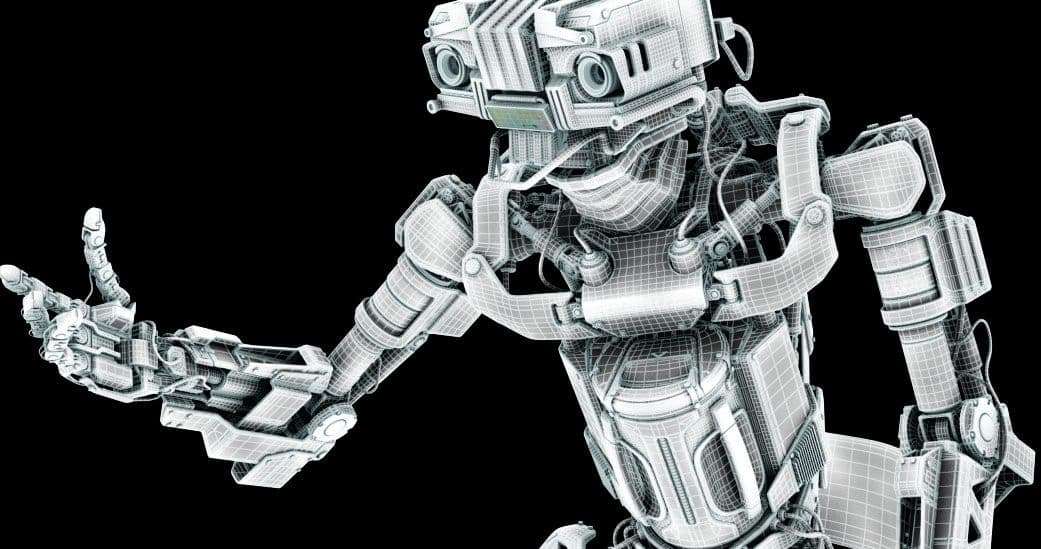
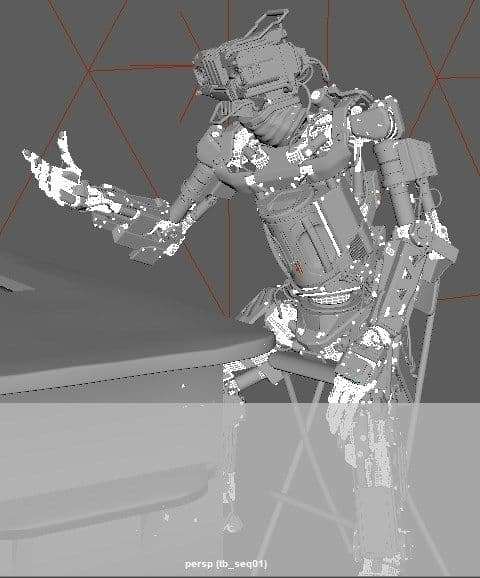
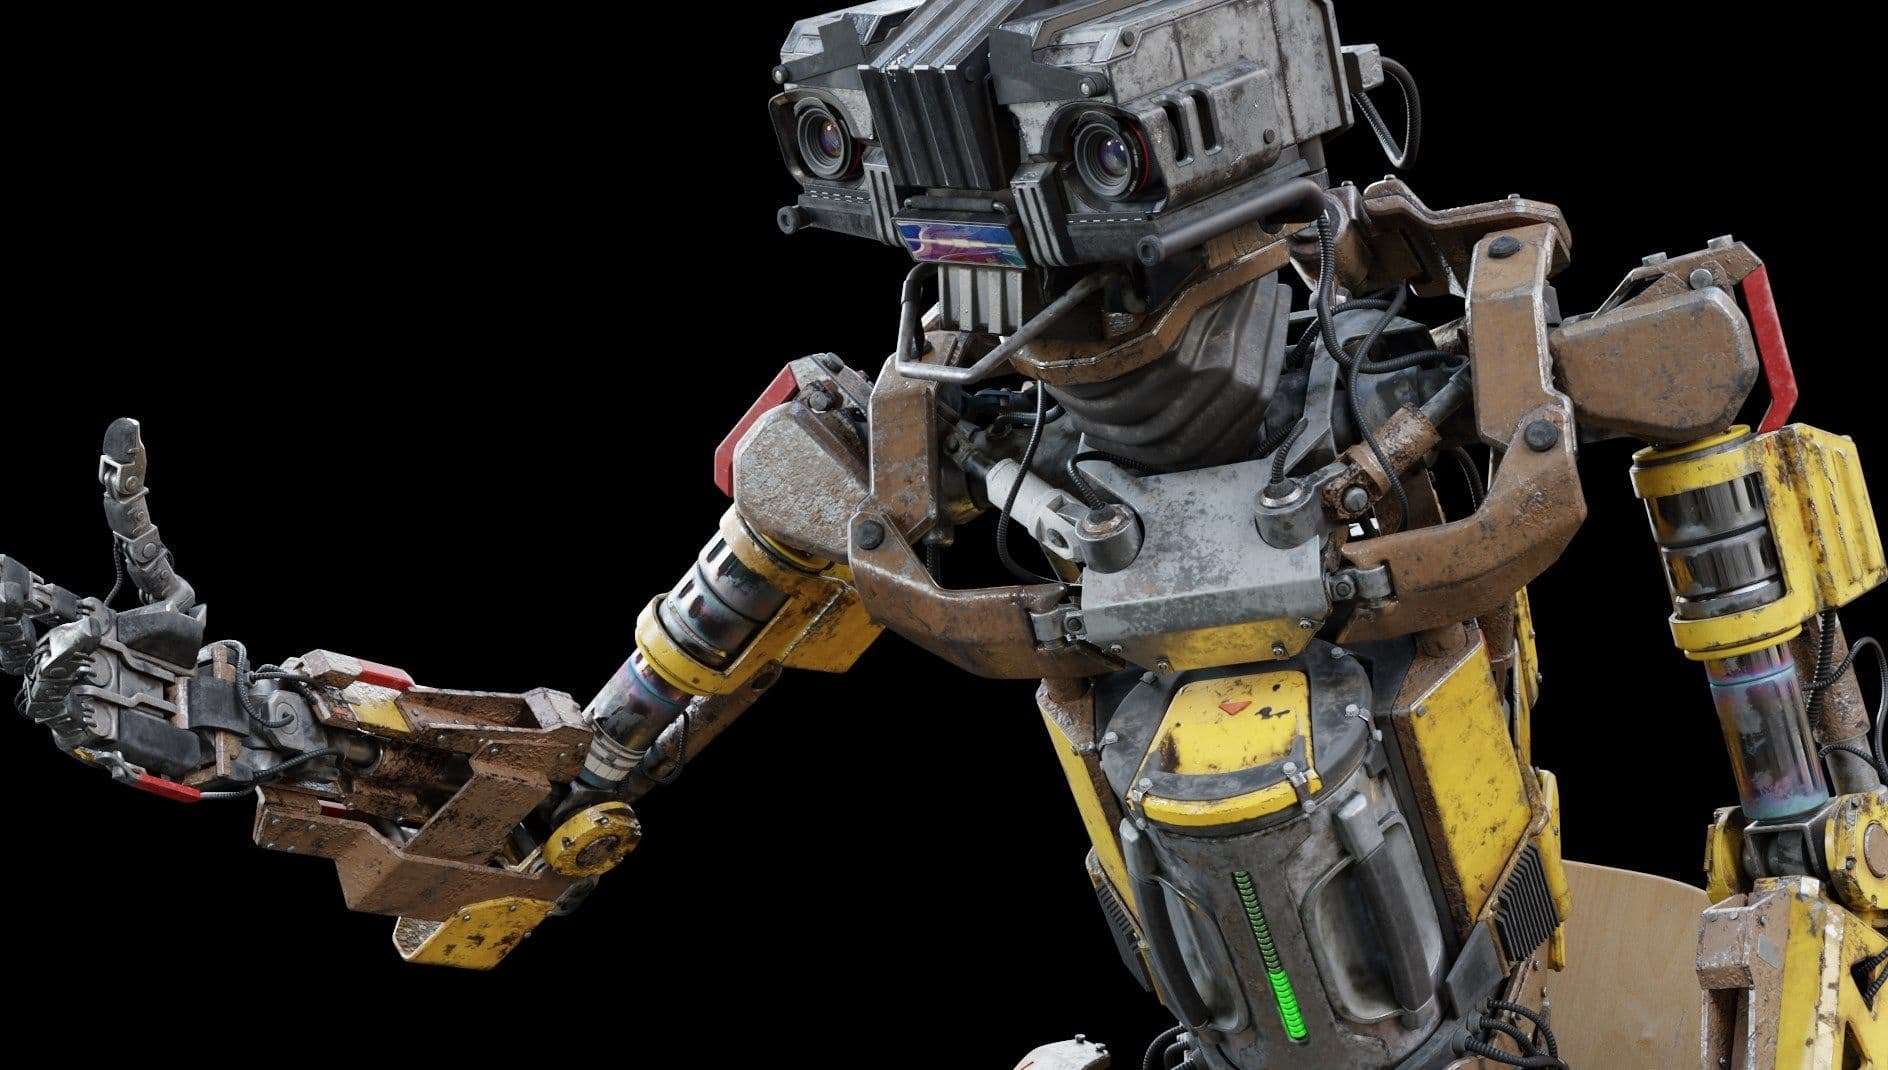
I’ll start referring the character as Robo for clarity. Hats of to Tibor Toth and other modelers who modeled Robo with details to the level of individual nuts, bolts, lens, cables, piston pipes, etc.
Having good surfaces with intricate details really make lighting a character much easier and help sell the character as an robotic character made with real-world parts. The cable simulations and rigged pistons by Brecht Debaene and Radek Szczepanczyk are essential to help ground the realism once he is animated.
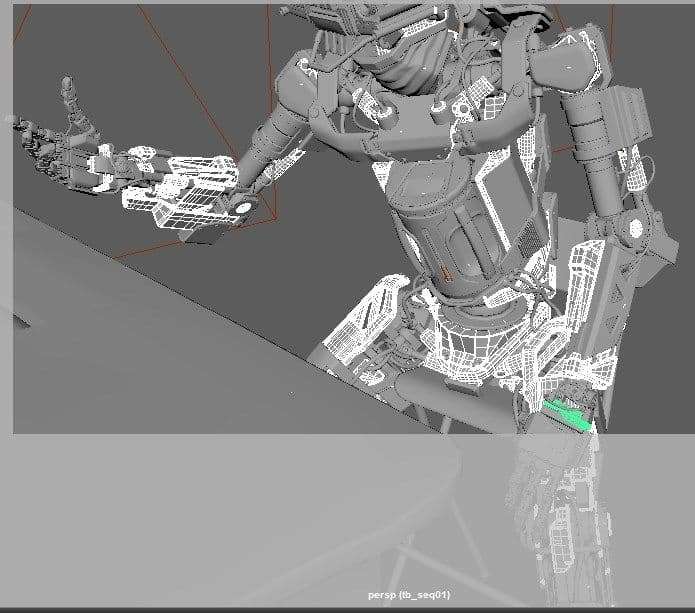
Robo has lots of about 180 UDIM tiles. They are packed based on material assignments and how I would separate Robo into multiple FBX in order to bring him to Substance Painter (referred as SP) for texturing and lookdev.
It is to my knowledge how I can texturing Robo efficiently in SP. In recent versions of Maya, there are a few new or improved UV related features that help lay out UVs into UDIM tiles for Robo with many parts (2766 individual objects in total).
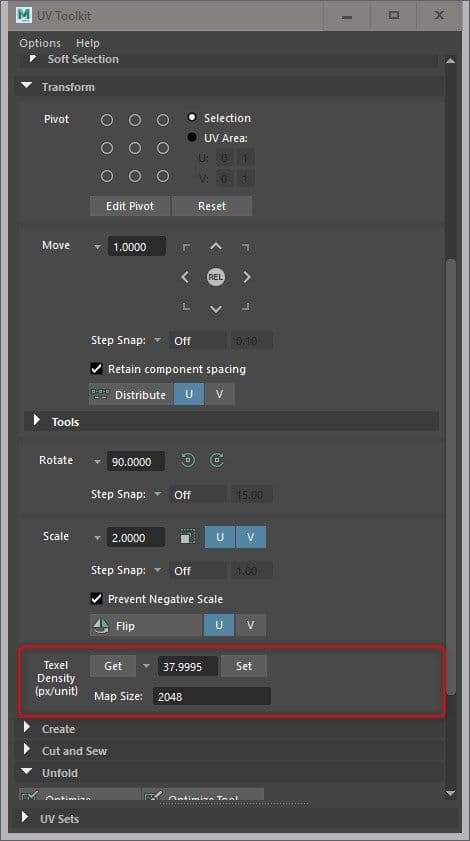
A few key functions that I used the most to quickly layout and organize UDIM tiles are the Layout and Unfold function that are under UV Editor > Modify. I have circle the options that I would tune for UV space optimization and layout organization.
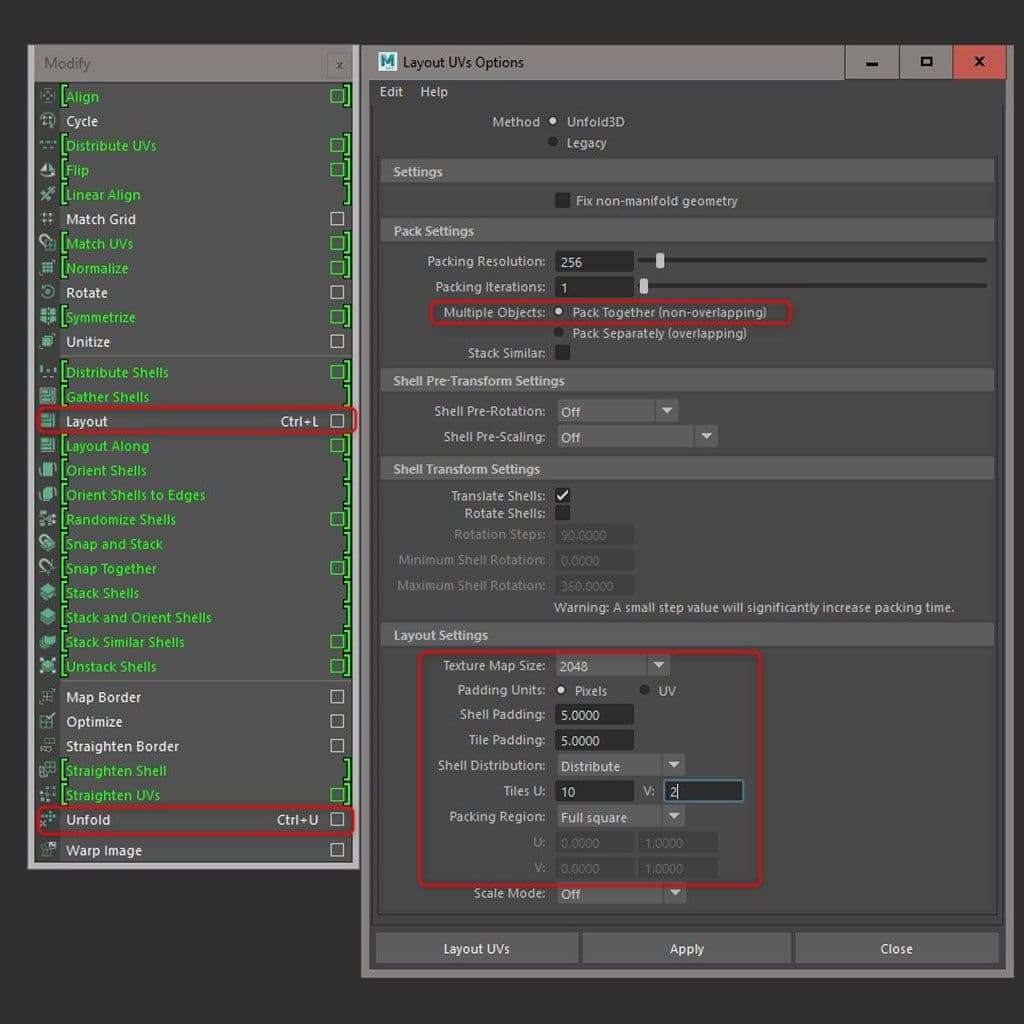
I would first cut seams for hero parts (parts that will occupy more screen space) manually and let Unfold to lay out UVs. Some people would further straighten UVs because but for Robo I found the organic resulting UVs suffices and save me some time.
The Layout function has options to pack UDIM tiles nicely into specific numbers of tiles user specified and how much padding you would like to work with.
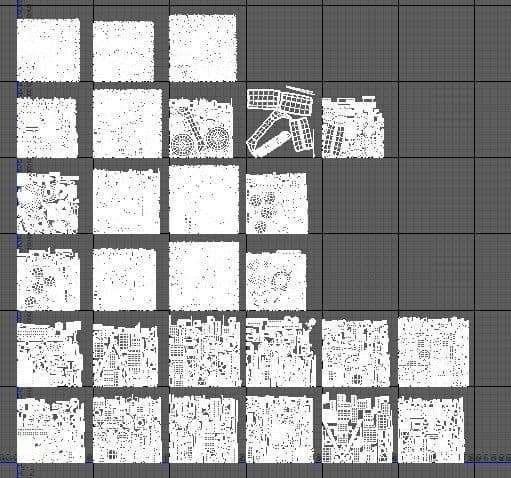
I tried to maximize the UV space while ensuring proper texel density is implemented so details can be added later in texturing. Each pack of UDIMs would use the same texel density value and I use higher value for larger panels/parts that reveal more textural details on screen.
Texturing & Look-dev
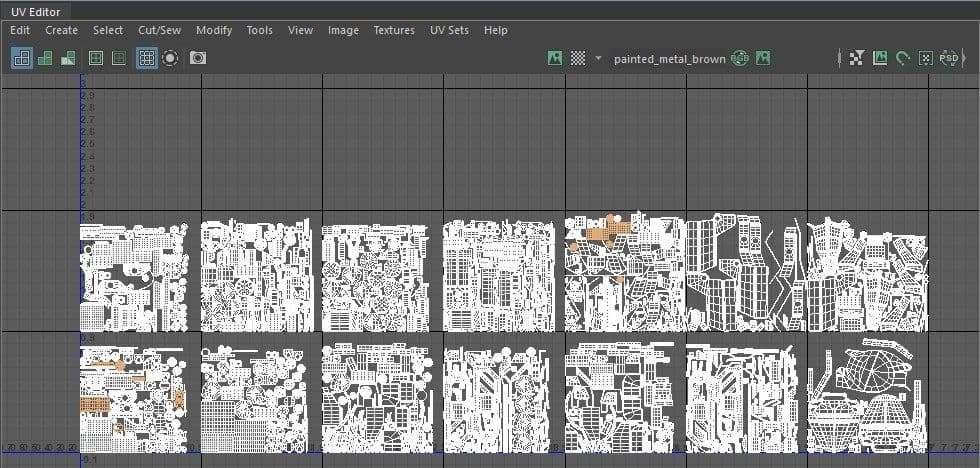
Texturing and lookdev of Robo is an integrated process done in Substance Painter (SP). Robo has 180 UDIM tiles. At the time of texturing Robo, SP hasn’t released 2018.3 that has the Sparse Virtual Texture (SVT) and viewport upgrade that makes working with heavy assets a bit easier.
I have to separate Robo into 9 FBX files and hence resulting 9 SP scenes to be able to texture it with good viewport response. It’s about finding a good balance between the total number of SP scenes and the number of UDIM tiles of each scene that I have to wrangle in SP.
If I separate the Robo into too few parts, each would have too many UDIM tiles or Textures sets as referred in SP that I have to keep switching while painting in SP because one cannot paint across Textures sets yet. On top of that, too many UDIM tiles would simply be too heavy to work within SP.
Hopefully, all this workaround can be tossed behind with the release of the newer version of SP that is supposed to be able to handle much heavier geometry and texture sets.
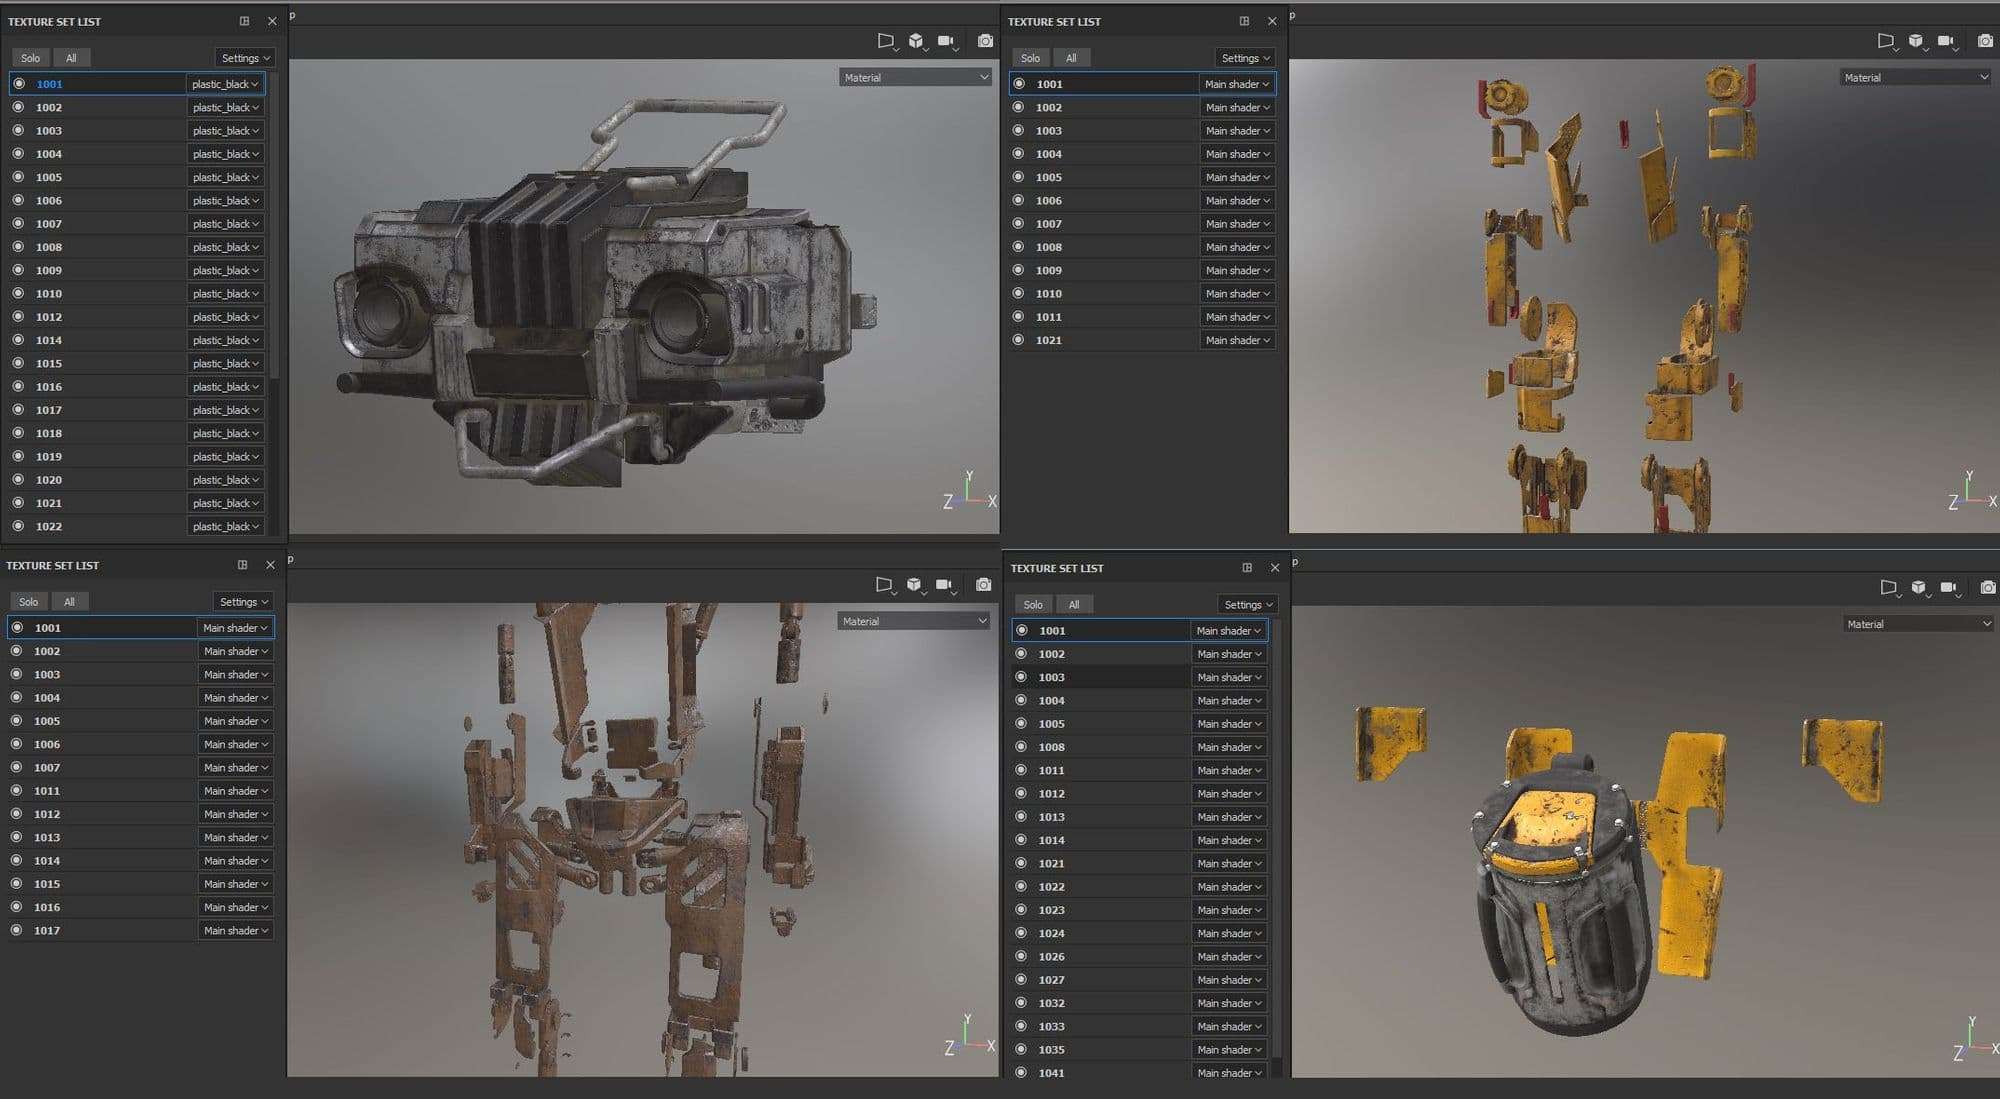
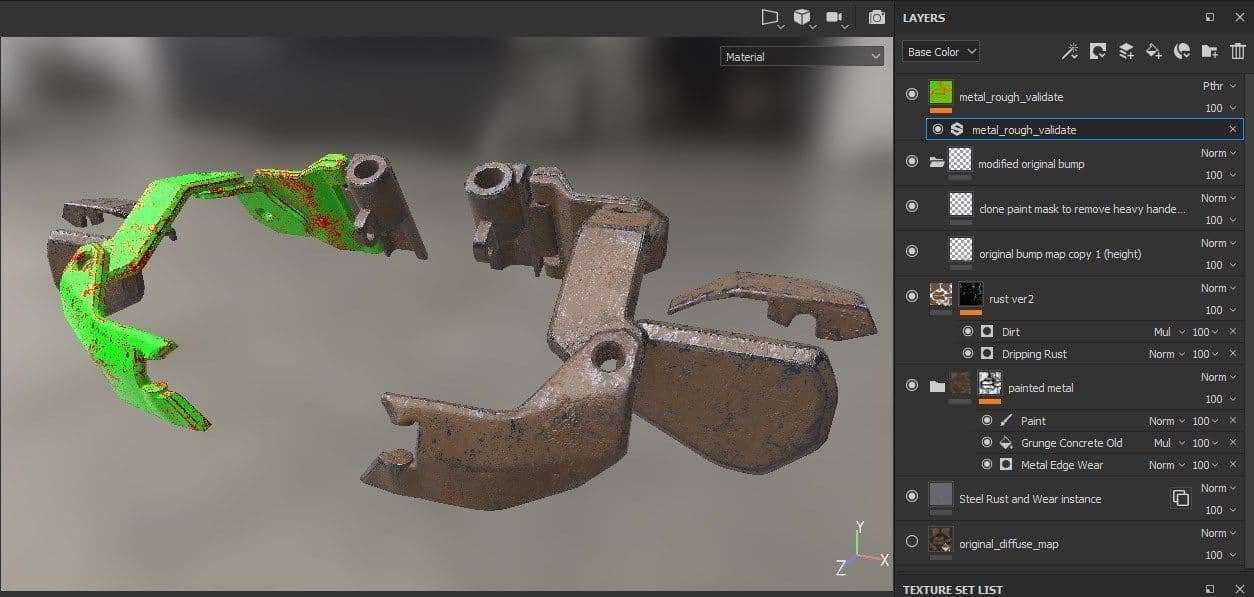
In order to efficiently texture Robo, I break him up based on material assignments, except certain area like the head and the chest battery pack where I would like to see materials in context. That way each SP scene would not have a too many Texture Sets to manage and bog down the system. The number of Texture Sets is ranging from 3 to 30 in 2k resolution.
For texturing hard-surface assets with weathering effects, I would highly recommend going through Substance Academy’s official tutorial here that covers in detail the process and workflow tips on texturing aging surfaces in SP.
With a lookdev contact sheet lying around or a mindset of what material goes on which part of the character, I typically start with a Smart Material preset that more or less resembles what I wanted that part of Robo’s surfaces to be in terms of the type of surface and color and start tweaking each PBR channel and gradually adding layers of weathering elements such as chipped paint, rust, dirt, grimes, dust, etc. I would add those details procedurally with masks and stay in the procedural realm as long as possible until I have to get in and start hand painting it.
The idea is to go procedural for as long as I can and then get in to texture manually at the end. Two main benefits working this way. First, it’s faster to block in lots of weathering effects procedurally. Secondly, the procedural effect is added in non-destructively, meaning I can go back to tweak parameters later on.
The hand-painting part at the end is the final touch to break up the “procedural” look and make the weathering effects more organic. Coming from using Mari for this type of work in the past, it’s very refreshing to work in SP’s real-time viewport.
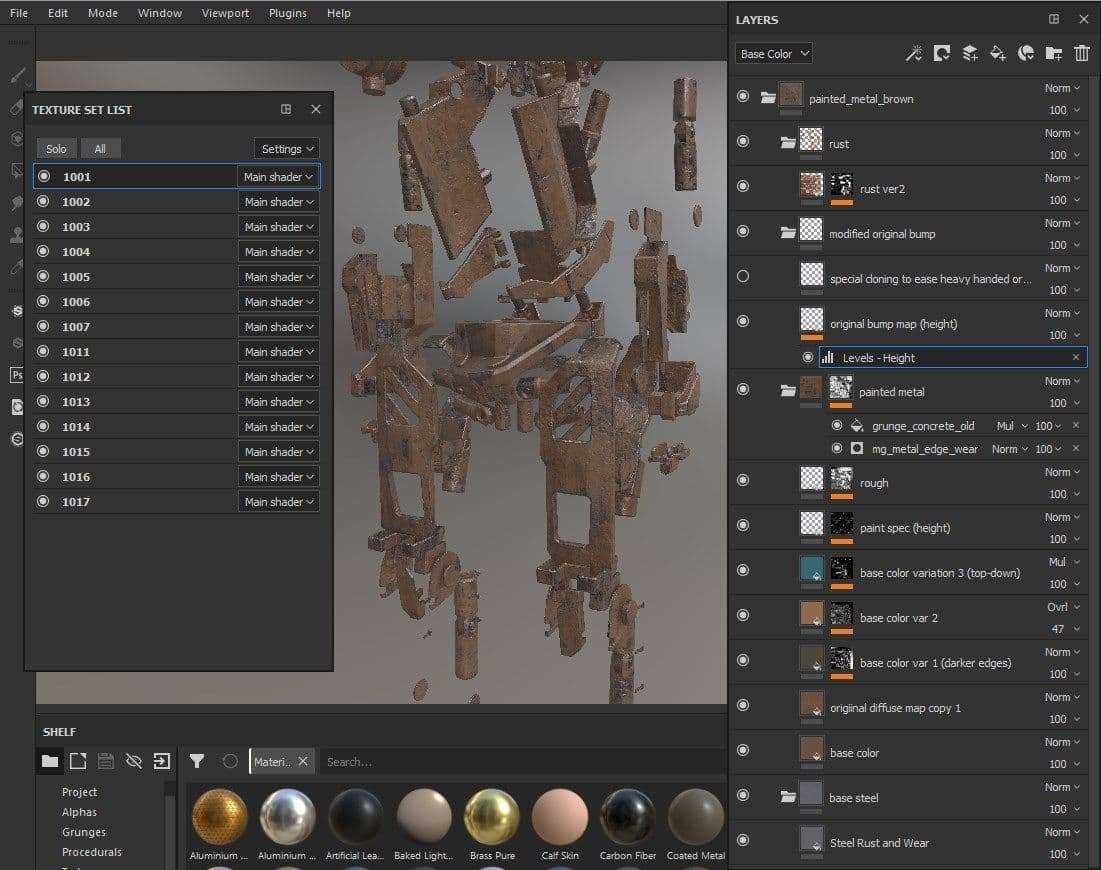
I would also take advantage of SP’s PBR Validation material that is stacked at the top of my layers/groups where I toggle to check if the overall albedo and metal reflectance are within the reasonable range.
I didn’t strictly follow the validation material’s guideline but dial in values based on what I see in the viewport even though the value could be slightly off the suggested range. Still, the validation material is a good tool to ensure the resulting values are not all over the place.
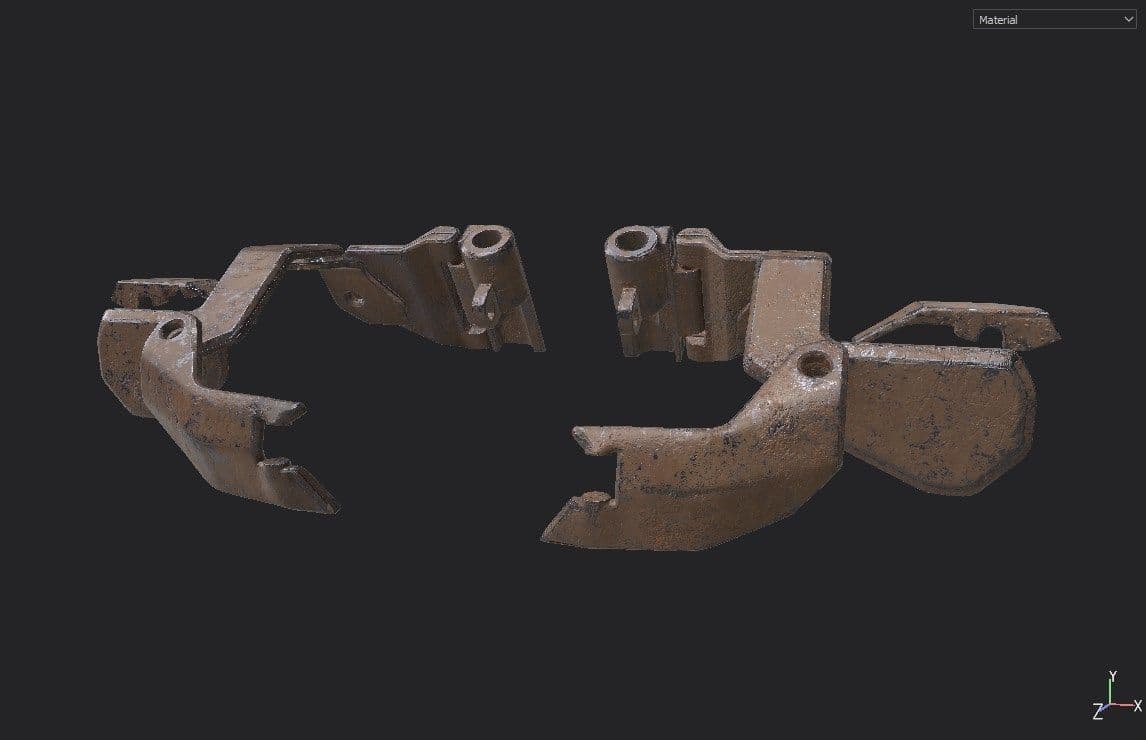
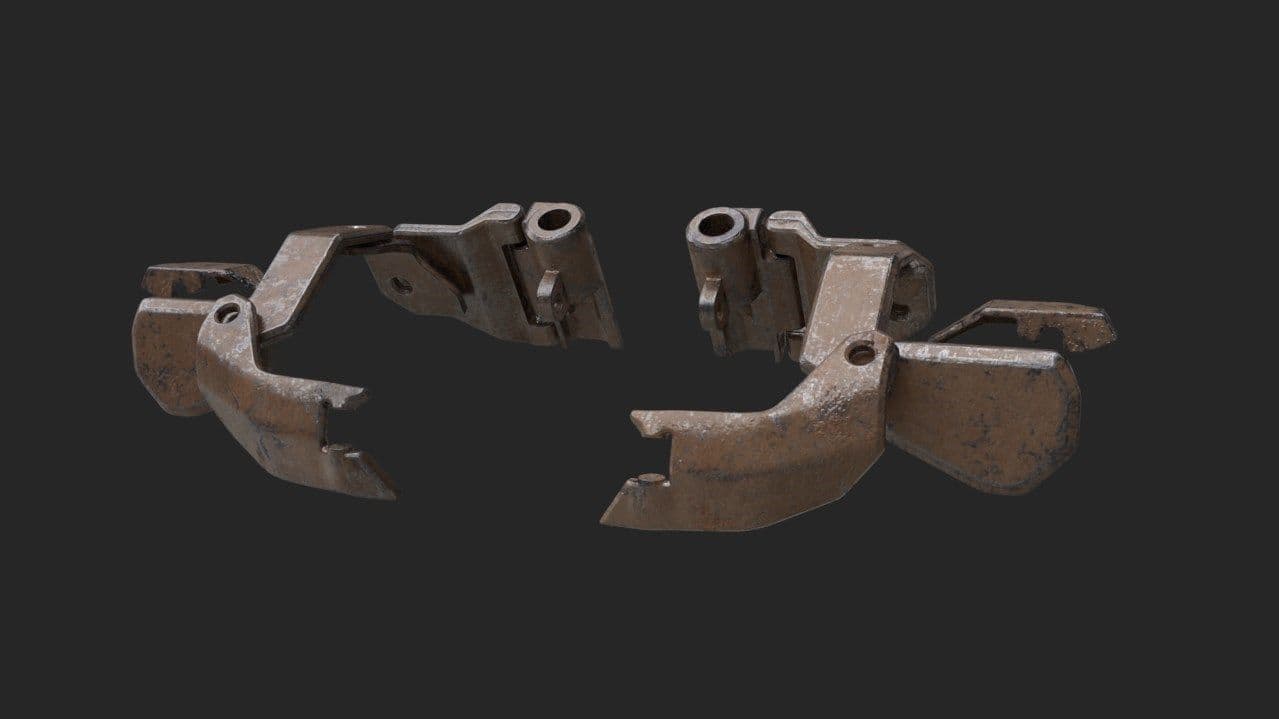
The majority of lookdev is taken cared in SP. I used a few self-made HDRs that are calibrated and neutralized as the base of lookdev environment. The idea is to take out the lighting variable during lookdev so I can focus on texturing and tweaking material properties in SP.
Those calibrated HDRs can be used in both SP and offline rendering (in this case Maya VRay) to ensure the lookdev is conducted under consistent lightings and to validate the look between SP and Maya. As both the real-time viewport in SP and V-Ray are doing PBR based rendering, I would know the lookdev-ed asset would come out with consistent looks and plausible results out of the lighting and rendering.
Regarding calibrating HDR, I have previously written a couple of blog posts here and here about the process. Feel free to check them out to dig deeper on this topic.
Once textures are exported from SP, it’s fairly straightforward to connect the textures to corresponding slots of a standard VrayMtl or VrayAlSurface in Maya. The results between SP real-time viewport and V-Ray output are visually close enough most of the time for my need with a mindset that it will provide enough room to tweak the look in post.
Minor color corrections and tweaks in Maya Hypershade at this stage to only fine-tune the look. A couple of benefits of letting SP take the heavy-lifting of lookdev are:
1. I can rapidly dial in the look in SP’s real-time viewport that has great fidelity of approximating how the final offline rendering output would look like.
2. the resulting shading network in Maya Hypershade is simpler and easier to extend and debug the shading, if needed.
Lighting & Rendering
The lighting starts out from the HDR shot on-set as the base lighting. The set HDR wasn’t ideal mostly due to the light fixtures used on-set are all clipped in the HDR during the capturing process, hence not representing the full dynamic range of the set lighting. Nor was there a gray and chrome ball photo taken on-set as references.
With what is provided from the integration team or set vfx grew, I need to exercise observations and some artistic choices. It happens in productions and will be the limitations I have to work around as a lighter. What’s good is at least the lights used on the set and their rough direction in the context of the room and set piece are documented in the HDR.
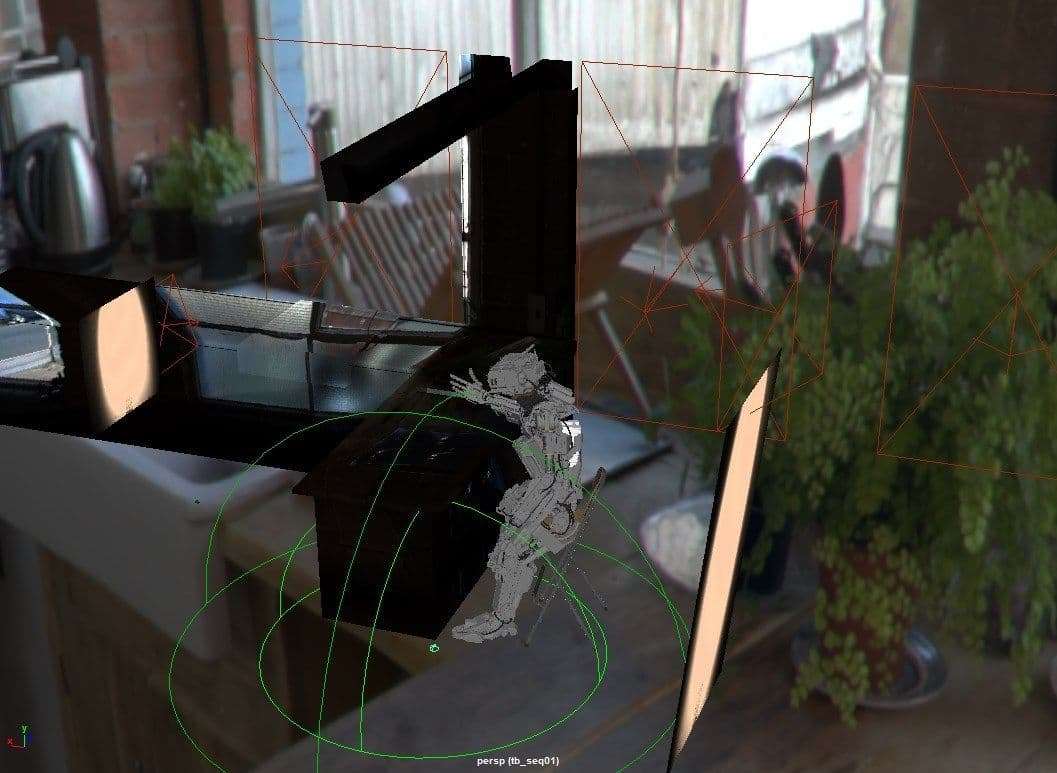
With the base lighting provided by the set HDR, a few area lights representing the key lighting coming from screen left windows are added. Kick and fill lights are placed to bring out a bit more shape for Robo. Being able to work in IPR and dial in the size and position of fill and kick lights to have certain body parts pick up interesting reflections while keeping it natural and intuitive was the key. An area light is also light-linked to Robo’s eye lenses.
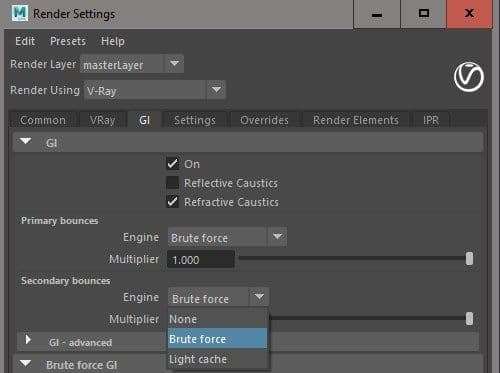
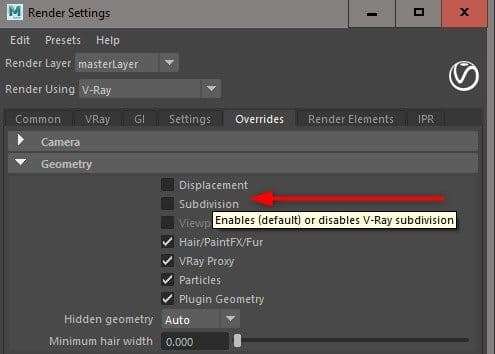
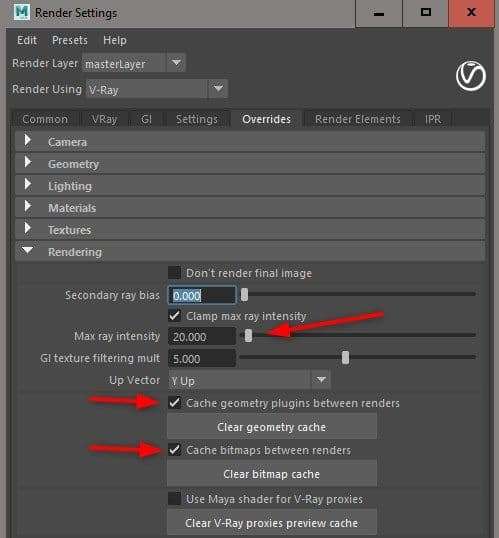
To speed up the lighting iterations, I typically turn off secondary GI bounces, subdivisions, displacement, and render elements to get quick feedback in V-Ray frame buffer (VFB).
Once I have a version of lighting blocked in, I would flip on those options and send the shot to render overnight with a setting that is acceptable in terms of noise and able to check the result in the morning for next iteration.
Several setting in screenshots below show options I typically use to get faster feedback in IPR.

Another interesting concept I used is implementing the filmic LUT workflow that I came across here. With a proper LUT in VFB, It allows me to push the lighting without burning out highlights and see more details in shadows.
I highly recommend to read on about this topic on Light Collab’s post and Jeremy Selan’s Cinematic Color white paper here.
In my experiecne, it is totally worth it to spend some time setting up the workflow in your choice of rendering and compositing package to take full advantage of this.

In terms of rendering output, typical AOVs (render elements) are set up including lighting AOVs for rebuilding the beauty in post and utility AOVs such as mattes and world position for color corrections and relighting in Nuke.
Compositing
Compositing for the shot is a straightforward process and I follow some rule of thumbs as below.
- matching blacks between the plate and CG on per R, G, and B channel basis.
- matching the highlights
- balance the mid-tones and here I exercise lots of artistic choices in terms of tweaking the hue of yellow and brown metal of Robo.
- match the softness and depth of field appeared in the plate.
After that, I would start adding photographic elements to introduce lens imperfections and photographic effects such as flares, distortion, vignette, subtle camera shakes, etc. Also, allow some light-wrapping and volumetric effect from the dominate screen-right light through the window.
For understanding and adding photographic elements to a shot in Nuke, I would highly recommend two great resources: Pluralsight’s Photorealistic Camera Lens Effects in NUKE course and Robert Nederhorst’s ‘ARCHETYPE' VFX BREAKDOWN Gnomon course.
Finally, I put a bit of color grading to sweeten up the shot. I learned several good tips and tricks from Hugo’s Grading basics in Nuke.

Here is a shot breakdown video to quickly show the compositing breakdown.
That’s all! Thanks for reading and I hope you enjoy it and learn a couple things on the way. Every single personal project is a learning and R&D process that I take the chance to explore techniques that I have not used and that’s why I enjoy doing it so much.