Concept
I started everything by gathering many references to guide my vision of the creature. I wanted to make a troll, and I was very lucky on that part because there are many great art pieces of similar creatures that I could base myself in. I used many references from the Lord of The Rings movies and games, like Middle Earth: Shadow of War, for example.
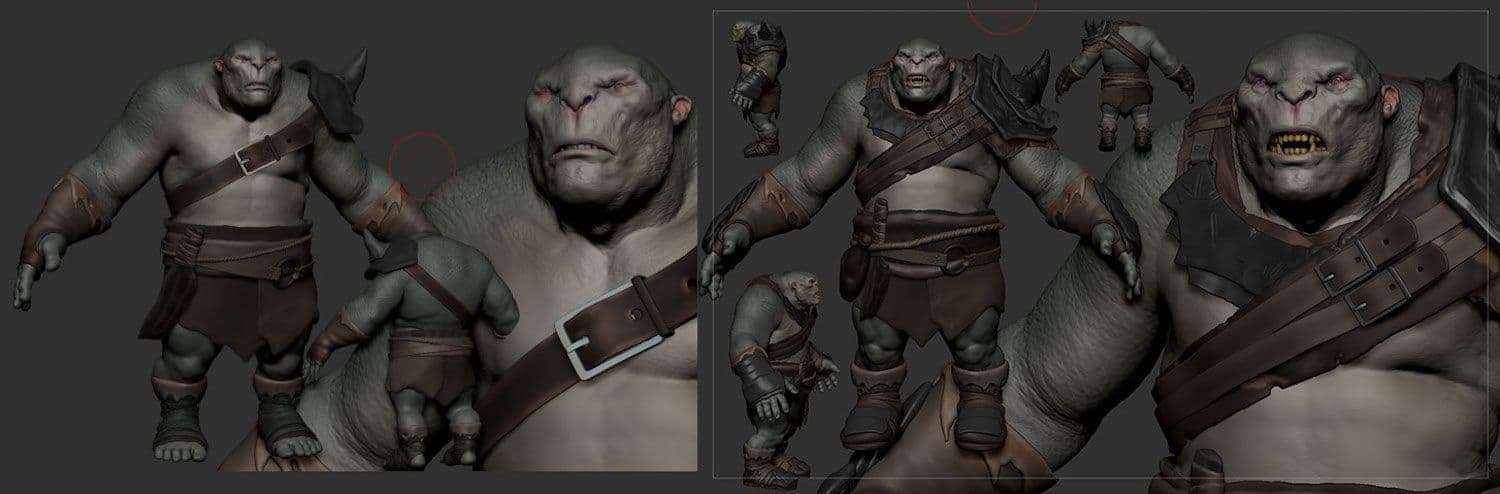
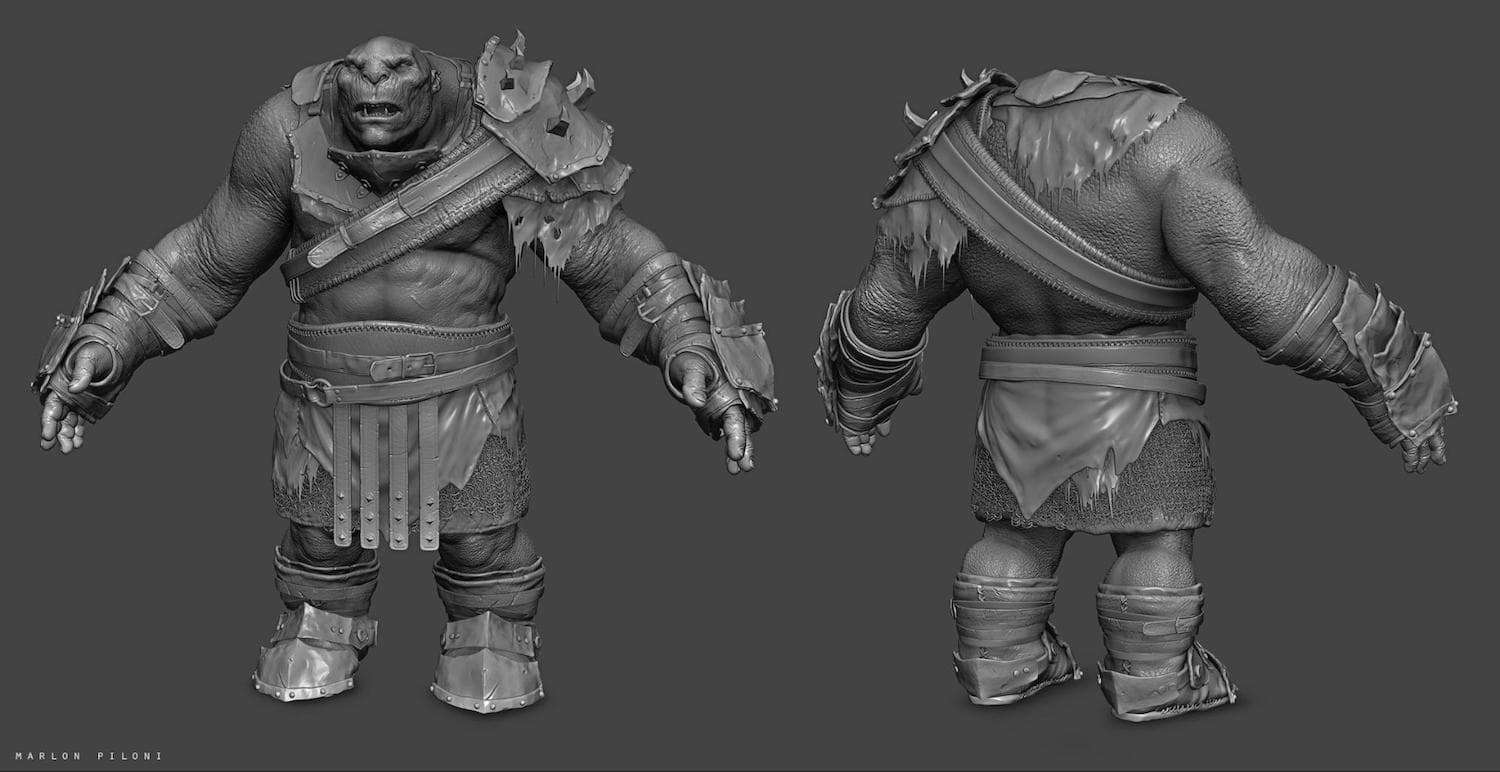
I am a sculptor so my first steps, after having my semantic panel, was going for a quick sculpt. I started focusing for a while in the body of the creature, and I changed many times the forms, playing with the silhouette and expression on the face. My goal was to make it with stylized proportions but with a touch of realism and a detailed skin so it could be looked by very close and be interesting in the same way.
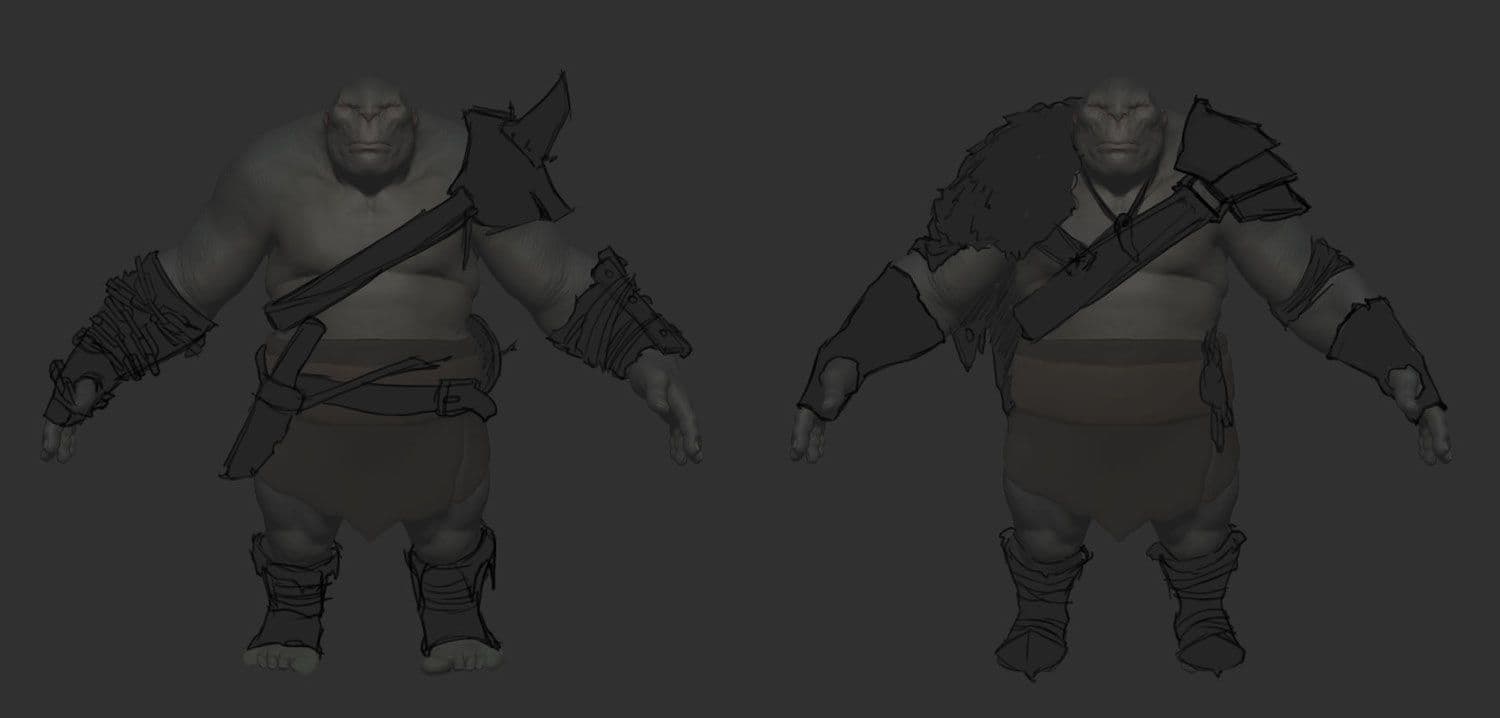
When I got a little more confident of the shapes of the body, I started concepting the armor pieces and assets that it would have. My process on that is basically be jumping from ZBrush with quick sculpting into Photoshop with paintovers, so I can start organizing the pieces always looking for the silhouette and forms. Sometimes is easier to see quickly some big variations by painting over it, and that way I can have a better understanding of what I will have to do on 3d in order to get to the end result.
Sculpting
Big changes at this point was still a good thing. And I kept changing the forms and designs until the low poly part comes along.
For now it was just about designing a character that could fit into a game as a boss, or a simple creature, but with some personality to it and by the end I wanted to have that realistic textures in order to make the character believable.
I still was doing paint overs to figure out how I wanted some designs, like the shoulders pads for example. I was also playing with some simple colours, I like that to start getting a vision of the final idea.
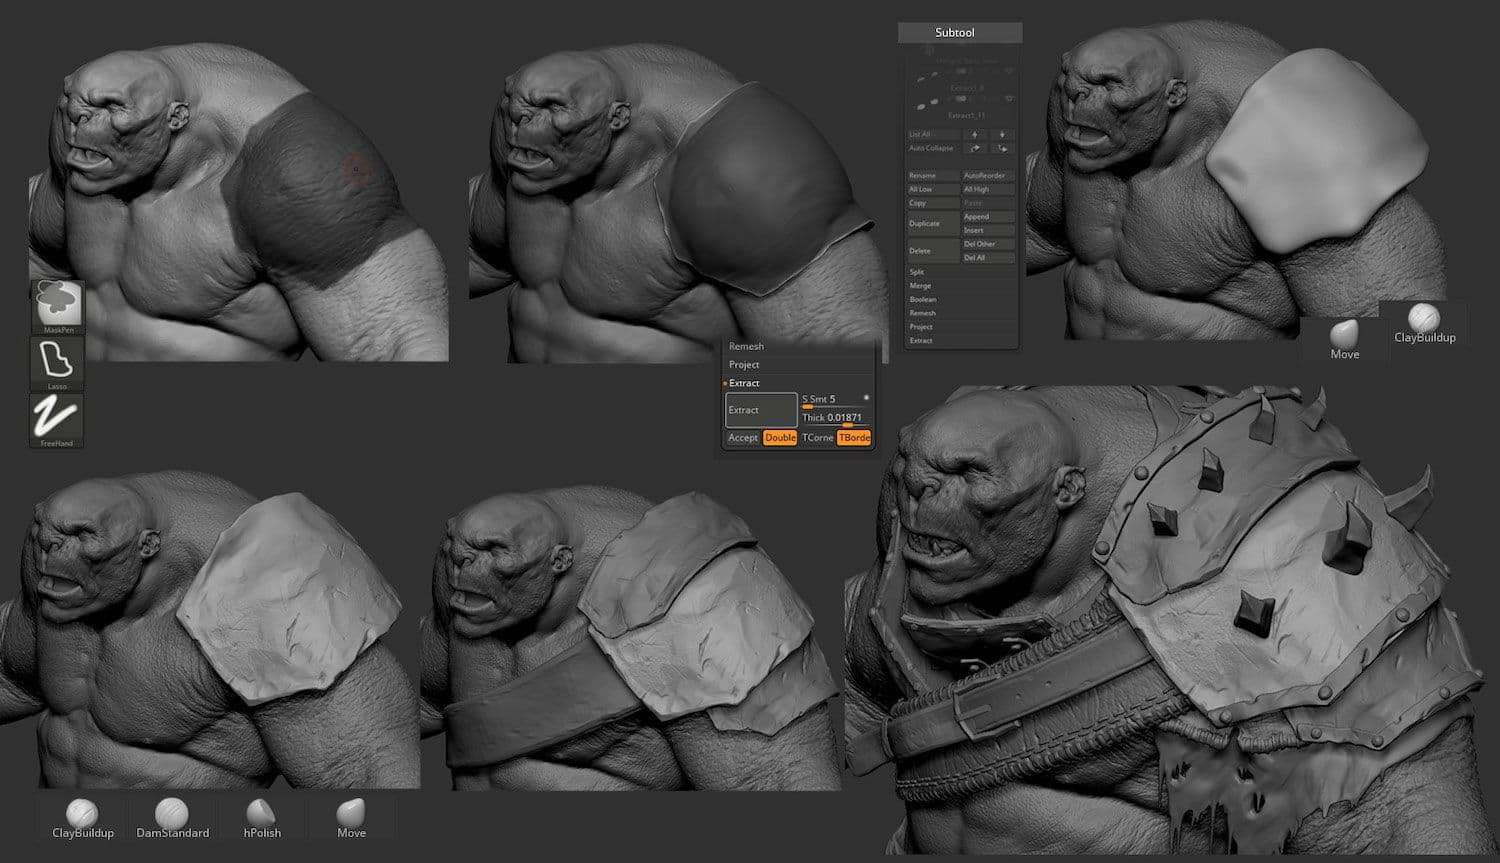
For sculpting the assets, I was able to sculpt most of it inside ZBrush. The armor that the character is wearing would be made of very rough pieces of metal, and old and very used leather.
Substance made my life easy on that point, it is very simple to test and apply different variations on the materials.
That way I was able to extract and model by hand the armour pieces. Using simple mask tools in ZBrush I designed the basic shapes and extracted pieces from the body, in order to model it and detail by hand using a lot of move and clay tools.
I sculpt using some of the very basic tools in ZBrush, like clay buildup, move, damstandart and a few others. I applied this technique in many parts of the model, extracting and sculpting is very powerful for concepting and keep things organic.
When I got closer to the end result I wanted for the sculpture. Was about time to start working the low poly mesh in Maya.
Low Poly
I made all the retopology into maya, using the modelling toolkit. I was bringing the decimated pieces into maya and retopologizing by hand.
Some other pieces like the belts for example, were made into maya, and sent to ZBrush in order to make the high poly details.
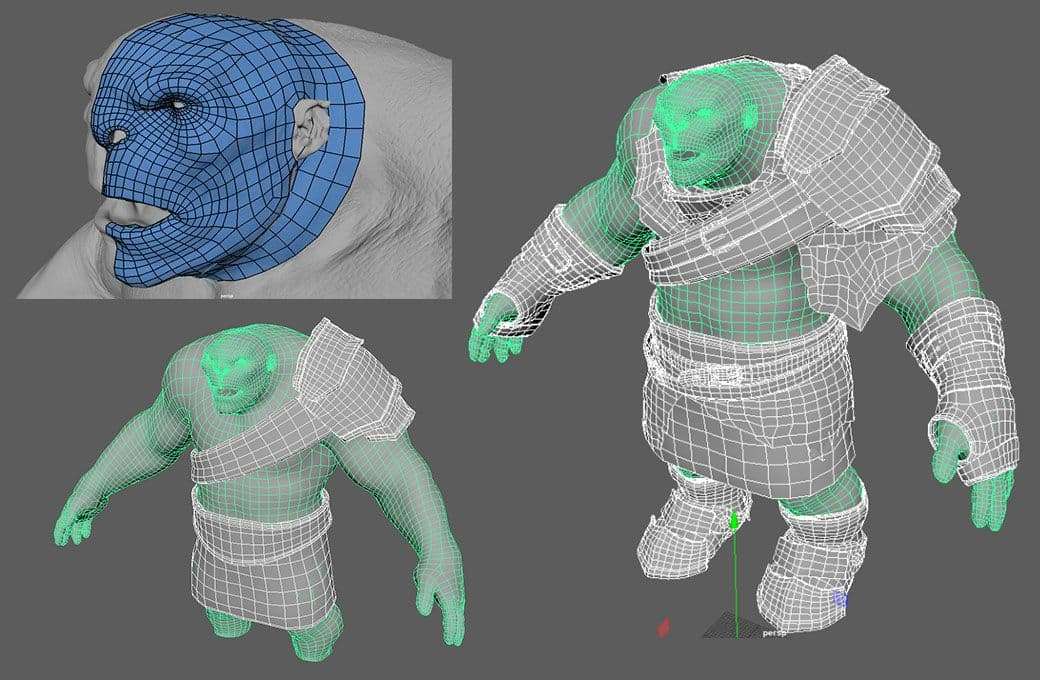
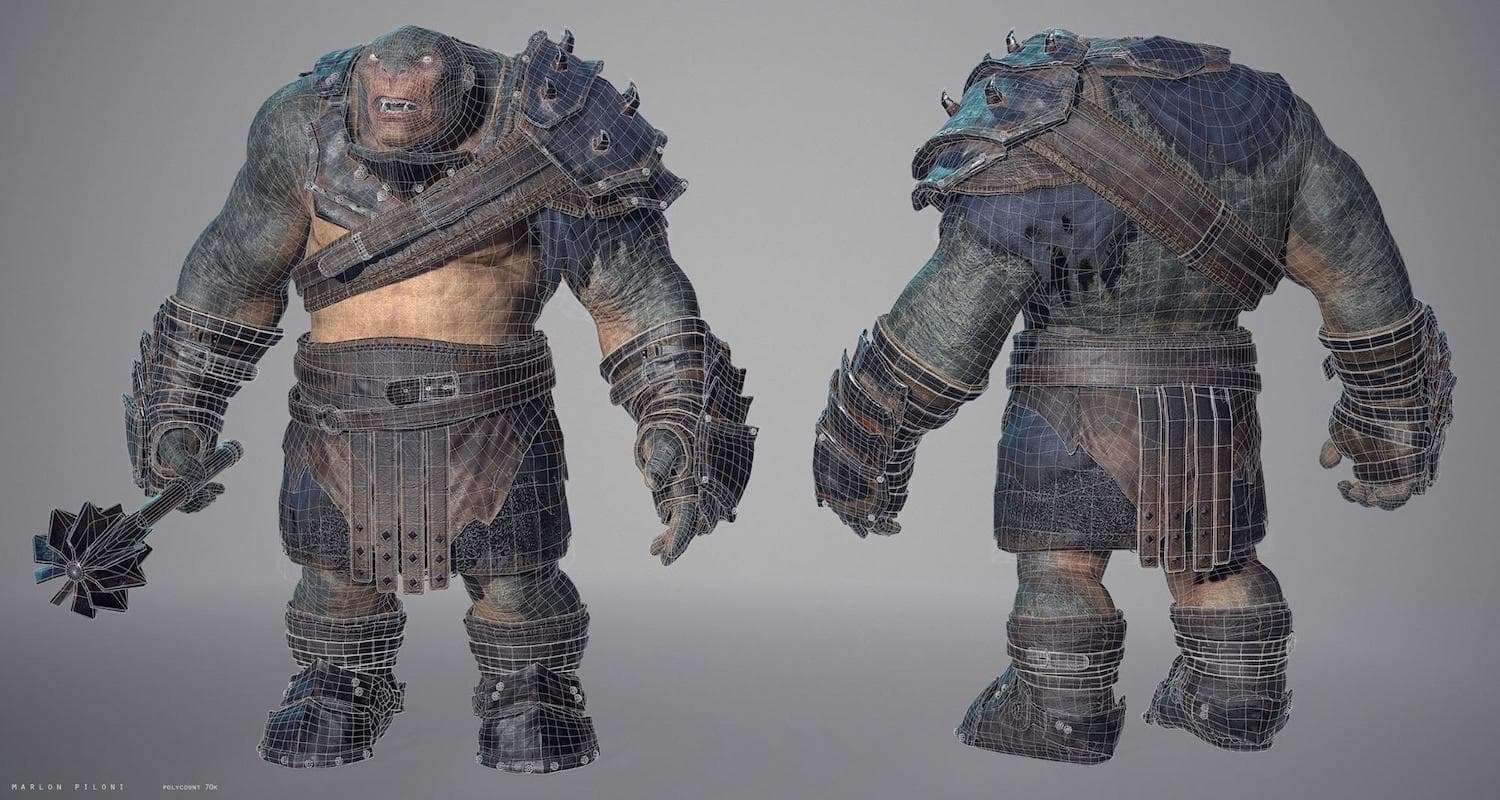
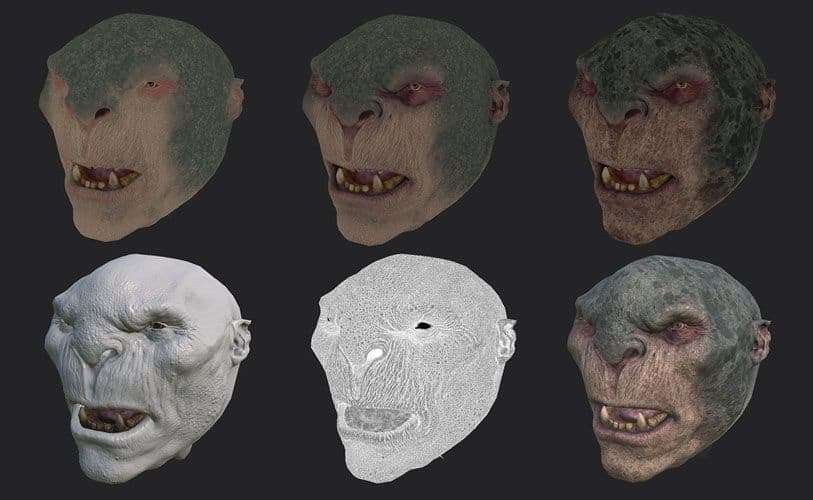
That process took a while, until a got the final result on the low poly mesh. I used the time to think about the UVs and organize myself for the texturing work. The final model has about 70k triangles and was divided in 5 different UVs.
Texturing
With the low poly mesh ready, was time to work on the textures. I utilized Substance Painter for this part of the project, the program gives a lot of facilities when changing the UVs and building up the texture.
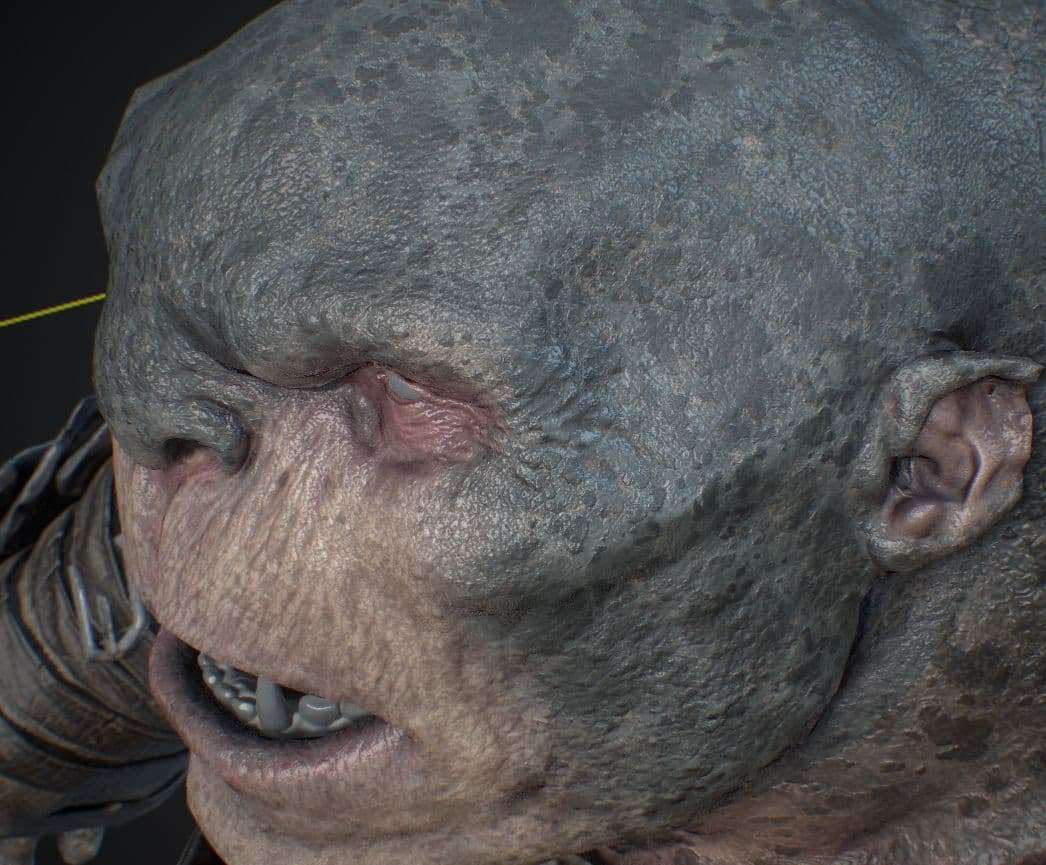
I used some time to bake everything before start adding any information, and for that, I had to go back to ZBrush a few times to adjust things the way I wanted. On the face for example, I increased some details so they look better on the normal maps.

When I had a decent result with the bakes, I moved on to test some colours and materials. Substance made my life easy on that point, it is very simple to test and apply different variations on the materials.
Basically I blocked out the colours and textures, and then I destroyed and added colour variations on strategic points.
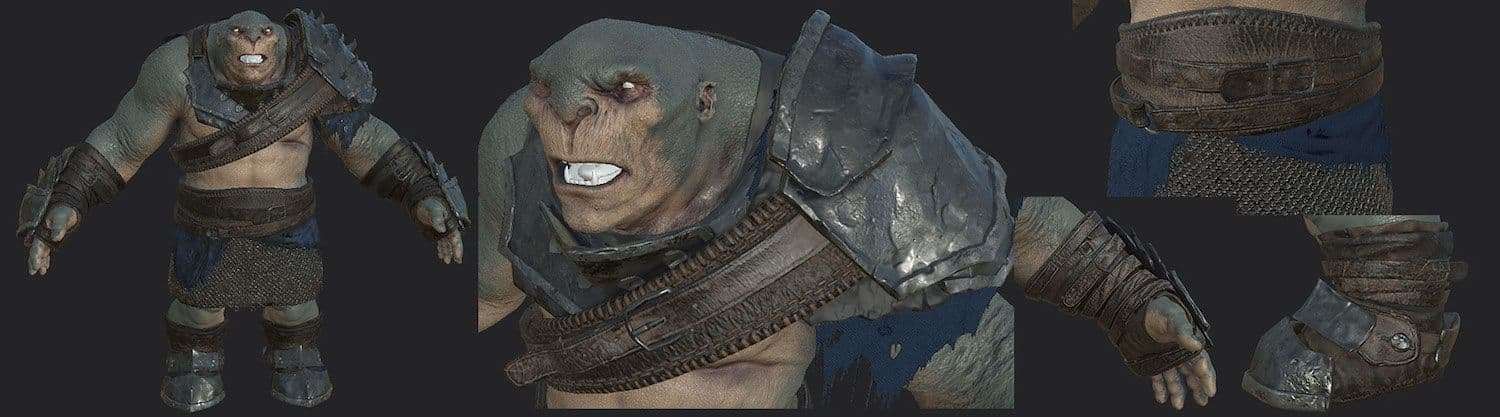
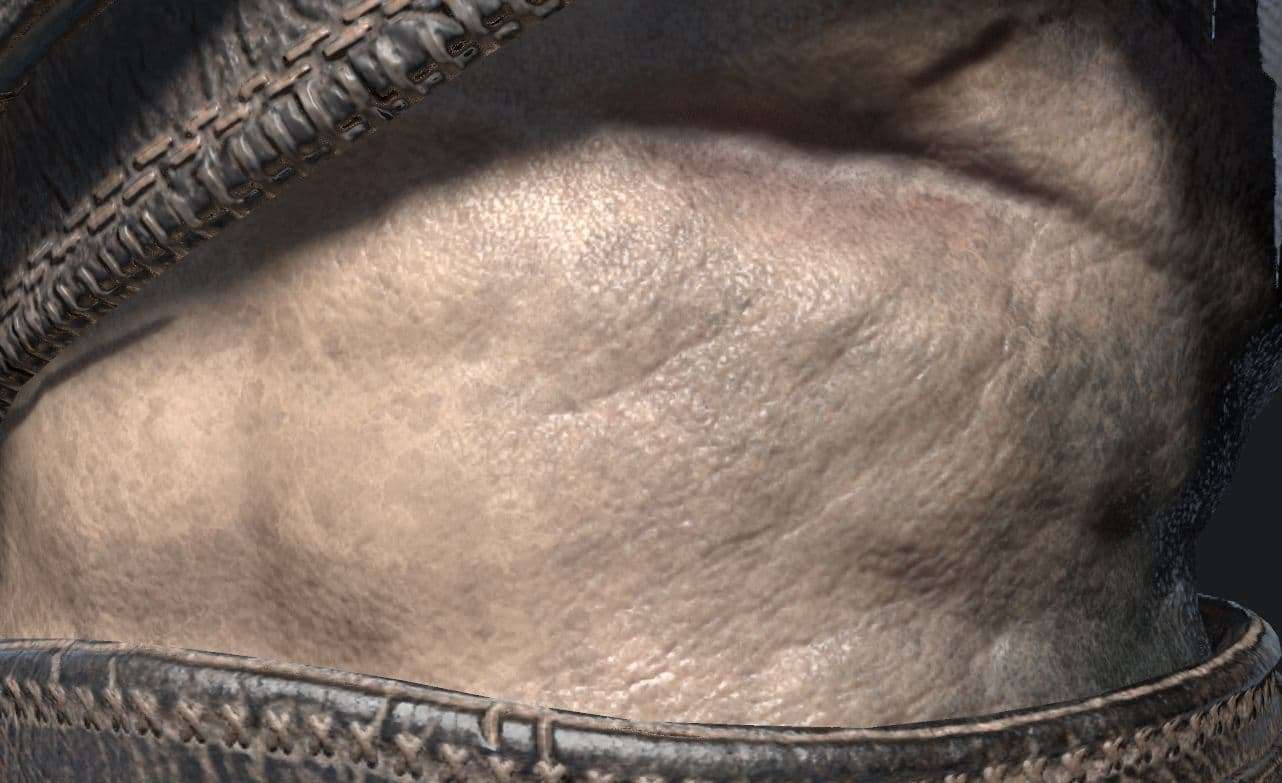
Heaving the skin all sculpted, I could use the sculpture information to help me construct the texture on the skin. For that, I made a base colour on the skin and applied over it some maps to start giving me more volume and detail, like occlusion and the cavity map. I also increased the colours in some spots to make it look more interesting.
Substance Painter is great on that detailing, because utilizing masks I could put skin of a different tone in the middle of the cavities of the sculpted details, that gave to the character a more natural look.
This can be very useful for making old leather, it is simple to put dirt in the details giving them a very used and old look.
In order to make things realistic, the shaders and illumination talk very loud. I always keep in mind that the environment and lightning will influence how the character will look in the end.
It's important to always be testing the results of the texturing with different lighting.
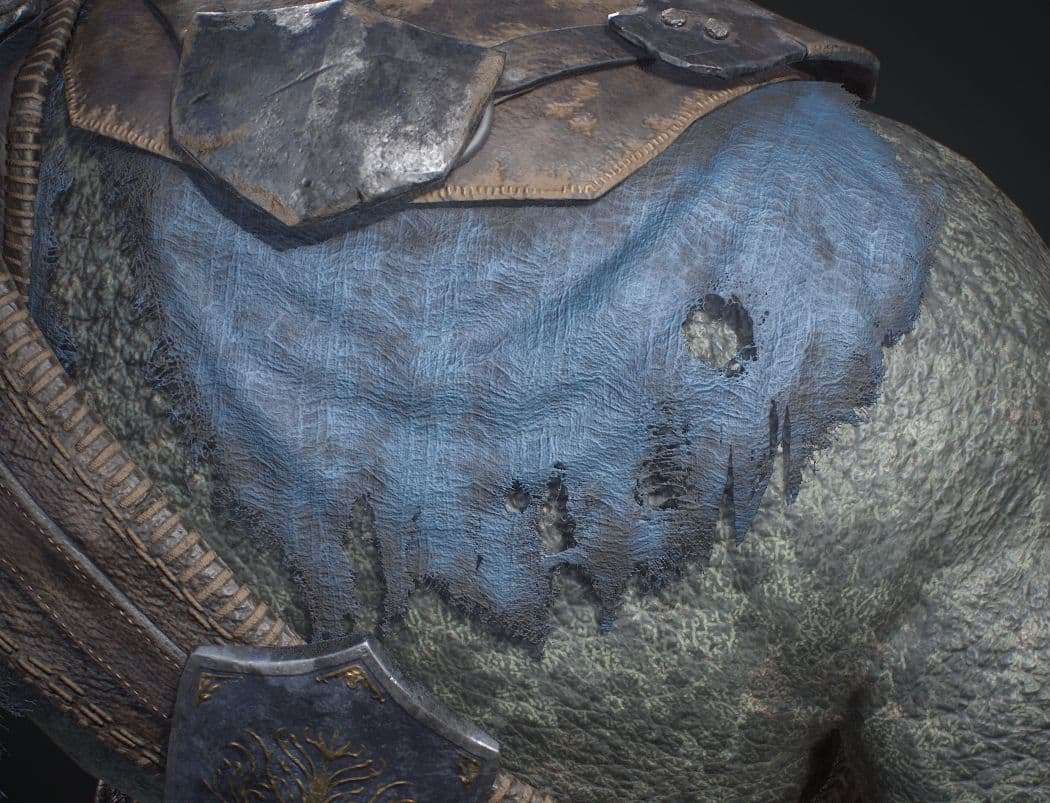
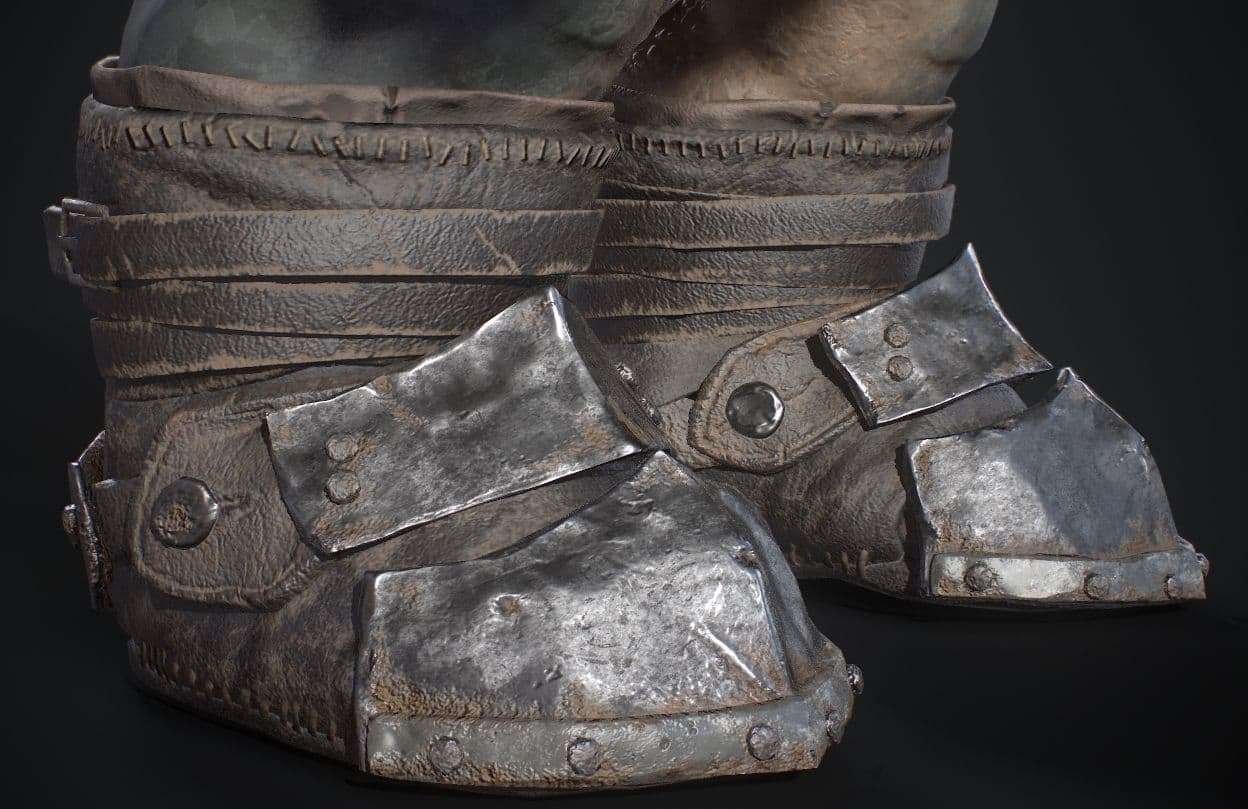
For making the assets and armour of the character, I was basically configuring a good material in Substance, using high res textures, and then I would go in to every piece giving it a touch of colour variation, forcing the occlusion in some parts to mimic dirt accumulated by use, and also adding destruction playing with the heights of the maps.
By paying attention to every piece I was happy with the result I was achieving.
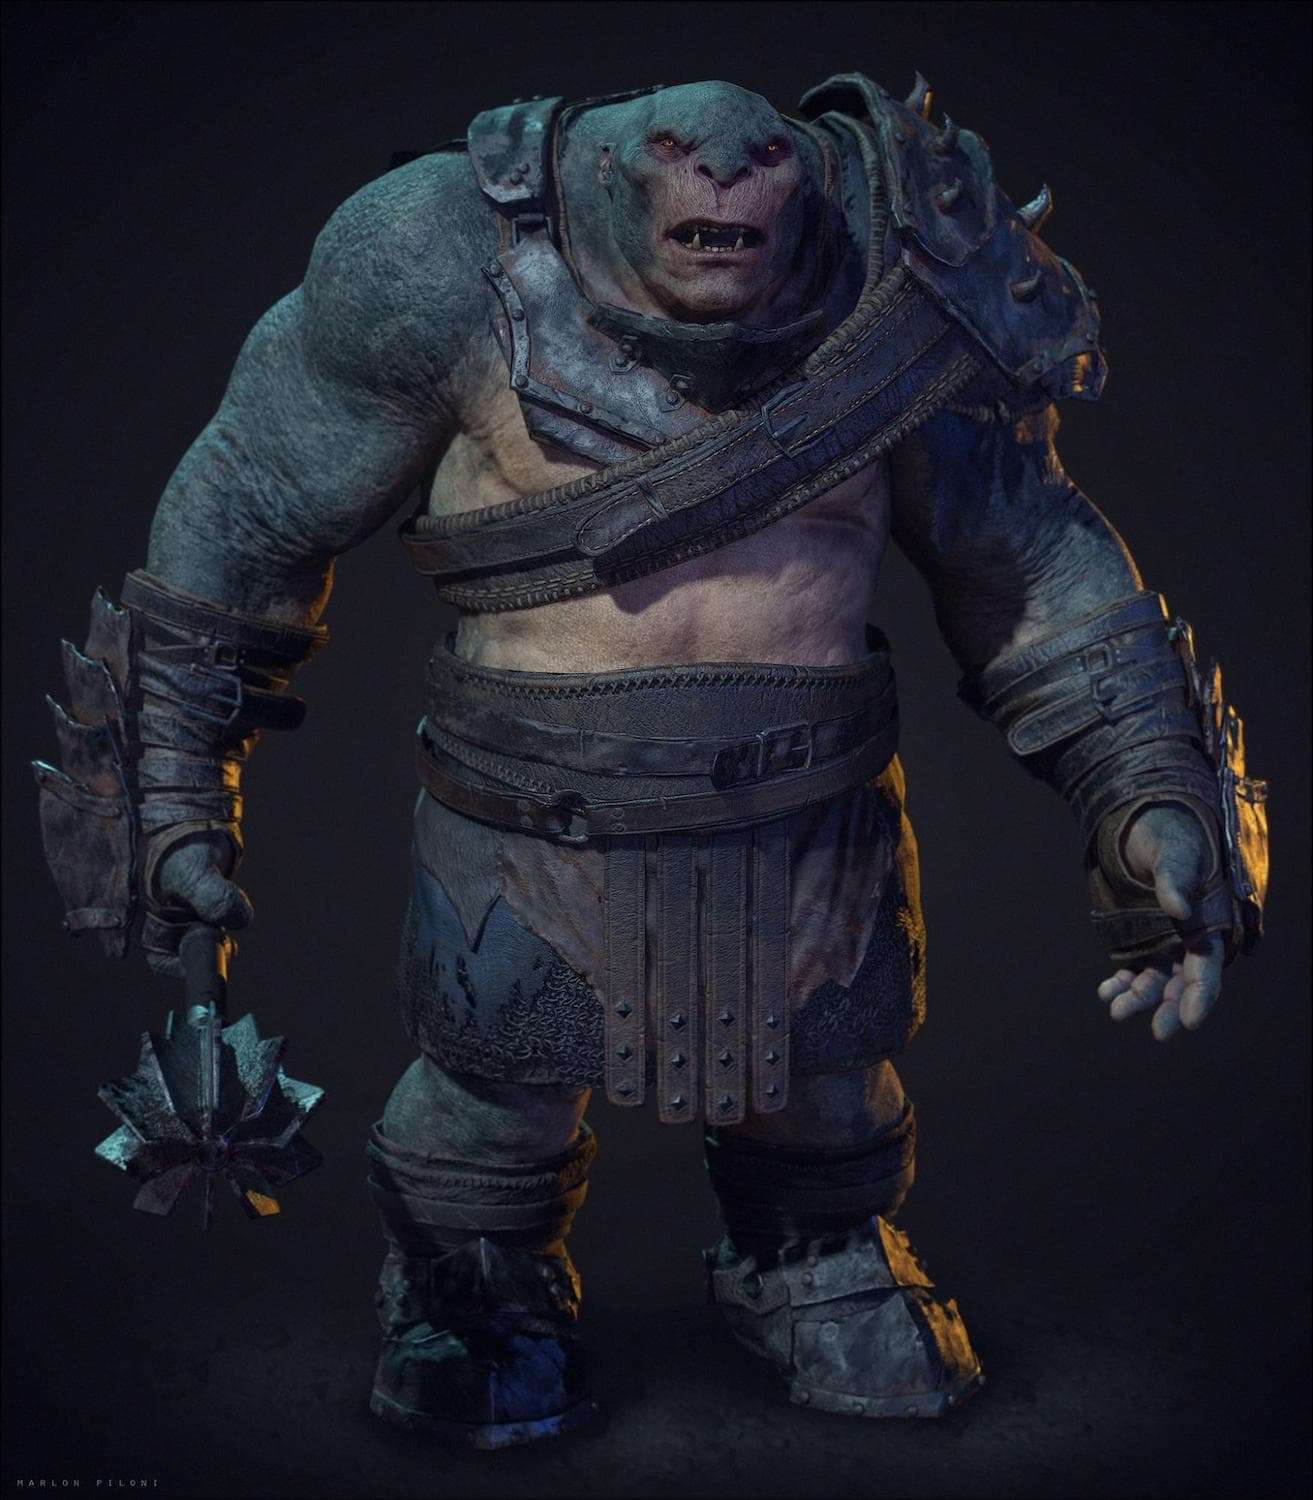
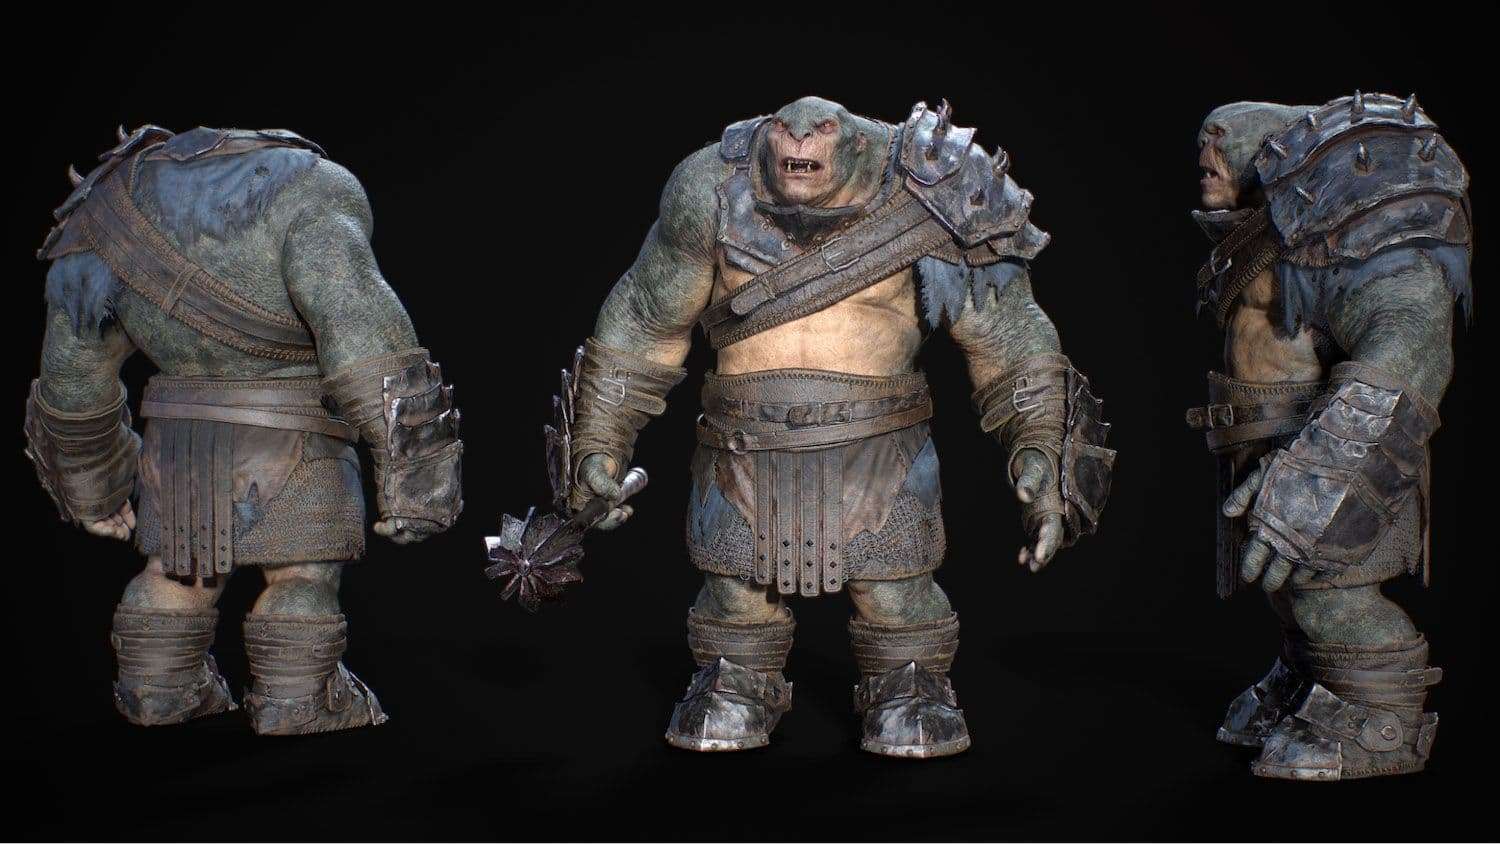
For finishing the project, I wanted to give the character a very basic pose, and a weapon, that makes things much more natural and looks much better.
I also played with light and tried to give a more dramatic feeling to the final images, imagining the environment that the character would be. The final renders were made in Marmoset.
Here is the final result.