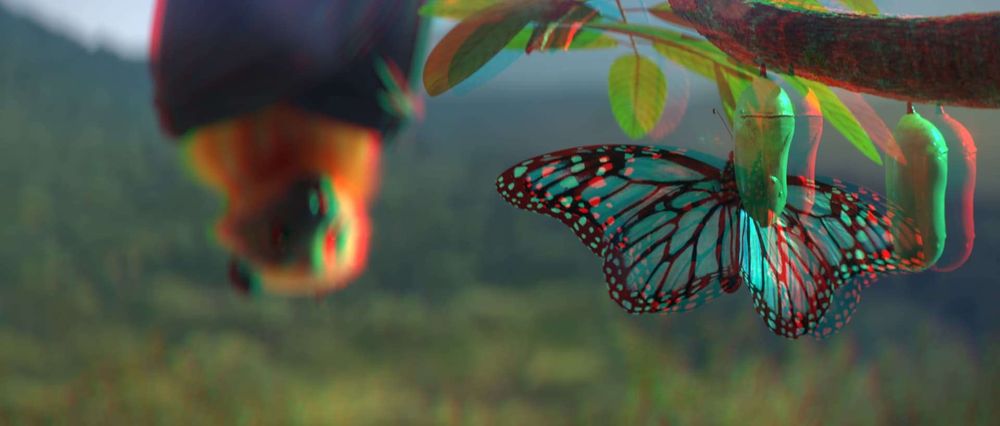

To explain the process of how to take a shot from 2D to Stereo I'm going to go through my experience working on 'wn0030' the 3rd shot of 'Wings'.
Setting up your Nuke script for Stereo
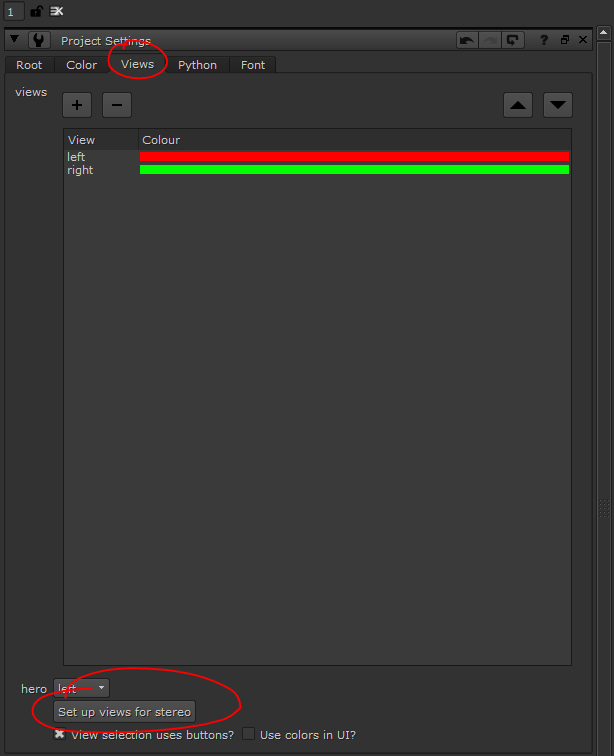
The first thing you'll need to do is actually set up your Nuke script for two streams instead of the usual single stream a standard comp needs.
To do this, open your project settings and navigate to the 'Views' tab. There you can click 'Set up views for stereo'. Clicking this will remove your 'Main' viewer and replace it with a 'left' and 'right' viewer.
Working with the left and right streams individually
Once your script is set up correctly, you should notice view selection buttons have appeared at the top of your viewer. Each parameter within your nodes should also have a new button available, the 'View menu' button.
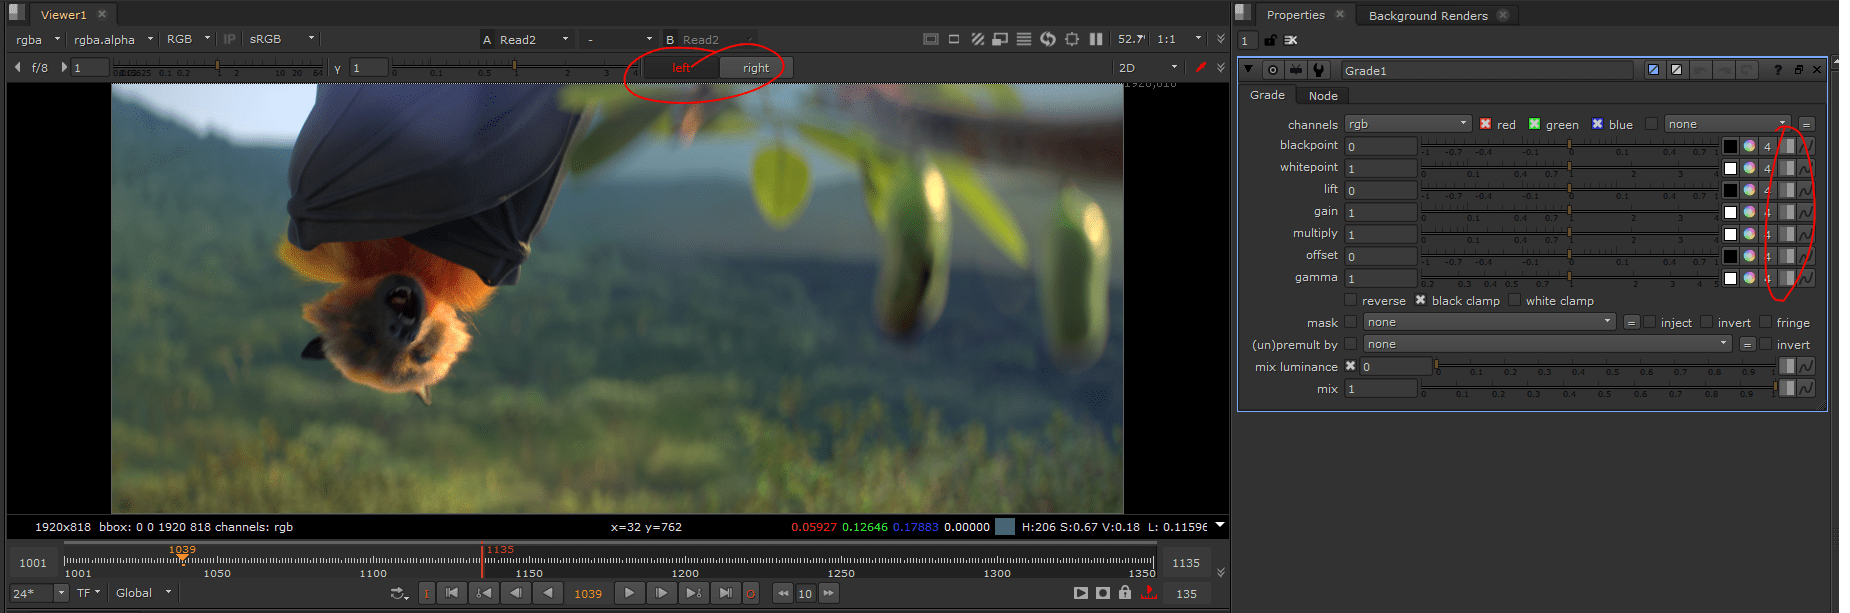
Clicking the 'View menu' button will give you the option to split the parameter's influence between the left and right eyes. For example, if I want to tint my right eye to be purple but leave my left eye as-is, that's now an option.
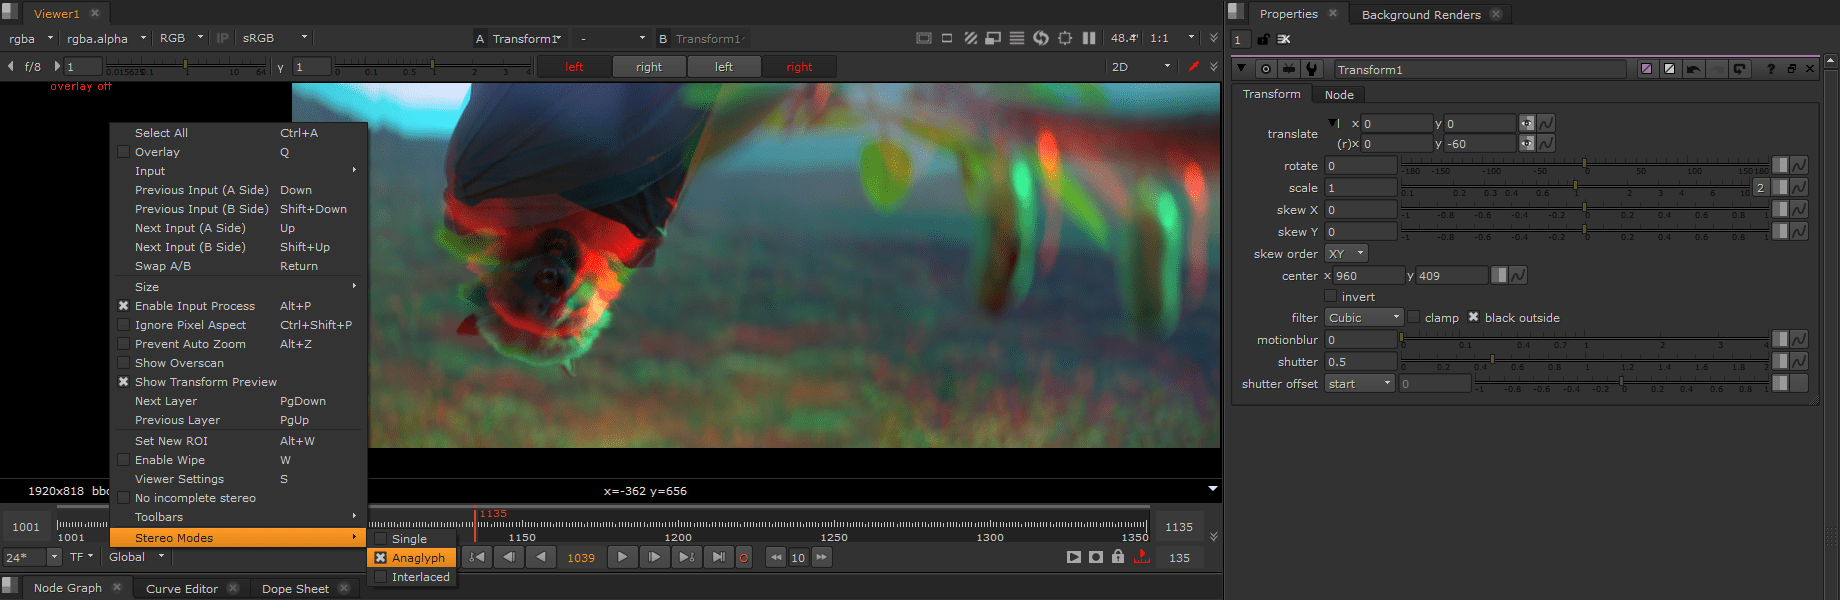
Splitting controls like this becomes especially useful for alignment. I could transform my right eye slightly without altering the left eye in order to tweak vertical alignment.
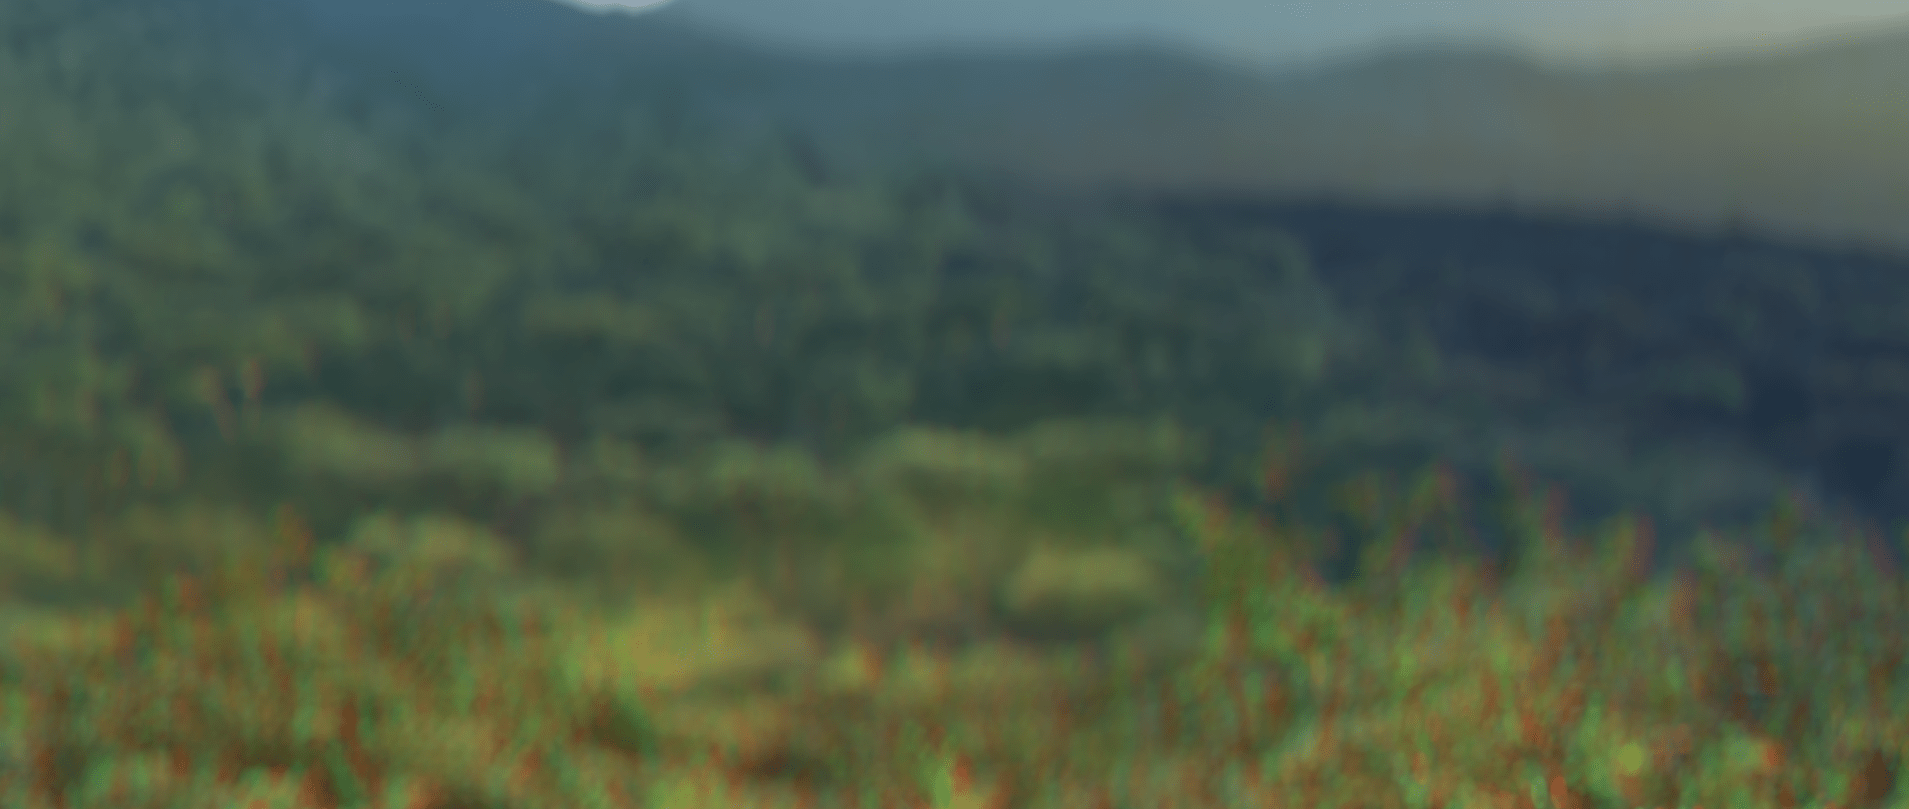
Below you can see the right eye (Cyan) has been moved down 60 pixels but my left eye (Red) hasn't been affected. To check the difference between the views you can right click on your viewer and select 'Anaglyph' as the stereo mode.
Almost every control on every node has this option so hopefully you won't run into too many obstructions while making awesome comps.
Rendering for stereo
Rendering out your scenes for stereo isn't too crazy. When looking into the best method to take I found that Steve Wright had a really good explanation behind the pros and cons of various stereo methods. You can read it here.
I decided to work with parallel cameras (two cameras facing the same direction displaced horizontally). Human eyes are spaced approximately 64mm apart. So I took the rendercam for the shot, duplicated it and translated 64mm to the right in camera-space.
Once that's set up, render the scene once from each eye and you're ready to head back to Nuke.
Reading stereo renders into Nuke
Now that we've got our renders it's time to start comping. Create a read node and direct the file input to the hero (left) eye render. Then split in parameter and set the right eye to read the right eye render.
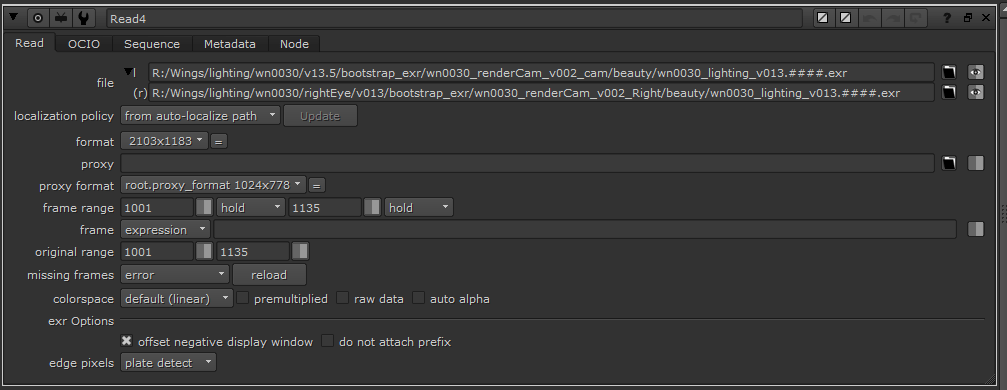
Everything done to the sequence in your comp will now be done to the left and right eye simultaneously. For really simple comps this might be the only thing you need to do.
However, things in comp are rarely simple, here's a few examples from this shot where I needed to add a few steps for both views to remain consistent whilst respecting the depth of the sequence.
Projection fixes in stereo
For the branch render, the level of detail didn't quite hold up when we get as close as we do in this shot. To remedy this I added some more detail in comp by projecting some extra details.
As with most things in stereo, first I got the projected detail to its final level in the left eye. For a standard 2D workflow this would be the end and I could move on. However for stereo I can't just redo this for the right eye by hand as that would leave far to much room for human error and inconsistencies between views.
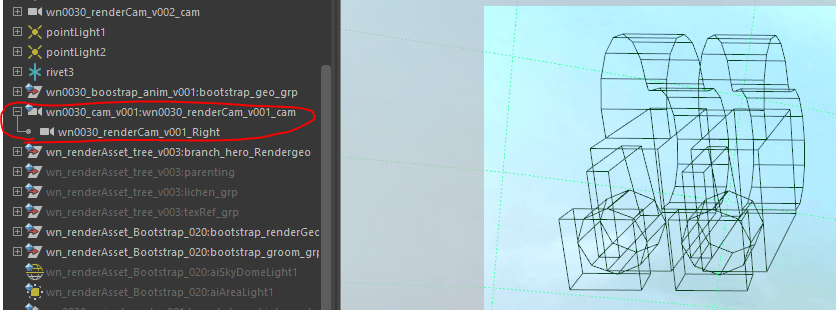
The method I opted for was to project the fix through the rendercam from the hero eye's then view it through the rendercam of the right eye.
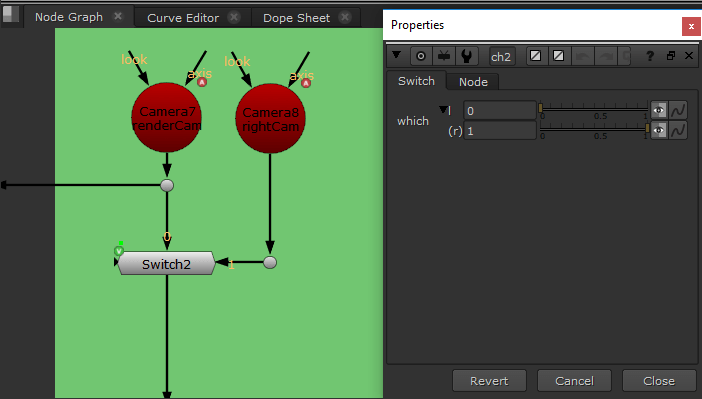
When written down, this might sound quite complicated but when seen in the node graph the simplicity of the process reveals itself. Just tell Nuke to use the right eye's camera for the right view. I decided to use a switch node, setting it to read the right cam for the right view (I could have split the file option of the camera to be different for each view but I found this caused unexpected results)
Creating a right view, without a second render
For various shots in the film, a CG forest was rendered for a single frame, then projected over the DMP for extra detail. However, due to time constraints a second eye wasn't rendered. To remedy this, I took the left eye, translated it in 2D space using a translate node, then used the depth pass to weight this translation to be stronger in the foreground than in the background. This resulted in the same render having a fake parallax that worked well for the out of focus background forest.
Thanks for taking the time to read through this, hopefully you learned something.
If you'd like to know more or have any questions please don't hesistate the reach out to me.