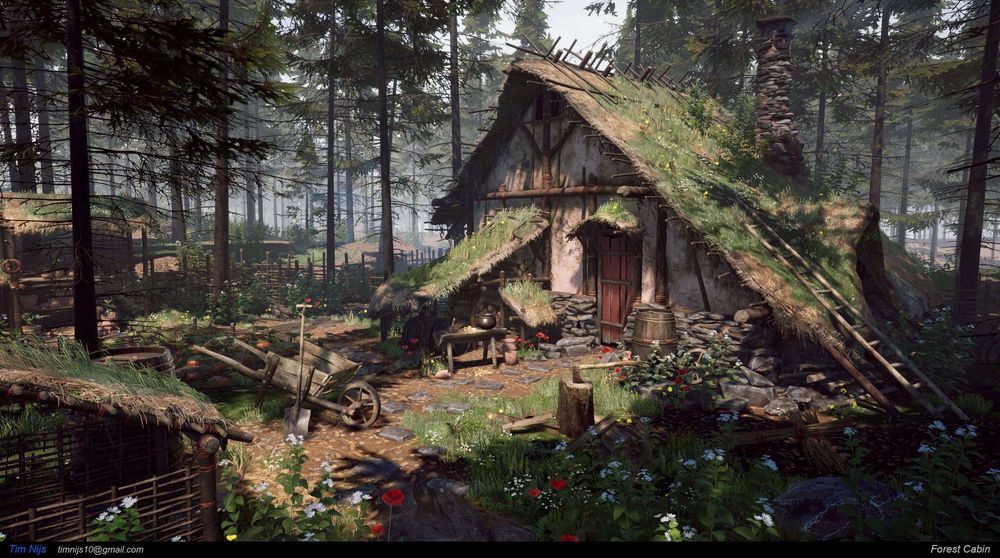
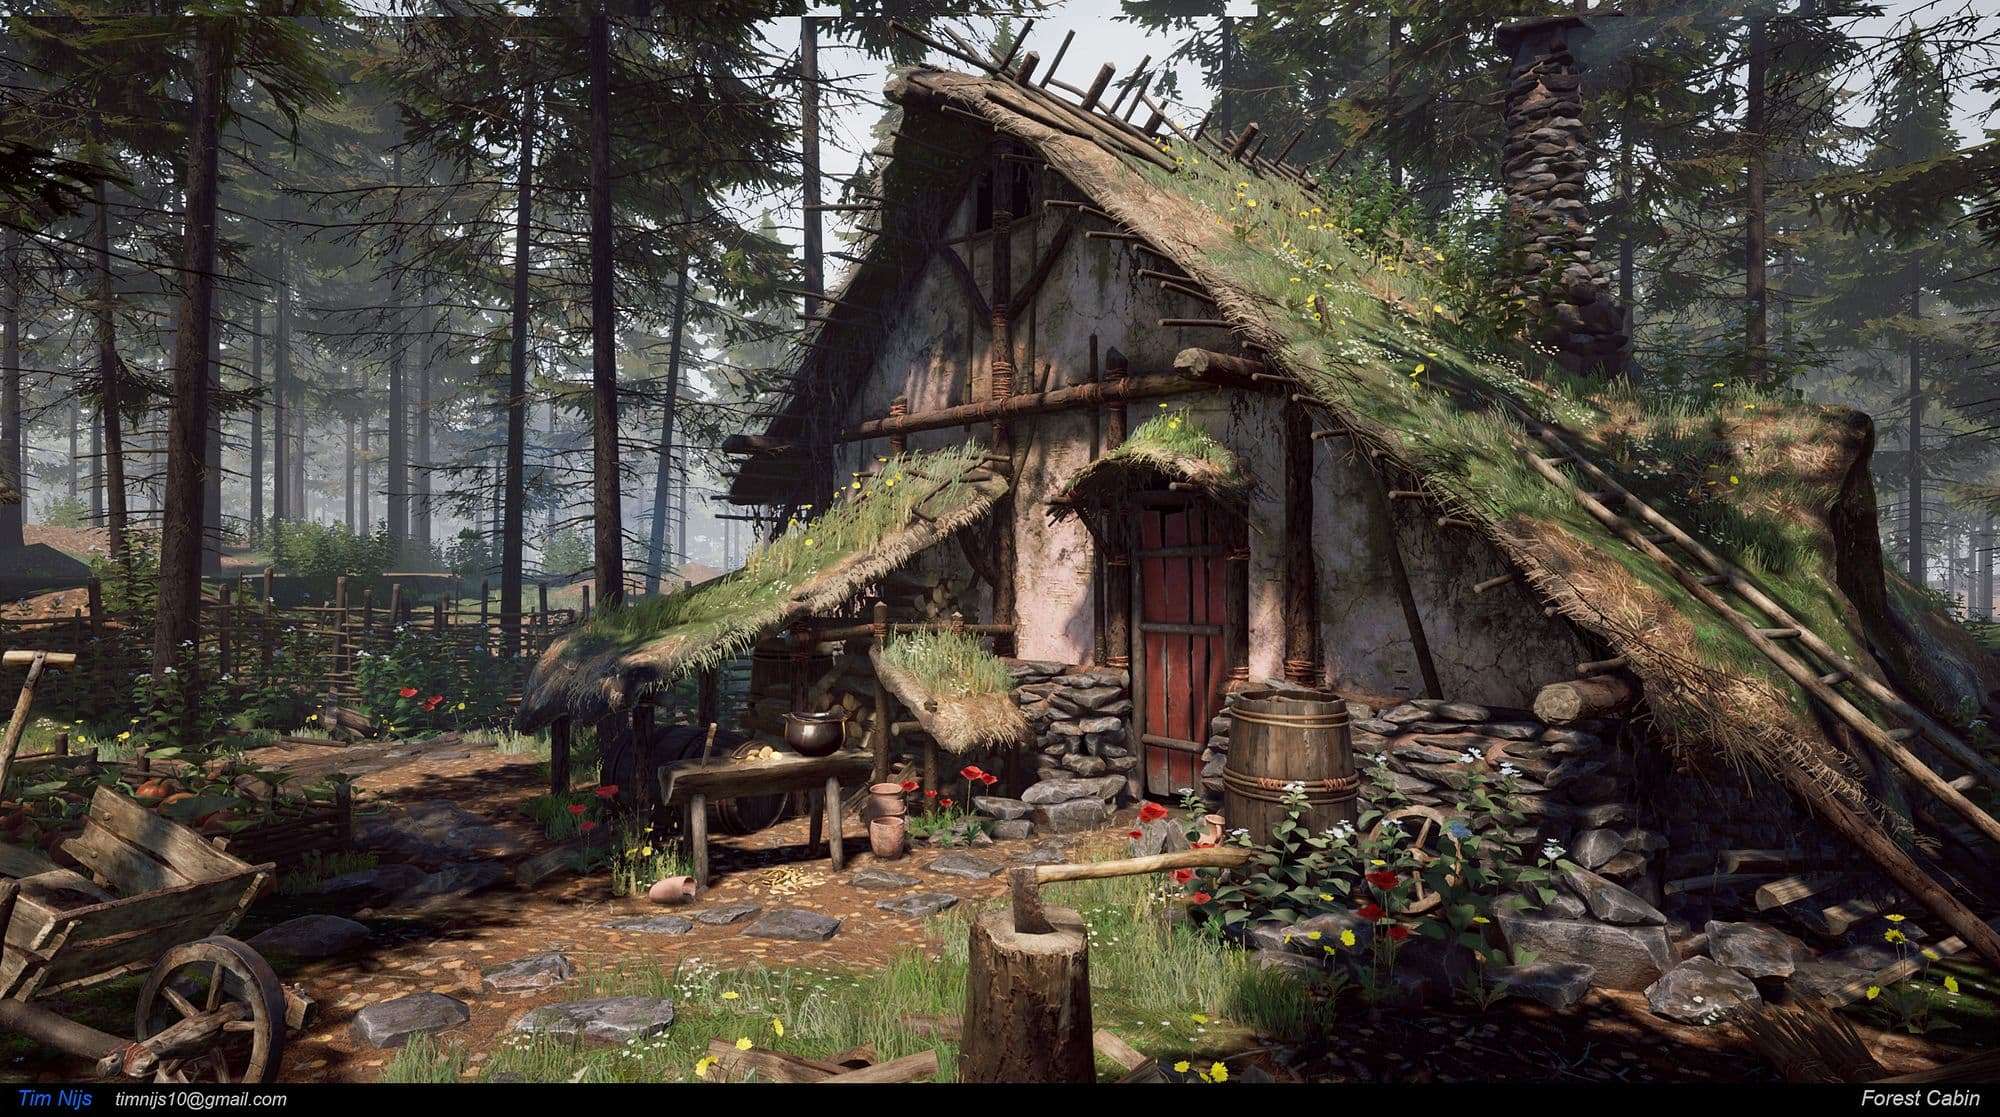
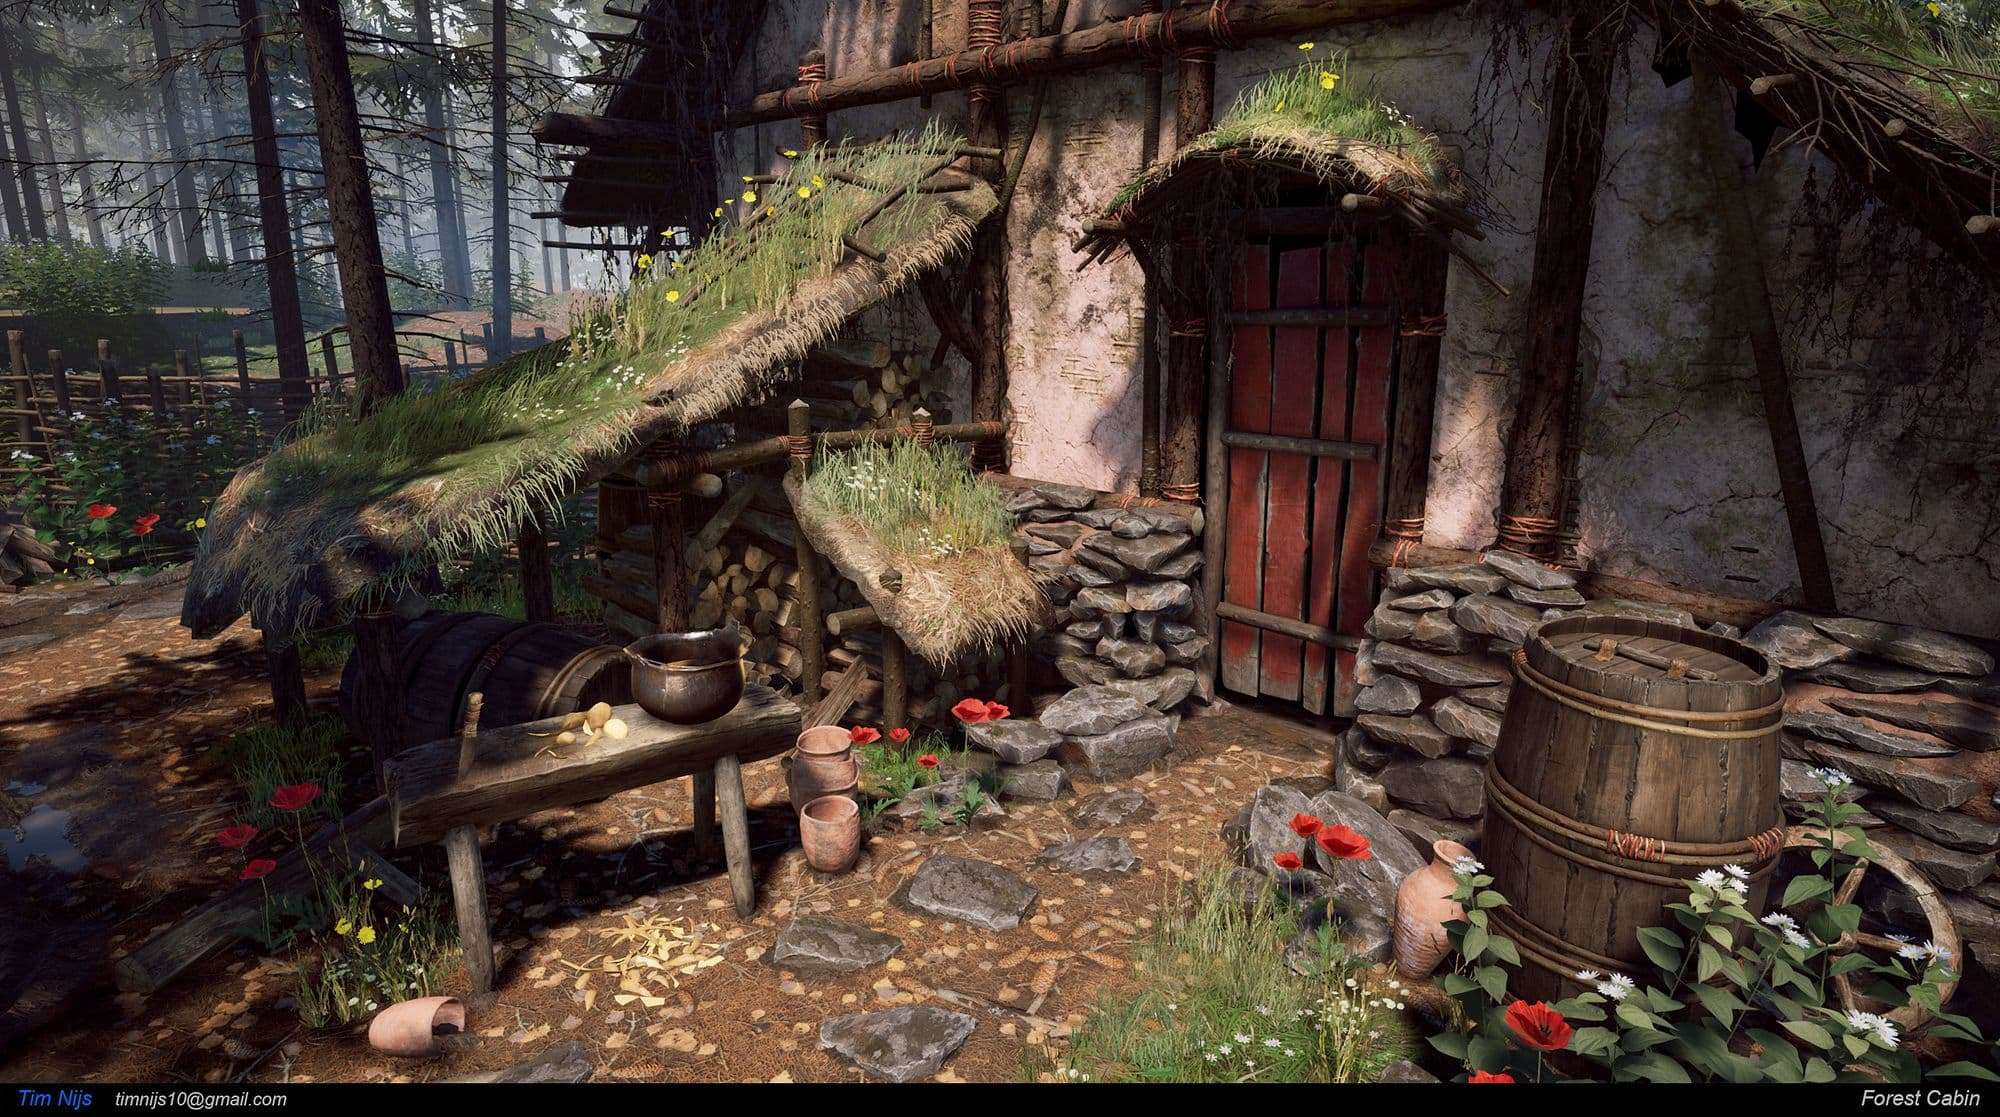
My latest project, Forest Cabin, was one of those projects. After creating my previous project (well of souls) I wanted to create something that had more organic elements like foliage. The aim of this project was to create an entire scene from scratch, with a focus on texturing and materials.
Idea and Pre-production
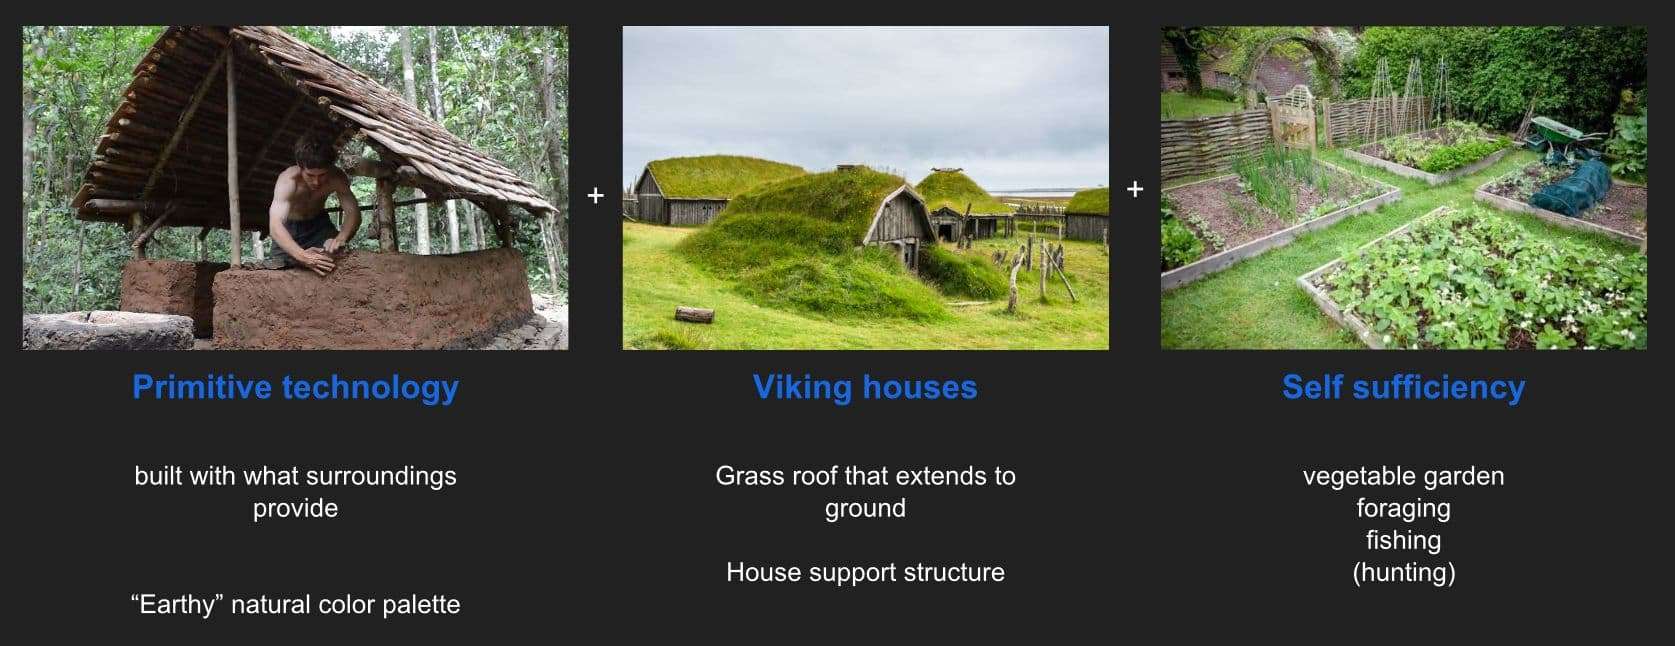
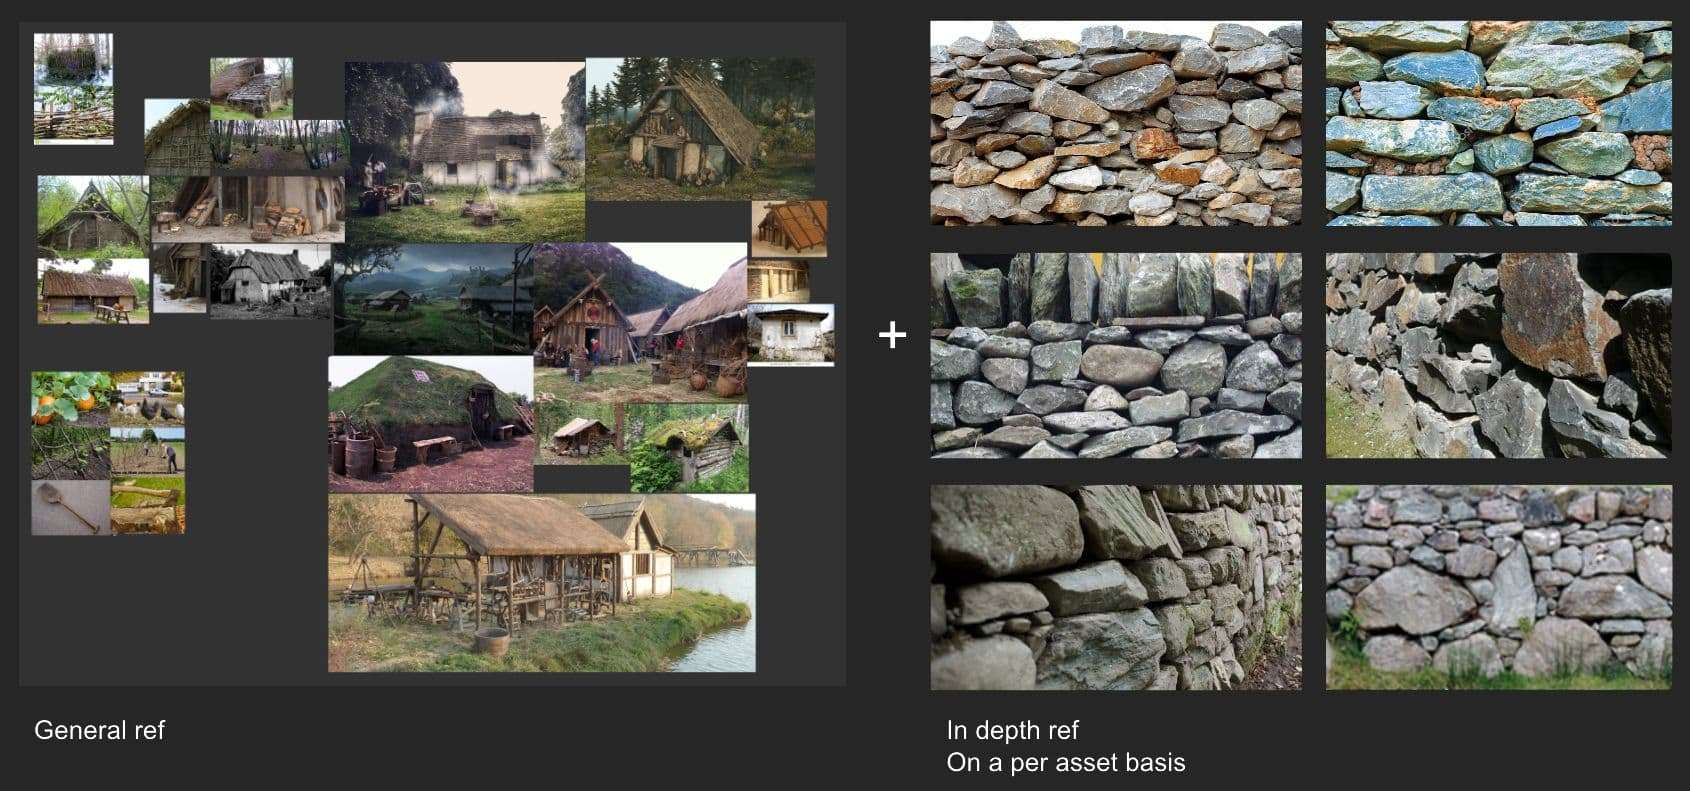
The main element in my composition was going to be the cabin. The cabin design was based on three things: primitive technology, viking houses and self sufficiency.
So all the material choices were based on old (ancient) survival techniques. Think of using spruce roots as rope or tar as a kind of glue. The shape of the cabin as well as the grass roof were based on viking houses.
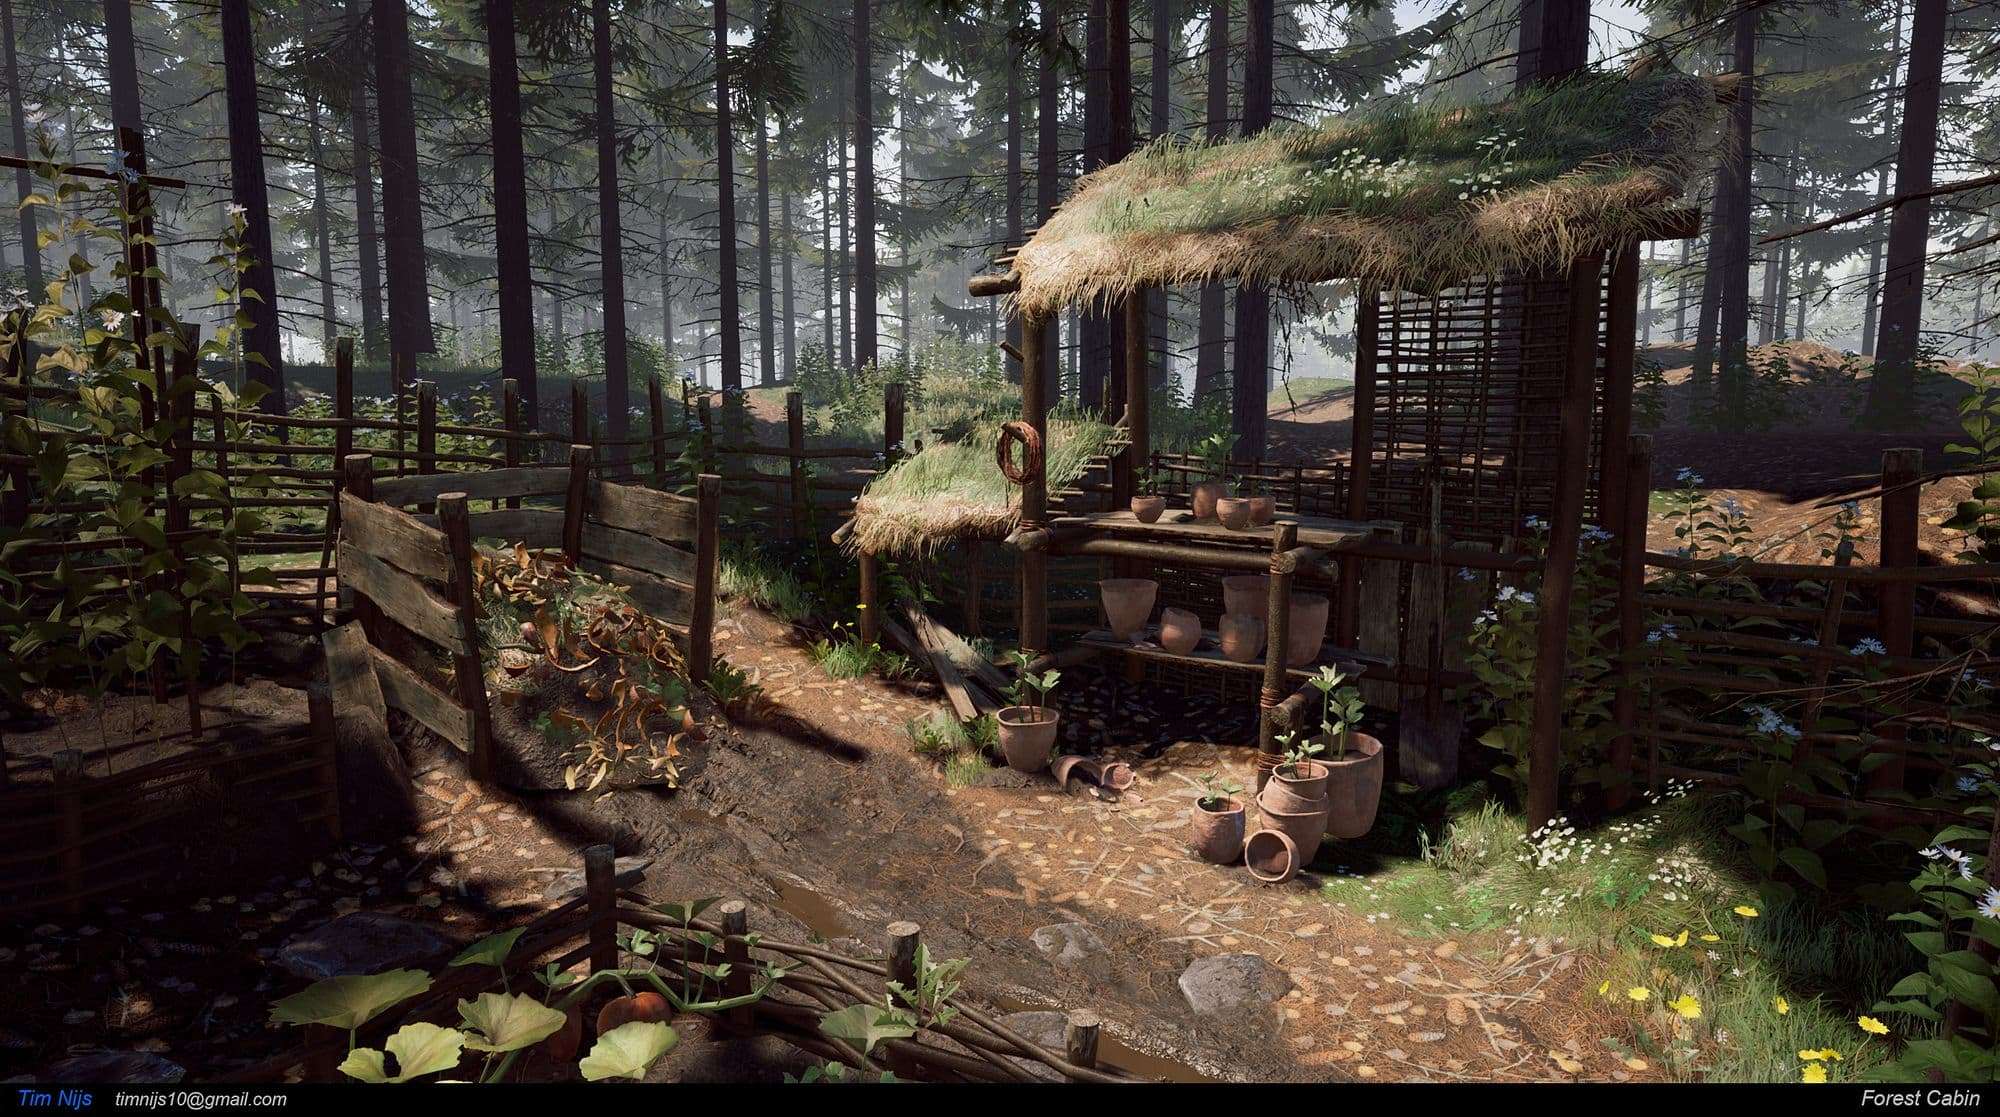
As a narrative I wanted to convey the person living here lives off his vegetable garden and what his surroundings provide.
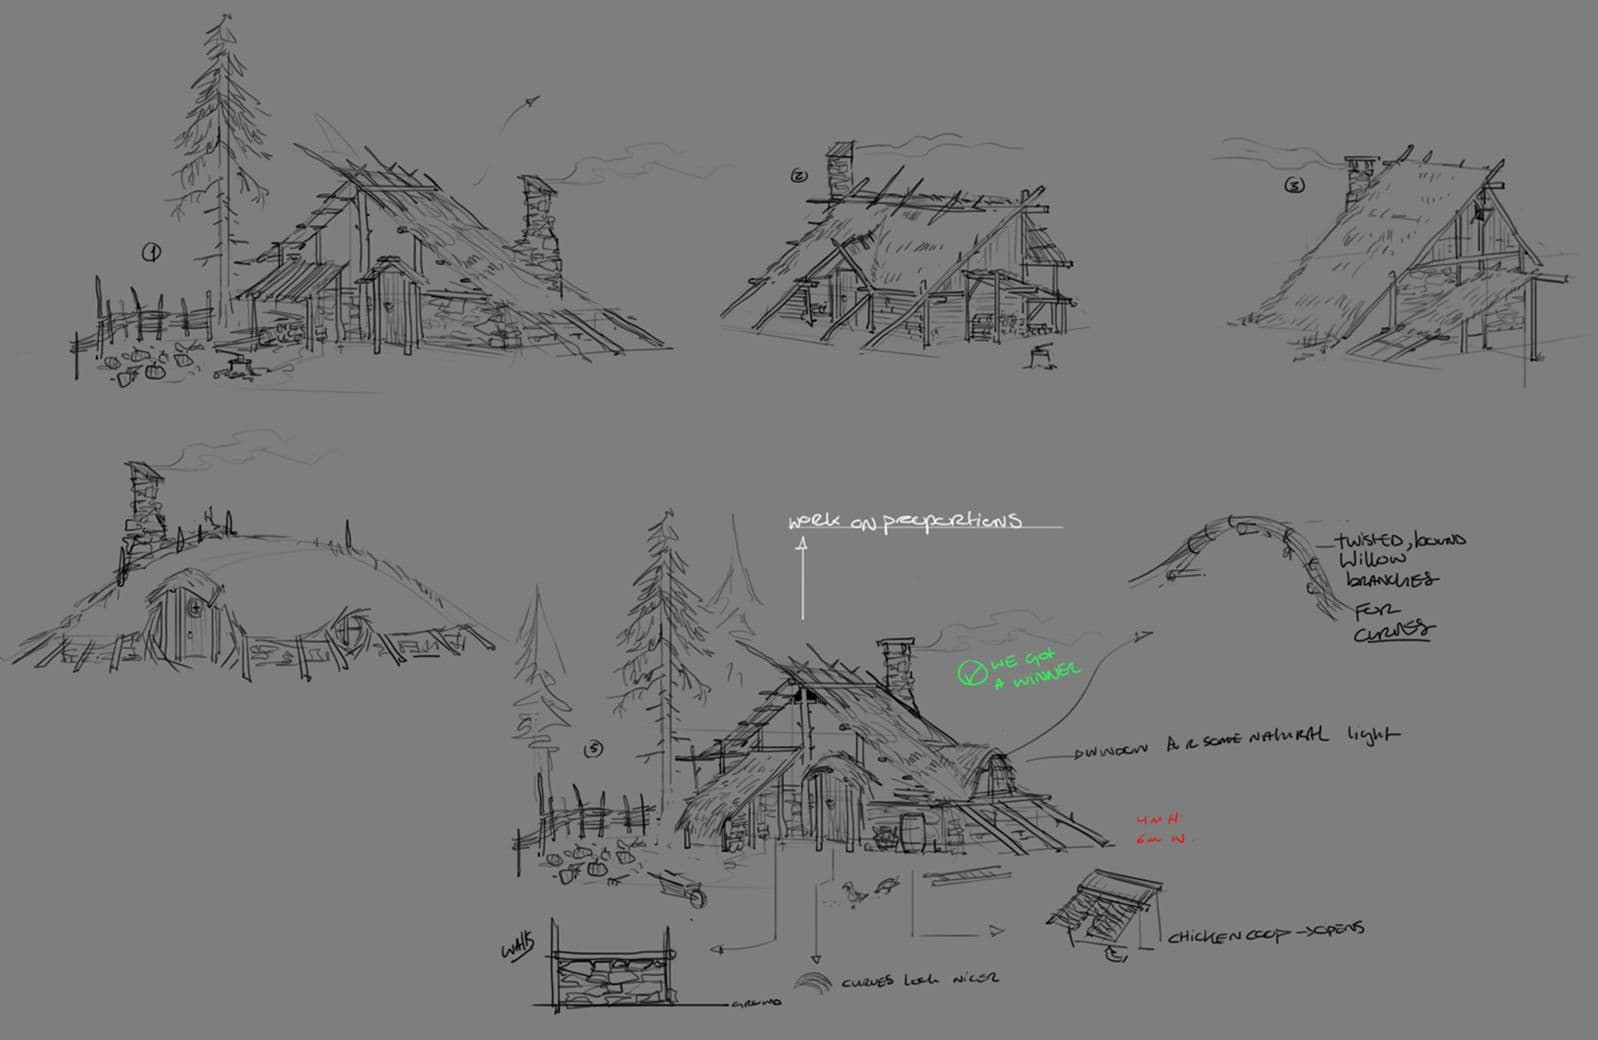
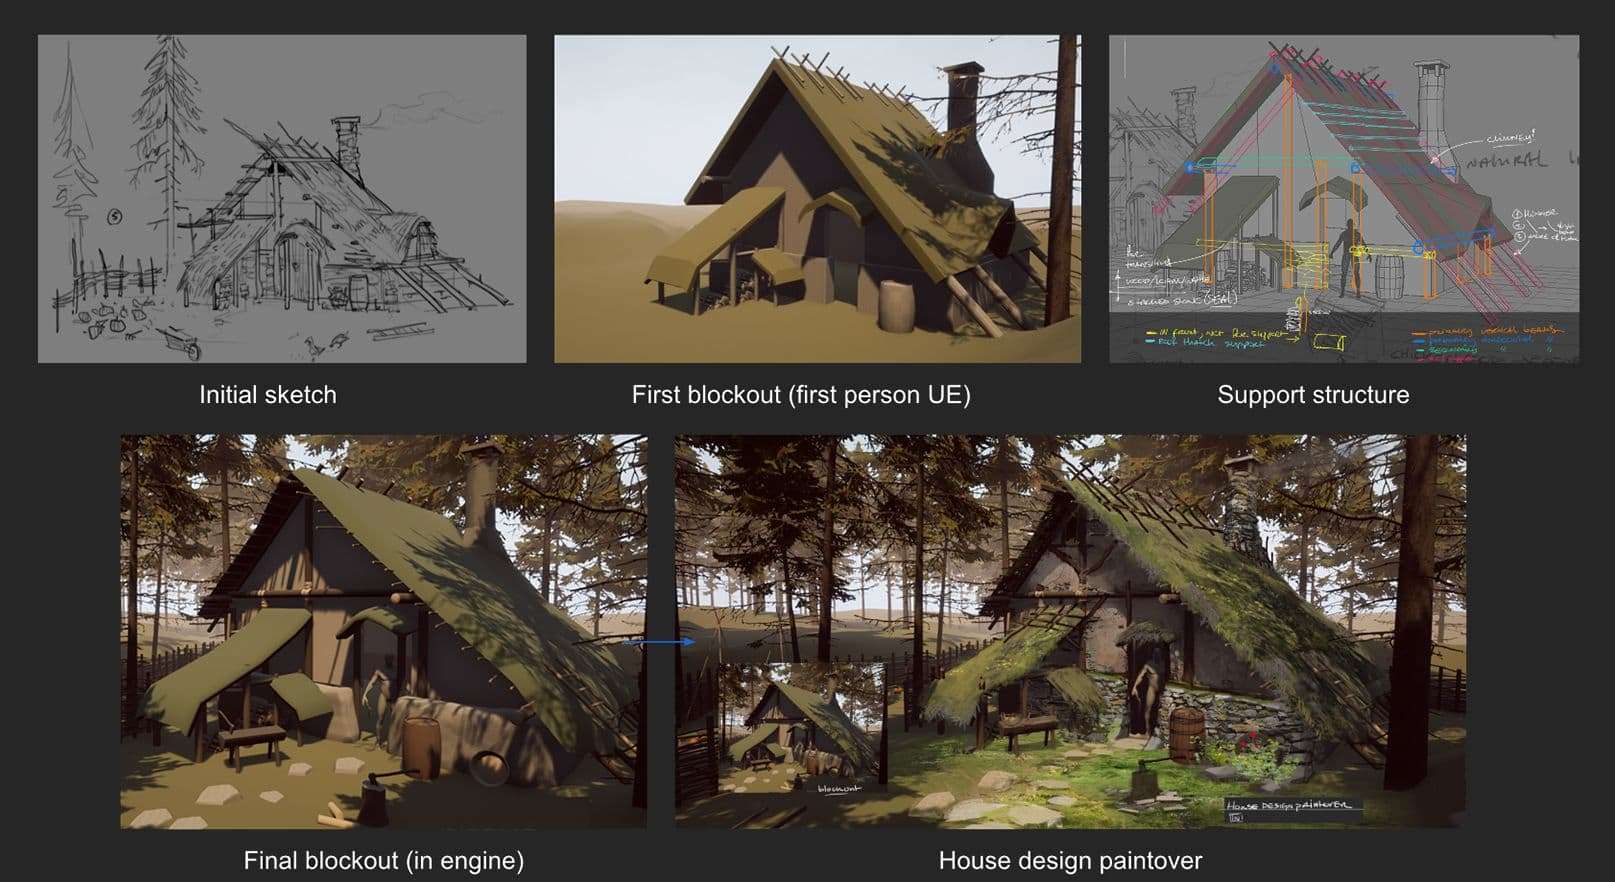
After doing those initial sketched I picked one and decided to build on top of that. The first blockout looked really bad, but it did help me get a feel for the scale. Importing it into Unreal Engine4 right away allowed me to walk around the house. I tweaked the proportions of the house until I was satisfied with the result. After that a final paintover where I defined the materials and some additional design elements.
Throughout the creation of this scene I kept making paintovers to figure out the design.
After doing a paintover I usually modeled some really basic blockout meshes that I could place in the engine.
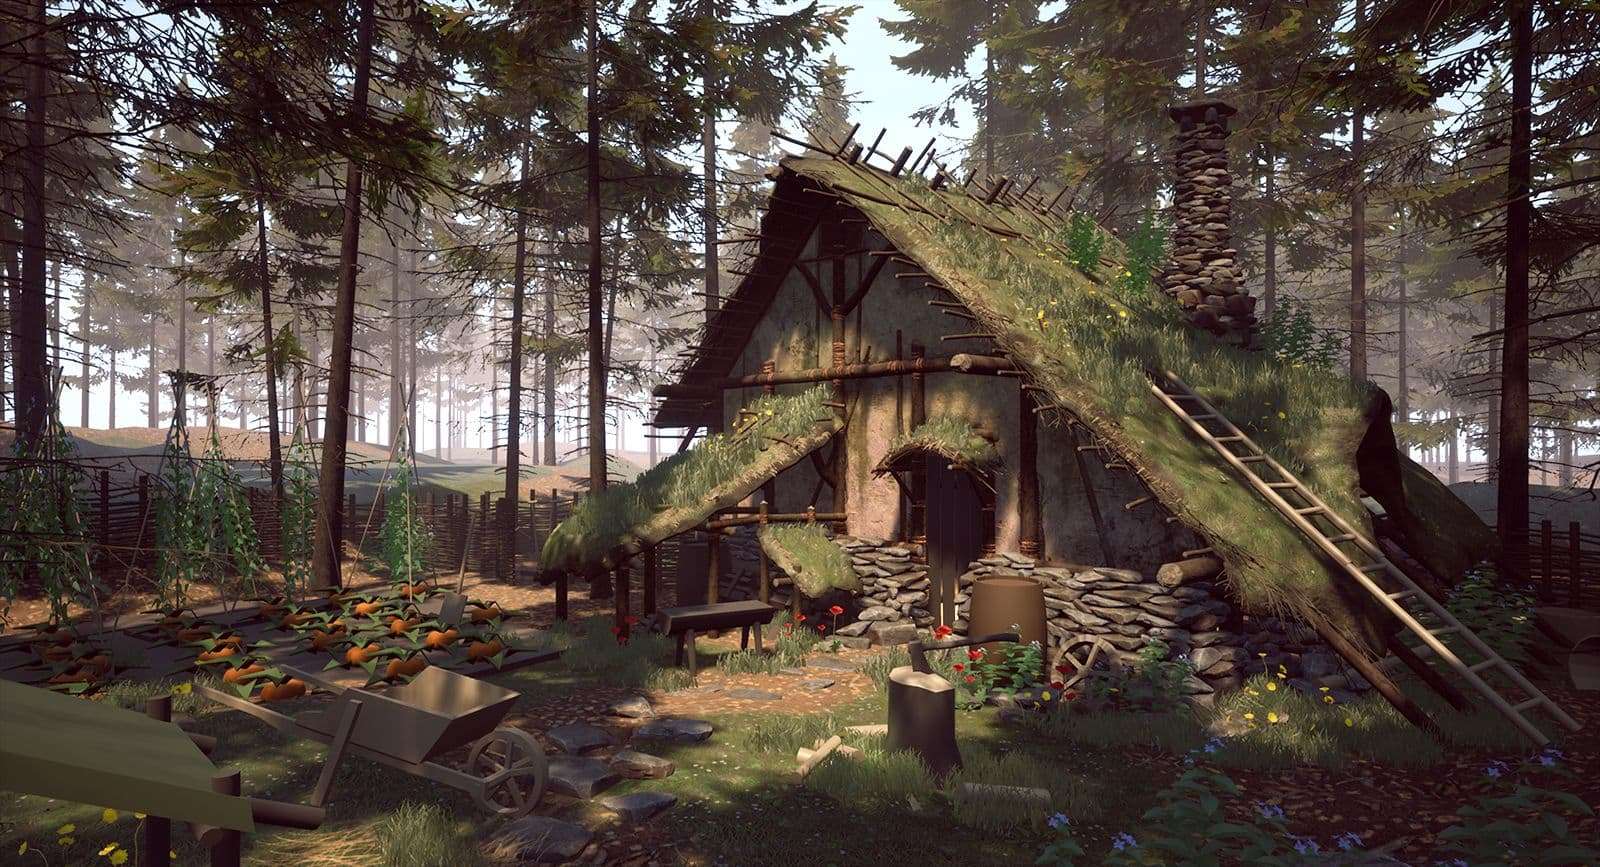
This is what the scene looked like around 1/3rd into the project. At this point I had the major elements in and started to pick out single elements or props to refine them. I also did a first pass on my lighting, creating an interesting pattern of light and shade cast on my scene(but way too dark and warm).
Materials with ZBrush and Substance Designer
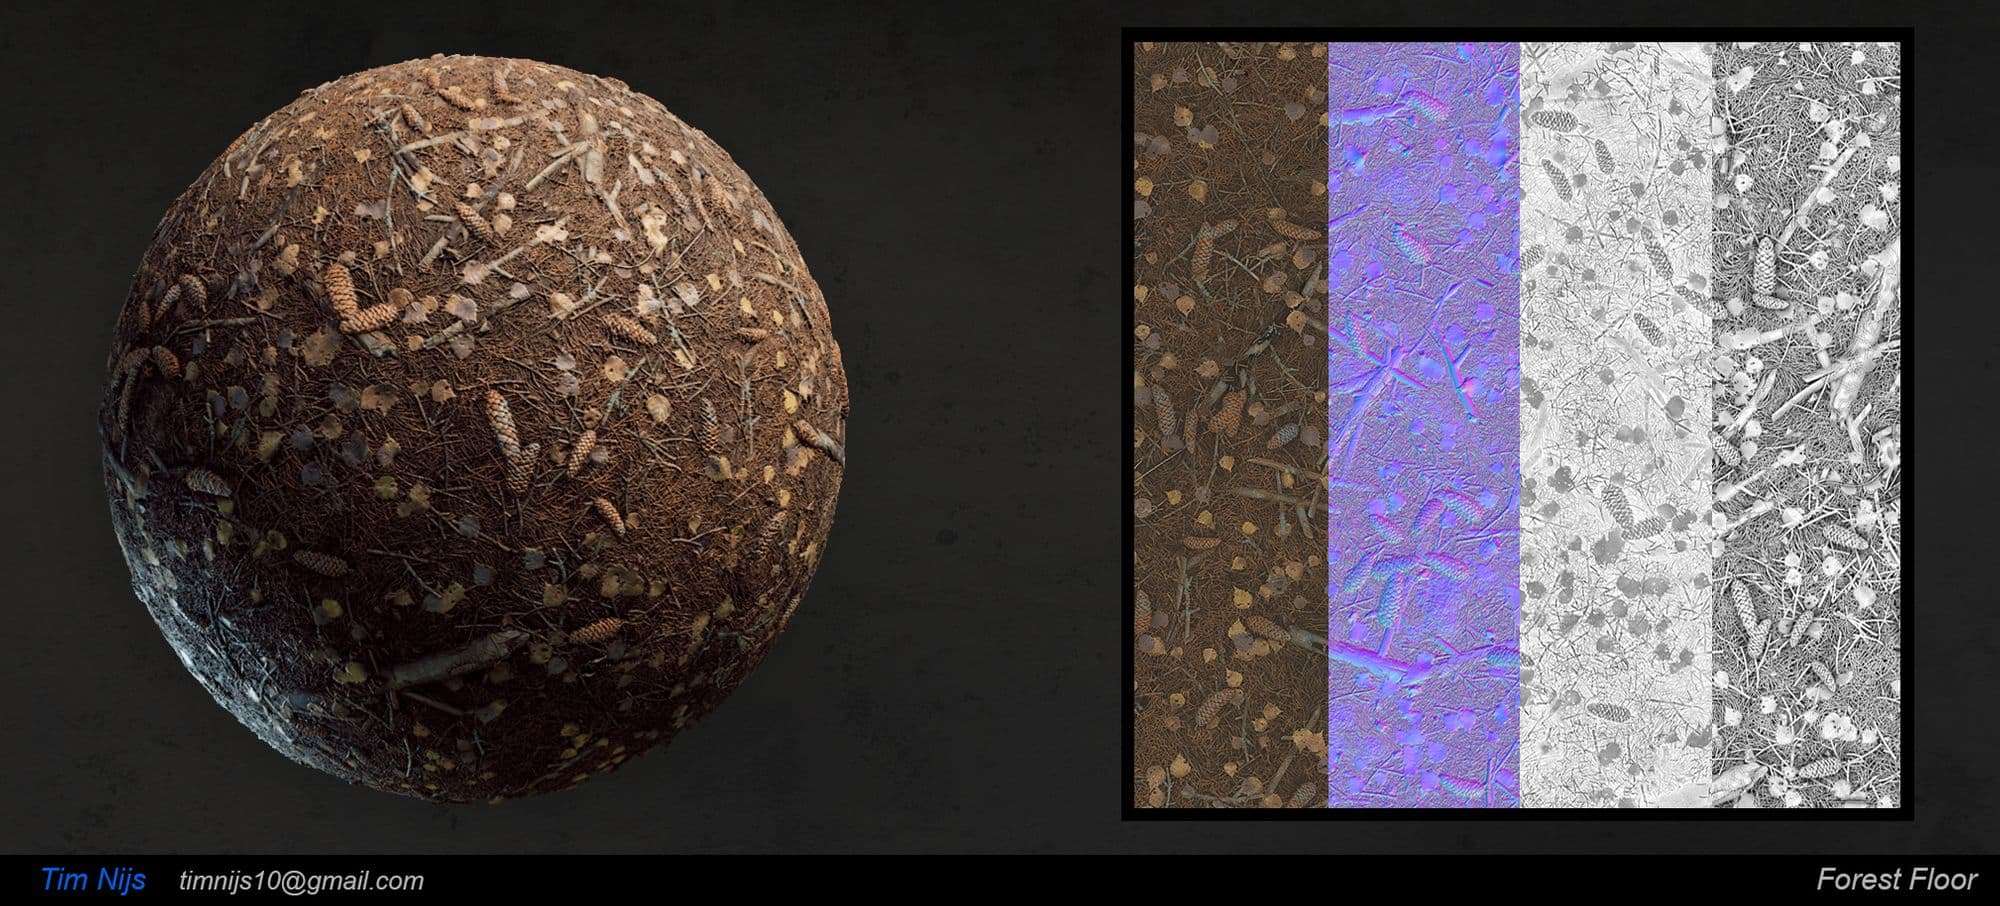
For this project I created a number of tiling base materials that I could use throughout the scene. These materials were created with a combination of Substance Designer and ZBrush. Some things are quite complex to create in Substance Designer. In those cases I switched to sculpting them in ZBrush.
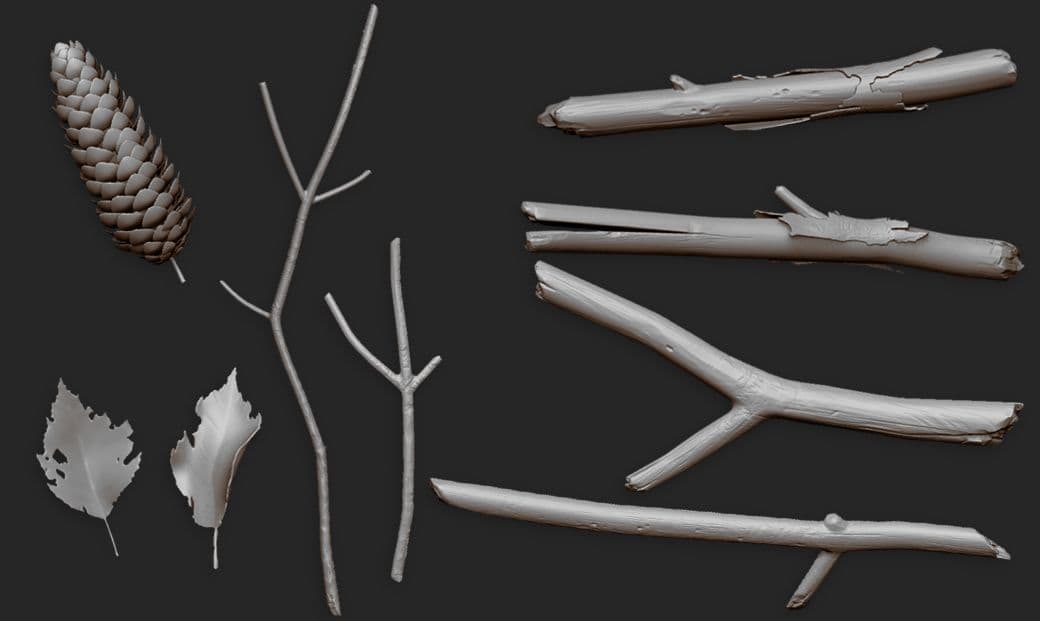
These are some of the elements I sculpted for the forest floor material. A base mesh was created in Maya, then sculpted in ZBrush. After sculpting, simply orient the object in your viewport and use alpha>grabDoc to capture a heightmap. Then export that to Substance Designer as a 16-bit TIFF. you can then use a tile sampler to scatter them.
In Substance Designer I assemble my texture, always starting with the height map. I like to finish the height map completely before moving on to creating my albedo and roughness maps.
The reason for me using Substance Designer was also because of a technical limitation. My computer couldn’t handle too many polygons in ZBrush. One problem with Substance Designer when scattering heightmaps is intersections. I played around with the random position/rotation and random seed of my tile sampler until I eliminated as many intersections as possible.
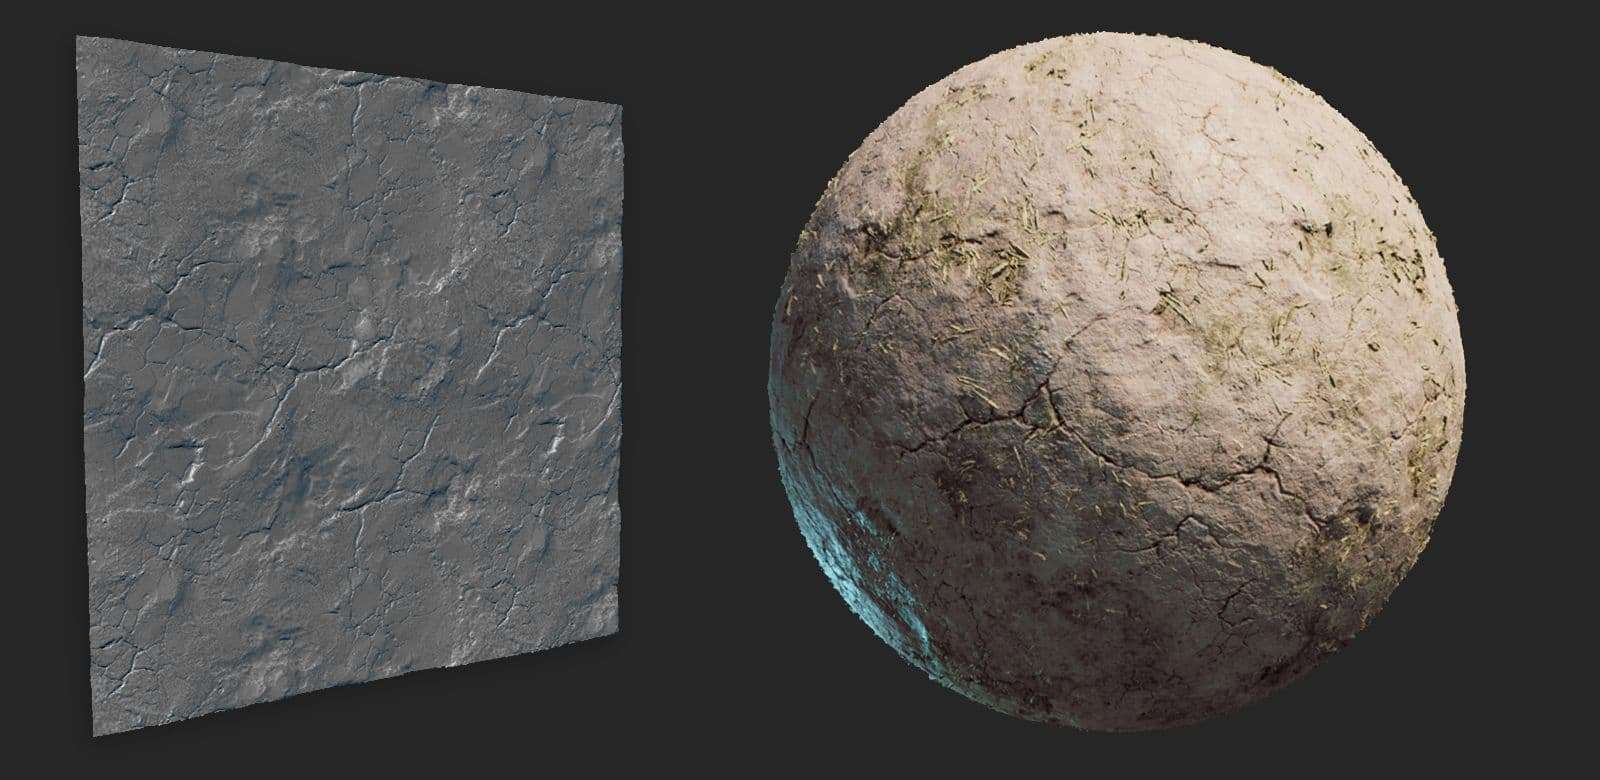
Some materials like this loam wall were sculpted in ZBrush and then finished in Substance Designer for the smaller details. I found it easier to sculpt the loam structure in ZBrush. I usually started out by sculpting some alphas that I could use to quickly sculpt a first pass of my material. Scattering a large number of objects like the straw is much easier to do in Substance Designer. I tried to use best of both worlds.
Prop workflow
For the props I wanted to take the time to create a unique sculpt and texture. I blocked out my model in Maya. After that I imported it in UE4 to check for scale. I then created a base mesh for sculpting in ZBrush.
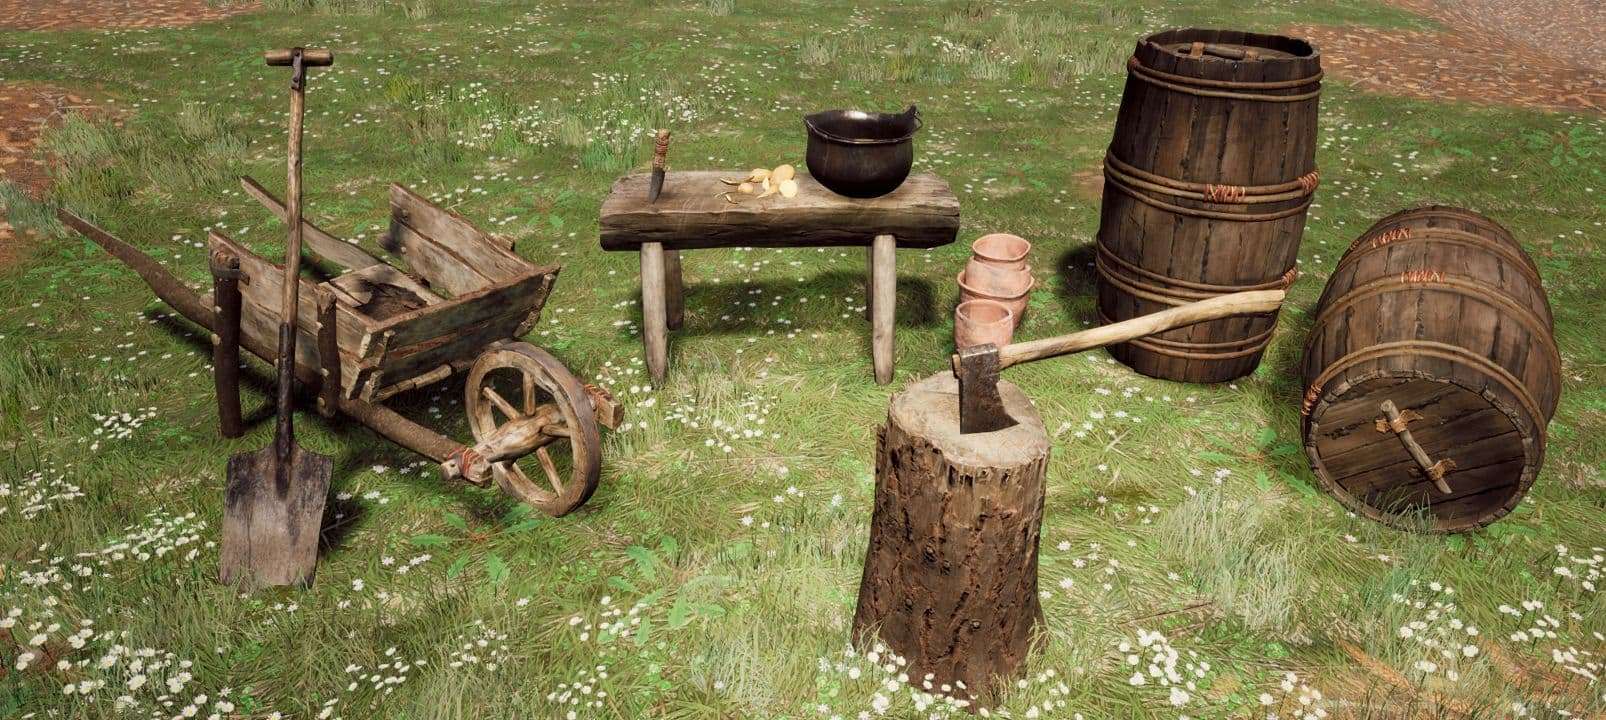
After sculpting I made a low poly. When creating a base mesh try to keep the low poly in mind (so you can easily convert it). To create my low poly I go back to the lowest subdivision on my sculpt and then export it to Maya. That way I knew for sure the low poly would match up with the high poly.
For more organic objects like rocks decimation master is your friend. I then removed the unnecessary edge loops. I did not have a target poly budget in mind, but tried to make my assets game-ready. As a rule of thumb every vertex had to contribute to the silhouette, or the smoothing of the object.

All the texturing work was done manually in Photoshop. I used photo source material from Textures.com. However I did not use photo textures in the traditional sense. I tried to use them in a PBR-friendly manner. This mostly meant getting rid of any lighting information in the photo. I created dirt and edge wear masks in Substance Designer using curvature and AO maps.
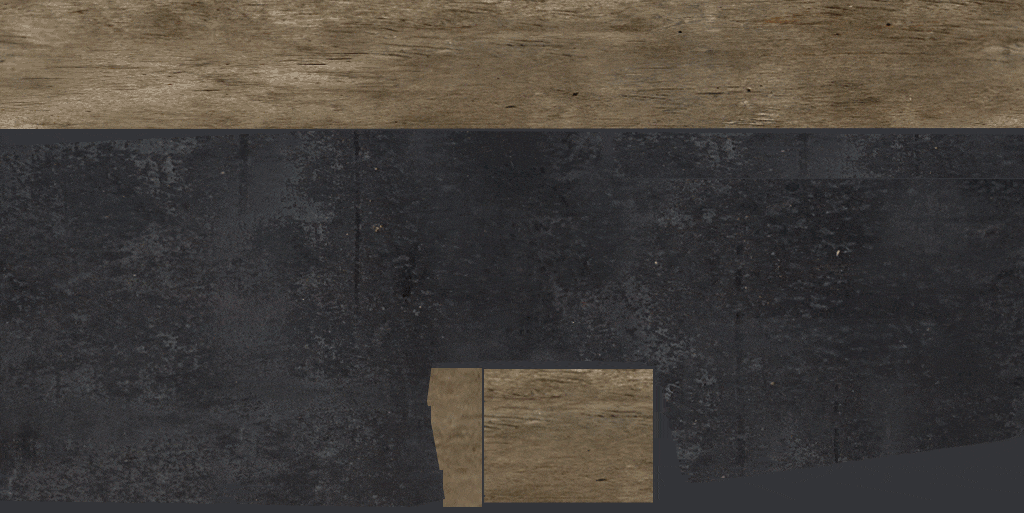
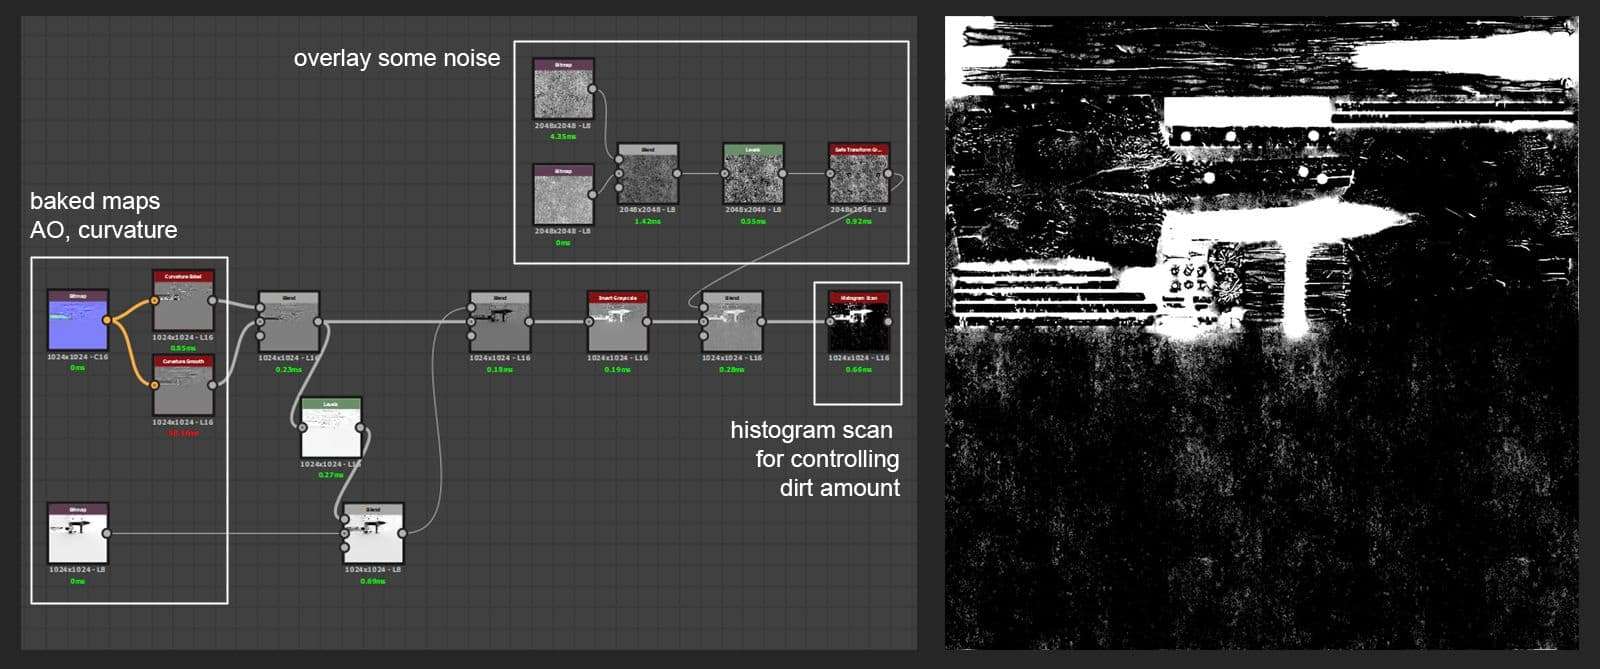
The roughness map was created by taking all my layers from my albedo and adding a black and white node on top of the stack. I then use levels adjustments and inverts in individual layers to give them their roughness value. I find it really important to add enough interest in the roughness. This means a wide variety of values and then tying it all together with a rough dirt pass.
For some of the really small details some of the albedo layers were converted to a normal map and overlayed that on top of my normal bake.
Re-using assets
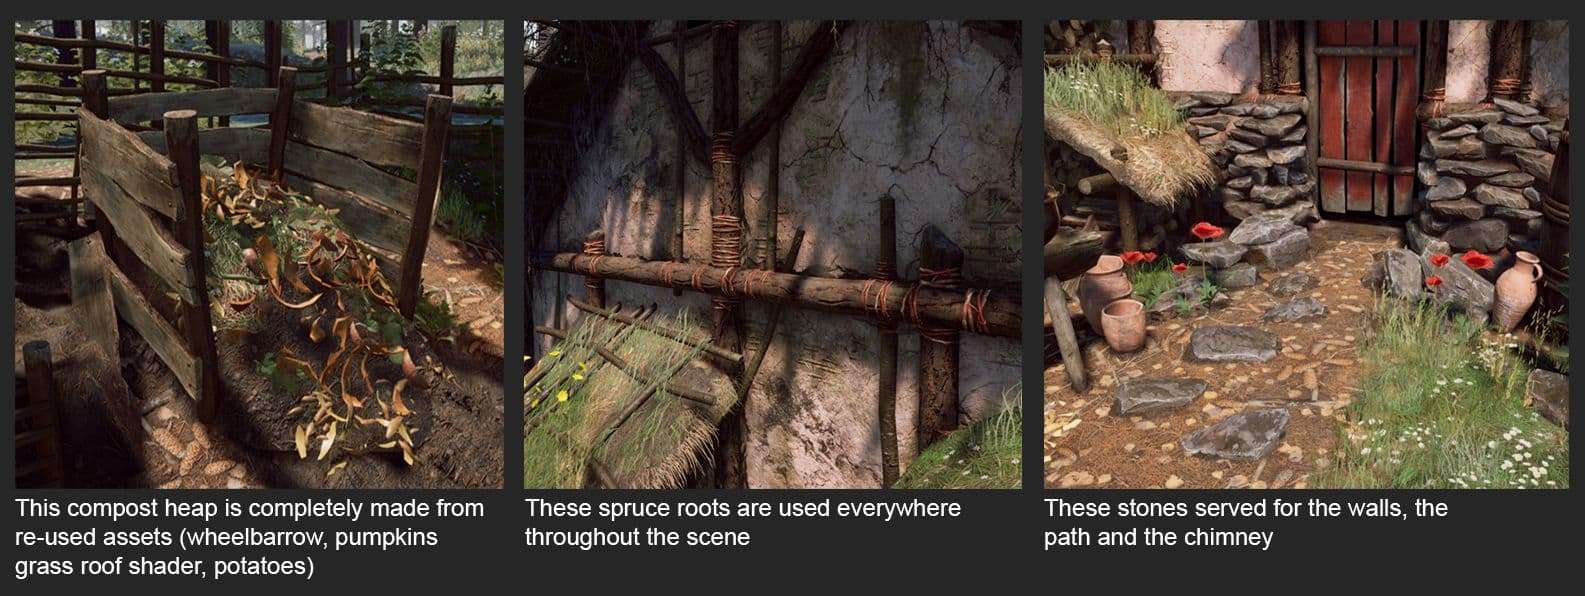
One important lesson I learned this project was to re-use assets as much as possible. In some cases I discovered by accident that I might be able to use part of an asset for another asset. For example the legs of the wooden bench are the steps on the ladder. But in most cases I tried to think beforehand how I could make as much use of an asset as I could.
Foliage
Foliage was a big part of this project. Most of the plants were made from scratch. Two or three plants were made with atlas textures from Textures.com. For some of the really small plants like the daisies I used photo textures. In those instances I created a normal map by painting some black and white masks and converting those to a normal map in CrazyBump.

To create the foliage I first looked at my reference and broke down the plant into its smaller components. It can be useful to do this in a small sketch. After that I used a combination of ZBrush, Substance and Photoshop to create my texture sheet. When making foliage try to cut out as much alpha space as you can. A few extra polies is much cheaper than excessive alpha space.
Master Material Setup
Another trick I use on every project is a simple master-instance material setup. For most materials you need Roughness, AO and Height (height for texture blending). I saved these textures in R,G and B respectively and called this texture C1. People often refer to this as channel packing. I did the same for plants, but for plants the AO was replaced with a Subsurface multiplier, this texture was called P1. The Albedo and the normal both need all three channels. The Roughness, AO and
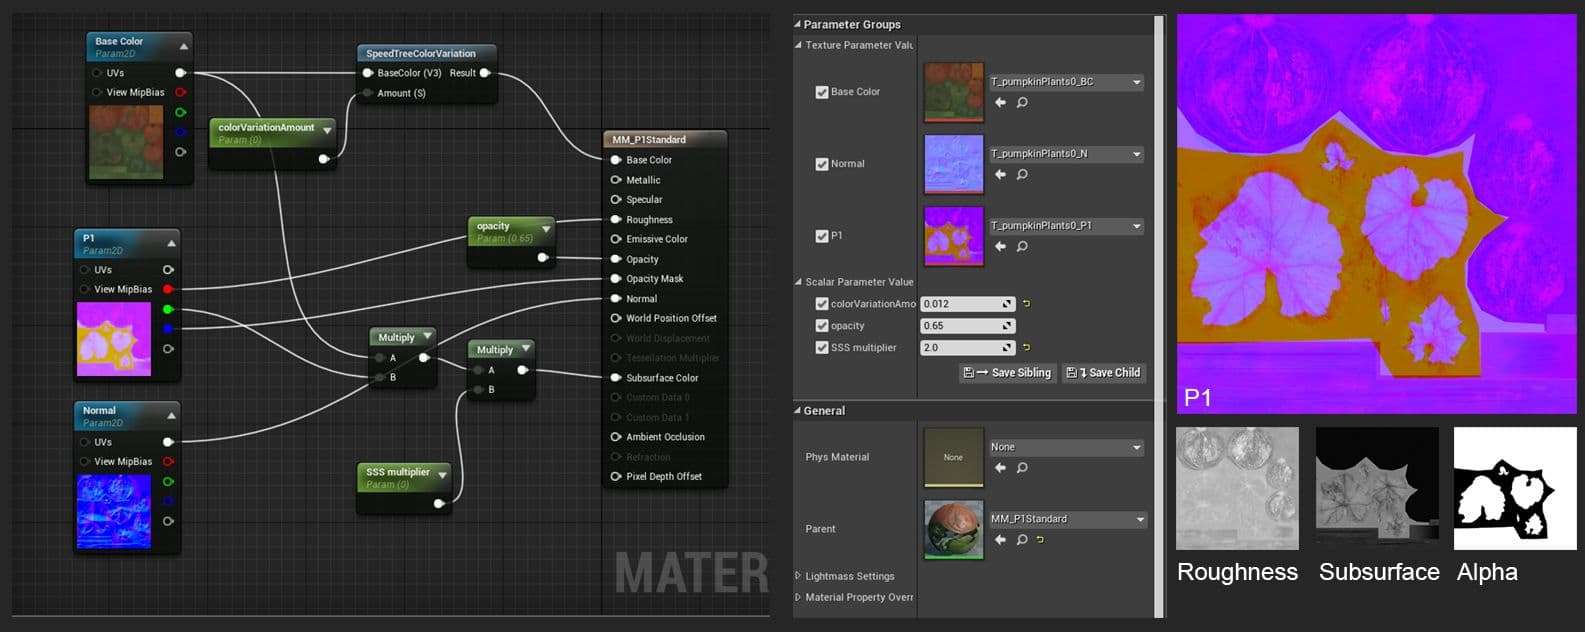
Height/Metalness can be packed in a single texture. If you keep the channels in which you save these maps consistent you could make a master material that takes those three maps as inputs. In the end I had a couple different master materials where I could plug in those maps. You can also expose some parameters, like color variation and Subsurface amount.
Workflow and Feedback
When I worked on a specific asset I like to test it out in engine as soon as possible. For example, materials in Substance always look different from what they look like in Unreal. So after working on assets for a while I saved them to Unreal in the right place with the correct naming convention. I keep working on the asset and re-import every now and then to check what it looks like in engine.

While making this project I constantly asked teachers and peers for feedback. I think feedback is extremely important because other people will always see things you didn’t notice yourself. Everyone has a different way of looking at your project and that can result in new ideas from their side as well.
Final thoughts
I hope you got something useful out of this post. I would encourage everyone to do personal projects. Remember to keep your project scope small so you can actually finish it. And most importantly, have fun!