
Choosing the stork
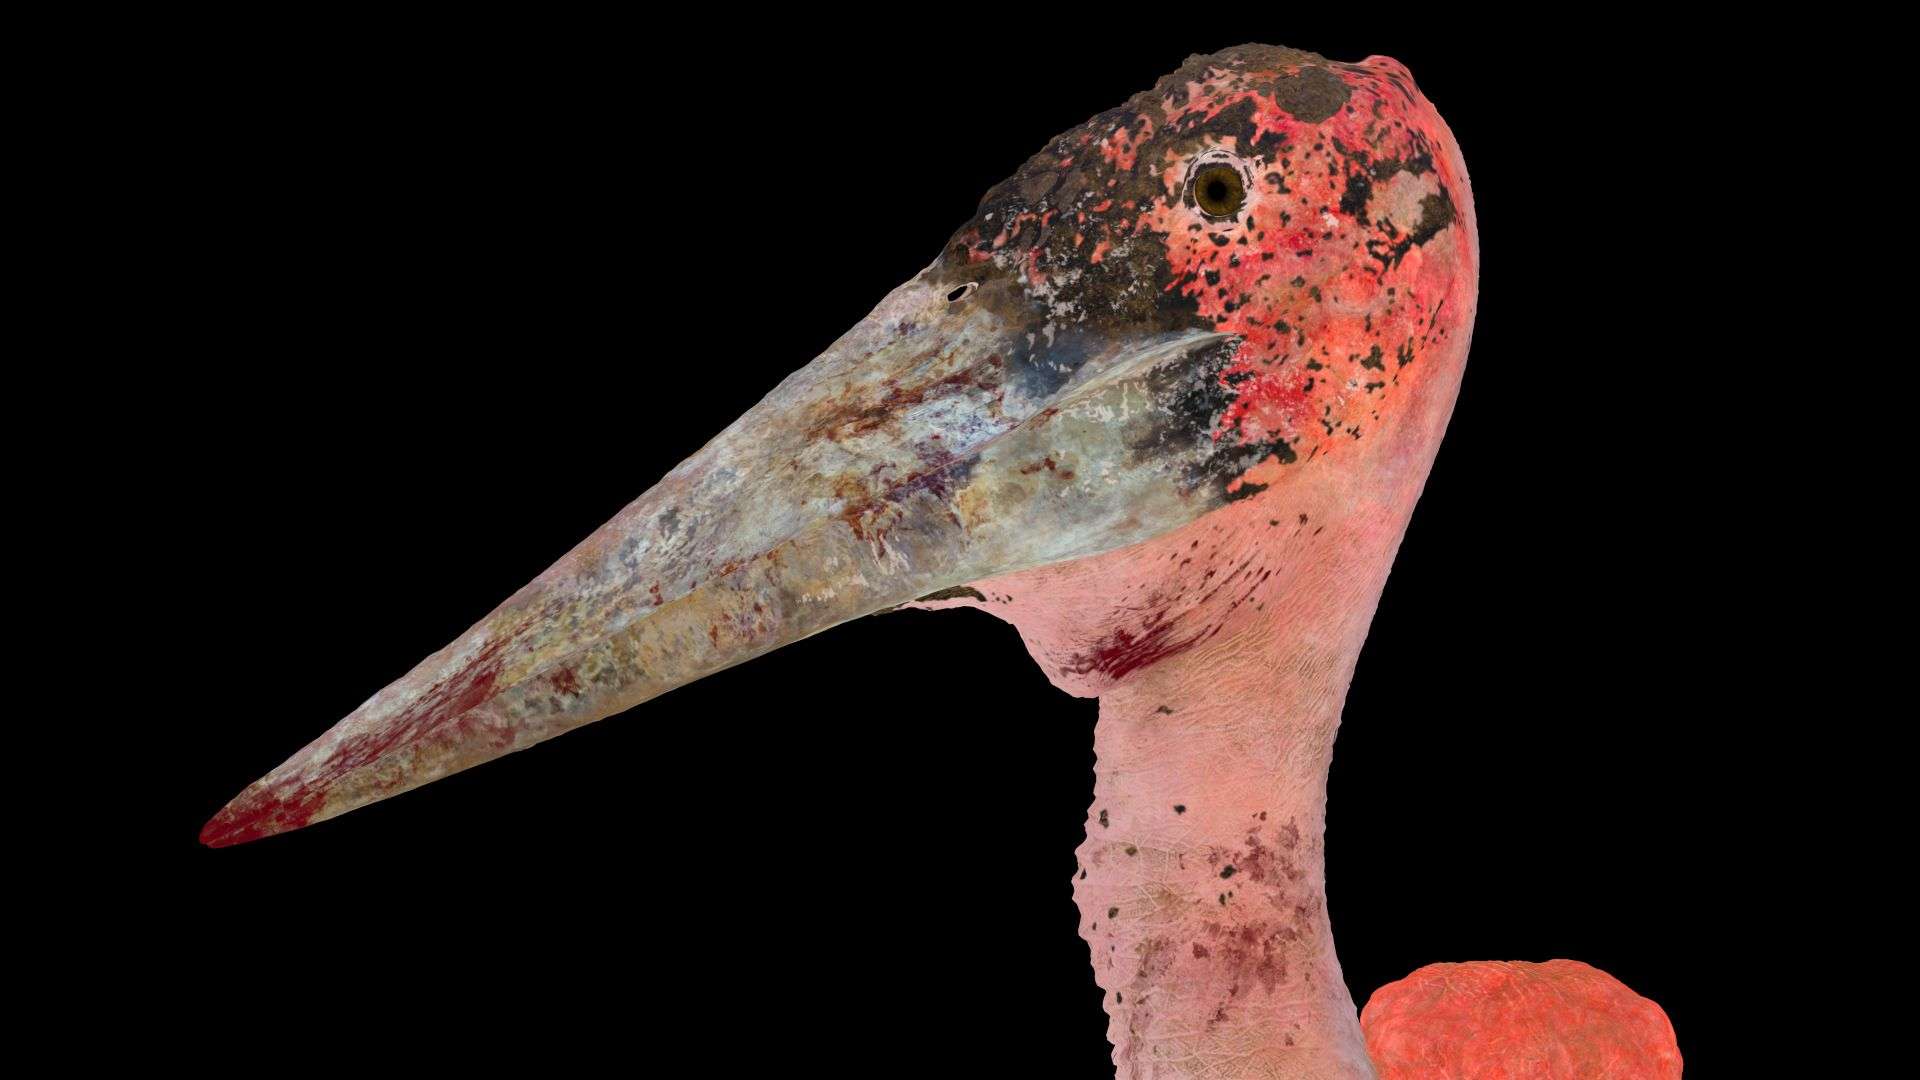
This was my second piece done at school and I wanted to do something completely different from my previous one, which was sci-fi and hard-surface. The logical step was to create something organic and based in real life. I wanted it to be interesting and different. My mentor, the amazing Reilly Lohr suggested, among other ideas, doing a bust of this stork. I had never seen this bird before and just loved his overall look, how unique it was and the challenges it would present.
Reference
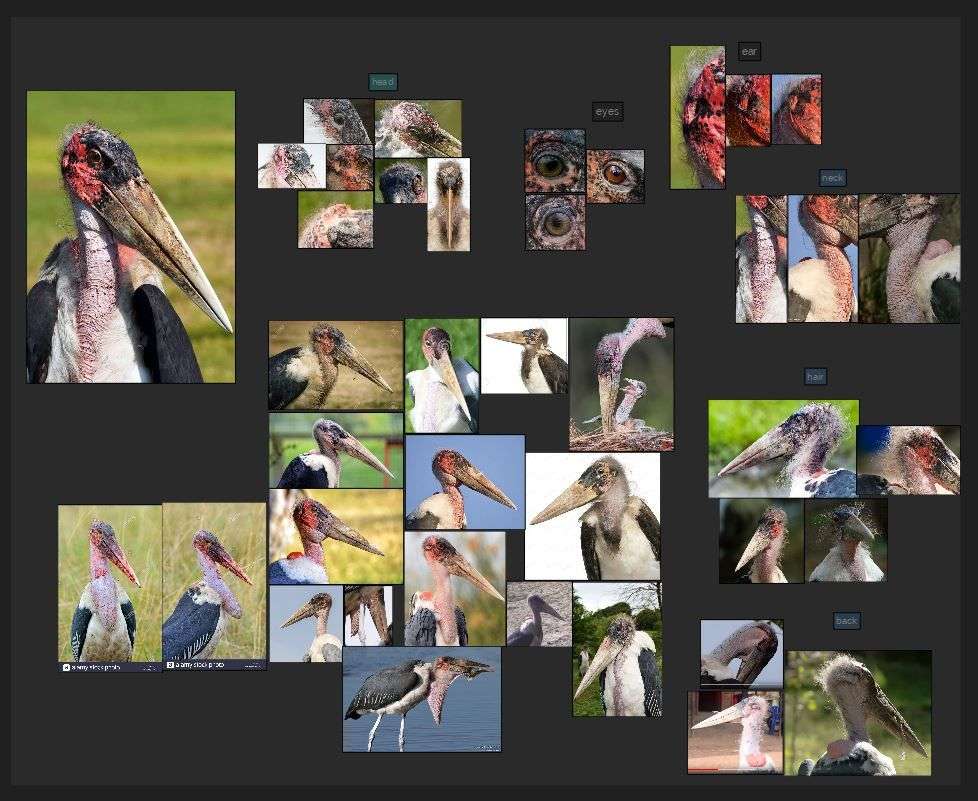
The most important part when starting a new project is to gather as much reference as possible. The process can be tedious and boring at times but the payoff is worth it. Having an abundant set of references take guesswork out of the equation.
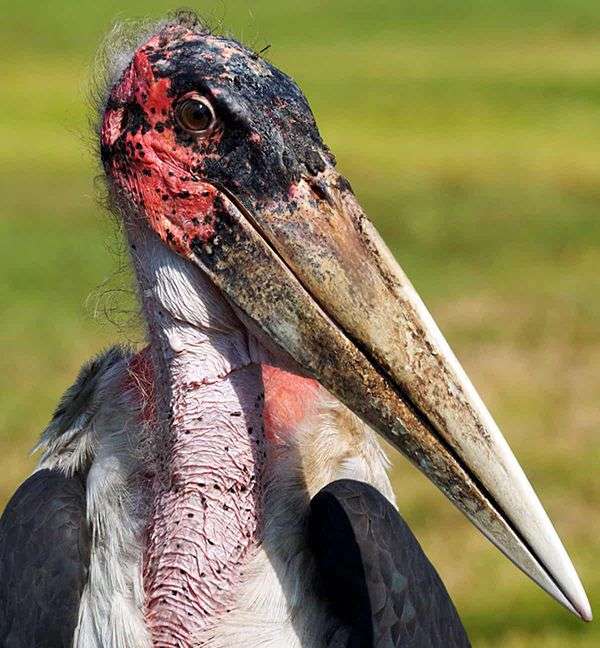
My software of choice for managing reference is Pureref. I started gathering reference from Google Images and Pinterest. The first thing I noticed was how different the head and beak colors were between specimens. The older they get the less vibrant and saturated their colors are. I had to choose one image as my main reference or it would start getting confusing. I decided on a younger version of the bird.
When gathering reference choose one image, if possible, as your main one. Then have supporting ones for areas that are not visible or not clear enough.
Sculpting, retopo and UVs
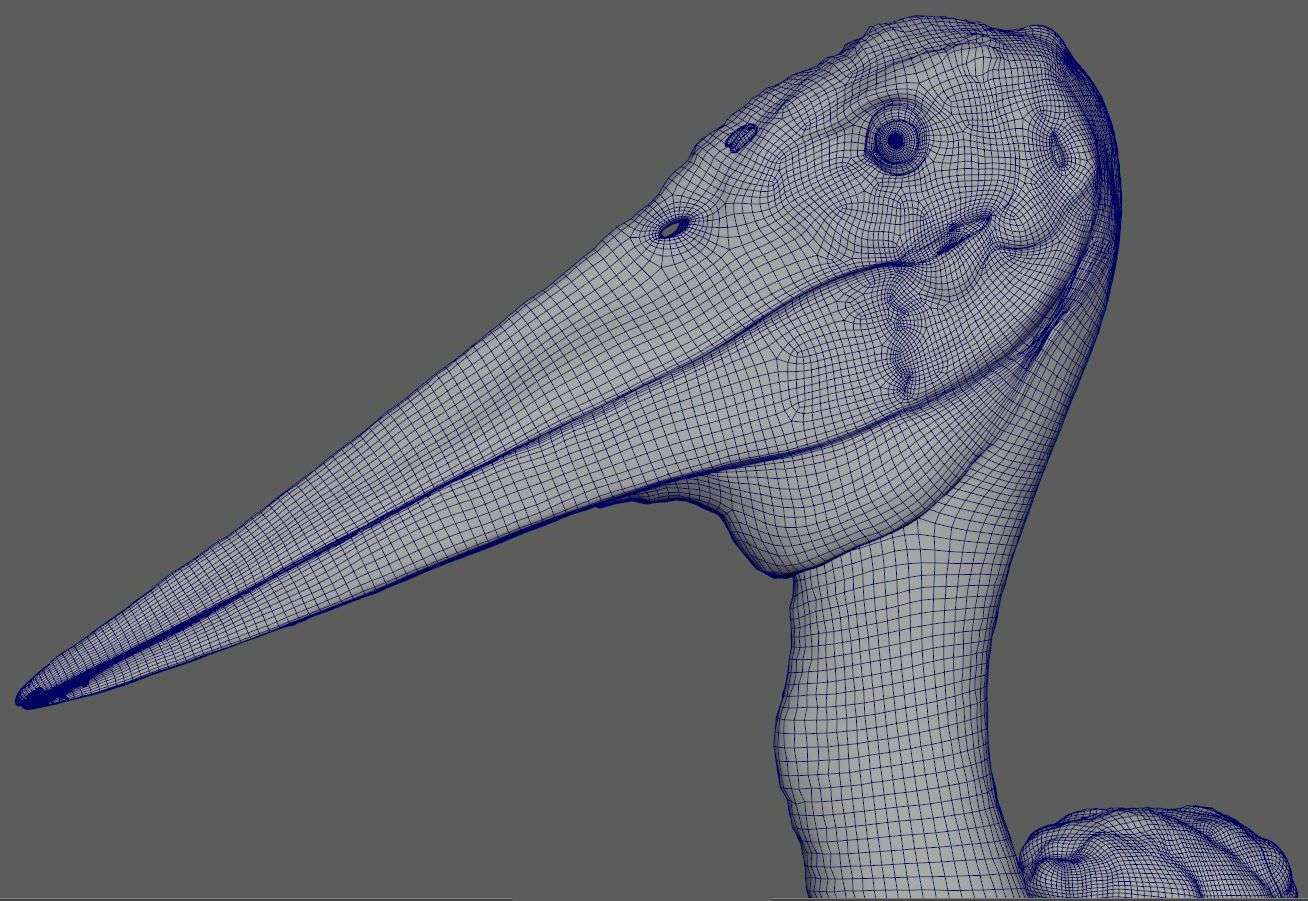
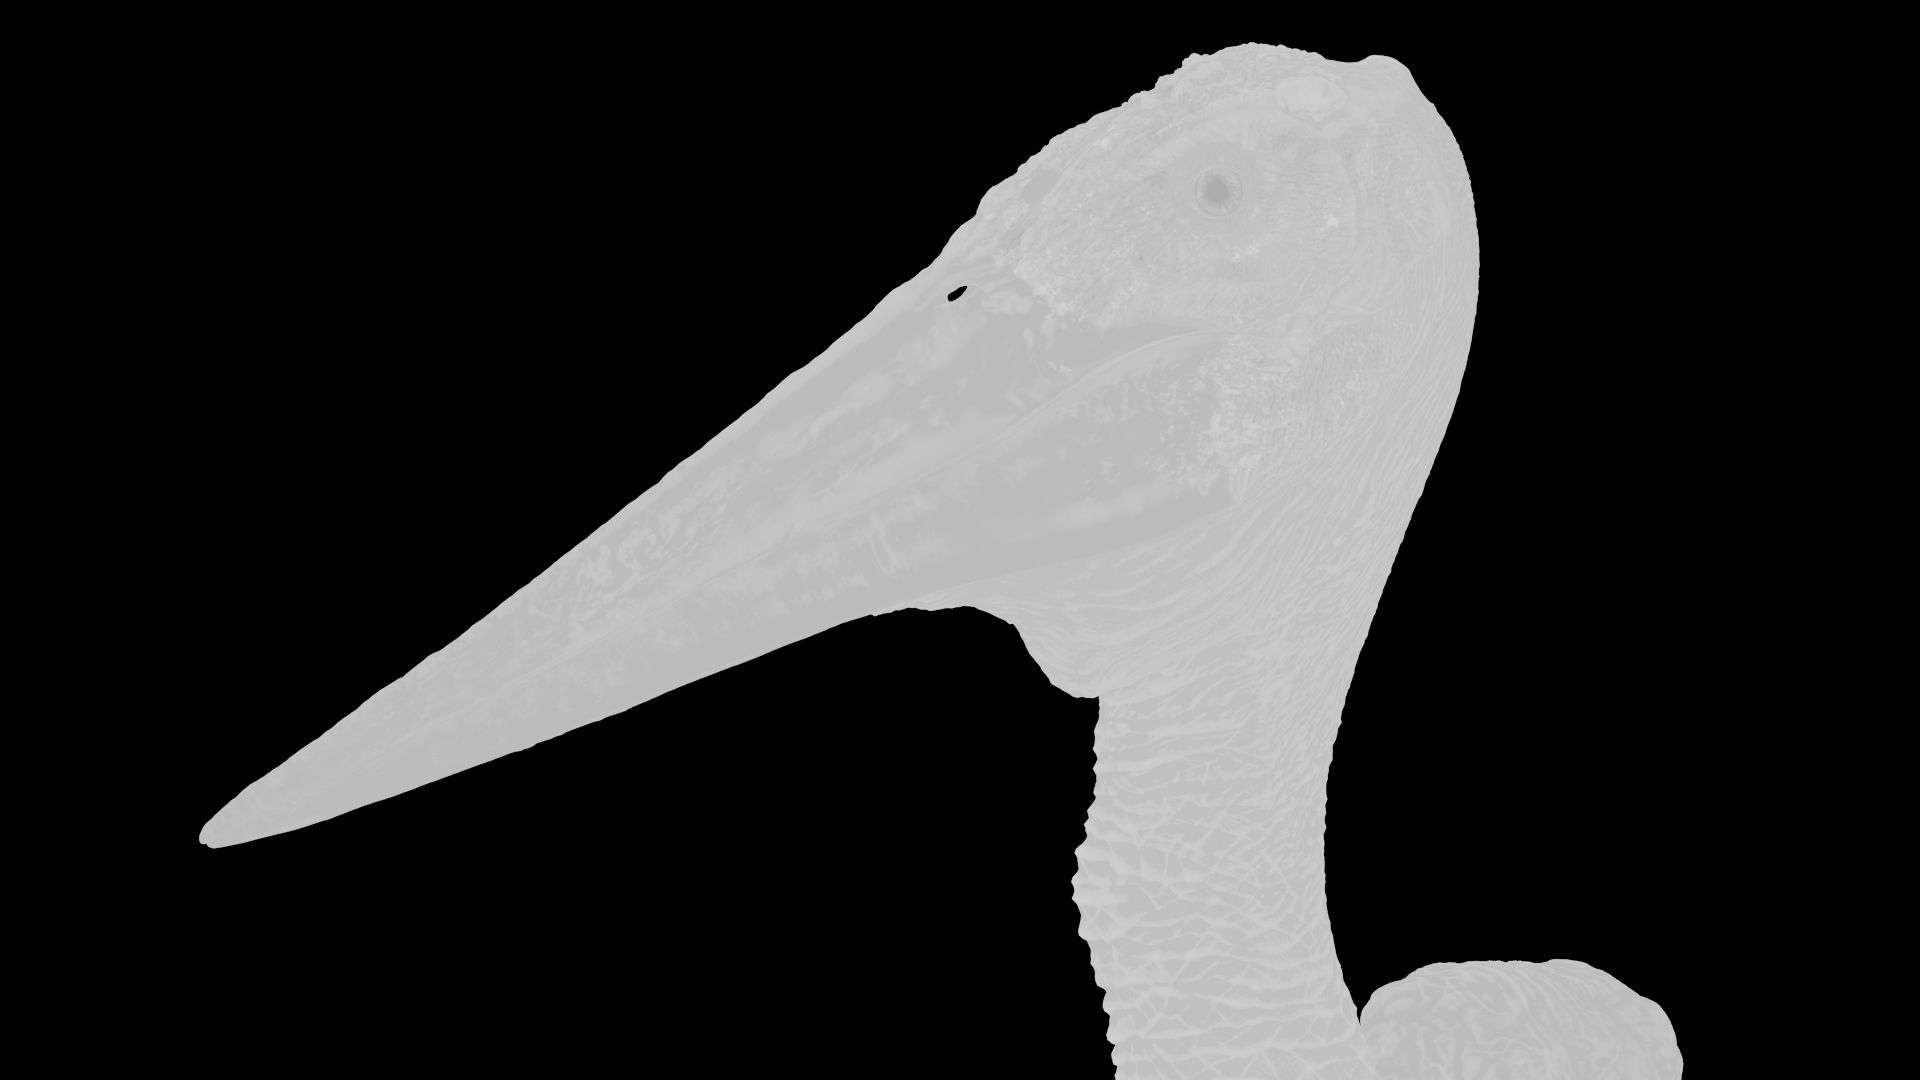
After gathering enough reference from as many angles as possible I jumped straight into Zbrush. With the help of dynamesh I started to pull out the main shapes from a sphere. For this purpose the main brushes I used where Move, Standard and DamStandard. You want to get the silhouette and the proportions right first. Once I had the main shapes laid out I went to Maya for retopo and get proper edge flow.
I always use Maya’s Quad Draw, which is very intuitive and easy to use. When doing retopo try to avoid creating over-stretched faces, keep them as close to a square as possible. This will prevent stretching during texturing. Also take into consideration where your edge loops need to be (in my case they had to be around the eyes, the ears and the nostrils).
This is the appropriate time to do UV’s. To know how many UDIMs you are going to need you have to first decide how close the asset is going to get to the camera. I wanted mine to get fairly close without losing texture detail so I ended up with 9 UDIMs (each UDIM being 4k) for the entire asset.
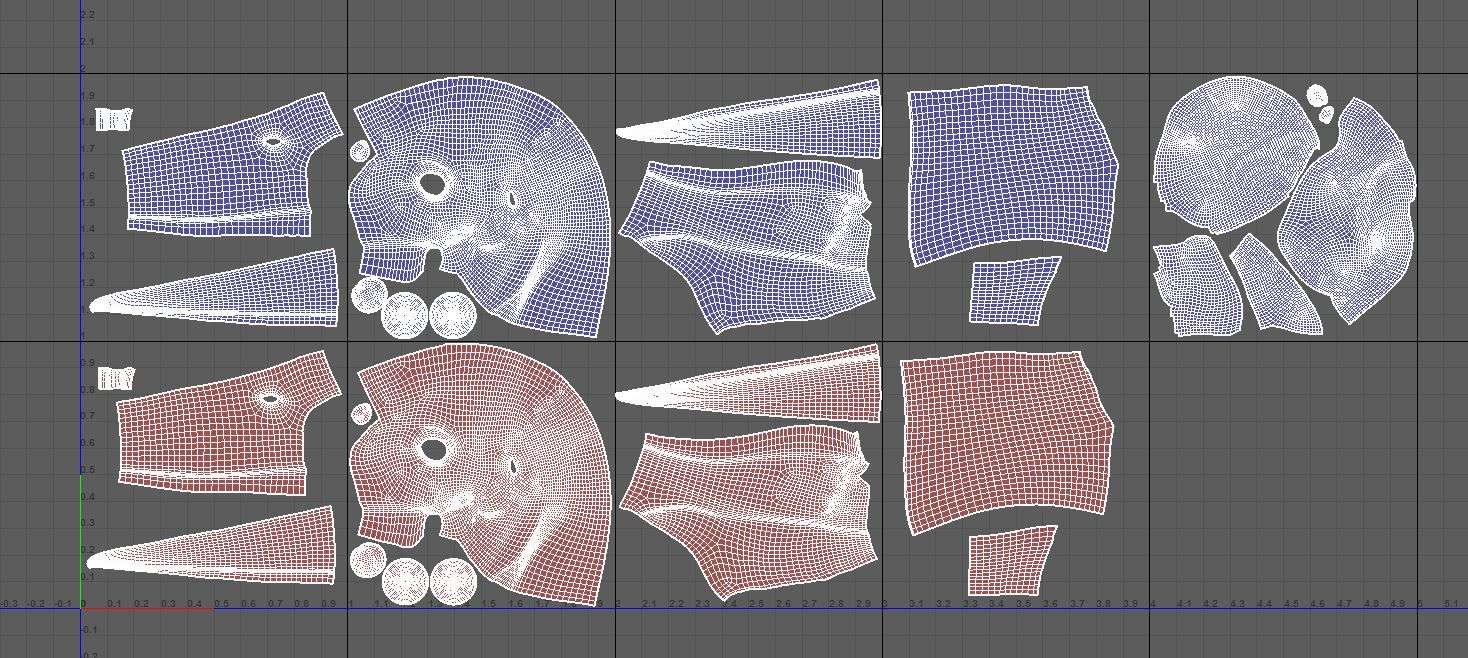
My UV tiles were symmetrical, this was helpful during texturing. You can paint one side and simply copy and paste to the other, speeding up the process. This was only for the base, I didn't want to have identical textures on either side, it wouldn't look organic.
When I went back to ZBrush I had to re-project all the detail I already had. Enrique Sagasta, one of Think Tank’s awesome global mentors gave me a great tip.
Tip: An alternative to ‘Project All’ when reprojecting detail. You can 'Freeze SubDivision Levels' on the original mesh then import the new mesh on top of it, overwriting it. Then just unfreeze the subdivisions and all the detail should be in the new, retopologized version.

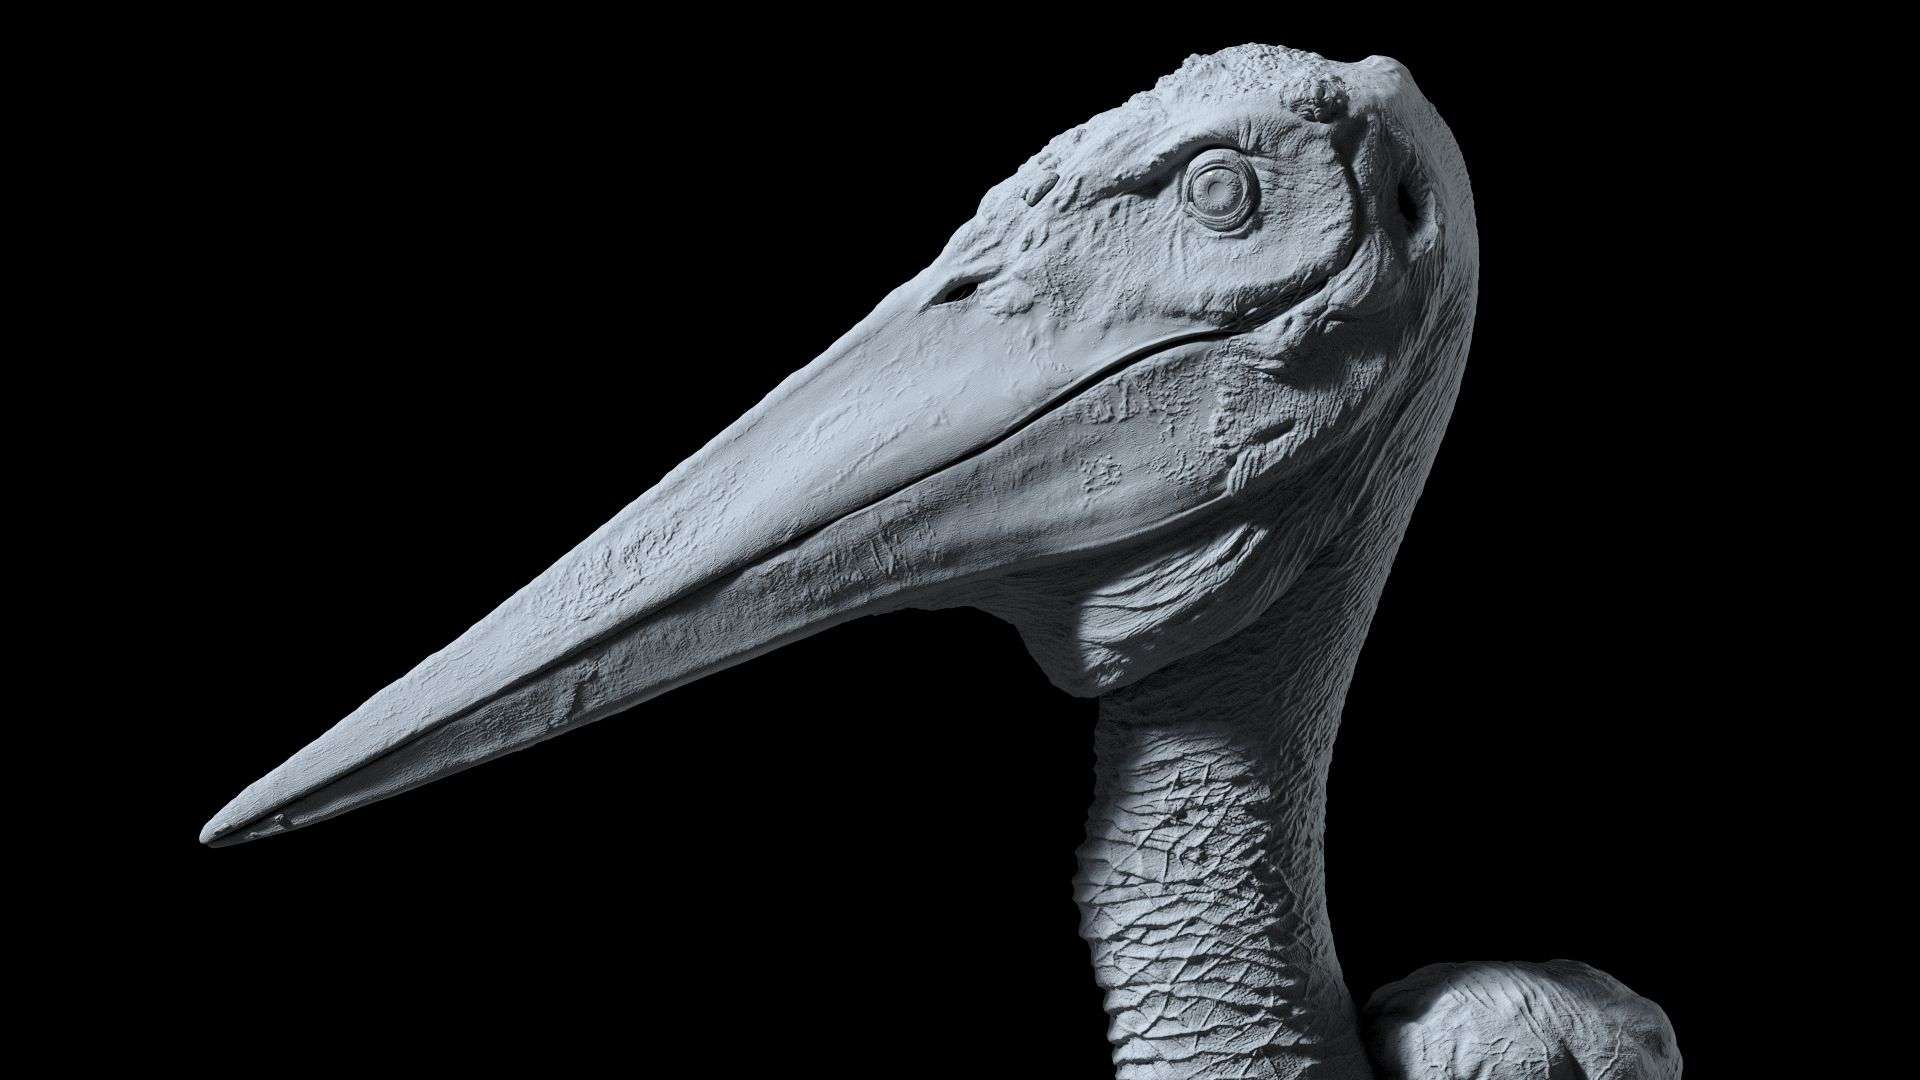
Once I had proper topology it was a matter of expending the time adding secondary layers of detail on the bird. Don’t make the mistake of jumping straight into high frequency details if your primary and secondary shapes aren’t there yet. They are the very last step, don’t rush them. Get as many resources as you can from your reference. Things like alphas, even the surface noise from within ZBrush is very handy. Everything that can make your life easier during the sculpting process.
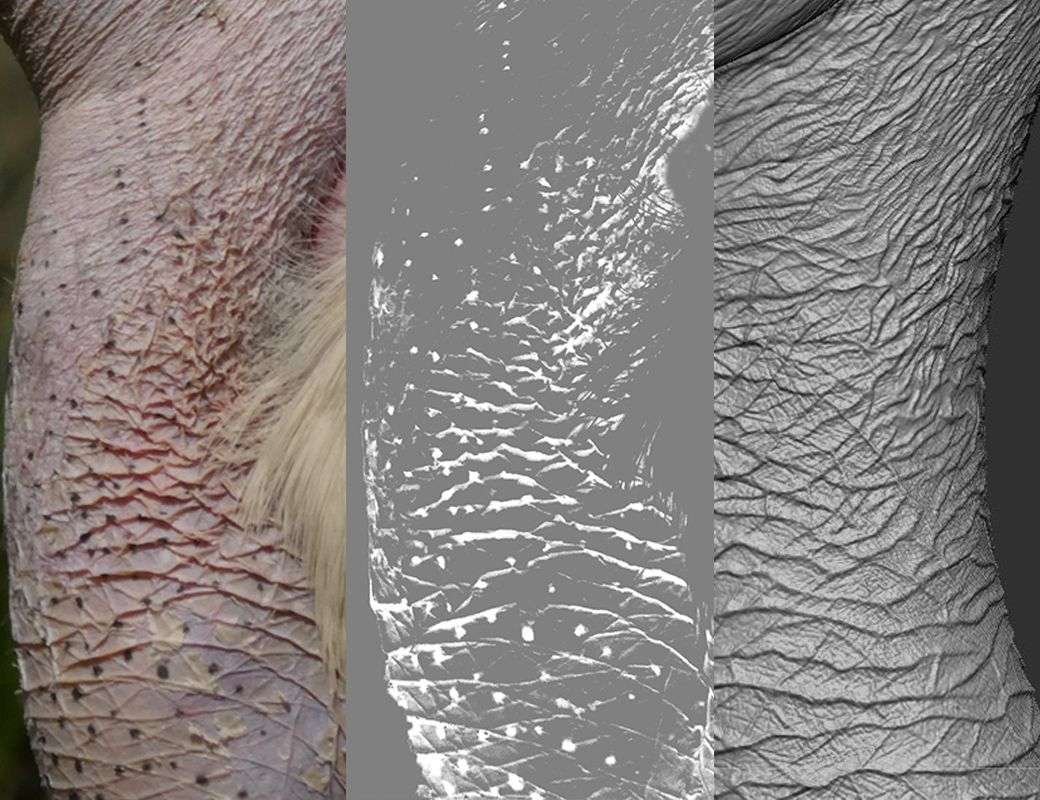
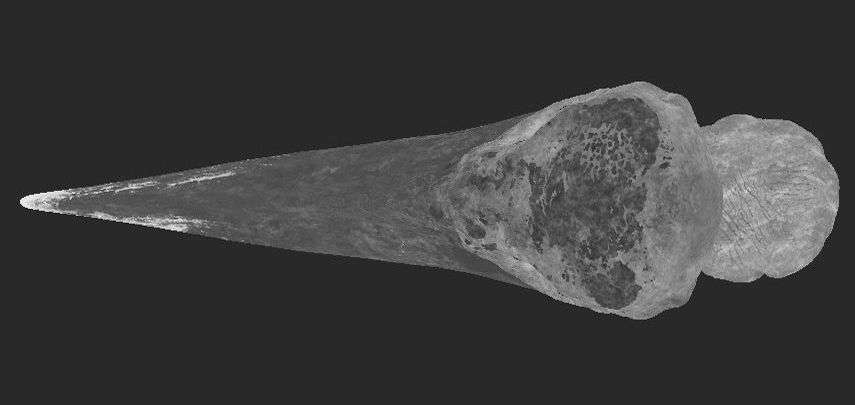
Alphas were extremely helpful on this project for complex areas like the warts on top of the head and the wrinkles covering the entirety of the neck. For example, with the neck I was overwhelmed at first and didn’t know where to start. What I did was extract alphas from pictures like the one down below. Even if the resolution wasn’t the best the only thing I cared about was getting a base. After that I cleaned up the detail and push it further.
When I was happy with the sculpt it was time to export all the details as a displacement map. Displacements can be a headache when you have never set them up. This website has been a life saver for me. It details the process step by step. I highly recommend checking it out.
Once in Maya, I imported the subdivision 1 from my meshes and their displacement maps. The problem I immediately ran into was that I forgot to model to scale. Having your model in real life measurements is key to avoid problems while shading, specially with SSS shaders.
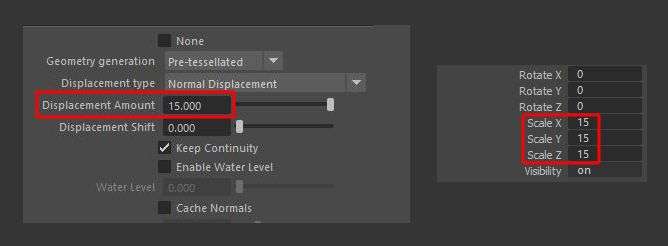
You can actually change the scale of your model after you've baked your displacement without messing up the map (in V-ray at least)
I had to upscale my model 15 times its original size to make the bust life sized. Afterwards I made sure to increment the displacement amount to 15 (it defaults at 1.0) and it worked. I used V-ray so I cannot guarantee it will work on other renderers.
I did some test renders and when I made sure everything was working it was time to start texturing.
Texturing
I used Mari for the texturing process. But before starting I had to create some maps that would help during texturing. This is where Substance Painter became handy. I used it to create a Thickness map. Other maps I used were AO (baked both in Mari and Substance just to have two variations) and Cavity (I used ZBrush for this one).
I would suggest creating the following maps before texturing:
- Ambient Occlusion. They are useful for things like dirt since it normally collects in occluded areas. Useful for both organic and hard-surface assets.
- Thickness. Useful for color variation. It could be driving an HSV or some other type of color correction node. This map is also important for SSS on organic pieces.
- Cavity. Its useful for peaks and valleys. Could be used for color and gloss variation. Most commonly used in organic pieces.
- Displacement. I already had this from ZBrush. I would suggest overlaying it on top of your layer stack with around 20% opacity so you know where the displaced areas are located. I also used it as a base for my bump map.
- Curvature. It highlights the edges of the mesh. Mostly used for edge wear on hard-surface assets. I didn’t use this one for this particular project.
- Isolation masks. If you have multiple materials is nice to have each one isolated in a mask for easy access. For this project I used them to isolate different sections of the bird: head, beak, neck, warts and bag (the weird thing on its back).
Once all the auxiliary maps were ready the fun part began: actual texturing. Remember to grade and tile your textures if necessary. Grading means removing lighting information from your textures before applying them to your asset. To make a texture tileable I used Photoshop’s Offset feature. That way I can see the seams and use clone stamp, content-aware or the spot-healing brush to remove them.
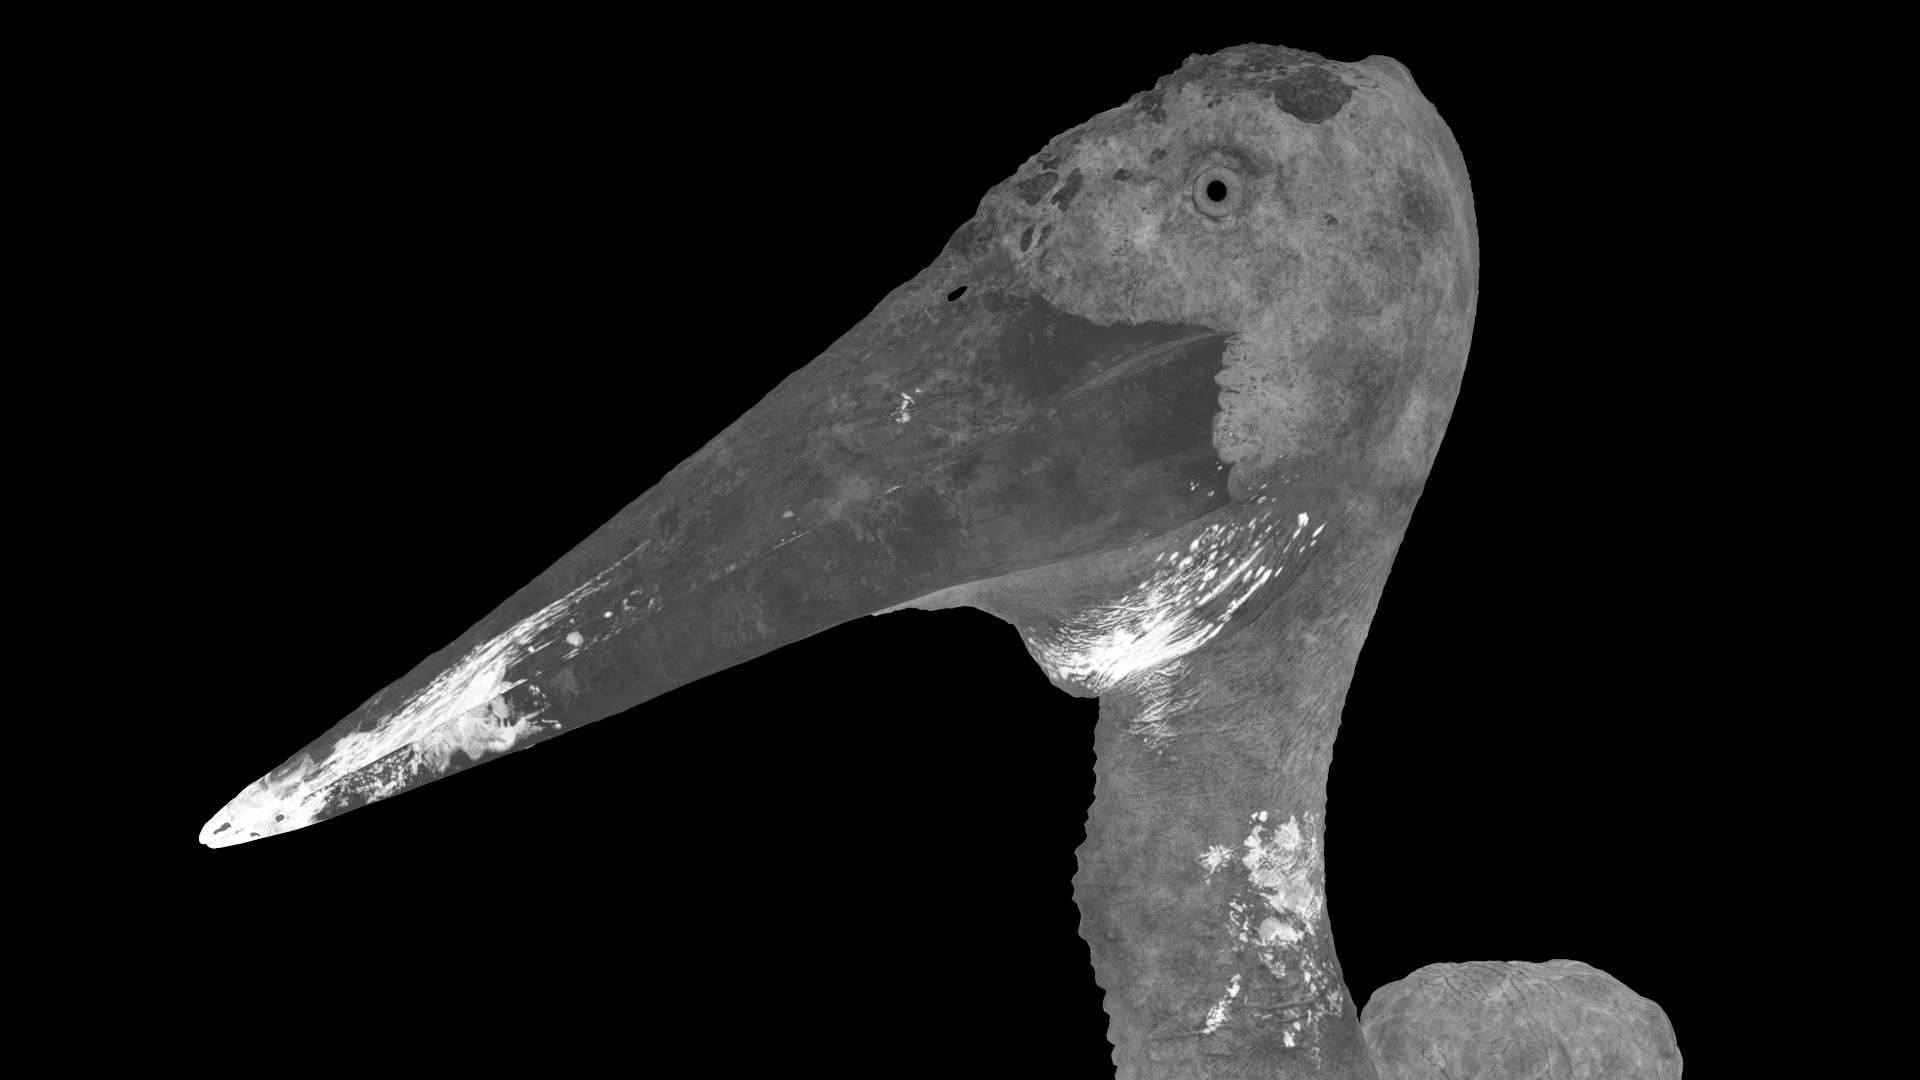
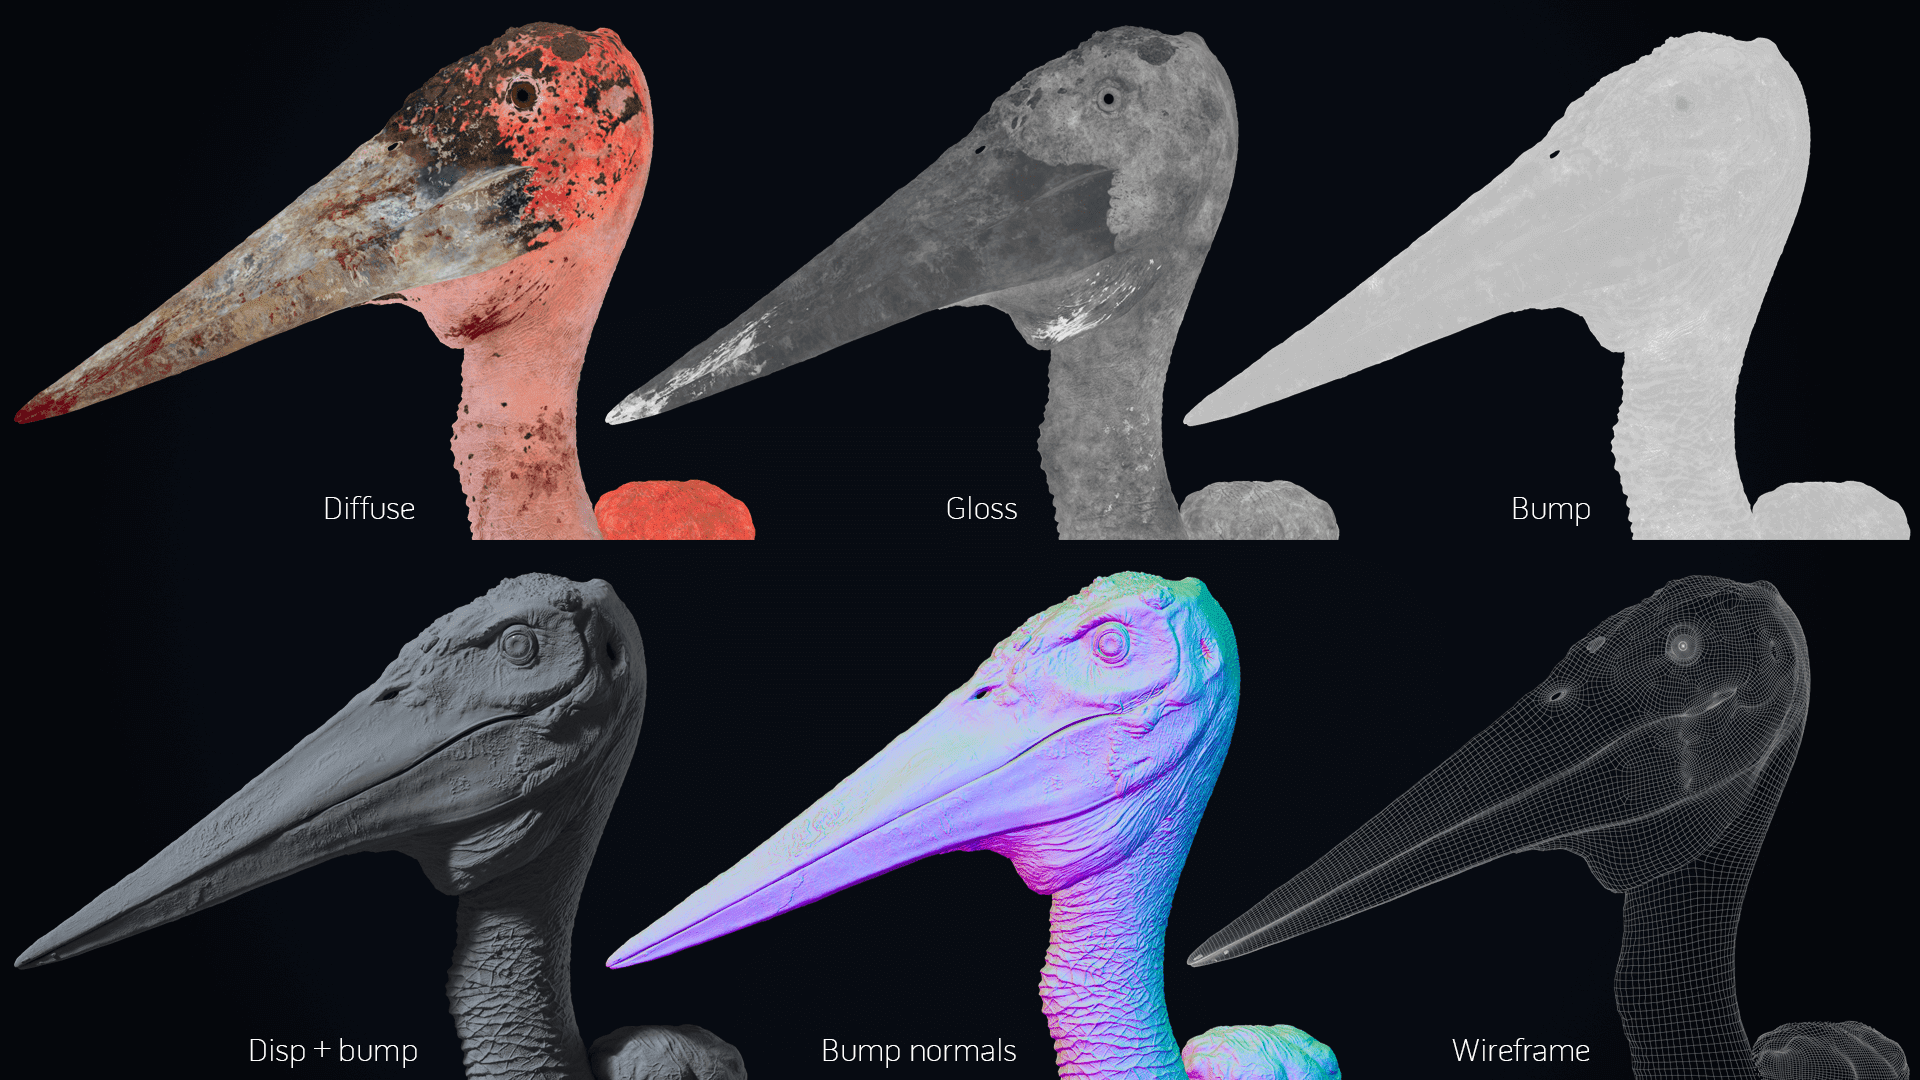
Diffuse
- For the skin I used raw fish photographs, human skin, and anything fleshy that could give me the look I was going for. This was just the base. I made changes using my auxiliary maps, added layers using masks for breakup and the many procedural tools Mari provides.
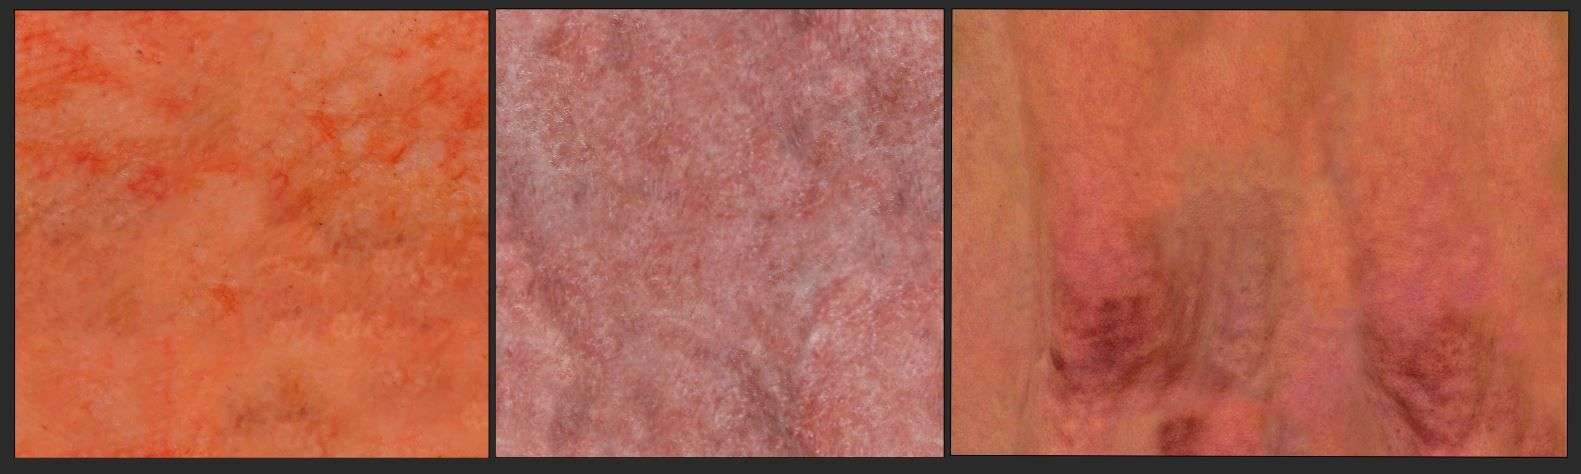
- For the spots that the stork has across all of its face I used my reference images and made alphas out of them. Most of them were low res so cleanup was necessary.
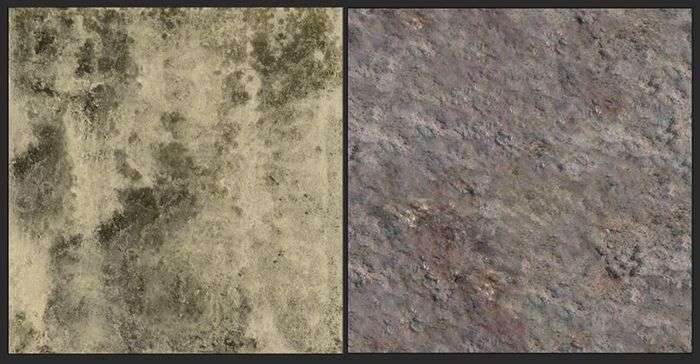
- The warts had a rock texture as a base. It resembled the dry look they have.
- The beak was a combination of projected detail, grunged walls and rock textures too.
- I added some dried blood here and there, specially in the beak but the fresh blood was gonna be entirely done in Maya through a shader. The thing I did in Mari was the blood mask and the gloss variation map.
Bump
Bump was the most important map for this project and the one that I had to tweak the most to get the look I was going for. The marabou stork has a very dry and bumpy skin. At first I thought the sculpt could do all the heavy lifting but I soon realized that I could have exaggerated more the bumps on the sculpt, specially around the eye which was very smooth at the time.
During this stage I went back and forth between tweaking the bump and the sculpt itself. To fix some of the smoothness I used the displacement map as a base for the bump to boost those details and on top of that some leathery textures for tertiary details in the skin.
Glossiness
The glossiness map was more straightforward. A lot of the reflection breakups were already coming from both the displacement and the bump. The thing I had to add was some general gloss variation on the skin and the beak. Some elements of the diffuse map were useful to get halfway there.
The warts on top of its head and the beak had to be the roughest parts of the bird. This is where the isolation masks shined. It was fairly easy to lower the gloss in those specific areas.
I worked on the gloss map for the fresh blood and the dirt separately from the main gloss map because they were gonna be on a different shader.
Shading
Tip: Go back and forth between texturing and look-deving. Only this way you can clearly tell what your textures are doing to the shader and vice versa. Don’t think of them as separate stages, they go hand in hand
For look-deving I recommend using an HDR to light the scene. HDRI Haven is the website I used. They have dozens of free HDRs to choose from. Use at least a couple of different HDRs to tell if your shaders are working well in different lightning scenarios.

For the skin shader, Karthik Kolthay, one of my schoolmates recommended V-ray’s Alsurface shader. It proved to be the perfect choice. It has control for 2 separate reflections which was very useful for the final result. Because I corrected the scale earlier I didn’t have to struggle with the ‘scale’ value, leaving it at the default 1.0.
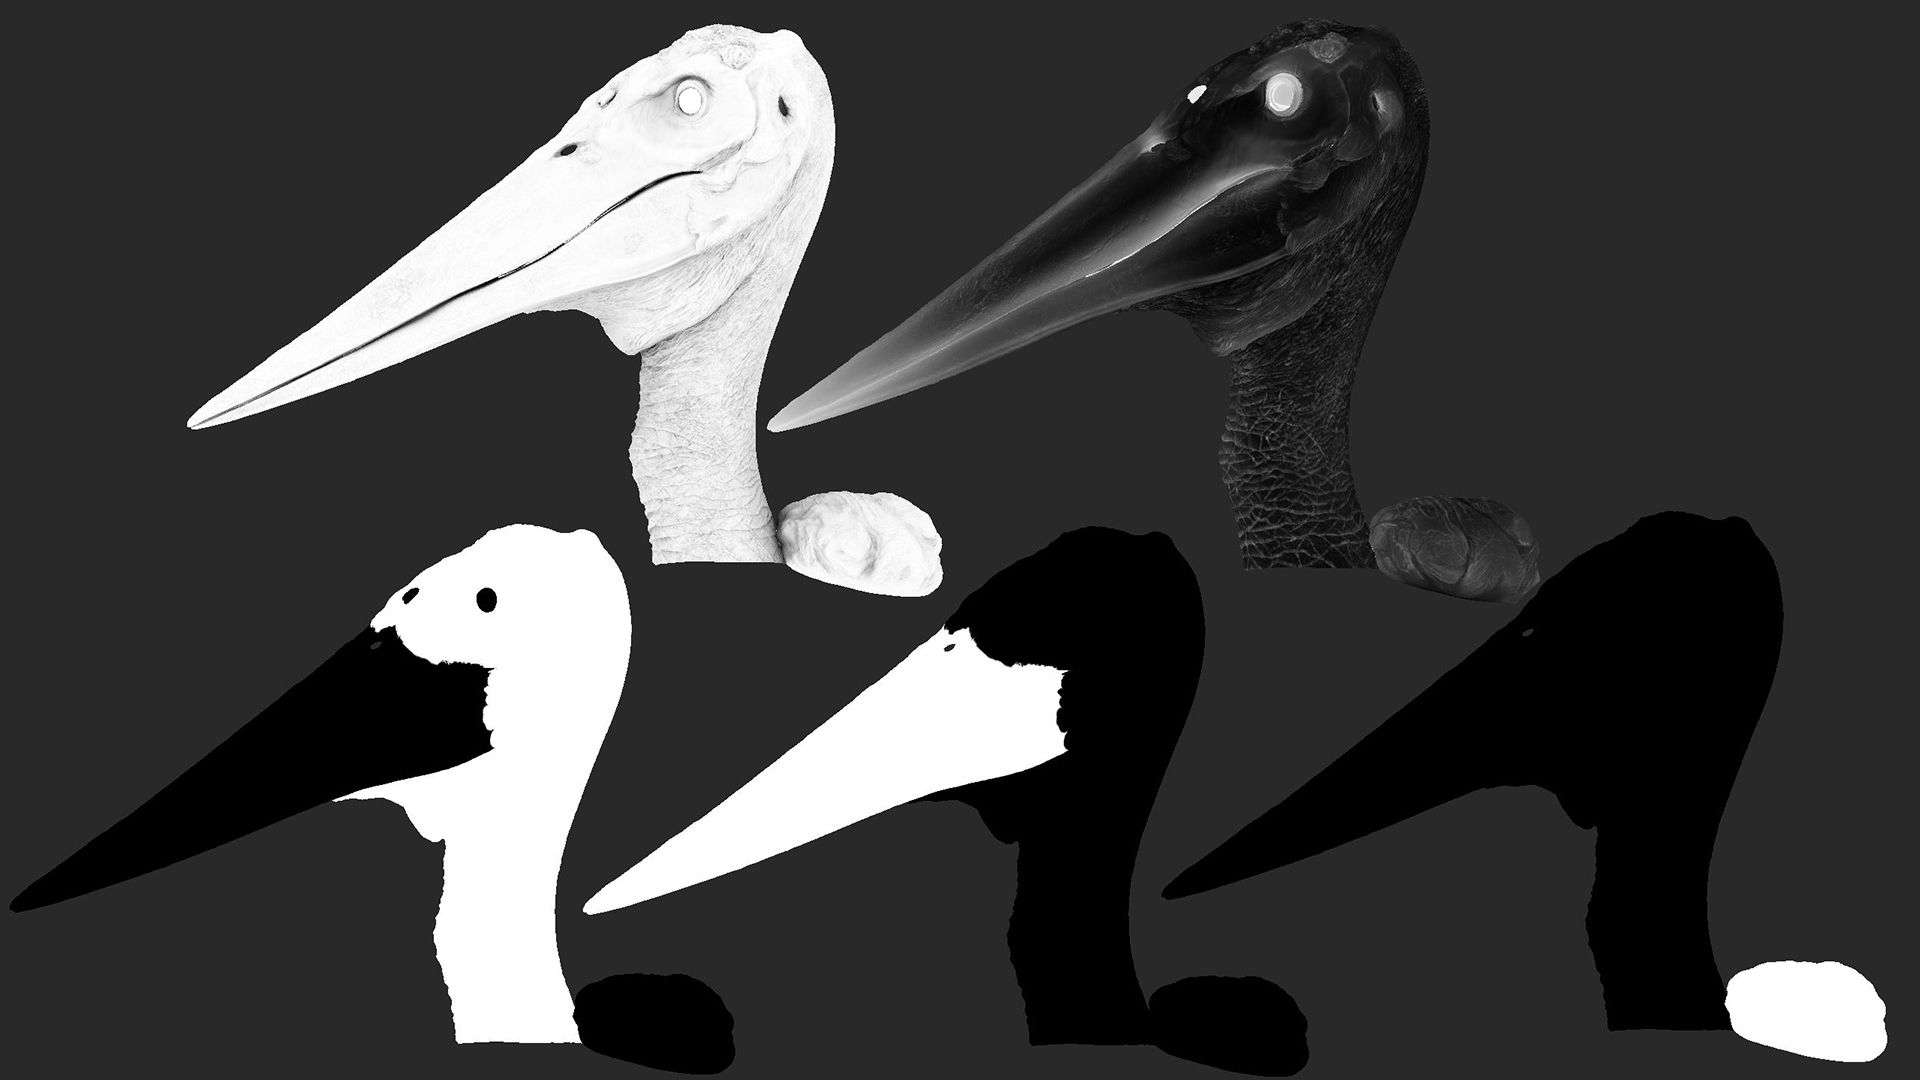
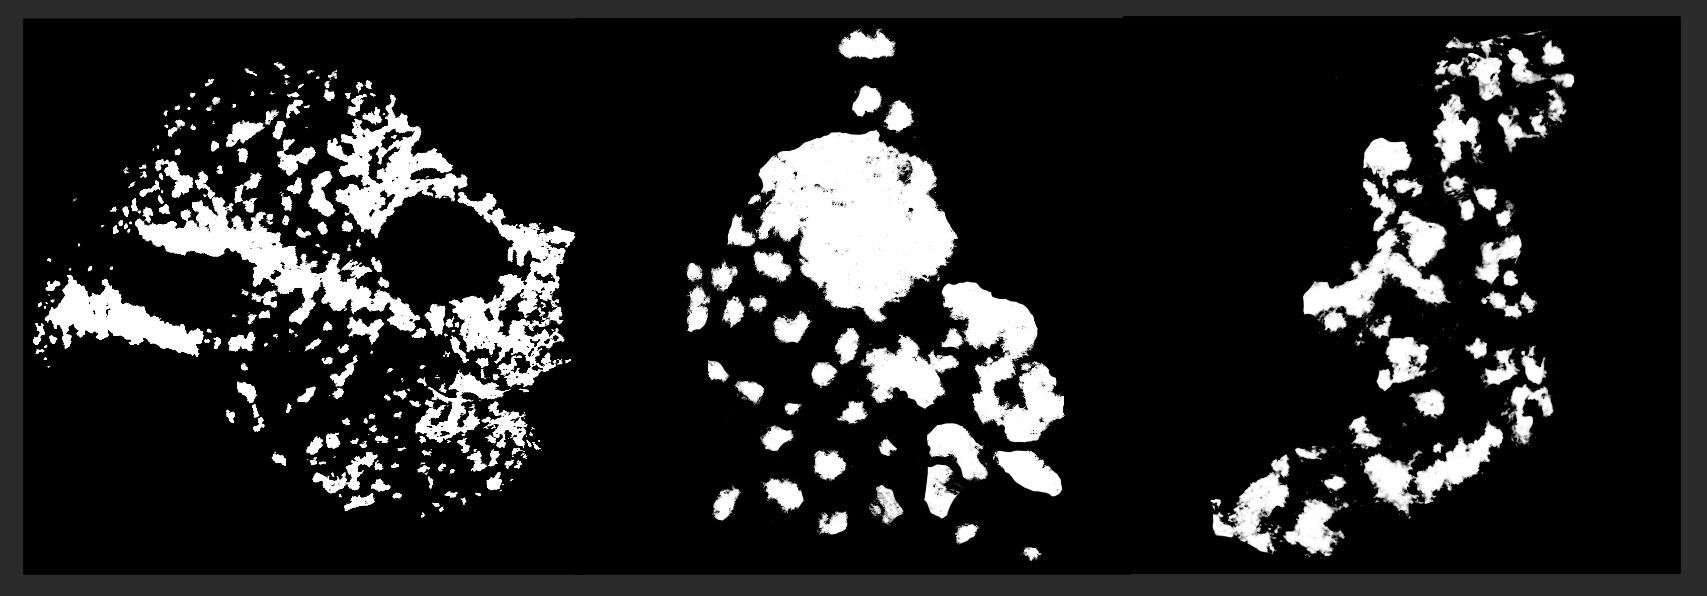
The other important parameter was the ‘SSS mix’. This value determines the blend between the diffuse and the SSS component. Down below you can see the SSS mask I used to control this value. The logic I followed was that the rougher and drier parts of the asset would have less SSS contribution.
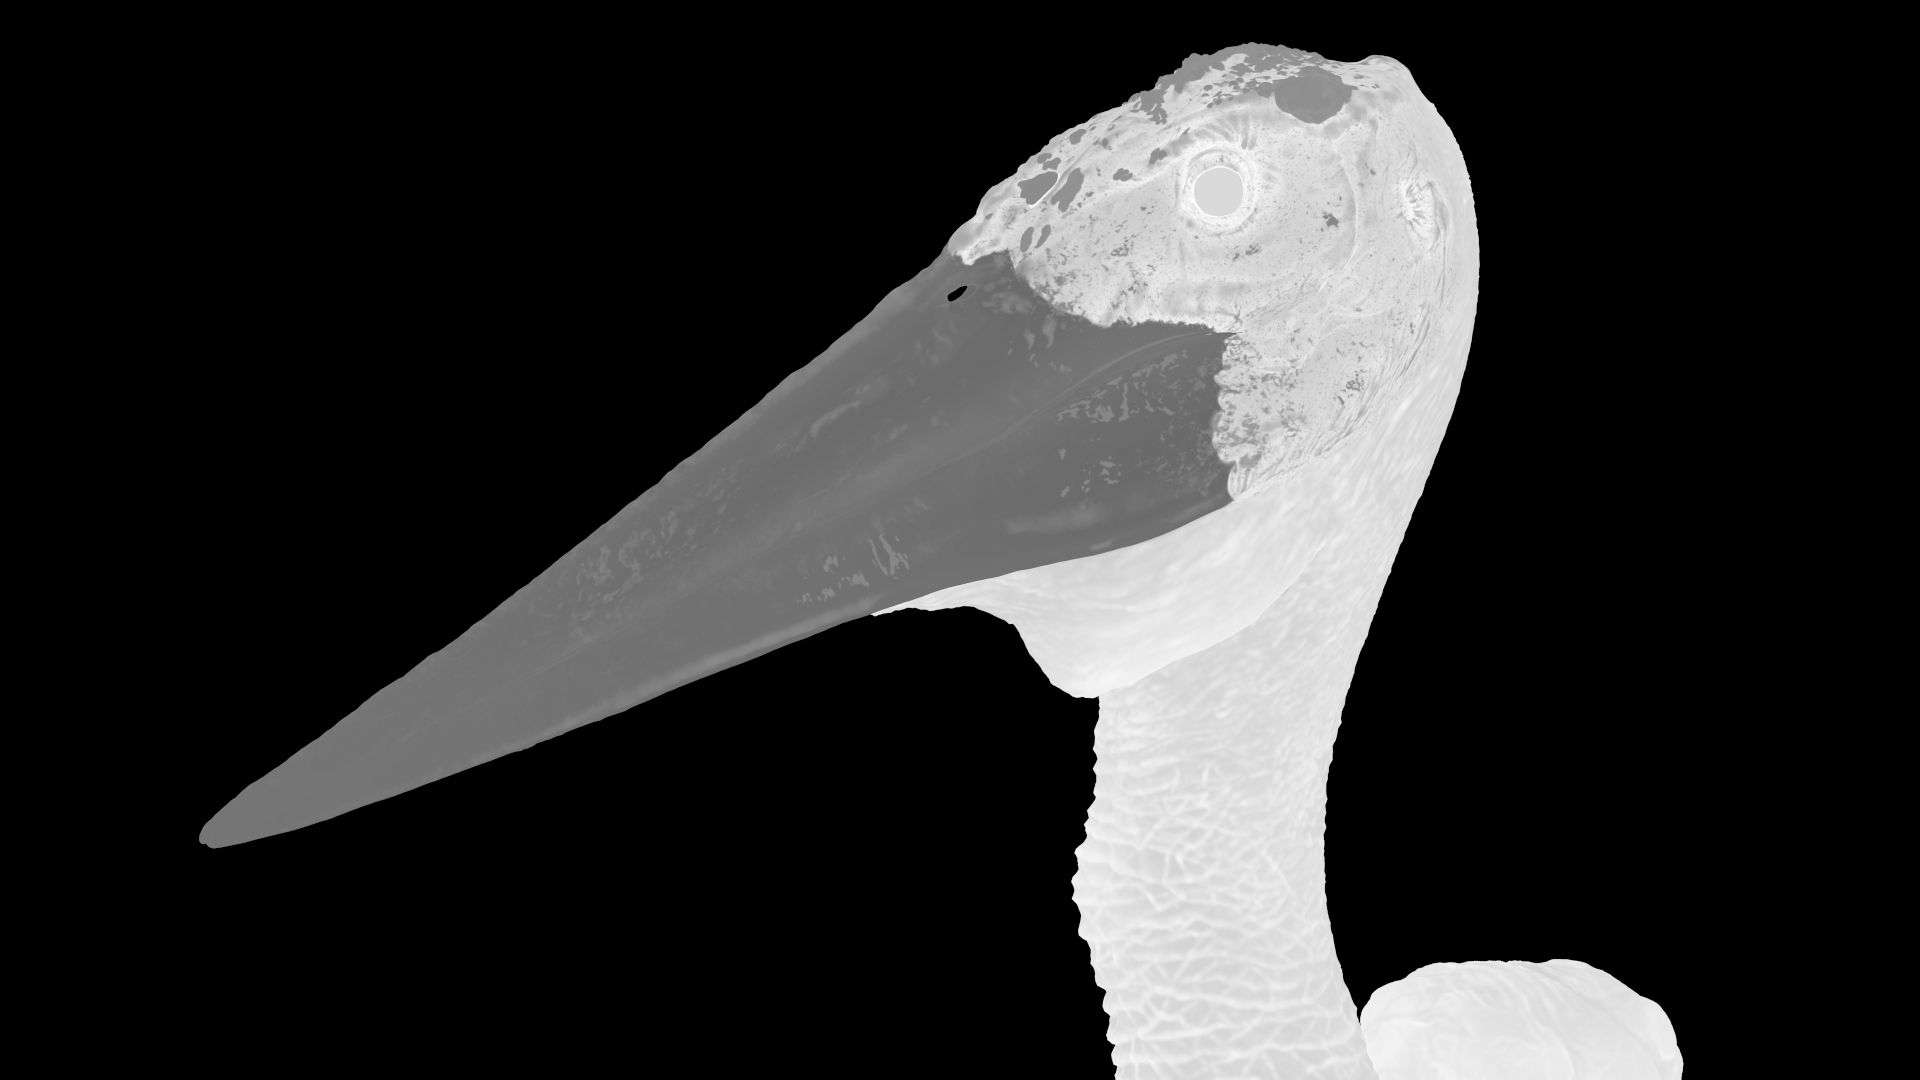
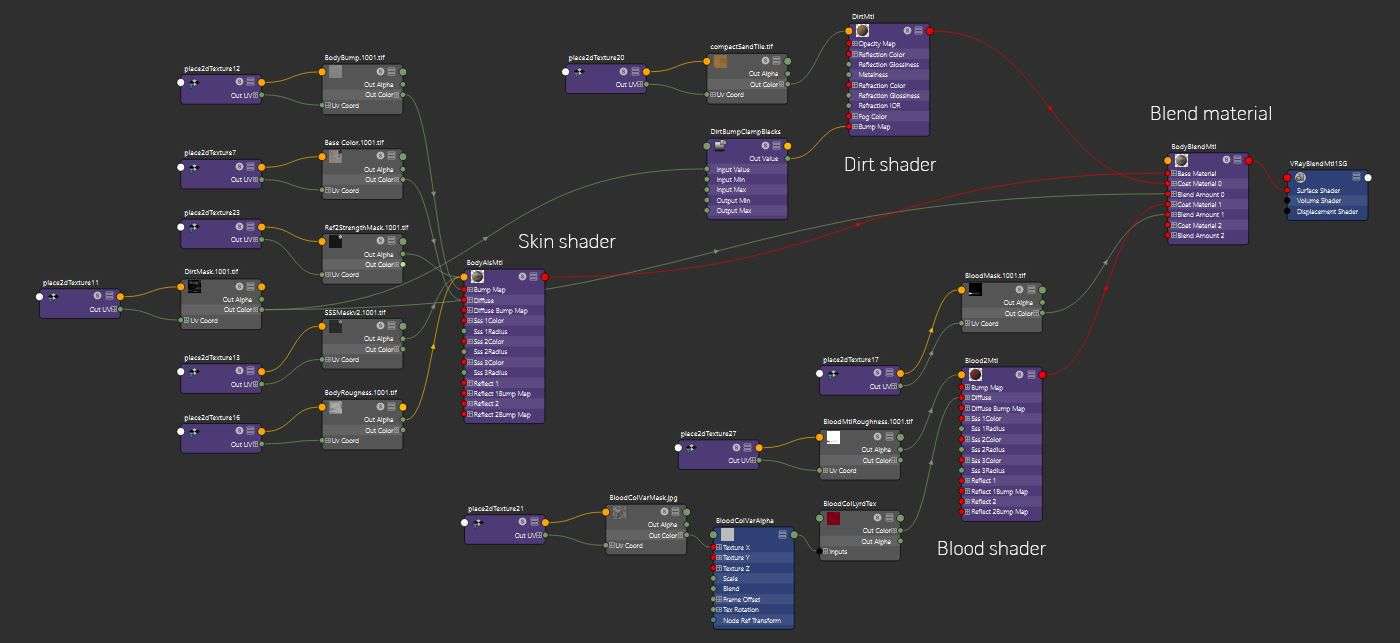
The base was the Alsurface shader for the skin and on top of that the dirt and blood shaders. The masks that drove the blend between them were created in Mari. Everything was combined using a VrayBlendMtl.
Xgen
Finally for the hair I used Xgen Interactive Grooming. I was intimidated at first but the Xgen Interactive Grooming Editor is very user-friendly. The tool has modifiers that you can apply to your collection. The marabou stork has very messy hair so I added a noise modifier and did some manual tweaks on top of that.
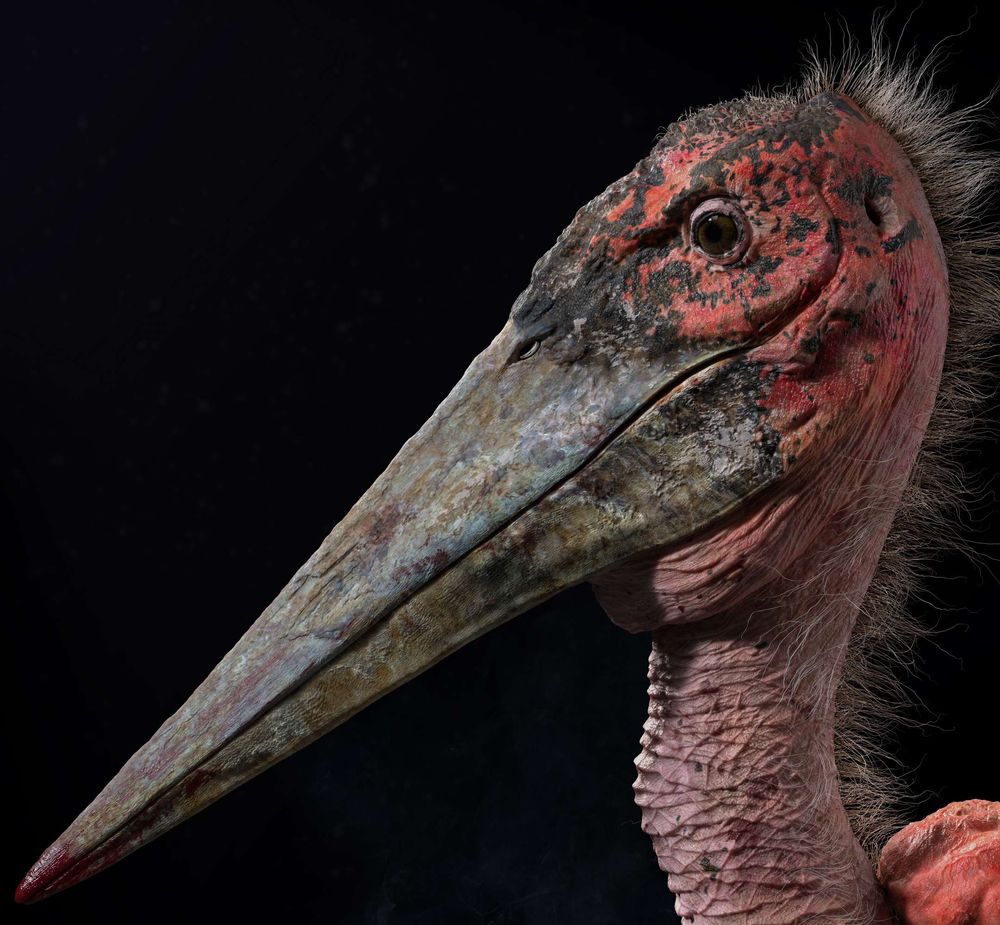
Final renders
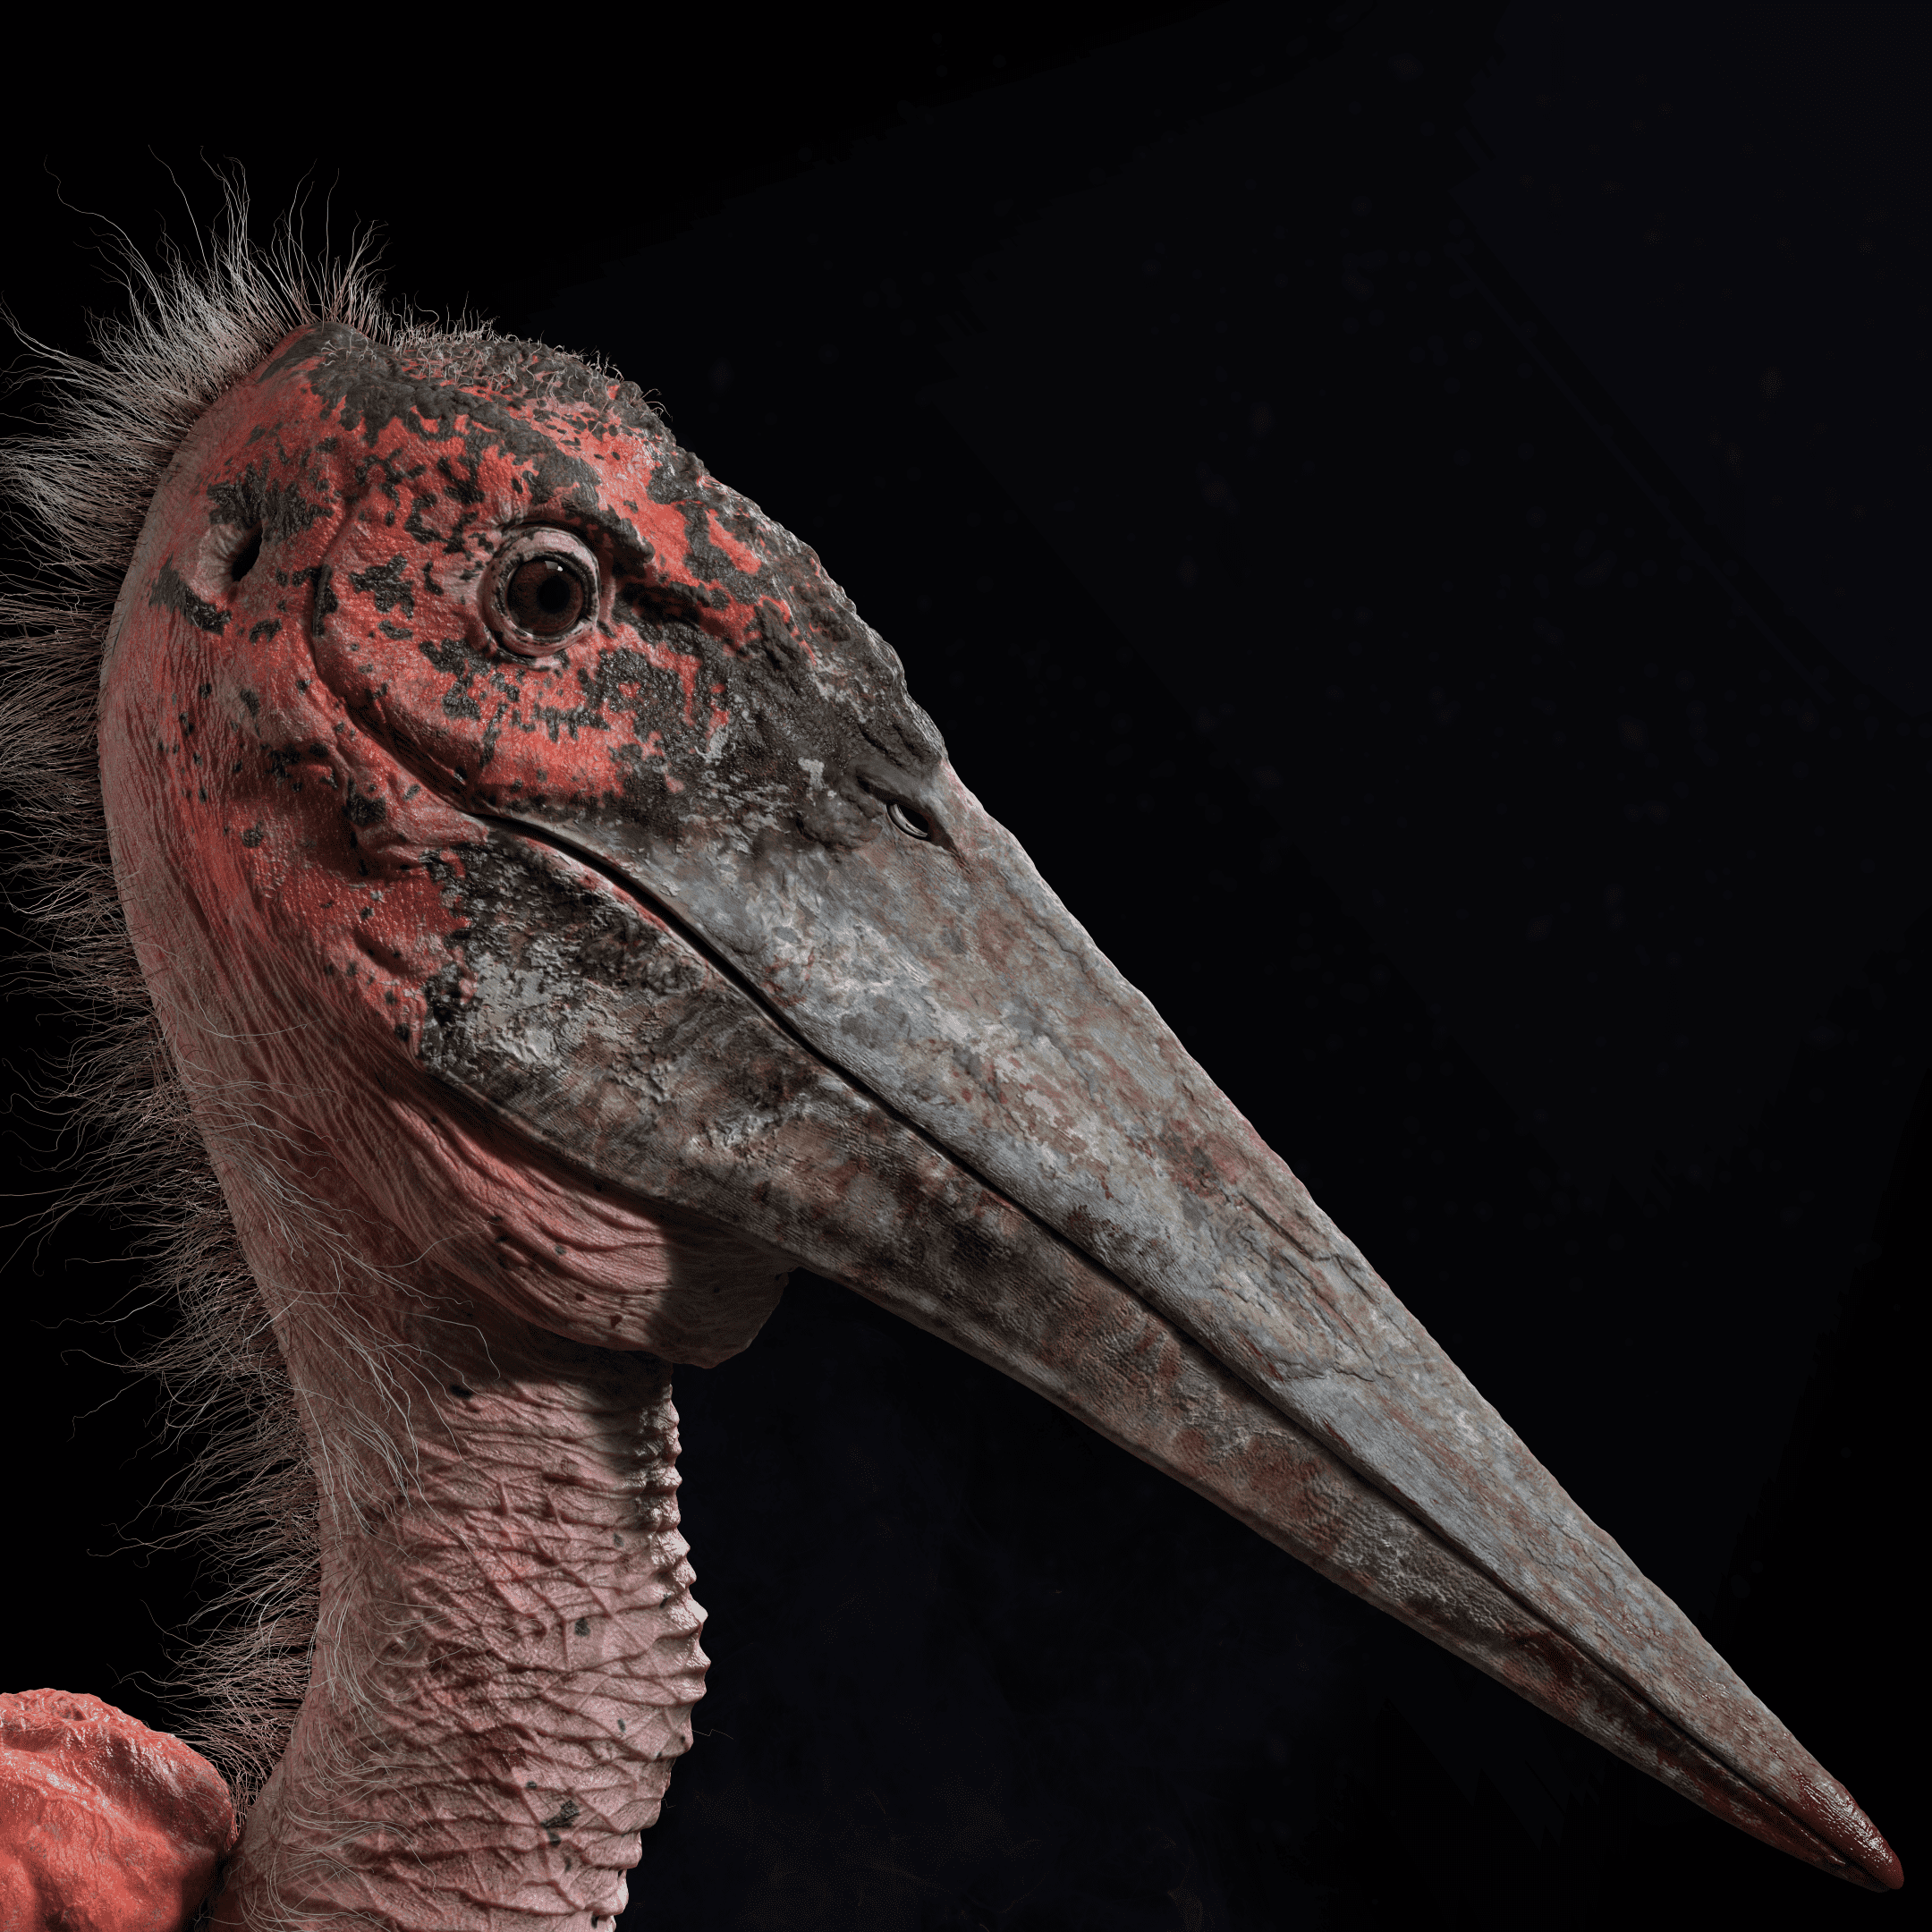
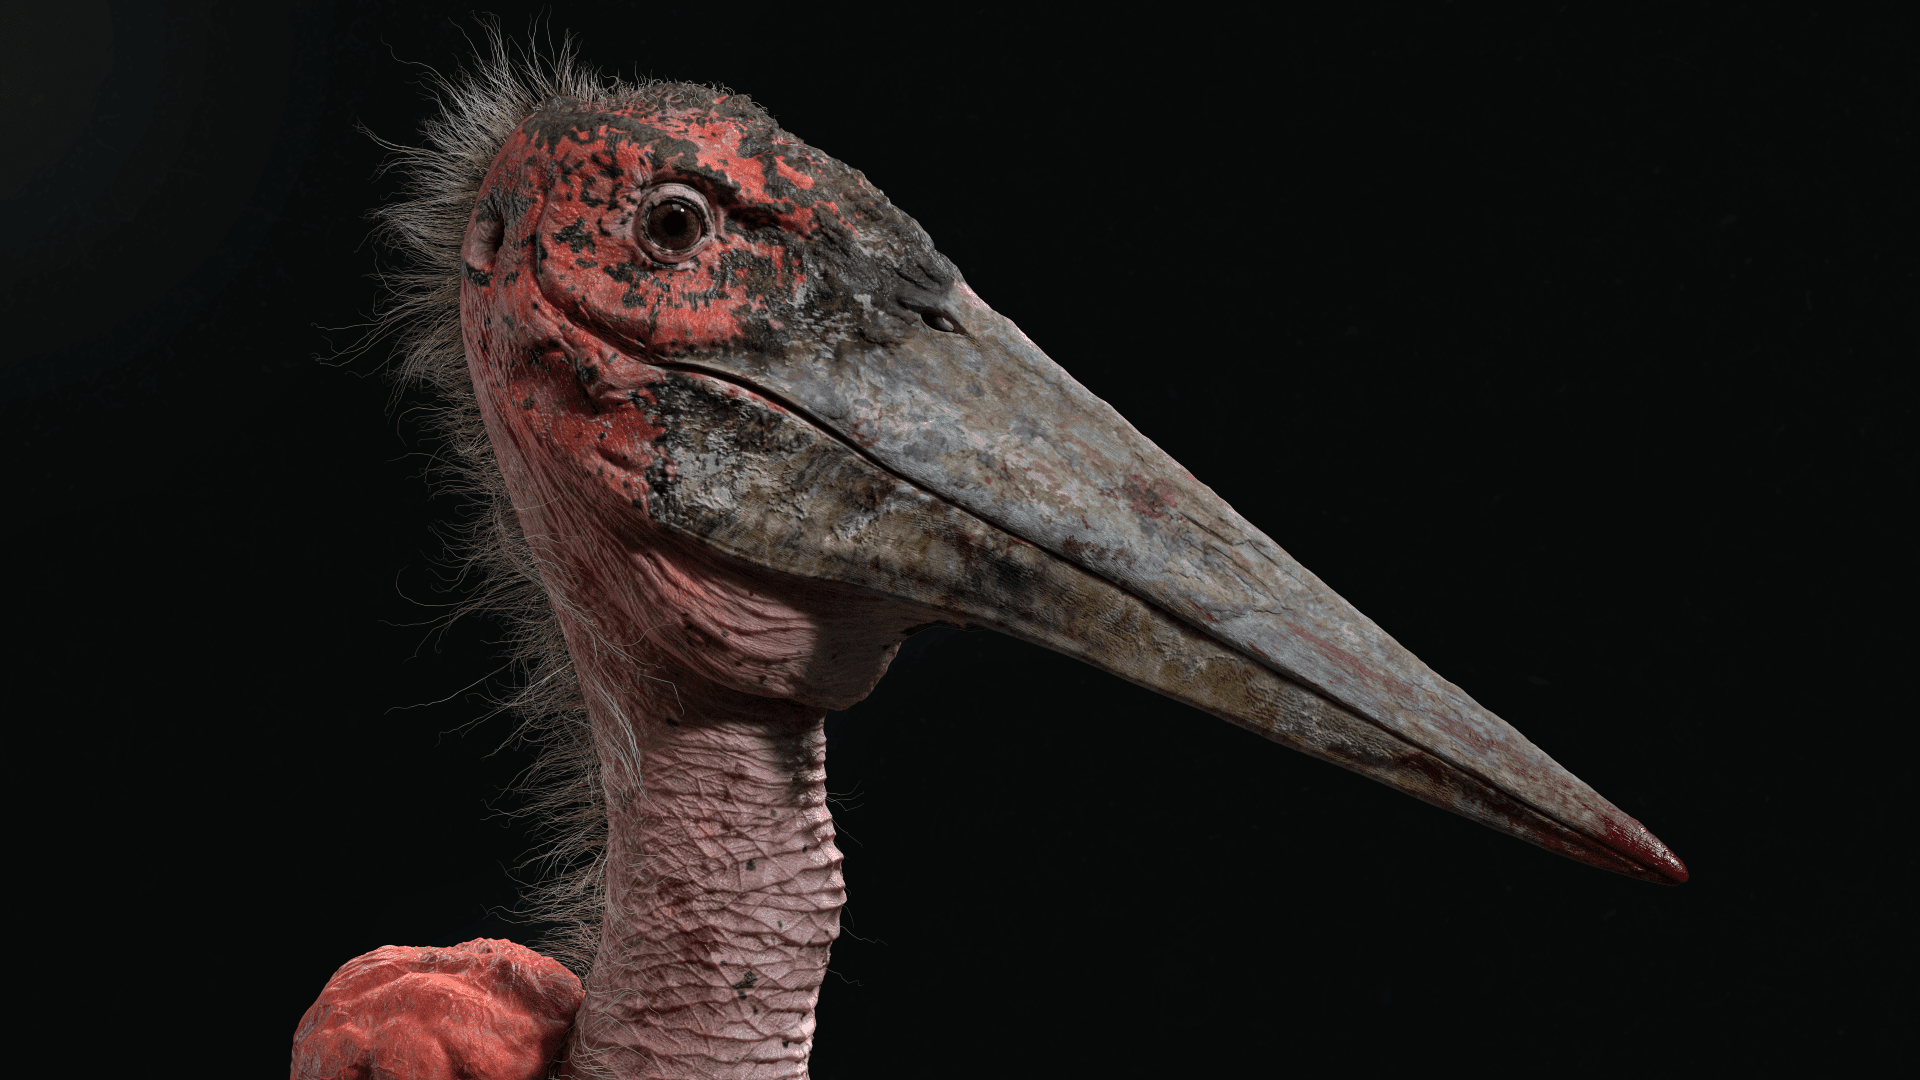
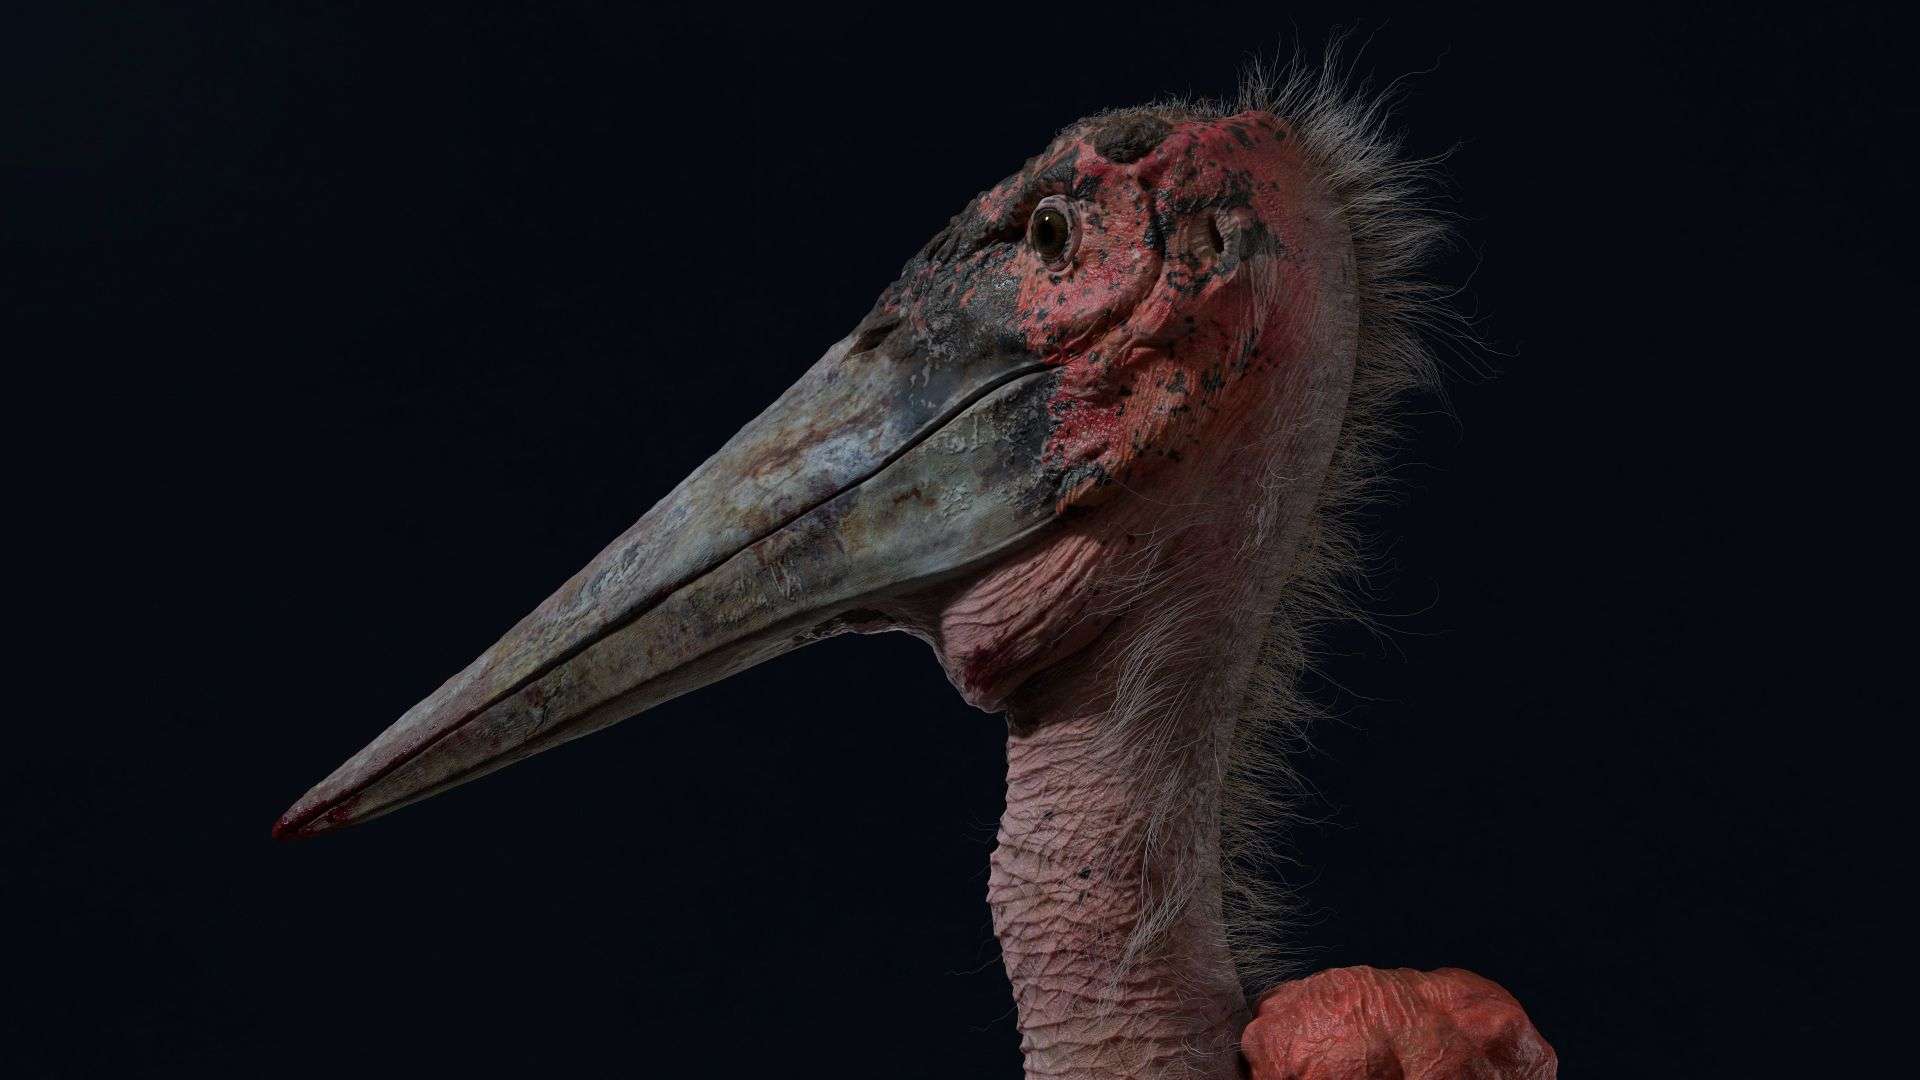
I want to thank The Rookies for this amazing opportunity. Thanks again to Reilly Lohr for mentoring me and to my friends and peers at Think Tank Training Centre who helped with their feedback and support. I hope this article was useful and that you learned something new, I sure did doing this project. Feel free to contact me on my social media if you have any questions. ¡Gracias!