Creating a Fantasy Castle in Unreal Engine
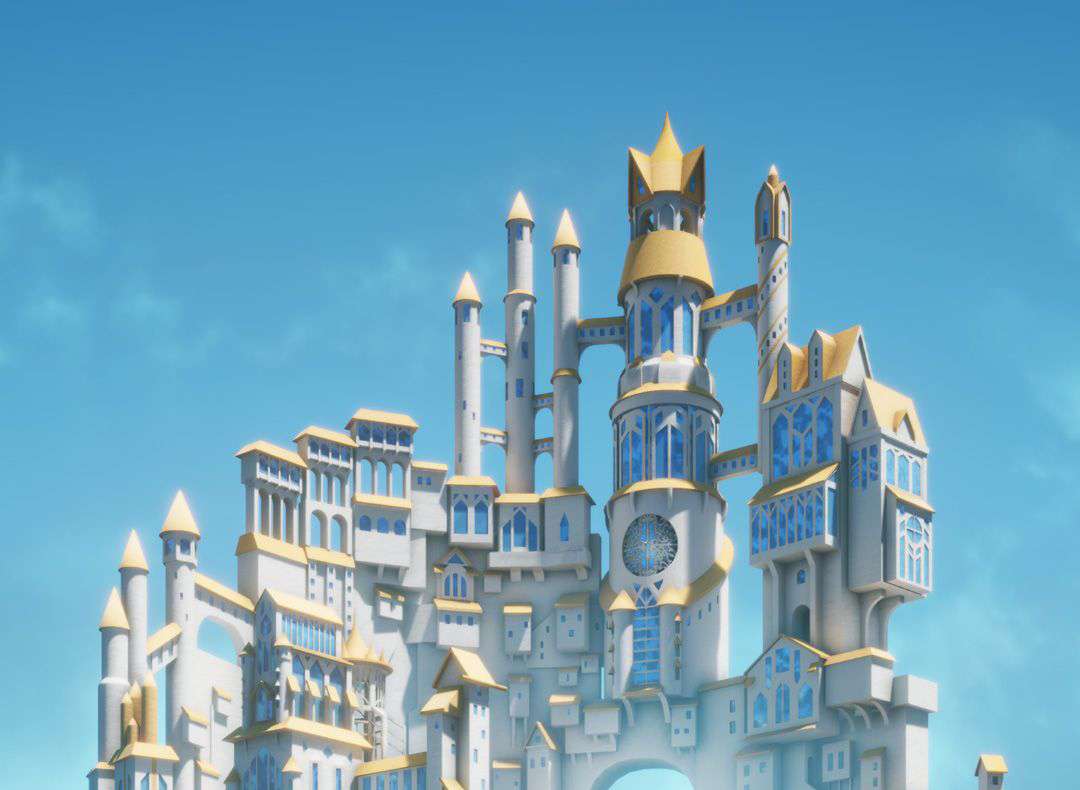
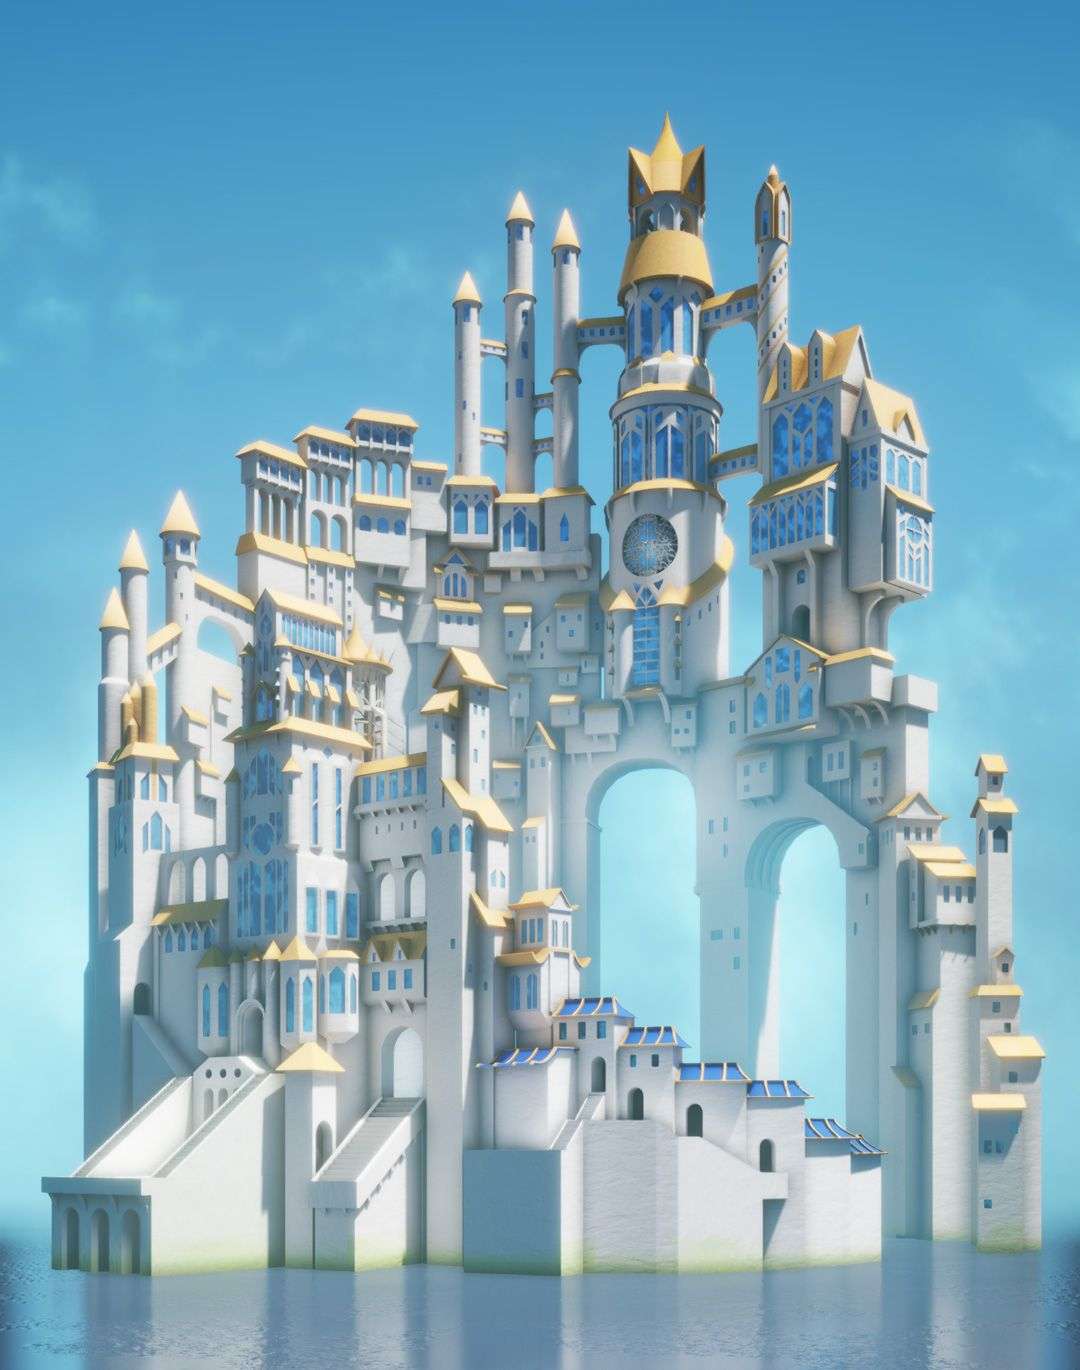
A fantasy castle I created in Unreal Engine based on a concept by SnowSkadi.
A fantasy castle I created in Unreal Engine based on a concept by SnowSkadi.

This was my second time creating a scene in UE4. I was still in the process of learning the many features this engine offers. My primary goal for this project was to learn how to use the fog system in Unreal. It turned out that there was a lot more to learn. I did not intend to make the scene "game-ready." I simply wanted to explore more of UE4's features, use them someday in a future project, and share my findings with the community.
Looking around, I stumbled upon this magnificent concept by SnowSkadi. The concept art to me looked like it came straight out of a Miyazaki film. I'm a big fan of fantasy RPGs and movies, so I was instantly hooked and wanted to recreate the scene in Unreal.
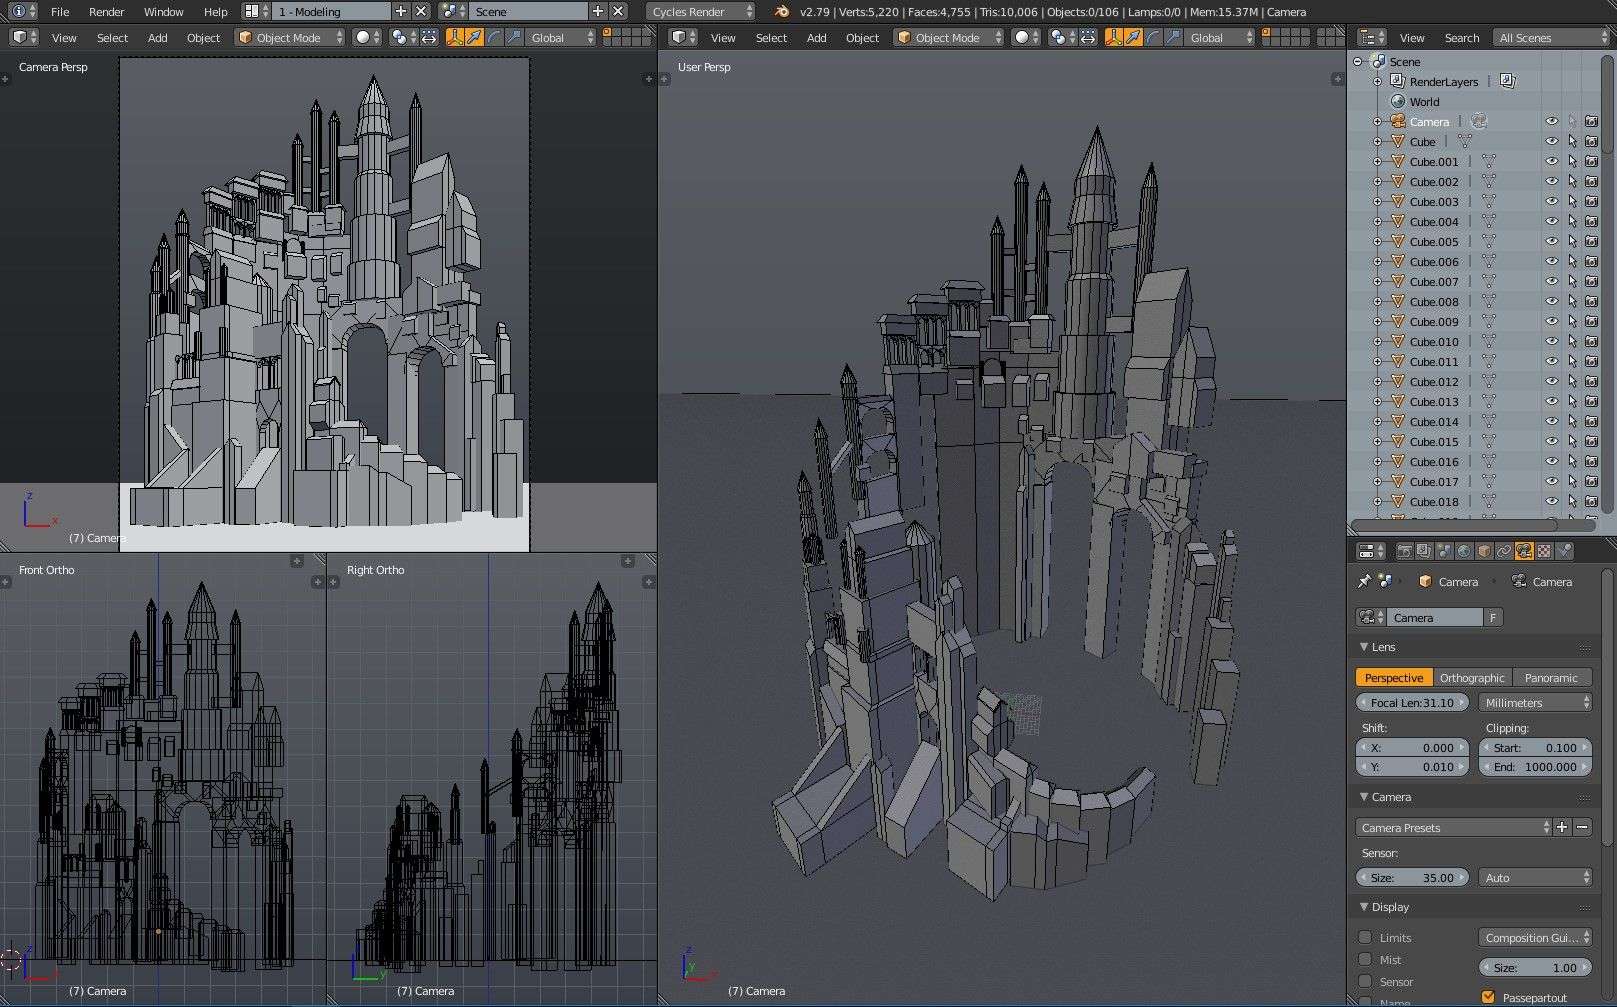
I followed the standard procedure. First, I setup the camera in a 3D modeling app (Blender in my case). I started with a bunch of cubes, cylinders, and cones. I then modified their shapes and moved them to their corresponding positions. I worked with larger shapes first - no need to labour over details at this moment. You can see from the screenshot below that I used basic placeholders. This gives me an idea of the scale of each mesh and the relative distances to each other. Afterwards I adjusted the camera and the meshes until I got something that matches the perspective of the reference image. With 100+ number of individual objects, I needed to combine everything as a single mesh to make auto UV mapping for lightmaps a lot easier. It's a good idea to create backup files or copies of the original meshes before making drastic actions like this.
I like to put my block meshes into Unreal as early as possible so that I could spot problematic areas early on. Primary light sources will come from a directional light and a skylight. But before importing the block mesh into Unreal, here are two things I learned that I should have changed during the start of the project:
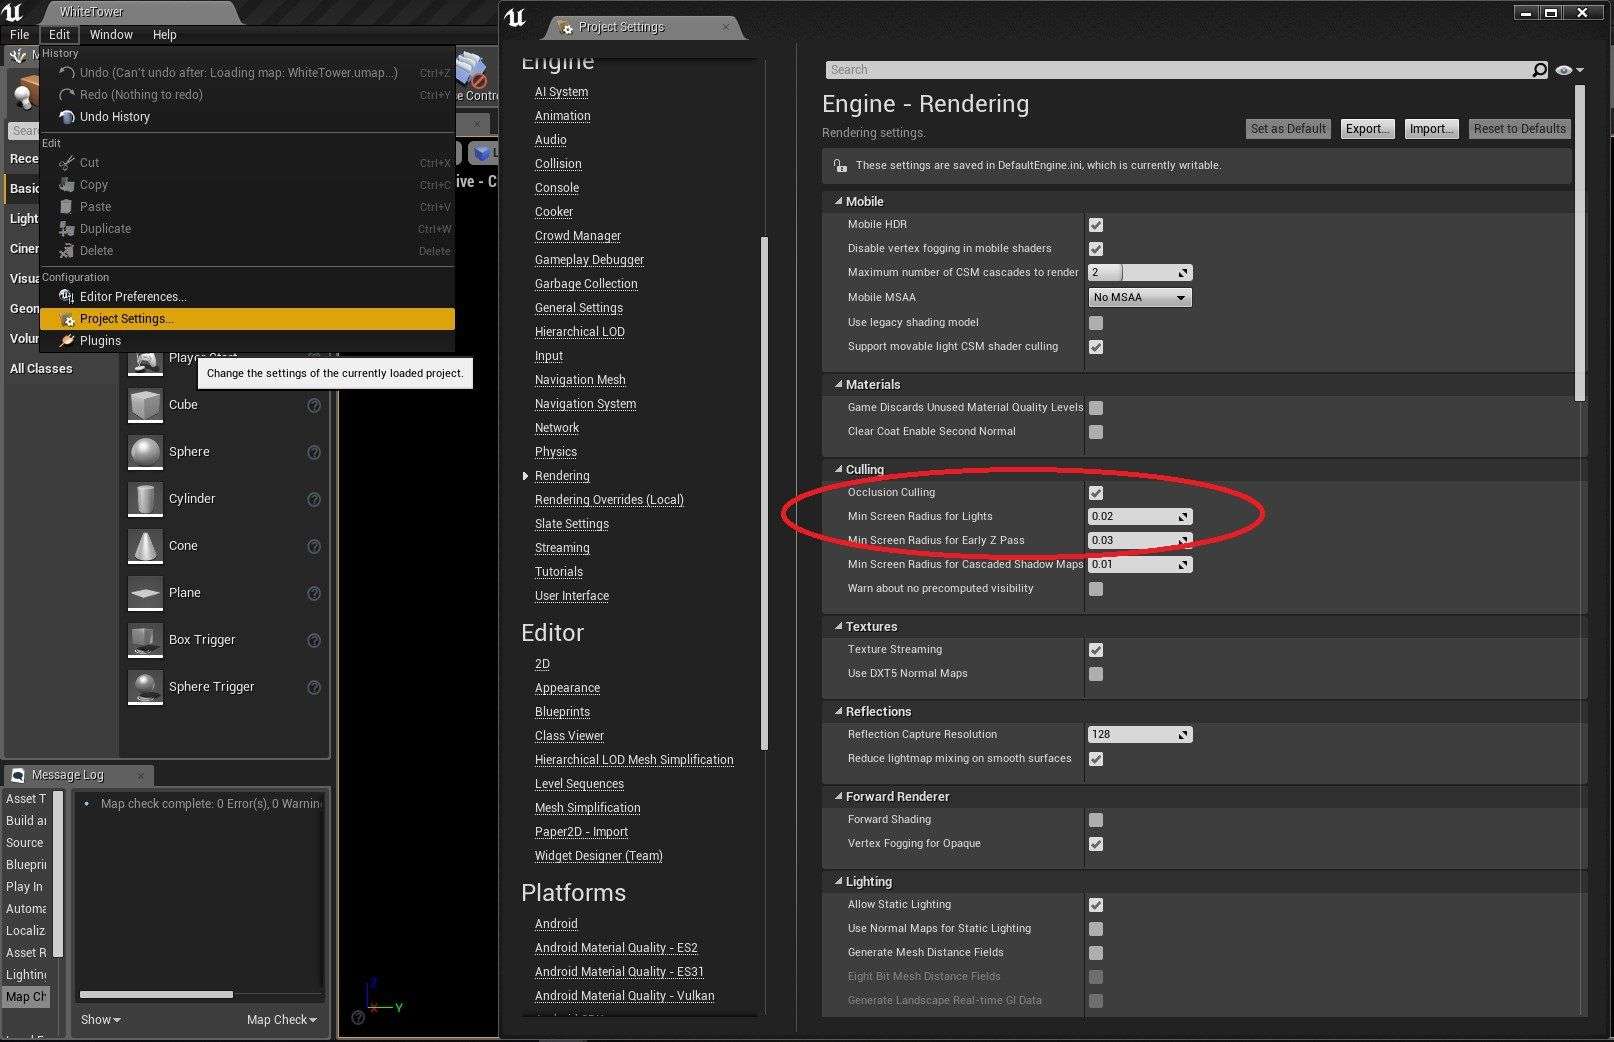
First, Min Screen Radius for Lights
This is a setting found under Edit > Project Settings > Engine > Rendering > Culling. What this does, is cull real-time lights when they occupy a screen radius less than a given value. This is good for performance. By default, the value I think is 0.03. However, this caused some of the supplementary lights that I added near the end to suddenly disappear because the camera is very far from the light source. Adjusting this value to 0.02 fixed the issue.
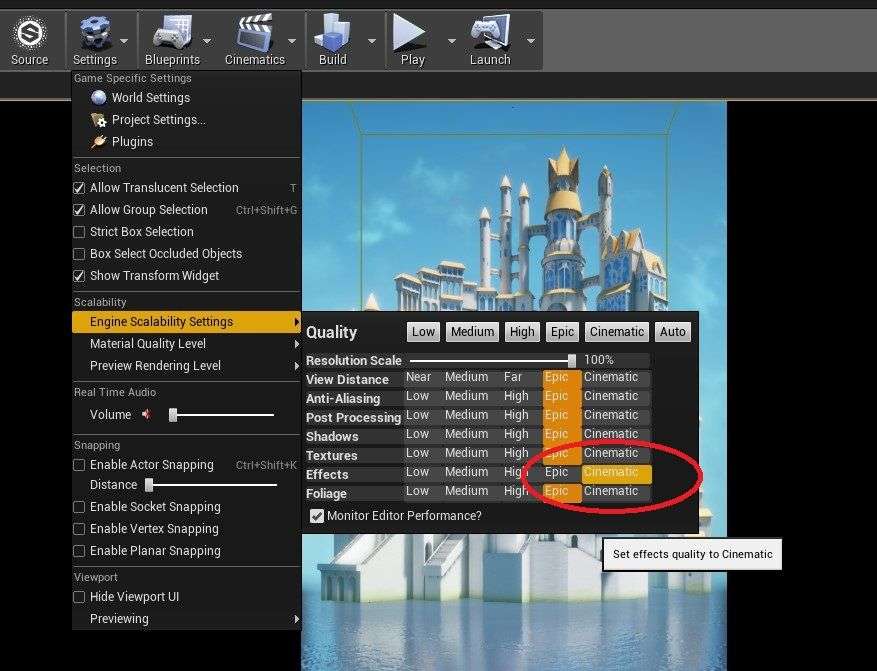
Second, Engine Scalability Settings
You can find this under the Settings button in the toolbar. Depending on your type of scene, you might want to change some of these settings to a higher quality. In my case, I changed the "Effects" quality to Cinematic because it produced better reflections coming from the water below.
When exporting the mesh into Unreal, I used renderhjs' FBX Bundle exporter (for Blender users). This addon has batch export features as well as an Unreal Engine preset which saves a lot of time and prevents all those rotation and scaling issues.
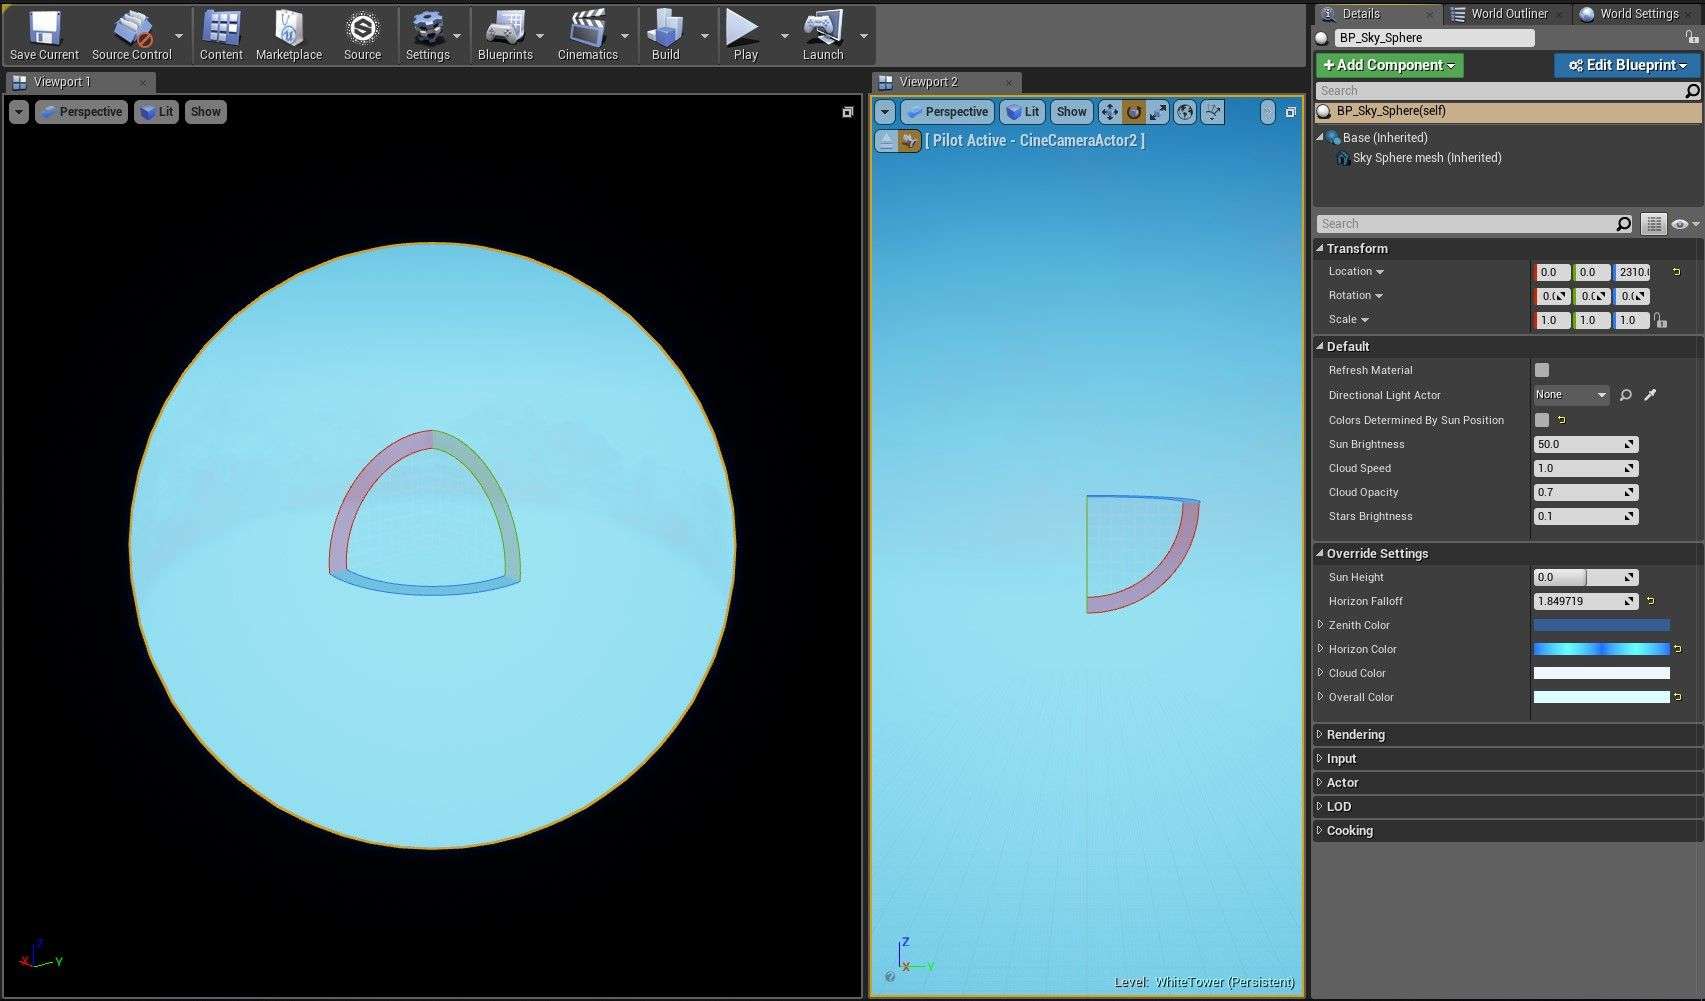
The next step is to create the scene's backdrop. This was a great learning experience since this was my first time setting up the sky, fog, and other stuff in UE4. These elements needed a lot of attention since they played a great deal with the mood of the scene. I started with a empty scene and placed a BP_Sky_Sphere which you can get from the Unreal Starter Content. I adjusted the parameters until the colors felt similar to the reference. An important setting to change here is to disable the Colors Determined By Sun Position. You want more control with the sky and sunlight by decoupling these two.
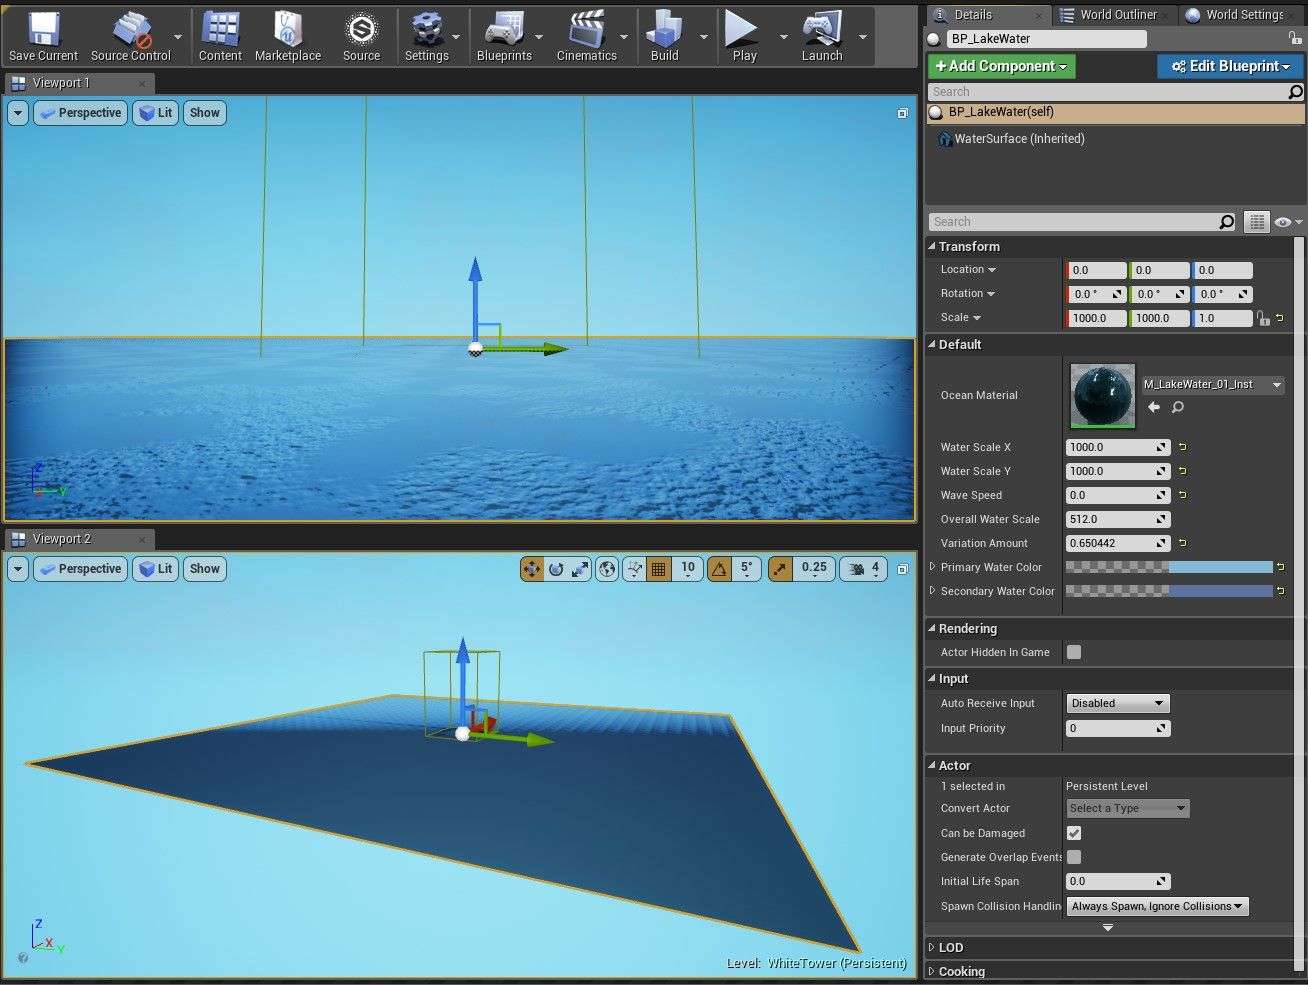
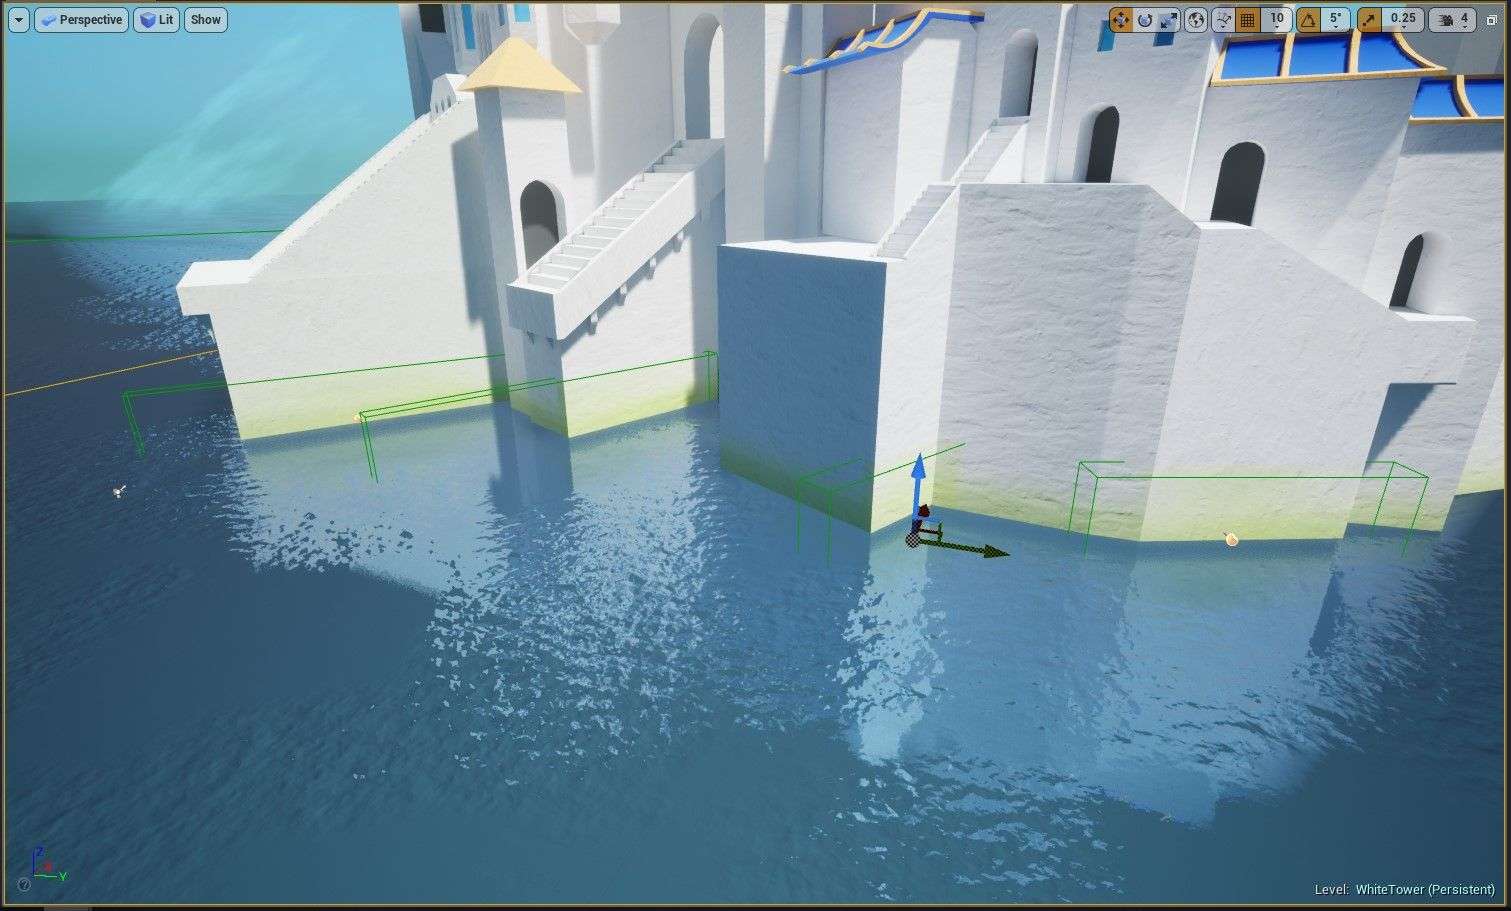
For this one, I used the lake water sample from the Water Planes project by Epic Games. I adjusted the parameters until I got something close to the reference image. Make sure that there's at least one directional light in your scene. Otherwise, everything will be dark. The wireframe box you see in the screenshot below is a Lightmass Importance Volume. I used it as a placeholder of the castle mesh.
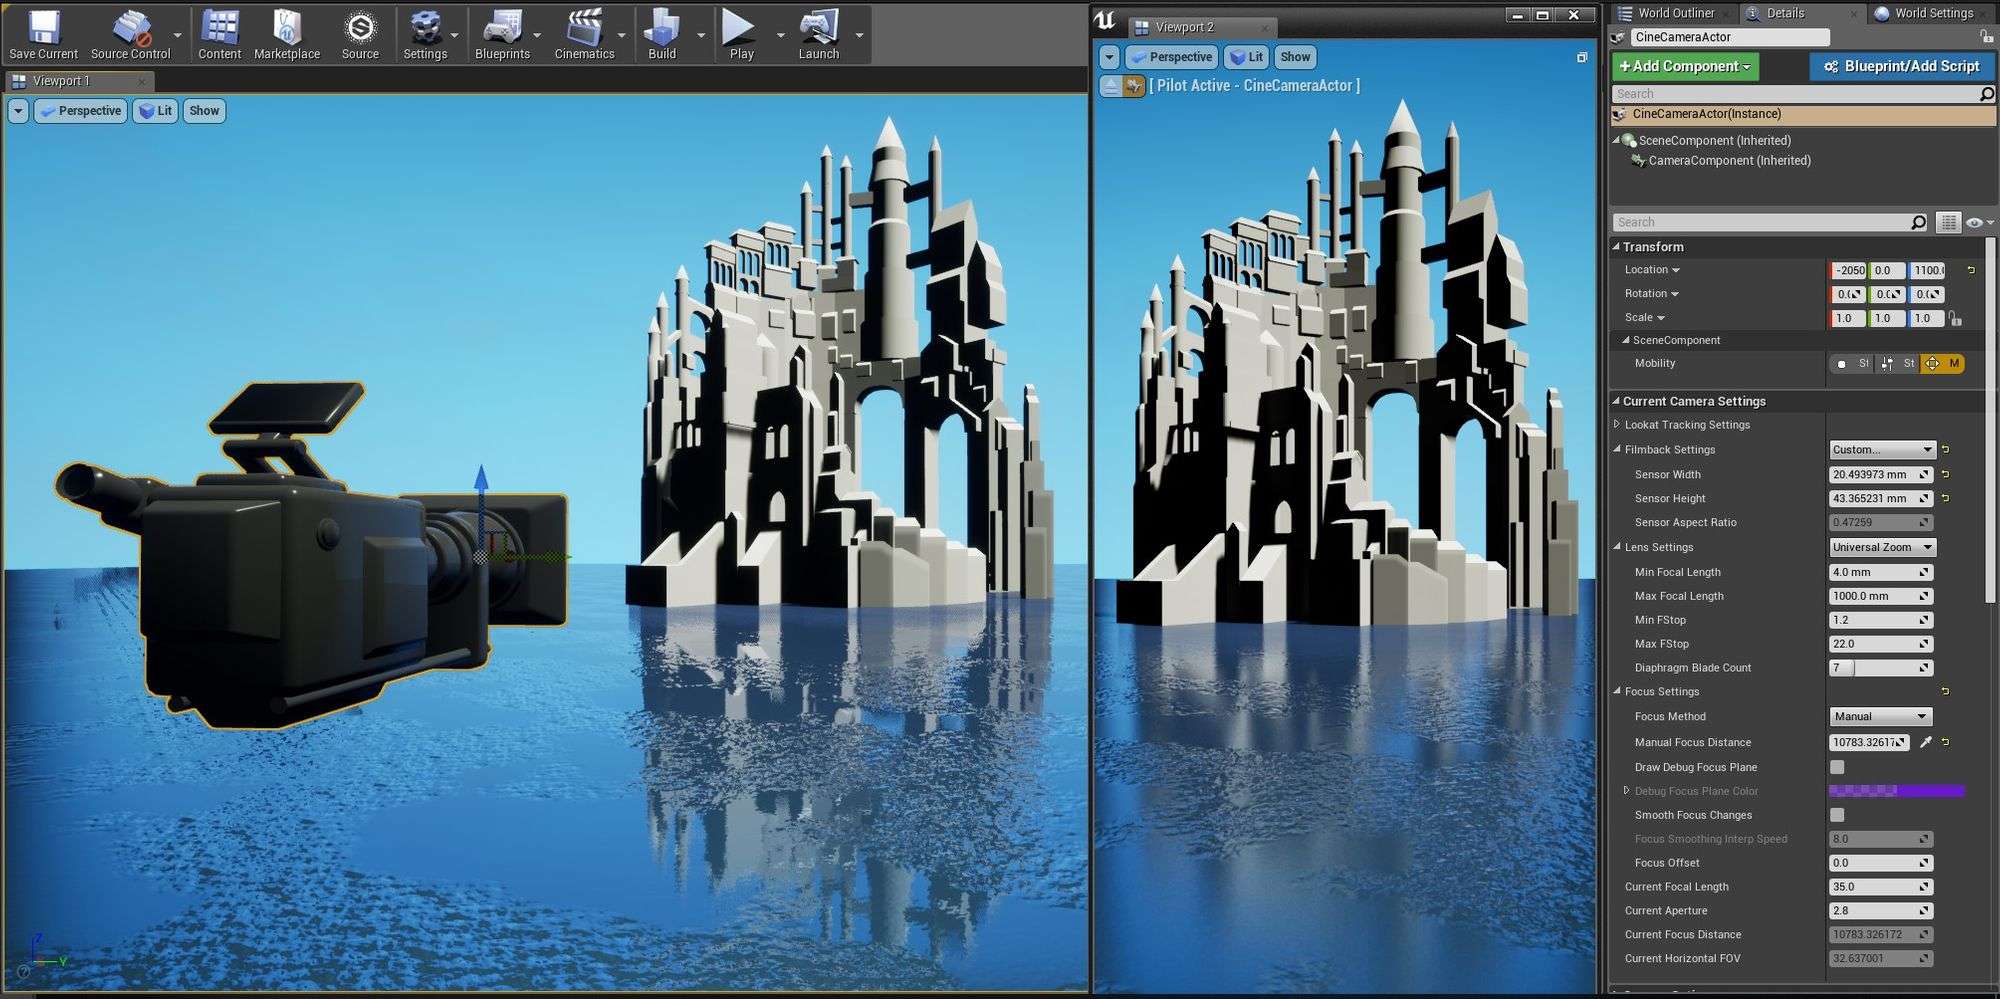
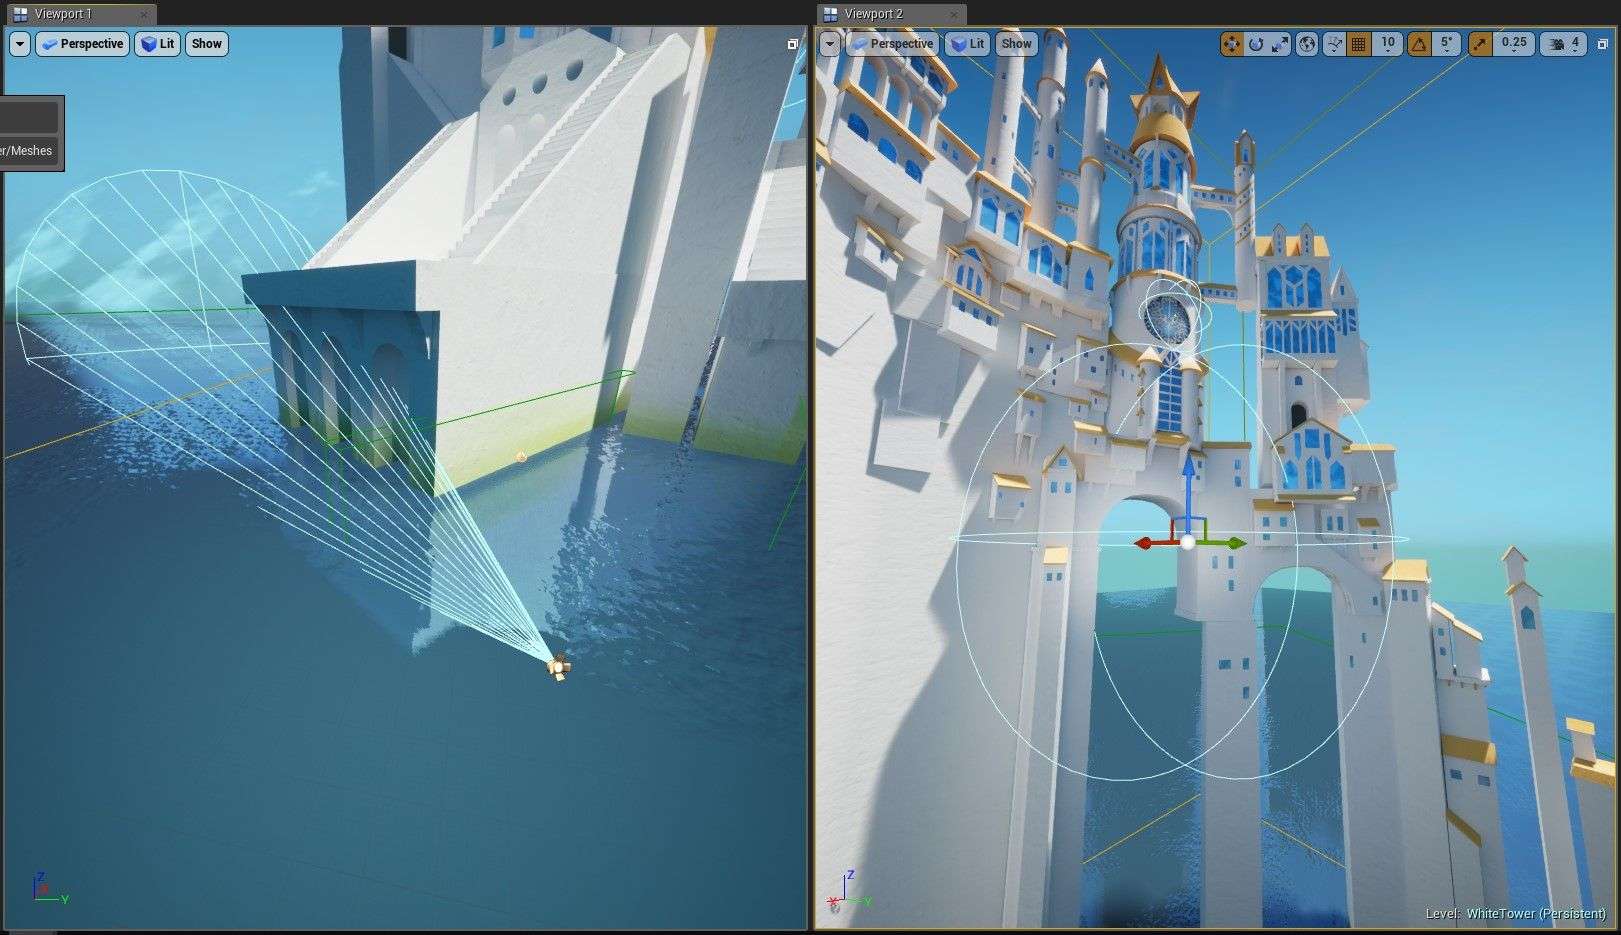
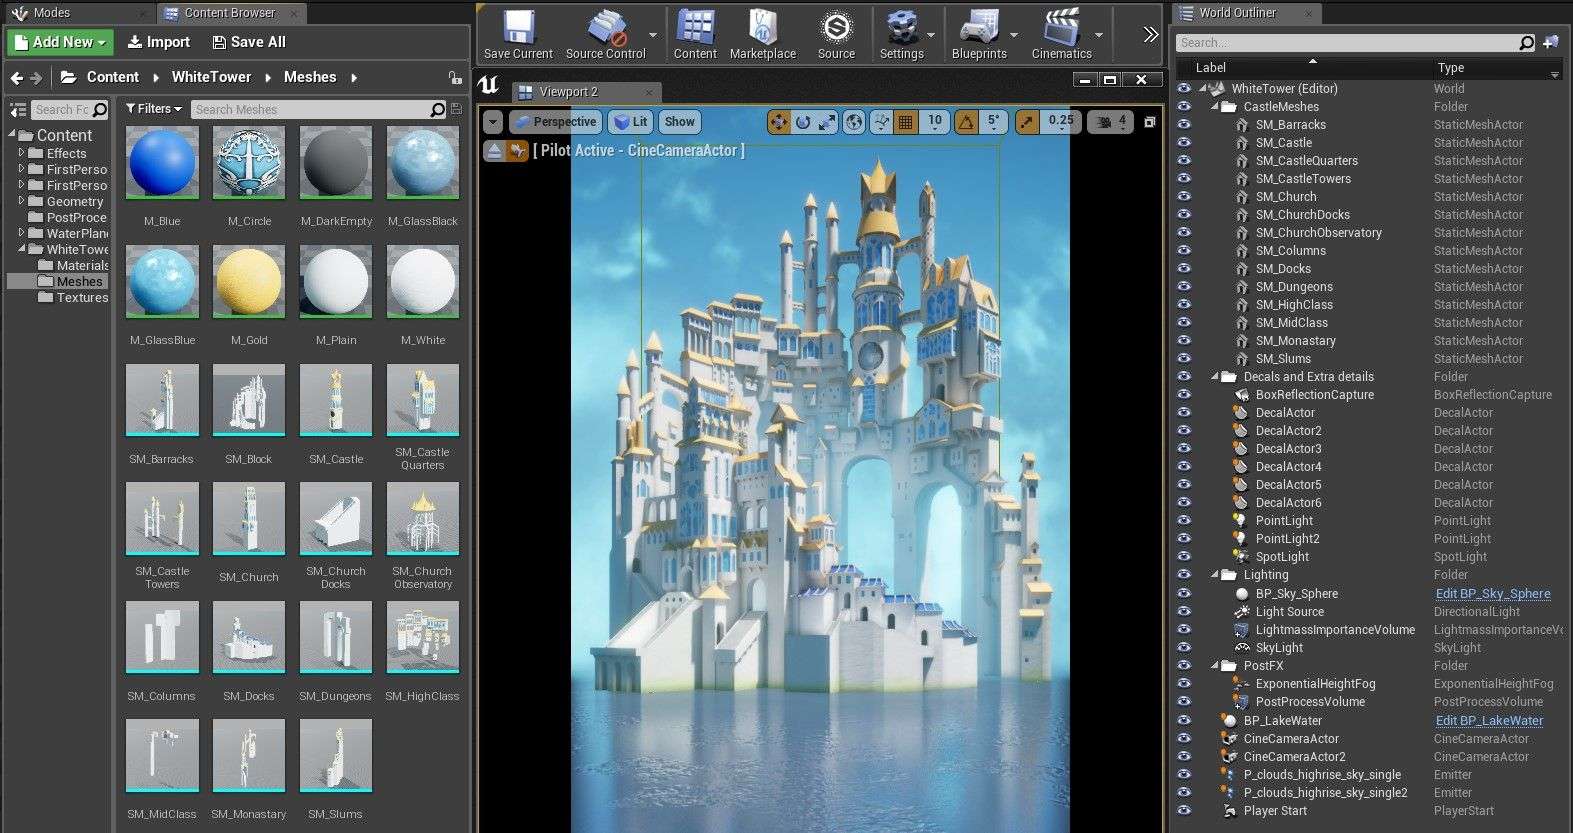
I placed the tower into position and moved the CineCameraActor. I adjusted the camera's settings until I got the proper perspective.
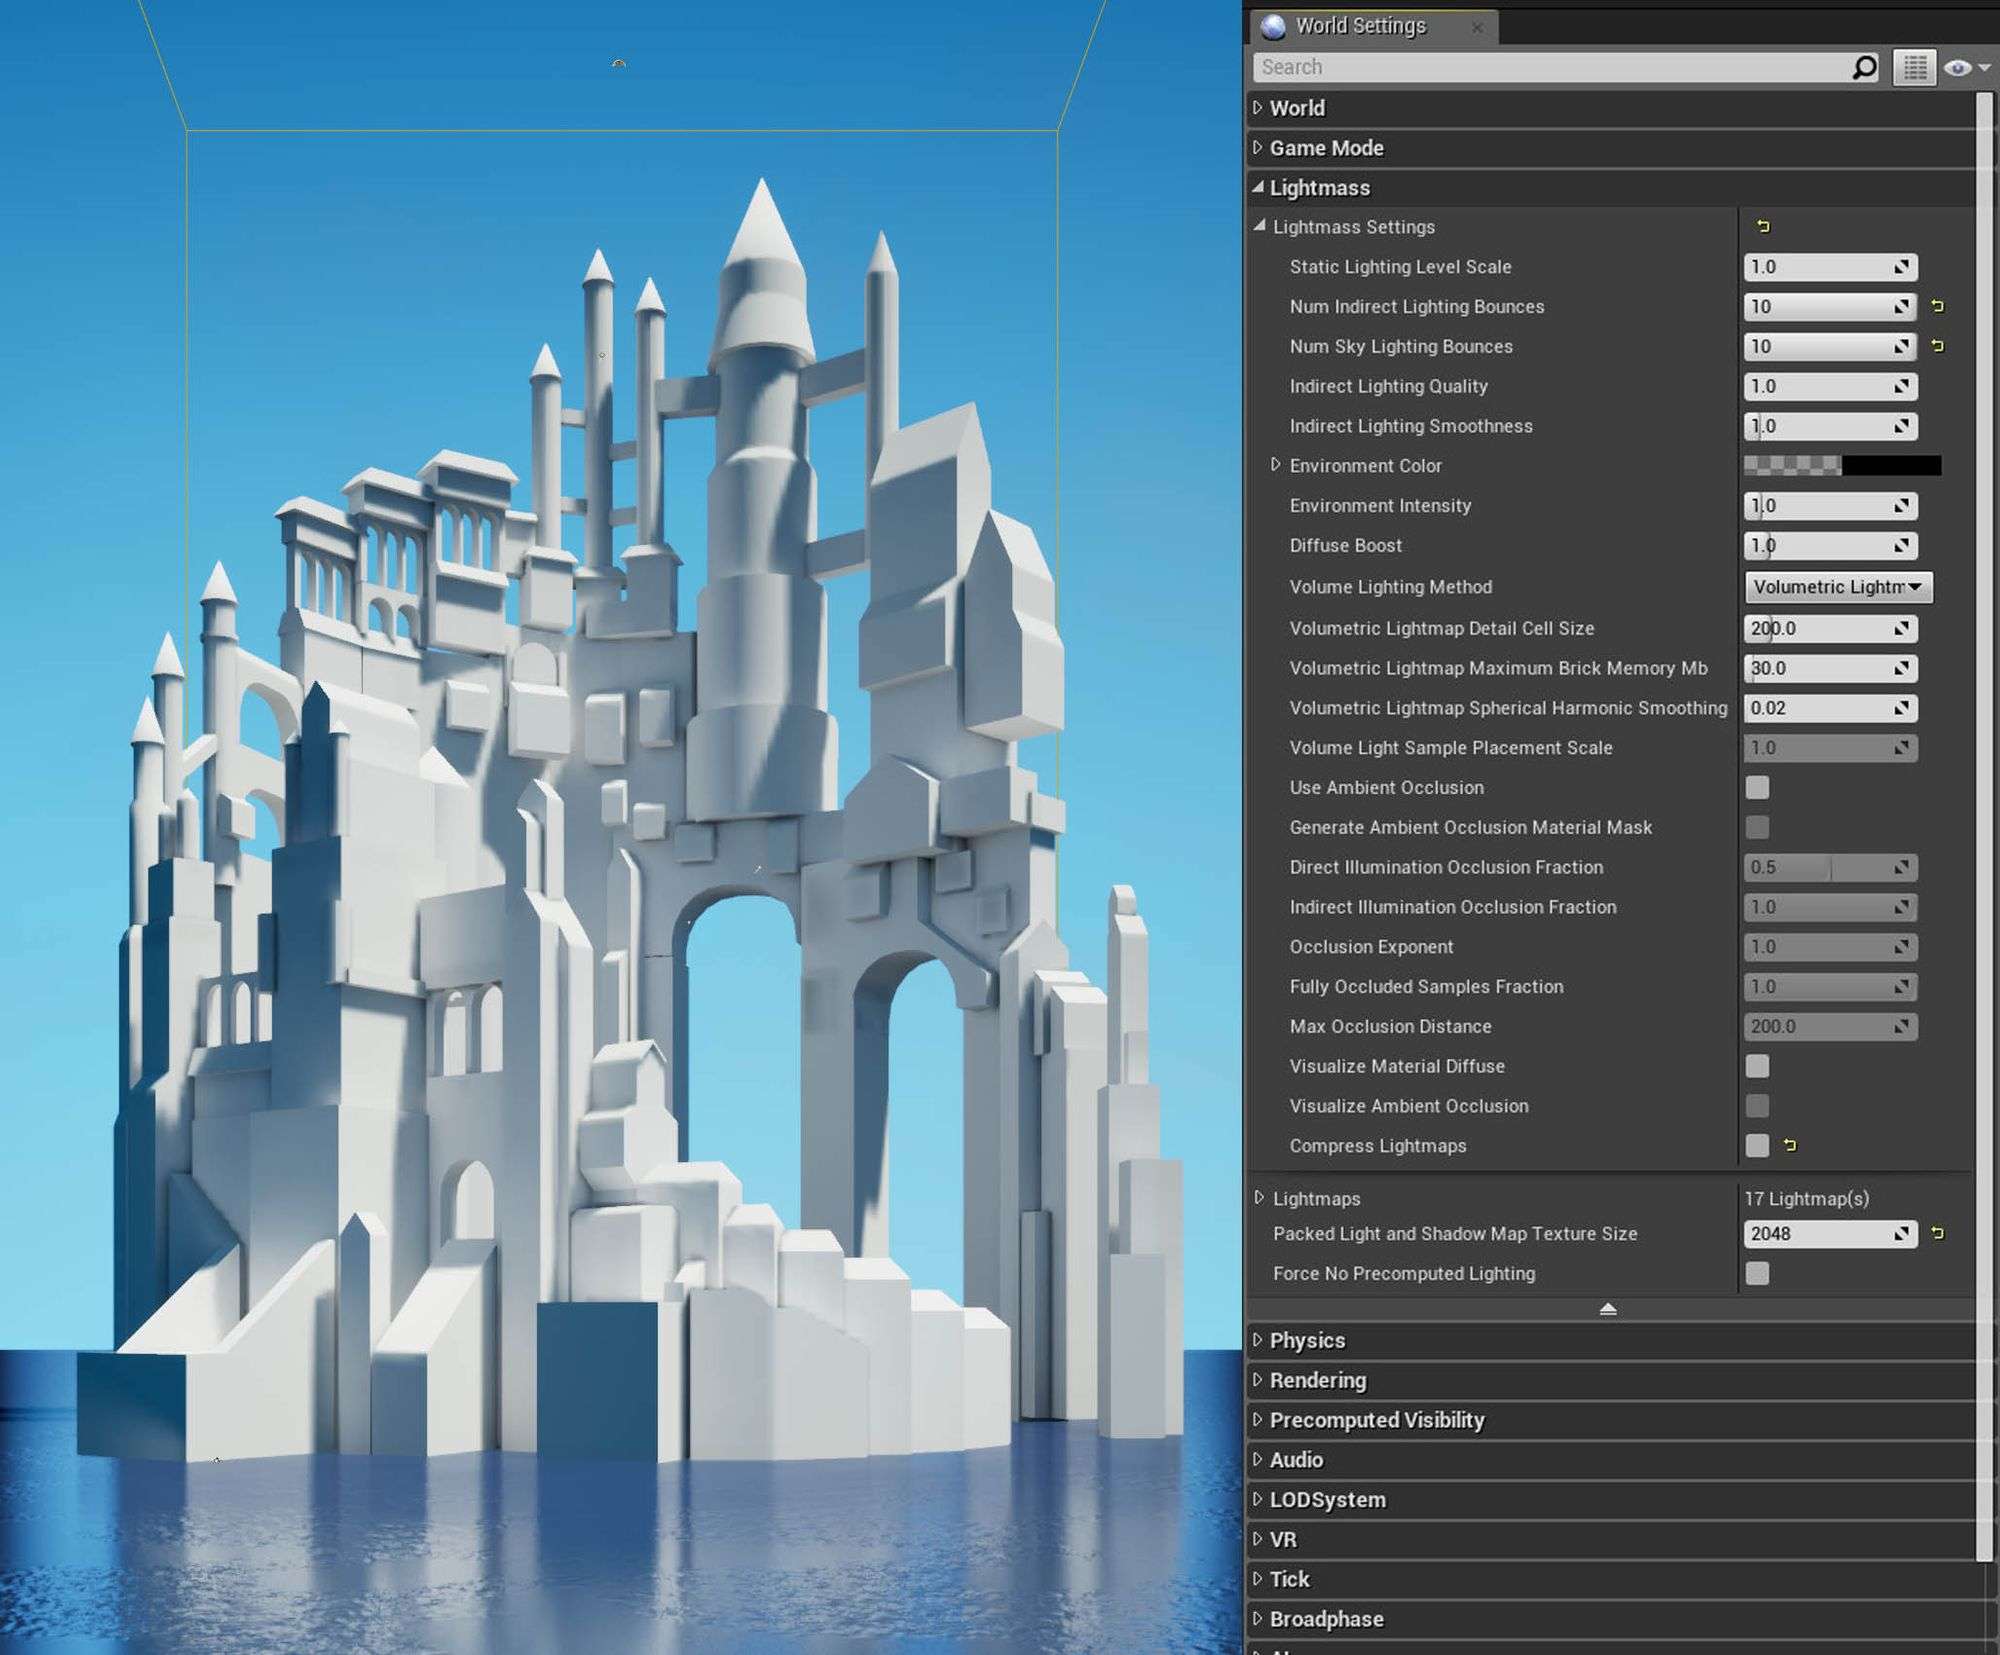
In the world lightmass parameters, I increased the Num Indirect Lighting Bounce and Num Sky Lighting Bounce. In a previous project, these parameters had a great impact in the brightness of the scene. Because of this, I decided to do the same here. Additionally, I turned off Ambient Occlusion in the beginning, but at the end of the project, I decided to turn it on. The effect was not significant since in the end, I used a certain degree of SSAO.
Furthermore, I disabled Compress Lightmaps. This setting is good for reducing memory and disk size, but it introduces artefacts. After setting up all these parameters, I added a directional light and skylight. I adjusted their colors and intensity, set both to Static, and set Lighting Quality to Production. Afterward, I added a Lightmass Importance Volume over the entire mesh and baked the lights. There were some hiccups in matching the direction of the sun light with the one in the reference image.
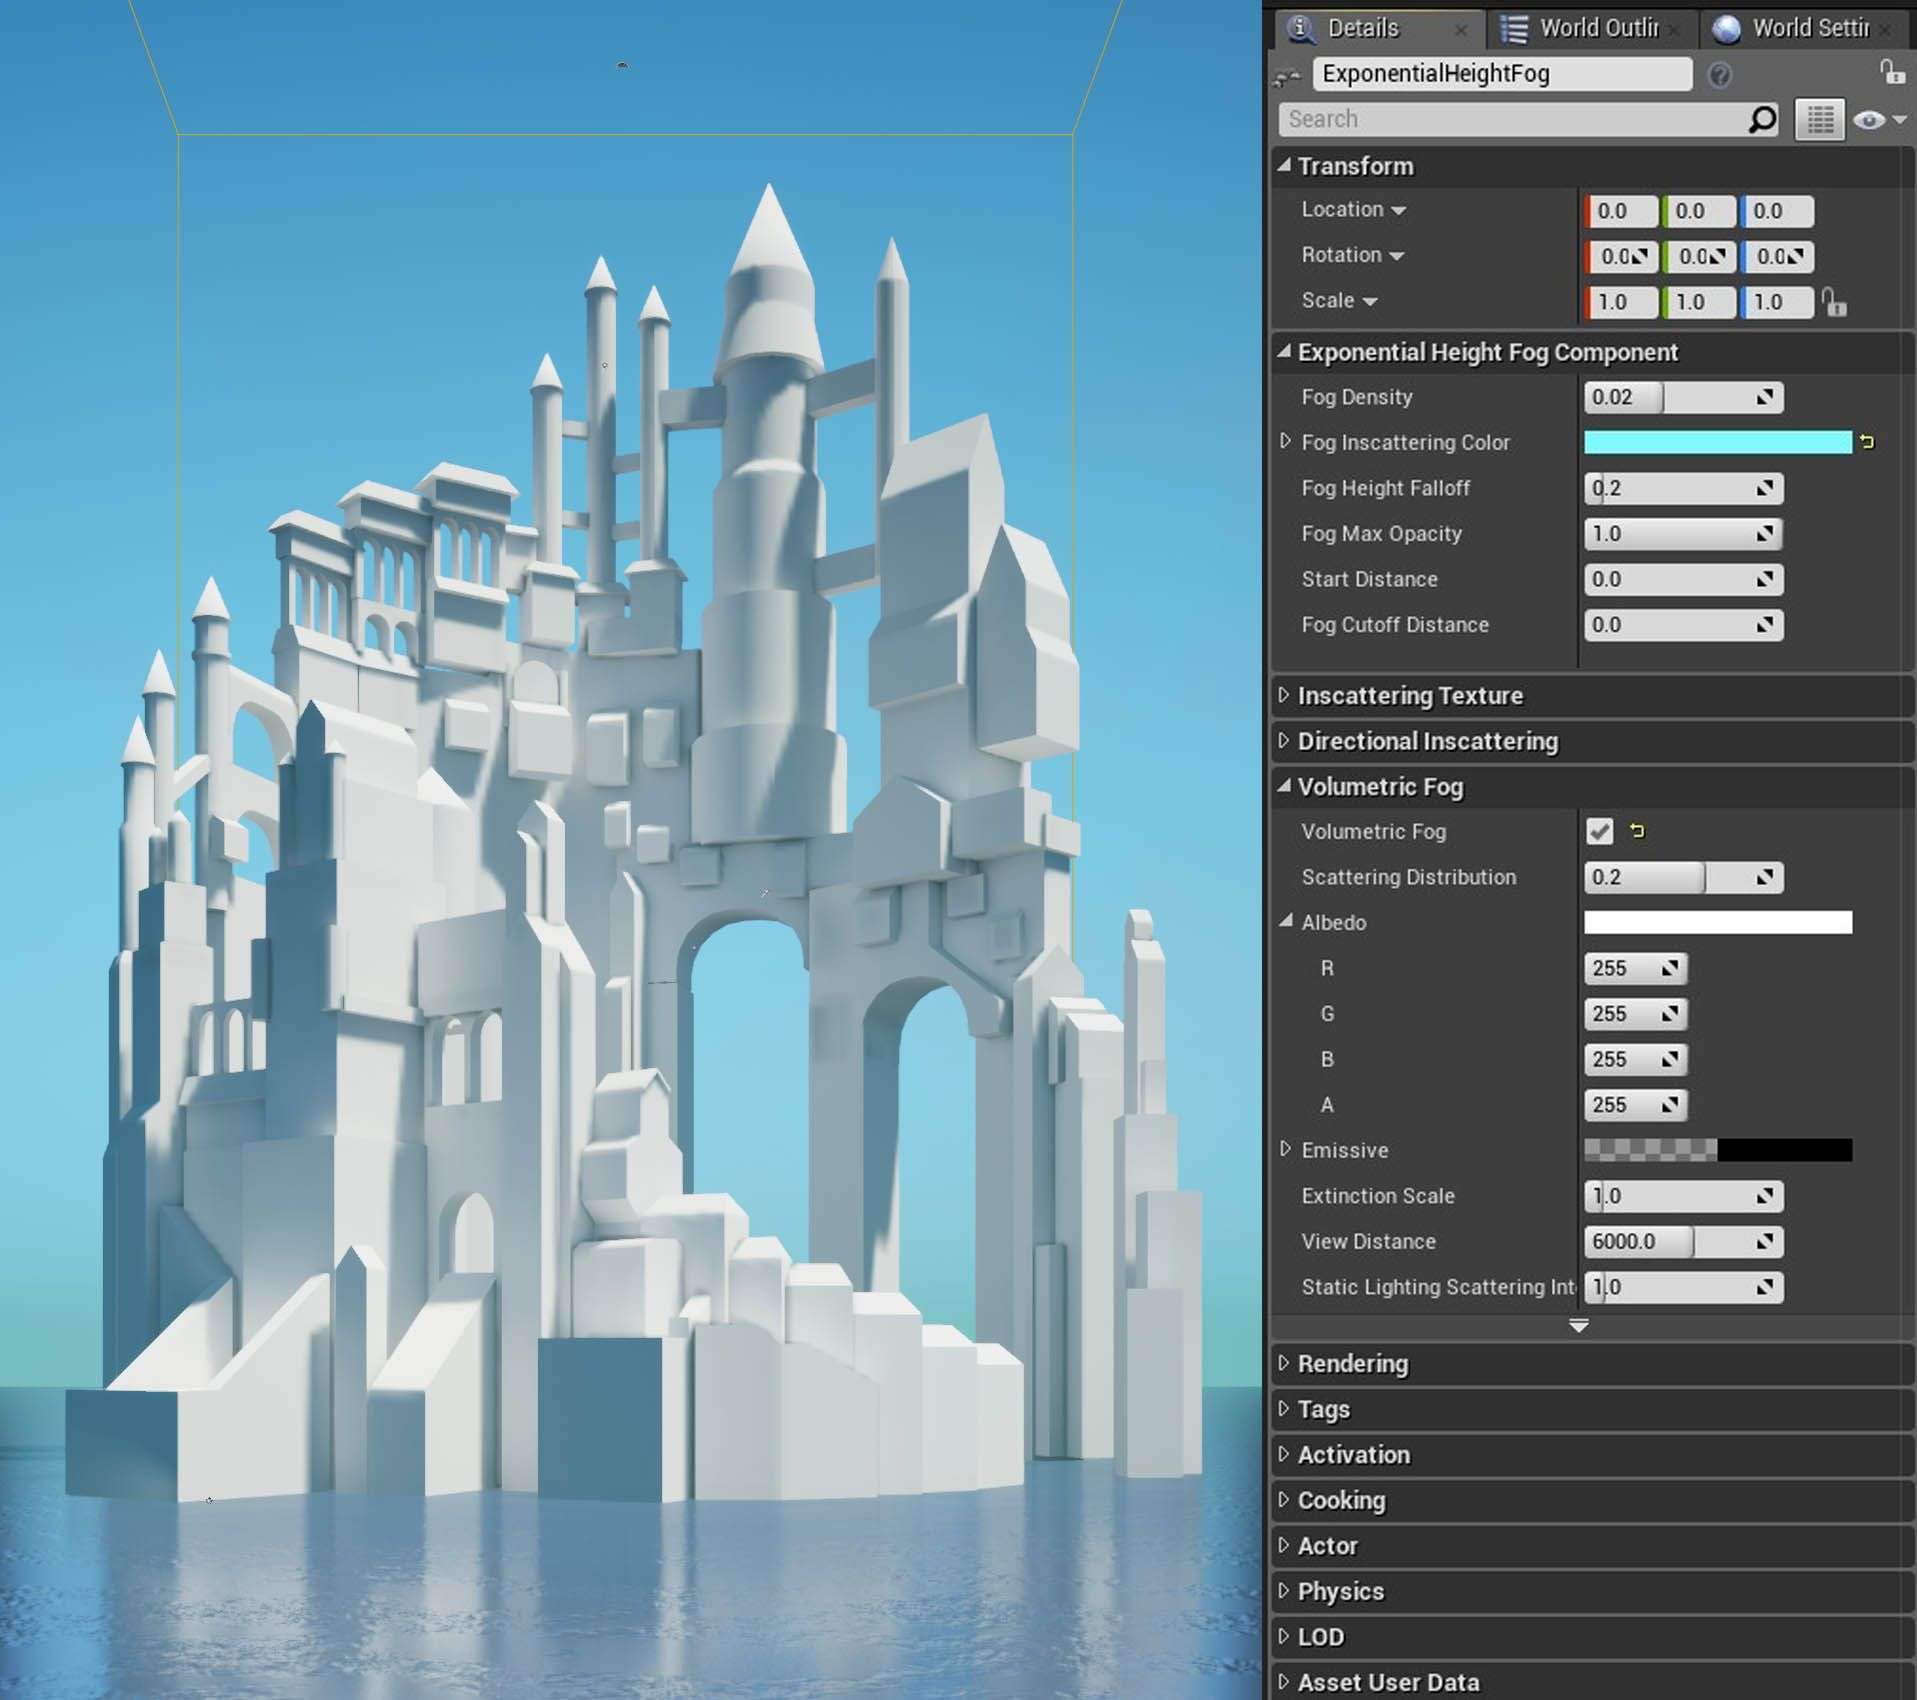
This one is a very cool feature. I knew from the beginning that volumetric fog was essential for the ambience of the scene. I aimed to make it feel distant, mysterious, and magical. The nice thing about this is that I only had to adjust two settings from default: changed the color to sky blue and turned on the Volumetric Fog setting. The fog looks subtle at first glance. When you combine this with particles and Post FX, you get an amazing effect.
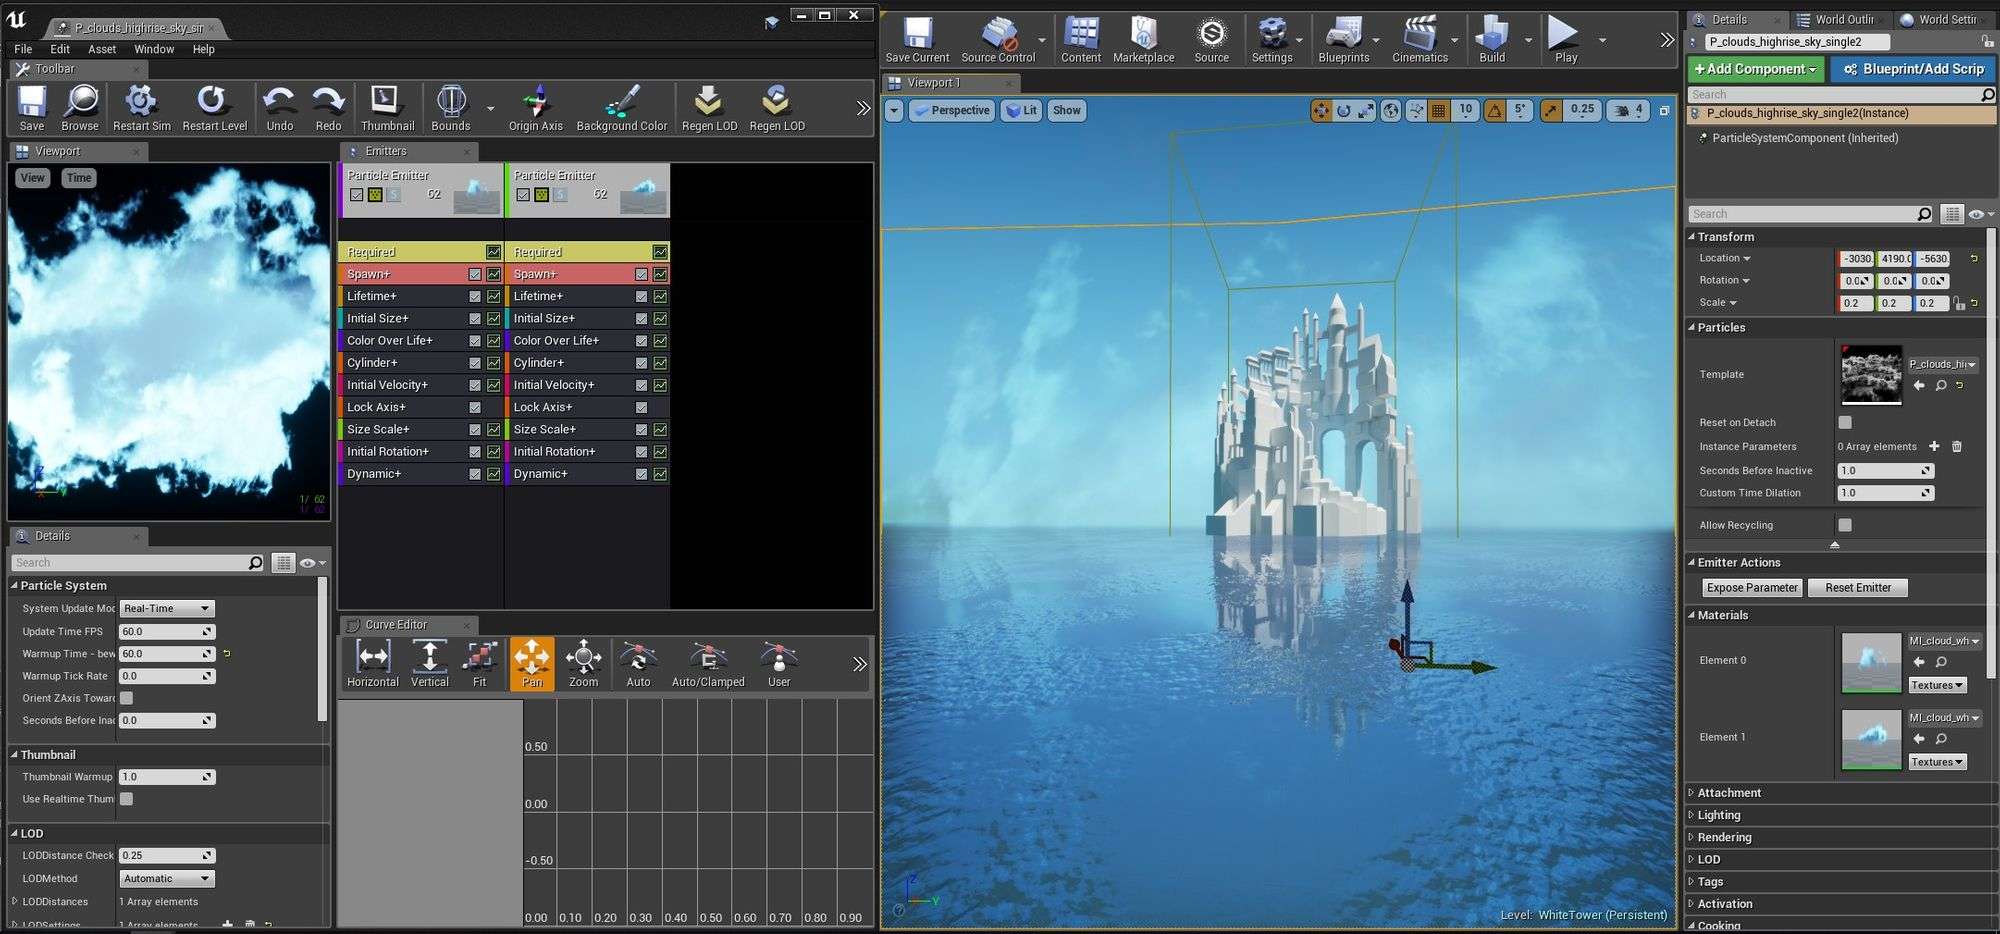
Adding only the exponential height fog was not enough to create the thick fog in the reference. I scouted for cloud particles and stumbled upon these cloud planes from the Unreal FPS sample projects. I adjusted their colors, size, and location. As for the other parameters, I haven't studied them in great detail.
Modeling all those small details took the largest chunk of the total time it took to finish this project. There's no shortcut here. Just pushing and pulling vertices for several days. Because of the large number of objects, I combined meshes until I had only 14 large meshes. At this scale, having fewer objects make it easier to do a couple of things: auto UV mapping, managing materials, exporting to Unreal, and adjusting lightmaps. I created two UV maps for each object: one for the textures, and one for the lightmaps.
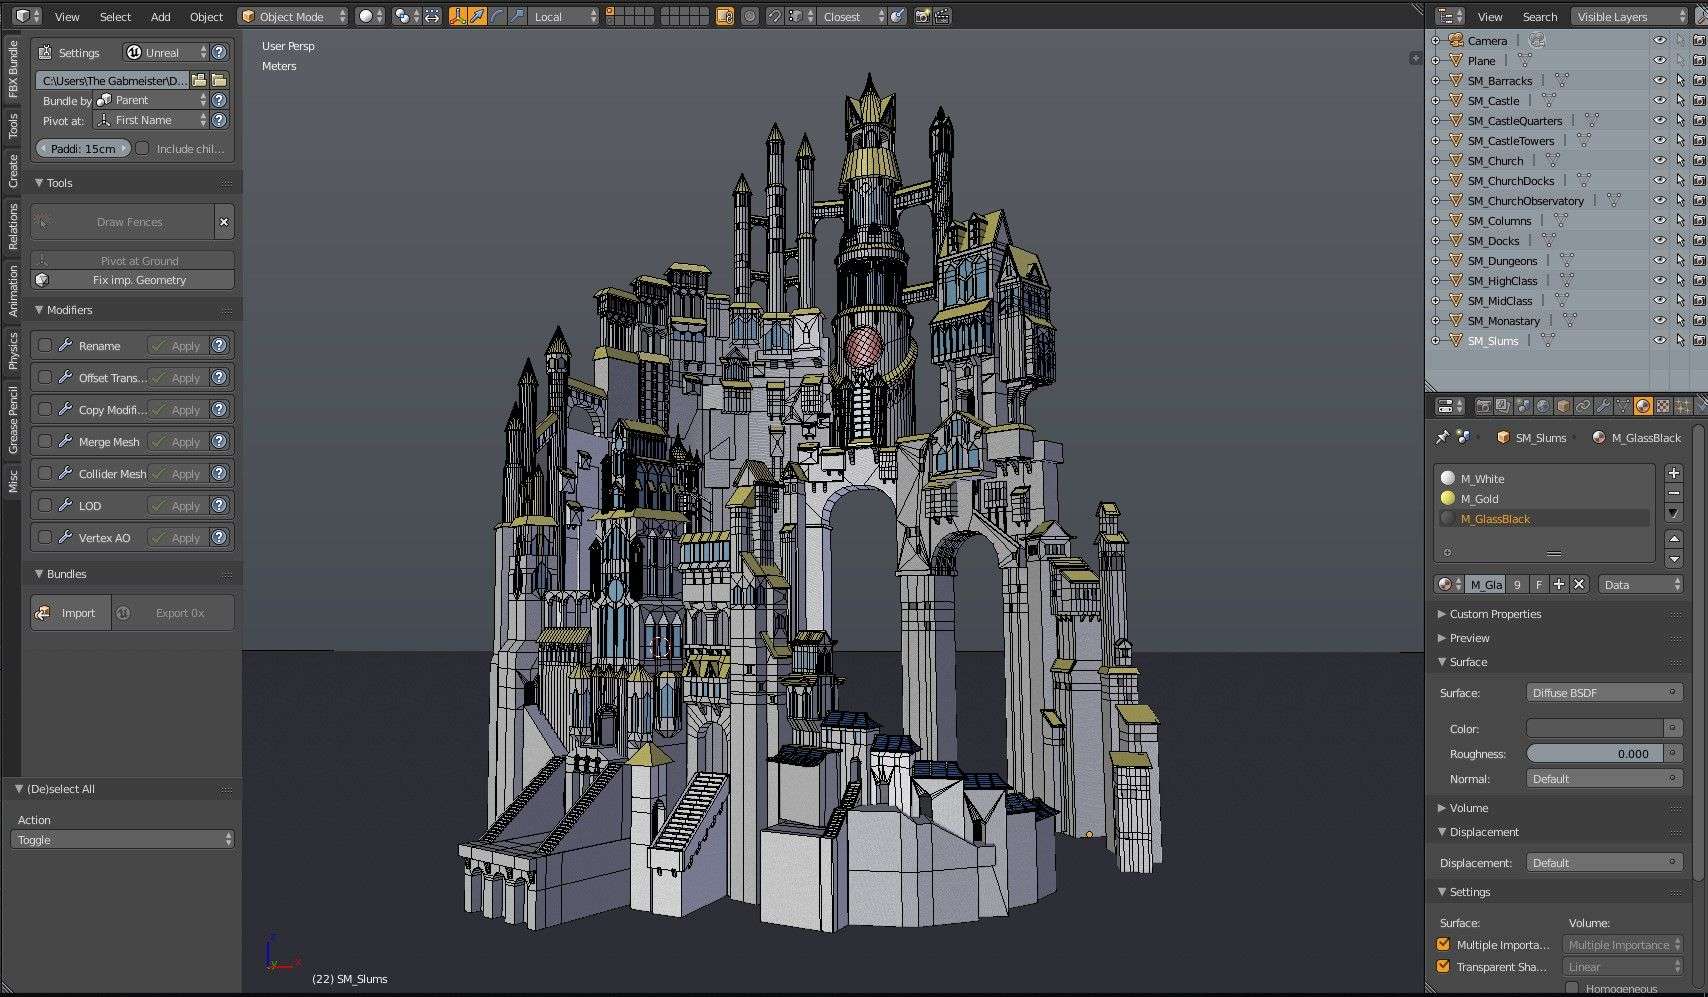
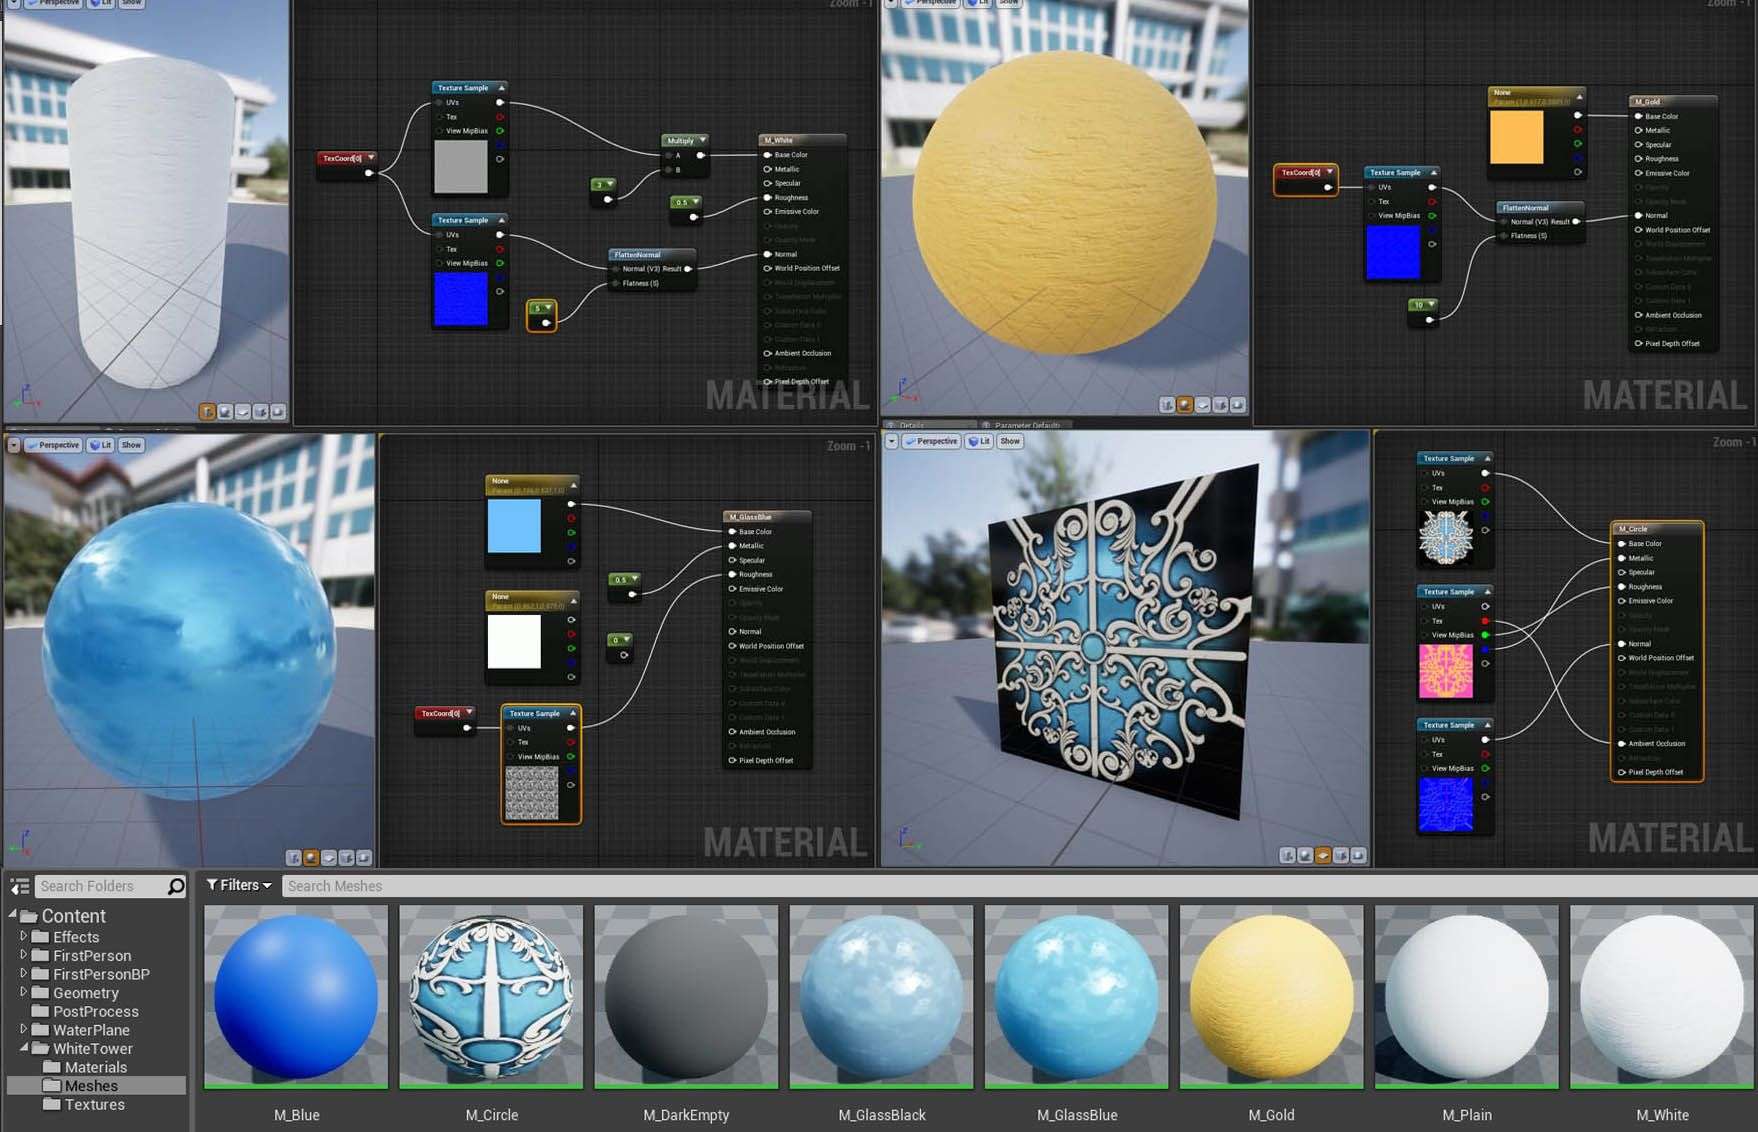
The materials I used here were very basic: a wall and a roof material with tiling textures, two glass materials with a roughness map taken straight from the default Cloud texture in Photoshop, an ornate texture I created in Substance Painter, and a couple of different colored flat materials.
This was my first foray with Unreal's decal system. I downloaded some stained moss textures online and edited them in Photoshop. Afterward, I made a decal material and placed a big DecalActor right on top of the water to simulate the moss on the bottom of the castle. I also sprinkled a few more DecalActors here and there to add variety. Good thing there's a handy checkbox Receives Decals which prevented decals from appearing on the water plane.
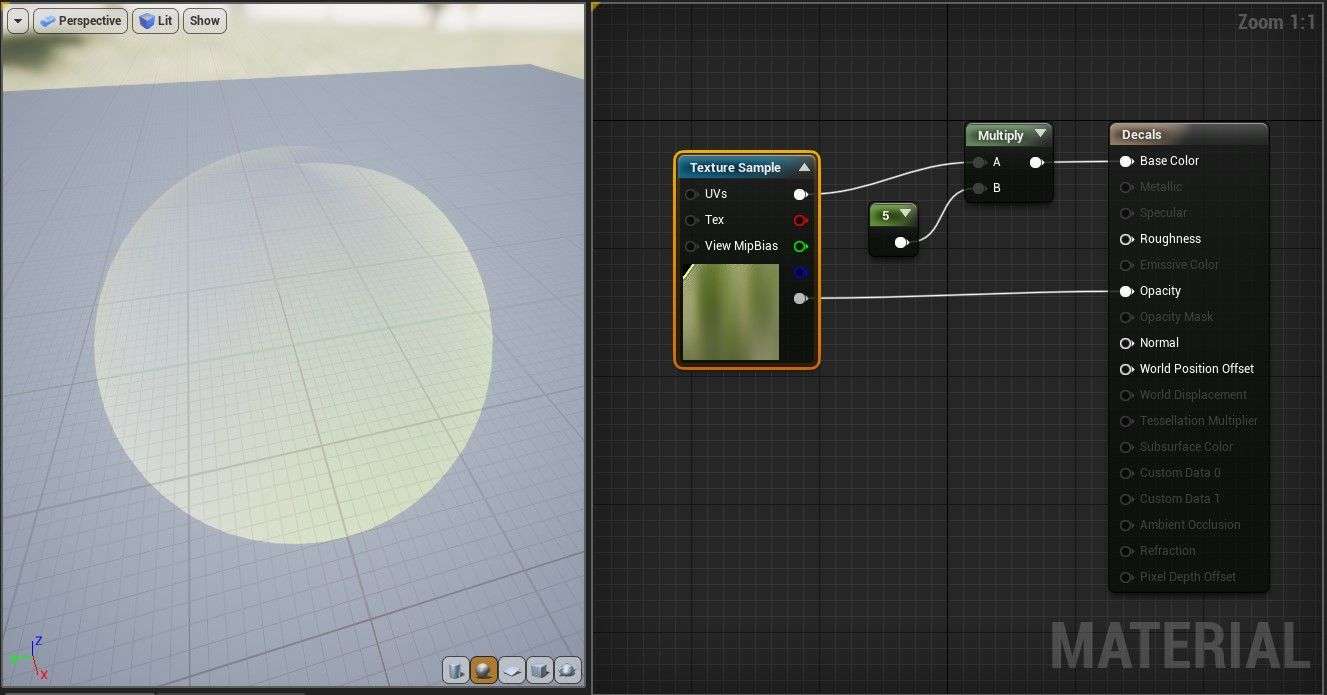
I could have added a lot more decals to make the castle walls look more interesting. The project was already taking more time than I had allotted for it. After decals, I added one big reflection capture so that all those windows could display some reflections on them. I also placed a couple of point lights and spotlights to places I found to be too dark.
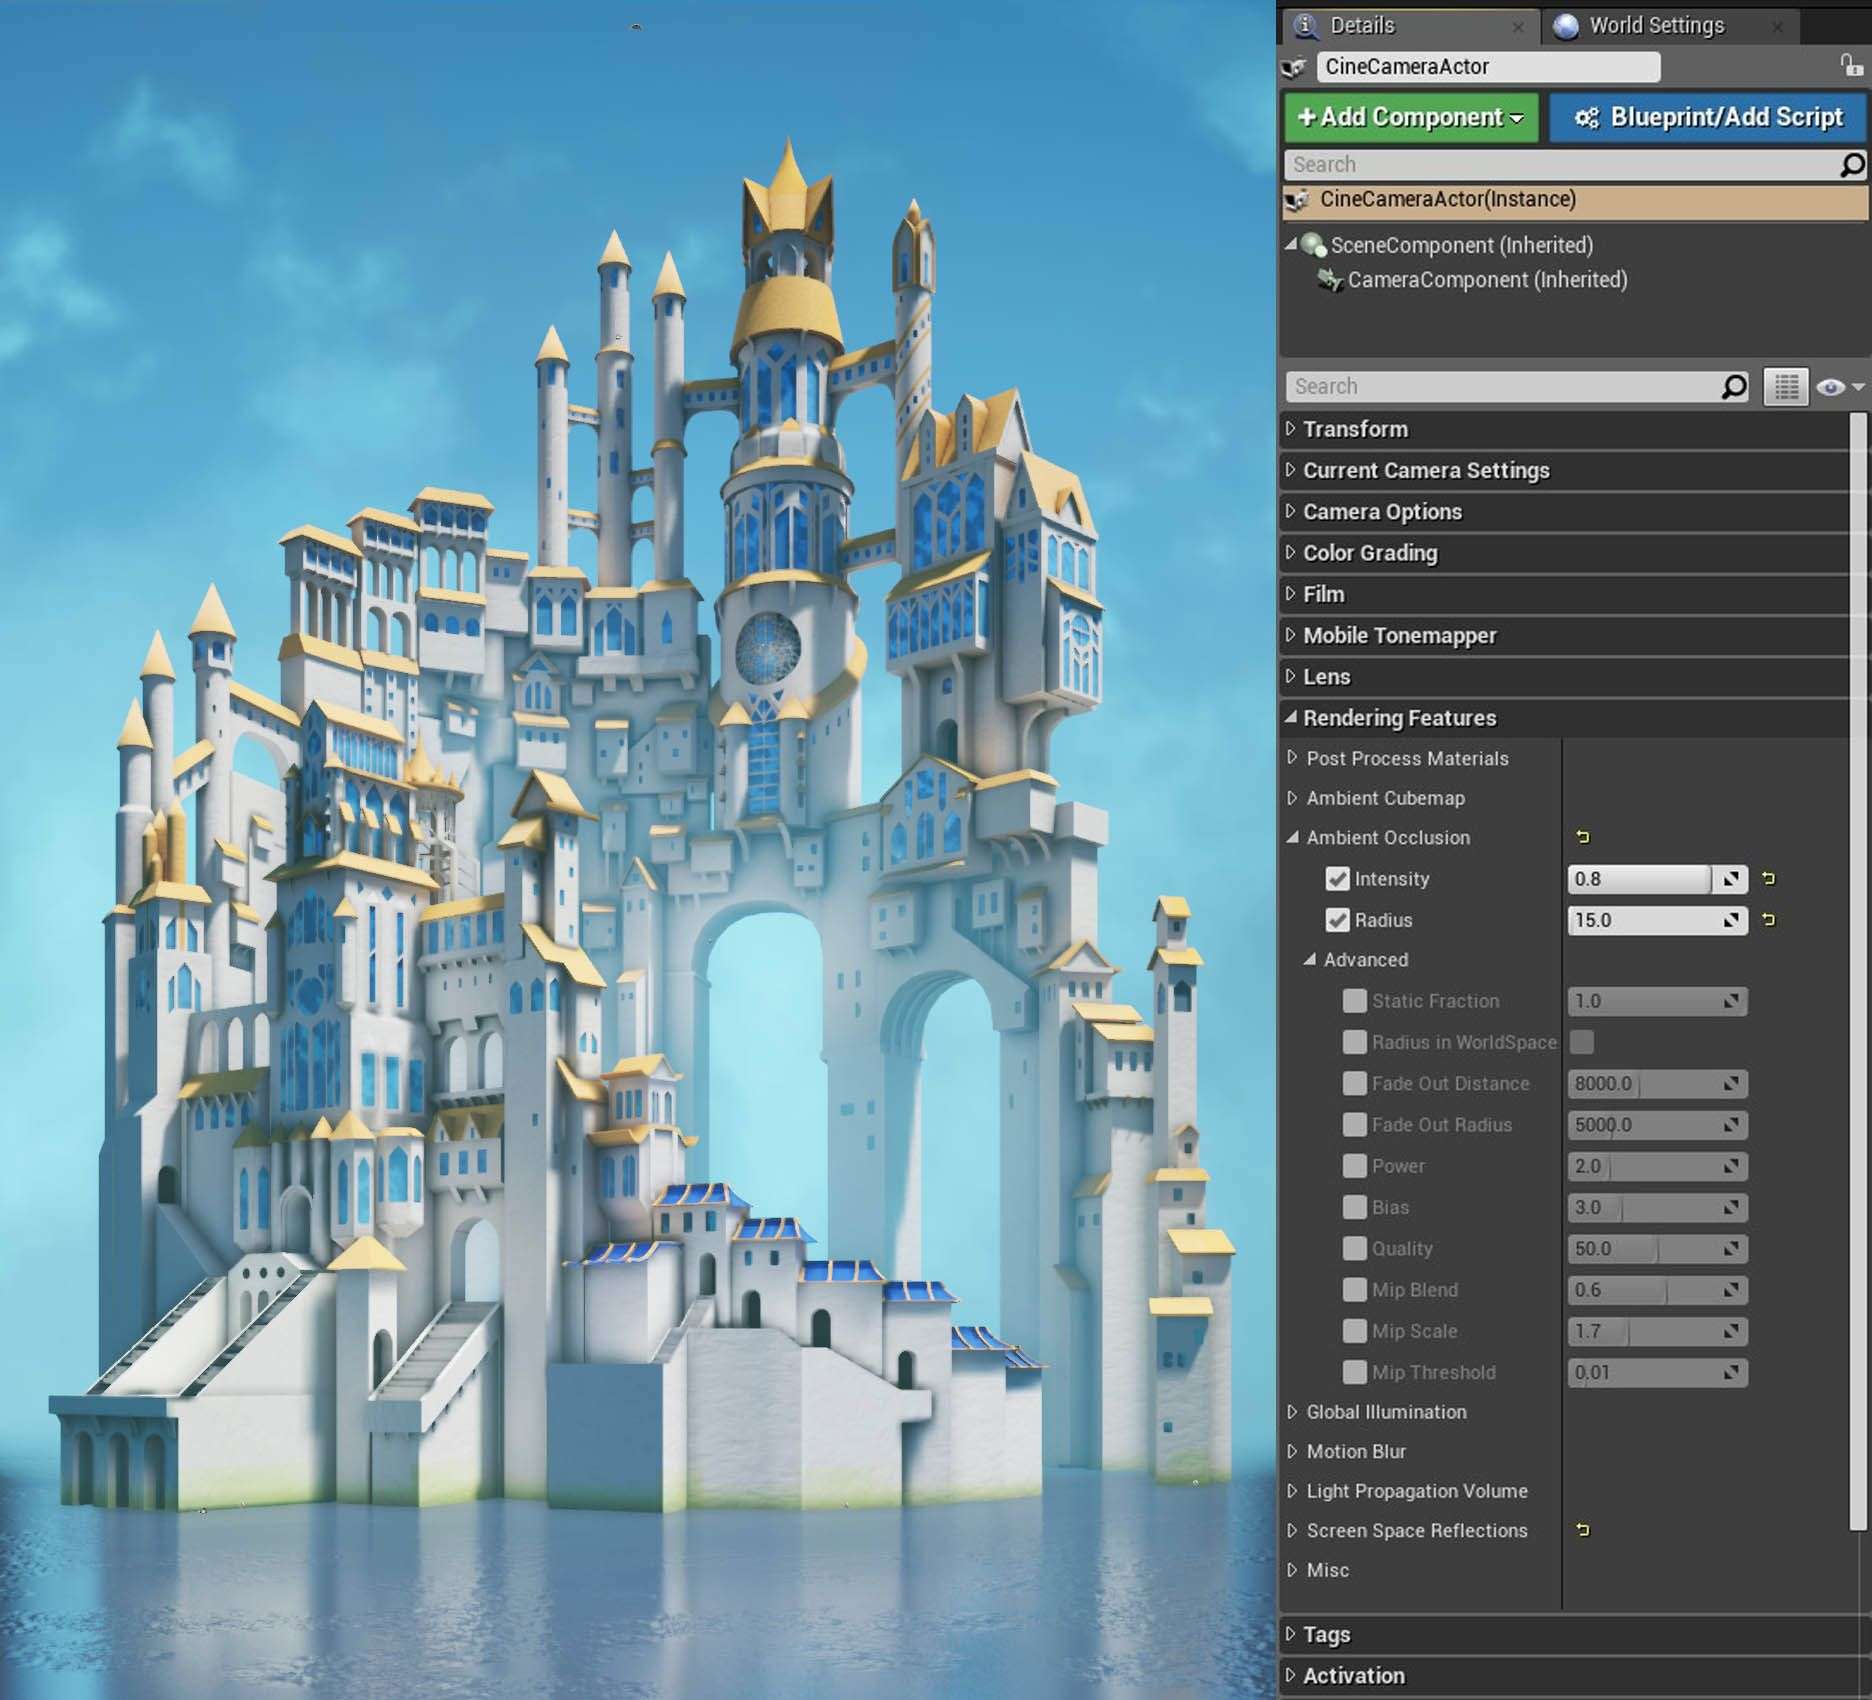
For Post-processing, I did not use a post-processing volume. Instead, I edited the settings within the camera. Screen Space Ambient Occlusion (SSAO) is something I added but not quite sure whether it was the right move or not. This allows you to add contrast and show more of those details that look flat due to lights.
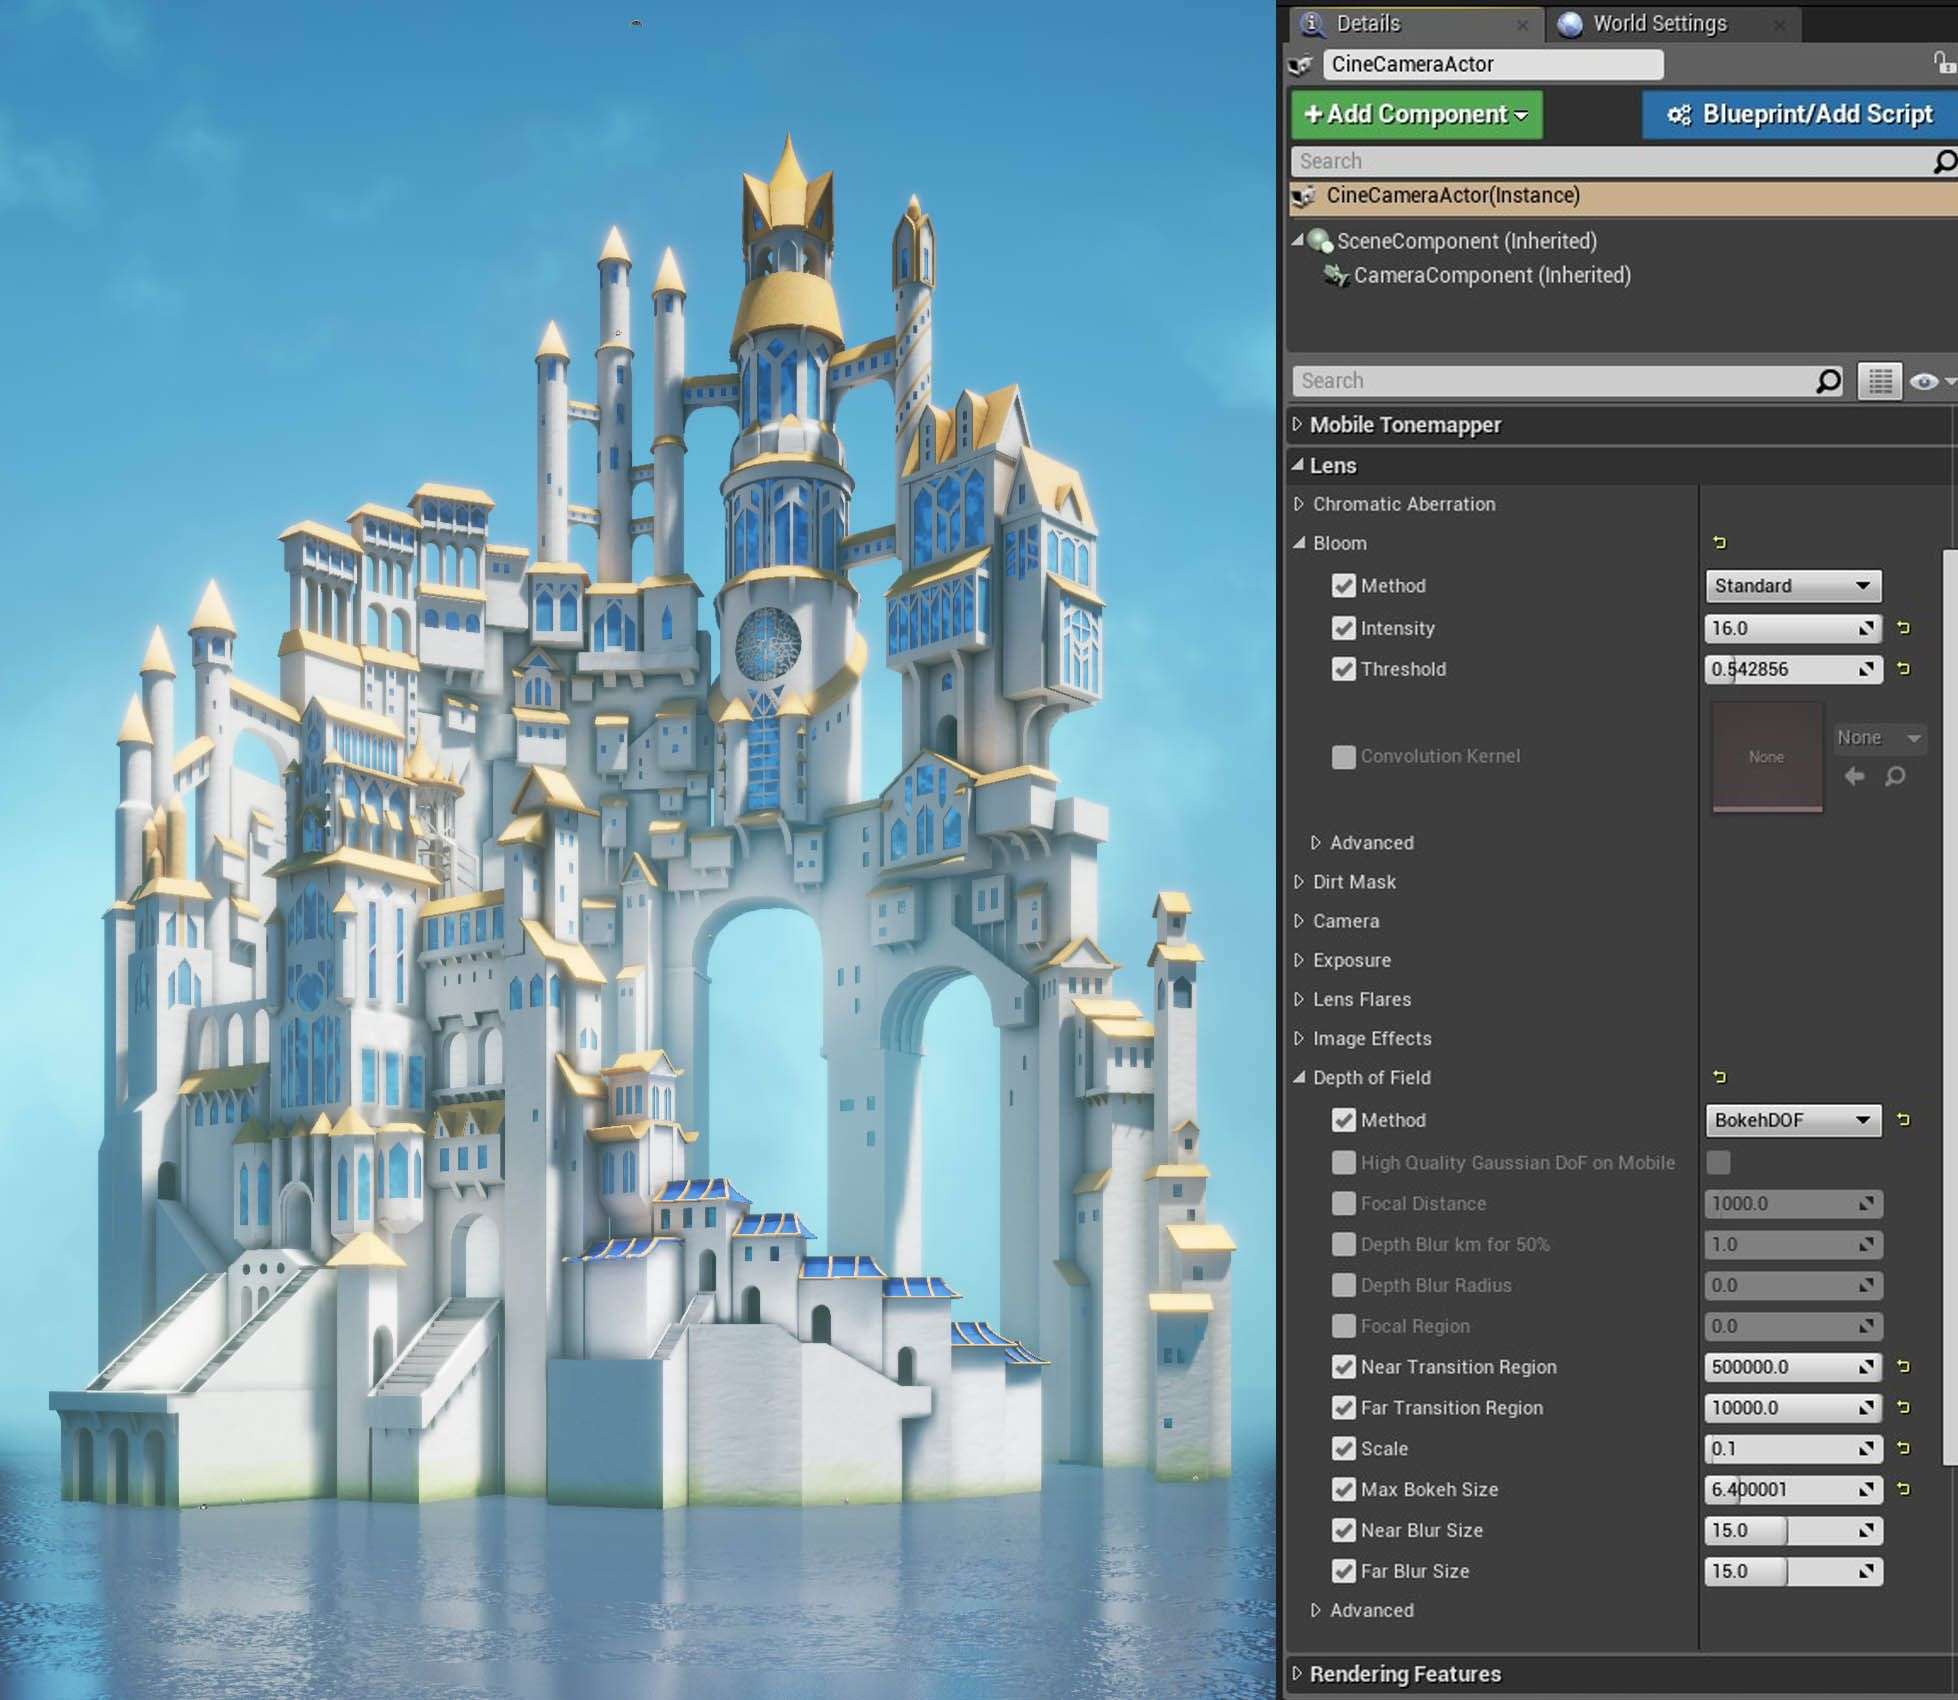
This was a tough one. I spent a lot of time adjusting these parameters since these were essential in making the scene feel like it's far away and mystical. Shown below are the settings I used. There's room for improvement in this regard. Furthermore, there were instances where I encountered a few bugs with the DoF effect. The intensity I was seeing from the viewport was very different from the one I got from the built-in High Res Screenshot feature. I still don't know why this happened.
This was a great learning experience. In reality, there was a lot of back-and-forth in adjusting the parameters of the materials, lights, and post FX until I arrived at the final image. There are a lot of things that can improve in this scene. In a year or two, I plan to come back and add more details to the castle.
This is a re-post of an ArtStation blog I published last December 2018.