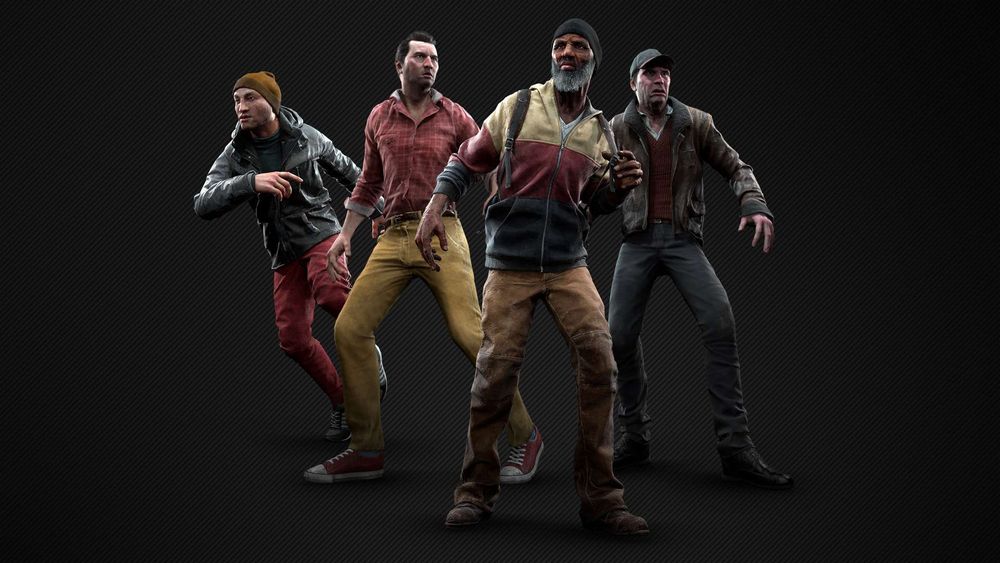
Hello, my name’s Daniel and I’m one of the character artists working on the video game Cold Comfort. It’s my first Job in the industry and thus probably my last time attending the Rookies Awards. I want to use this opportunity to give you a quick insight into the character pipeline from conceptualization to texturing, shed some light on my tasks and deeply discuss two features I was responsible for - Modularity and Zombie Morphing (both pre-engine).
No time to read? No problem, here’s a breakdown video where I’ll guide you through the creation process step by step, featuring the exact same information you find in the article:
Modularity
The Modular AI in Cold Comfort plays a big role in maintaining realism and authenticity in a lively environment without being too heavy on resources. It aims at delivering a certain level of randomness in the appearance of NPCs by combining interchangeable body/clothing parts and altering the texture colour (or adding dirt, blood etc.) with the help of masks and nodes rather than using a big library of different NPCs and texture sets.
Basic Setup
We decided to split the NPCs into 5 interchangeable pieces.

Every part will get its own texture set and has to meet a certain triangle count, in order to keep every NPC in the end at an average of around 30 to 35 thousand triangles. Additionally, each mesh, texture and material follows a strict naming convention to keep things organized for every department down the pipeline.
Conceptualization
For now, the NPCs in Cold Comfort represent civilians in the immediate aftermath of a zombie apocalypse. Their clothing style is simple and only a few really adapted to the circumstances yet. So, for the first set of NPCs, we decided on normal and clean street clothing. Don’t worry, we’ll add grunge and blood later with the help of masks, once the NPC transforms into a zombie.
Since the clothing parts must be interchangeable, we can’t choose any uniforms or sets that only work together. We also can’t pick clothes that are too unique and stick out too much.
Modeling
In order to make the interchangeability work, areas where the different modular pieces meet have be at the same locations in 3D space. Once a universal scale for all parts is set, the next steps of the modeling process are almost identical with most peoples’ workflows for 3D characters: Block out in Marvelous Designer (for clothes) – Highpoly in ZBrush – Retopology in Maya (or 3Ds Max). Now, regarding the retopology there are certain things that need extra attention.
The topology of deforming body parts (neck/chest area and arms) which is normally covered by clothes can’t be changed, because it’s going to act as a guide for the topology of all clothing parts above to avoid crashing geometry. The same rule also applies to layers of clothing in one modular piece, like a shirt below a jacket for instance.
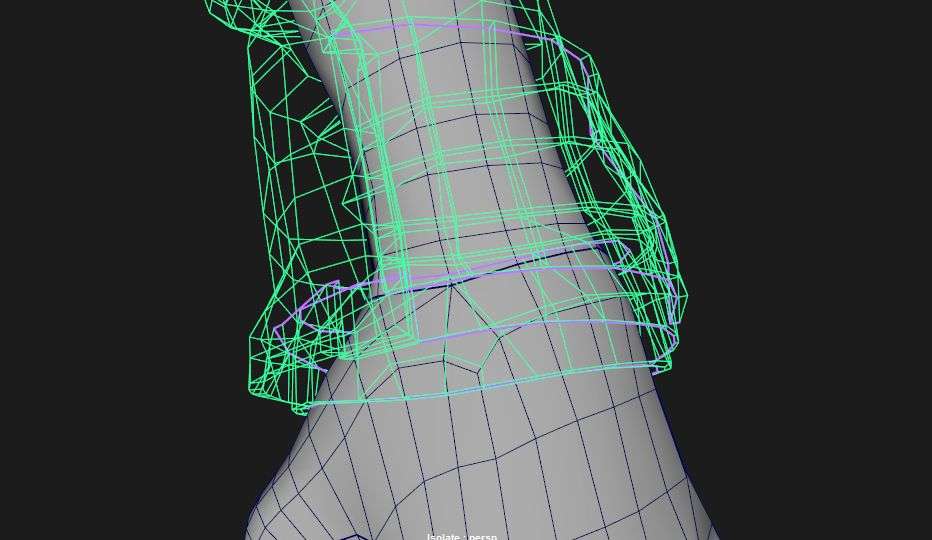
However, the topology of the head above the neck can be changed without any problems. But circumference of the skull on the other hand not, because it has to fit with all top pieces in our library.
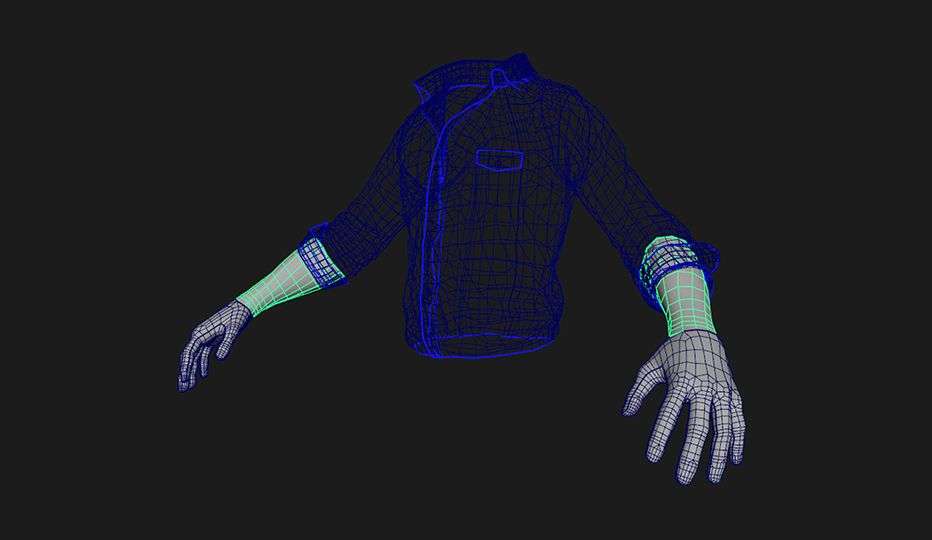
Additionally we cut the lowpoly geo of the arms into upper arms, lower arms and hands. Depending on how much the sleeves of the overlying cloth will cover the body, parts of the arms will be hidden in engine in order to save resources.
Now, we don’t have to bother with the clothes’ topology if the sleeves reach over those cuts, since we will also conveniently place them right after the deforming areas of the arms.
UVs & Texturing
Regarding UVs and Texturing, besides keeping every body piece on a separate texture sheet, there is nothing special here, yet. They will play a bigger role in the Zombie Morphing chapter. For now, it’s only important to follow the common steps that are crucial for a good UV Layout in order to texture properly and optimize resources. And, since we are going to be creating a lot of heads, it’s a good idea to keep recurring meshes like eyes or the mouth bag on the same locations in UV space, in order to reuse their textures for the next head variants. Additionally, I combined all facial hair like eyebrows or beards on one sheet, since they are using the same material and the same additional maps like an alphamask.
Colour Variations (Masks)
Adding color variation with the help of masks is the last step before we will focus on the zombie version of our current set of modular parts. These masks will be later used to change the colours of certain areas of the clothes (or even arms for different ethnicities). For this torso piece I decided to make the colours for 3 areas interchangeable:
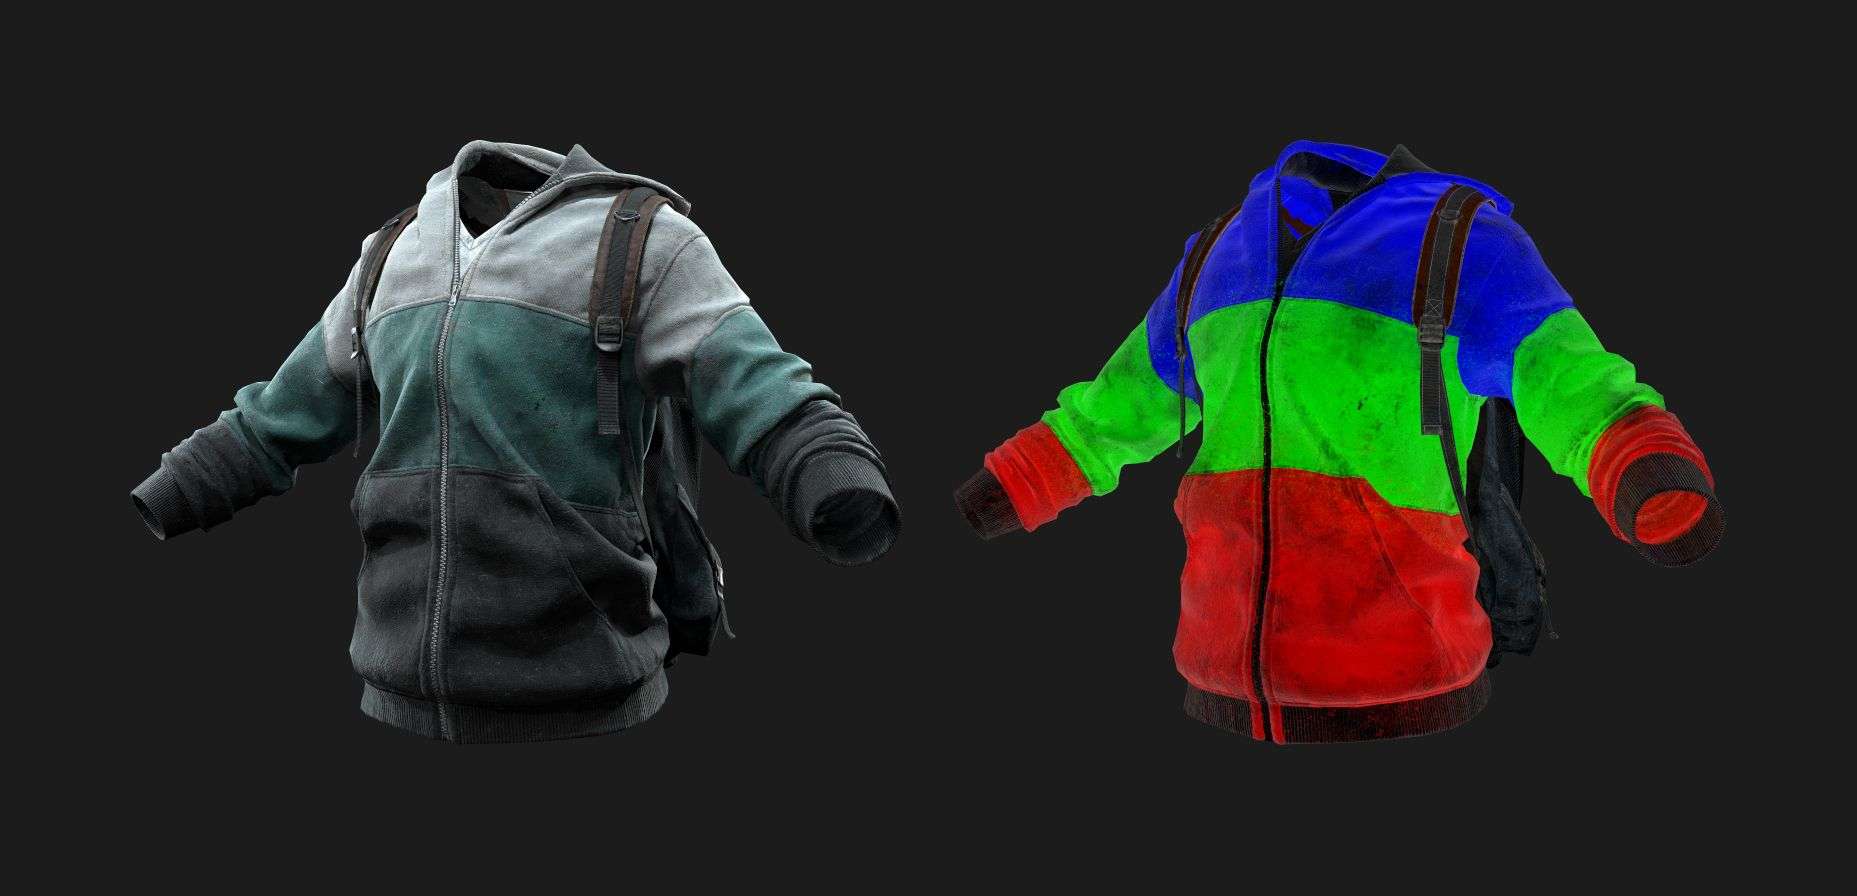
Since we chose the hue shifting node in UE to change the colours, it’s important to deliver the textures coloured (and don’t include any white or black clothes). It’s also important to exclude anything from the mask, that shouldn’t be hue shifted like dirt, or edge wear and keep these areas black or grey in the mask to lower the impact of nodes on them.
And that’s it for the uninfected version of our set of modular pieces. Now, we are going to deface our handsome looking dude, transform him into a zombie and match his clothes to his new lifestyle.
Zombie Morphing
The Art of our zombie morph feature is actually pretty basic and mainly utilizes blend shapes. But there are still certain shortcuts during the art pipeline that are definitely worth diving into.
To create the zombie version of our NPC we won’t do everything from scratch like we would with a new set of clothes or uninfected heads. For each step in the pipeline we are going to use what we have and start from there.
Conceptualization
The conceptual design is heavily intertwined with our lore and state of the zombies. They are freshly transformed by some sort of virus. That means, no crazy flesh wounds or damage you would normally find on a zombie that already got to experience some gunfights in the past. Furthermore we can’t strafe too far from our uninfected head, since we are going to use the same UVs and topology in order to make the morph work with blendshapes and texture blending.
Modeling
For Modeling we only need to work on the geometry of the head and arms. Clothes will get an overhaul in the texturing process. The only parts that need to be put into ZBrush are the body pieces.
UVs and retopology are already finished and can’t be changed due to the morphing feature. If they differ from our sculpt in ZBrush, we are going to import them back in and re-project the detail of our uninfected head to the retopologized and UV’d mesh on a layer. That way we keep the skin detail of our human and can later use it as a base. Disabling the layer allows us to work on the bare mesh without destroying the detail when smoothing areas.
Now we have to keep in mind that altering the geometry too much will result in heavily deformed UVs (since they are bound to our retopology geo). Whenever we plan to, for example, pinch or inflate certain areas of the skin, we make a copy of the mesh, apply the changes and project them back to the original sculpt. No evenly distributed topology will be harmed during this process.
Once we are happy with our primary and secondary detail, we are going to move to the micro stage and enable our uninfected skin layer. On top of that we are going to add, on additional layers, zombie skin detail like decay or wounded skin. The morph brush is our friend when deciding how much we want to blend our different types of skin.
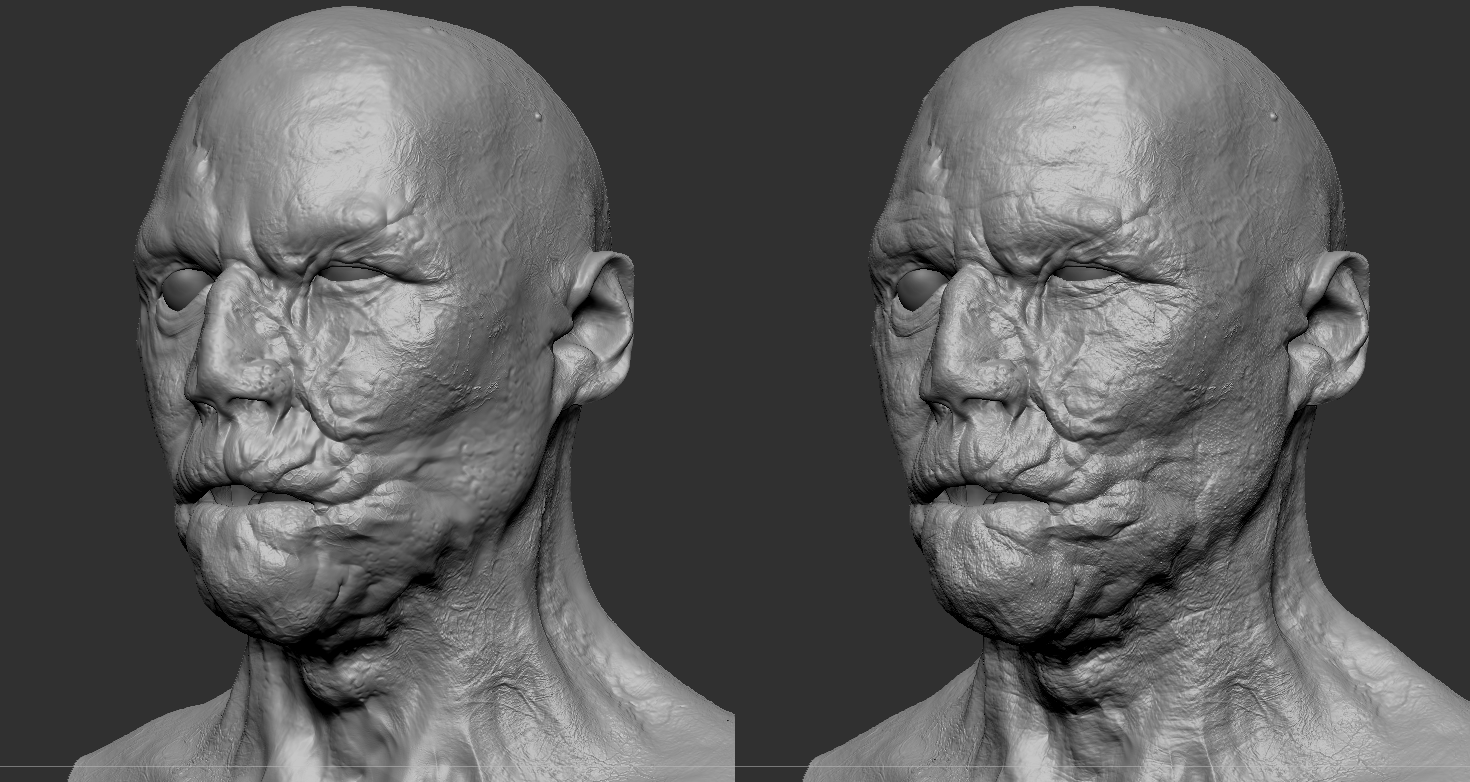
As soon as we’re finished with our highpoly, we’re going to import it back into Maya (or 3Ds Max). The lowest subdivision level, which is our UV’d retopology and a medium level to use as live object. The medium level is important, if we want to make changes to the lowpoly geometry. Sometimes our zombie version gets a big bump or some serious deformations in certain areas.
If done right, topology and UVs shouldn’t be stretched, but we won’t have enough faces to smoothly adapt to these drastic changes of the head shape. So we are going to increase the polycount in these areas while using the medium level sculpt as a live object. But since adding geometry to the zombie retopology will break our blendshapes, we need to apply all our topological changes to the uninfected head as well:
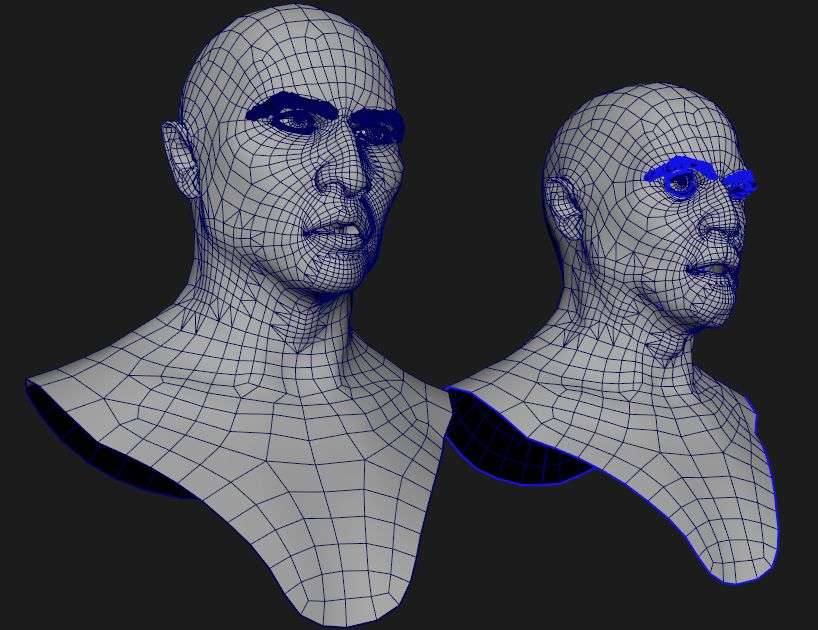
If at some point our vertex order gets screwed up, as long as topology stays exactly the same, we can fix our blendshapes with the “Reorder Vertices” tool in Maya.
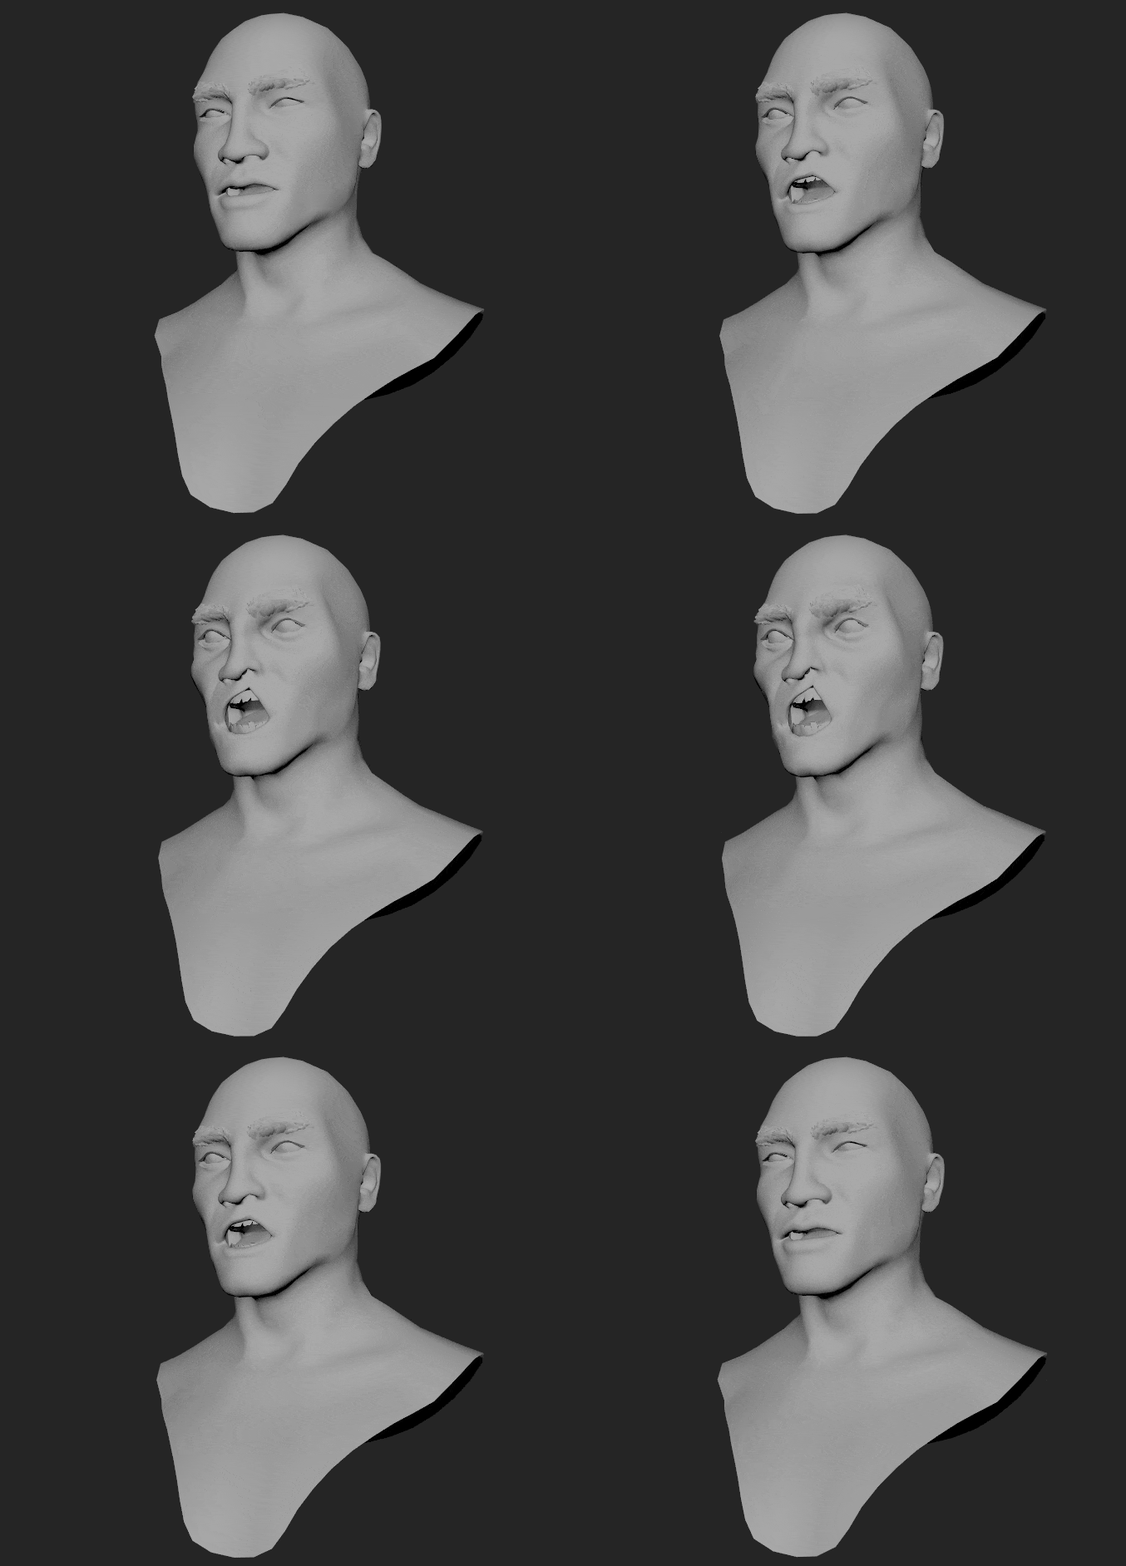
The last step in our modeling process is combining all secondary meshes of our uninfected head with our zombie head. That includes eyebrows, eyelashes, eyeballs, mouth bag and sometimes a beard. To match eyebrows, eyelashes and beard to the new head shape, we are going to use our blendshapes together with a wrap deformer. If the uninfected head acts as a deformer for these secondary meshes, they are going to move to their new location and stick to the same spot on the skin surface, once we blend the uninfected head with the zombie head.
Now we need to combine everything in the same order we did with the uninfected head to keep the vertex order the same. If everything is done right we get something like this:
Texturing
Since UVs are identical, we can reuse the Substance Painter project and just swap out the mesh + baked inputs. Unfortunately every stroke that’s painted by hand is reprojected onto the mesh instead of using the UV map. So if we want to use our custom painted masks, we need to export them first and add them to the zombie Substance Painter project as bitmaps.
The uninfected textures act as a good base for the zombie. Now we can adjust the colours a bit and add any blood stains, wounds, infections etc. on top.
Layers
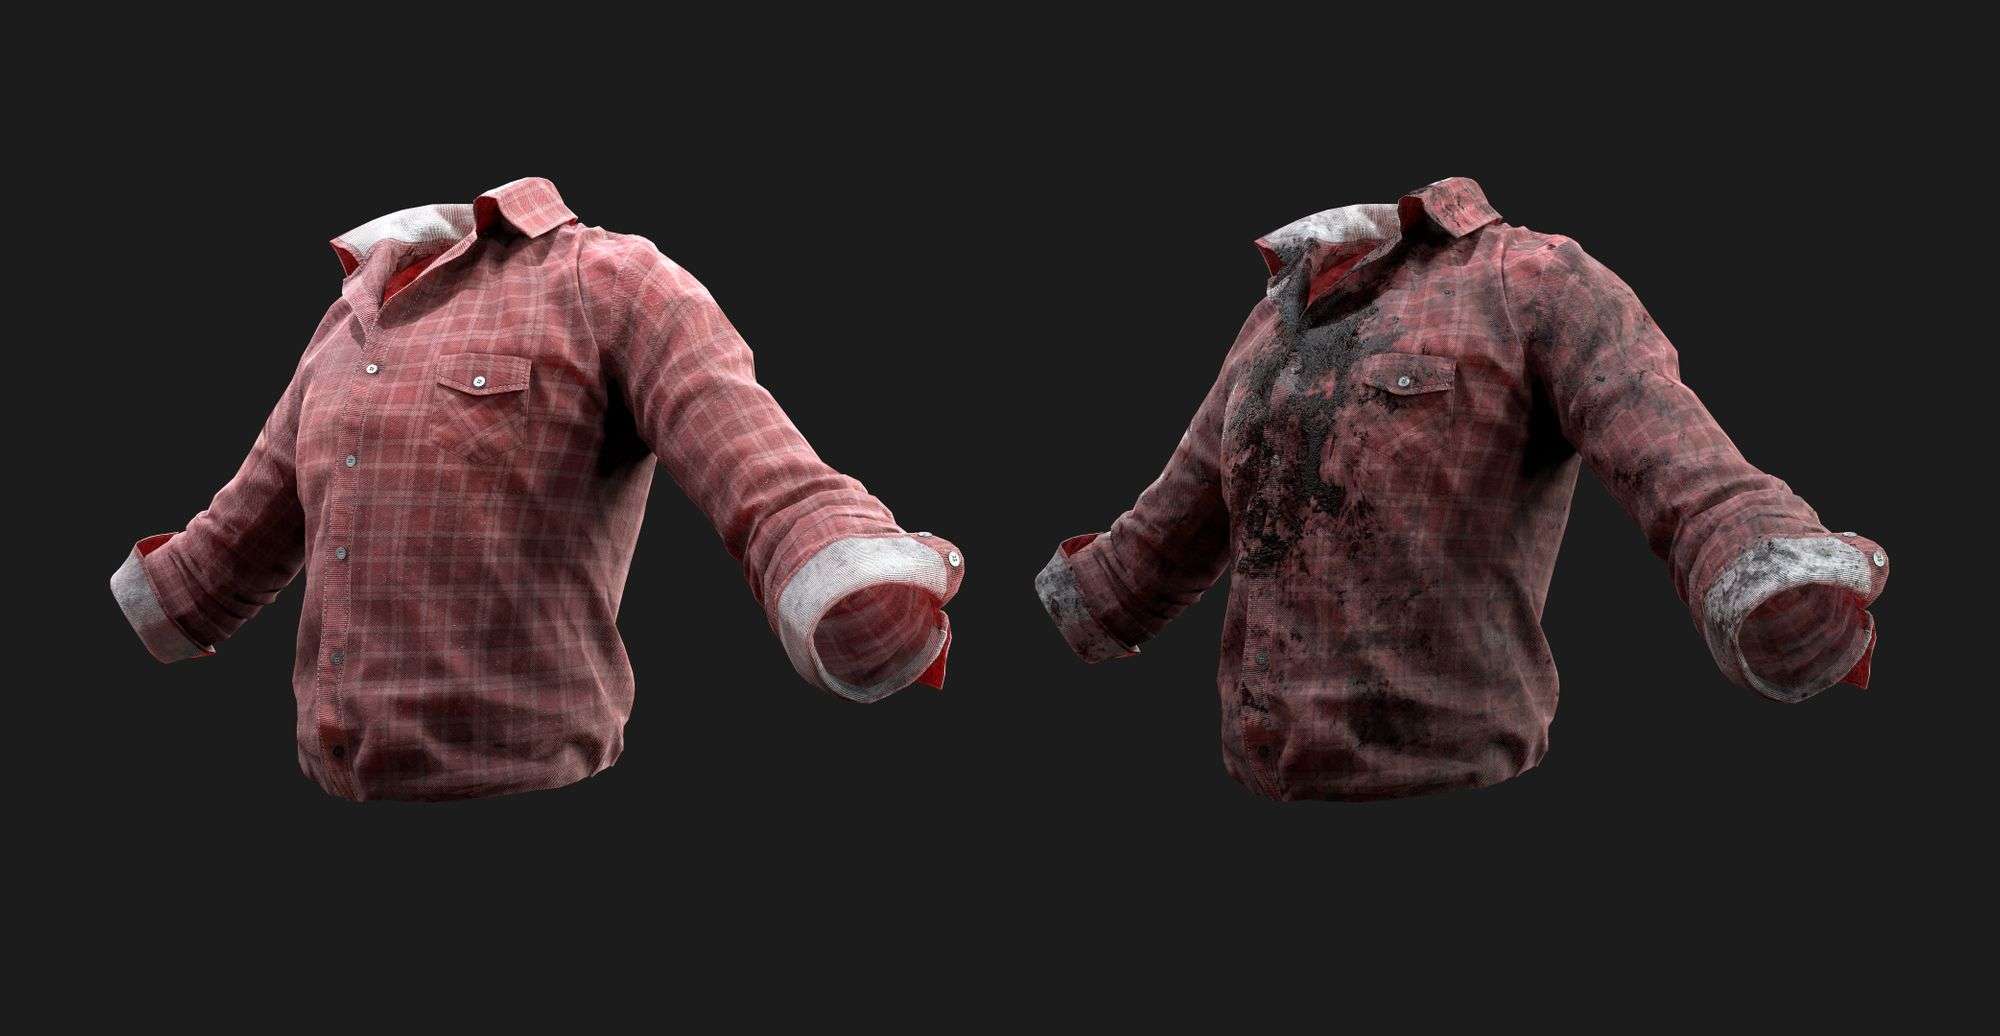
The last step of the AI creation process revolves around additional masks for the clothes, in order to add dirt or blood textures on an additional layer in the engine.
There are two different types of layers that will be added on top of the clothes after the zombie transformation.
1. The dirt/grunge layer, which must be created only once, since it’s going to be tri-planar projected in engine and thus is going to work with every modular piece.
2. The blood layer, which is going to add a big stain of blood on the chest of the zombie’s torso clothing piece. It uses the torso’s UV map and thus will only be layered on top of that particular modular piece. Due to this and since we don’t want every blood stain to look the same, we are going to create a new one for every new torso part.
Both layers use the standard range of PBR textures required for the UE4 + a grayscale mask, to determine which areas of the zombie’s clothes will be covered by dirt or blood.
Delivering the asset
And that’s it. Once everything is named correctly, textures and masks efficiently packed and blendshapes successfully tested, the asset can be delivered to the next department, where it’s going to be rigged and animated.
