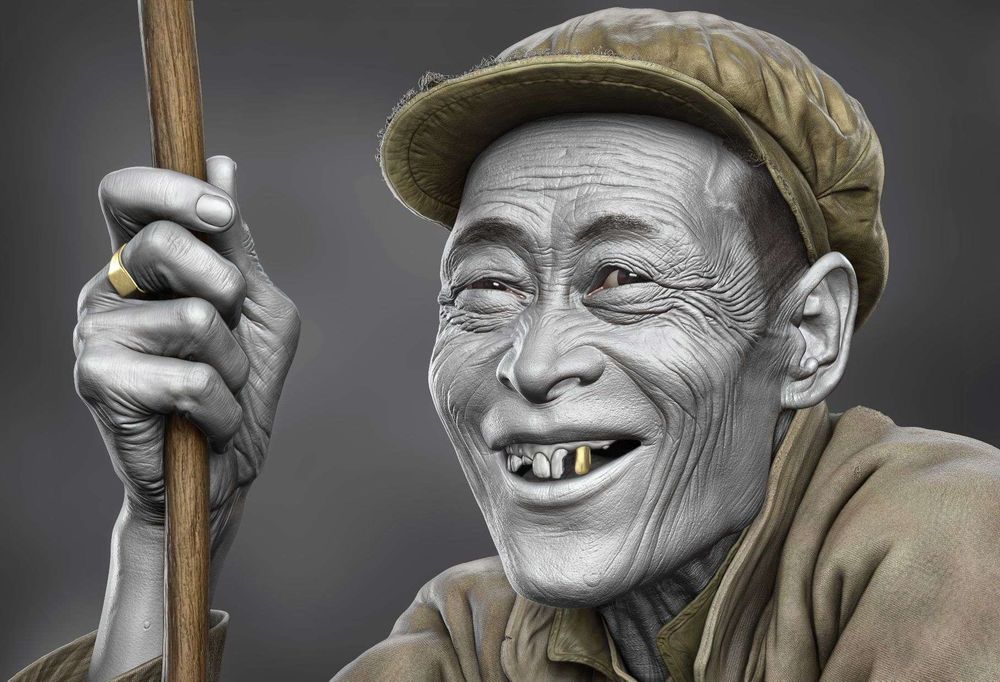

For the first step you have to make it clear what sort of portrait you’re gonna do and look for inspirations. It's not always necessary to sculpt famous actors or singers. Sometimes a regular person can be exciting and more challenging. I found this image in my laptop, when I was looking for people and suddenly saw this old man I realised that sculpting this man could be a challenge with those wrinkles.
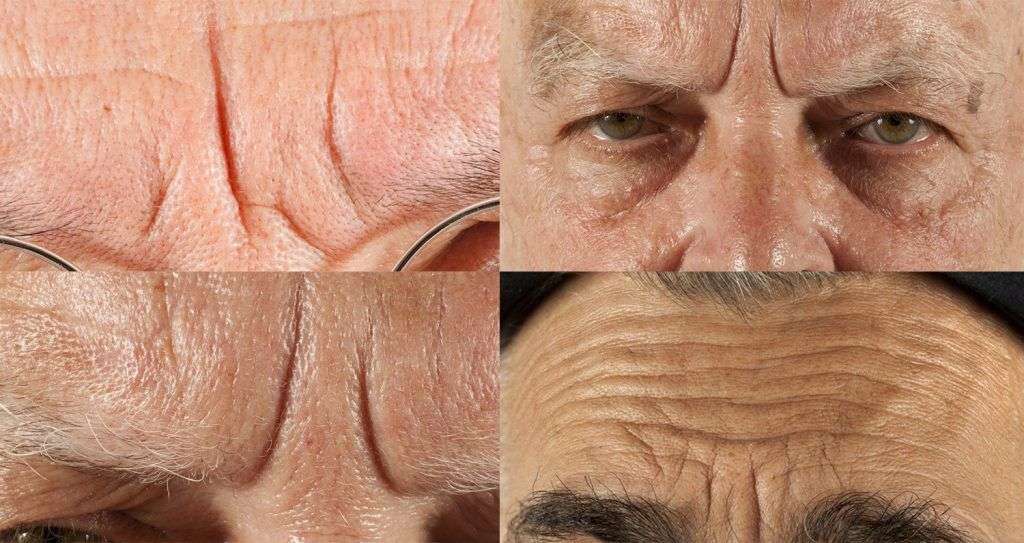
Unfortunately the image was very low res.and of course it becomes more difficult when you want to work on details.so I used some close up images for help which I had saved from the robophot.com.

Setting up ZBrush Scene
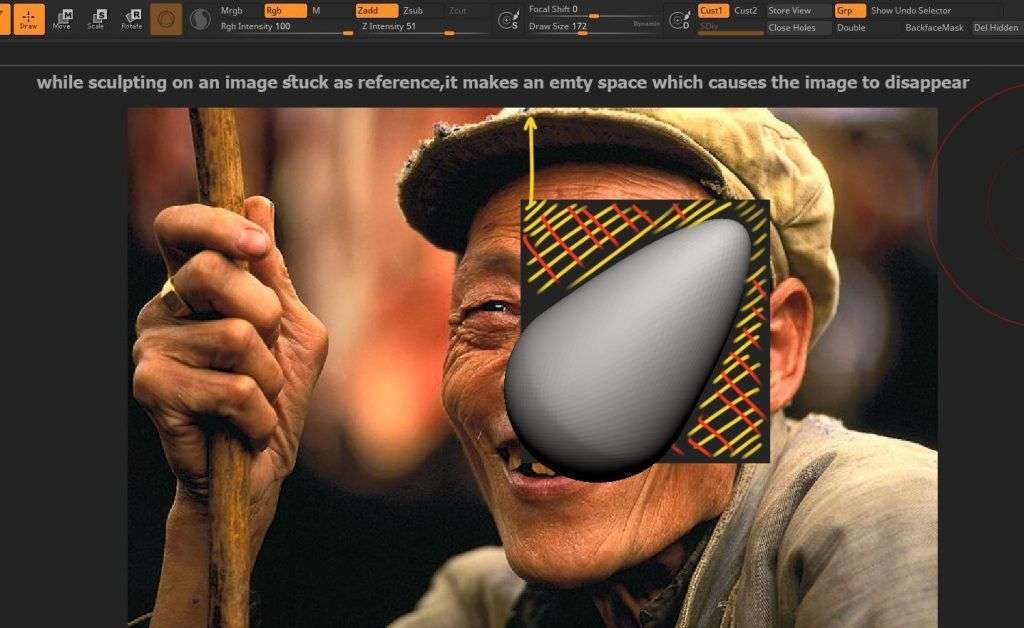
Before doing anything I set my document size to 1920*1080 so I work in full screen canvas. I usually stick my reference to the background.to save the specific views, there are 2 ways, by ZApplink properties or reference views. I used the second choice. Model opacity option can help you adjust the model transparency and the image appears through the model.

Starting to Sculpt
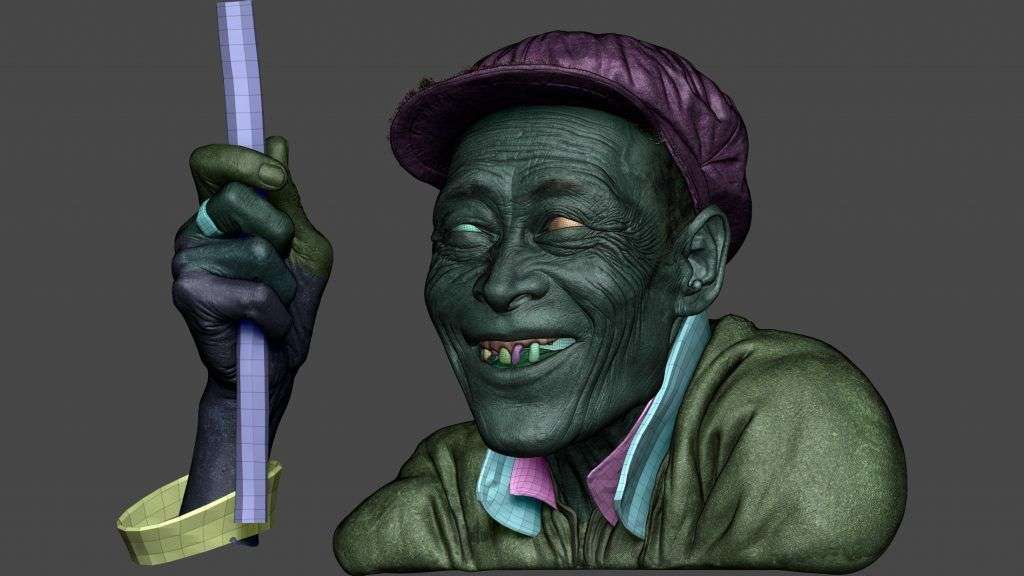
To block out the face and teeth I used ZBrush 3d meshes and IMM Primitives brush. For the hand I used a simple base mesh in the ZBrush tool menu. For the cloths I brought in some base meshes from my Pete Docter statue to save time. This project was done in 2018 and I used the Sculptris Pro feature which I always liked to see something like this in ZBrush. I remember that one day I had suggested a similar function in Zbrushcentral forum.and Im happy to see this in ZBrush. For this project I didn’t re-mesh the head to get a low poly model and that makes it harder to refine and manipulate the general shapes.my major brushes in this level are Move, ClayBuildup, DamStandard and transpose. In the beginning work in symmetrical to save time.and then go asymmetrical.
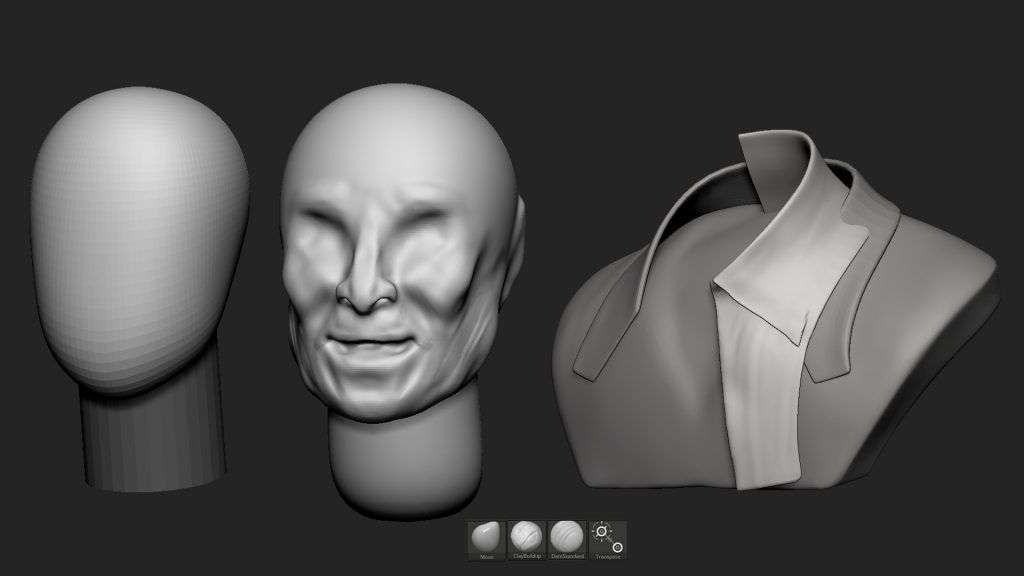
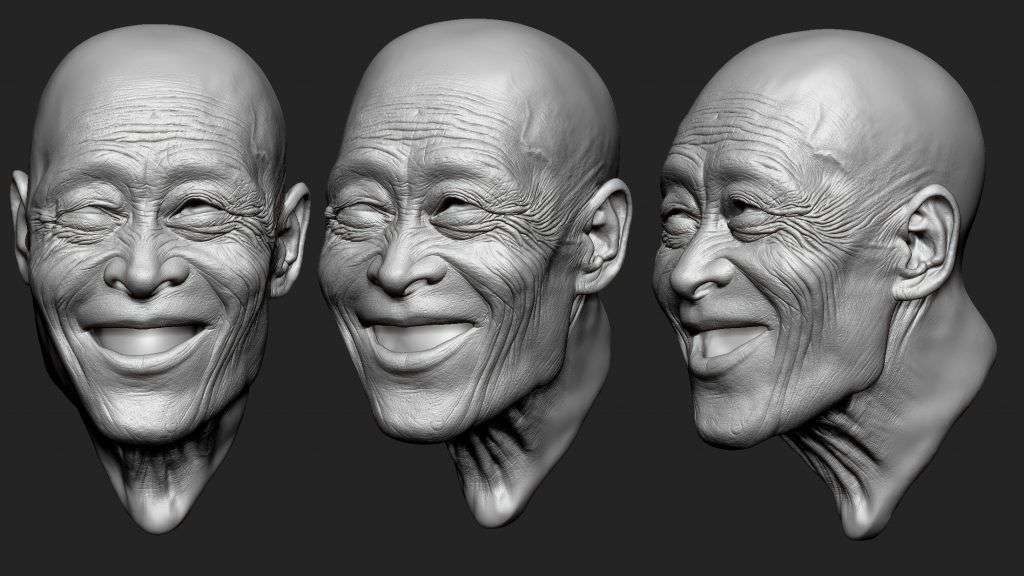
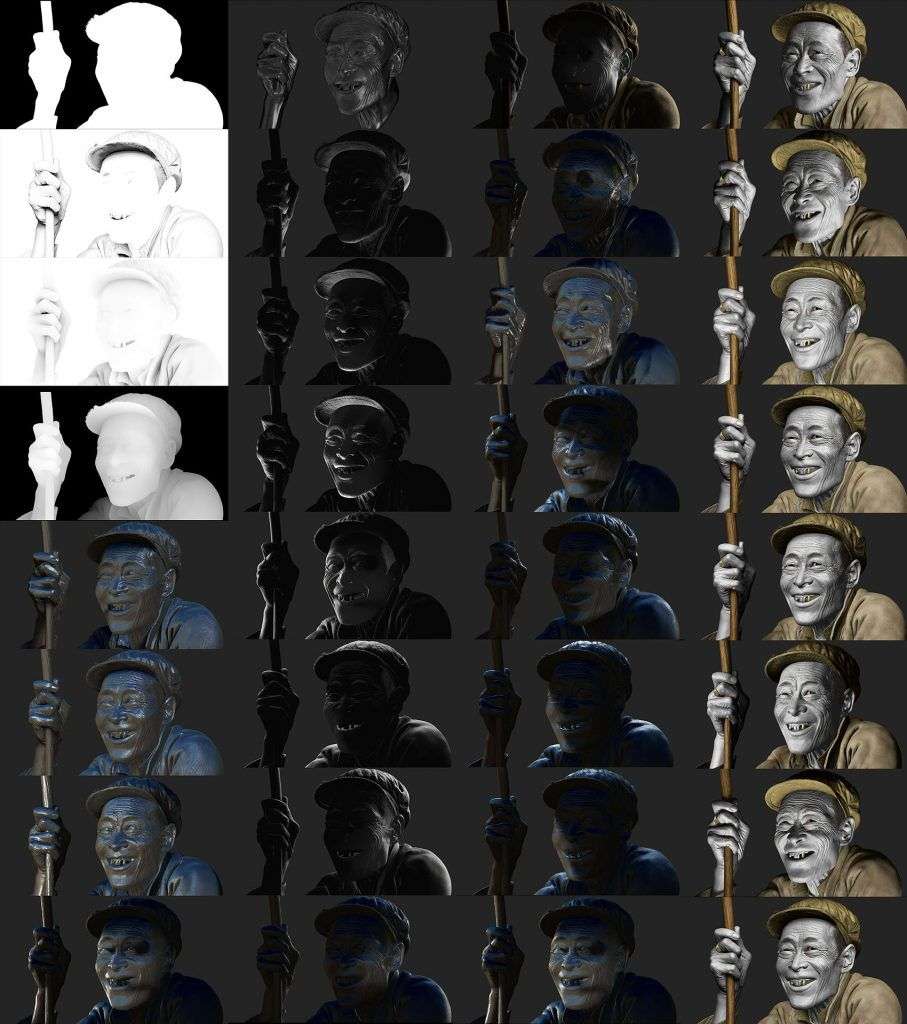
Continue to Modeling and Sculpting
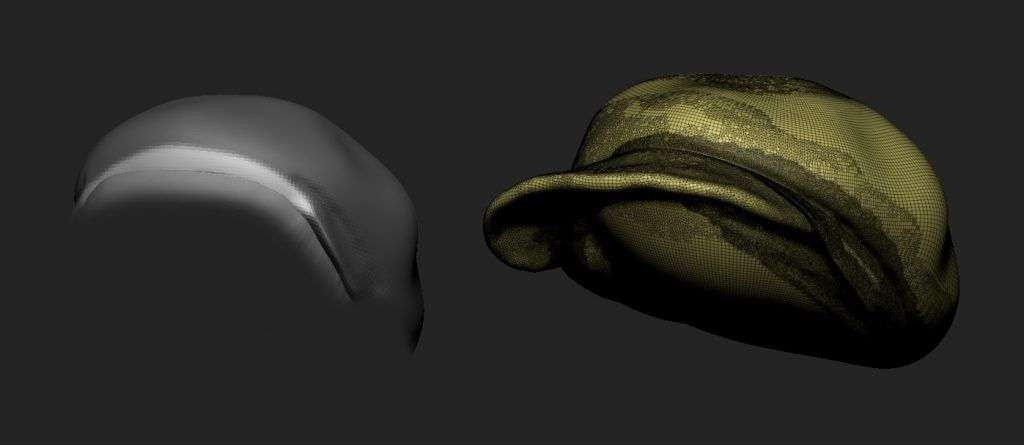
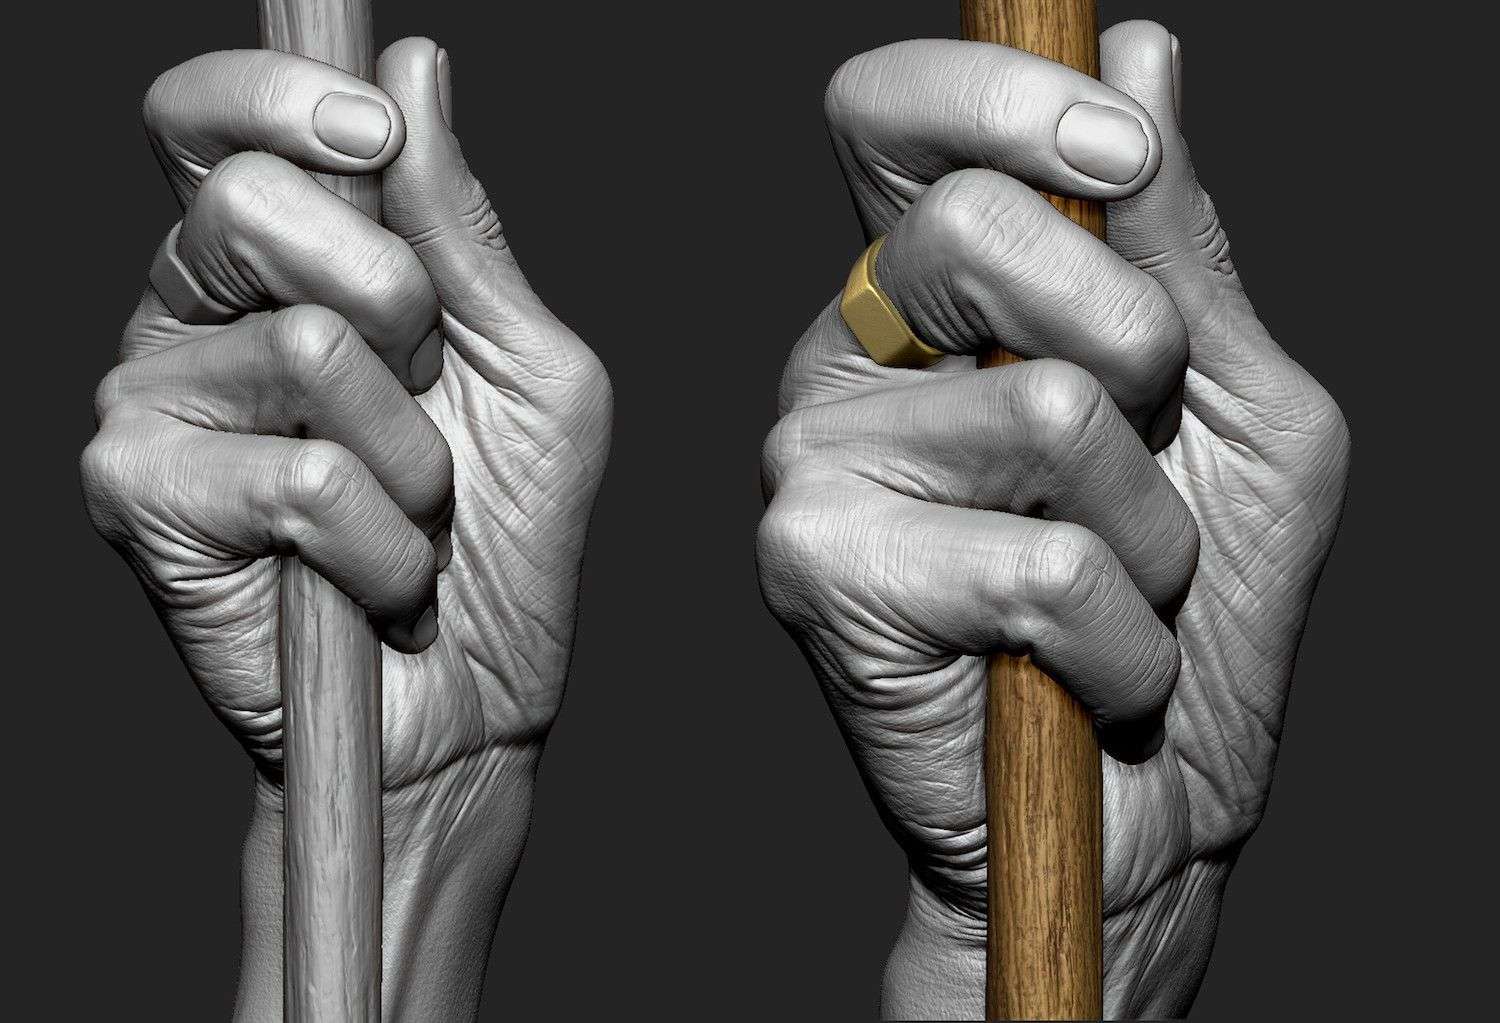
Made the cap with IMM brush.masked the whole part and unmasked the area of cap edge.pushed out with transpose and refined with Sculptris pro.the stick is made with CurveMultiTube.and the ring is made using ring3d mesh and zmodeler. His sleeve with cylinder and zmodeler. Posed the hand with Transpose and Move brushes.make each finger a different polygroup to mask it every time you want so you can pose them independently.

Working on Details
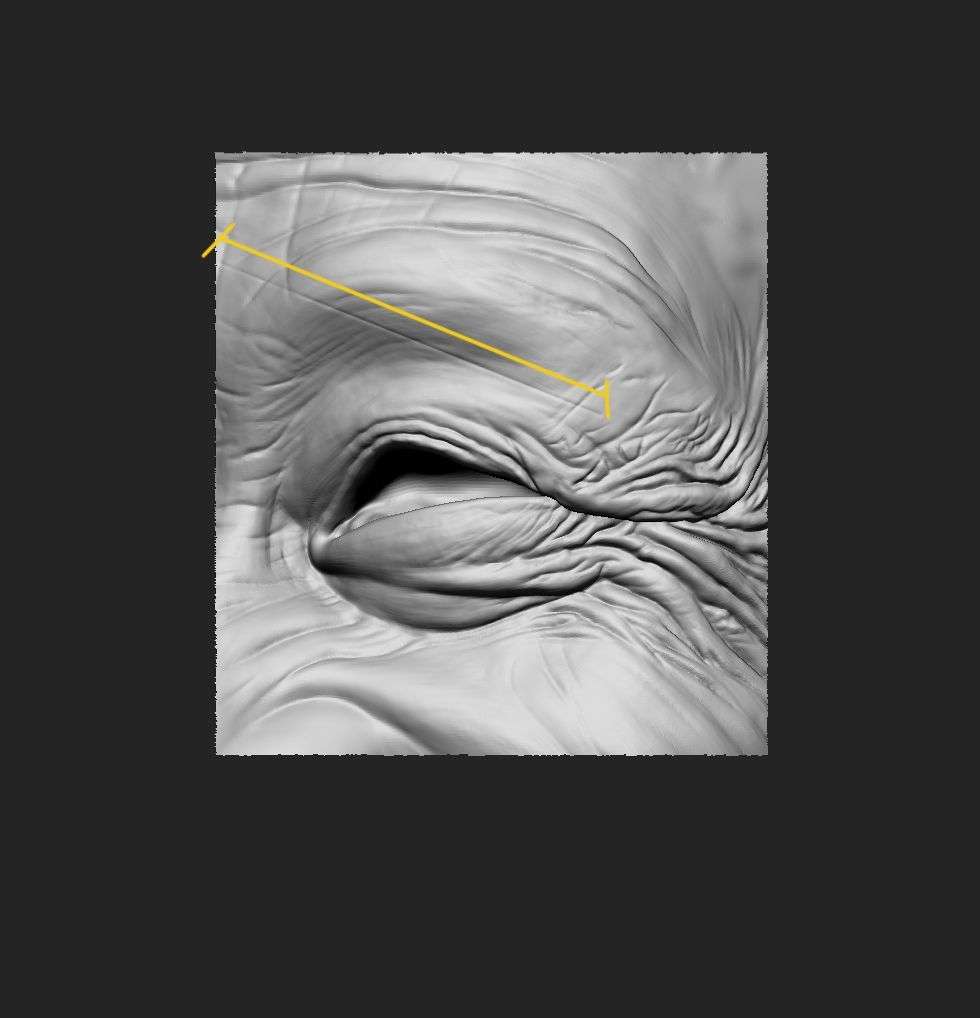
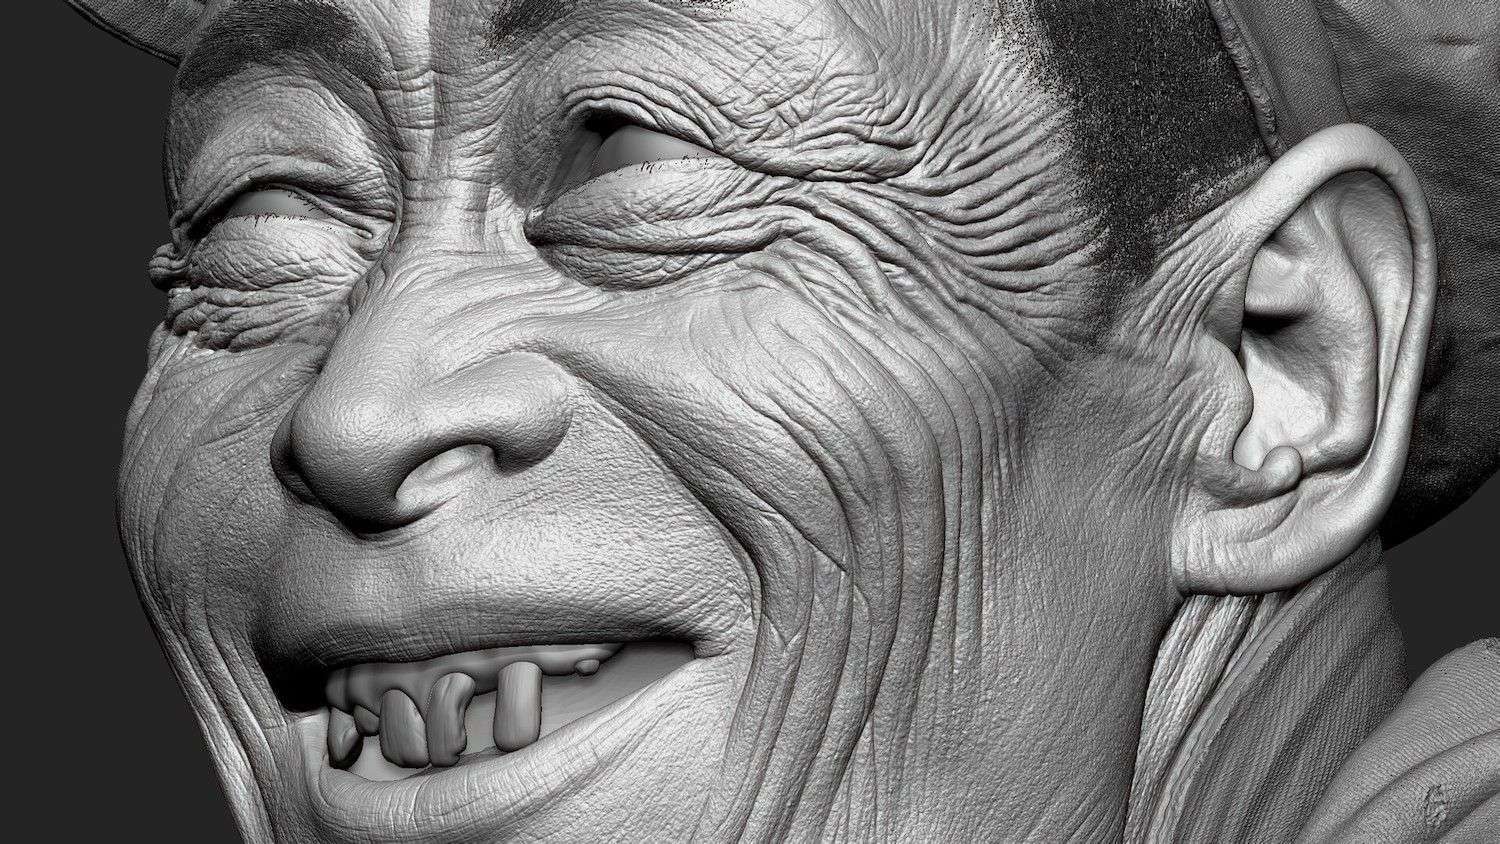
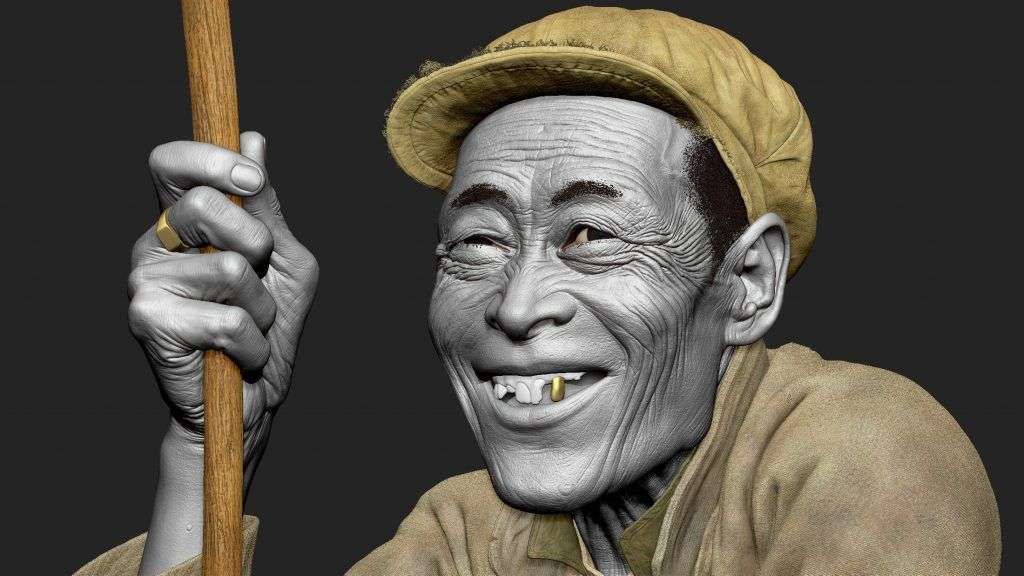
For details I used a combination of hand sculpt , XYZ maps and some alphas and textures around the internet and also some brushes by JRO. For this purpose I mostly use DamStandard,Standard and Move brushes. it’s important to have a mirror besides you and take a close look to yourself.that would be a good handy reference. Here I would like tell about something that looks like a bug. I’ve seen this since long time ago when I had started working ZBrush,among sculpting you are working relax but suddenly ZBrush makes a sharp straight line and sometime you don’t see that and keep working. That’s a nightmare.
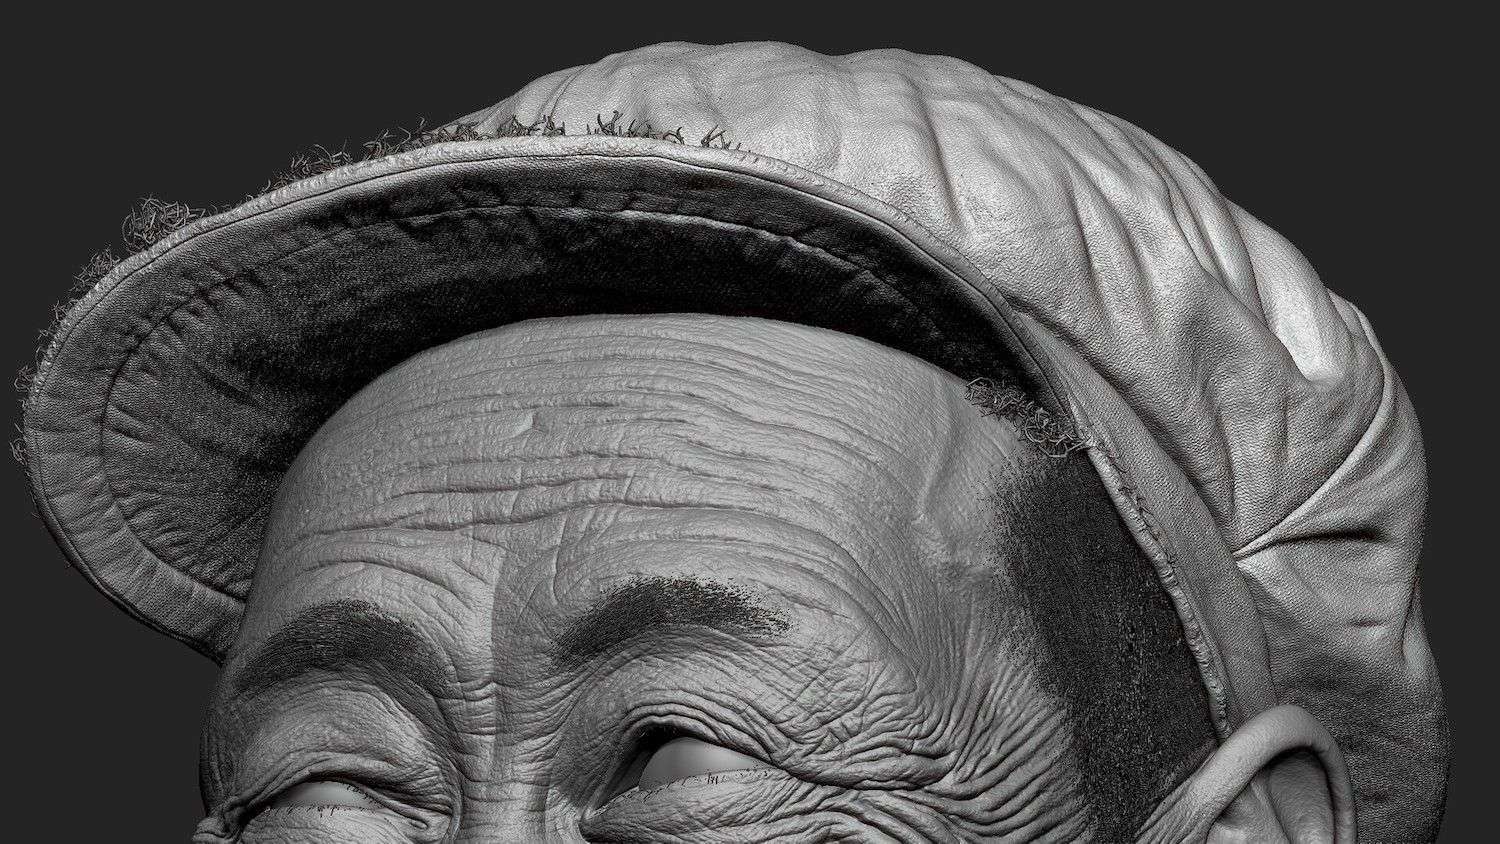
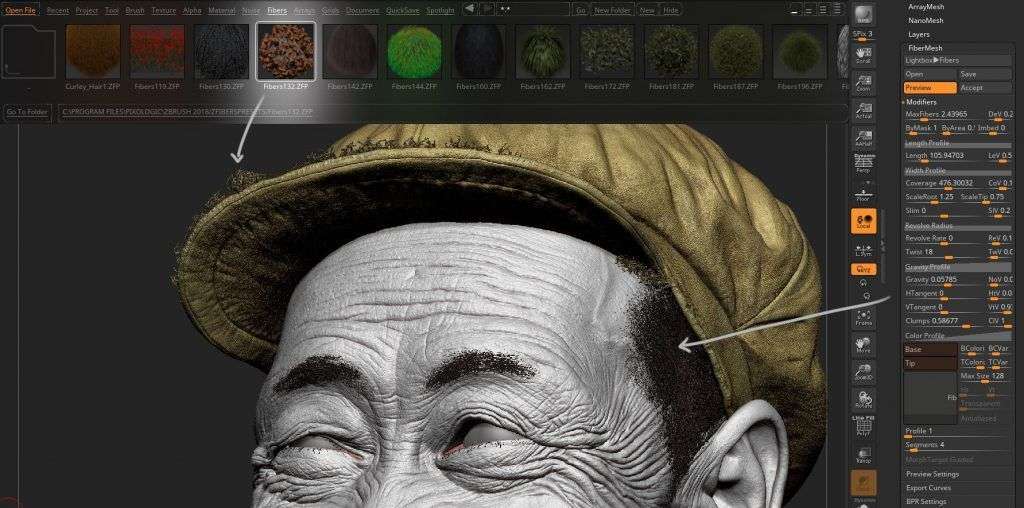
Adding Fibermesh
I used fibermesh to make the hair and cloth fibers.first you need to mask the area where the hair is supposed to be and then go to FiberMesh pallet and activate the preview.there you can play around the settings and reach the result you want. Also, there are a bunch of presets in the lightbox, fibers menu. To work with fibers there are various Grooming brushes.
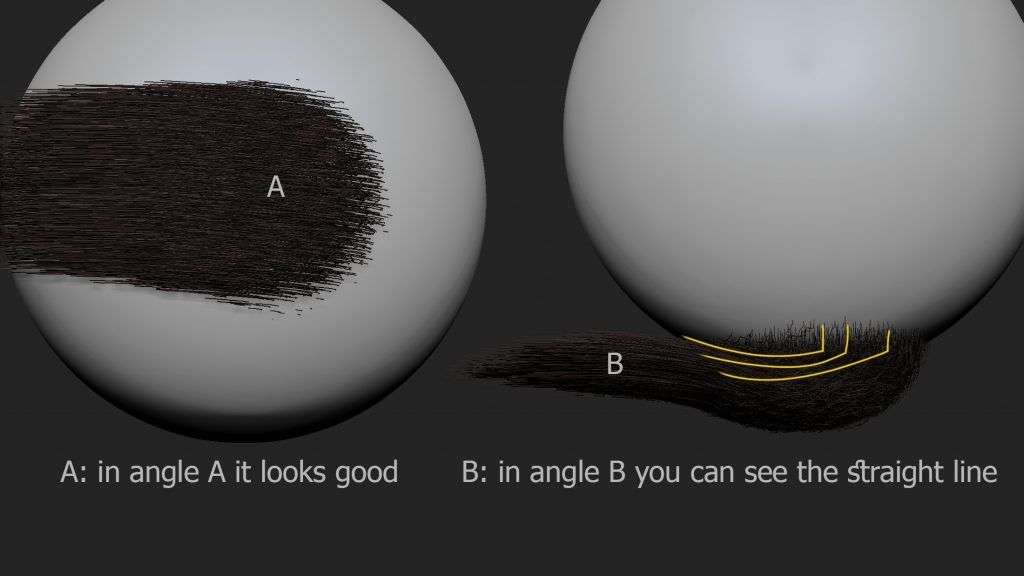
Remember that other sculpting brushes work with the fibers, but for me there is maybe something wrong with the Grooming brushes, its not user friendly and easy to work with maybe my weakness. When I groom the hair, it looks good from that angle but when I rotate the camera to the other side I see a straight line in root of the hair. This offset can be controlled by front collision tolerance in fibermesh sub-pallet in brush menu.
Texturing
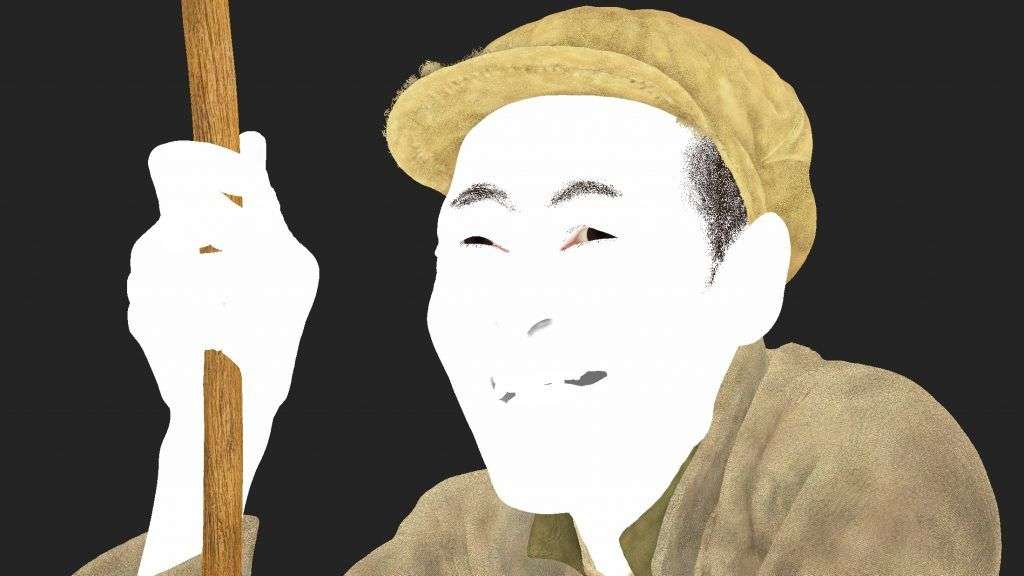
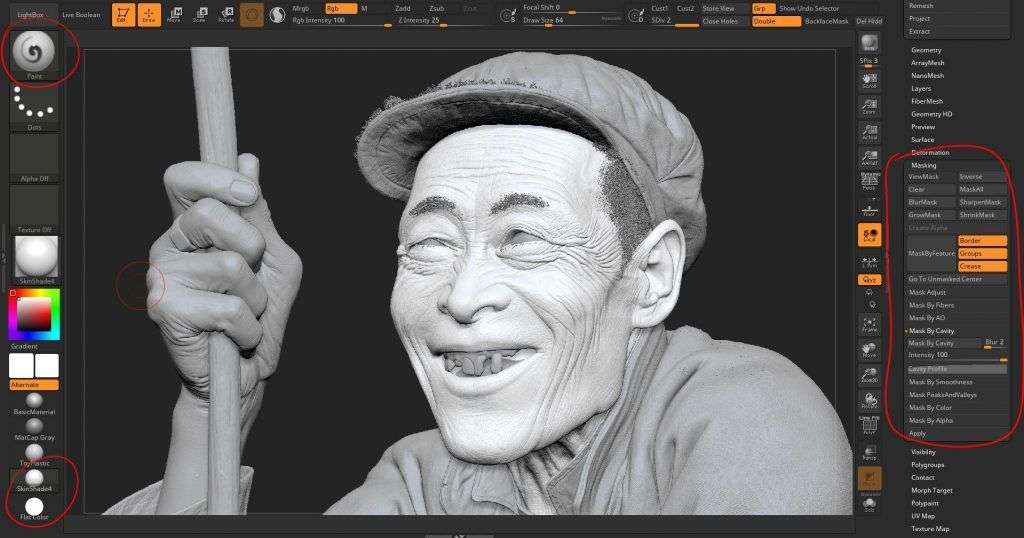
I did a fast texture in ZBrush with the Paint brush and some awesome alphas in the alpha tab.mask by cavity is a good help here.also Inverse and ViewMask options are handy.you can paint on every material you like.but two materials are commonly used, those are SkinShade4 and FlatColor. I didn’t texture the face but painted with a darker value in his mouth and nose holes.
Rendering and Compositing
Rendering is done within the ZBrush. I rendered in different materials and different lightings to compose them in photoshop.in the material menu go to the wax modifiers subpallete, there you can adjust the wax strength to get a sss feeling.
In the end I also did a little paint over and retouch.
Sculpting an Old Man in ZBrush
Work methodic and step by step
I can say that you have to do everything methodic and step by step and never give up anything. Practice everyday and read new features and methods. Keep drawing and studying different anatomies. First realistic and then stylized if you are interested in.share your work in the forums and get feedback from the professionals of the industry.always challenge yourself. Be sure that you will do it.
Thank you guys spending time on looking at my little making of I hope it’s useful. Please don’t hesitate to contact me.