
This is going to be by far the most subjective of the Modelling Blogs as there are many different ways to go about doing our work. Some of the best artists I know and admire don't even use the hotkeys or sub menus I talk about, they have an incredible eye and attention to detail while working super fast in their own ways. This blog will just give insight in to what basic Tools, Menus and Hotkeys I use day to day. Following what tools I use won’t have any impact on the final result of the work but these are the combinations of methods I find most comfortable and even more importantly, fastest. Speed is fundamental to working in our industry and being fast is a very valuable thing to be known for.
Tools I Use
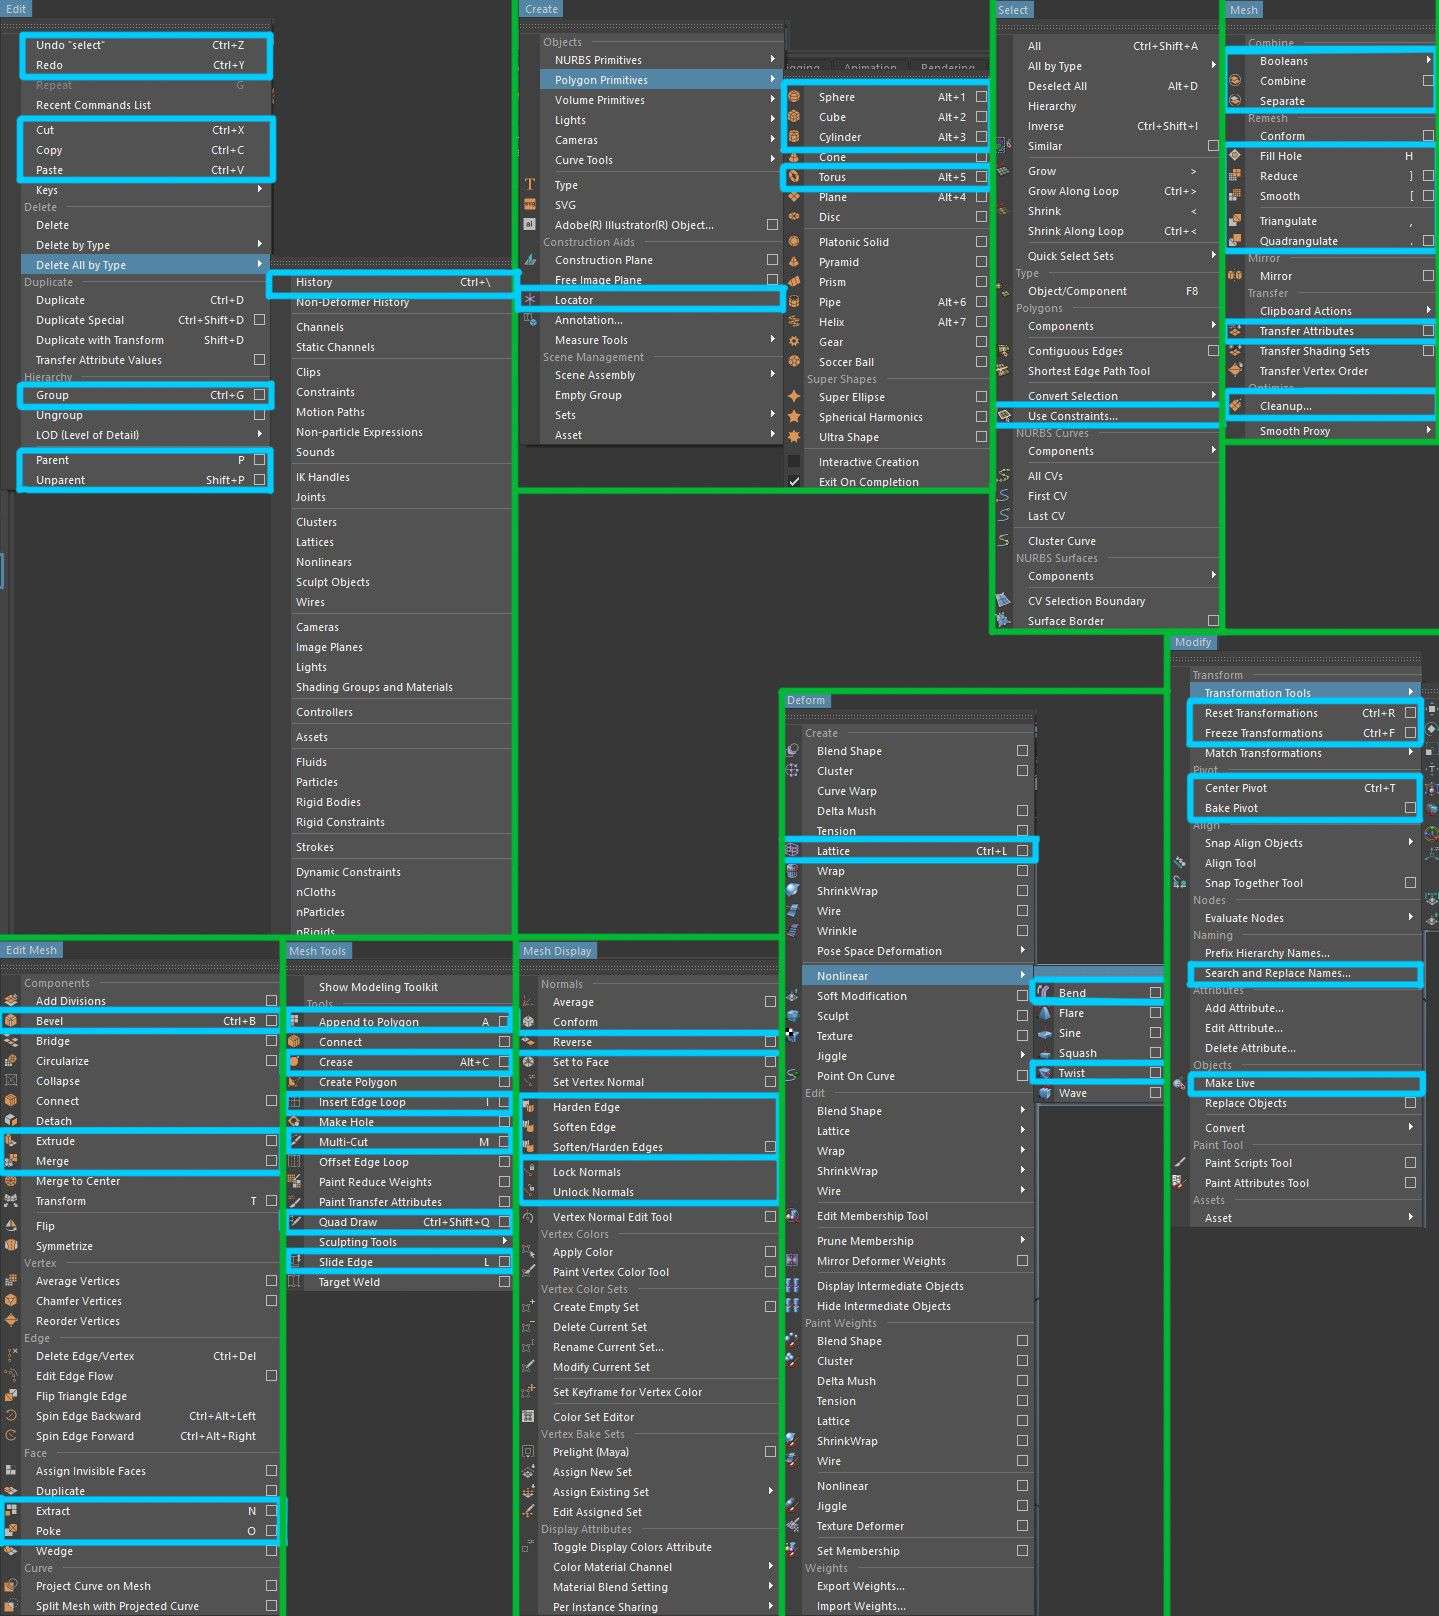
Modelling is very subjective and there are many different ways to approach shapes. Everyone has their own methods. As long as the job gets done, that is all that matters. There are way too many tools go over so I just screenshot where I could find them in the menus and drew over the ones I use but in reality a lot of the tools are for very specific things. I will cover a few of them individually in a following Blog (stay tuned for Part III).
I don't really use any magic scripts or fancy hidden tools, it's just basic poly modelling and knowing how to approach the topology of a shape before you make it. The main way I approach modelling is by starting with primitives. I use a cube, cylinder or sphere for pretty much everything, you can make everything you need to with these. The reasons I don't use pipe or cone for example is I can just create a cylinder and merge the top verts for a cone or delete the caps and extrude to create a pipe. Sometimes I also use ¼ of a torus to start making a pipe. I use CV curves for making cables. I also never use Nurbs...ever.
The main tools I use to model are multi cut, insert edge loop and extrude. That's pretty much the fundamental for me, most other tools are for very specific things. It's just about cutting up, extruding and manipulating the basic primitives till you have the shape you need. Then, you have specific things like, if I wanted to cap a cylinder I could select the edge, fill hole, select the face and then poke face etc. I would never use poke face for anything other than that for example.
Speed is fundamental to working in our industry and being fast is a very valuable thing to be known for.
A handy thing I do to approach curved shapes is I make the really basic shape, usually a plane at this stage with no detail. I preview it smoothed by pressing 3 and move the verts in to what looks good for me. Once I am happy with the shape I actually smooth it and go back to normal by pressing 1, now that is my new basic geo to work with. I will cover this more in another blog when I talk about modelling Paneling.
When you are happy with the finished shapes I usually use Freeze transformations and delete the history to kind of clean the mesh. If your scene has too much history it can slow it down over time. Center Pivot puts the modifier to the middle of the geometry and reset transformations will set it back to the origin of the world. Make sure you Freeze transformations first though or it will move your object to the origin if you try reset transformations.
Usually, when we finish an asset ready for the pipeline we select the whole asset, freeze then reset transforms. This means every single object and group will have 0,0,0 transforms with all their pivots being at the center of the world. I have hotkeys set up for CTRL + F to freeze with CTRL + R for reset and CTRL + T for center pivot. This means I can very quickly just hold control and then press F then R or T depending on what I want, Freeze then center or freeze then reset. You will have to manually set that up though which I talk about below in the hotkeys section.
Sub Menus / Hotbox
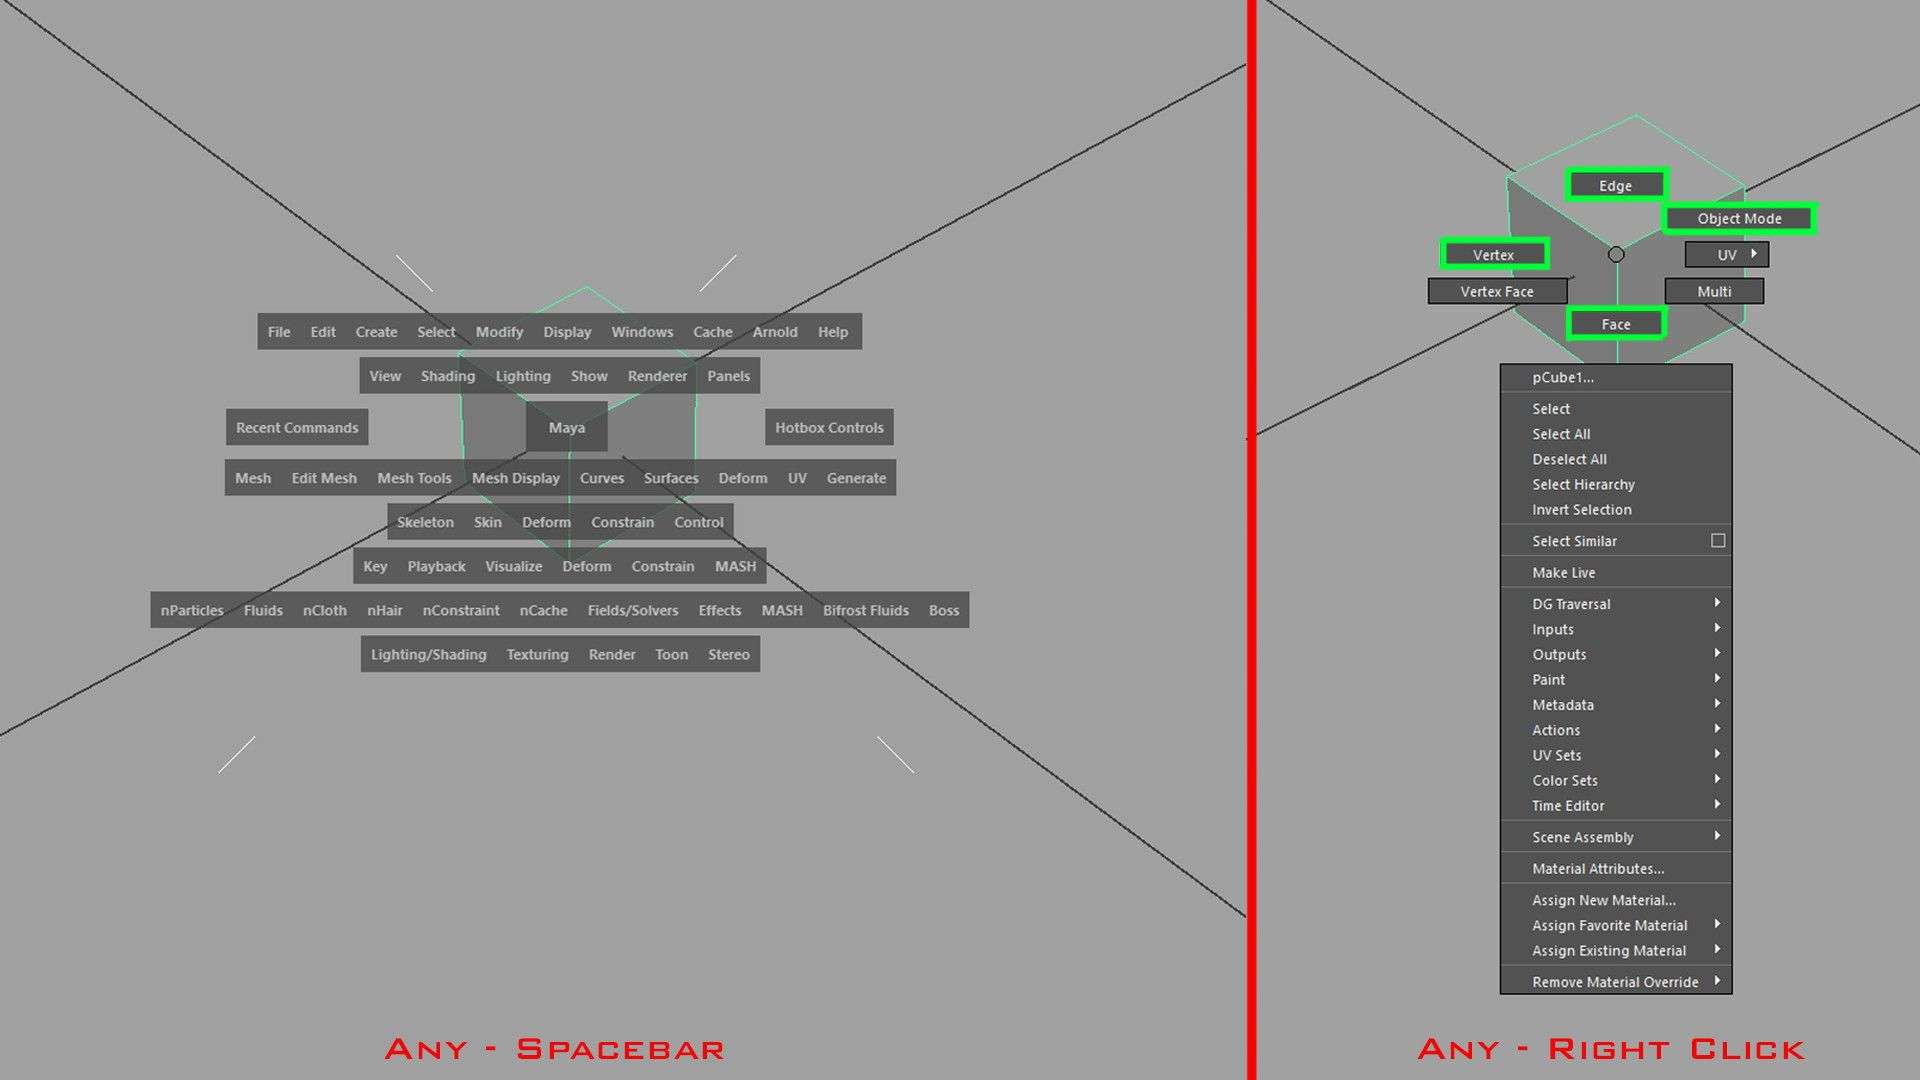
When I work, I almost never go up to the menus or use the Maya interface, you can actually access everything directly over the top of your work in the viewport. Activating any of these menus below will make them appear where your cursor is which is super handy. The most important menu is the Hotbox. The Hotbox can be activated by simply holding the space bar while in any mode. This will create an overlay of all Maya menus and tools right in front of you. This is pretty minor but I really like having access to everything in front of me instead of having to keep looking up and down the screen.
Probably my most used menu though, is just holding right click while in any mode, this is how I quickly go back and forth between model, face, edge and vertex modes. I use a tablet and it feels very comfortable to just hold right click and flick my wrist in the direction I need. When you get used to where each option is in one of these pop up menus, you can even perform the motion and activate the option before it even visually appears in front of you. To do this you simply hold right click, flick your wrist in the direction you want and let go of the click. It is incredibly fast to change modes on the fly which I do a lot.
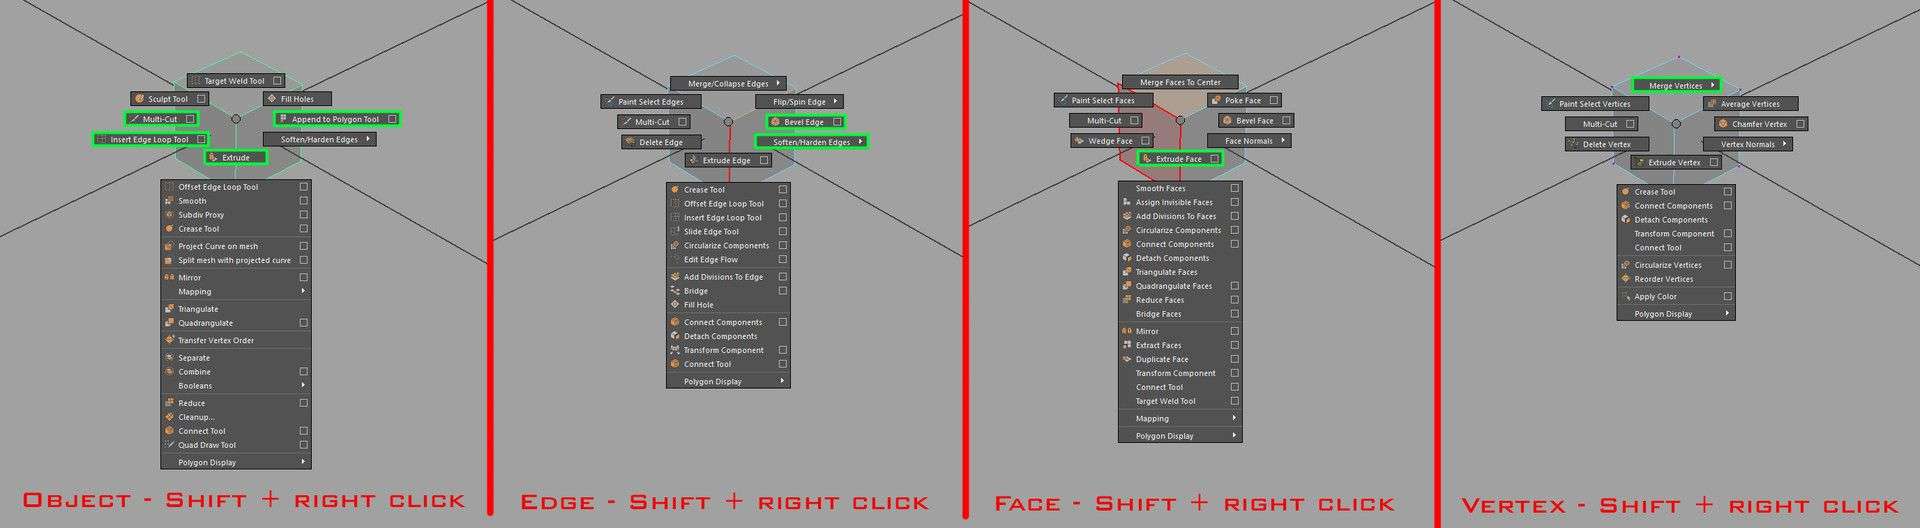
The last set of menus I use is the hold shift + right click menus which give different options depending on which mode you are in. I do have a lot of my own manual hotkeys but if i can just flick my wrist to hit a tool in these sub menus, that has priority over making a hotkey for it to me. I can see a few tools I use in the menus that I have hotkeys for because that is faster for me than searching through the lists, I use them mainly for the direct options
Modelling is very subjective and there are many different ways to approach shapes. Everyone has their own methods. As long as the job gets done, that is all that matters.
The same deal as above applies where if you know where the tool is, you can activate it before the menu appears by doing the correct motion. For example if I am in Vertex mode and I want to add an edge loop. I can simply hold right click and flick to top right hand corner then let go to go to object mode followed by holding shift + right click and flicking to bottom left corner to activate insert edge loop. When you get used to these it can dramatically include your work speed.
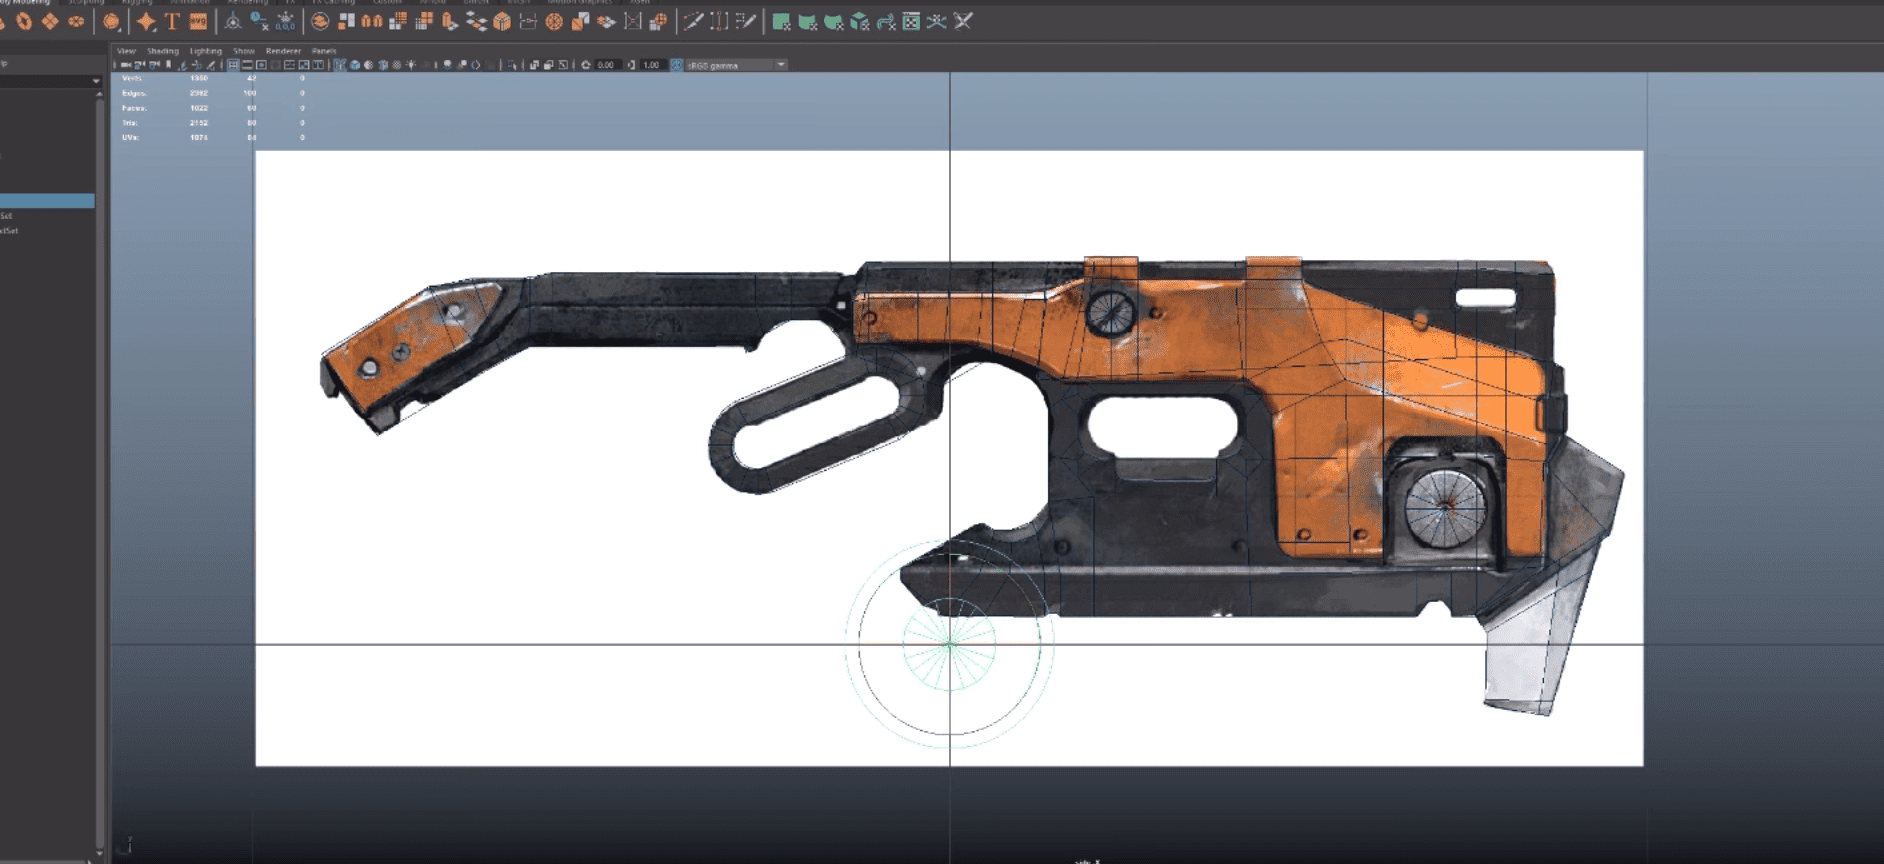
You can see in the below video which is a time lapse of me working, that my cursor is almost always staying in the middle of the screen. Aside from this I just play with values on the right in the attribute editor and Channel Box. You will also notice the sub menus don't appear as I usually activate the tool before they come up. Thats why my cursor will randomly dart off to the sides as I change to another tool.
Hotkeys
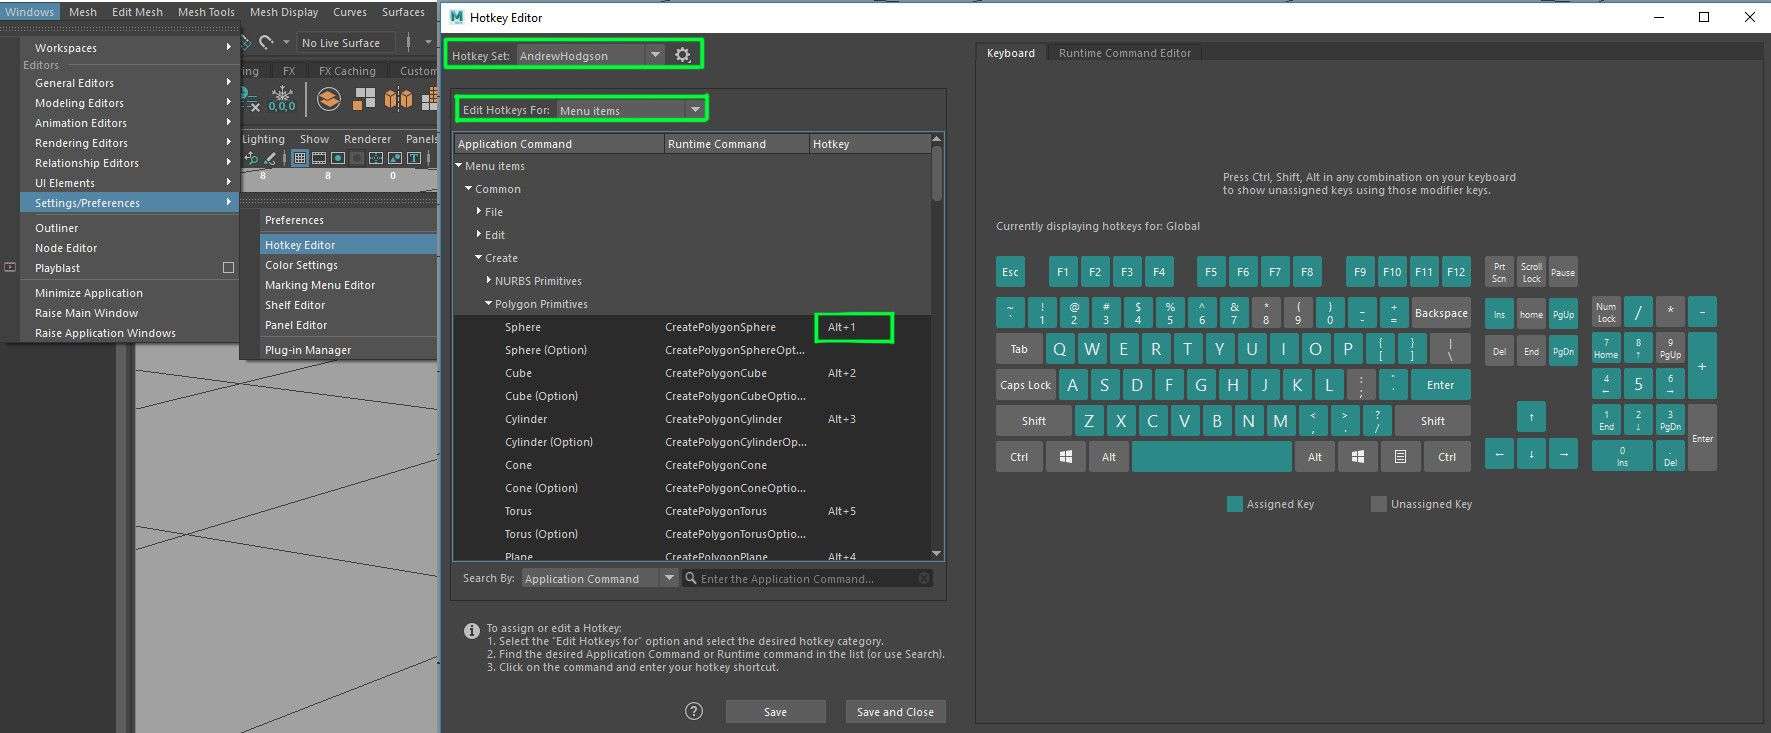
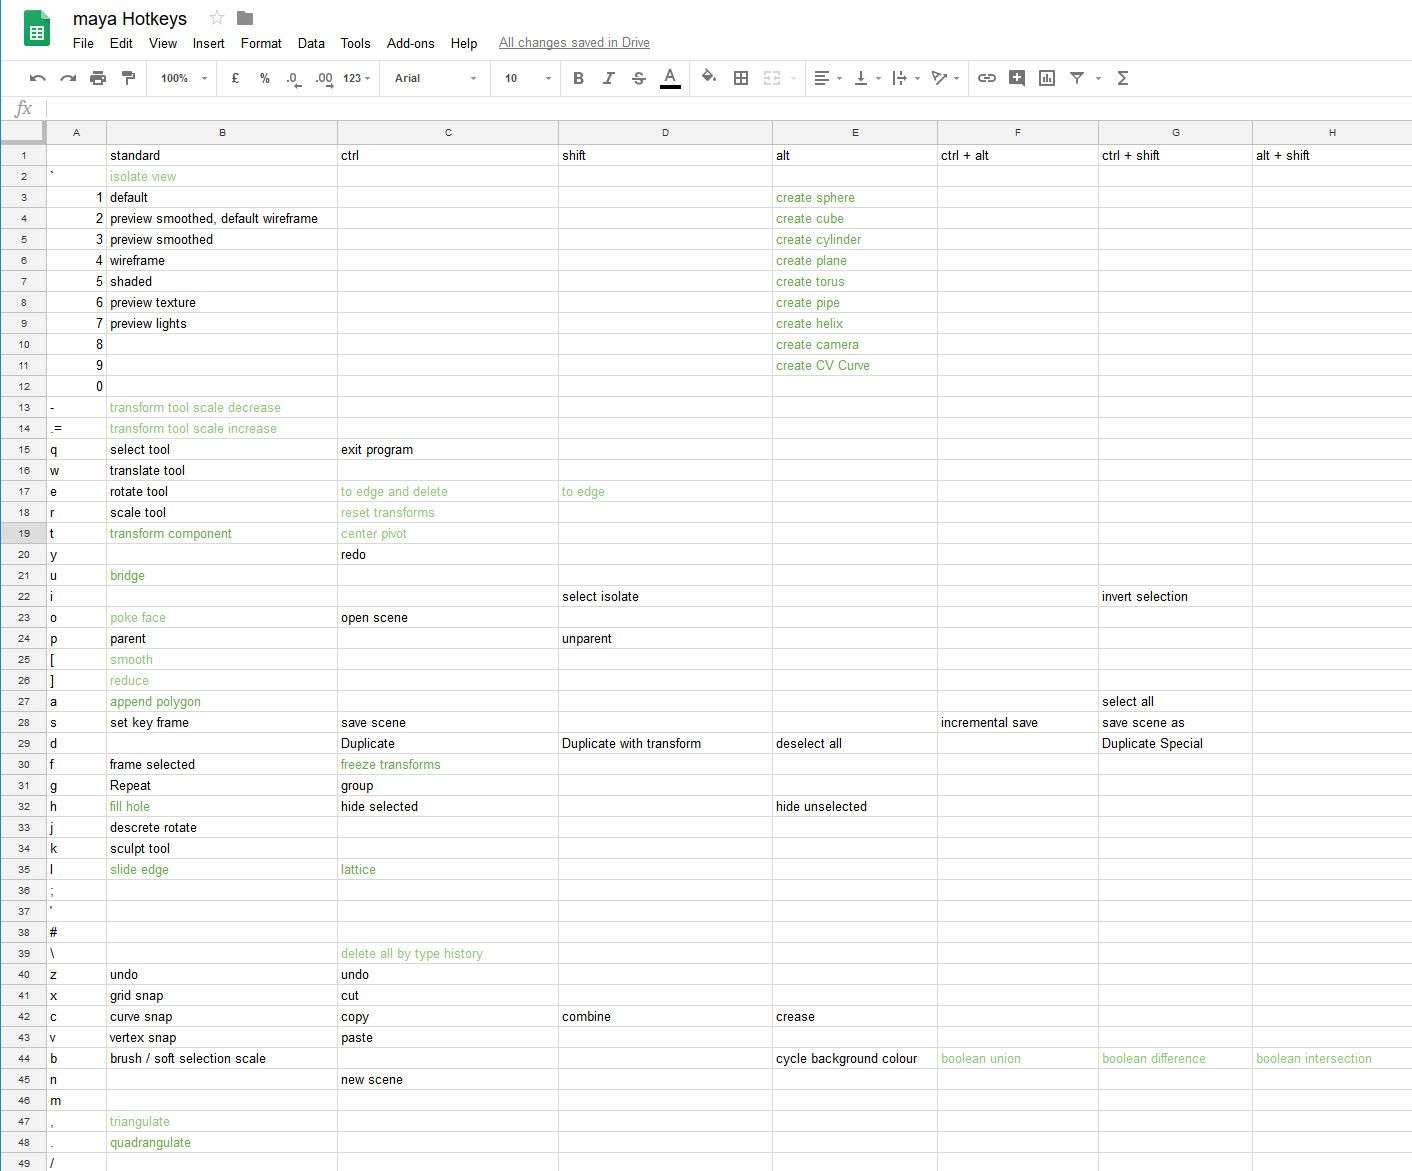
This is entirely personal but I thought it would be good to mention. Making and using your own hotkeys can make you a much faster artist, and speed is essential. It isn't fundamental but personally I think it helps a lot. The Hotkey editor can be found in Windows > Settings and Preferences > Hotkey Editor. My friend Mark Keetch showed me this great idea of planning your hotkeys on google Sheets so I made mine that you can see below. I worked out all the tools I mainly used with existing hotkeys and left them. The green are my own personal added ones. You don't need to add everything, just what you use. Having your sheet with google means you can access and update it anywhere you go. I almost never use the Maya interface, everything is either hotkeyed or if its faster to use the sub menus and hotbox, i use those. This is what what makes sense to me, it really takes time to get used to a set of hotkeys so play with what is comfortable for you and stick with it until it's in your muscle memory.
Hopefully people learn a thing or two from this. These are just my thoughts and my standard practice at work...please spread the word if these sorts of things helped you!