How to 3D Model a Cyberpunk Robot
Nicolò Granese shows us how to 3D Model a Cyberpunk Robot and it's a tutorial with so much detail you can't miss it.
Nicolò Granese shows us how to 3D Model a Cyberpunk Robot and it's a tutorial with so much detail you can't miss it.
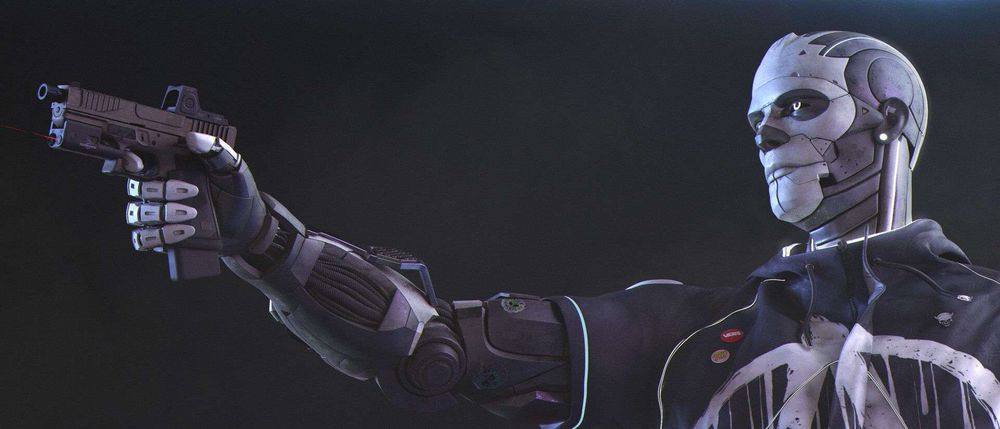
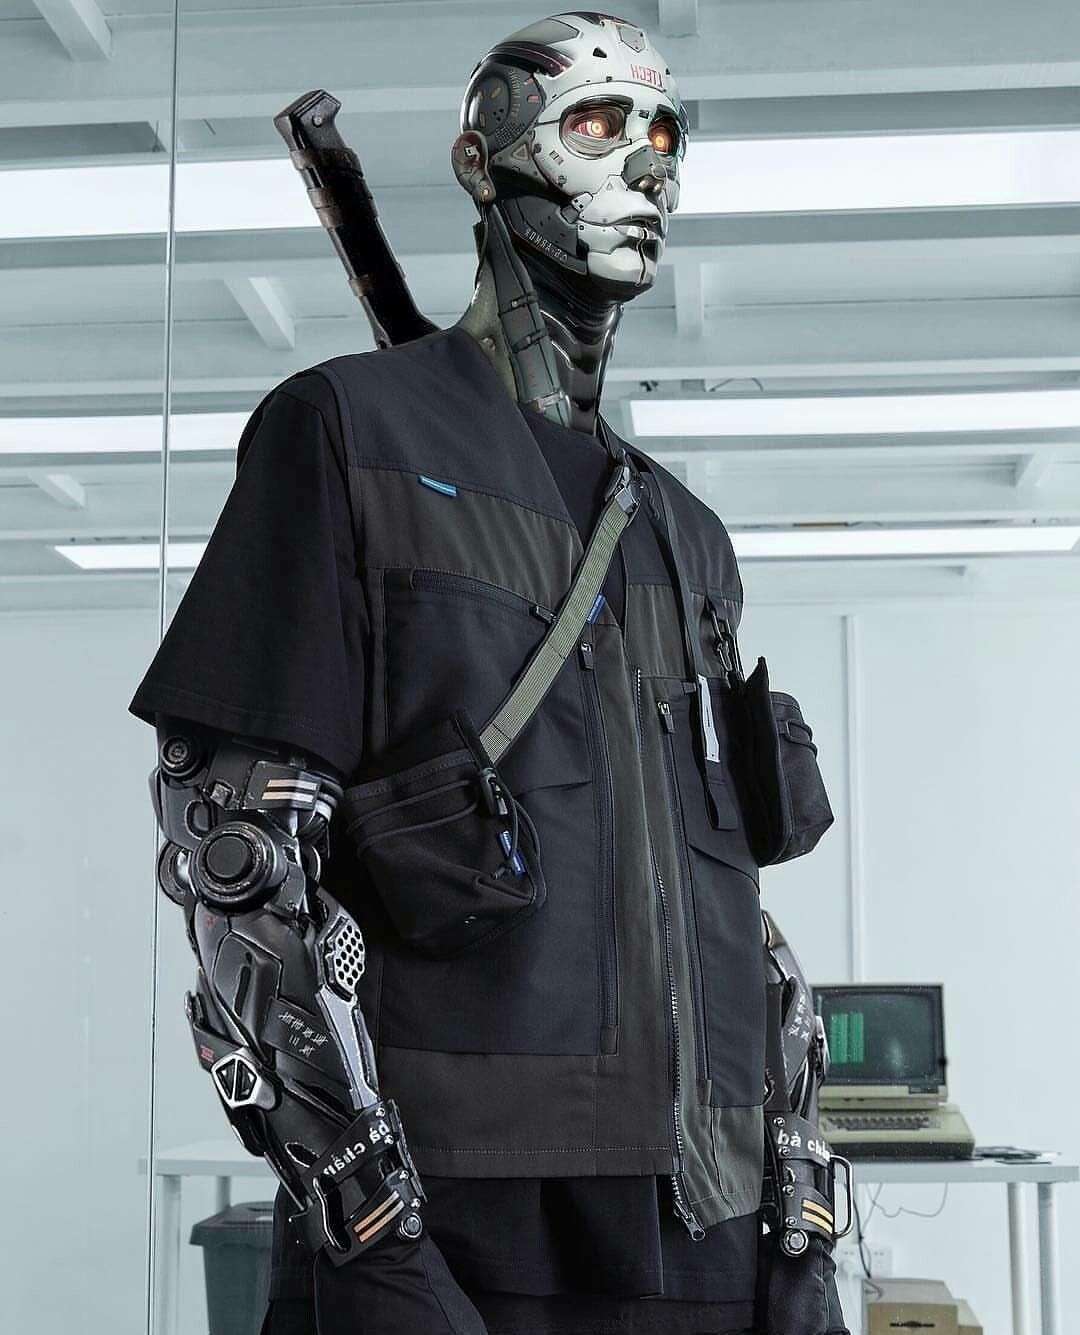
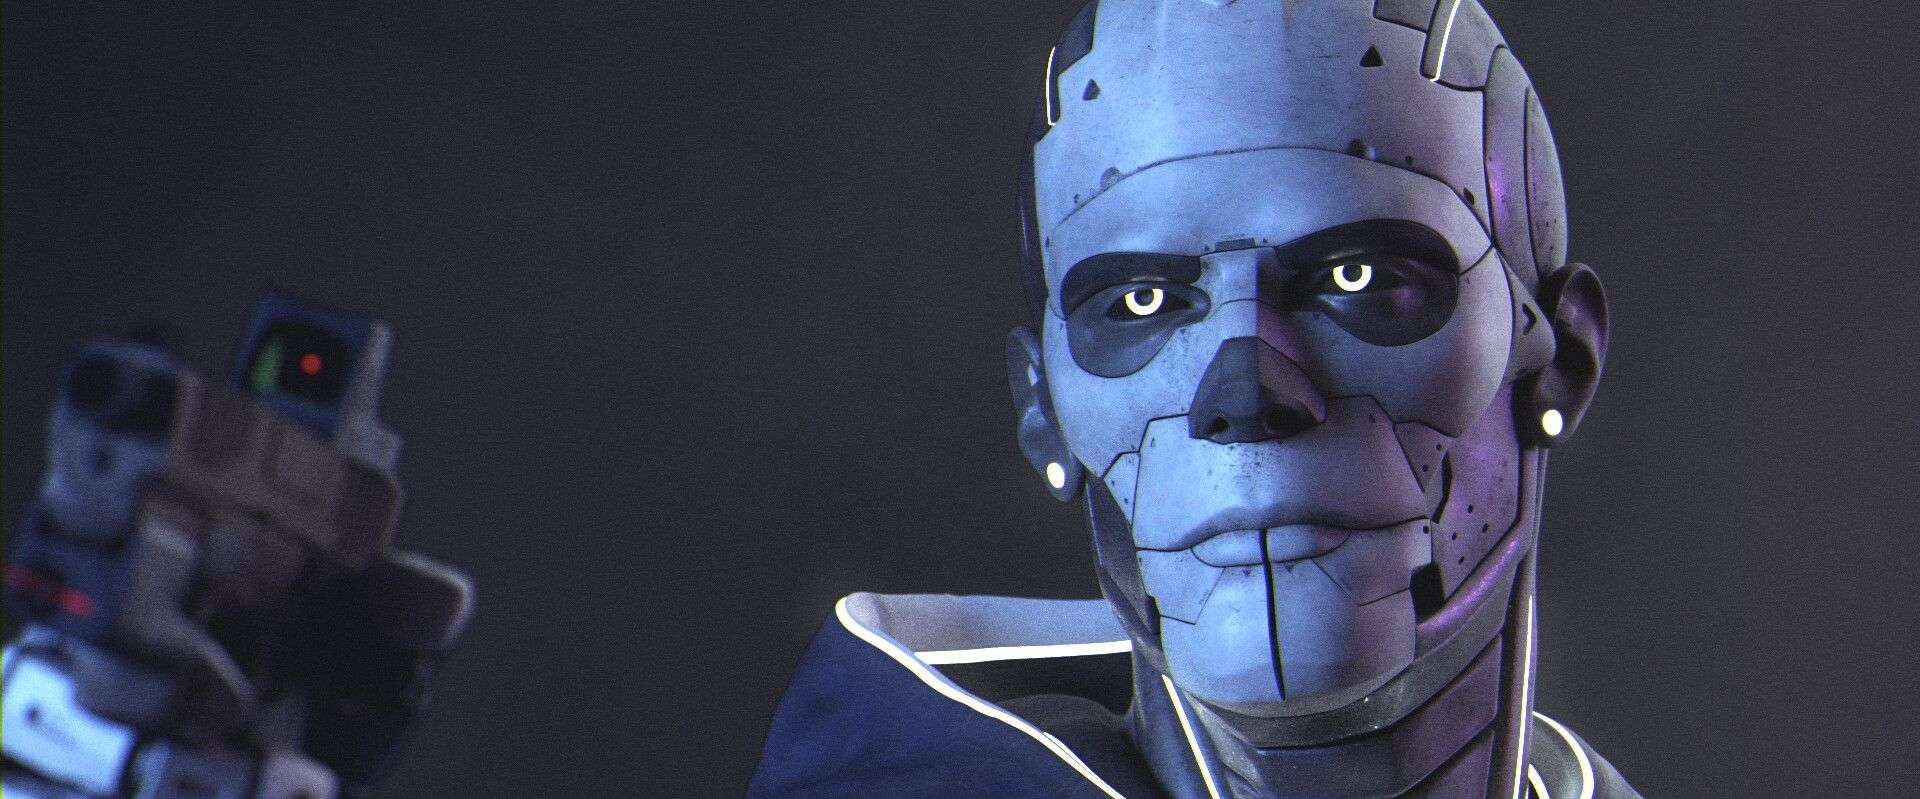
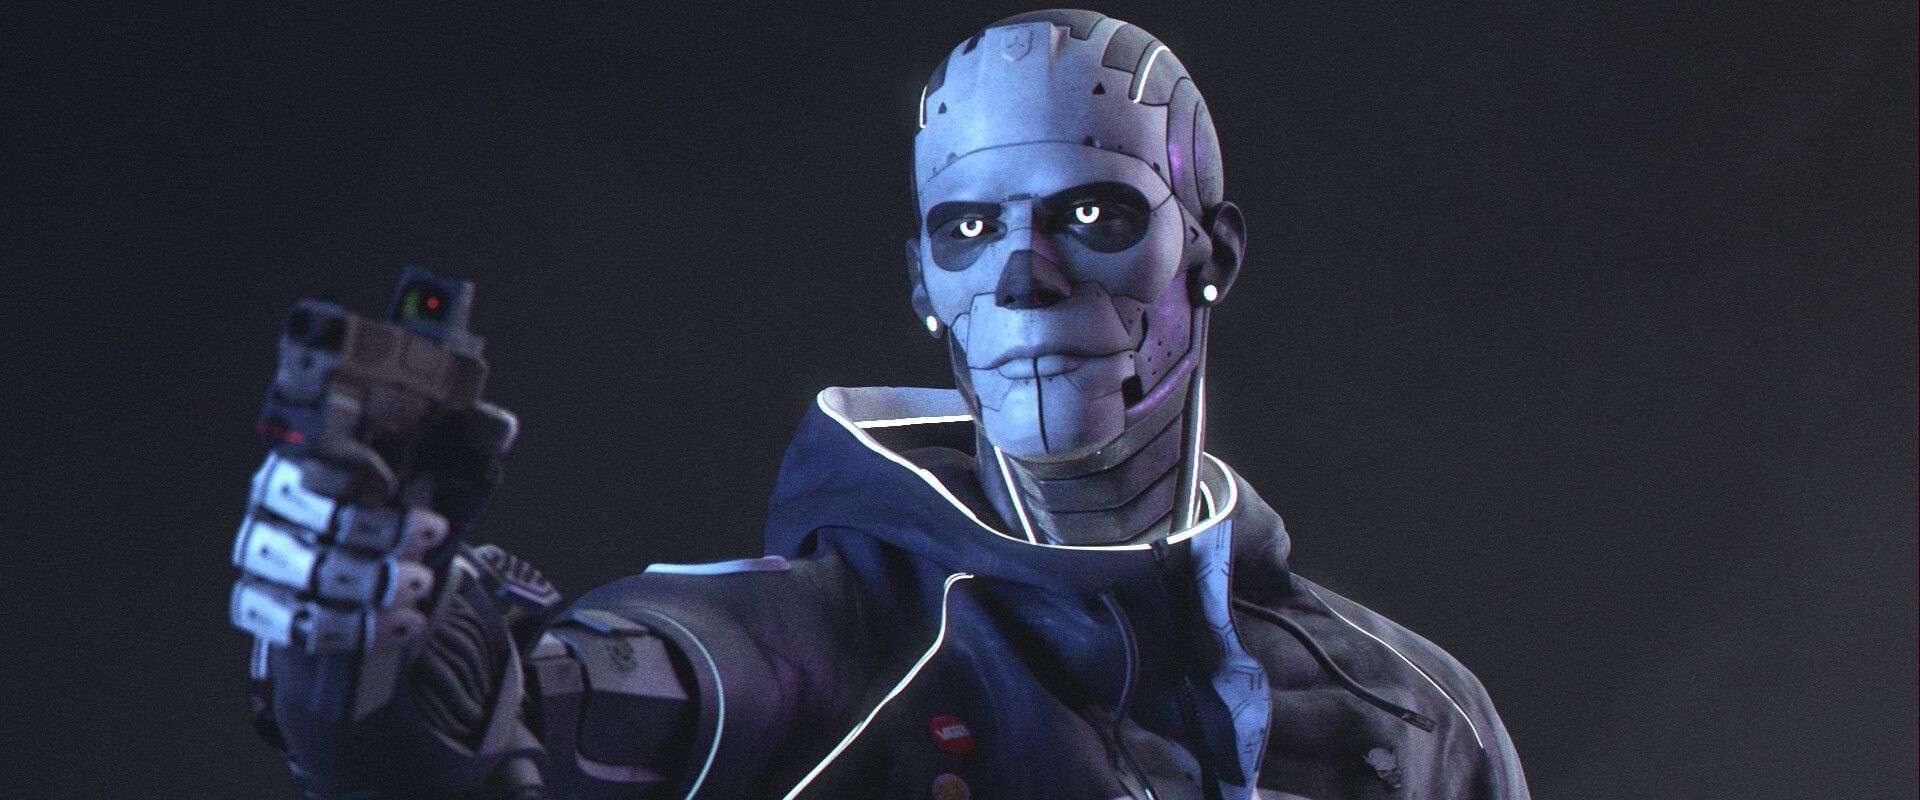
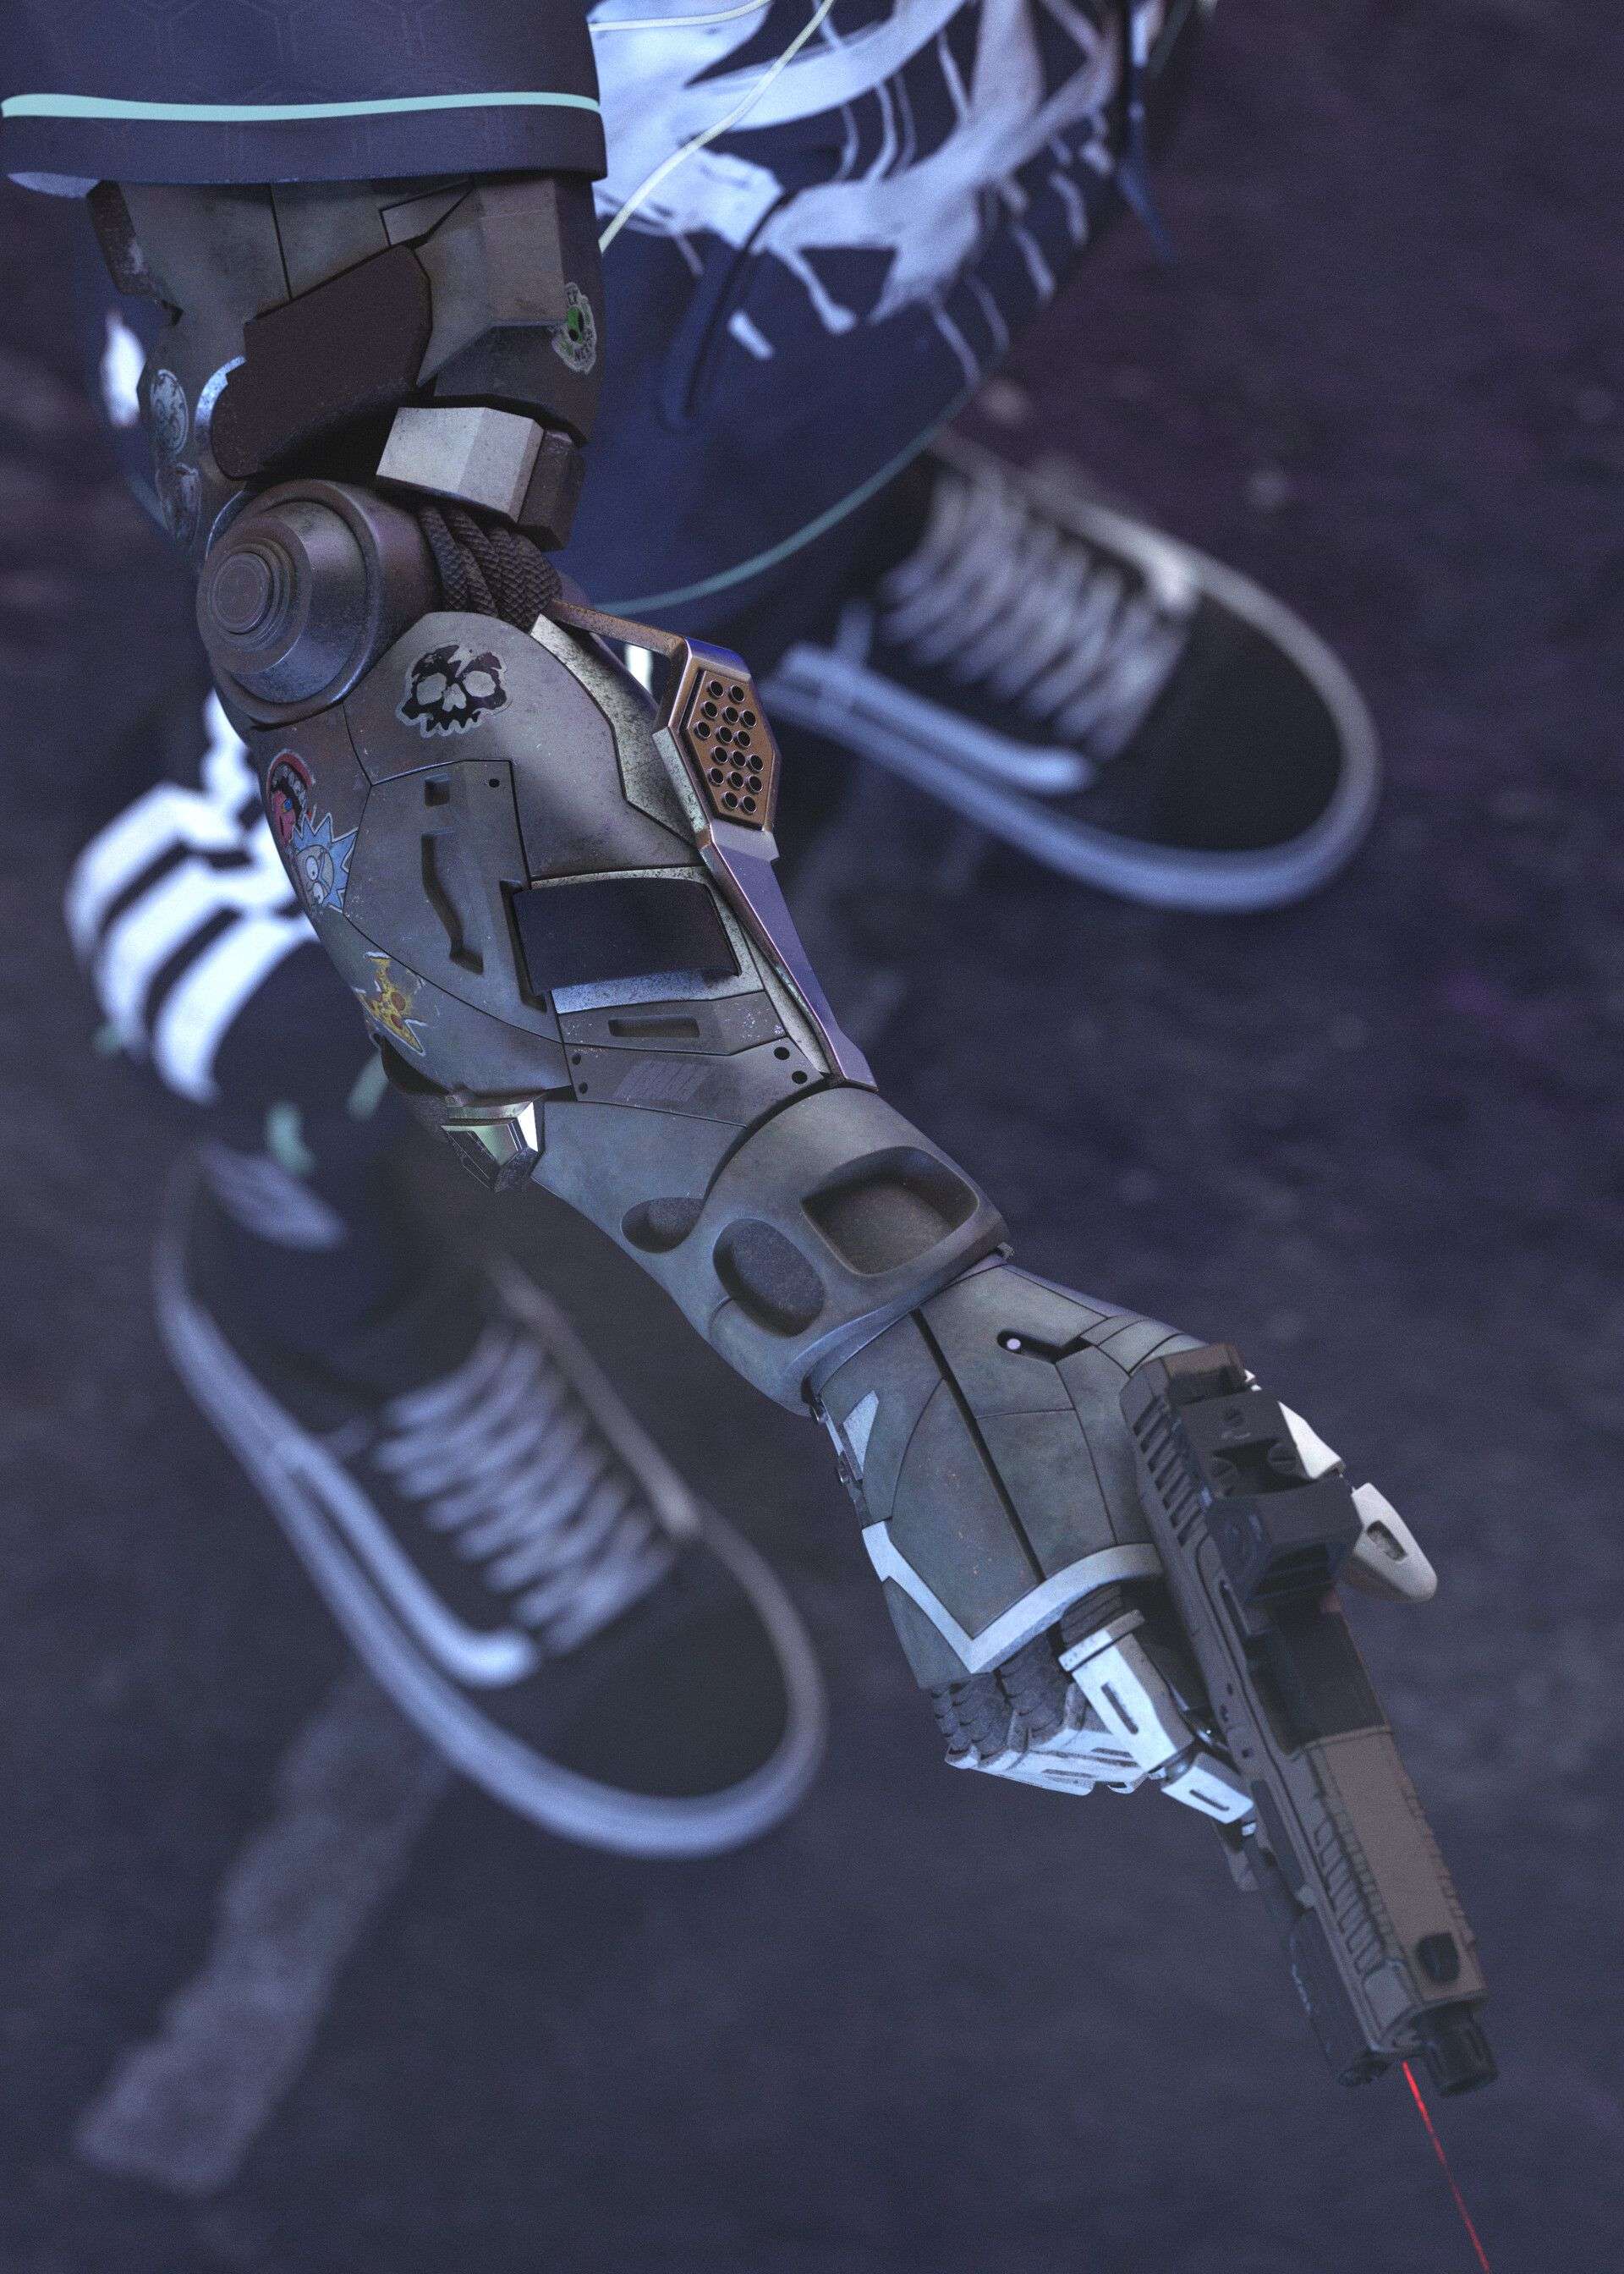
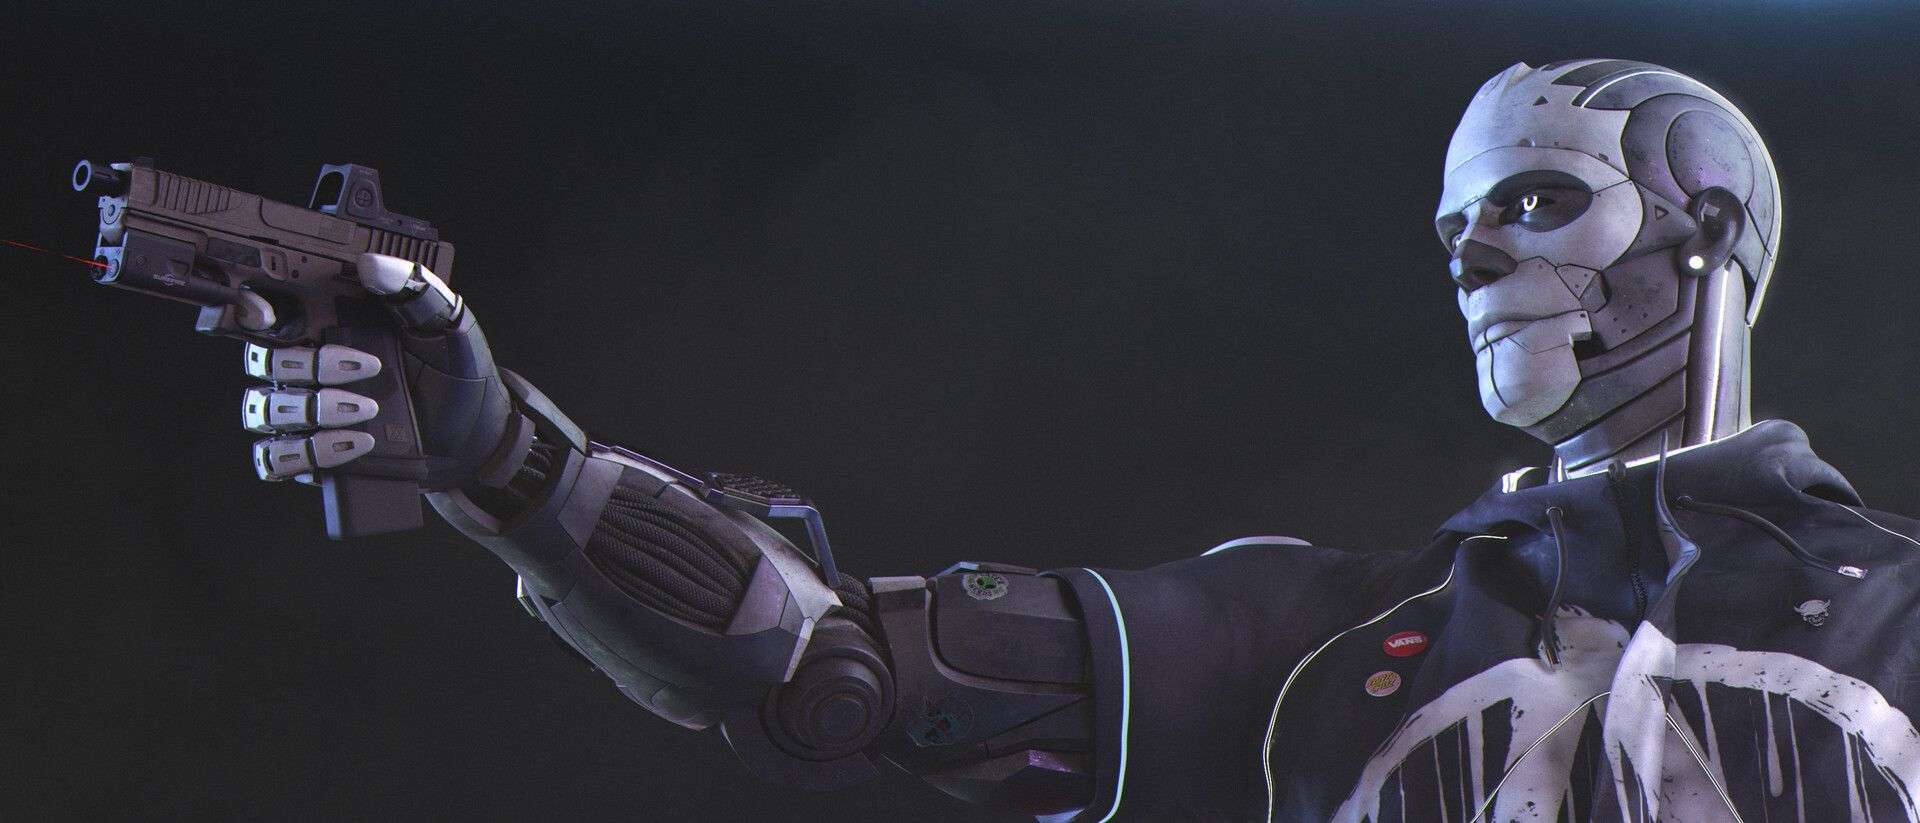
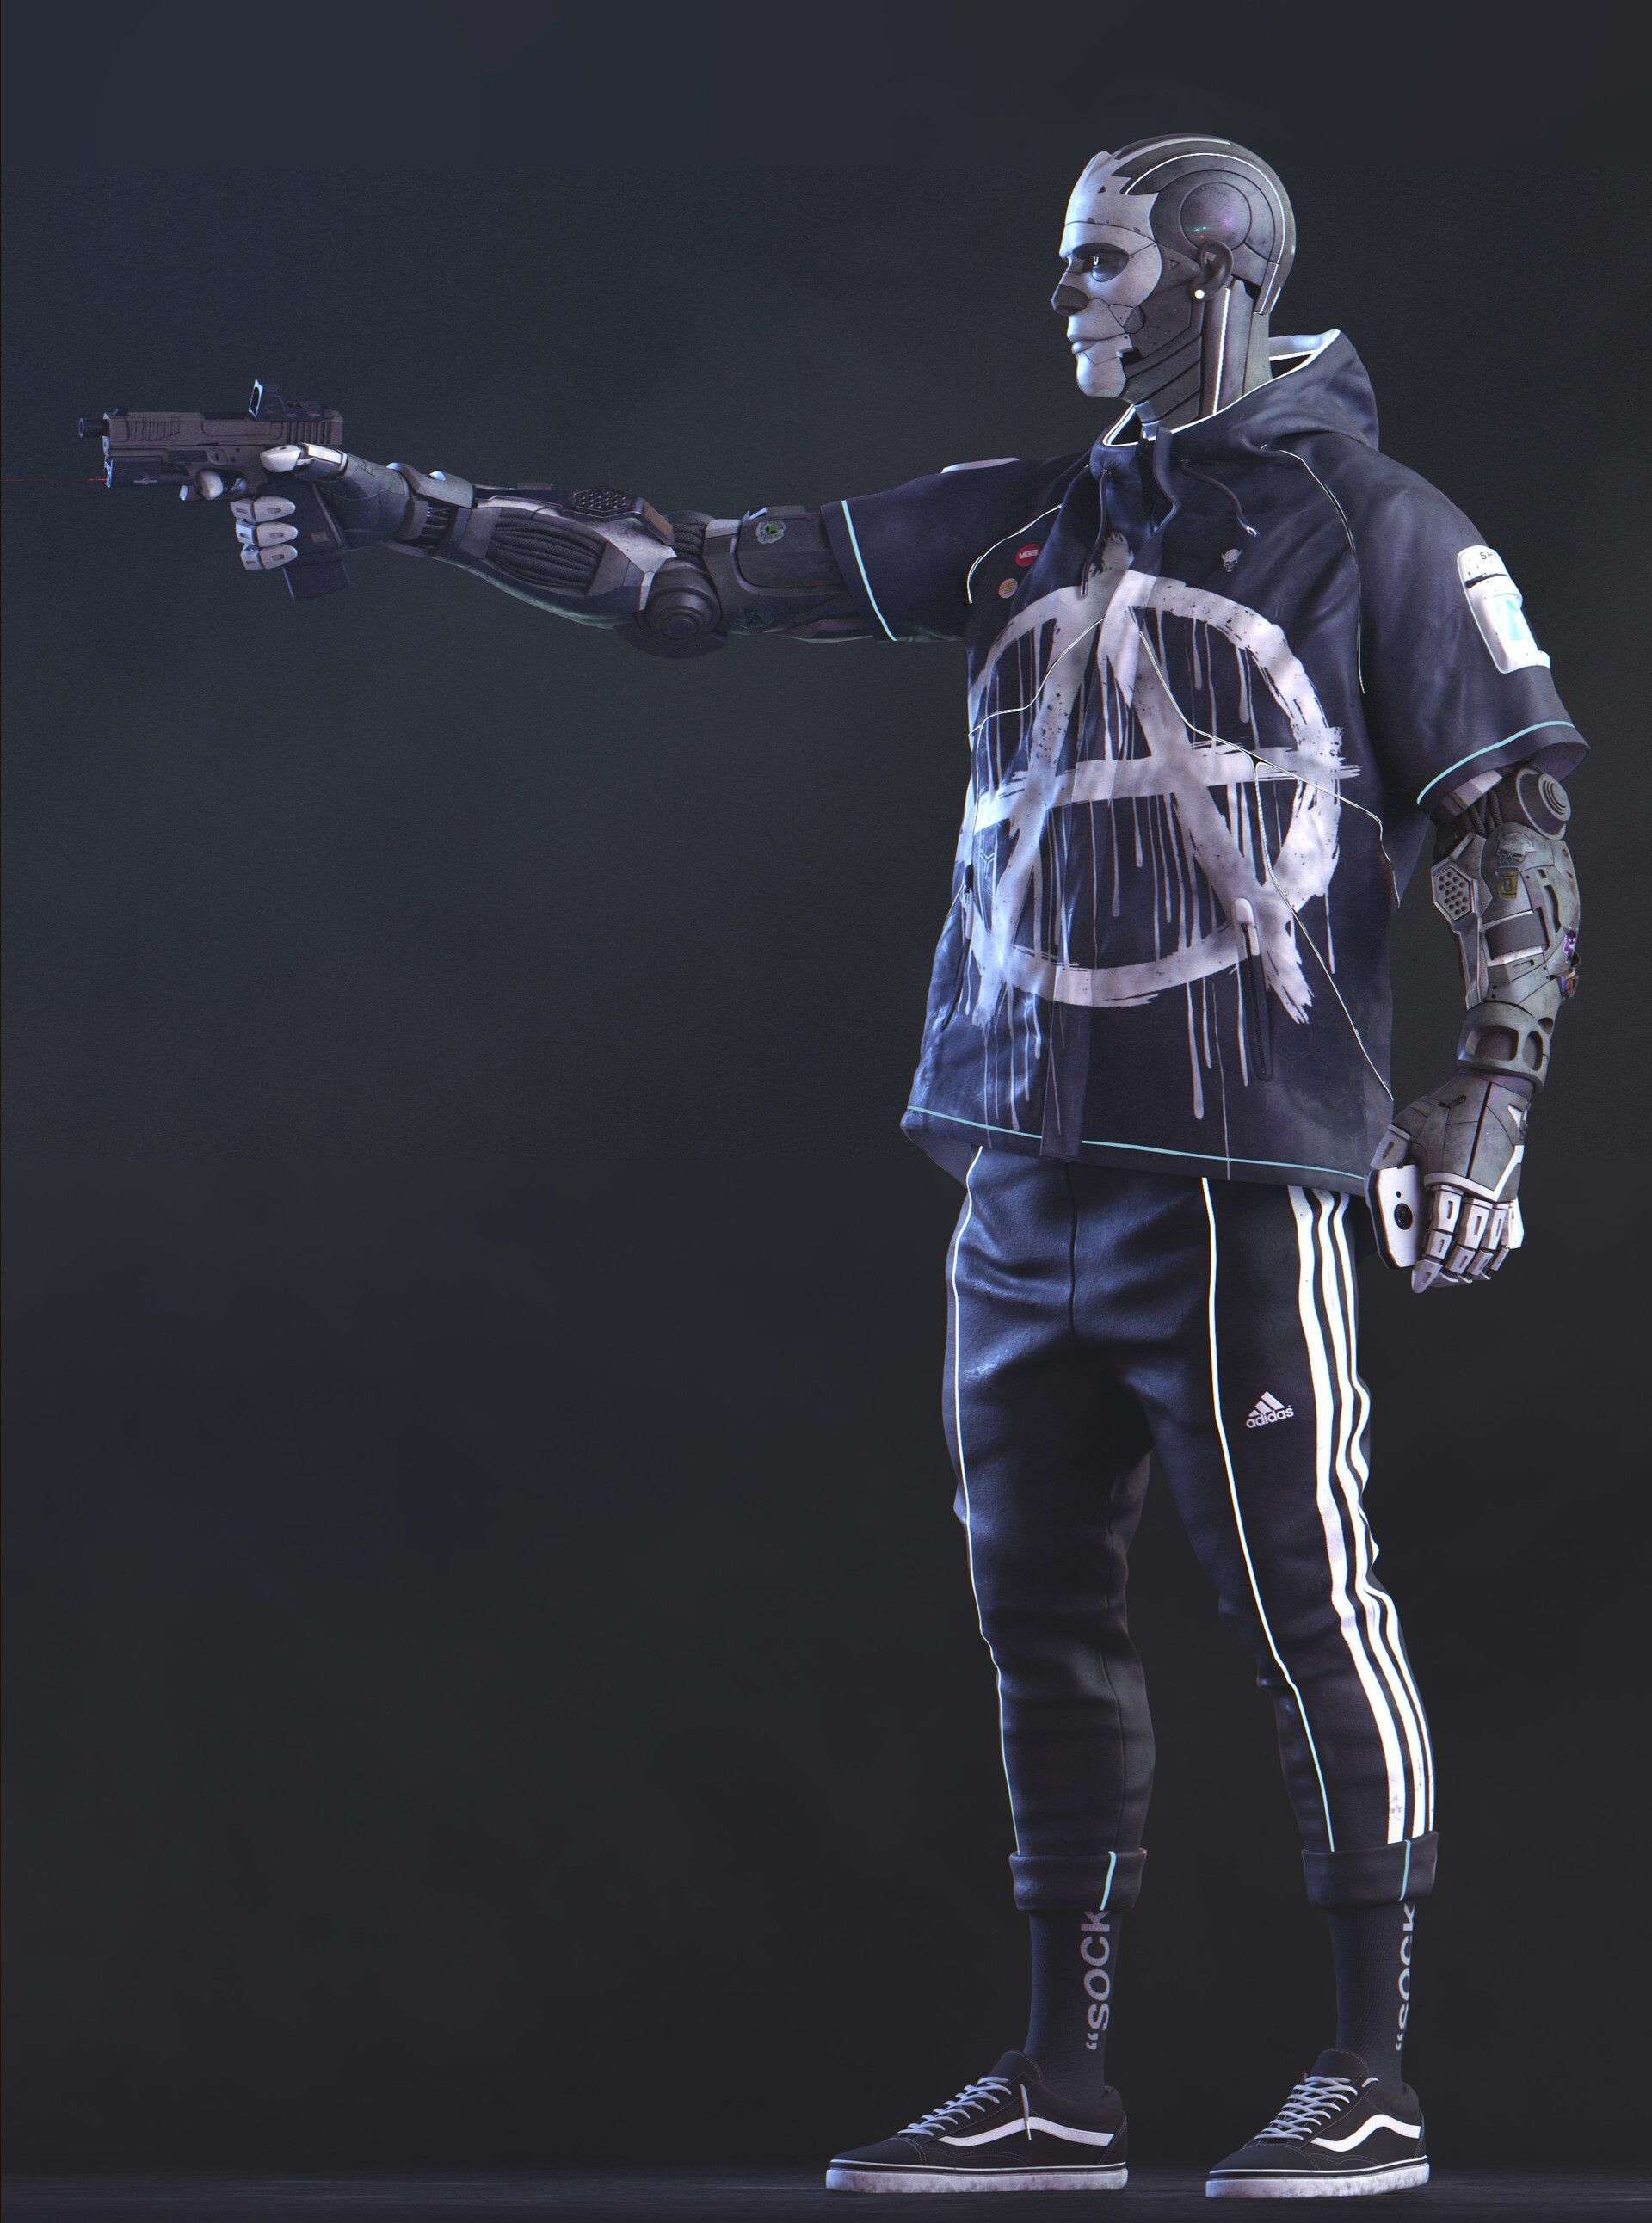
For my latest project I wanted to do an hard surface character for my reel. It all started with this concept that I’ll attach below. I fell in love with it and I thought that would be great to make it in 3D. Unfortunately the lower part of the body was missing so I decided to photobash some photos that I found on Pinterest. My goal was to create a kind of streetwear look for the character!
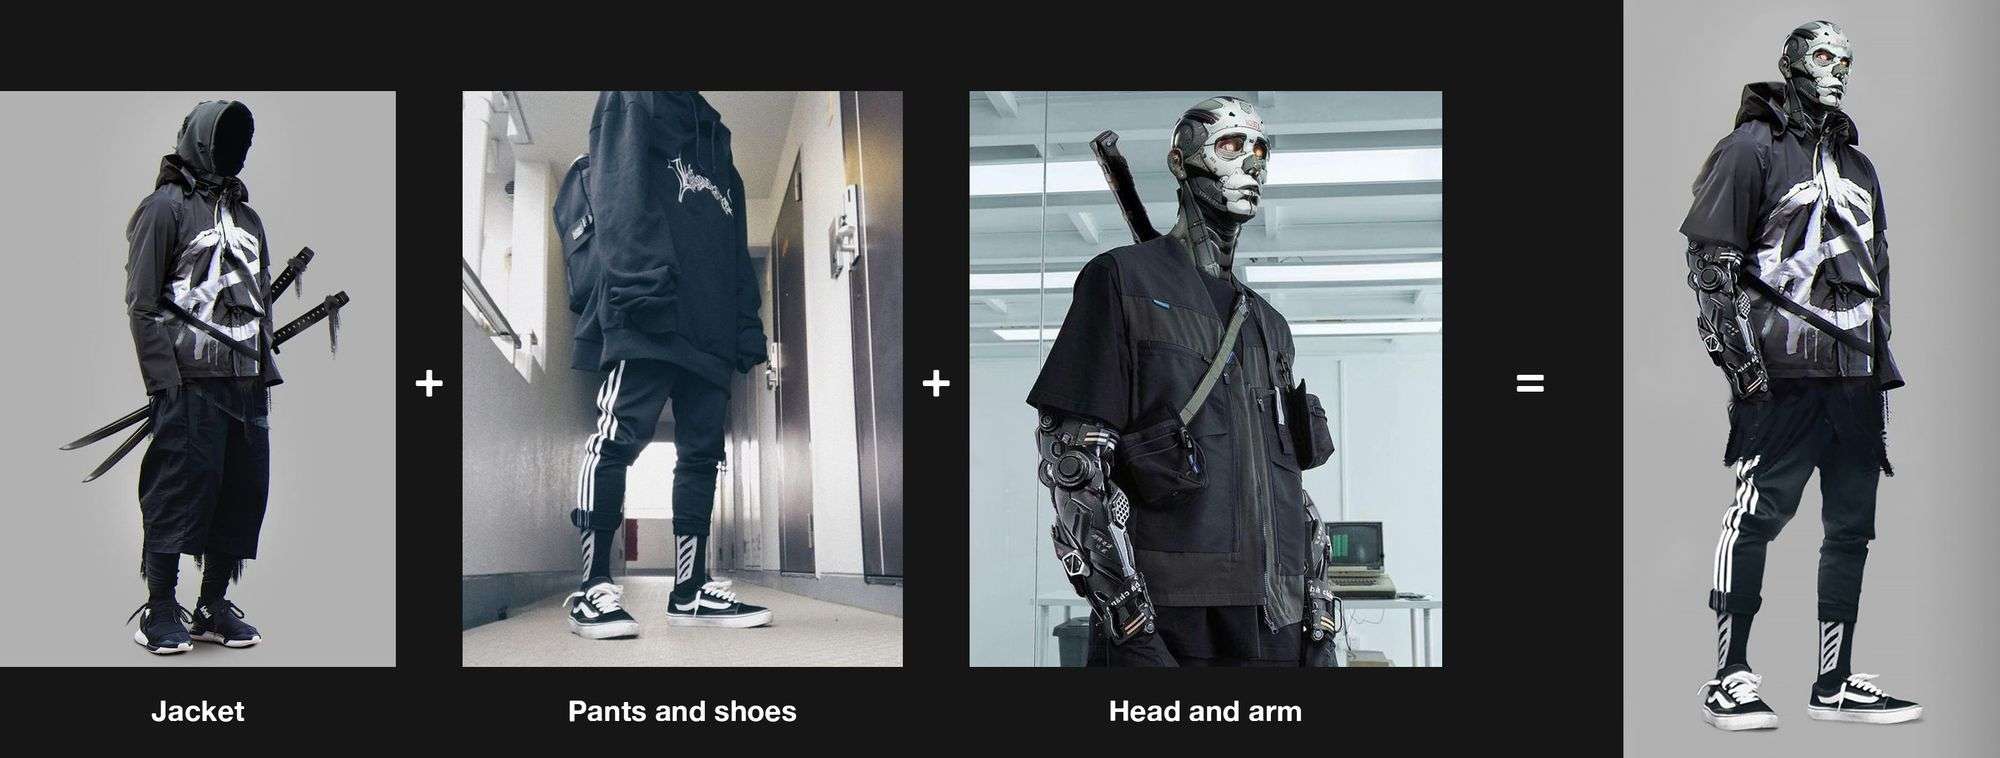
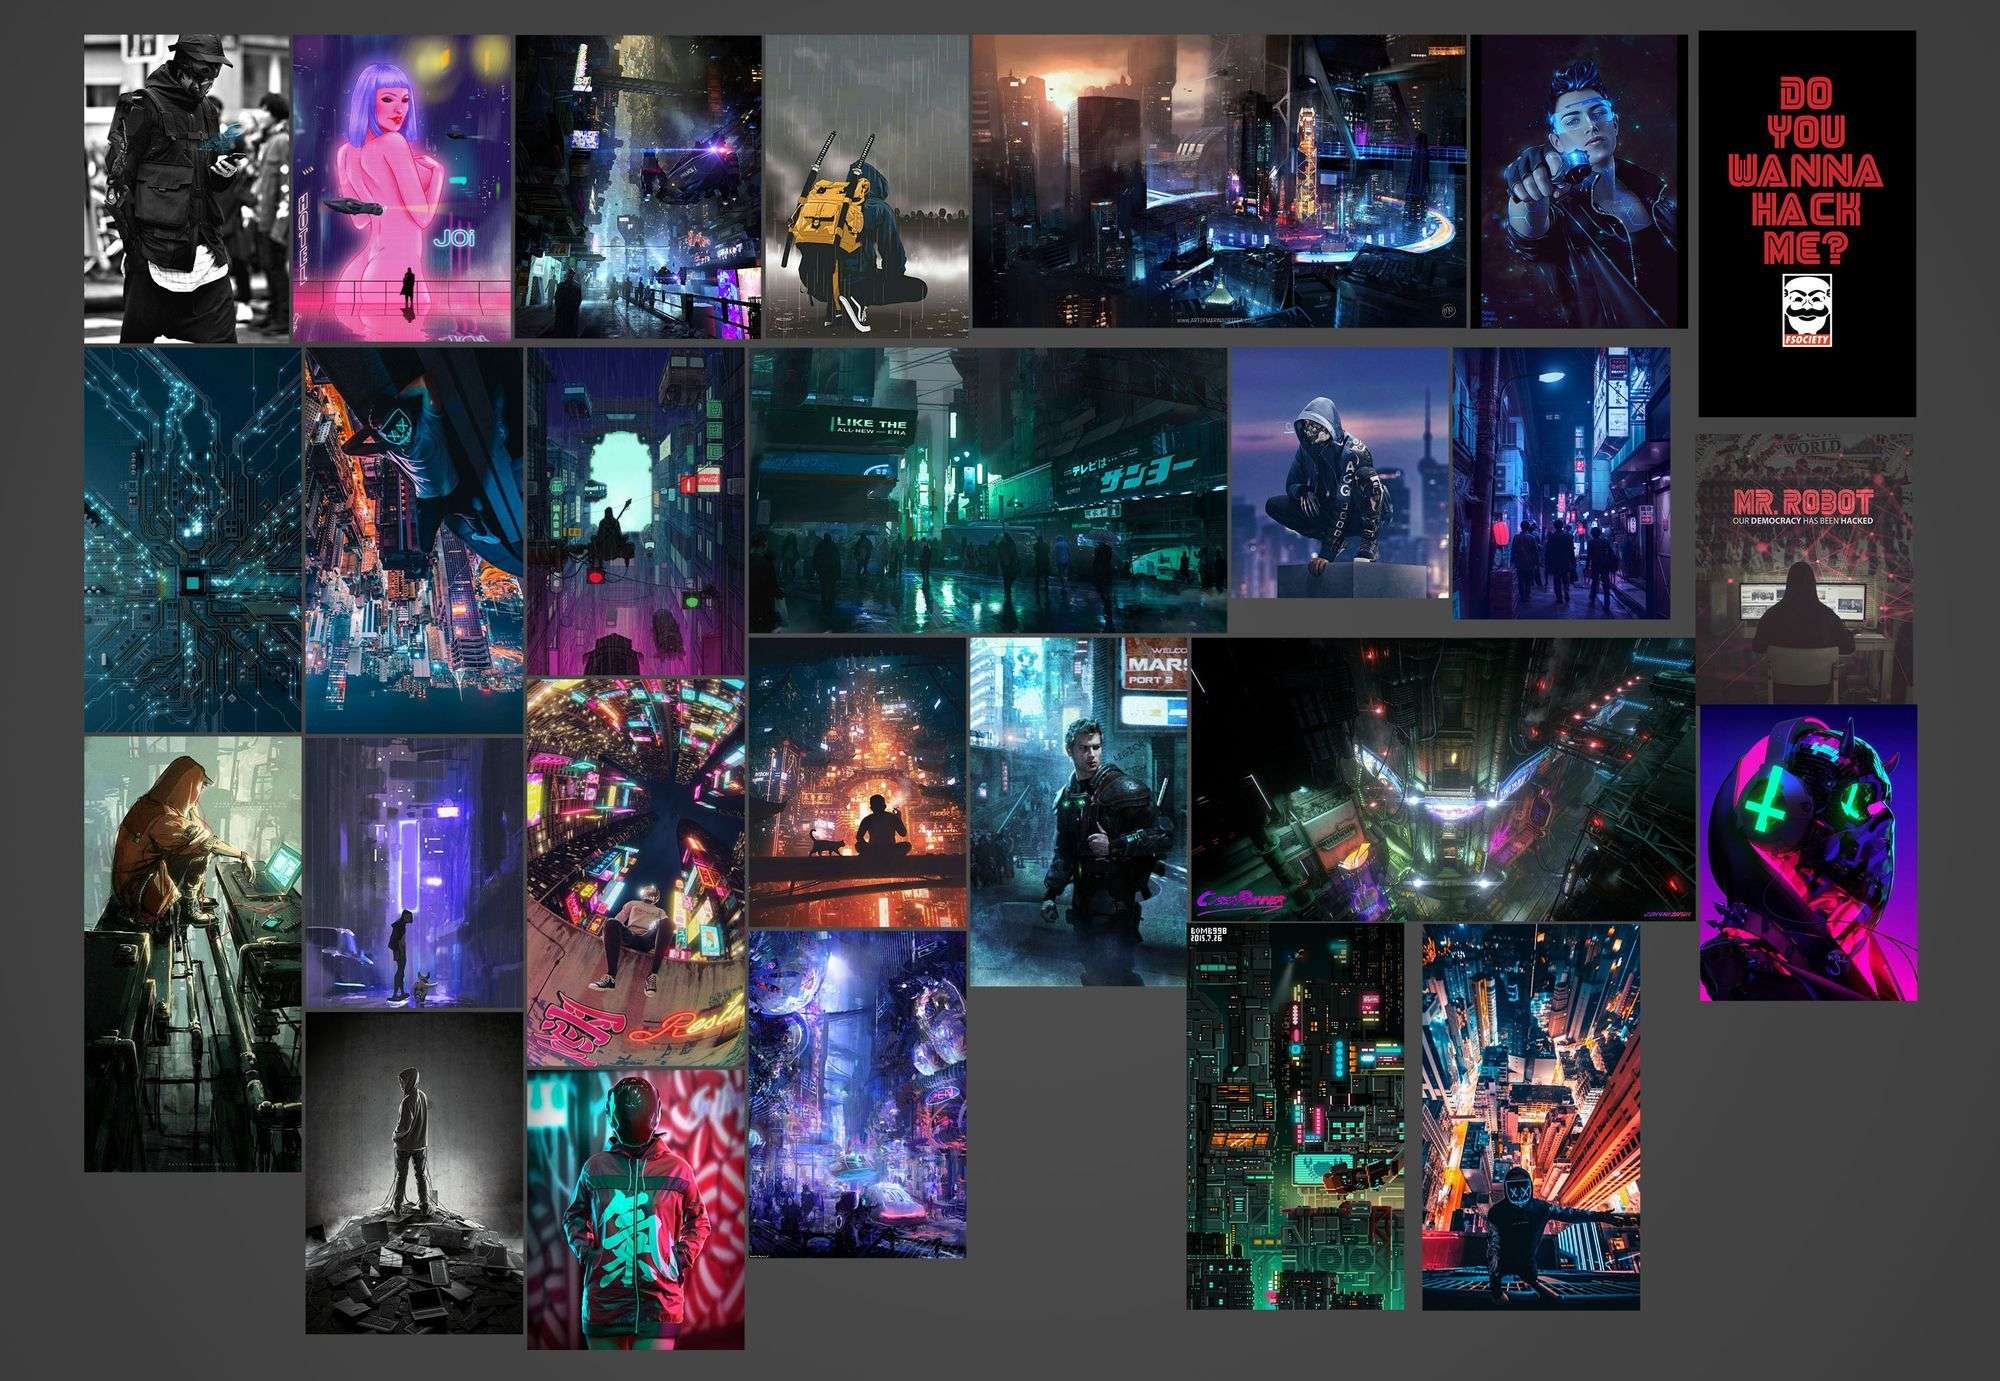
This step is super important. When I choose images I try to stay focused on the main concept. It’s ok to collect a lot of images but be sure that those are inherent to your project. Usually when I finish to collect references around the internet I select and delete some of them, by doing this you avoid redundant images and similar stuff, it’s easy to get distracted.
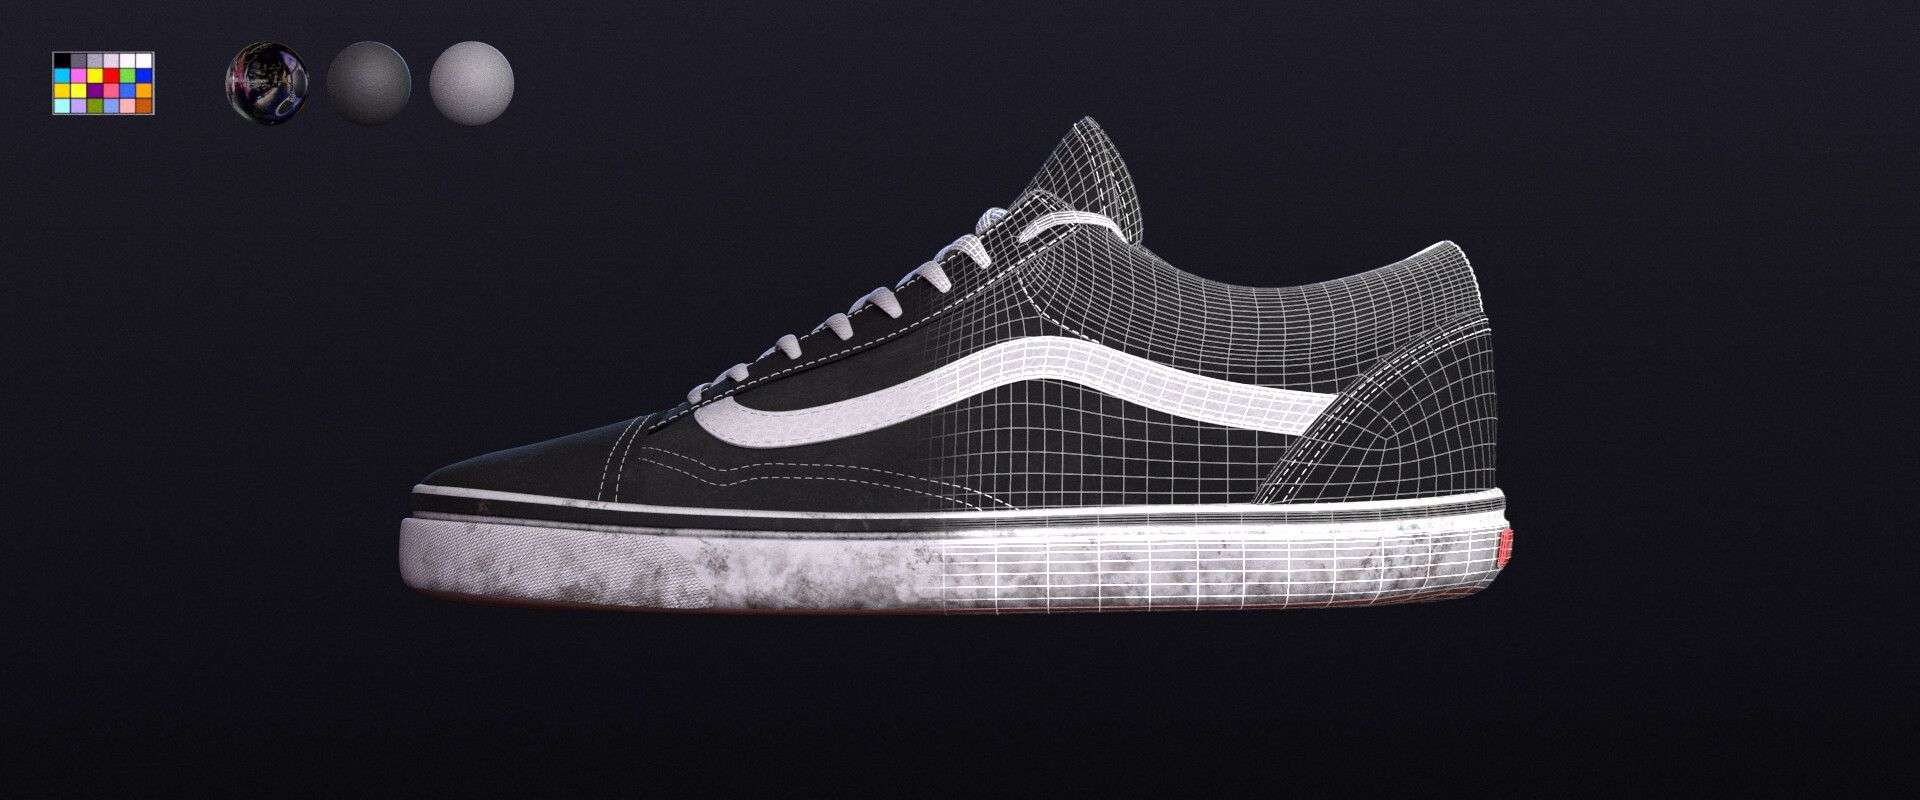
Usually I use Google images and Pinterest, but think outside of the box! When I modeled the shoes (Vans old skool) I searched some good orthographic photos but I can’t found none. So I decided to open some online e-commerce which sells shoes and I found them! Internet is so vast, don’t limit yourself to Google images or Pinterest! As main program I use PurRef.
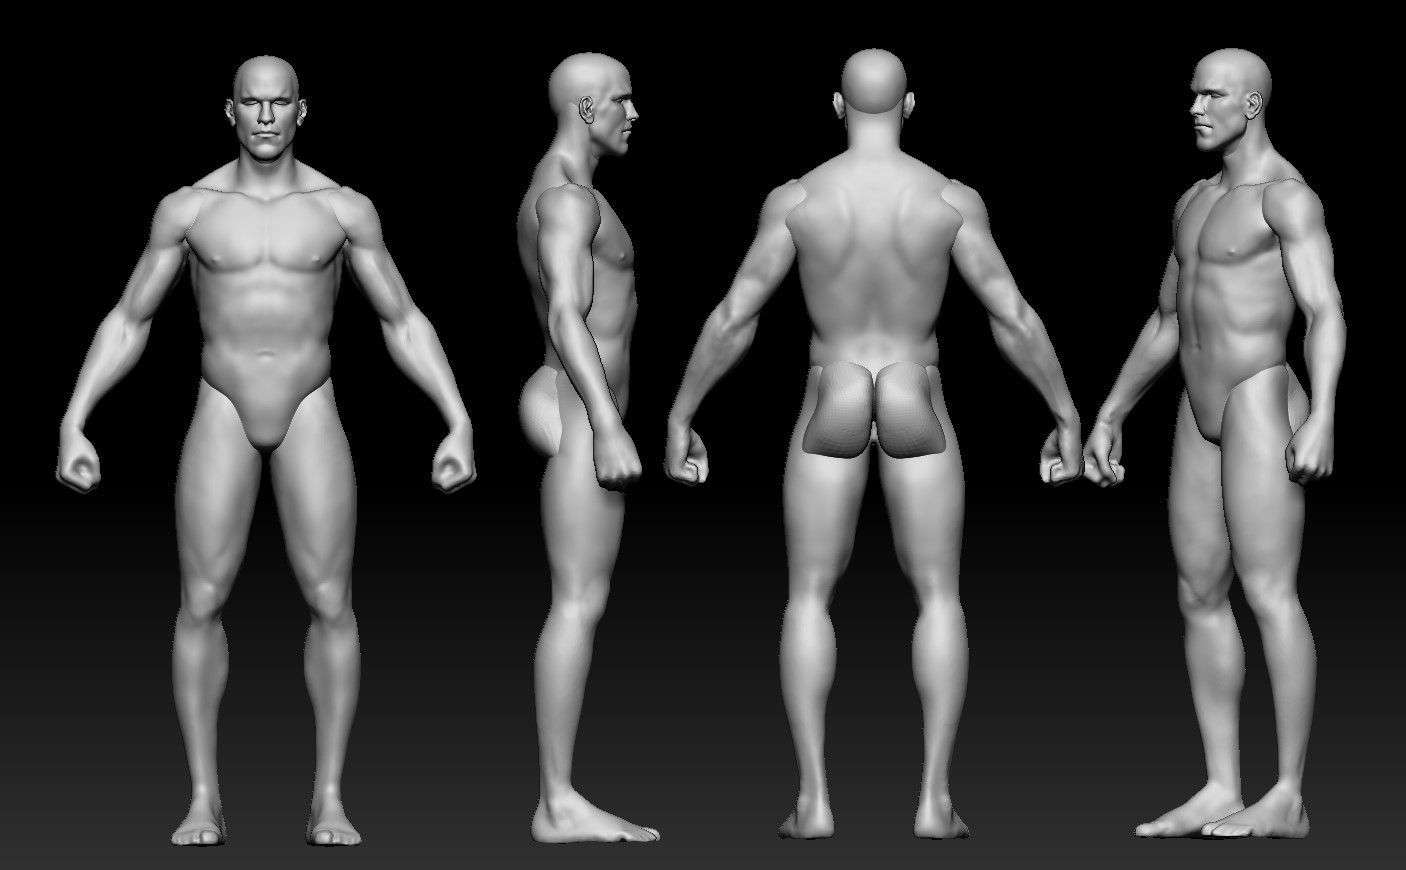
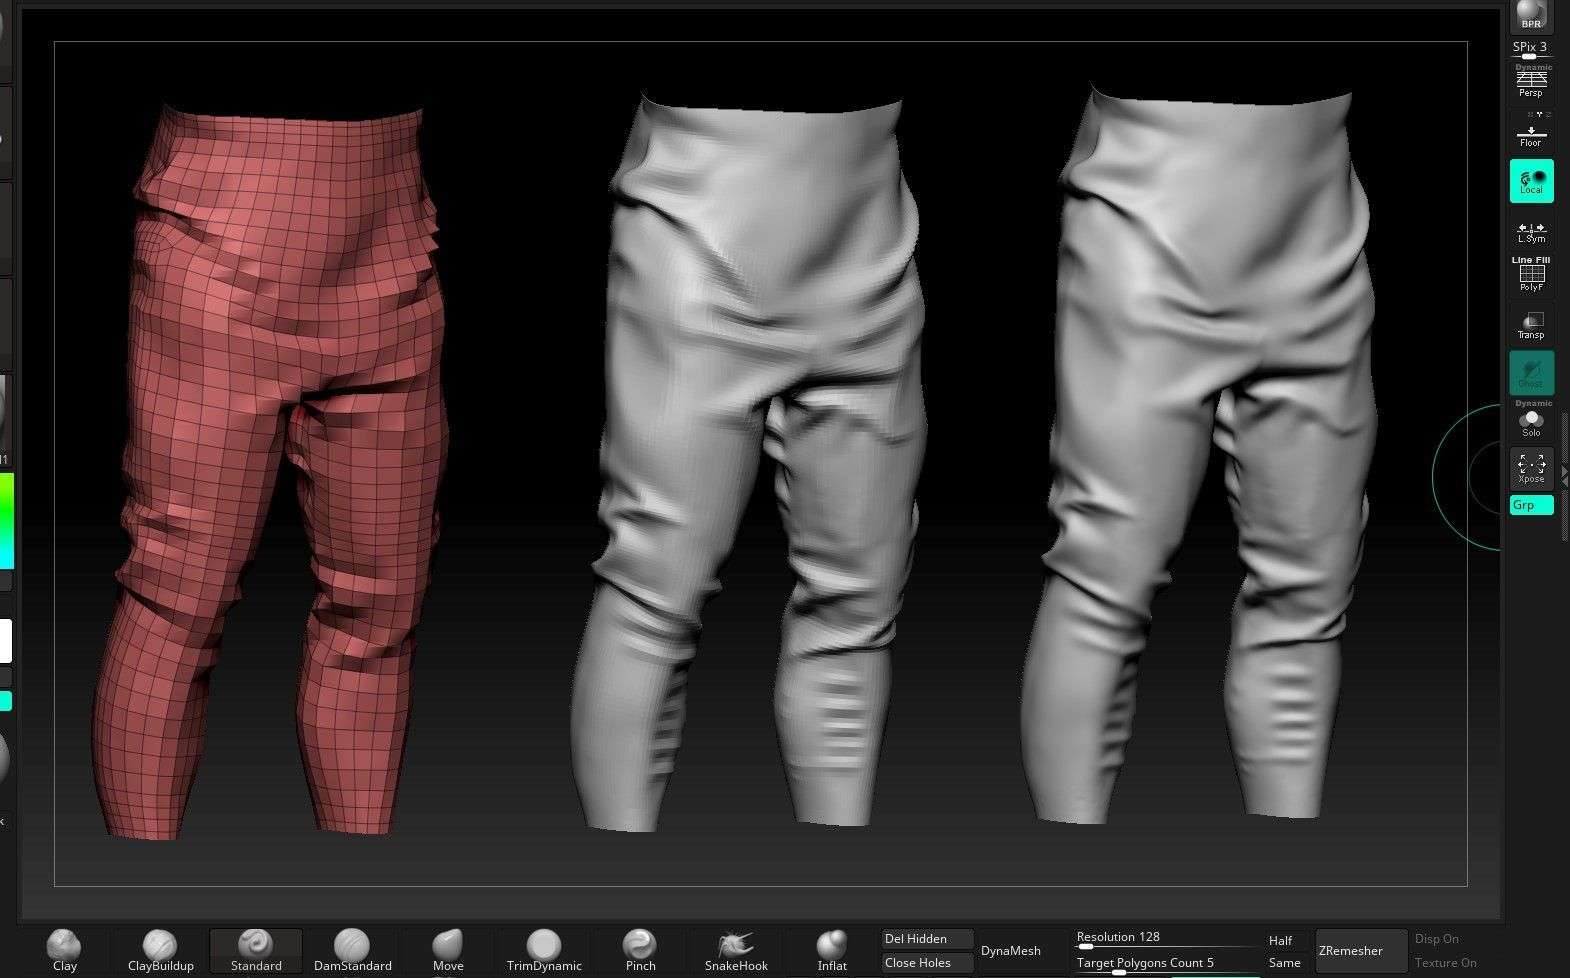
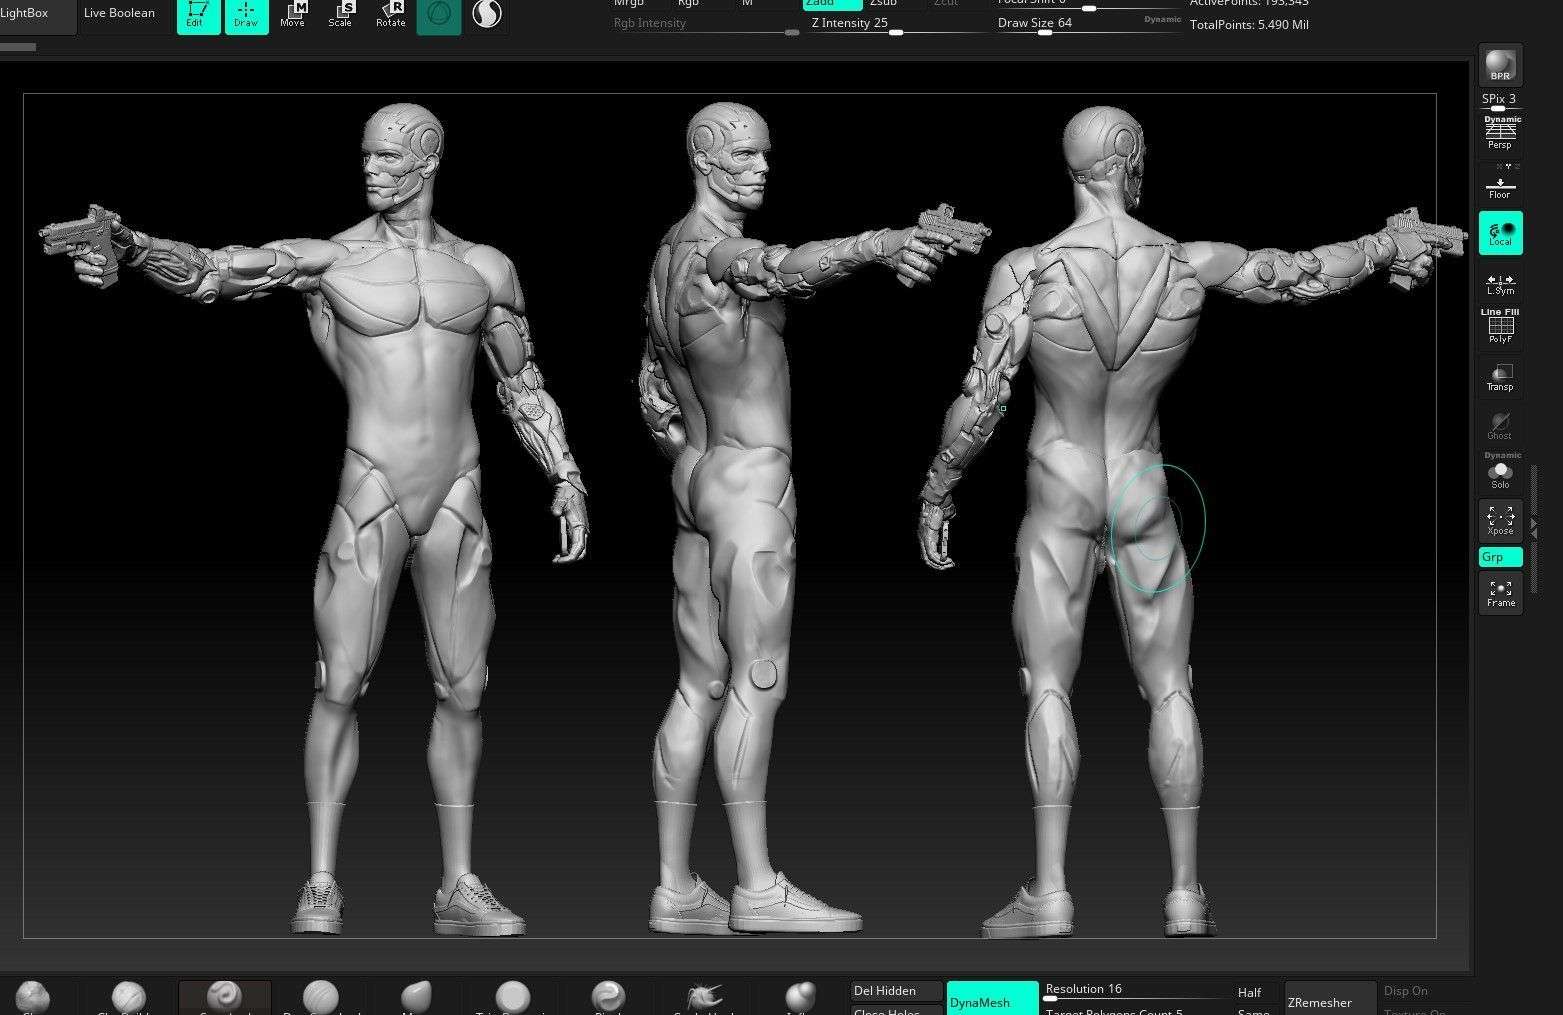
I always start from scratch in ZBrush, it will help you a lot if you are a beginner as me. Blocking out anatomy and proportions is crucial to learn and understand how to human body works. When you will have a solid understanding you can of course use basemeshes but since I would like to be a Character Artist, it’s super important to study this way. Starting from very very low dense sphere in dynamesh you can block out volumes without problems using the move brush.
I only use standard brushes like Claybuildup, Move, DamStandard and Clay. Don’t focus yourself with some fancy brushes, they’re not important at all.
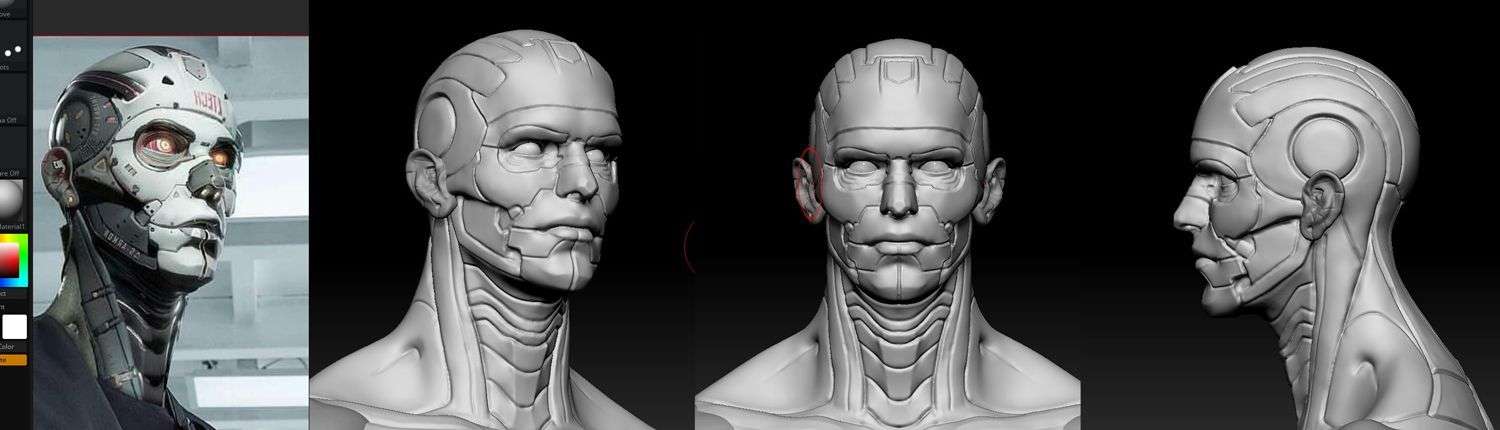
When body is done, it’s time to start designing! Same principles, use standard brushes to blockout the shapes. Focus yourself on design, stay raw, don't polish everything from beginning. Explore and try to match as mush as you can the concept. Use DamStandard to define edges and connections.
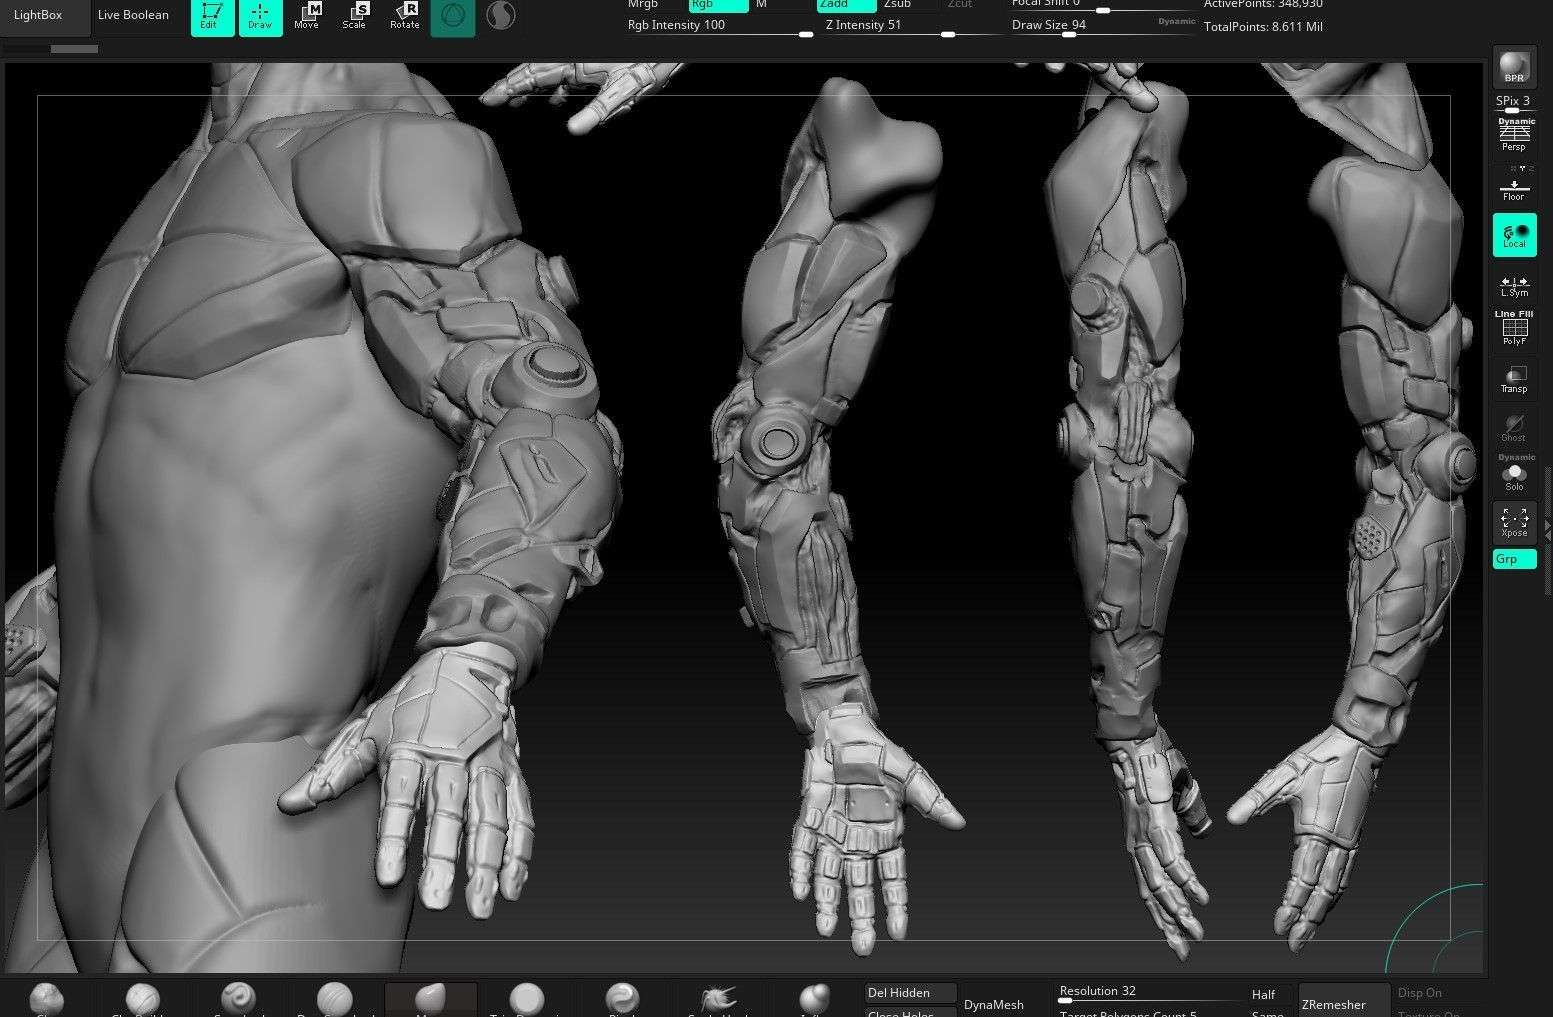
Same story for every part of your concept. As you can see below I used the same exact process to blockout arms and hands. When you’re happy with the result try to polish a little bit the shapes with Pinch brush and smooth out some bumpy areas.

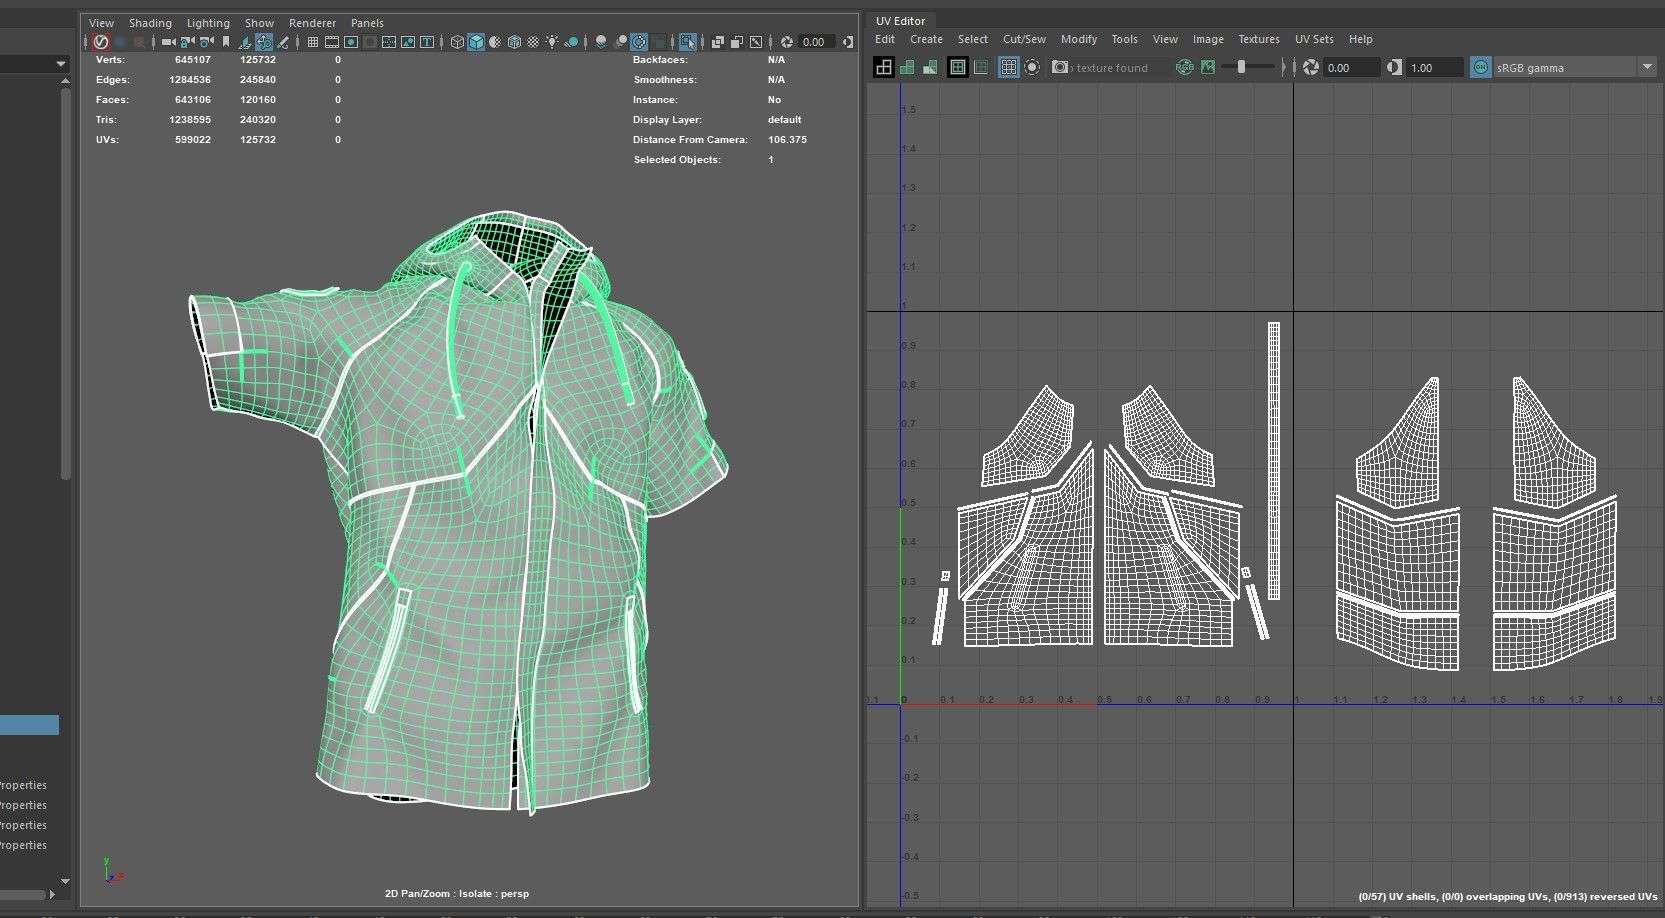
Once you have finished the blockout, it’s time to start retopology! I use the Quad Draw tool inside Maya, I think that it’s pretty fast and easy to understand. This is the most important step with hard surface pieces, the topology must be clean and functional with correct edge loops. Start low, define the shape, use crease to lock piece’s edges and then start subdividing.
For a better understanding I’ll leave here a little tutorial that I did about this workflow. I hope that will help you, check it out!
After that, it’s time to open UVs. I’m not going to talk a lot about this process because it’s pretty straight forward. I used UDIMs and divided the shells by materials, 4k tiles.
The only thing that I can suggest you is to delete the internal polygons that will not be visible. This will help you with UVs and with the polycount as well.
Other assets were modeled directly inside Maya with proper topology. I’ll leave here a little speed modeling video about Vans
Once finished every single asset it’s time to jump into texturing!
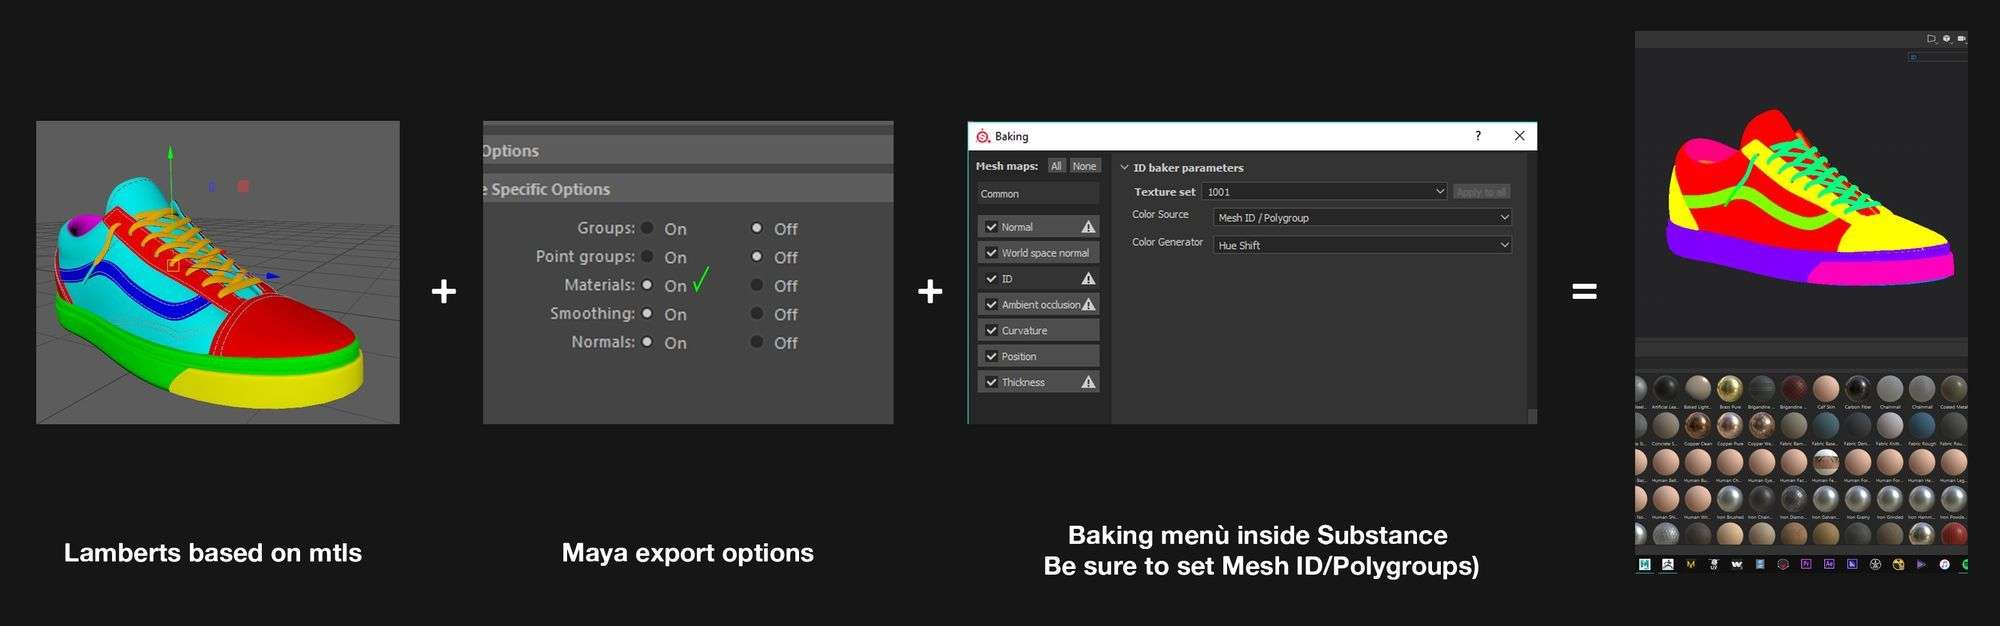
(Pro tip: use different lamberts inside Maya to define materials, by doing this and checking the “materials” export option you will have ID Maps when you bake the maps inside Substance Painter)
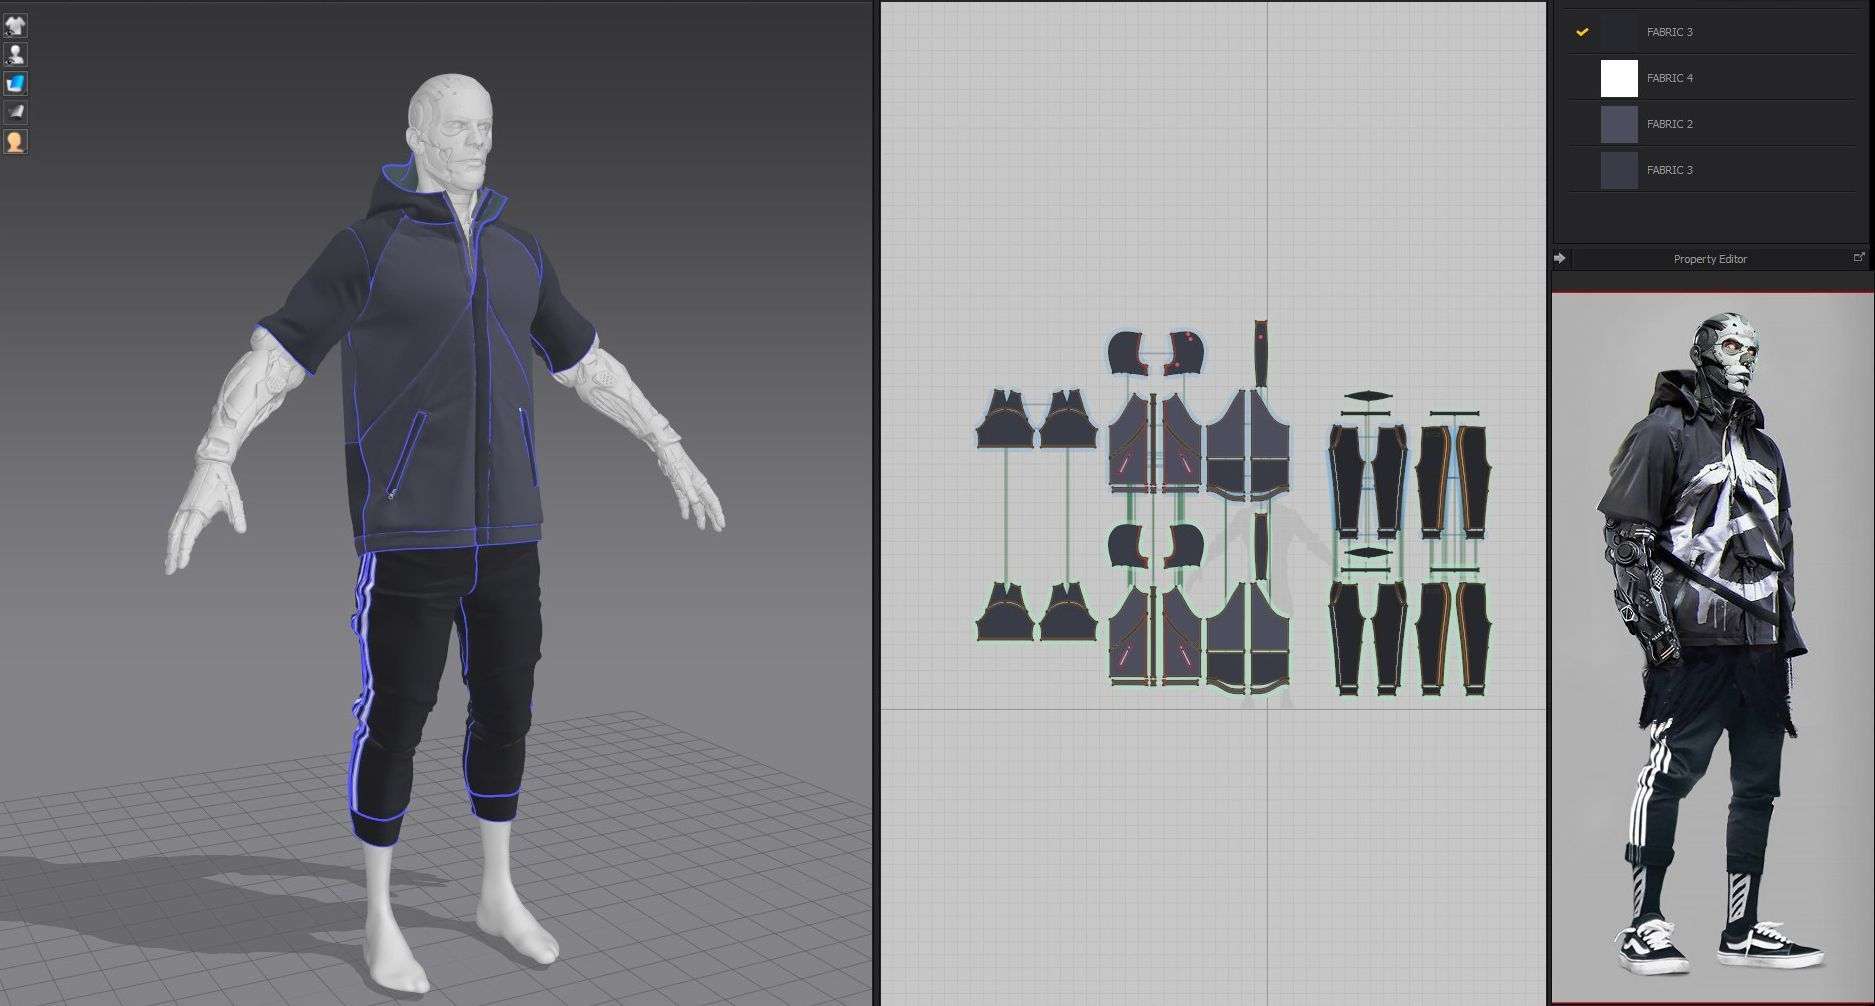
A big part of my project were clothes. I used Marvelous Designer to simulate them, definitely the most difficult part to me. I used a lot of references to draw patterns and try to match as close as possible the concept.
This step is time consuming and you need a lot of patience to match clothes. Simulation is tedious as well, use very low values only at the end, when you know that the patterns are finished.
When you’re done with patterns it’s time to deal with topology. I’m not going to cover the whole process here because I think this tutorial can explain it better then me. I used that method to reproject the retopologized mesh on the simulated one. It’s super simple and will save you a lot of time!
After retopology, I used ZBrush to pose my character. I use the Transpose master tool
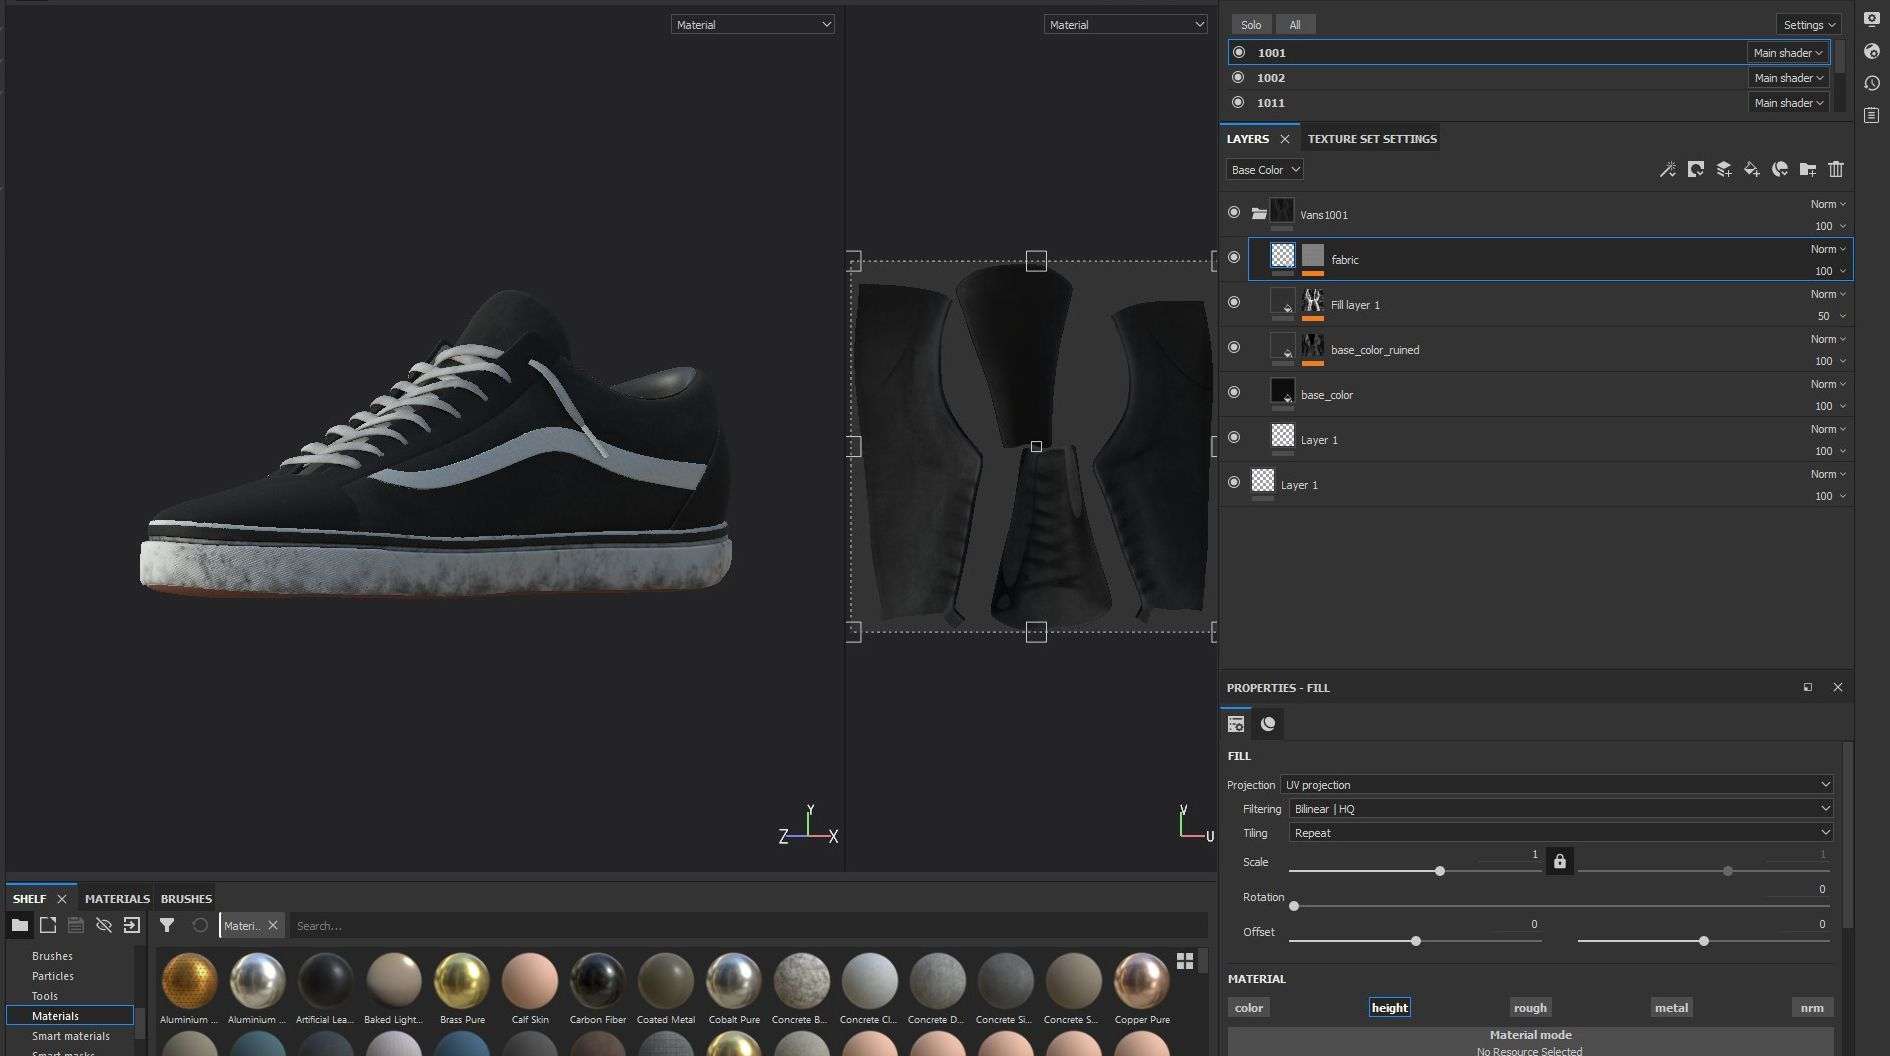
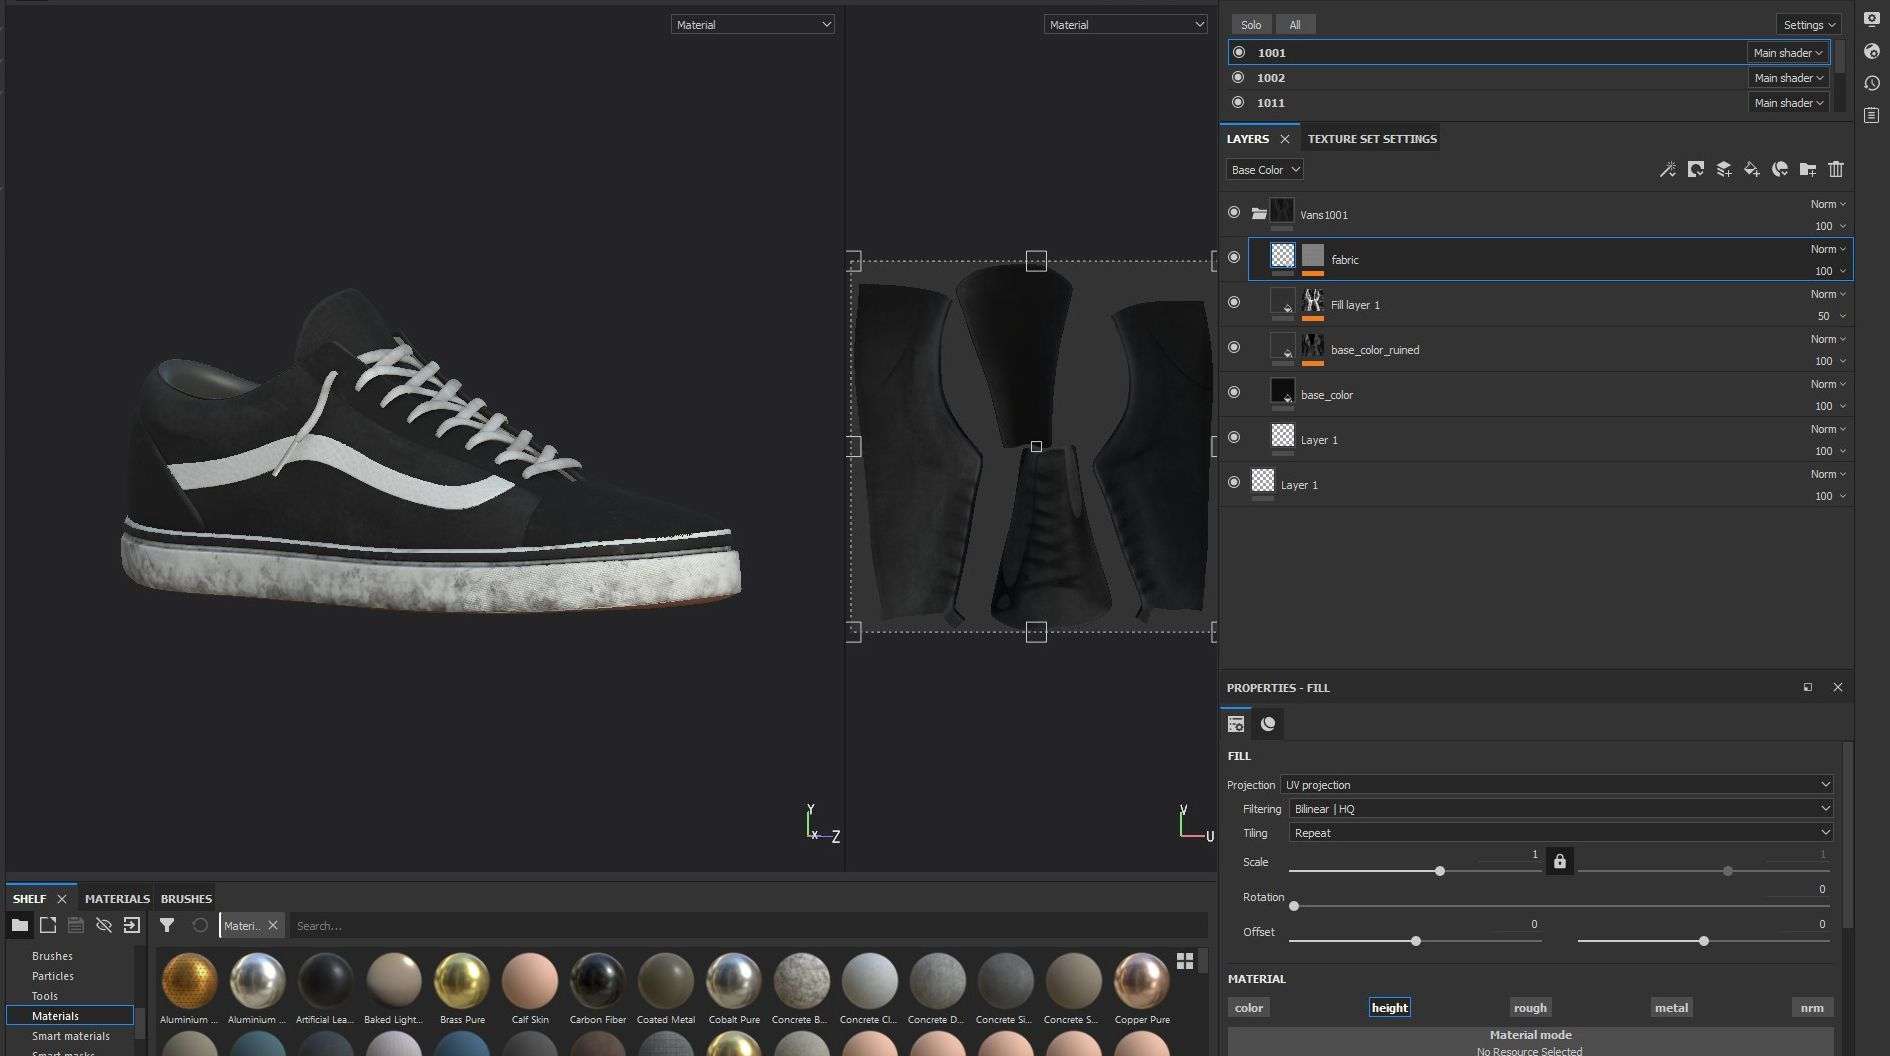
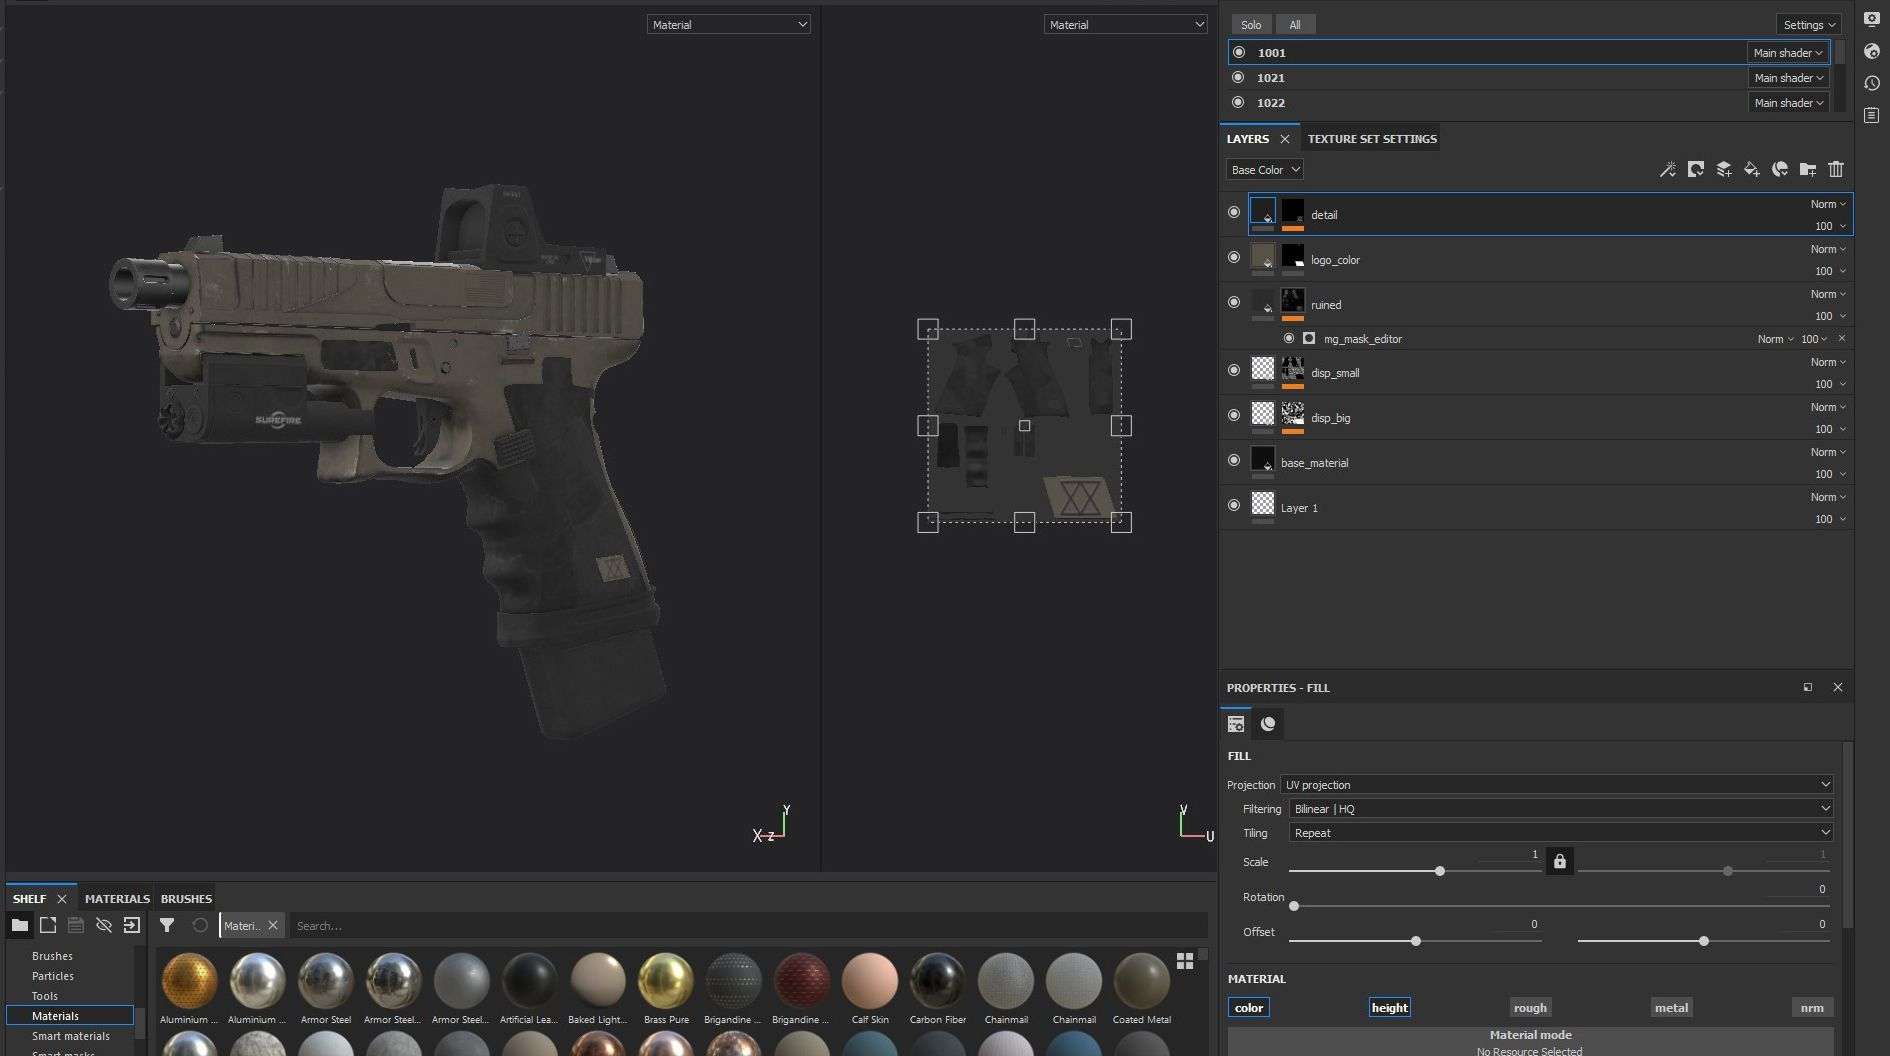
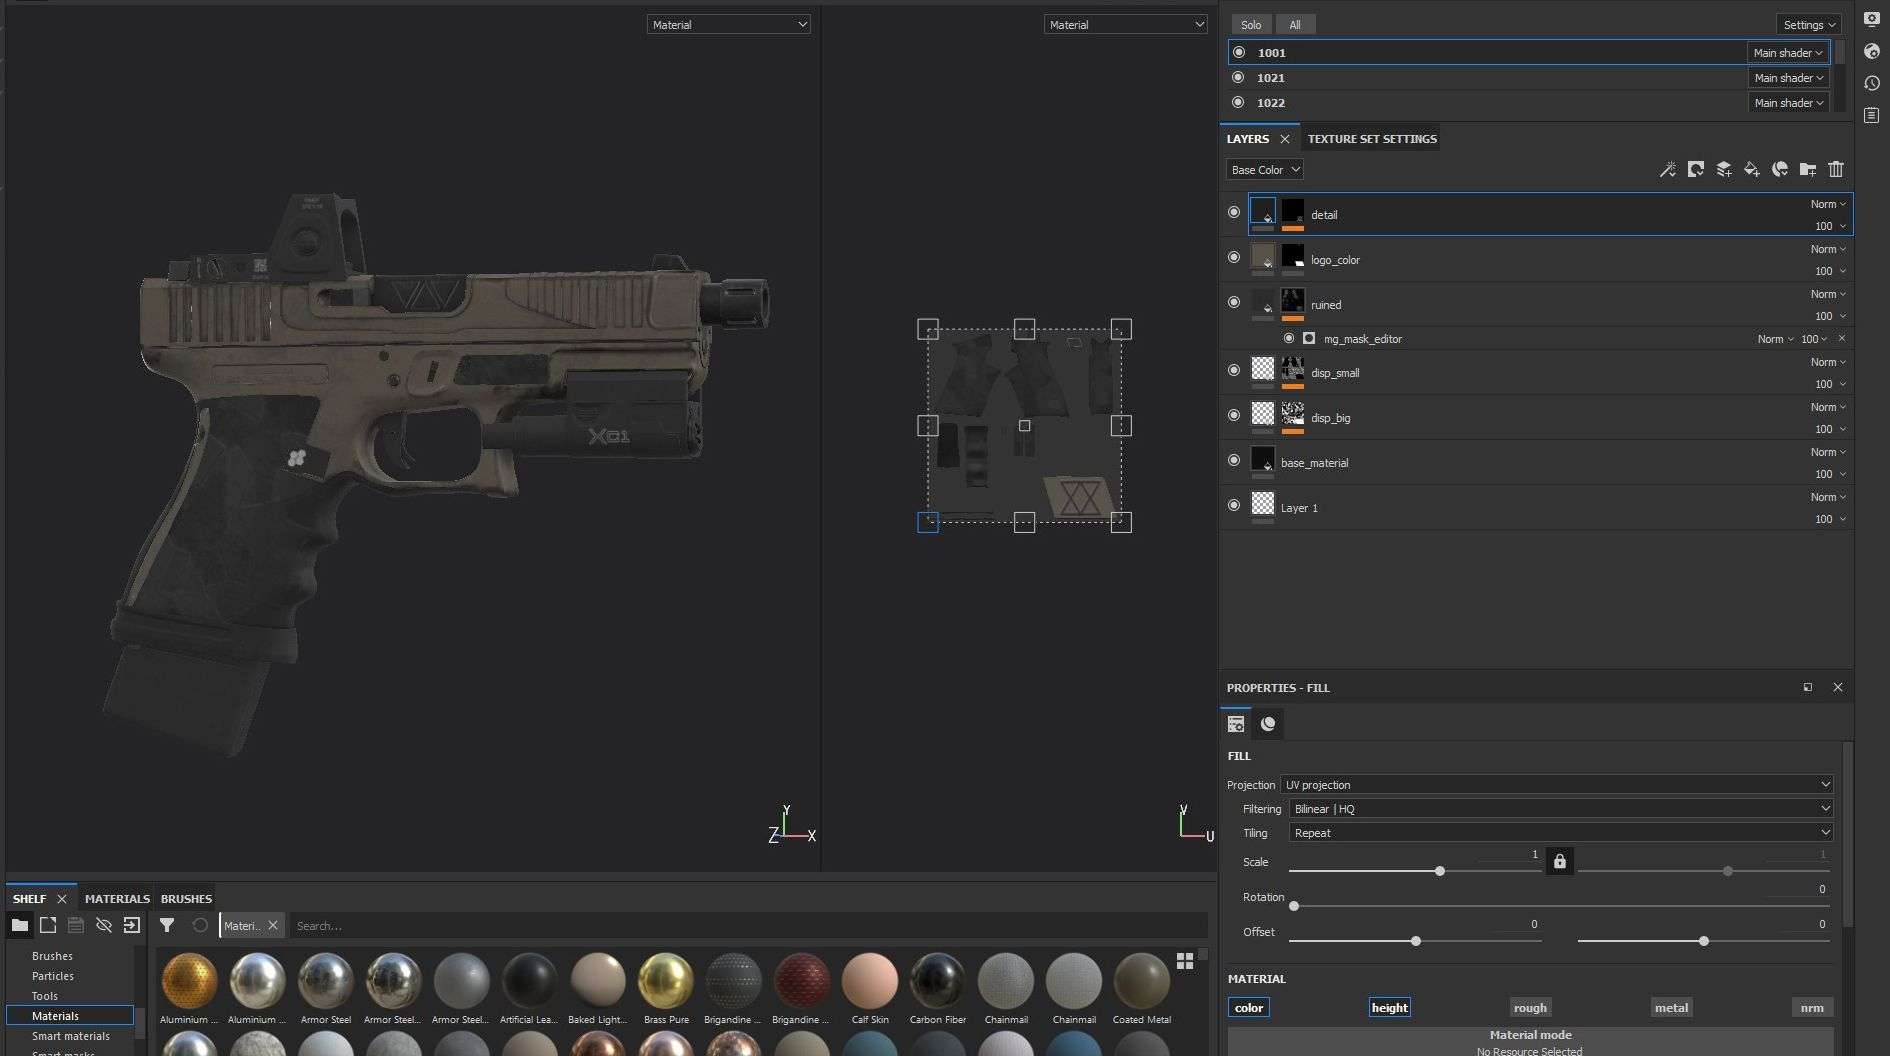
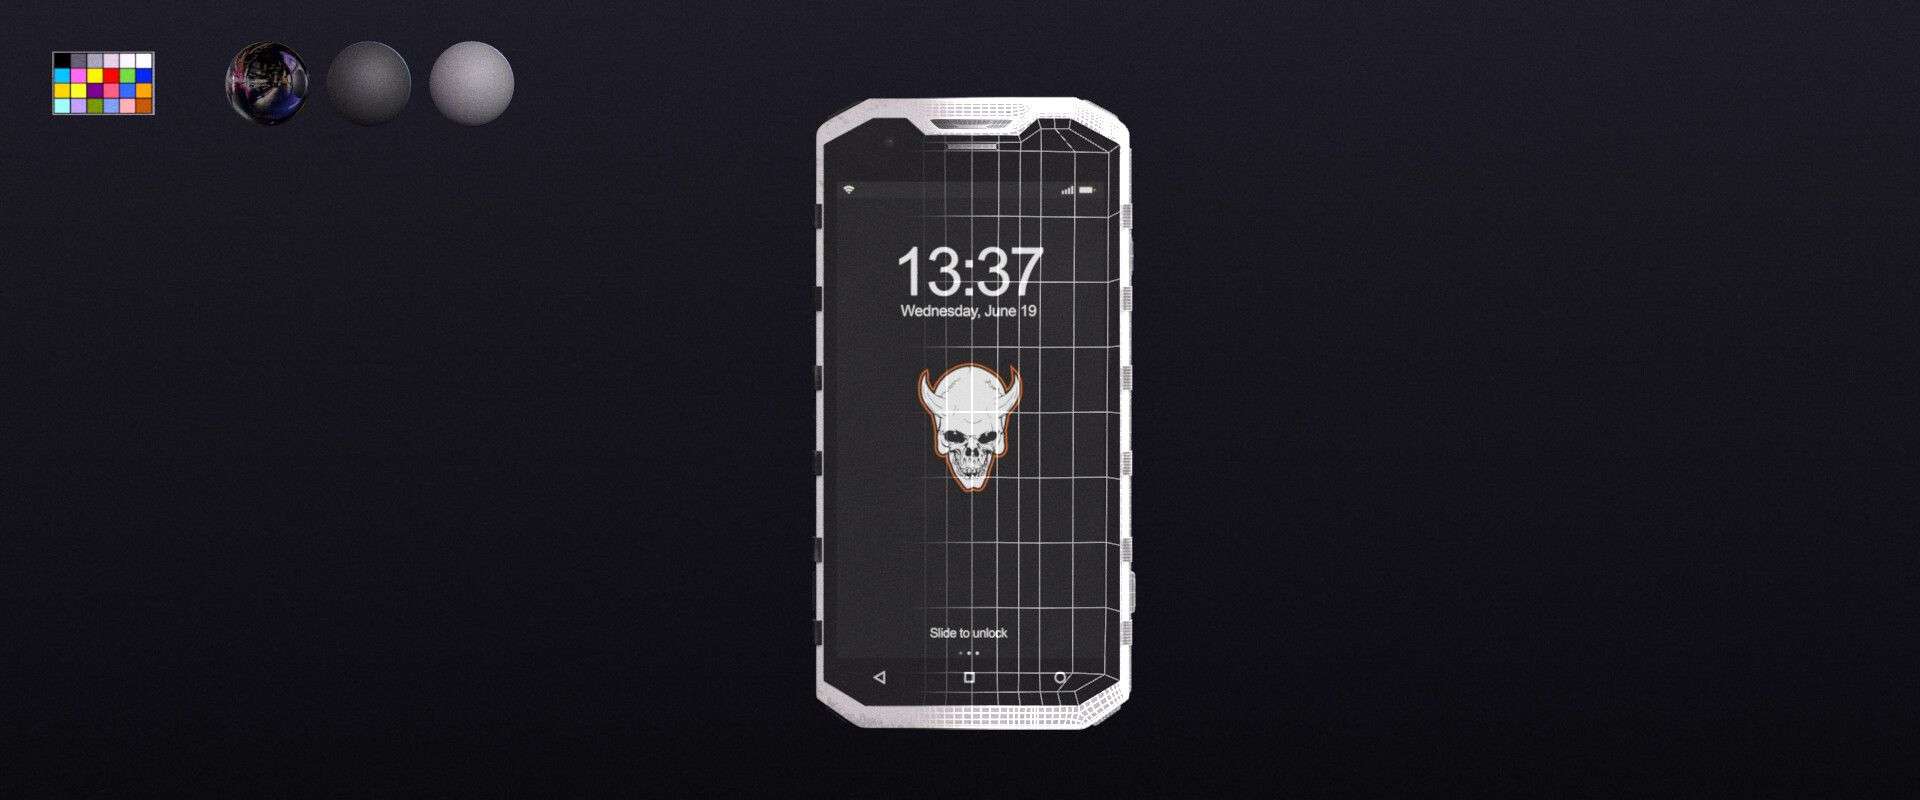
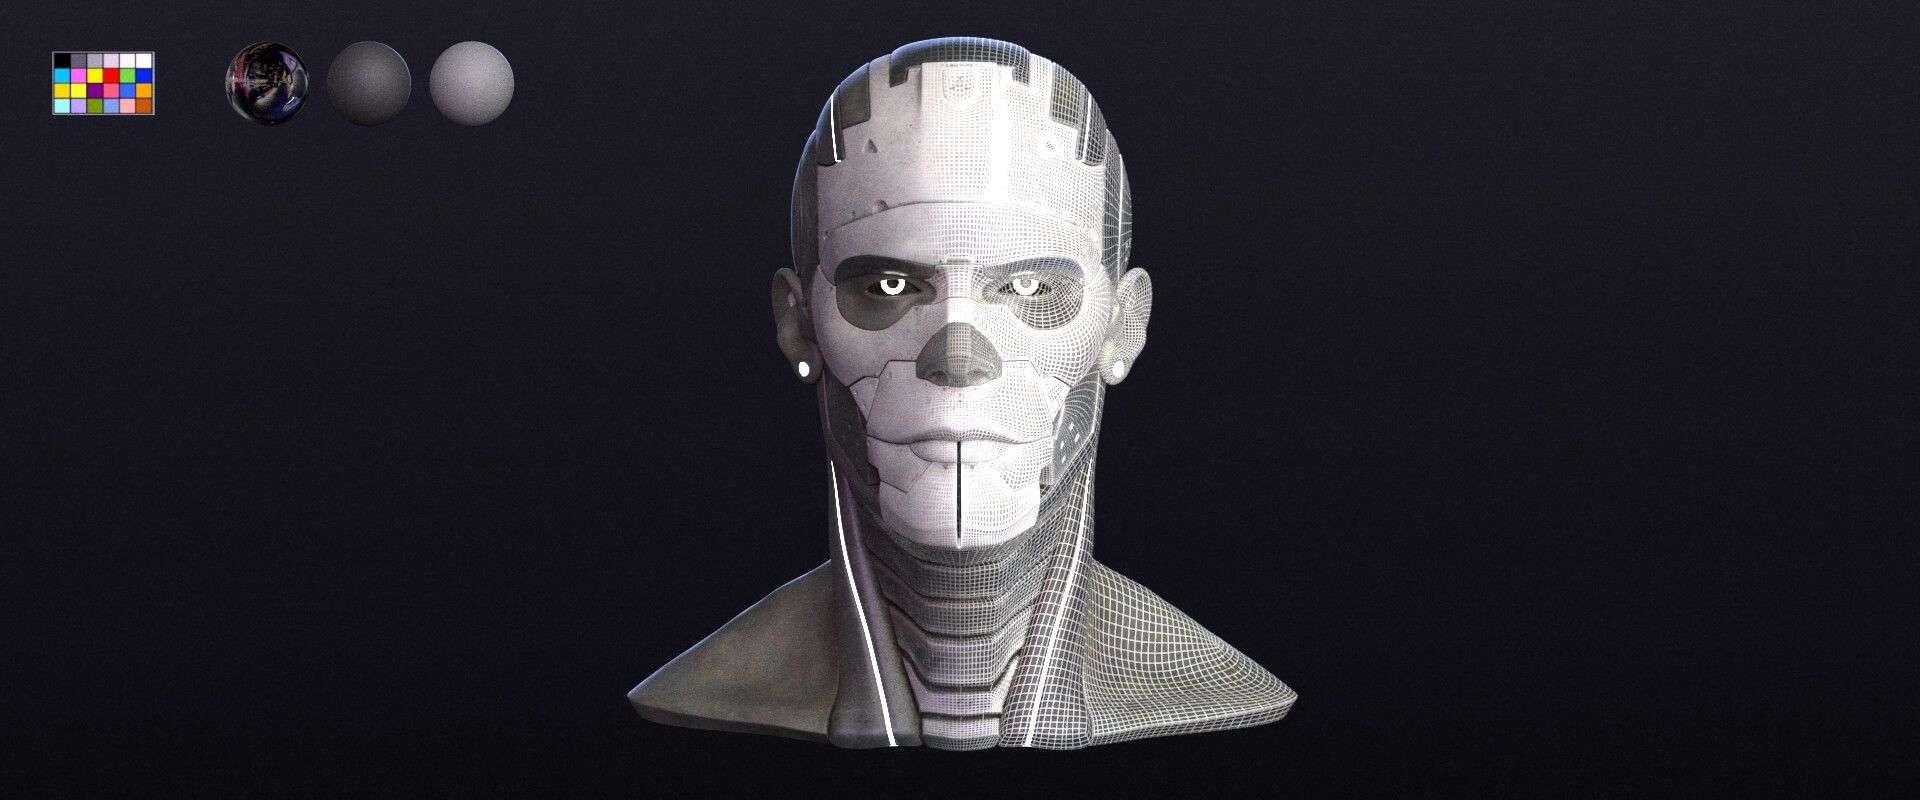
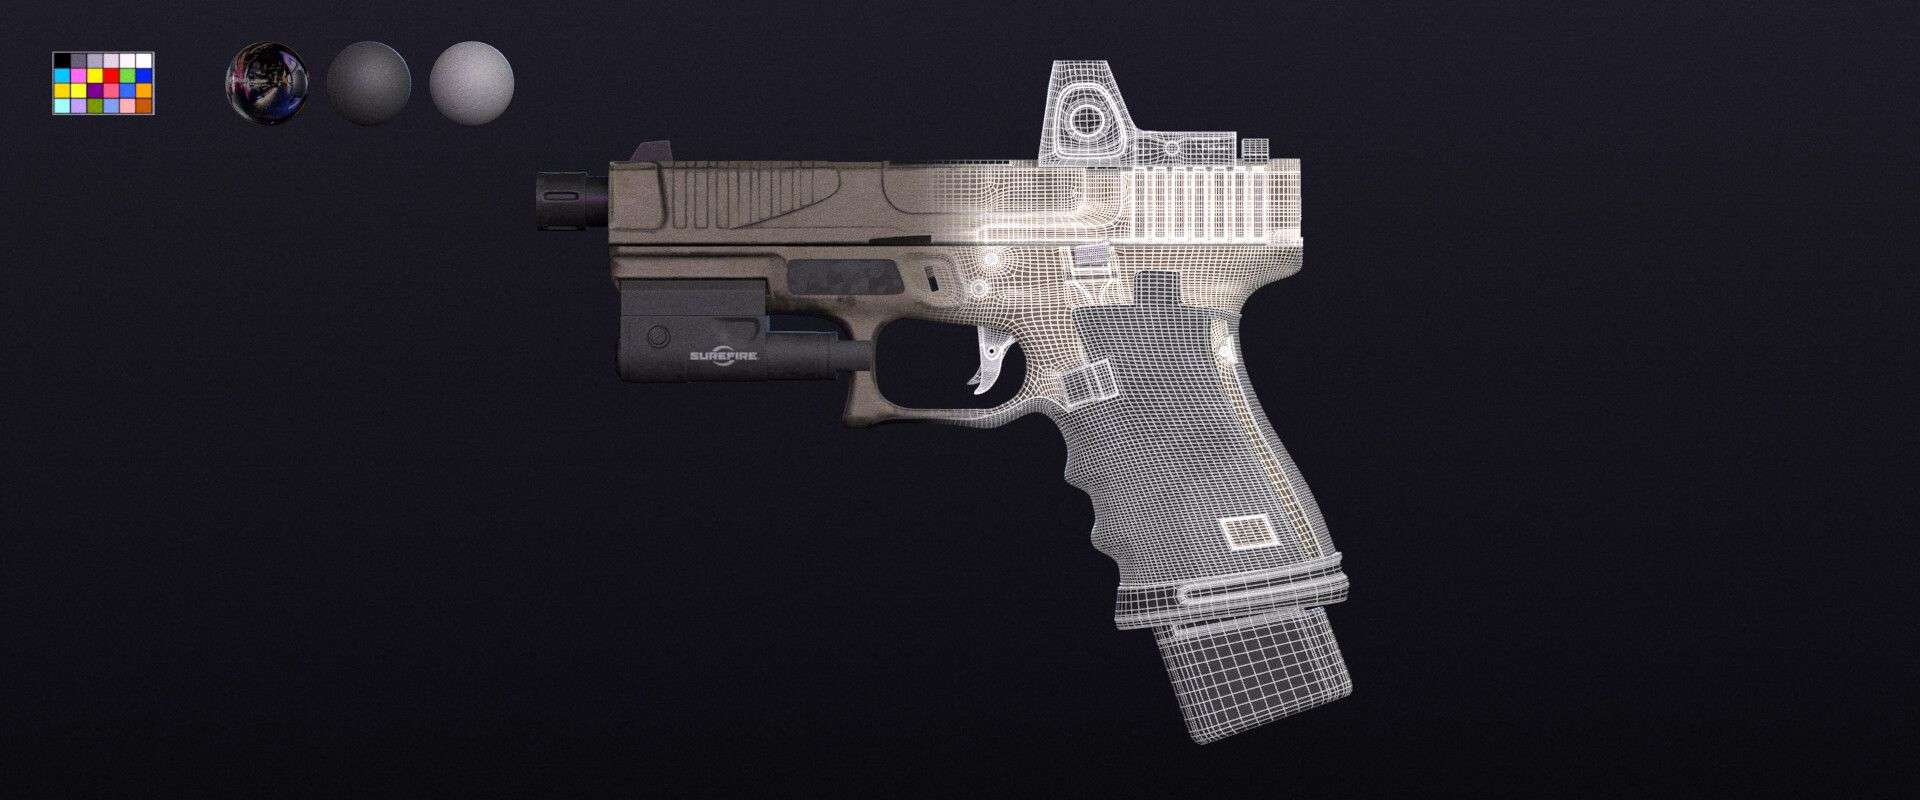
I used Substance Painter to texture shoes, gun and smartphone. The body was textured in Mari.
Starting from Mari, I used Paul Paulino’s workflow to deal with all the isolation and utility masks.
From Substance Painter I baked:
· Ambient occlusion
· Thickness
· Curvature
Then in ZBrush I exported 2 types of Curvatures, this will help you to add more variations during texturing.
I Imported everything inside Mari and started to define Isolation maps. This stage is very important, be sure to organize your UVs shells by materials, by doing this you will define ISO Mask a lot quicker!
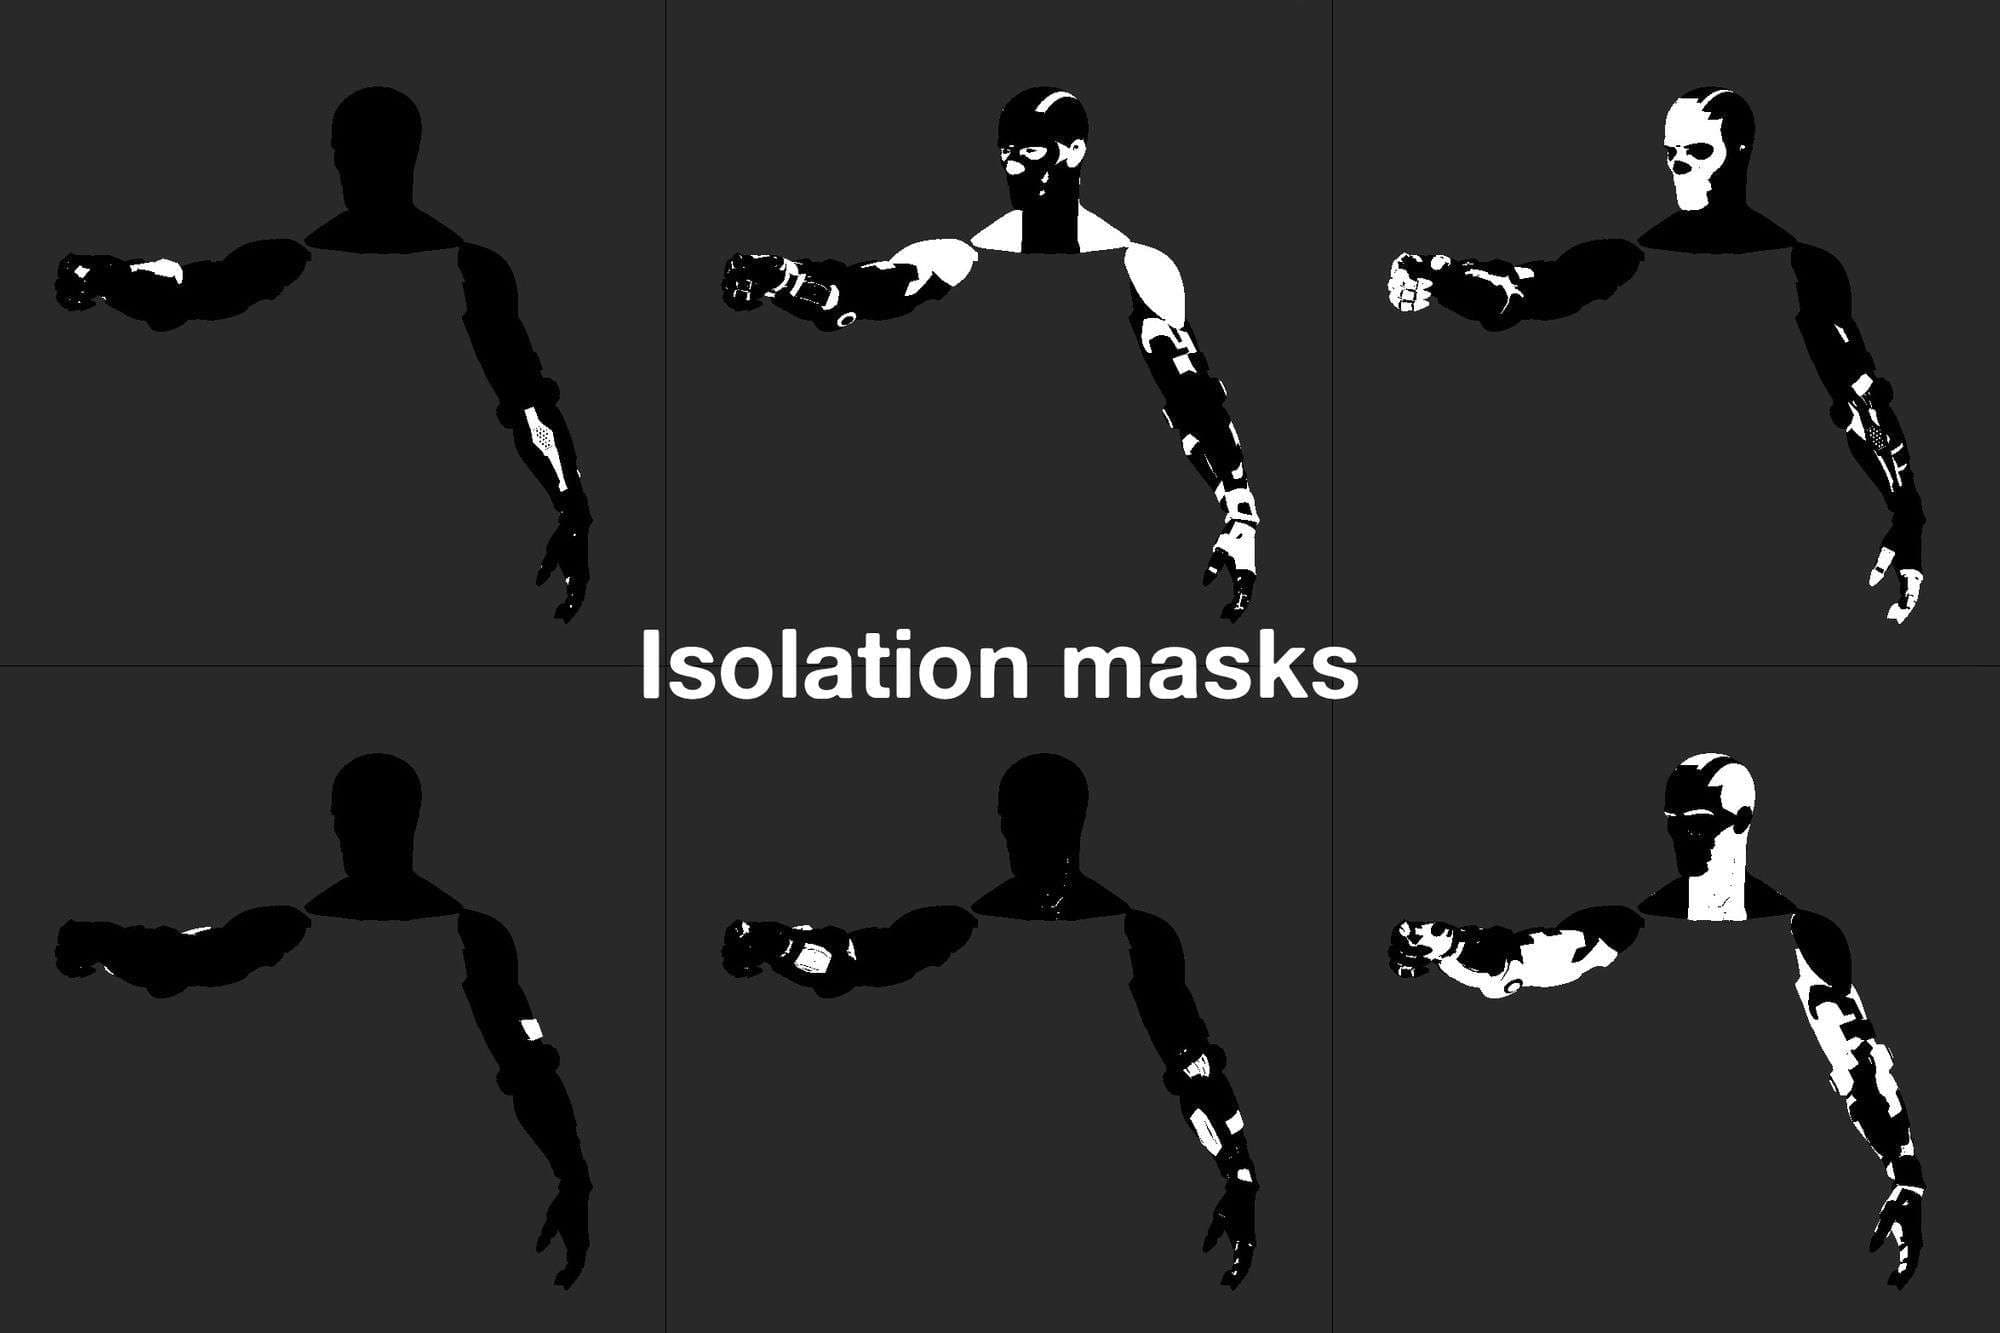
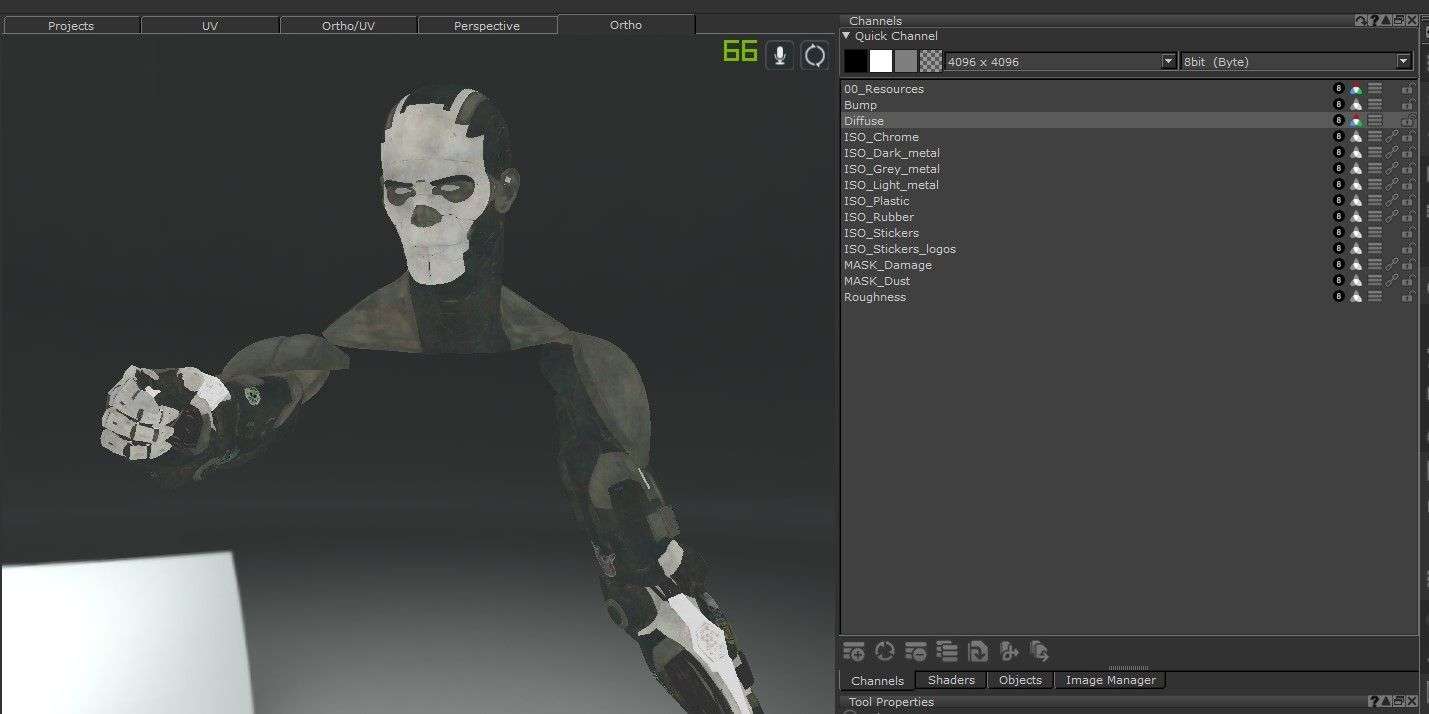
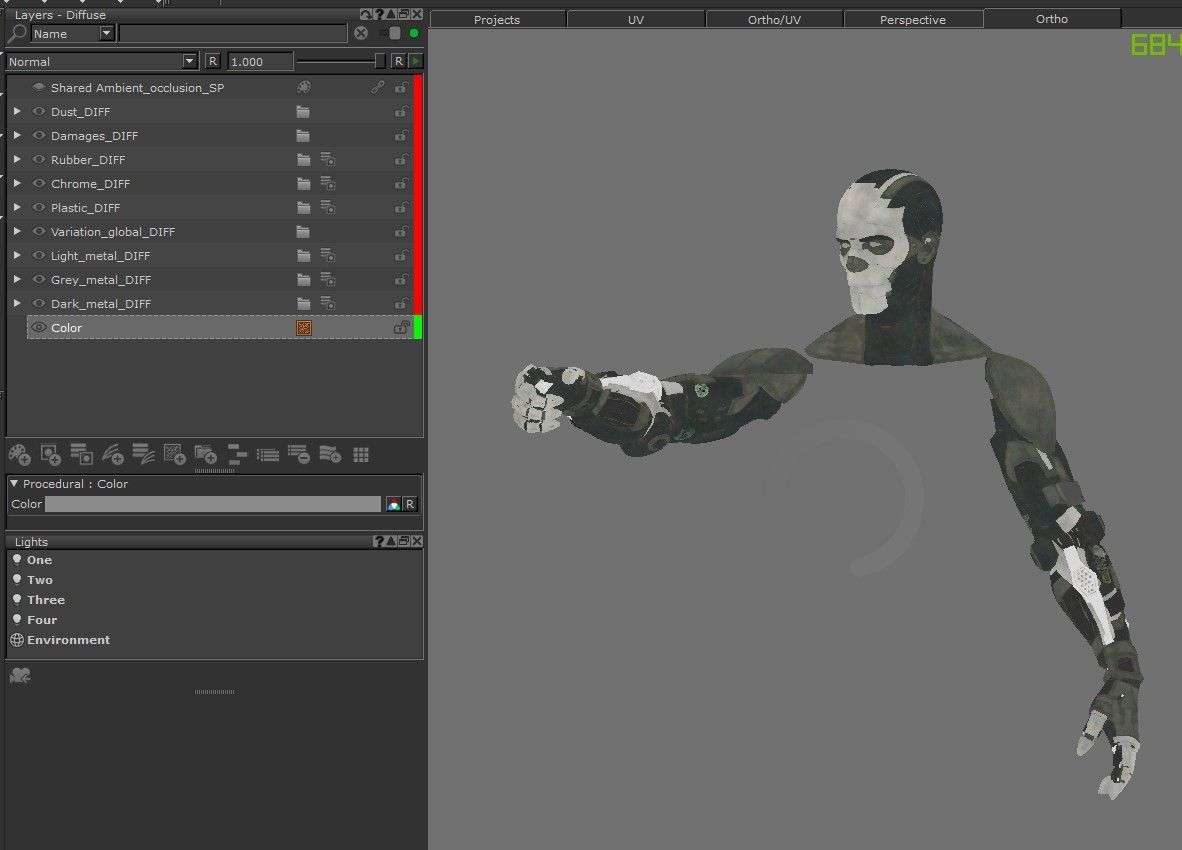
Every single channel is organized by materials. By doing this you will have total control about how your texture map will look, I’ll leave here a screenshot of my Diffuse channel.
As you can see, every single folder is set up with shared ISO mask in the mask stack and, inside each folder, projections and procedurals which effect the overall look. It’s super important to keep this kind of stuff organized, take your time and rename that layers!
Inside Substance Painter, life is a little bit easier. I used ID maps to isolate different types of materials and set up every single layer with masks. I used a lot of Substance procedurals but also some I found online. As you might already know, Substance is quite quicker than Mari and you can tweak maps almost in real time. I use this plugin to speed up my workflow
Honestly, a game changer. I fix maps directly inside Substance and when I want to see how it looks, I just click the “Send” button and I can render it out inside Vray (Or you’re favourite render engine).
I also created some smart materials by myself, just to be a little bit quicker with stuff I’ve already done. Metals, scratches etc… Save your presets guys, your brain will thank you!
Thanks to The Rookies for this opportunity, really glad to be part of this community.
Thanks to my mentor Abraao Segundo, to my Think Tank supervisors, to all my new friends that I made during the master who always pushed me further.
I hope to make more of these articles and share with the community tutorials and breakdowns in the future! If you have any kind of questions about CGI feel free to contact me on my social media! Enjoy the journey guys! :D