

Etienne Vittani is a freshly graduated student from Institut Artline, a french online school. Today he is sharing his workflow for integrating photorealistically an element into a camera mapping using Photoshop, Maya, Nuke and Premiere. If you've ever wanted to improve your matte painting skills to the next level, this is a great place to start.
At the time of creating this camera mapping I had oriented my final year project towards Matte Painting. I wanted to start with a simple image that could make me work with several techniques.
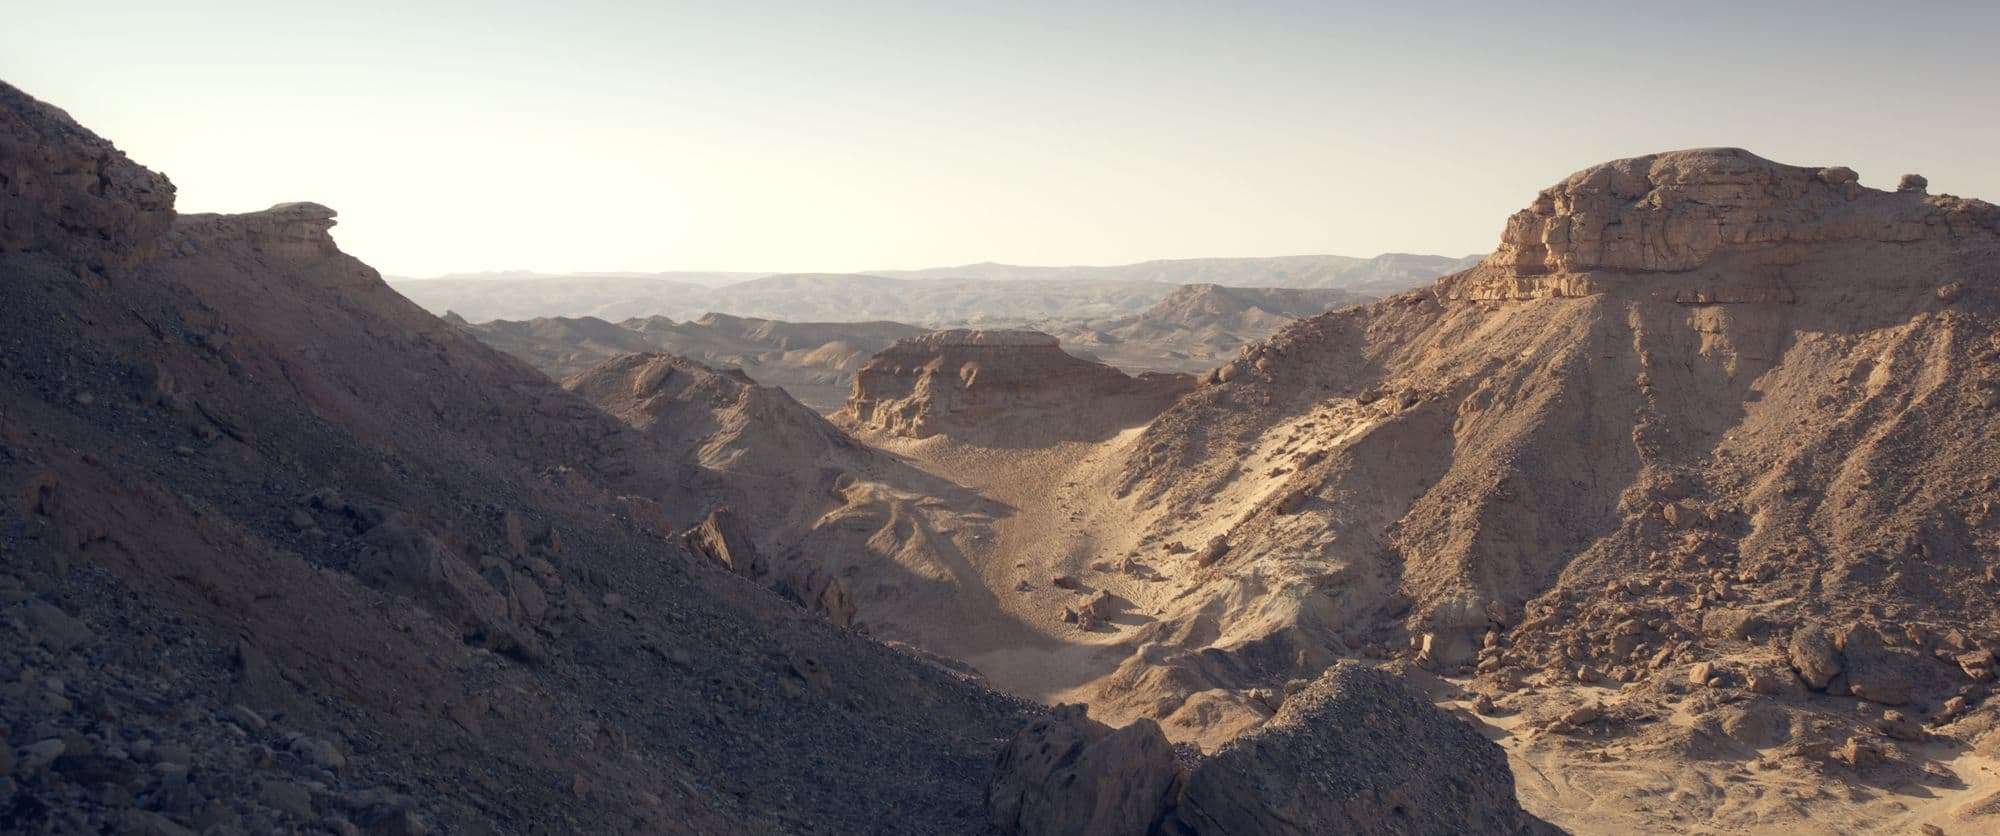
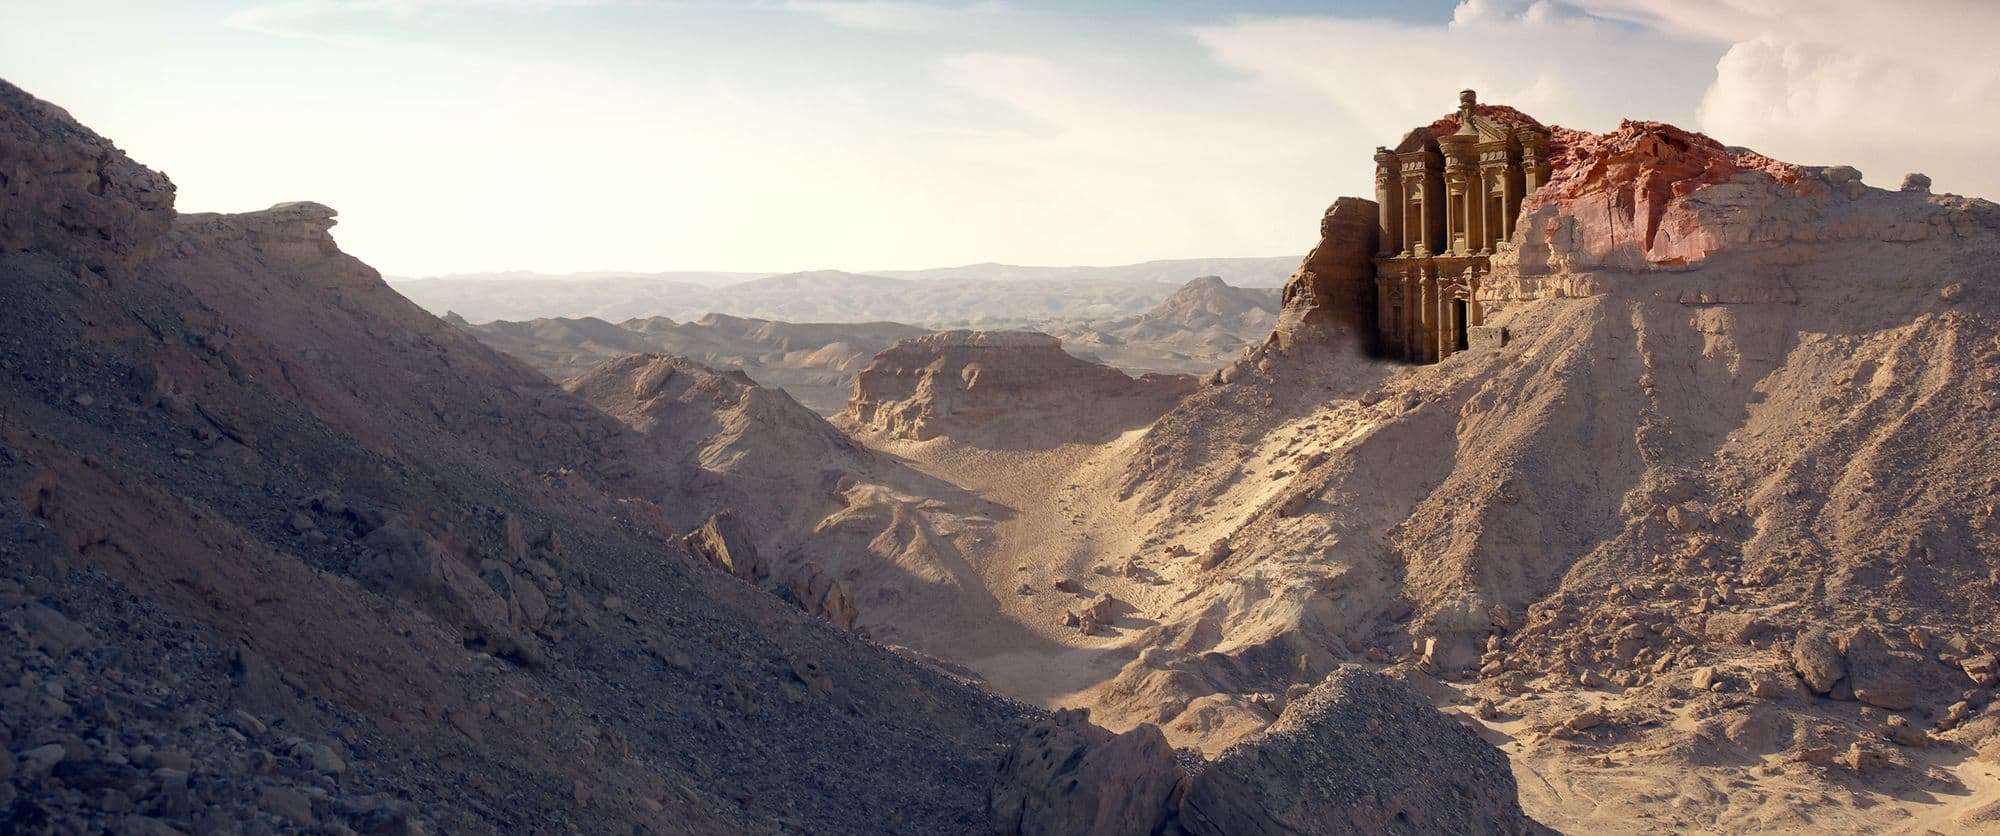
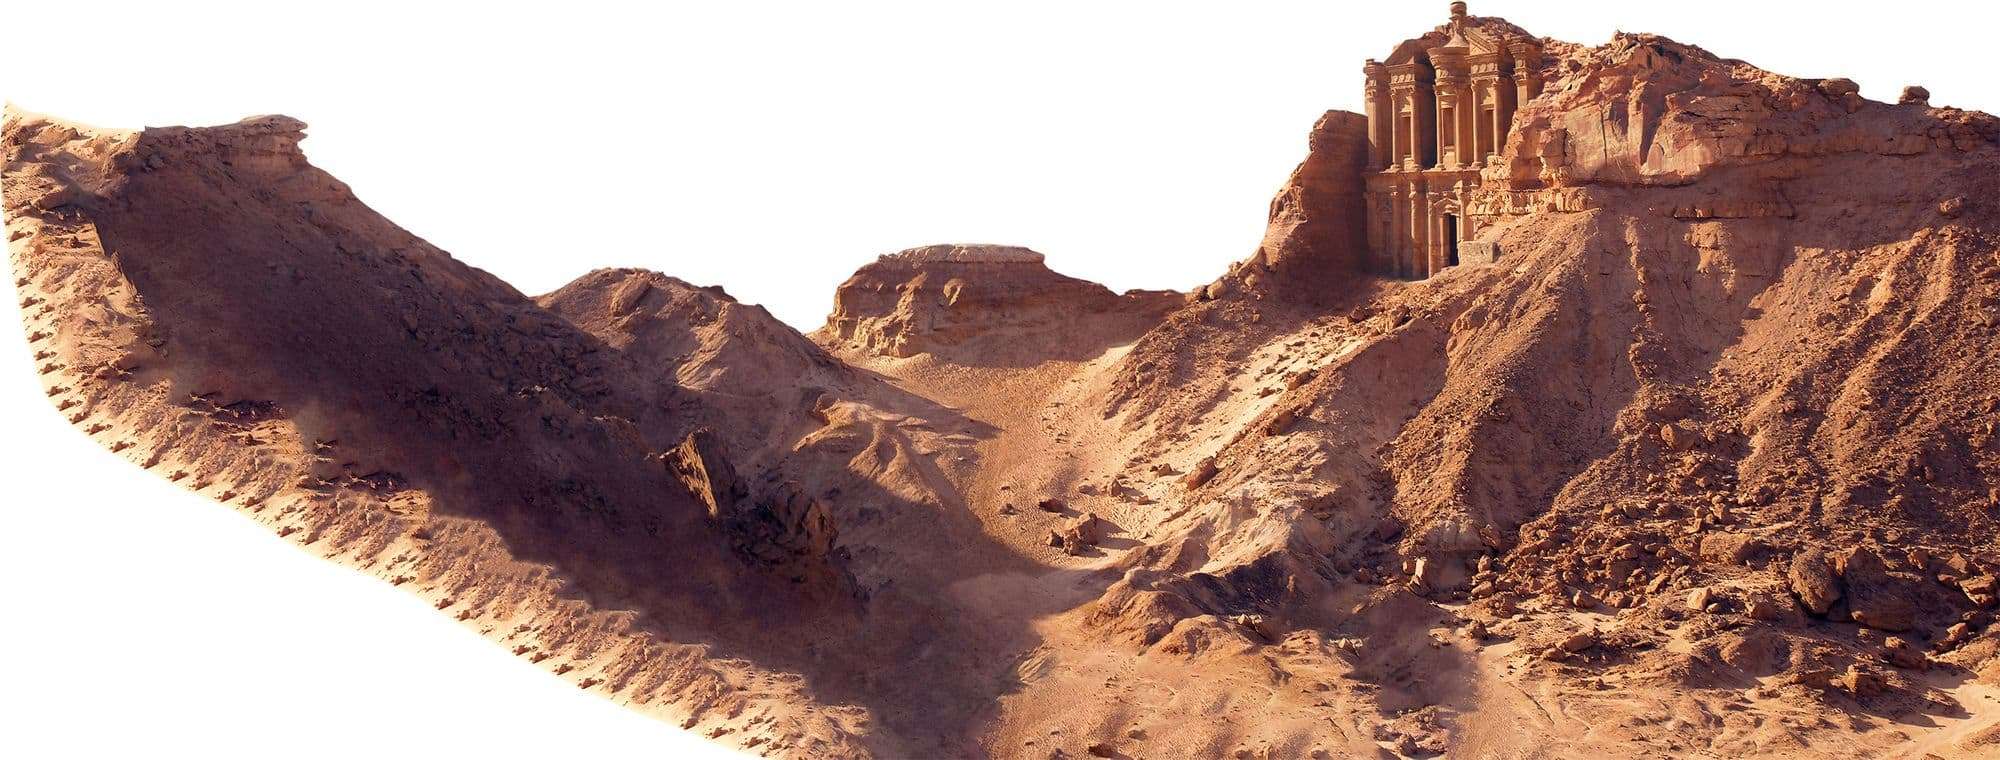
So I started with an image of a desert that would serve as a base for atmosphere. It would also be like an original plate captured during the shooting. I wanted to impose me a workflow as close as possible to that of a production. In any case the idea that I could make of it compared to the information that I had been able to get from pros. At the end, the image had to be photorealistic, and like a shot conceived for an adventure film, like Tomb Raider.
Collecting reference and images
I then moved on to the phase of source image research for my temple and for the rock cliffs. For this phase I go to Flickr or Mattepaint.com but I can use other sites until I find the right image. I wanted to use a temple in the Petra complex because I love the architecture of the place. It also integrated quite well with the rocky desert side of the original image.
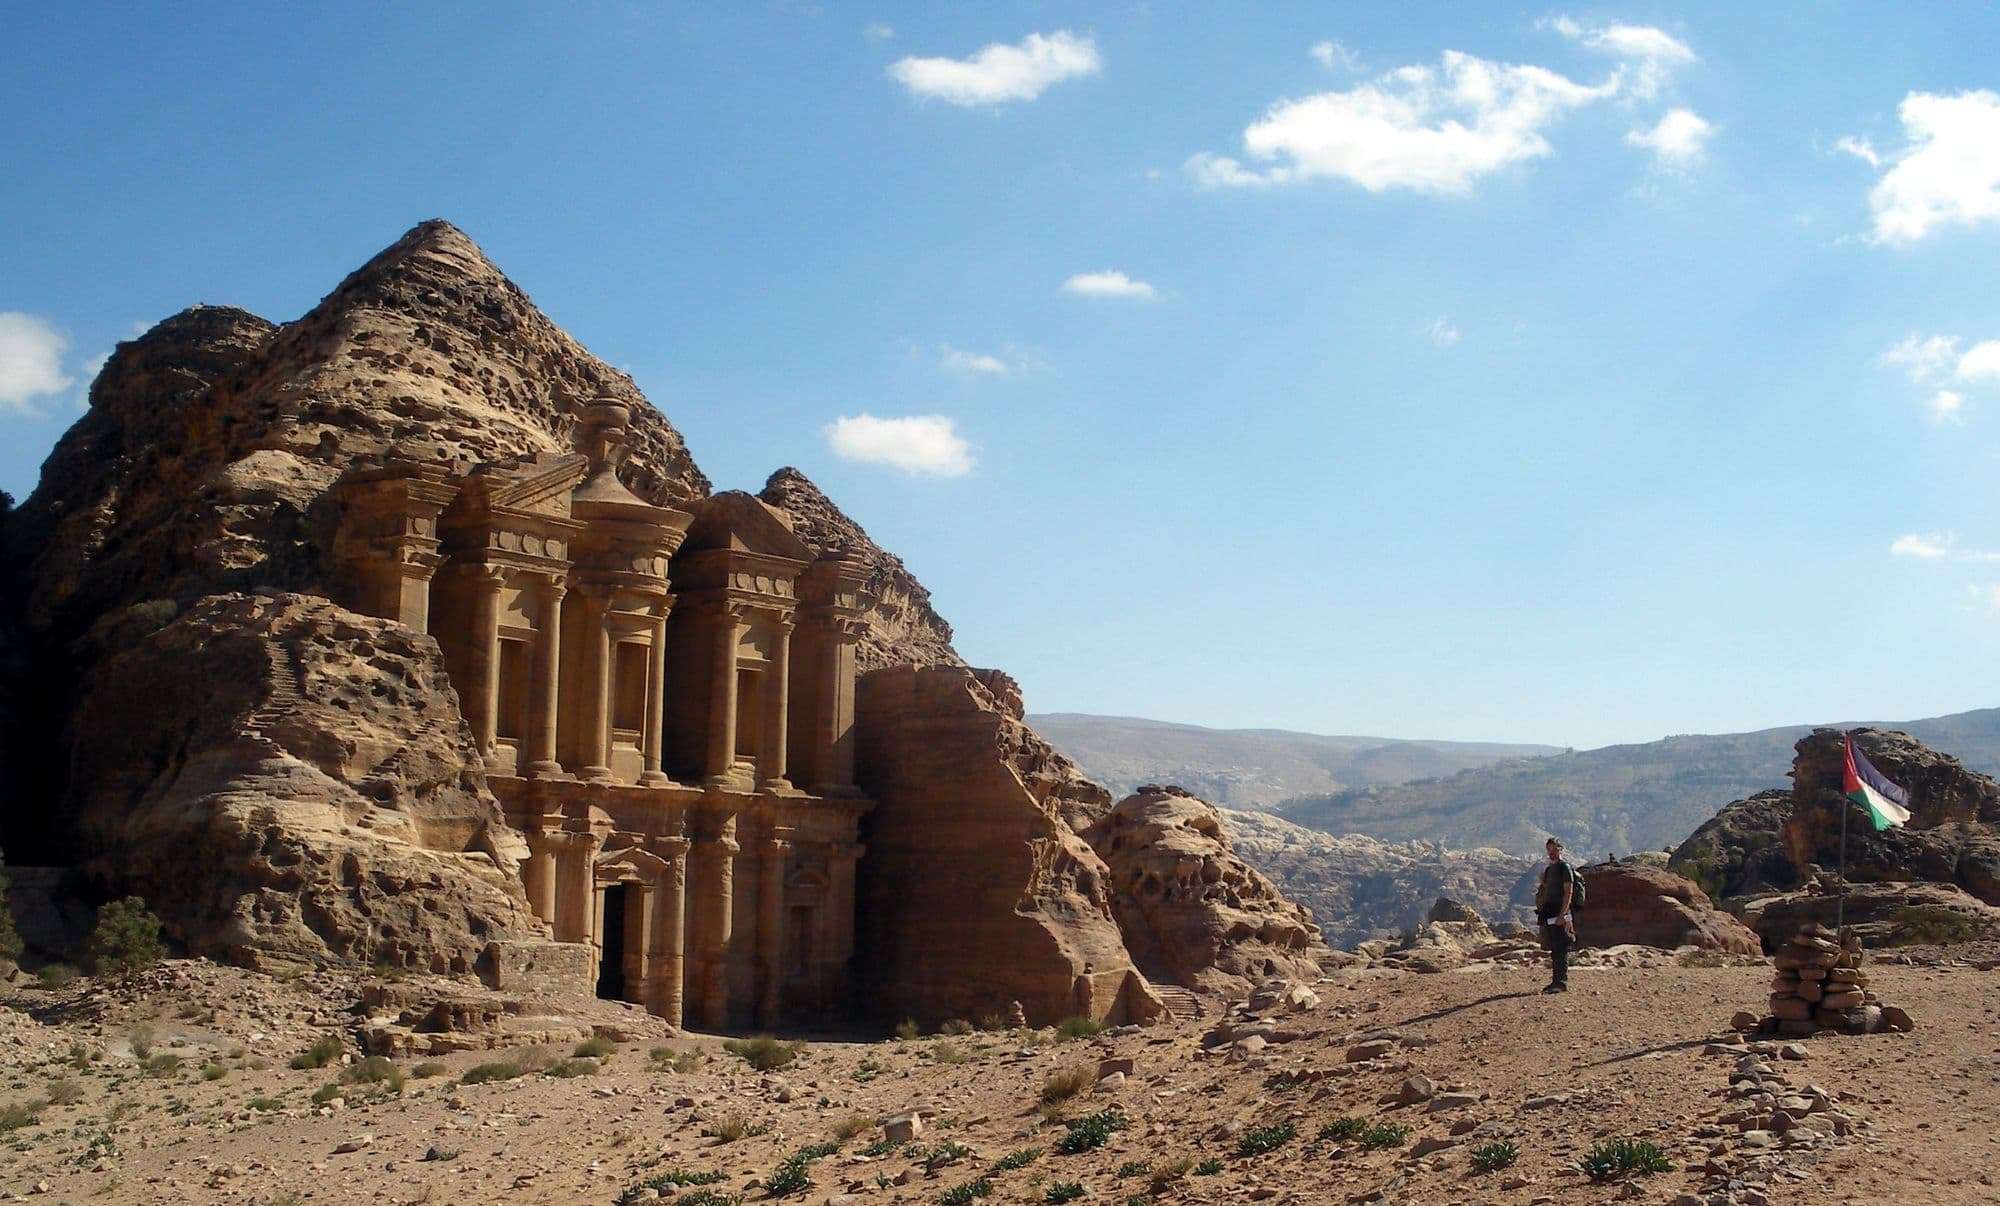
The goal of this step was to find an image that could match with the perspective and light to save time after. Once found, I diverted it to have a quick preview of the result without wasting too much time. In case it doesn't fit well with the point mentioned above.
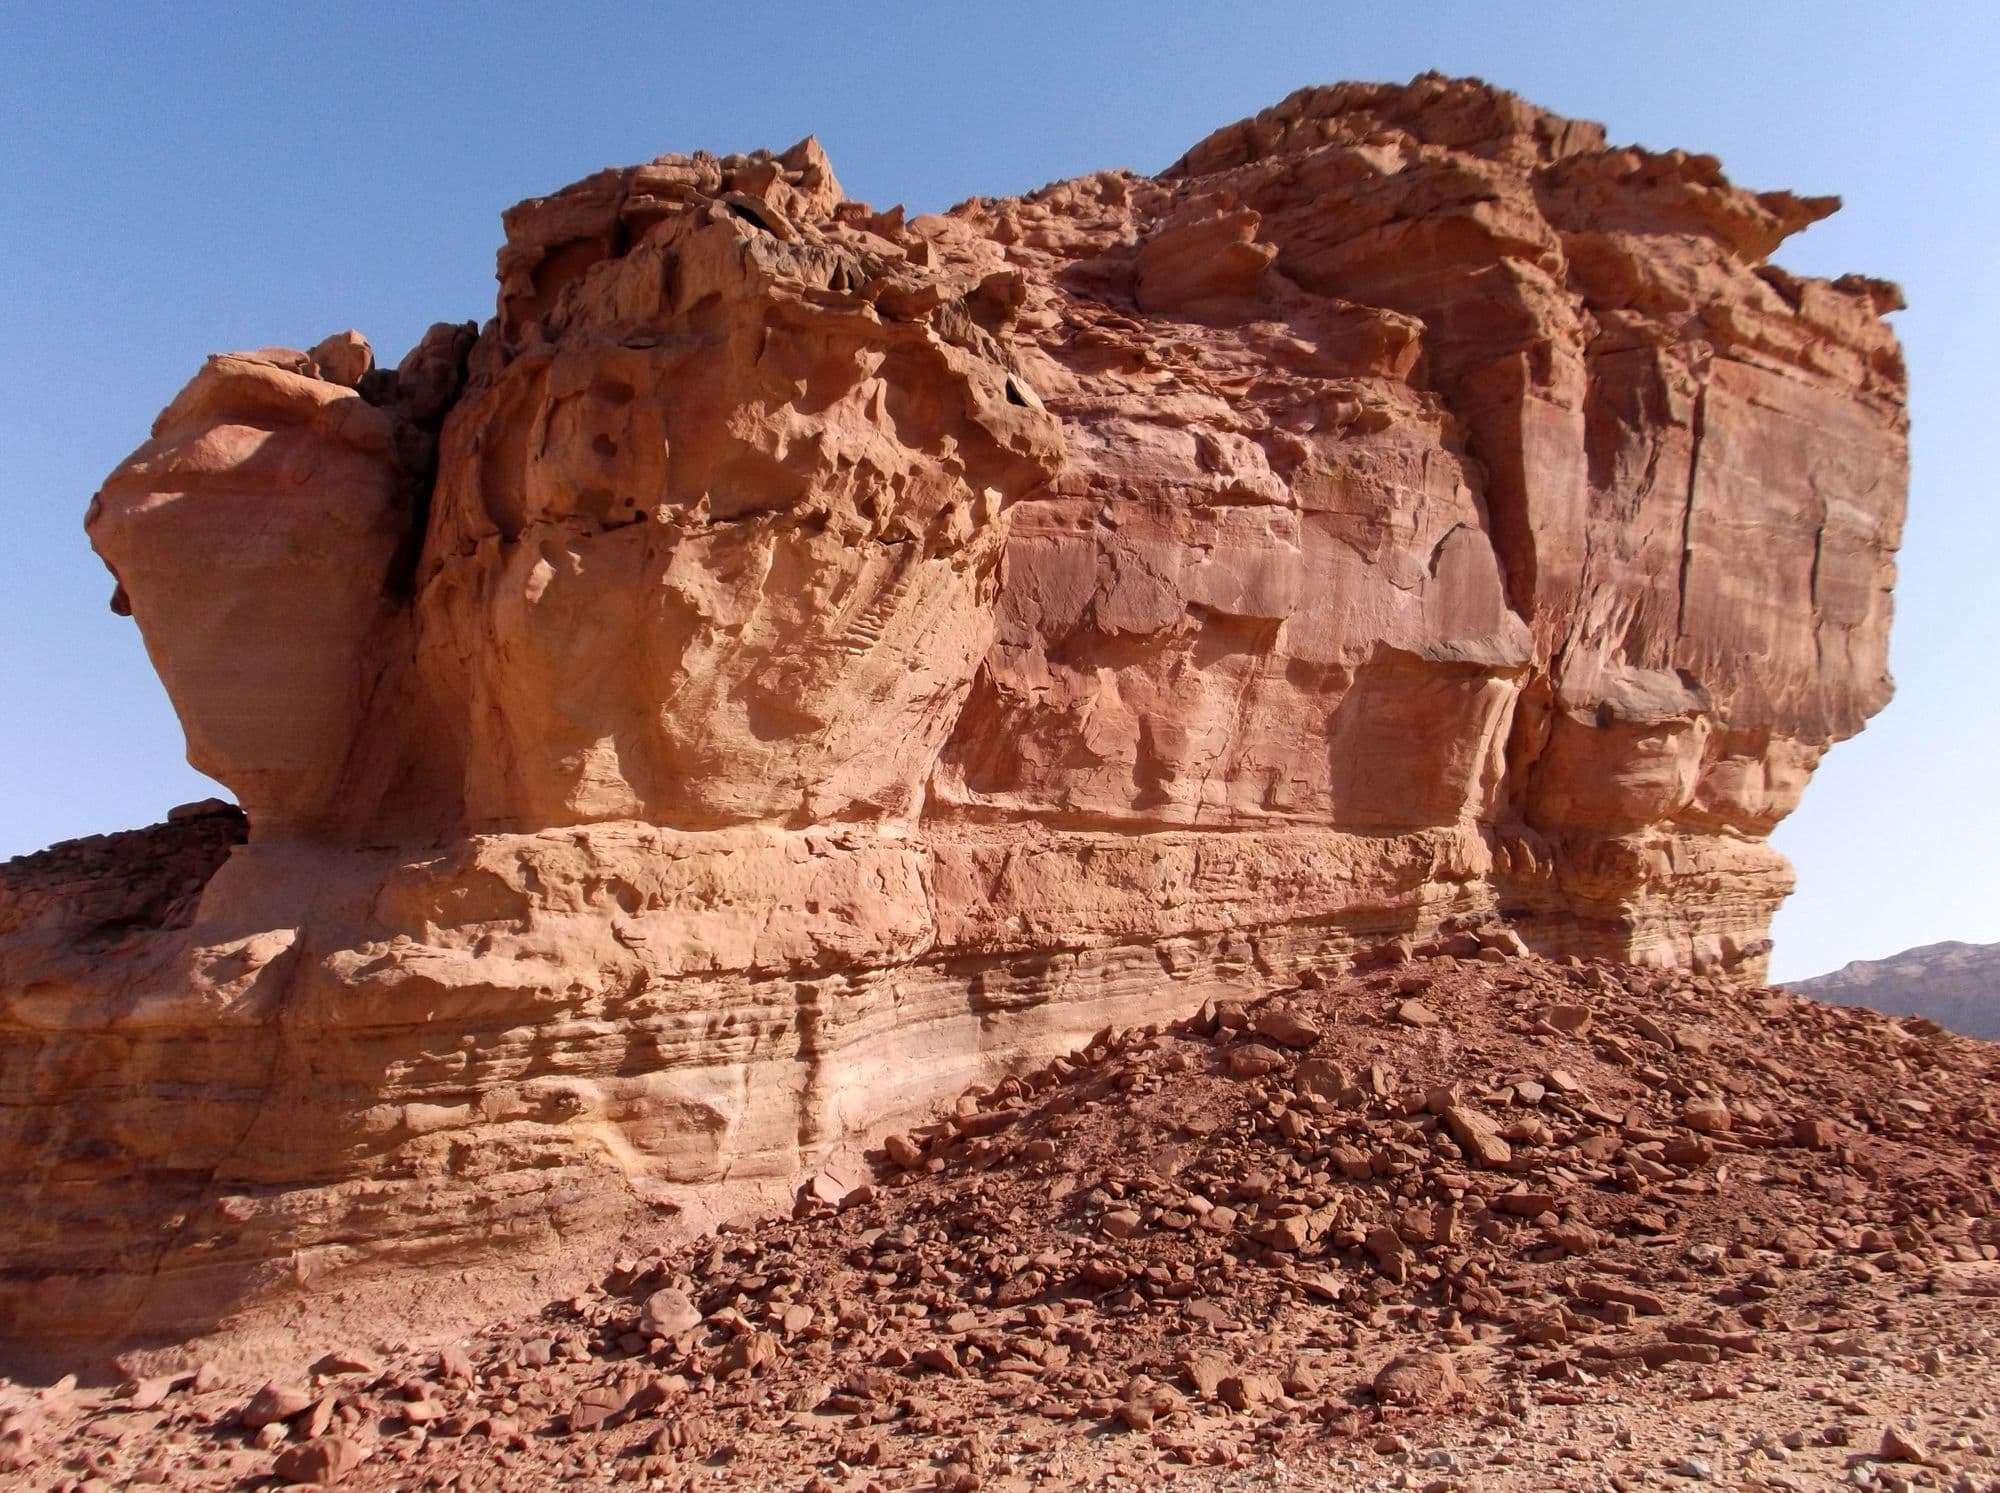
Once this quick setup I needed rocks to perfect the integration of the temple. I came to search in the different rock cliffs that I had collected and that corresponded geologically to the original image.
As for the temple, I quickly placed them to get a general idea of all the elements together. The image at this stage changed several times until I got the best temple/rock combination.
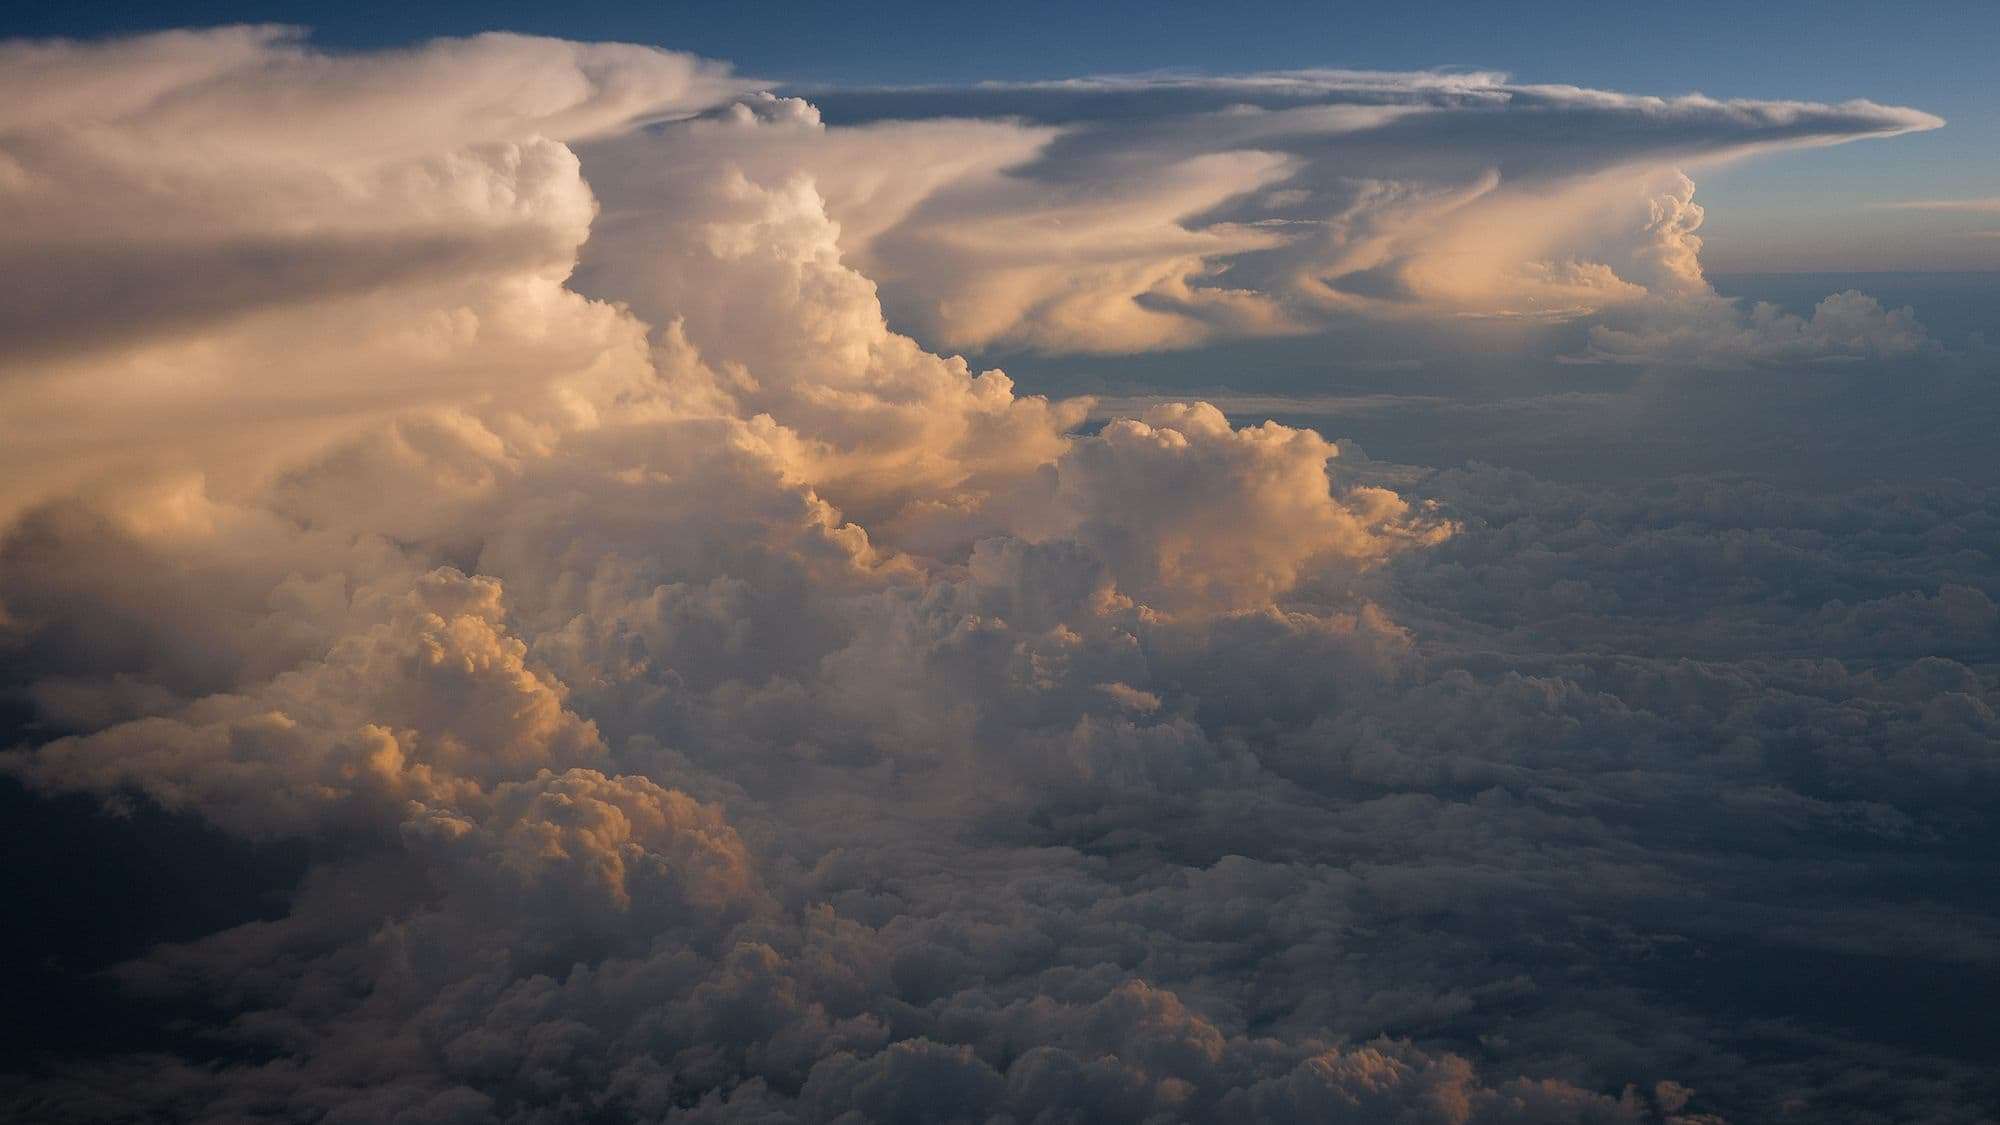
I also modified the original sky which was almost a single color flat. Instead I put a sky with more visible and marked clouds, guiding the eye in the direction of reading the image. I placed this layer as an overlay to mix the original sky and the new one. This way I kept the bright halo of the original image which was interesting.
Color grading your new elements
The skeleton of my image was now constituted. I still had to match the color of the elements together to give the impression of a single image. I used several techniques for this purpose.
First of all, I tried the match color tool which can be enough to integrate the element into the original image.
If this is not enough, or doesn't work at all, I go through the levels. I use two complementary techniques.
The first is, with the eyedropper of the level menu, take the dark, medium and light tones in the original image. To do this, you have to double click on each icon and pick the color in the original image. Then you have to select the dark tone sampler for example. Once done, you need to eyedrop a dark area of your added element. The dark tones of this last one are now tuned according to the tones of the original image. I repeated the operation for the middle and light tones.
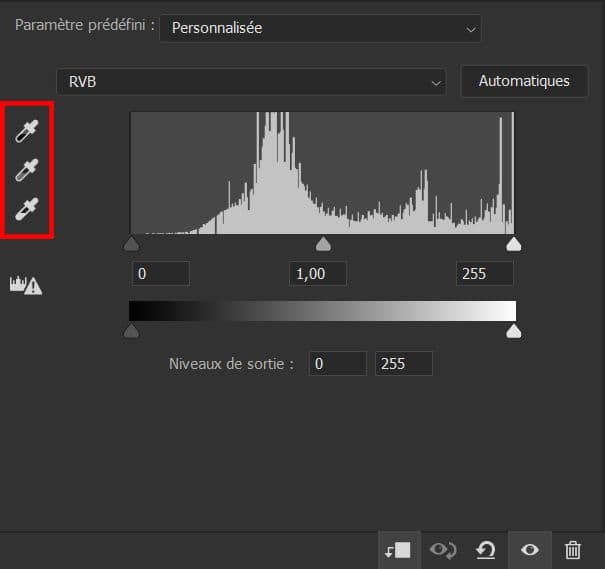
The second is to change yourself the different levels to make it perfect. I place myself successively on the red, green and blue layers to change the levels of the corresponding color.
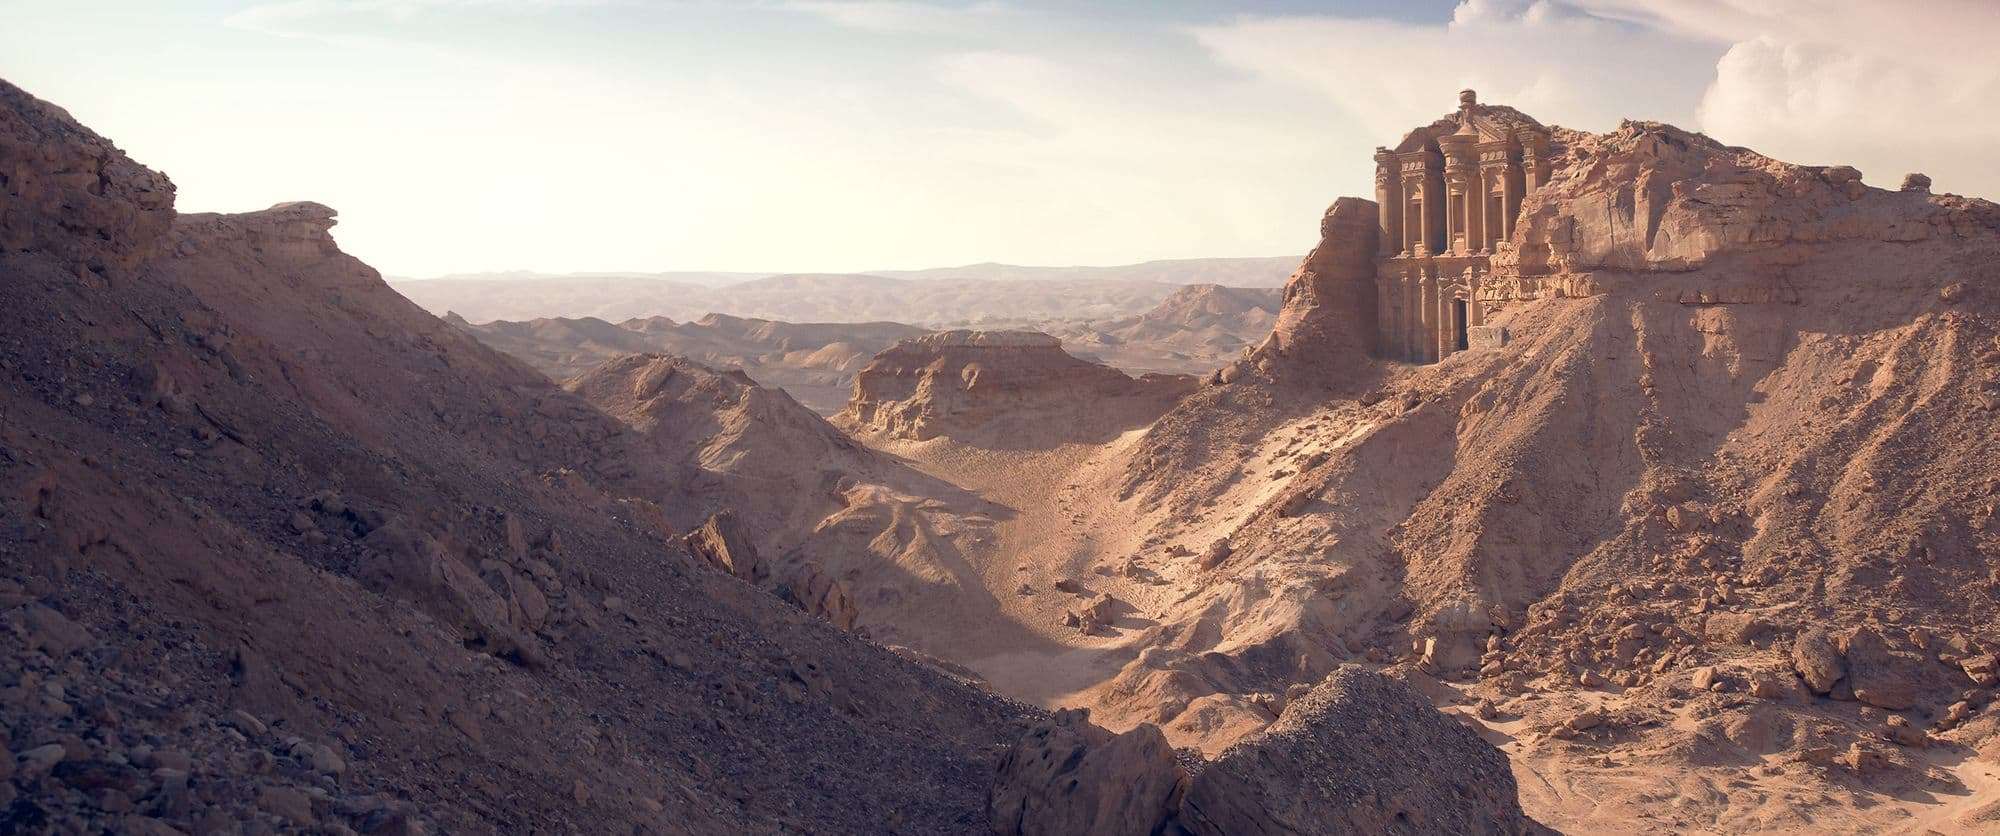
An extra change was necessary to desaturate the colors of the new cliffs. So I add a hue/saturation filter to play with the saturation. The goal is to always have control on each step and have a 100% non-destructive process. I always keep a layer with the unmodified element in case I need to restart from 0. A handling error can happen, like merging two layers.
I wanted more luminosity on the faces lit by the sun on my temple. For that I used a layer of this same temple with a color dodge mode. With a layer mask I painted the area which I wanted to illuminate.
The general atmosphere of the final image is rather warm. To homogenize this I added a layer with a "dew" hue that I put in color mode. Its opacity percentage was very low, around 5%. It had to give a warm hue without changing the original colors of each element.
Adjusting the details
Another point is the detail levels between added elements and the original image. To correct this I used a very slight gaussian blur. All the added images had a higher quality than the original image.
If they were of lower quality I used a sharpen filter. This way I can control the level of details I want depending on the depth of field, and also between elements.
I then check if my depth of field was correct. I use a method explained by Maxx Burman in his course Intro to Matte Painting. It simulates a Z Depth of your image.
To do this I added a level layer at the top of all layers. I decreased the high values, and drag them progressively to the left. The image will gradually become white from the background to the front. If all the layers are well calibrated they should disappear one after the other. If this is not the case then you have to go back to the level layer of the element concerned and change it. At this point all the elements are calibrated.
Final adjustments on the image
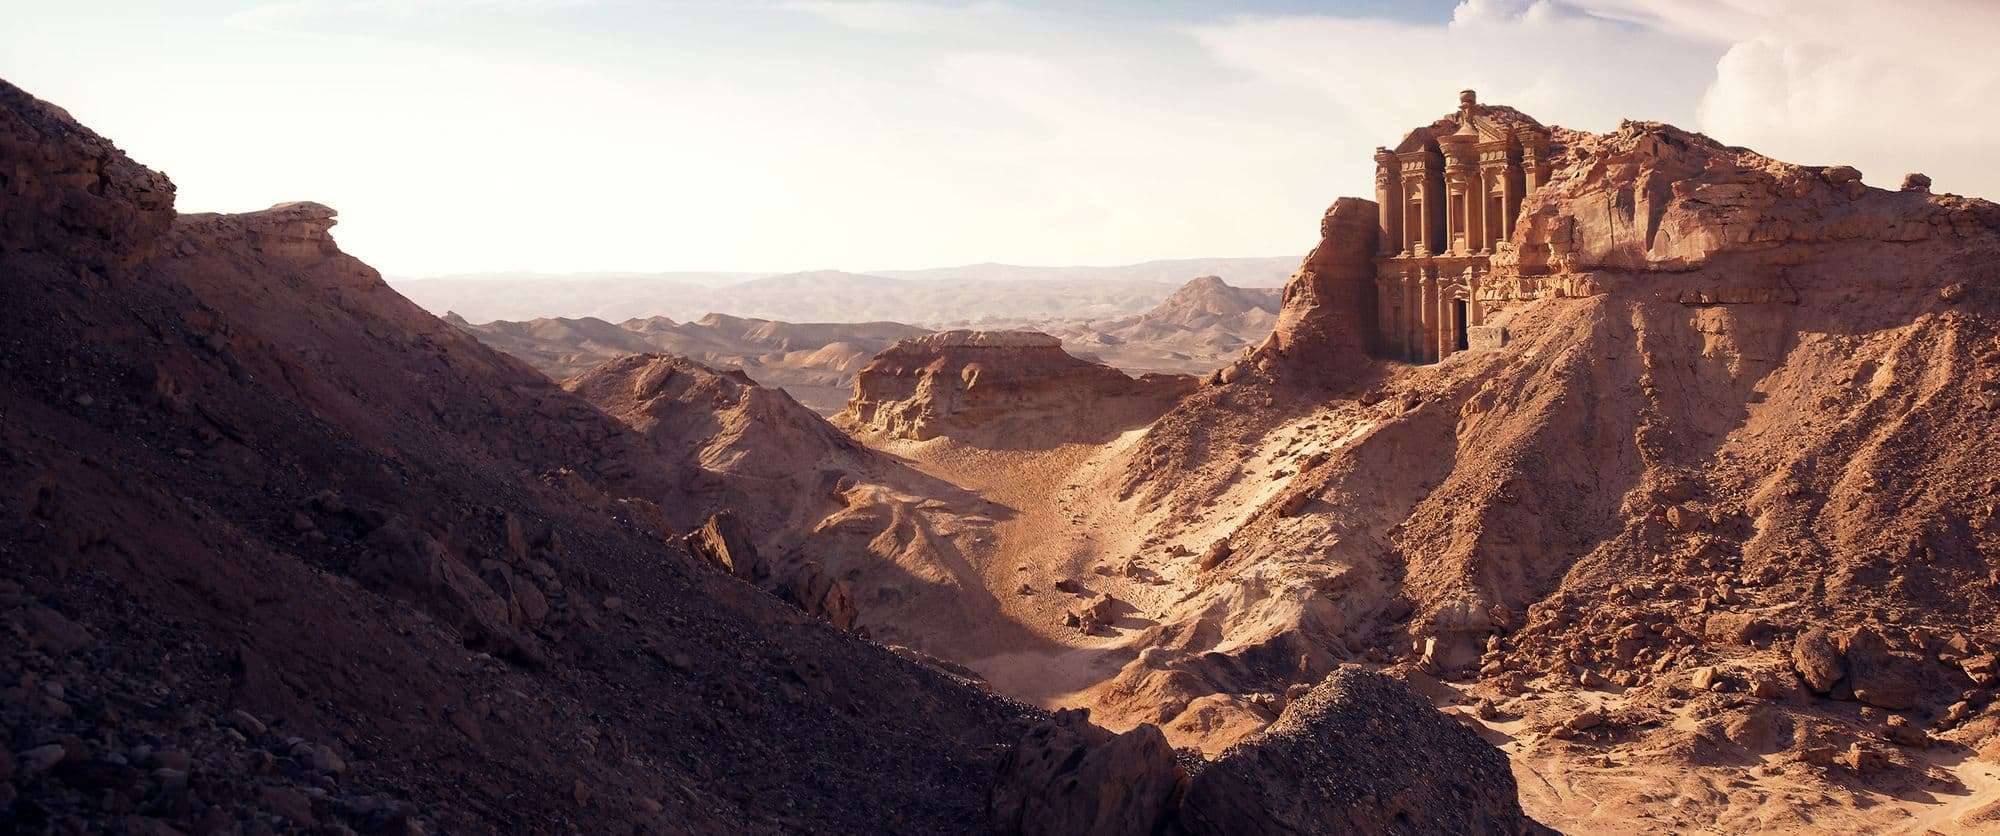
Once the image was photorealistic I made some aesthetic adjustments. I added a curve layer to add more contrast. I wanted to make the dark areas deeper. I also lightened the light areas very slightly so as not to overexposed them. I tried to give a more cinematic look to the whole image.
I also changed some mountain shape in the background to avoid some tangents and improve the composition.
Preparing the Camera Mapping
My shot was a still image, so I had to camera map the whole image to give an impression of volume and real camera movement.
To do this I started by cutting my image into different layers. Fortunately it was already very well cut in its composition. For the camera mapping I knew that I would only have my first ground and my second ground in volume. The other grounds, including the sky, would be simple cards, being quite distant.
Once the grounds cut out, I paint in the empty area of them. Like that when they moved over each other there would be no empty areas that would appear. For this I used Photoshop's Auto Fill tool which allows you to have large areas filled in quickly. On the 2020 Photoshop version it does an excellent job. Then I refined the details with the clone stamp tool and the healing brush tool. The goal was to remove the elements that were repeating too much.
I then exported all my grounds individually as png's and went to Maya to start creating the 3D volumes.
Creating 3D volume for projection
To begin I created a camera in which I projected my image. This way I will be able to create the 3D volumes over this background image. I also duplicated my viewer with a tear off copy in Panels. This way I could place my final camera on my secondary screen, and my Pers camera in my main screen. Like that I can add and modify geometries while seeing the final result on my secondary screen.
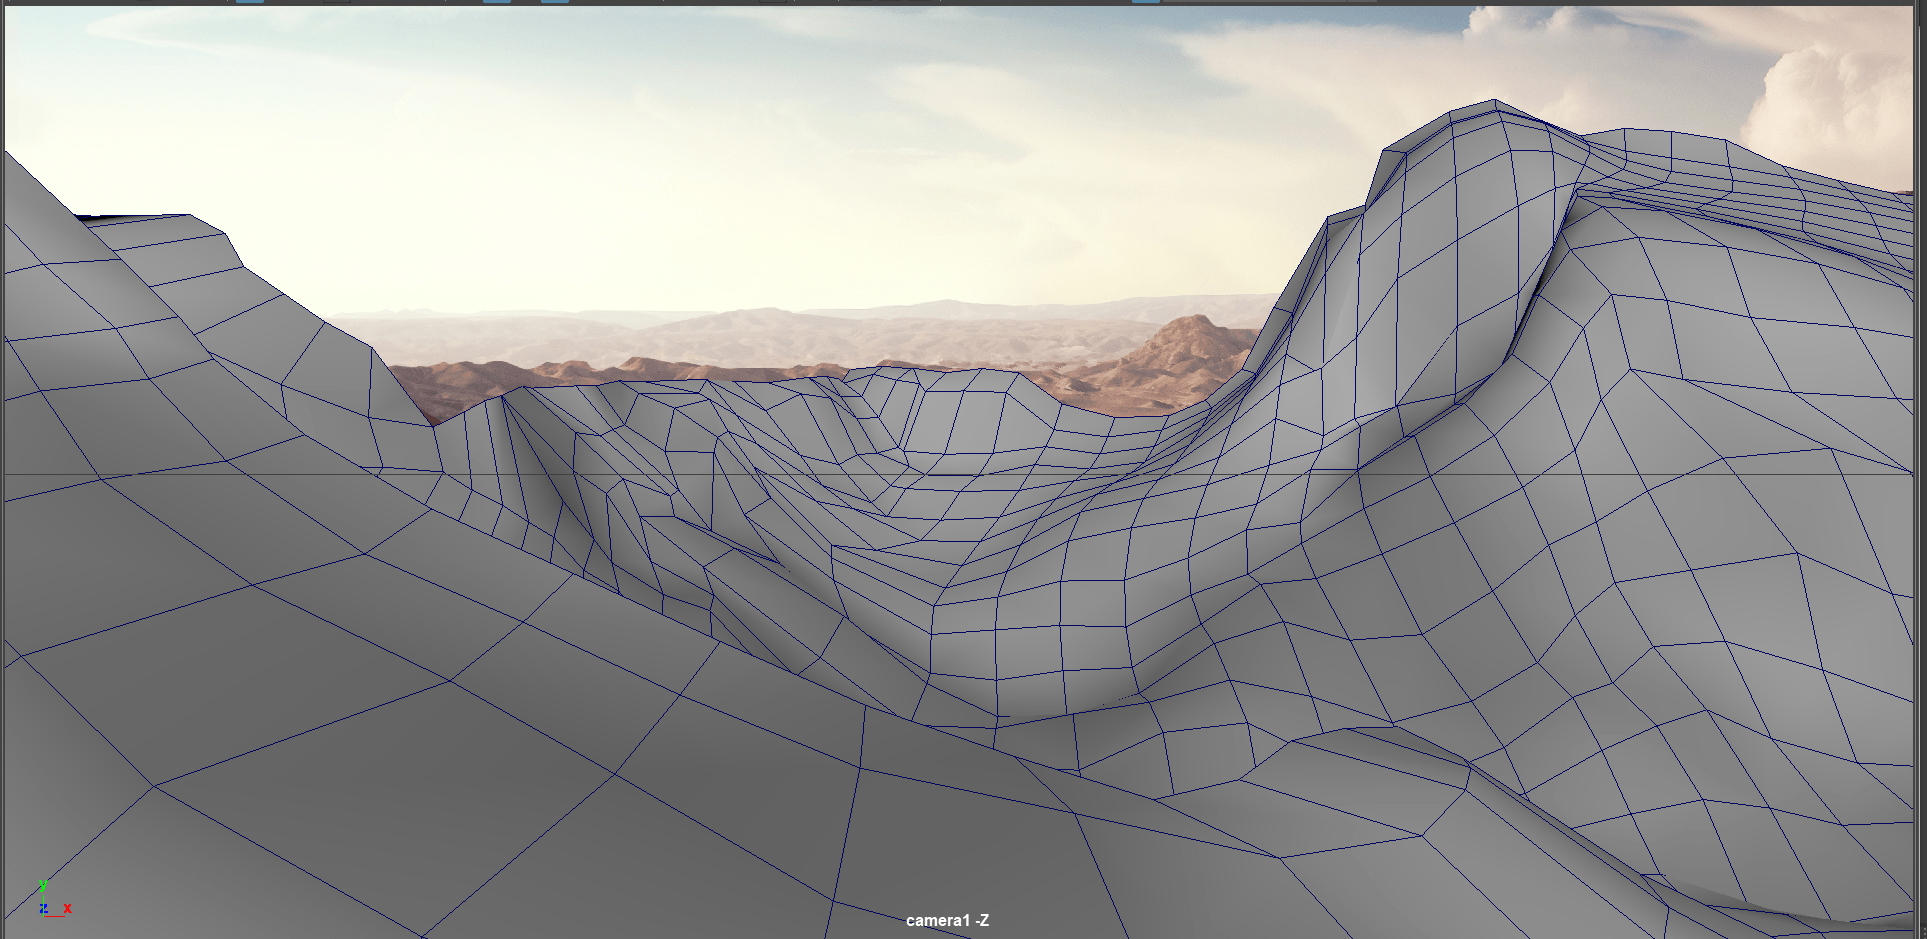
The goal at that time was to create simple volumes of the mountains, while keeping enough relief. If the relief of the 3D geometry is not enough, the volume effect with the camera mapping will not be either.
I started with boxes that I used for blocking. Which I then subdivided more and more to fit the different reliefs. You have to mentally imagine the volume that the terrain really has on the image. When you look at your 3D geometries from above, it must be in adequation with what you see in the image. The closer you are to a realistic layout, the more realistic your camera mapping will be afterwards.
There are a few little pitfalls to avoid that I have discovered by dint of doing them :
- Two parts of your 3D geometry should not overlap when used as a basis for projecting the same image. Otherwise you will end up with a duplication of this image, or a sliding of it with a crenellated effect,
- Remove hidden back sides from your geometries, especially at the top of the edges. Otherwise your edges round and your projected image will be duplicate there,
- Do not hesitate to make several 3D geometries rather than one large which could be complicate to manage. Even if you have to redraw your original grounds into subgrounds to fit your new 3D geometry choices.
Once the projection geometries made, I switched to Nuke for the projection. There were still several back and forth between Nuke and Maya to adjust the 3D geometries to be perfect. Minor adjustments of a few vertices but that changed a lot for quality during the movement.
Projecting with Nuke
First of all I imported my 5 grounds and my sky under Nuke. Then I added a Reformat node to make sure they had the particular format of my image (5760x2408).
I also added a Premult node to apply the alpha layer of my png. Like that my grounds were like they were on photoshop.
At this moment the 2.5D projection step of the camera mapping started.
I added some ReadGeo nodes for my two volumes (Foreground and Midground) and some Cards for the others. It's important to add UVProject nodes afterwards. Either your grounds will be project like Nuke chose it, not like you chose yourself.
We had also to link all the UVProject nodes to a Scene node and also to a Camera node. The Camera node is the camera used to project them.
After the Scene node we had to add a ScanlineRender node which is a kind of mini renderer. On this one I connected a Camera node, which this time corresponds to the camera that will move in our scene.
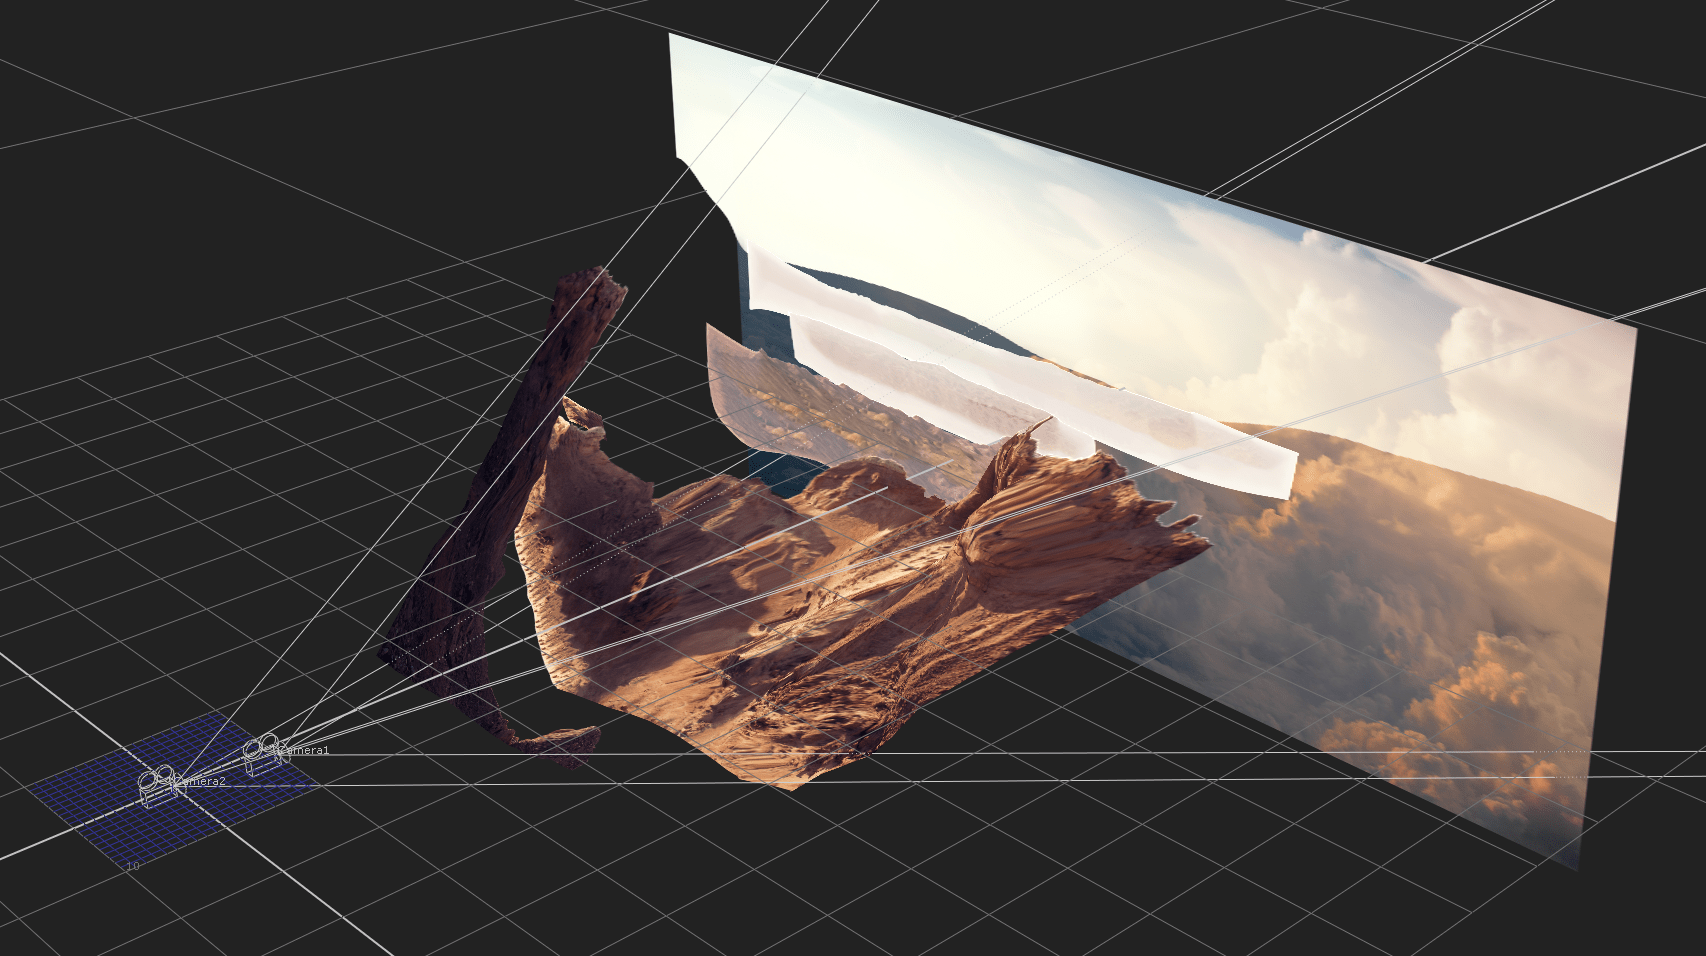
Once all this was in place I was able to place my different geo and card to give the depth of field I wanted. I also had to add some Transform (before ReadGeo and Cards) and TransformGeo (after the ReadGeo) nodes to adjust the images and volumes. Some elements of the projection weren't exactly where they were supposed to be on the final shot.
To bring more realism to the sequence, and avoid an artificial look, I added a CameraShake node. Parameters of this one were Amplitude: 20; Frequency: 0.03. This allows to have a very slight movement of the camera and thus make it more "real".
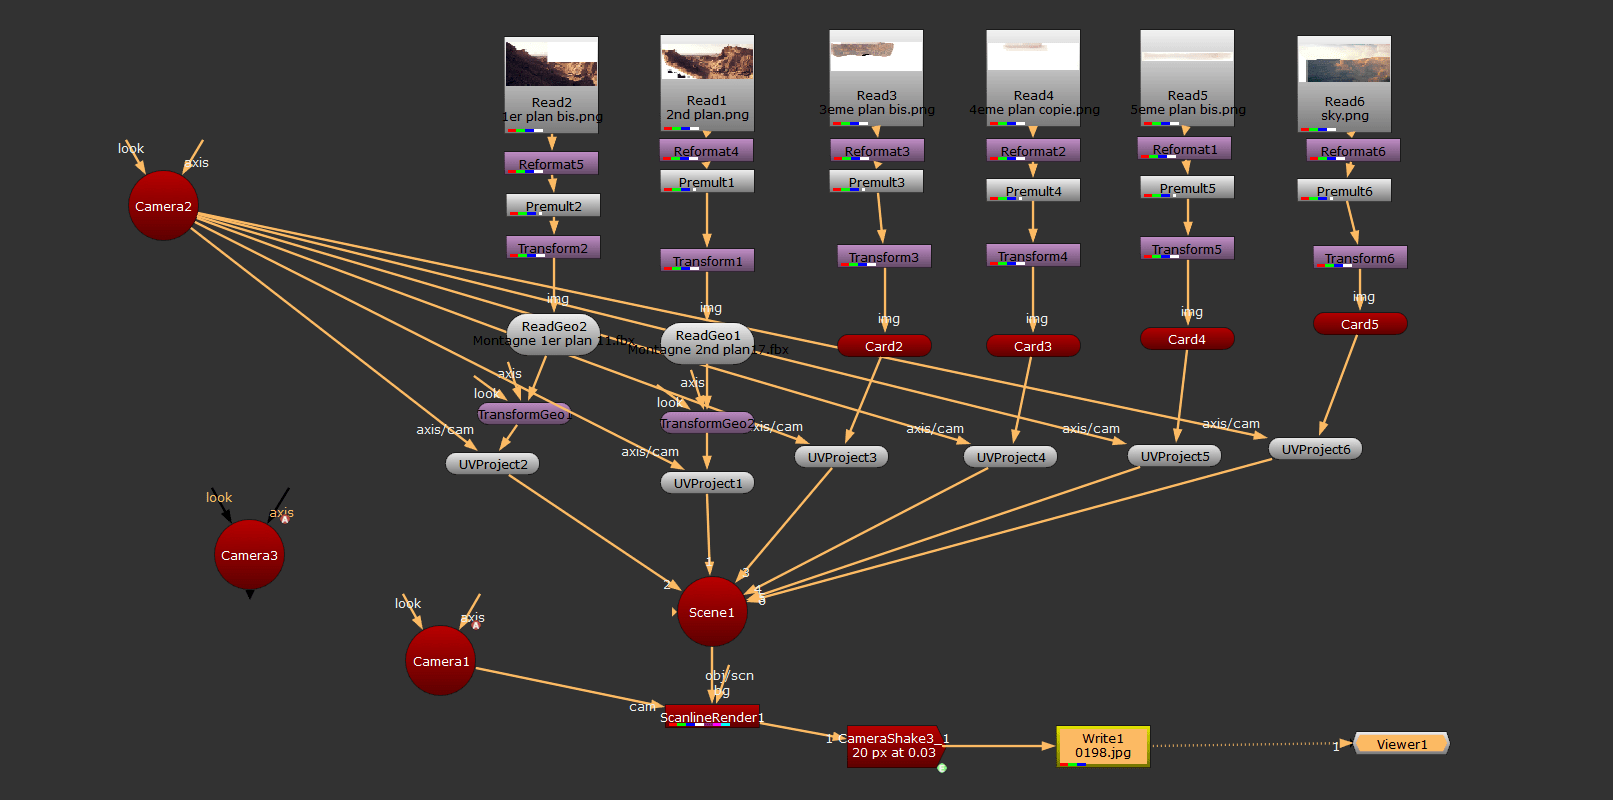
To conclude I exported all the frames using a Write node. I output the frames in exr format to keep the greatest quality. I then imported all my frames in sequence into Adobe Premiere, which allowed me to export my shot in mp4 format.
That’s it! I hope I helped you getting the answers you wanted, if you have any question don’t hesitate to reach me out on Linkedin or Artstation!
Thank you to my Artline classmates Naïm Bonnot and Thibaud Delaperche for their feedback on my image. Thanks to Jacques Leyreloup for his feedback on the camera mapping and the tip of the camera shake !