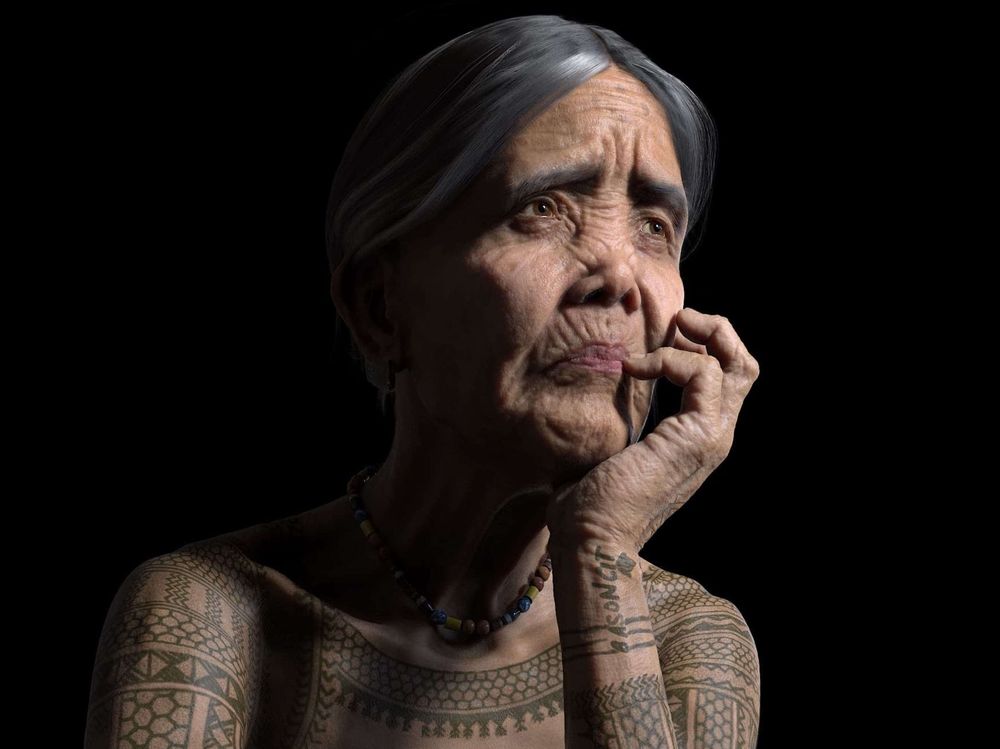
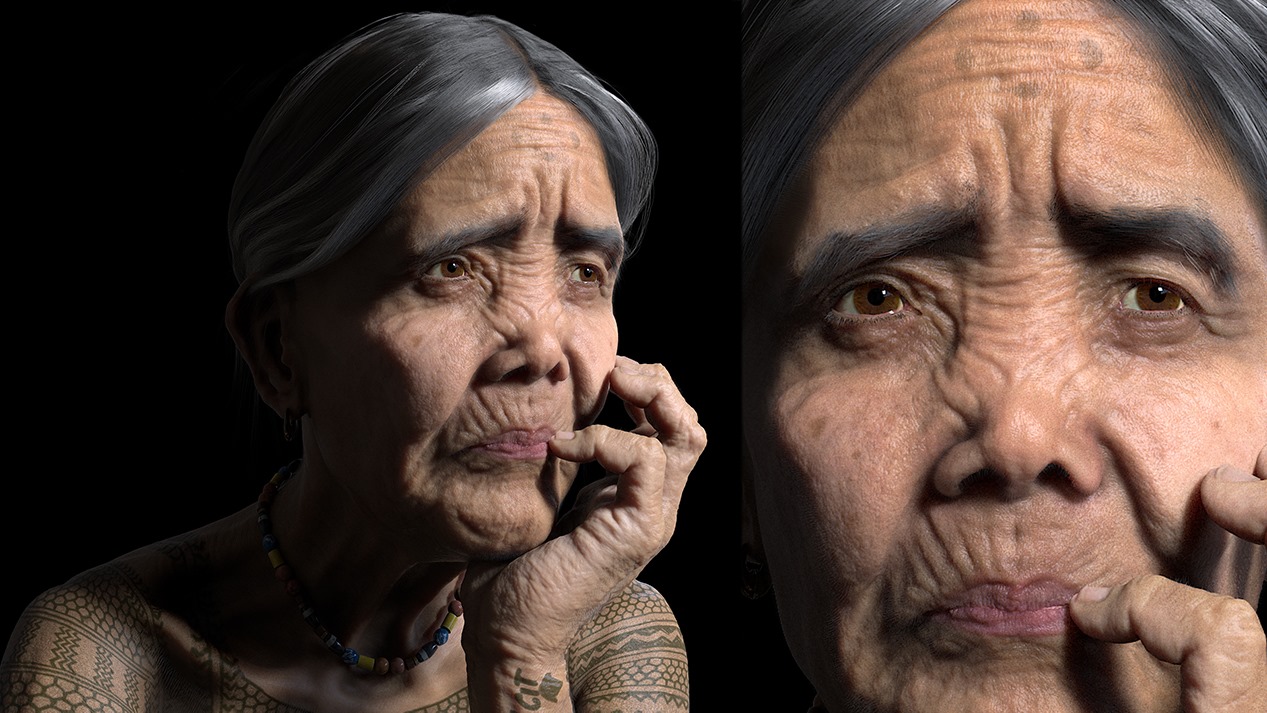
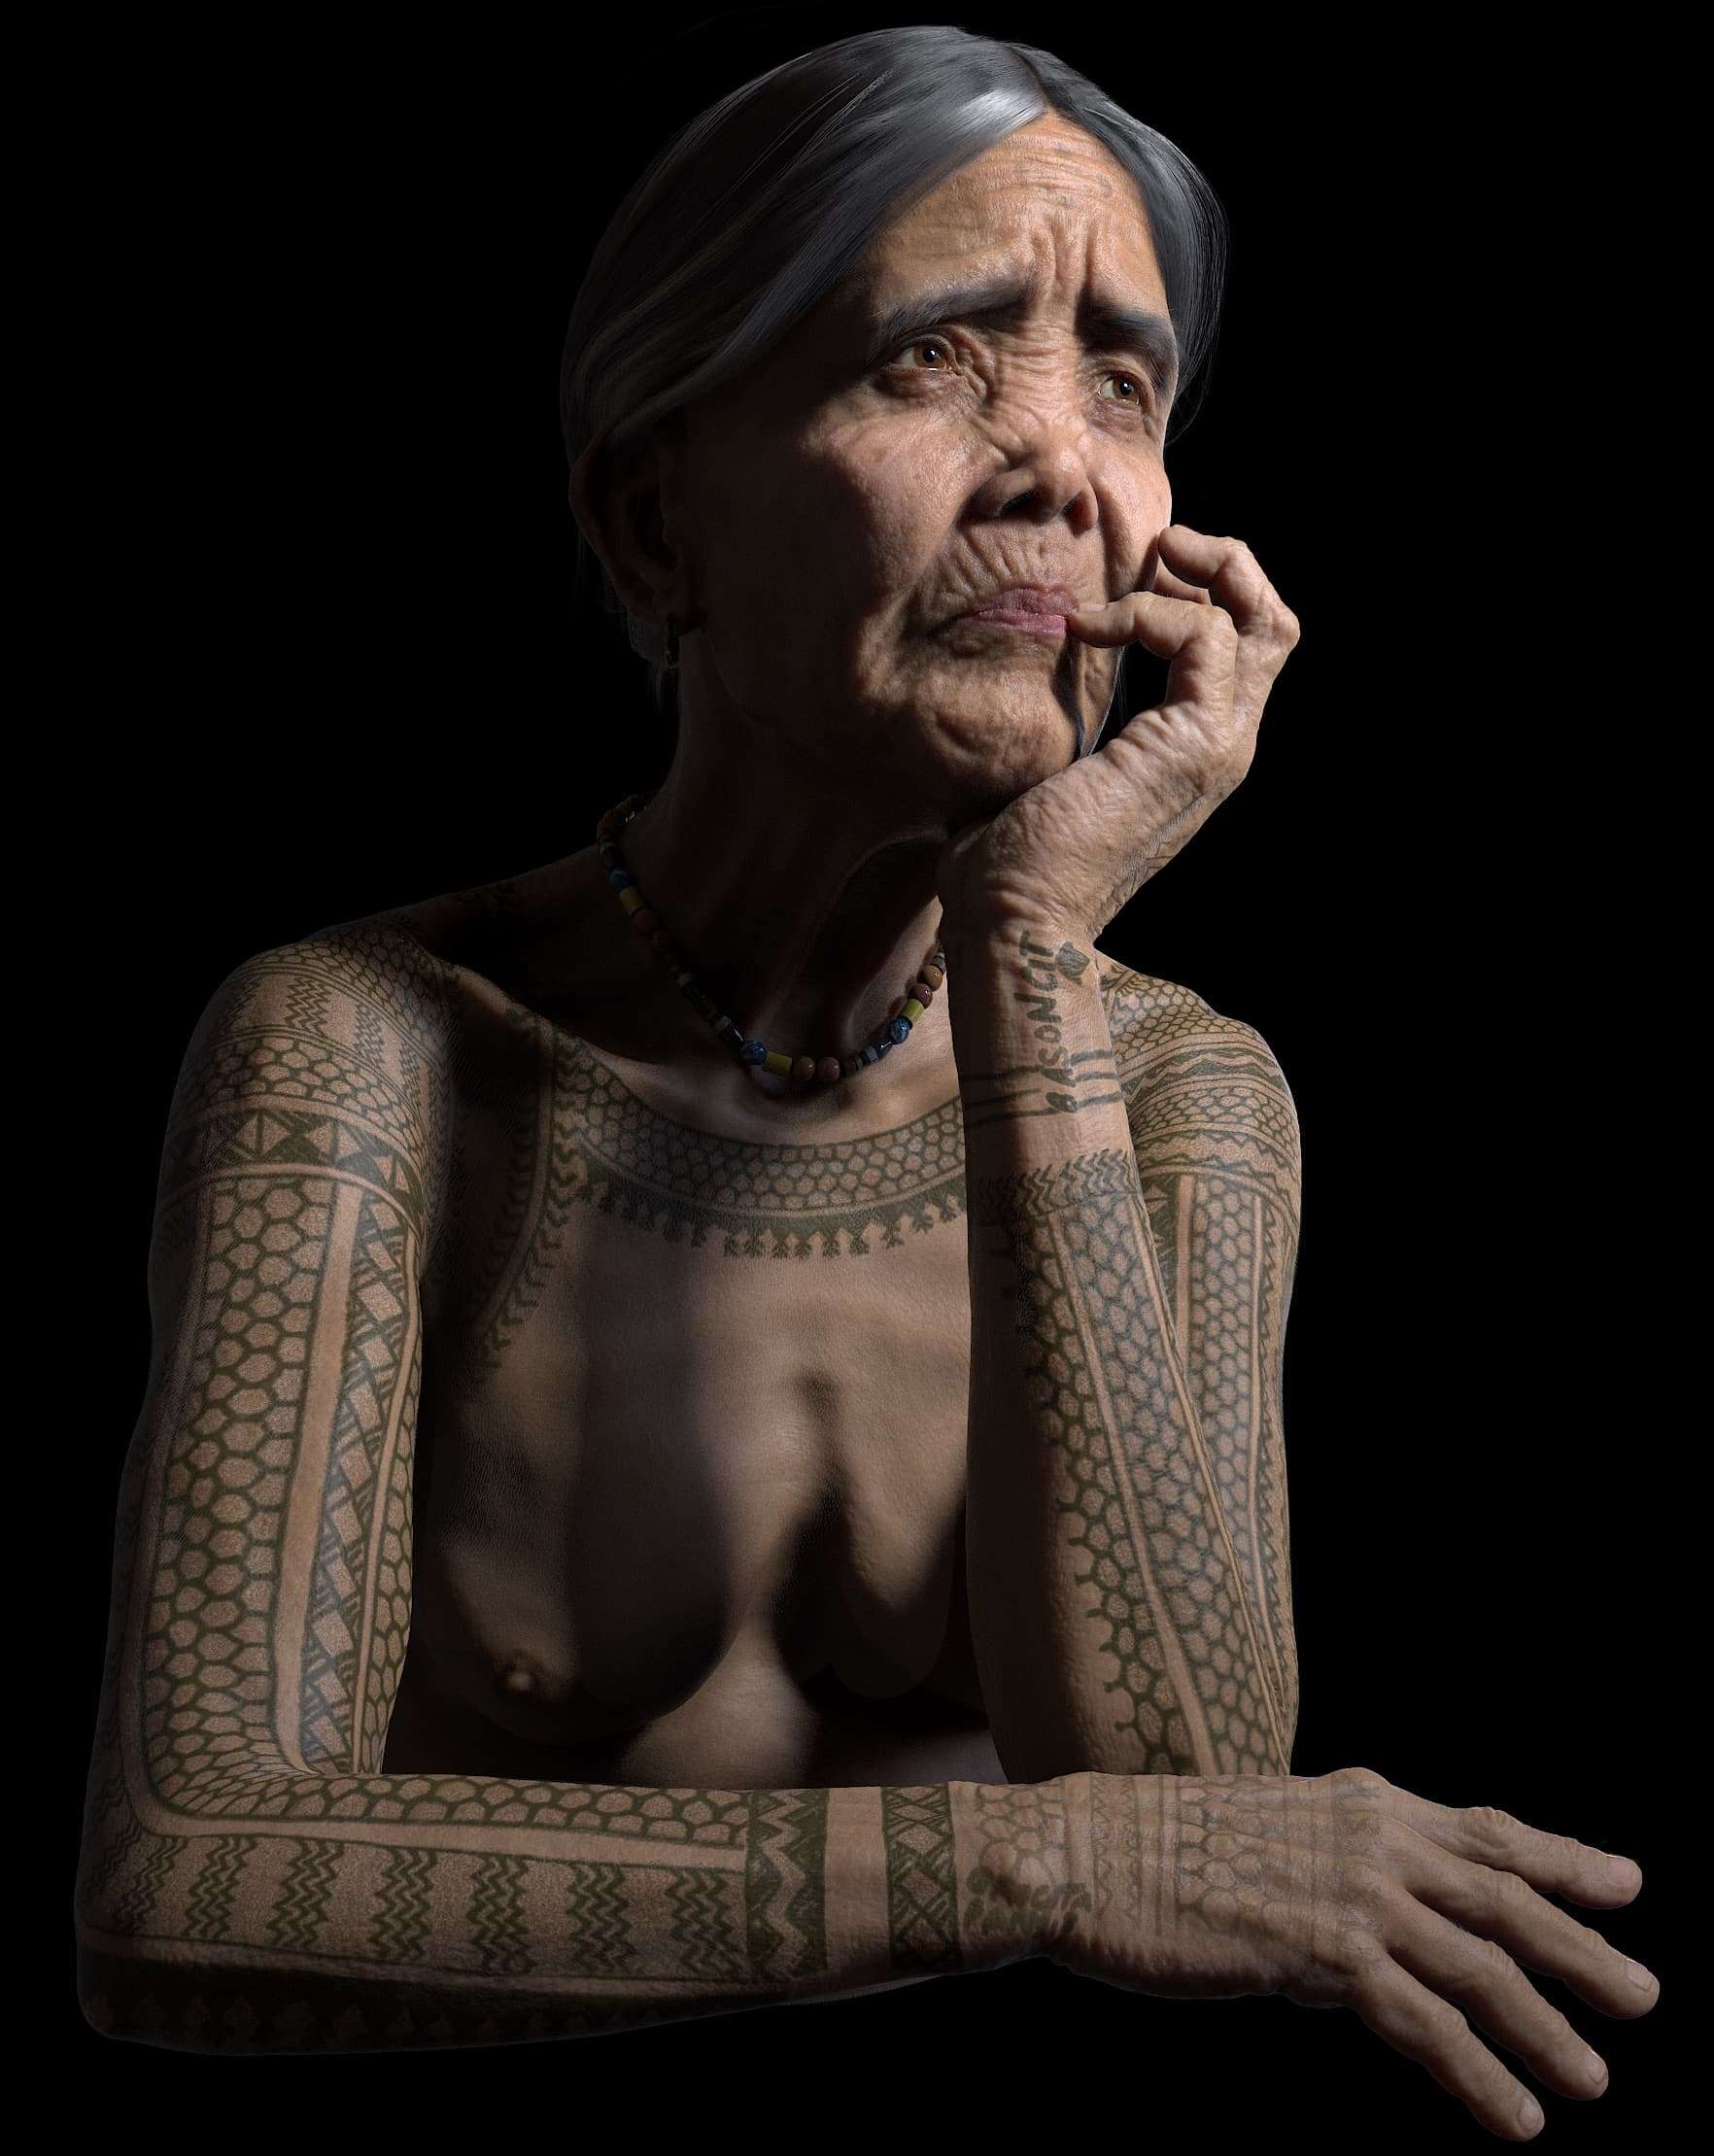
Halime Maloof walks us through the workflow she used for creating the Portrait of Whang Od. The article outlines her production pipeline for making high resolution characters and includes solutions to some issues that may appear in the process. Definitely worth a read for those trying to improve their own photorealistic characters.
References and Goals
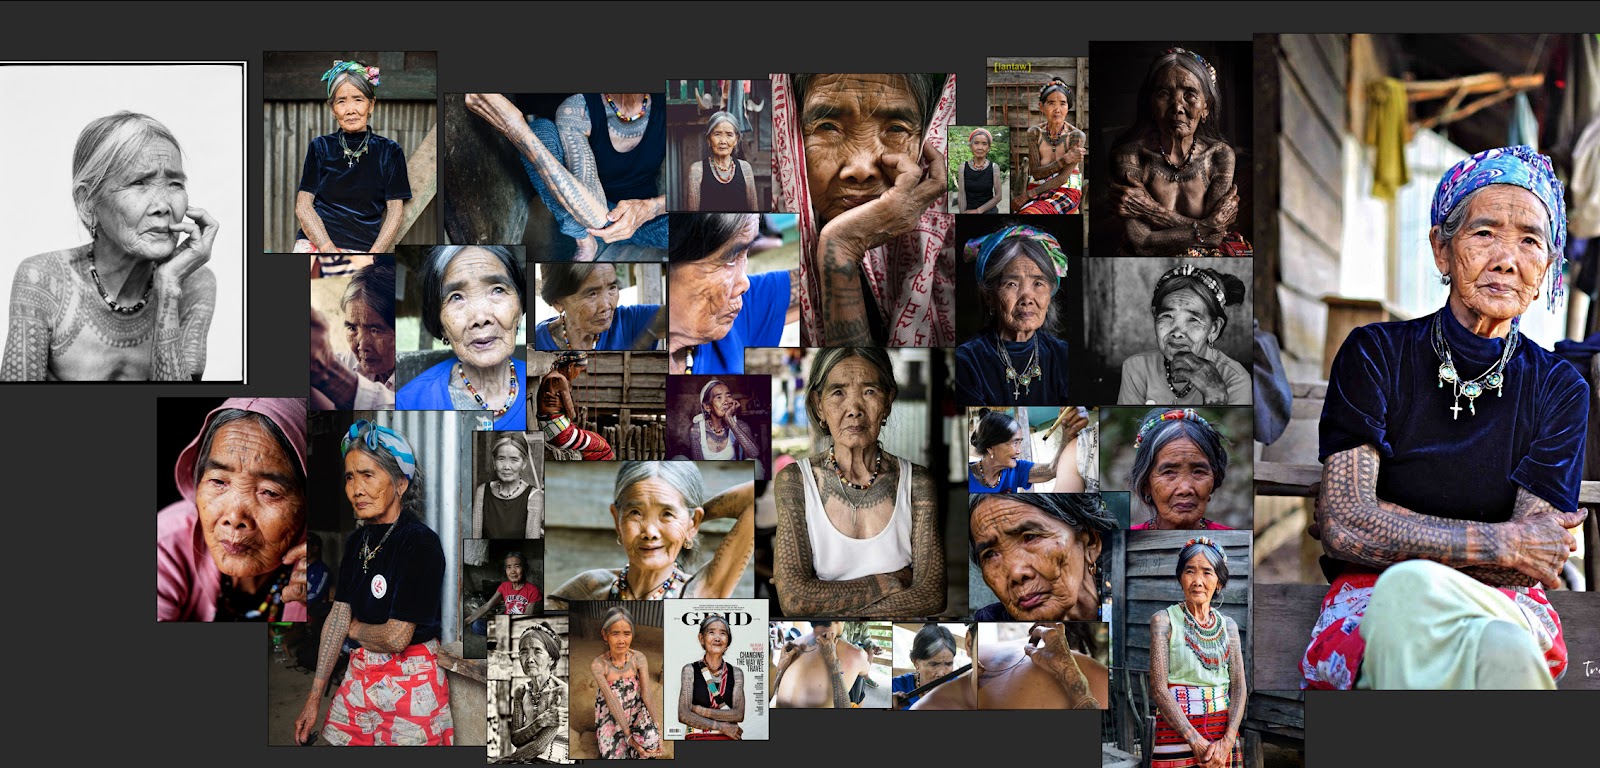
The first step as everyone probably has heard is always trying to get the best references out there. It's also important to have one photograph or stage that is the main reference to what we want to achieve.
One thing that usually makes me very anxious when starting a new project is where to get good references, what type of photographs are good, etc.
To be honest, I used to spend hours looking for the perfect reference picture, the perfect front eye level no shadows face photo, and the perfect profile (not ¾ or slightly angled to one side)… and well, those are nearly impossible to get. So, I learnt to work with what is out there.
There are no bad references (ok maybe a few), almost any photograph you can find from your reference is good. Every angle will help for different details, different light sources will reveal surface details and volumes.
These are just a few of the ones I used only for texturing and lookdev:
But I also had a board on Pinterest for her, a folder with images in my drive and another PureRef sheet too.
So references, always try to get the most you can.
Anatomy Study
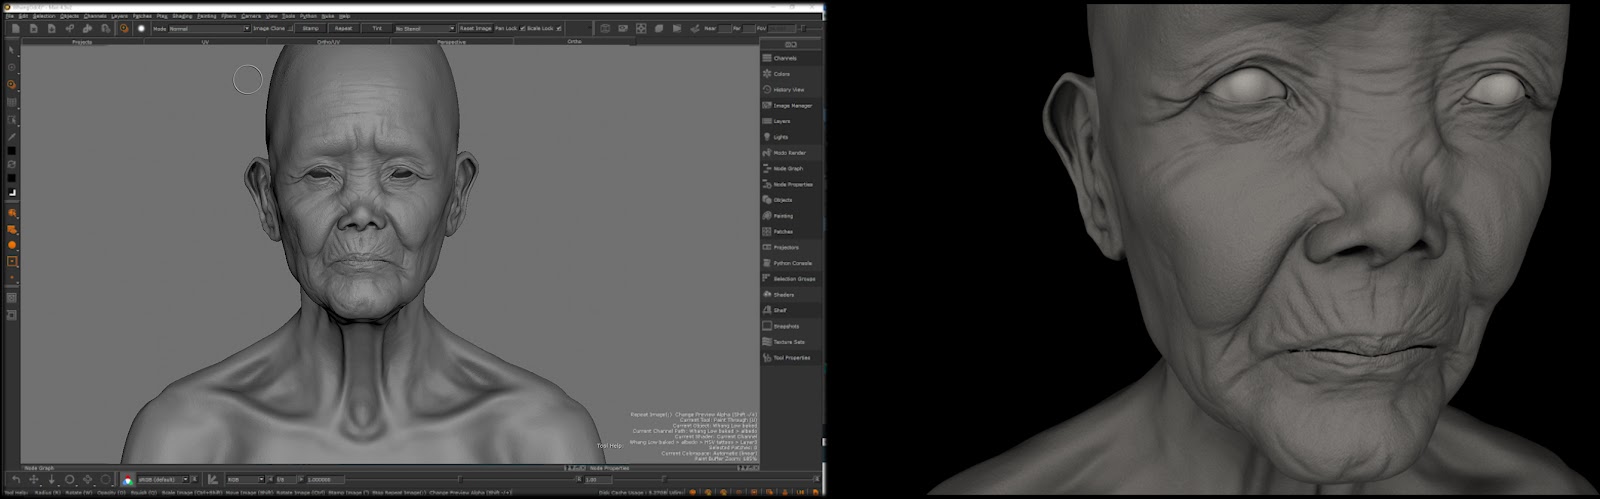
Since I wanted to work on this piece from scratch, I decided it would be a great opportunity to start the sculpture from a sphere and work on it from the inside out.
By following Scott Eaton’s anatomy guidelines, I worked on trying to make what I thought would be her skull structure in Zbrush . From there added main facial muscles roughly to fill the head, sculpted the main shapes and started giving it form.
It was the first time I sculpted a person from asian ethnicity, so it took a lot of new anatomy understanding, mainly for the nose and the eyes. It is important to understand the eyelid anatomy because it tends to change a lot from other ethnicities. Also, the face tends to be flatter, including the nose bridge and eyelids, this kind of observations helped me get the realness of the model be much more accurate.
There are some great resources from Anatomy for Sculptors that portray this greatly:
https://www.artstation.com/artwork/2x4raK
https://www.artstation.com/artwork/4bVJY4
Analyzing head scans was also a enriching process, it helped me a lot with the face angles and the folds in it. Using older people scans was also a great way to realize how the skin ages.
In the end, facial anatomy and likeness, are basically big observation exercises.
Retopology and UDIMS
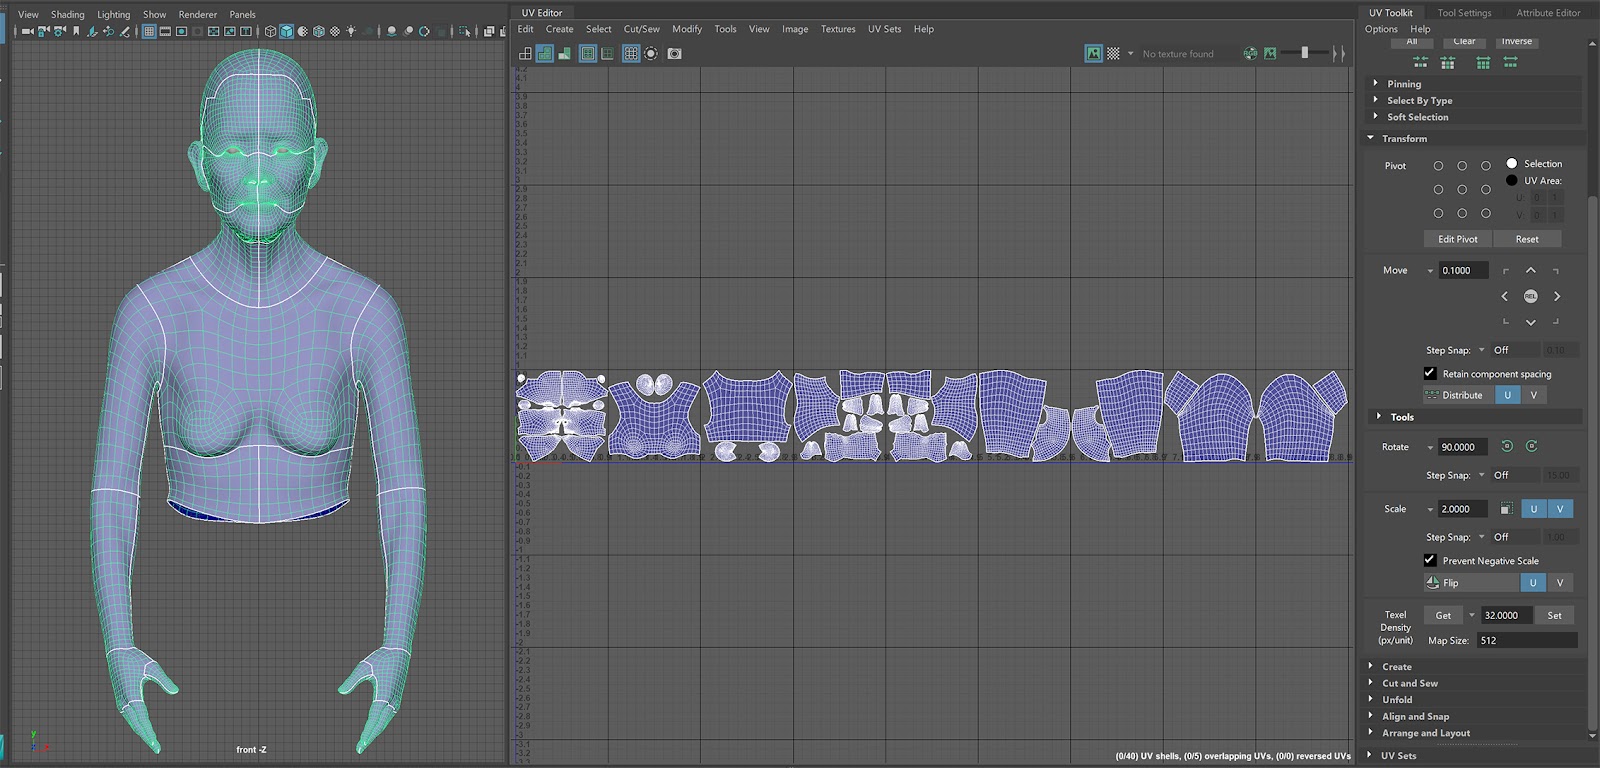
Once I felt like the sculpt was 75% completed, it was time to take it into Maya for some retopology and UV process. I used the Quad Draw tool from Maya to get a good lowpoly base, and then went back into Zbrush to reproject some detail into the new model. After this, I worked on making the uvs back in Maya for only half of the model and setting the layout to get 4K texture resolution.
This model has 9 UDIMS, because I wanted to work in something close to a film resolution and keep all in the same scale. The face and hands were given a full UDIM each due to the amount of detail they had in the original picture. The arms were divided in 2 sections, each section having its own UDIM as well because all the tattoos that needed to be painted.
After the UDIMs were layout, I mirrored the model and used the UV toolkit inside Maya to flip the uvs so they were symmetrical, for an easier workflow during texturing.
Once I had a good basemesh with final uvs, I went back to Zbrush and used the Zwrap plugin to reproject back all the high detail and the sculpted a bit more to break the symmetry of the model and add more specific traits of her. Then, I went on to pose the model in using the Transpose Master and layers. Since the uvs were final it would not be disruptive and I could texture it using the one in a neutral pose.
Texturing Process
To begin with the texturing part, I exported my displacement map from Zbrush using the Multimap Exporter, in 4K and EXR. As well as a decimated version of the model for better texturing reference.
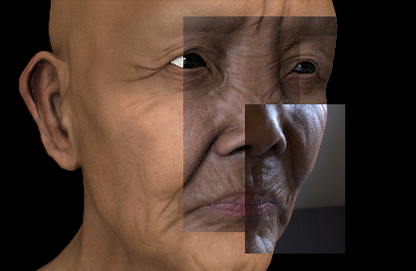
Then in Mari, with the help of texturingxyz maps, I went on to painting the displacement detail for the head and body. In this stage I was very careful not to just project the map straight into the face, but tried to match what was painting with the main references I had.
Once the skin displacement was done, I went back to Maya to start testing with Vray. This helped me realize it was better to go back to Zbrush, to carve some areas stronger and that some wrinkles would be better sculpted than projected. Sometimes we feel that the detail we sculpt is not as accurate as the one from scanned data, but each person is different and there are some features that won't match in our final piece. So, take it from me, it’s better to do the most you can by hand and be sure.
For the albedo maps I also used texturingxyz photo maps to get a similar skin color and detail when painting. First just projected straight into the face and body, then I cleaned the textures in Mari and painted some of the specific skin features from my references, like dark spots or scars. On top, I applied on multiply a cavity map I had extracted from Zbrush to add a but more depth and extra detail to the albedo map.

The most challenging part for me during texture painting was thinking how I was going to approach the tattoos. For this I went and gathered all the photographs I could get with good quality and high detail of her tattoos, not only all angles of her arms but neck and hands. After this, I analized how many types of patterns were in there, to figure how many tattoo stamps I needed to make.
When I found a photo of the patterns online, I took it into Photoshop and was able to trace most of the patterns to make the stamps. In other cases I had to trace straight from photographs or by mixing a few of the other stamps. In the end I had 13 different tattoo stamps.
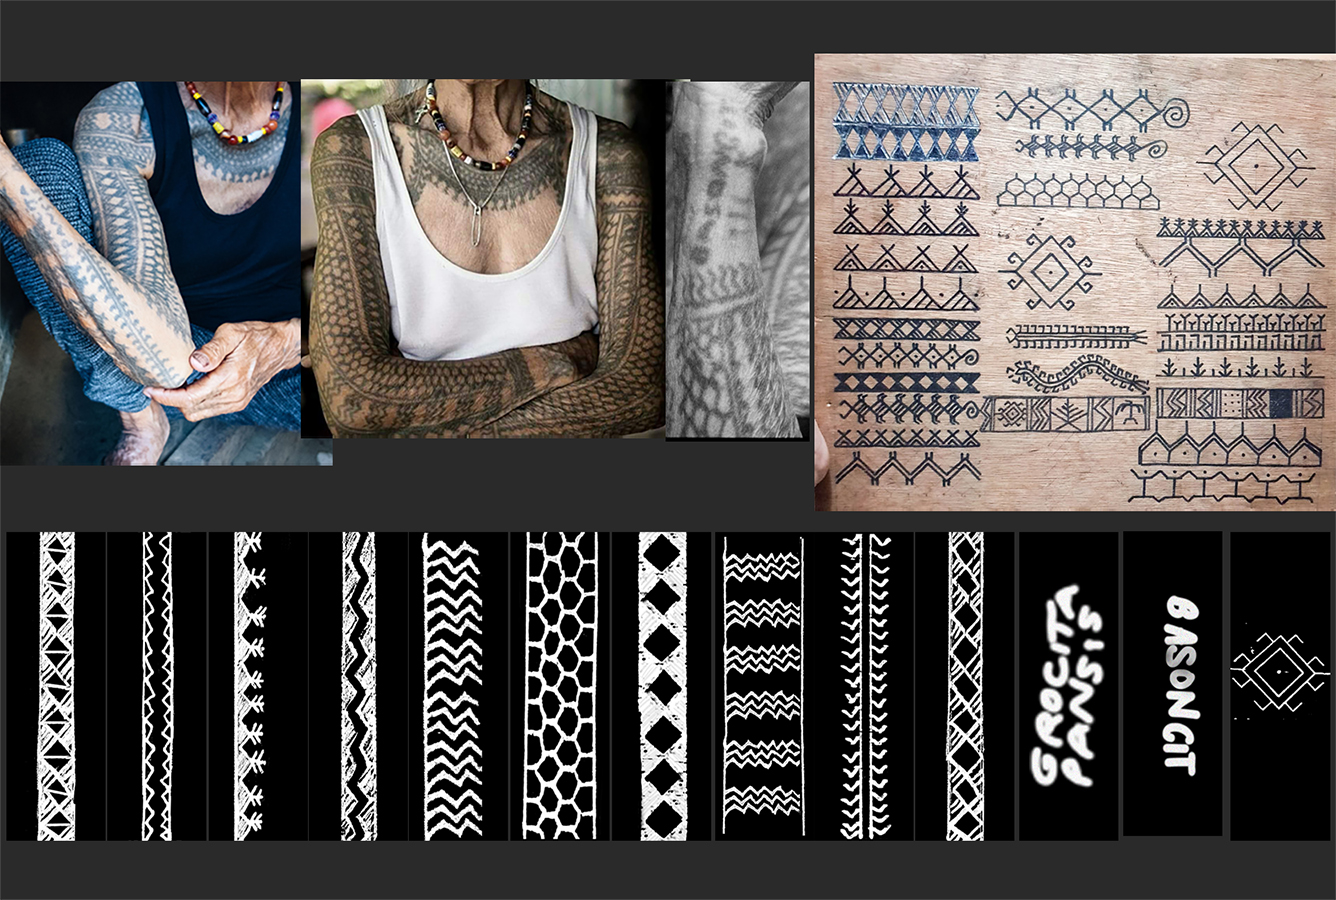
In Mari I projected them inside a HSV with mask stacks, one for each tattoo pattern. I made different folders for each arm, hand and the neck, so it could be easier to fix any issues that might show in the render. I started adding the Albedo map into my Lookdev tests to see how the tattoos looked and then going back to Mari to do some more color correction on the masks, blurring a few places and adding a bit more noise to others.
Starting LookDev
I started my Look Development process in Maya after exporting the displacement map from Zbrush. At first, just checking that my maps were exporting ok, later I added an hdri map to have a better light source and more realistic skin color with this.
The Hdri was a great help on seeing the color maps better, but the moment I started to work on making the skin material in Vray, that’s when the magic began. Adding and testing the Subsurface Scattering properties to the material, made the skin look a lot more realistic in a second (or a few more, because render times and a mere mortal equipment).
When I started working on the gloss map, I realized that the Hdri was not an option to have as main light source for the final frame, it was mainly washing away a lot of the displacement details and reflecting too much. So I moved to a 2 point light arrangement (key light on the right side, fill on the left), keeping the hdri in a really low intensity for reflection detail only, and from there I worked on the gloss map again.
Eyes
I think the eyes are the most important feature when trying to make a character feel alive.
Having the right texture is important, but also a good position could help bring out the expression you’re trying to get.
Each eye is divided in 3 parts: the Eyeball, the Iris and the Pupil. Then on top, there is also the plica and the wet line connecting the eyeball and the eyelids. For each part I also used a different shader, the eyeball is the main source for reflections, glossiness and shadow casting, the Iris color and displacement are from texturingxyz.
Something I had to constantly check on when I was making corrections to the main shapes of the face and the expression, was that the eyes fit correctly in the eye sockets and the eyelids were also thick enough.

These are some great articles that are super instructive on how to make a realistic eye:
fxguide.com/fxfeatured/the-eyes-have-it/
https://www.artstation.com/artwork/L2Qrbw
https://marmoset.co/posts/creating-realistic-skin-toolbag-saurabh-jethani/
https://marmoset.co/posts/how-to-create-realistic-hair-peach-fuzz-and-eyes/
Hair
All the hair was done inside of Maya with Xgen. I divided it into 5 main groups:
Eyebrows, Eyelashes and Hairstyle, that were manually placed creating guides from curves. Facial Hair and Body Hair were done with groomable splines.
Since she is an older woman with white hair in some places, I decided to create an extra description so I was able to attach an specific shader for the white hairs in places like the eyebrows and the hairstyle.
The hairstyle group is by itself divided in 5 different descriptions: the main hair coming out of the roots, the white sections, the bun, bun’s loose hairs and baby hair in the head.
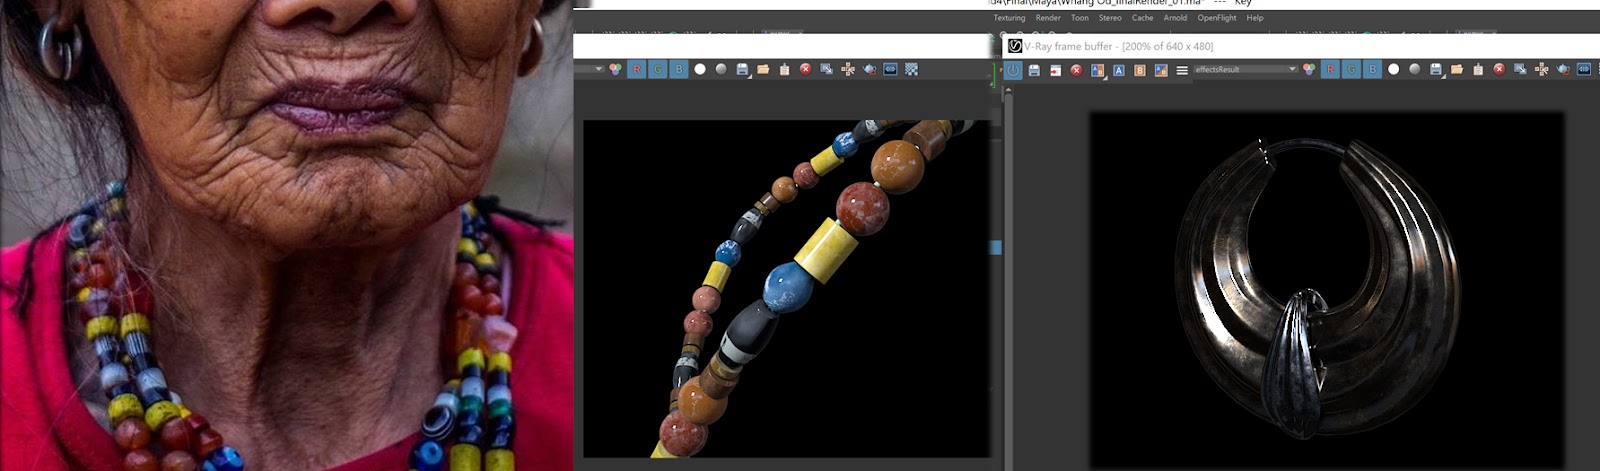
Accessories
The earrings and necklace were modelled last, both on Maya.
For the necklace I traced a curve from where I made the cord on the neck and then grouped it to send it to the origin where I started adding the small pieces. I created 5 rock shapes and their Uvs, then in Substance Painter I made 2-3 different texture maps for each so I could have variation.
The earrings also seemed to have 2 different material color, so in substance I created that and added a bit of wear marks to it.
Back in Maya I created and tested shaders for each jewelry piece alone and then integrated them into the scene.
Final adjustments
To test the lights and details I rendered some clay shots first and then when I was happy with the results, I just sent the really high resolution renders. Lastly, I just checked my camera angles and experimented with new ones to get more character shots.
Doing a likeness study is a lot about observation and reproduction, but the main goal is to be able to transfer to your model the essence of the person. Sometimes is not about making a perfect copy, but taking what makes the person who he/she is and trying to place it in your 3d model.
Finally, I want to thank a lot to Tran Ma, Jared Krichevsky and all my classmates at Gnomon for all the guidance and feedback with this project. This project would not have ended up looking like this if it wasn't for their amazing help and direction. And thank you all for sticking around until the end!