

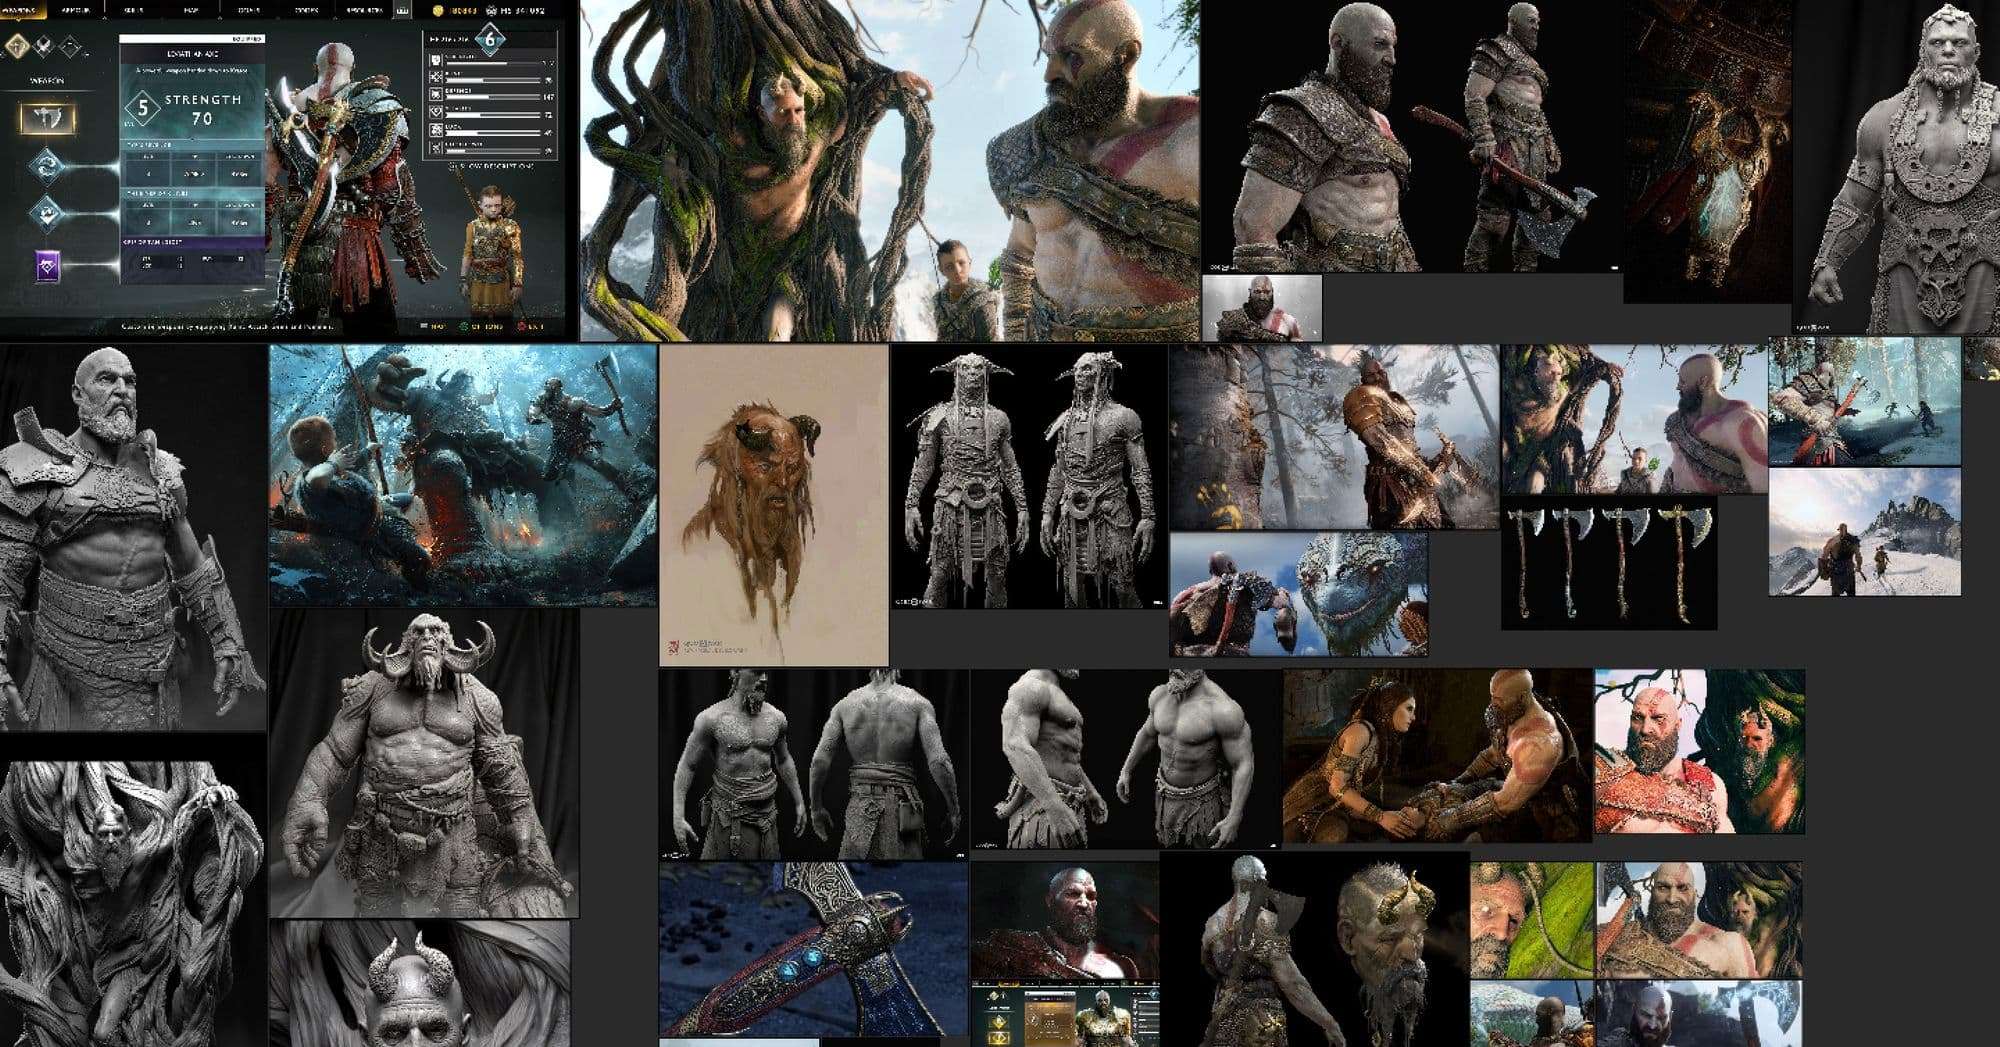
Massimiliano Bianchini is a 3D artist from Italy. Like all incredible digital artists, he always spent his time drawing as a child. It was only recently that he decided to jump into the world of 3D and we couldn't be happier he made the decision and is sharing his workflow for Kratos | King of Midgard.
Gathering Reference
Gathering reference is one of the most important part when you start a new project. I’ve spent hours looking for references, more you have better is.
I use PureRef for display all my references, for this project I gathered like three hundred images. This is an example:
Modeling and Blockout stage
Blocking out the model is the key to achieve a good final look, you will define proportion and look of your model. This is why this part is so important.
In this phase I used ZBrush to keep playing with proportions working with rough mesh, no detail, only primary forms. I started creating an anatomical correct body, then layering on top of this the armor. Props and weapon made in the same way, in different Ztool files.
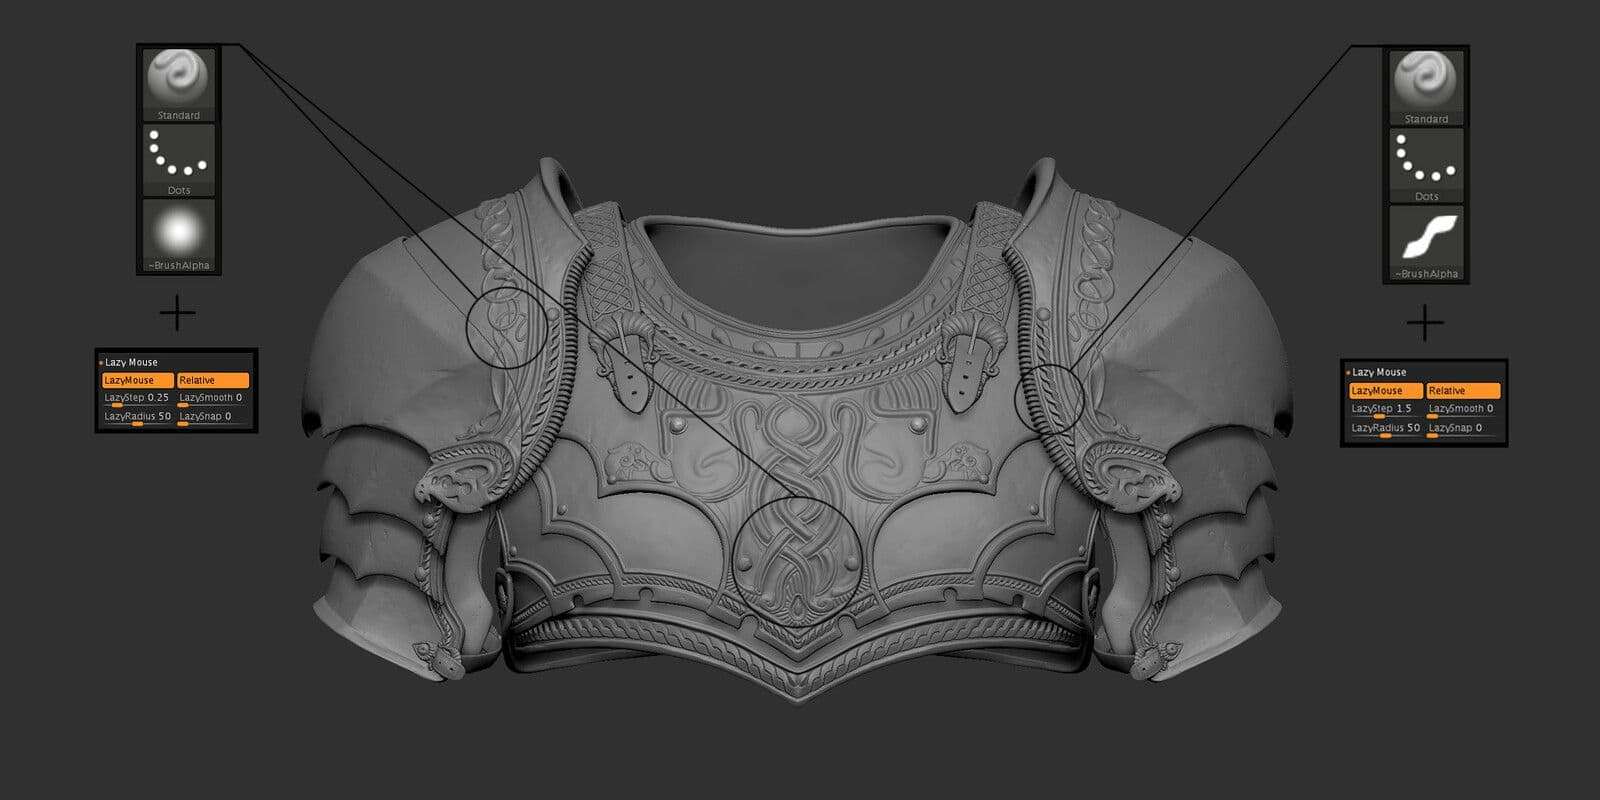
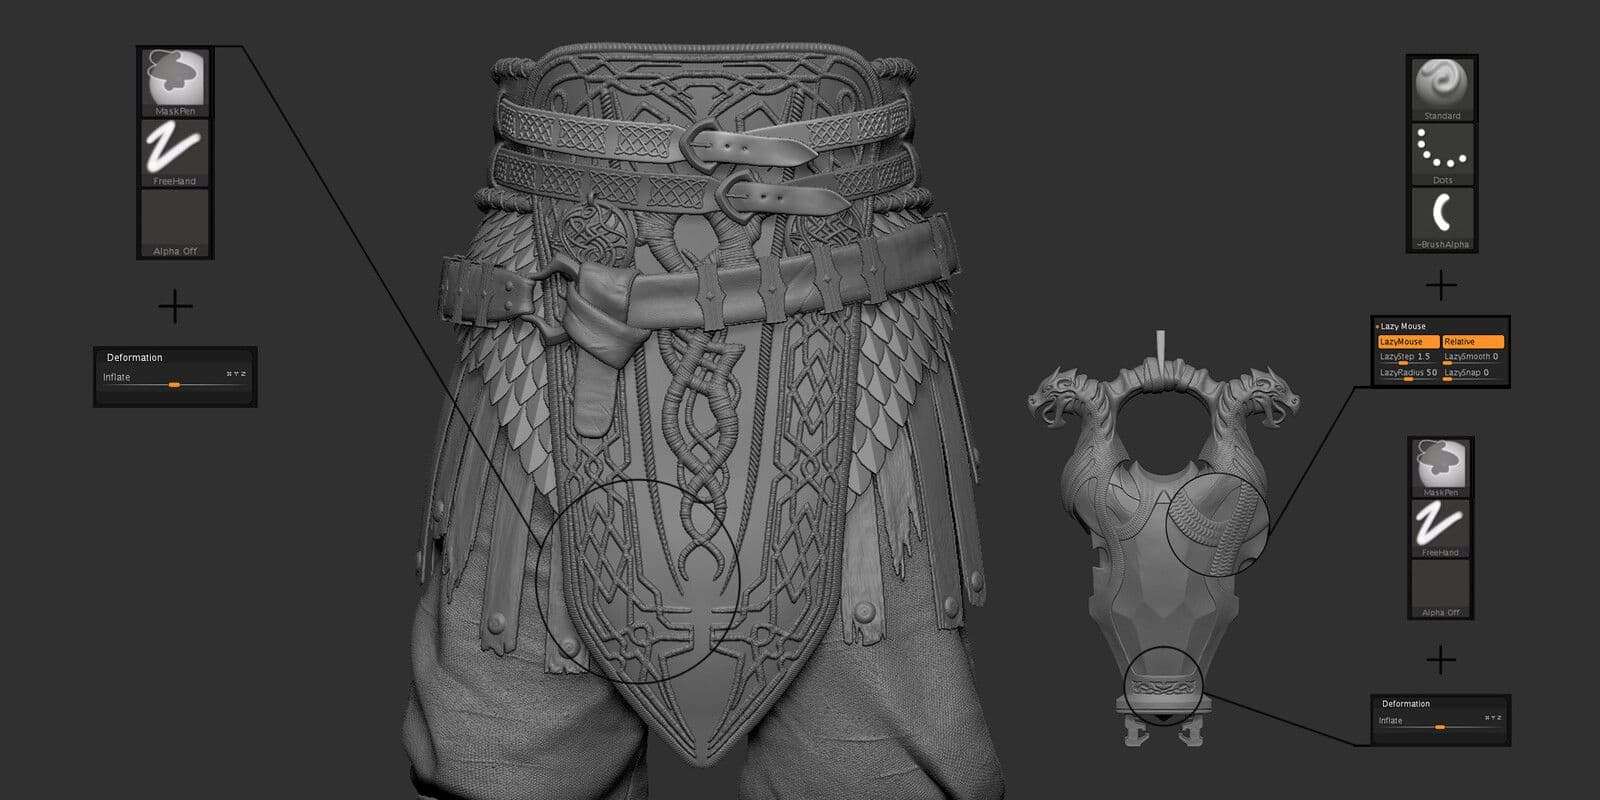
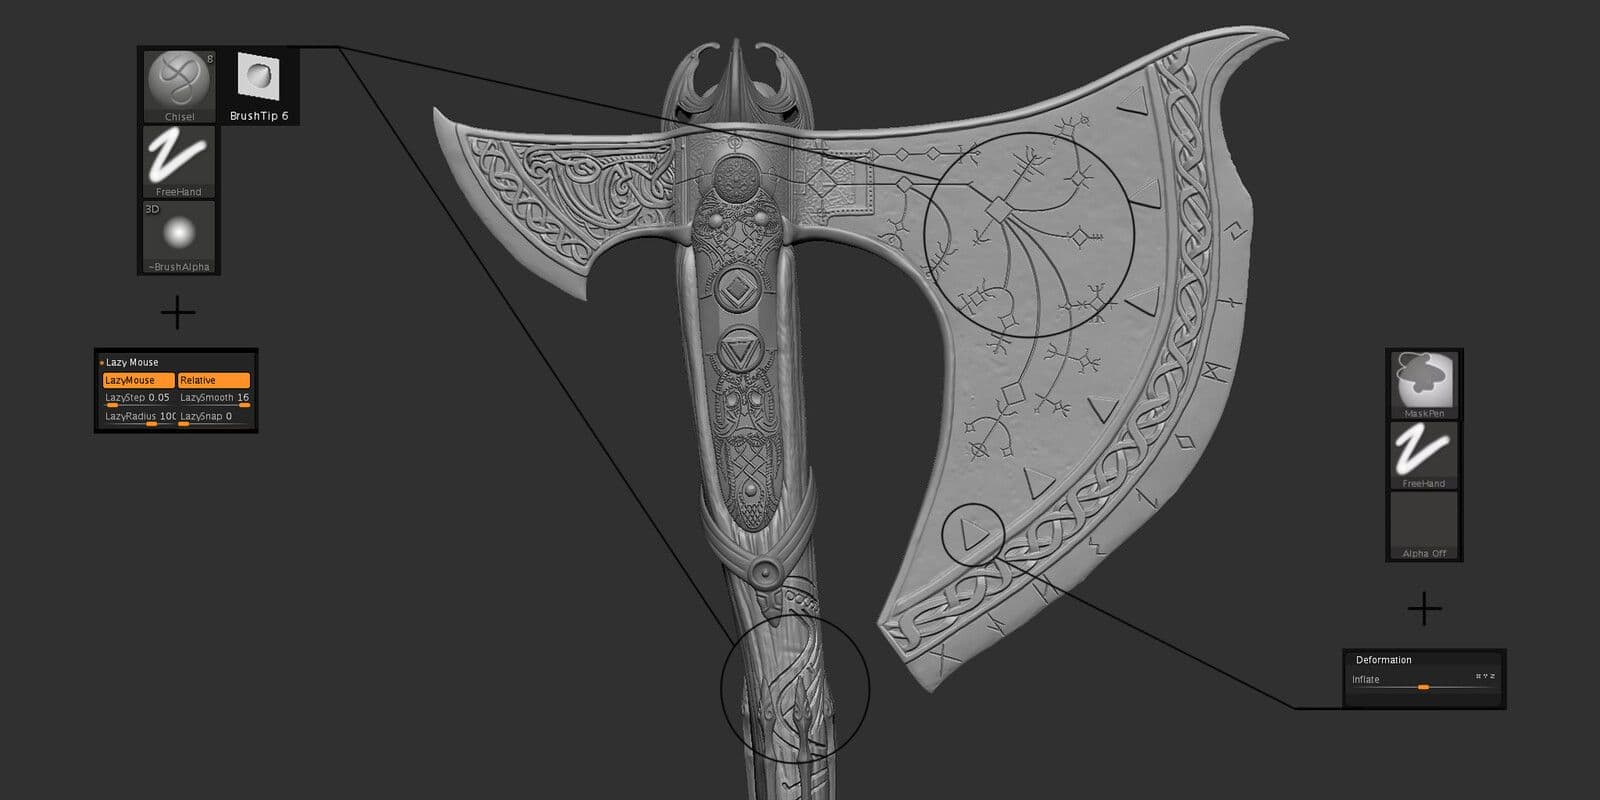
Modeling Secondary and Tertiary shapes
Once the blocking is done, I started gradually adding details. While I kept symmetry on the armor and other props, I started work without on the body.
You can record a layer with symmetry on so you can step back. Anatomy is fundamental, I used a lot of anatomical references, is necessary to study and understand each muscle, even watching video of muscles work.
This is how I get some of the details:

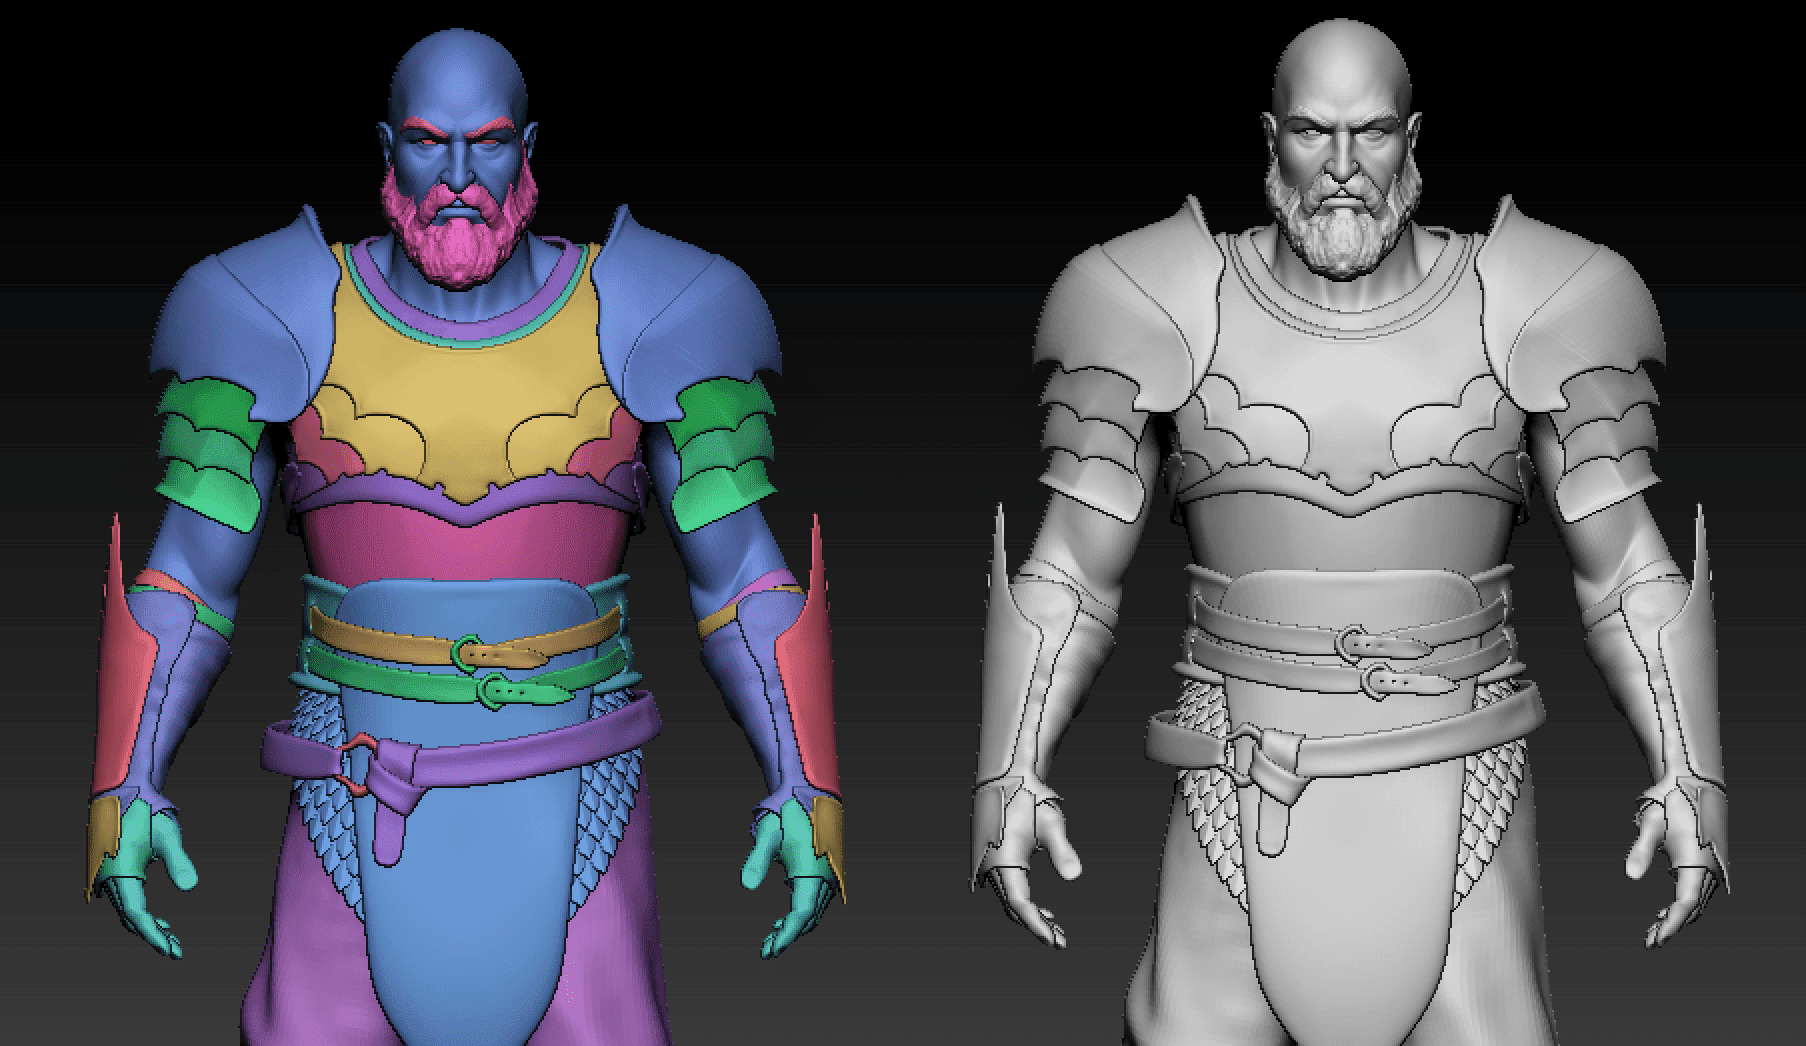
Retopology and UV
I like work with clean topology and subdivision levels, so once I finished the blocking I start creating mesh with correct topology with Zremesh or Quad Draw tool from Maya.

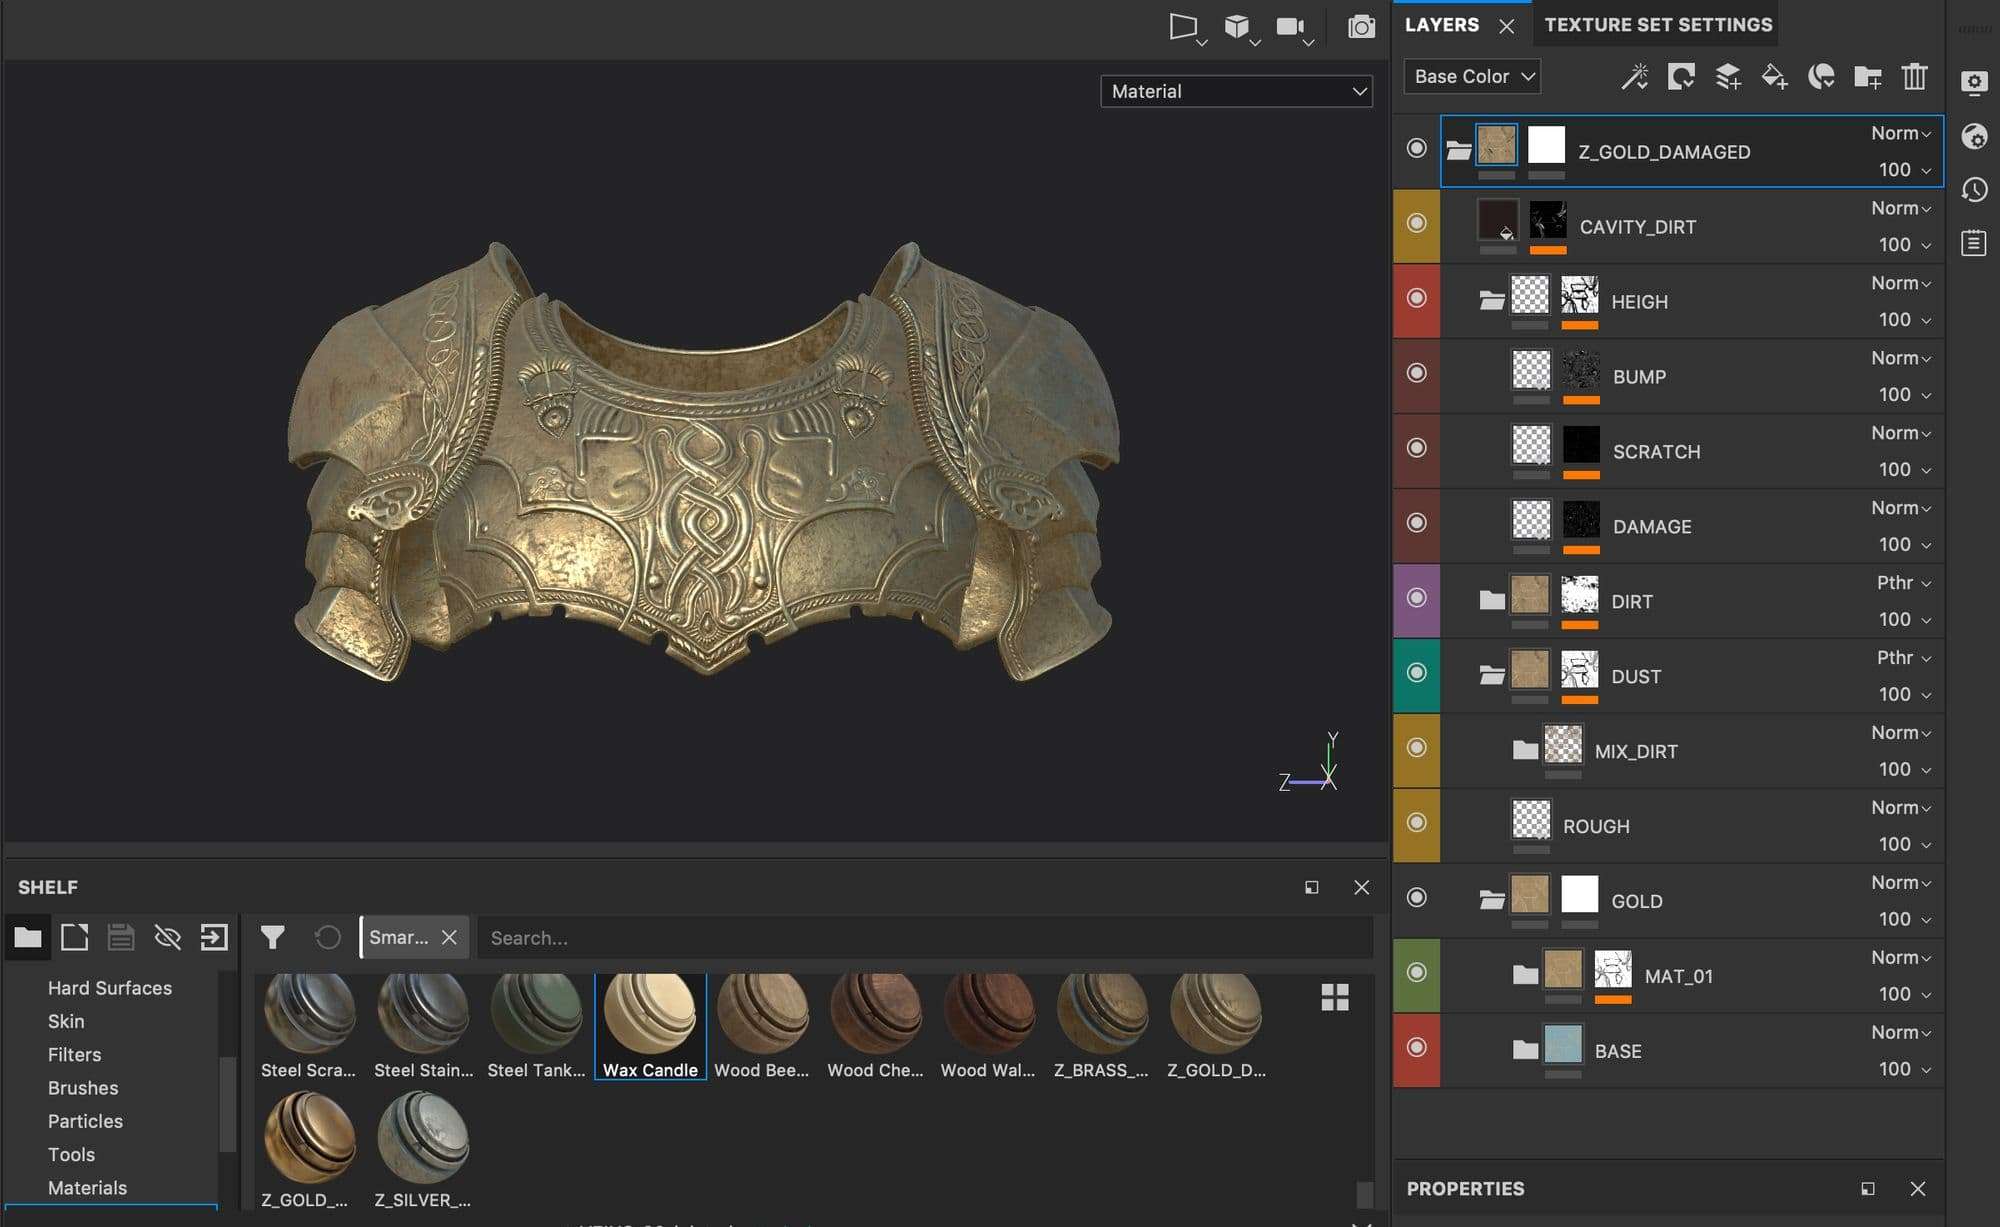
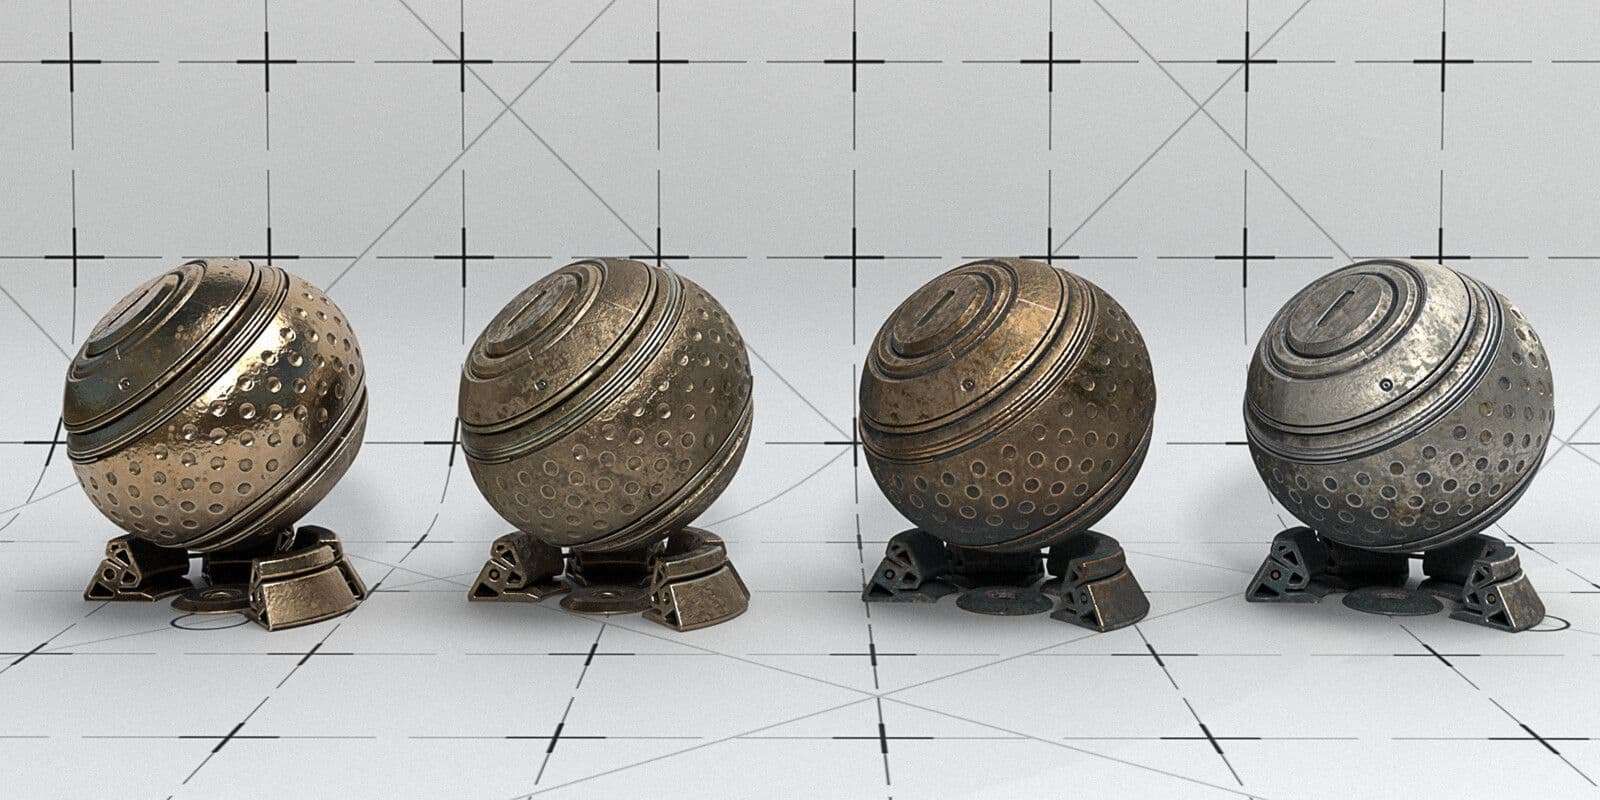
Texturing and Materials
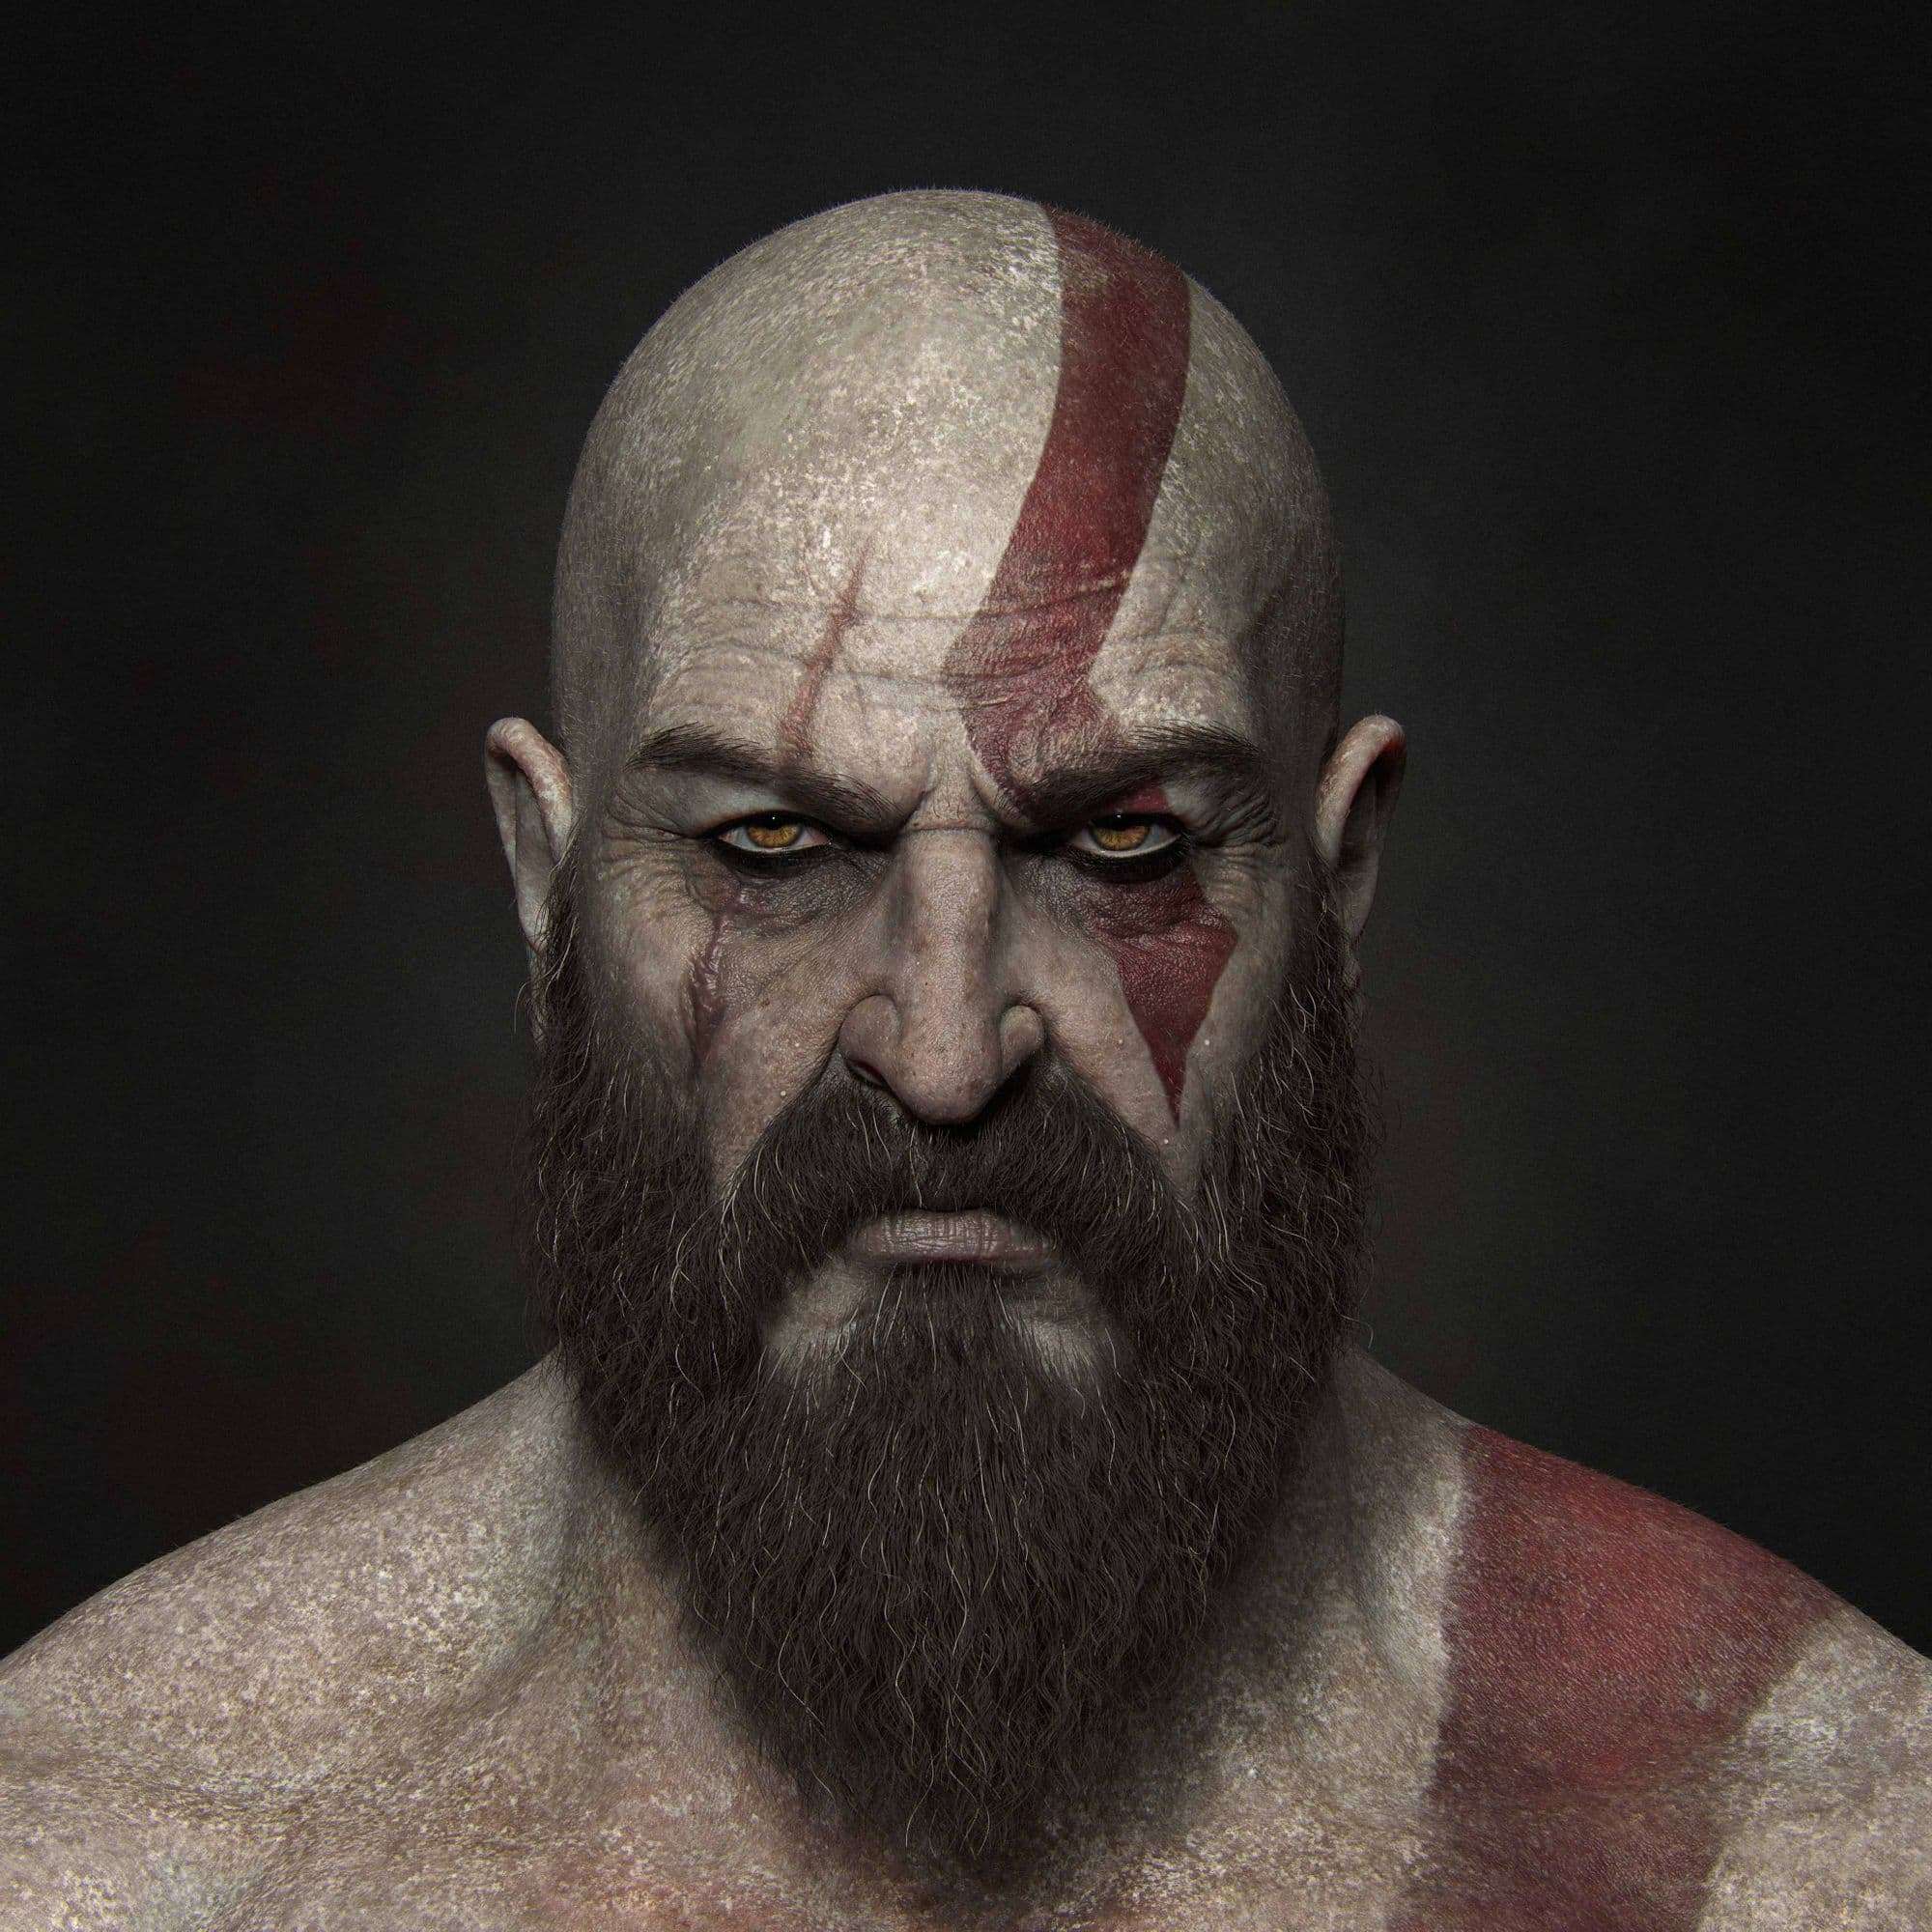
All the texture was made with Substance Painter, skin texture was a base between a polypaint in ZBrush made with Texturing XYZ map and procedural/hand-painted texture on Substance.
For this I created a lots of smart material, usually I use a procedural base then a mix of hand-painted texture to get a more realistic look. When I’m creating a new smart material, I work with different different folder with separate channels(base/roughness/height) and if needed layering different kind of materials.
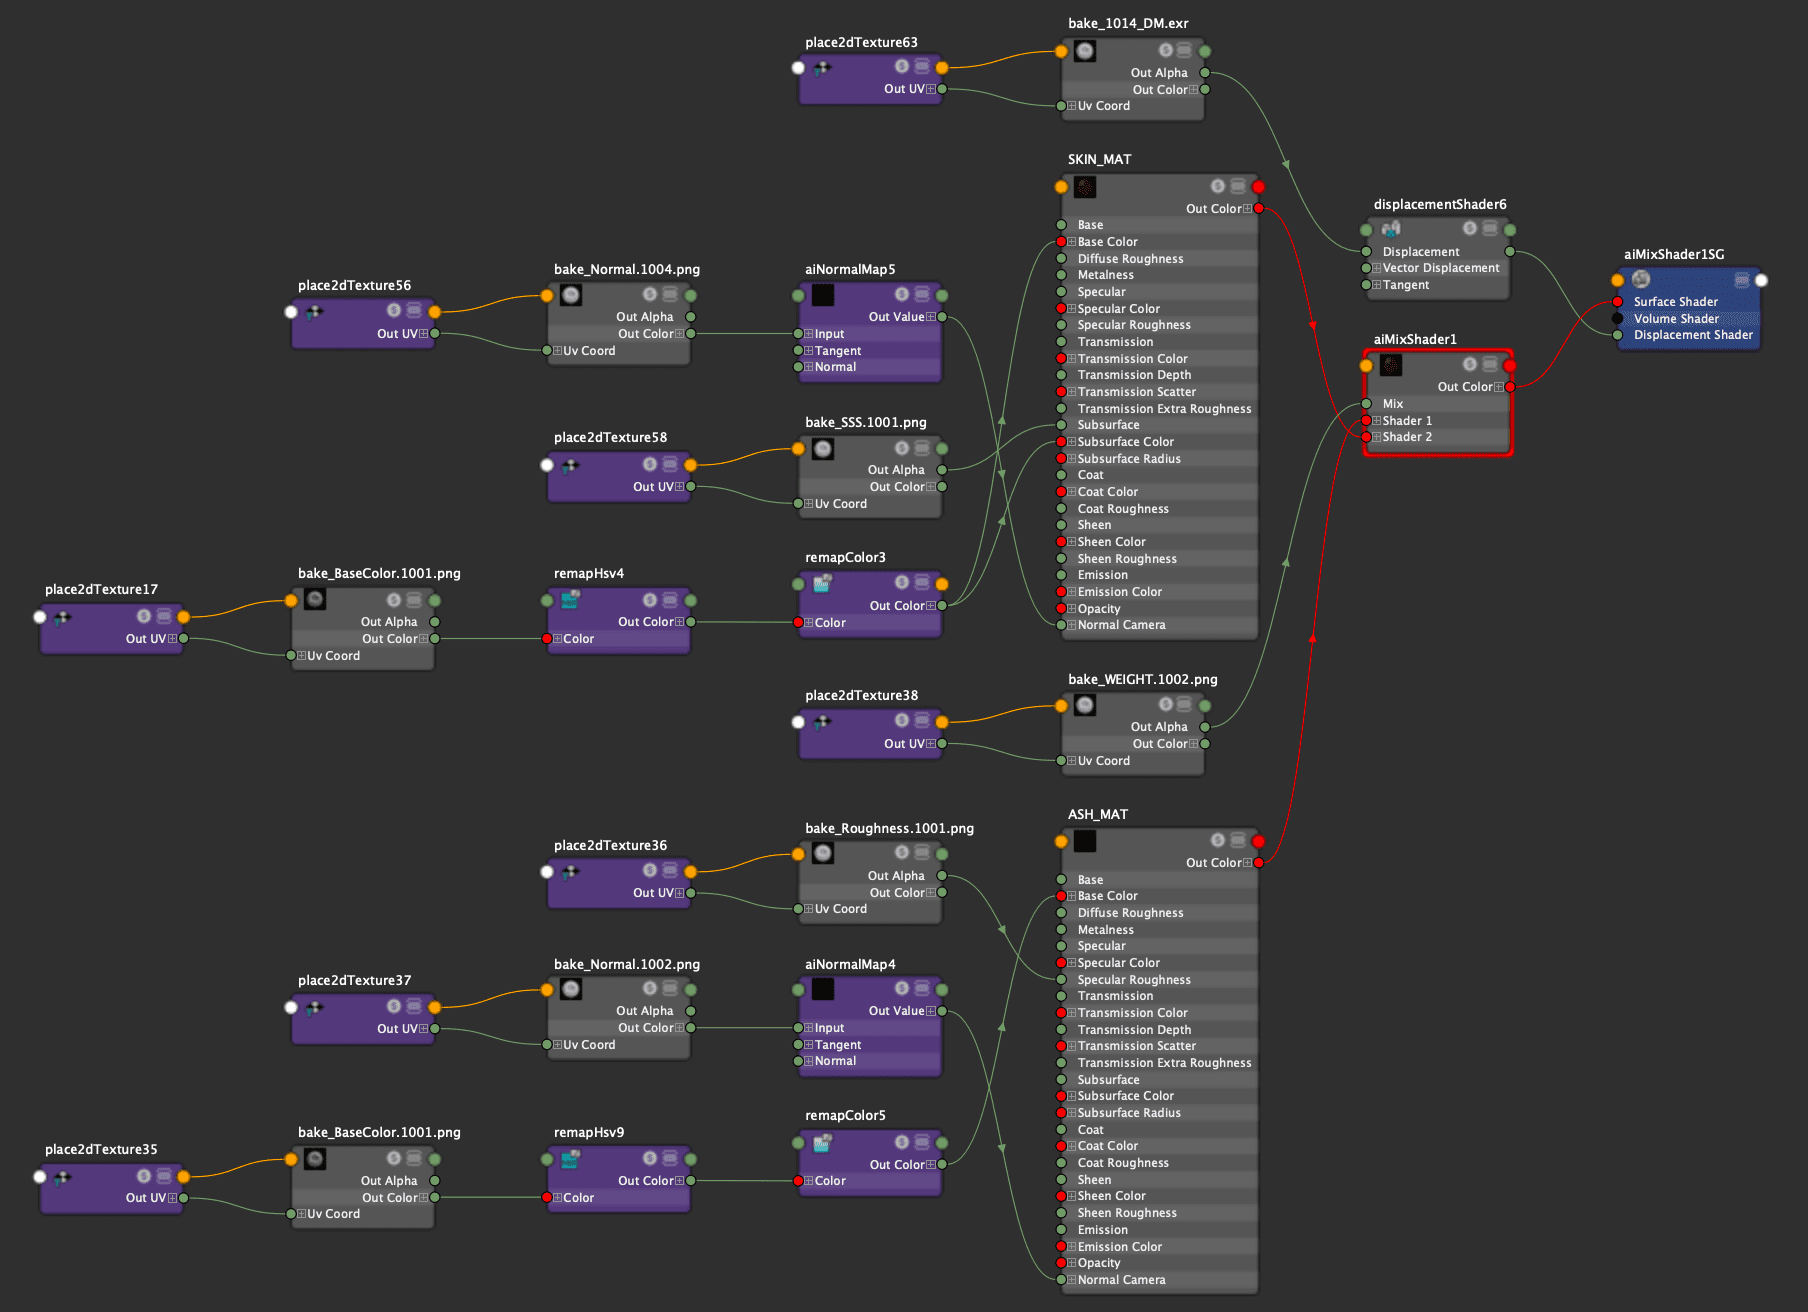
Shading and Lighting
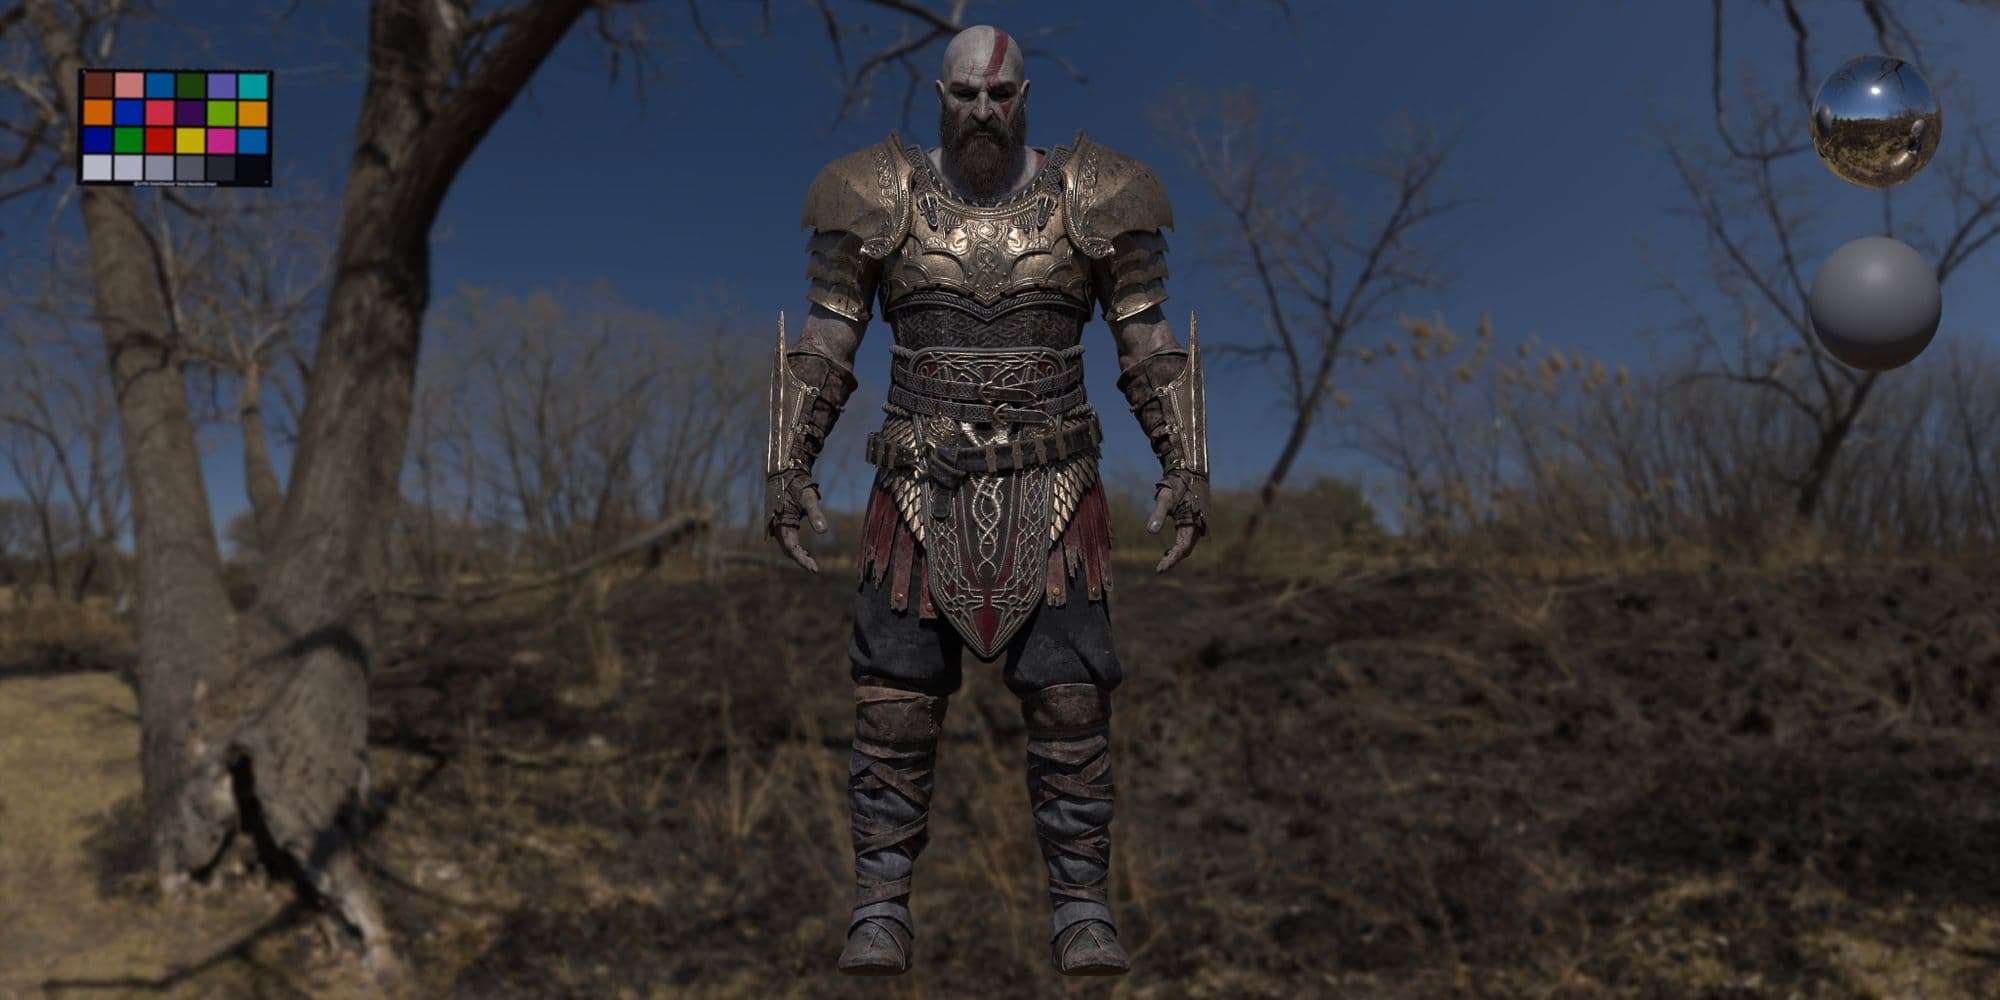
When I have some base texture ready, I start creating the shaders and setting up different lights set and HDRI.For this project I used a filler HDRI with very low intensity, and other five area light(Key/Filler/Rim/Eyes Specular).
Here there’s how the skin shader looks like on the Hypershade, two aiStandard surface(ash and skin) mixed together.
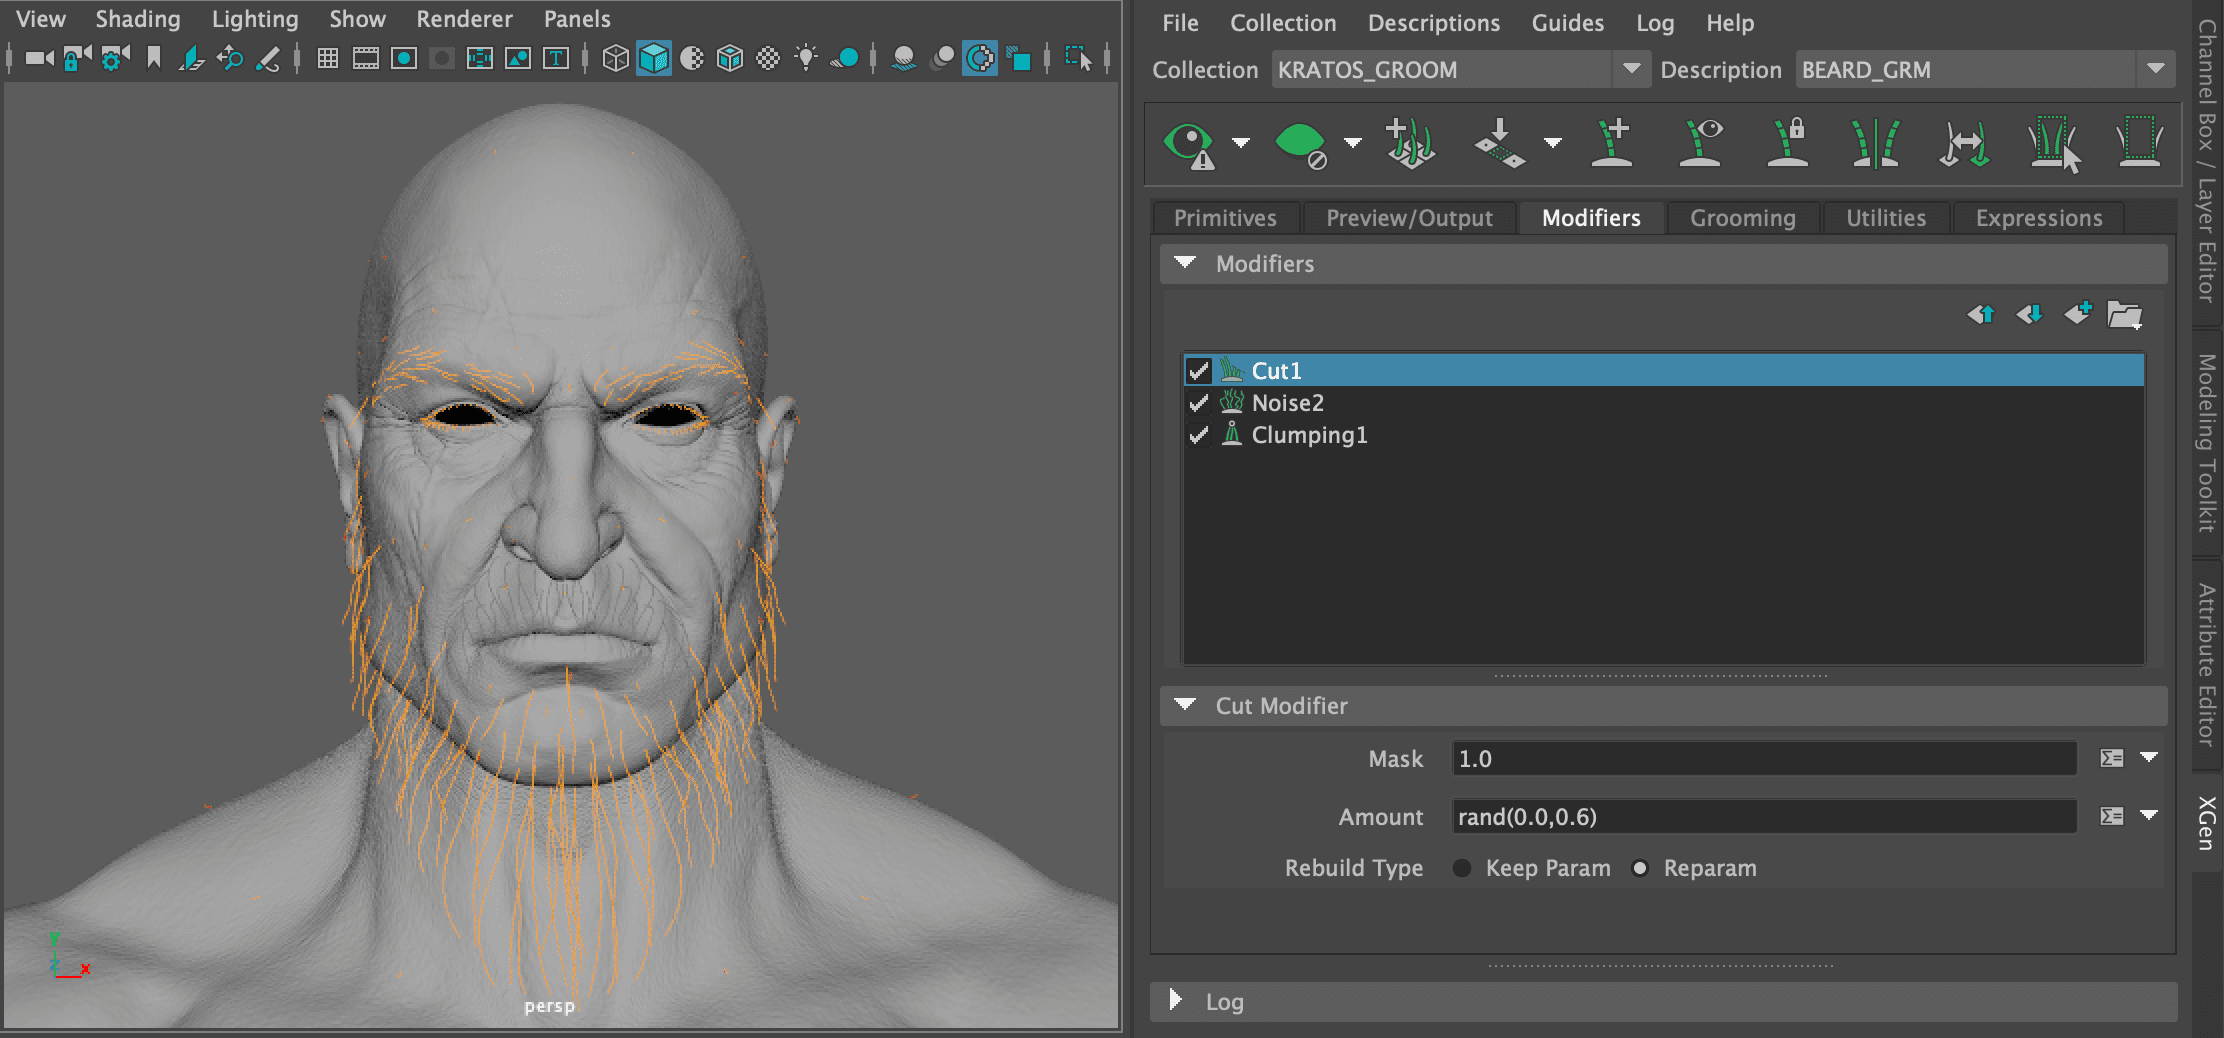
Grooming Development
Made with Maya Xgen, subdivided in three different Collection: Kratos, Mimir, Cloth. In each Collection I’ve got different description like eyebrows, beard, wink, moustache, peach fuzz and chest hair.
Kratos beard is made of two description instead of paint a color map, so I splitted in brown and white hair.
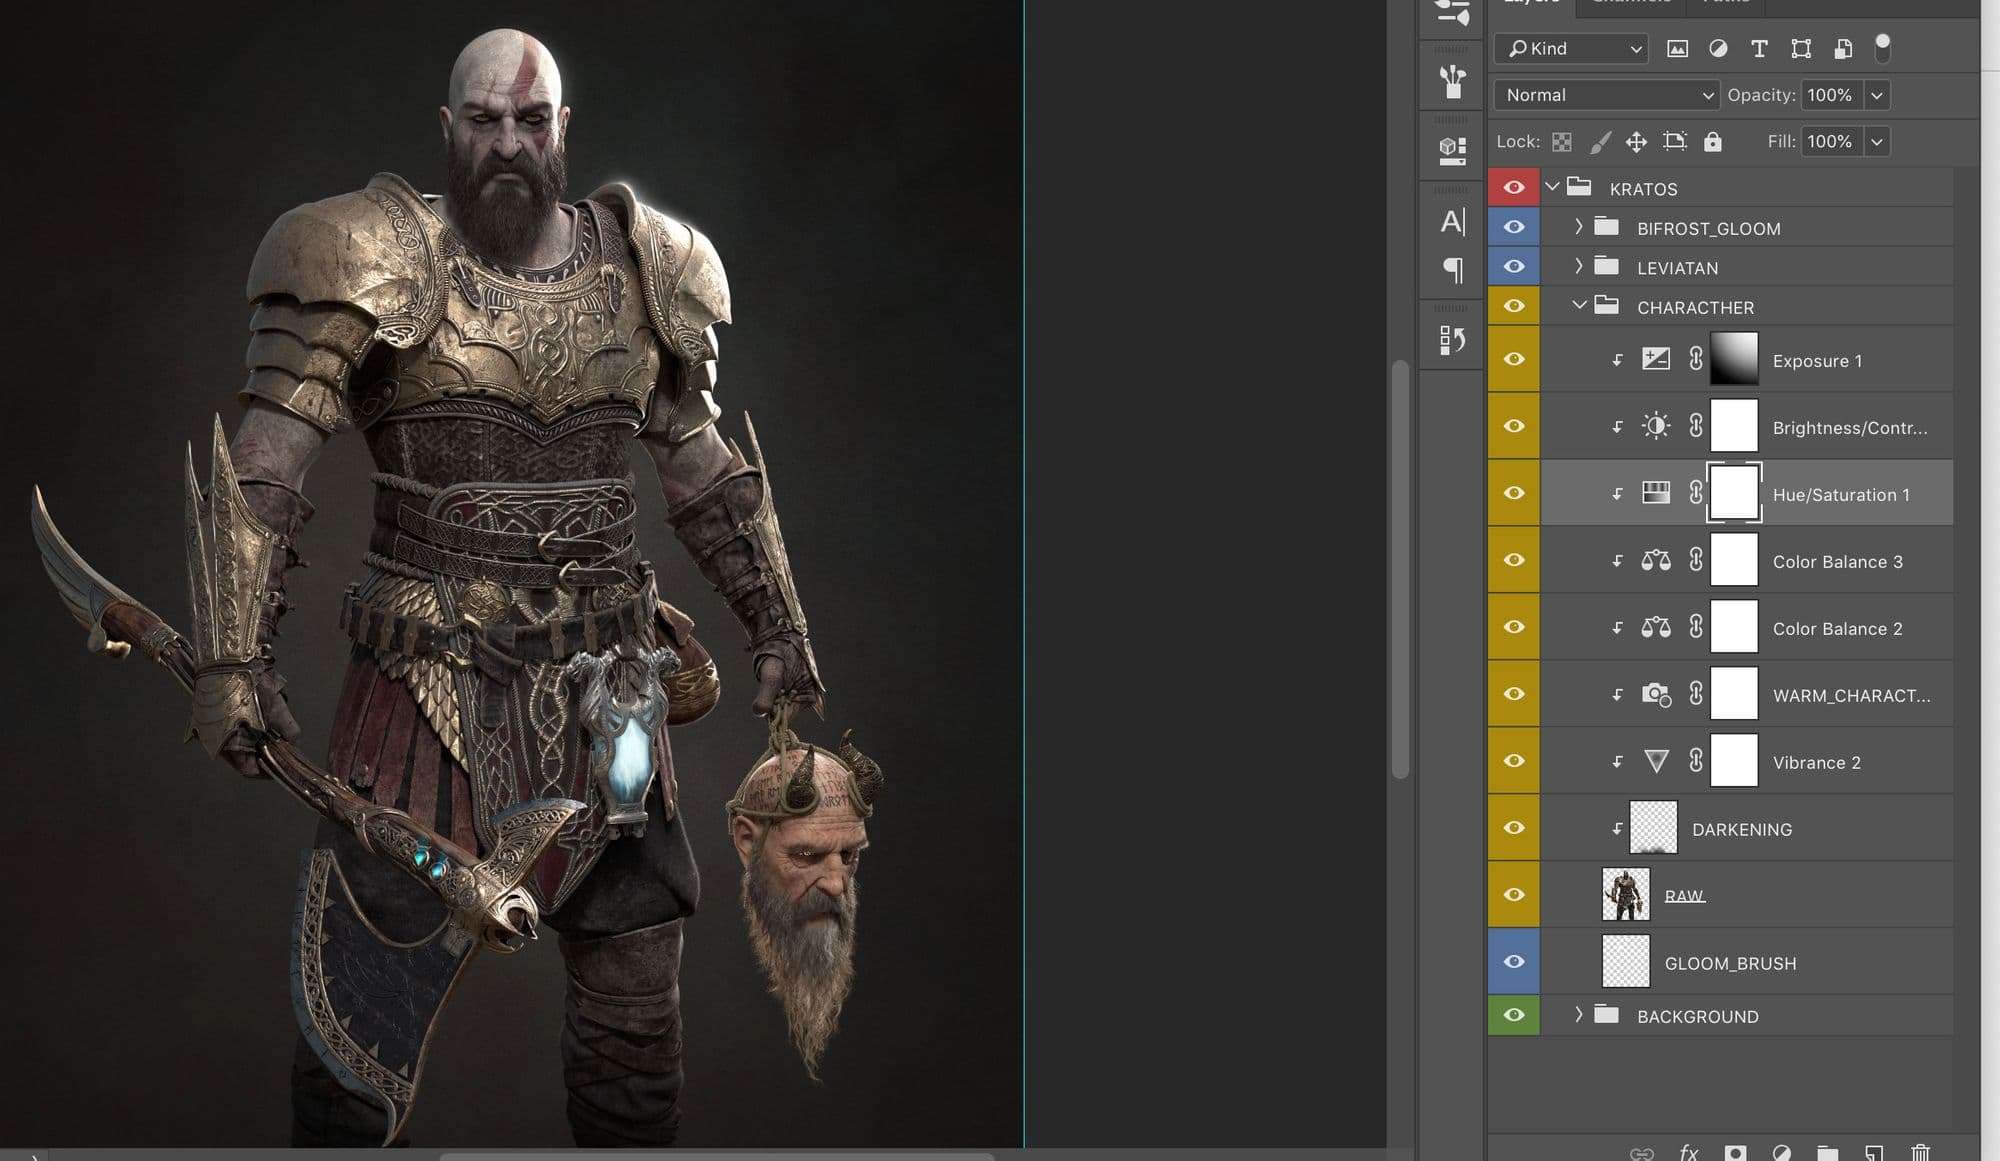
Final Compositing
The final stage, I added some layer in Photoshop. Like a background, some passes and a gloom effect on the Rim light side.
You can check out more of Massimilliano's work here, here and here.