Amazing 3D recreation of 'Cable Car Heaven' from Evgeny Lushpin's painting
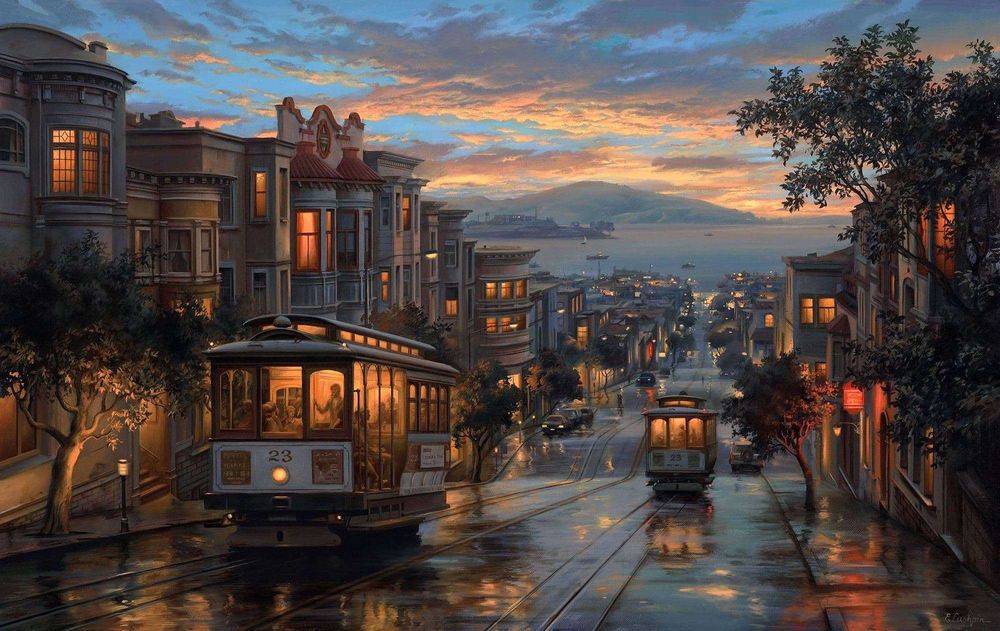
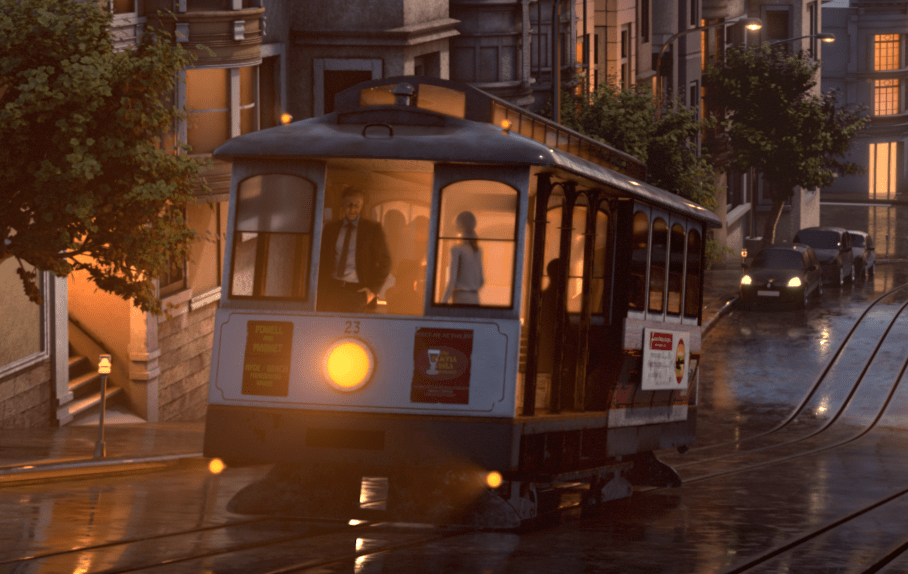
In our spare time when we were working in Athens, we wanted to recreate one of Evgeny Lushpin’s paintings. we chose to work on his painting “Cable Car Heaven” for its color and the aspect.
Inspired by the color and aspect of Evgeny Lushpin’s paintings, we get the lowdown from a group of friends who set out to recreate the artwork in 3D. During their spare time (while working in Athens), Guy Iltis, Daniel Paul and Philipp Sieben set out to see if they could actually pull this off. We think they nailed it!
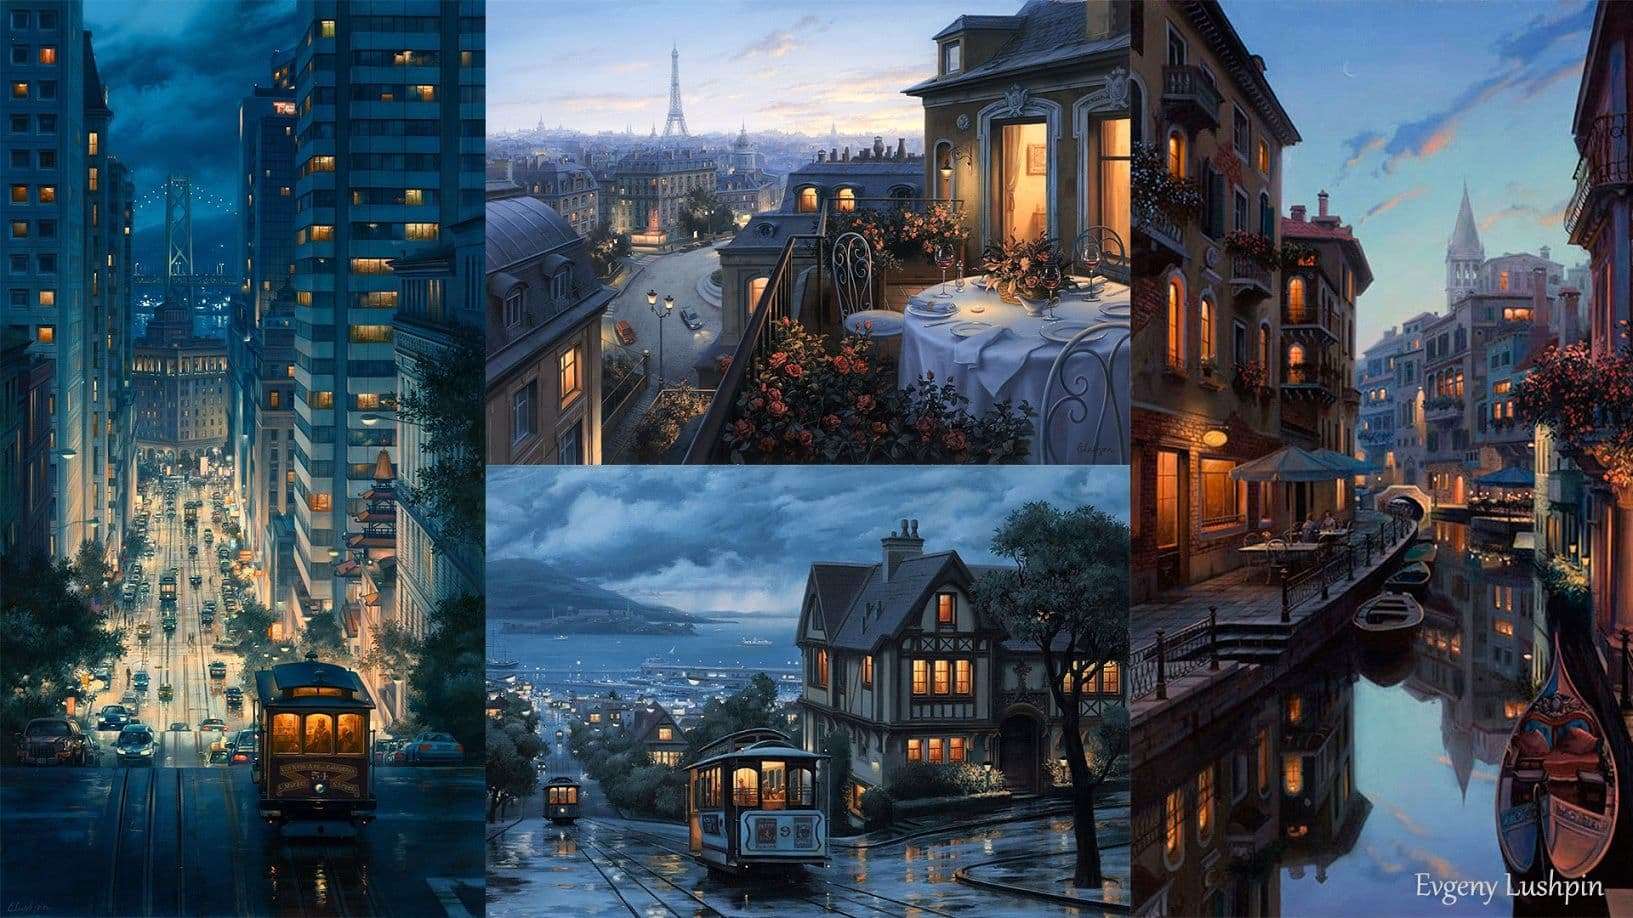
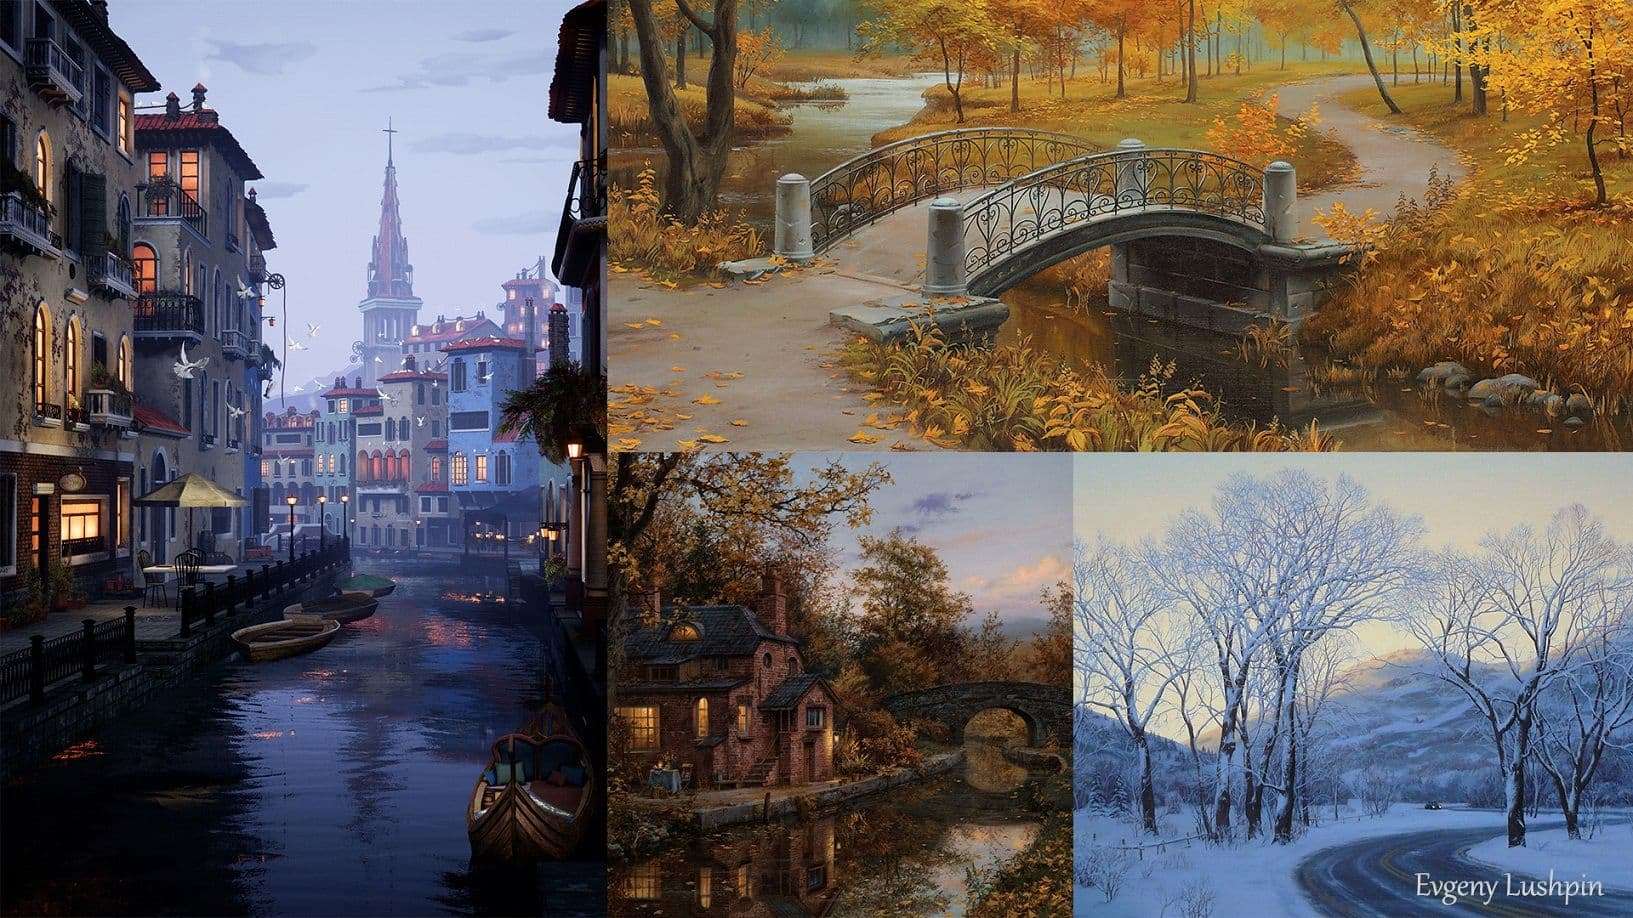
Evgeny's environment paintings reflect complex looking textures, illusionist lights and attention to refined details. Having a strong interest in the effect of illusions, proficient in the technique of painting complex textures with shimmering, glossy or reflective surfaces, he has a unique gift for capturing the dynamic energy of a crowded sidewalk or the serene mood of a quiet neighborhood.
Concept art: “Cable Car Heaven” by Evgeny Lushpin3D work
At the beginning of the project with Daniel Paul and Philipp Sieben, we split the work according to our preferences.
I was mainly responsible for the layout and modeling. Daniel Paul was in charge of all aspects of the cable cars, some houses on the right side and textures/shading of the street. Philipp Sieben was responsible for the scene assembly, lighting and compositing.
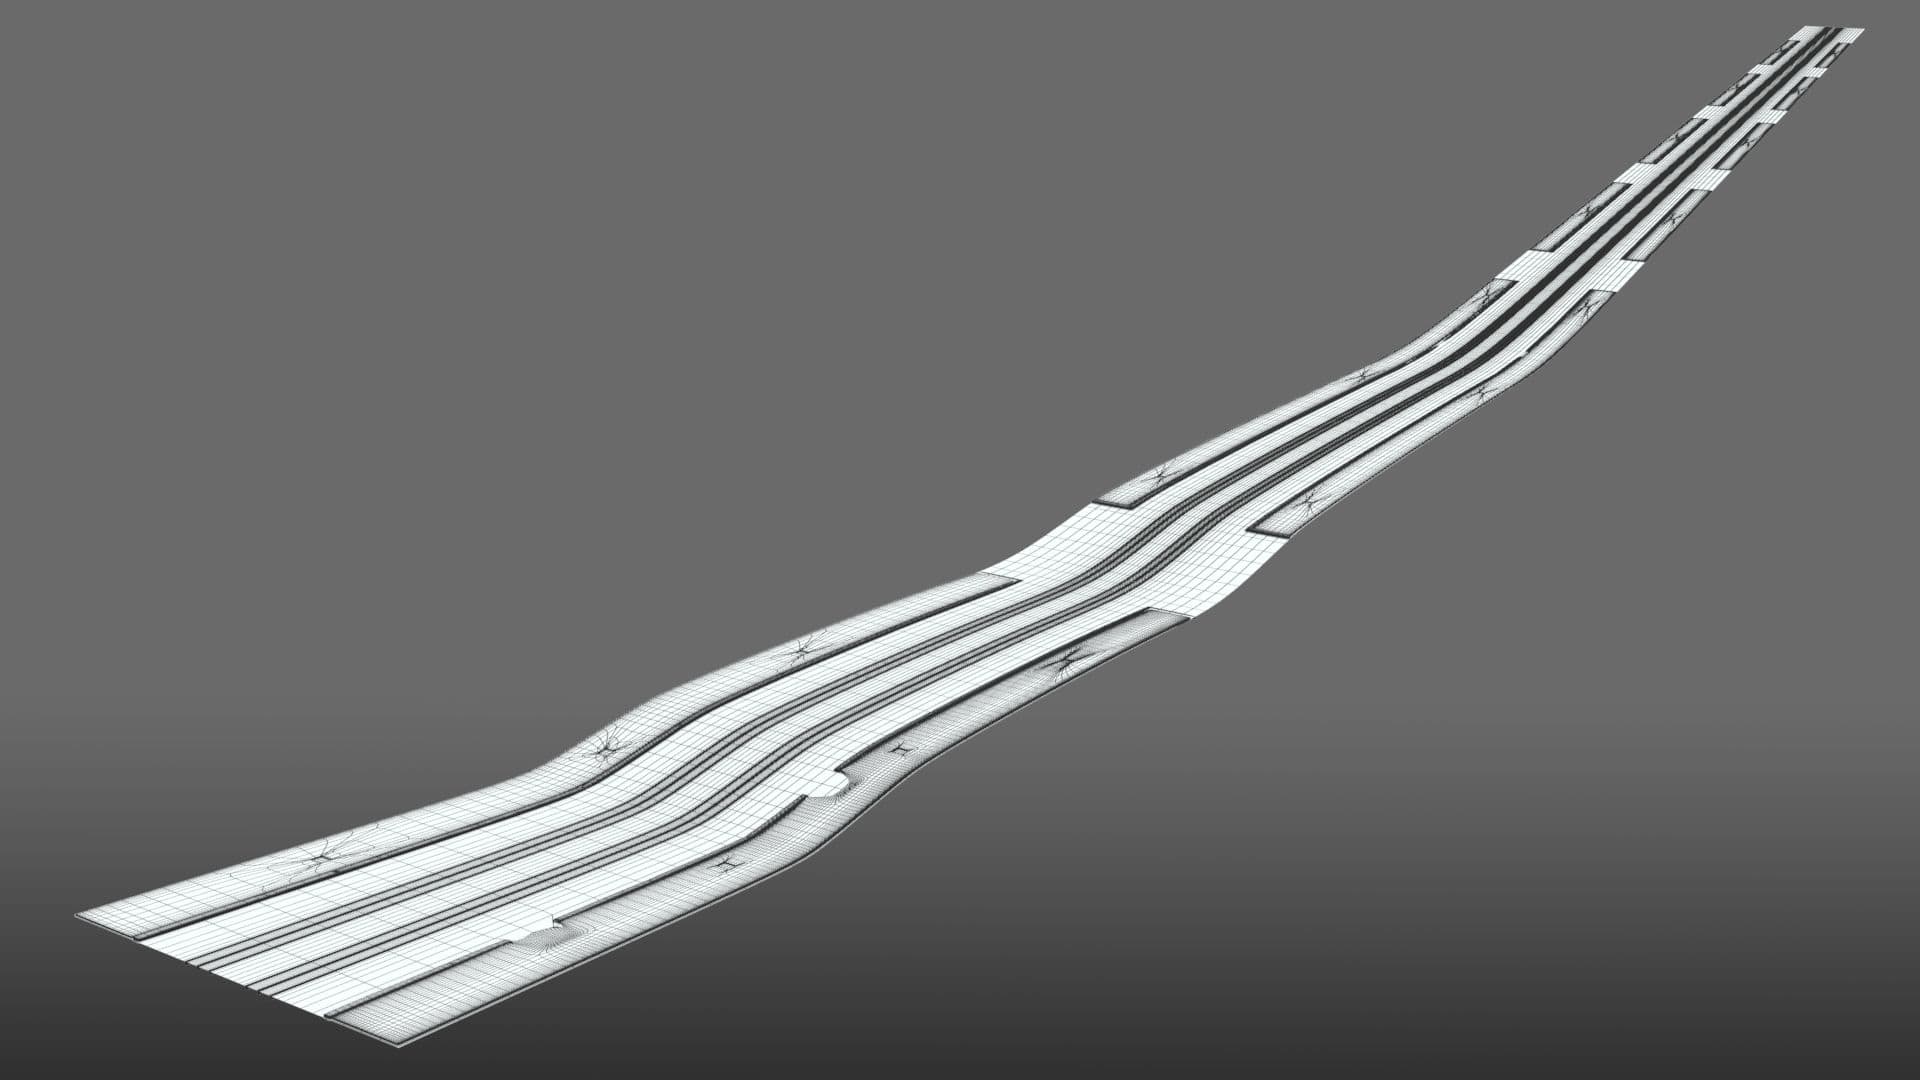
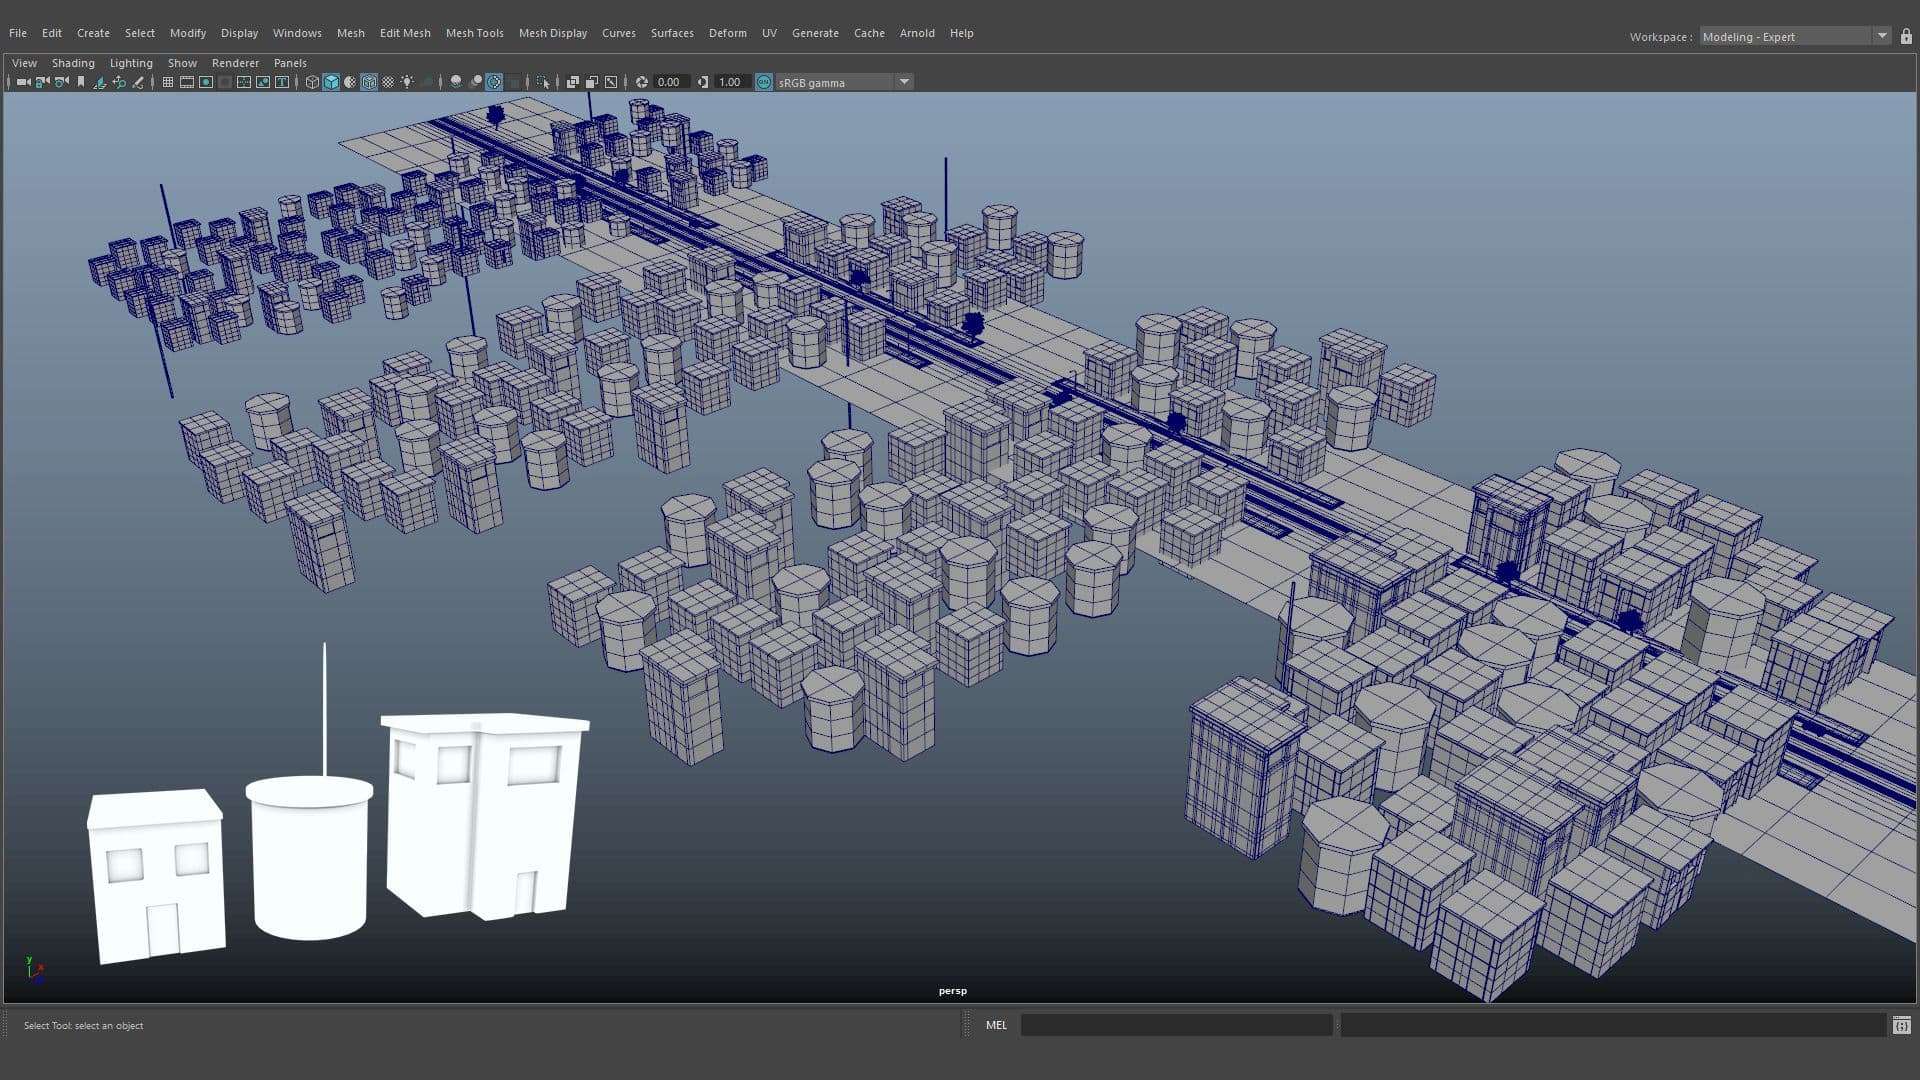
We chose to work in meters so I started modeling the street with around 1.2 km of length.
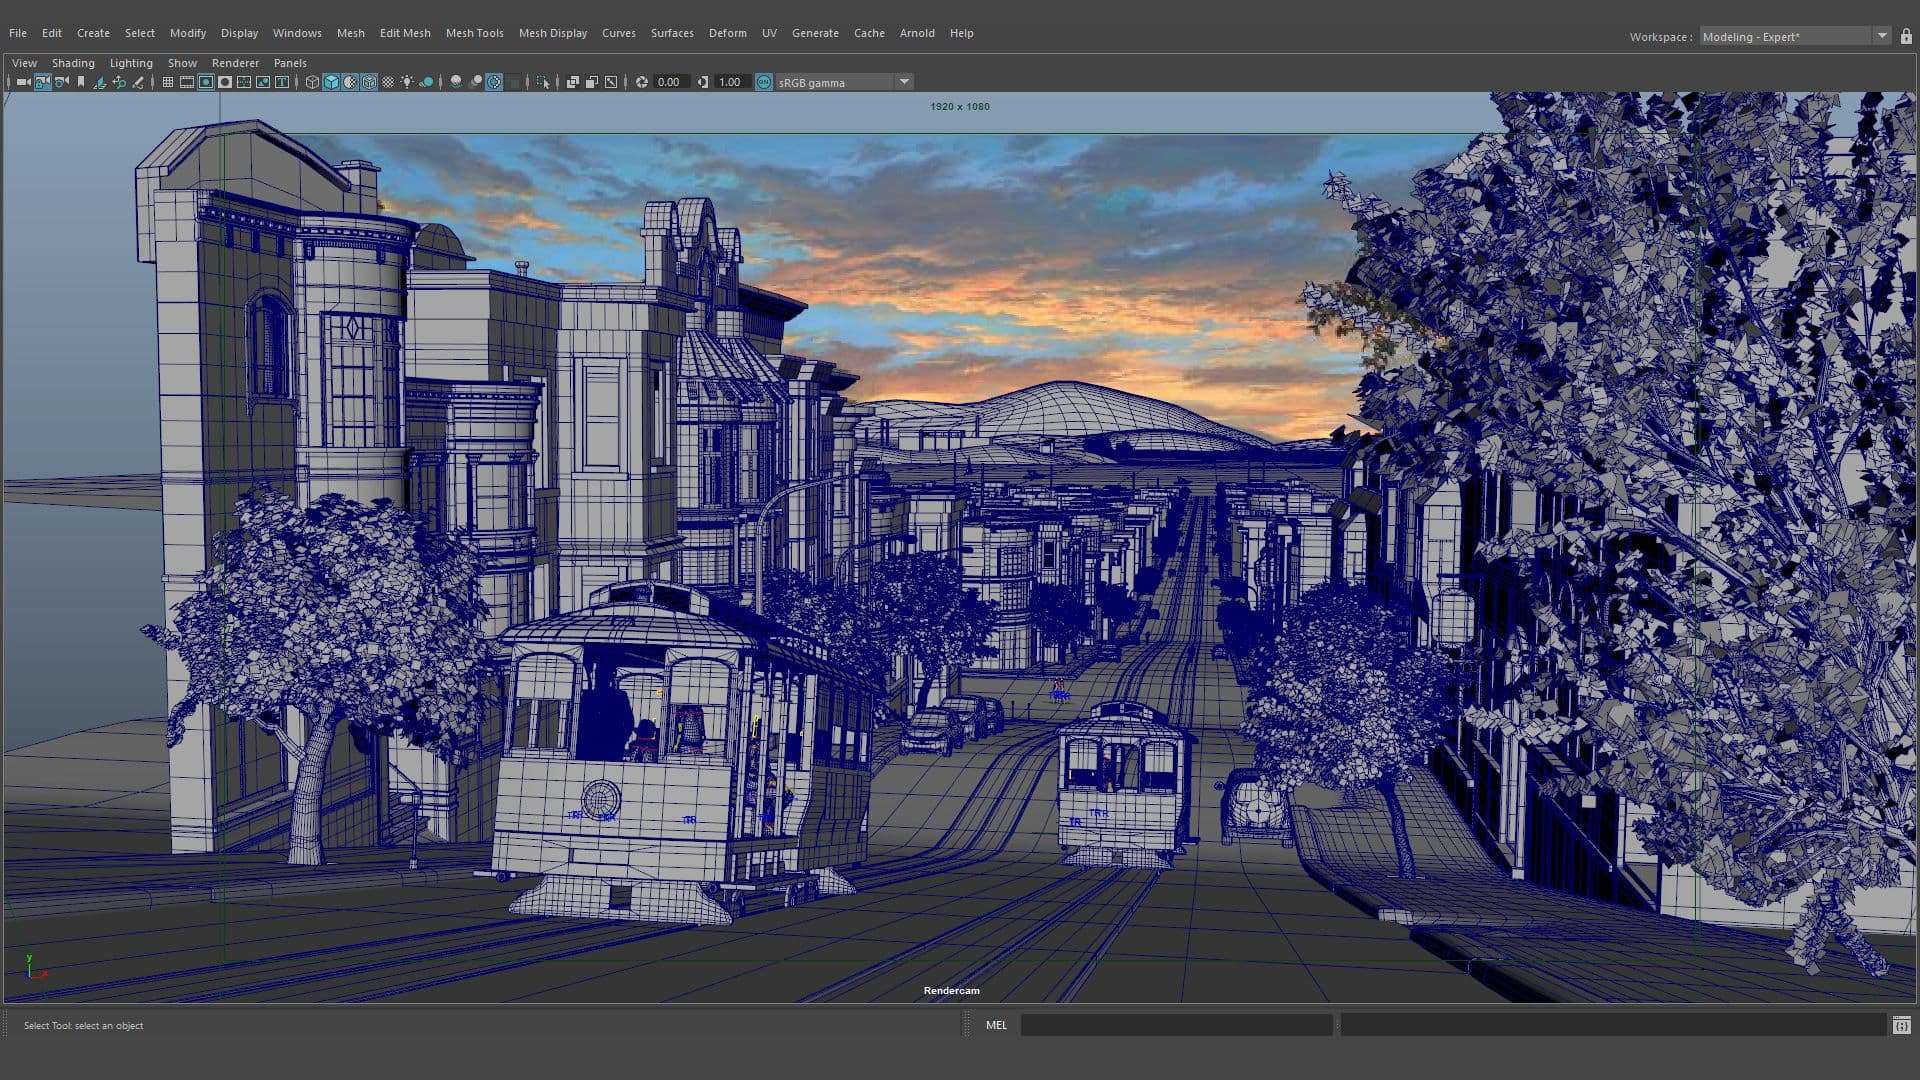
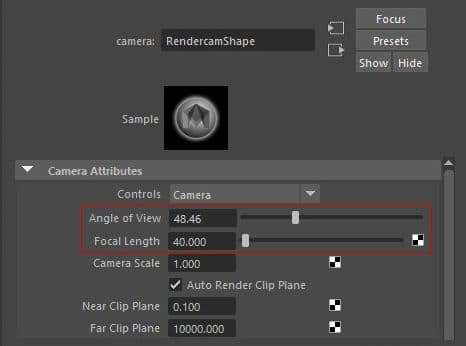
But the scene would have been too big, so I reduced the street to get approximately 800m of length and placed the main camera playing with the focal length to get a first idea of the future scene.
When you are working on a big scene, don't hesitate to play with the near and far clip plane to see everything.
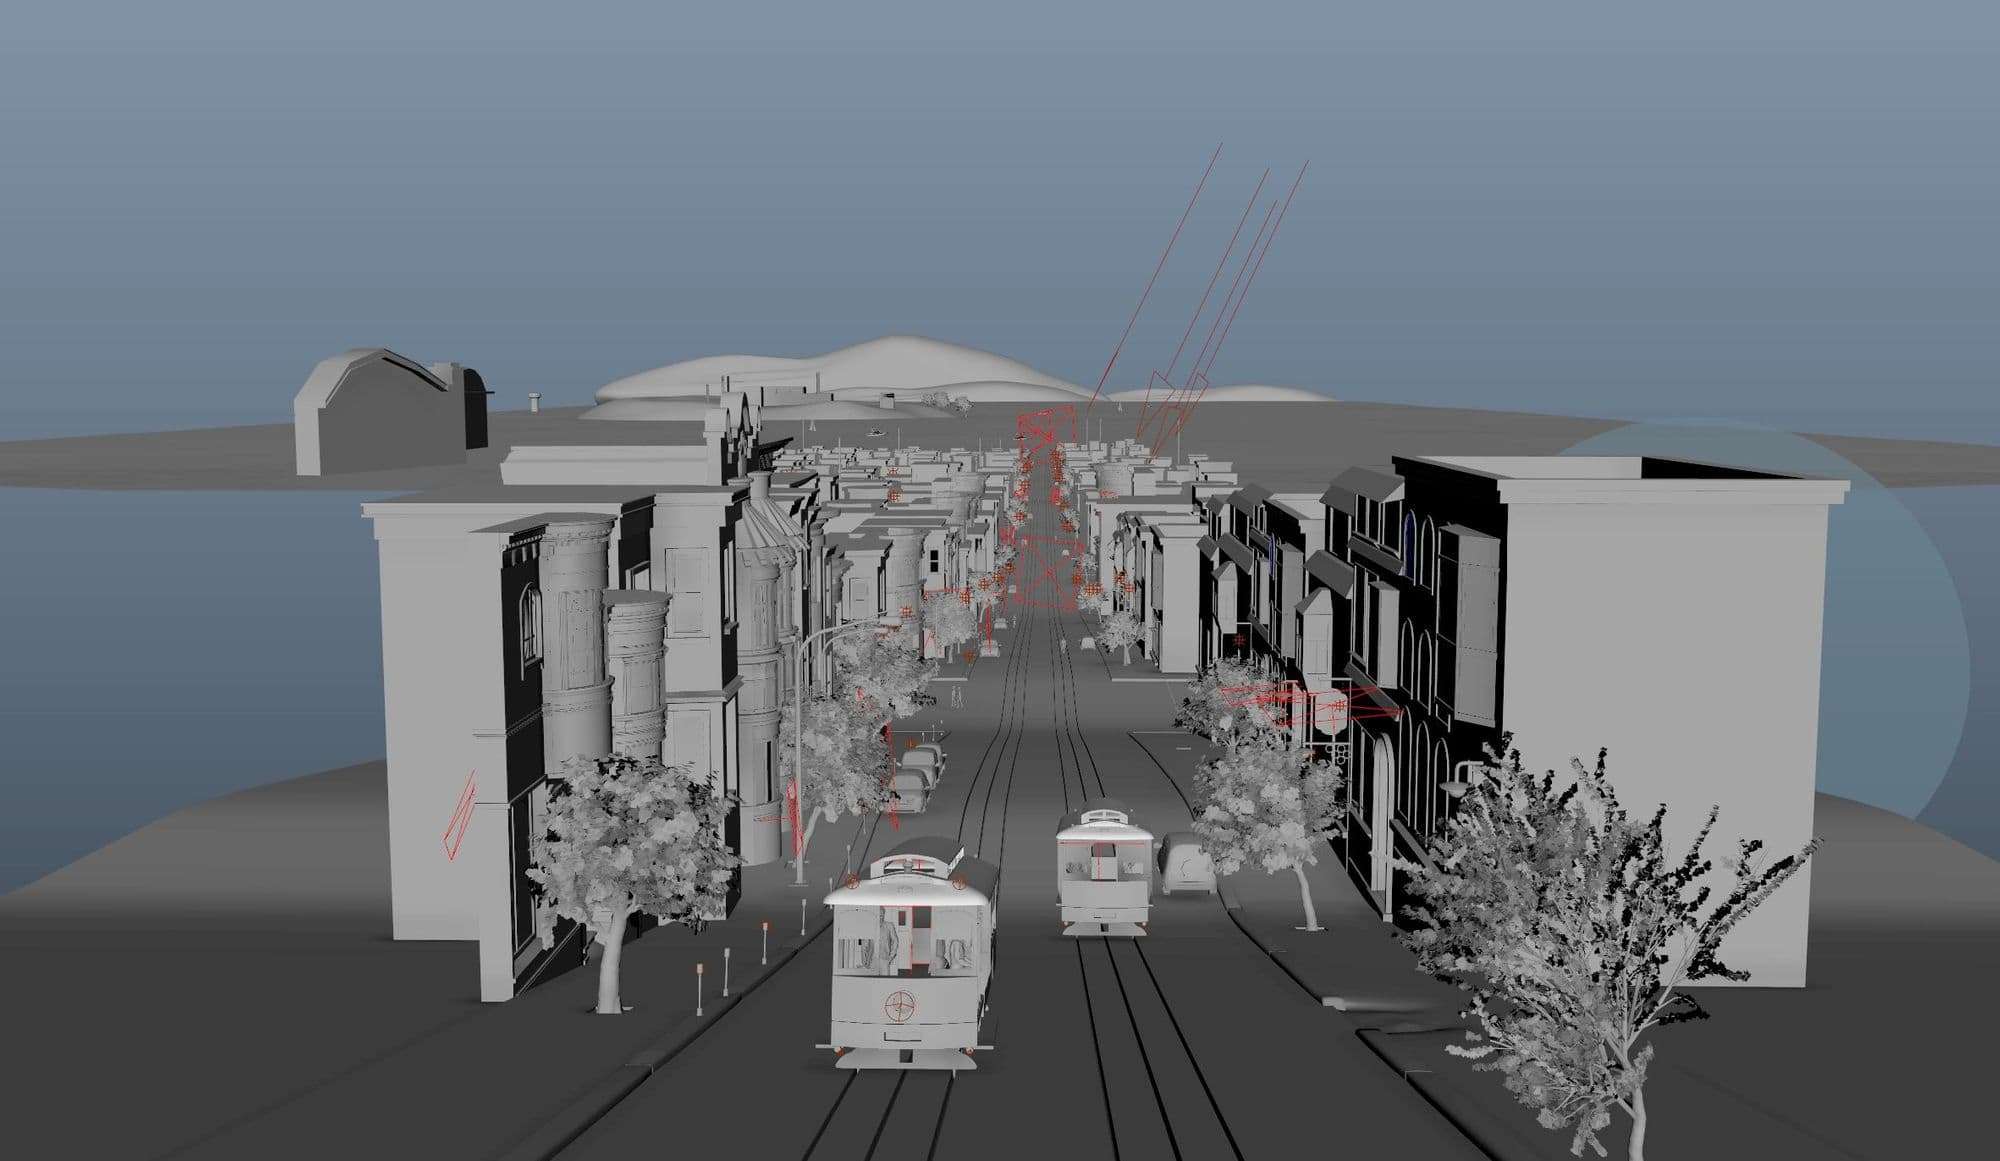
Then I did a blocking with simple cubes before tweaking again the main camera and getting a better idea of what we would get.
Even if we can always modify the scene, the blocking part is really important, we cannot to go through. Our concept art is still a 2D paint so it is normal if the perspective does not match perfectly, but the goal was to be as close as possible.
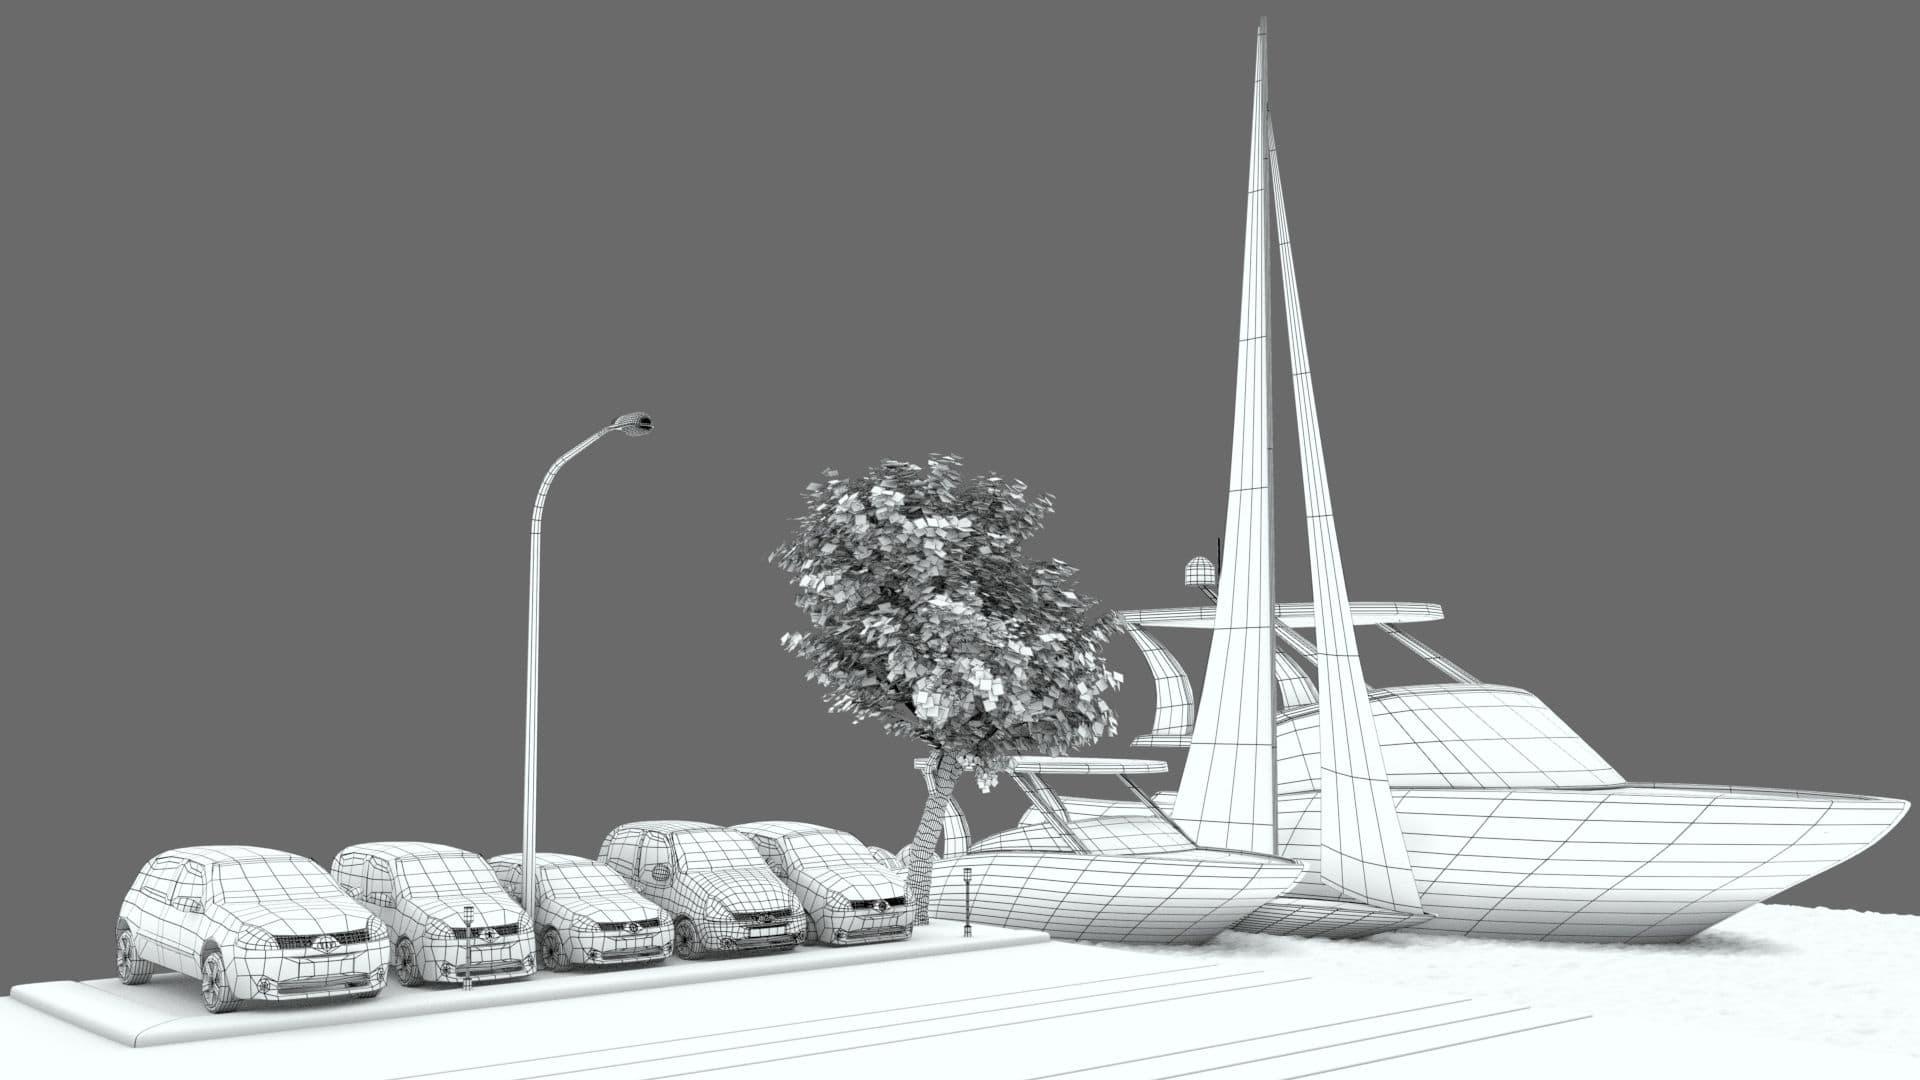
After the blocking, I made low poly assets for the scene.
Philipp Sieben did five variations of trees using SpeedTree who featured the project
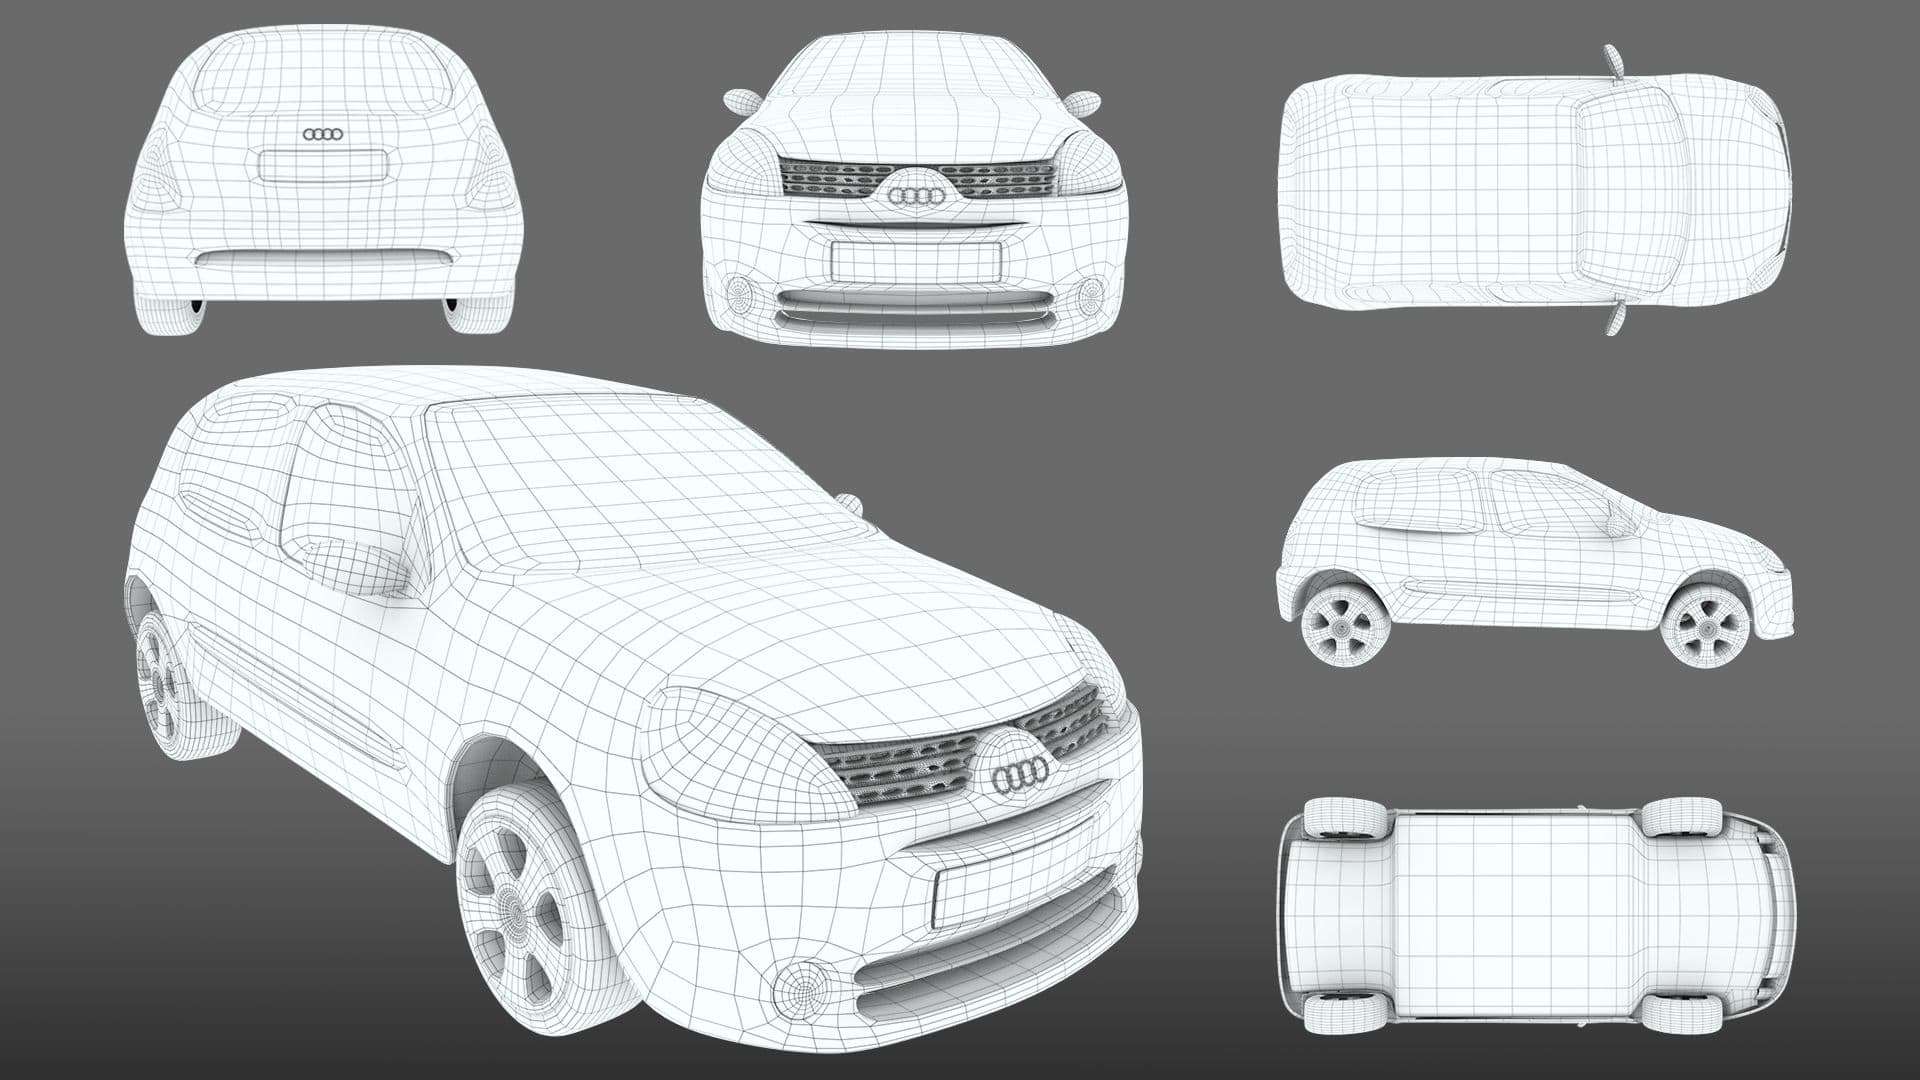
From the first car modeled, I made four other variations using Zbrush, the lattice tool in Maya and changing the logos.
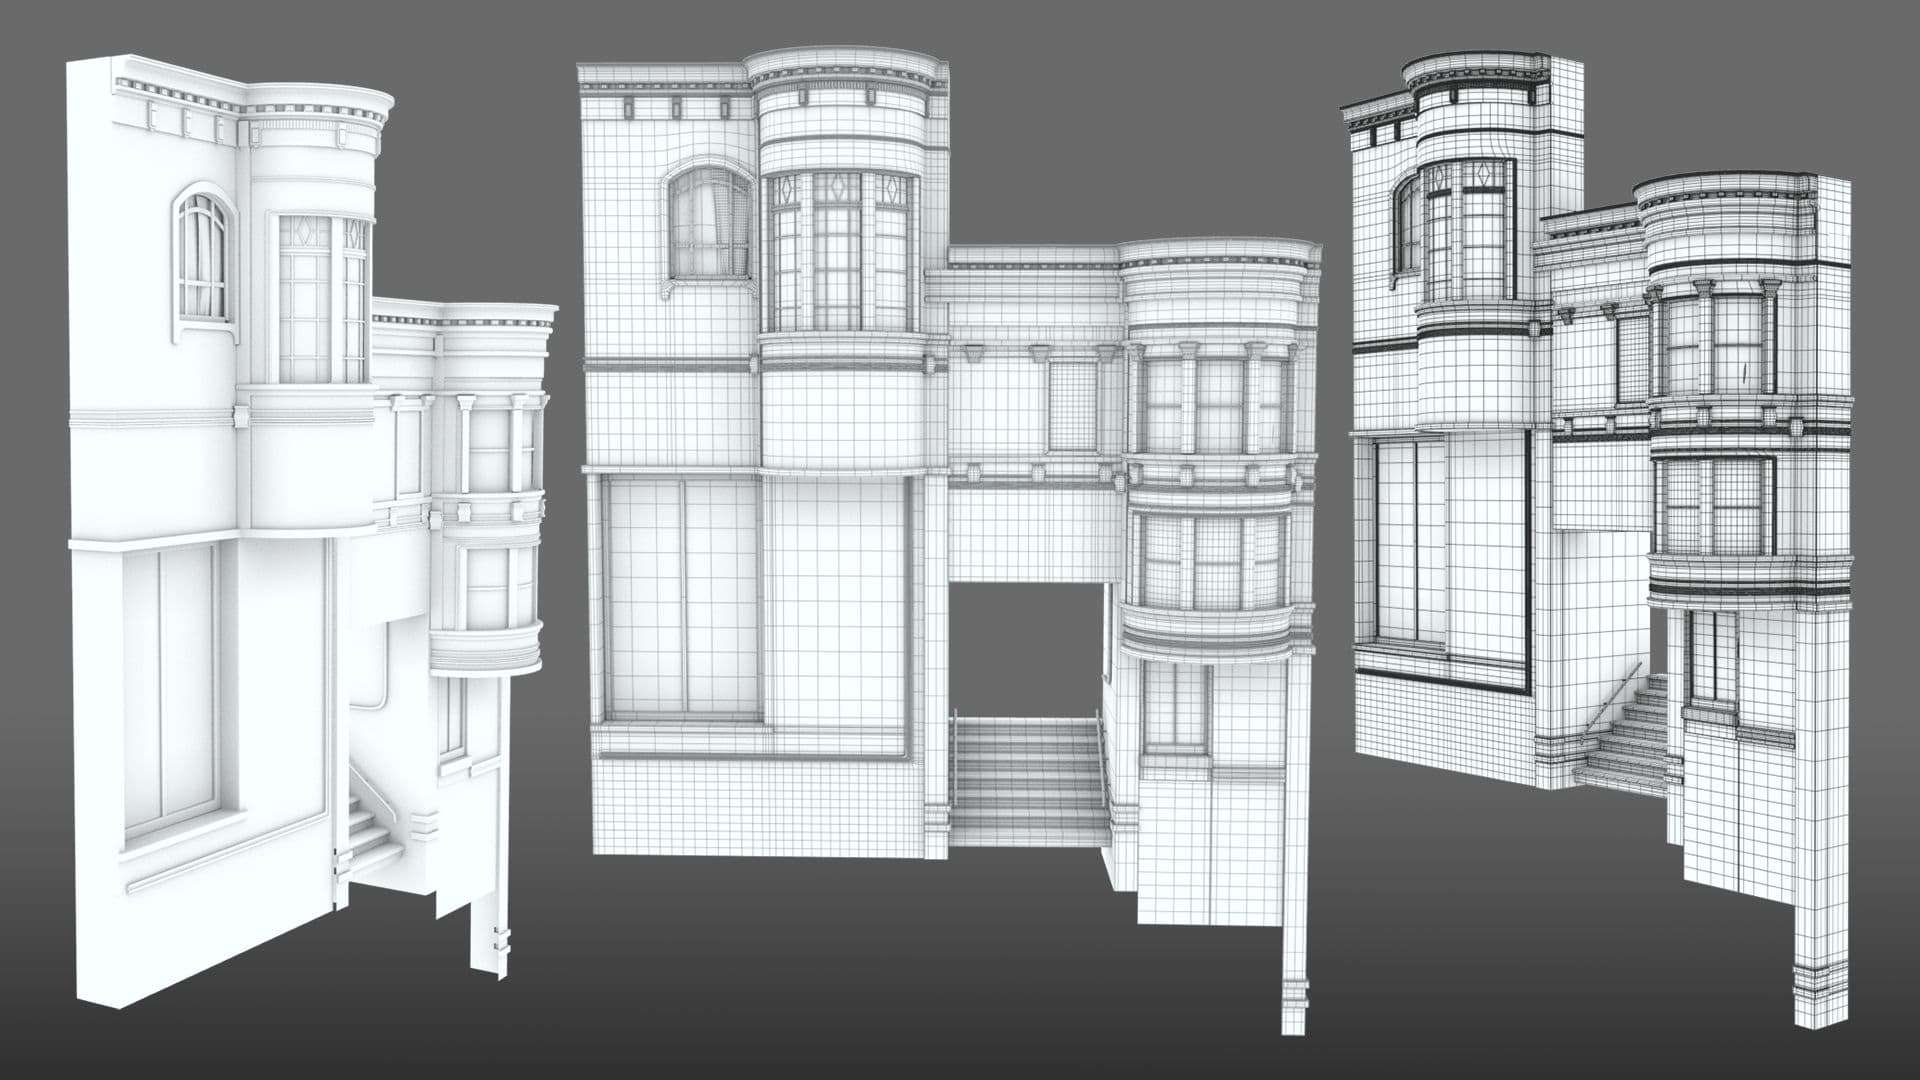
Then I made houses thinking about optimization so I only modeled visible faces.
To get the same texture resolution for all houses in the foreground, I gave them the same UV scale based on the pixel ratio of the street.
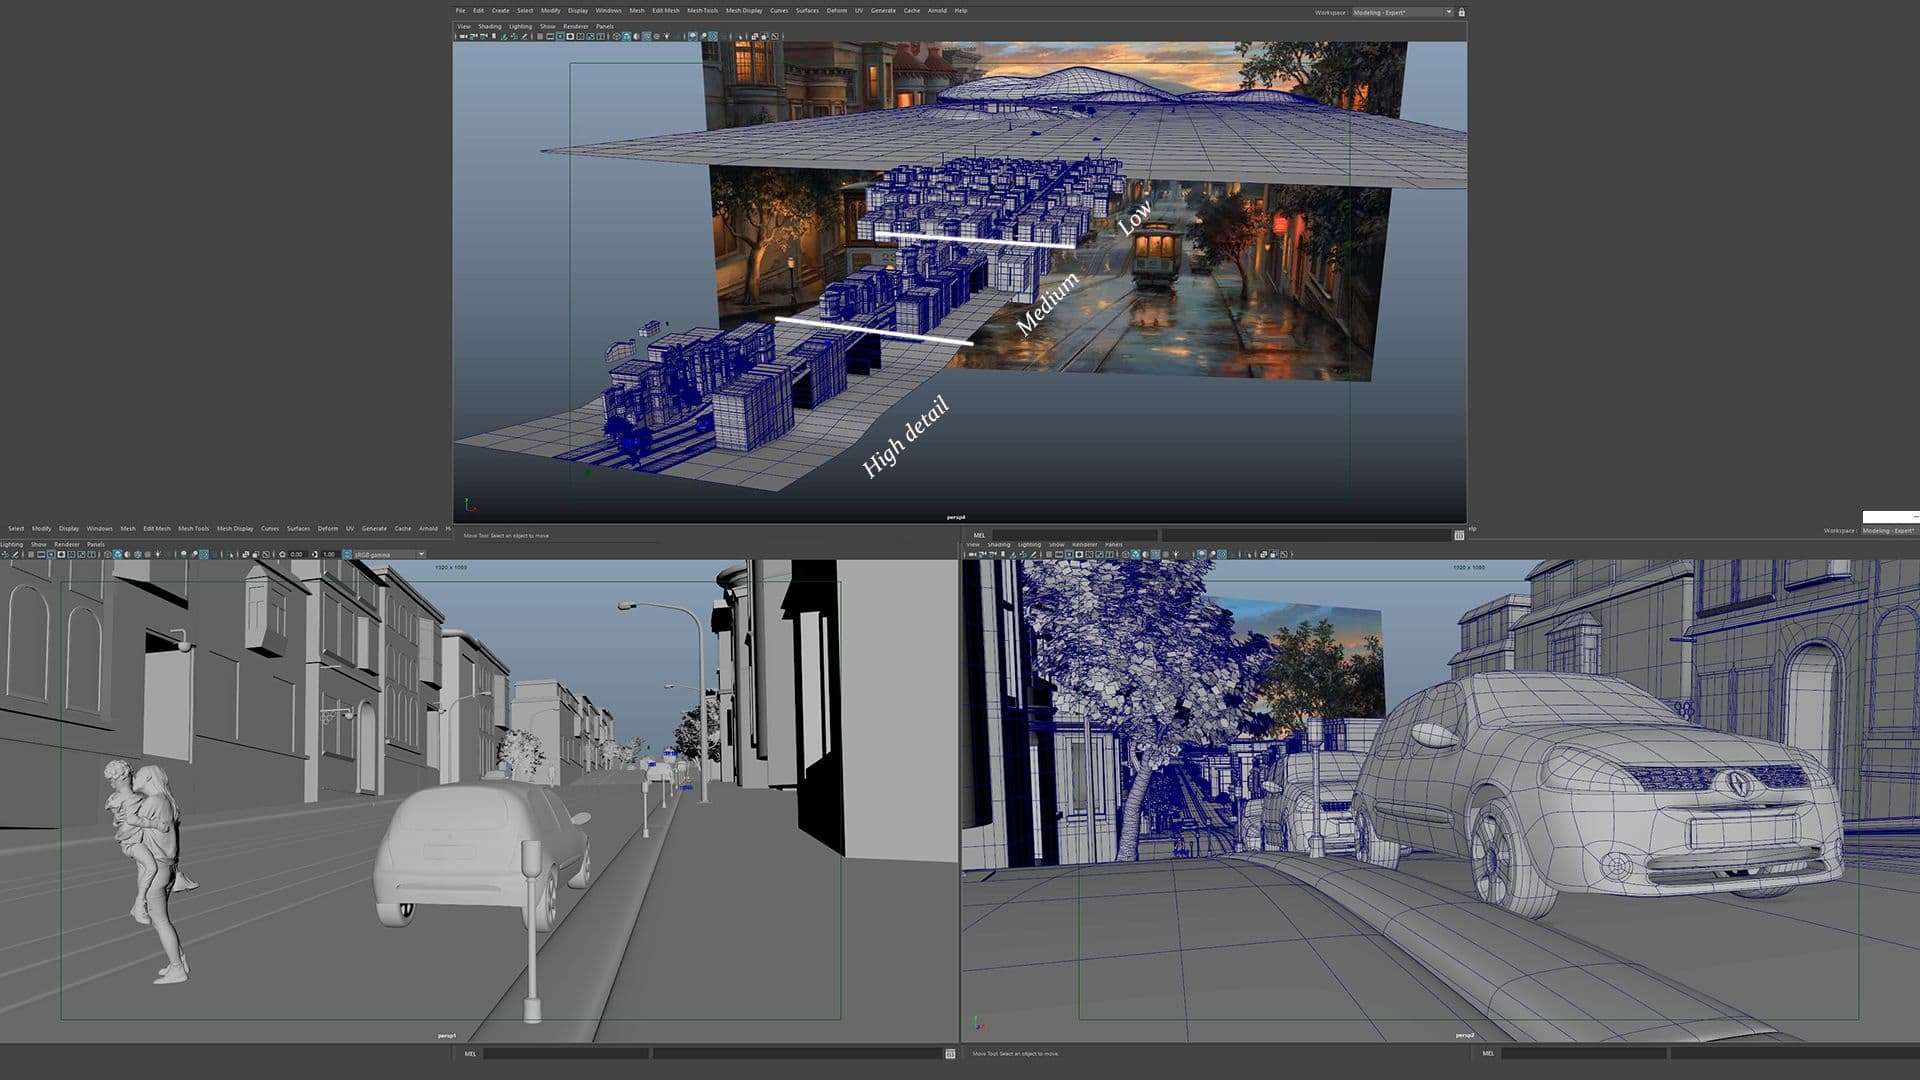
At the first crossroads, I started lowering the level of detail of the buildings.
And I used proxy houses to fill the space all the way down to the sea.
For a better render I made three different houses that I scaled down to fake the distance.
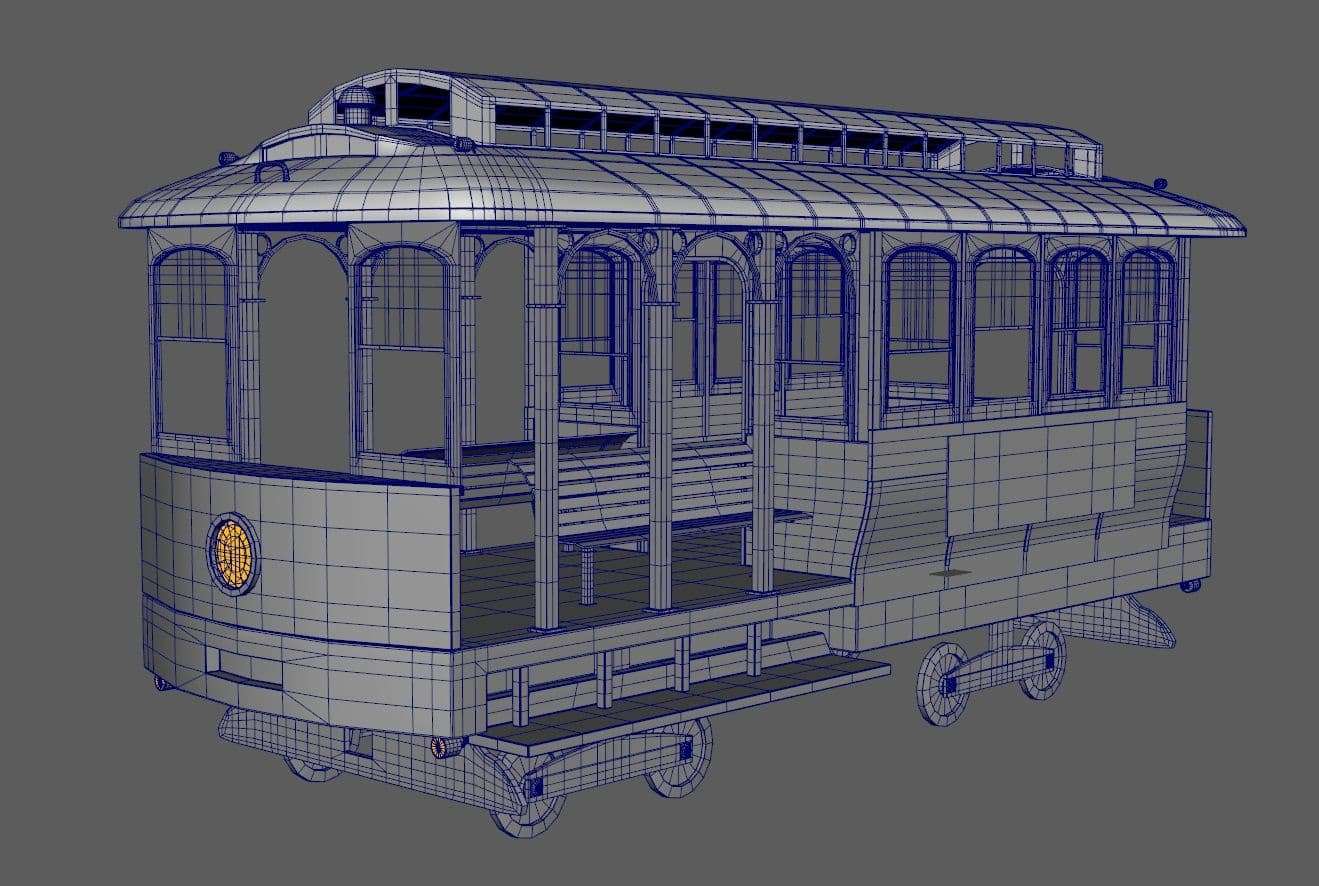
For modeling the cable car, I tried to find as many references of real cable cars as possible. It is always important to use references for everything that you are doing in 3d, to create your model as good as possible.
Gathering the references was not as easy as I thought in the beginning, because there are a lot of different cable cars out there.
After hours of searching for images, I gathered enough references and images of different perspectives of the cable car, so I could start with modeling.
We tried to achieve a mixture between a gaming and a realistic look for our San Francisco project.
So the modeling of our hero asset should be detailed, but not too detailed, but as close as possible to the cable car in Lushpin’s painting.
For modeling, I loaded a front view and a side view of the cable car in Maya, set everything to the right scale (meters) and then started modeling. First with a rough blocking of the main shapes, and after with modeling all the details.
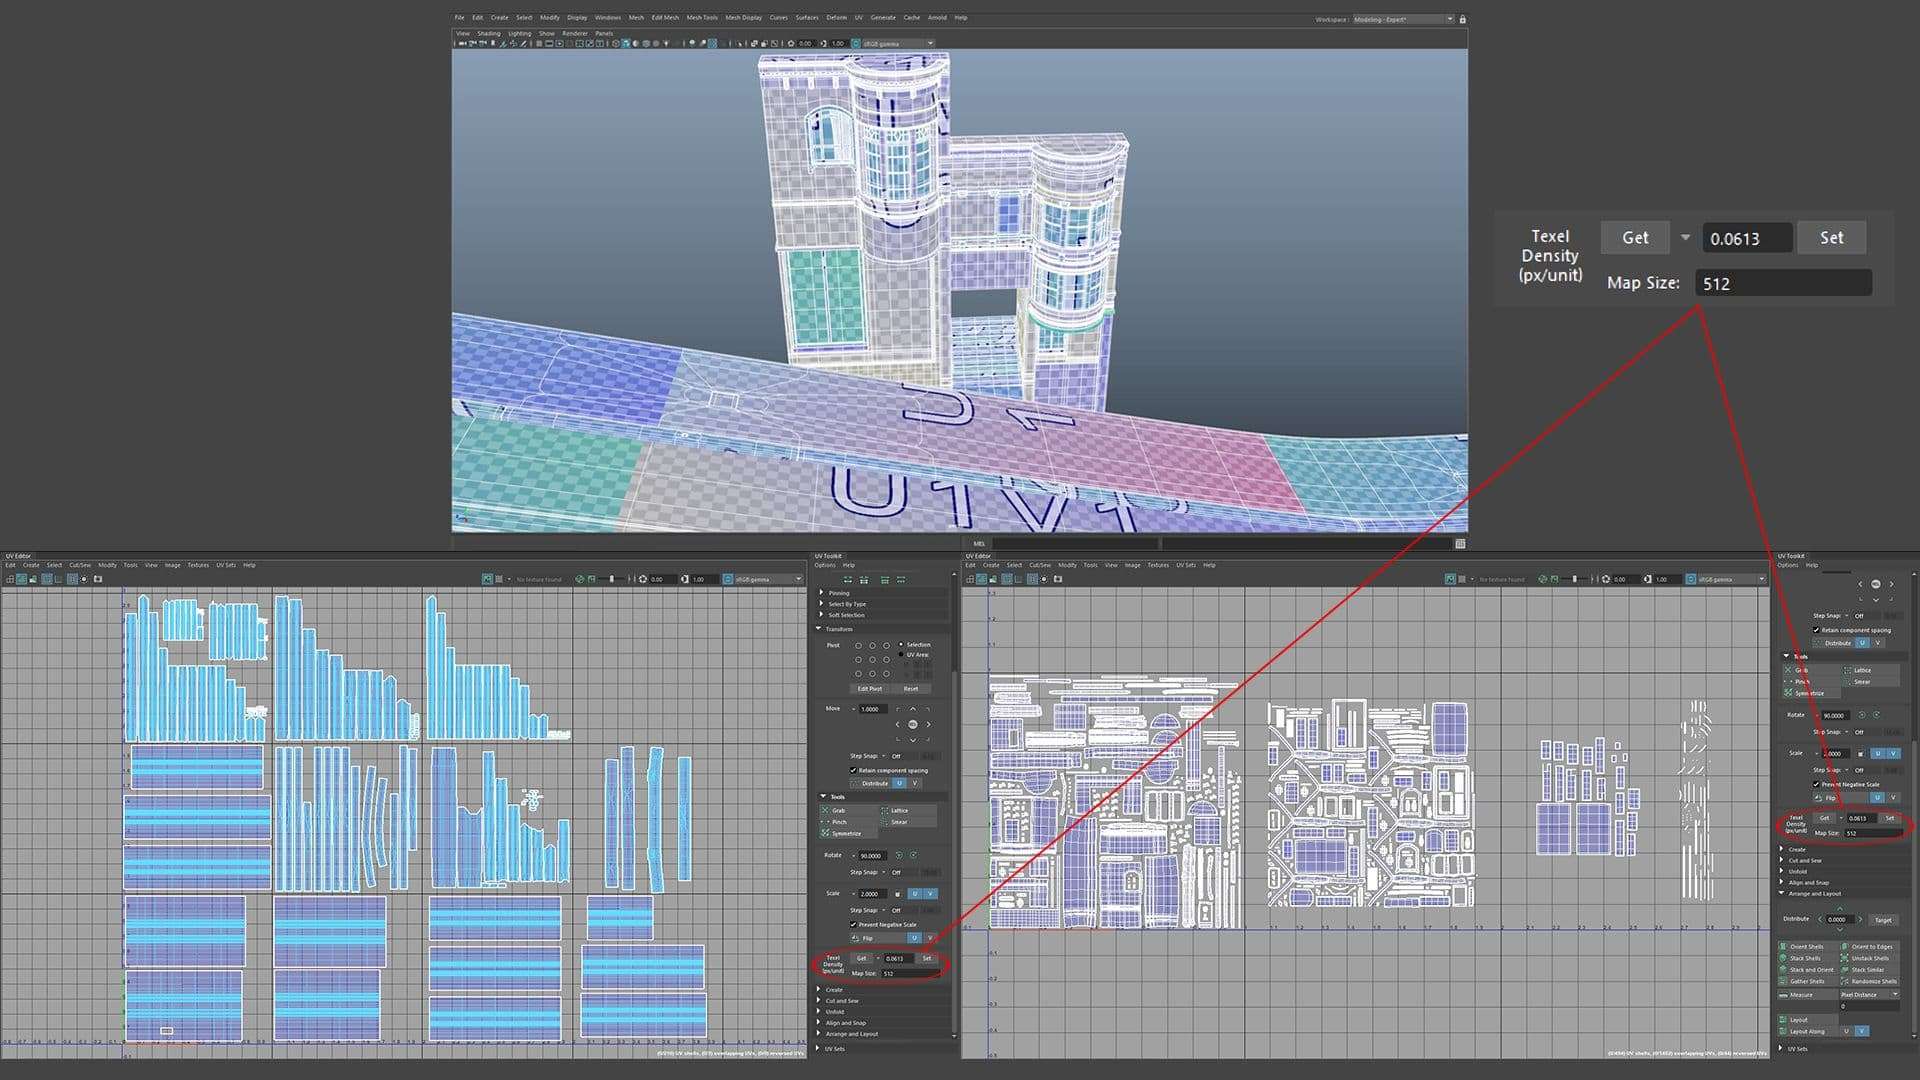
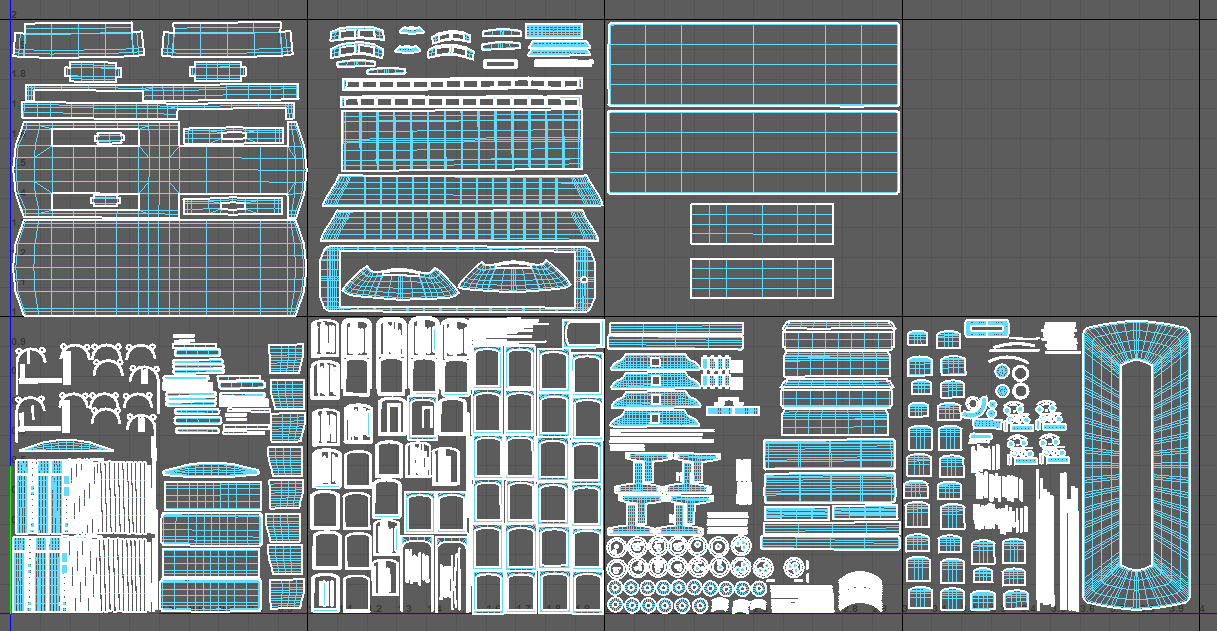
Texturing When it comes to texturing, we were using UDIMs for all assets in our scene, and Substance Painter as our main tool.
Splitting the cable car in UDIMs, I first had to set the right texel density, which I received with a quick render with the checkerboard assigned to the model . This is also a reason why you should start with a blocking of your scene and setting the camera.
I ended up using 7 UDIMs in 2k resolution.
For dividing the UDIMs, I used the tactic of separating the objects and UV tiles by materials, so I came out with a UDIM for all glass assets, one for the metal assets and so on.
Because Substance Painter was not able to handle all the geometry of the cable car, I only loaded in 2 UDIMs at the same time, so everything worked faster.
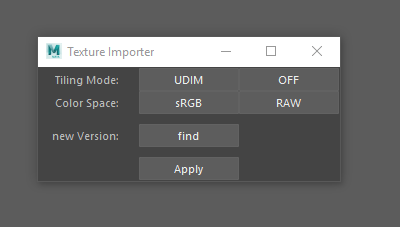
Shading Coming out with a lot of different texture files for the cable car, I decided to write myself a script, which made it way easier for me to connect all the textures to the Arnold shader and update them, when I made a newer version.
In the painting, most of the materials are hard to identify. That's why it's also important to use references.
A problem that occurred during the shading process was the fact that everything is rainy and wet in the painting of Lushpin. To fake this effect in 3D, we used the coat option in the aiStandardSurface and broke the coat layer up with a bunch of noises, to avoid a too perfect look. Also the roof of the cable car was quite a challenge, because the colors are neutral but reflecting the skydome a lot. That's why I had to do a lot of lookdev tests in different lighting/skydome conditions and checked together with my colleagues, what would work out the best in lighting and shading.
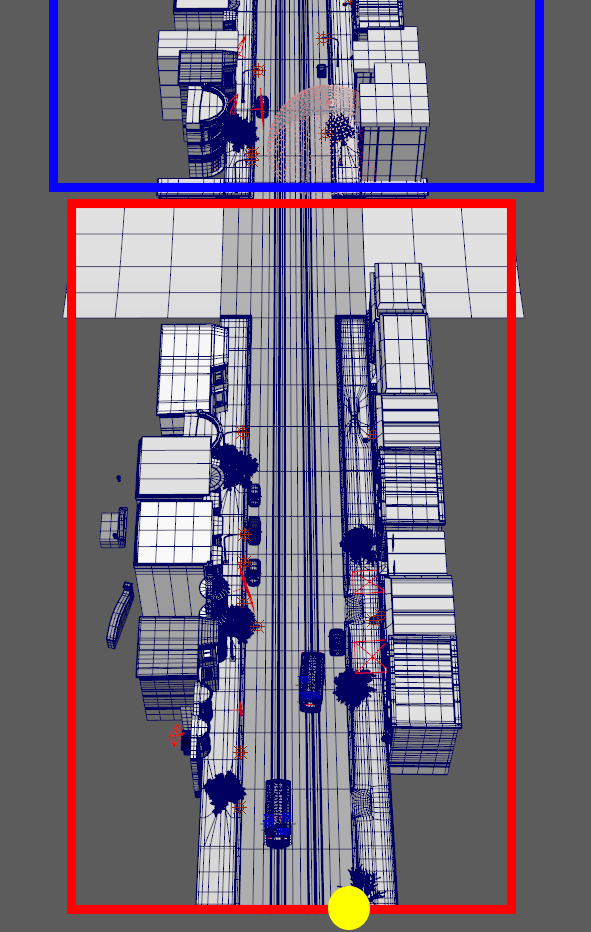
Street For the street, the workflow was nearly the same. But here, a lot more happened in shading, than in texturing. When splitting the UDIMs, I thought about camera distance and the field of view. The part of the street which was closer to the camera, needed much more resolution than the part which was far away. So I gave the UV tiles until the first cross a much higher resolution than the street farther away.
Yellow Dot = Camera / Red Box = High Res UVs / Blue Box = Low Res UVs
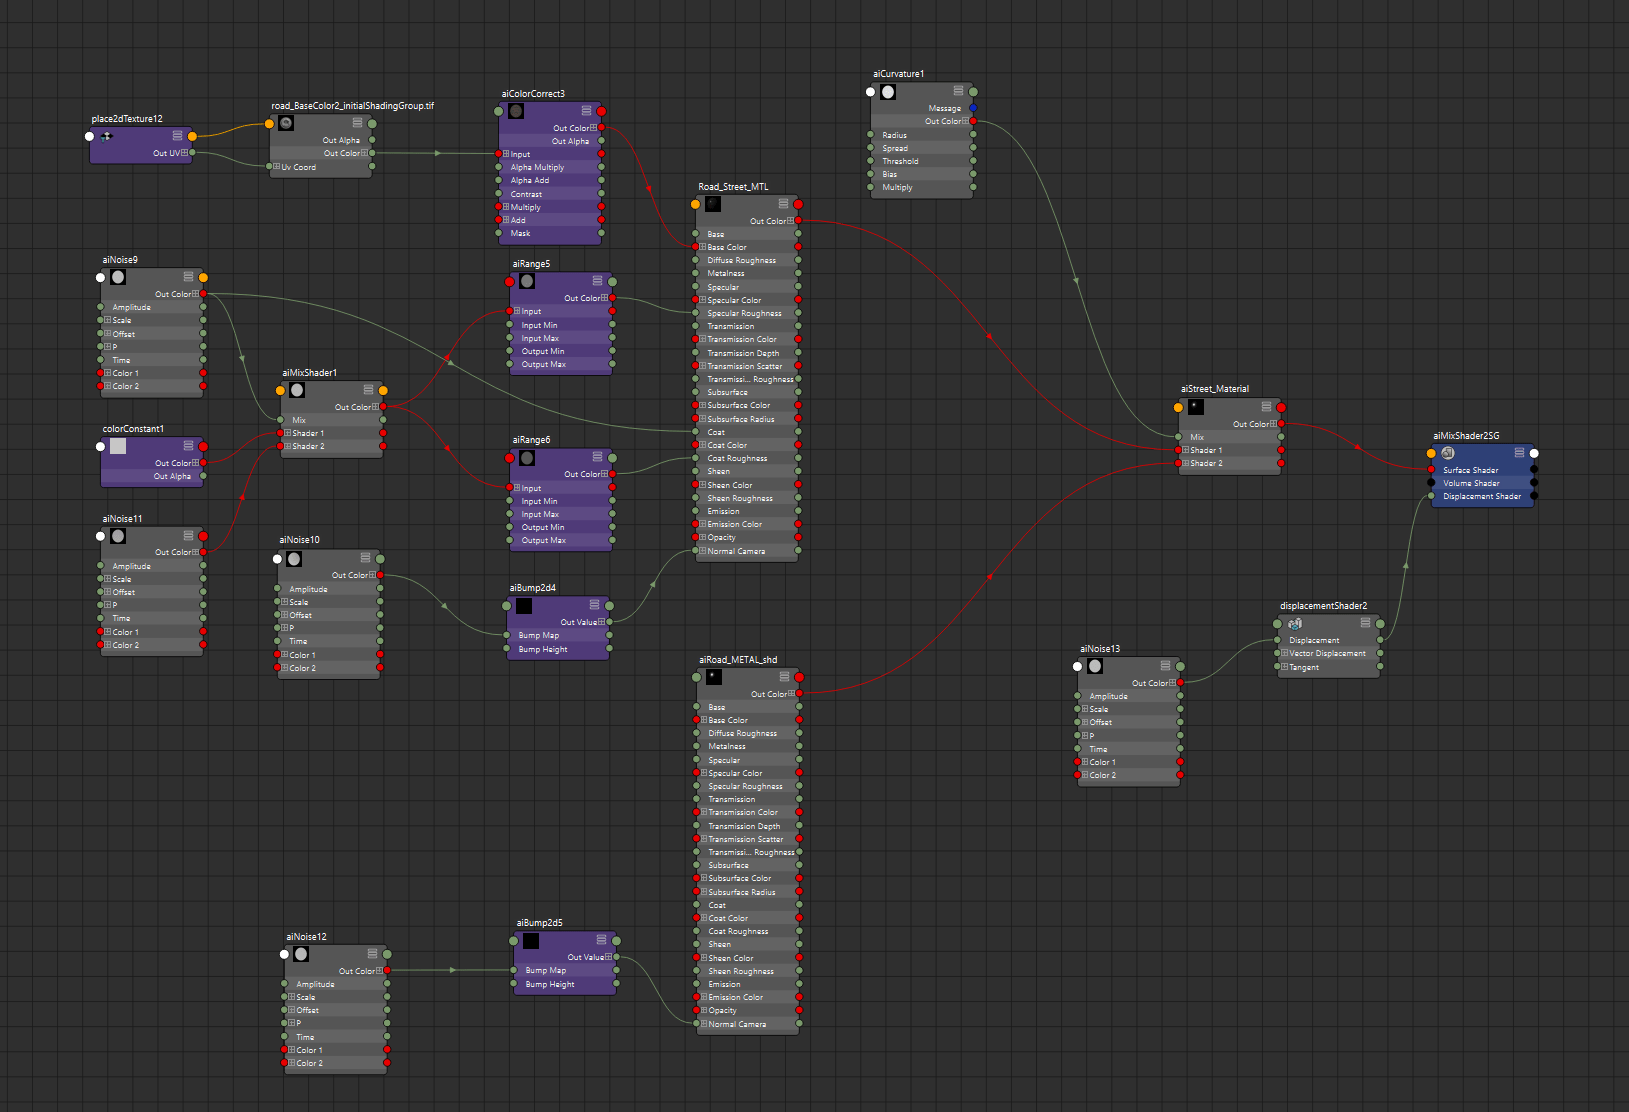
For the base, I used a few different street textures from Quixel Megascans and layered them on top of each other to get a unique look. Thinking about render time, I only used a noise as displacement, giving it a better look with combined normal and bump maps.
I assigned a shader to the street with roughness and coat which was masked by some noises, to choose which parts of the street are more wet than others as I did before with the cable car. With these noises, I was also able to create little puddles in some areas.
For creating the wagon trail, I used a curvature as a mask for the mix Shader and assigned a metal material to it. Mixed with the normal street material, it gave our road an unique look.
After we had created the layout for our scene I started with the lighting right away. It is always good to already start with a rough lighting blockout even if some of the assets are still in progress. We referenced all our assets into our main scene. This gave us the possibility to update them anytime during the lighting process. Taking our concept as a lighting reference gave me already a great base for the light color and direction.
In most cases, I am starting always with the sun as it defines the main shapes and feeling to the shot. For San Francisco, this really helped because from there on I had mostly just to continue with practical lights. It really helps to set every light individually and proceed when you are happy with the position and brightness of them. Through this technique, I avoided unnecessary lights and knew exactly what each light is contributing to the shot.
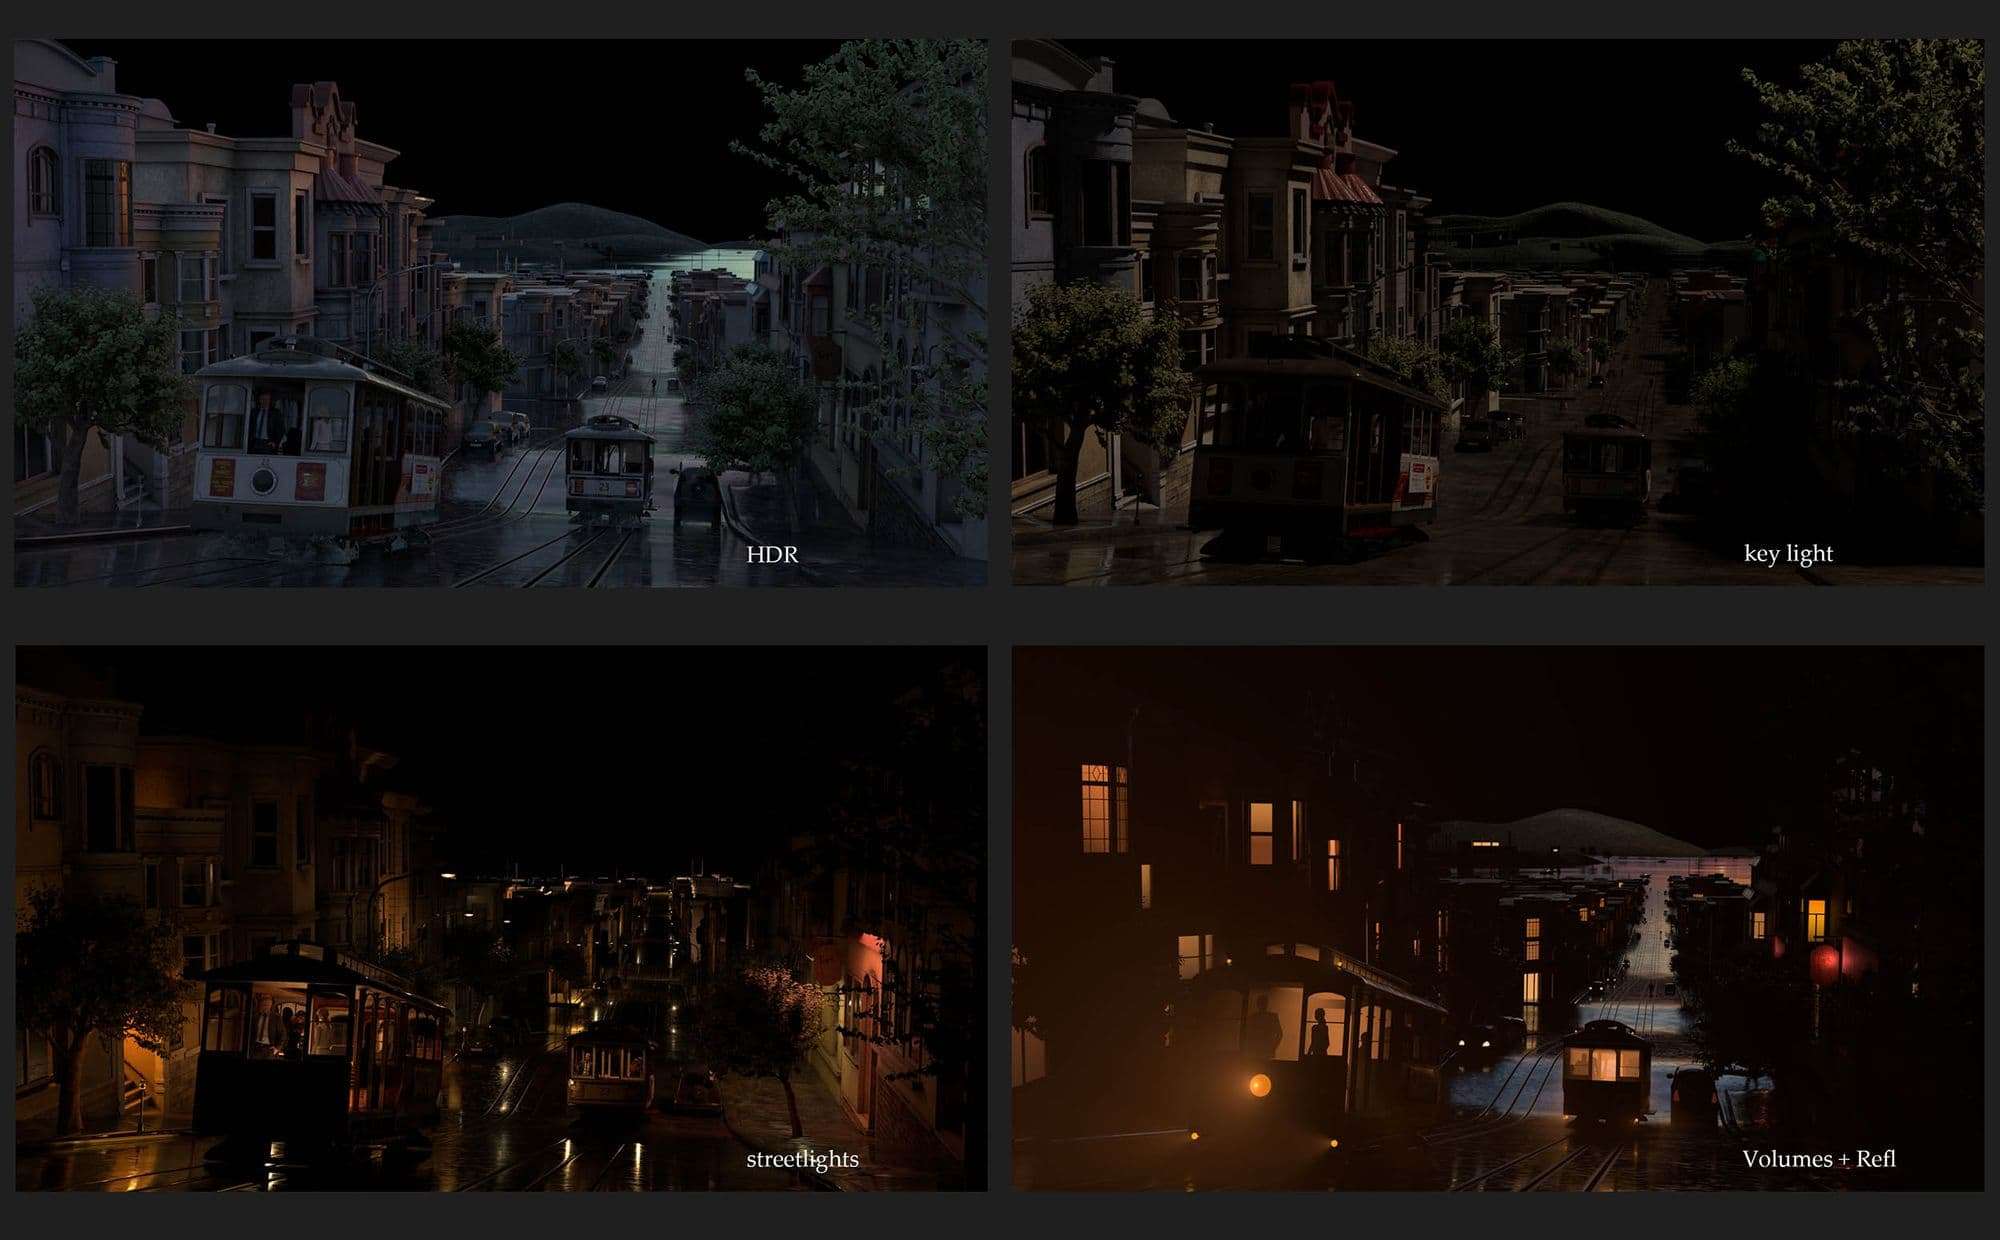
I really loved the lighting part of this project because the mood played a huge part in it. We focused on achieving a golden hour feel like we see in the painting. I used mainly warm colors for my lights and an HDR for the blue light that is coming from the sky. Of course, after setting your base lighting it requires some tweaking until you are getting the look you want to achieve. What really helped me is to start the compositing while doing the lighting. Then I had the possibility to see what is still to do in 3D and what is easier and faster to adjust in compositing. Rendering Light groups really helped to have full control over your lighting in Nuke.
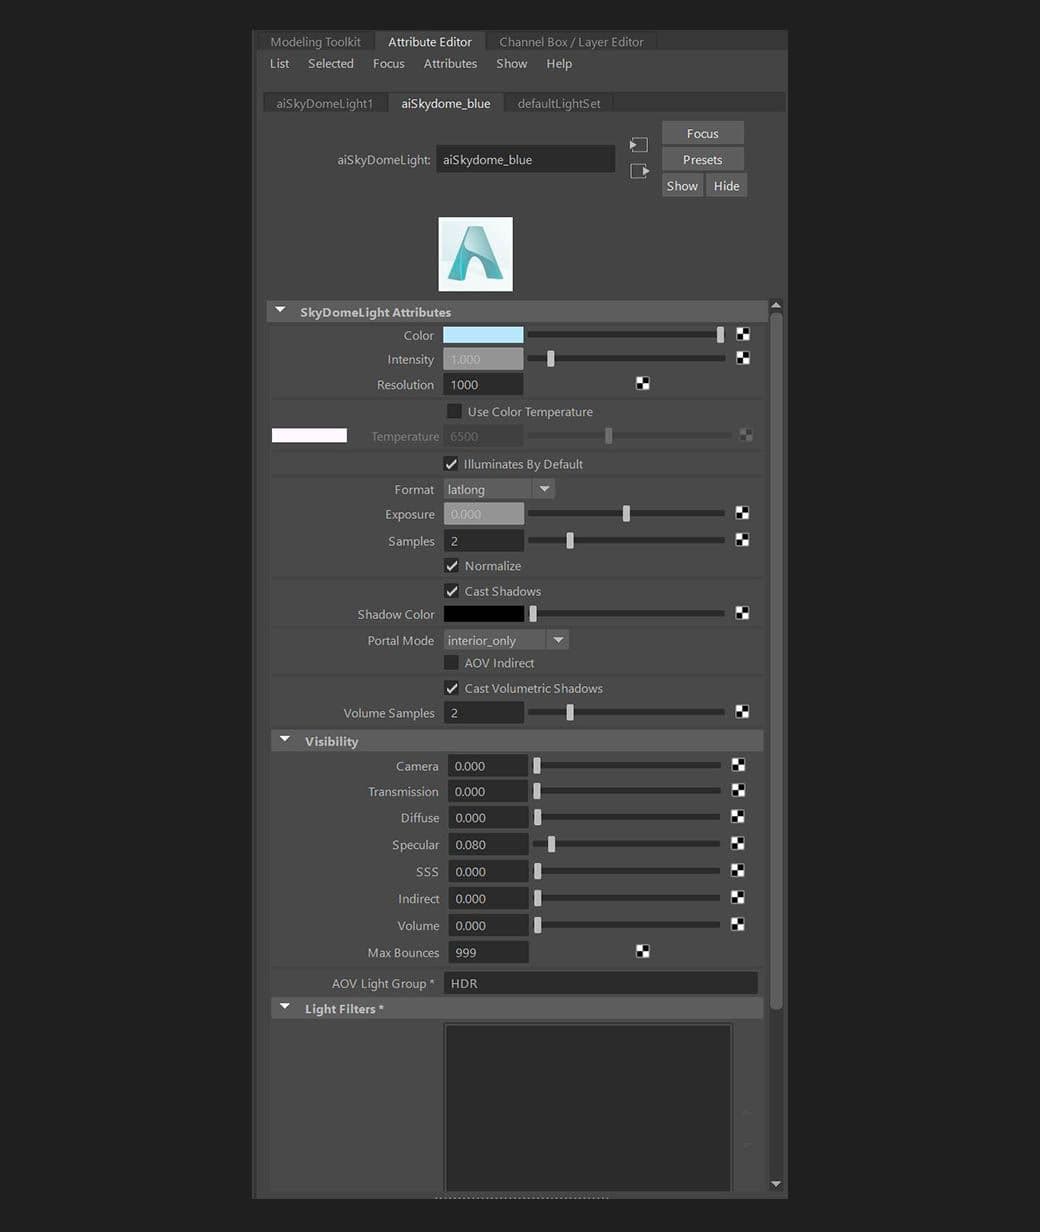
An important part of our project was getting the street right as it covers a wide area of the image. The street is very reflective so we had to take care of what we want to have reflected on it. As an example, I used a Skydome Light from Arnold and just gave it a blue color and linked it to the street. This was a mostly artistic choice but it helped to provide the look we wanted to achieve.
Other than that I used point lights as they gave a radiant spread which gave good looking reflections on it. Using too many takes a lot of resources. We decided to put geometry planes into the windows of the houses. Afterwards we assigned to them an emission shader with a ramp texture. This helped to sell the look and I had the possibility to add a glow effect to them in Nuke.
To get more attention to the cable cars in the foreground I put area lights on the top of both cable cars and added some volumetric lights to them. In Arnold, you have the possibility to control the volume amount for each light. So it was really easy to add them to my lights that I put into the cable cars.
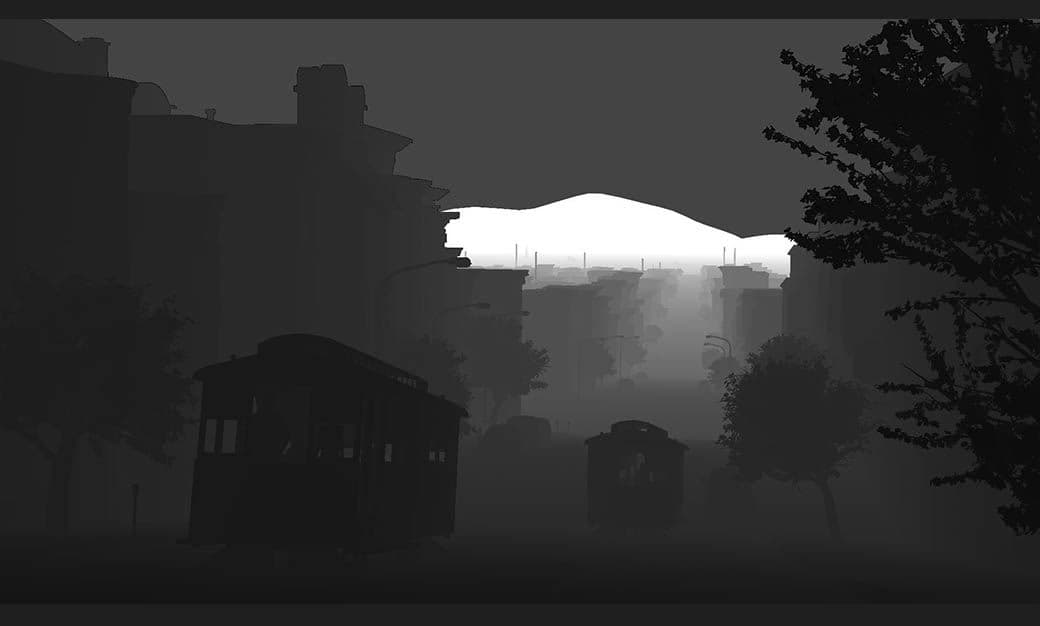
In Nuke I created a fog to create a depth feeling to the shot. I just shuffled out my Z-depth pass and used a Grade node to visualize it. After some masking and grading, I used a screen node to merge it into the stream.
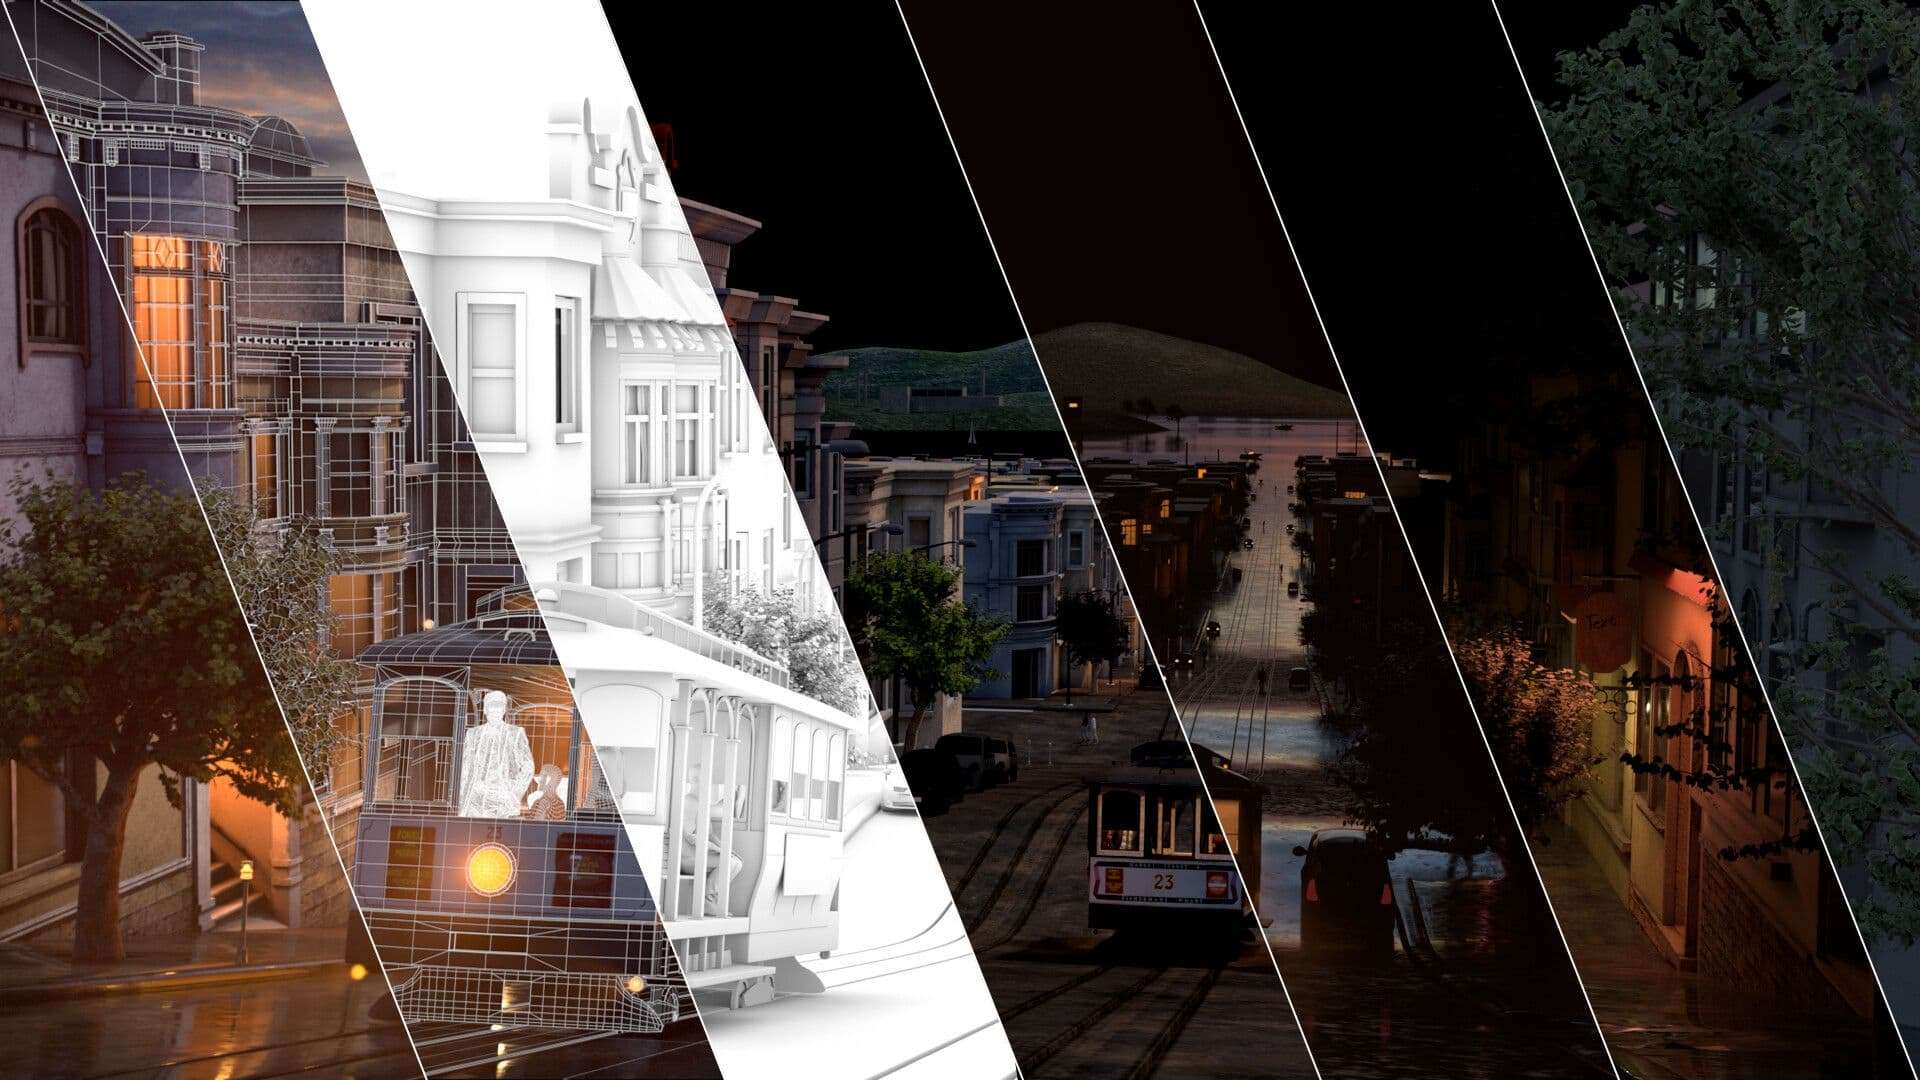
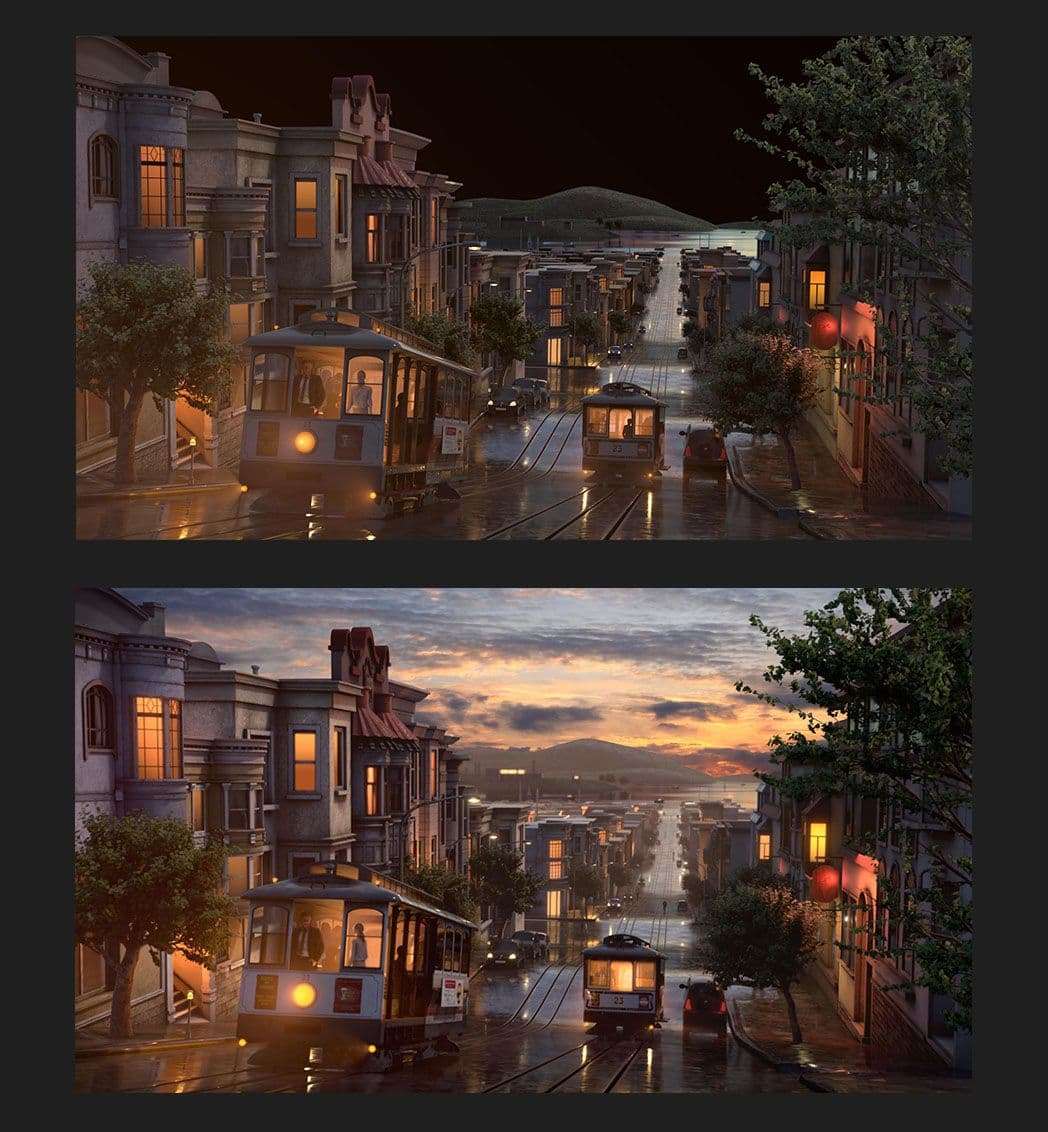
For the rest, it was mainly color correction and adding the background.You should always try to achieve the best possible result in 3D. It will help you to focus then on specific details in compositing afterwards.
before & after Compositing
We had a lot of fun with this project this project, life has separated us so we had to achieve it remotely, but we learned a lot about organisation. We hope that we gave you some good insights and were able to inspire you.
Thank you guys for reading this article and thanks to The Rookies for this opportunity! If you have any kind of questions feel free to contact us on our social media, and if you want to watch our other projects, please take a look at the links below.