Don Quijote: Complete 3D workflow from 2D Concept Art
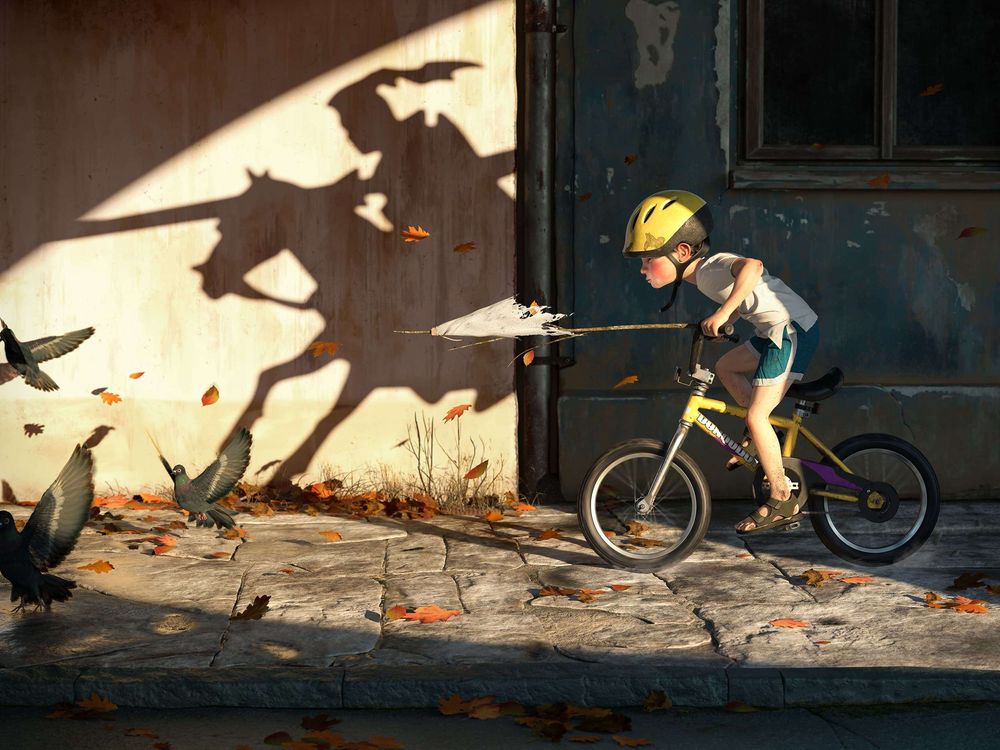
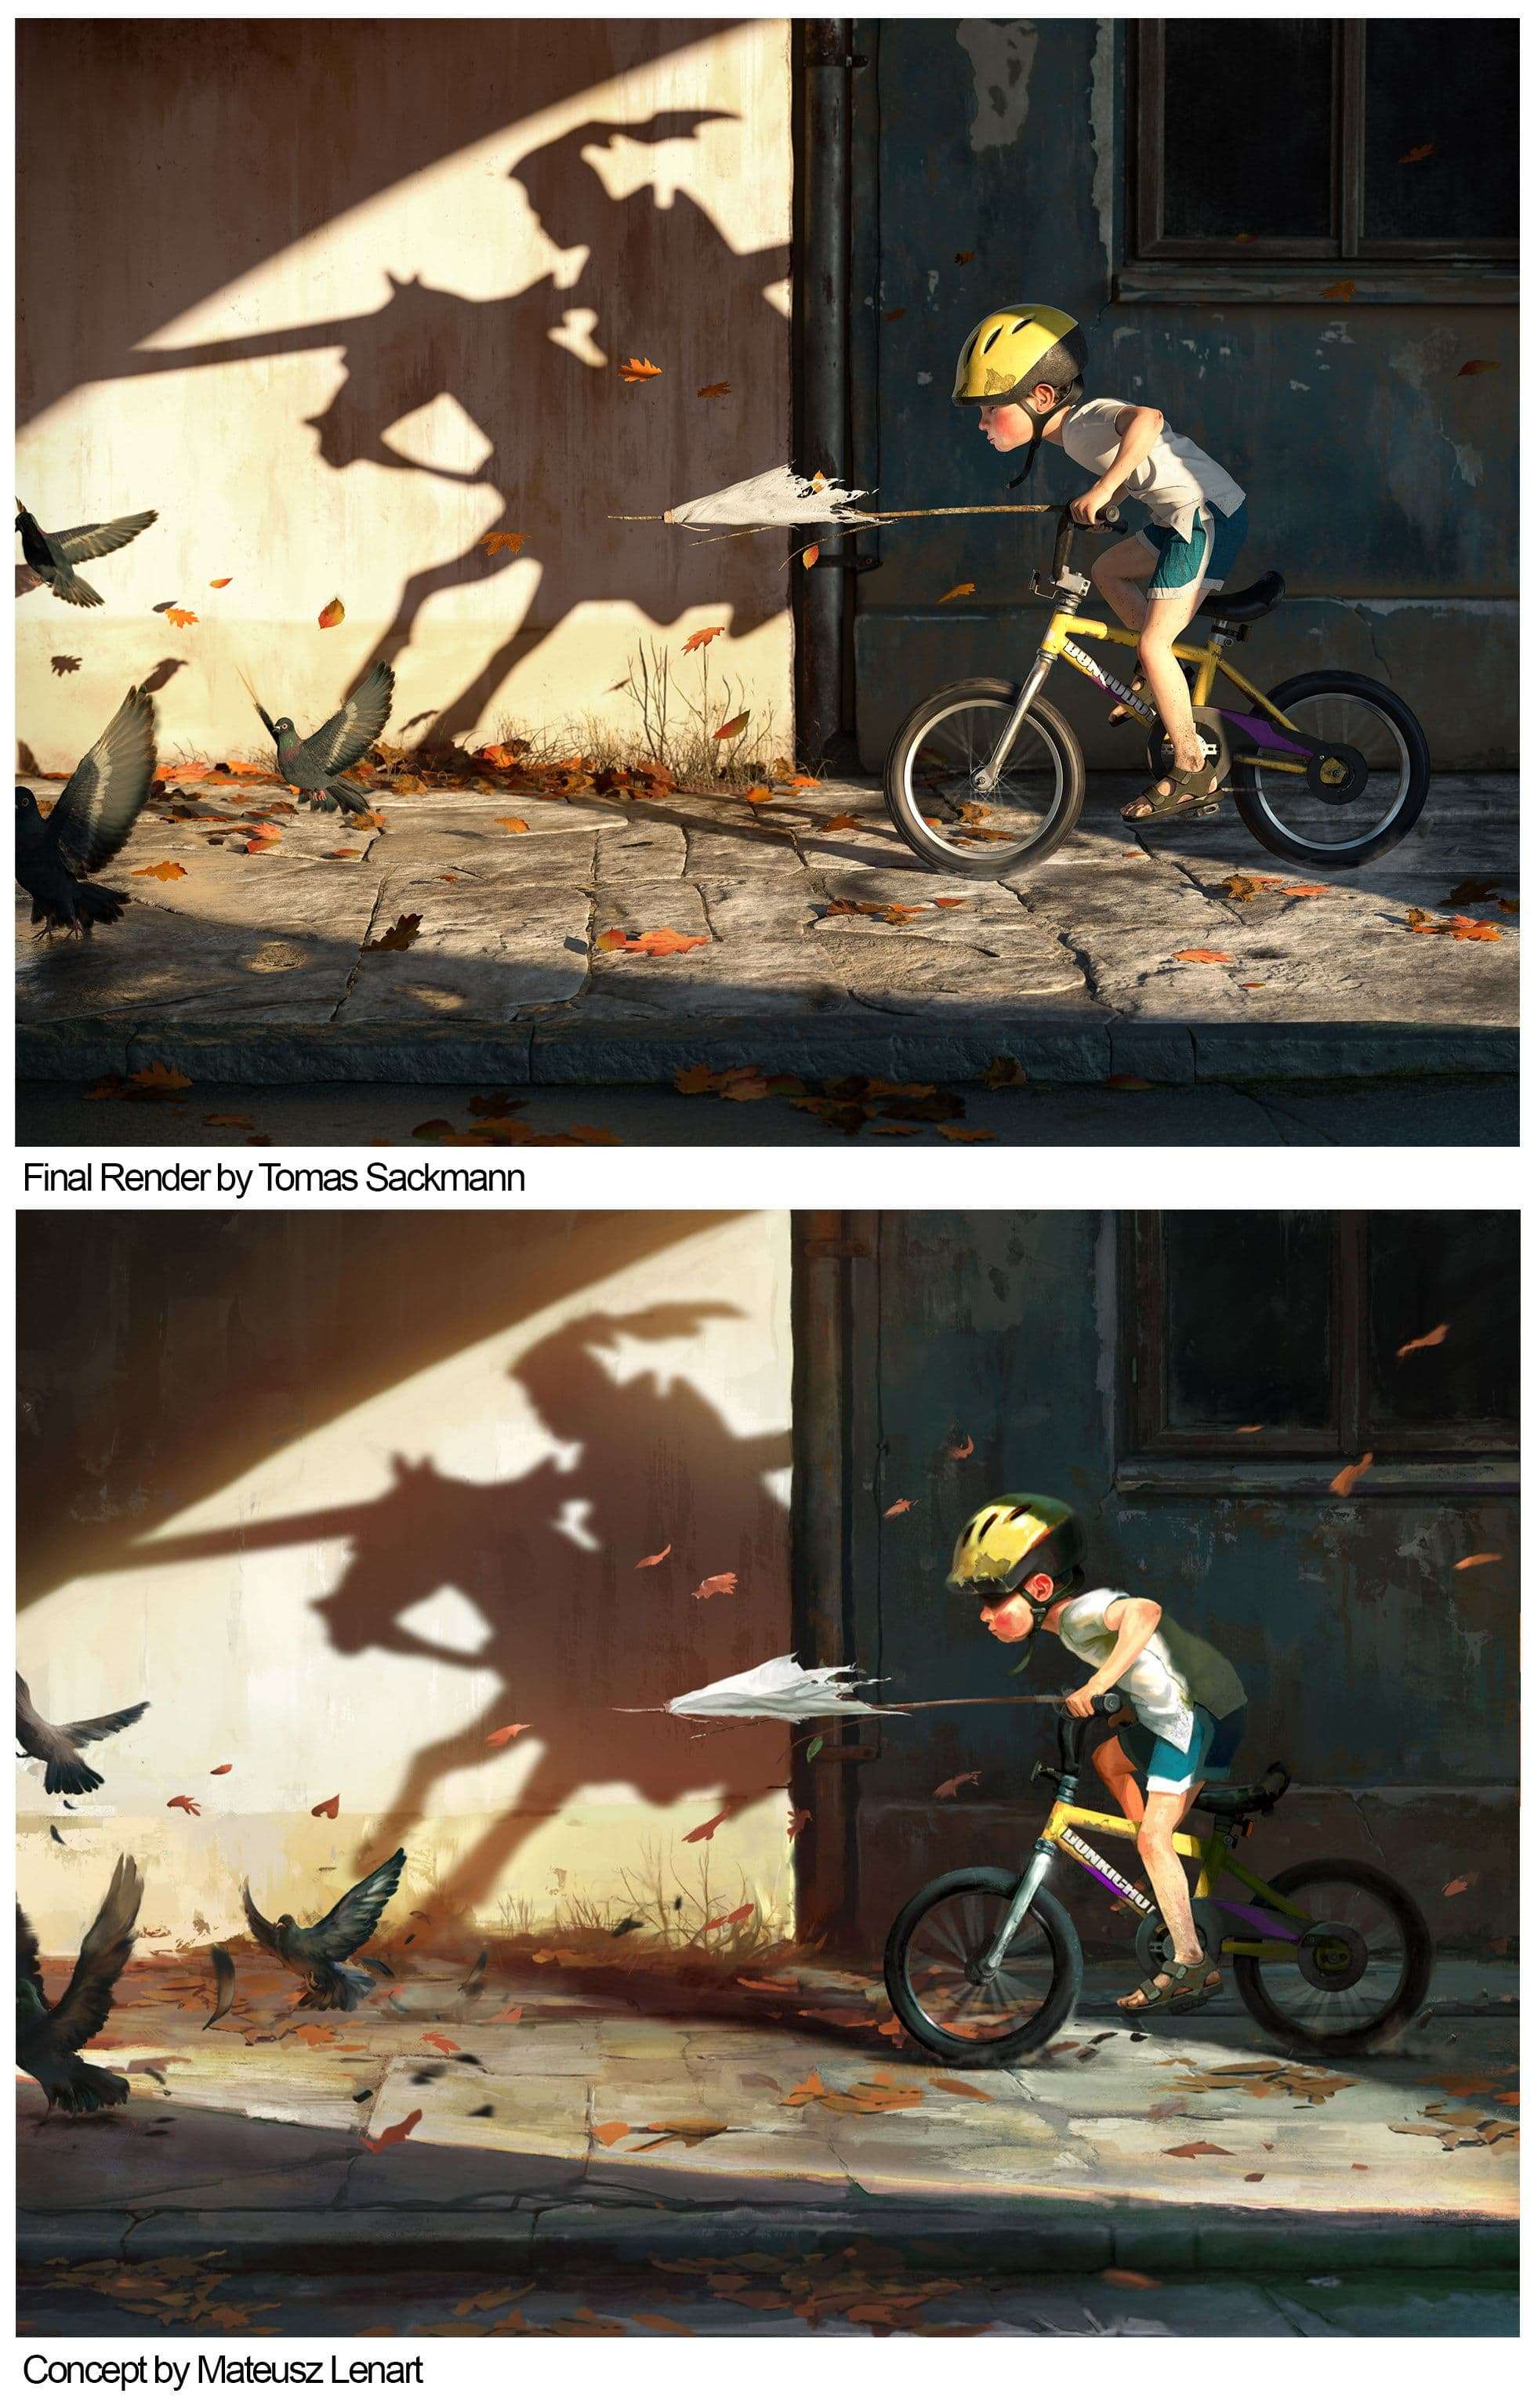
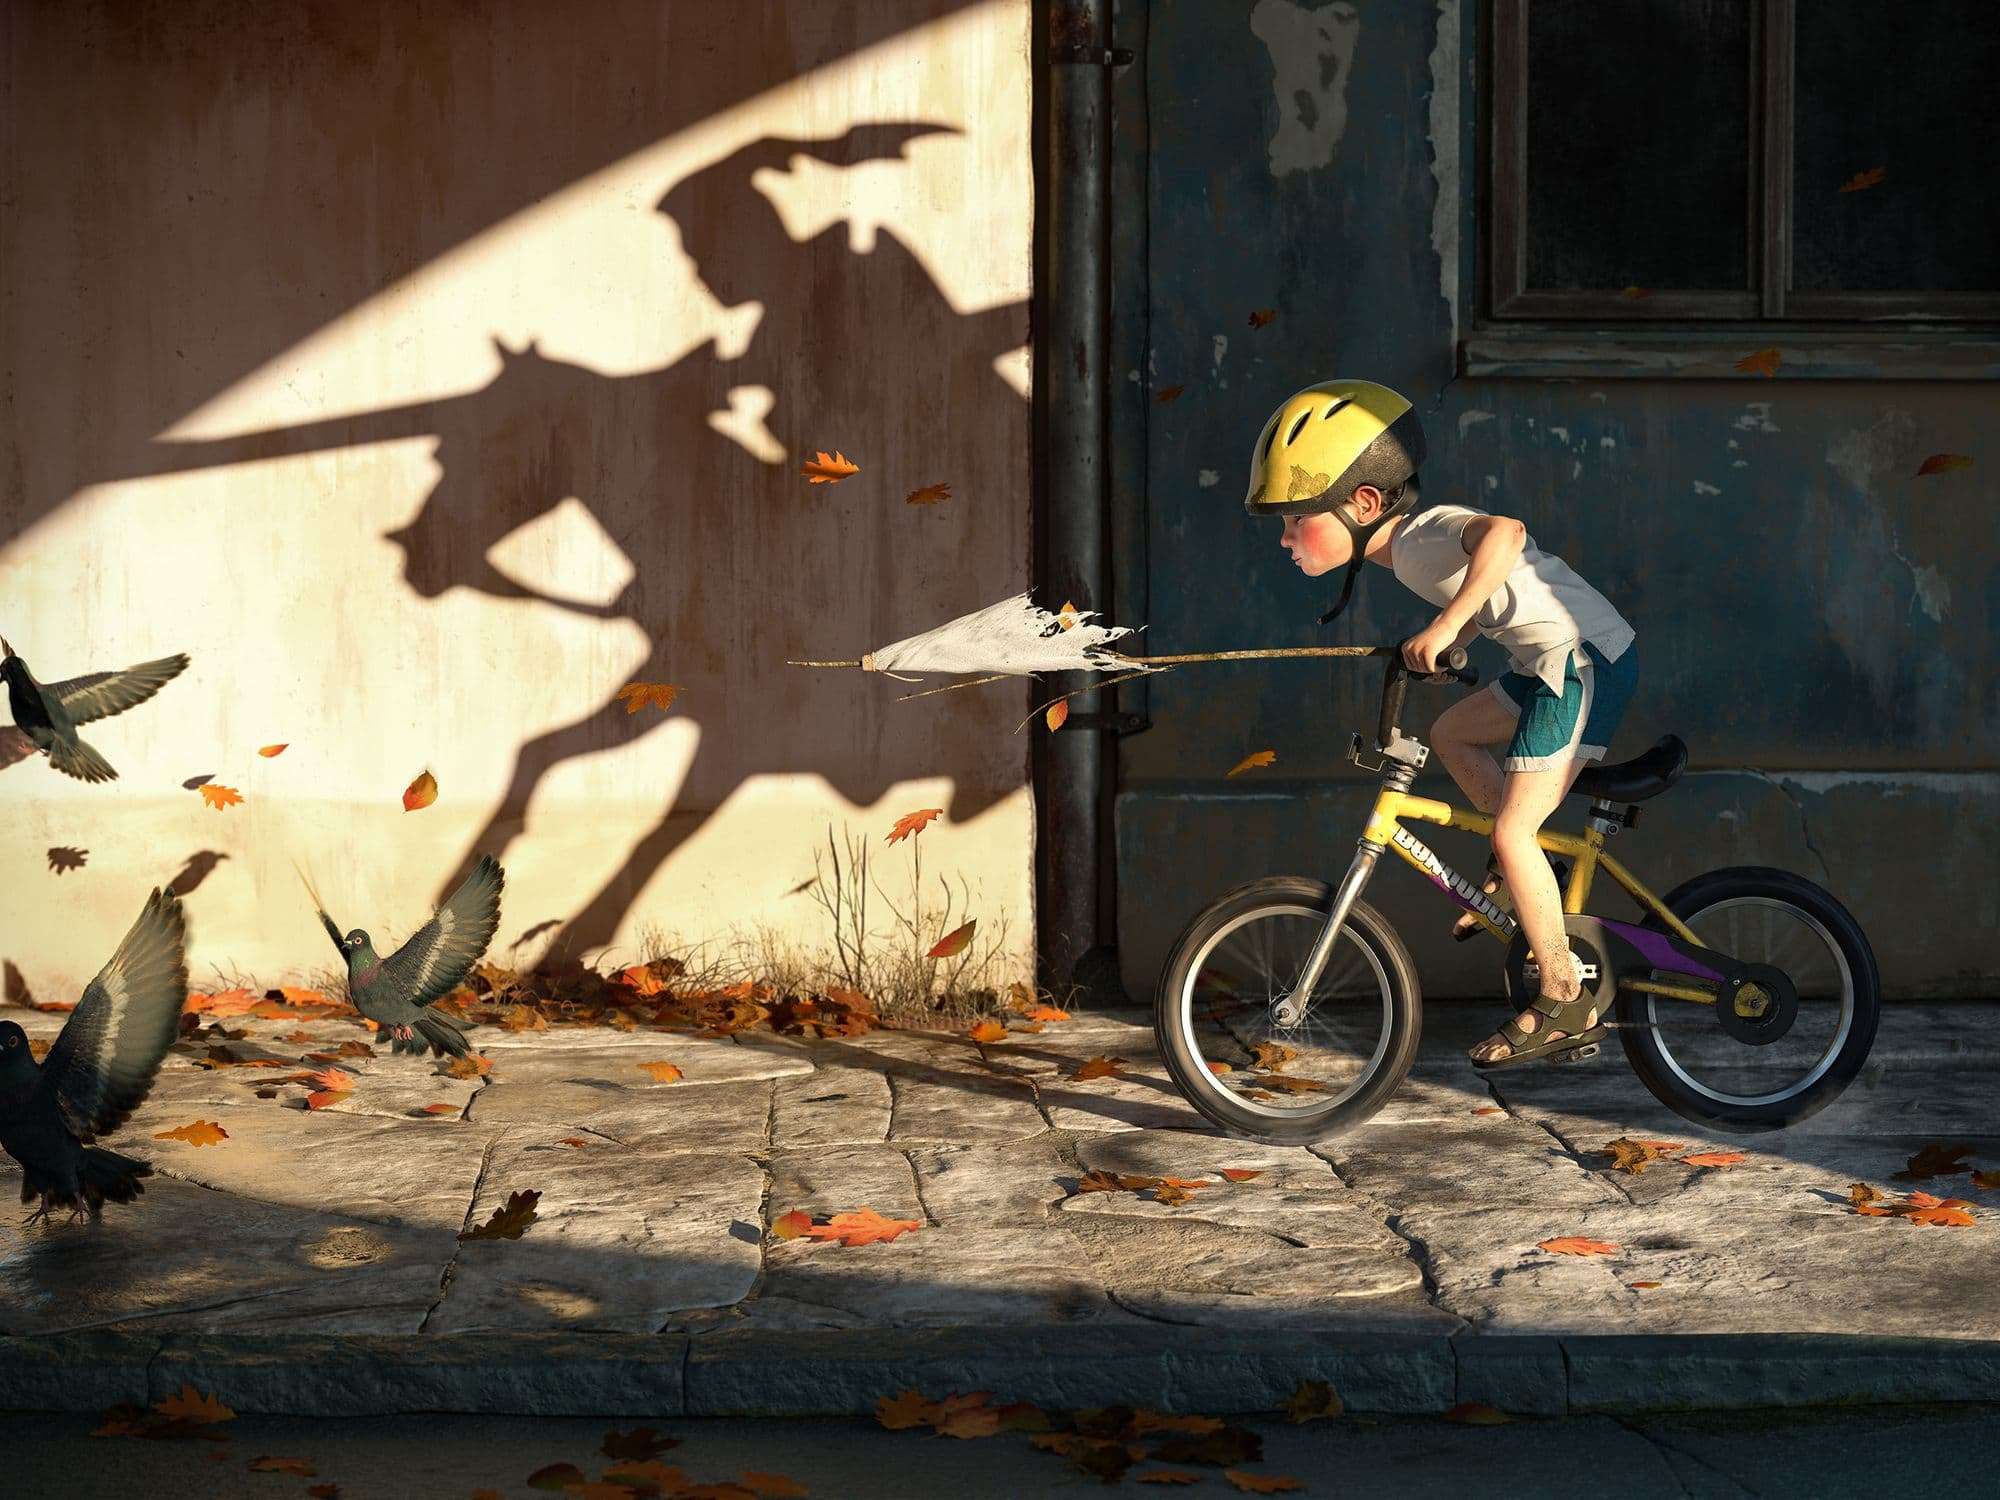
Tomas Sackmann recently submitted a stunning 3D project he created as his final project during the foundation term for Think Tank Training Centre Online. The project was inspired by the 'Don Quijote' 2D concept from Mateusz Lenart.
Tomas Sackmann recently submitted a stunning 3D project he created as his final project during the foundation term for Think Tank Training Centre Online. The project was inspired by the 'Don Quijote' 2D concept from Mateusz Lenart. Thankfully Tomas was happy to walk us through how he created the project from start to finish - sharing his full process along the way.
Concept selection: The importance of the story
One of the fundamental pillars of a project is the story behind it. That’s why you should give yourself enough time for the concept selection. In my case, after searching for a few weeks, I found this concept and I fell in love with it straight forward.
From the beginning, I wanted to find a concept with meaning for me.
The selection of this concept was inspired by my cousin Santi who has autistic spectrum syndrome and the best way how Juan, his father, found to connect better with him is the bike. The original 2D concept was made for a charity auction for kids with an autism spectrum disorder in 2016.
The selection of the concept is really important, not only to keep you motivated during the process but also to make more people engaged with it. In the end, we are all here to tell stories.
In a more technical way, this concept was a great decision because of the amount of detail and the appealing lighting.
A fundamental part of my work was to deeply observe and represent in the best way all these details to tell the story efficiently.
Scheduling
As mentioned, the process took 5 weeks, divided into 5 main categories.
Blockout, camera and rough lighting
Modelling
Sculpting, clothing and hair
UV and texturing
Lighting, look dev and post-processing
Its is really important to schedule the project properly. This schedule will change in the way and it will be impossible to stick to it 100%, but you need to try to stay as close as you can with it. This will really help to achieve everything on time.
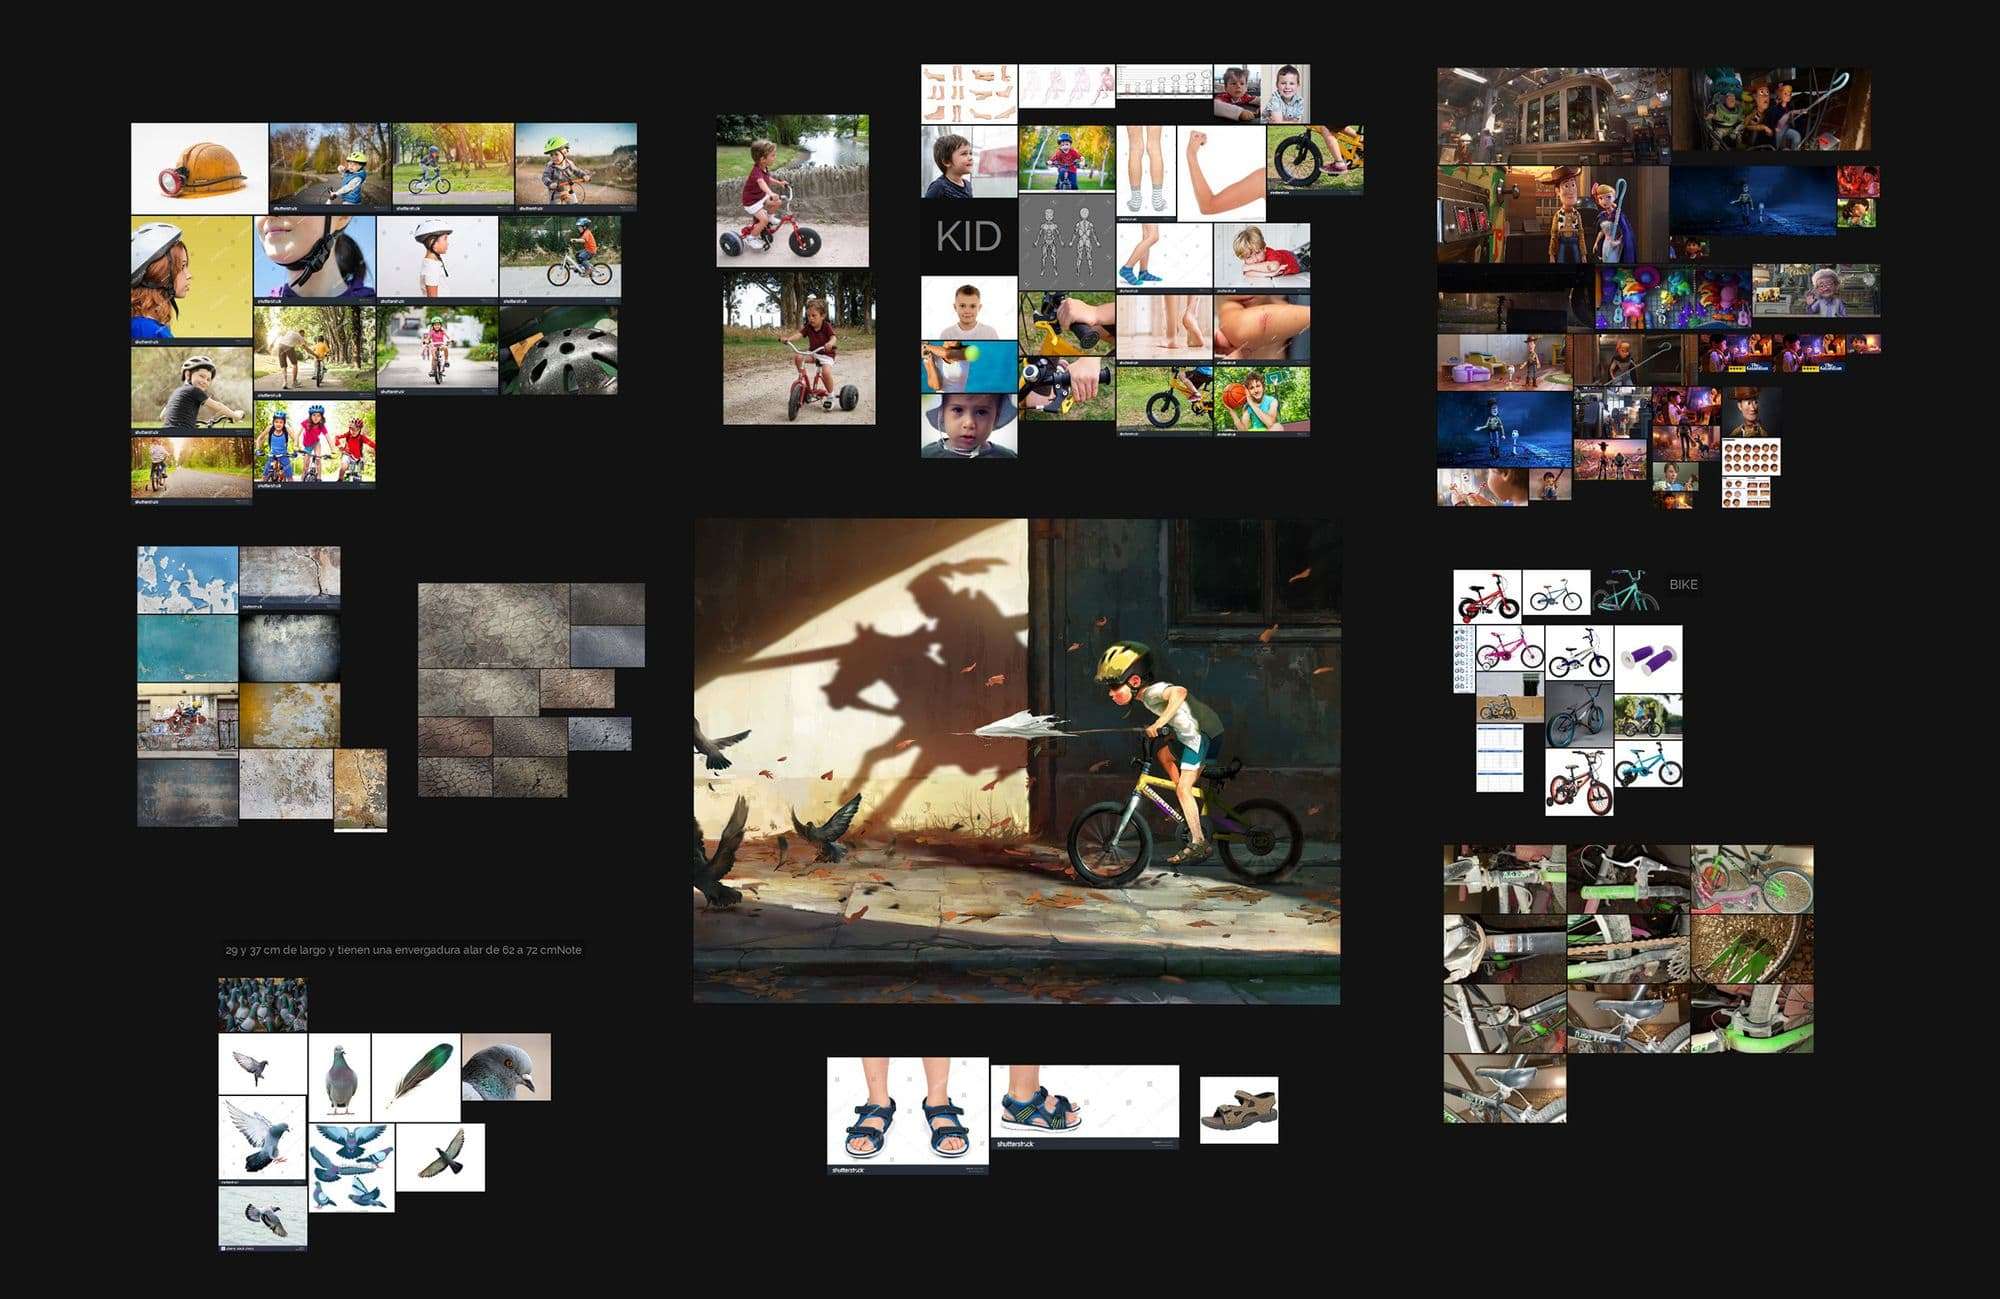
Before you start working with any of the 5 categories mentioned above, a really important part of the process is to collect as many references as you can for every object of your scene.
Ideally, you would try to find references in the real world, things that you can touch, feel and explore in detail before and during your creation process.
For all the other elements, I had to rely on images found on the internet.
To combine all these references I used a really useful software called PureRef.
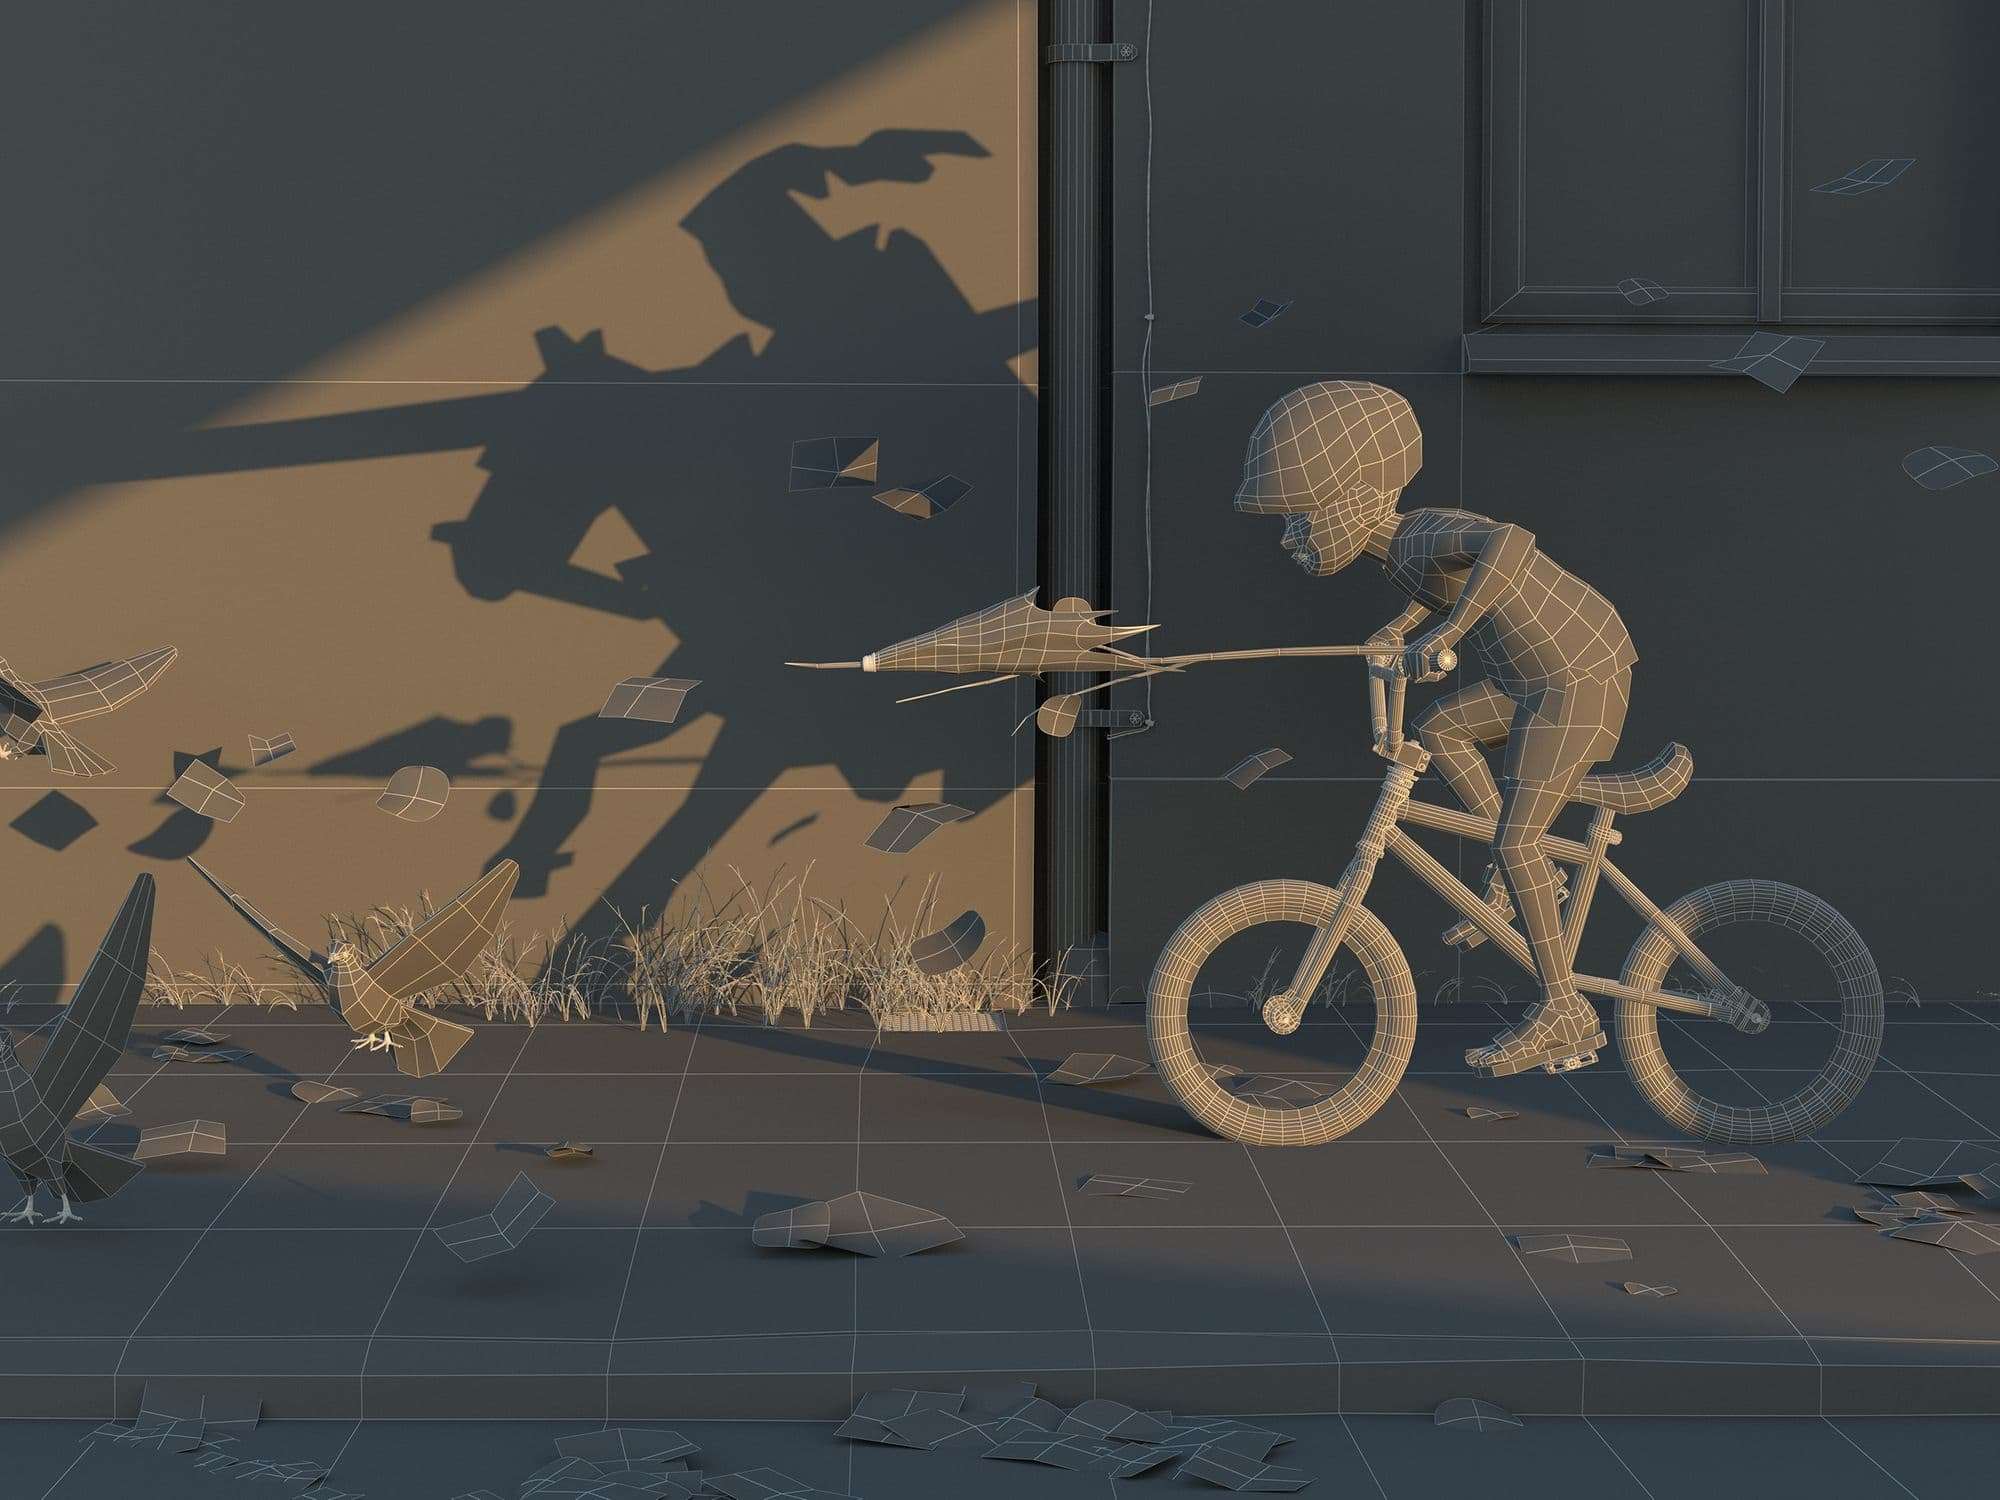
Blockout, camera placement and basic CGI lighting
I started with the block out, keeping the shapes really simple just to place the objects on the right position and scale.
After this, a really challenging task was the camera placing. In this case, the concept artist did a great job on the perspective but as 3D artists, we will always have some discrepancies between the 2D drawing and the real perspective in the 3D software.
This was a coming and going process until I found the right camera angle and focal length. Important reminder: save your camera. Even if you lock the camera position there will be moments where you will move it by accident so it is always helpful to have it saved externally.
Even if the lighting was scheduled for the last week of the process, in this concept it was key element. So from the first week I started blocking out the sun position and the shadows but it was not until the last week that I figured it out properly.
I will come back to this important point later.
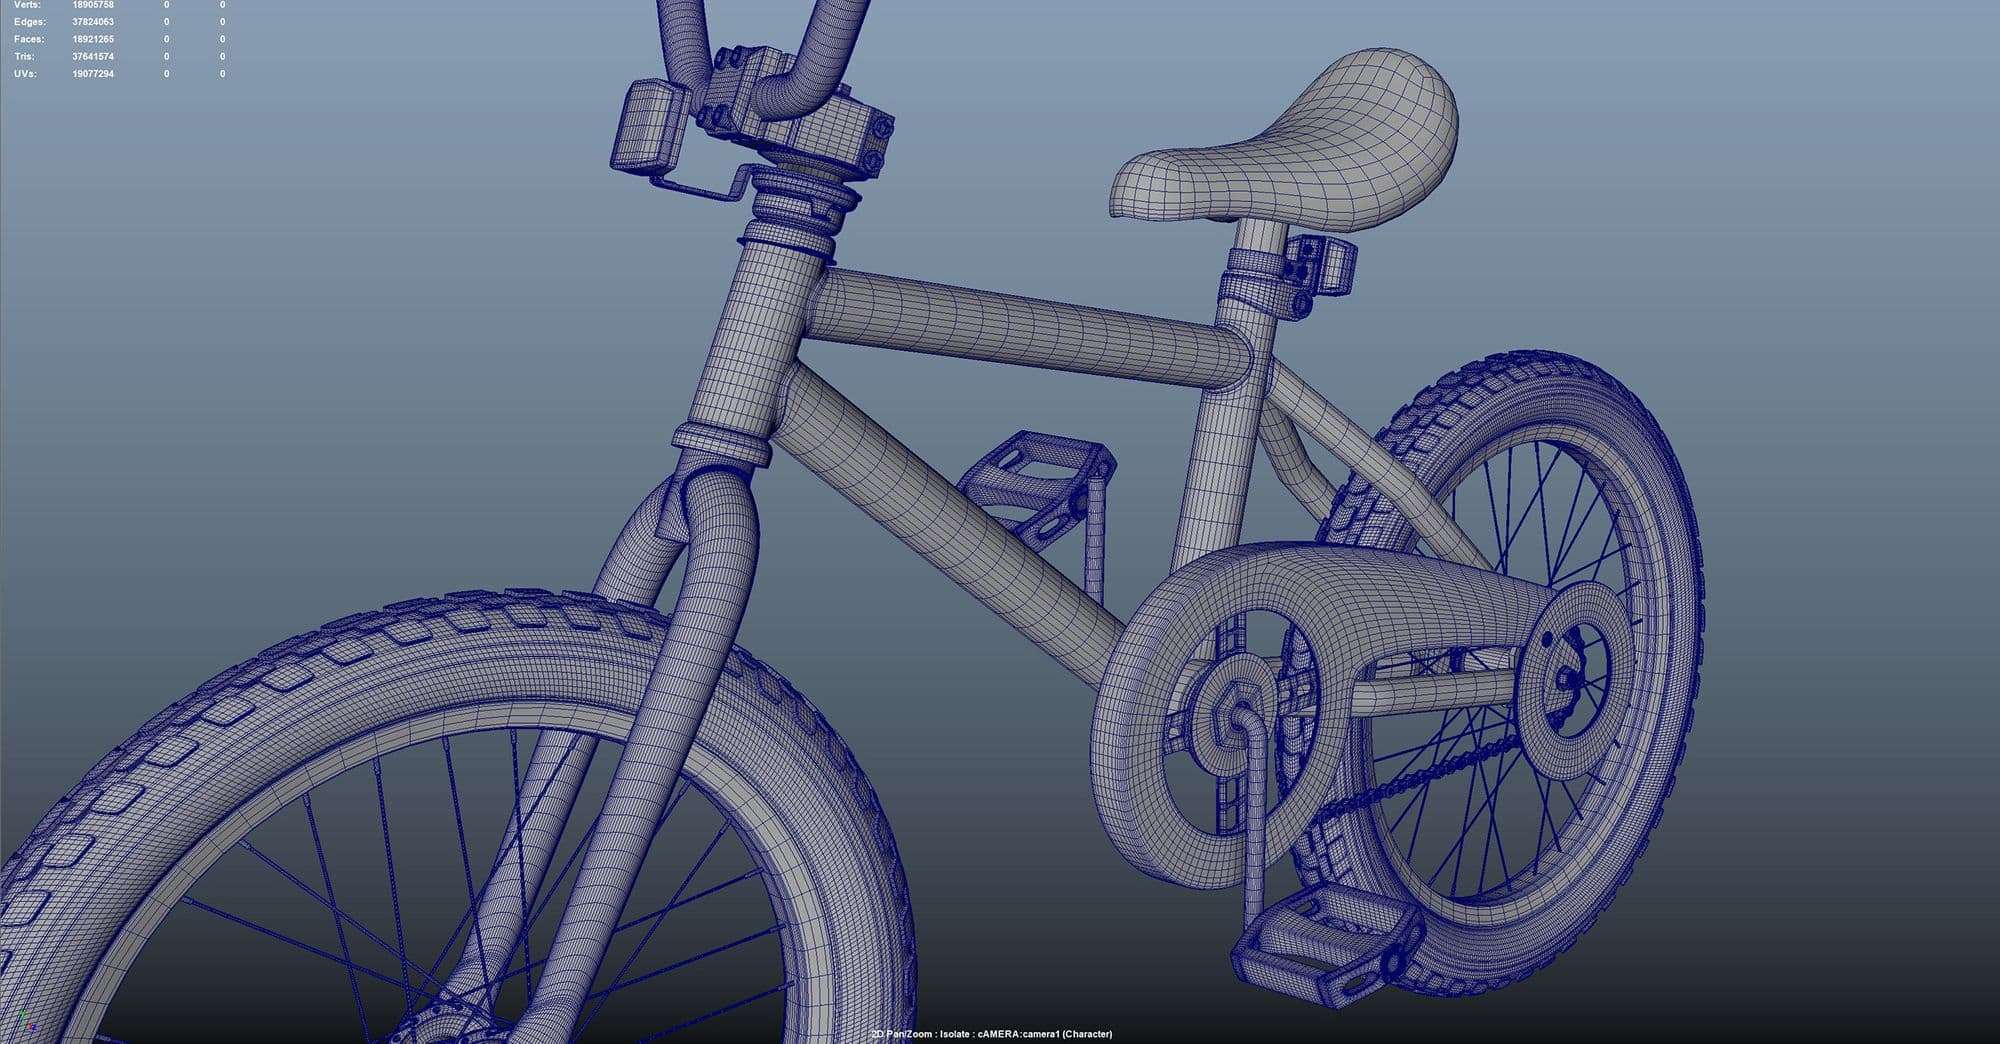
Polished 3D modelling
During this part of the process, I focused on modelling the floor, walls and the character with a simple and even topology to be able to export and work on it in Autodesk Mudbox.
Important reminder: For the sculpting phase, try to have your topology with all quads and as square as possible and try to avoid too many supporting edges in this phase because that will cause excessive polygons in undesirable places.
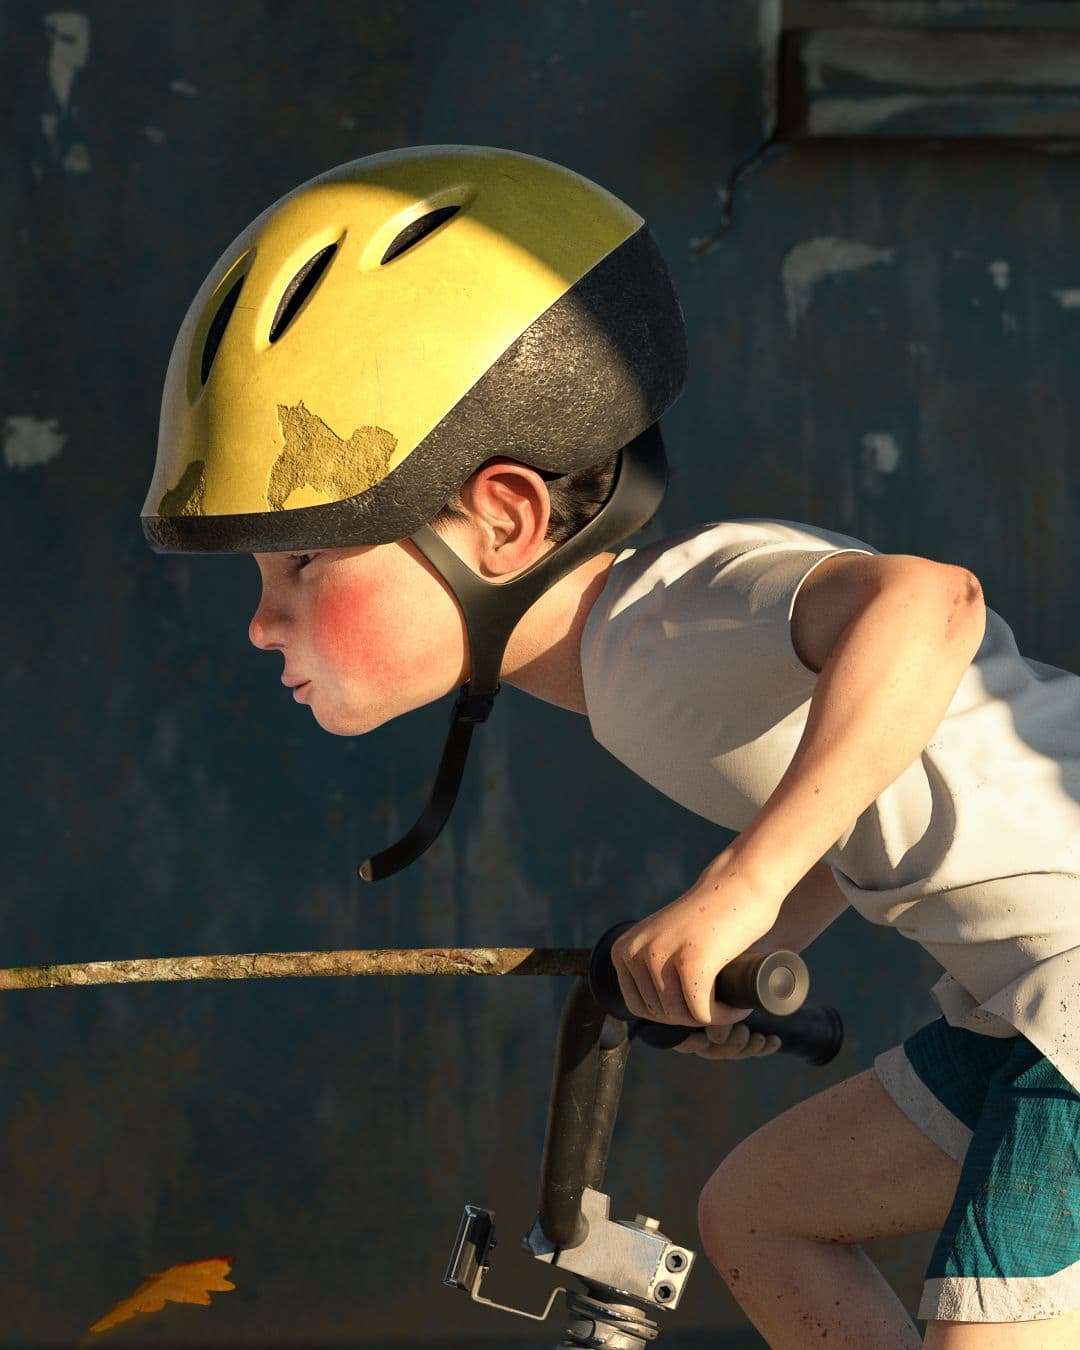
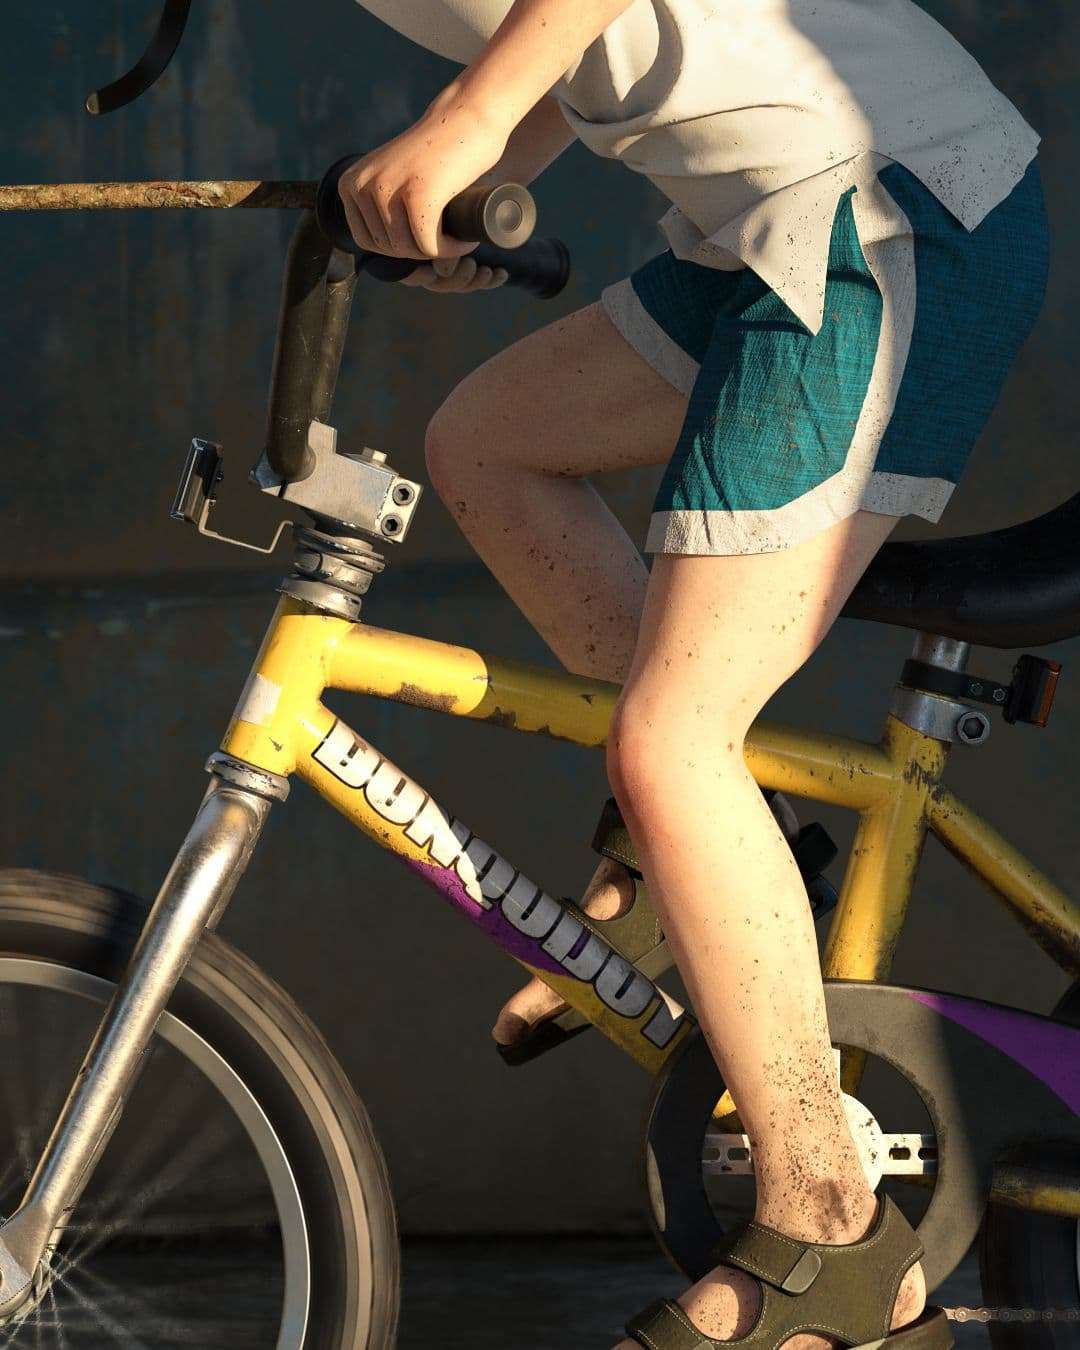
For the elements that didn't need sculpting, this was the moment to go more in detail with them. The bike and the helmet were the elements that took more time and attention.
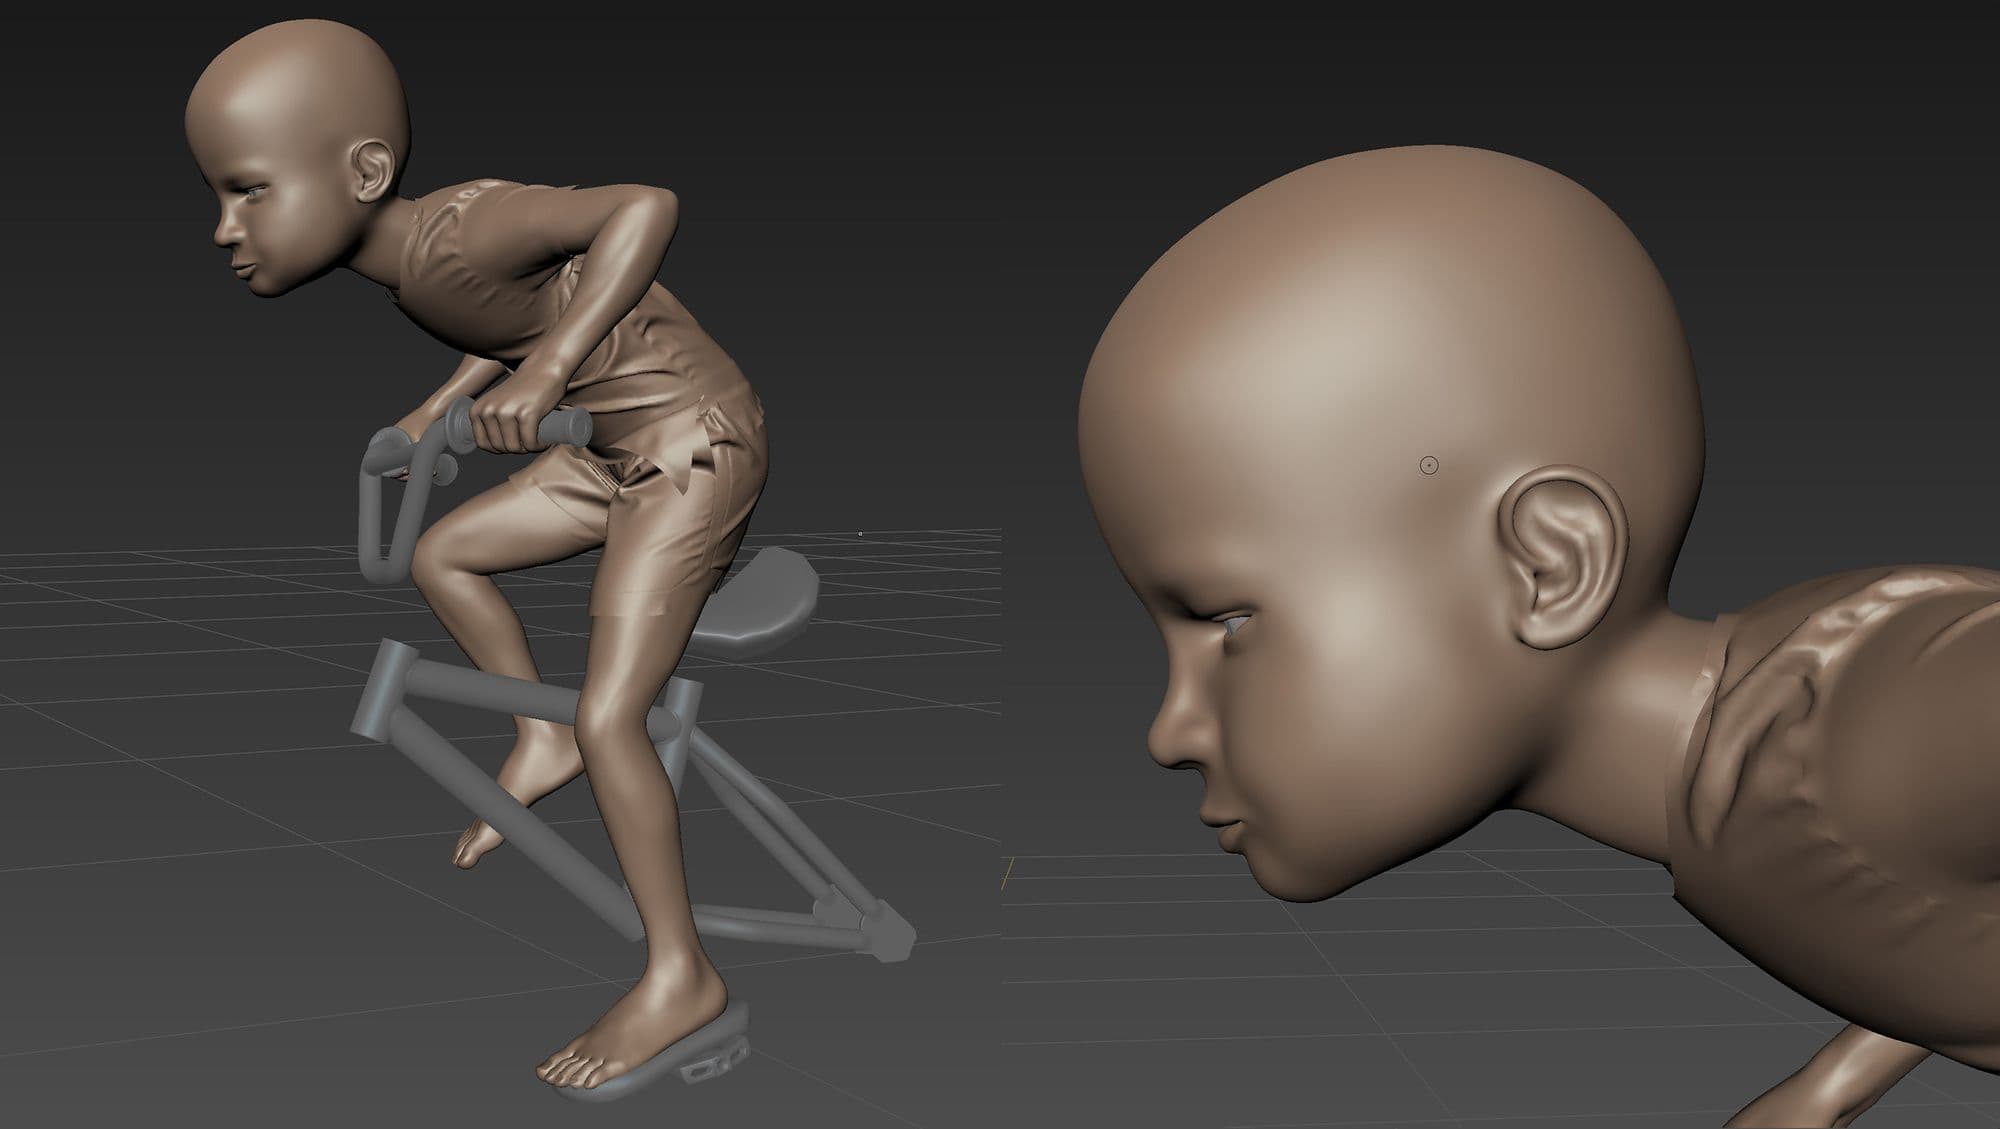
Sculpting and clothing
I can say that the third week was the most intense. Not only I had to do all the sculpting, but also explore 2 completely new tools for me. Marvelous Designer and Xgen. As these last 2 were not part of the scope of the 1st term of the course, YouTube was a great friend.
In Mudbox I had to work in 2 different files. One for flooring and walls and one for the character. In both cases, something really helpful in Mudbox is that you can import your camera from Maya. That helps you to only focus your efforts in the visible areas. In the beginning for example, I made the mistake to put too much effort in making the character face look good from the front while after some time I realised I had to focus more on just the side. For sure maintaining right proportions, but not spending time in details that were not going to be seen.
This practice will help you to optimise your timing especially in projects with tight deadlines.
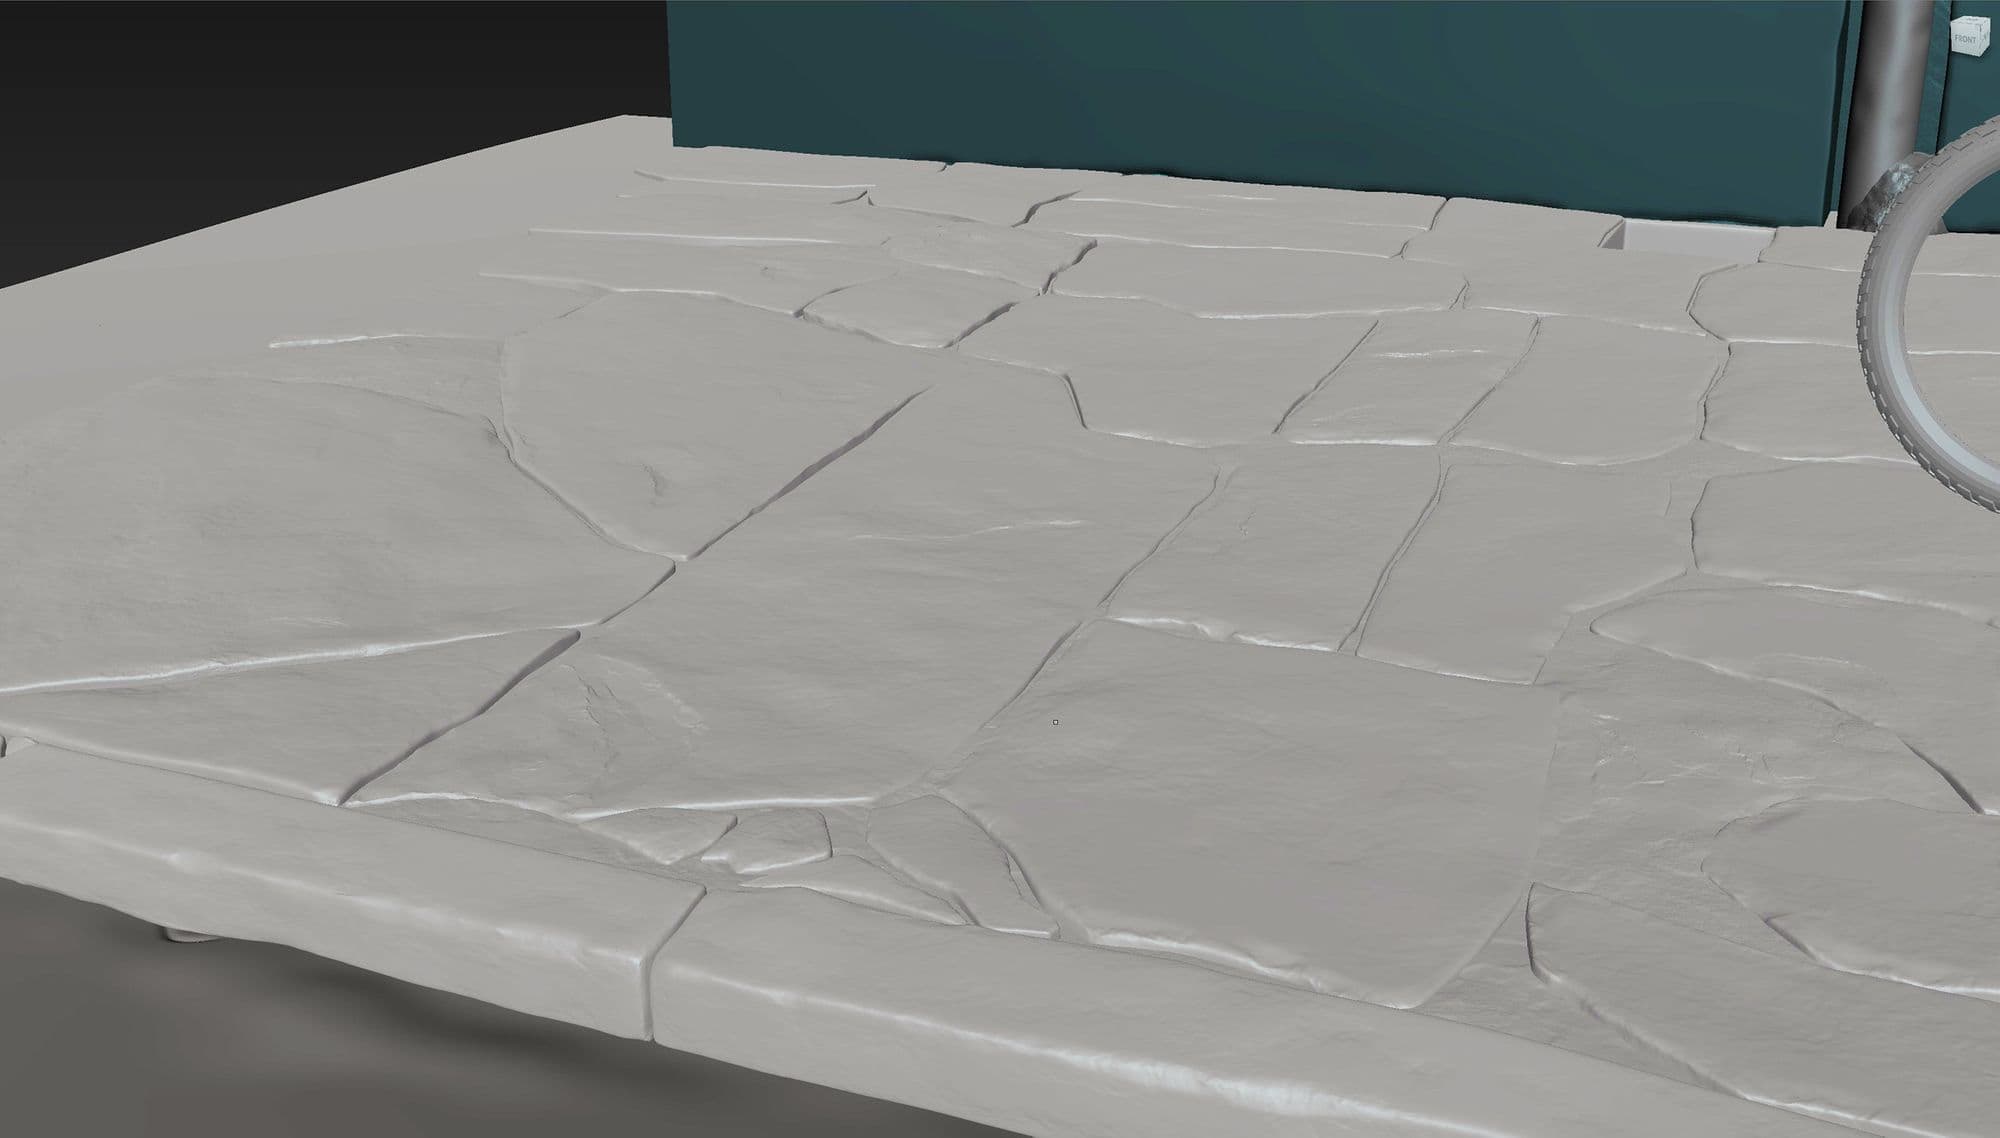
One of the highlights of the sculpting process for me was the sculpt of the stone tiles. This was a manual process, and for this, I used a brush trying to mimic the trim adaptive brush in ZBrush. See below the brush settings I used.
Scrape brush:
Stamp: Square
Random: Rotation and scale 100%, position 30%
Distance: 5
Build up: 100
Falloff: 5
Update plane: On
Direction: Camera
The brush strength and size will depend on the scale of your model
After having all the sculpt done I exported 2 different OBJ for each element. A high and a medium resolution mesh, planning to use displacement maps for the sculpted details but I ended using directly the high-resolution mesh in Maya as my computer could handle it properly and I knew that it was going to be only a still image. For production, you would need to export a low res and apply a displacement map.
In Maya I used render layers in the Channel Box to allow me to hide the high res meshes while navigating in the viewport. In Substance I imported the medium res file and I used the high resolution to bake the normal maps.
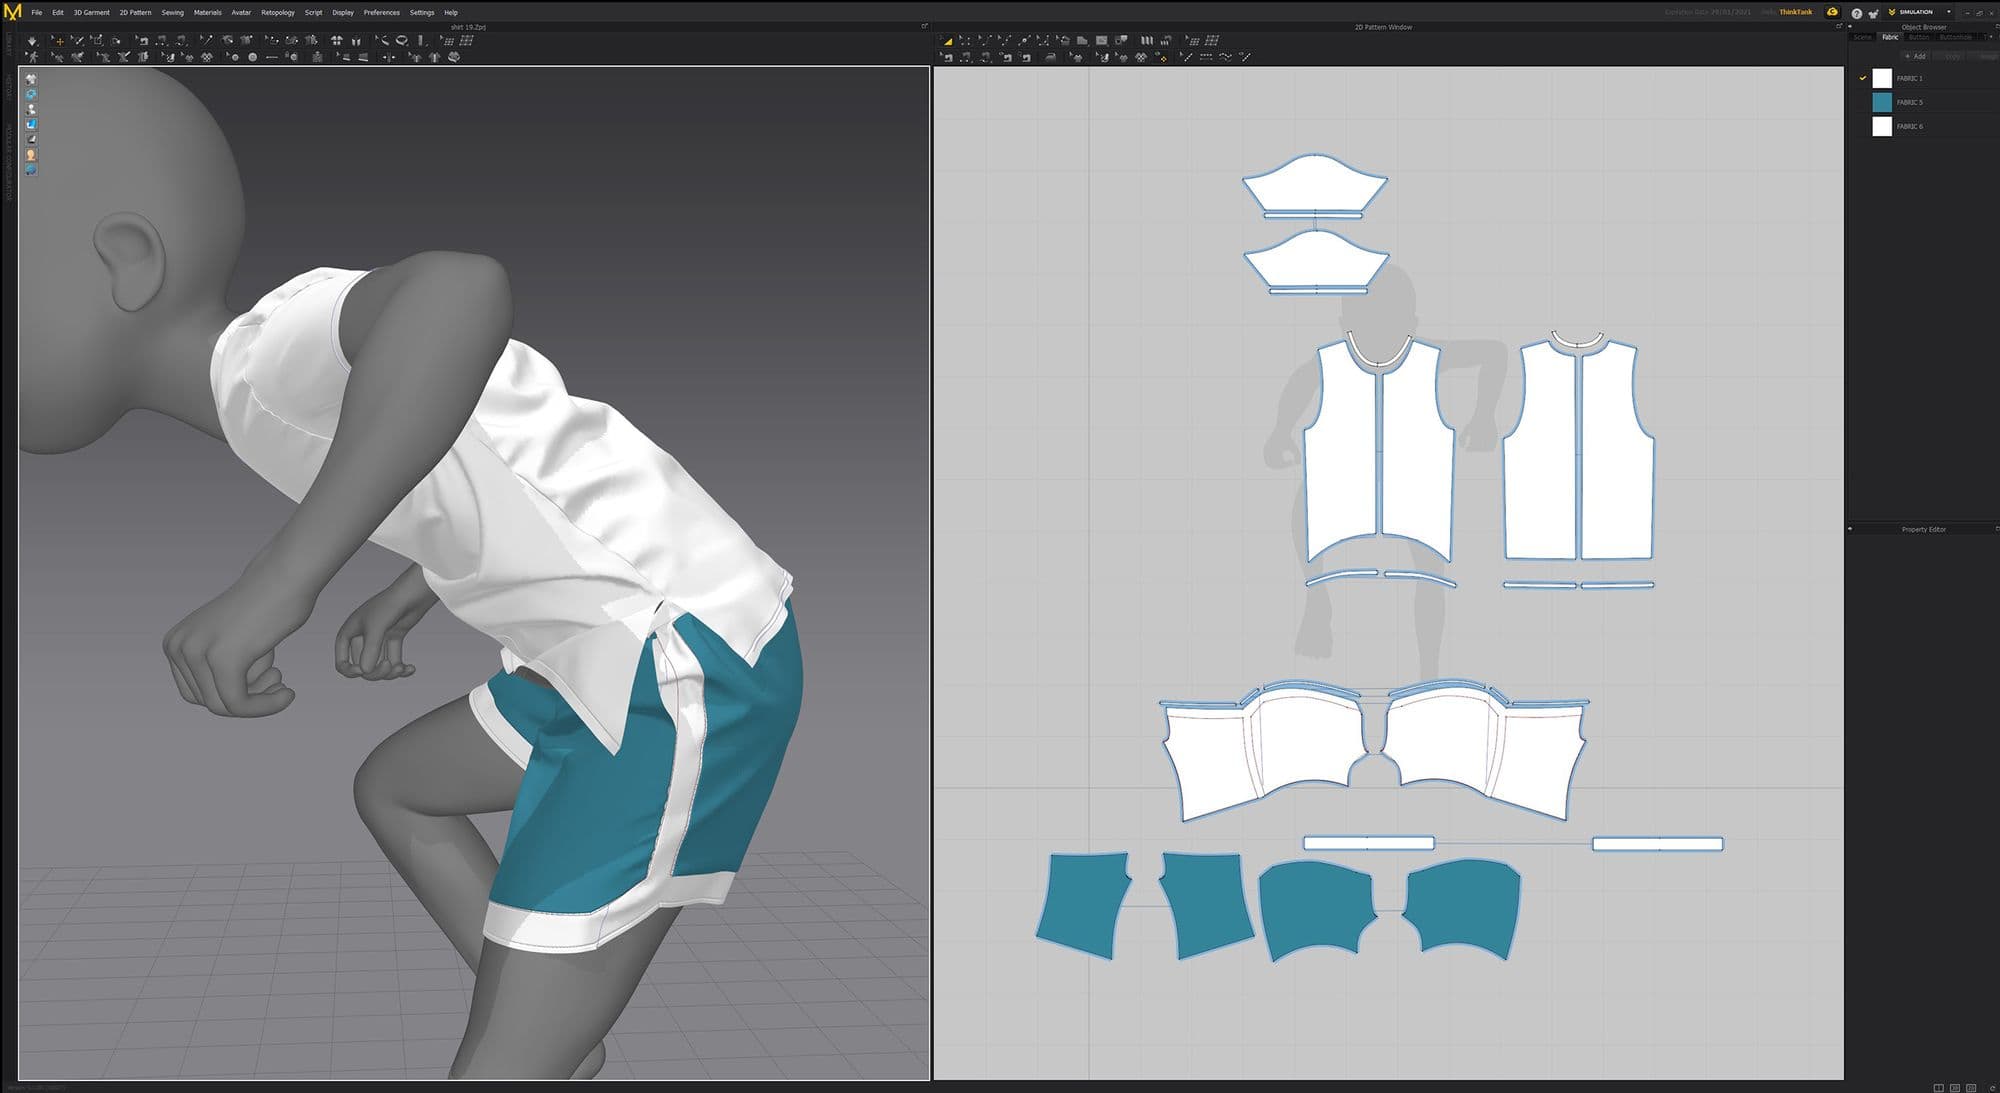
During the sculpting phase, I used Marvelous Designer for the shirt and the shorts of the character.
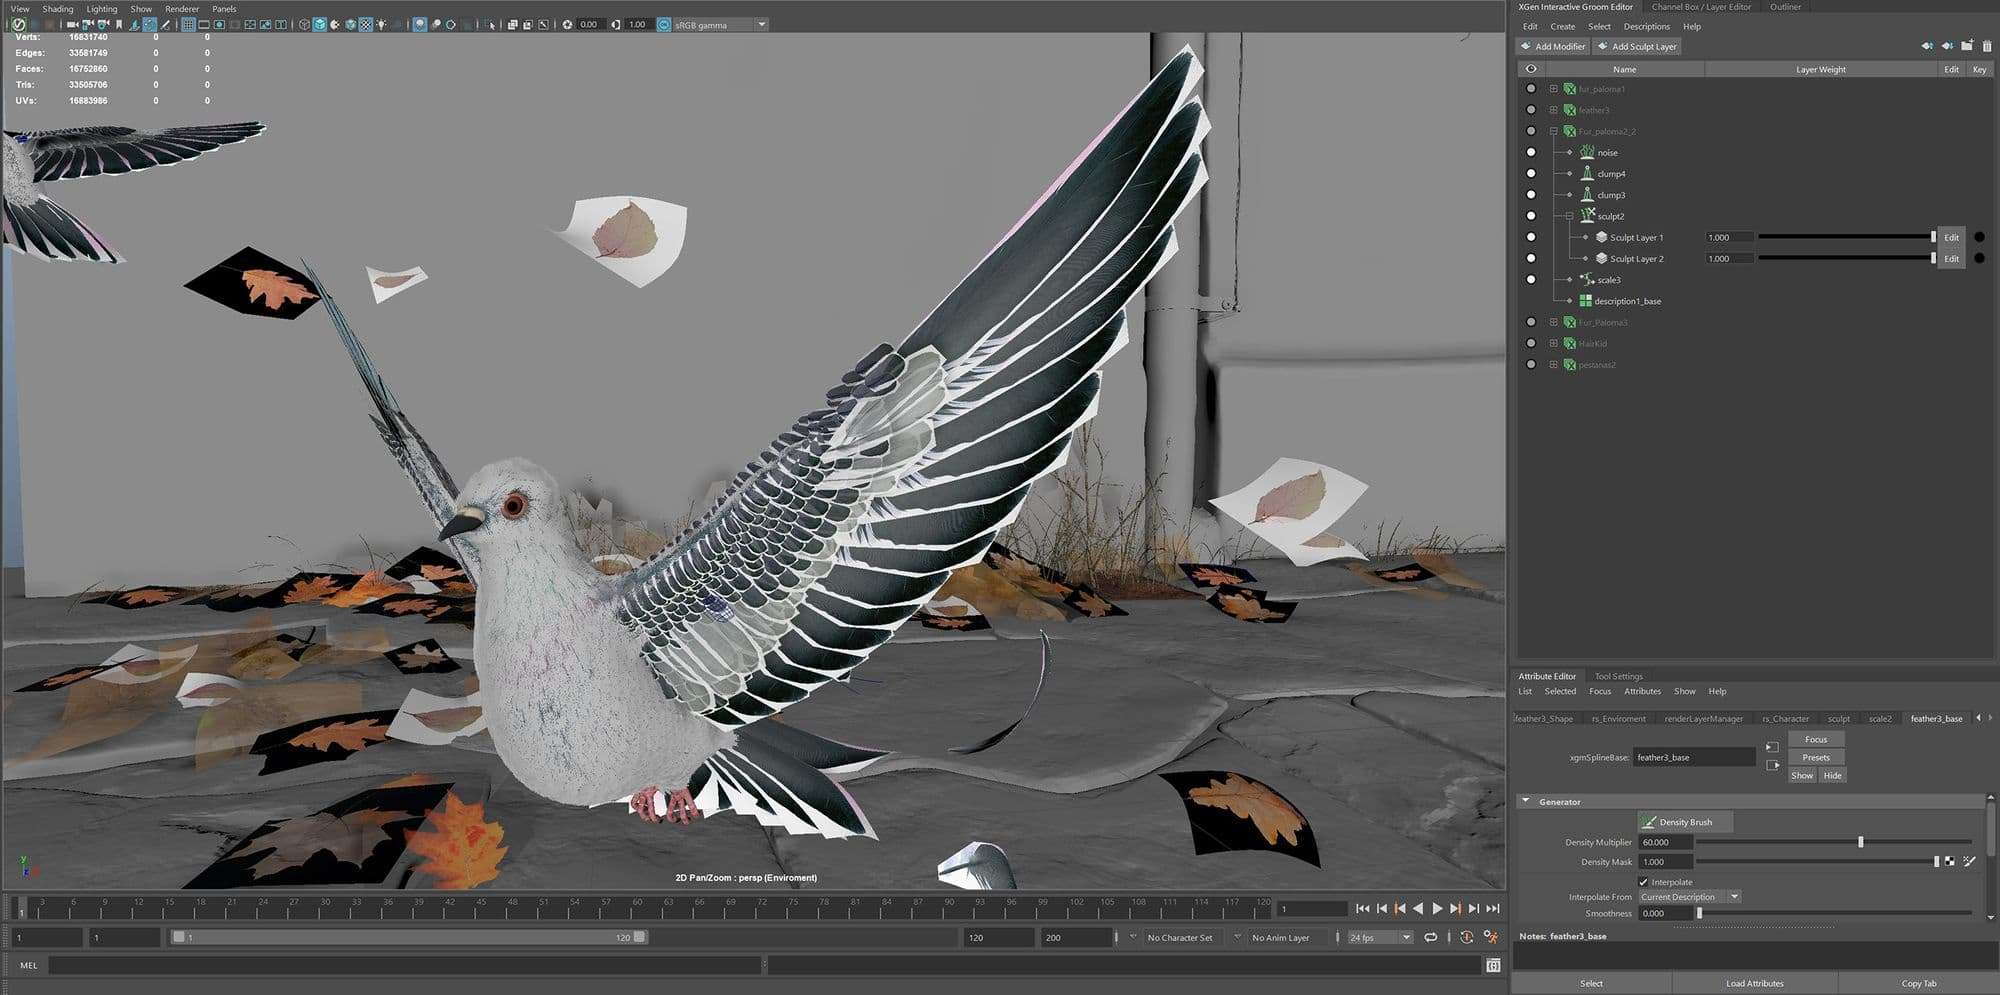
Grooming CGI Pigeon Model
The pigeons were a big challenge. After getting the base mesh ready, my plan was to do the feathers in Xgen but I encountered some problems duplicating them so I ended up doing the main feathers one by one with textures and opacity maps and this sped up the process a lot getting a similar result. For the body, I used Xgen Interactive Grooming. This is a great tool as it allows you to see and interact with the hair in real-time.
The problem with the Interactive grooming is that it is extremely buggy and Maya crashed several times in the process. Also, I couldn't figure out how to copy directly the grooming from one pigeon to another so I had to do each of them from scratch.
Besides this tedious process, I consider that the Xgen helped a lot for the realism of the animals. I used the same process for the characters’ hair. Just with a VrayHairMtl.
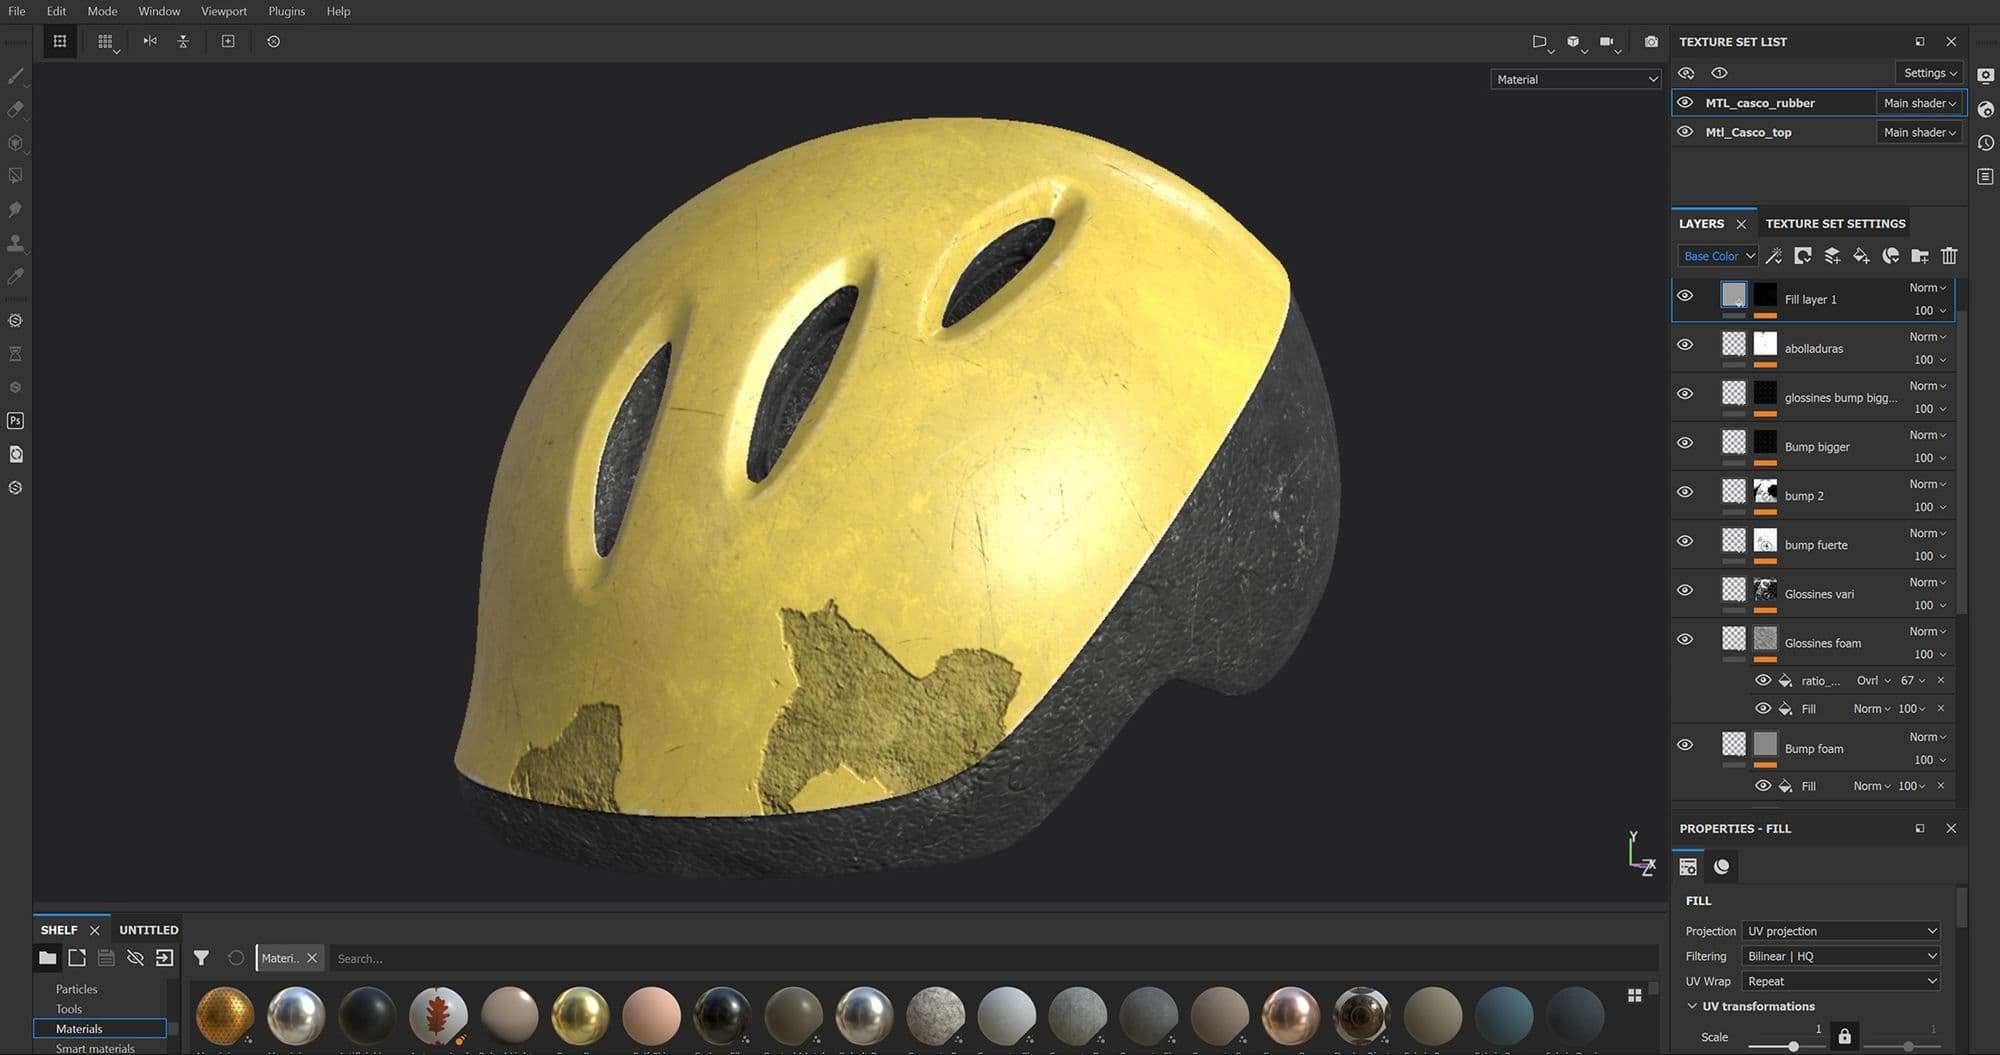
Texturing and shaders
During this project, I got for the first time familiar with Substance Painter. Substance is a great texturing software that allows you to work procedurally but also to do precise hand painting. It allows you to work in several maps at the same time and in this way you work directly in the shader.
The problem with Substance is that beginners usually fall in the temptation to overuse smart materials.
The problem with Substance is that beginners usually fall in the temptation to overuse smart materials. Smart materials give you the power to, in a really quick way, get interesting results. But for trained eyes, this pops up really easy if you use them. That's why the fundamentals and the eye into details makes a big difference.
It is really important to try to make the materials yourself layer by layer to understand the process correctly.
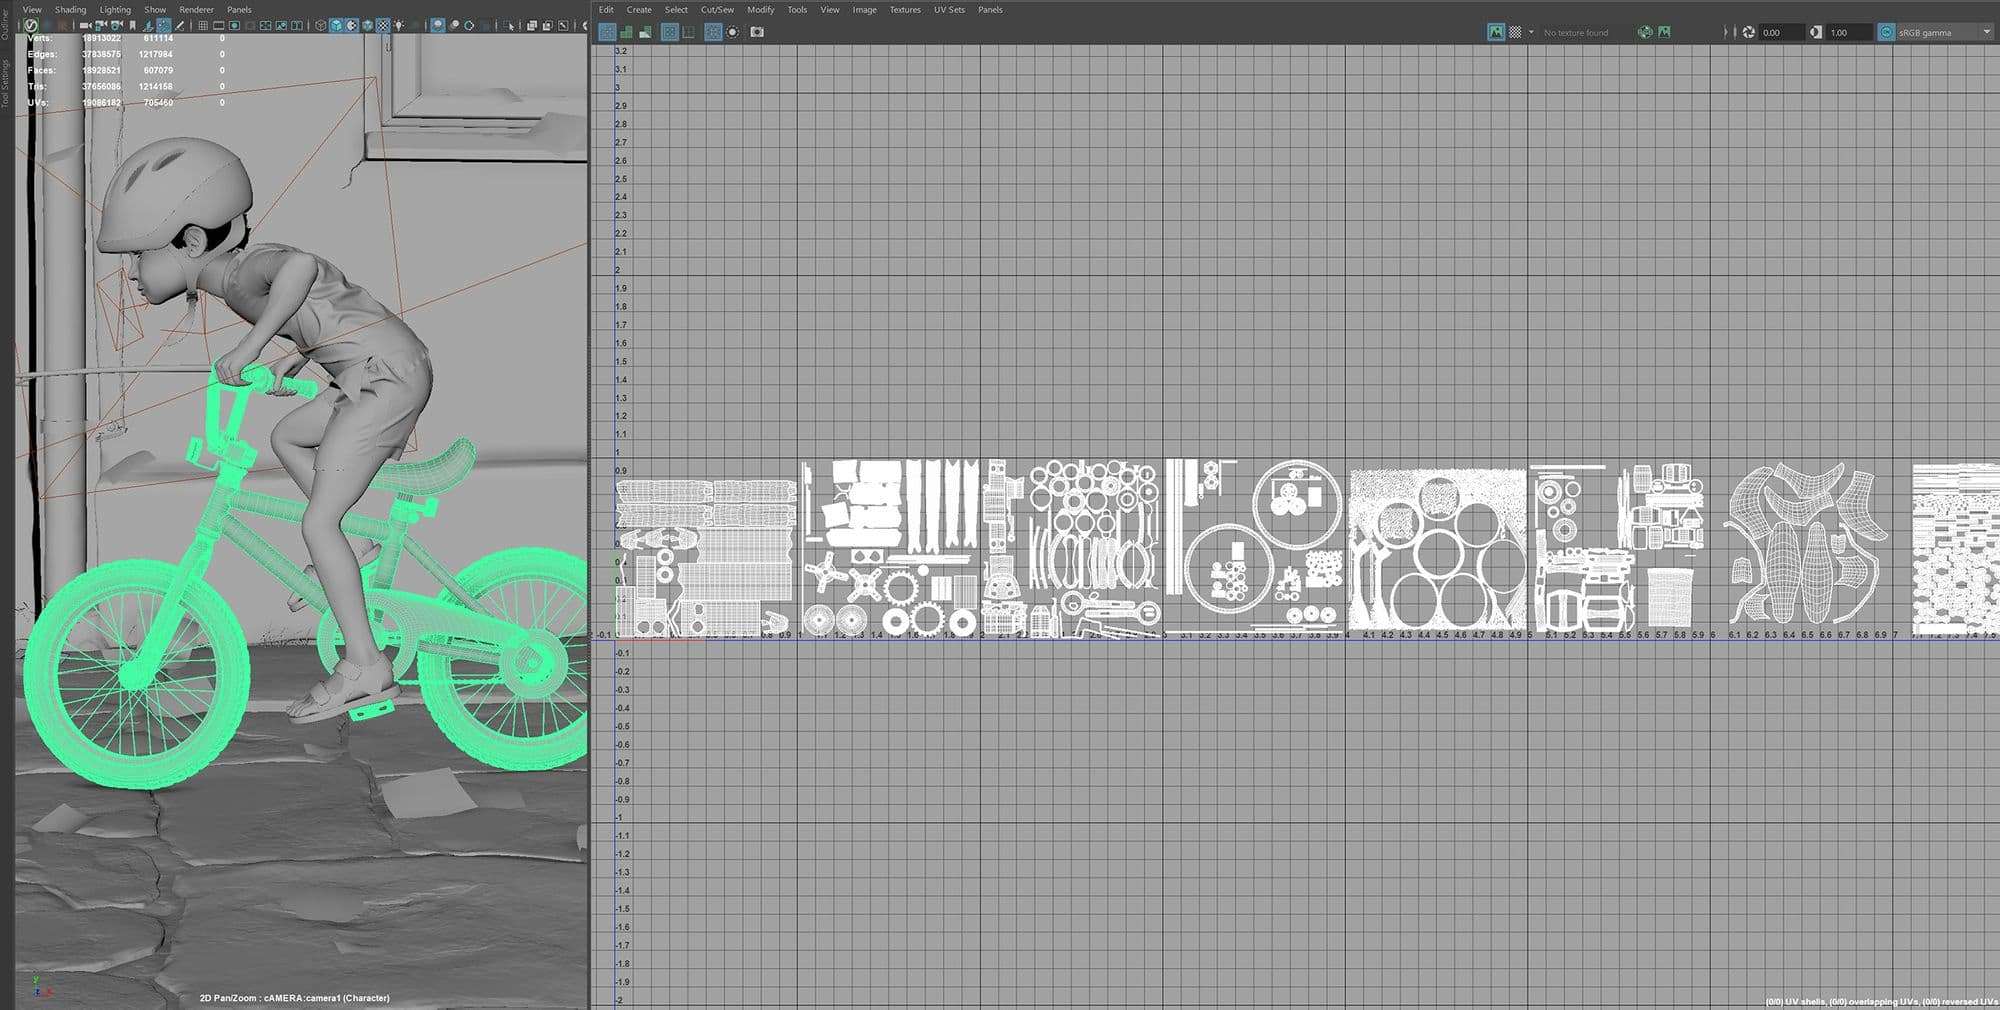
To be able to work as many elements of my scene at the same time in Substance I exported several objects in one OBJ with the UDIM workflow. In this way, I could give one material for each UDIM.
As in Substance you cannot paint through UDIMs, I divided the characters head from the rest of the body and kept the seams under the clothing. In case I couldn't manage, it would be better to do the character textures in Mari.
Important tip: Work the resolution of your UVs based on how close the camera will be to your object. As I was planning to make my final render 6000 px I had to do my UVs big enough to match this resolution. In most of the elements I did the correct sizing but in some of them, for example, the bike I did the UVs much bigger and this slowed down the performance during texturing and rendering while it was not really necessary.
Details as scratches, paint peeled or dust is what will help to make your scene much more realistic. There is nothing in the real world that is 100% clean or polished and especially in an outdoor scene like these details like dust and dirt are essential.
To give the colours to the grooming of the pigeons I used Mari to paint one texture that I reused on each one of them.
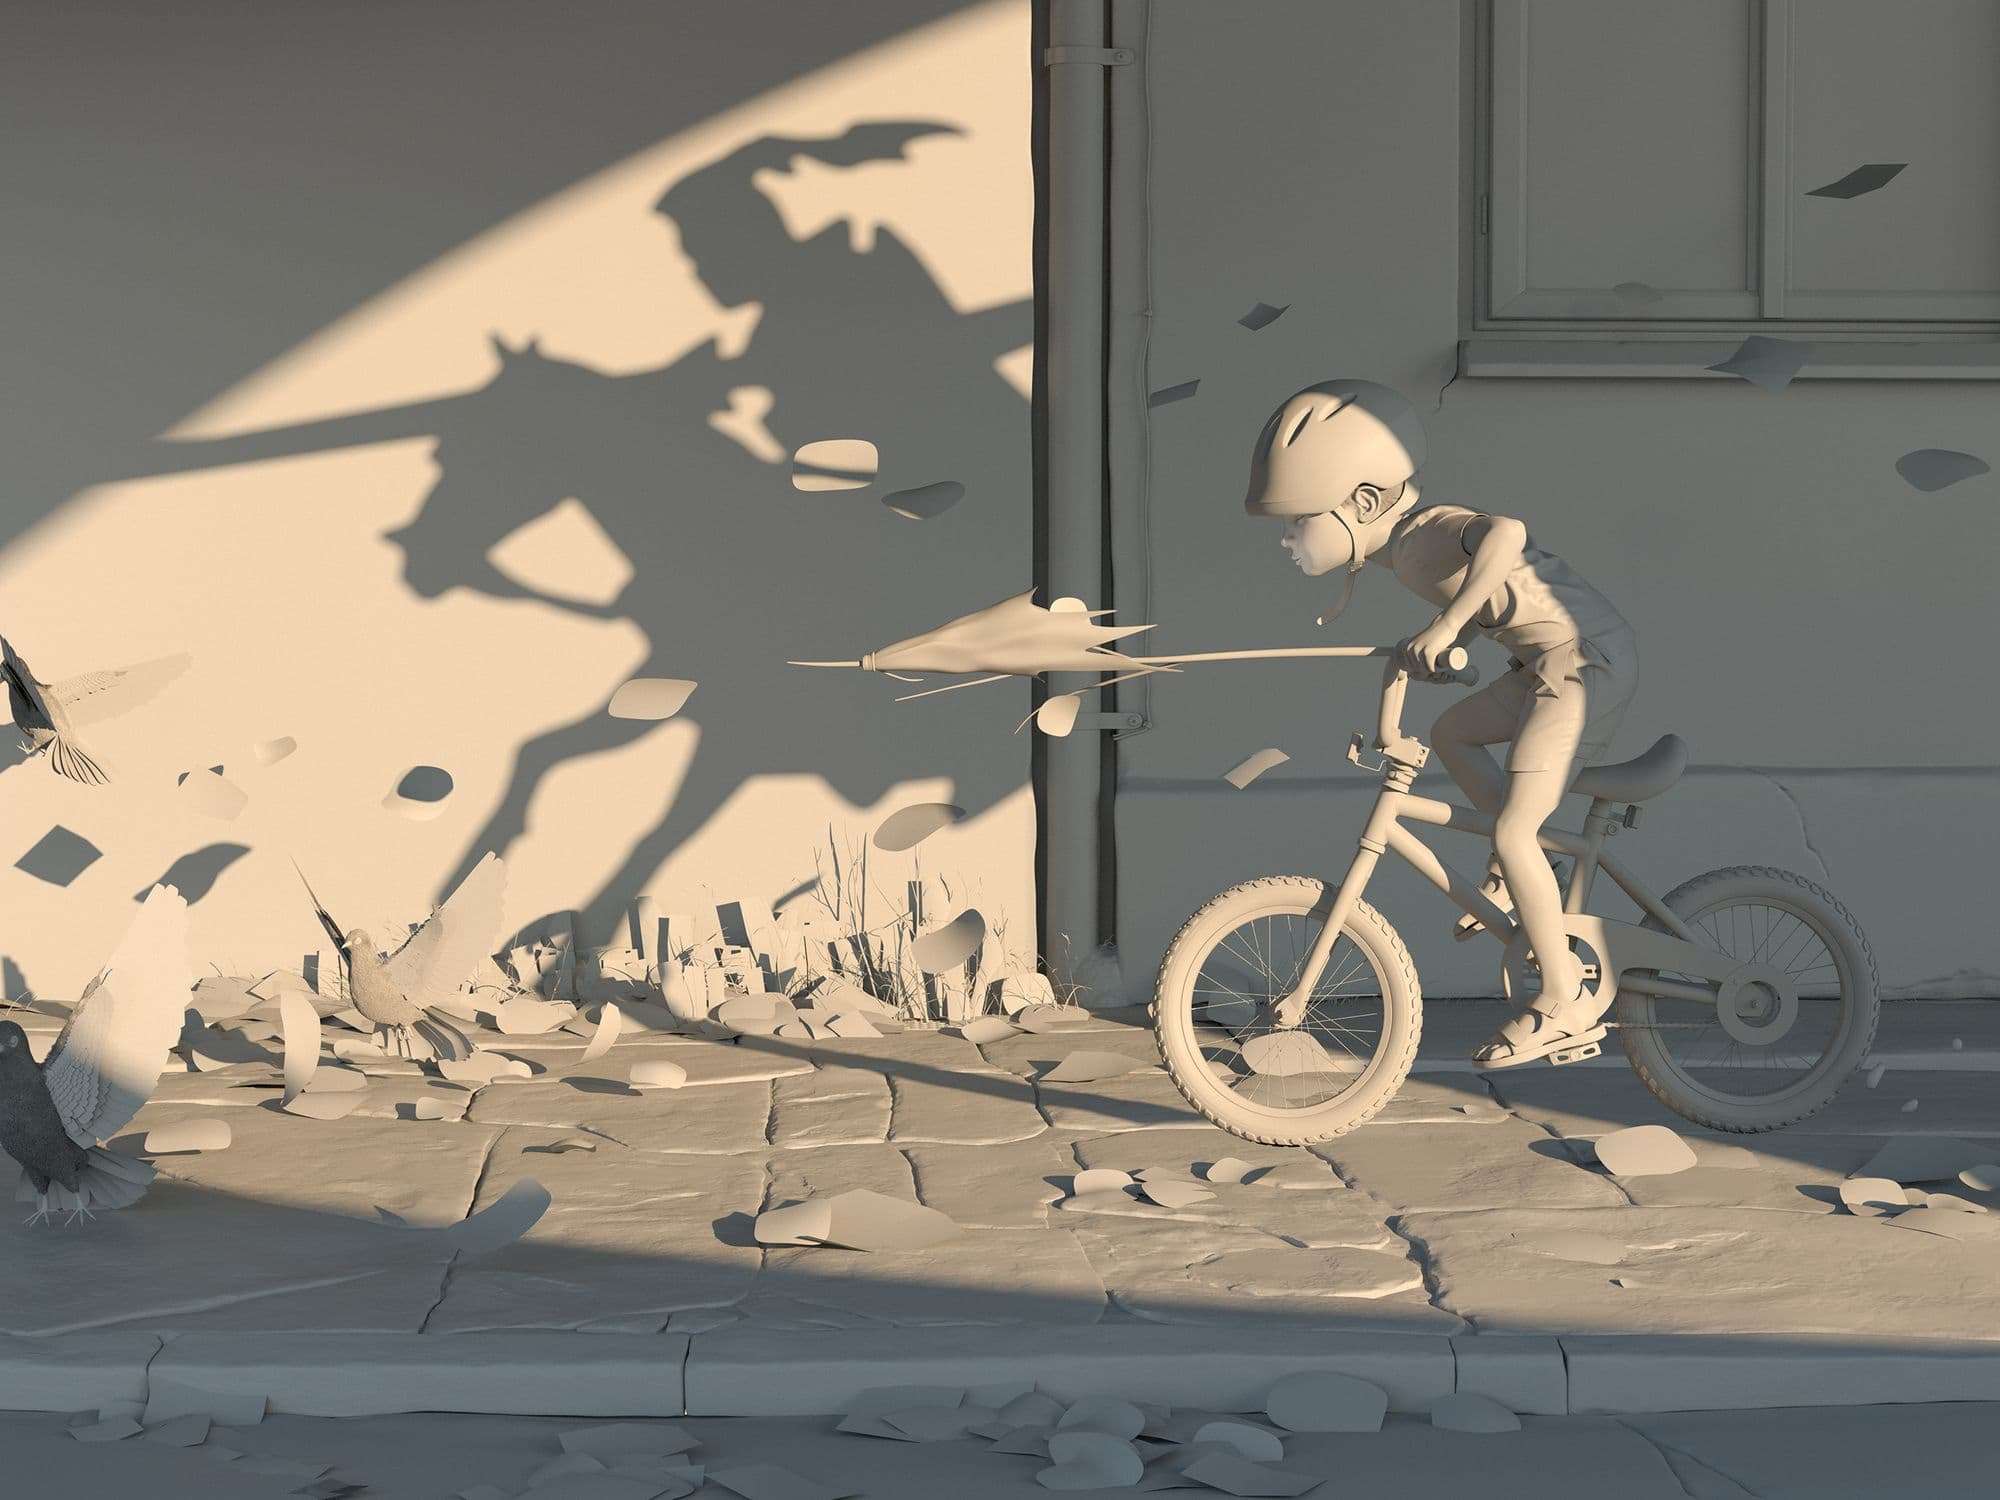
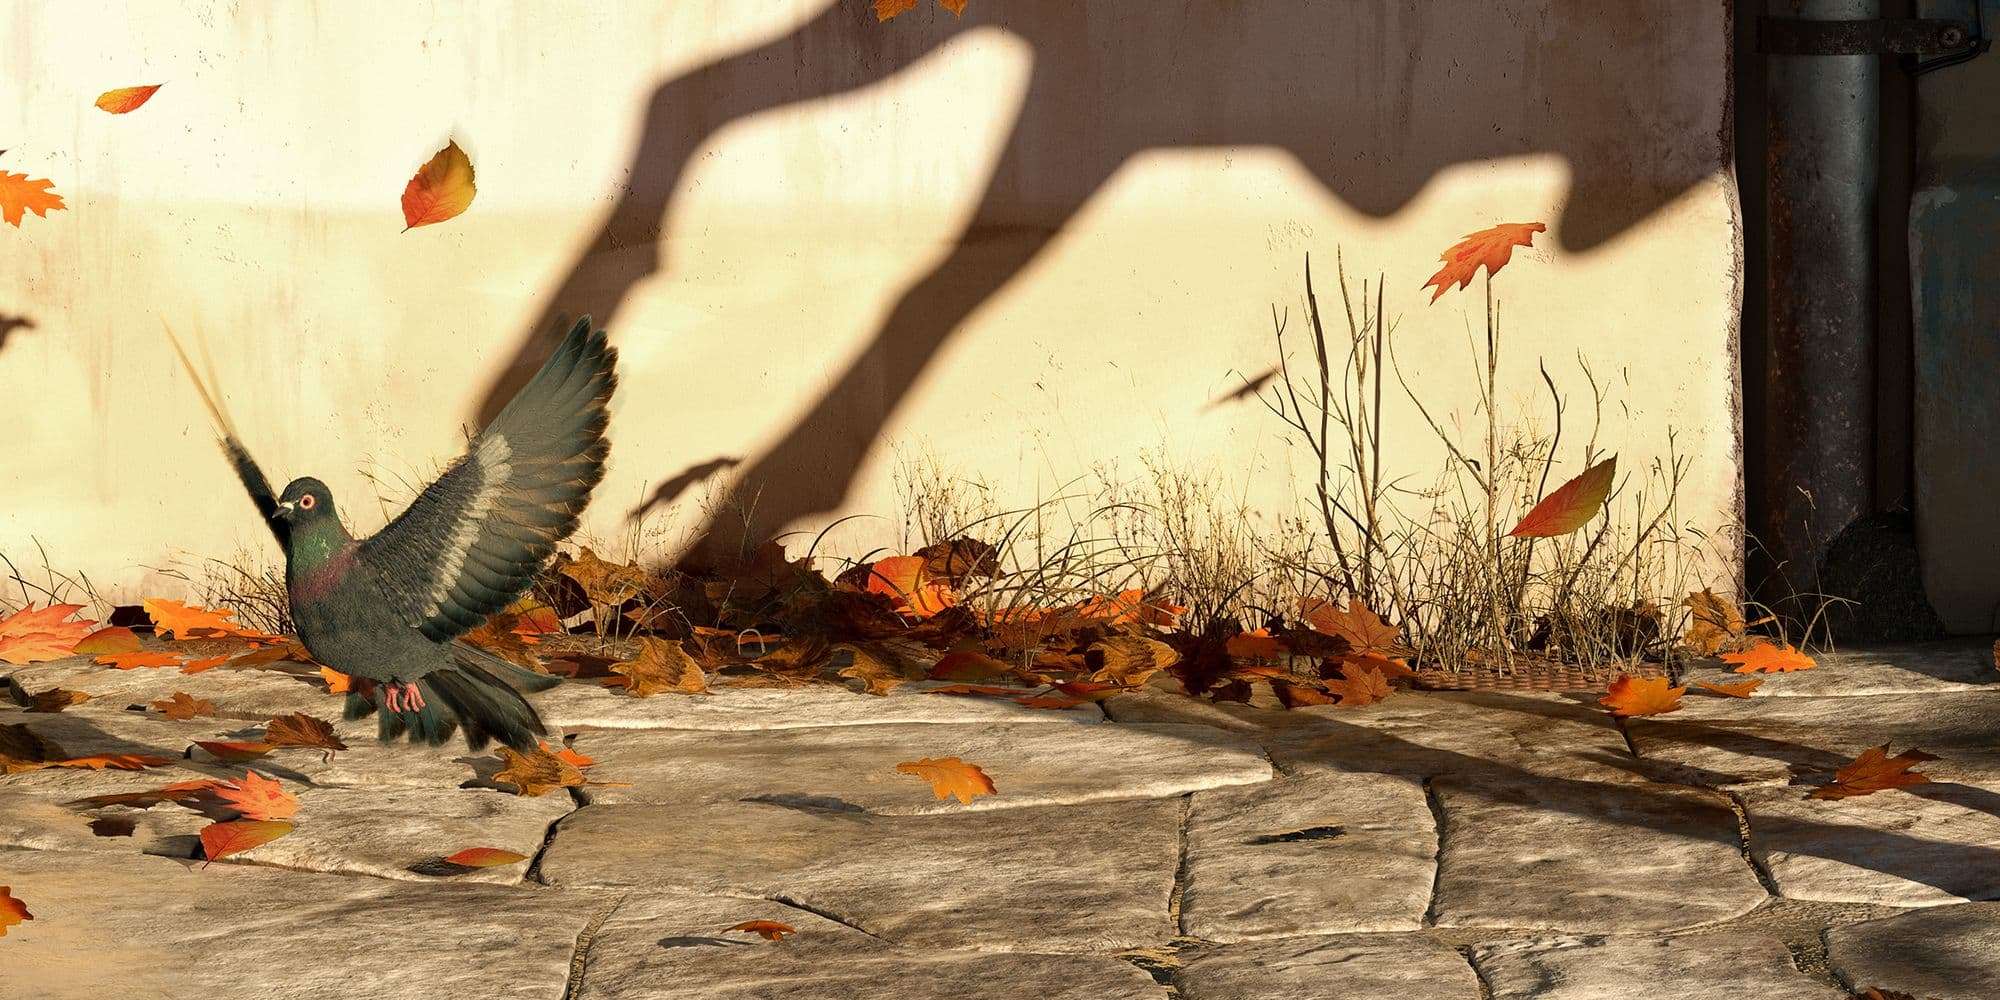
Lighting and look dev
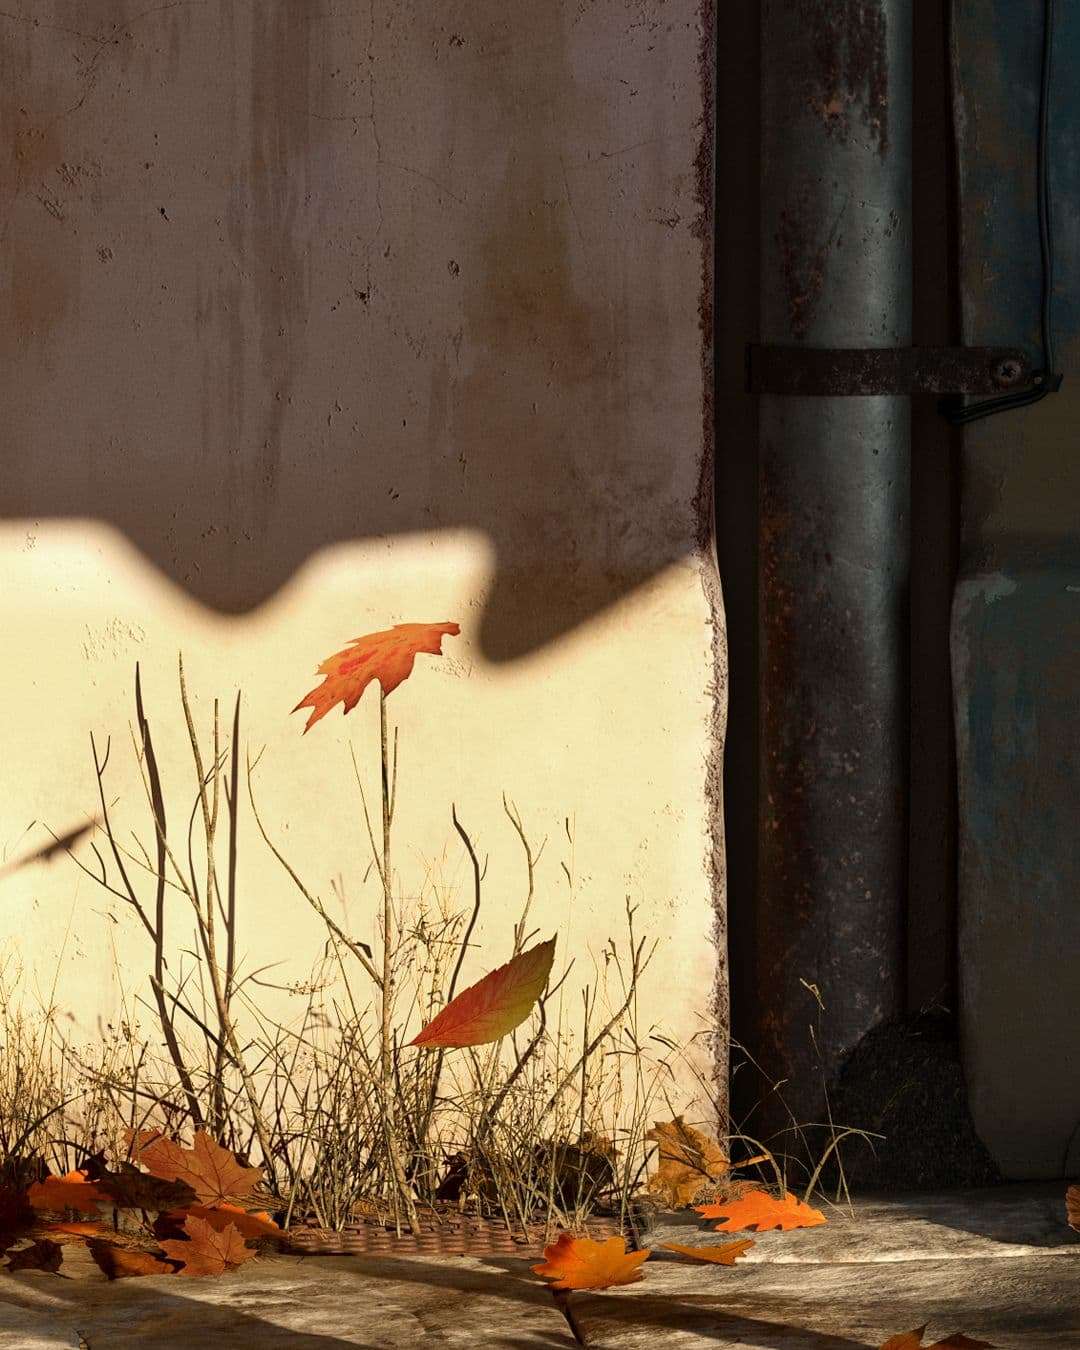
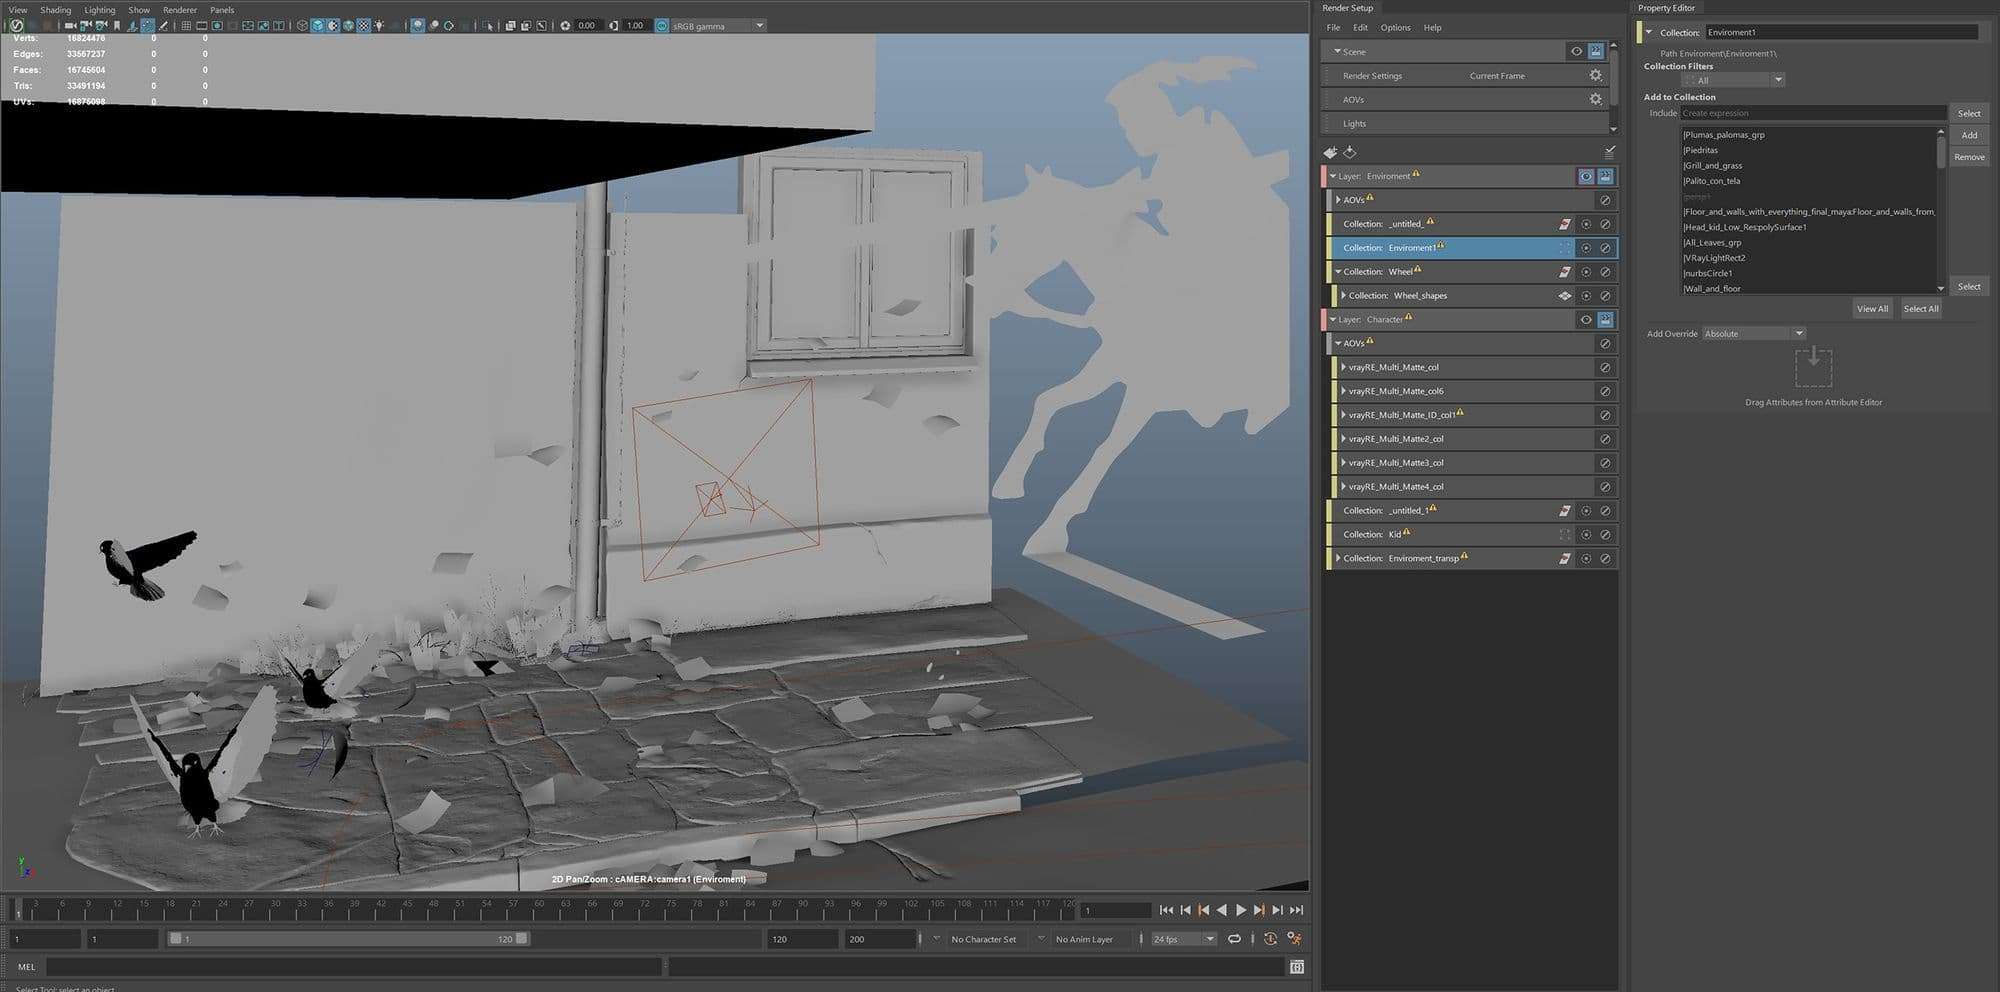
As mentioned before the lighting was one of the most important and challenging elements of the scene. It had to look realistic but at the same time, as the shadow of the character changed from the kid to the knight, it was necessary some cheating.
To achieve this after a lot of trial and error, the way I found to do it was to divide the scene into 2 render layers. One with the environment and one with the character and the bike.
For the shadows, I used geometry with VRayMtlWrapper that allows you to project shadows while keeping the object invisible.
The main light source I used was Vray Sun and hidden 3 point lighting for the character.
For the look dev process, almost all the materials I developed in Substance Painter and I only had to do some small adjustments in Vray. For the pigeons’ feathers and the leaves, I used Vray2sidedmtl and opacity maps for the translucency effect.
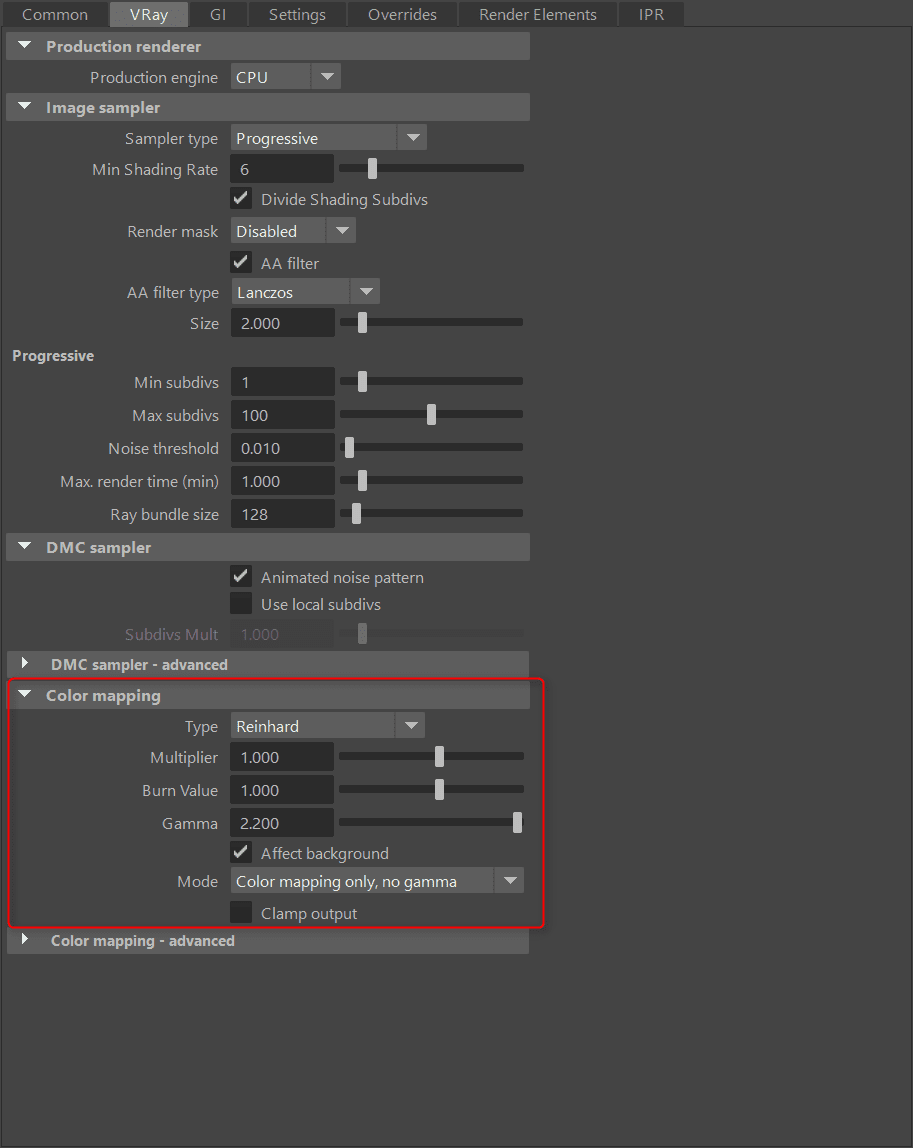
Important tip: Always read the software documentation. Until one of the last days of the project, I had a discrepancy between the colours of the materials in Substance and in my renders in Vray. This took me a long time and effort adjusting the materials while after reading the documentation I found out that I had the colour mapping wrong in the Vray settings. After adjusting this I saw a big change in the colours and final image. If I would have read the documentation from the beginning, I could have saved a few days of work.
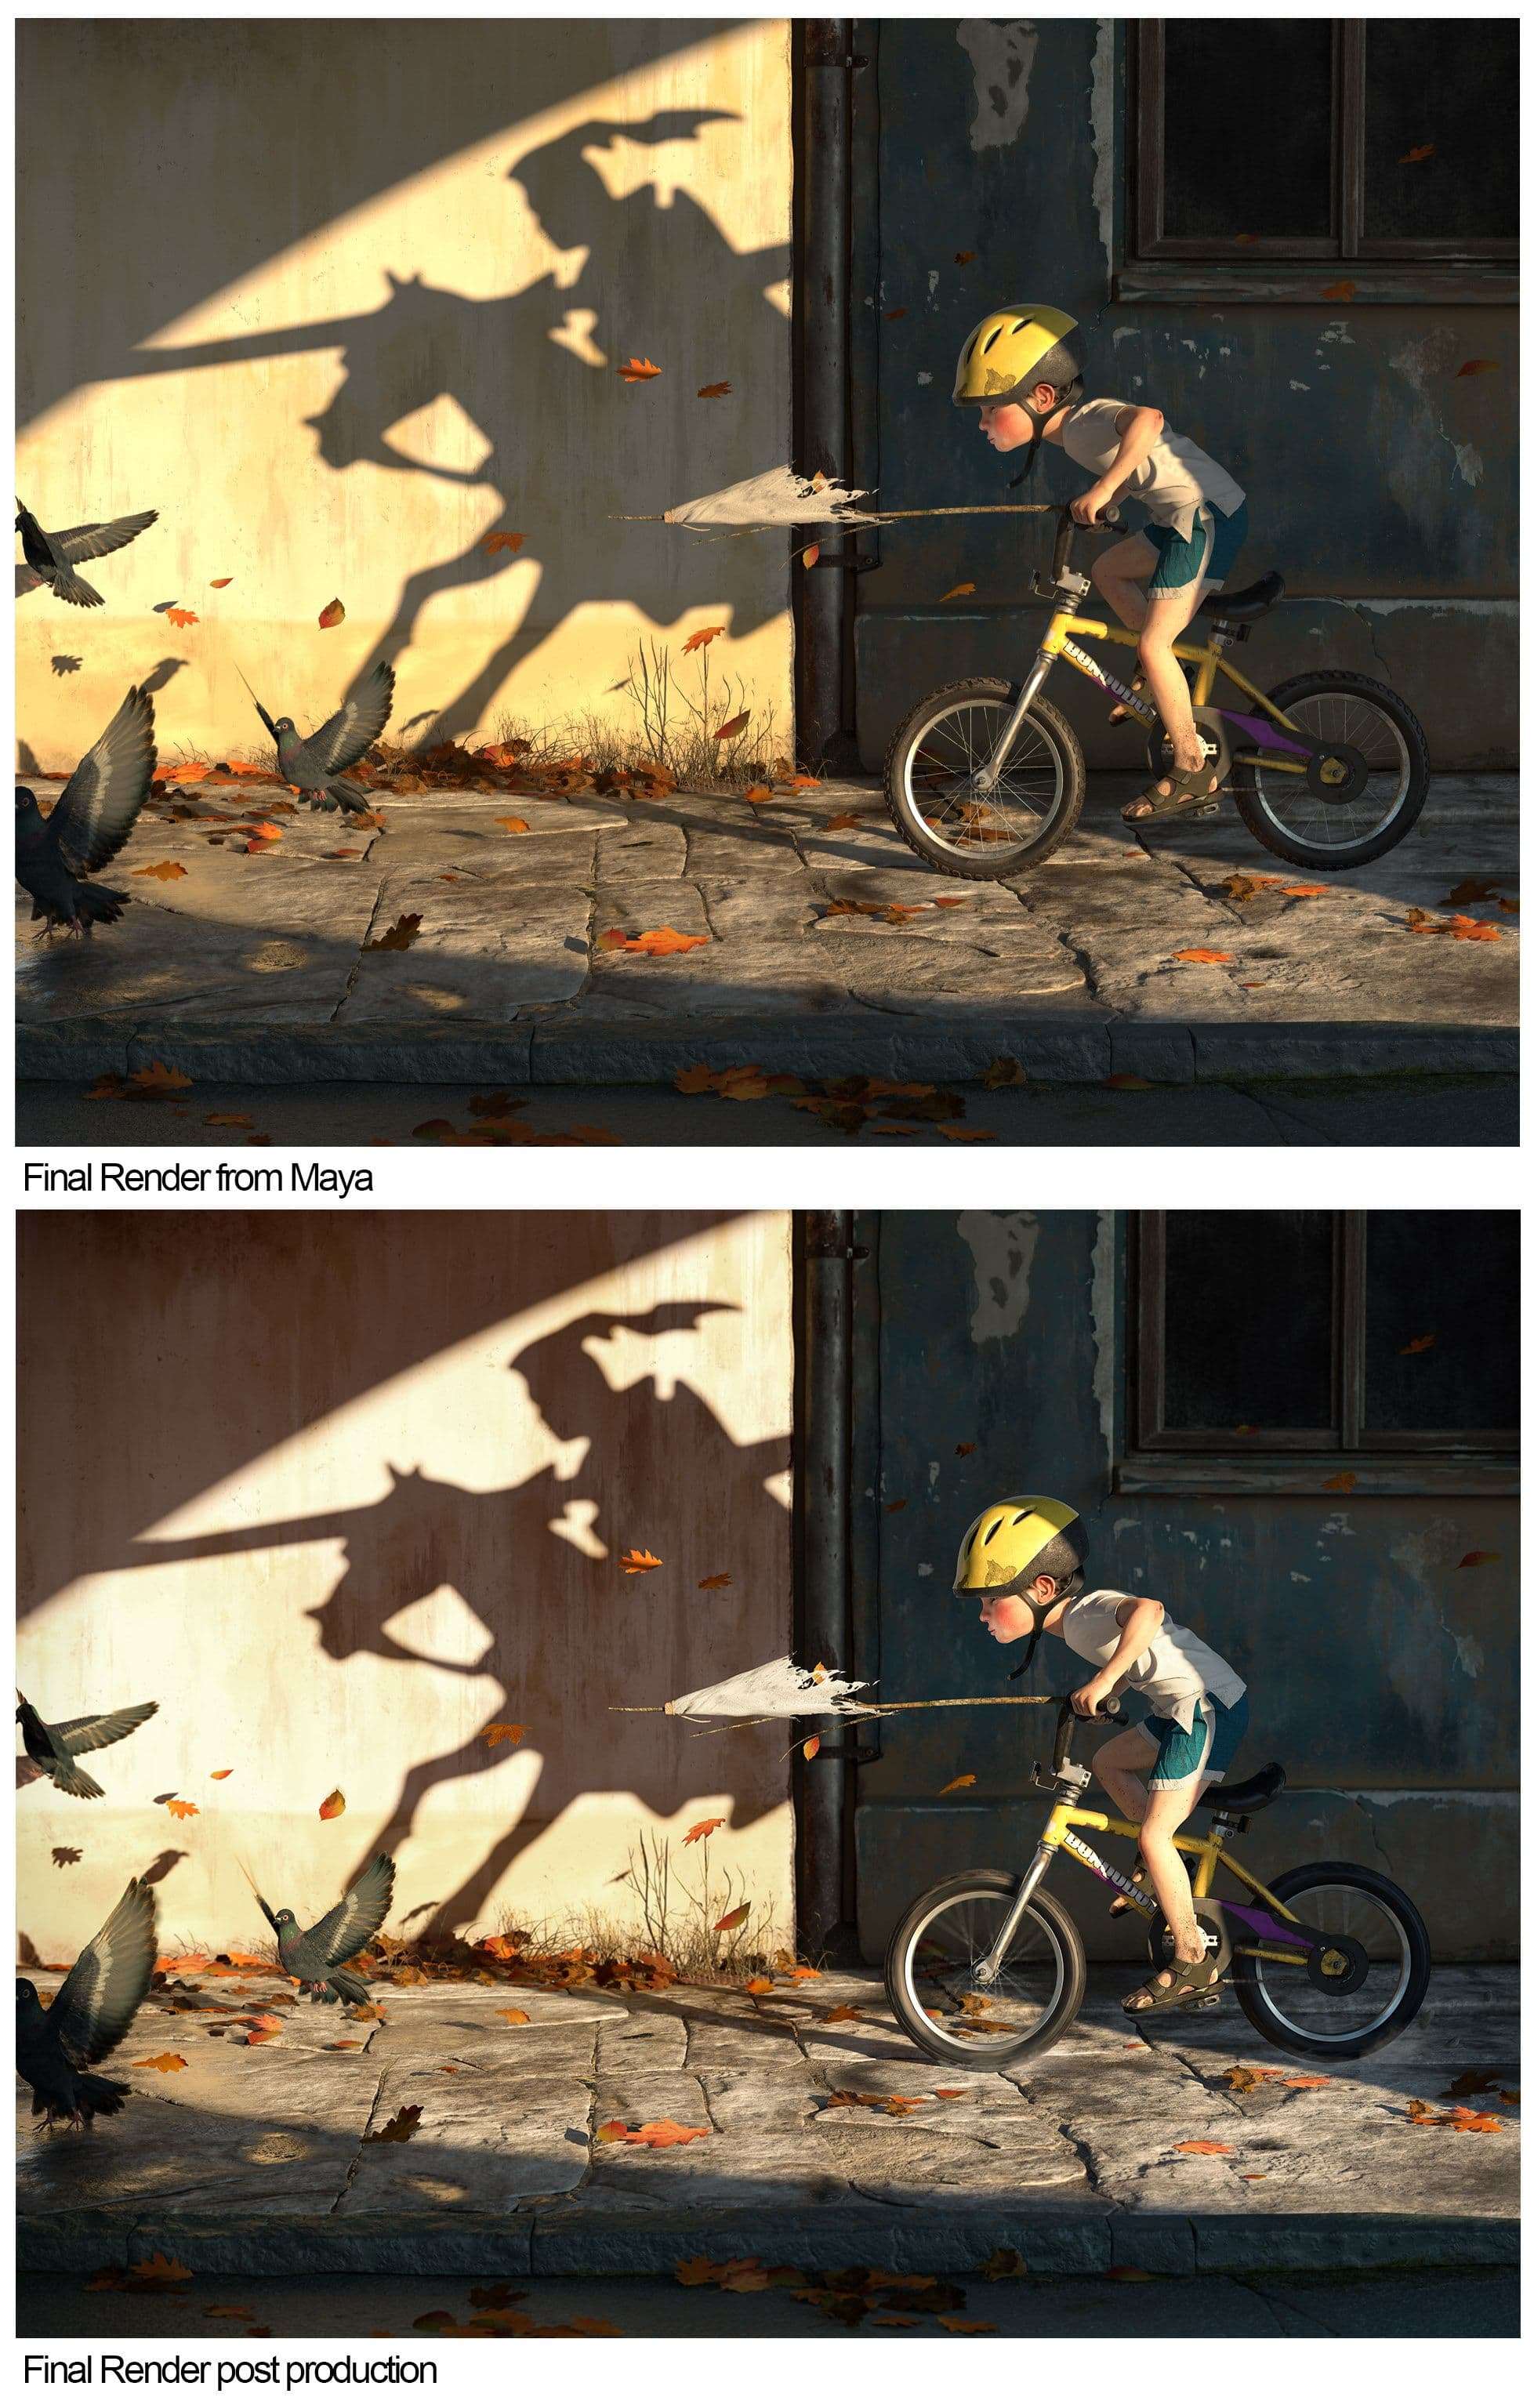
Final mood: Post-processing
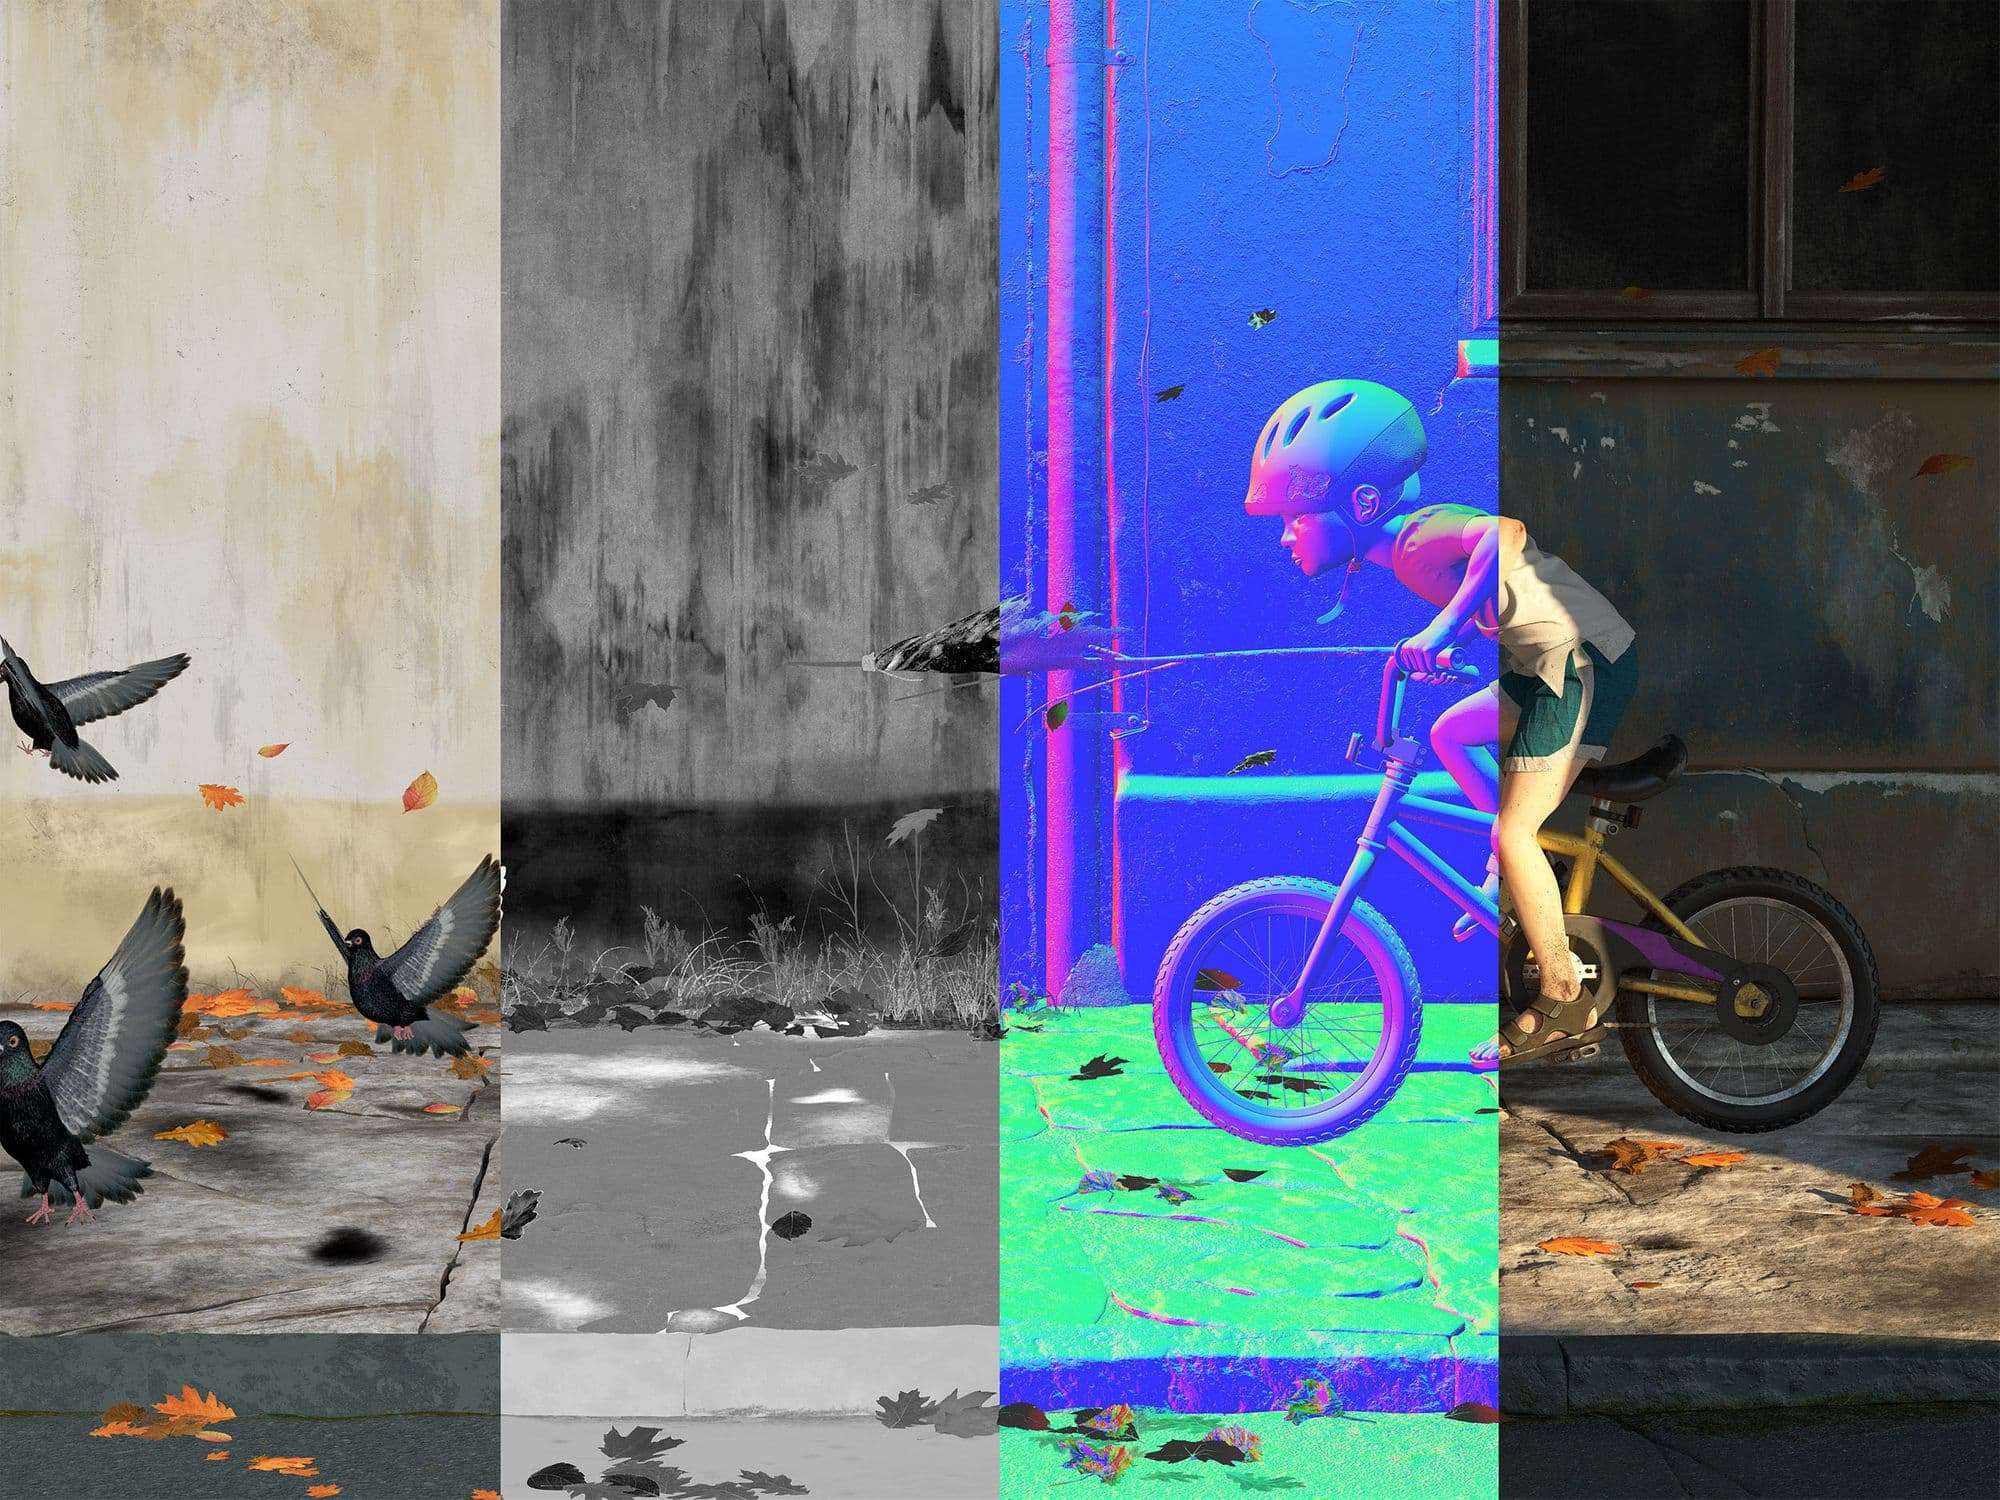
All the post-processing was done in Photoshop. At this point, the render elements are key to adjust more in detail your final image. Changes like adjusting the final colour of the leaves are much easier using render elements like Multimatte to select them straight forward. For this project, I did several different Multi mattes allowing me to work on each element of the scene separately. This might be a tedious process in Maya but it will make your life much easier in the post-processing. Another really important render element is the Zdepth used to create depth of field.
For colour correction, I used the Camera Raw filter constantly comparing with the 2D concept to match it as close as possible.
The entire process lasted for 5 weeks and I modeled, textured and look developed every single object of this piece.
This was a great project to solidify all the knowledge learned during the foundation term at Think Tank Training Center Online and a really fun project to work on.
Still a lot to learn. This learning curve just started, but please don’t hesitate to contact me in social media in case you have any question, critic or advice about my process. I will try to help as much as my knowledge allows me and I am always open for critics to keep improving my work.
I don’t want to leave without giving a big thanks to the school, to my instructor Rusty Currier and to all colleagues and friends from Think Tank Training Center. I found it super important to see the progress of the other students every week during the process. This made all of us push each other and put the bar higher constantly.
Also thanks to The Rookies for invited me to share my work on this great platform.