Recreating a CGI Environment in Unreal Engine
We spoke with Nikhil Kedige, who recently completed his diploma at Think Tank Online and Junk Planet was his graduation project.
We spoke with Nikhil Kedige, who recently completed his diploma at Think Tank Online and Junk Planet was his graduation project.
We spoke with Nikhil Kedige, who recently completed his diploma at Think Tank Online and Junk Planet was his graduation project. He got interested in this field back in High School and was part of a 5 person team for a game jam. He was given the role of creating the environment. Since then he's been in love with the process of creating experiences that he can share with others through games.
This was my graduation project so I wanted it to be a compilation of skills I had acquired during my course and more. To challenge myself, I had decided pretty early on that I'll be doing an outdoor environment. It was something I had never approached before and it would come with its own set of learning experiences and challenges .
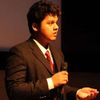
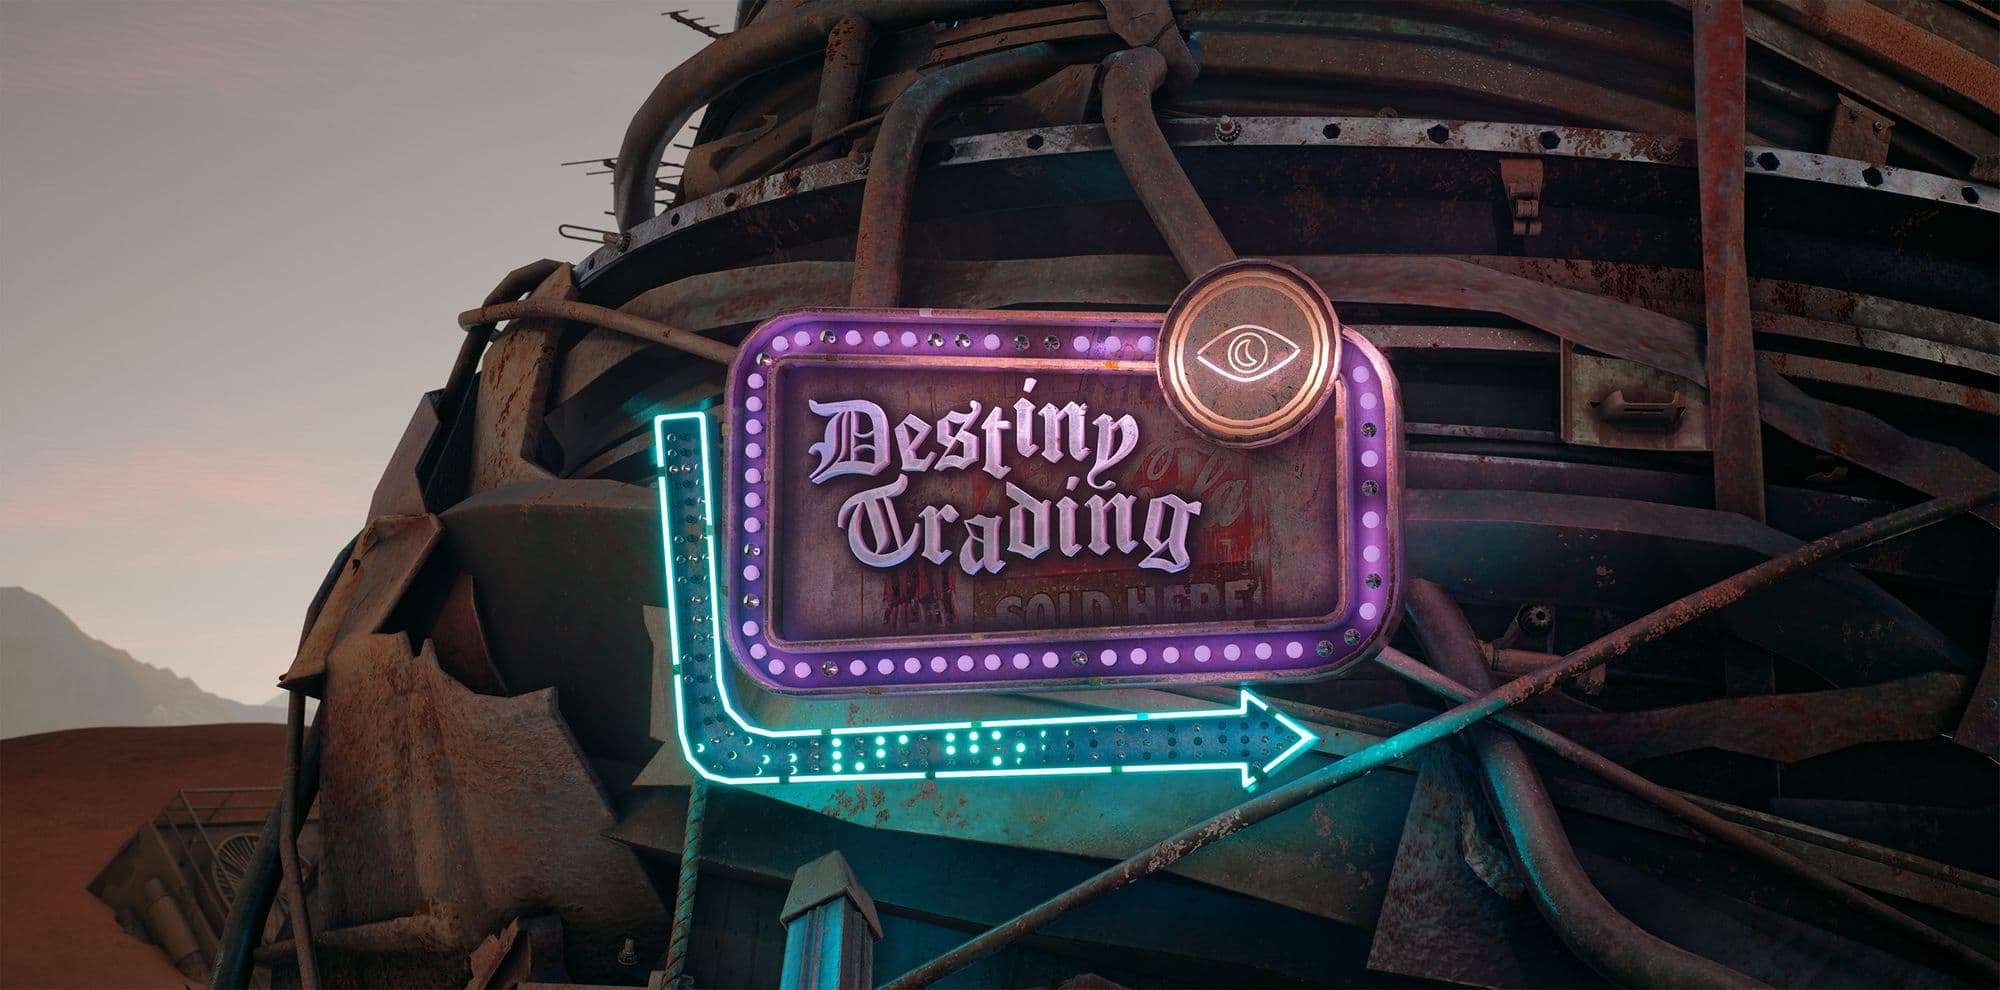
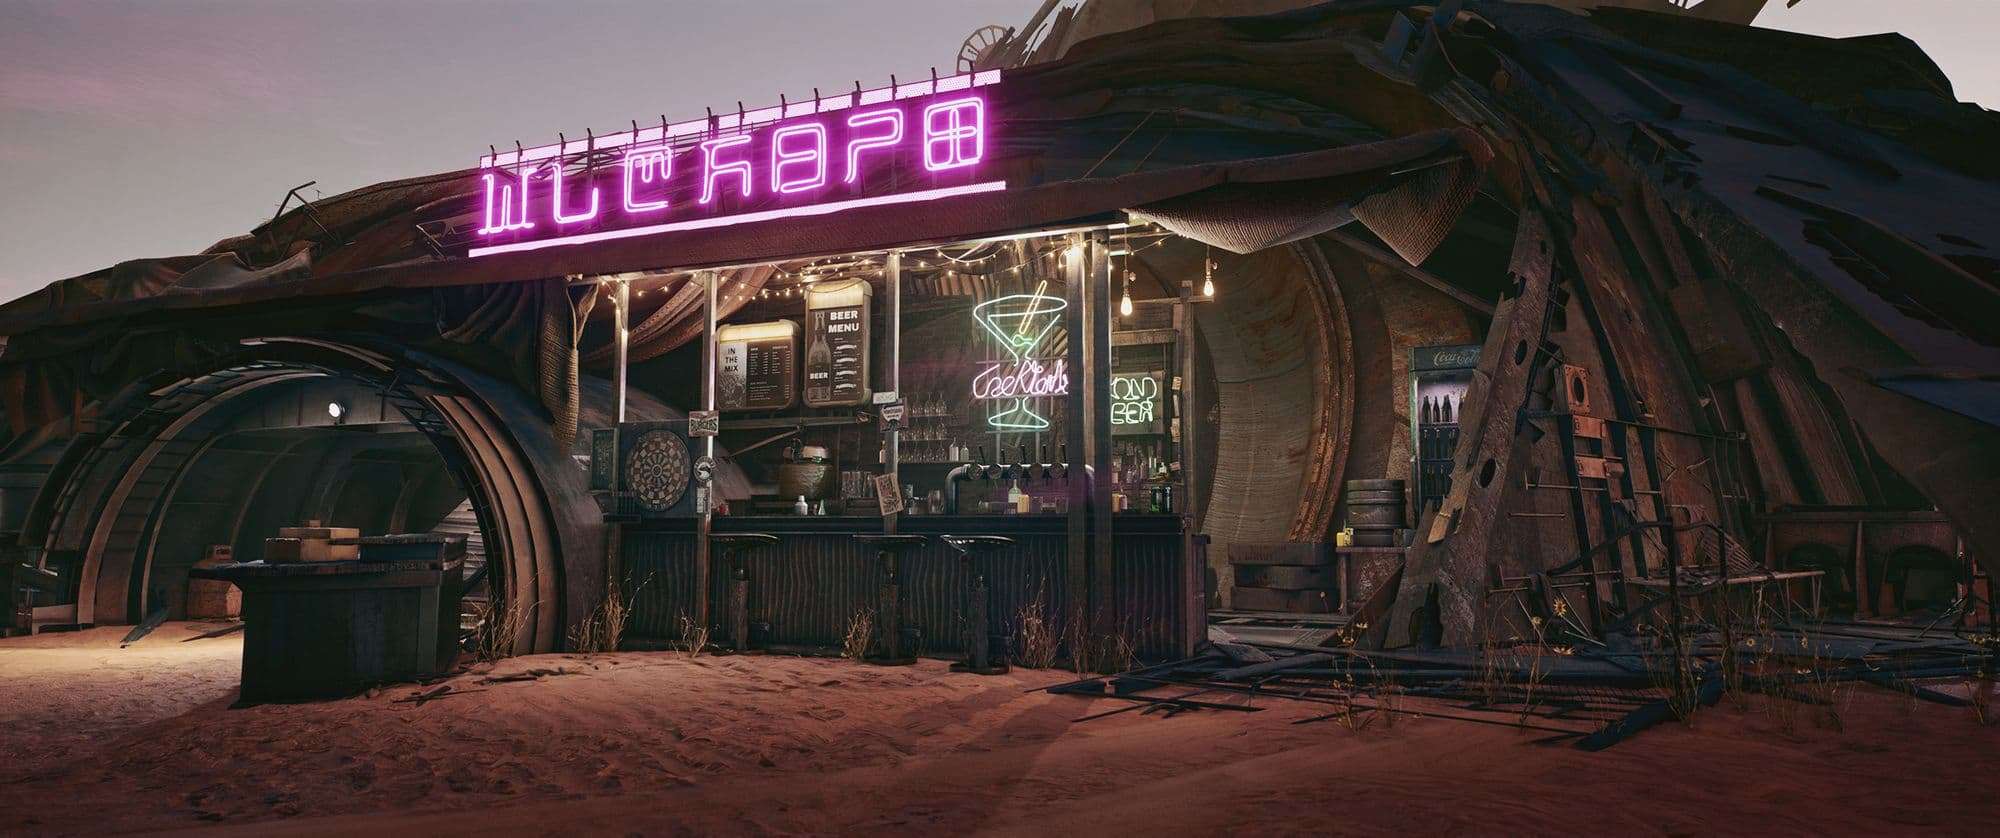
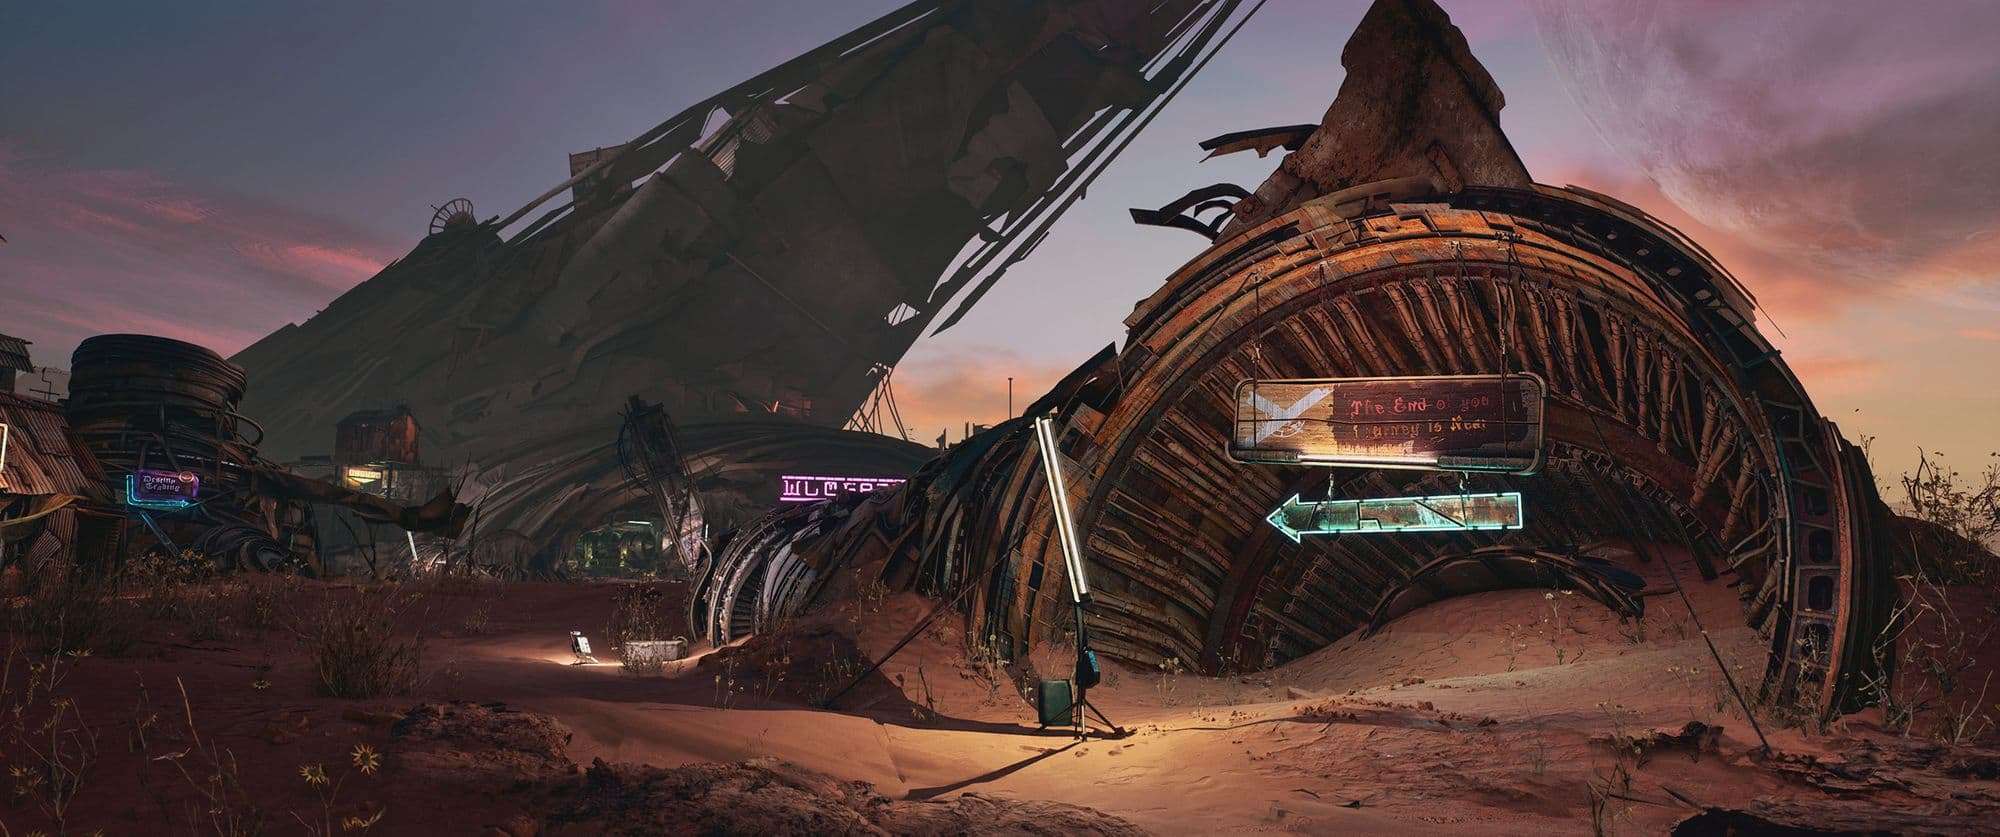
The concept I chose was made by Eddie Mendoza. I decided to go with this because it had a very unique look and feel to it. A blend of aviation tech we have right now with good variation in scale and a unique setup of makeshift houses . Apart from the pure creation process, there was also the opportunity to tell a story. I enjoy looking at artworks and discovering new details that the artist had left there to tell a small story. I wanted to fill my environment with little details which have been part of my journey as an artist. And I wanted to make this project serve as a milestone for what I have learned and how far I have to go.
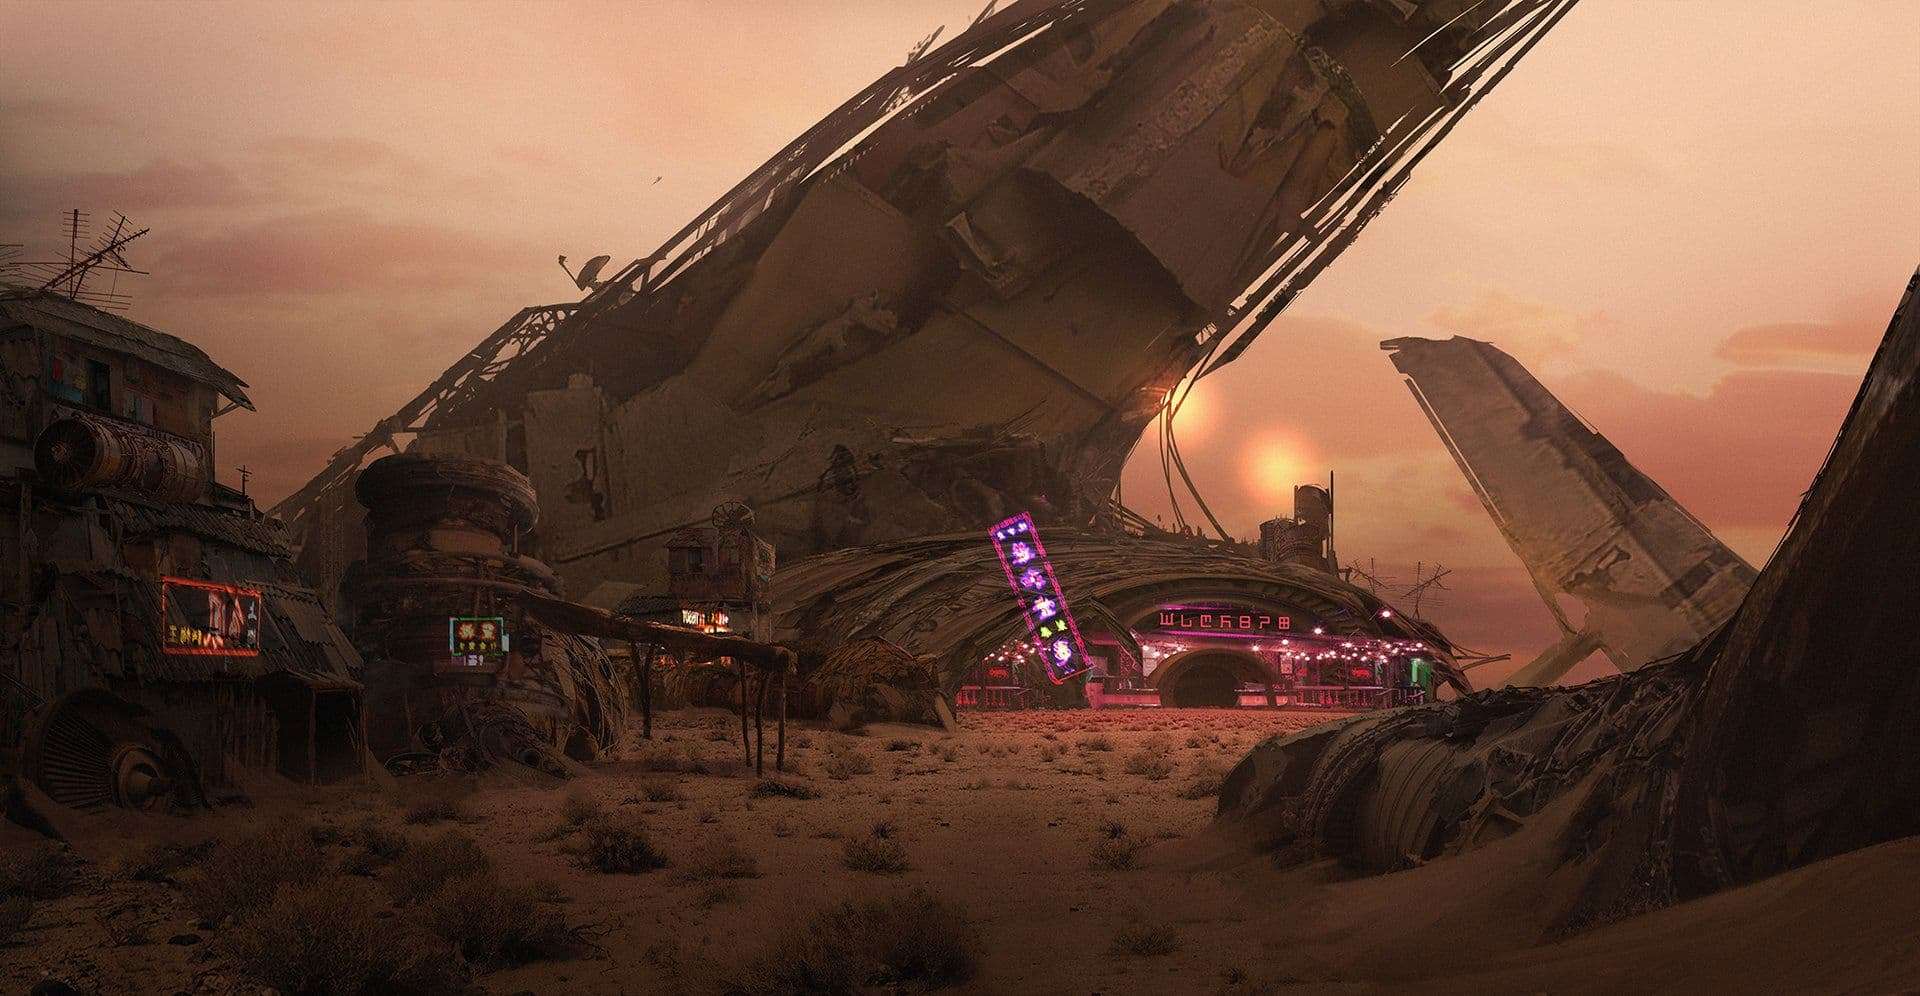
Apart from the concept, I had a wide array of references starting with images from MH 17 plane crash which I found were used in the concept for ship debris. Other life references included ship hydraulics , slums, and old signs. I also got some images from games like Far cry 5, Borderlands, Dying Light and Concept art done by ILM for the Star Wars Movies .
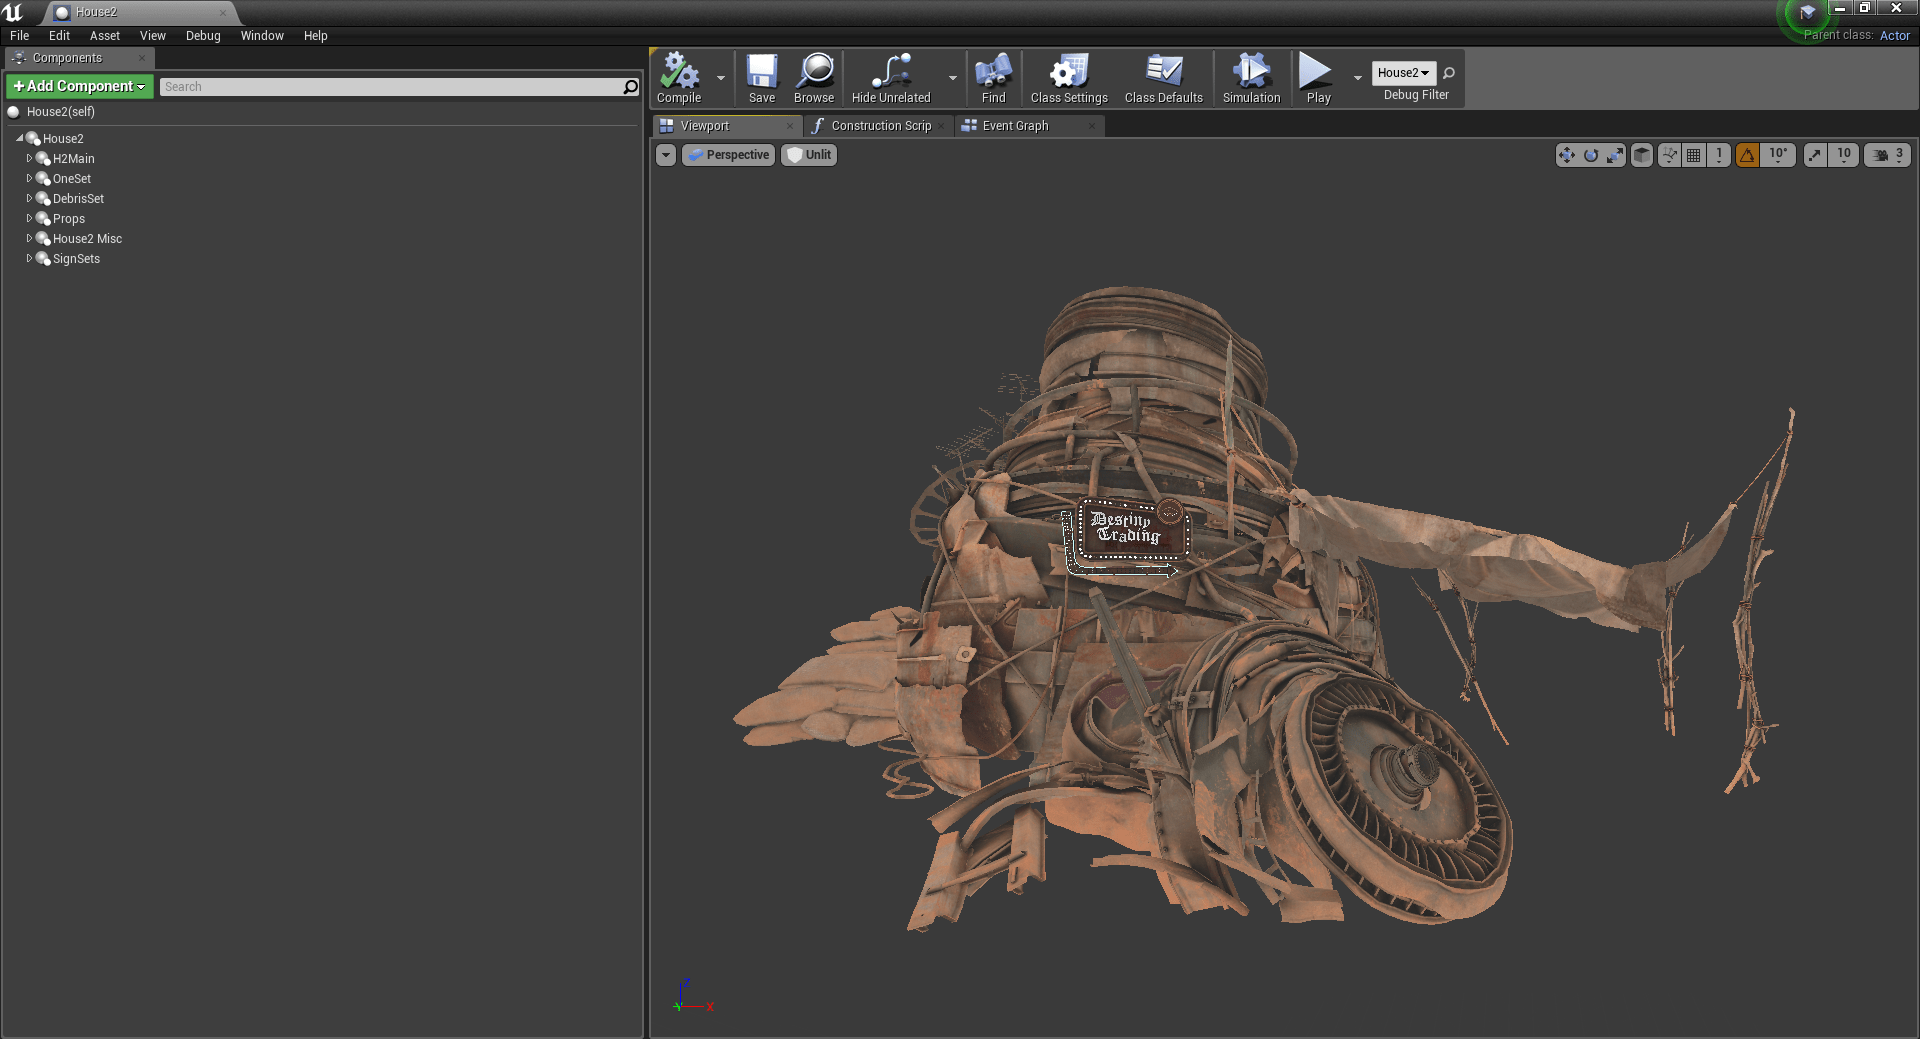
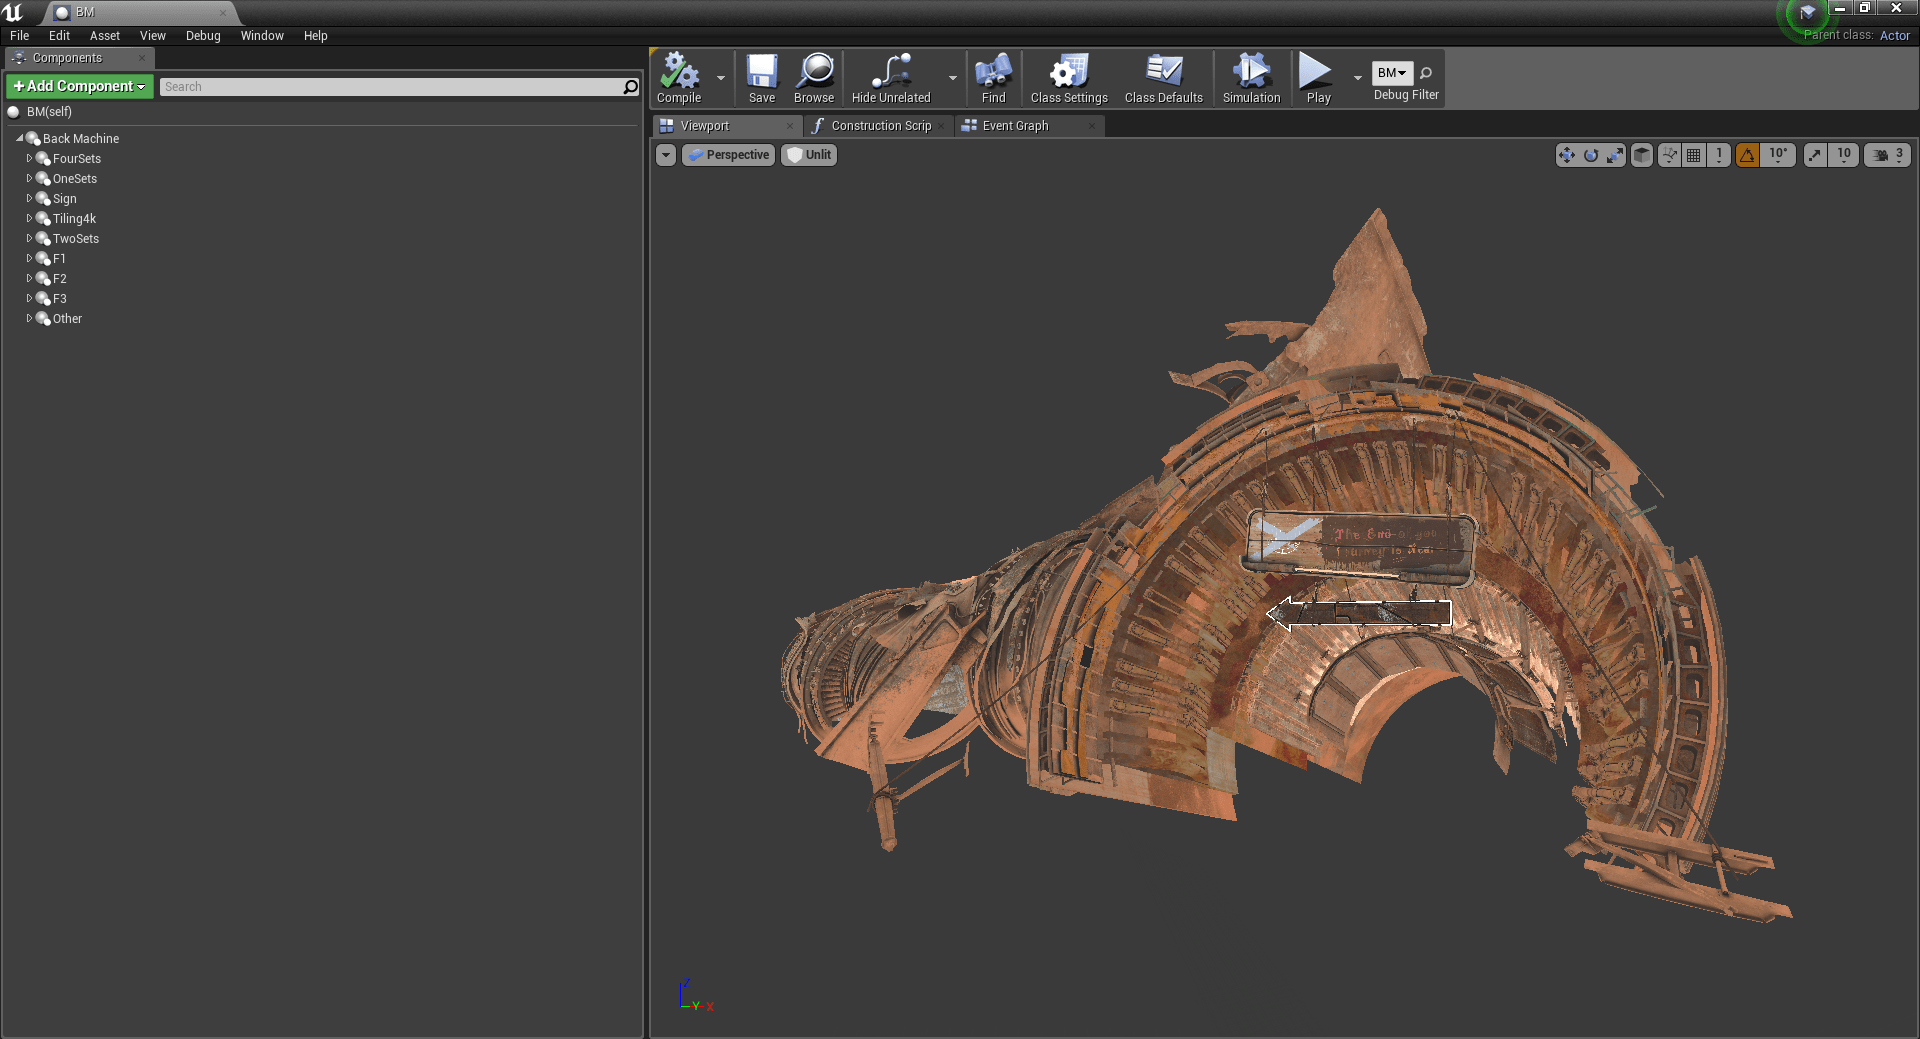
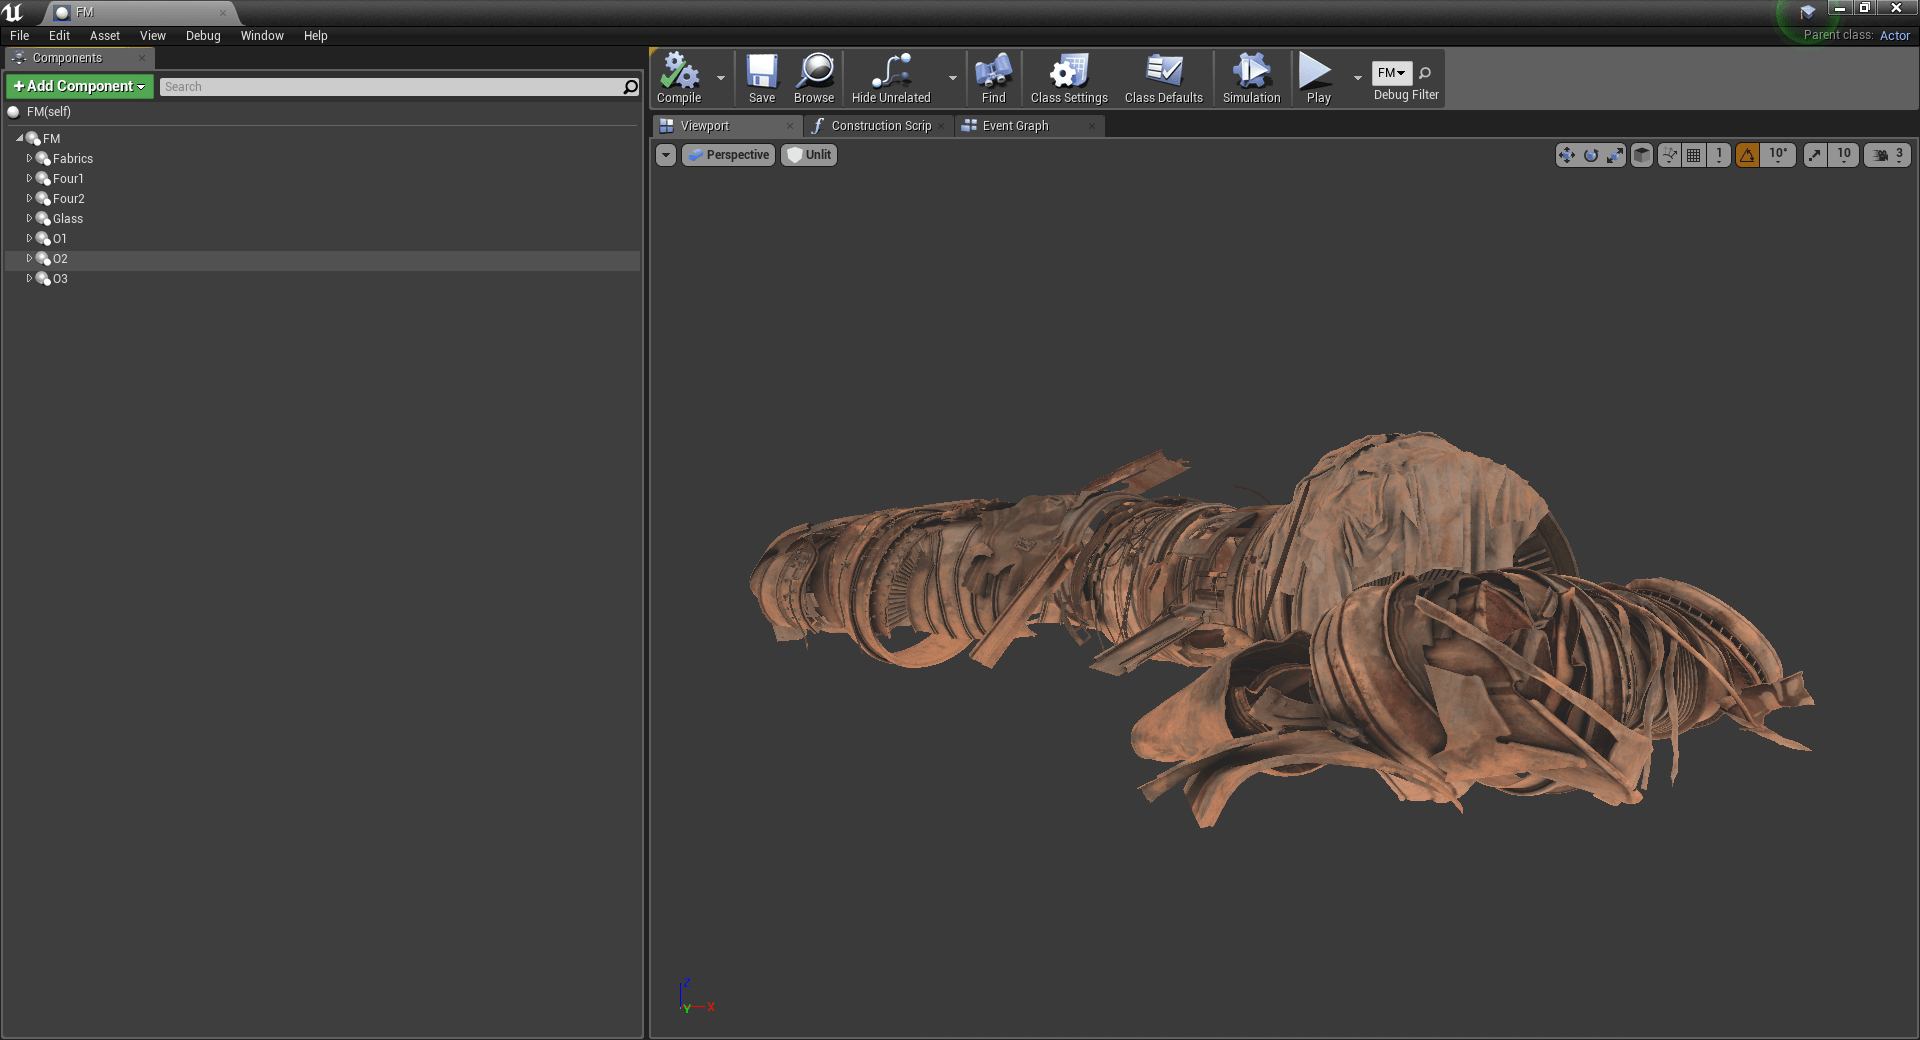
Having a modular approach for this environment was difficult given how unique each section was . So while blocking out the scene I focused more on the big picture and divided the scene into different ‘houses’ and had a blueprint setup for each of them. This way I could move large structures around and play with the composition . I also blocked out the shots alongside my environment in sequencer. So I had a clear idea of what would be visible in the camera which made me plan the amount of modeling that was required.
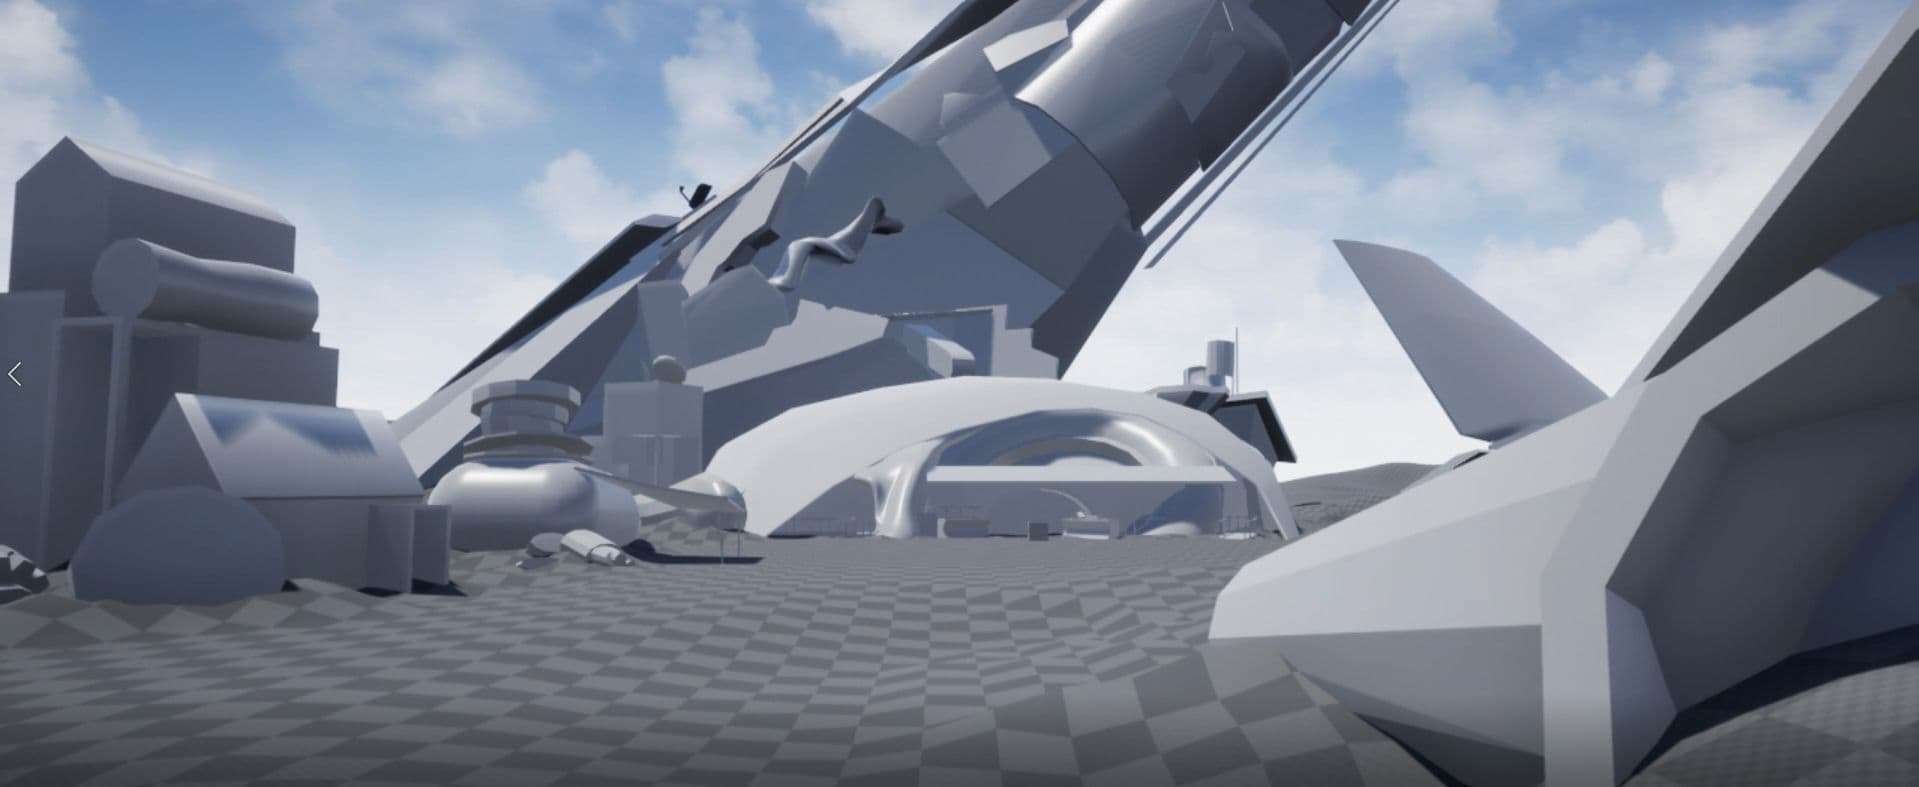
For the landscape I started with the default Unreal landscape tool to have a base on which I can set up my composition. Before sculpting into the landscape I'll create some basic geometry to take the place of the major objects that are going to be in the finished scene. At this stage it's important for me to get the feel of the space I'm trying to recreate. Once I've got the scale and the spacial relationship between the primitives about right on the flat ground, I'll move them to match the concept. Then I'll sculpt the landscape up to meet the geometry. Now at this stage I create shapes on the landscape at about the size, shape and position that looks right using the unreal sculpting tools. It is intended as a guide to help me with placing landscape features when I get into Gaea.
In Gaea I run the exported height map through the relevant erosion nodes while masking out the areas i don't want affected. I use Geia to create an Albedo map alongside the heightmap for the landscape. This heightmap replaces the one in unreal and the albedo is used as an overlay in the landscape master material.
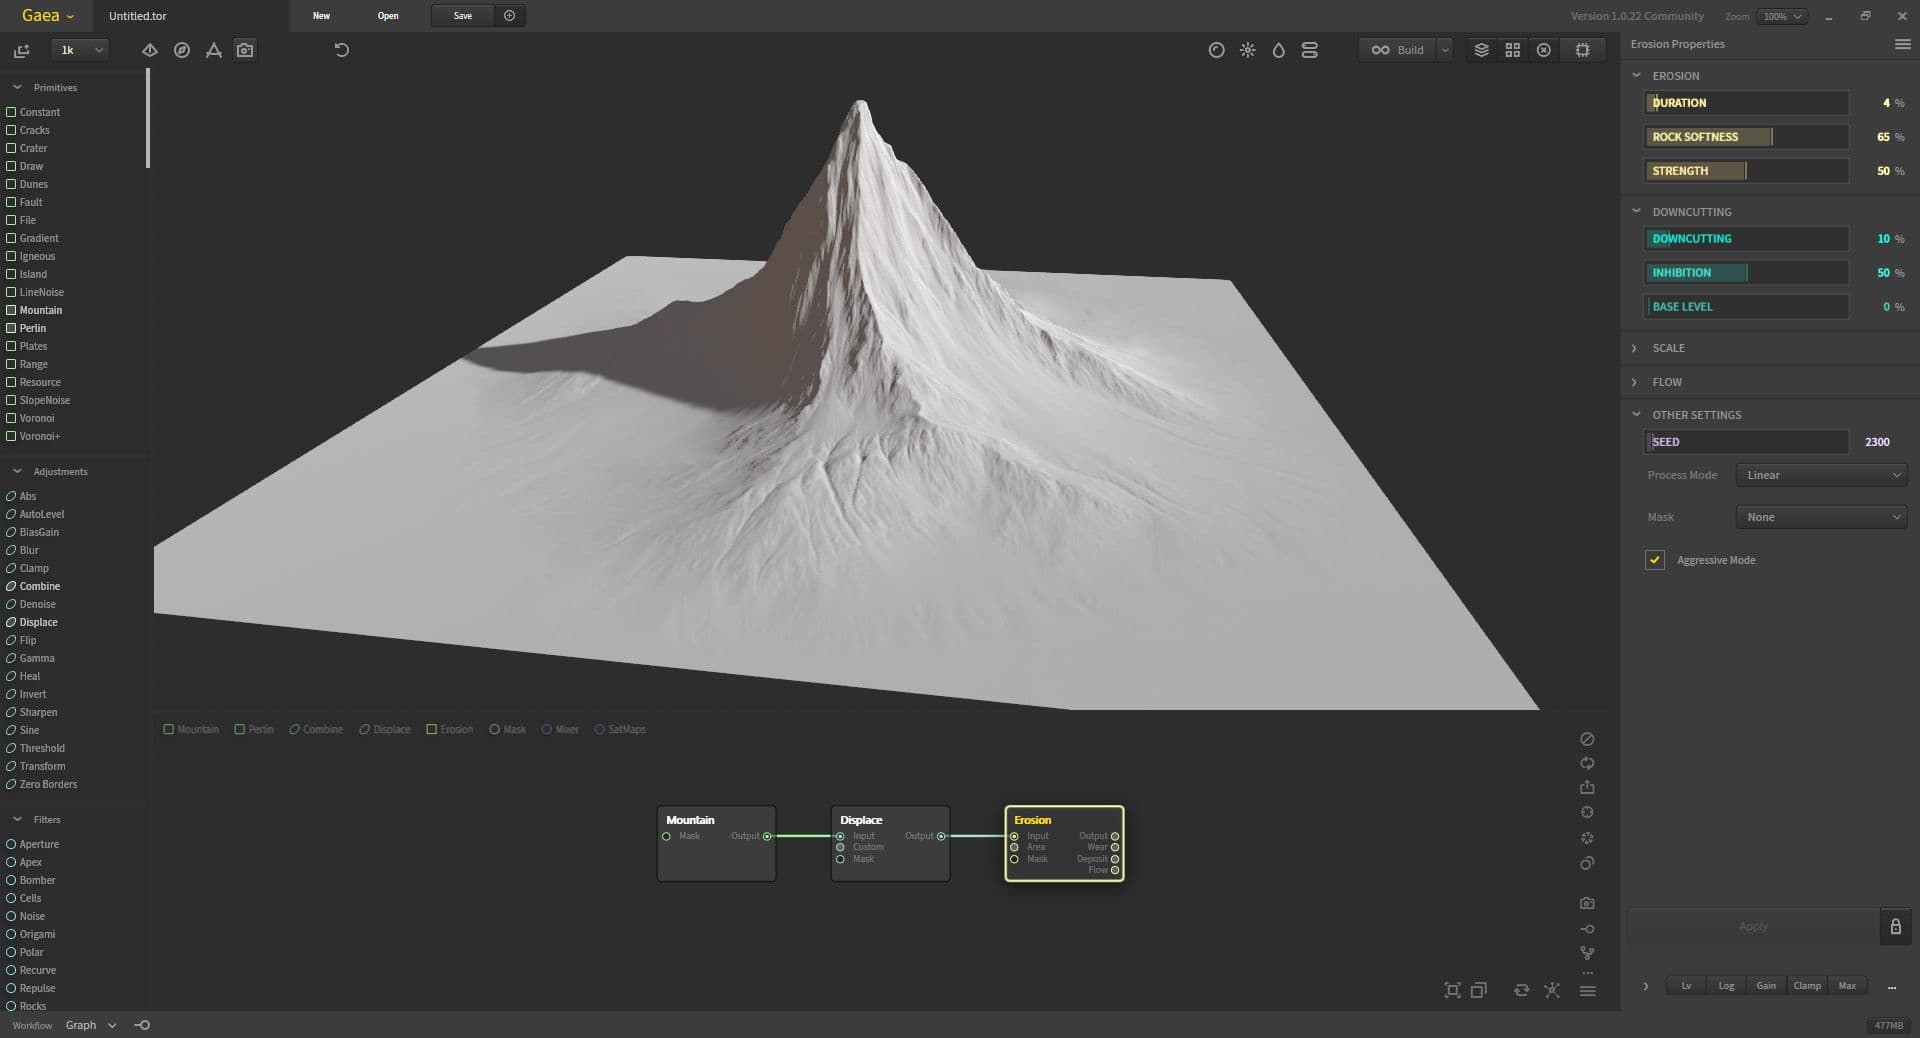
Lastly, to get some variations in the landscape , I used Gaea again to create a couple of mountain assets. I also sculpted some modular rocks to be used alongside the ones from the megascans library.
I approached modeling according to the shots I had blocked out so the structure in focus in the first shot was the one I modeled first. It ended up helping me out as I was able to reuse most of the assets when I went from shot to shot.

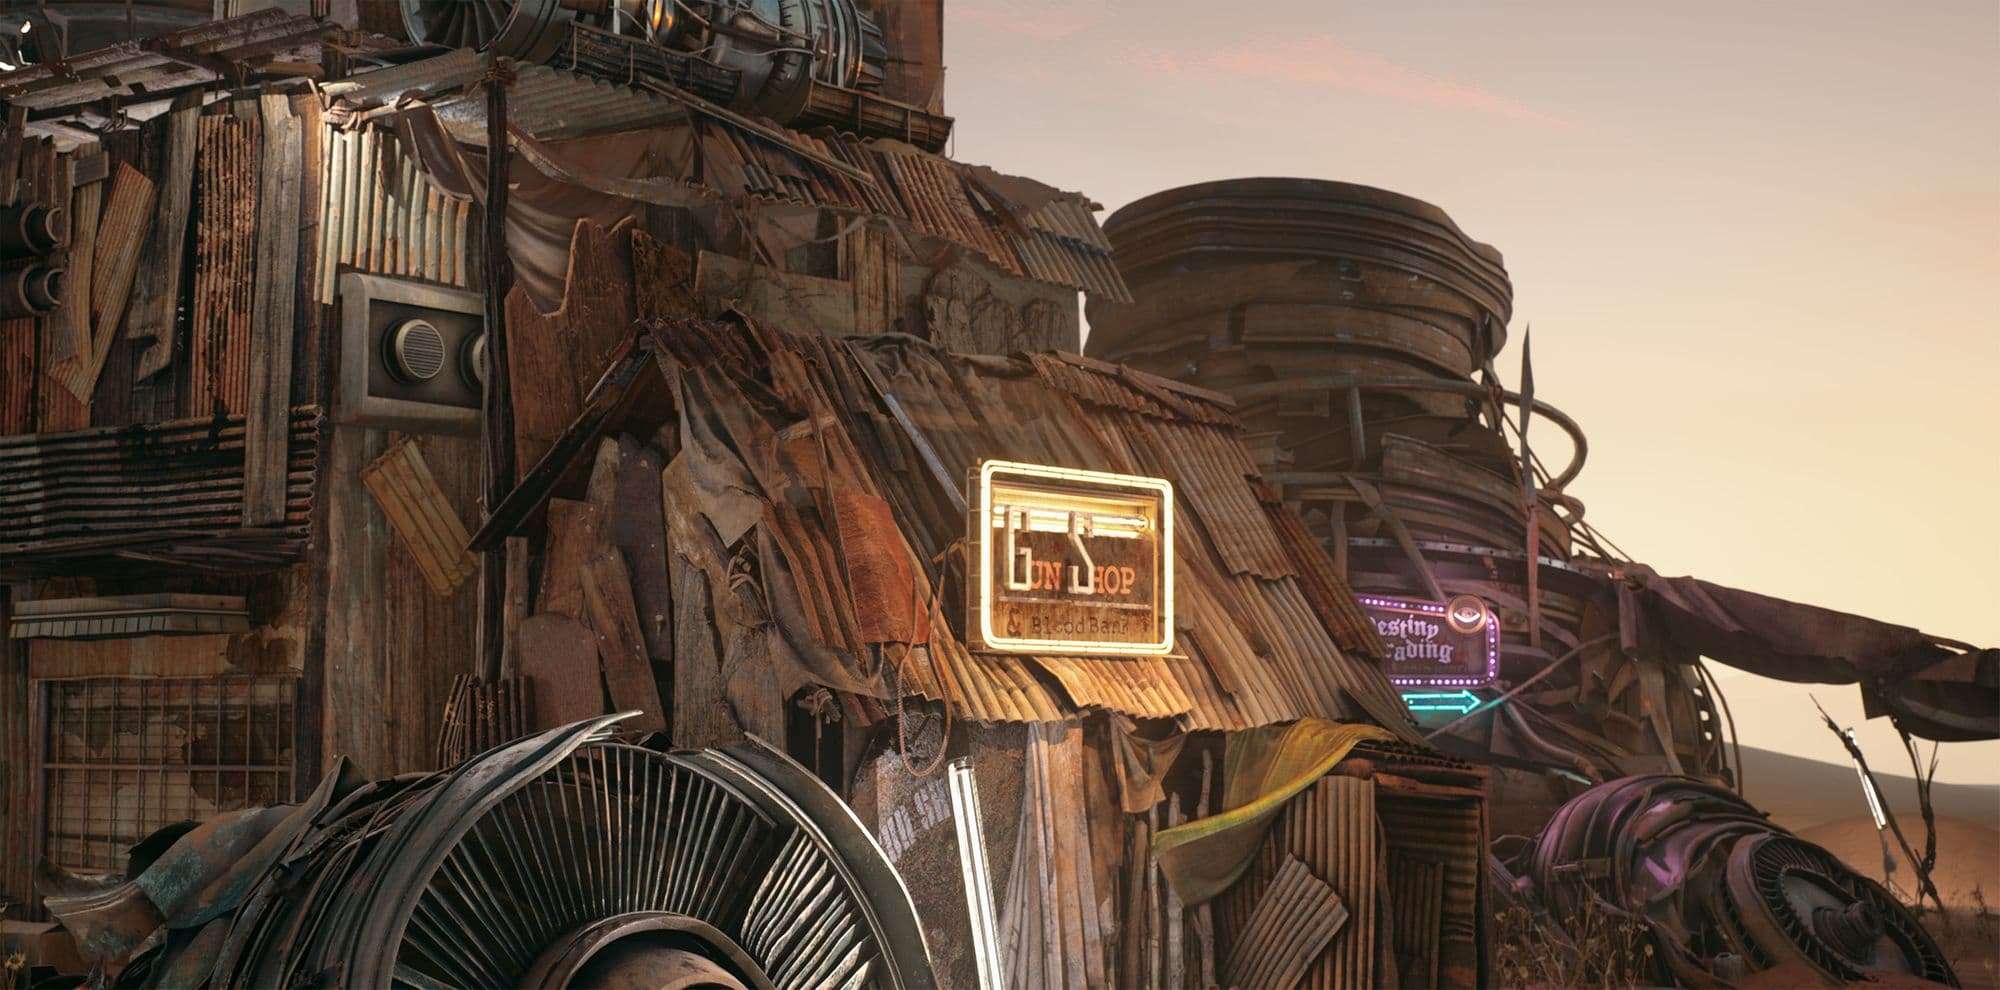
While analyzing the concept I realized that some engine debris were reused to act as roof for shelters by scaling up. Similarly some engine pieces could be reused by stacking them in different orders and changing the pipes on top. This gave me an opportunity to be creative when it comes to scale without having to do extra amounts of modeling.
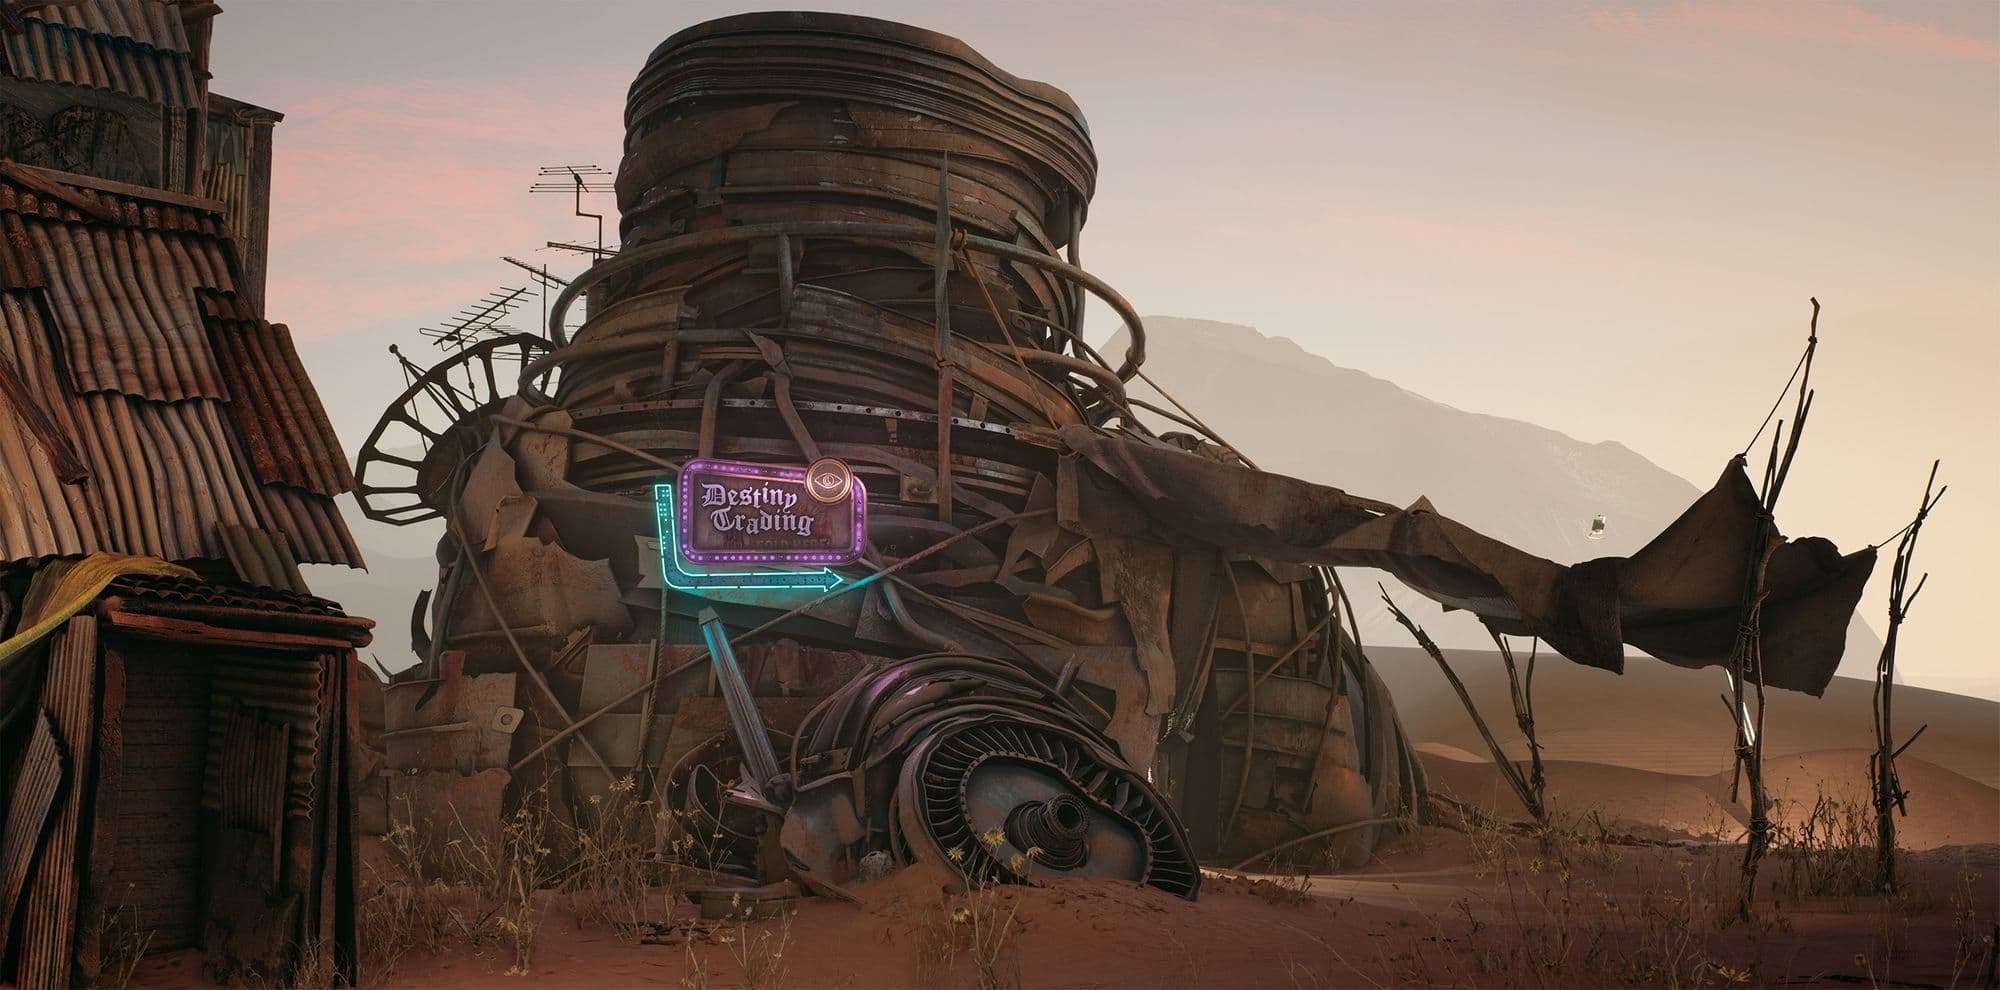
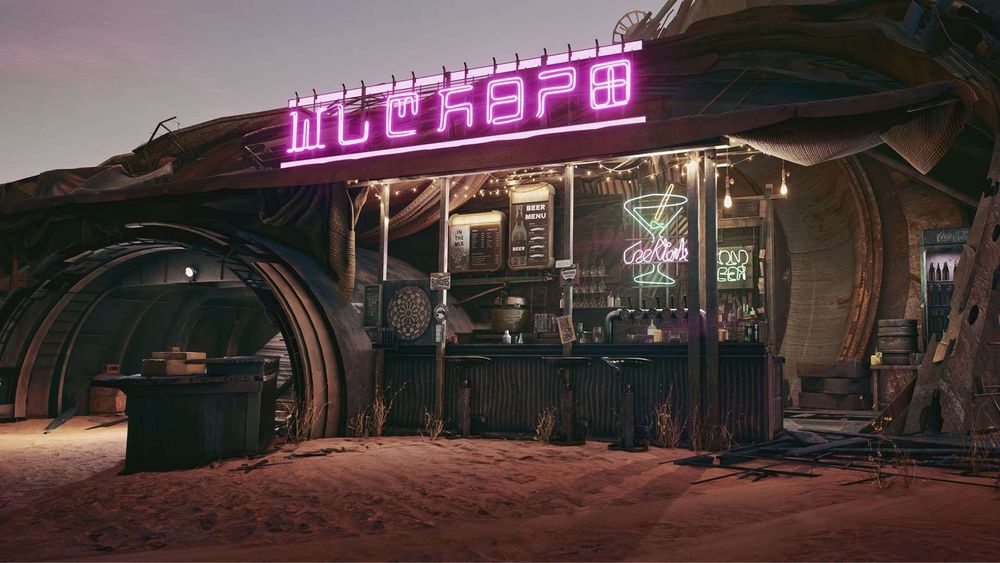
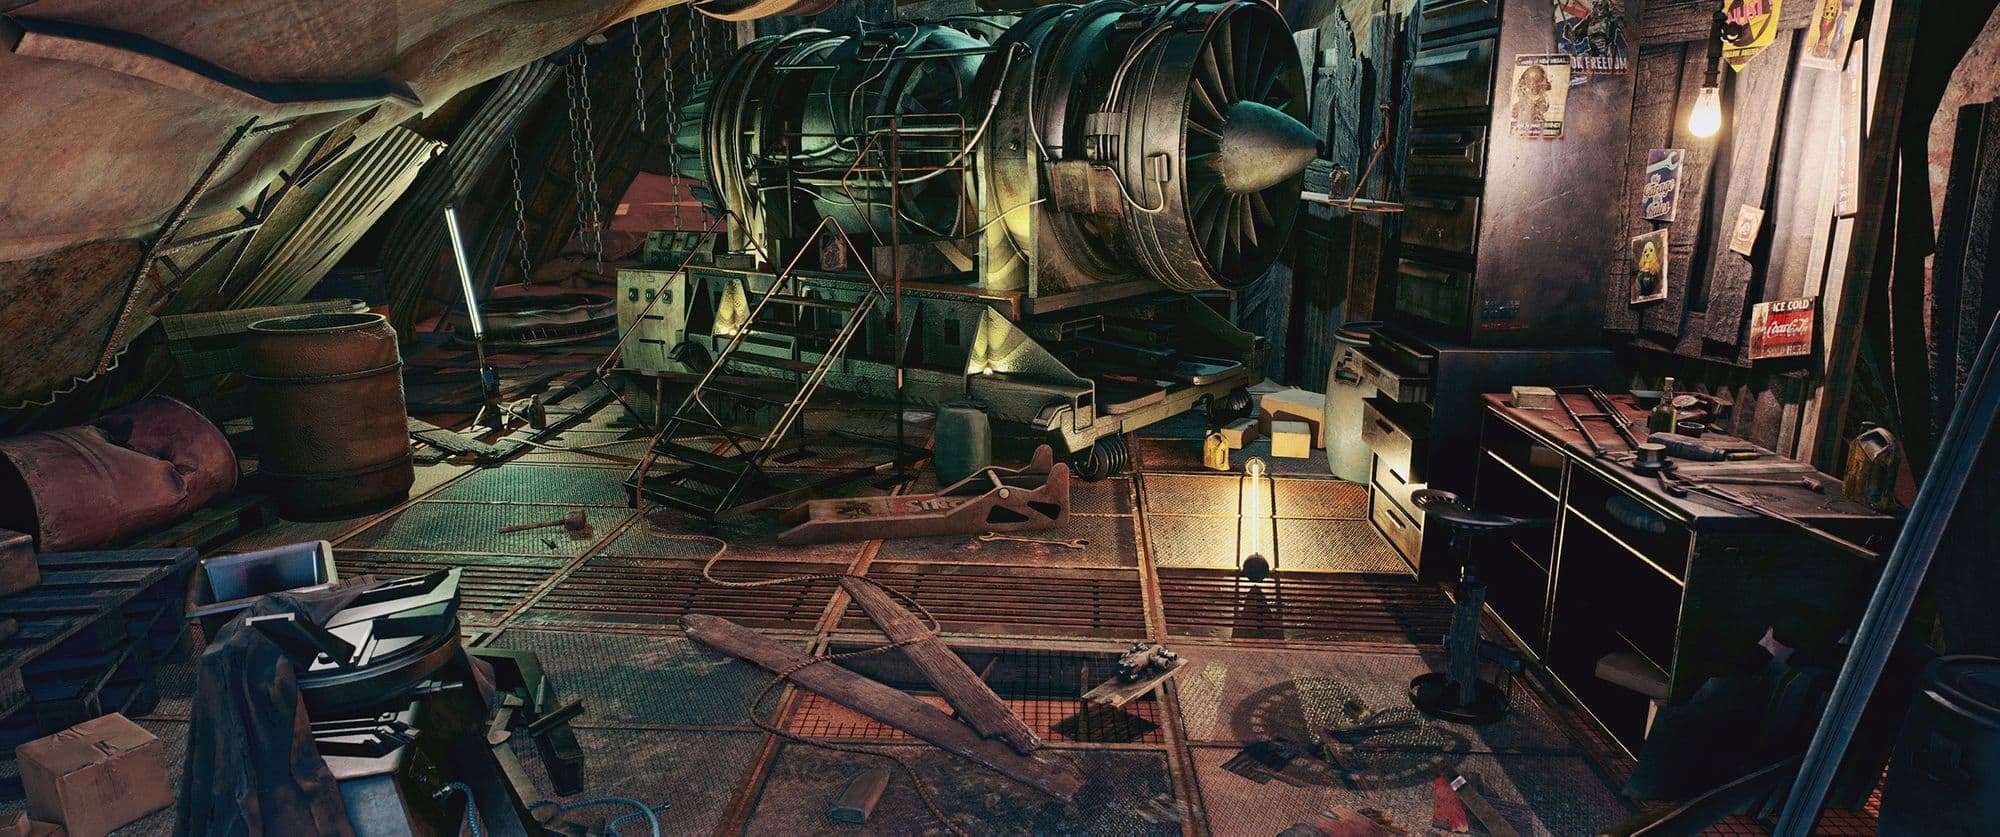
When it came to building the main structures, I wanted each one to have its own look and feel. In a real situation everything is built from scraps and not everyone has access to the same resources . So I approached it as if it was me building those structures in person which meant thinking about every asset and its practicality. Ex. If i were to put up a sign i would hang it up using existing pieces from the structure . Now if it lights up then it should have a power source but the power source shouldn't only be used for the signs as it would be a waste. Similarly while building the houses I kept in mind that not everyone can have the same amount of metal panels. Some would have to use alternatives like tarp or pieces of wood. This added a little bit of story element to every asset.

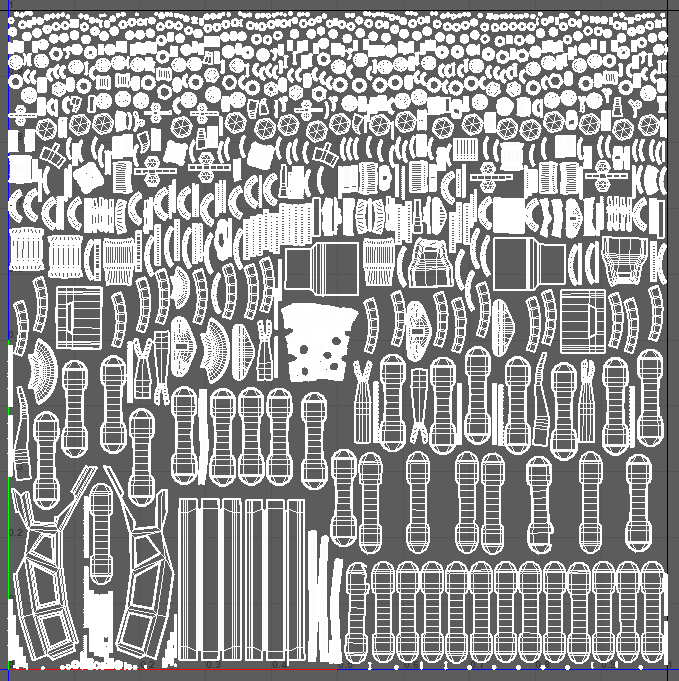
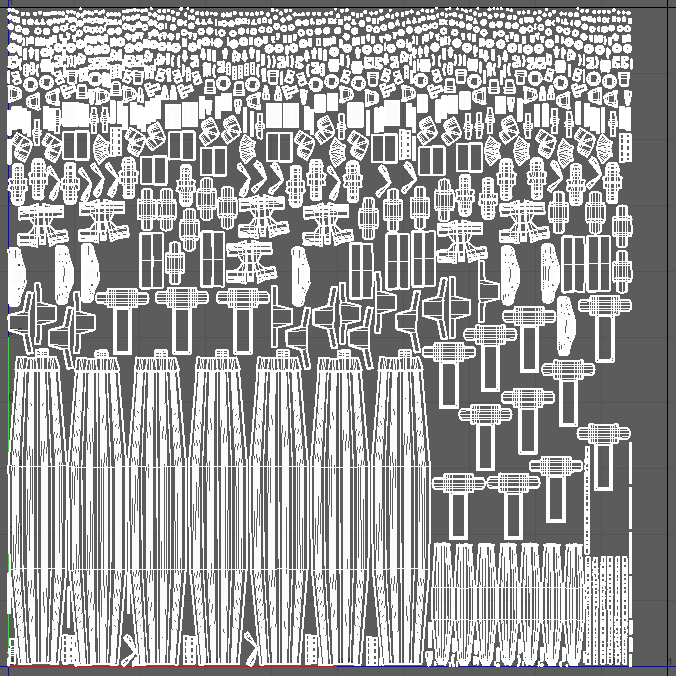
For the UVs I considered every major structure/house as one asset and set the texel density based on the shots I had blocked out earlier. Now to maintain the texel density I used 4k , 2k and 1k textures based on the scale of the assets. This way i still had room paint on the smaller assets by using a lower resolution. The assets that were too big in scale to fit inside the UV grid had tiling textures with vertex painting enabled. I also mirrored the UVs on symmetrical assets and put the mirrored parts on the negative axis to flip the texture. Lastly, all small assets like screws and bolts had stacked UVs.
I unwrapped the models in RizomUv and baked in Marmoset Toolbag. You just need to separate your model properly to different baking groups and models will bake in one click. Also, try to think about the baking process while you are at the high-poly stage. When you gain more experience in baking, you begin to understand how most artifacts can be eliminated if you think over high poly correctly.
The scene consisted of junk and debris set in a low light environment. There were quite a few things I had to keep in mind while approaching the texturing phase, both technically and artistically. It was important to make the viewer believe that all the scrap was actually reused and not placed for scenery . This can be achieved through the creation of specific damage. Always try to think about how you would use this prop and what incidents might occur during its use. I also added some graffiti here and there as I thought it would fit better in this particular world.

While texturing, always think about which layers of materials are present on the object and try to repeat them in textures. Mostly in my environment , there were no simple materials. Everything had to be built up while keeping in mind things like some objects are created first from polished metal, then covered with paint.
With time the paint cracks and moisture gets under it, which create rust between the metal and the paint, also there might be some dust and dirt on top of that layers, paint can fade out, if the object has been exposed to direct sunlight for a long time, and what sitting through sandstorms would have done to it. Following this I created some smart materials for all kinds of surfaces and reused them with minor changes .
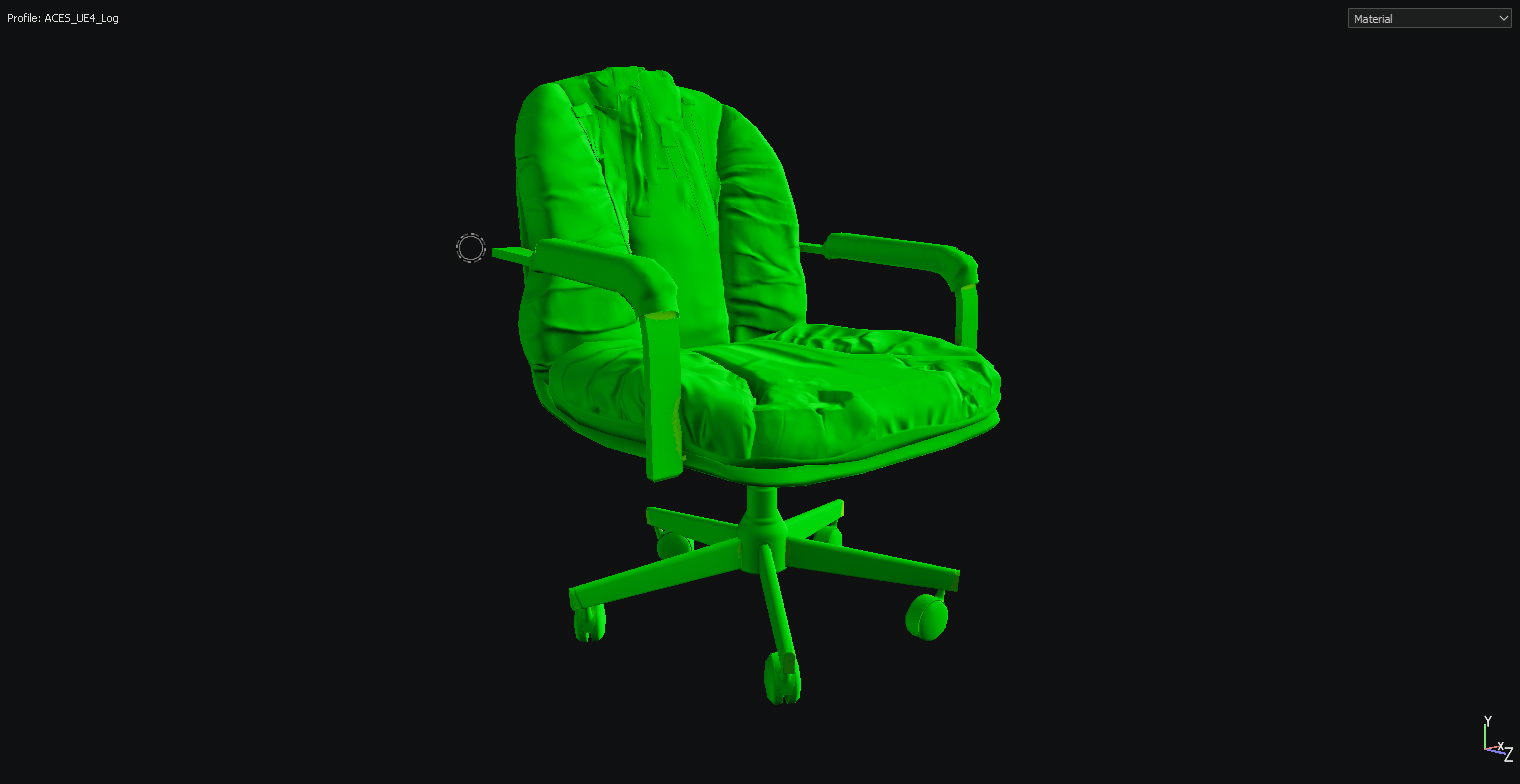
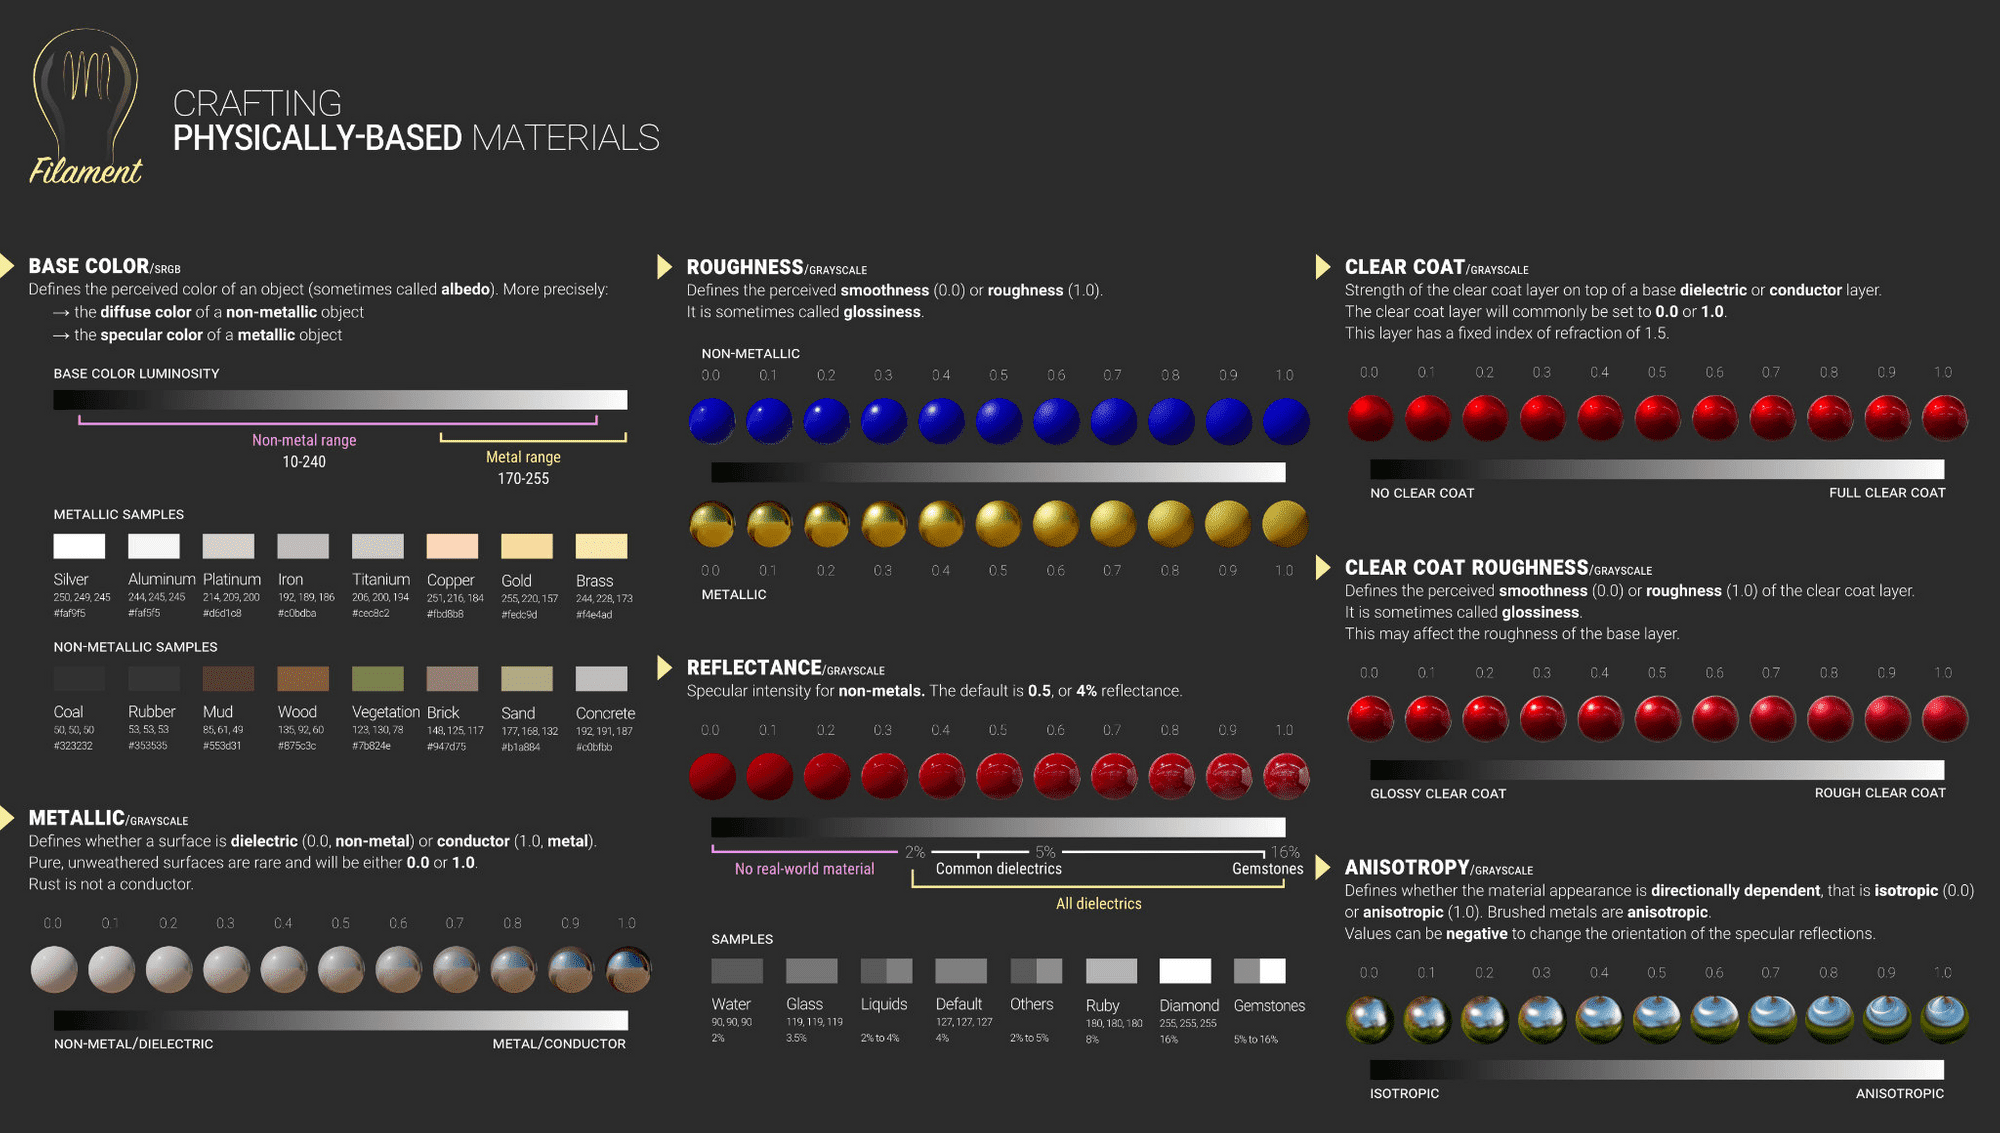
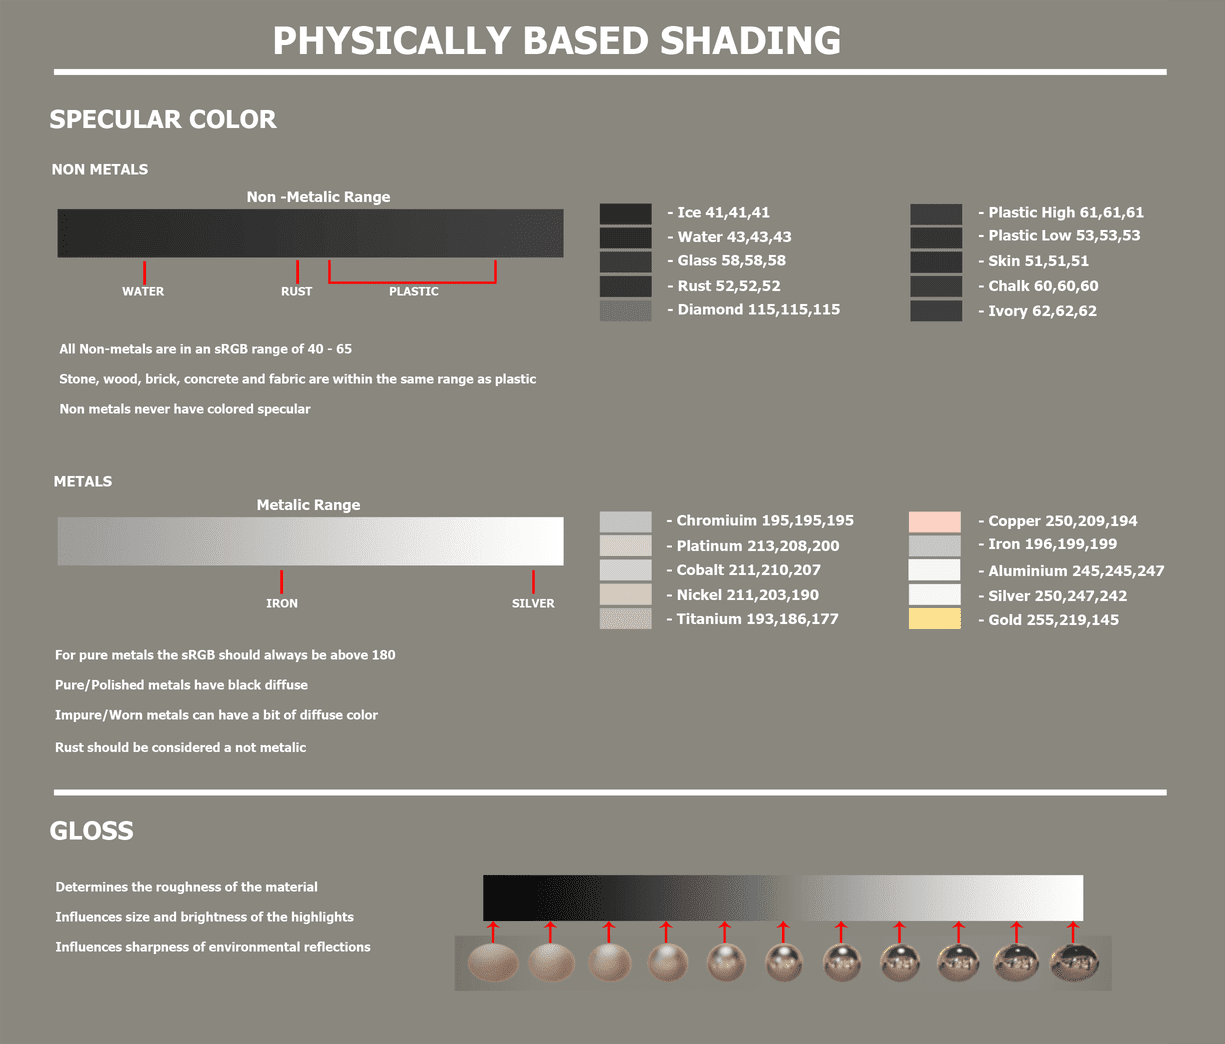
On the technical side of things, one of the issues I ran into was some of my renders looked too dark and had lots of pure blacks in them which is never a good thing. This is where I found the pbr checker. It's a filter used in substance painter to check the albedo and metallic values and it's represented by green, yellow and red colors. Red Symbolizes 2 Things! Either your textures ALB is too dark, or the metallic value is too dark! To hot fix this you can assign a clamp filter to bump all low values via a passthrough layer. This is a muddy way of fixing this,or you can use a histogram scan filter to bump the textures brightness.
More info on PBR can be found here: https://docs.unity3d.com/Manual/StandardShaderMaterialCharts.html
https://docs.unrealengine.com/en-US/Engine/Rendering/Materials/PhysicallyBased/index.html
https://80.lv/articles/validating-pbr-materials-in-ue4/
https://google.github.io/filament/Filament.md.html
http://davengrace.com/dave/cspace/
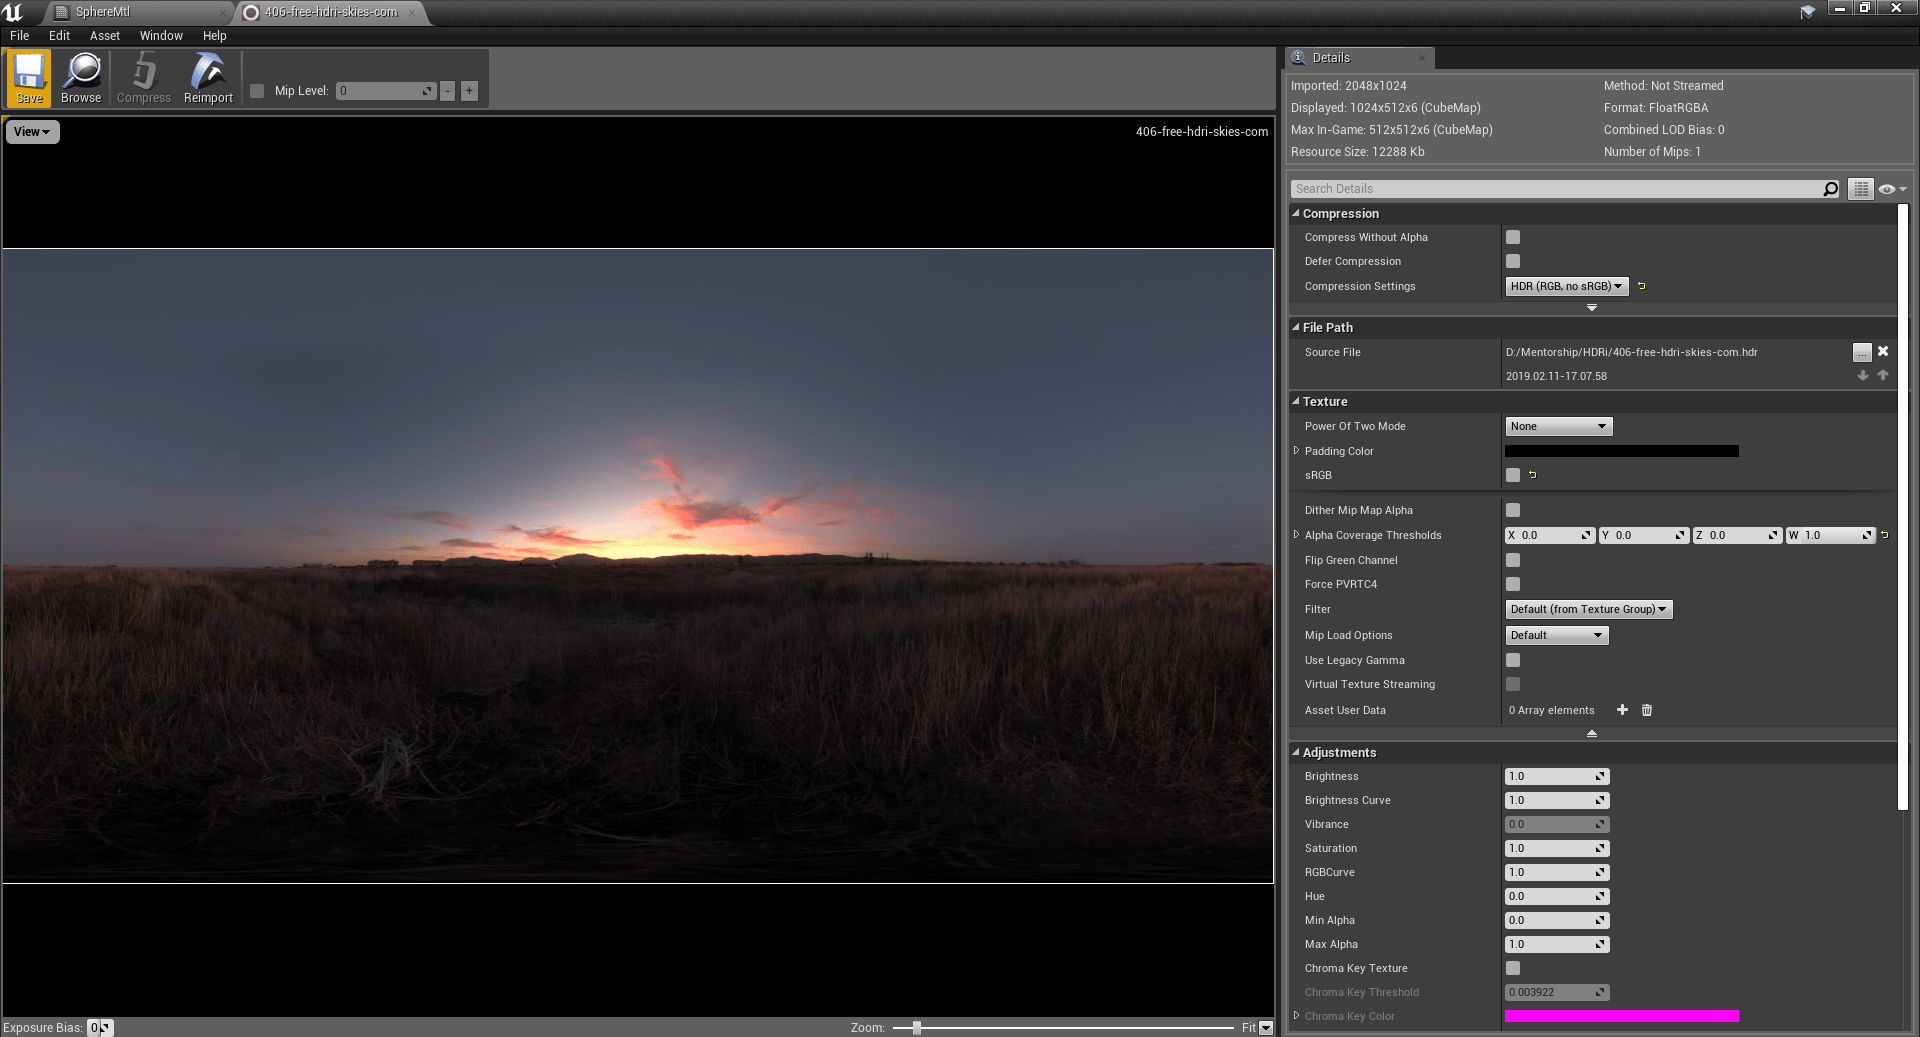

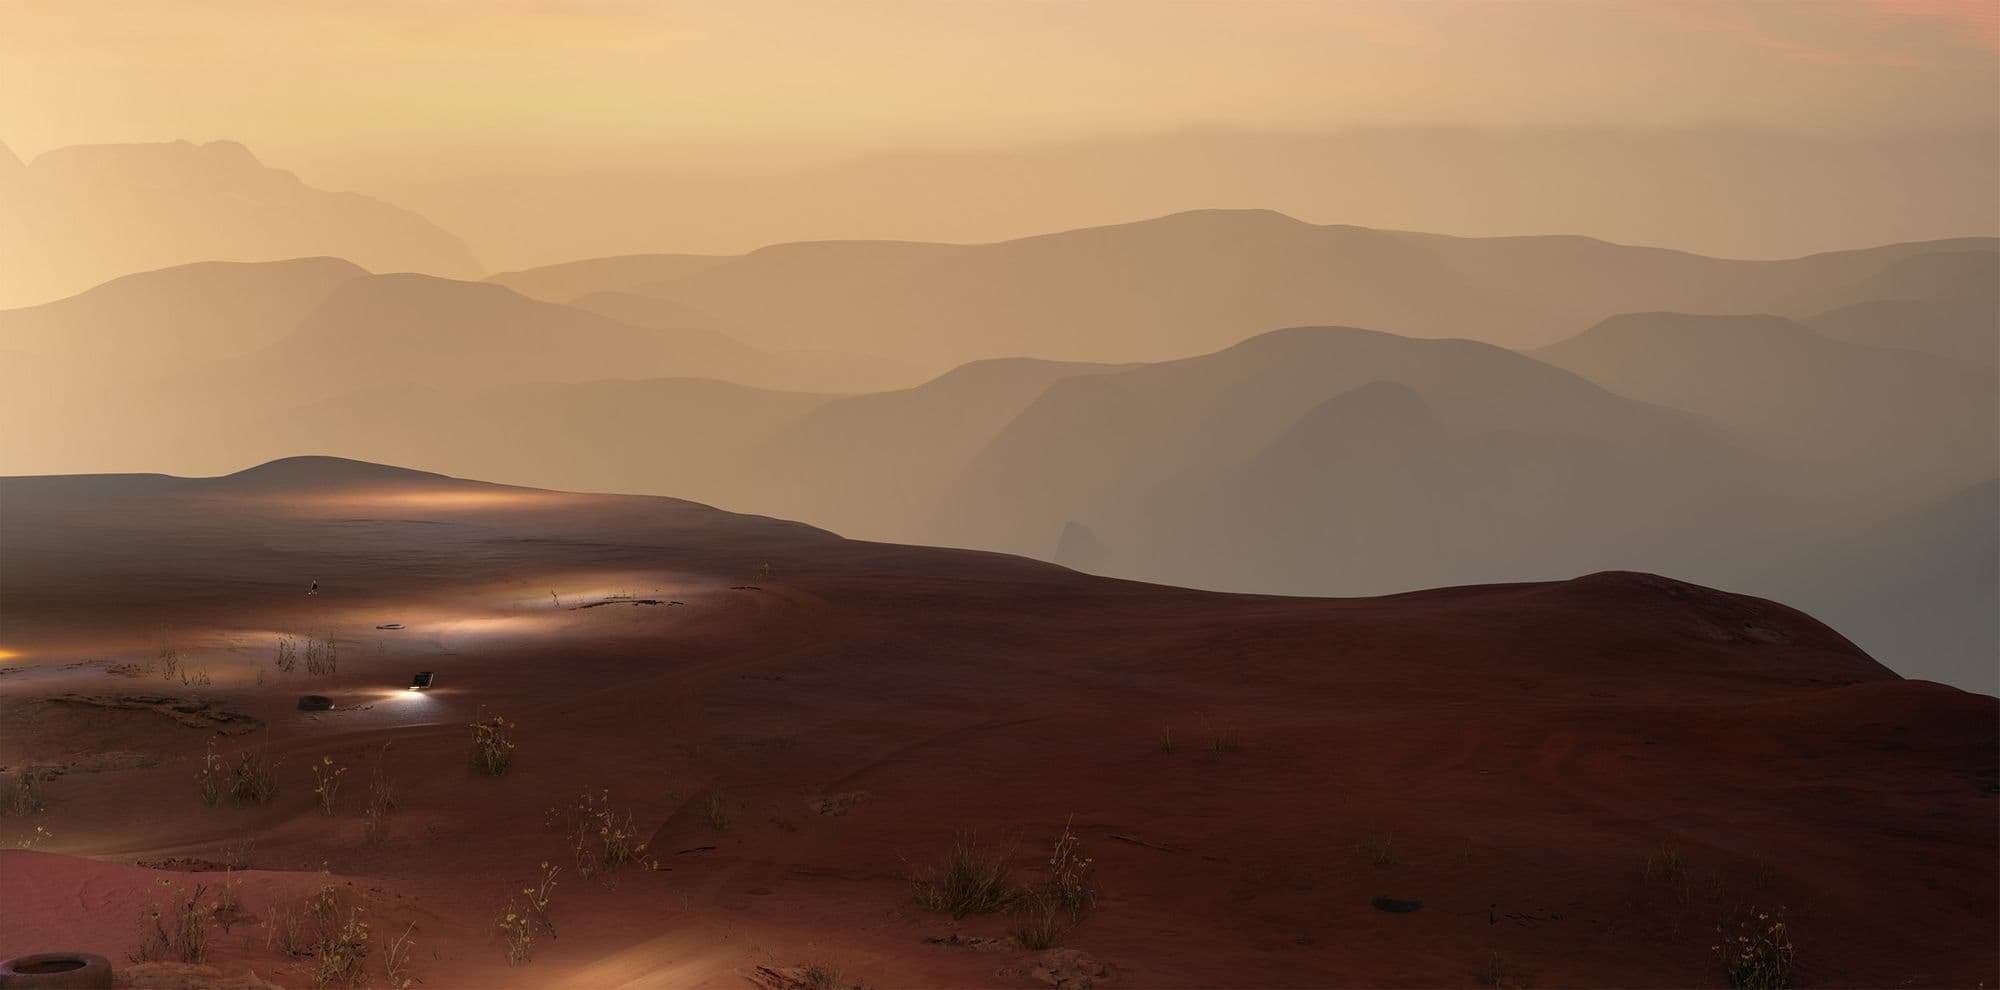
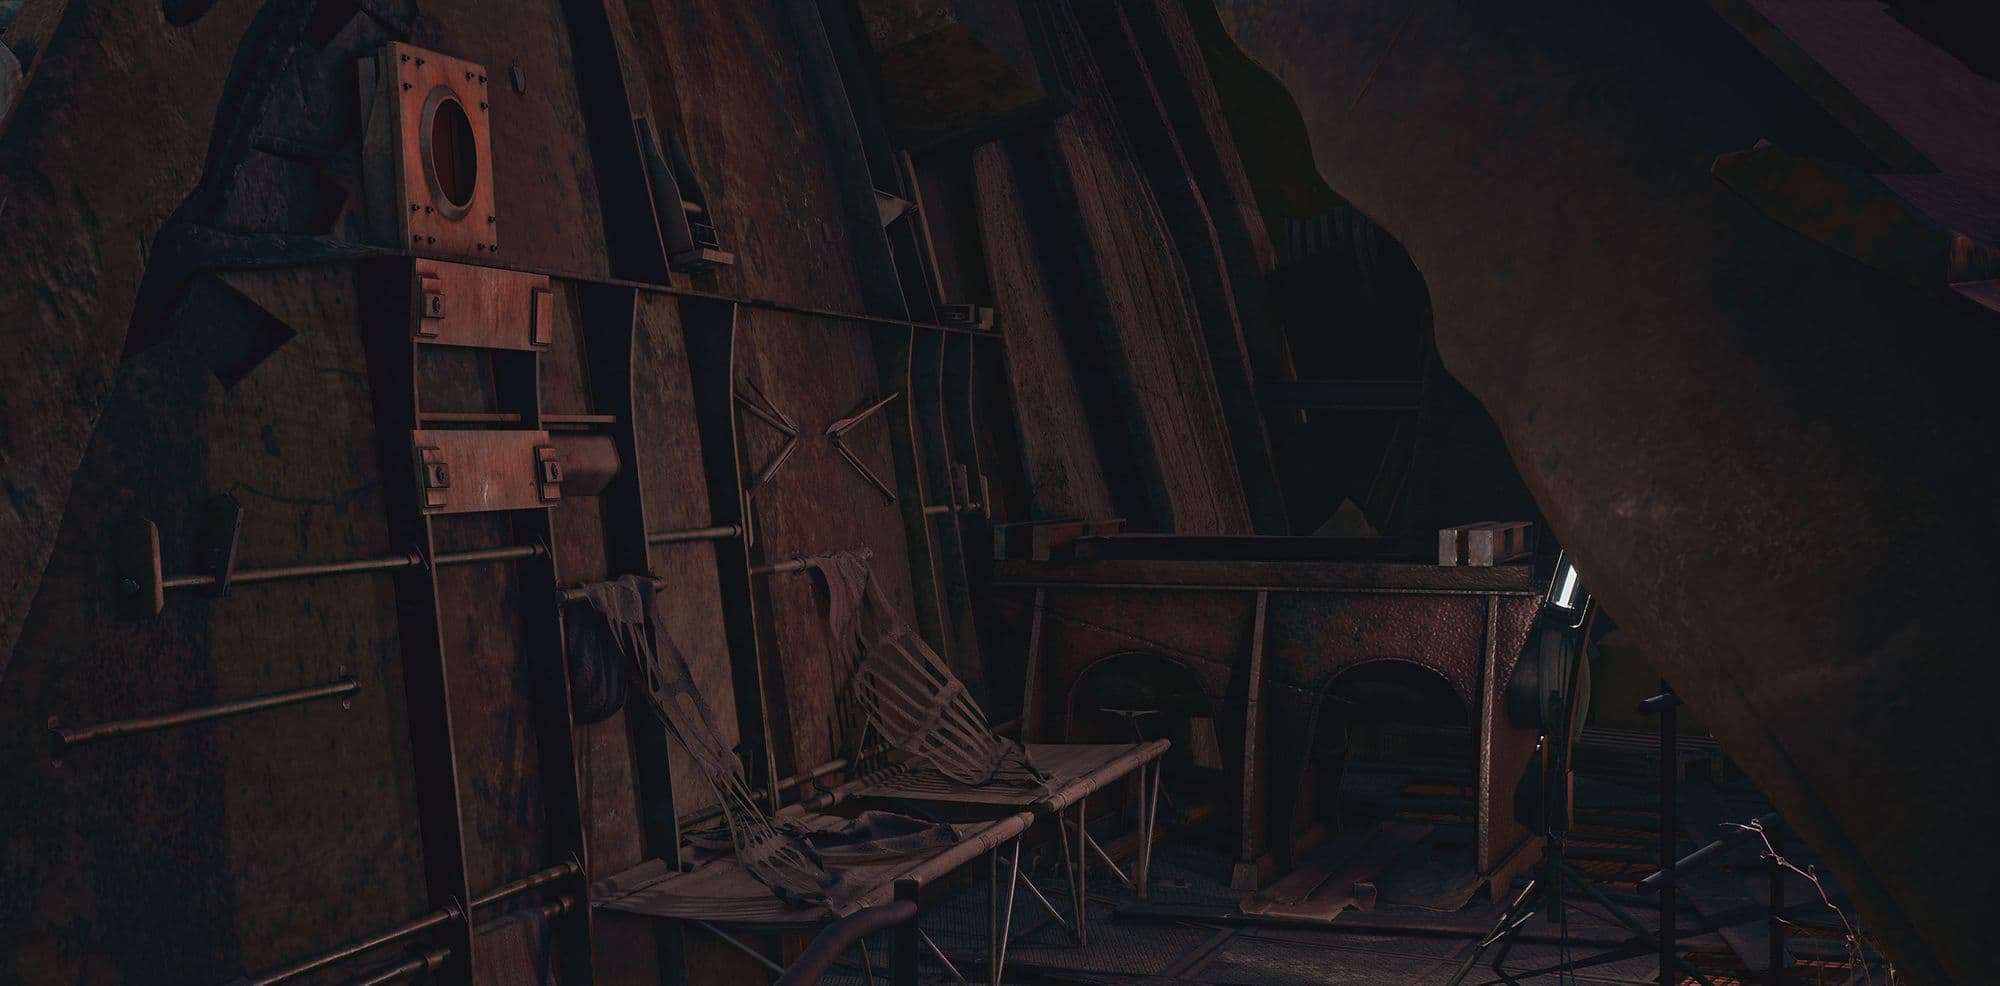
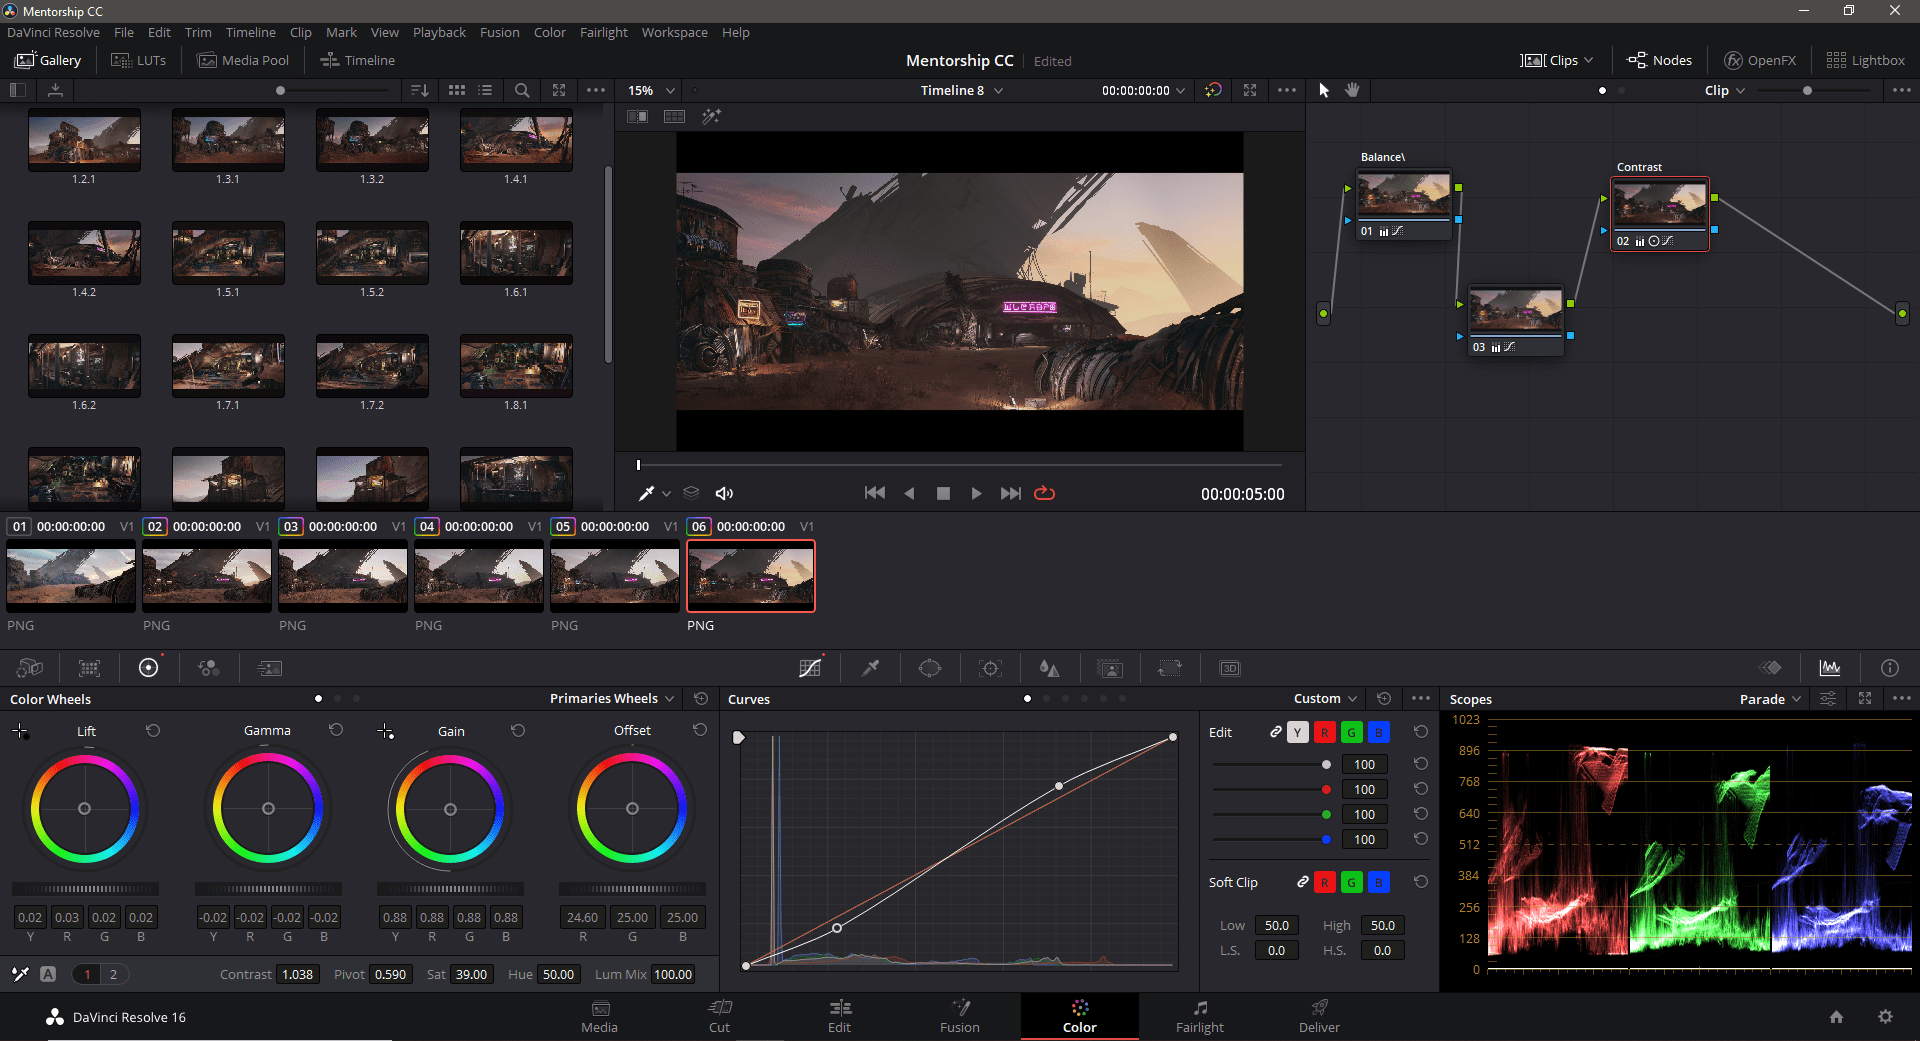
The lighting along with the look and feel for my scene was mostly governed by the sky. The concept had a very distinct look with specific colors , I decided to approach this by starting with the sky. I set up a very basic hdri setup with an inverted sphere for the sky. I got the hdris from HdriHaven. When it came to lighting , I had one directional light and one skylight which gave me the first basic setup. I took the renders from this into Davinci Resolve where I set up a distinct look based on the concept. I used it to create a Lookup table which I brought into unreal engine through photoshop. This took some trial and error as some of the colors and changes done in resolve were lost when transferred to unreal. So the LUT had to be adjusted alongside the color grading tools in the engine to achieve the final result. For me color grading and lighting went hand in hand as the concept did not necessarily have realistic lighting but a strong look to it.
Throughout the process there were some key words i had kept in mind which i wanted to convey through the atmosphere, and few of those were ‘harsh’ and ‘warm’. With the look set up, I went back to each shot and did some light painting with spotlights at low intensities . Lastly, to complete the look, I decided to break up the sky with some clouds and planets to emphasize the ‘sci-fi’ look.

Both sky and planet shaders were pretty basic but powerful. I could get quite a few variations without needing to do any additional texture work. The cloud shader worked on an image plane and I had a simple sphere to have the planet shader. The whole idea was to get more control over the sky breakup while being able to blend everything together since I was using hdri as the main background.
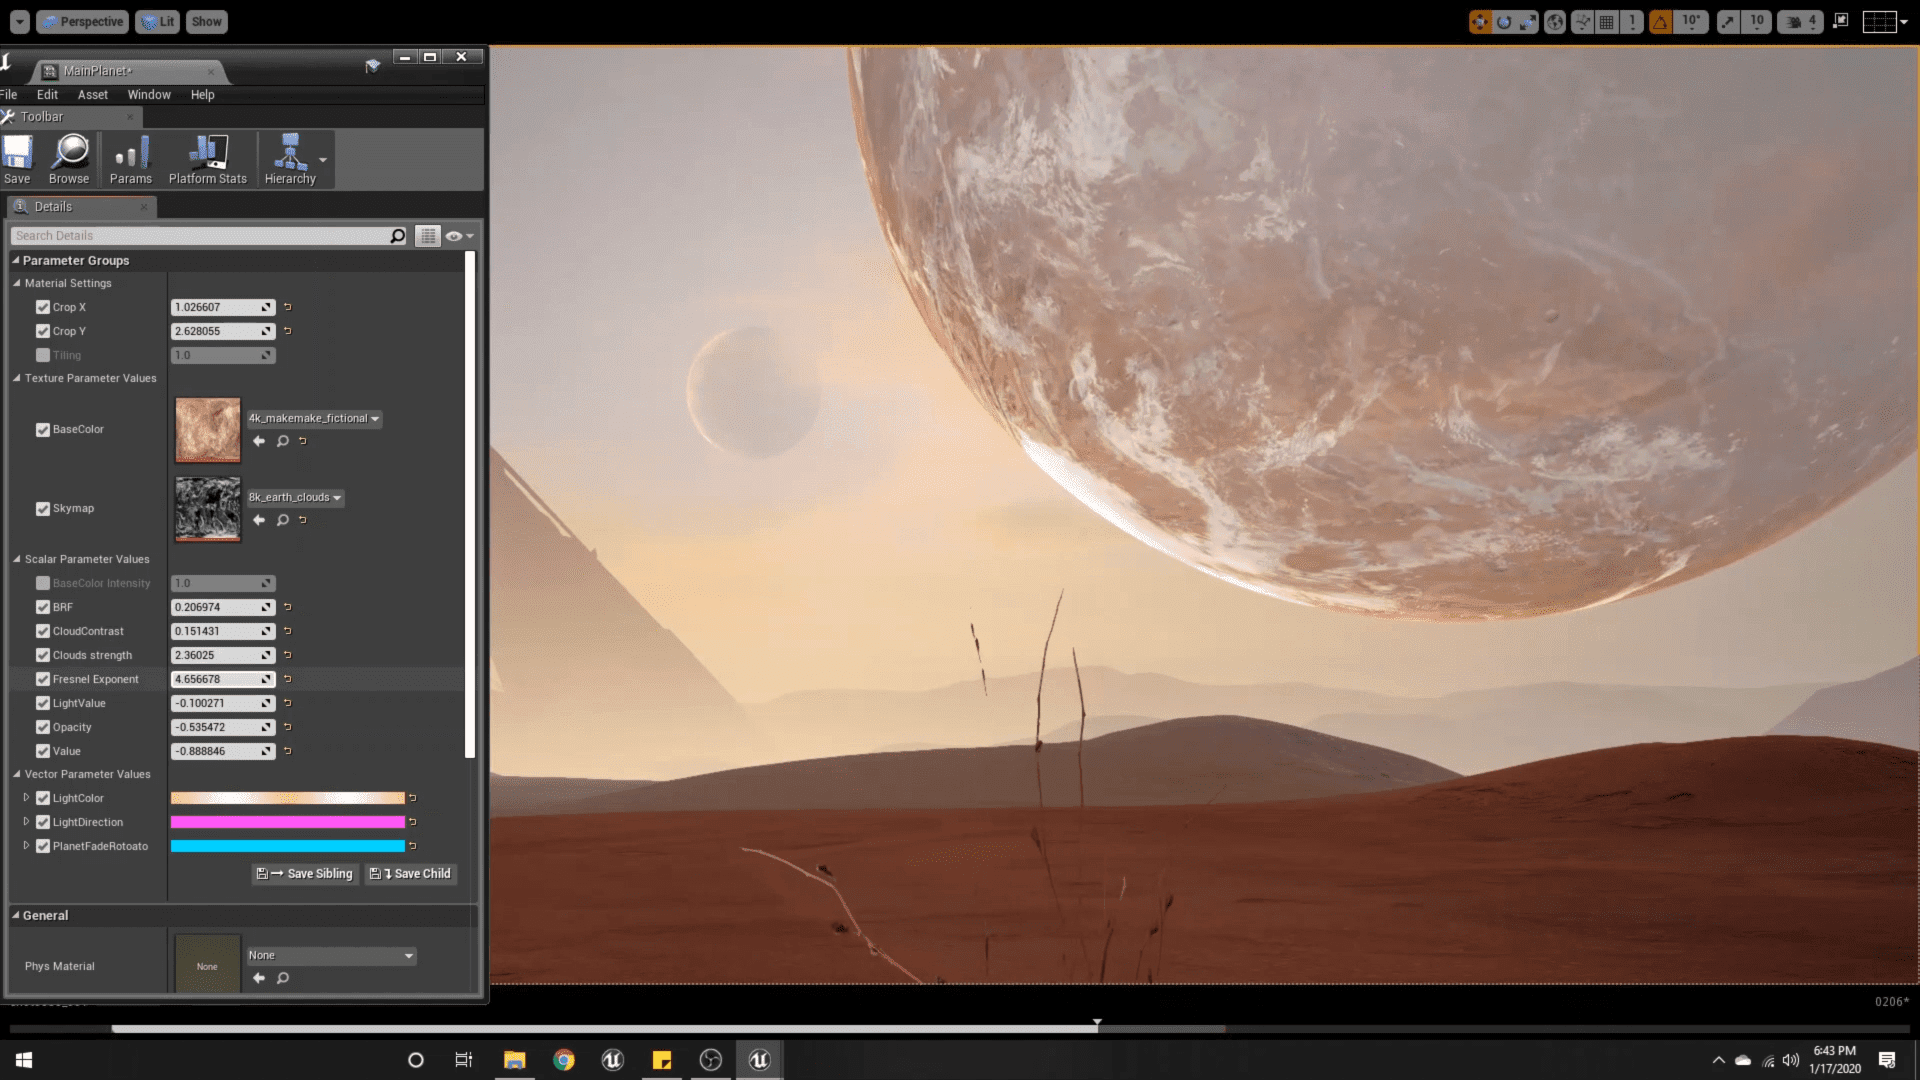
Here is the master material for the planet shader.
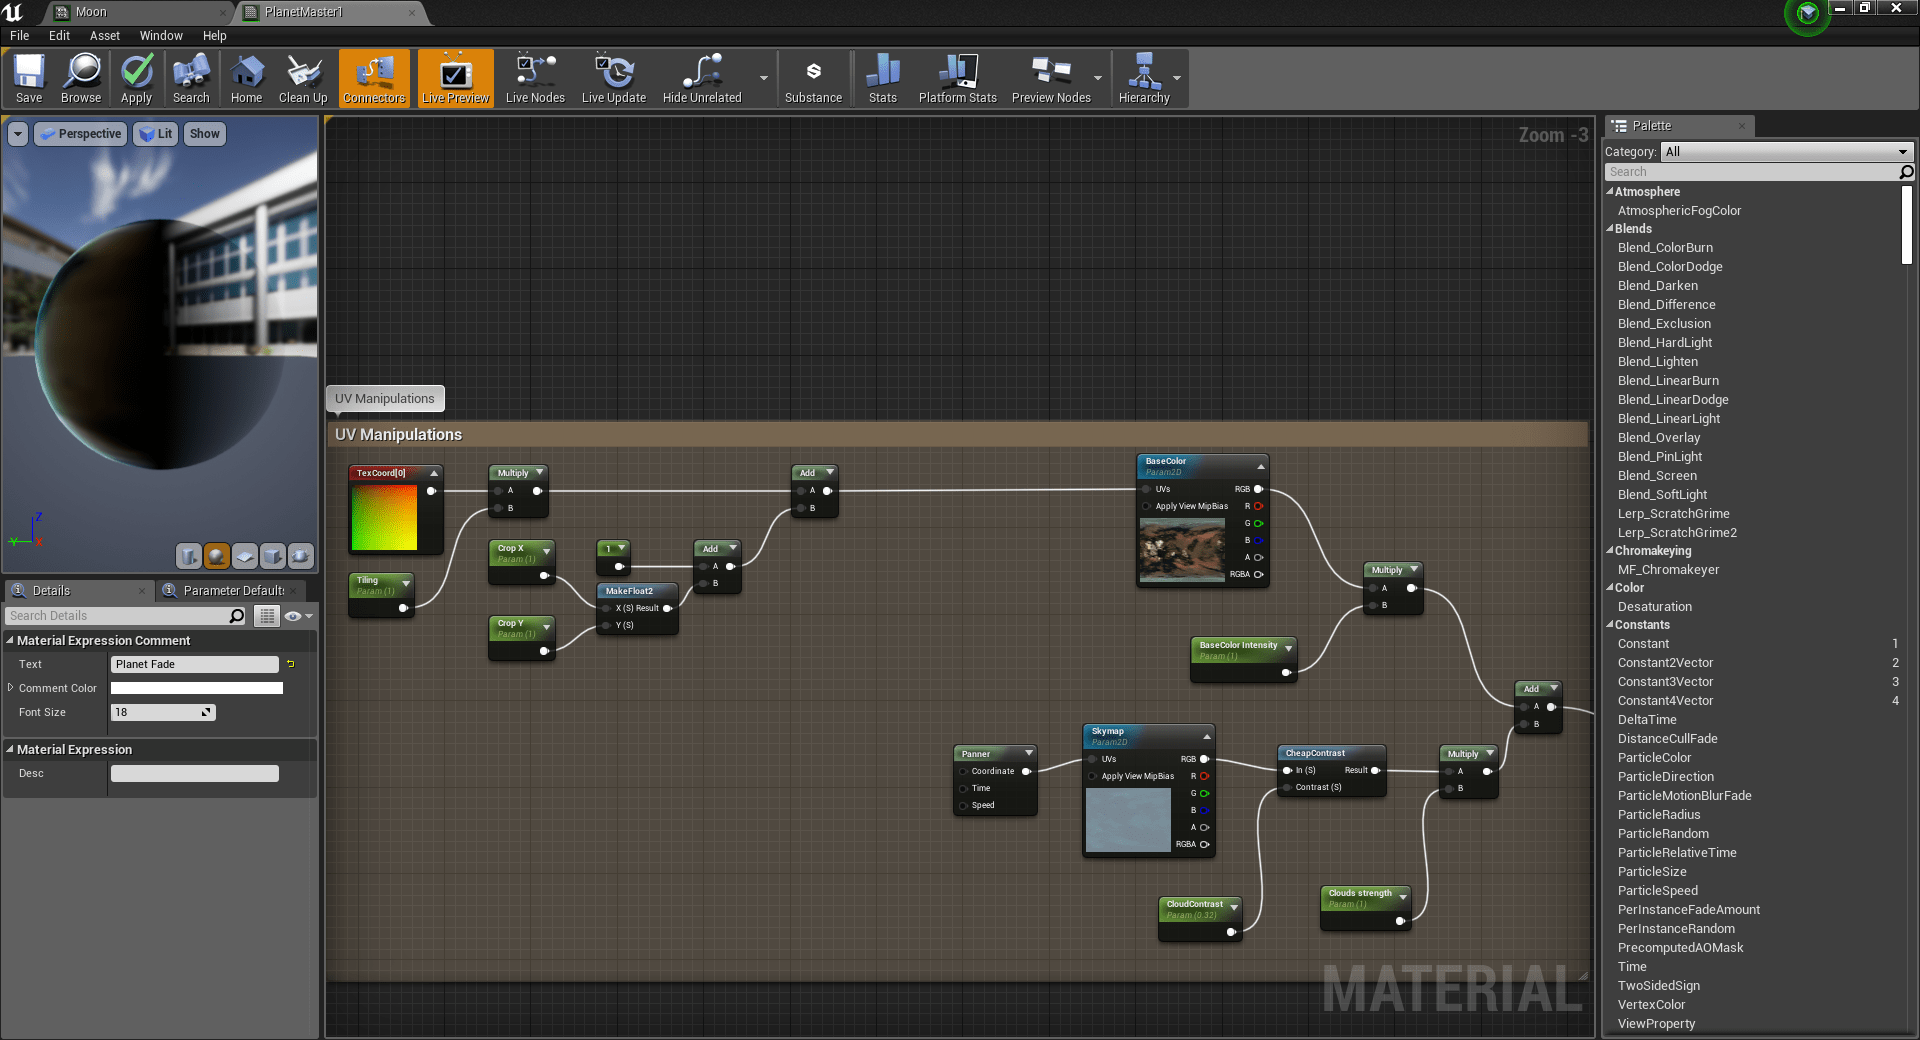
For the base I had a general planet texture along with a skymap which was a greyscale image of clouds which was connected to a panner node. I added some additional controls for the UV manipulations so I can get variations in the texture itself for every shot.
I also added Fresnel to simulate the effect of atmosphere. It added a gradient to the edge of the sphere whose direction could be changed so you can match the planet’s lighting based on where you place your sun.
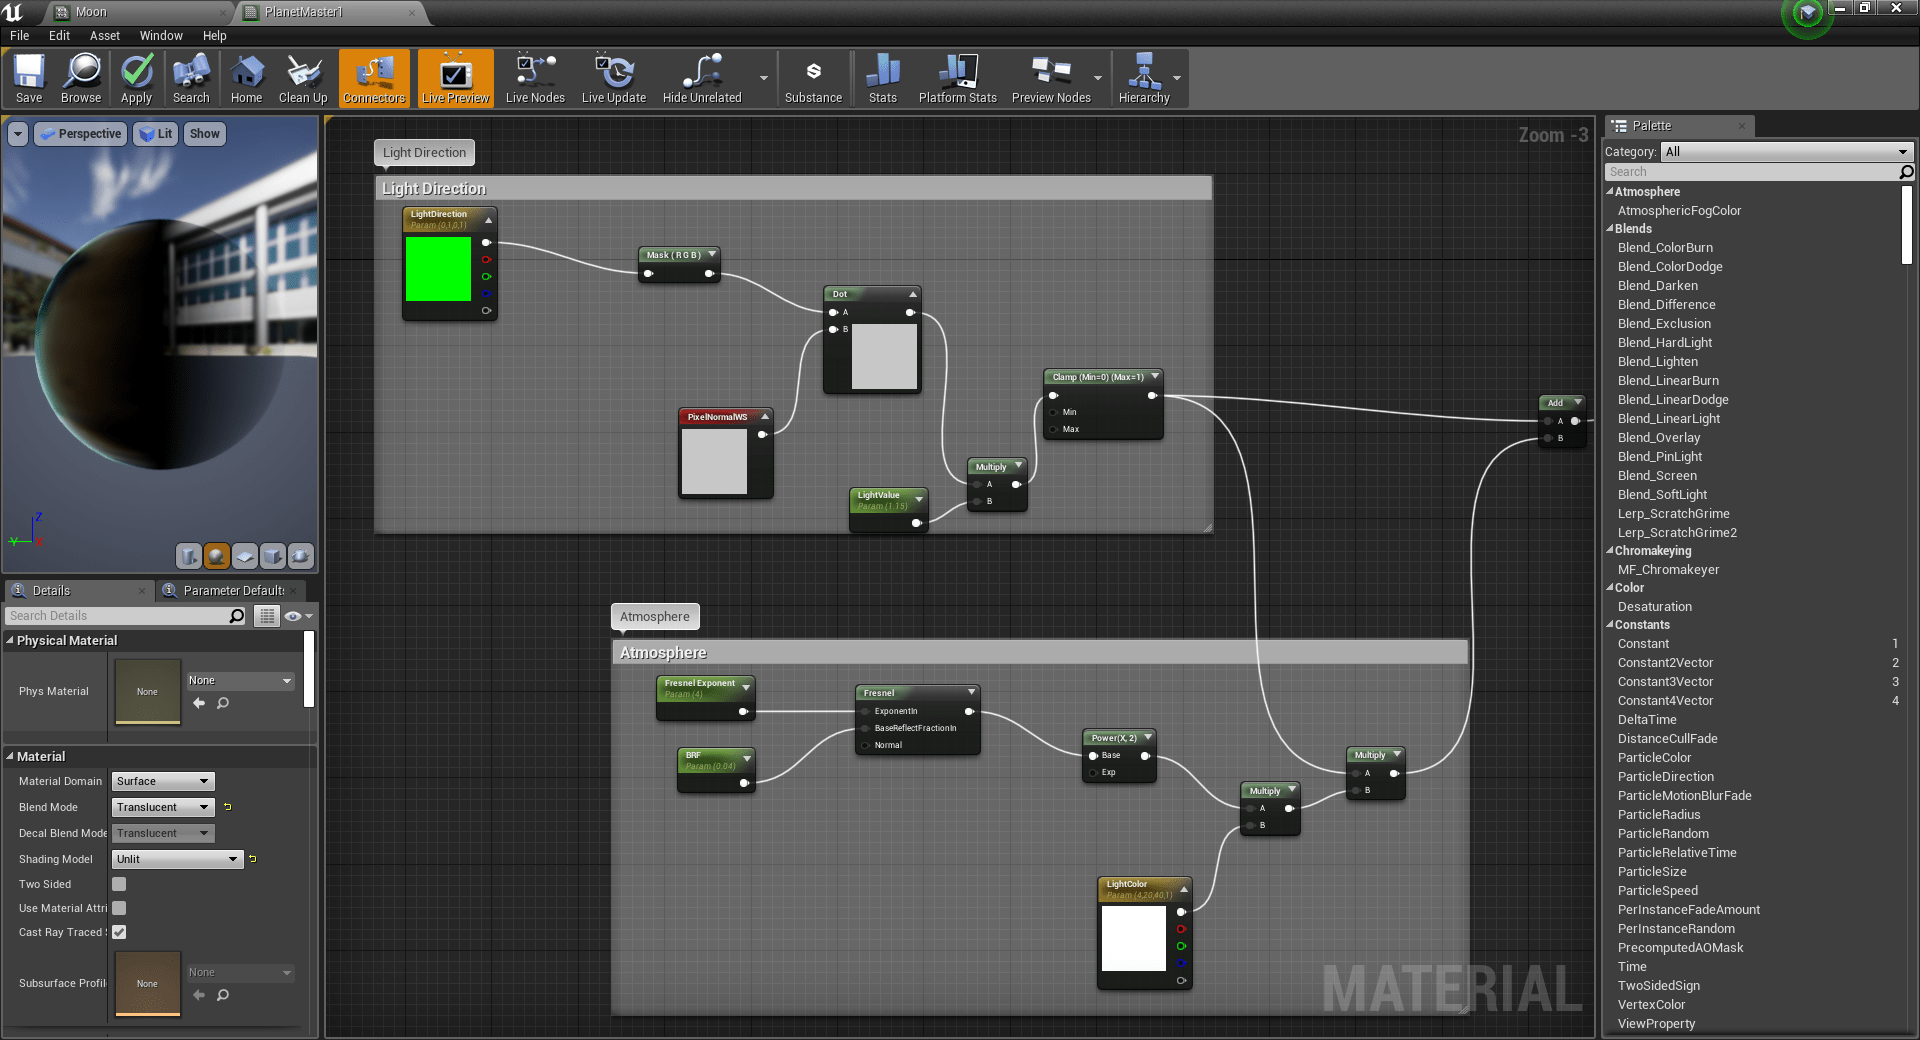
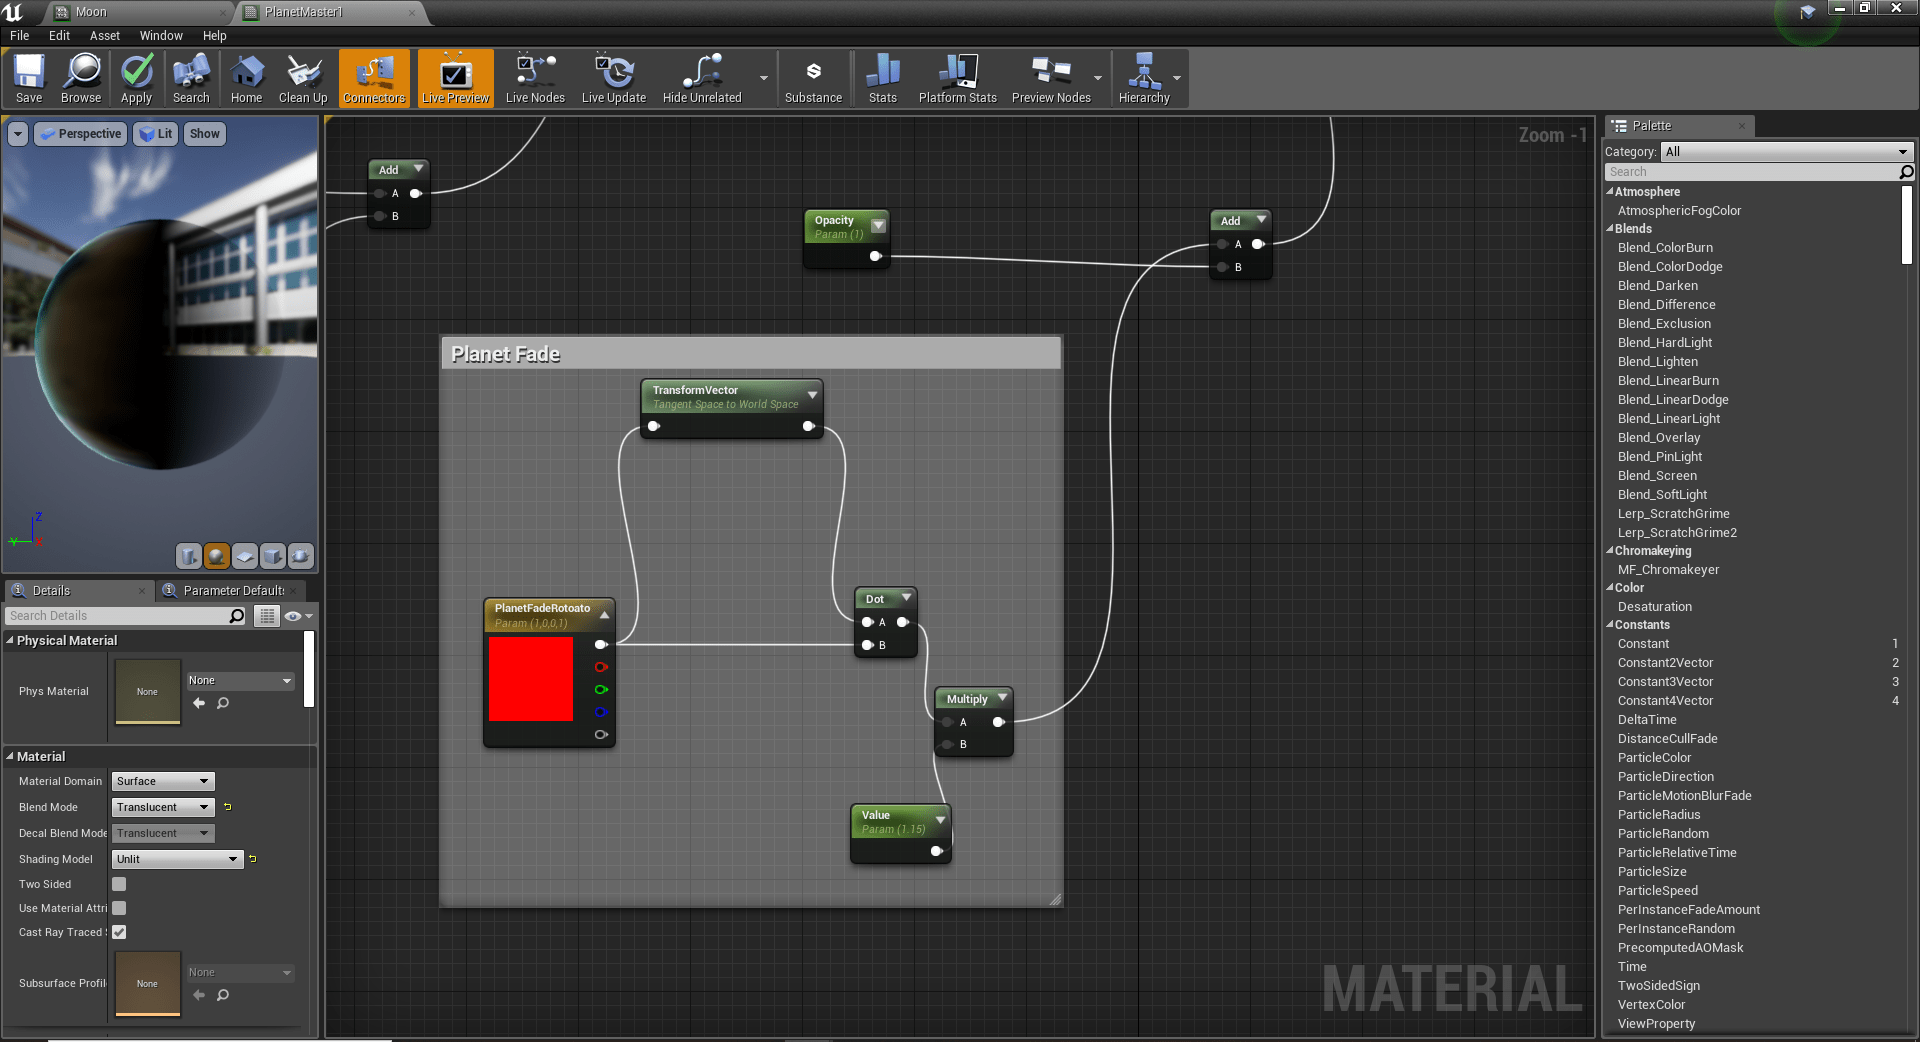
Now to blend the planet into the background I set this up as its important for daylight scenes to feel real by making it fade into the atmosphere fog. For using this, it's important for the material to be set as translucent.
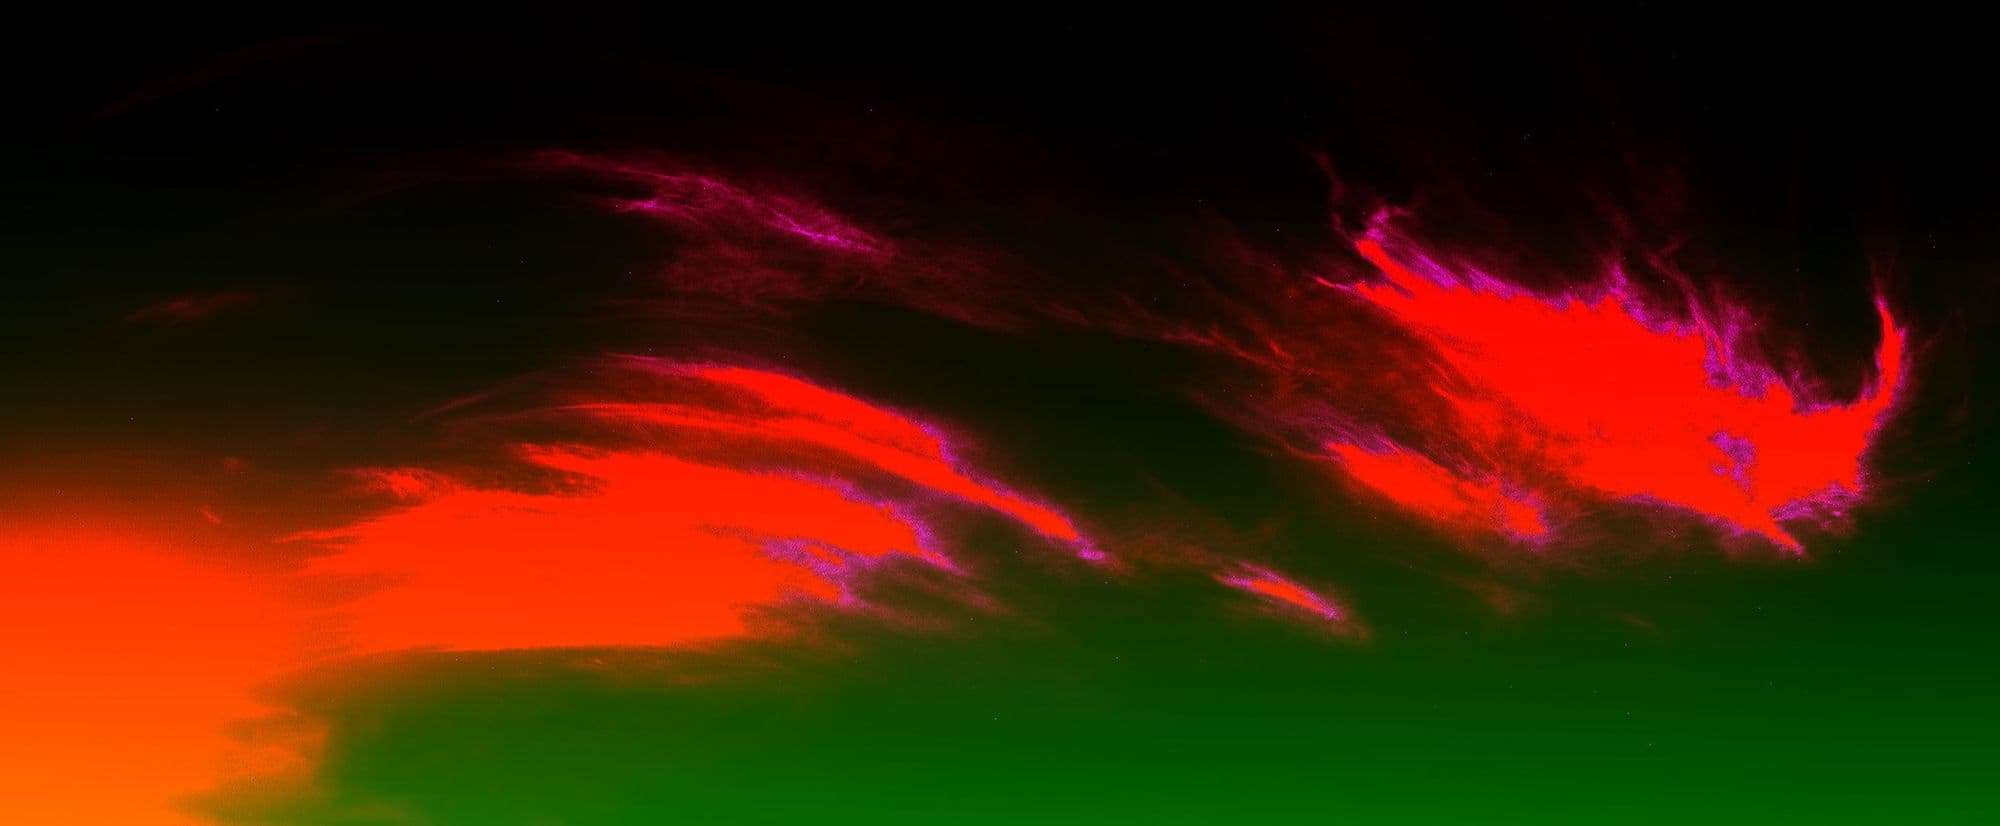
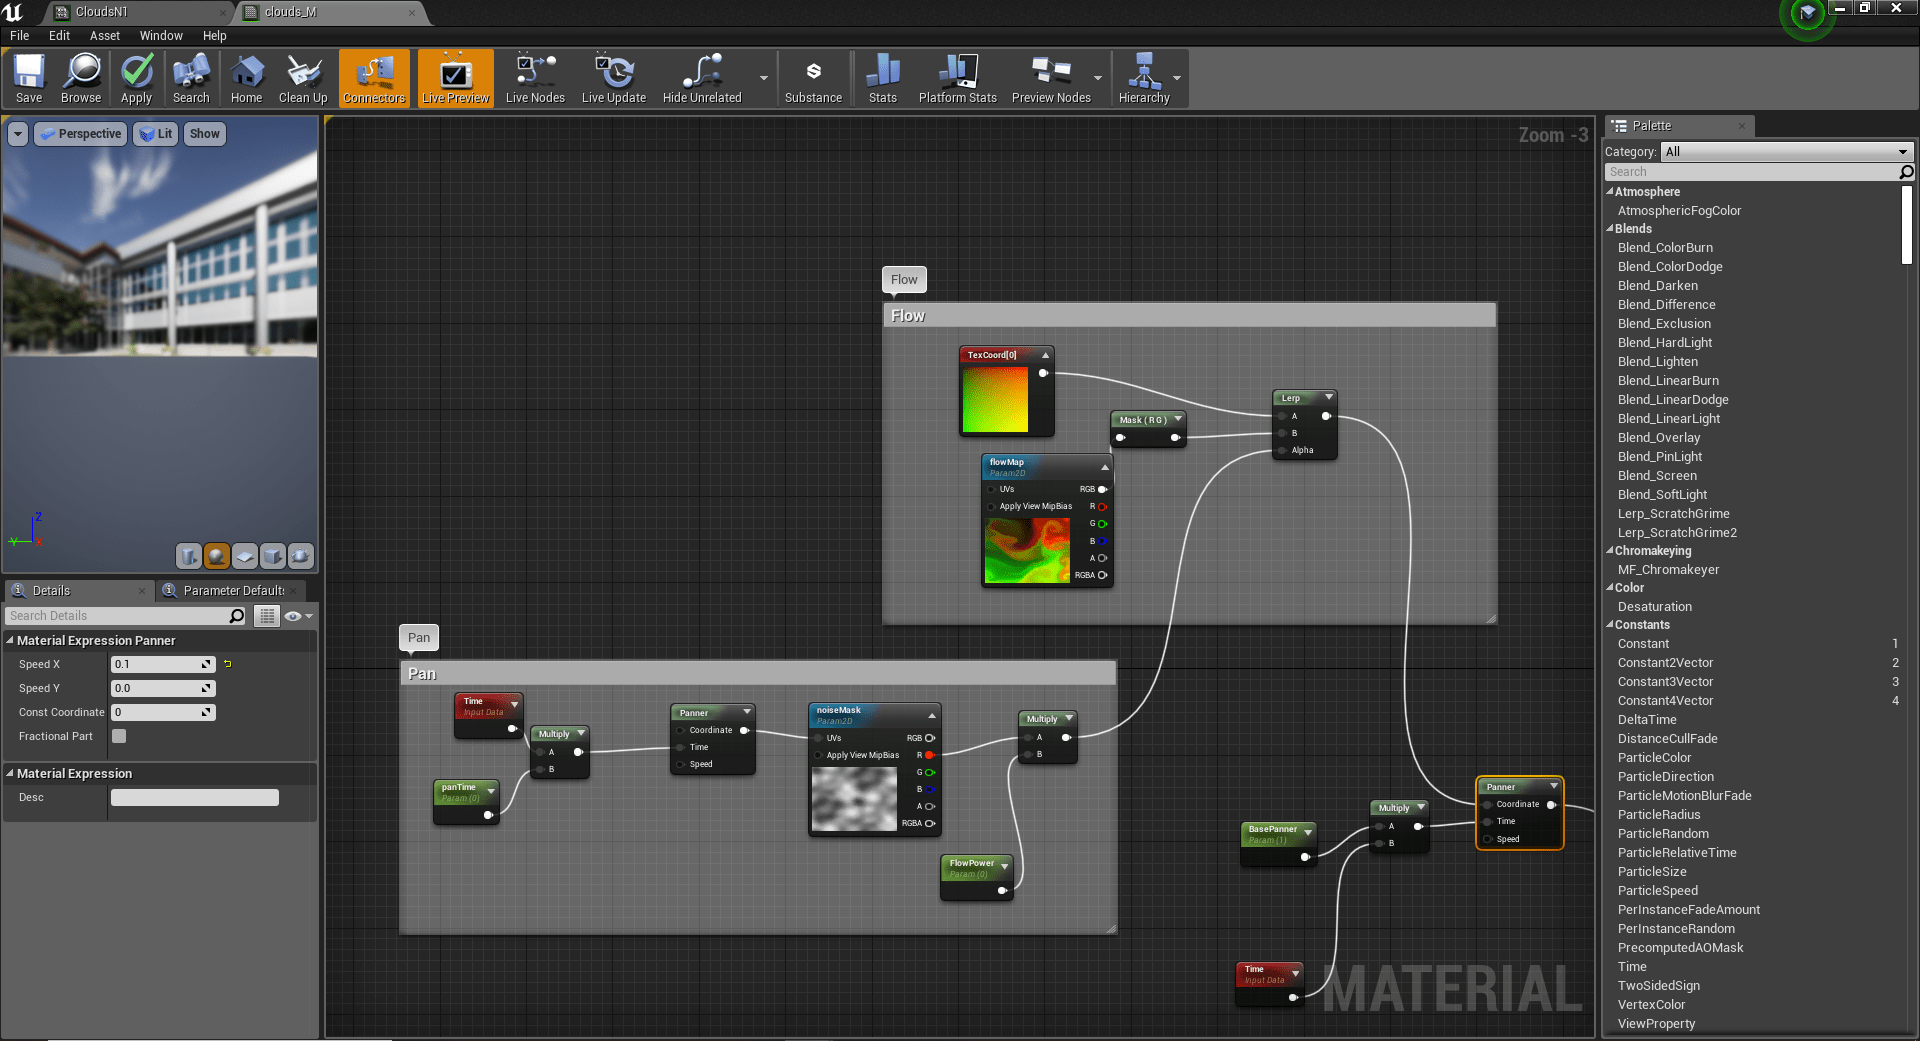
I started working on the clouds by researching the type of clouds in my concept. It took me a while but I managed to find some photographs of the same type of clouds. For me having a simple plane with an opacity map wasn't enough. I had to either make different versions or duplicate and reuse one. Instead I decided to add a little bit more functionality to my shader after analyzing the tutorial by Tyler Smith.
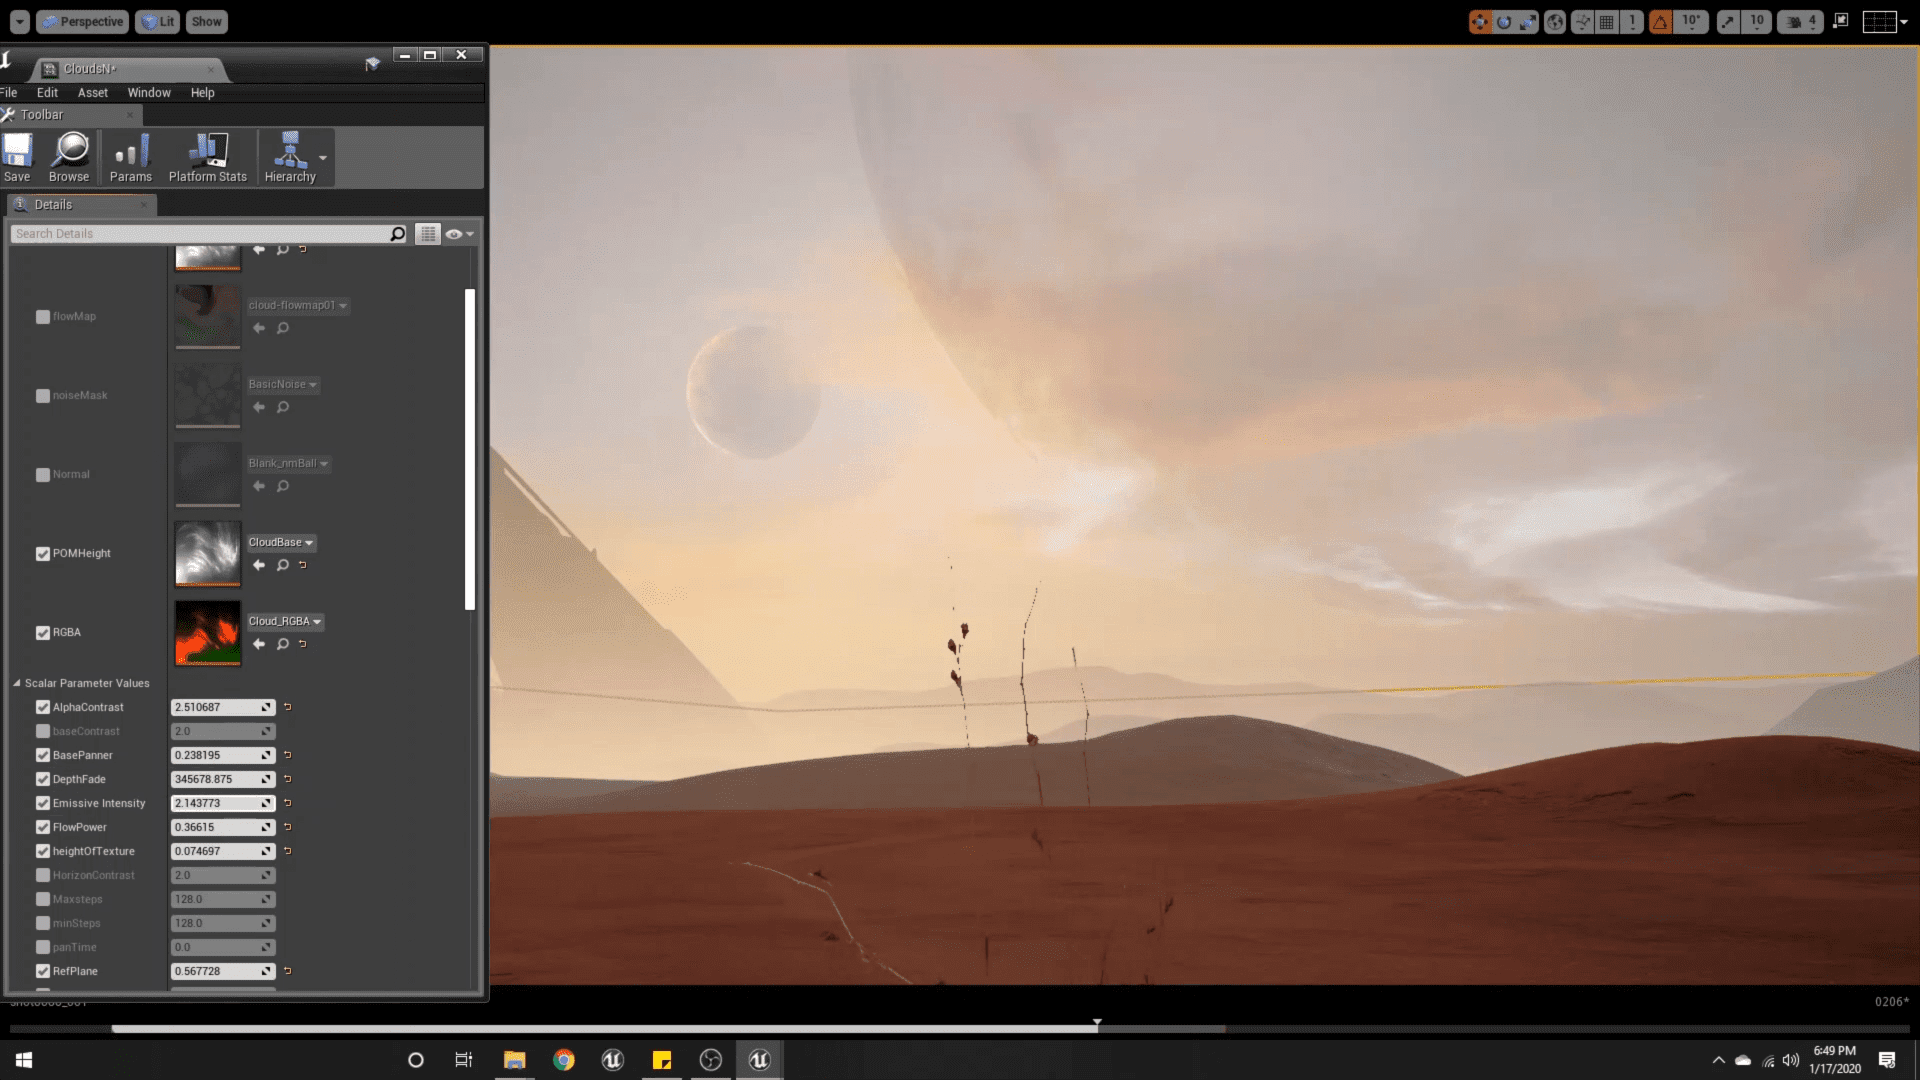
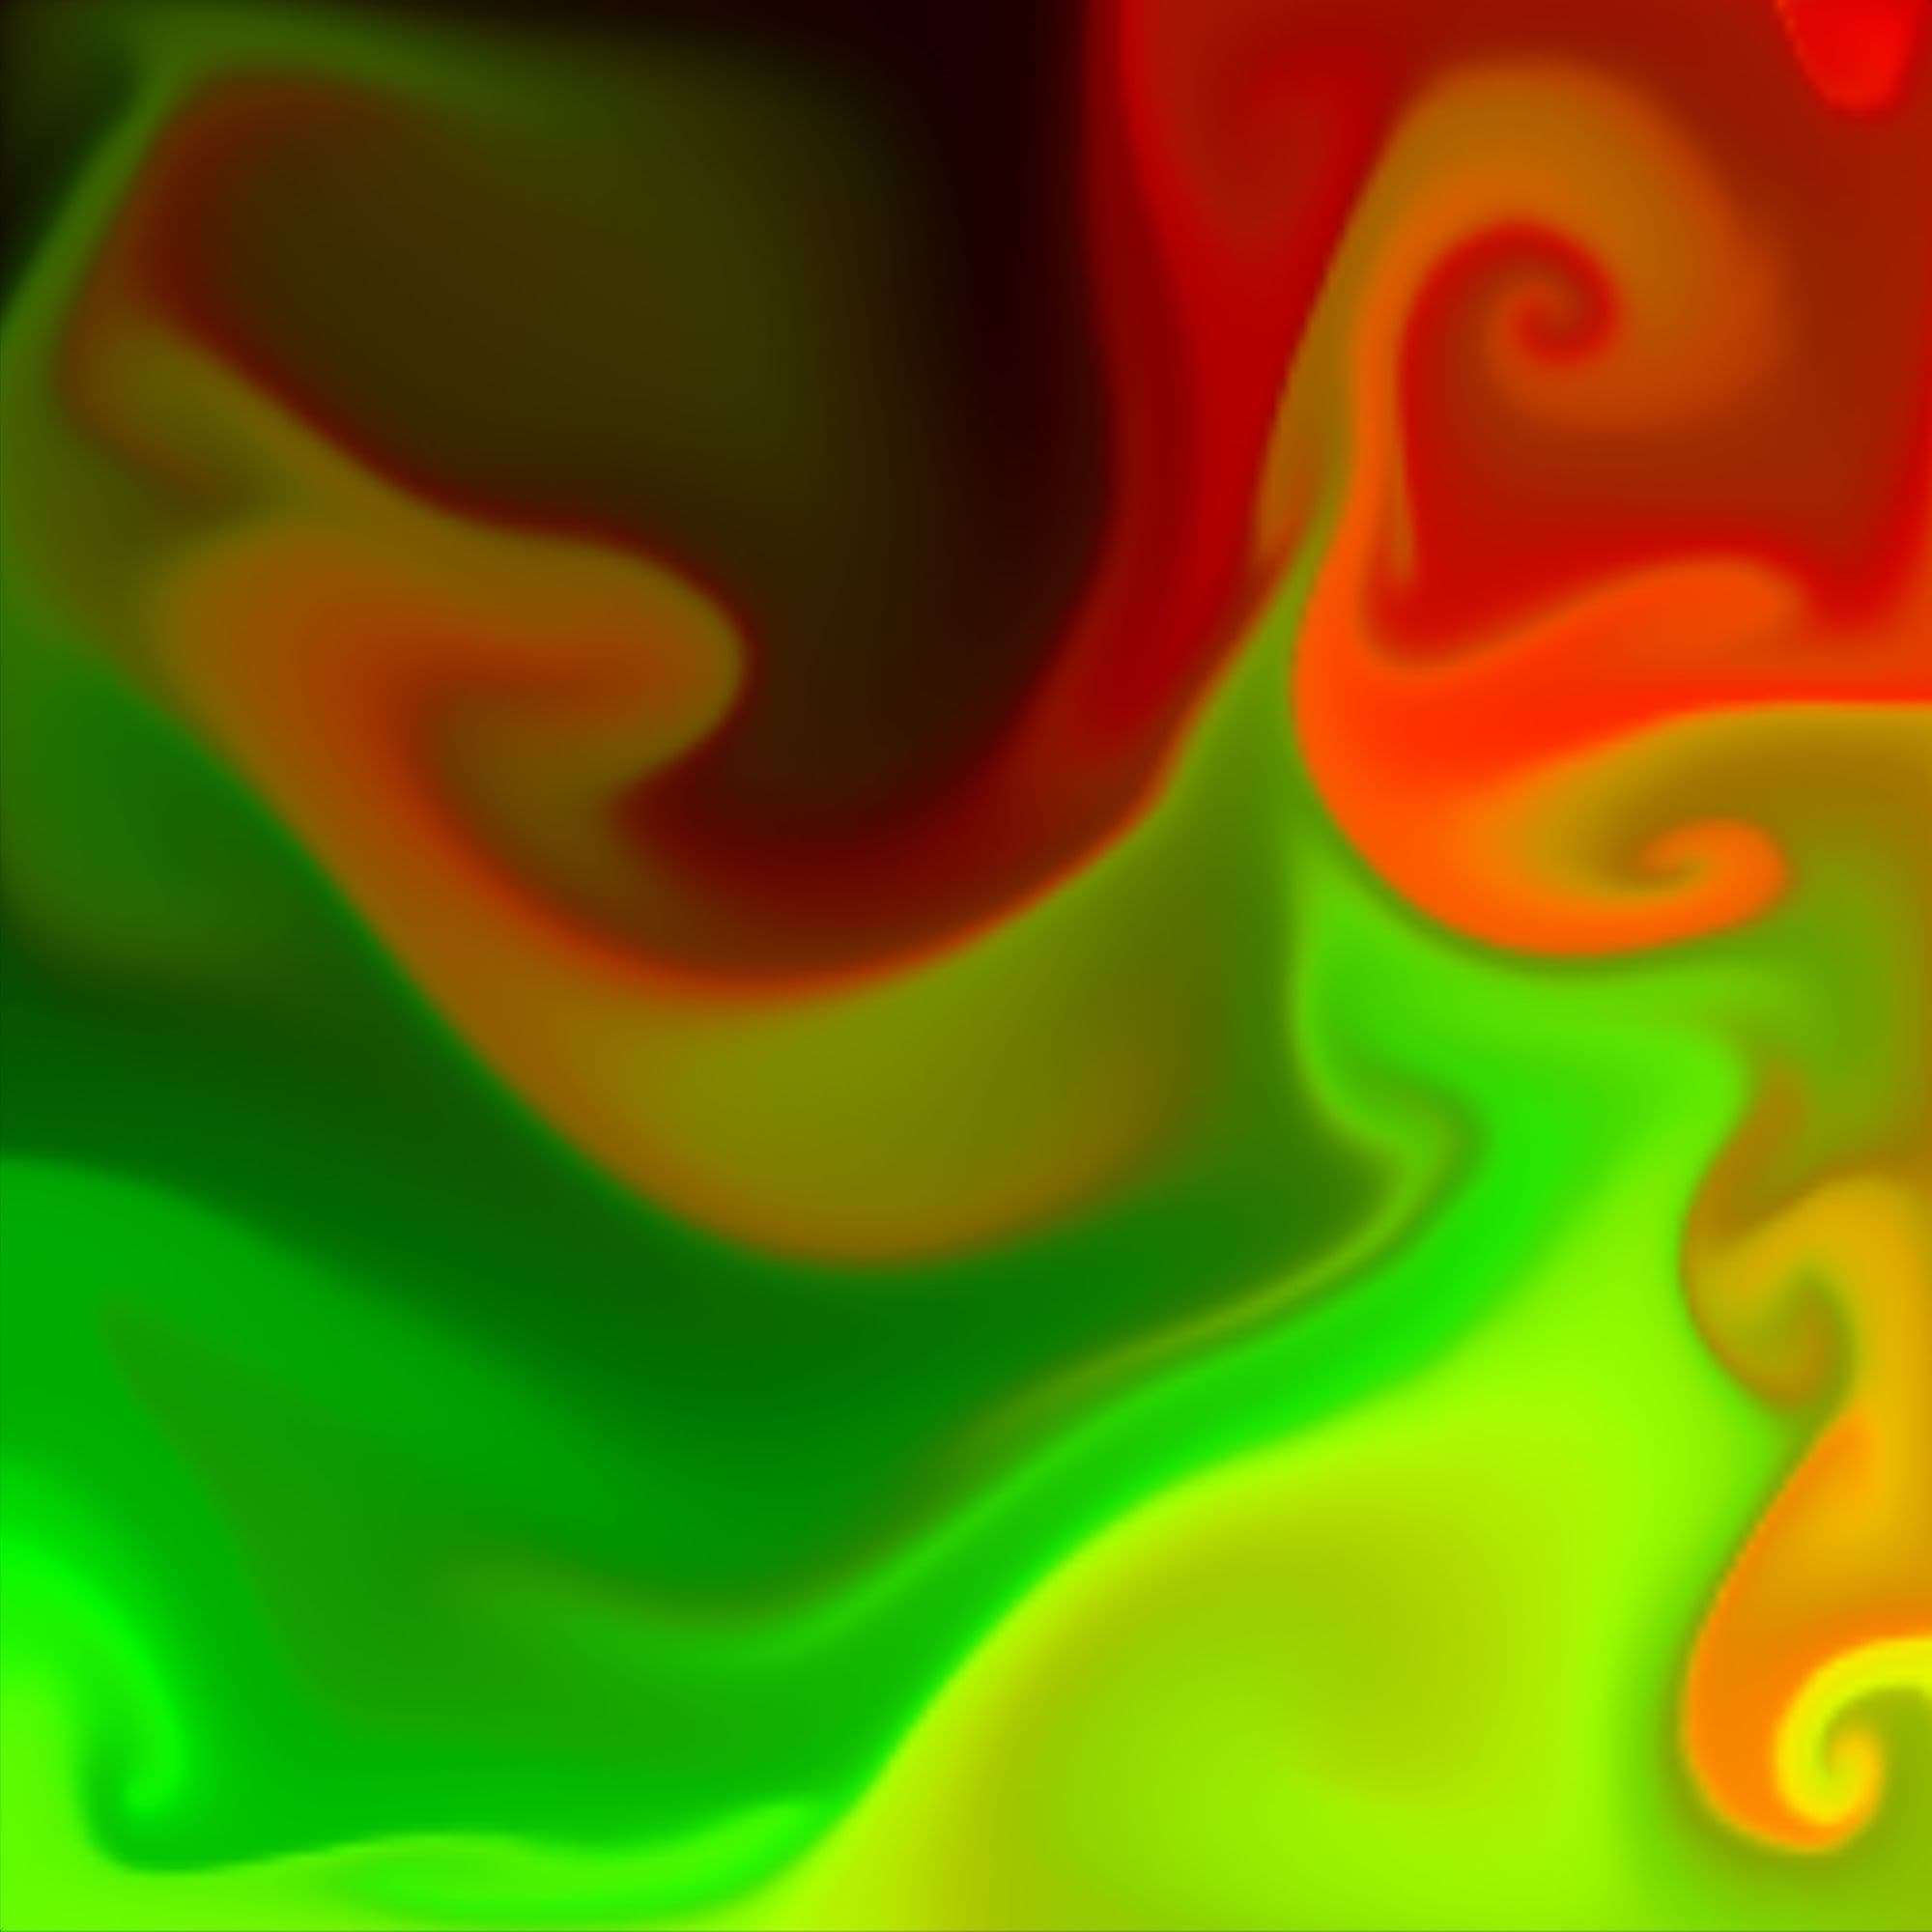
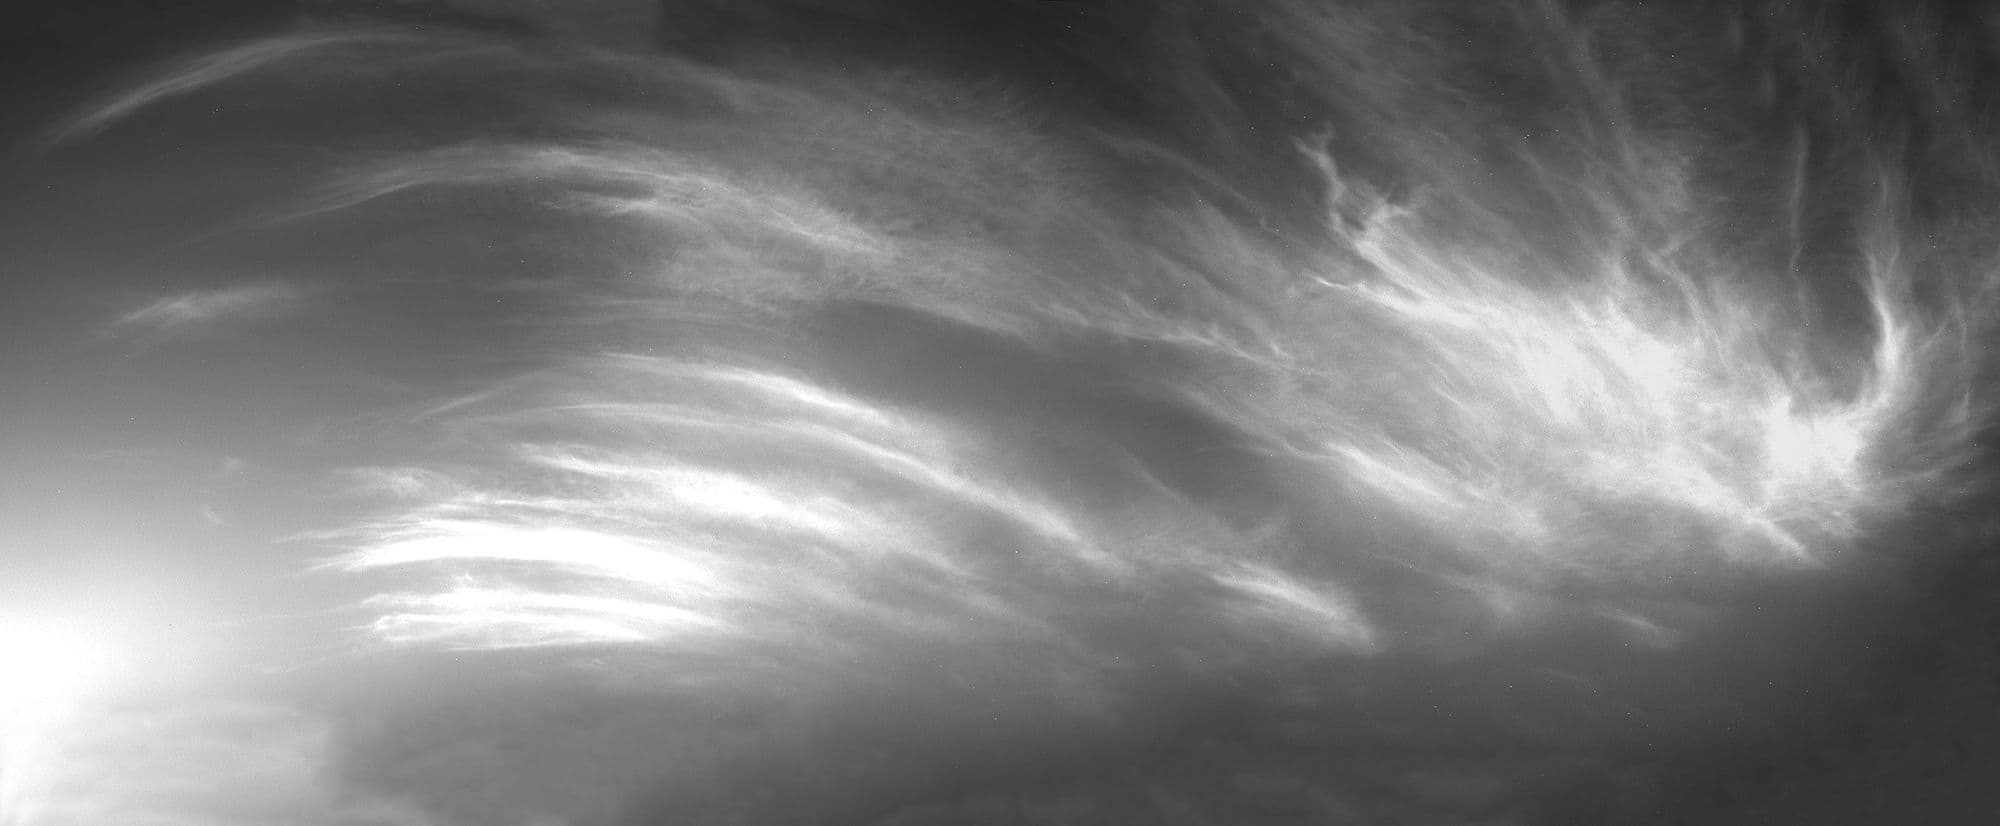
Before setting up the shader , I had to create some files for the shader to work with. One was a base texture file with an alpha channel , and the other was a RGBA texture map with different masks packed into different channels. Each mask represented Highlights, Midtones and Shadows so I could alter them in the engine. I also added a flowmap to give more directionality to the clouds.
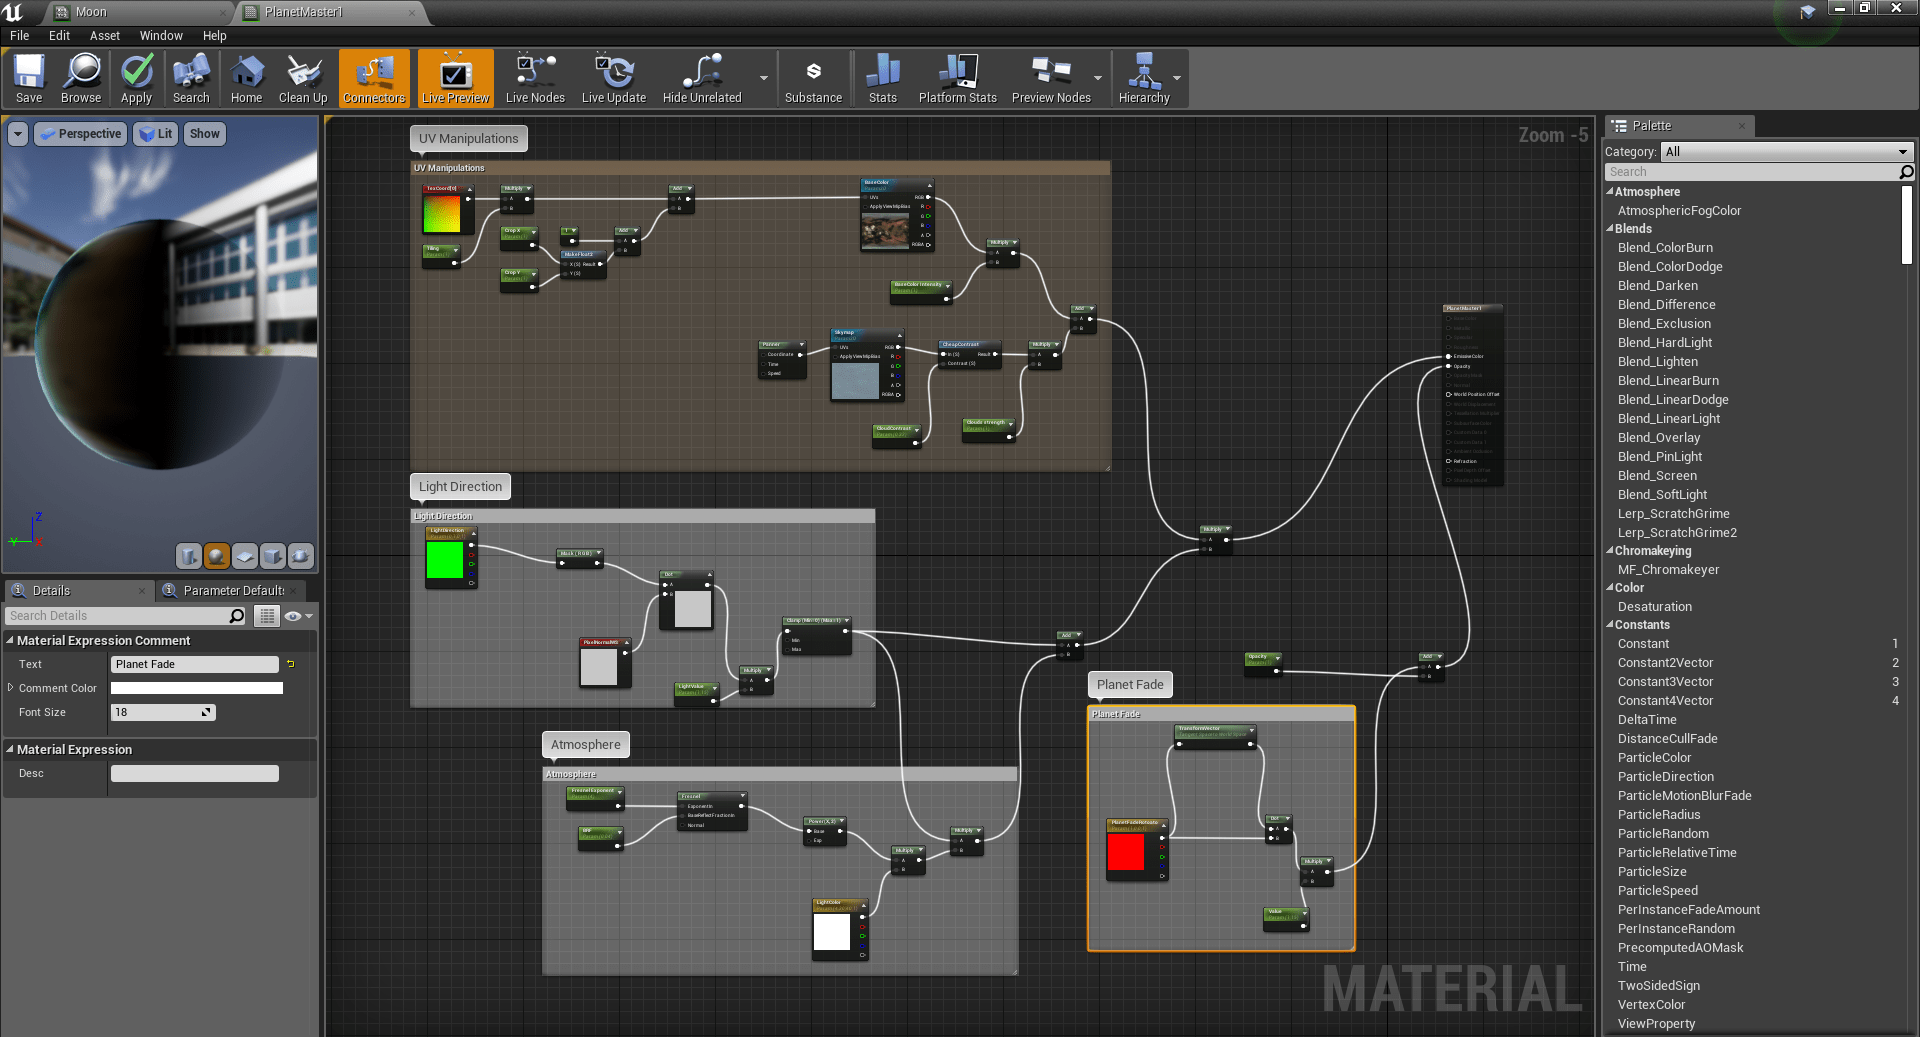
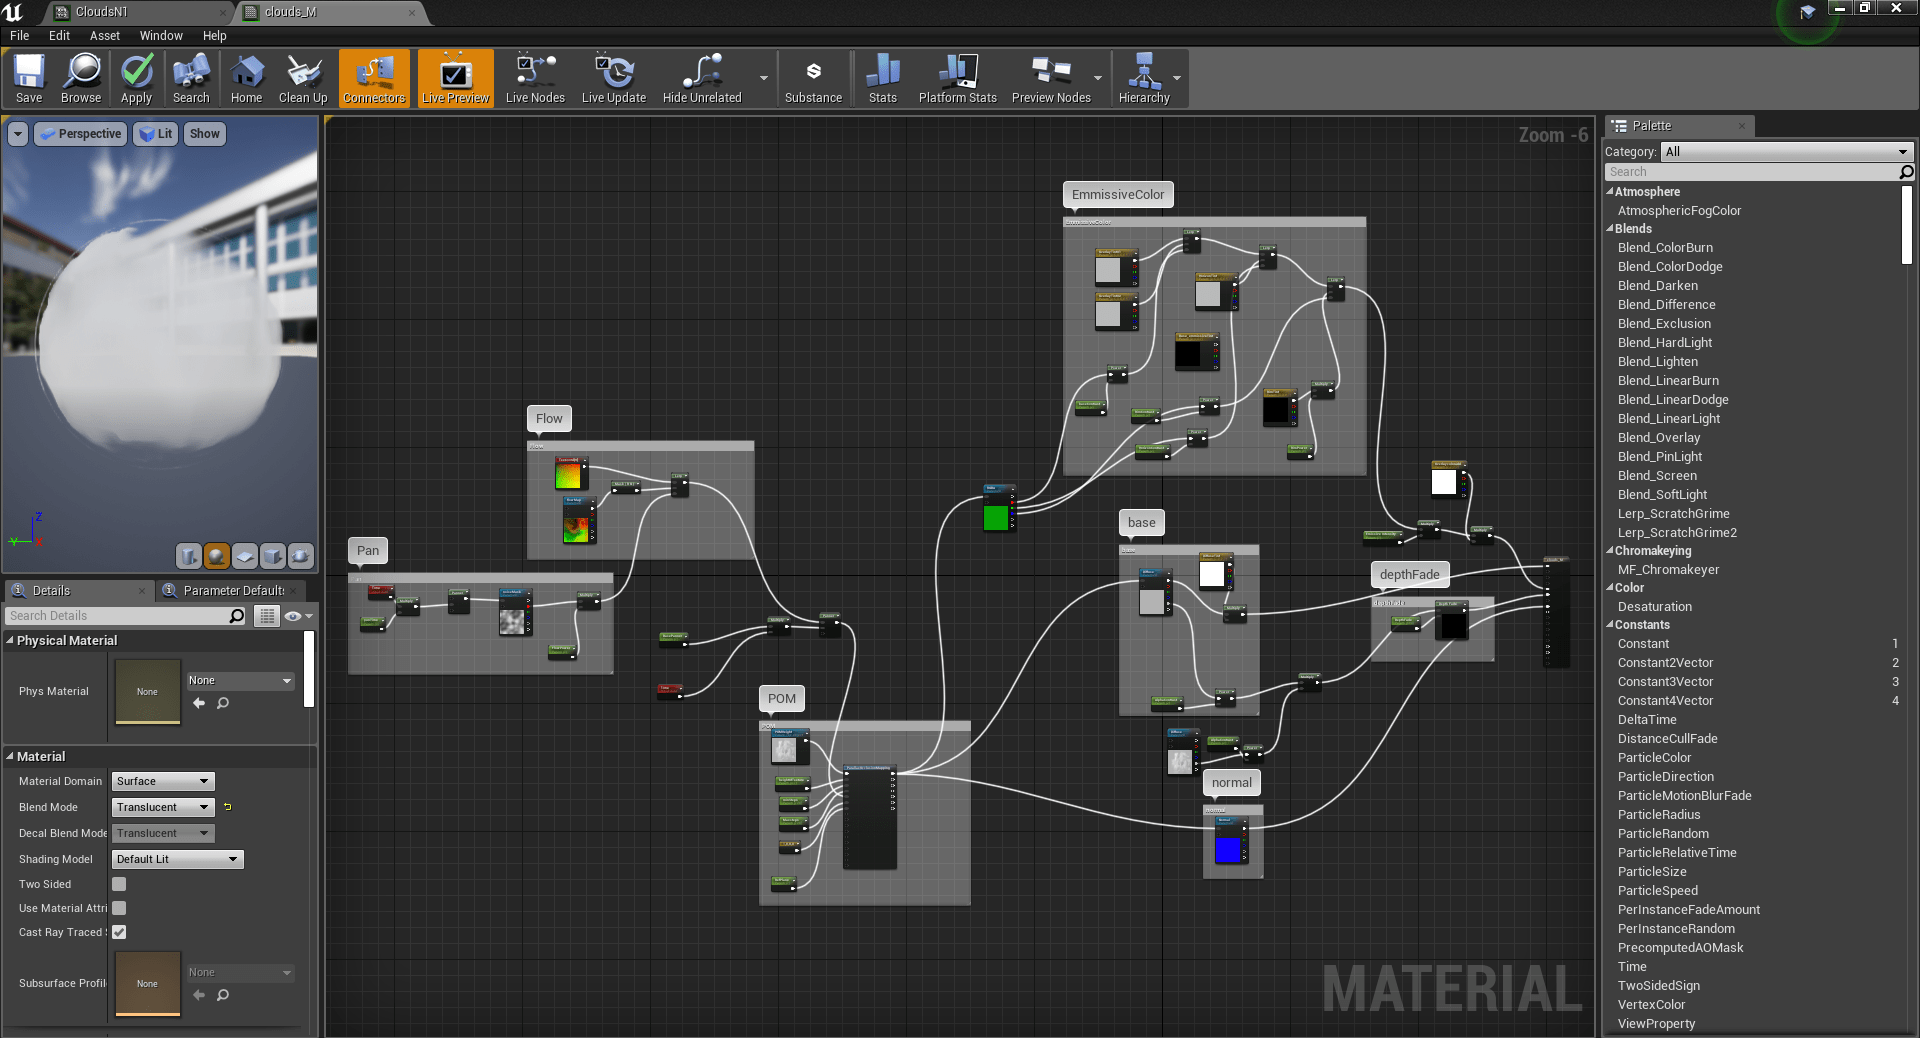
Here is an overview of the entire material.
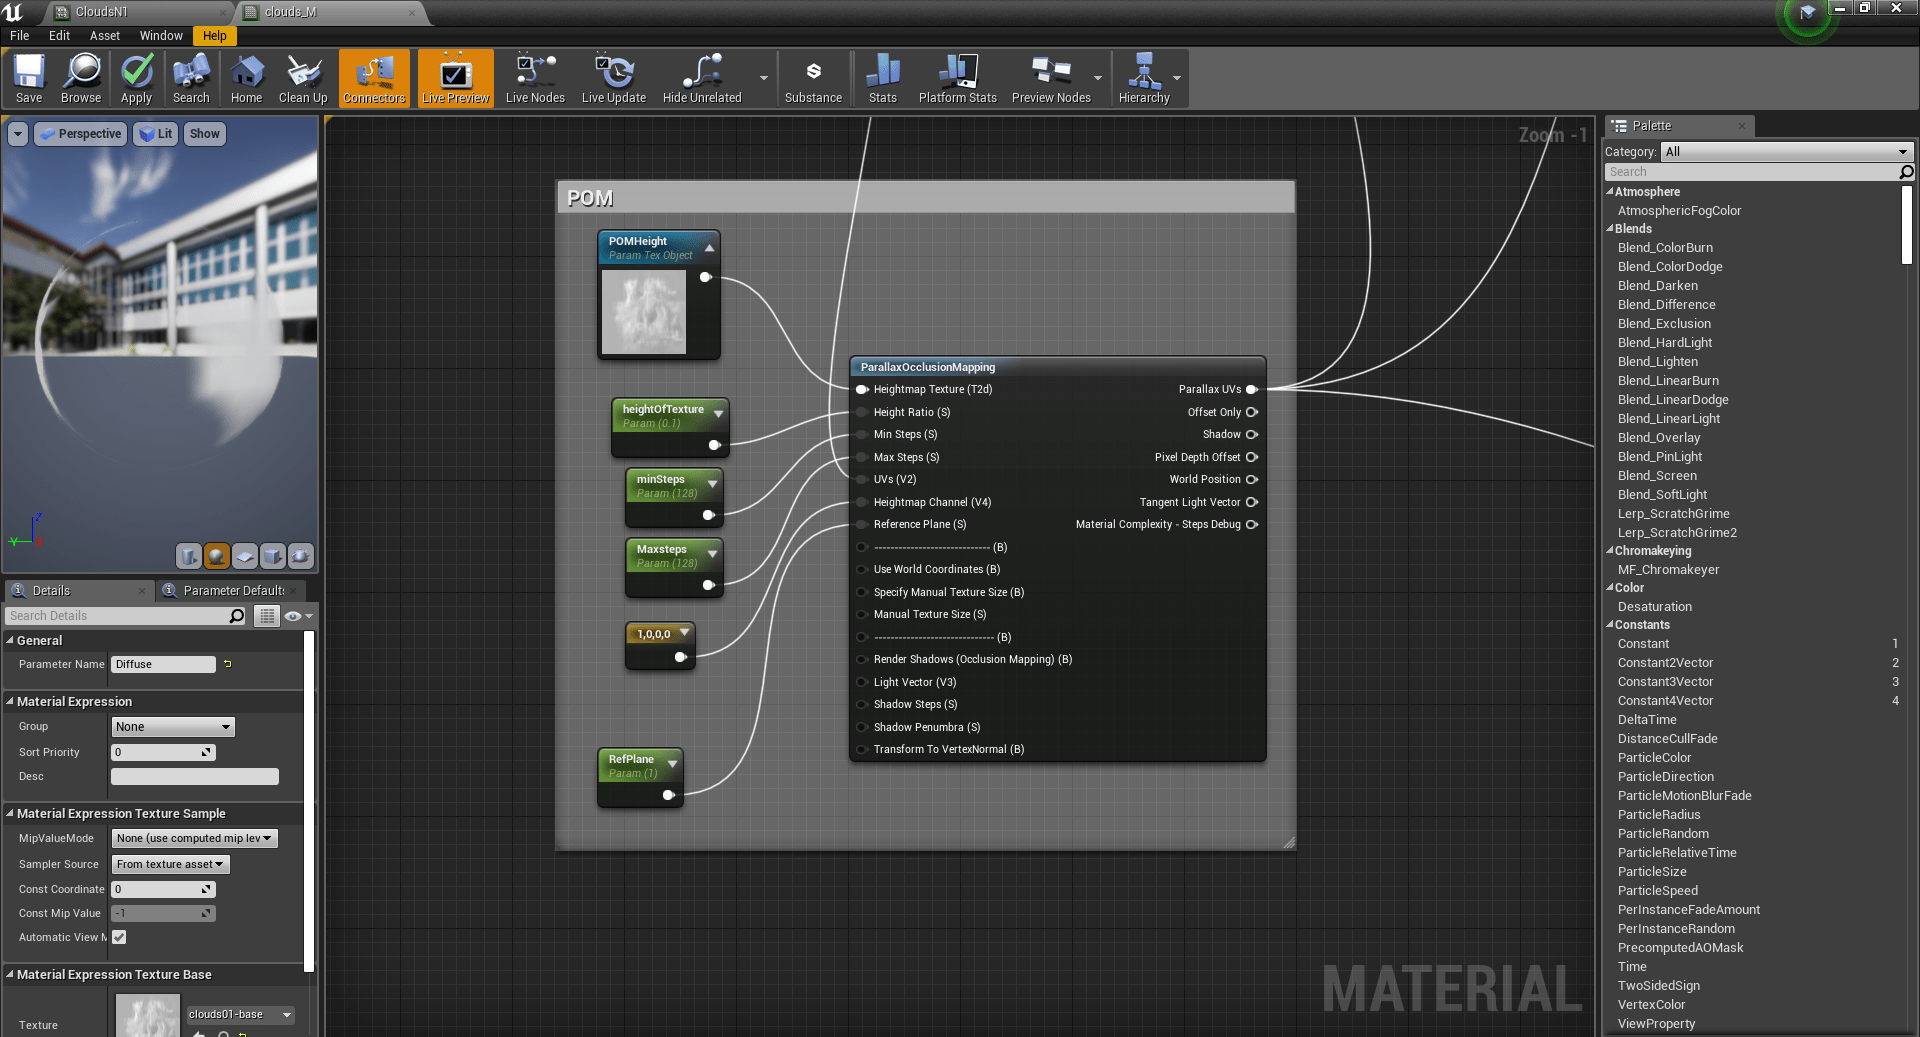
Most of the variation in this shader was controlled by using Parallax Occlusion Mapping. Adjusting each of the parameters here gave vastly different results.
And lastly this was my panning setup with the flow map. The way i used this was by keeping it at a minimal intensity as tweaking the parallax occlusion along with the flow map did break the texture. So it was about finding a balance which would work in every single shot without needing any extra tweaks.

Always pick projects that challenge you. While looking for concepts to work on , never approach it thinking “ yeah this seems like something i can do”. Instead find something which speaks to you , this will more than anything keep you motivated while working long hours on this project. You think about what you want to achieve then you figure out the easiest way to do it. Working on something you have never done before helps you grow faster.
Thanks to The Rookies for this opportunity, really glad to be part of this community.
And special thanks to my Mentor Matthew Clapperton for guiding me in this journey.