Full 3D Breakdown - Creation of WoW Character Sylvanas Windrunner
Nina Haftka created her Sylvanas Windrunner fanart, originating from the Blizzard universe of WoW, with the main goal of improving essential art fundamentals, especially the human anatomy.
Nina Haftka created her Sylvanas Windrunner fanart, originating from the Blizzard universe of WoW, with the main goal of improving essential art fundamentals, especially the human anatomy. Sylvanas Windrunner is one of the Horde's most divisive figures, a secretive leader who inspires equal parts dread and awe in those she fights alongside.In the following she would like to share her process with you and hopefully provide some useful information.
Defining goals
A quite important but often neglected aspect of creating a new portfolio piece, to me, is the process of defining goals before starting. Especially when starting out, the amount of possibilities we have within our industry can be impressive, but equally overwhelming. Therefore I think it is a good habit to take a few moments and set an objective before rushing into a project. Considering a new software to master during the process or putting emphasis on studying art fundamentals can be great milestones to work towards and keep you motivated. Every new project is a learning opportunity, but it will also determine who is potentially going to hire you, so always keep your goals in mind.
Reference
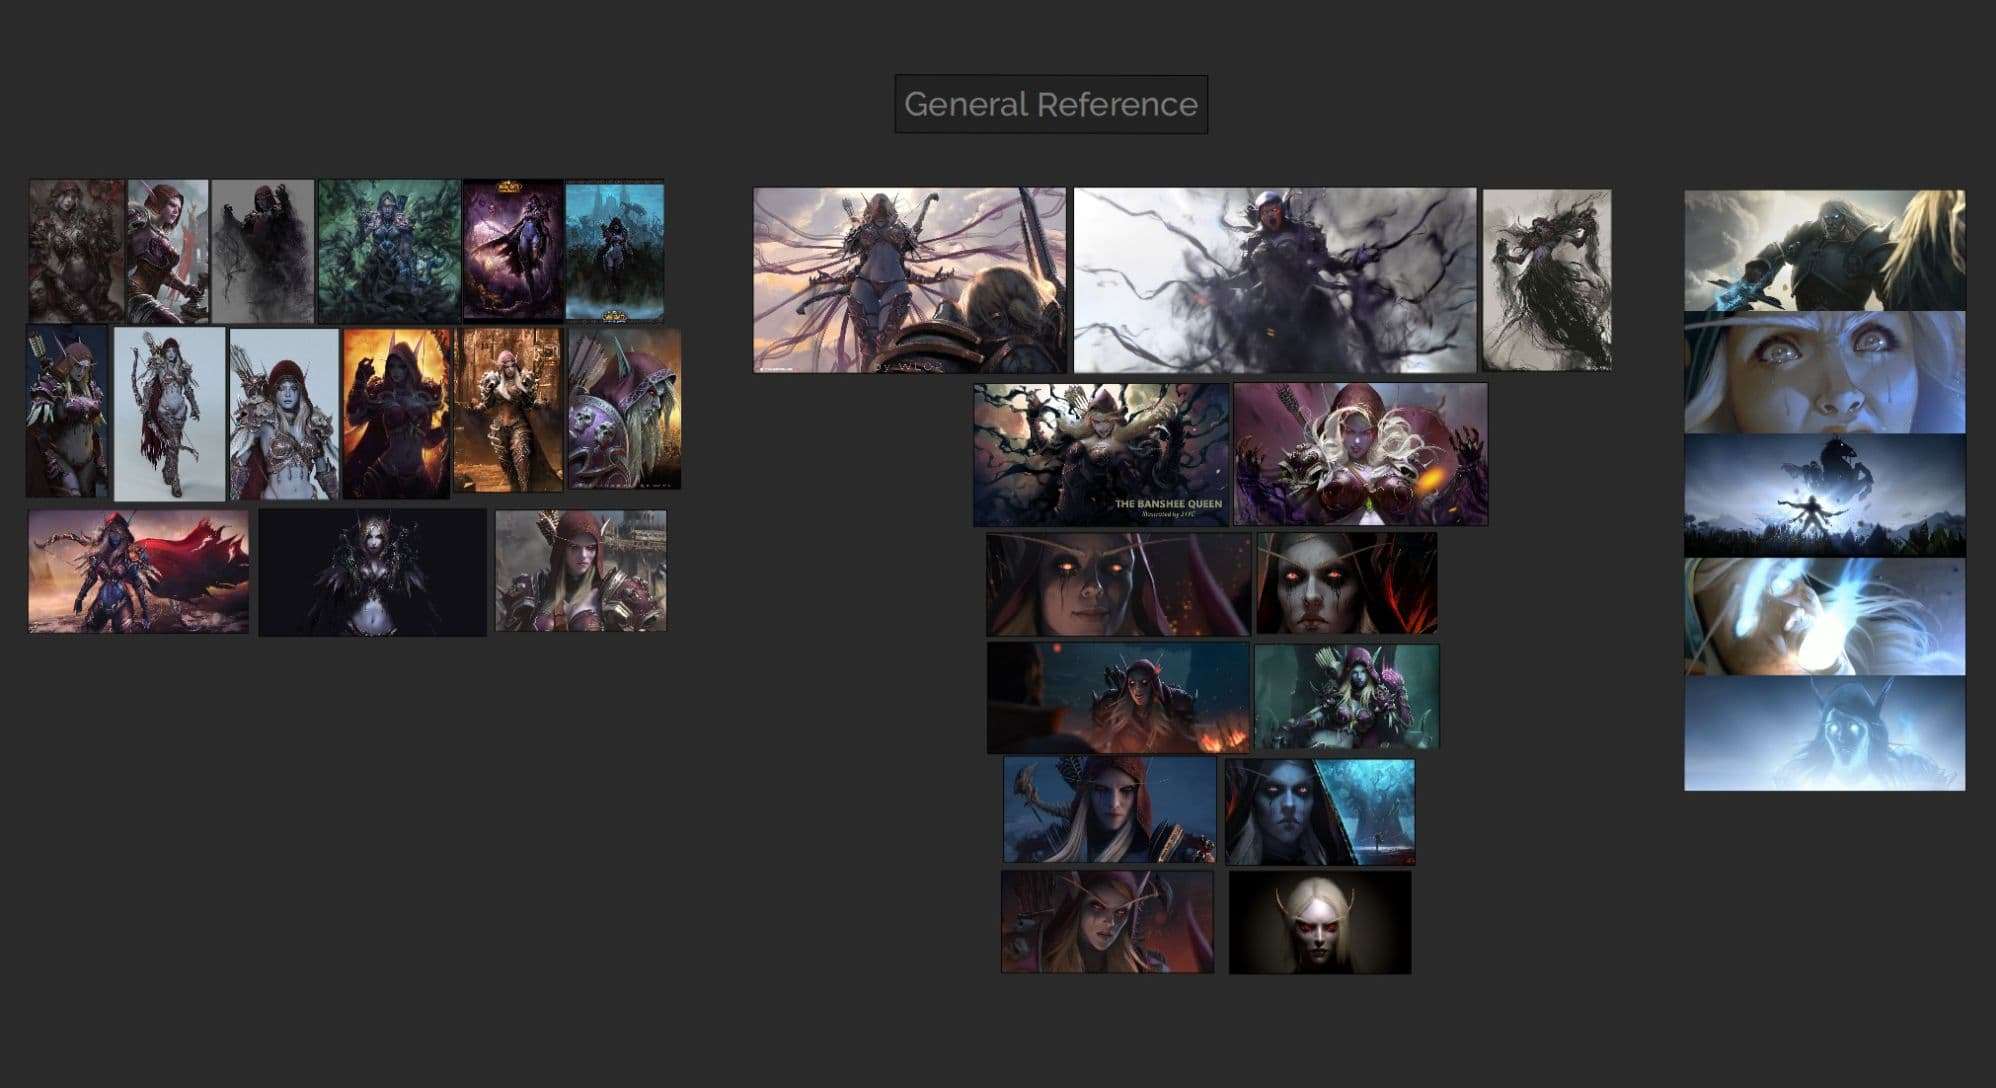
For any project, the first and certainly one of the most essential steps is to gather adequate reference images. In my case, I was oriented towards an already existing character, but I wanted to create my own interpretation instead of staying completely true to the initial design. Therefore it was even more important to gather a lot of reference in order to get inspired. This stage also helps to establish an understanding of the backstory and personality of the character, which will be useful to create a certain atmosphere in your final piece.
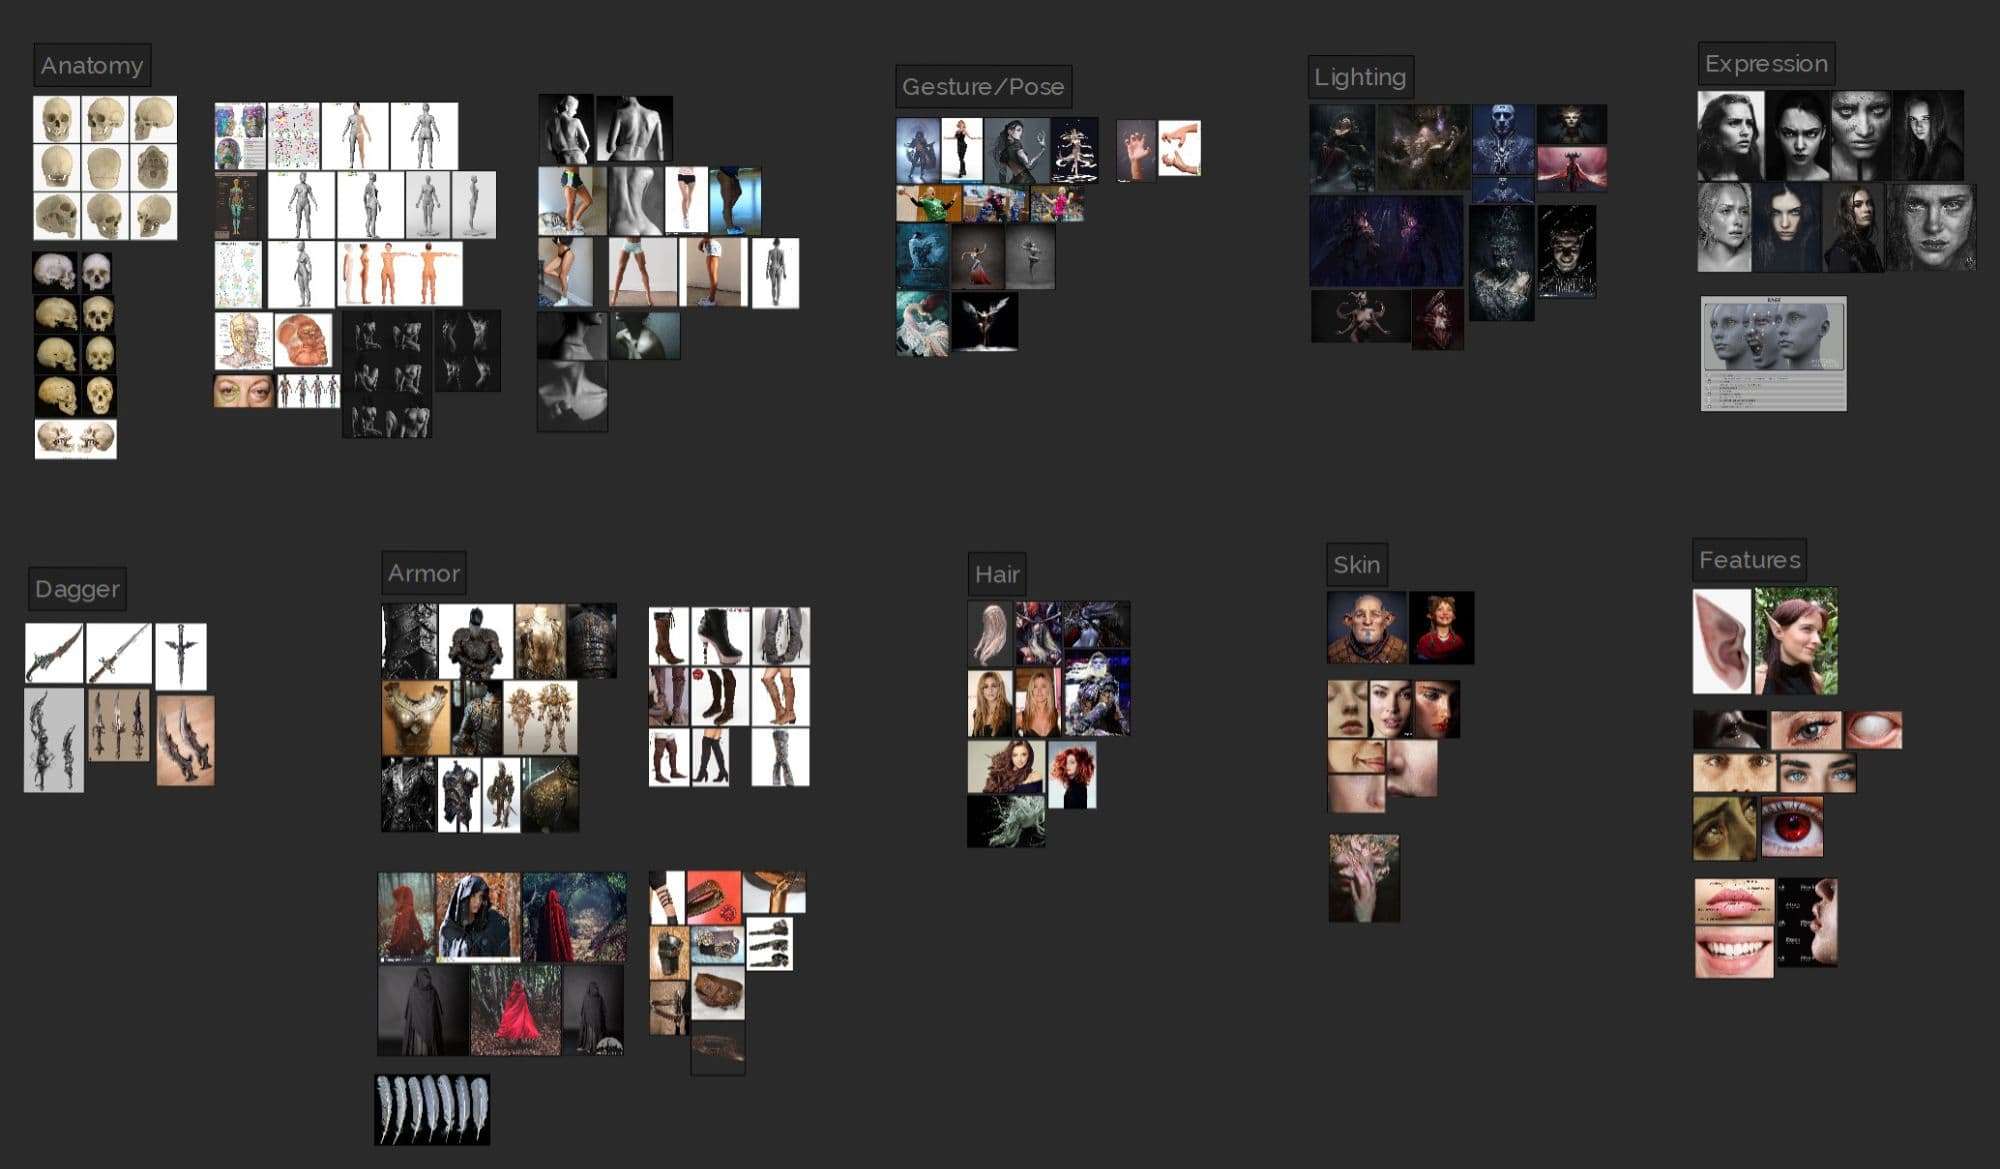
I like to back up literally everything I create with a decent amount of reference. The image below shows only a small snippet of my reference board.
My favourite tool for reference is PureRef, as it is fast, easy to handle and the “always on top”-shortkey (ctrl+shift+a) provides the possibility of constant reference comparison even if you are not in luck of owning two monitors.
Anatomy
As one of my main goals for this project, I chose to improve my understanding of the human anatomy, as it is one of the most fundamental and important tools for a character artist. Luckily, there is variety of great online courses, tutorials and books out there covering the topic.
Scott Eaton offers a series of highly informative courses regarding the human body and facial anatomy. Although pricey, they are definitely one of the most valuable and comprehensive resources on the internet. Other great sources of information, especially for putting theory into practice, are Raf Grasetti’s tutorials on human anatomy as well as Spicer McLeory’s Character Creation for Collectibles, where he speaks about anatomy quite extensively as well. One of the most useful and comprehensible anatomy books to me are the ones from Uldis Zarins.
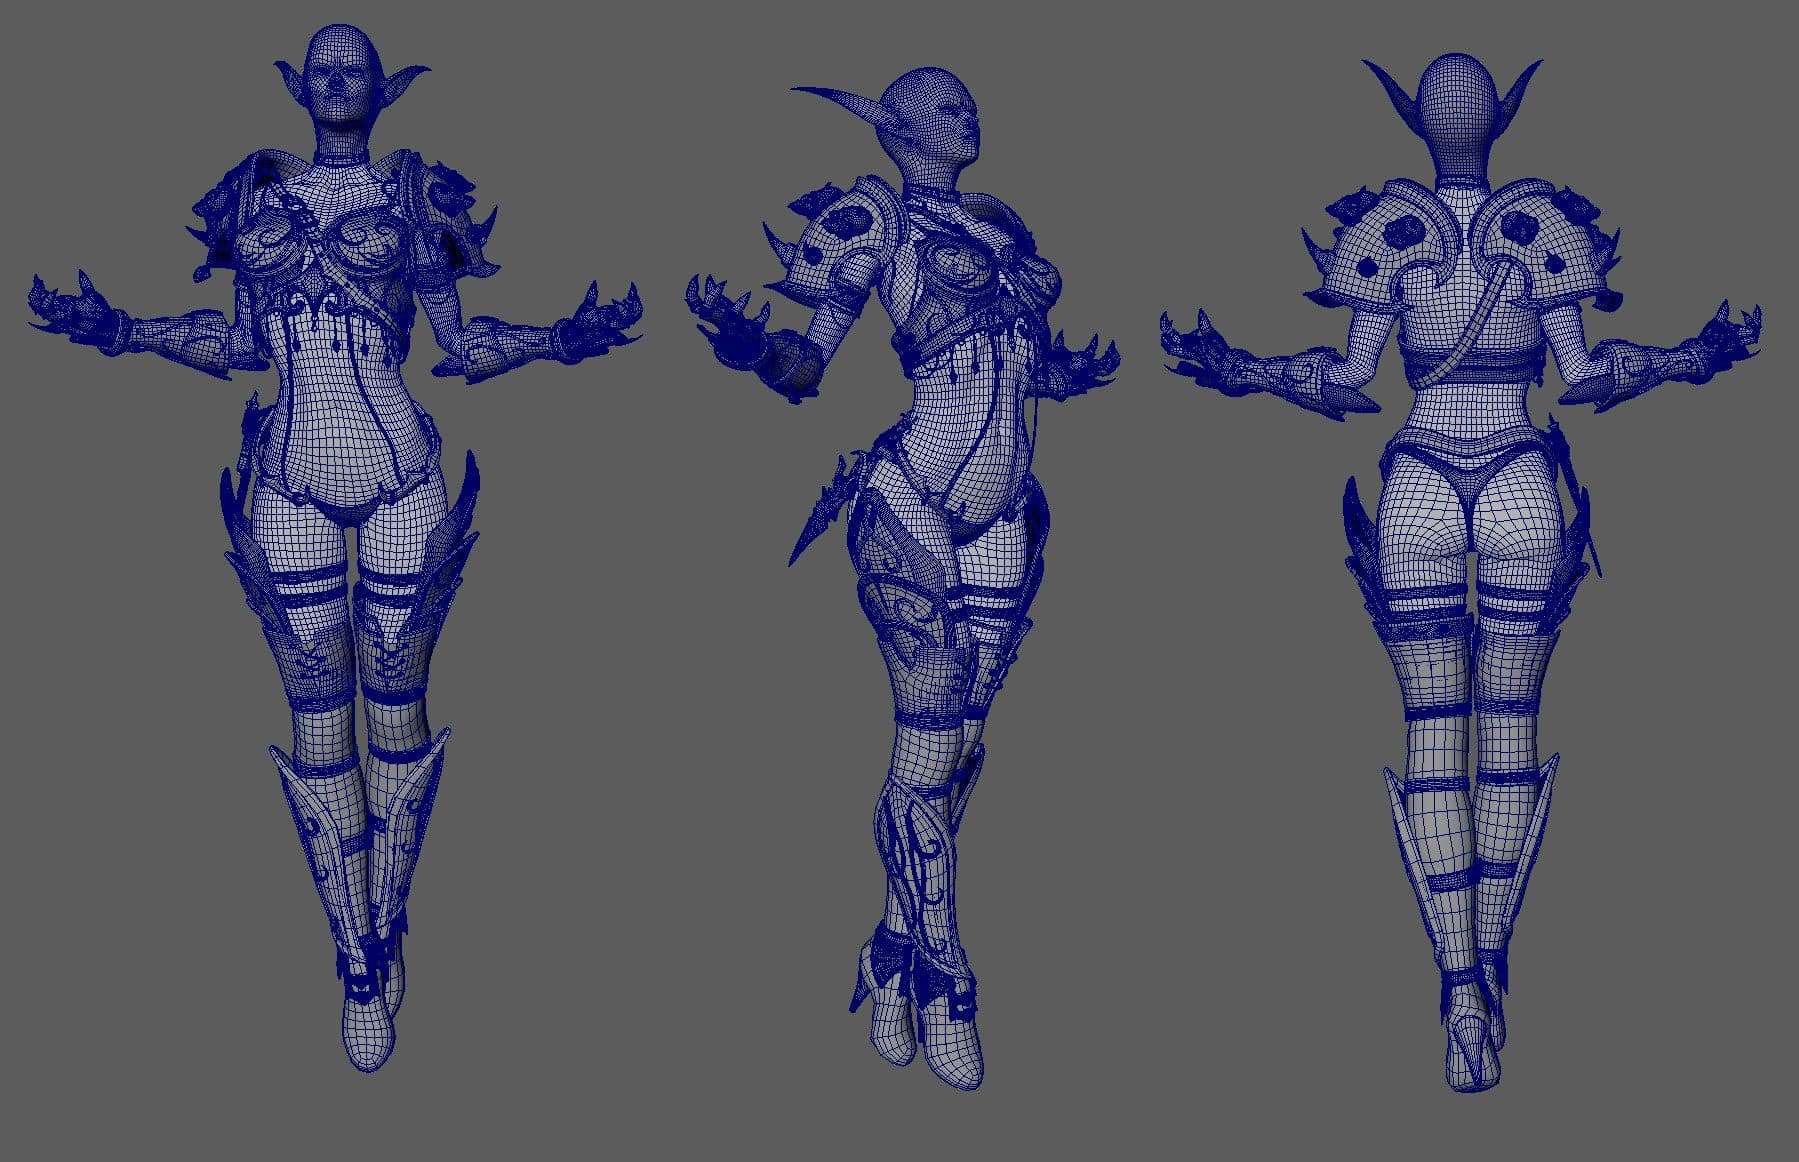
Blocking and Refining the Body
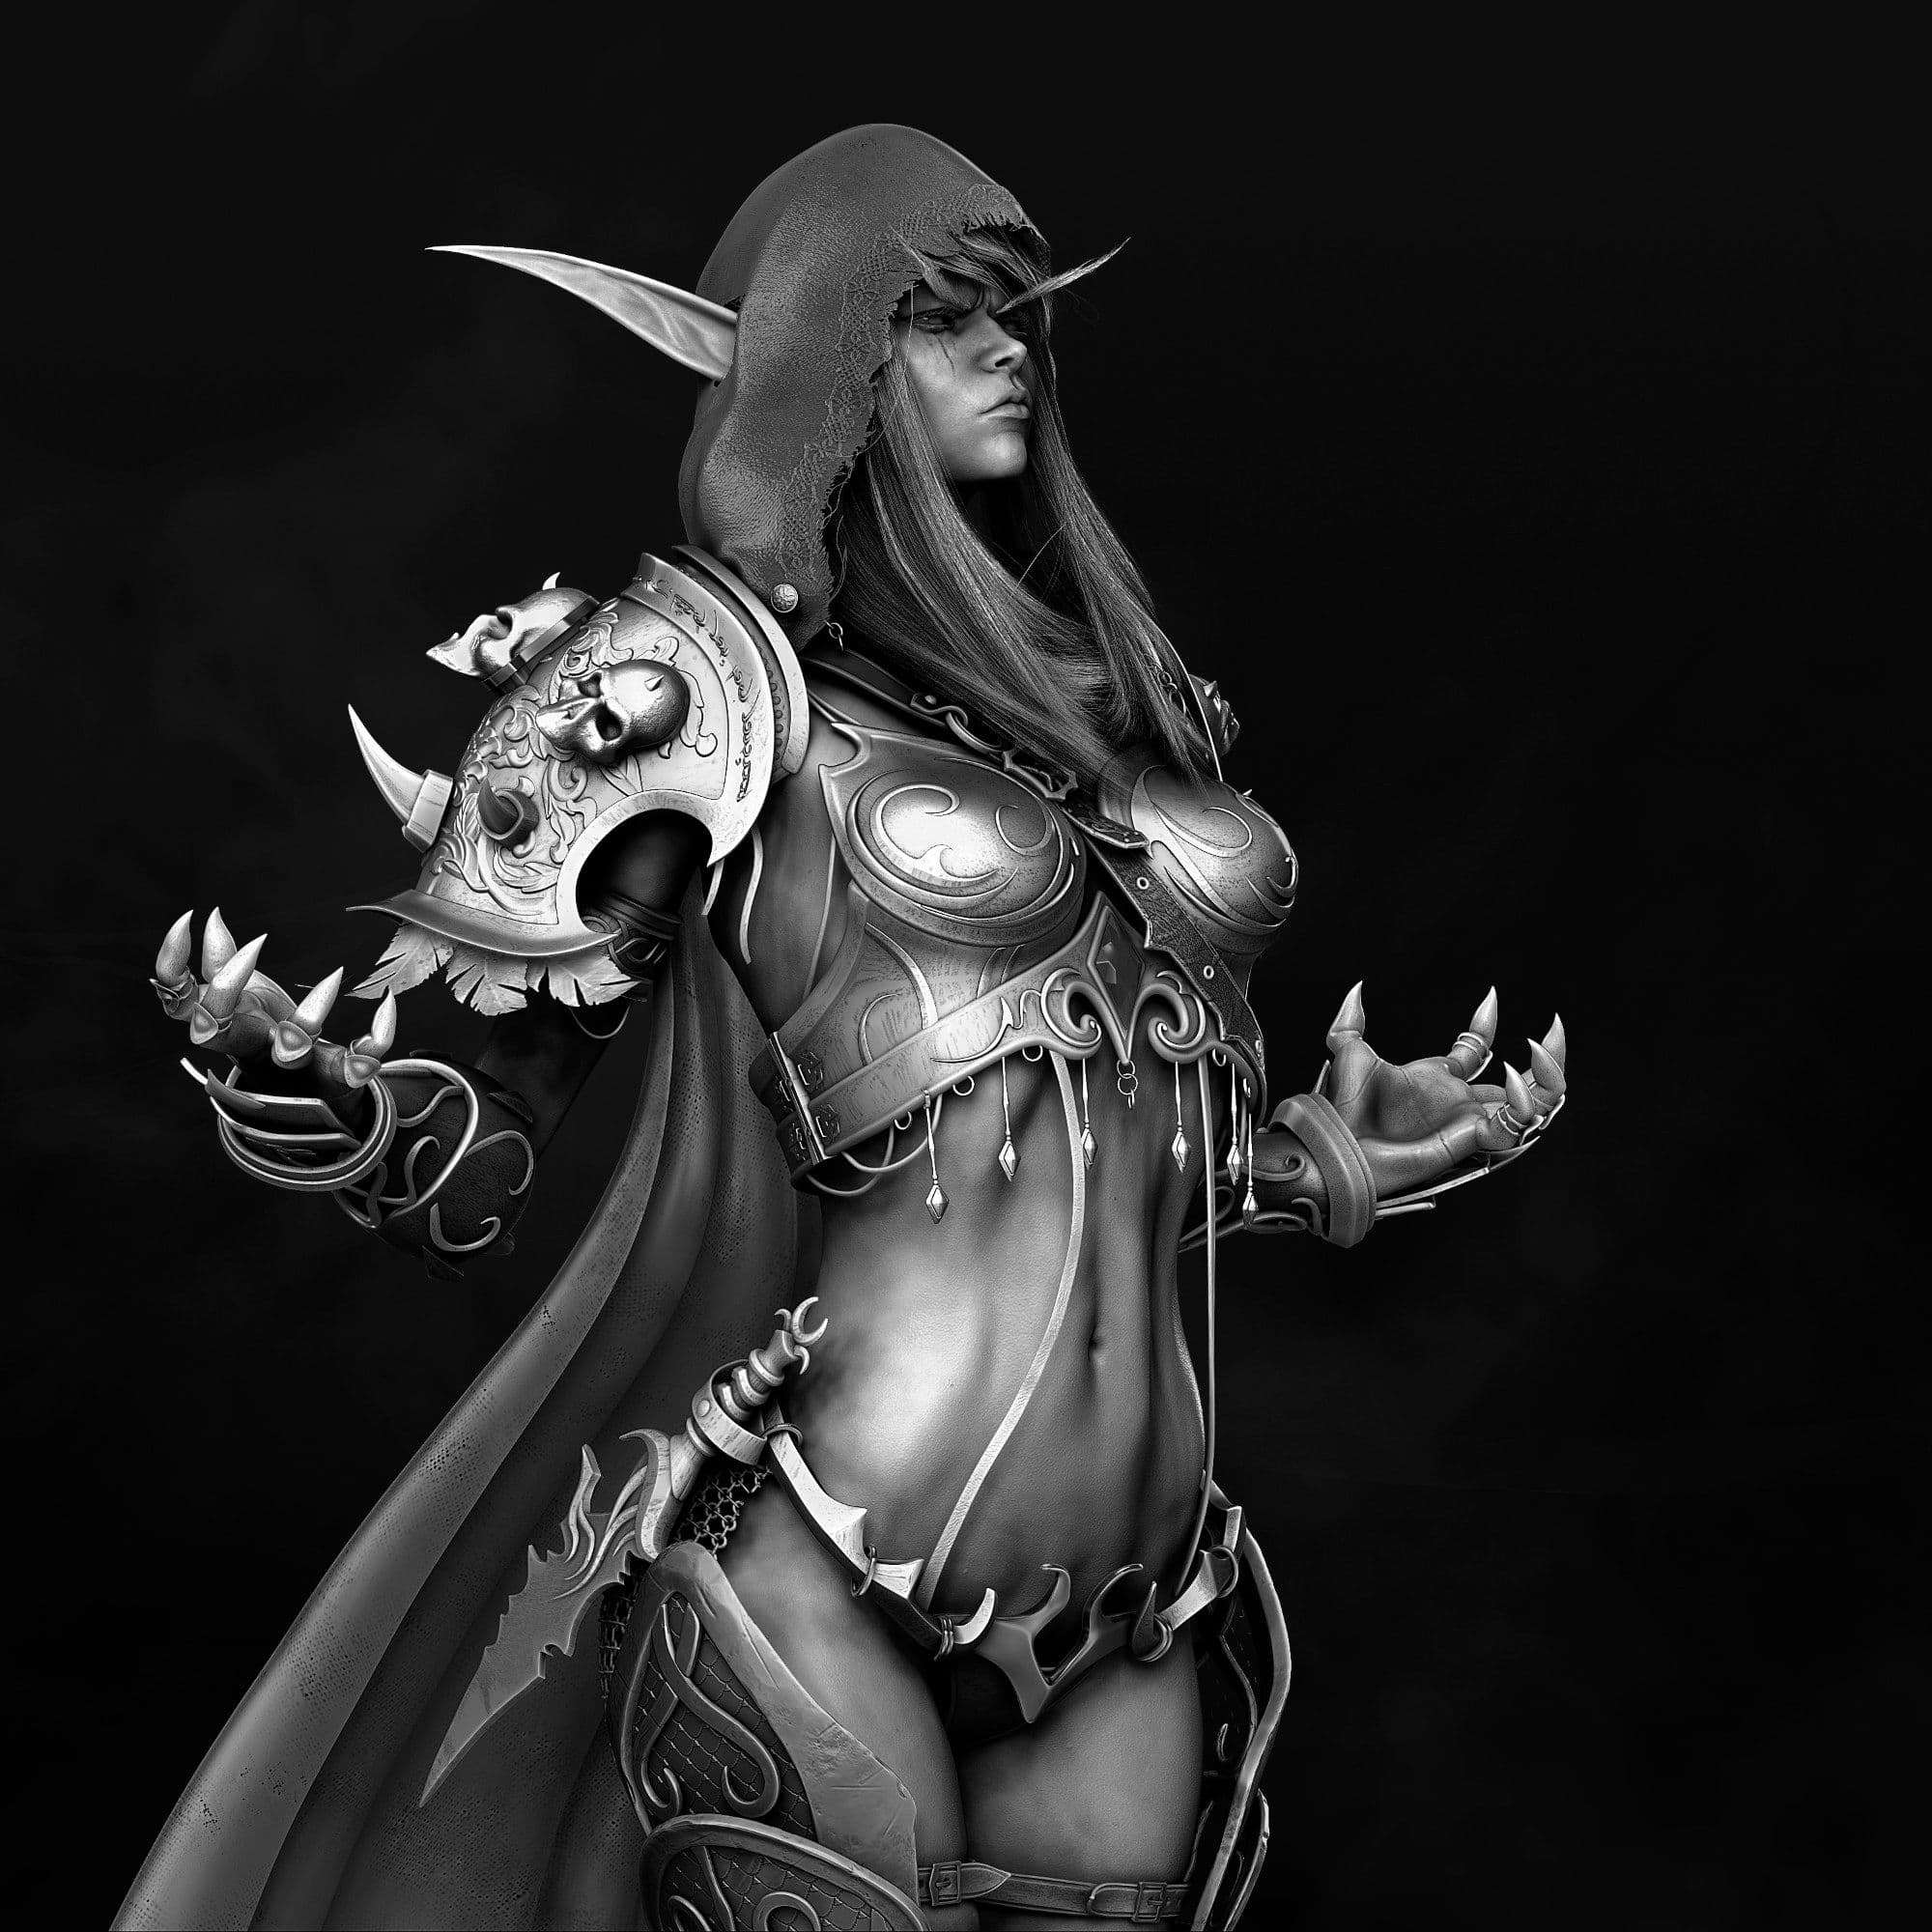
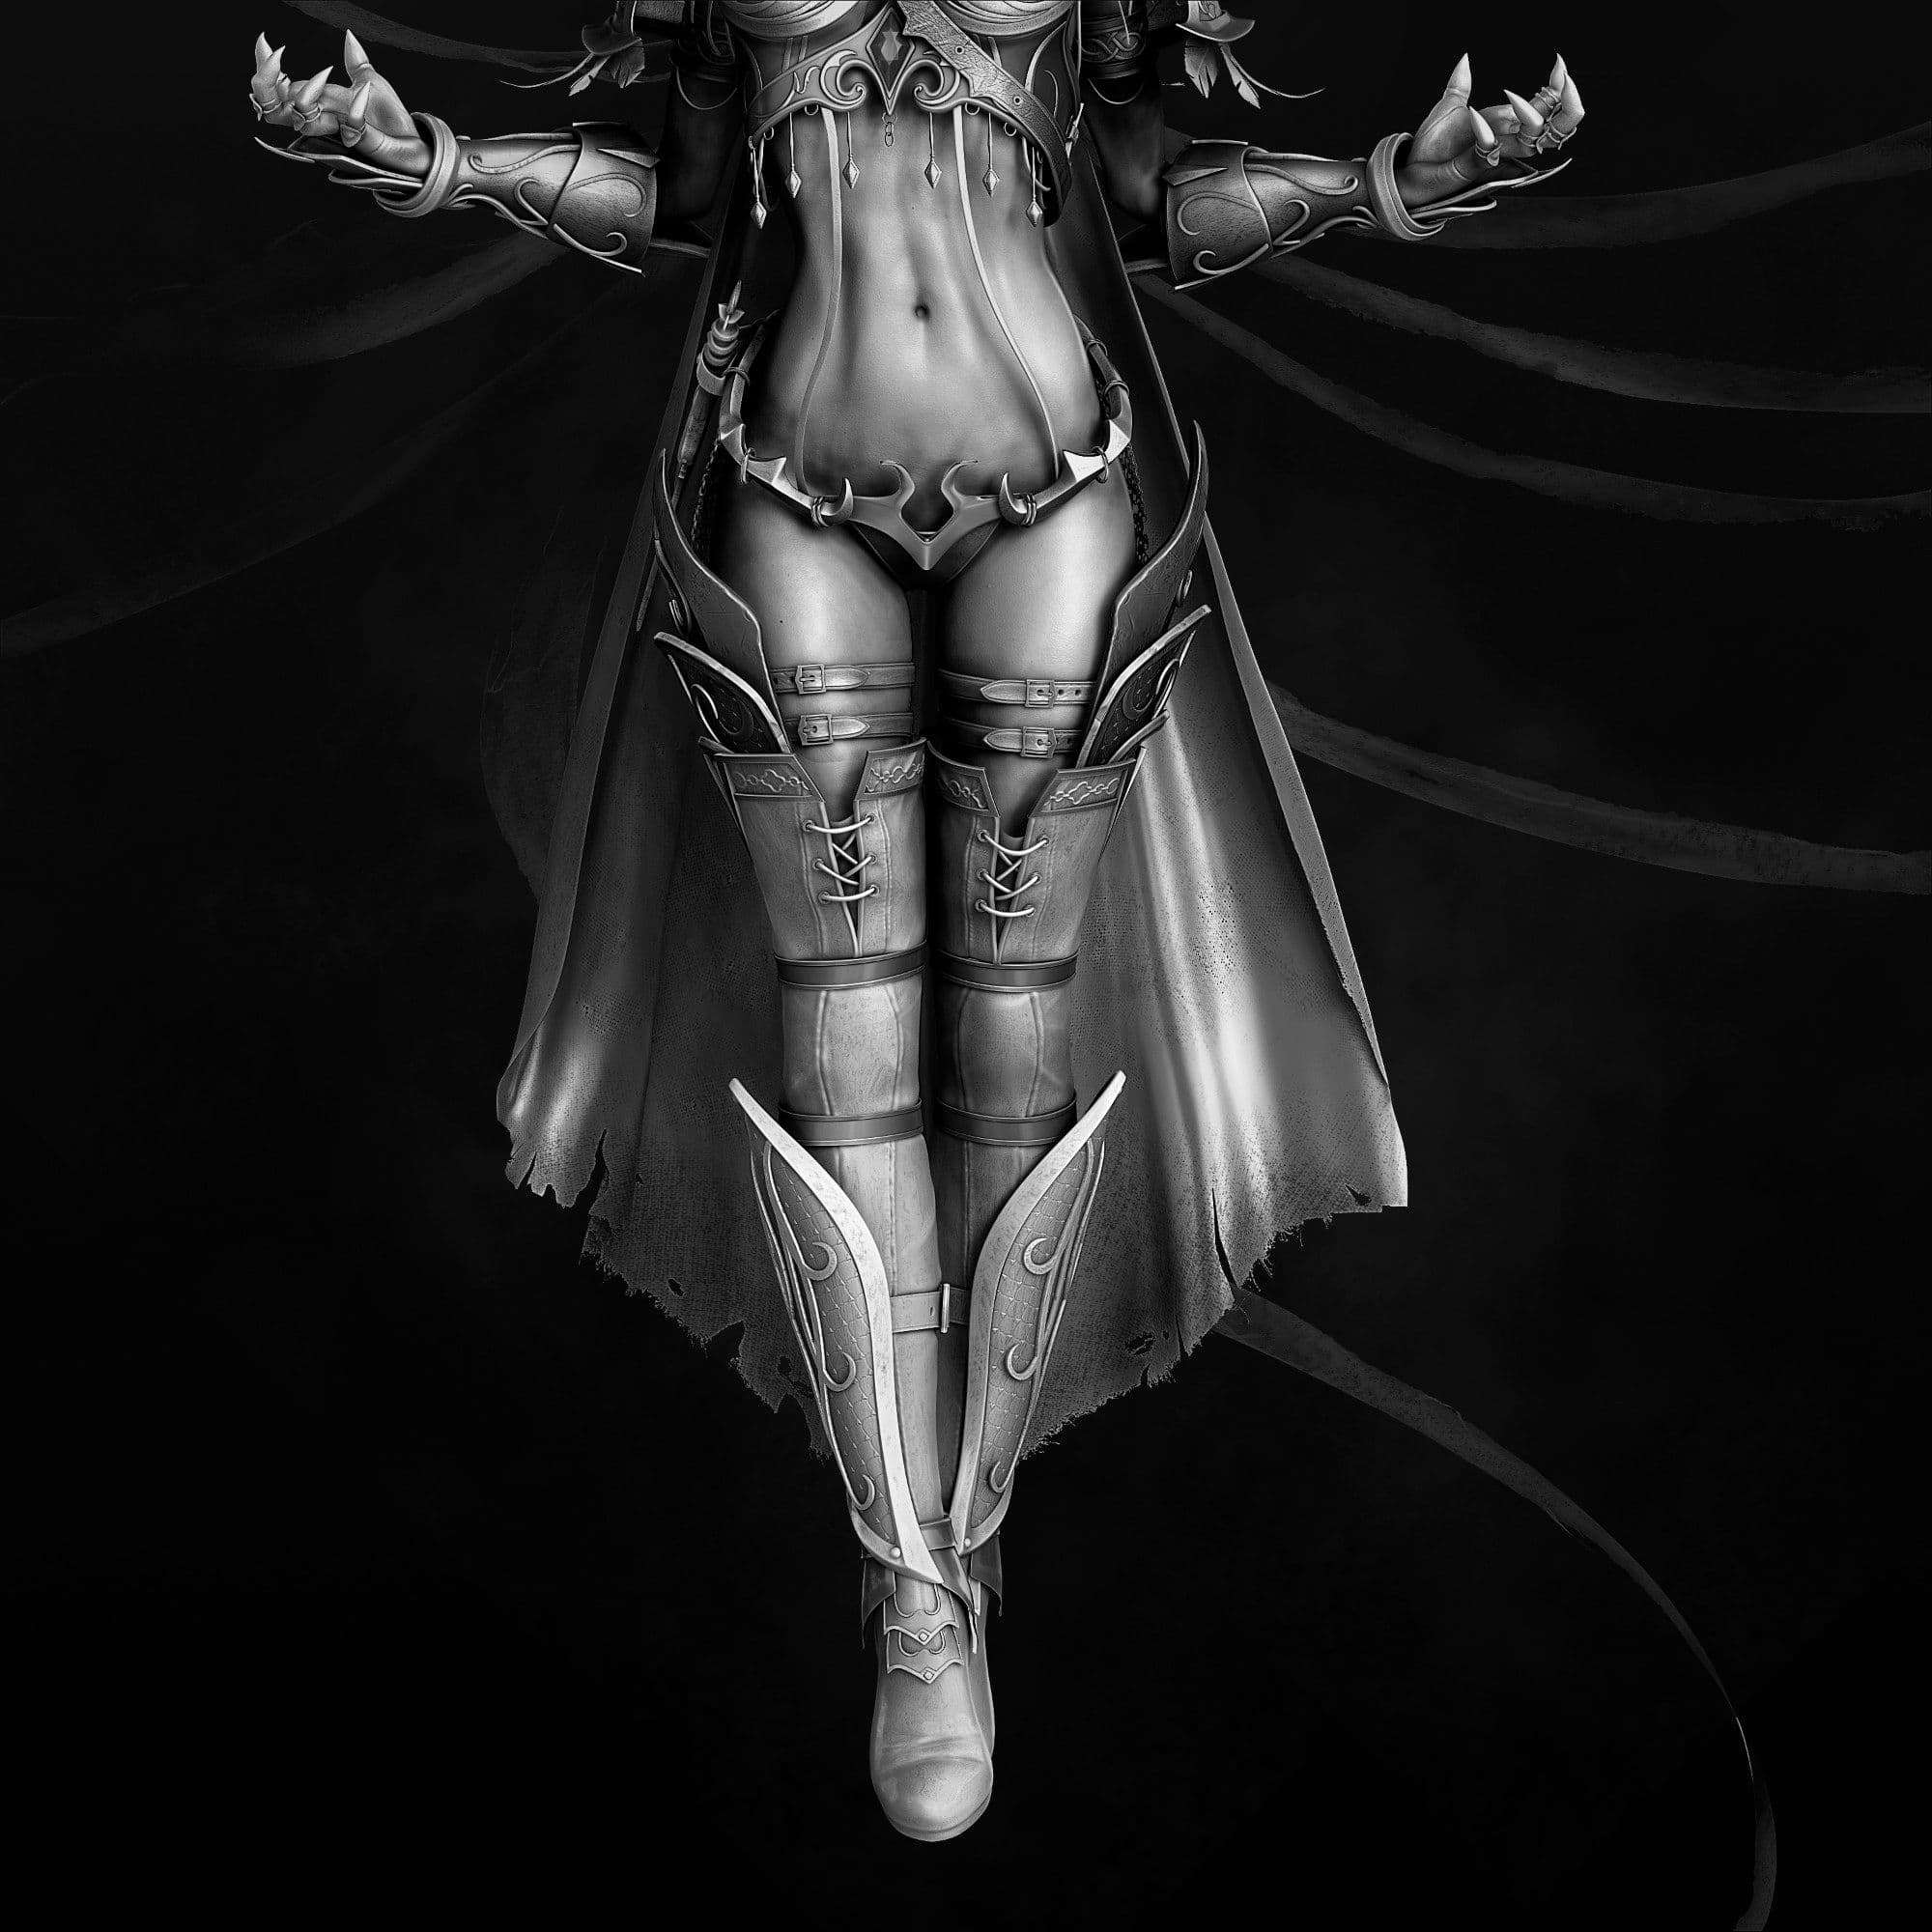
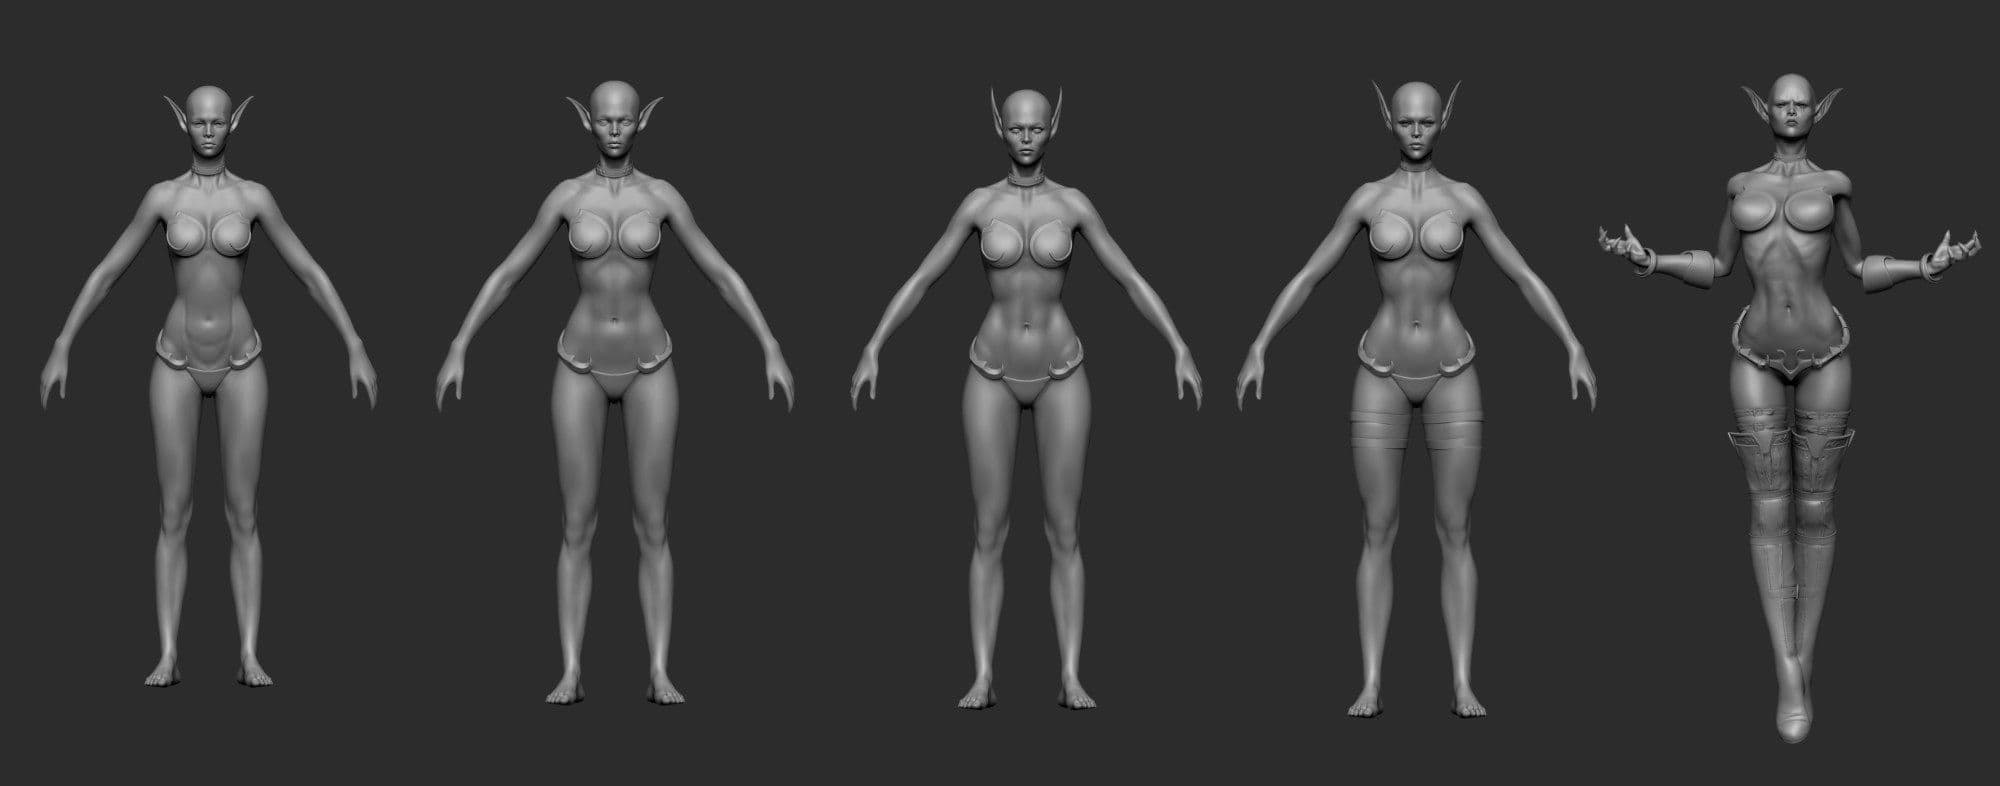
The Model was created in ZBrush 2019. Starting from the preset female ZBrush Model, I began to alter the proportions and rough shapes until I achieved the result shown below. I then began to refine the anatomy which was a longer process and can require multiple iterations, especially when you are just getting familiar with the subtile shapes and volumes of the female body. 3D scans, as you can find them on 3dscanstore and anatomy360 amongst others, can be used as a great reference and provide a lot of valuable information.
Also, it is important to keep in mind that adjustments have to be made after the model was posed. Bending and stretching of certain areas as well as the activation and relaxation of different muscle groups can make a significant difference.
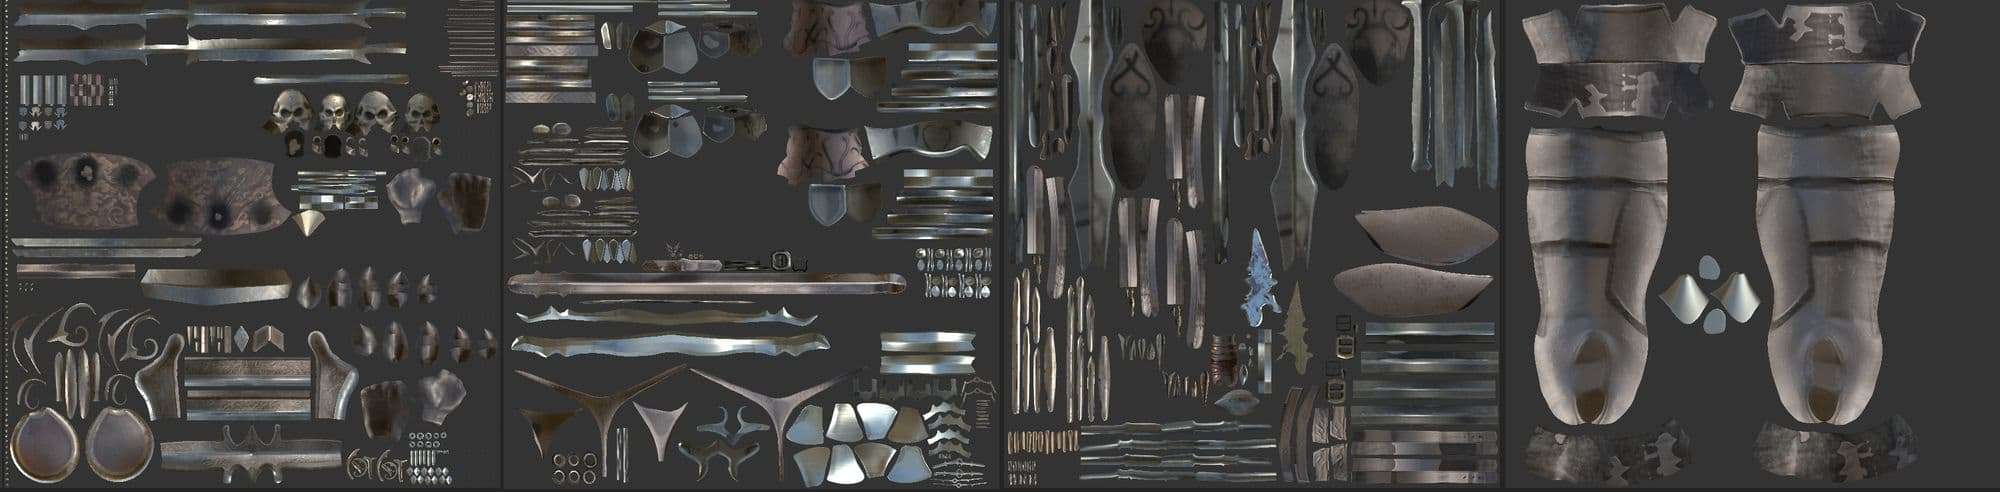
Armor Creation
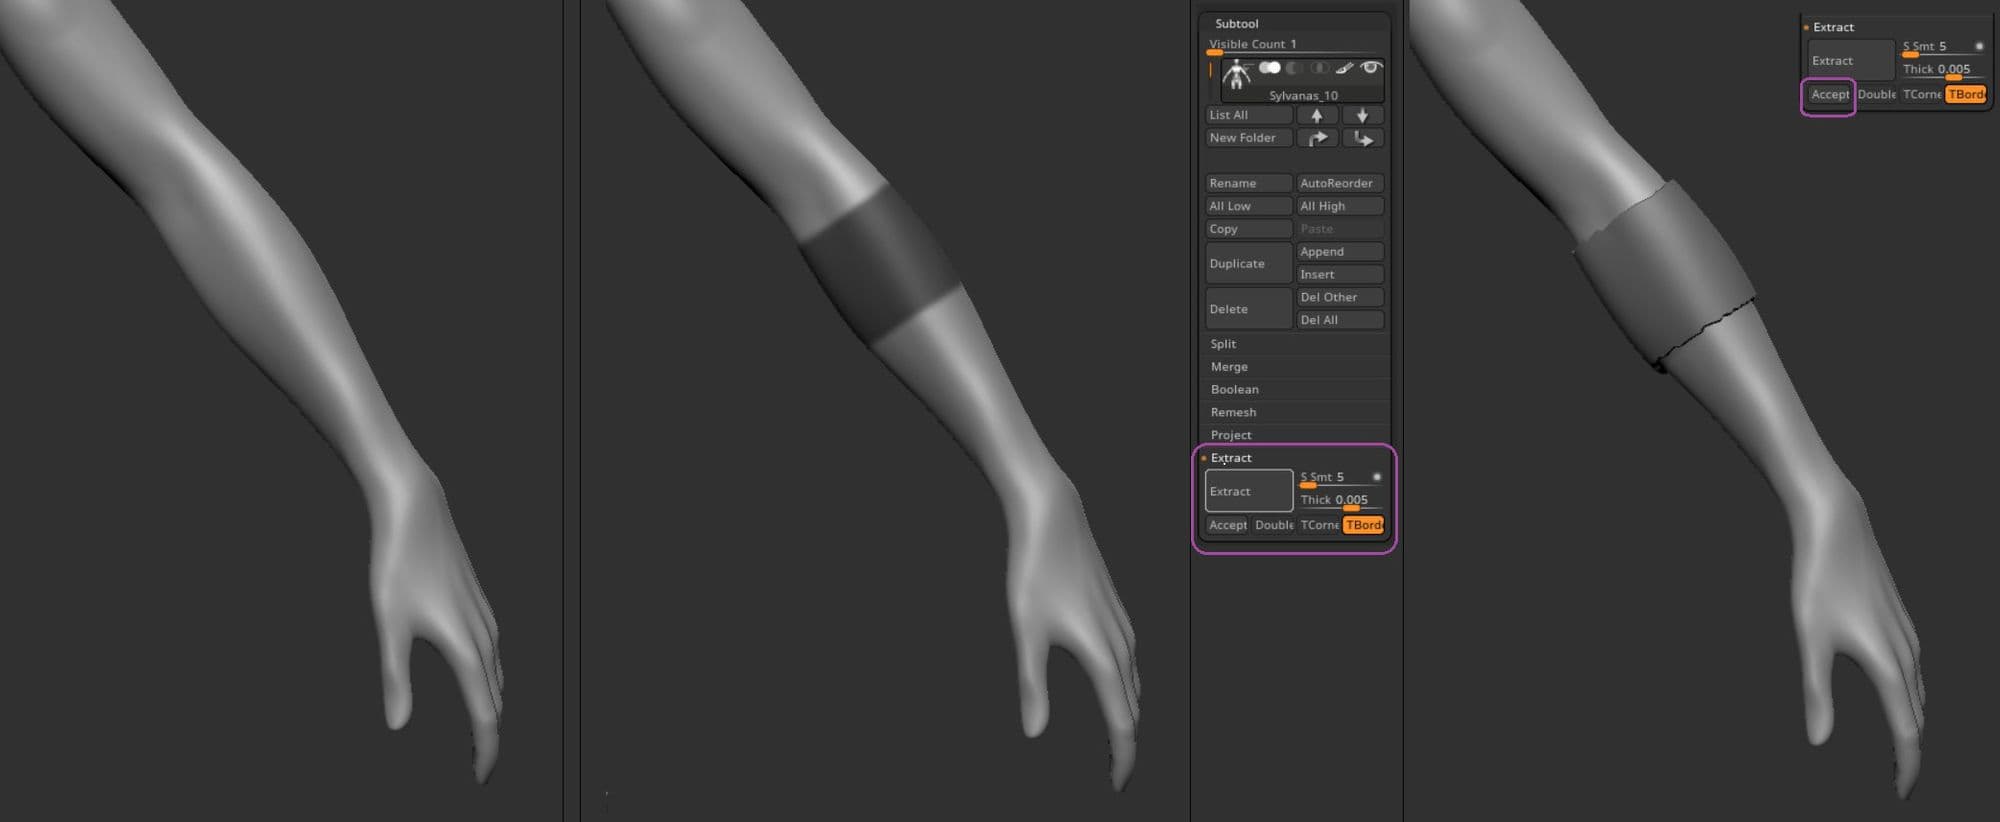
Once I was relatively happy with the figure, I began to block out individual armor parts. Since many of Sylvanas’ characteristic armor pieces are quite close-fitting, I primarily created them by masking and extracting areas as shown below.
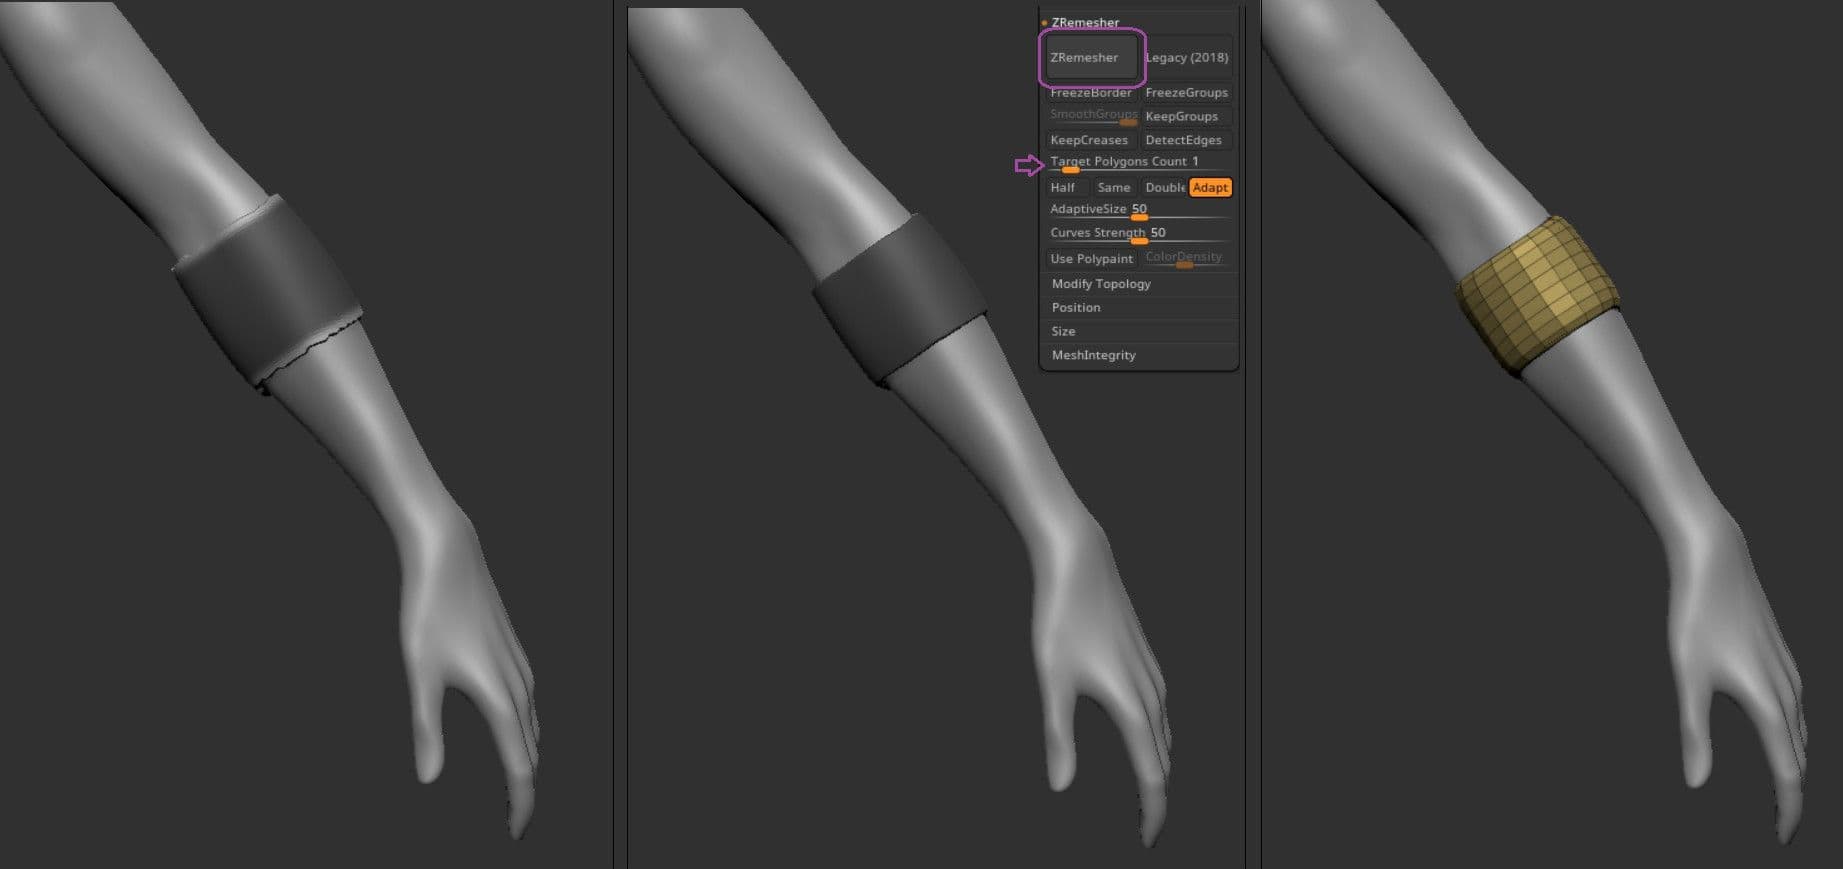
After smoothing the borders of the extract you can play around with the ZRemesher settings to achieve the desired result.
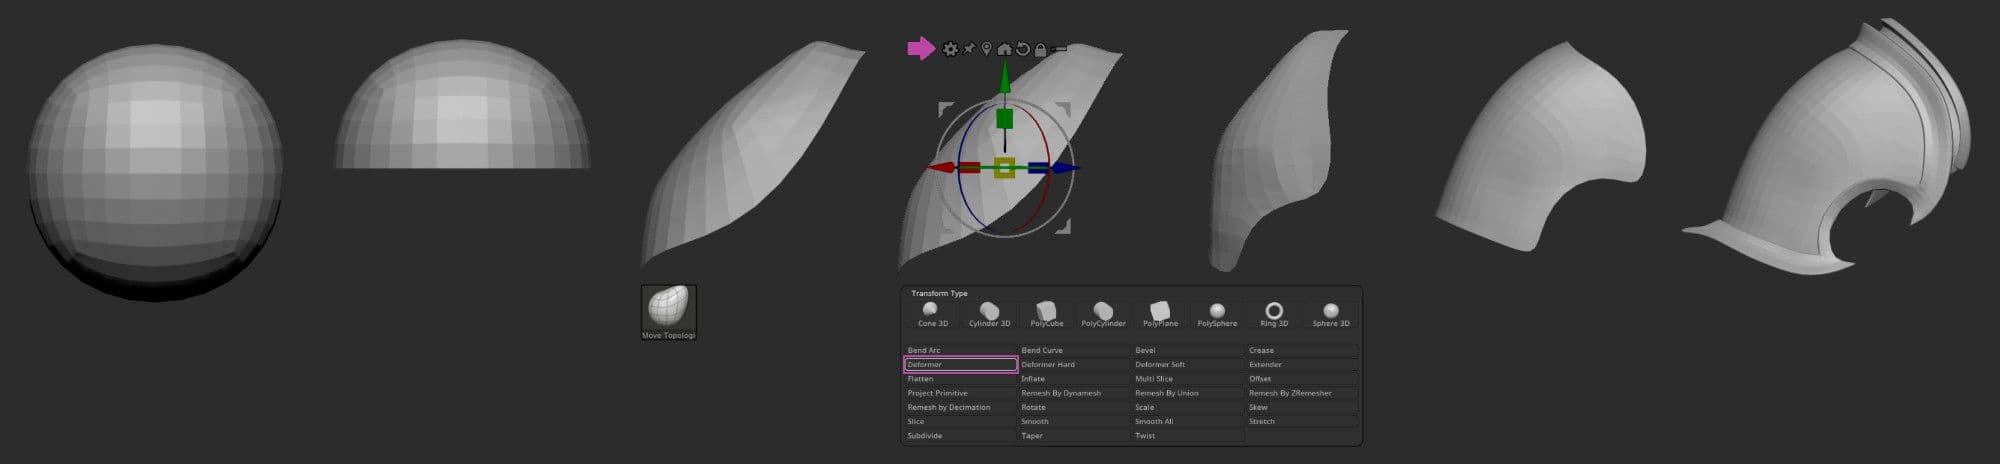
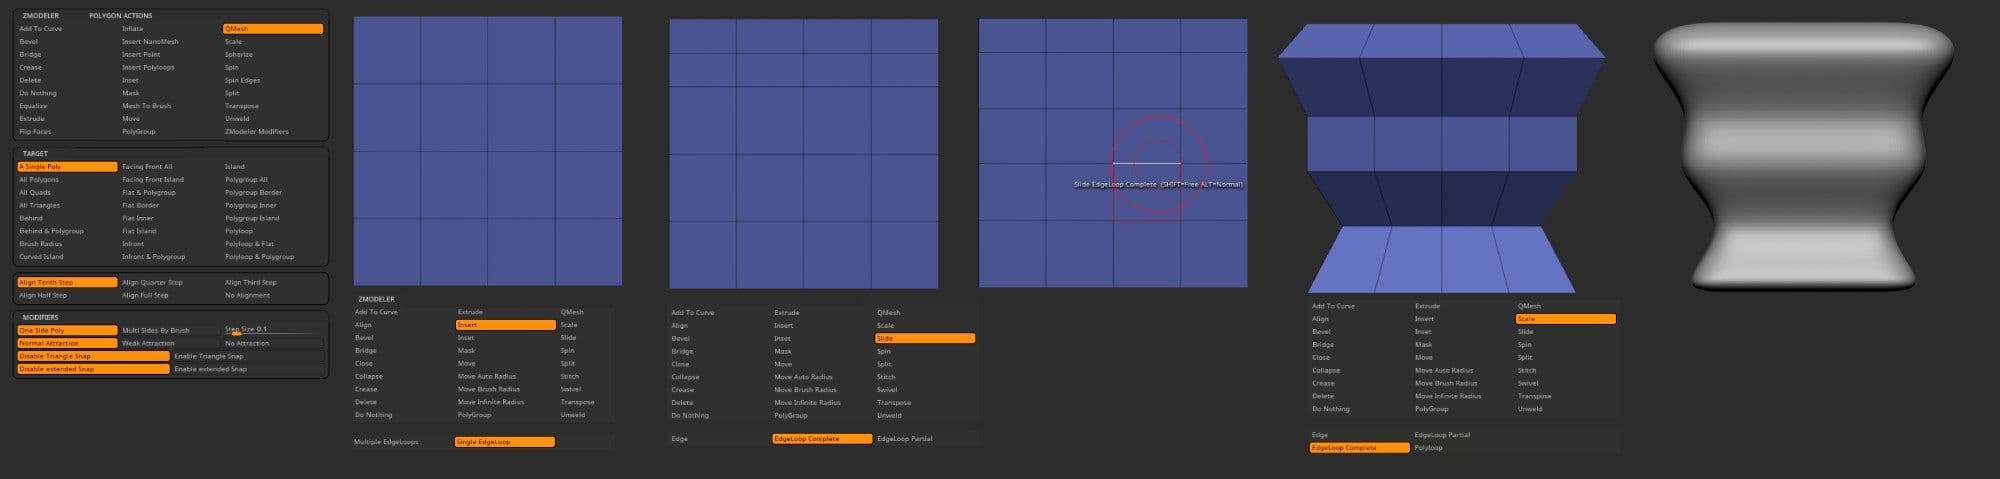
Other pieces which are not directly adjacent to the skin, like the shoulder pats, were created from simple geometric shapes and altered with the Move Topological brush. The deformers, accessible via the little gear over the gizmo, and the ZModeler Brush are also great tools to fit the desired shape.
The ZModeler certainly is one of the strongest tools in ZBrush to me when it comes to hard-surface modeling, as it allows for quick, easy and clean solutions while assuring a decent topology from the start.
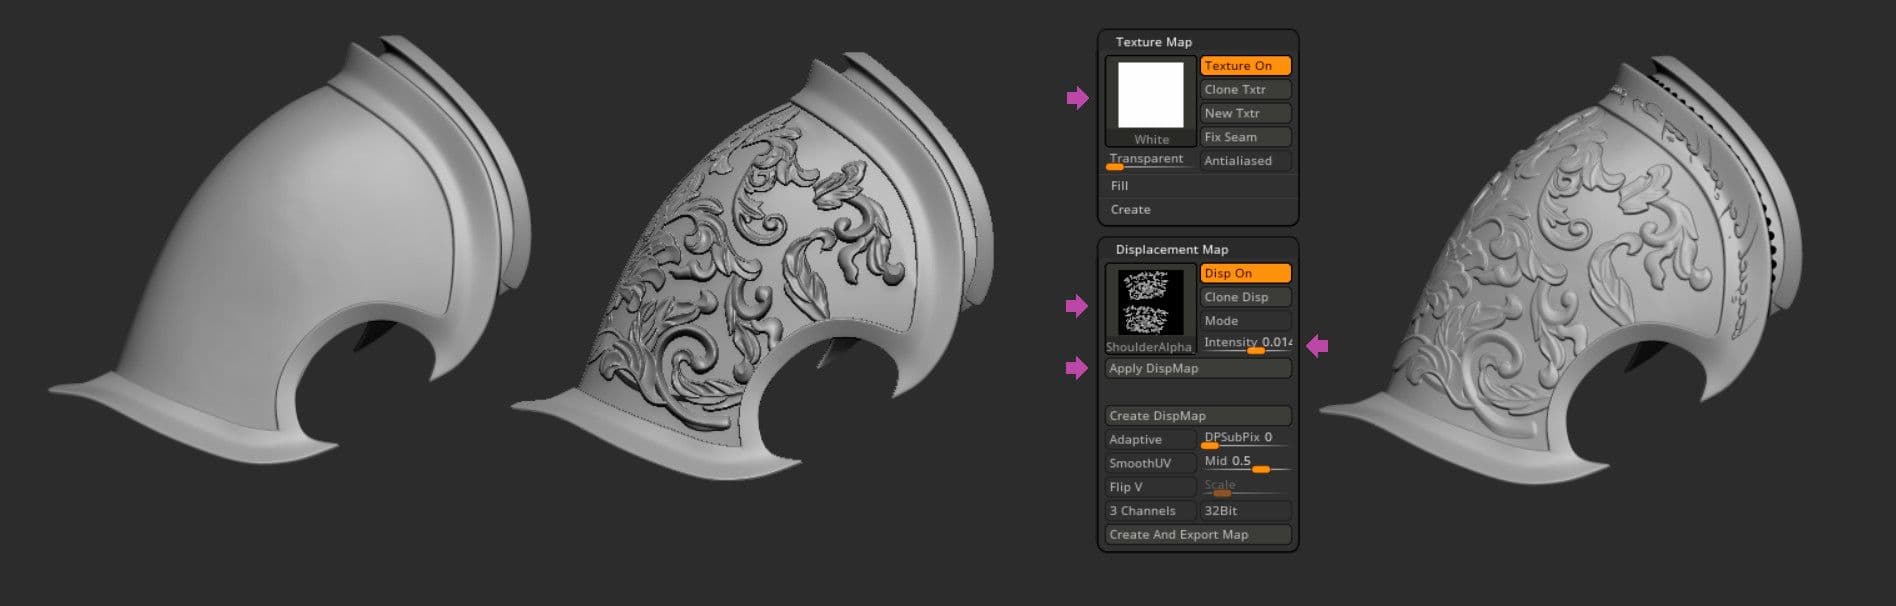
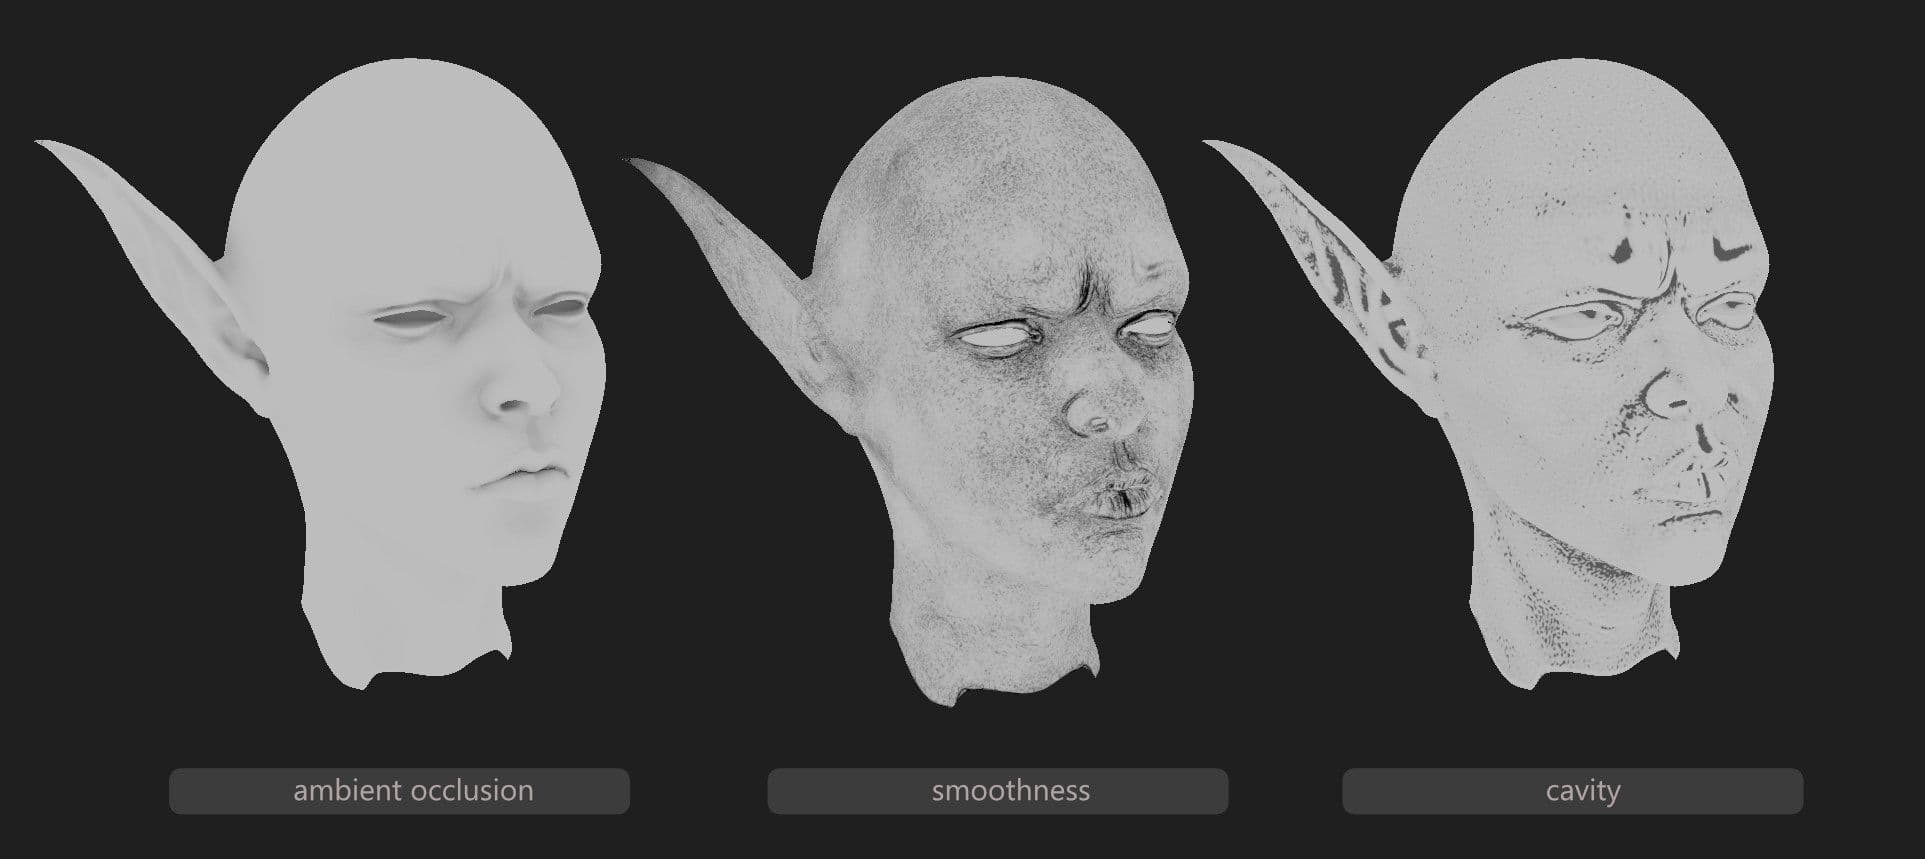
One of many ways of applying detail to the mesh inside ZBrush is via displacement maps. For this to work properly, your geometry should have UVs and enough subdivision levels. A white square map needs to be plugged into the texture slot and a displacement texture has to be plugged into the displacement slot. Use the intensity slider to adjust the amount and press “apply displacement”.
Texturing
As this was just a personal project which was not going to be animated, I declared the topolgy as decent enough for my purposes. Parts of the armor were created from simple geometric shapes with sufficient topolgy, and altered with the ZModeler which provides a lot of freedom and the possibility to achieve the desired edgeflow from scratch. Other parts, such as the face and the body, were ZRemeshed in conjunction with the ZRemesherGuideBrush, which helps to preserve the desired loops relatively well. That being said, the topology definitely could have been improved for production purposes.
Once this was set, it was time to think about the UVs. I used 6 UDIMs in total and 1 UDIM for face and body each, as I wanted enough resolution for the pore detail to show in closeup shots.
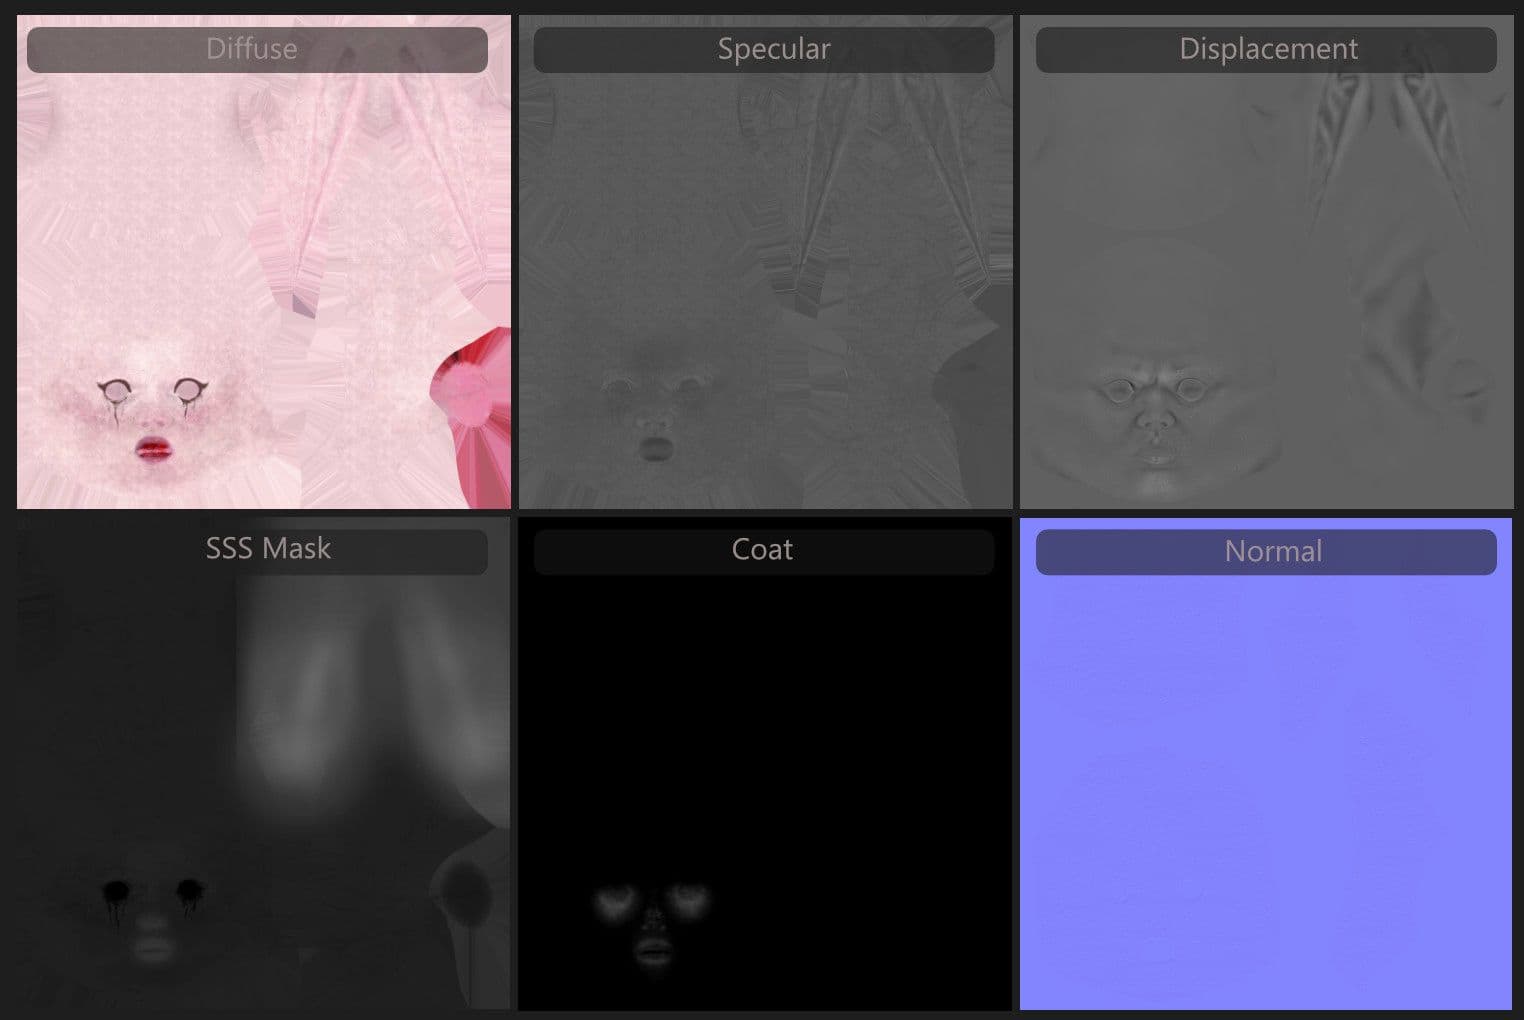
The textures for this project were created in Substance Painter. For the face texture, I projected an albedo base color from Texturing XYZ and then gradually started to build up more red-ish, yellow and blue-ish tones according to the color zones of the face. I also used utility maps I exported from ZBrush to add more breakup and detail in certain regions. Lastly, I added some subtle details like veins and freckles, as well as the makeup.
Some of the utility maps that I used during the texturing process
Final Renders of Face and Armor
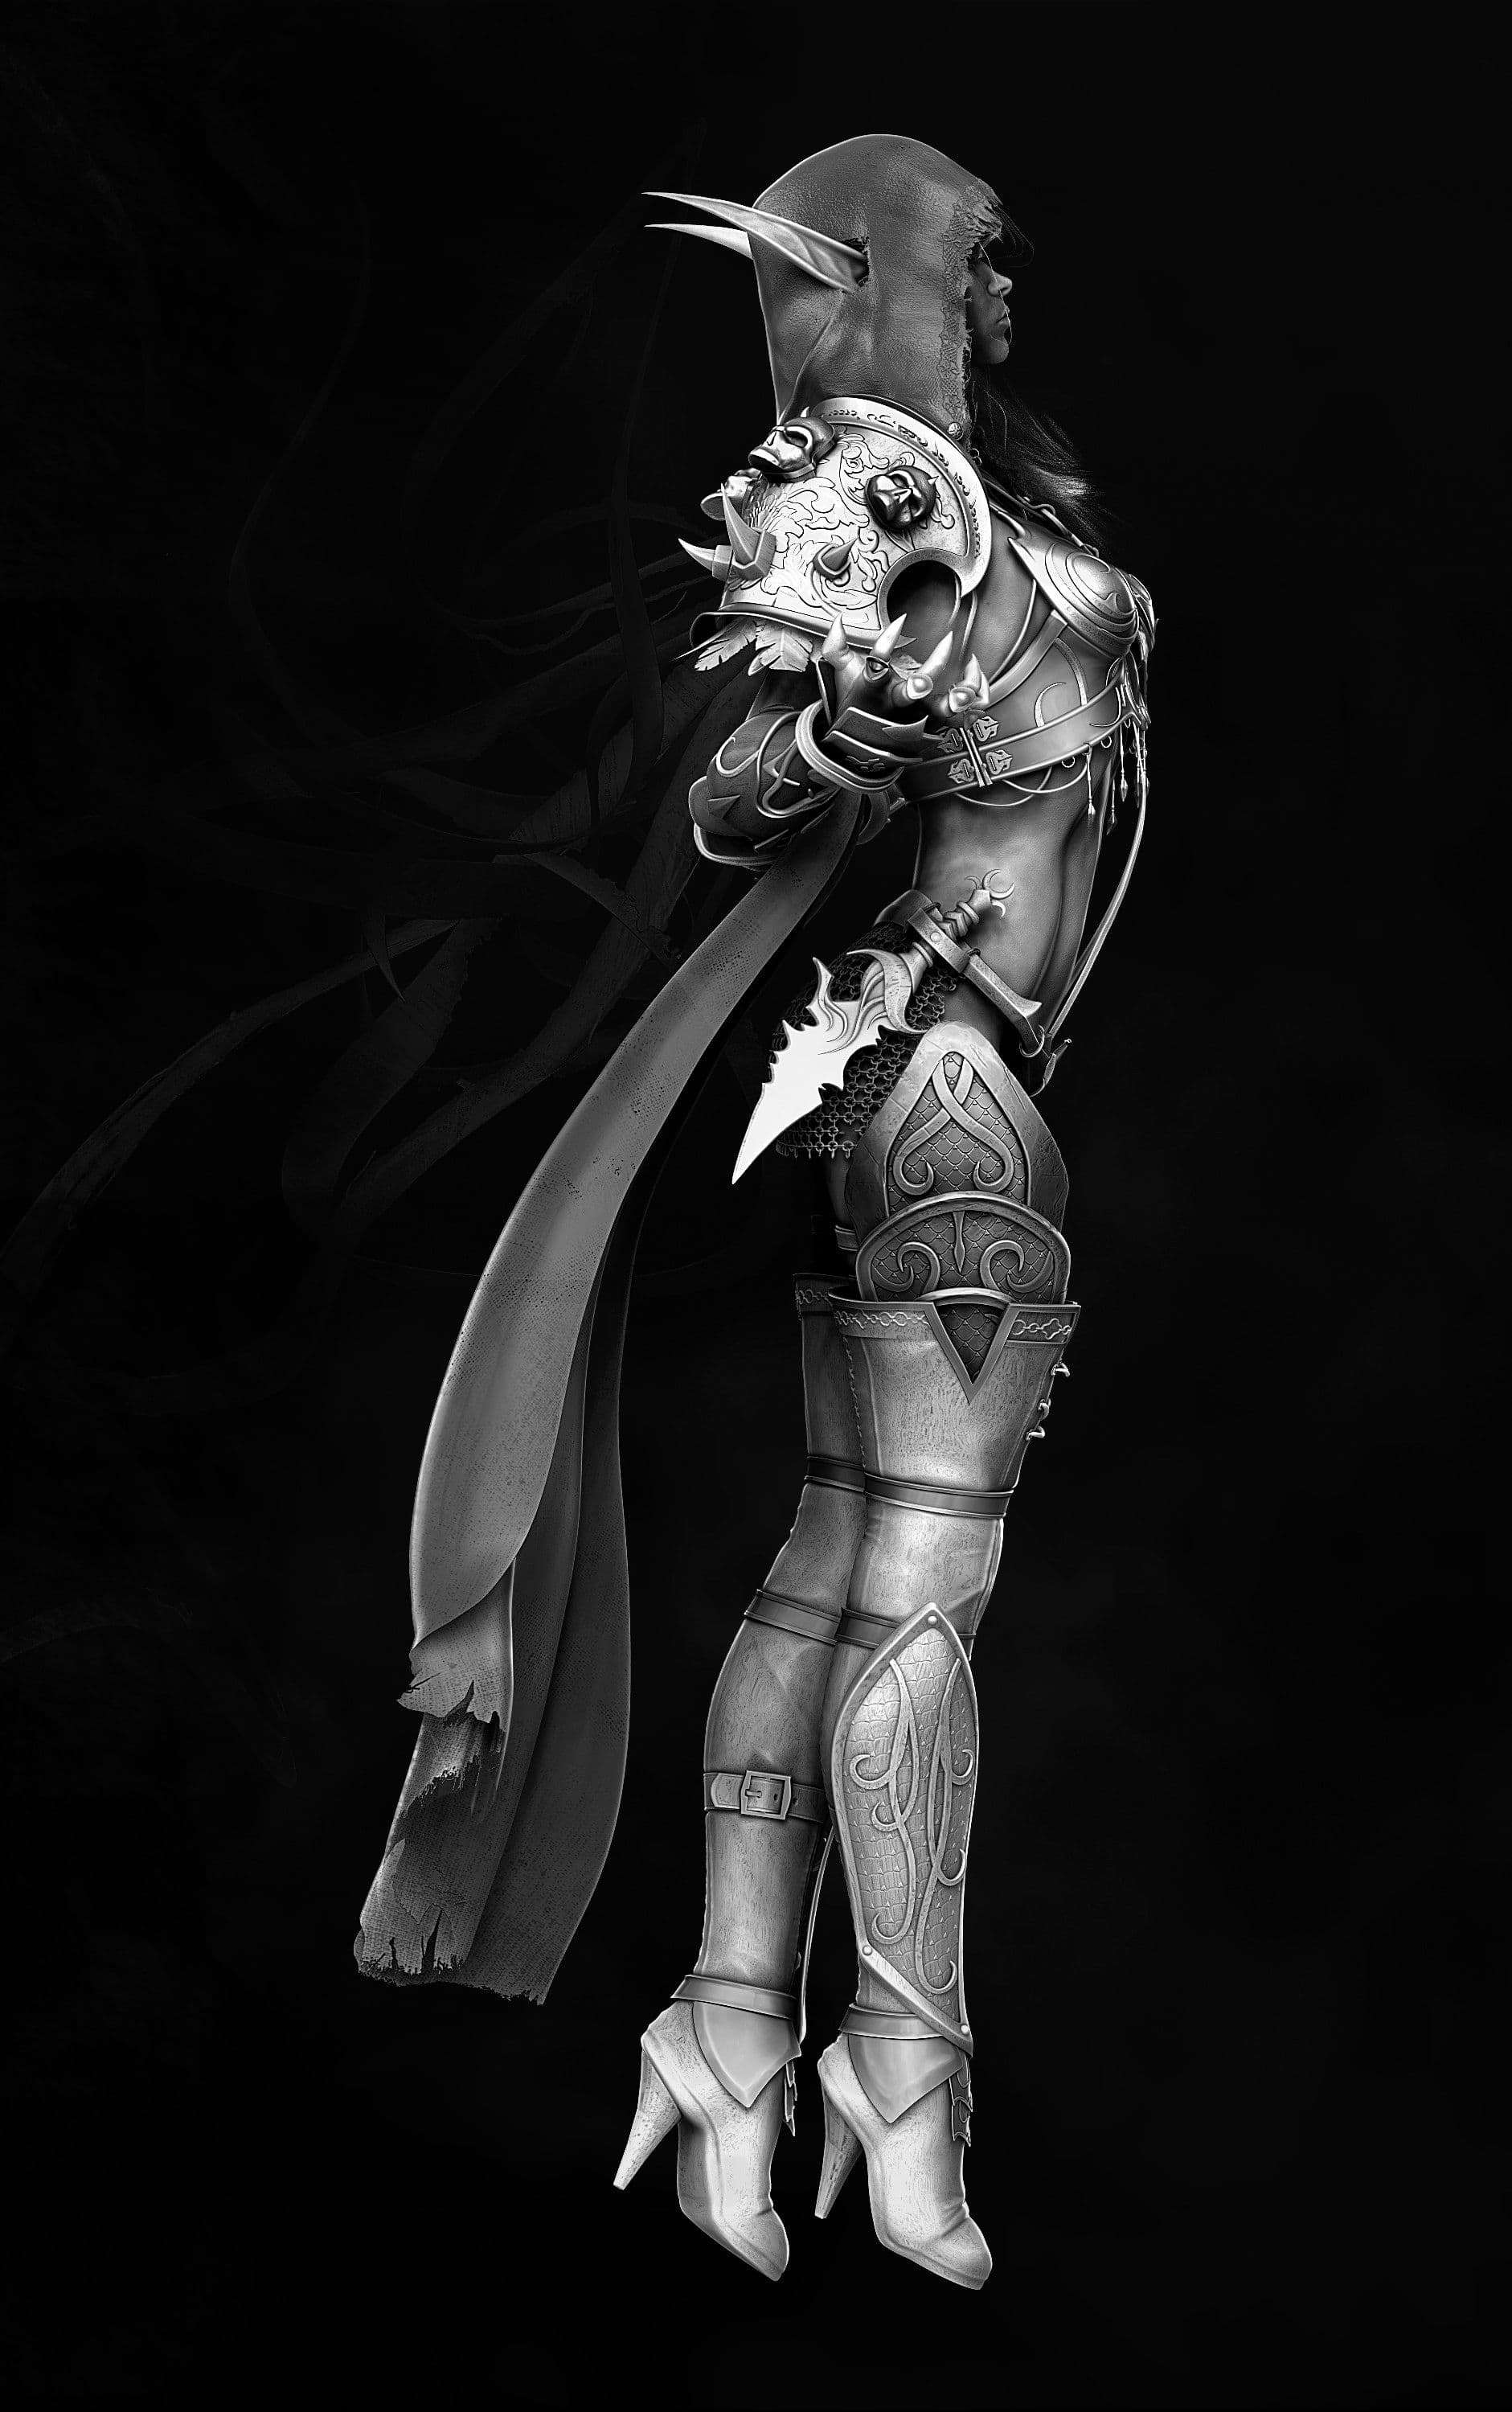
Posing
The pose of the Character can drastically change the effect is has on the observer. It can make all the difference between a decent and a great first impression and help to illustrate the backstory, underline a personality trait or simply create overall atmosphere and tension. Therefore it definitely makes sense to delve into design elements such as Contrapposto and to consider which message or feeling is supposed to be transported with the piece.
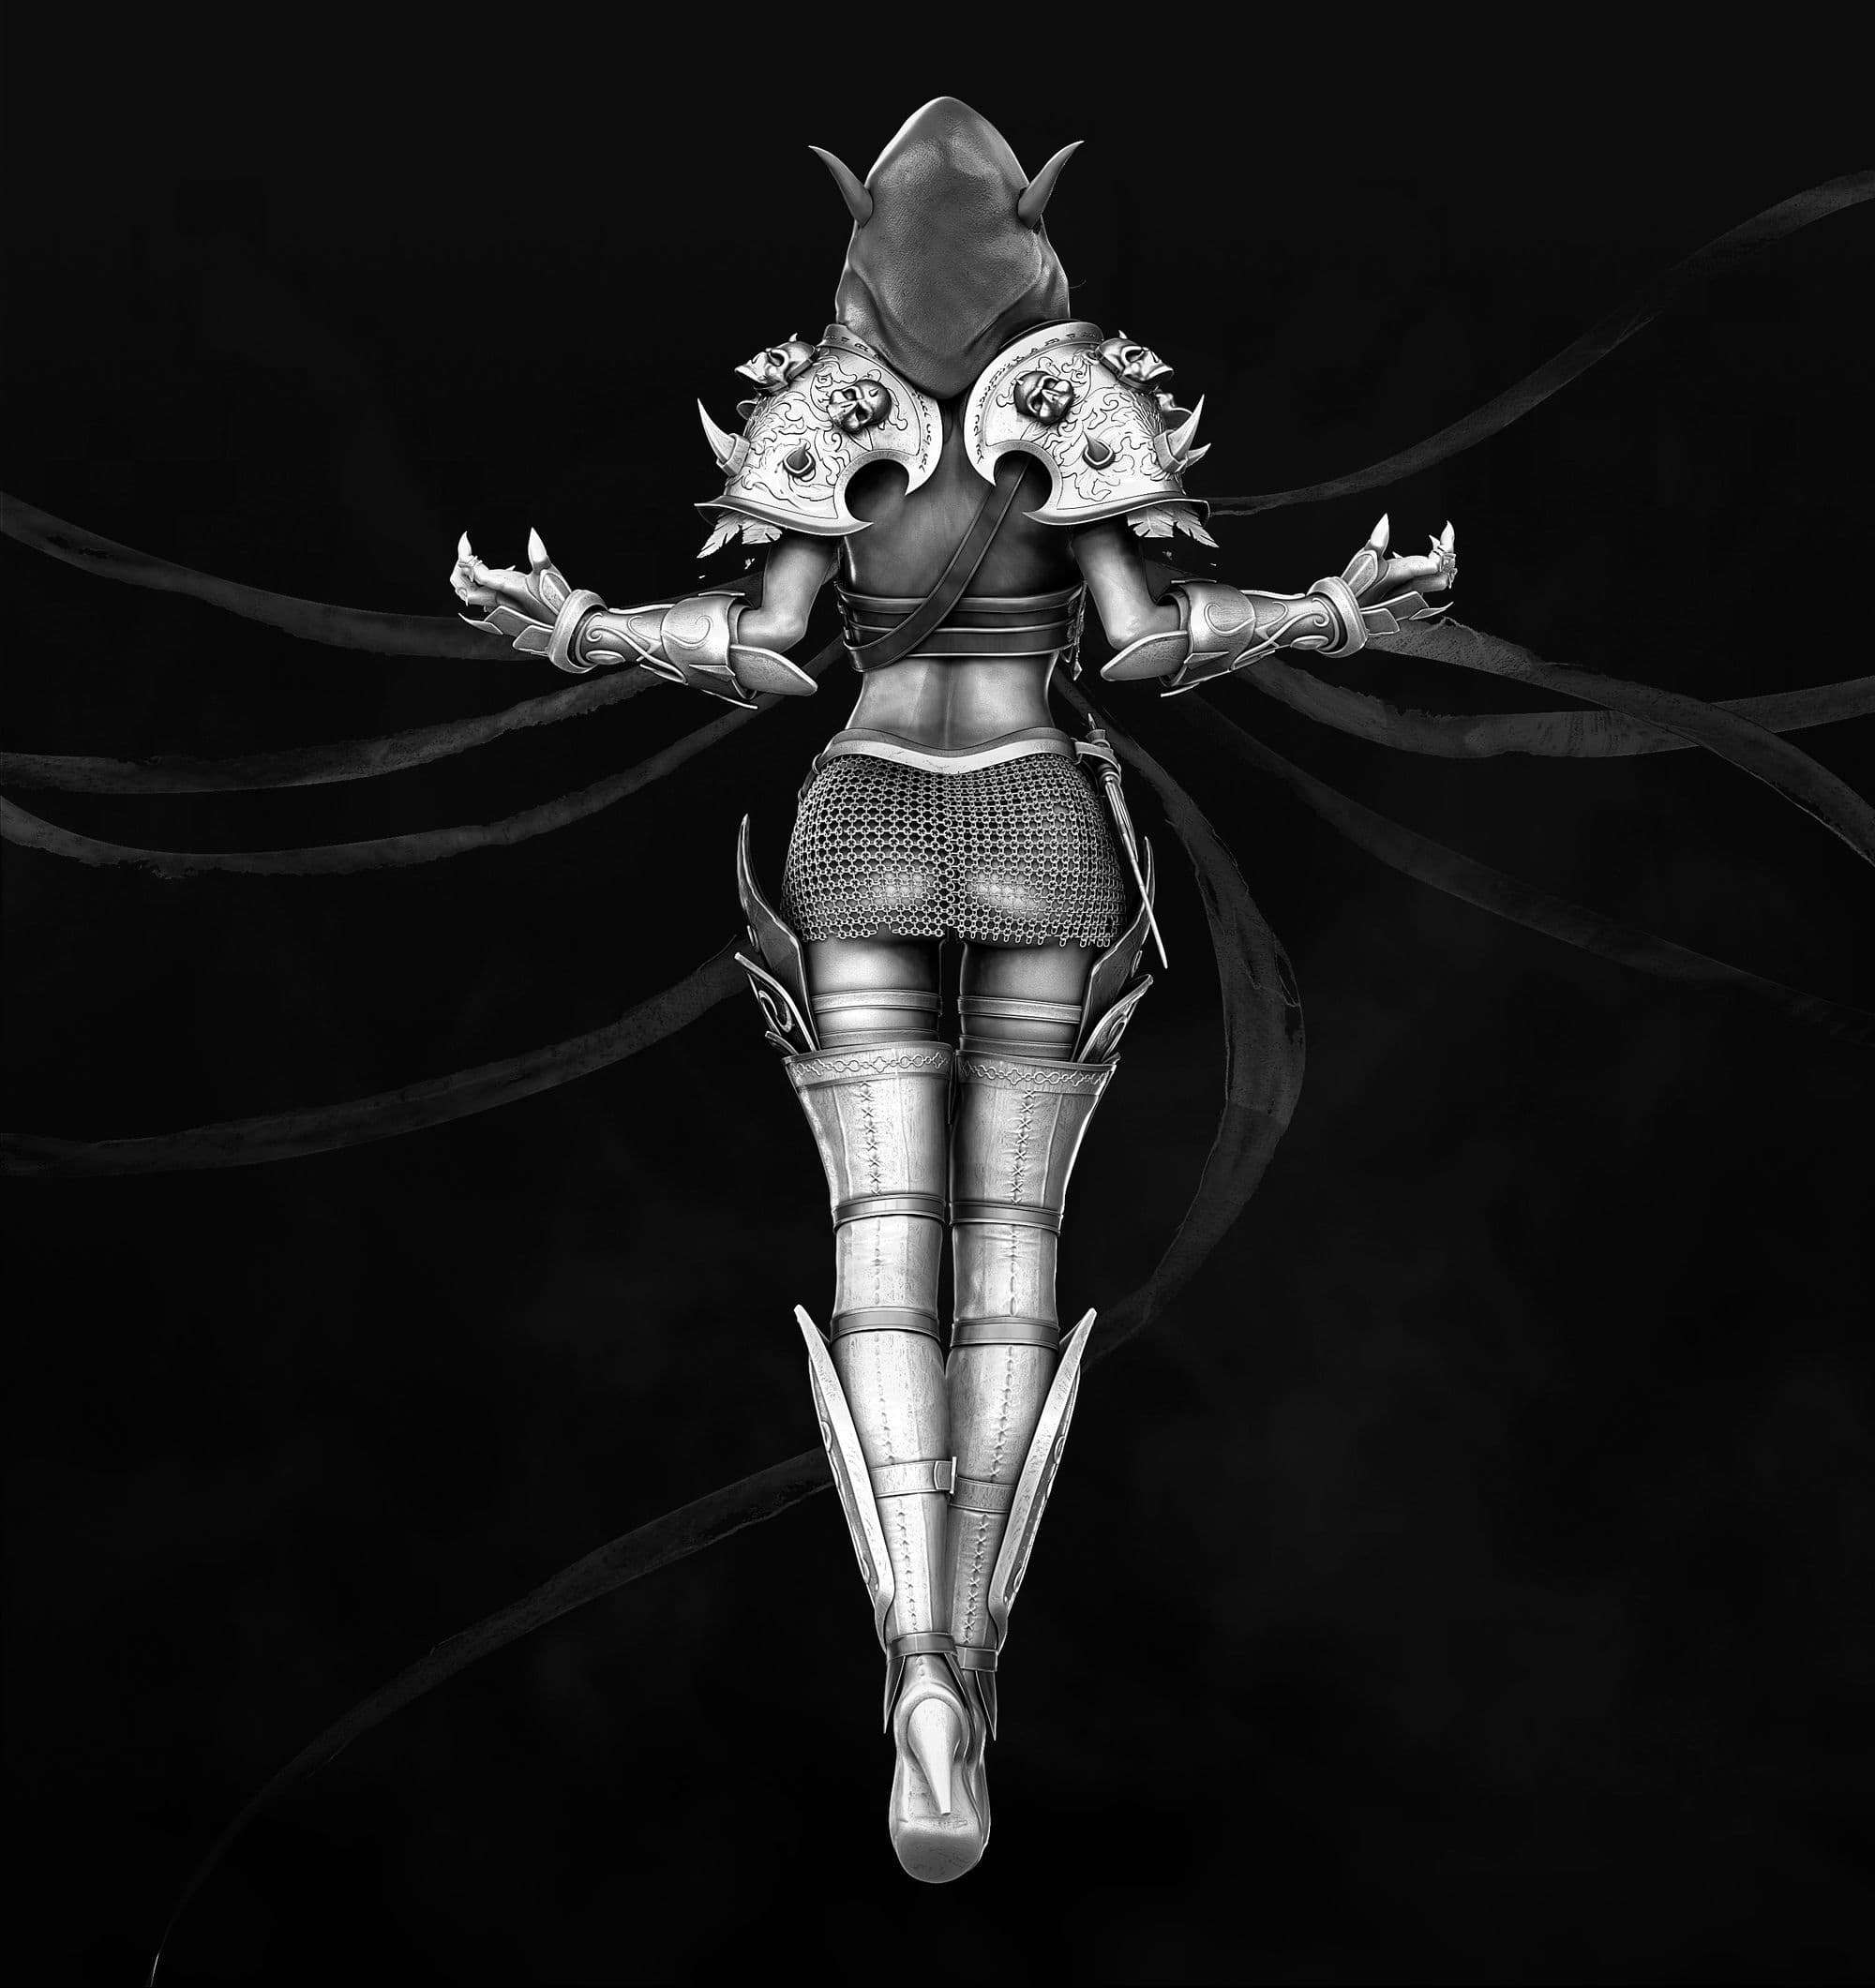
There are quite a few different approaches when it comes to posing the sculpt, which all have their pros and cons. While you could start blocking out your Character in pose from the get-go or rig it in the end, I decided to model mine in A-Pose and then pose it with ZBrush’s transpose master. This way, I was able to work in symmetry for the most part, but could also pose it without having to rig it.
By pressing the “TPoseMesh” button, ZBrush will automatically bring every subtool to its lowest subdivision level and merge all subtools into one. This way, you will be able to easily mask and rotate sections into place. When the posing is done, hitting the “TPose|SubT” button will apply all the changes to the higher subdivision levels. This process can take its time and I would recommend to save your subtool before starting the action - you never know!
While this function is a very useful tool, it certainly has its limitations. Possible minor fixes and adjustments should be taken into account.
Smoke
I got really inspired by the way Sylvanas’ infamous “Banshee screech” was depicted in one of Blizzard’s Cinematics. I appreciate how the visualisation illustrates her unquestionable strength and liked the idea of implementing some of it into my project.
After some research I stumbled across a great tutorial on Aero/Bifrost particles which helped me to achieve a certainly more subtle but interesting effect.
I started by creating curves resembling the shape of the magical artifacts in the cinematic. I then created simple spheres and attached them to the motion path, so they would wander along the curves.
Next, I selected all of the spheres and created an Aero on top of them. I lowered the Master Voxel Size for more density and played around with the settings until I achieved a satisfying result.