Tlaloc: Age of Pantheons - Sculpting, Texturing and Presenting a Character for Games
Kaloyan is a self-taught 3D character artist with only 2 years experience. He has a passion for traditional art, but 3D is where he really wants to solidify his skills. Kaloyan ahs provided a great breakdown of Tlaloc to help other artists on the same journey create incredible characters for games.
Kaloyan is a self-taught 3D character artist with only 2 years experience. He has a passion for traditional art, but 3D is where he really wants to solidify his skills. Kaloyan ahs provided a great breakdown of Tlaloc to help other artists on the same journey create incredible characters for games.
As much as I’m proud of my recent project, I have a mere 2 years of experience in 3D. Forums and discords are the closest to somewhat of a “production” knowledge. Anyone from beginner to experienced uses these platforms to share their artwork. It's a cool way to interact with industry pros and receive feedback. Sounds awesome, only until your head turns red from all the mistakes in your artwork and start over again.
Picking a Concept
When you start dwelling on the Internet for a concept art piece, it is easy to fall into the “overwhelming” trap. There’s no doubt you can find a lot of amazing artwork, but when you're building your portfolio, think as a 3D character artist and try to follow these certain guidelines:
Pick concepts that have very little rendering on them with mostly flat colors. This is important especially when you’re starting with your portfolio.
Spend some time on observing a piece that you liked and visually “dissect” it in primary shapes that you can easily read. Drawing on top of it also helps.
Have an idea what part of your skills you want to present with this piece. Either it could be anatomy, clothing, hard surface, etc.
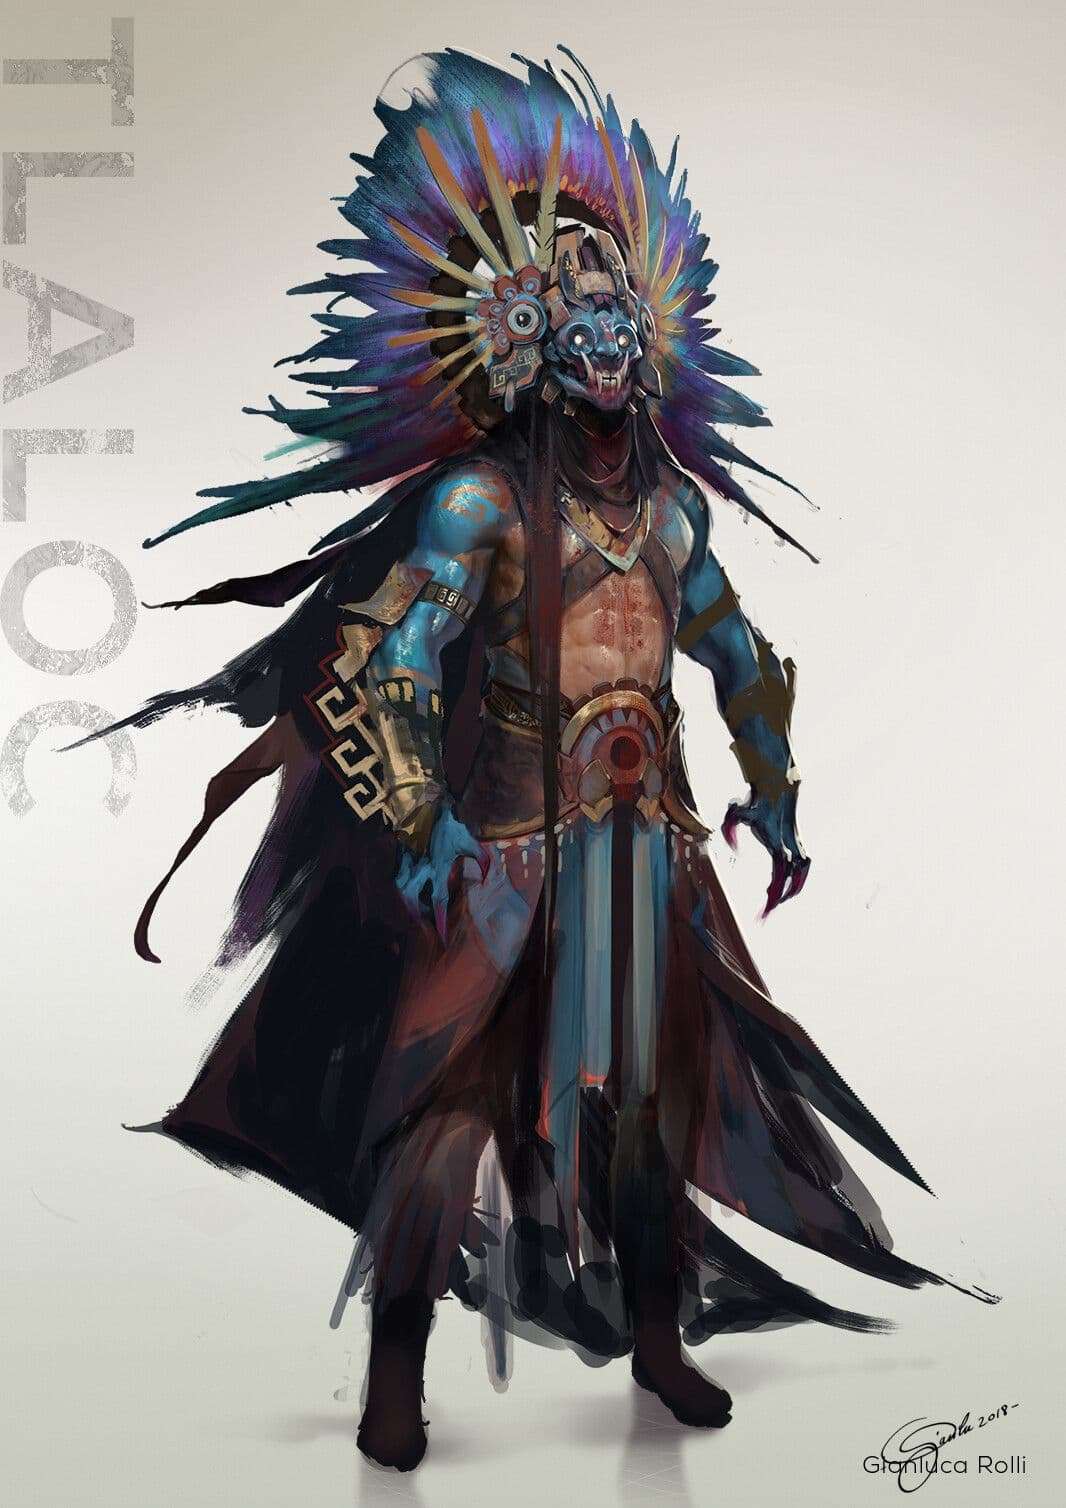
With Tlaloc, the 2D project had 2 designs. My decision was to use the 2nd one as my primary, while getting inspirations from the other as well.
One thing that helped me get the most out of the concept was to actually contact the artist himself. Kindly enough, we exchanged emails and he shared a sketch of his back, which helped me see how the crown is attached to the back (embed to be more precise).
Gathering References
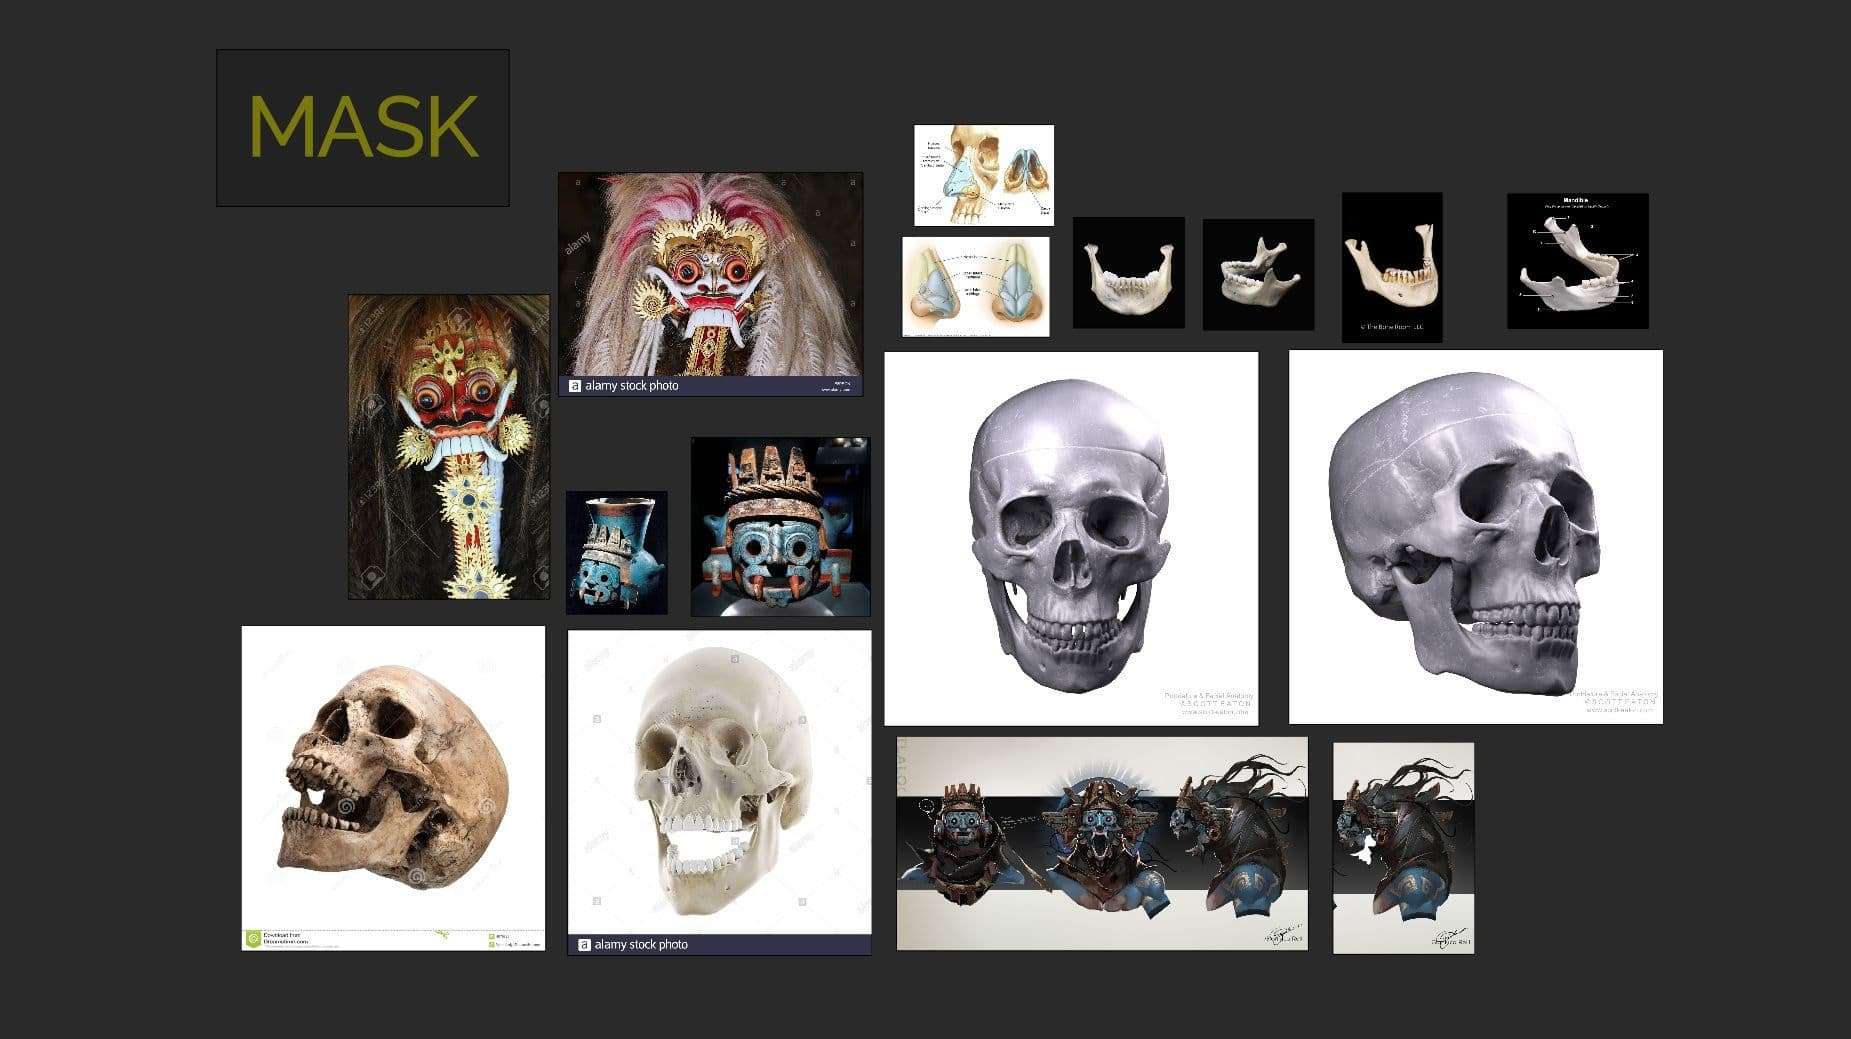
As much as we like to make art intuitively, you should use references at all cost. They serve you as a sanity check to better understand every object on your piece.
Purerefis a life-saving tool when it comes to organizing your references. If you have a second monitor, great! Import the necessary images that you gathered and structure your layout.
A plus is when you have more knowledge on what you want to search for. In this case, I knew my skirt is made out of woven fabric, so I had an easier time to find more references.
Sculpting
The blockout stage is where you should concentrate the most. You don’t want to go any further just to realise your wrinkles and folds look awkward due to a weak foundation. It is much easier to fix details on a solid basemesh rather than a sloppy one.
In some cases, if you haven’t paid enough attention or probably haven’t shown it for a feedback, you’re better off to go way back.
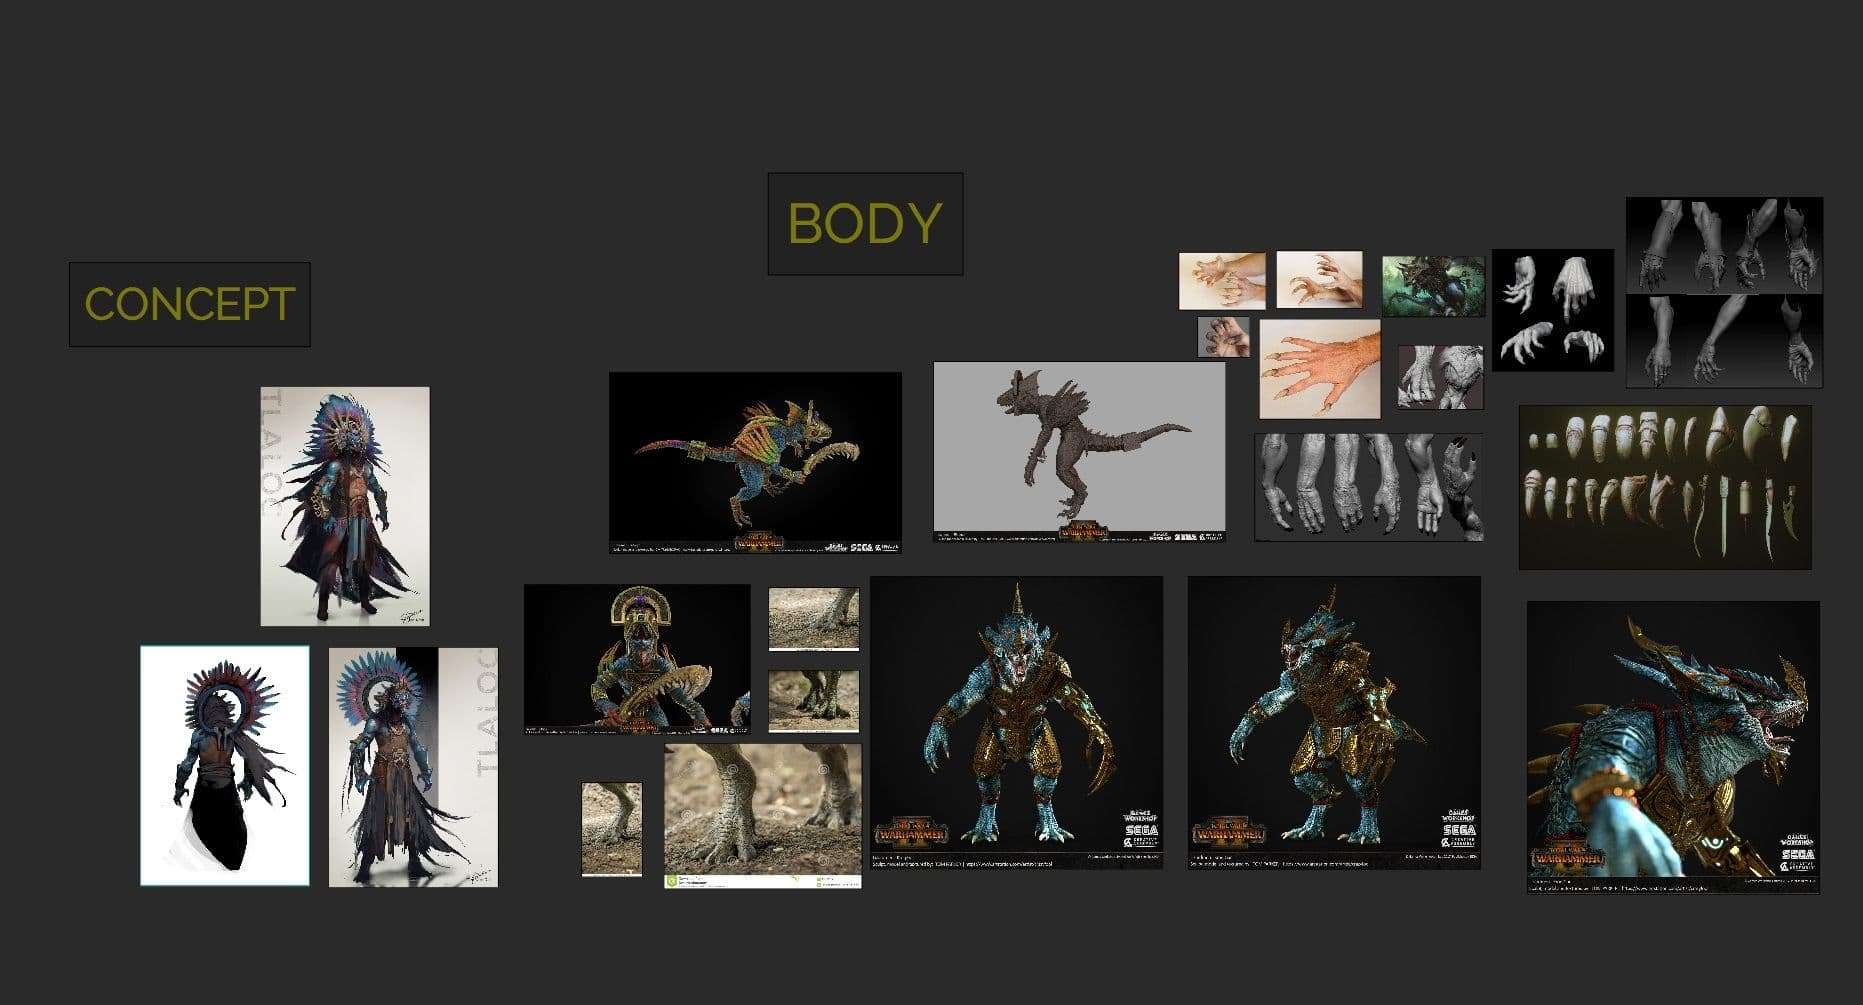
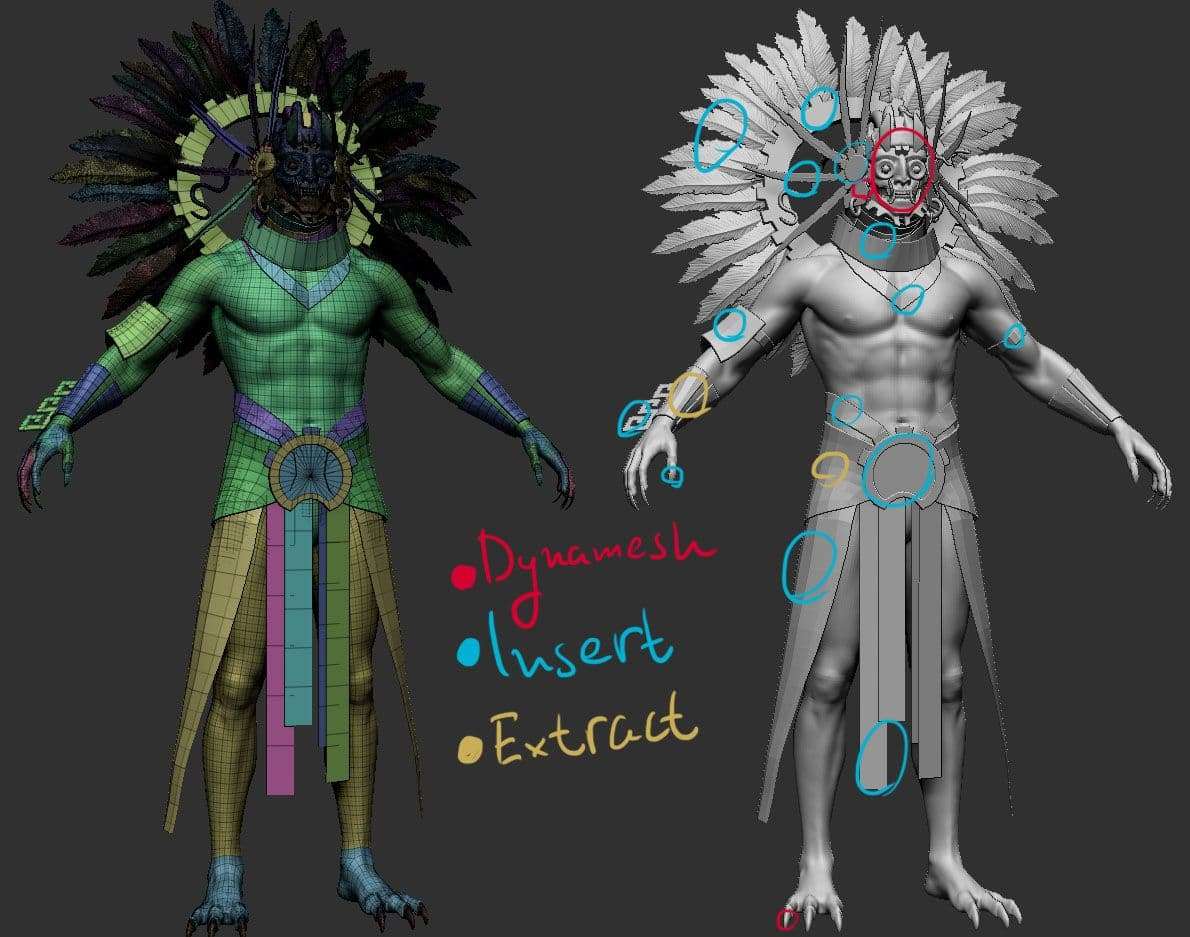
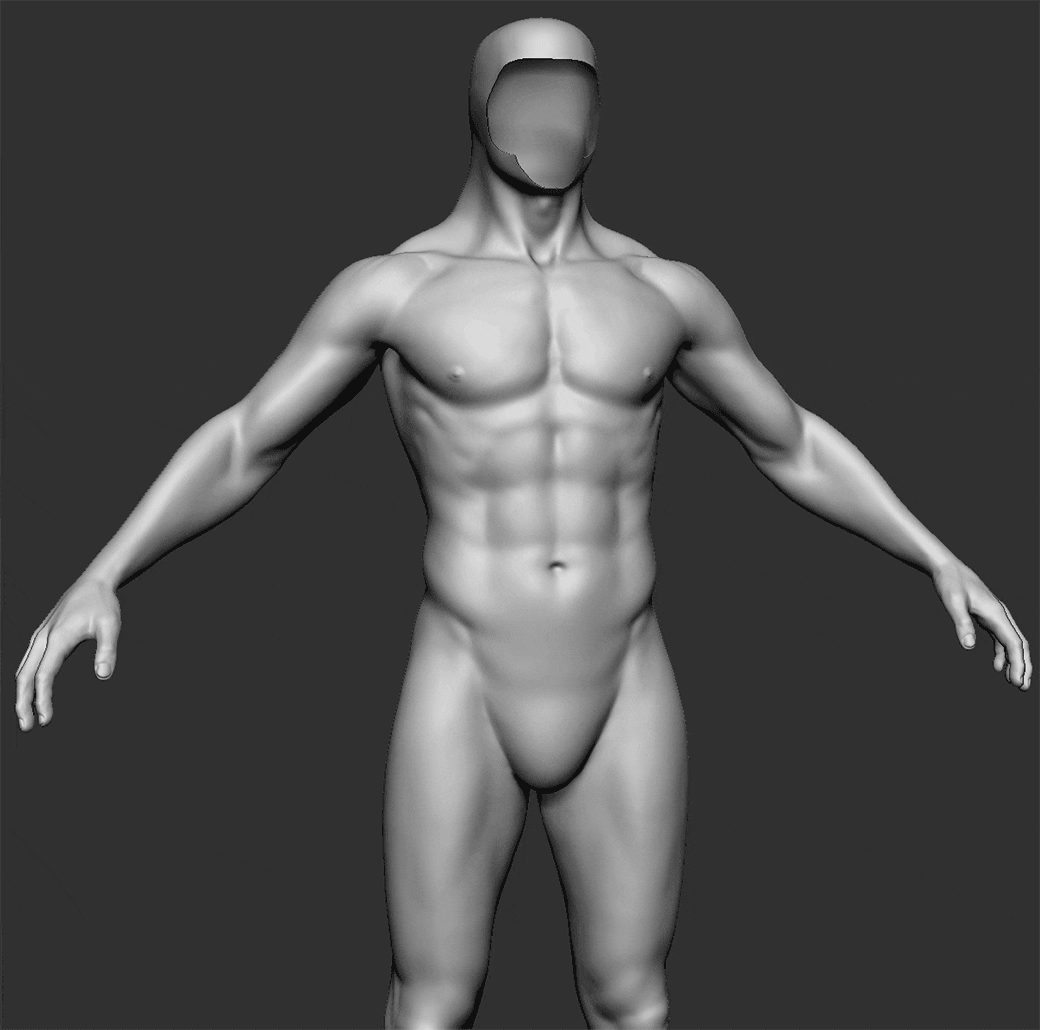
Since I wanted to make a character for production, I used an awesome basemesh by Vincent Ménier. I didn’t worry at all about the proportions of the body, so I had better time spent on the other pieces in ZBrush.
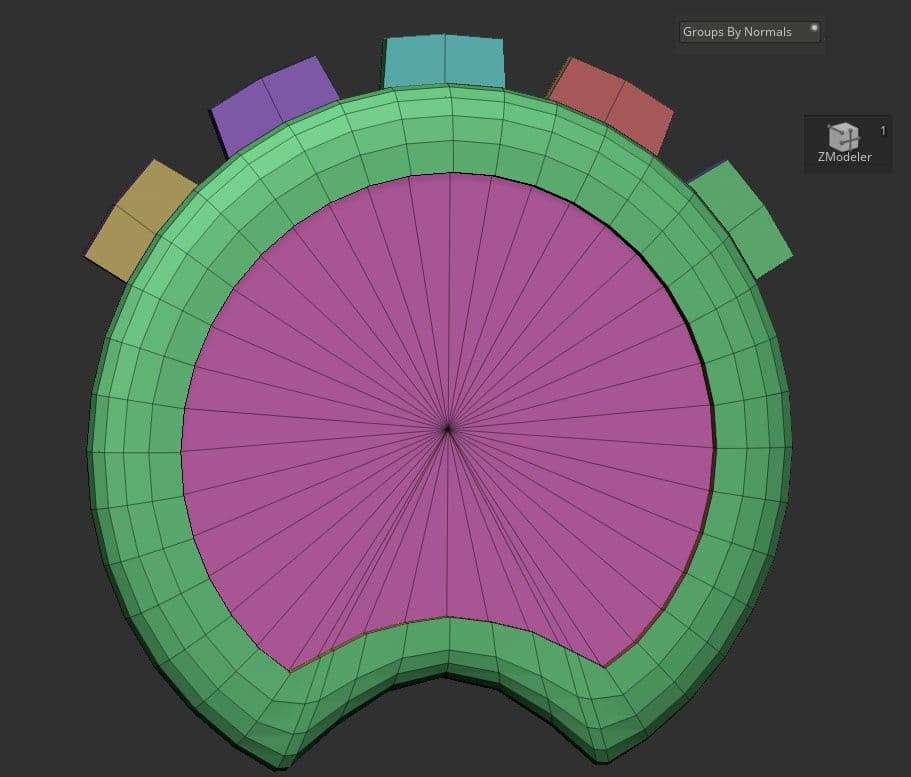
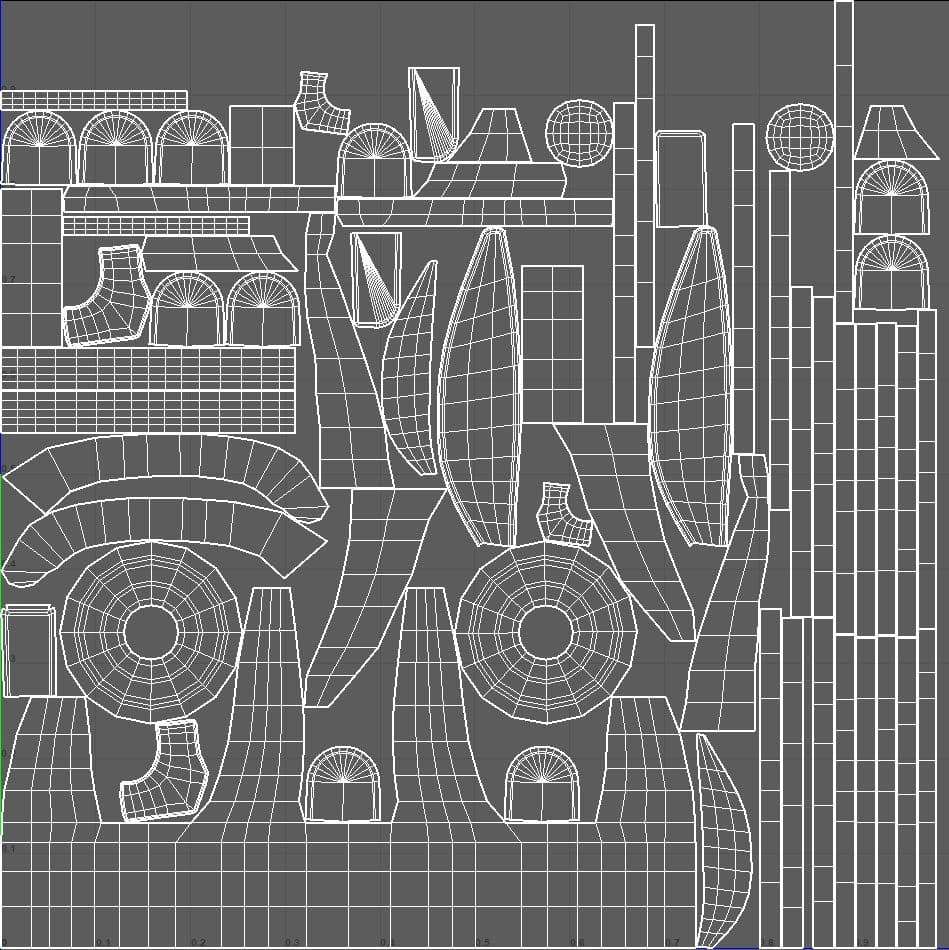
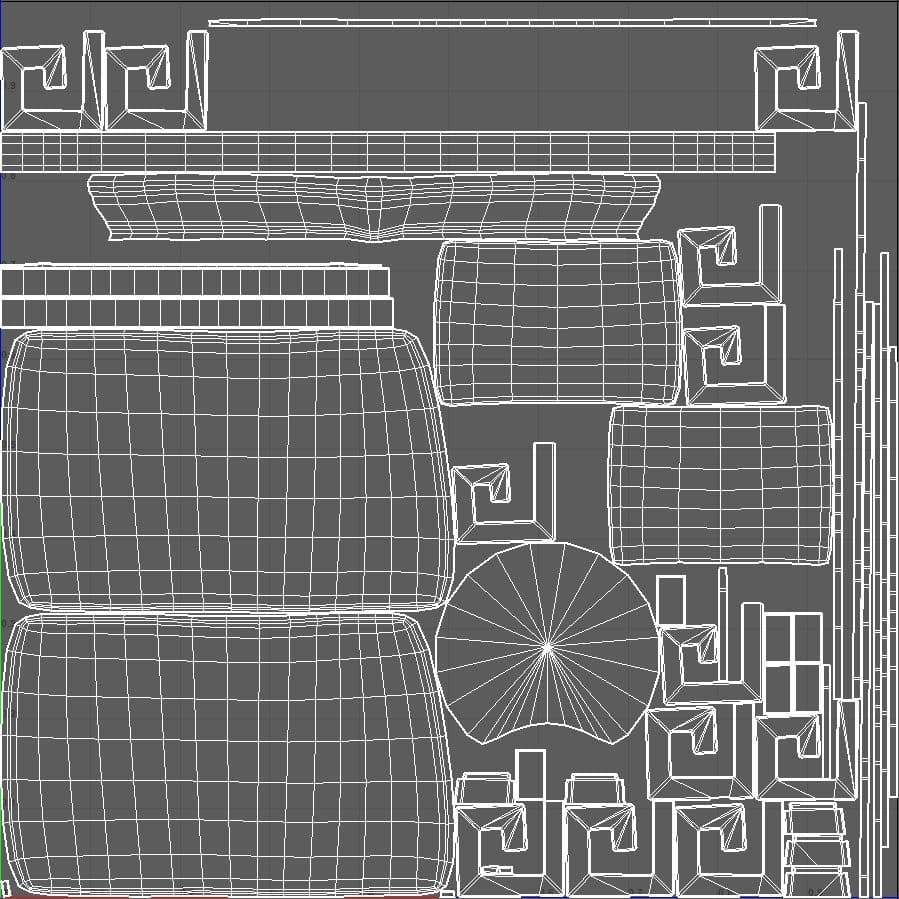
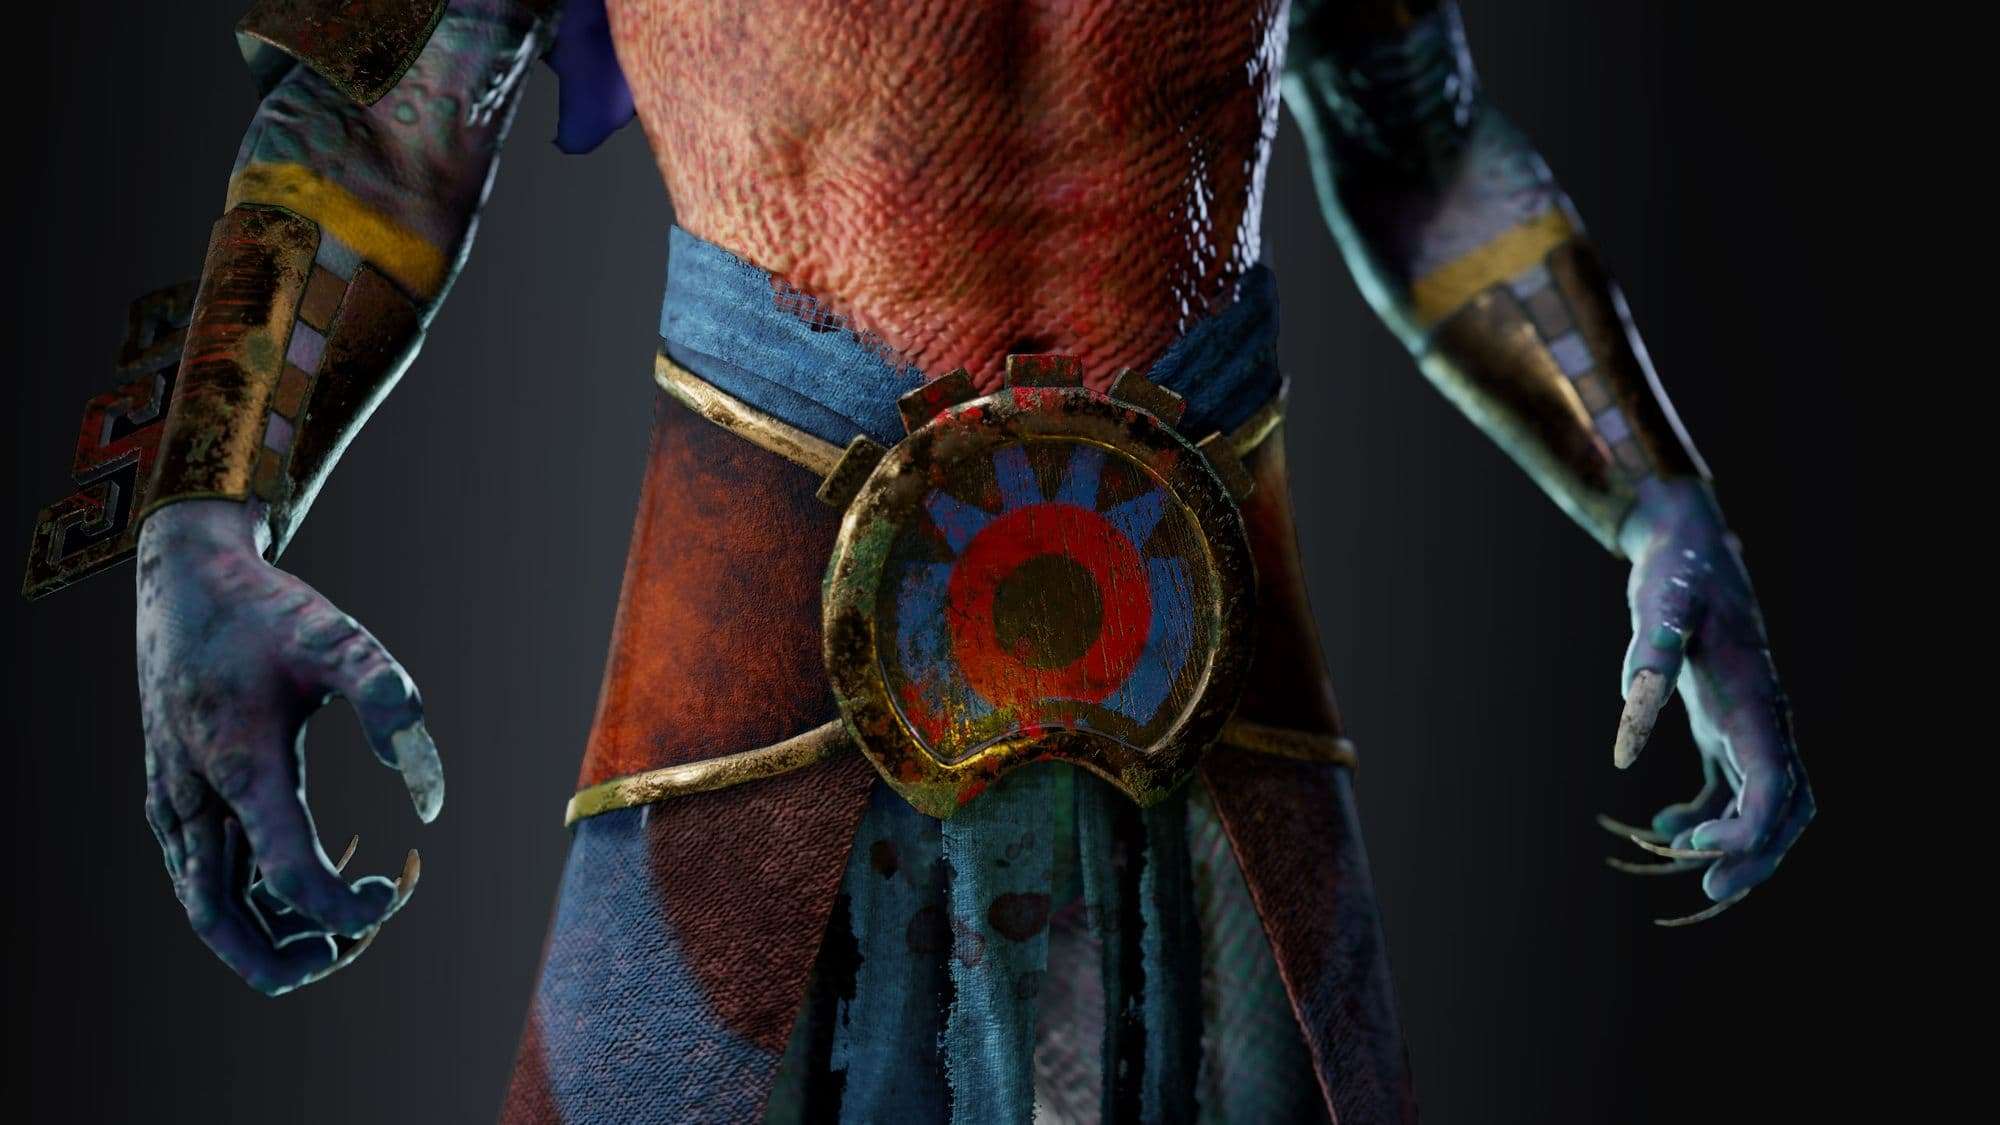
During this phase, my personal preference was to have control over the topology with only a few pieces made by dynamesh. That’s why I used one-sided “Extract” on top of my lowest subdivided basemesh. I also inserted objects with Gizmo3D, setting up the necessary number of loops which would help me use deformations like Bend Arc or Curve. Only the ornament on the waist was modeled in Maya.
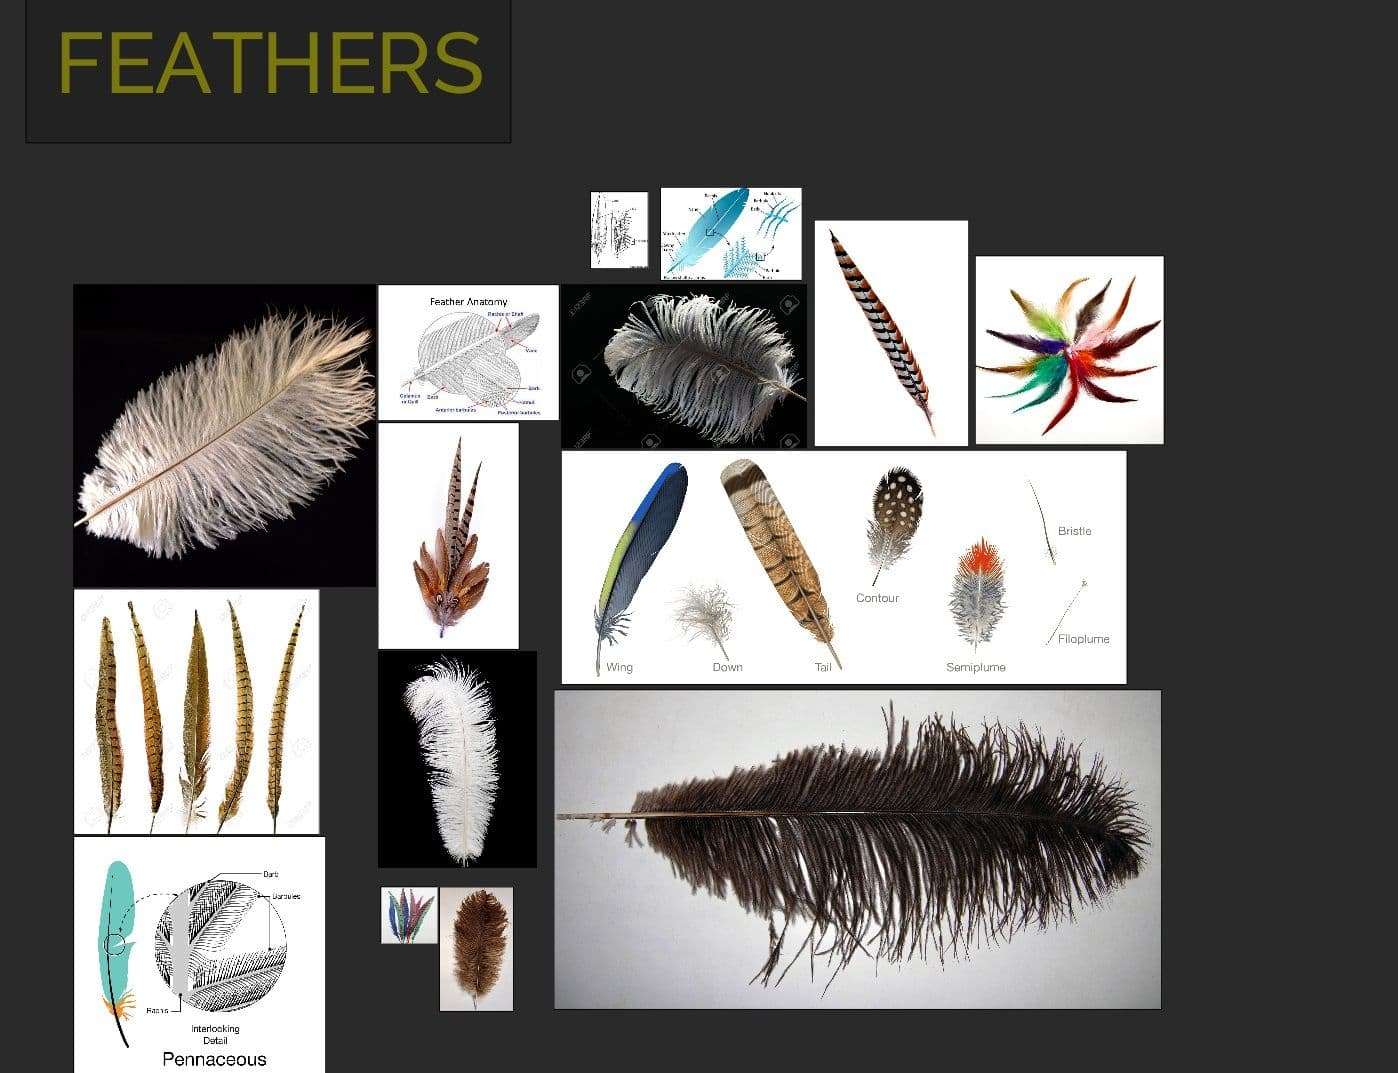
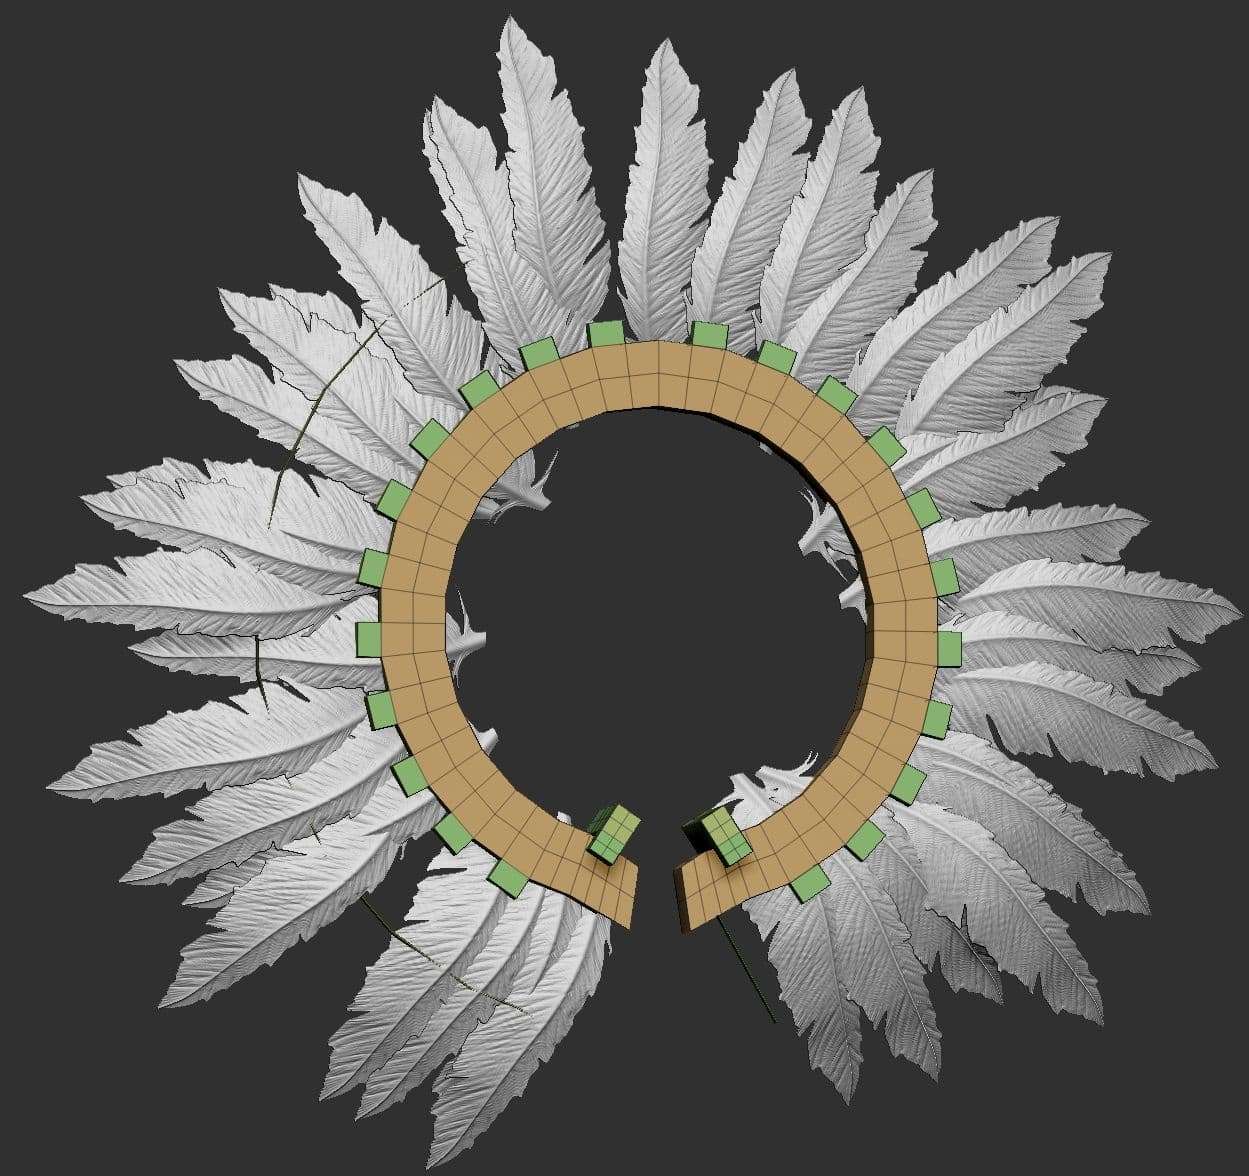
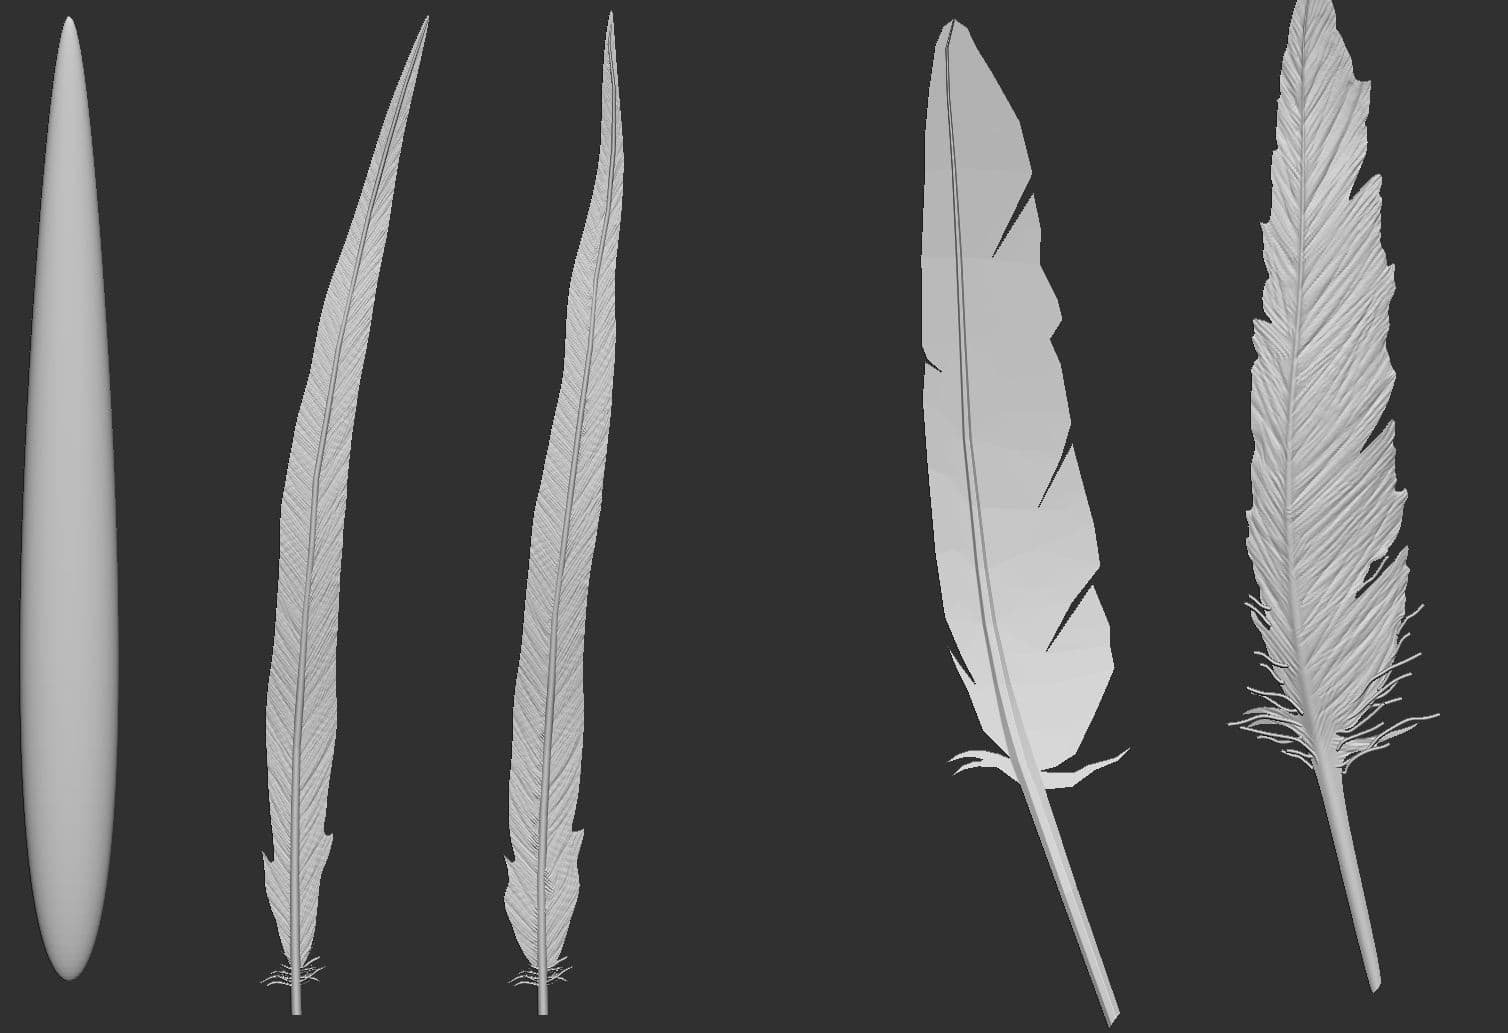
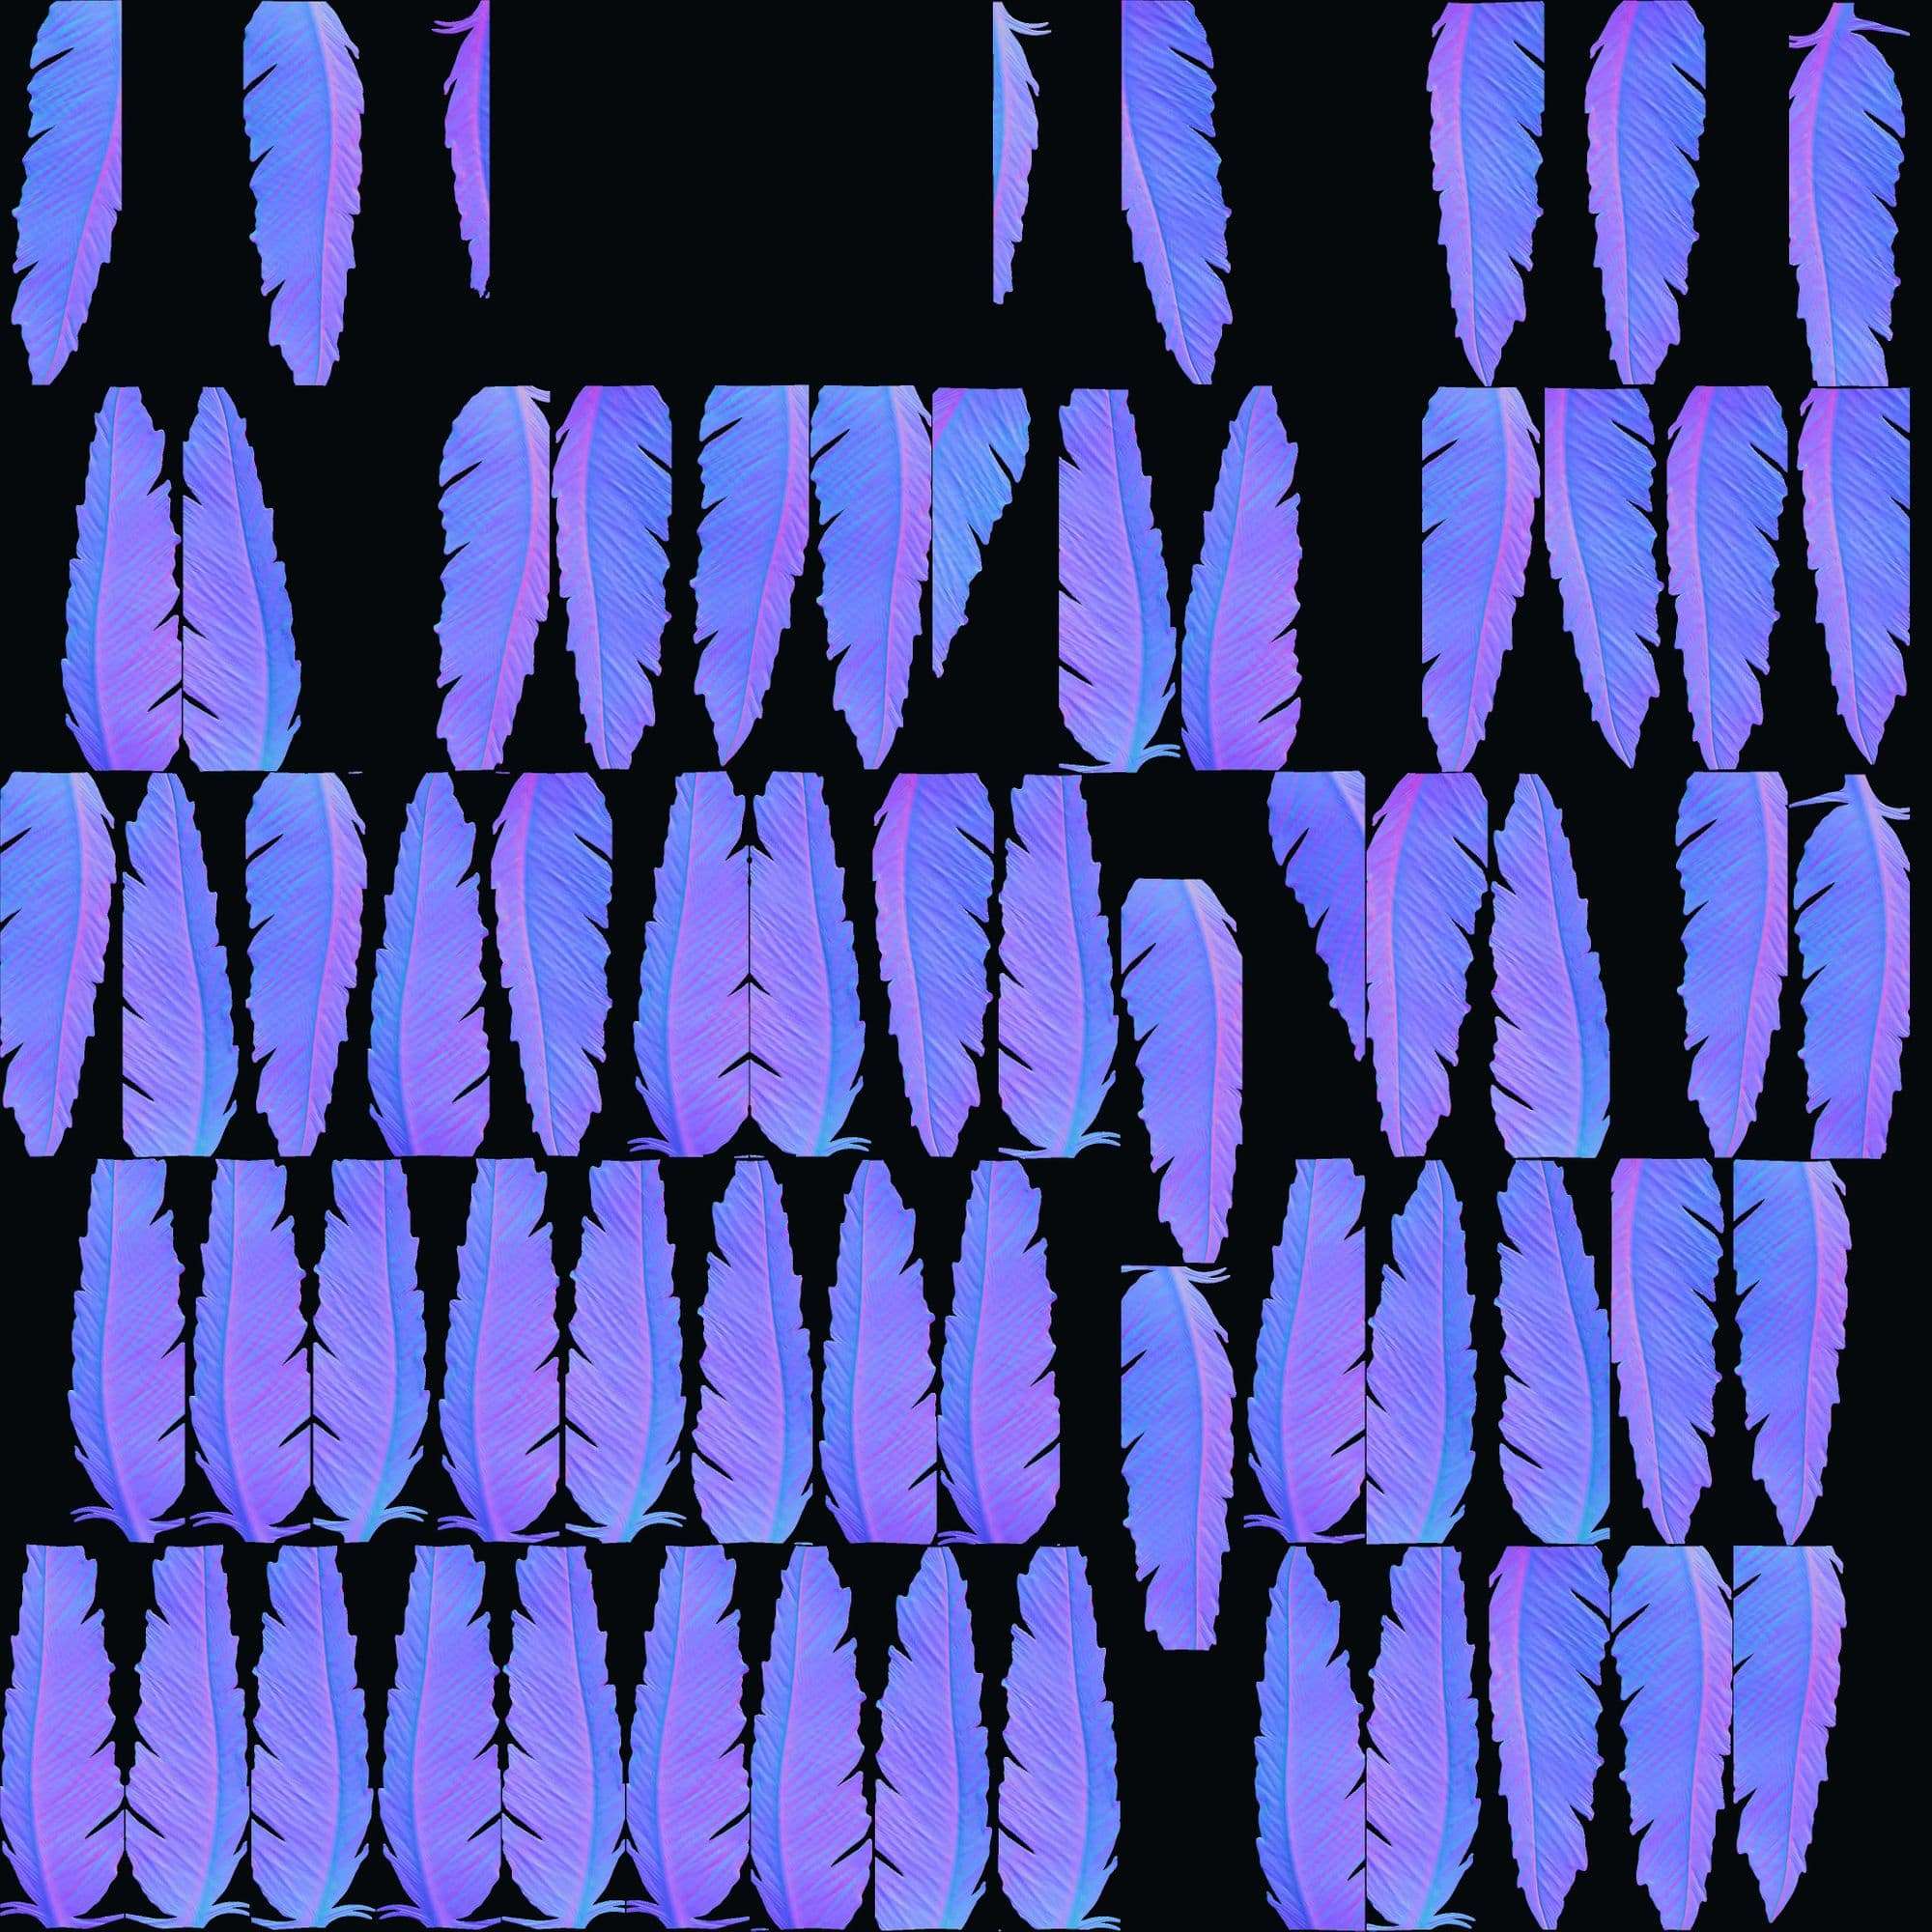
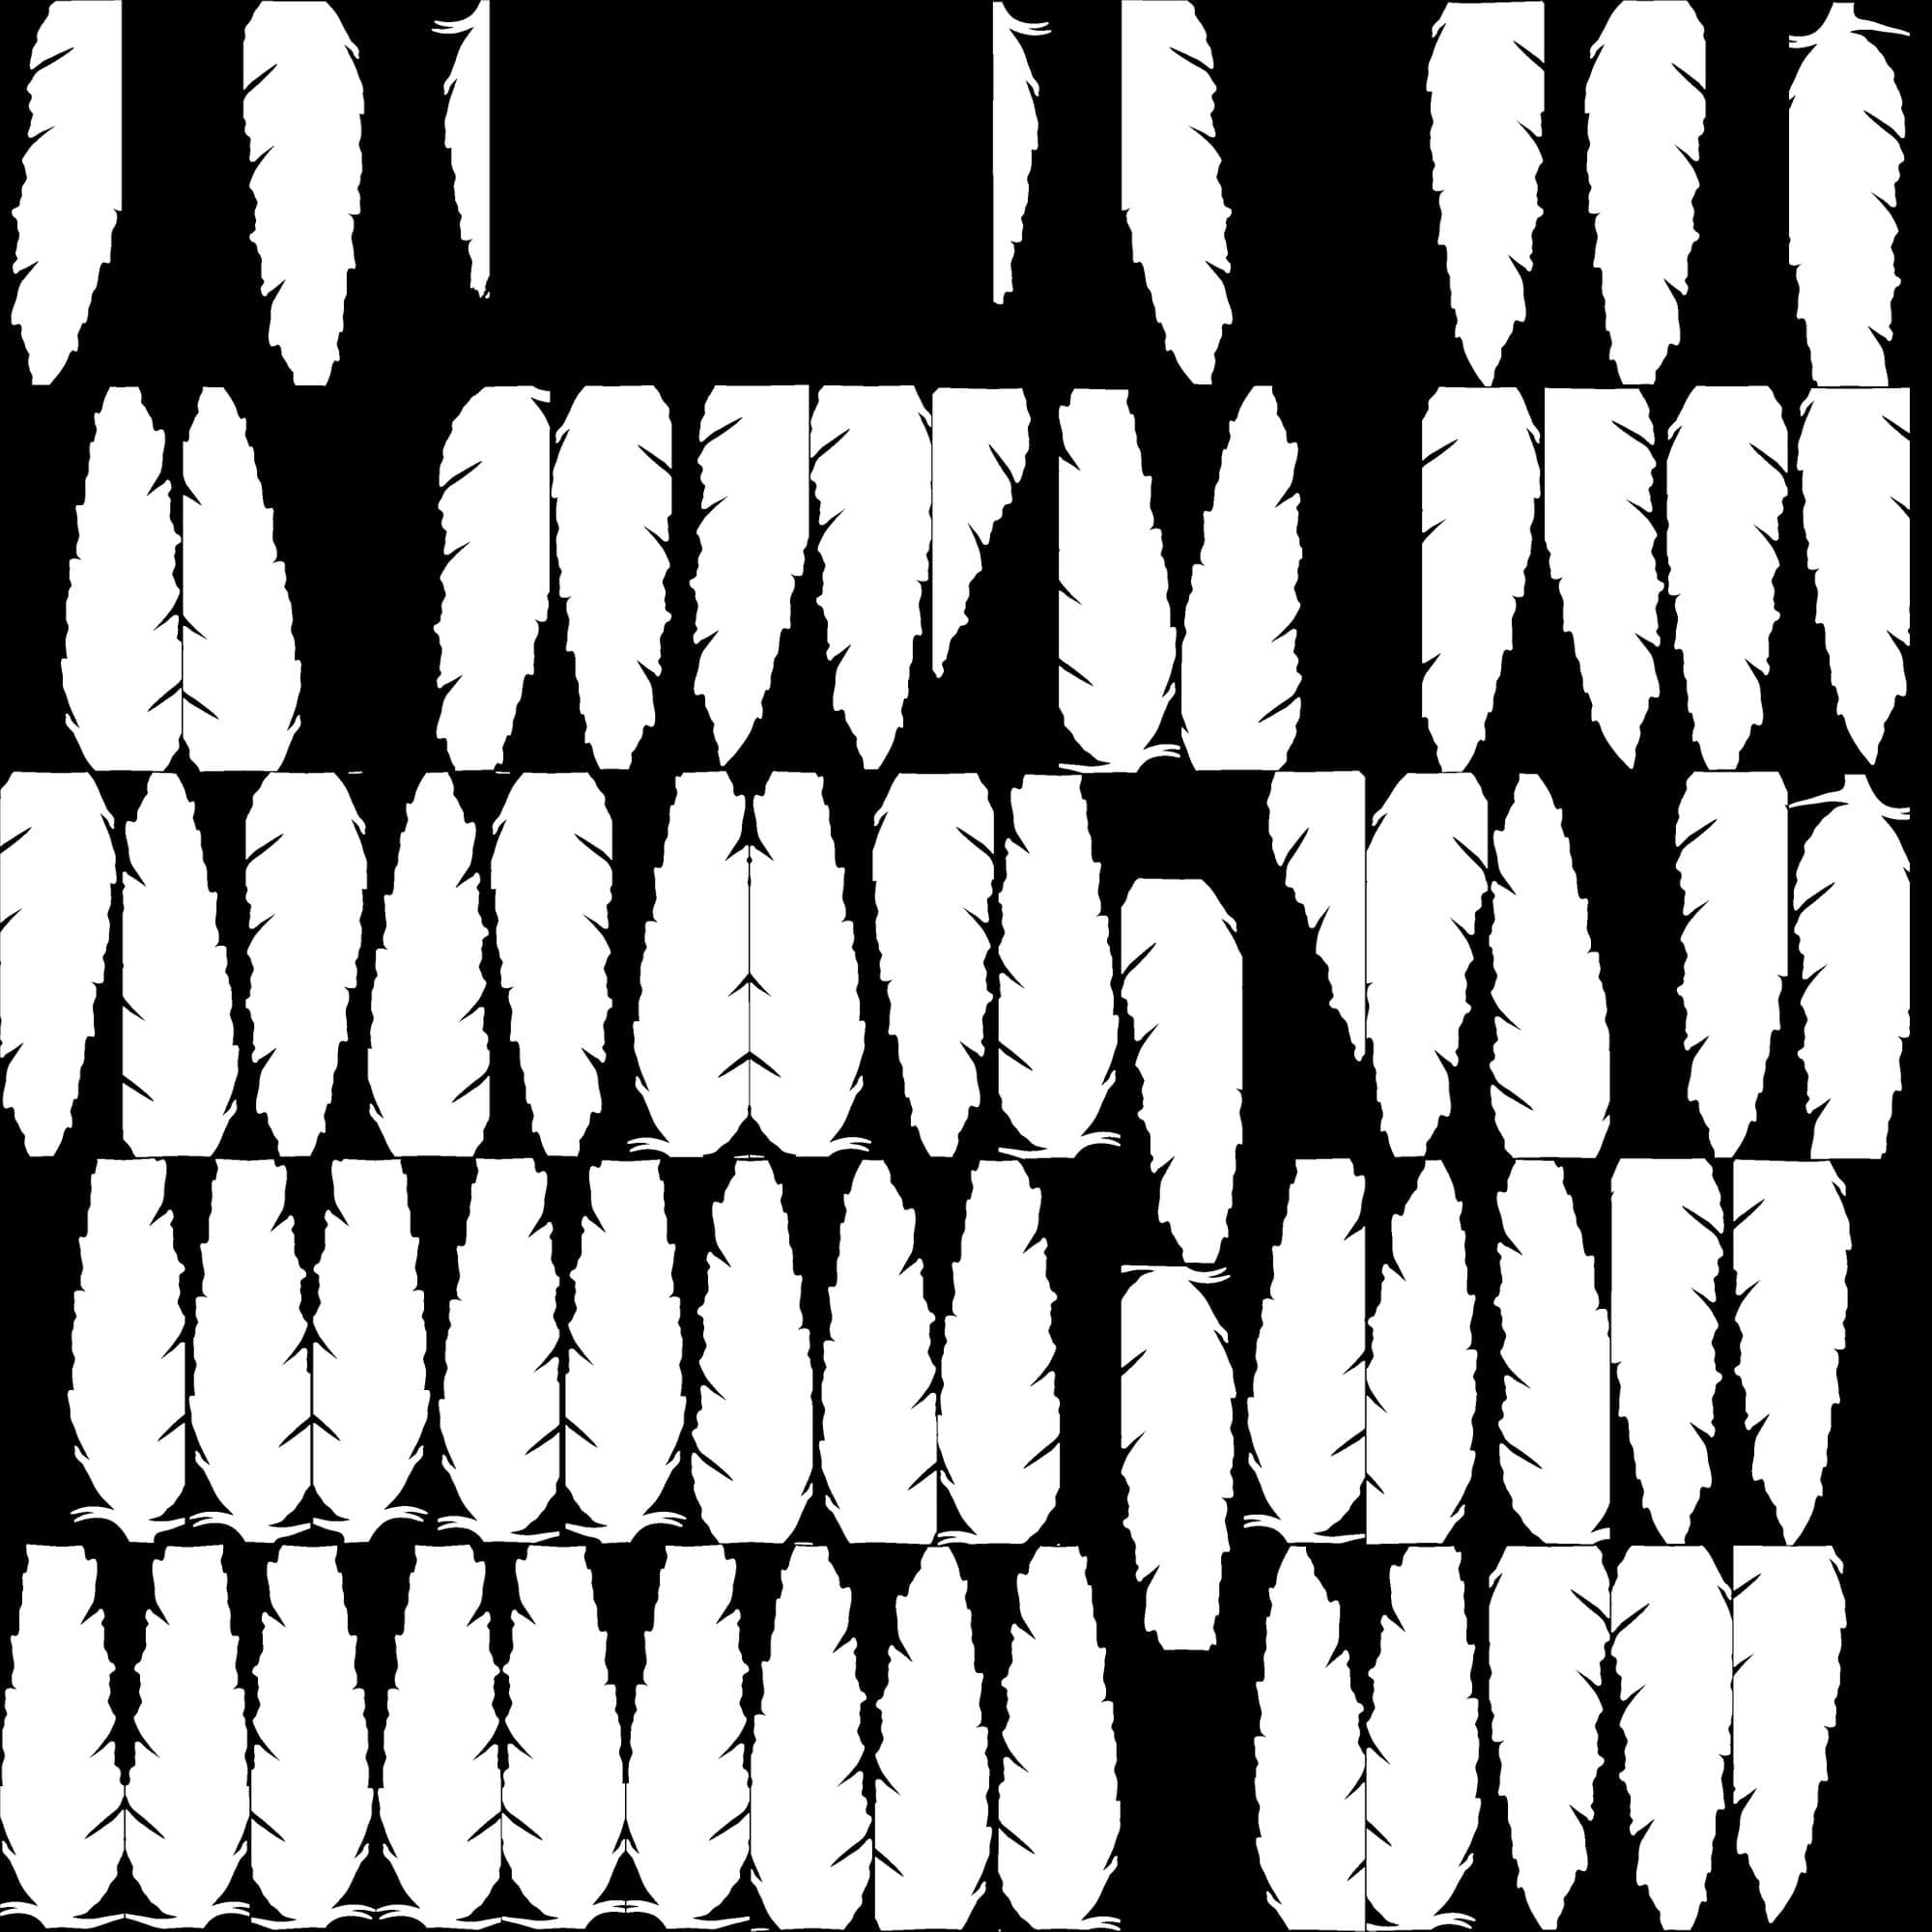
The feathers were a tricky part since I wasn’t sure how to proceed at first. Luckily, there is a nice free tutorial by ZBrushGuides on how to make feathers, which comes with a pdf book and several IMM brushes that contain low poly meshes. Nothing fancy, just using one of the ready meshes, subdividing it and then using the Rake, DamStandard and CurveTubes brushes.
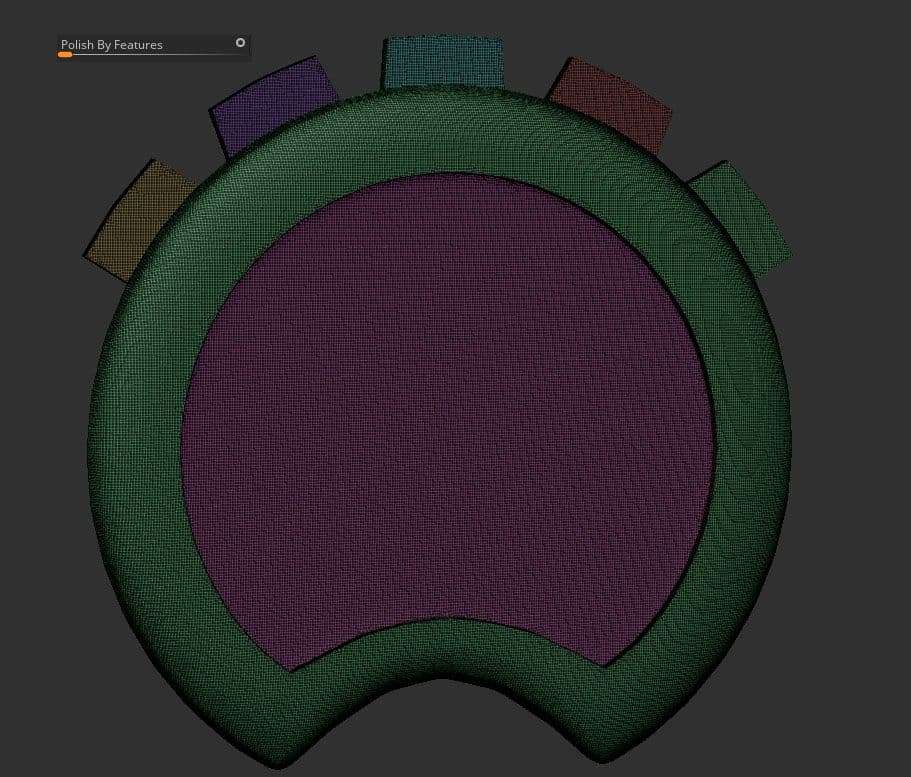
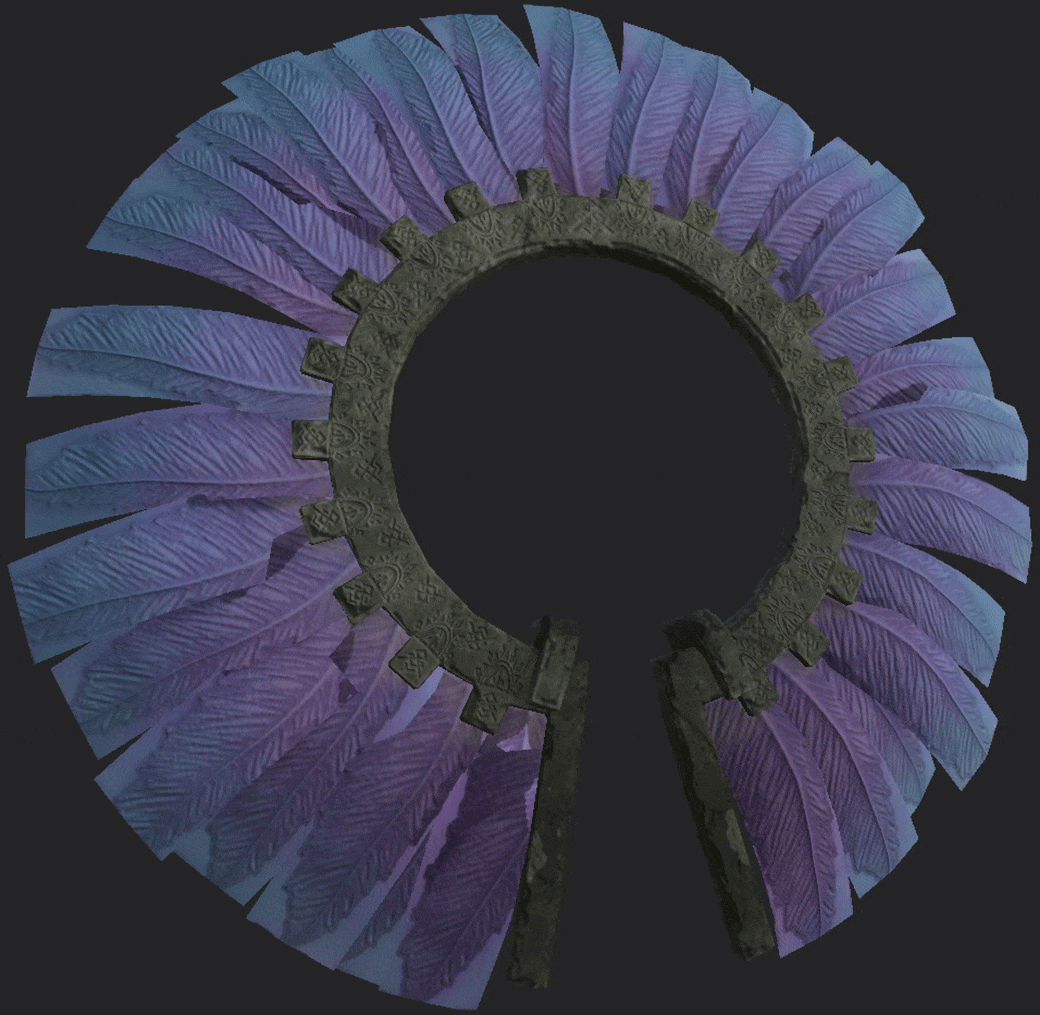
To make them of use, I create my own nanomesh brush out of these feathers and apply them on the circular polygroup of the crown. From there, I play around with the settings to position them correctly and finally converting them as meshes.
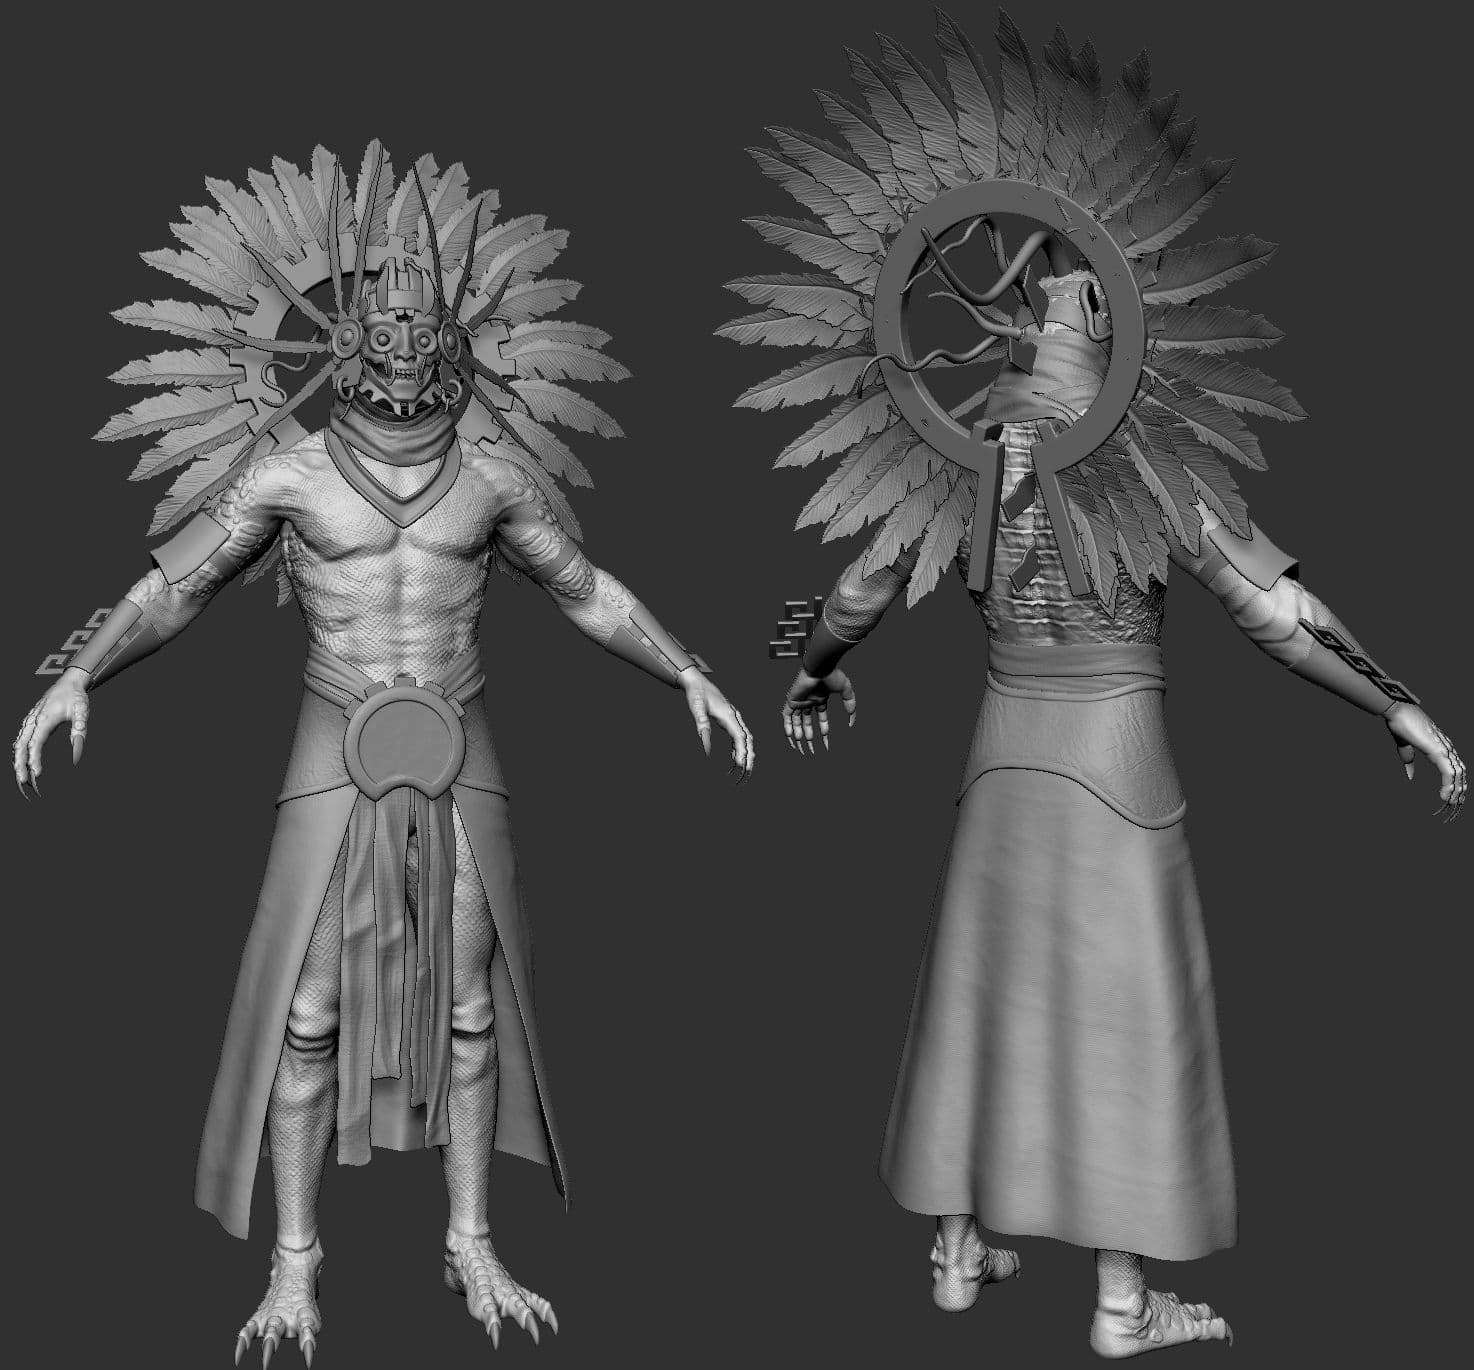
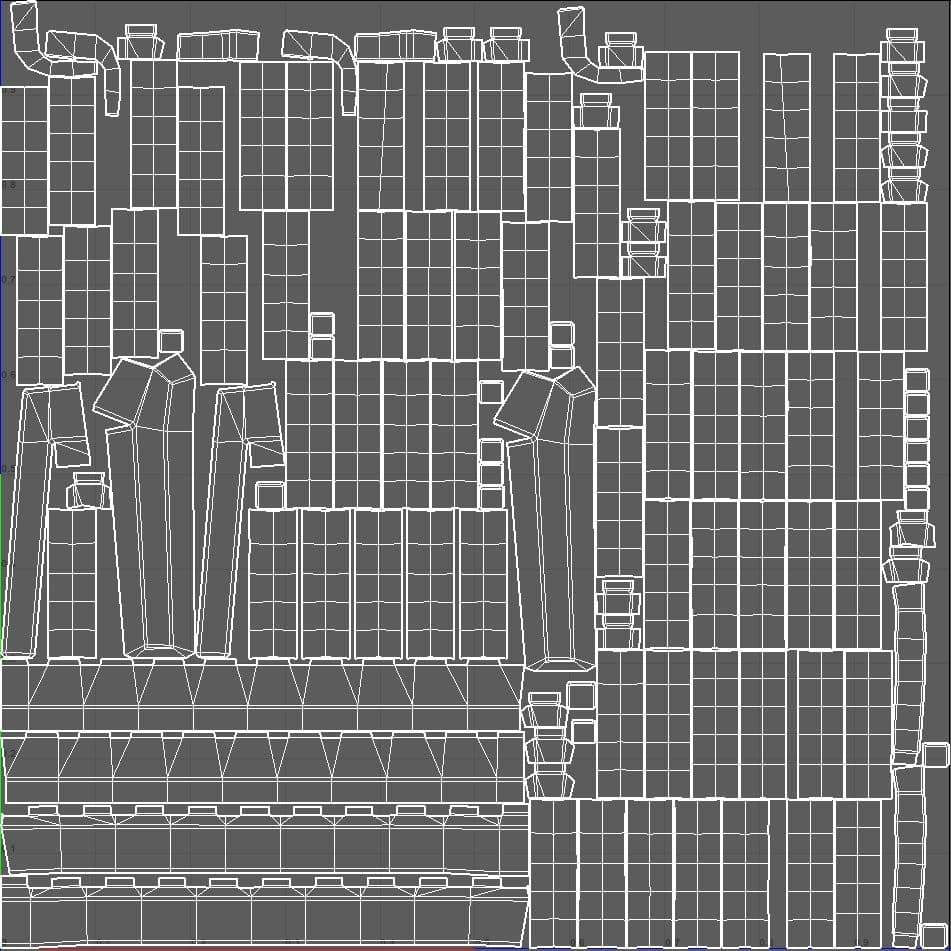
When I’m confident with the blockout after implementing some received feedback, we hop into the high poly stage.
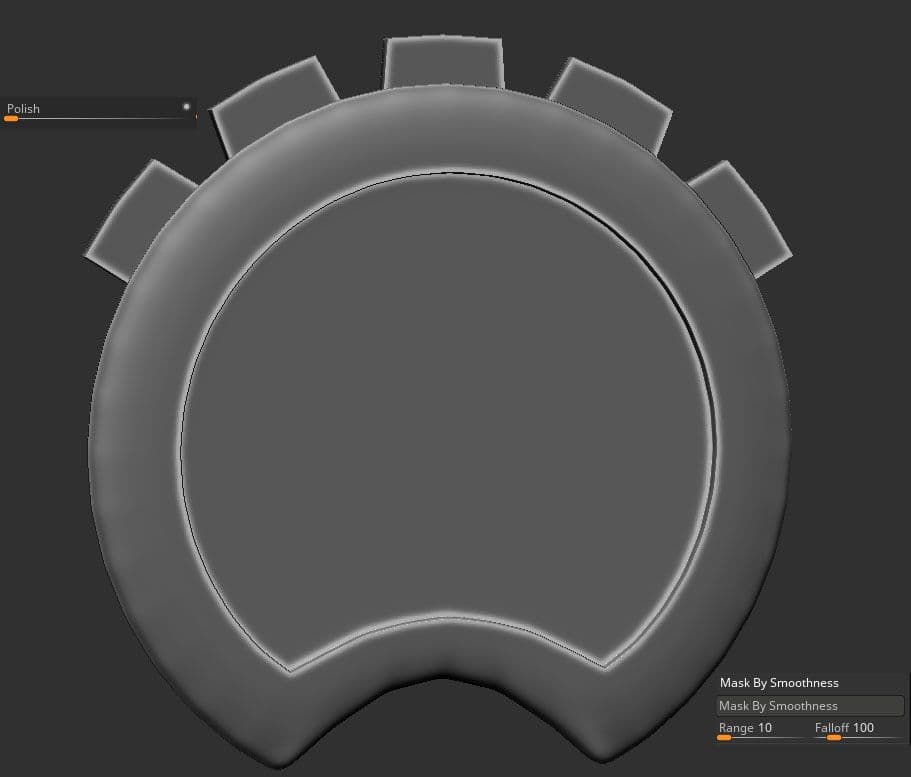
Here, we add thickness to our planar meshes. With most meshes, I added subdivisions, with only the ornament on the waist and a few pieces around the mask being dynameshed. The reason is that ZBrush isn’t always doing proper bevels. Using ZModeler is very time-consuming since the program doesn’t support n-gons to freely delete edges. Here are a few steps of the process:
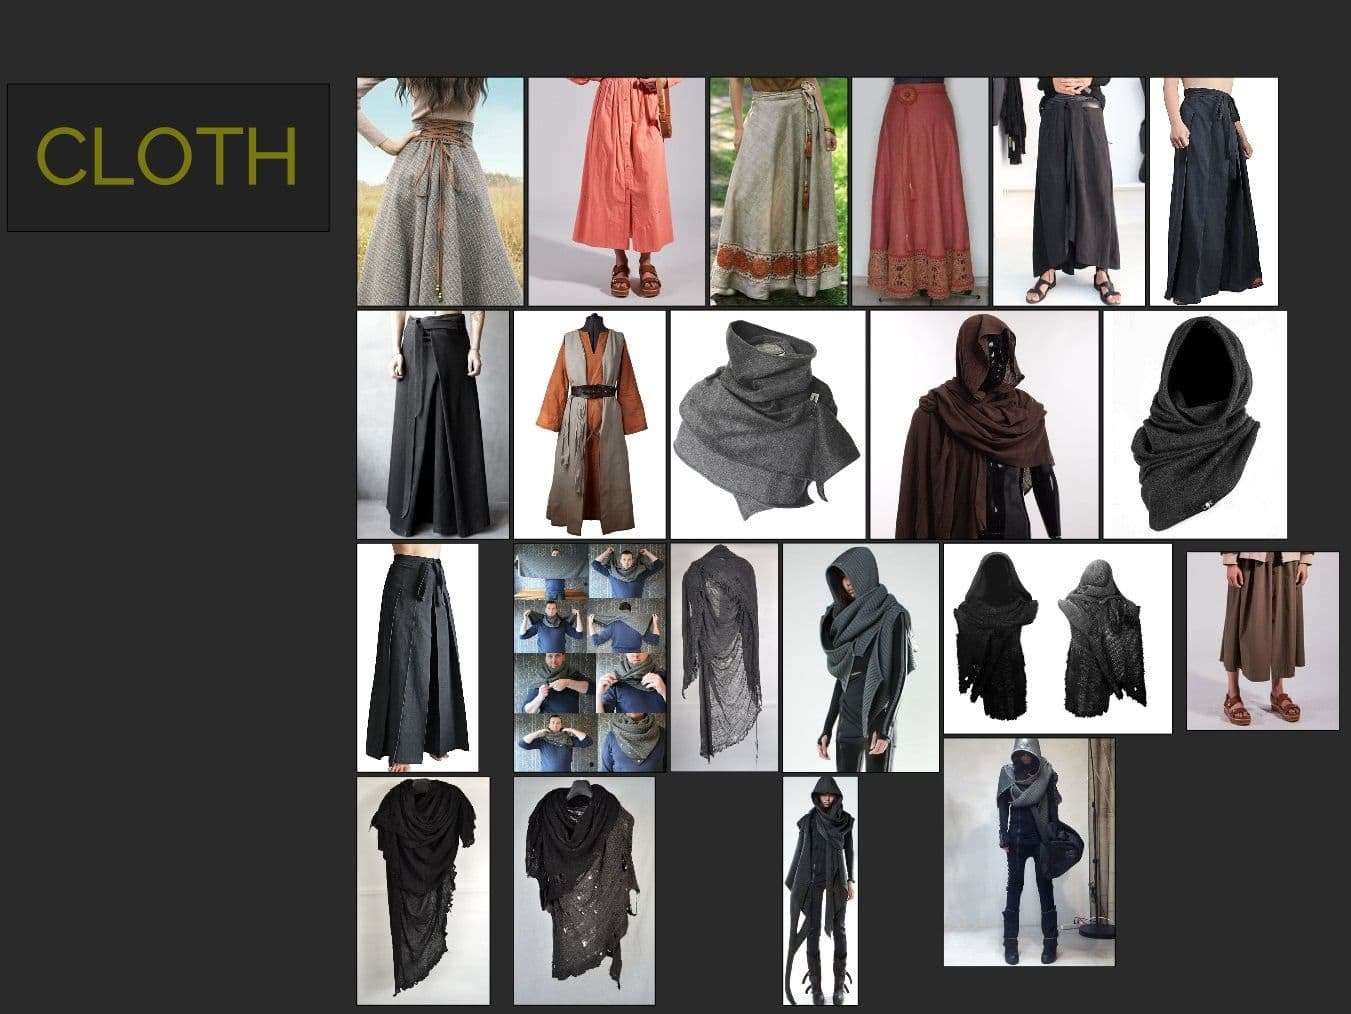
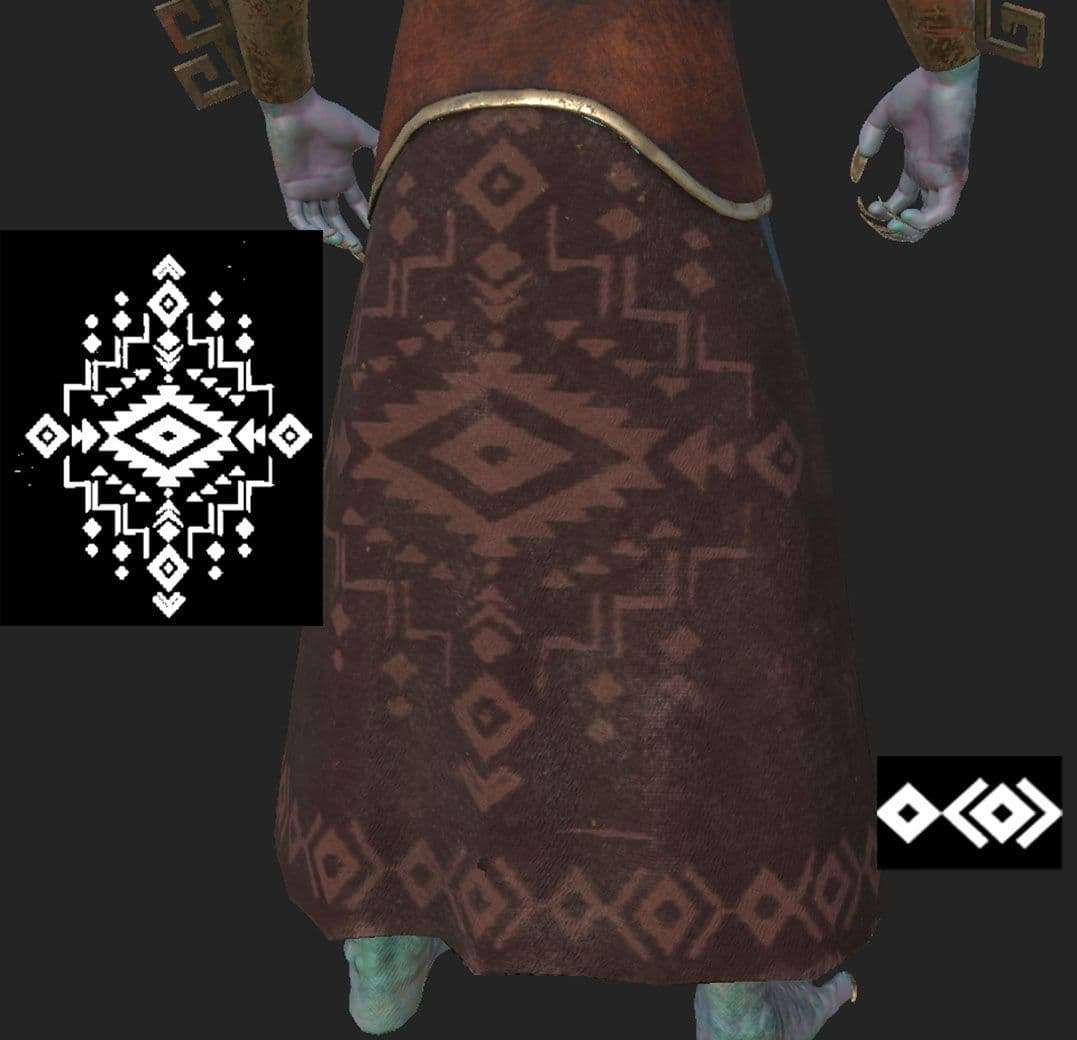
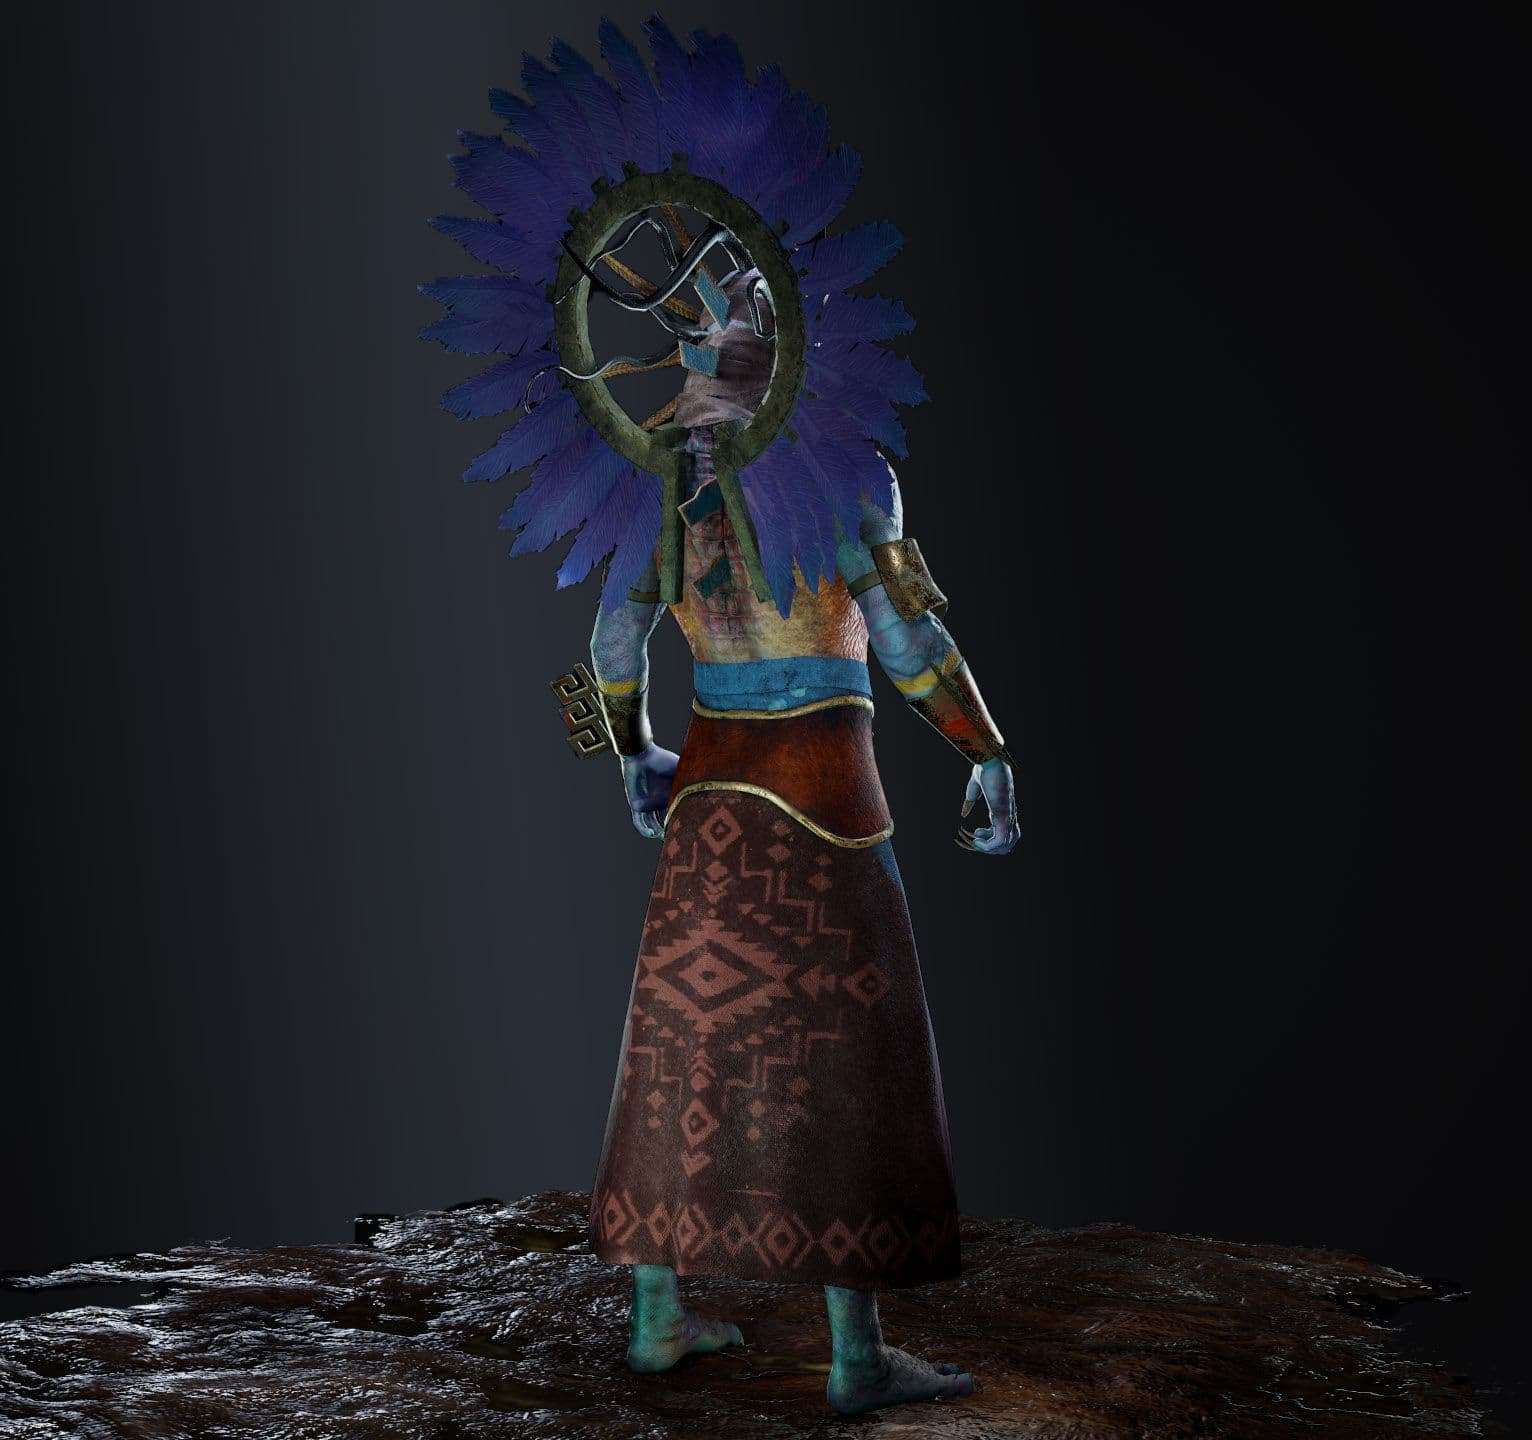
With the clothes, have an idea what the fabric is that you’re sculpting. It plays a big role in how folds are created and knowing where to put them. For the scarf, I knew it was a linen fabric and fairly light, which means it will tend to create saggy folds due to the neck being the tension point. The opposite is for the skirt, which is comprised of a woven fabric and generates heavy tubular-looking folds.
Before adding tertiary shapes like memory folds and patterns, make sure to generate simple UVs from the polygroups that you’ve created with panel loops. This will help you use tileable maps in the corresponding direction of the cloth. ZBrushGuides has again a great tutorial on how to create cloth and drapery.
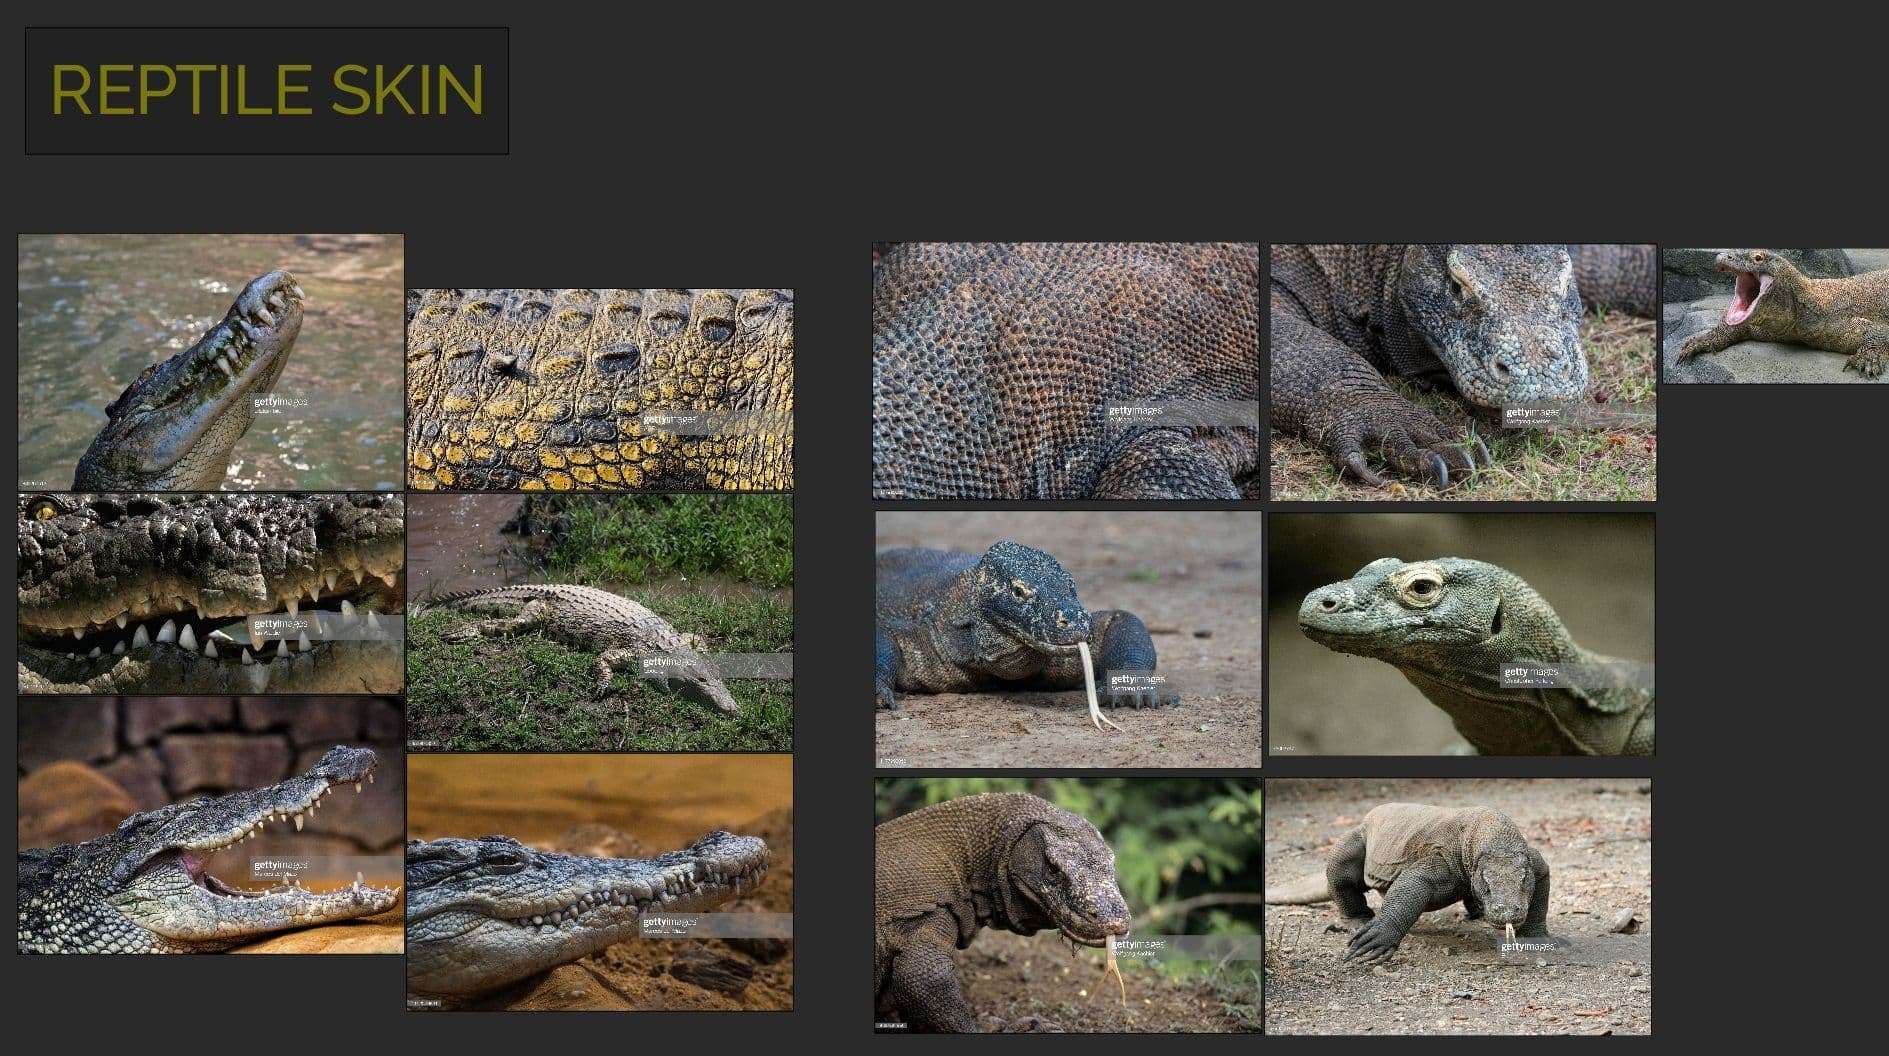
My initial idea when I analyzed the concept was that the character is a lizardman. This was a rather challenging part and I could not get a satisfying result at first. I consulted with some buddies from my beloved Donpolygon discord and Riccardo Morgia was of absolute help on giving me a huge insight about reptile skin.
Basically, reptile skin tends to be much thicker than ours, which means that folds will be created around the joints and the ribs. When I made sure the folds were in place, I started adding alphas of reptile scales, which had to follow the specific muscle group flow and differ in size (bigger on the immobile parts and smaller on the joints). Some scales required to be manually masked and inflated. There are great free alphas in ZBrush Resource Center with plenty psd images to help you find whatever you like.
When the high poly is completed, I create an ID map and add a suffix on all meshes. FJ Tools is an amazing plugin to help you out with these tedious tasks, making sure everything is organized later on for baking.
Optimization
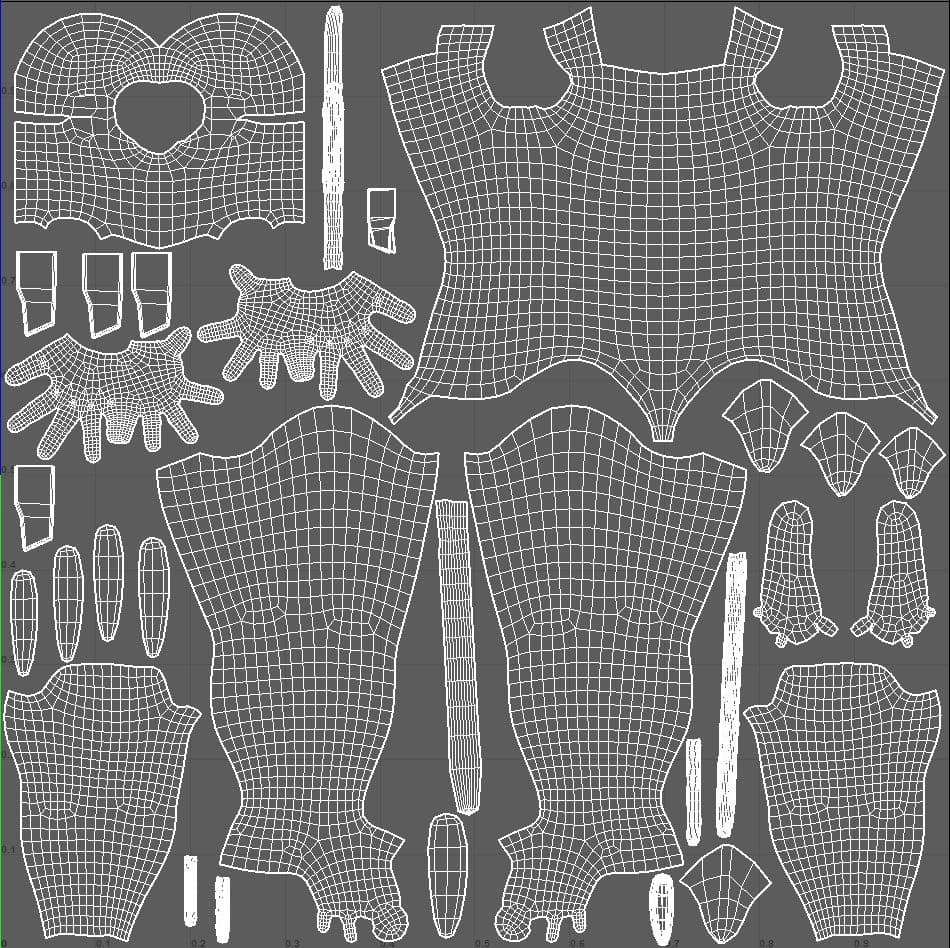
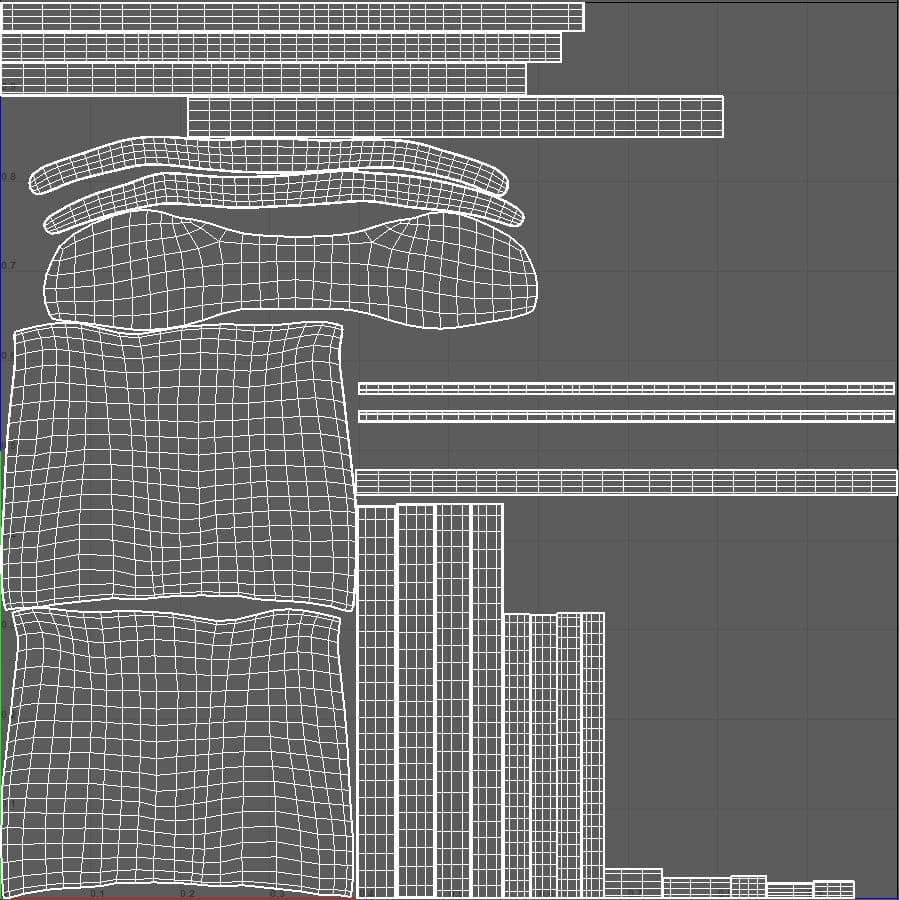
Not the best part of the process, but having a proper topology is important in video games.
When building a portfolio, try to aim for a more humble amount of tris. It is tempting to make a character with 100k tris to look stunning, but if you show everyone that you’re capable of using a specific budget that will fit in most video games, your value will instantly go higher.
Here’s why controlling your topology since the blockout is important, because you can now import the lowest subdivision from ZBrush and delete the unnecessary edges.
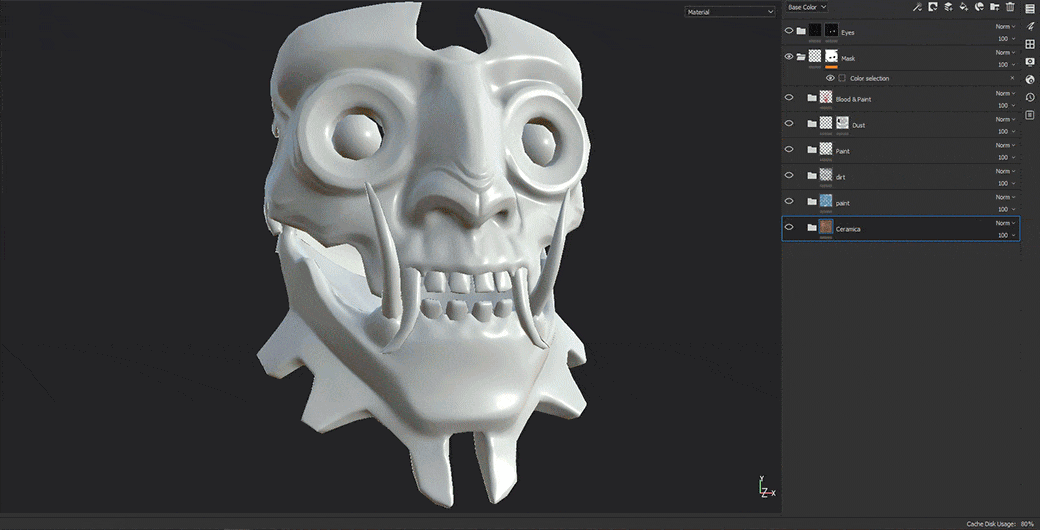
Of course, not everything is like that. In Maya, I had to retopologize the mask. To have a proper guideline of the topology, I took a ring and lowered the amount of edges, followed by a one-sided extraction which then was placed around the eye. From there, I used quad draw to continue.
41k tris
The feathers are just planes to maximize the most out of our budget. I’ll later on explain in the texturing process how they’re baked.
Before I wasn’t paying a lot of attention when making UV maps, but when I made more research, I found out how much texture padding is important to take advantage from the whole UV space. Since I want the most out of the resolution, I spend more time on unwrapping the UV shells to properly orient the checker maps.
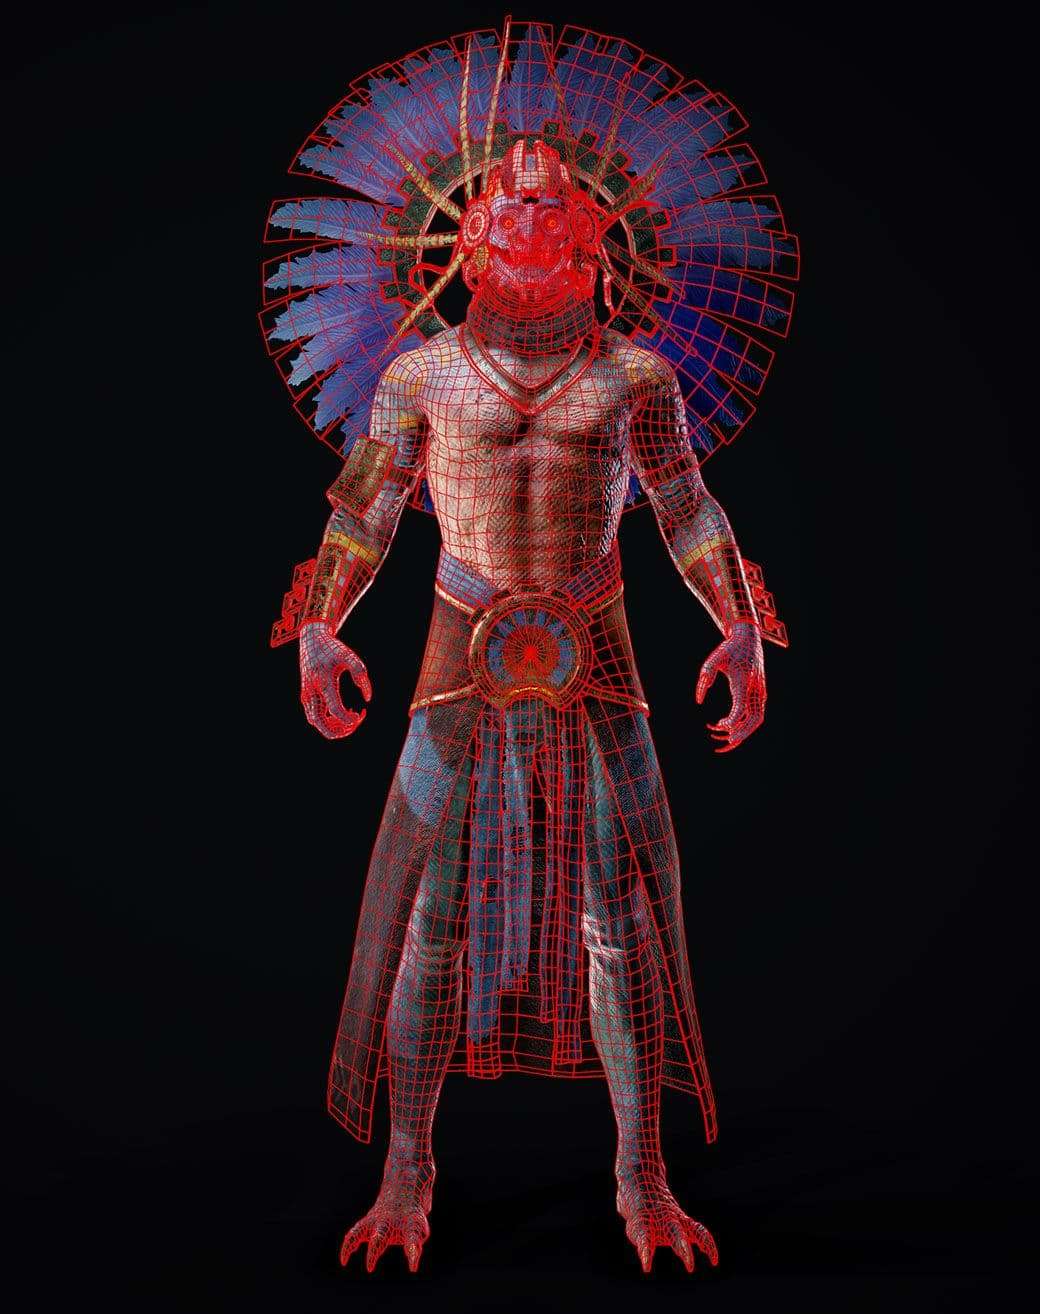
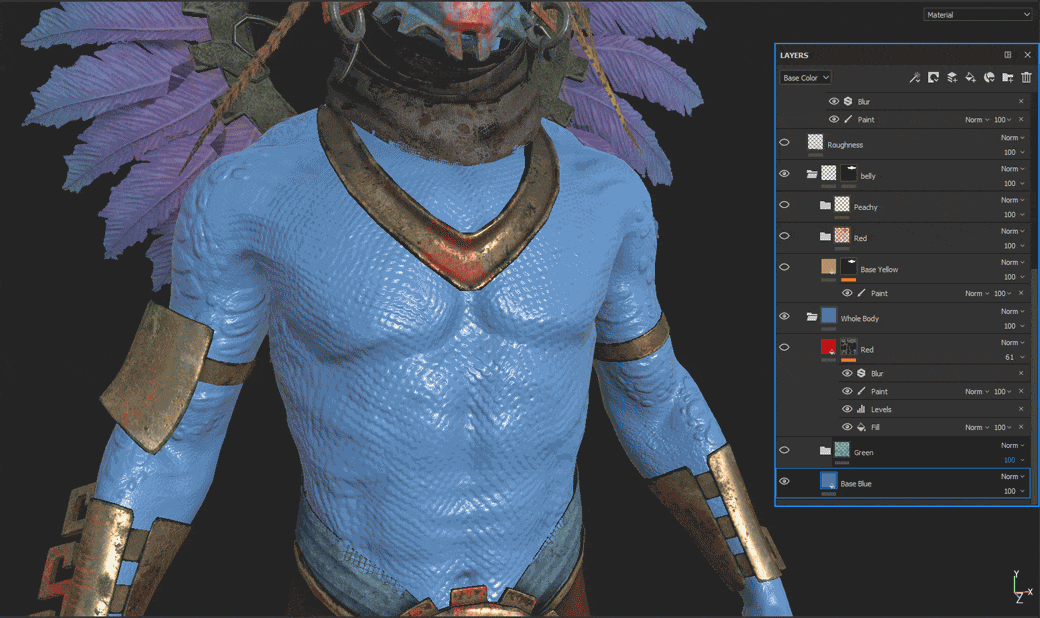
Texturing
This is a really fun part of the process where it can bring your character to a whole new level. Emphasize on telling a story with every detail that you add, either it would be edge wear, scars, blood, etc.
I had to figure out how to “stamp” the feathers on top of the planes in Substance Painter, so I could cut out the unnecessary geometry. Coincidentally, when I was browsing in artstation, I stumbled upon Aurelien Mauranne’s Carrion monster, which comprised of a vulture skeleton with a scarce number of feathers. I asked him how he created them, to which he told me that he baked the opacity map.
Doing a research on this workflow, Han Solo’s video explains it perfectly:
Bake the Normal map w/o diffusion
Export it in Photoshop, apply a color overlay to turn the feathers white
Rebake the Normal map this time with diffusion
Import your just created Opacity map in a new fill layer
Switch you Shader Settings to pbr-metal-rough-with-alpha-test
For the body, I got inspiration from Total War: Warhammer’s lizardmen and used Magdalena Dadela’s GDC tutorial for face texturing, which applies perfectly here.
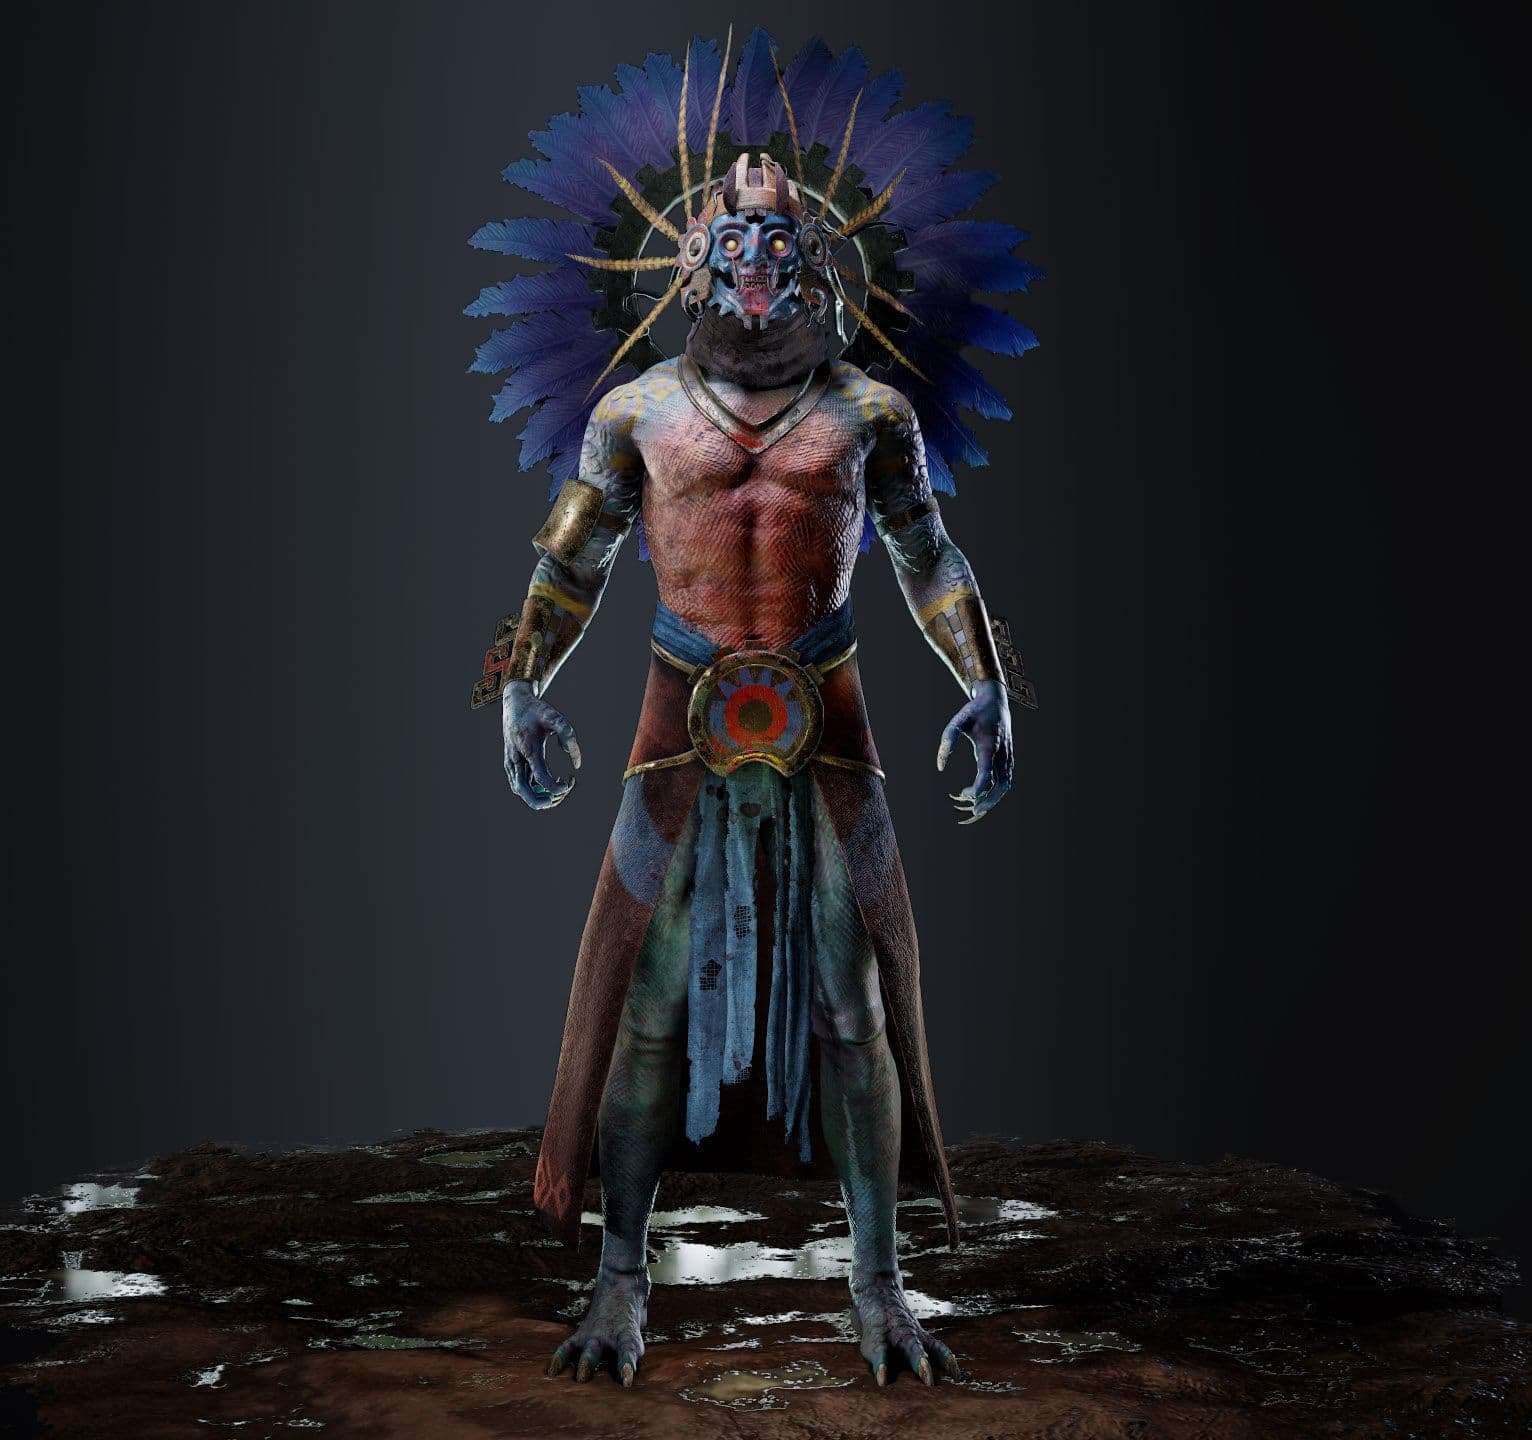
Since Tlaloc is the aztec god of earthly fertility and water, I wanted to find appropriate aztec motifs to draw on the skirt and his shoulders. I added both the running water symbol, as well as an evil eye to expose the corrupted side.
The mask was really challenging since I couldn’t get the proper pottery material that I wanted. This is where Nikolay Marinov comes to aid with helping me nail the appropriate macro details like paint wear and dirt to really stress on the sinister look. Another cool thing that he shared with me was adding a grunge map to my paint and blood roughness value so it can break the reflection a bit.
Presentation
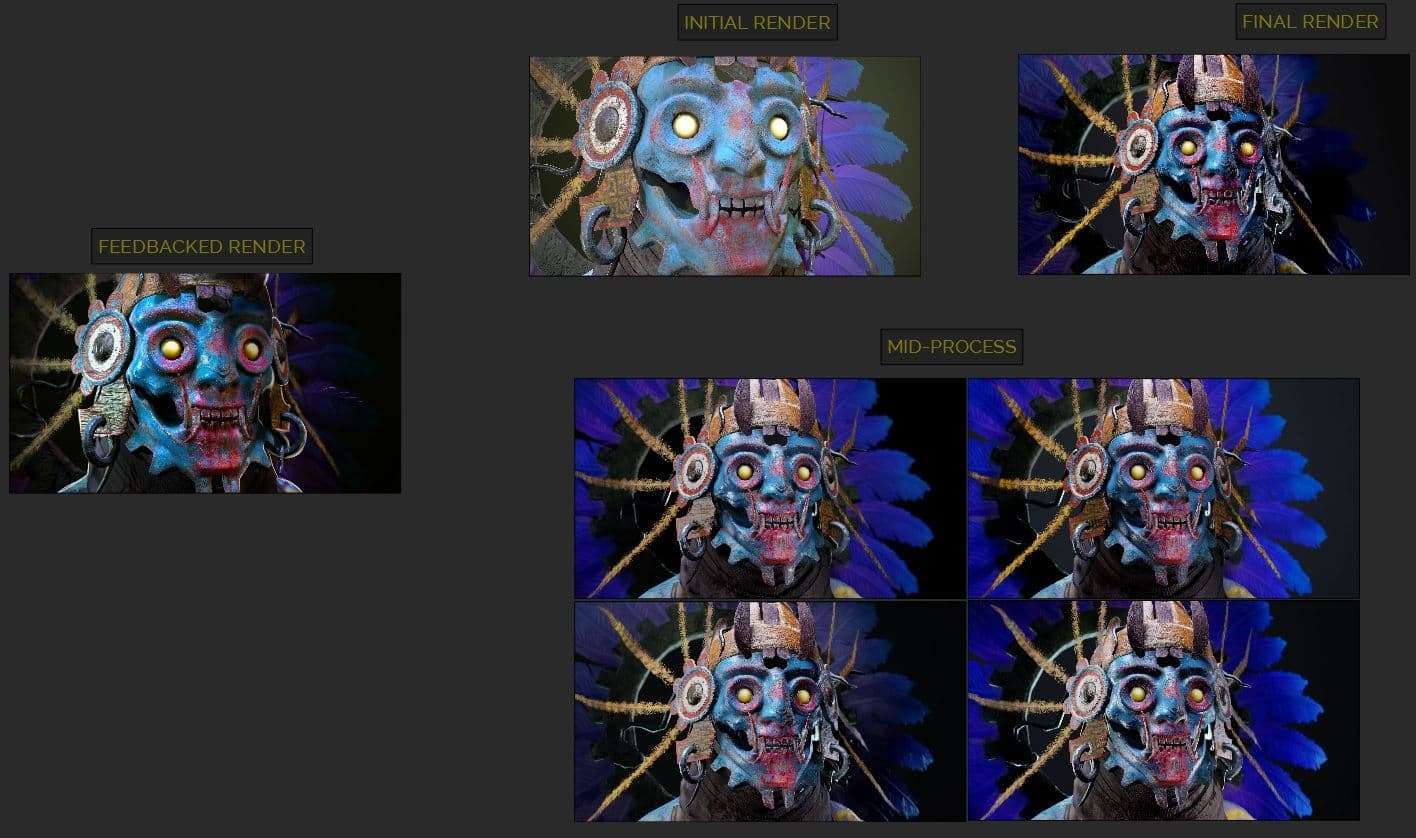
This was a huge lesson for me since I’ve always neglected rendering my characters. You’re making a big mistake if you just put 3 or 4 spot lights to finish your presentation. A lot goes into using the correct setup, especially when you’ve spend a significant time in texturing and you want to showcase your details. A messy lighting can ruin everything that you’ve done beforehand, undermining any craft you’ve put a lot of effort in creating.
My thanks goes to Marko Lazov for absolutely dedicating his time to orientate me with making sure I nail this part.
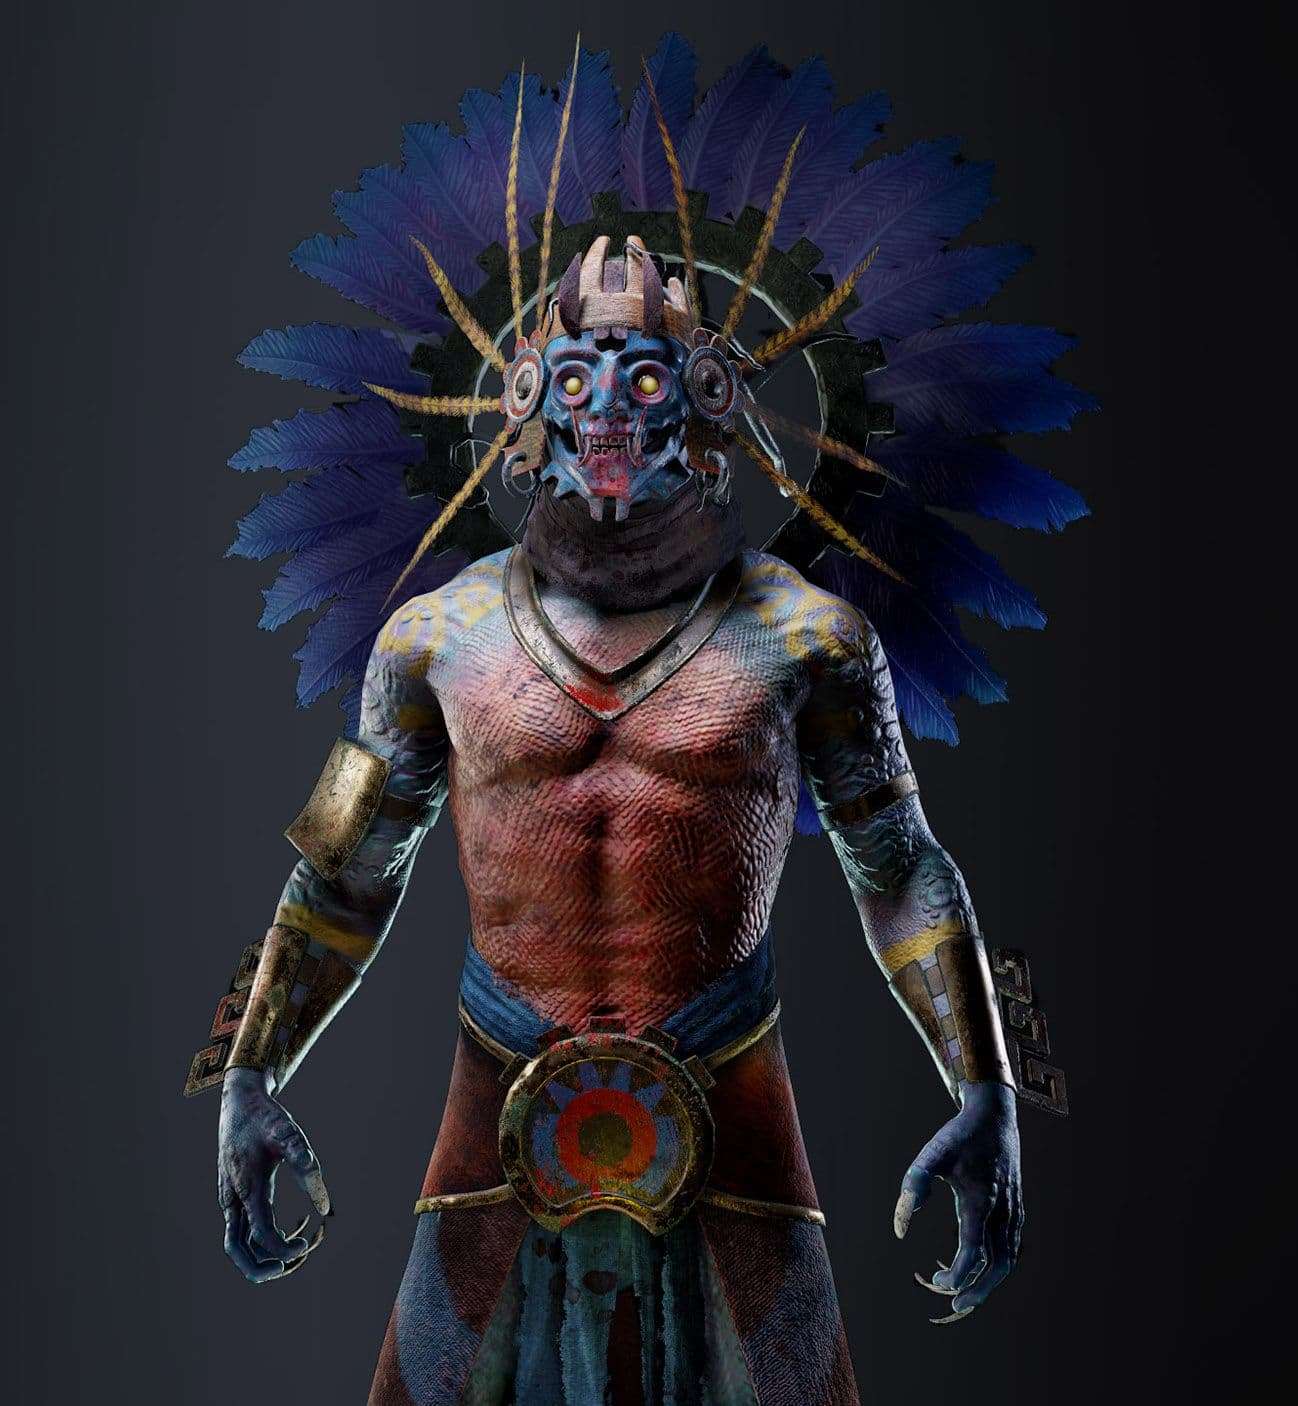
The program for rendering was Marmoset Toolbag. I used the ACES tone mapping preset to continue on the sinister visual around Tlaloc and toning down the saturation to further it.
Adding a spot light directly on top of the character makes a good omnipresent effect, as well as using cooler colours. To accentuate on the forms around the the mask and every other outline, I made sure to put rim lights and increase the width for a softer shadow casting.
Often you’ll end up having to go back to Substance Painter to make corrections, so be prepared to tweak in between color values, roughness, etc.
Last Tips
Always stay humble. If you are feeling pride in your art before anyone sees it, do yourself a favor and post it somewhere for feedback. You might find you’re not as good as you think you are.
Find a group of people who are more experienced than you and detach your ego when you’re preparing to receive feedback. If they’ve dedicated their time to pinpoint every mistake in your artwork, show some appreciation and come back with their implemented feedback.
Forcing your mindset to think all eyes are on you will raise the bar of expectations not only from the people who gave you feedback, but from you, too. If you succeed in overcoming this pressure, you’ve already grown as an artist.
I’m grateful to The Rookies for giving me the opportunity to share my process with you. I wouldn't have been here if it wasn’t for everyone from Donpolygon’s Discord who helped me get where I’m at. You can follow me on Artstation, Instagram or The Rookies.