
Old Dwarf Project Breakdown
A brief breakdown of an Old Dwarf character project done while studying at Gnomon School of Visual Effects.
A brief breakdown of an Old Dwarf character project done while studying at Gnomon School of Visual Effects.

David Walz has been kind enough to give us a breakdown of his Old Dwarf Character that he has submitted to this year Rookie Awards. David has been studying at Gnomon School of Visual Effects in Los Angeles.
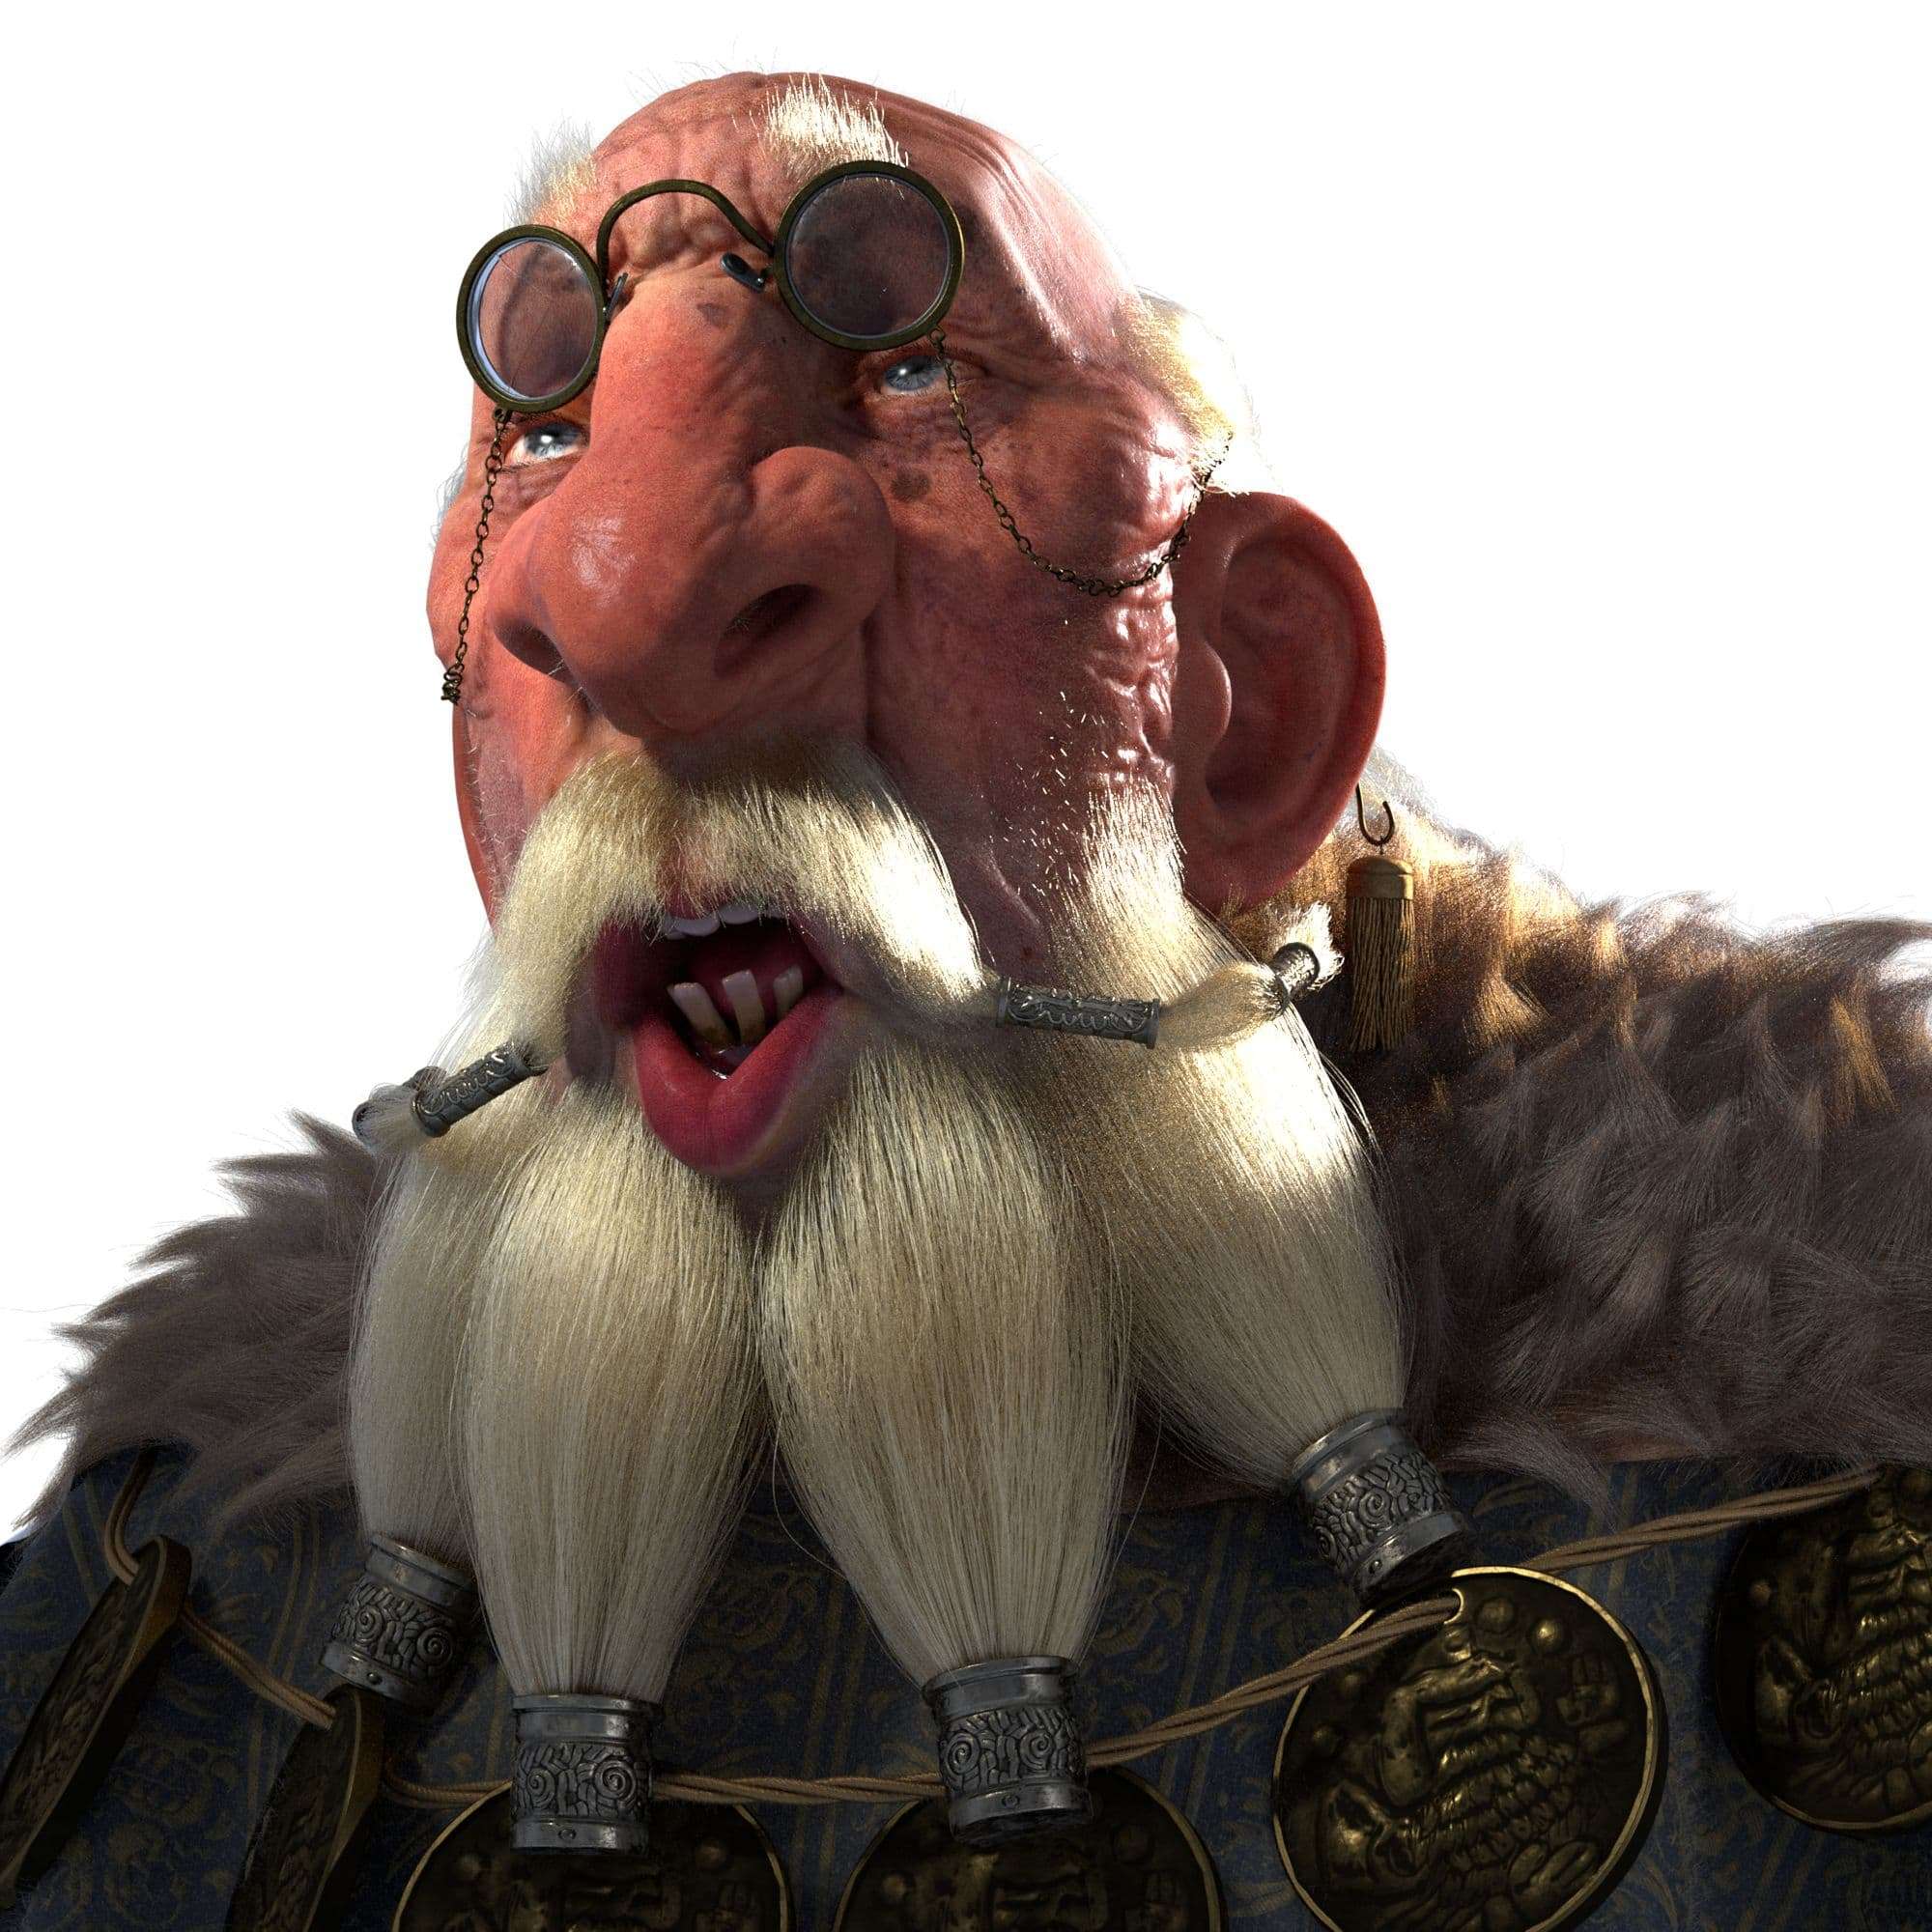
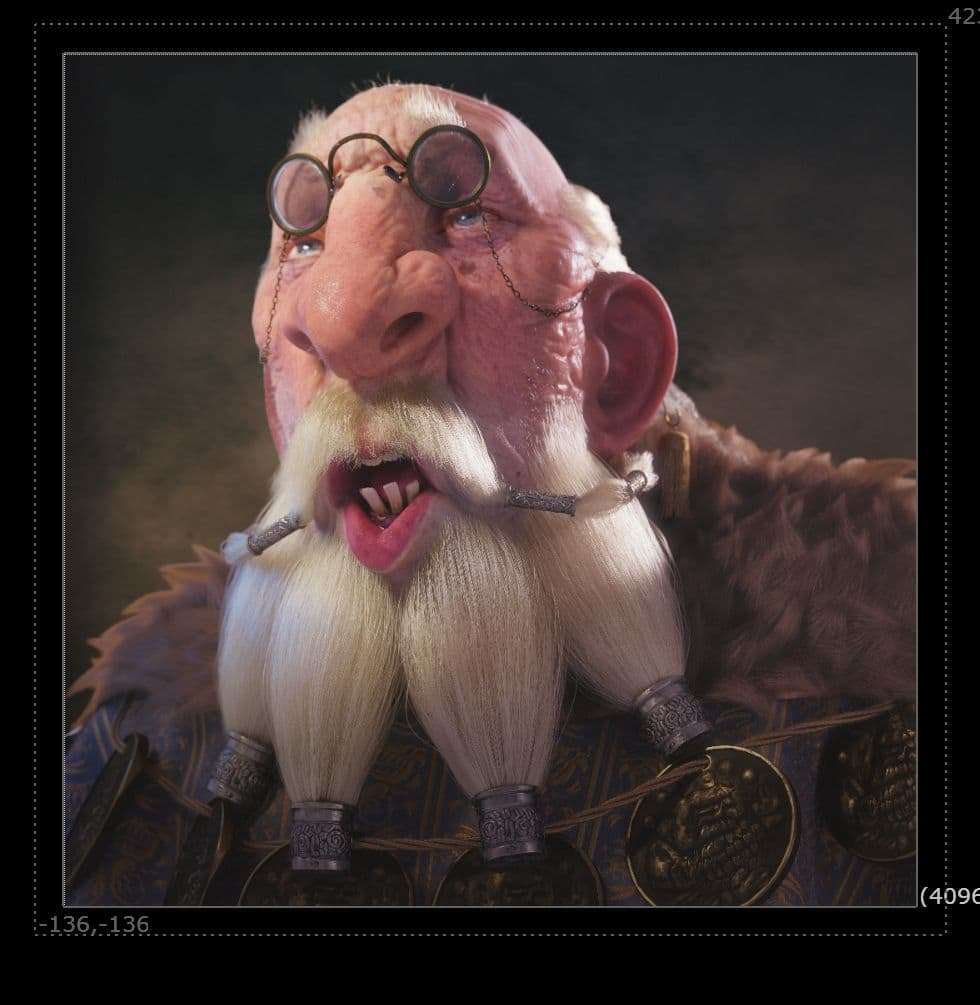
I’m often drawn to concepts that show a lot of personality and unique characteristics, partly because they’re more interesting to look at and partly because I would want to know more about them if they were a real person. Although the concept was more loose and painterly. This sketch by Even Amundsen had a lot of character and intrigued me.
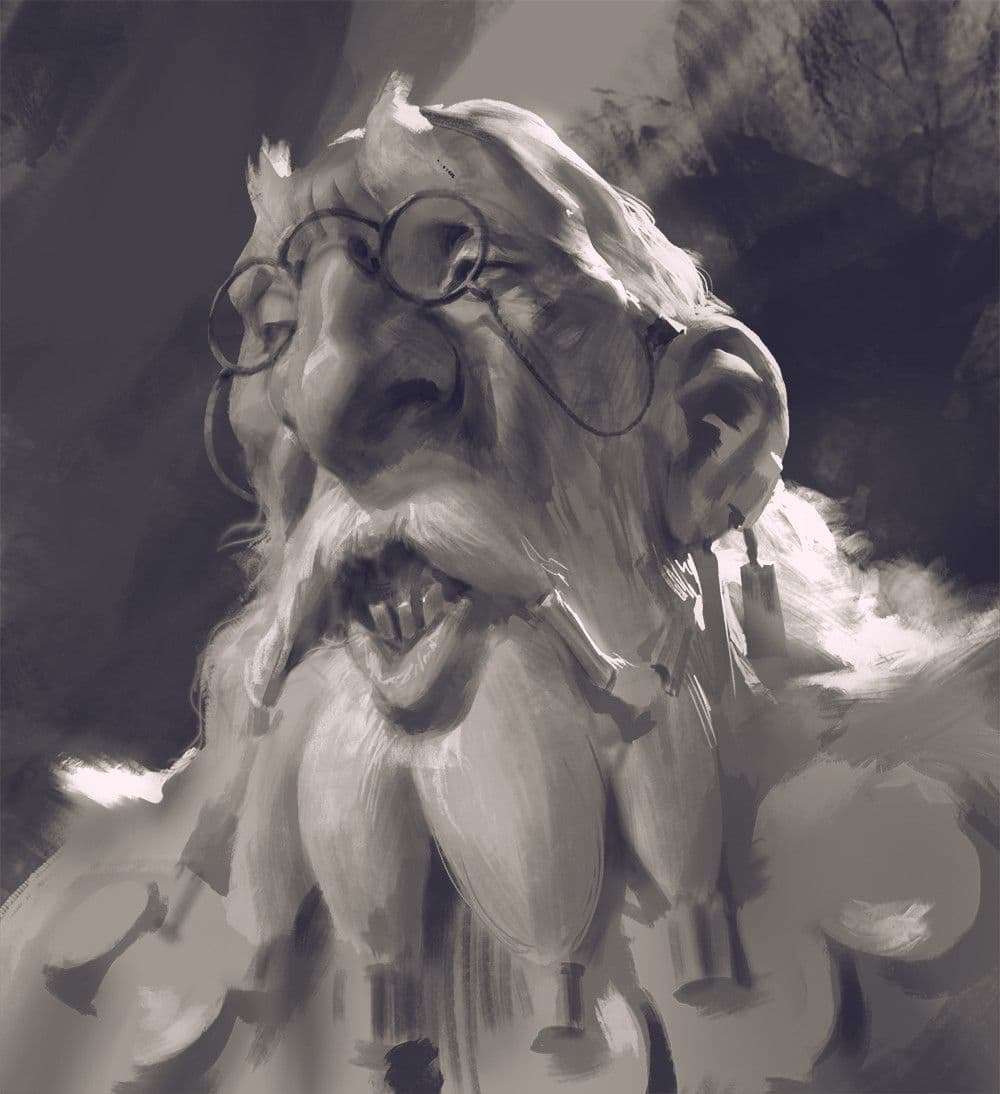
Before starting, I sat down and had a short conversation with myself. Why was I doing this project? What did I want to get out of it? In this case, a 1 to 1 recreation was out of the question. While the model was very important, I wanted to focus heavily on materials, texturing, and look development. I began this project as my final for Texturing 4 with Tran Ma at Gnomon, but I brought it to a finish after the class had completed.
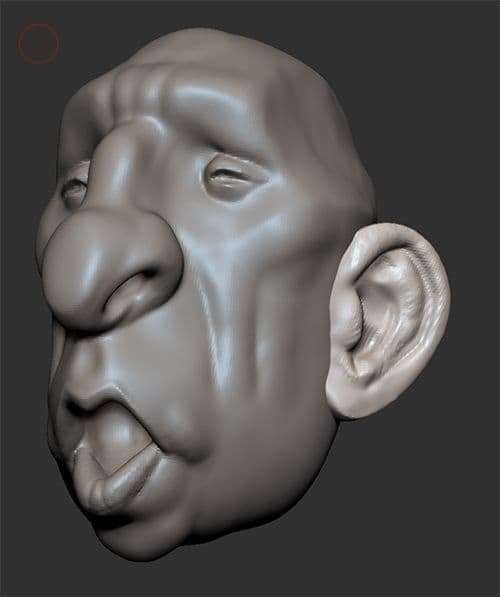
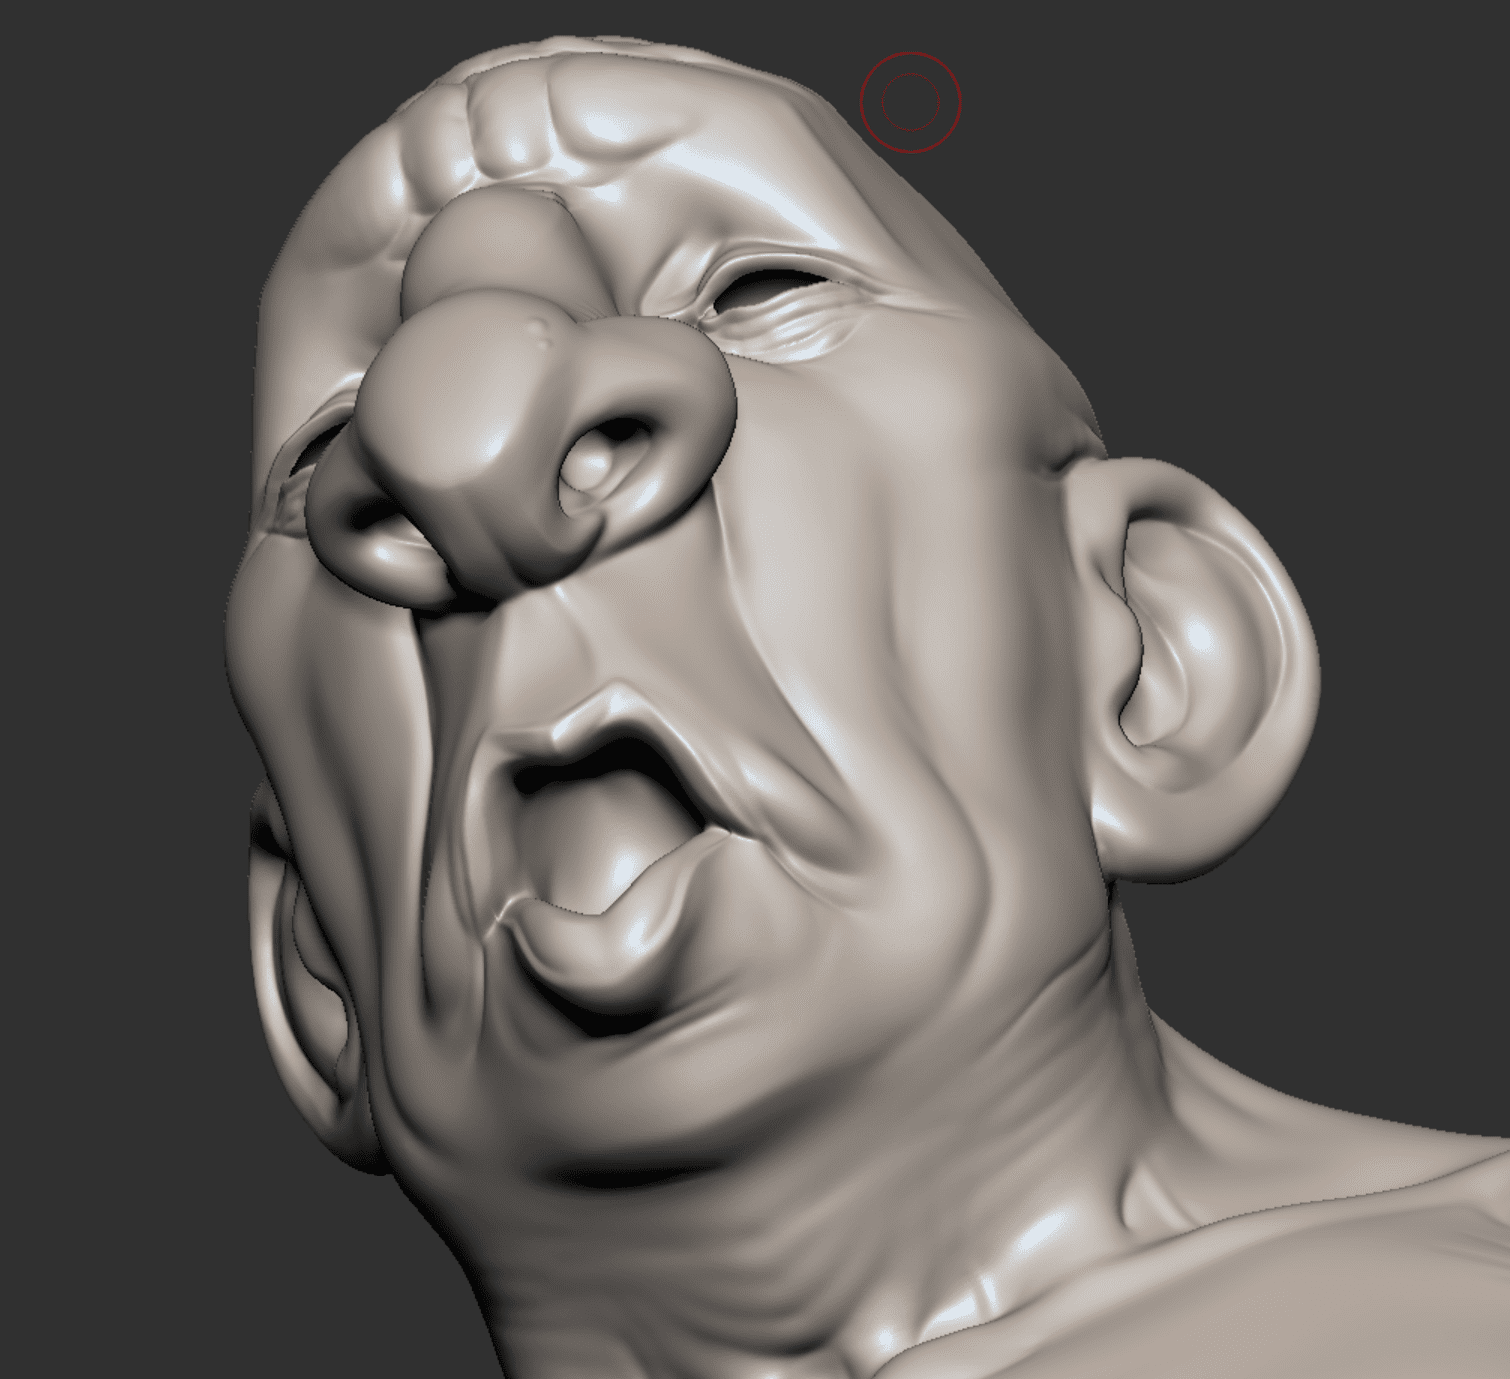
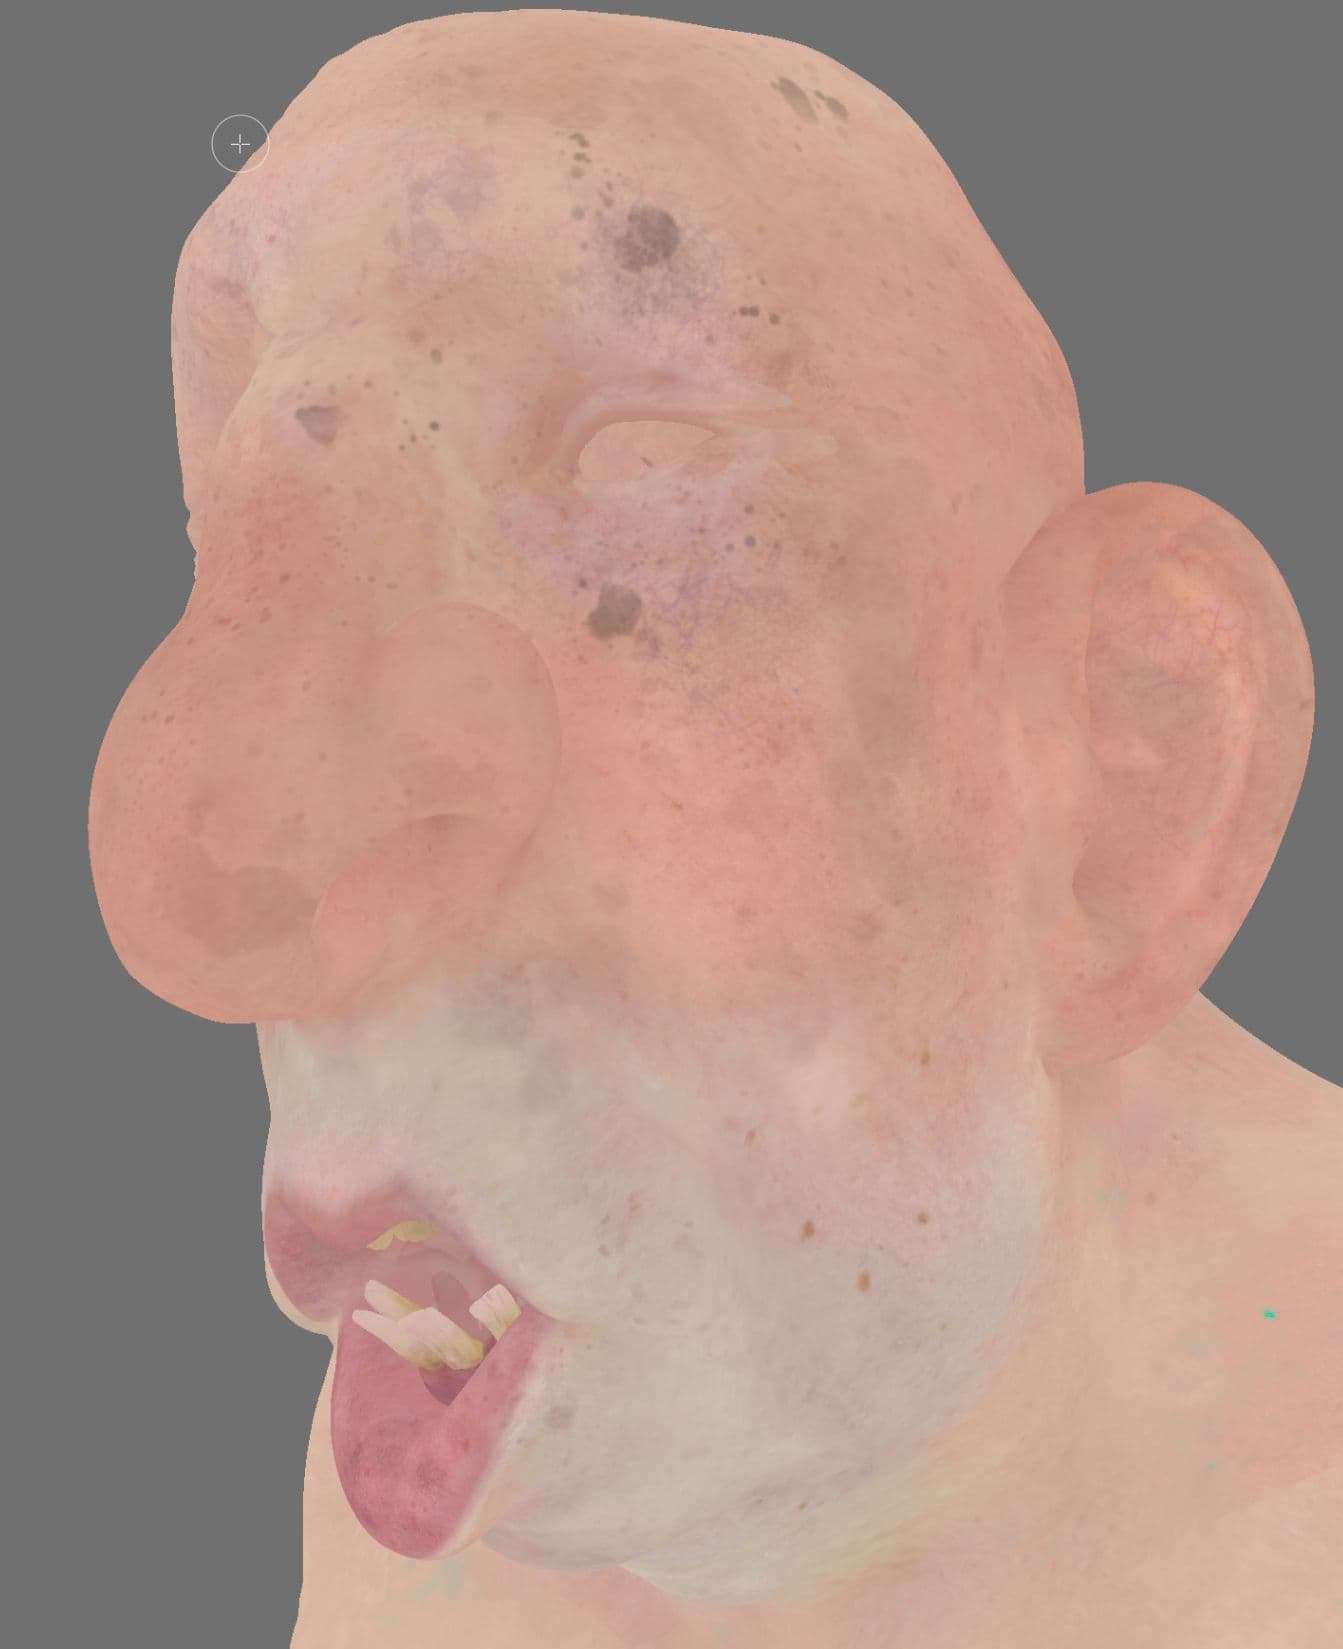
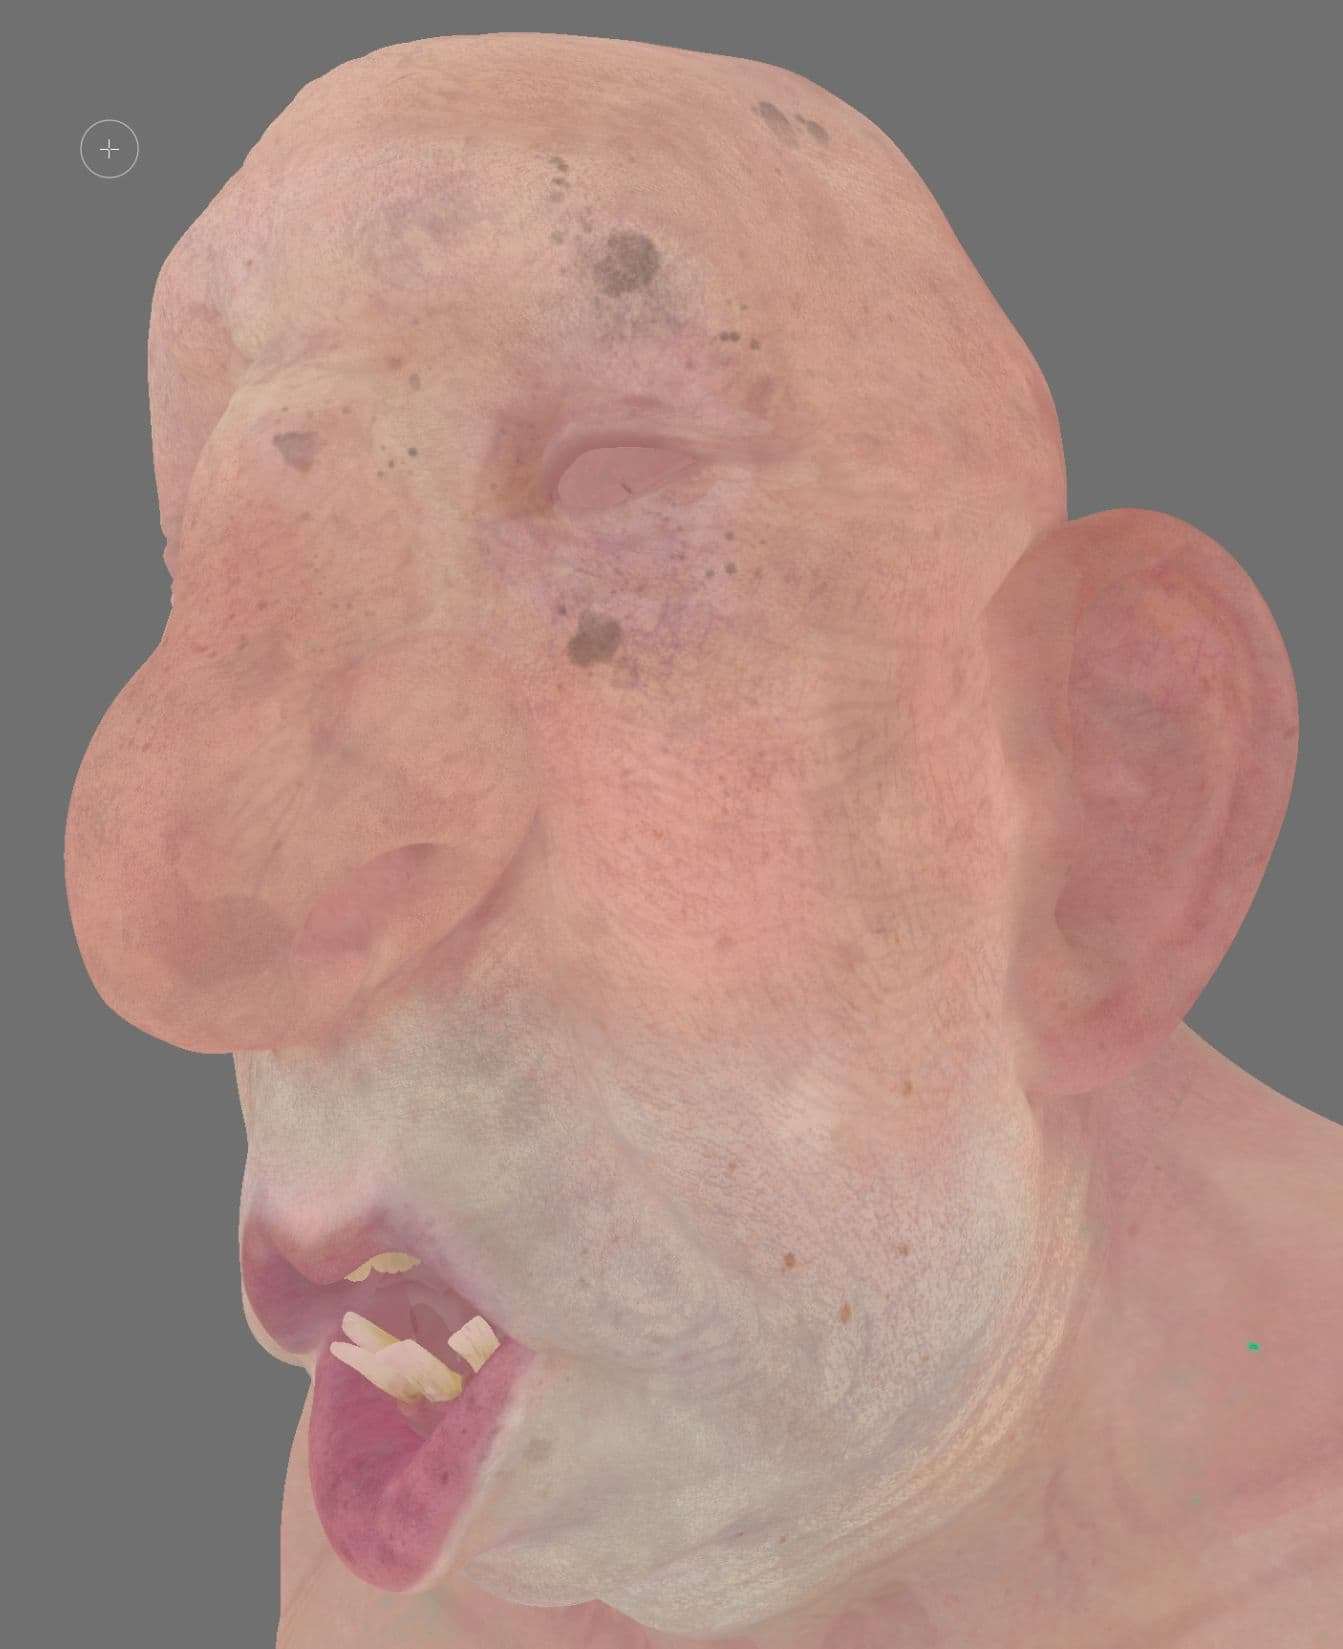
Since it’s an organic character, I started out in ZBrush. You can start from a base mesh, but I always enjoy starting from primitive objects and building up form from there. This way I don't have to think about the topology yet and can focus 100% on sculpting. For something like this that is more stylized I focus on big, chunky, primary and secondary forms. If you can nail those, the tertiary and micro details will fall into place. As I work forms, I imagine everything as big cylinders, spheres, and cubes.
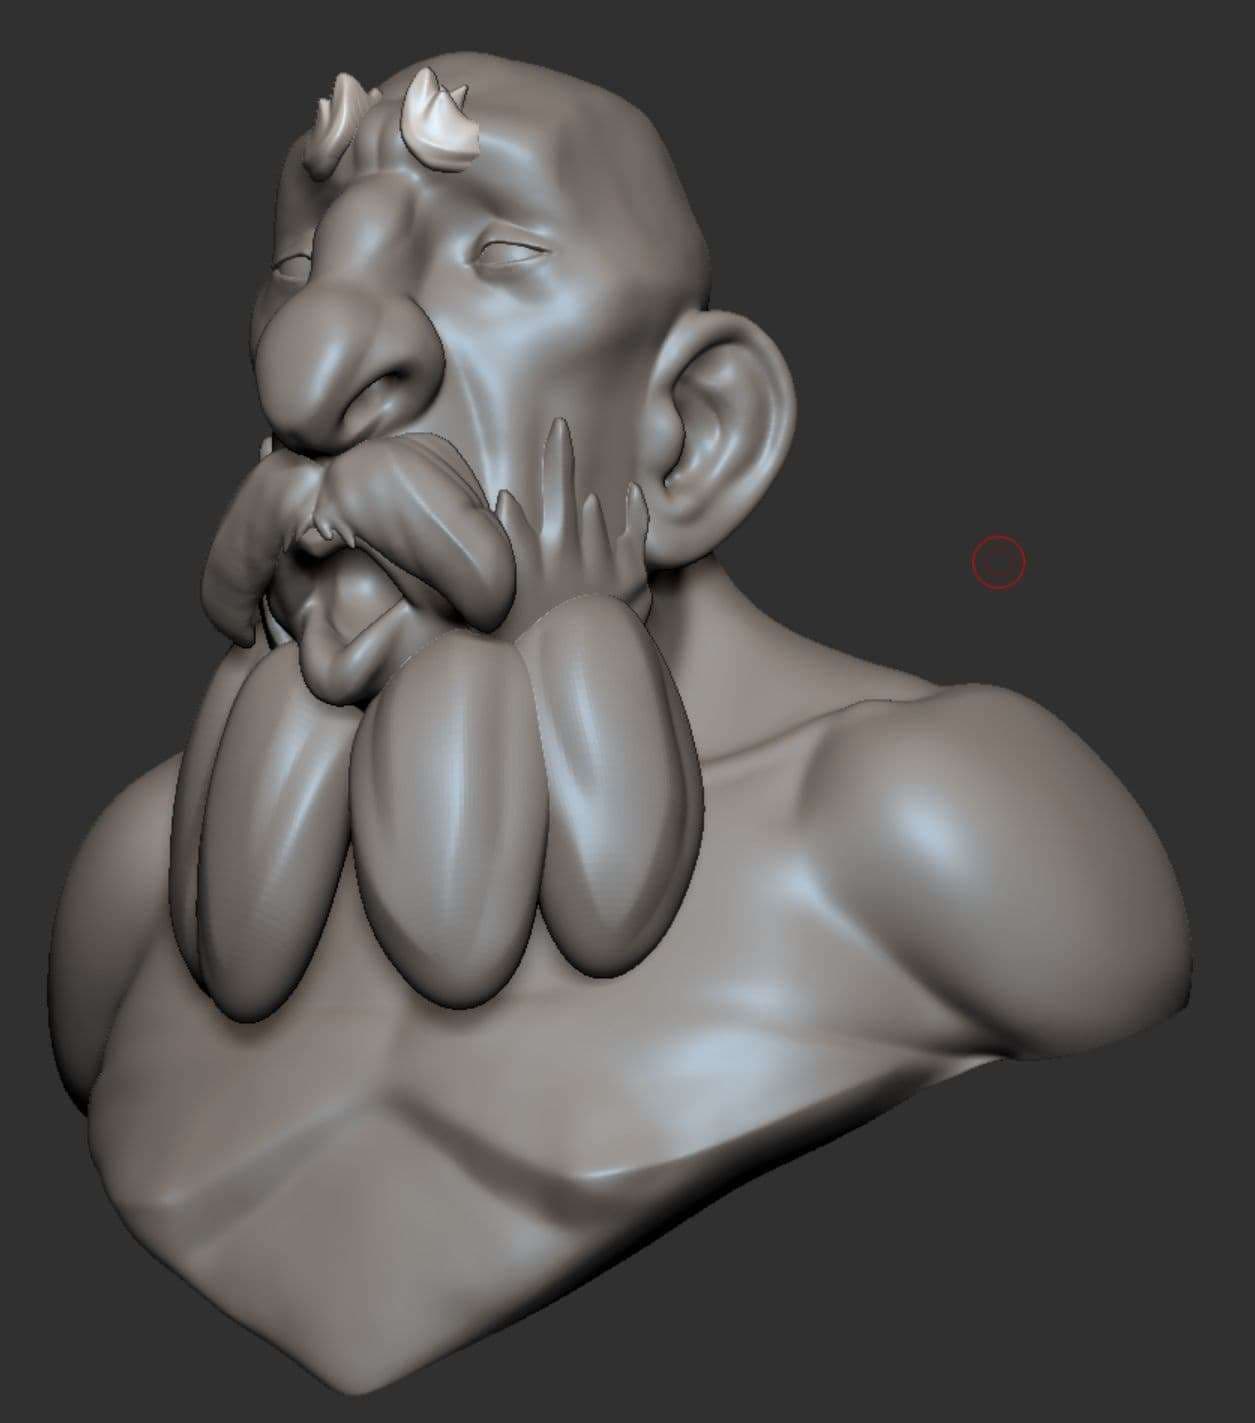
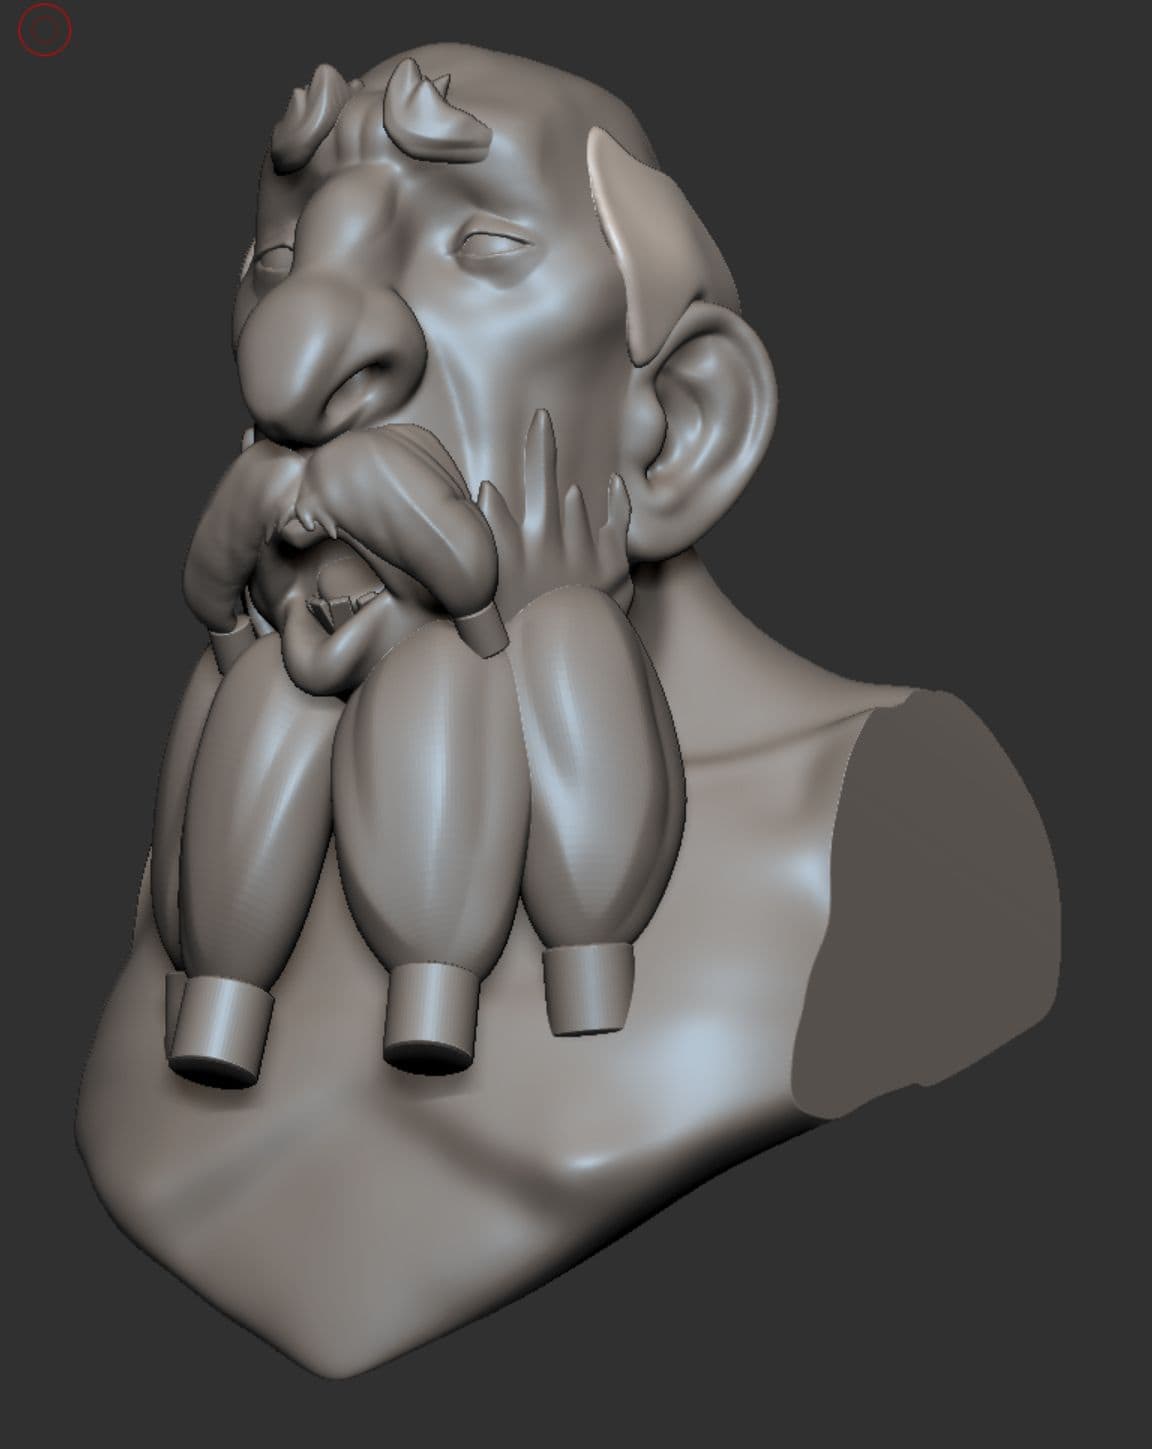
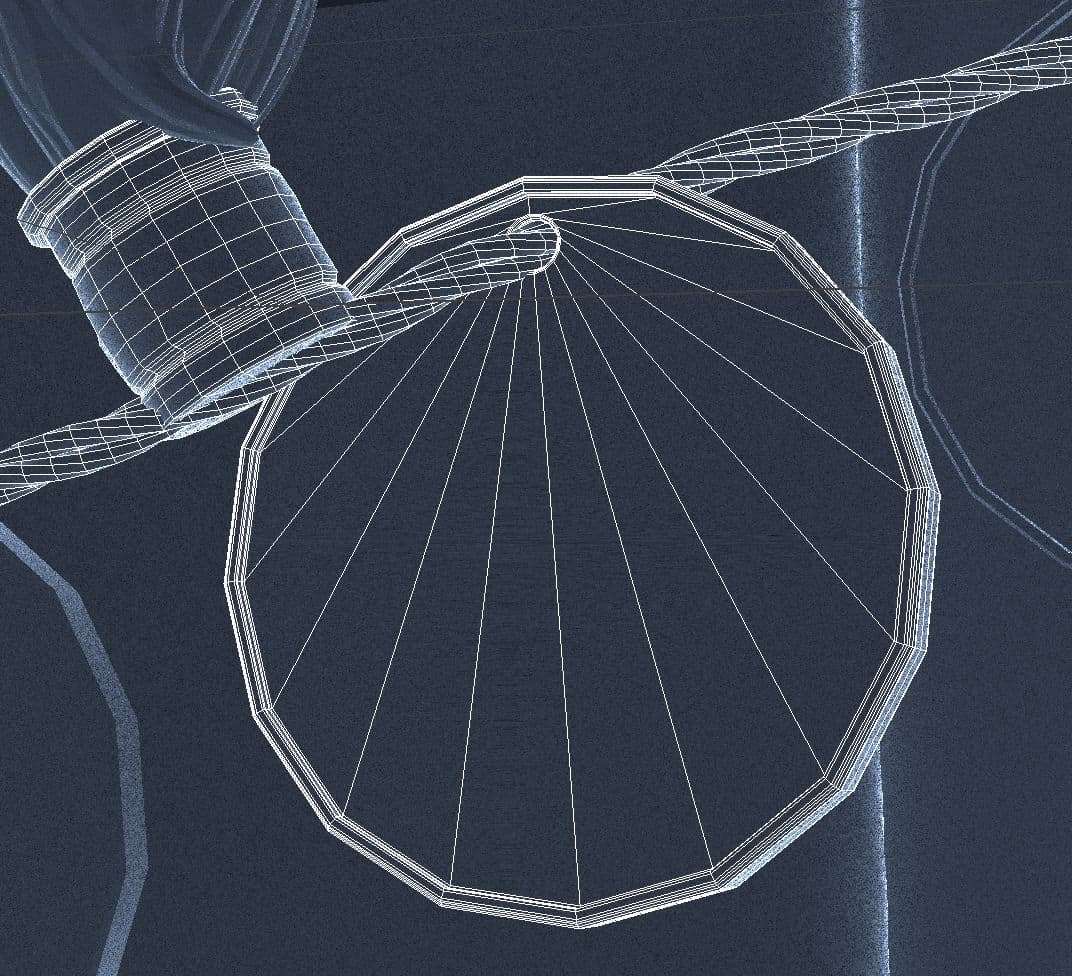
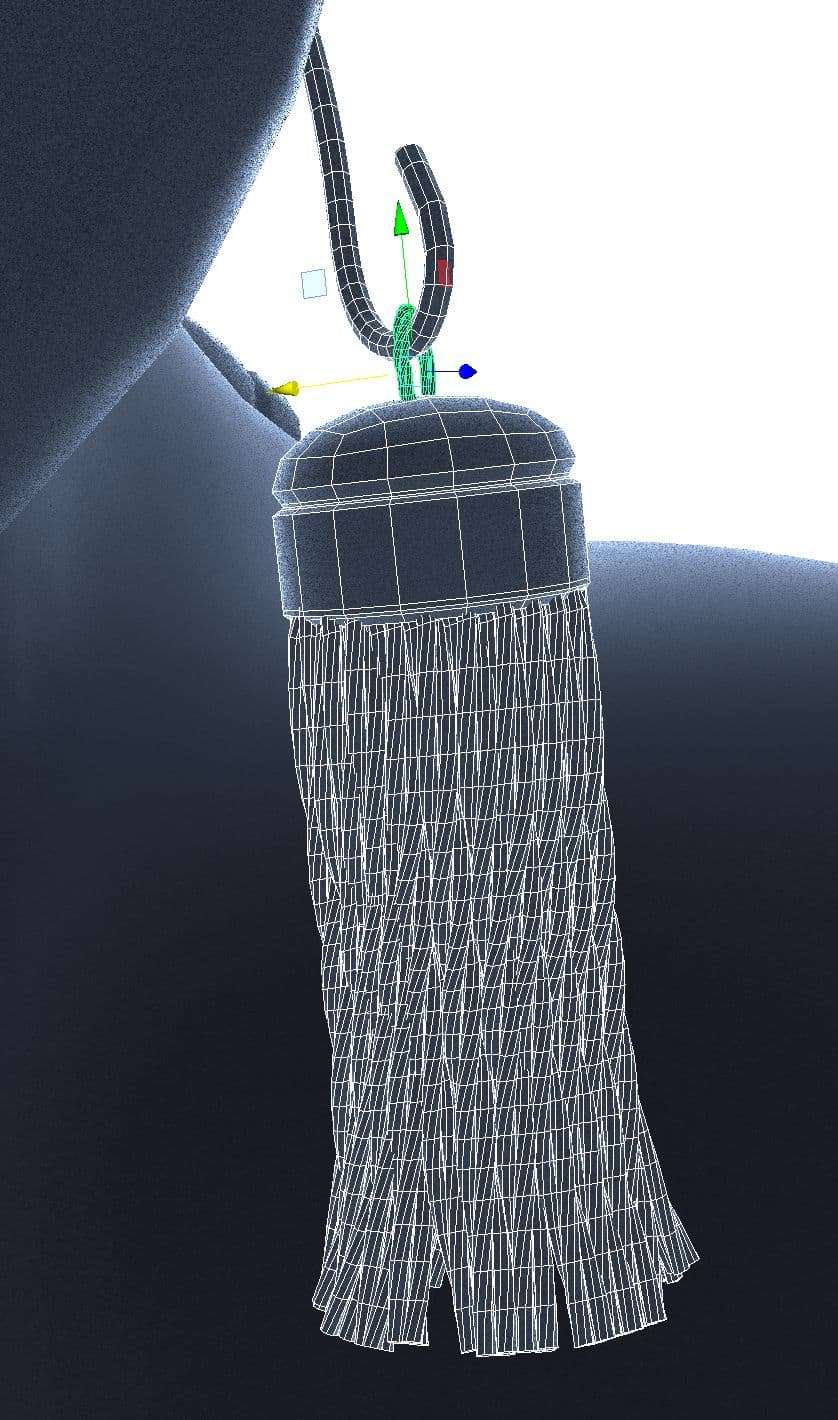
I knew from the start I would be doing Xgen for my hair, but it was still important for me to block out all the hair details with geo. This way, I’d know before even starting how the hair should behave. I was heavily inspired by this hair sculpting method used by Vimal Kerketta.
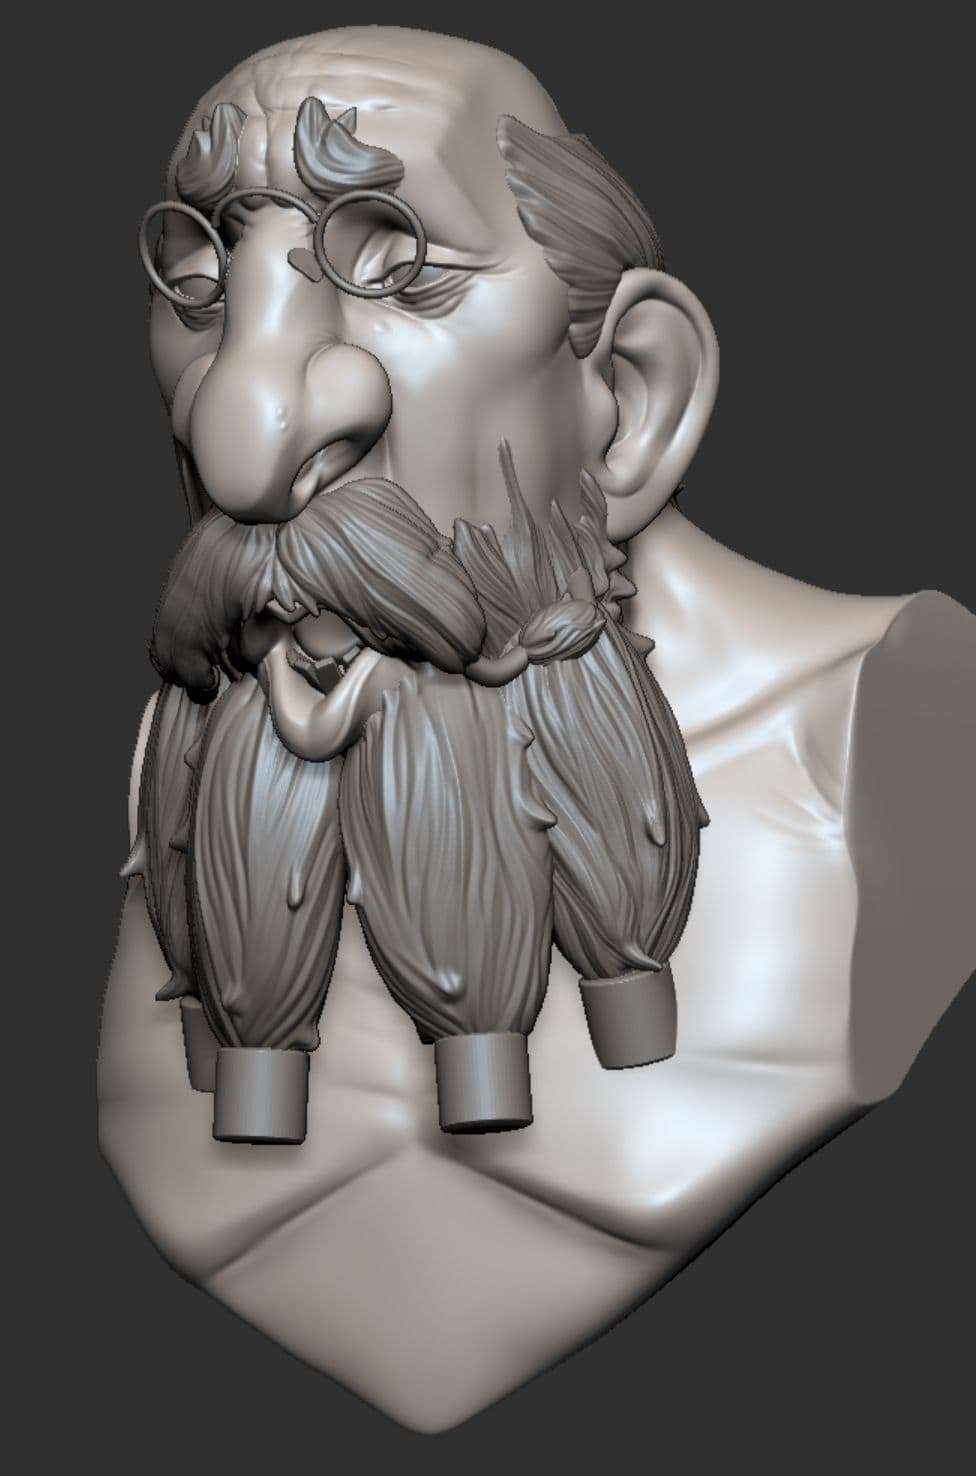
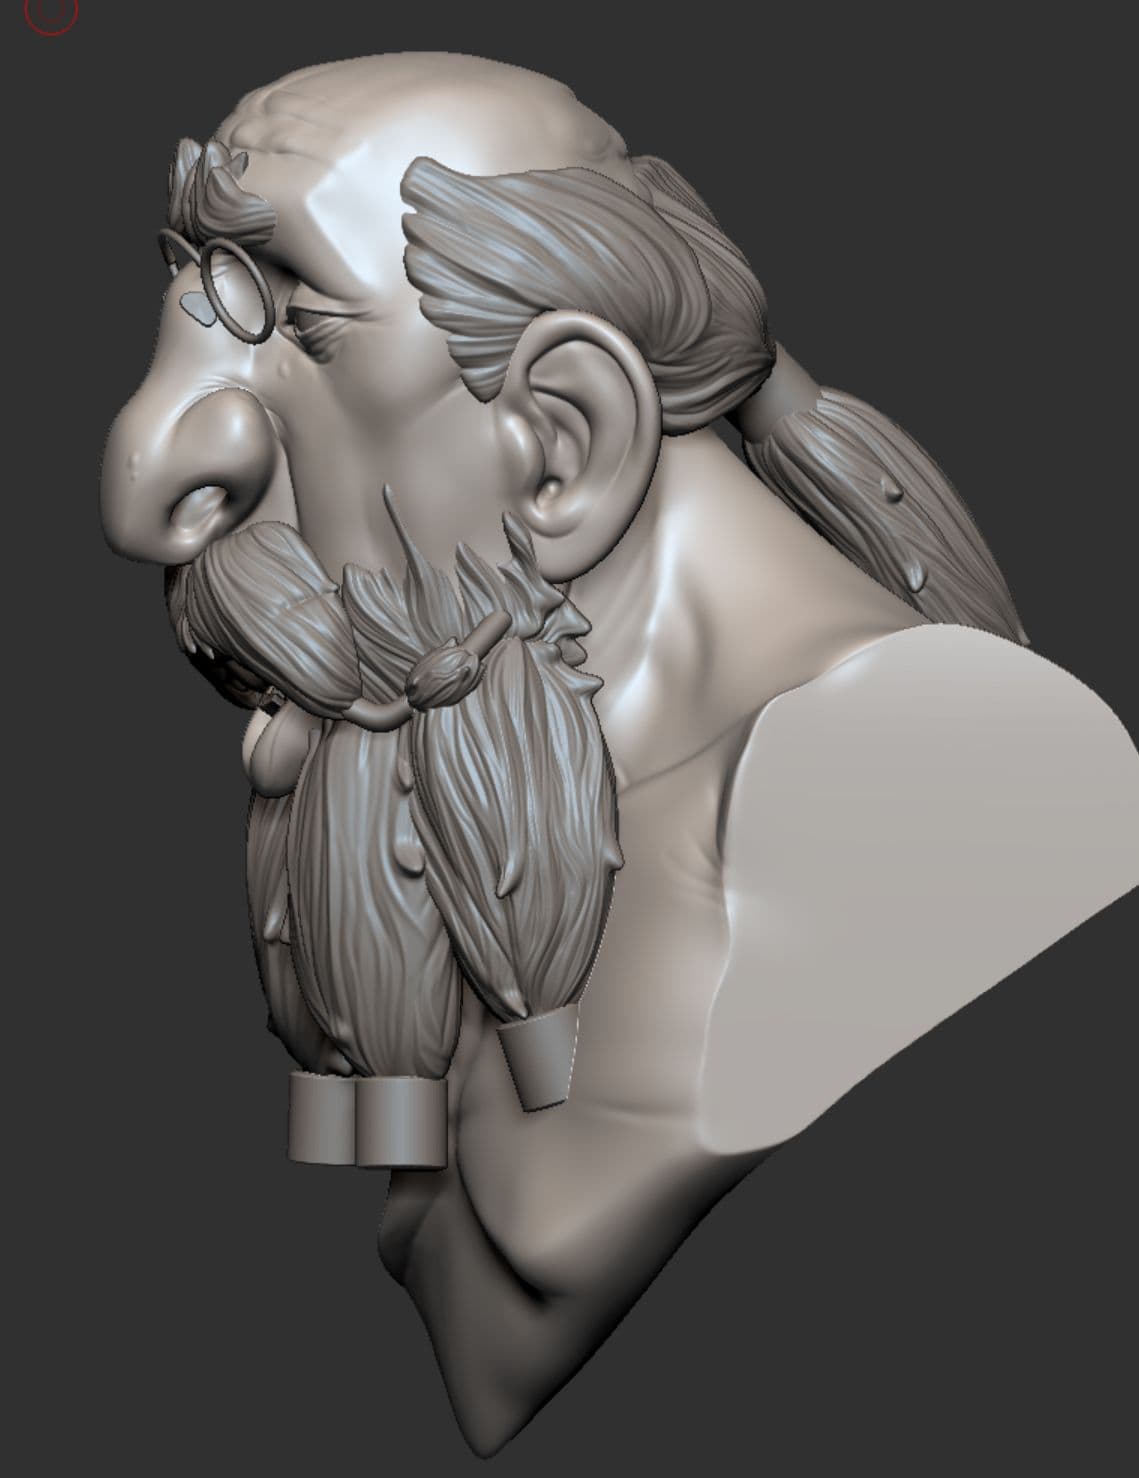
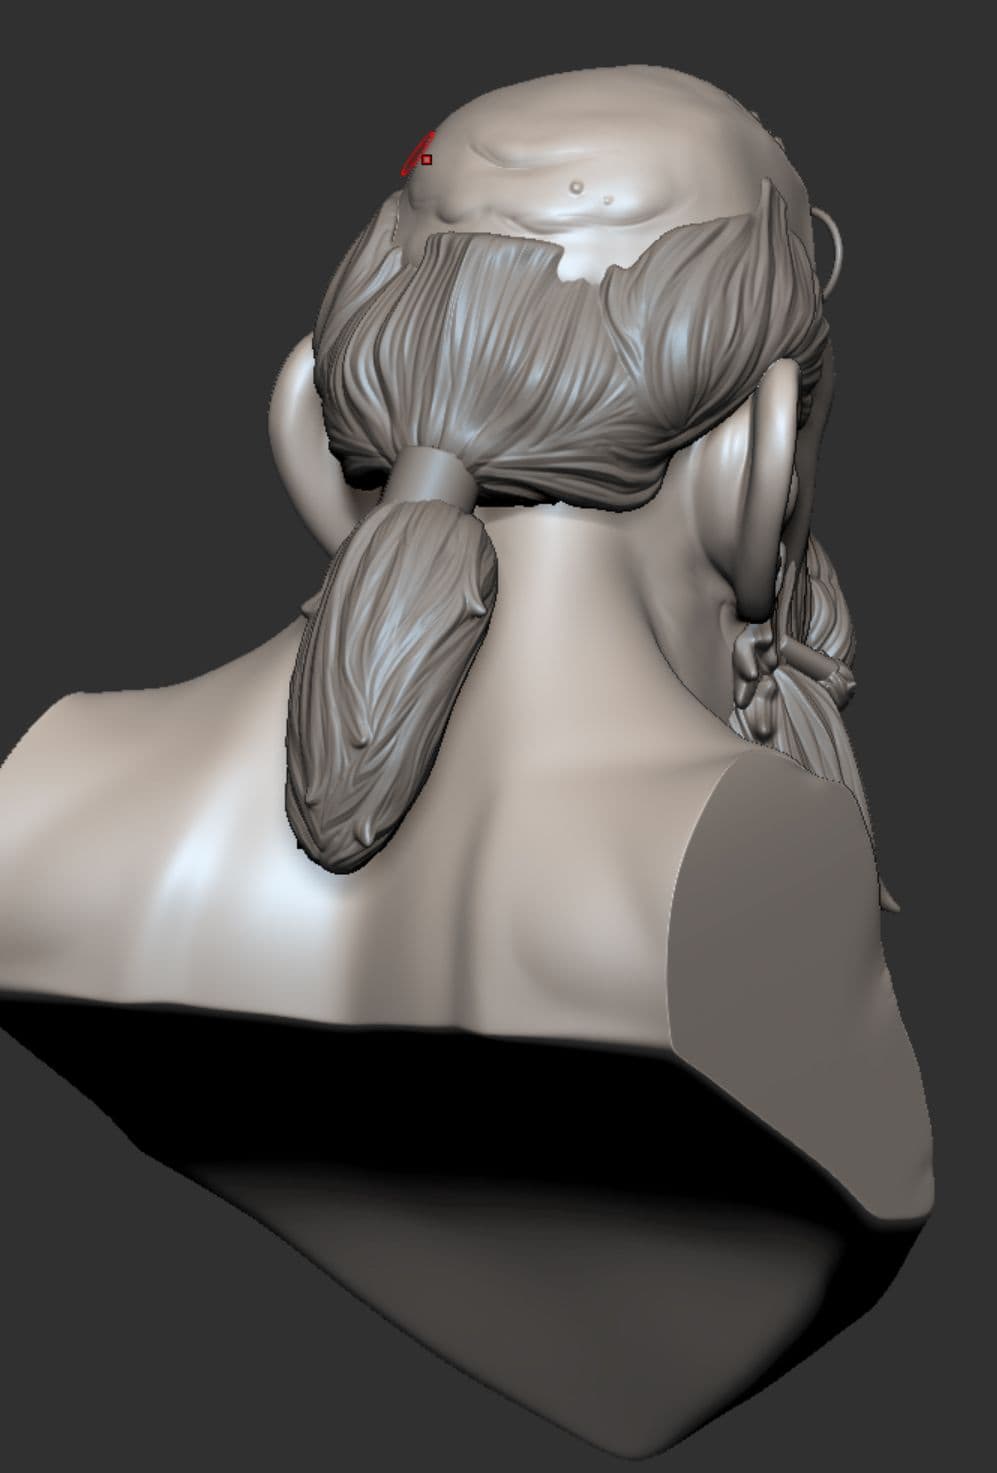
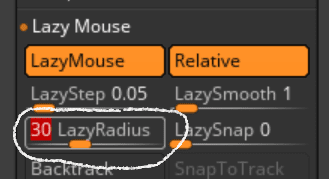
I employed the same basic principle as Vimal, using the dam-standard brush with lazymouse cranked up to 30, although I reduced the scope of the microdetail and used broader strokes. My purpose here was just to get an idea of the flow of the hair.
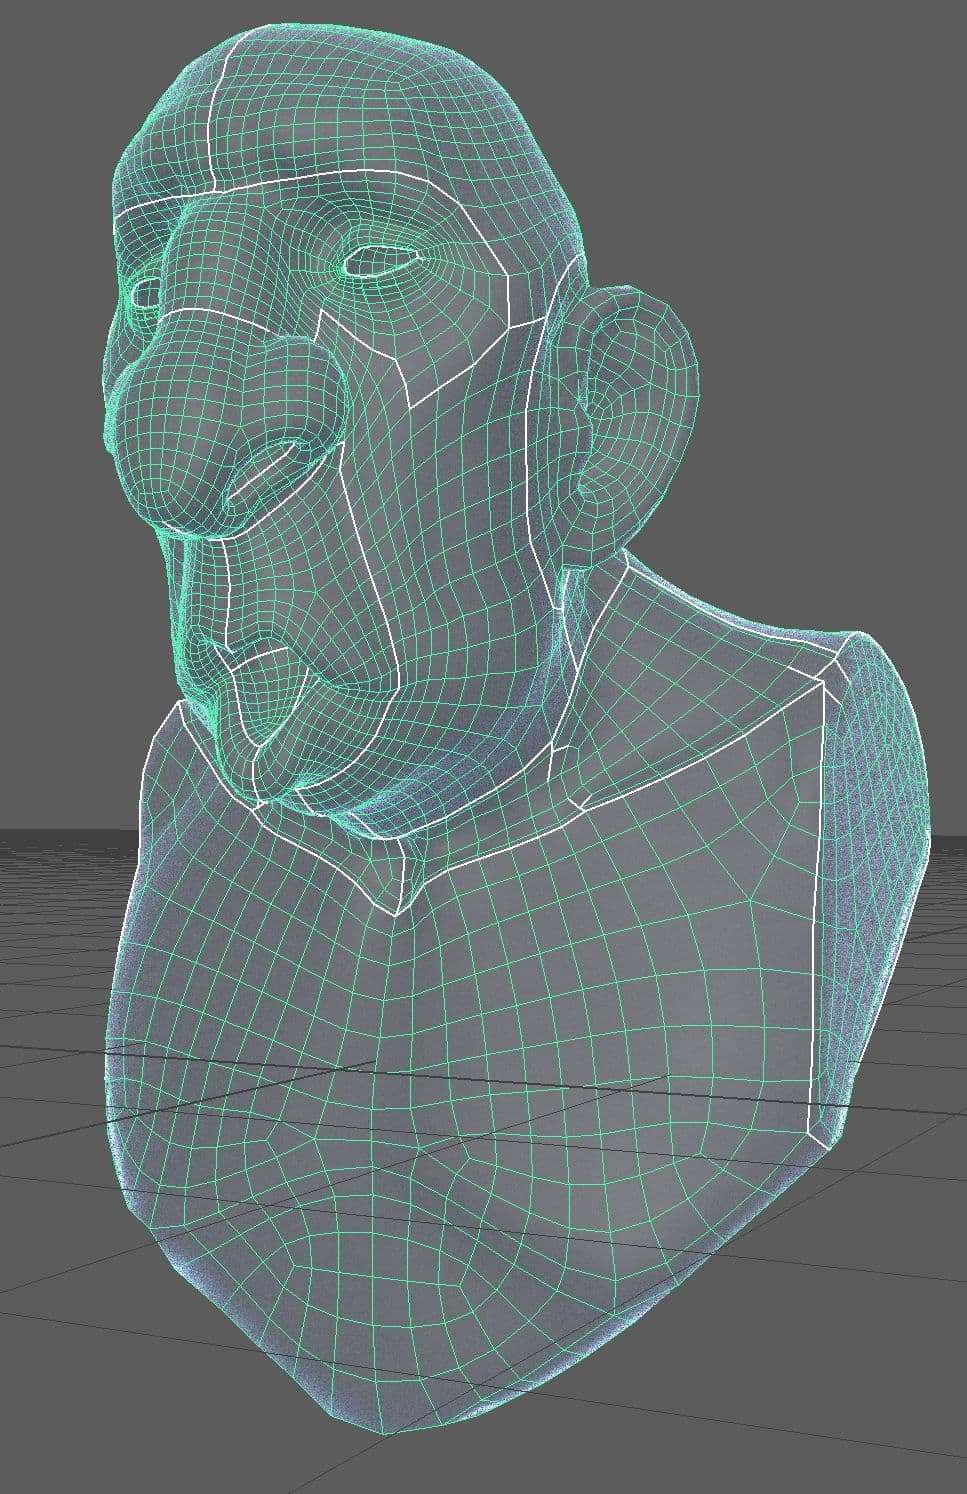
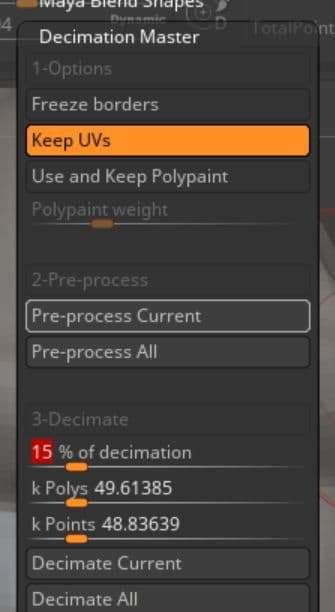
After I was satisfied with the sculpt I brought it back into Maya as a decimated mesh to retopologize. While perfect topology was not a priority, it was important to maximize my UDIM space to make the most of the high resolution texturesxyz displacement and albedo data.
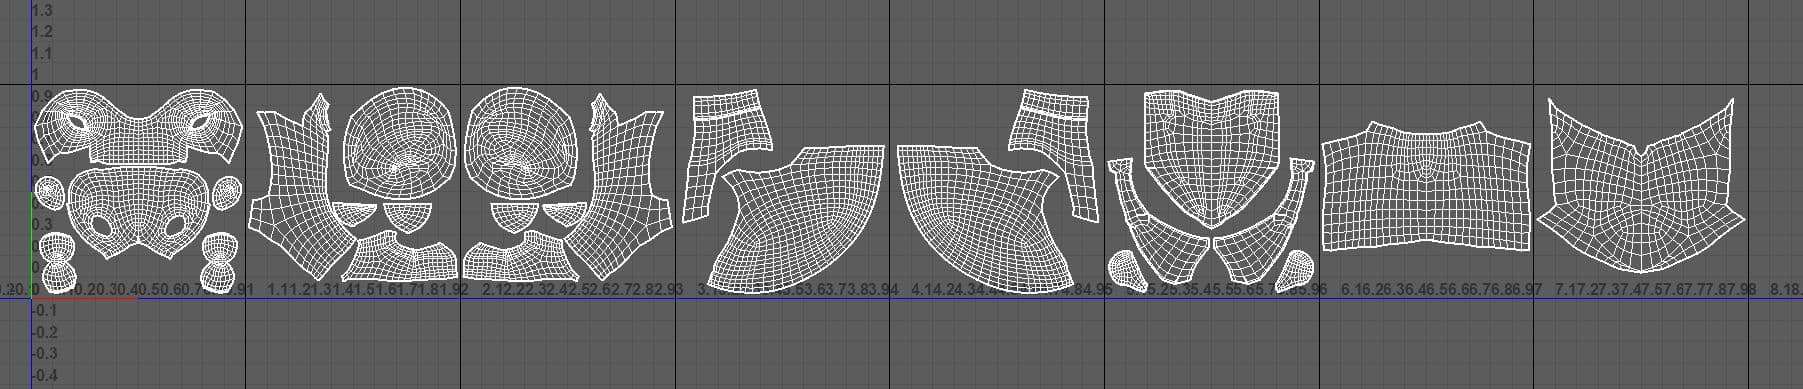
4k textures times each of the 8 UDIM tiles = a lot of resolution support!
It was important to me to find as much real-world reference as possible despite the project's overall stylized influences. For final topology here I followed a simple sub-d modeling workflow in Maya. Nothing fancy, just placing supporting edge-loops where needed. Again, my focus for this project was texturing and look development, so perfect topology was less important than good UVs.
If it’s a prop I knew could benefit from sculpted detail back in Zbrush, I would generally make sure to have even quads so I wouldn’t have any topology errors while subdividing.
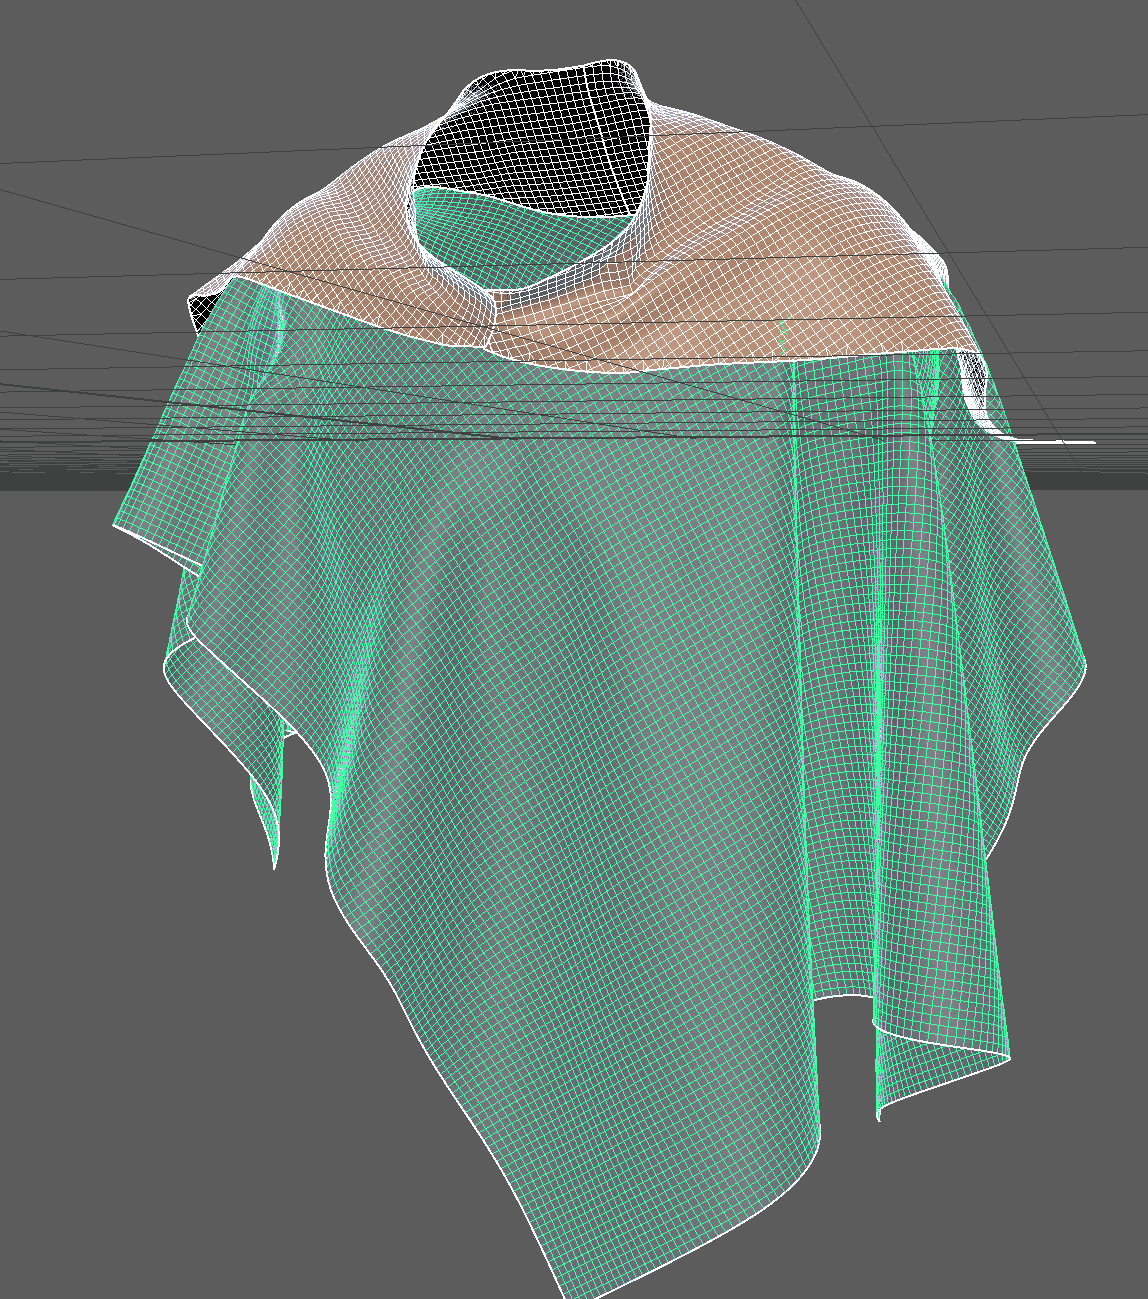
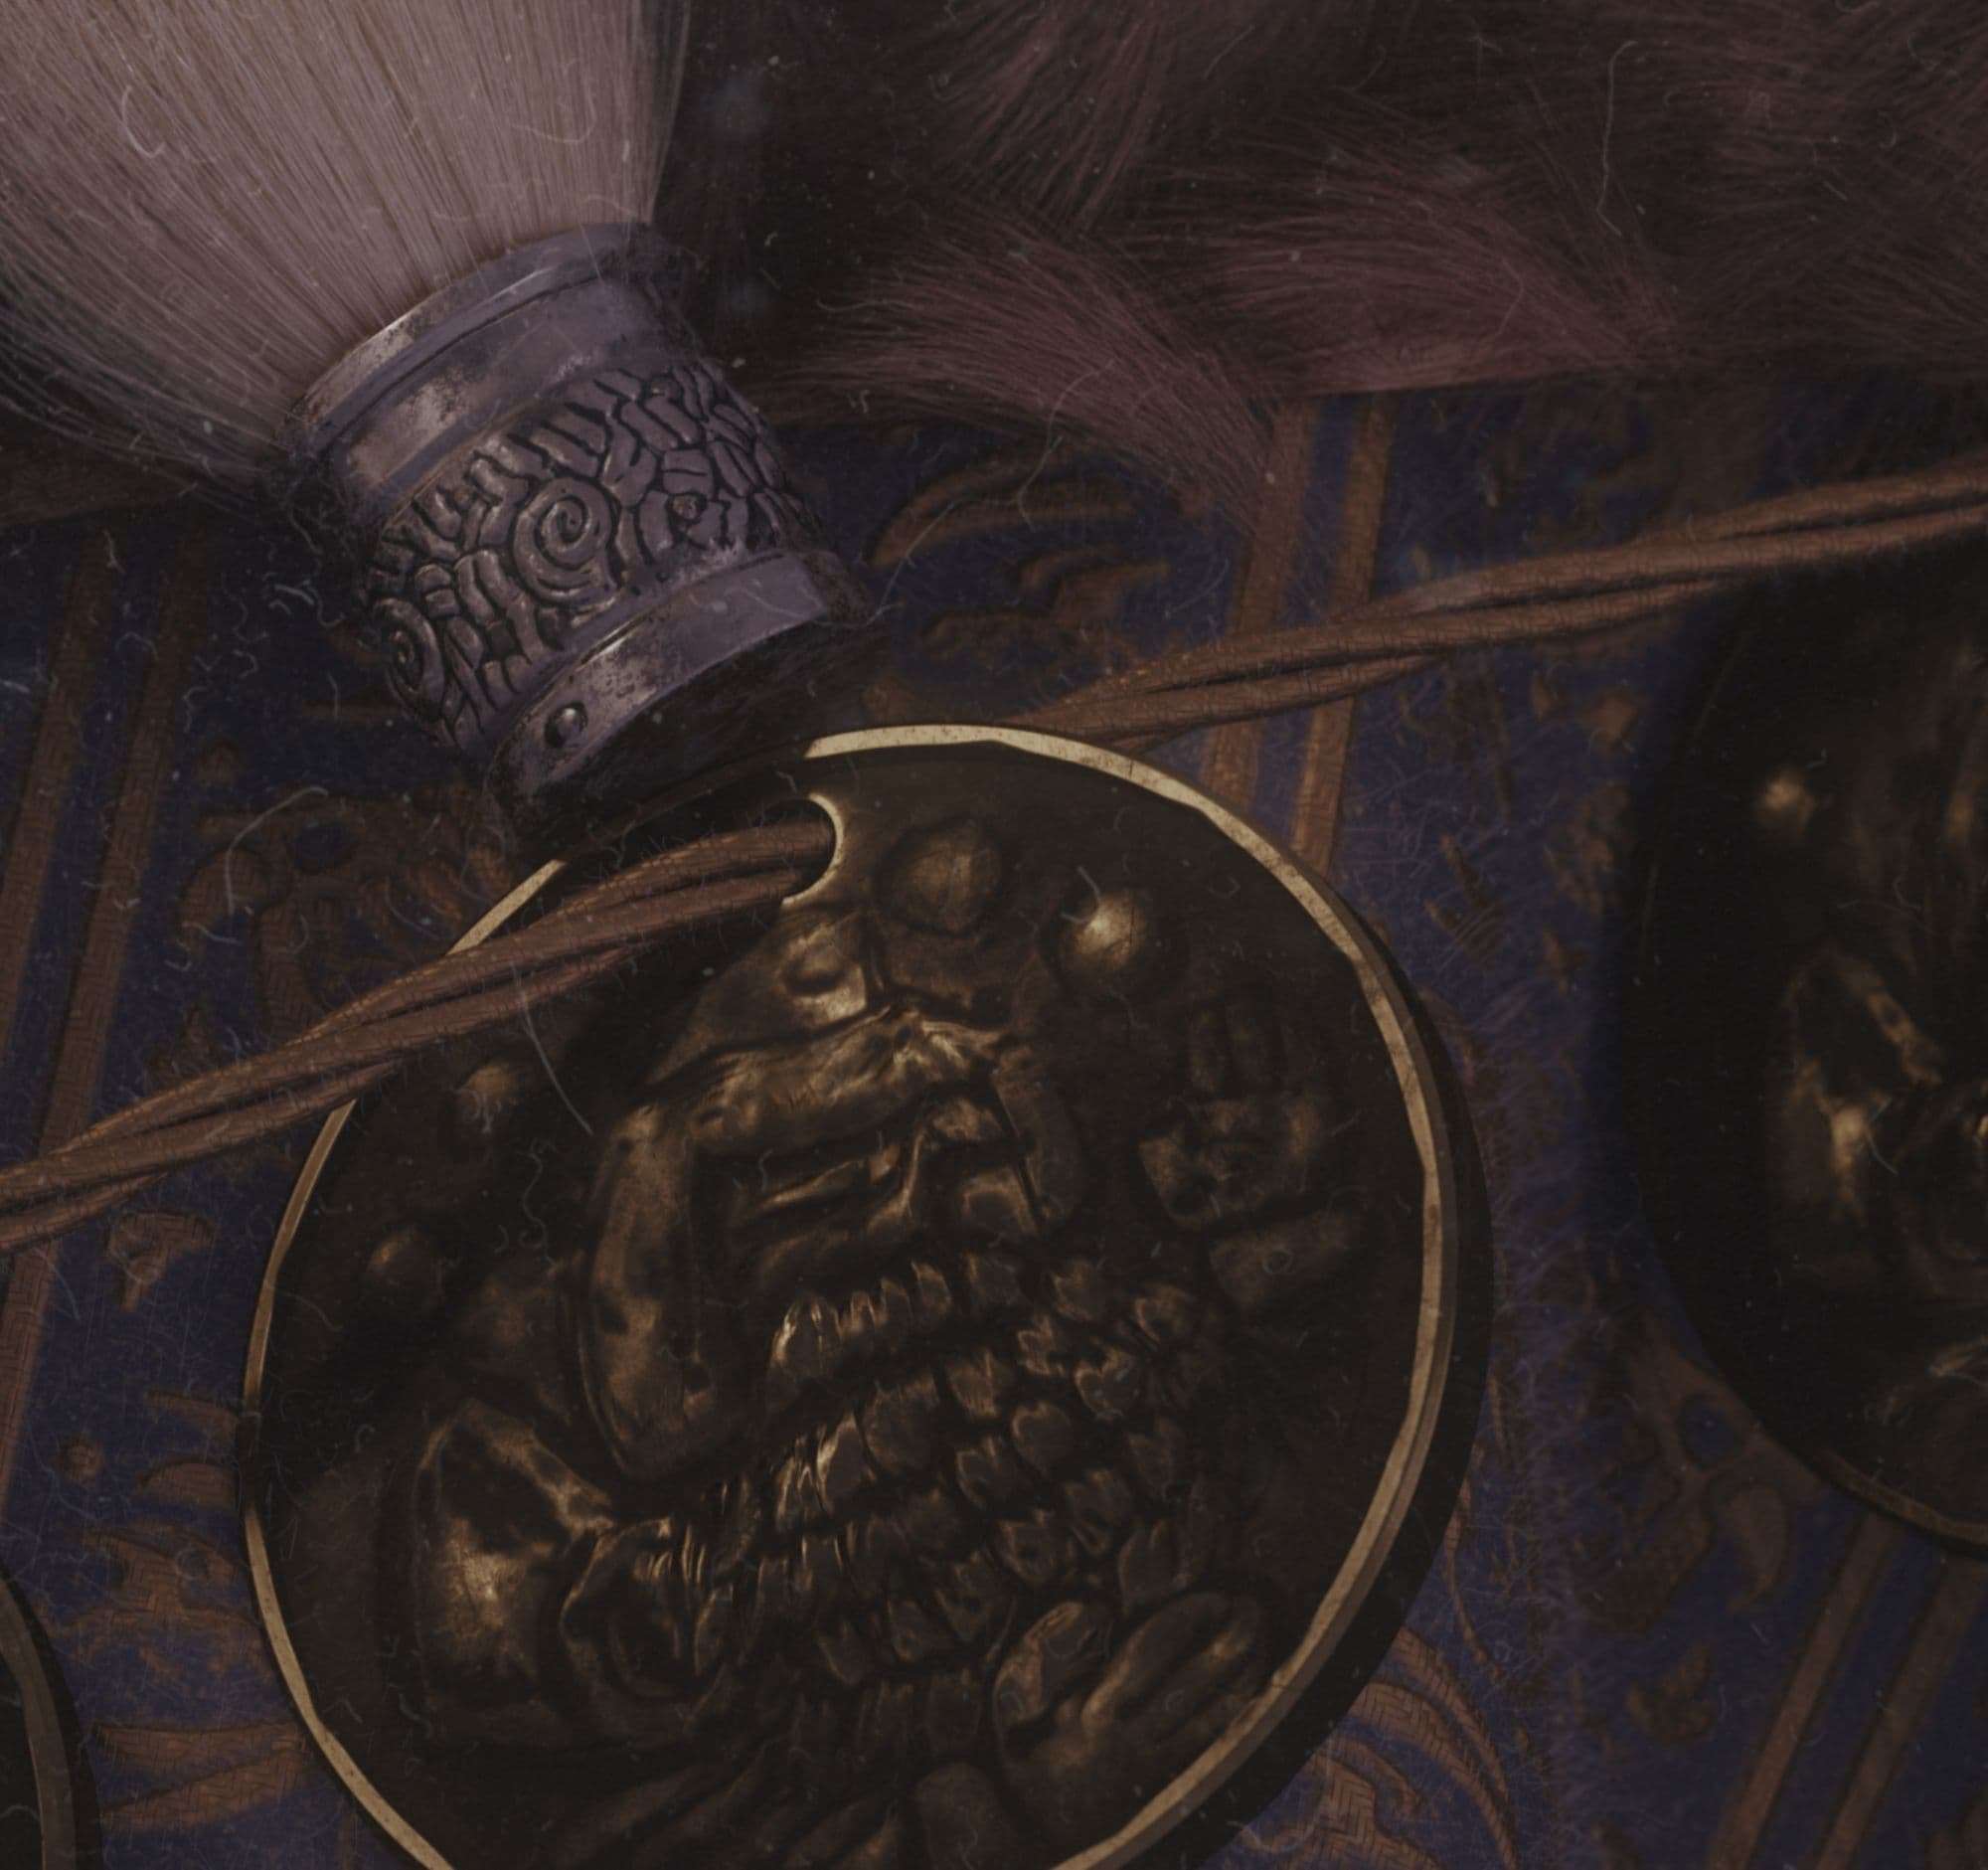
For the shirt and fur coat, I used a simple poncho pattern in Marvelous Designer. I ran the sim and used the autoquad system in Marvelous to quickly get even topology. Alternatively, you can zRemesh raw Marvelous geometry in Zbrush, or manually retopologize in Maya (or whatever equivalent third party package suits your interests).
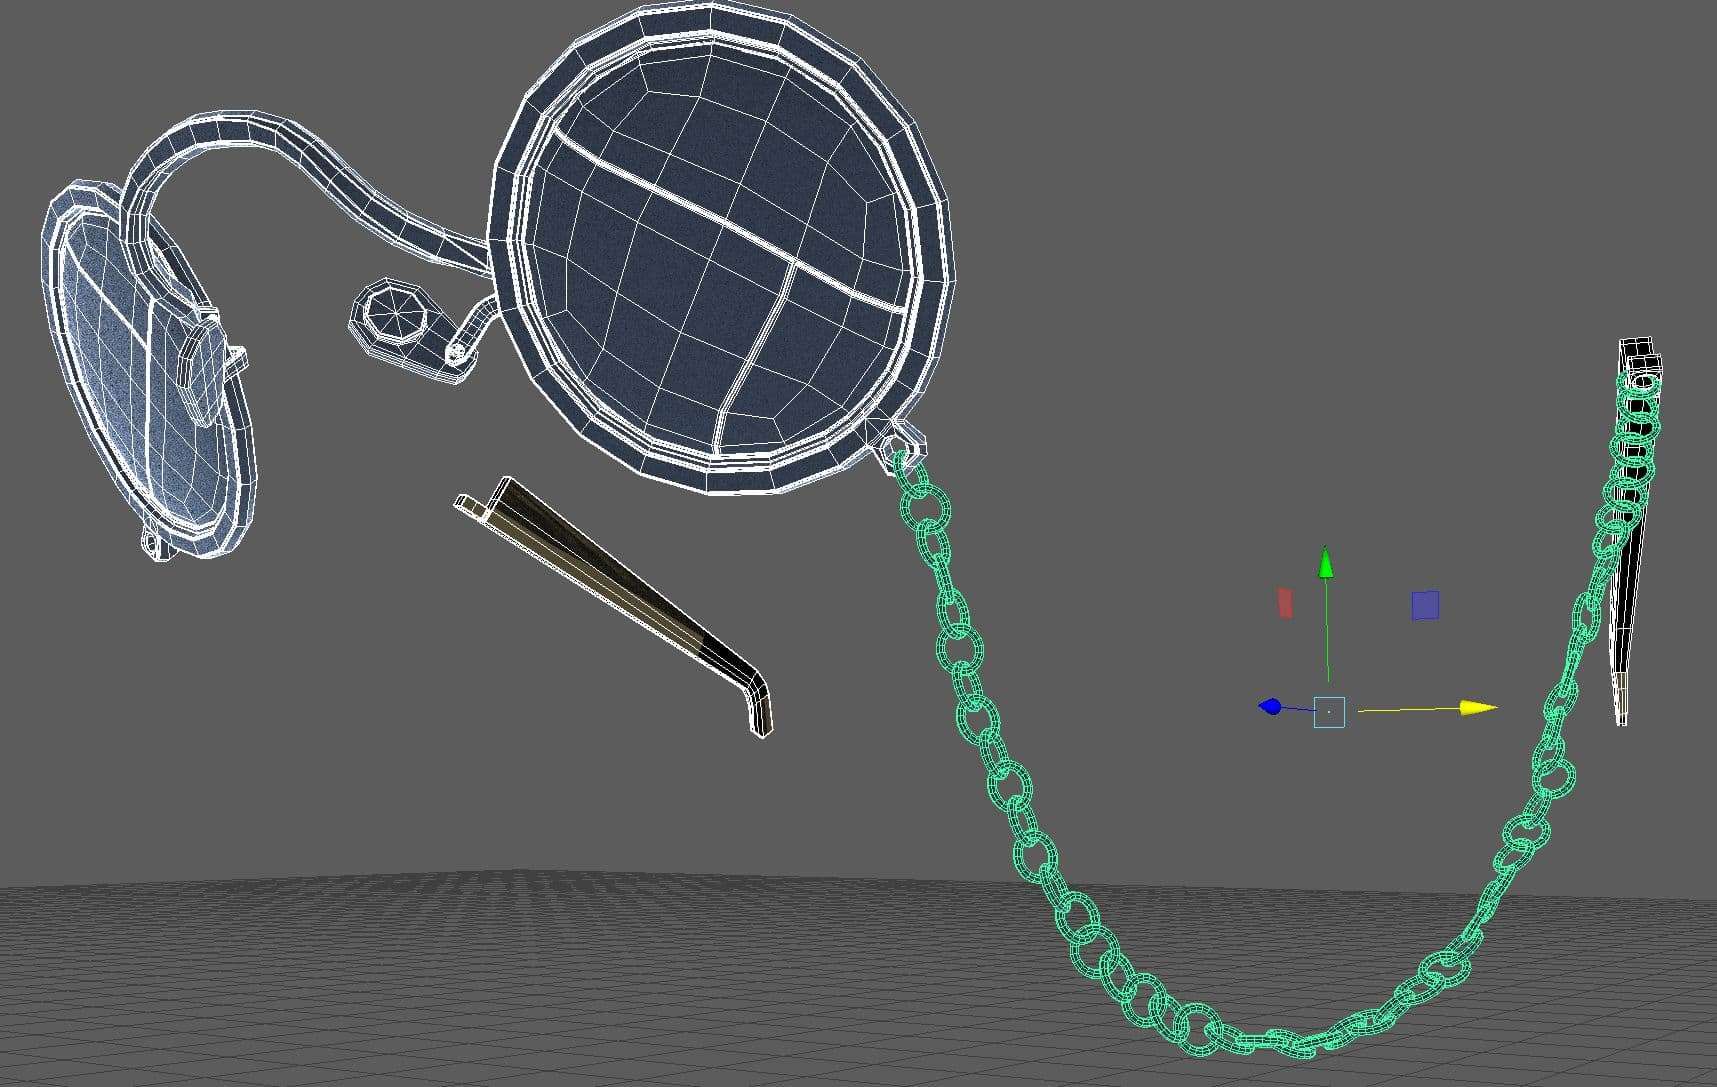
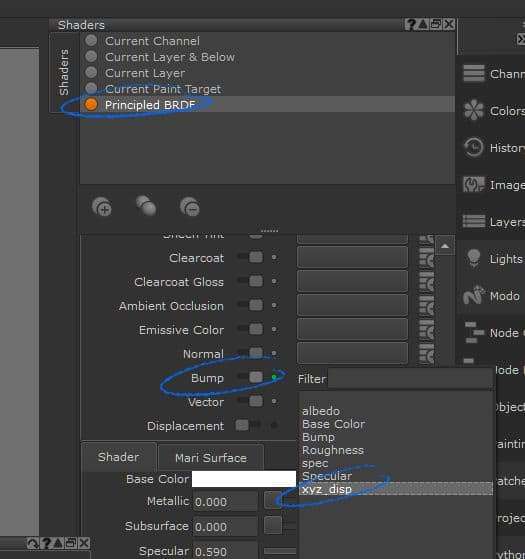
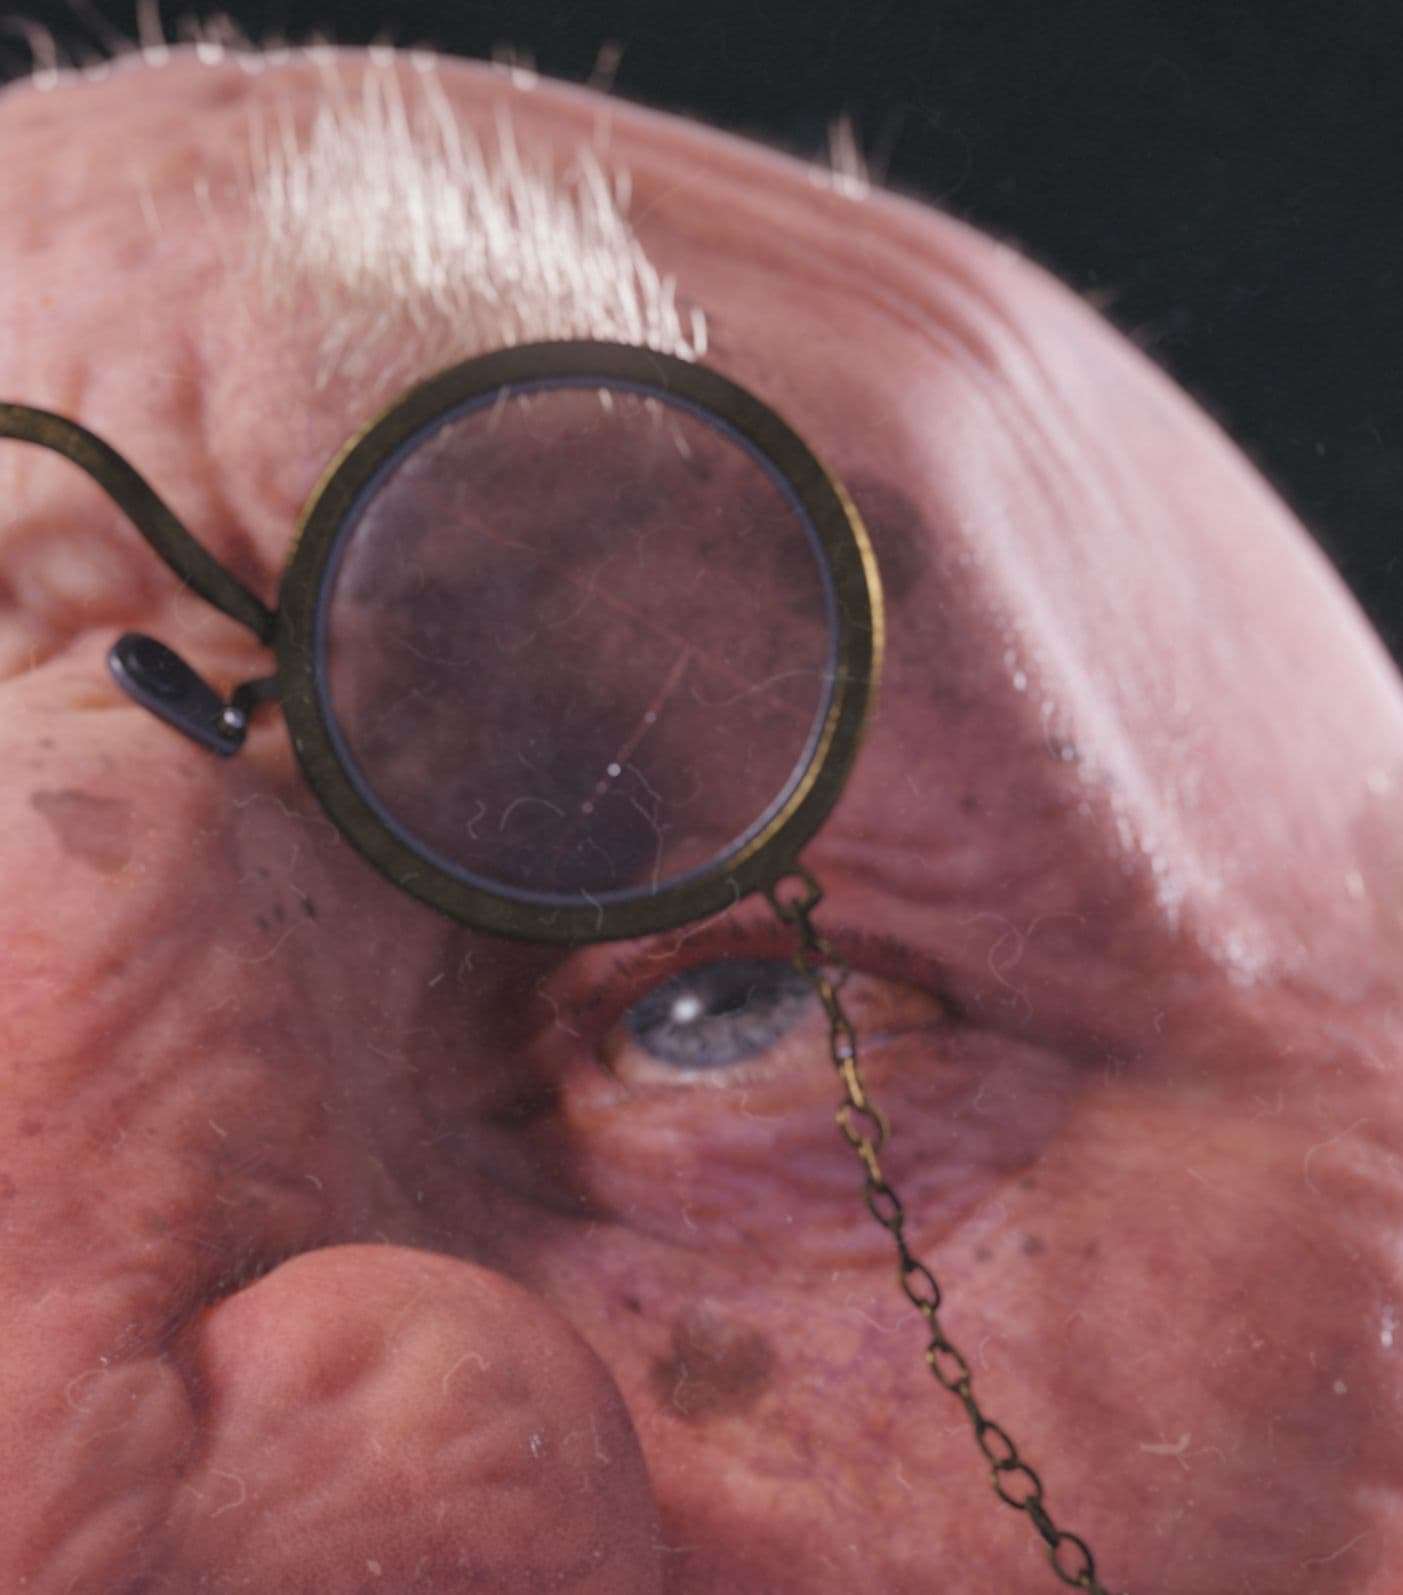
Note that a lot of this process was nonlinear for me. While I was beginning my textures, I was also setting up a shot camera, lights, and some base materials (such as the refractive material on the lenses and the cornea) back in Maya.
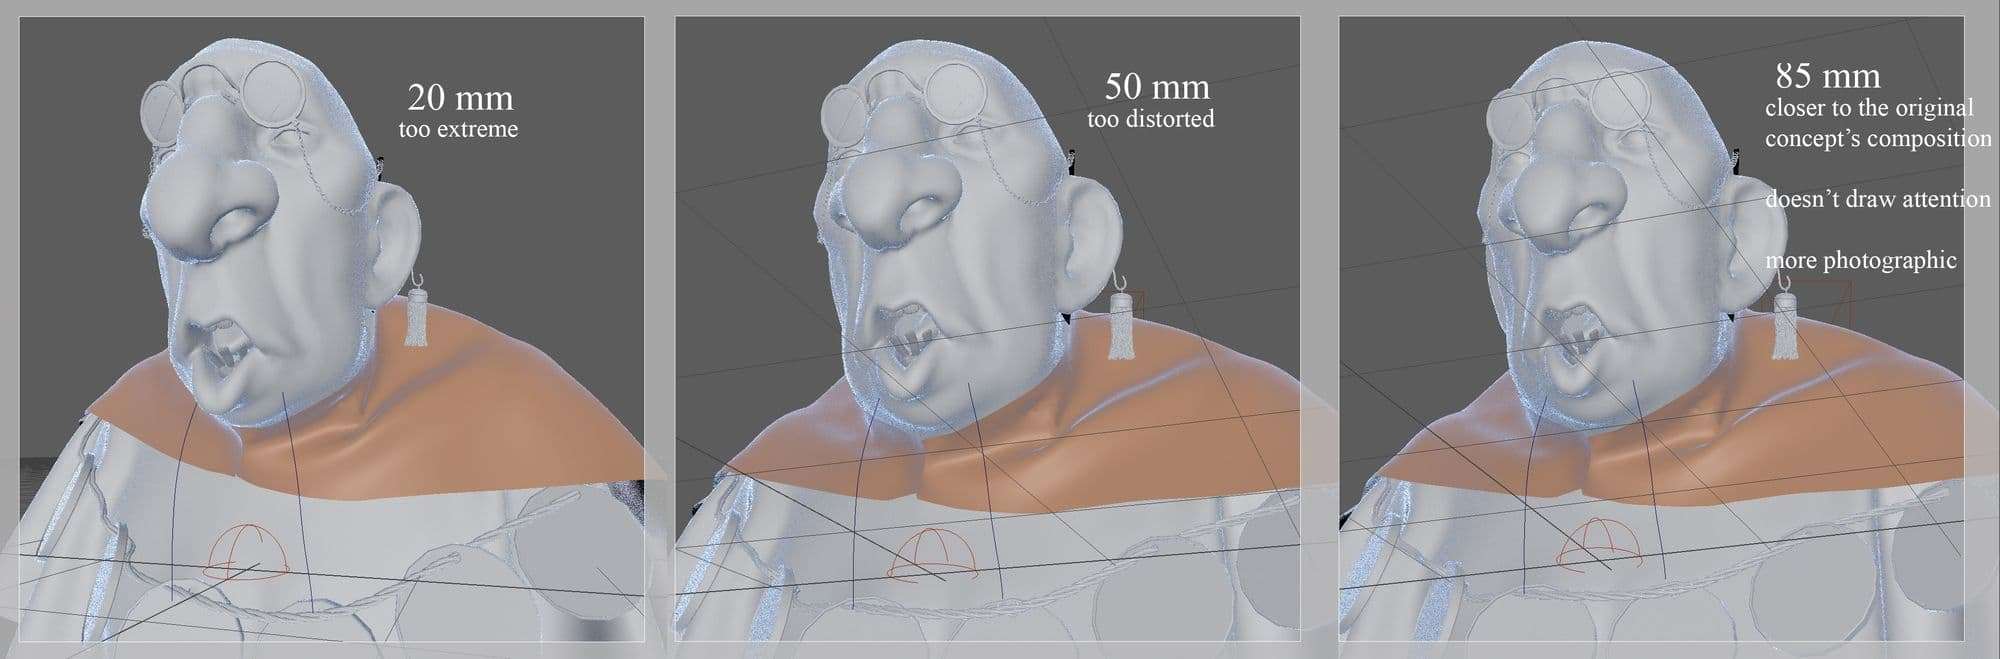
I messed with a few filmic focal lengths before settling on something that felt a little more natural.
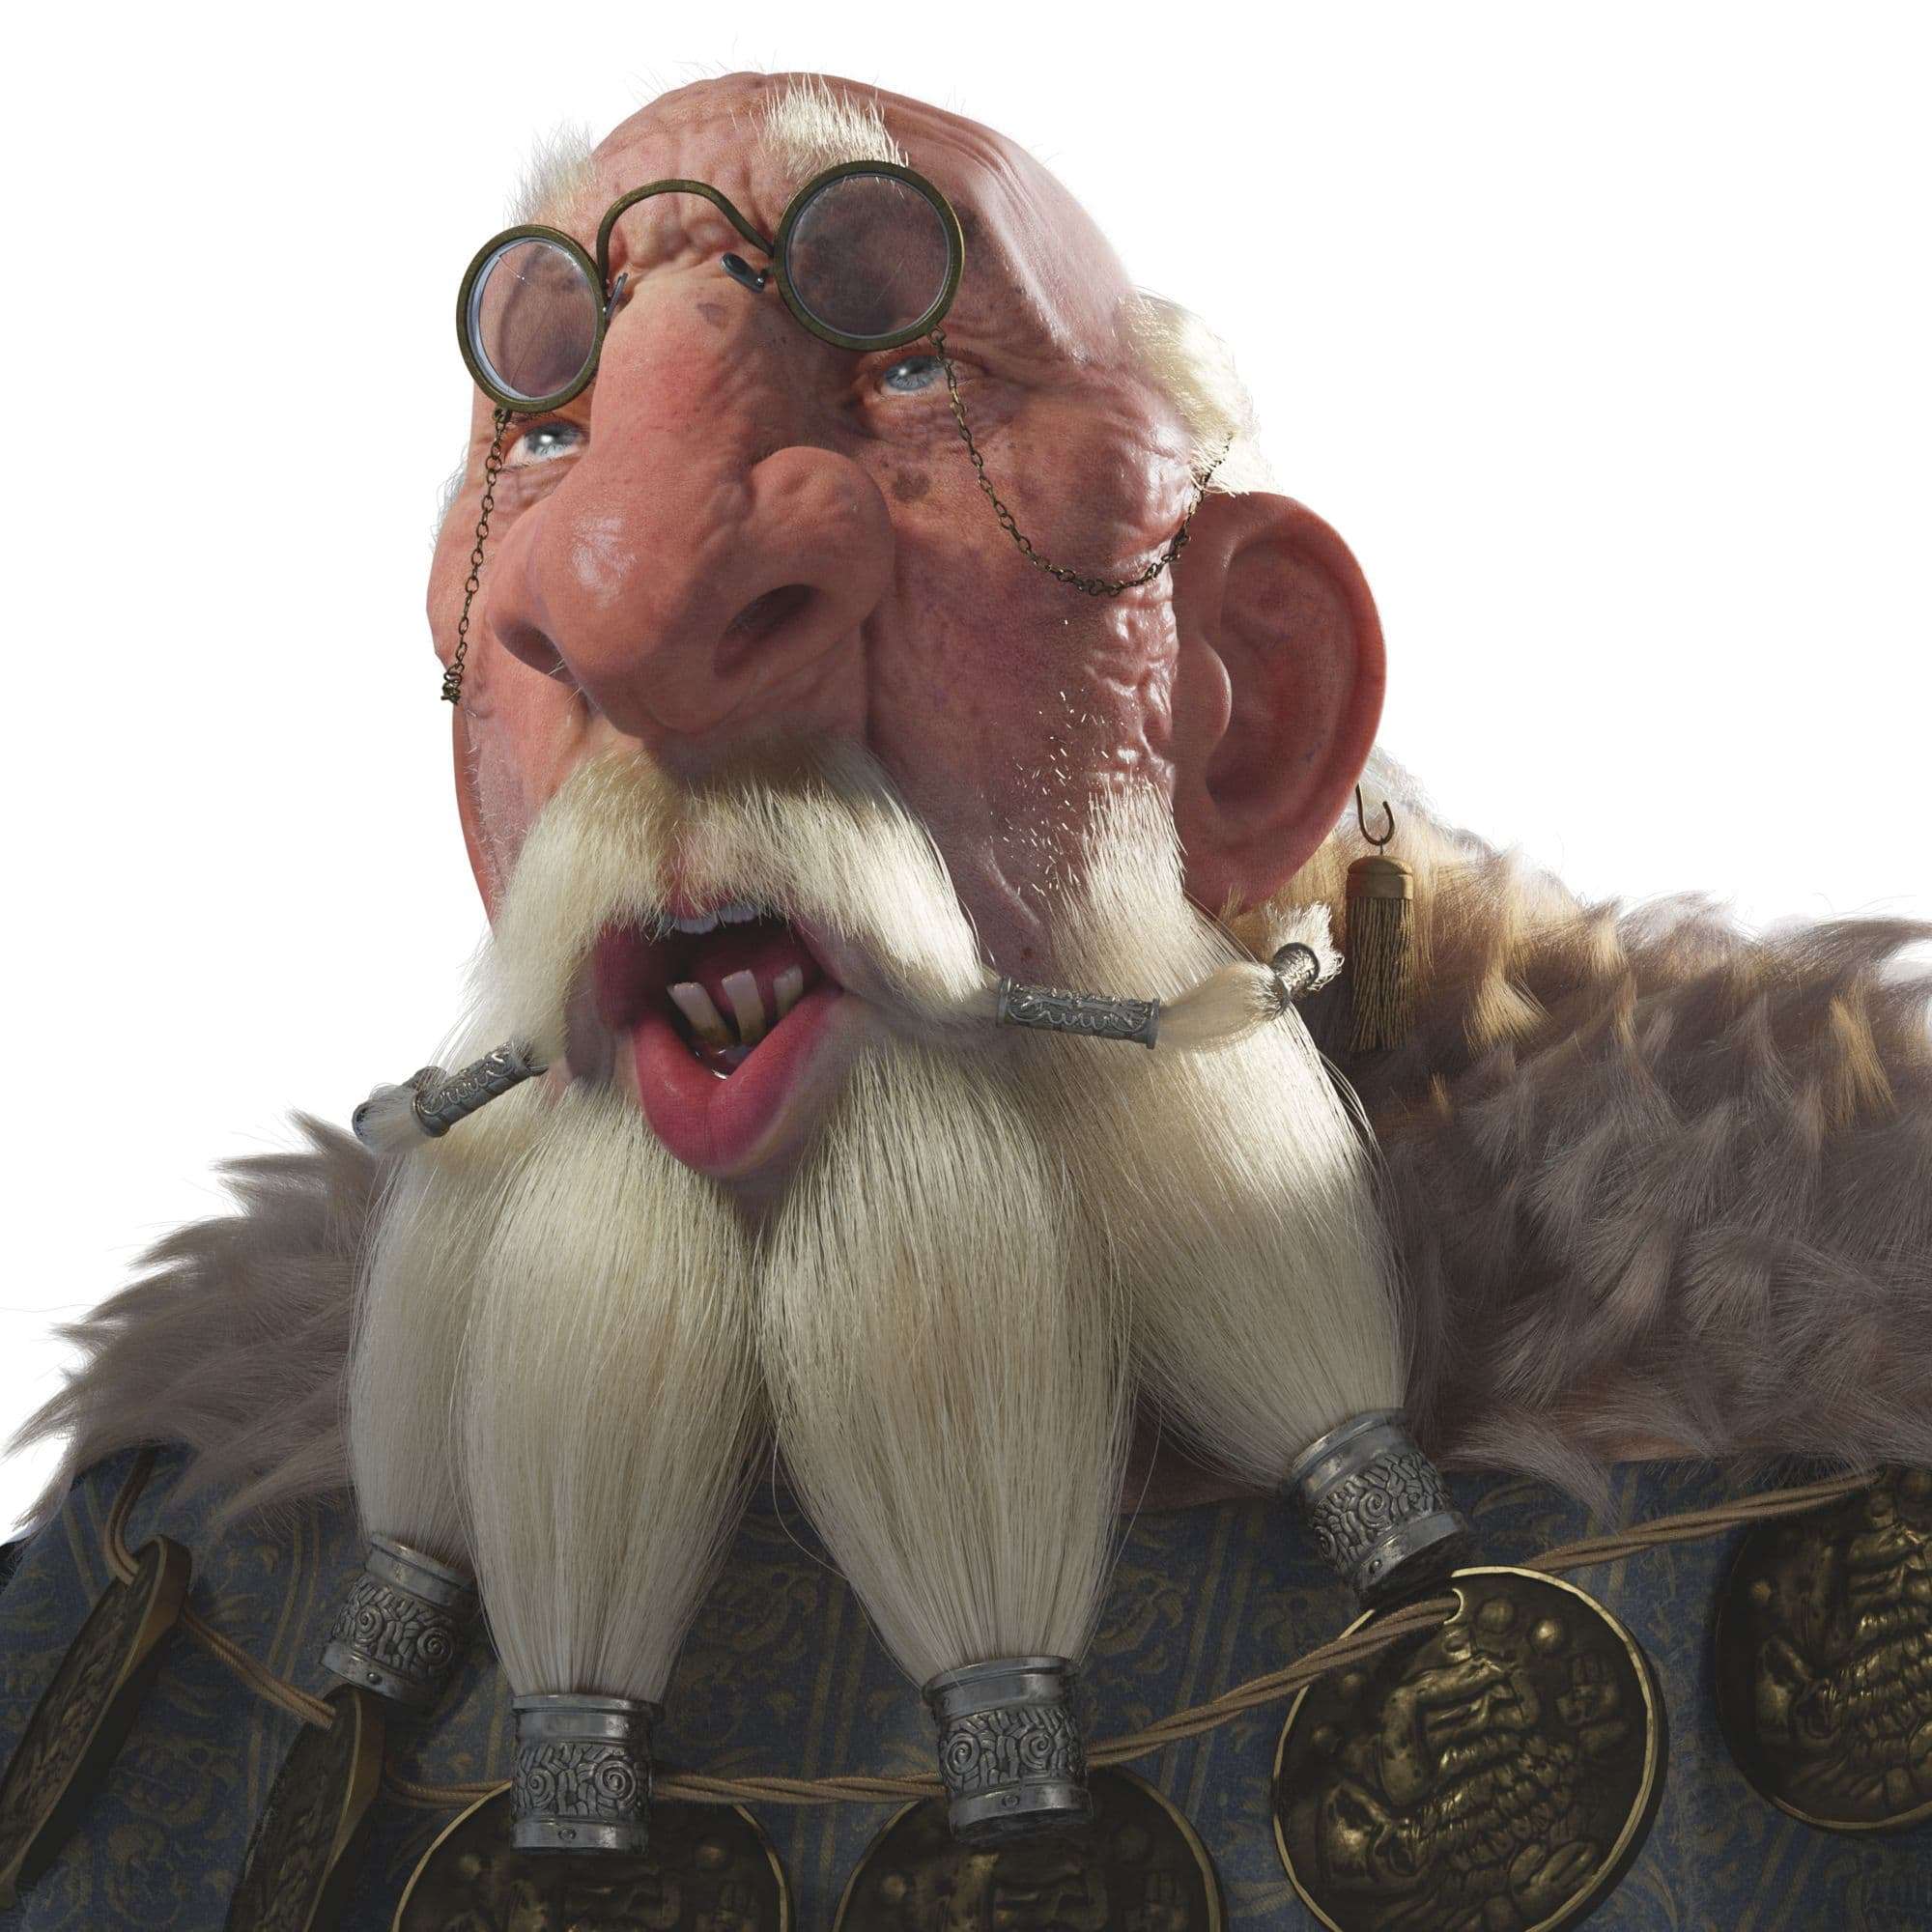
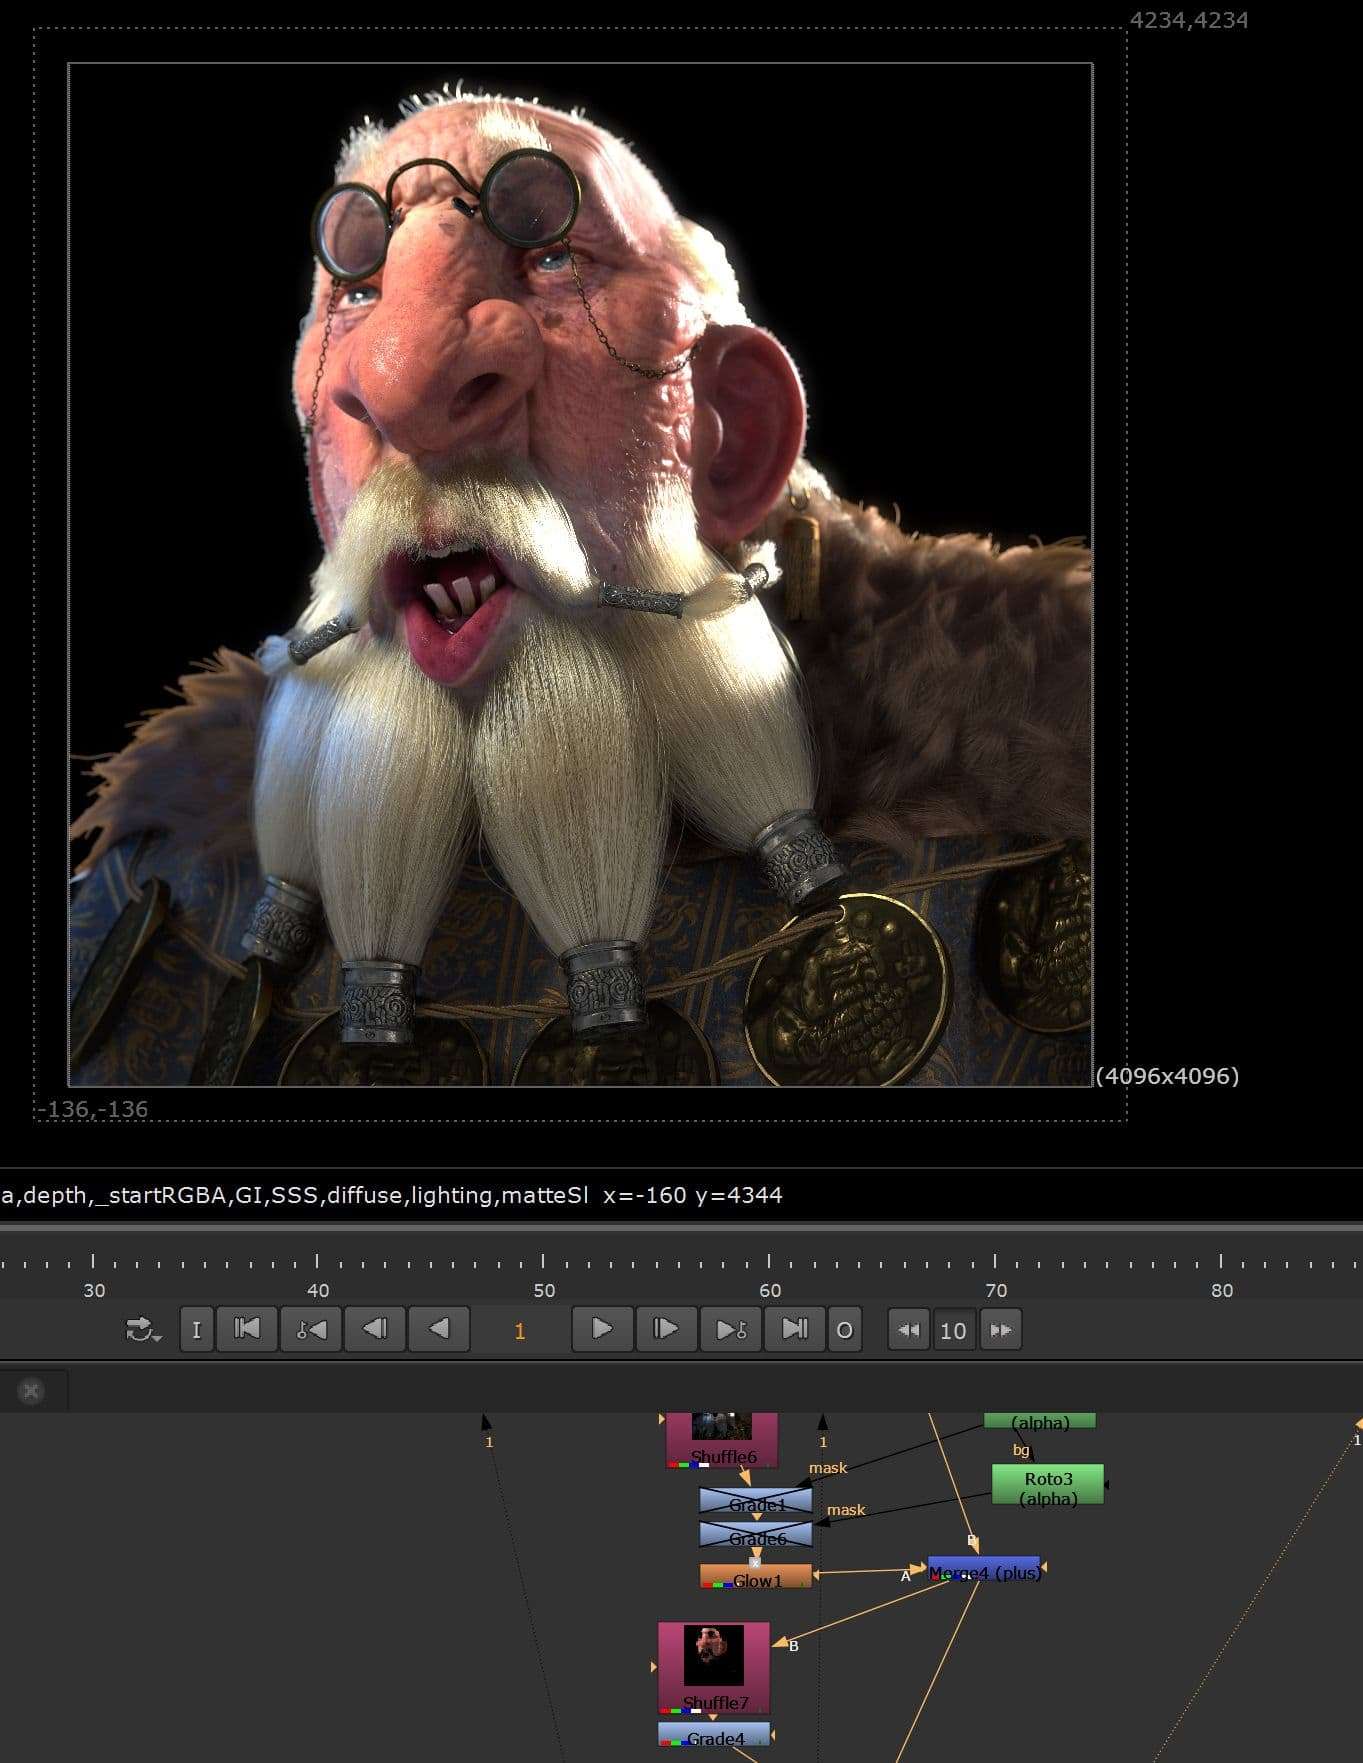
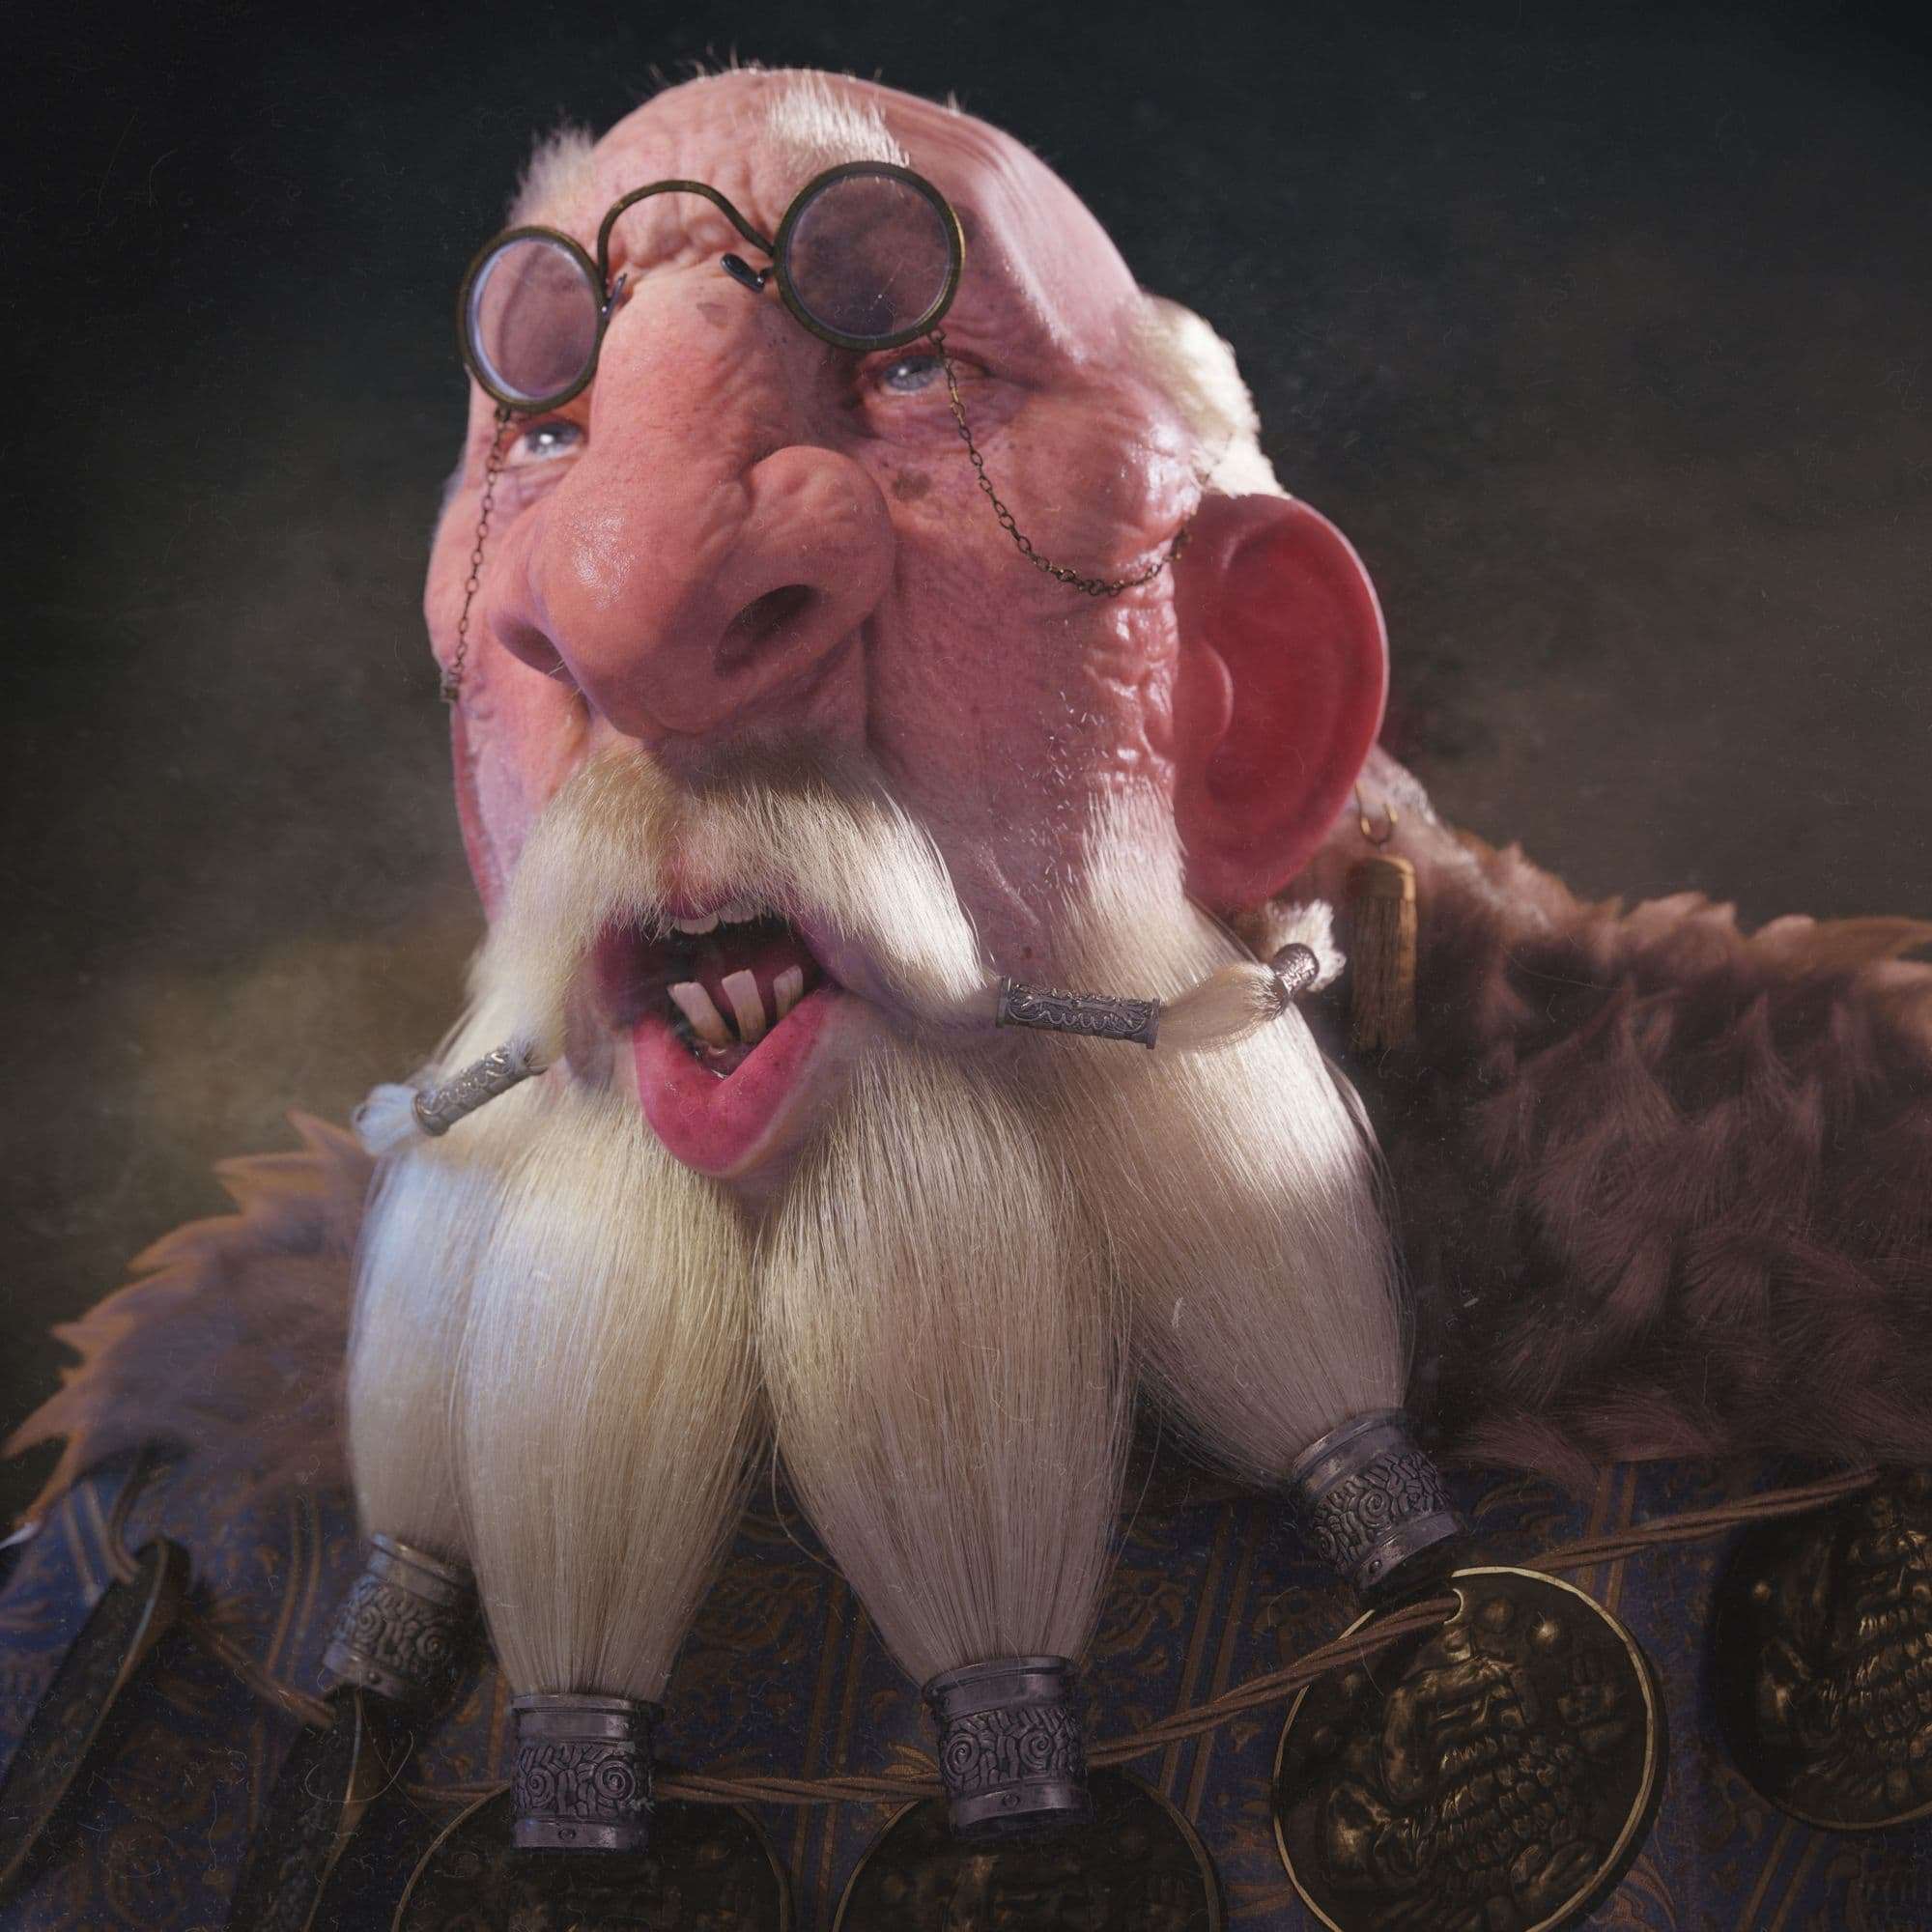
My light rig is very simple. It’s a 3-point light setup with a strong (but not overpowering) rim light and a v-ray rec light as my key light. I also have a low-intensity HDRI for a gentle fill. Beyond this, there are a few strategically placed sphere lights to make the forms feel rounder. Off-camera I'm also using a flat plane as a gobo. This was so that your eye would go straight to the face first and the rest of the composition second.
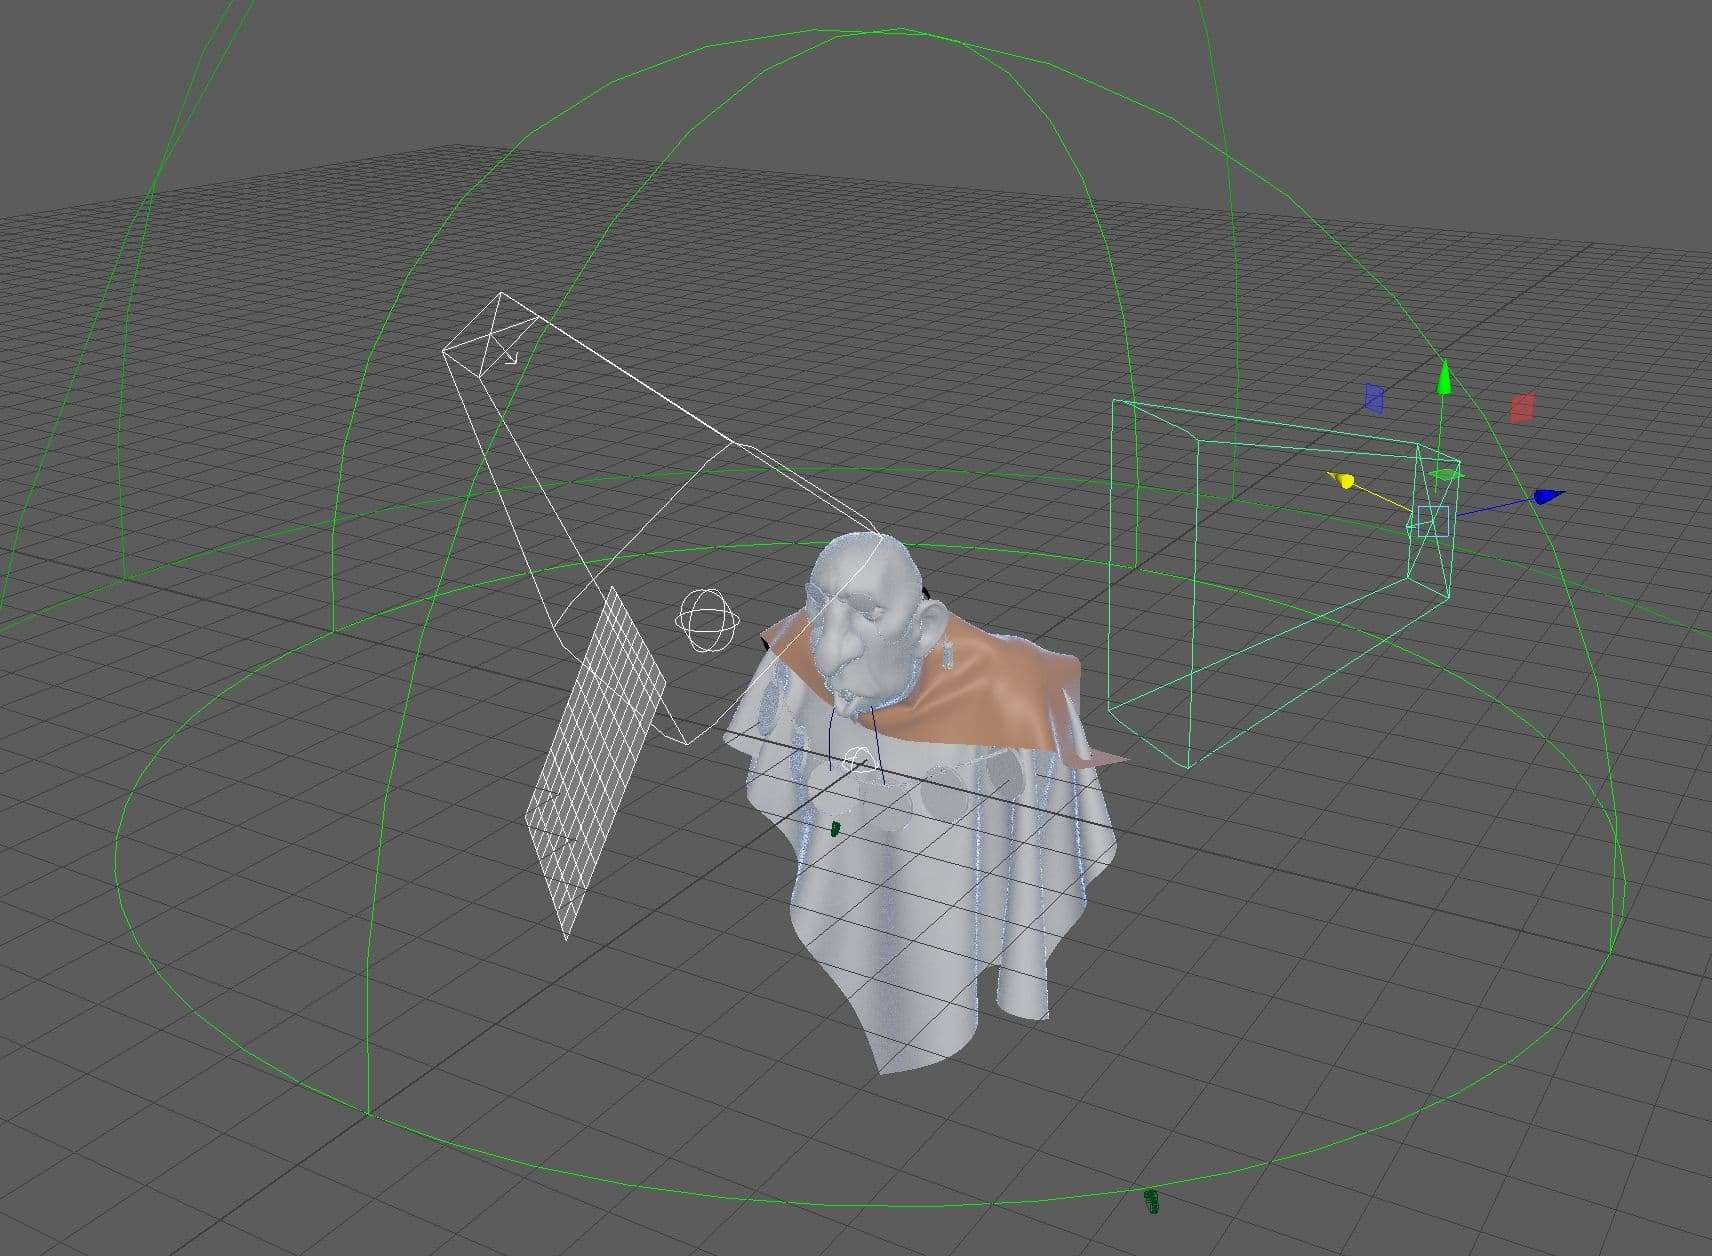
I’m also using a simple LUT to even out my highlights and shadows, and to make sure none of the values clip or overexpose. LUTs are a great way to quickly get a more cinematic look.
After finalizing my tertiary details back in Zbrush, I decimated my character bust with keep UVs on and brought it into Mari to project my displacement. This is a pretty simple process of importing texturesxyz 32bit scan data (I used a 60 year old man’s) and projecting it onto the model. There are a lot of great tutorials for this directly on the texturingxyz website, such as this one by Mateusz Sroka.

When finished, I exported at the proper resolution (in this case 4k to maximize the high resolution xyz displacement) and brought into Maya as a displacement map. I like to test the xyz displacement on my decimated mesh back in Maya before doing the final layered displacement, but you can also visualize them more quickly using the shaders built into Mari, simply by plugging them into a bump map. Personally, I like to get the displacement settings in Maya out of the way as soon as possible.
I briefly went back into ZBrush to generate a cavity map for my pores, which I then exported using the multimap exporter. This does require you to import your texturesxyz as a displacement in ZBrush, which can be tricky with a multi-udim setup. For this I followed a great tutorial by Tom Newbury which can be found on his Gumroad here. I then brought that cavity map back into Mari as a mask.

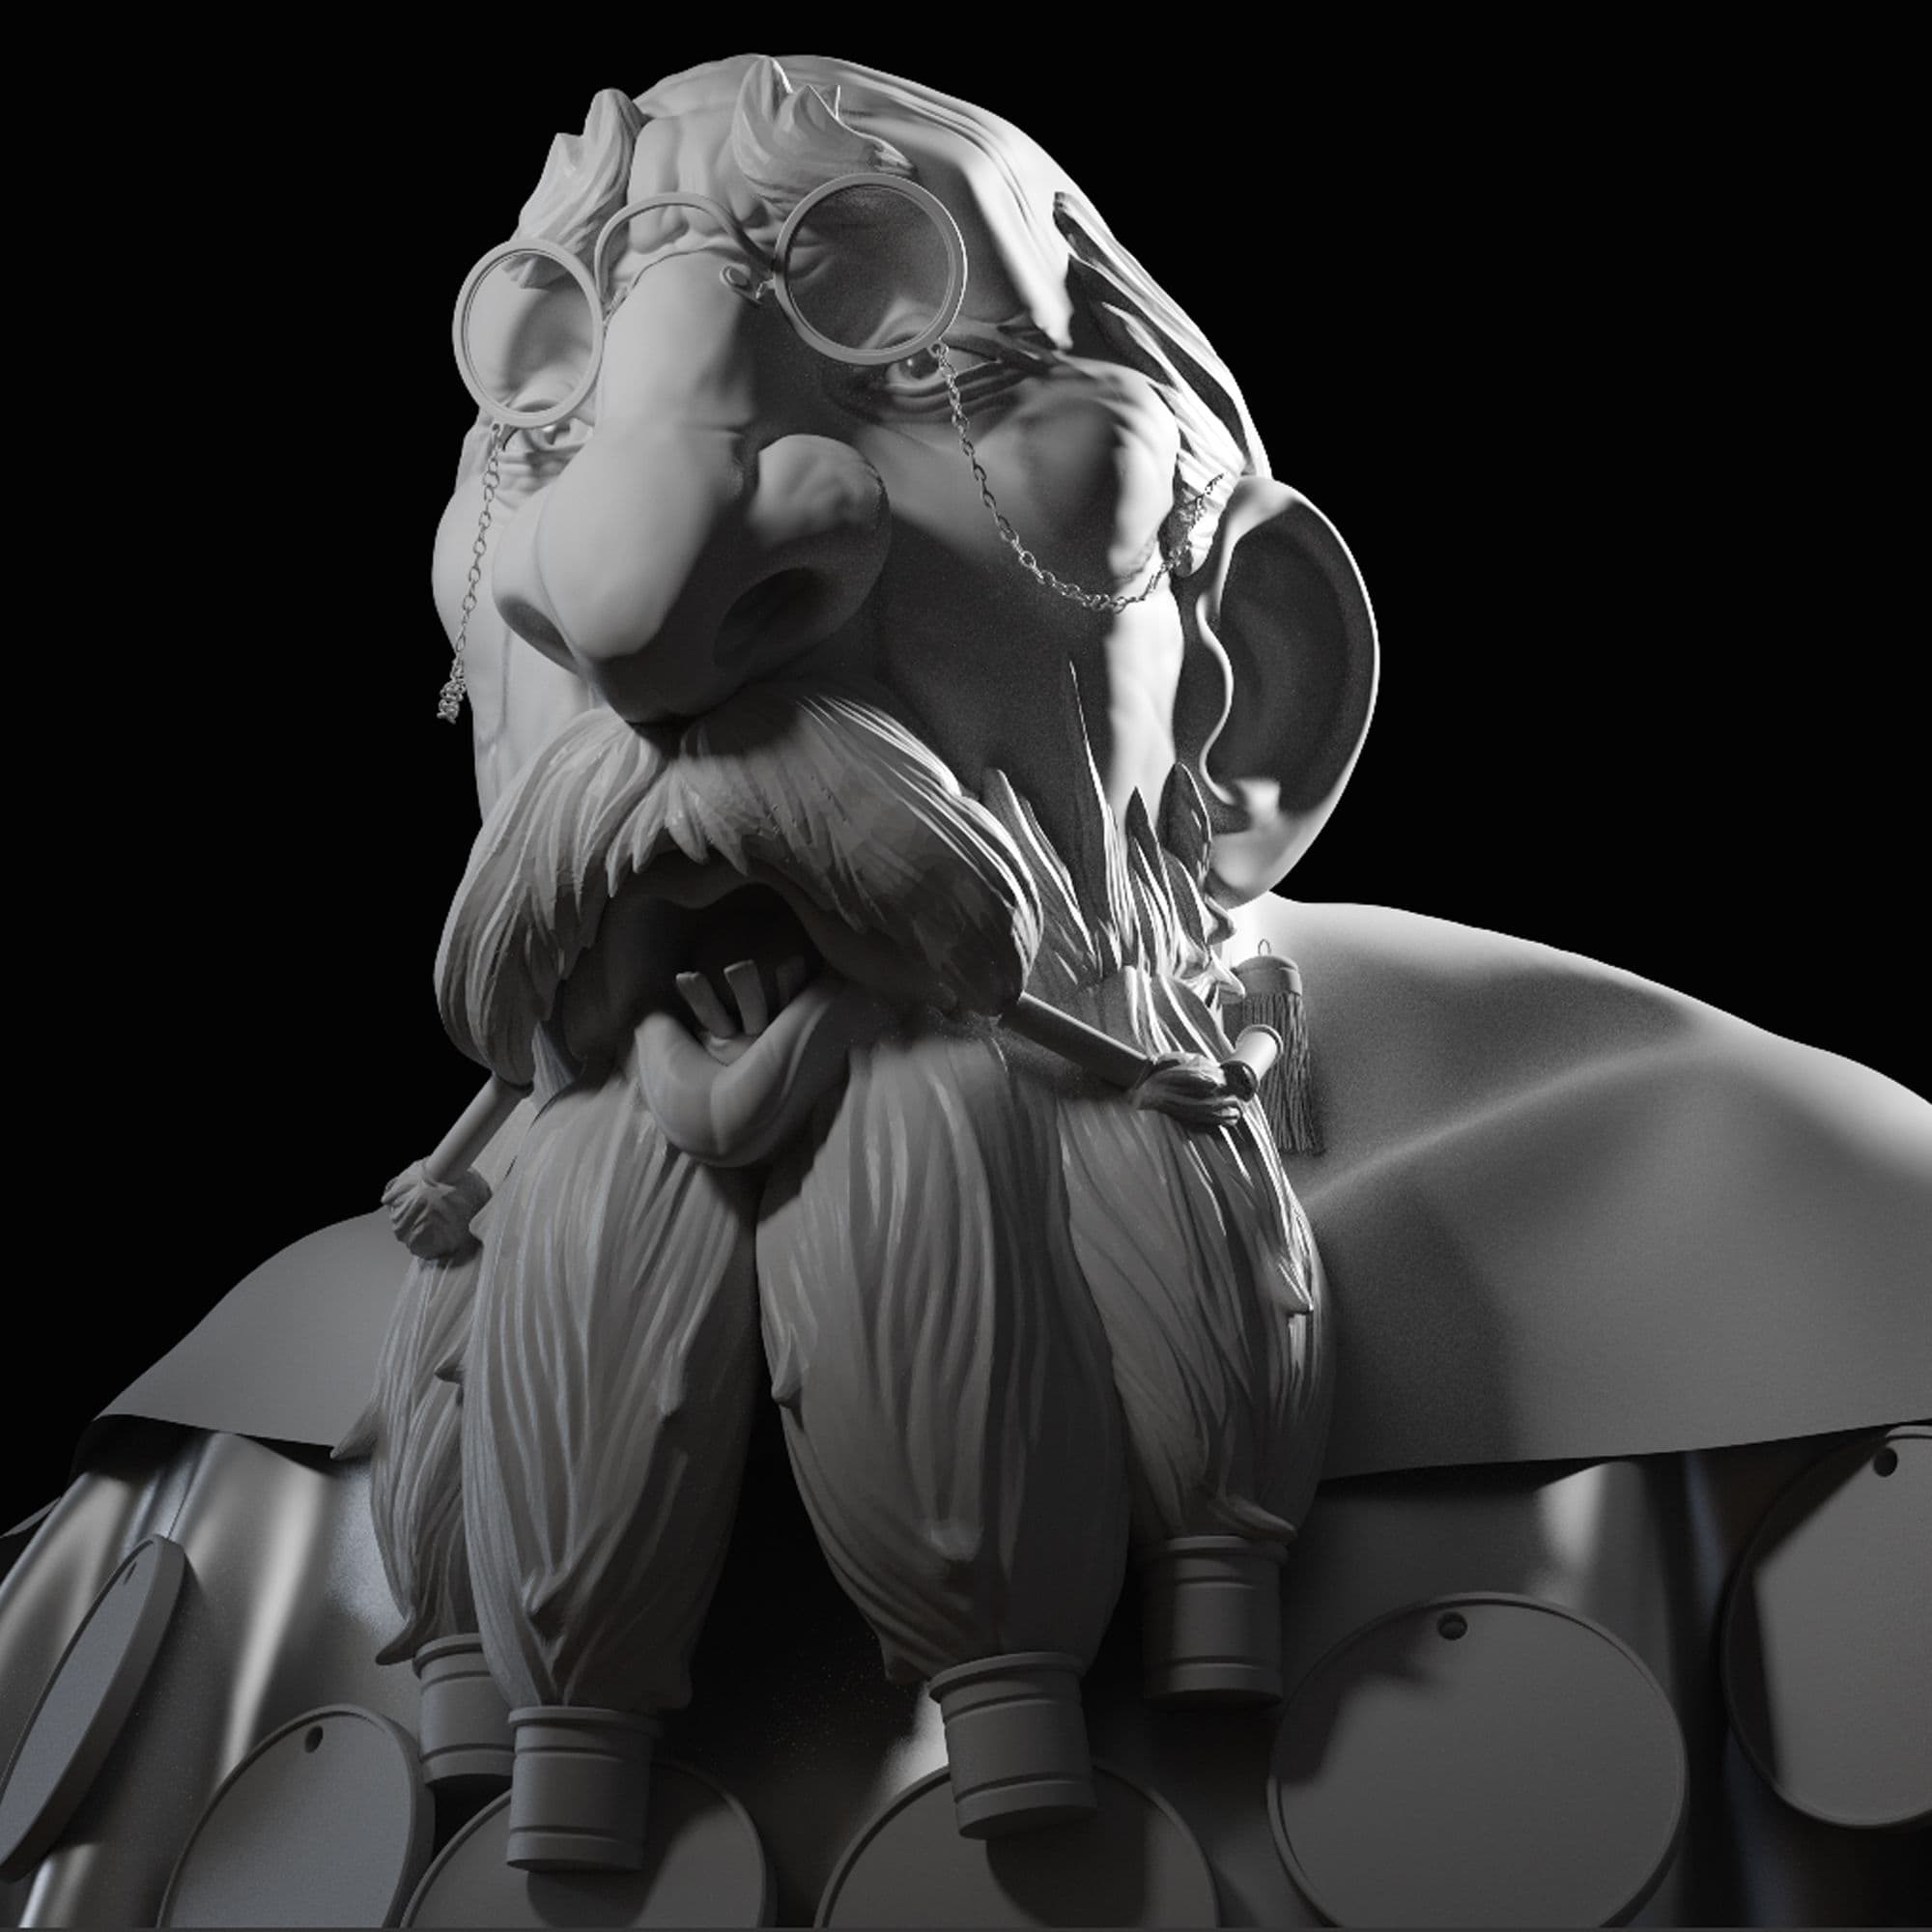
My base skin albedo is actually a little boy’s (also from texturesxyz), something that was suggested to me by my Gnomon instructor Tran Ma. All the liver spots, veins, and certain pore details are hand painted. The rest of the texture wrinkle detail comes from the cavity map and will line up with the sculpt and displacement.
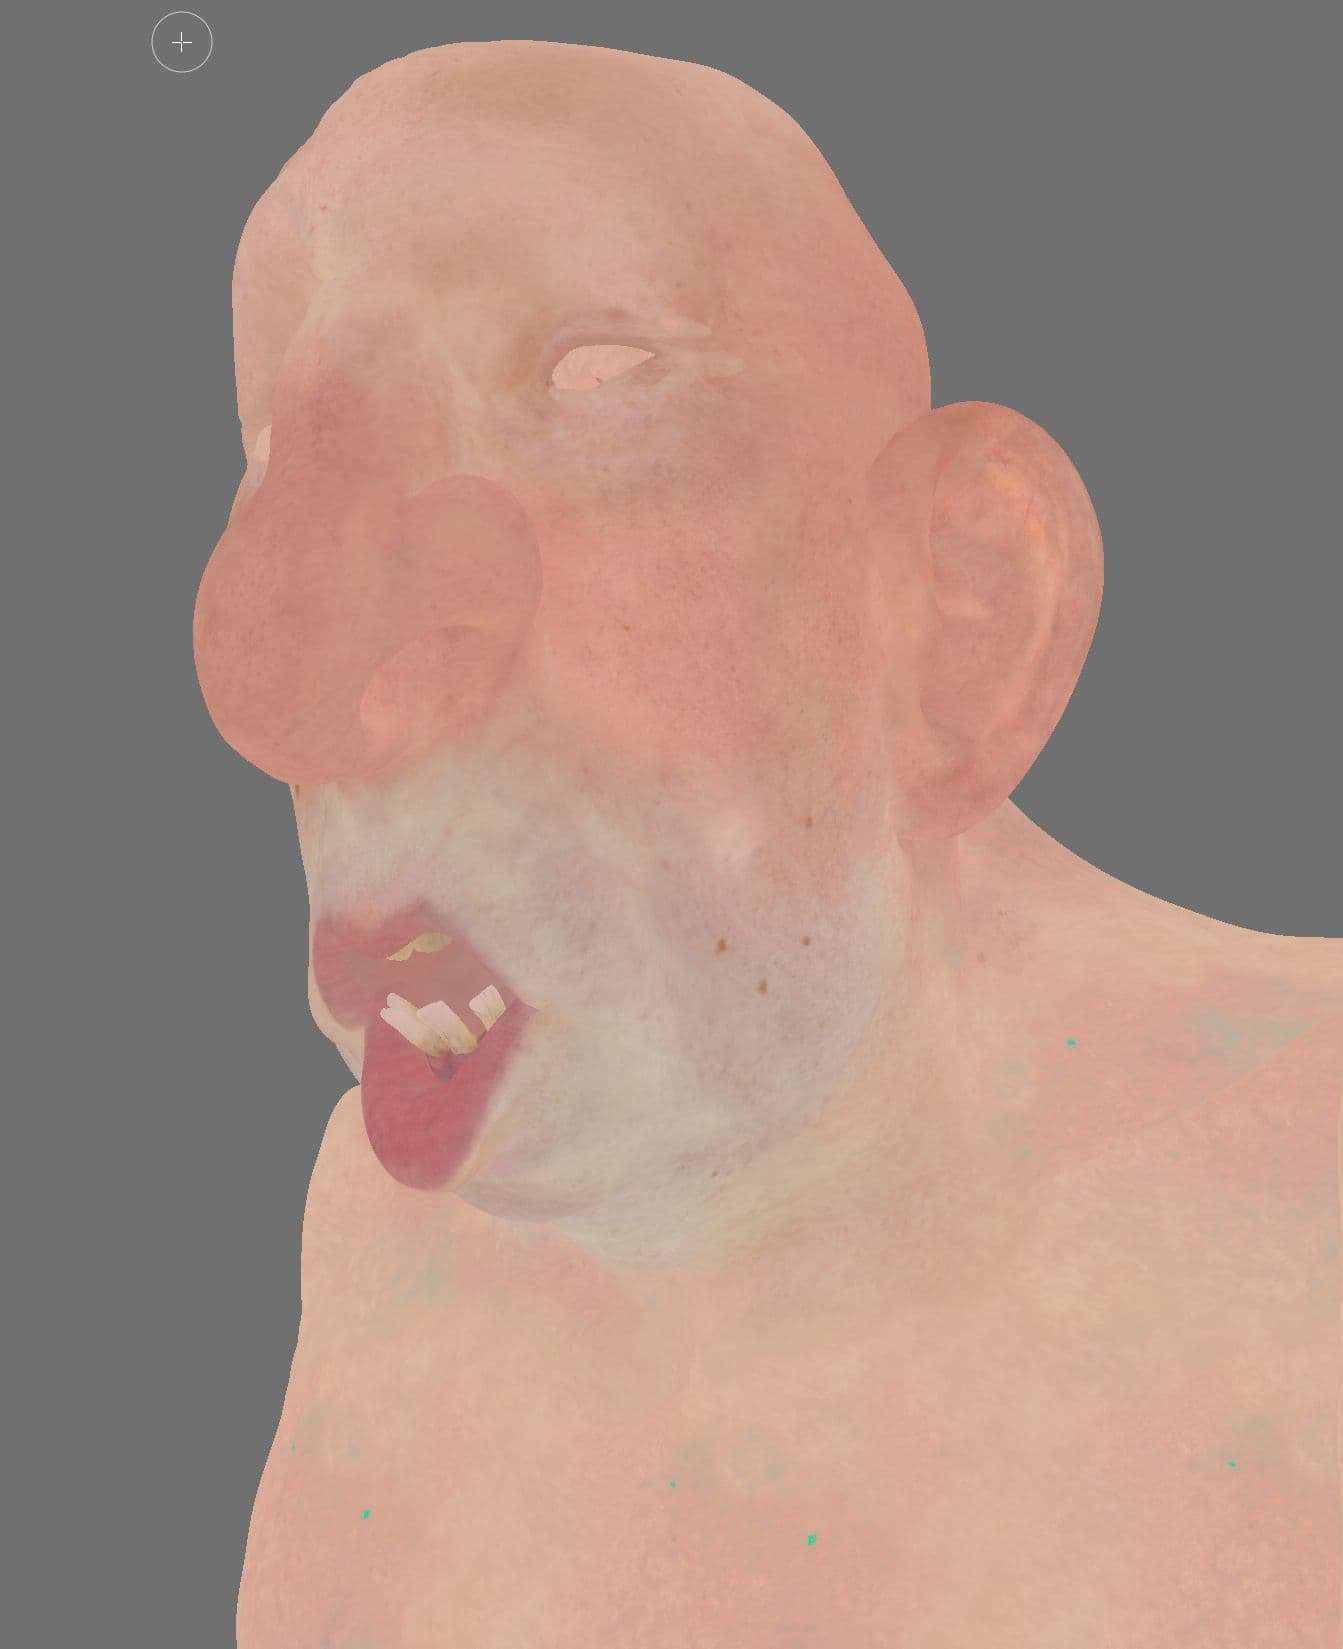
In Mari I used the cavity map from ZBrush as a mask for an HSV modifier and lowered the value, as well as added some warmth to the hues. On top of that I hand painted away some of the pore detail so it felt a little more organic and less overtly like a cavity map. I used various organic brushes native to Mari to paint veins, freckles, and liverspots.
As I work, I try to remember that not all these details will be seen, but they will be felt emotionally.
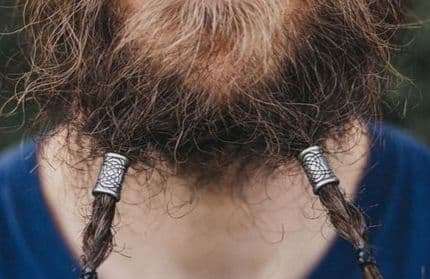
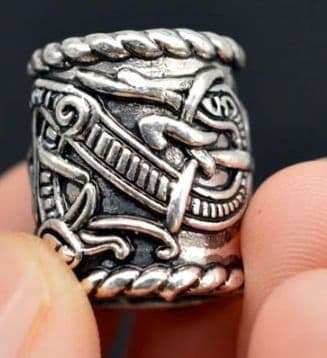
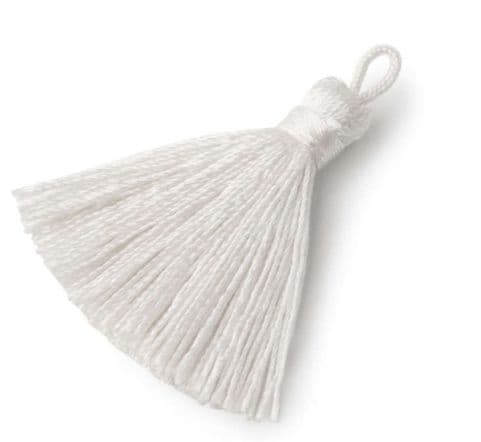
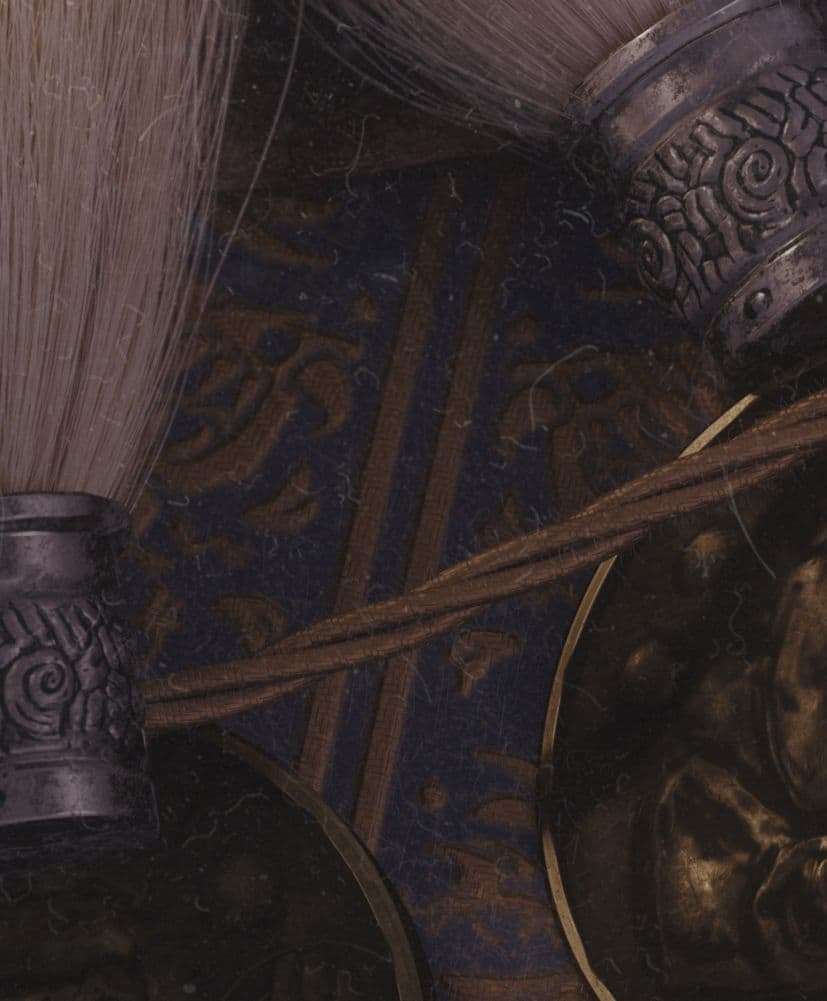
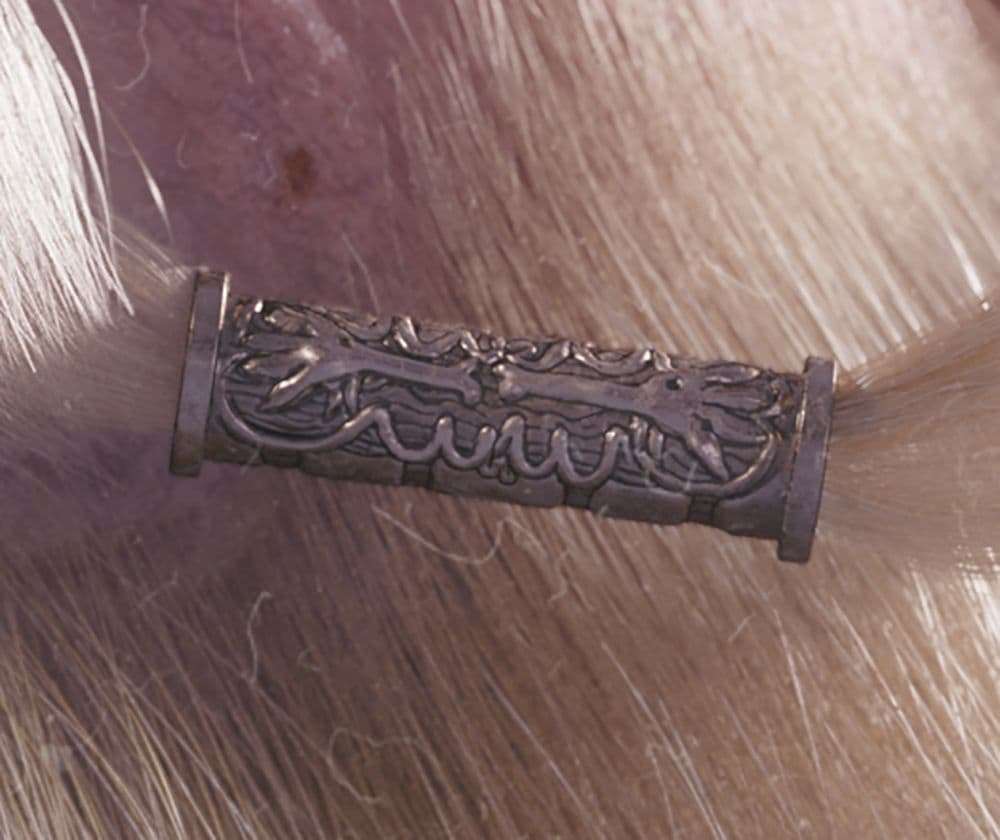
For the shirt I referenced a lot of old embroidery. I painted a tileable mask in Photoshop using its built-in symmetry tools and was able to use that as a mask in Substance Designer. The idea for the design is that dragons were revered in ancient dwarf culture for this particular universe, and this character, being an older guy, is into maintaining the old ways. You can see this dragon motif repeated in the hair beads and clips.

I was also retroactively look-developing my shaders as I worked on textures. This process was very back and forth.
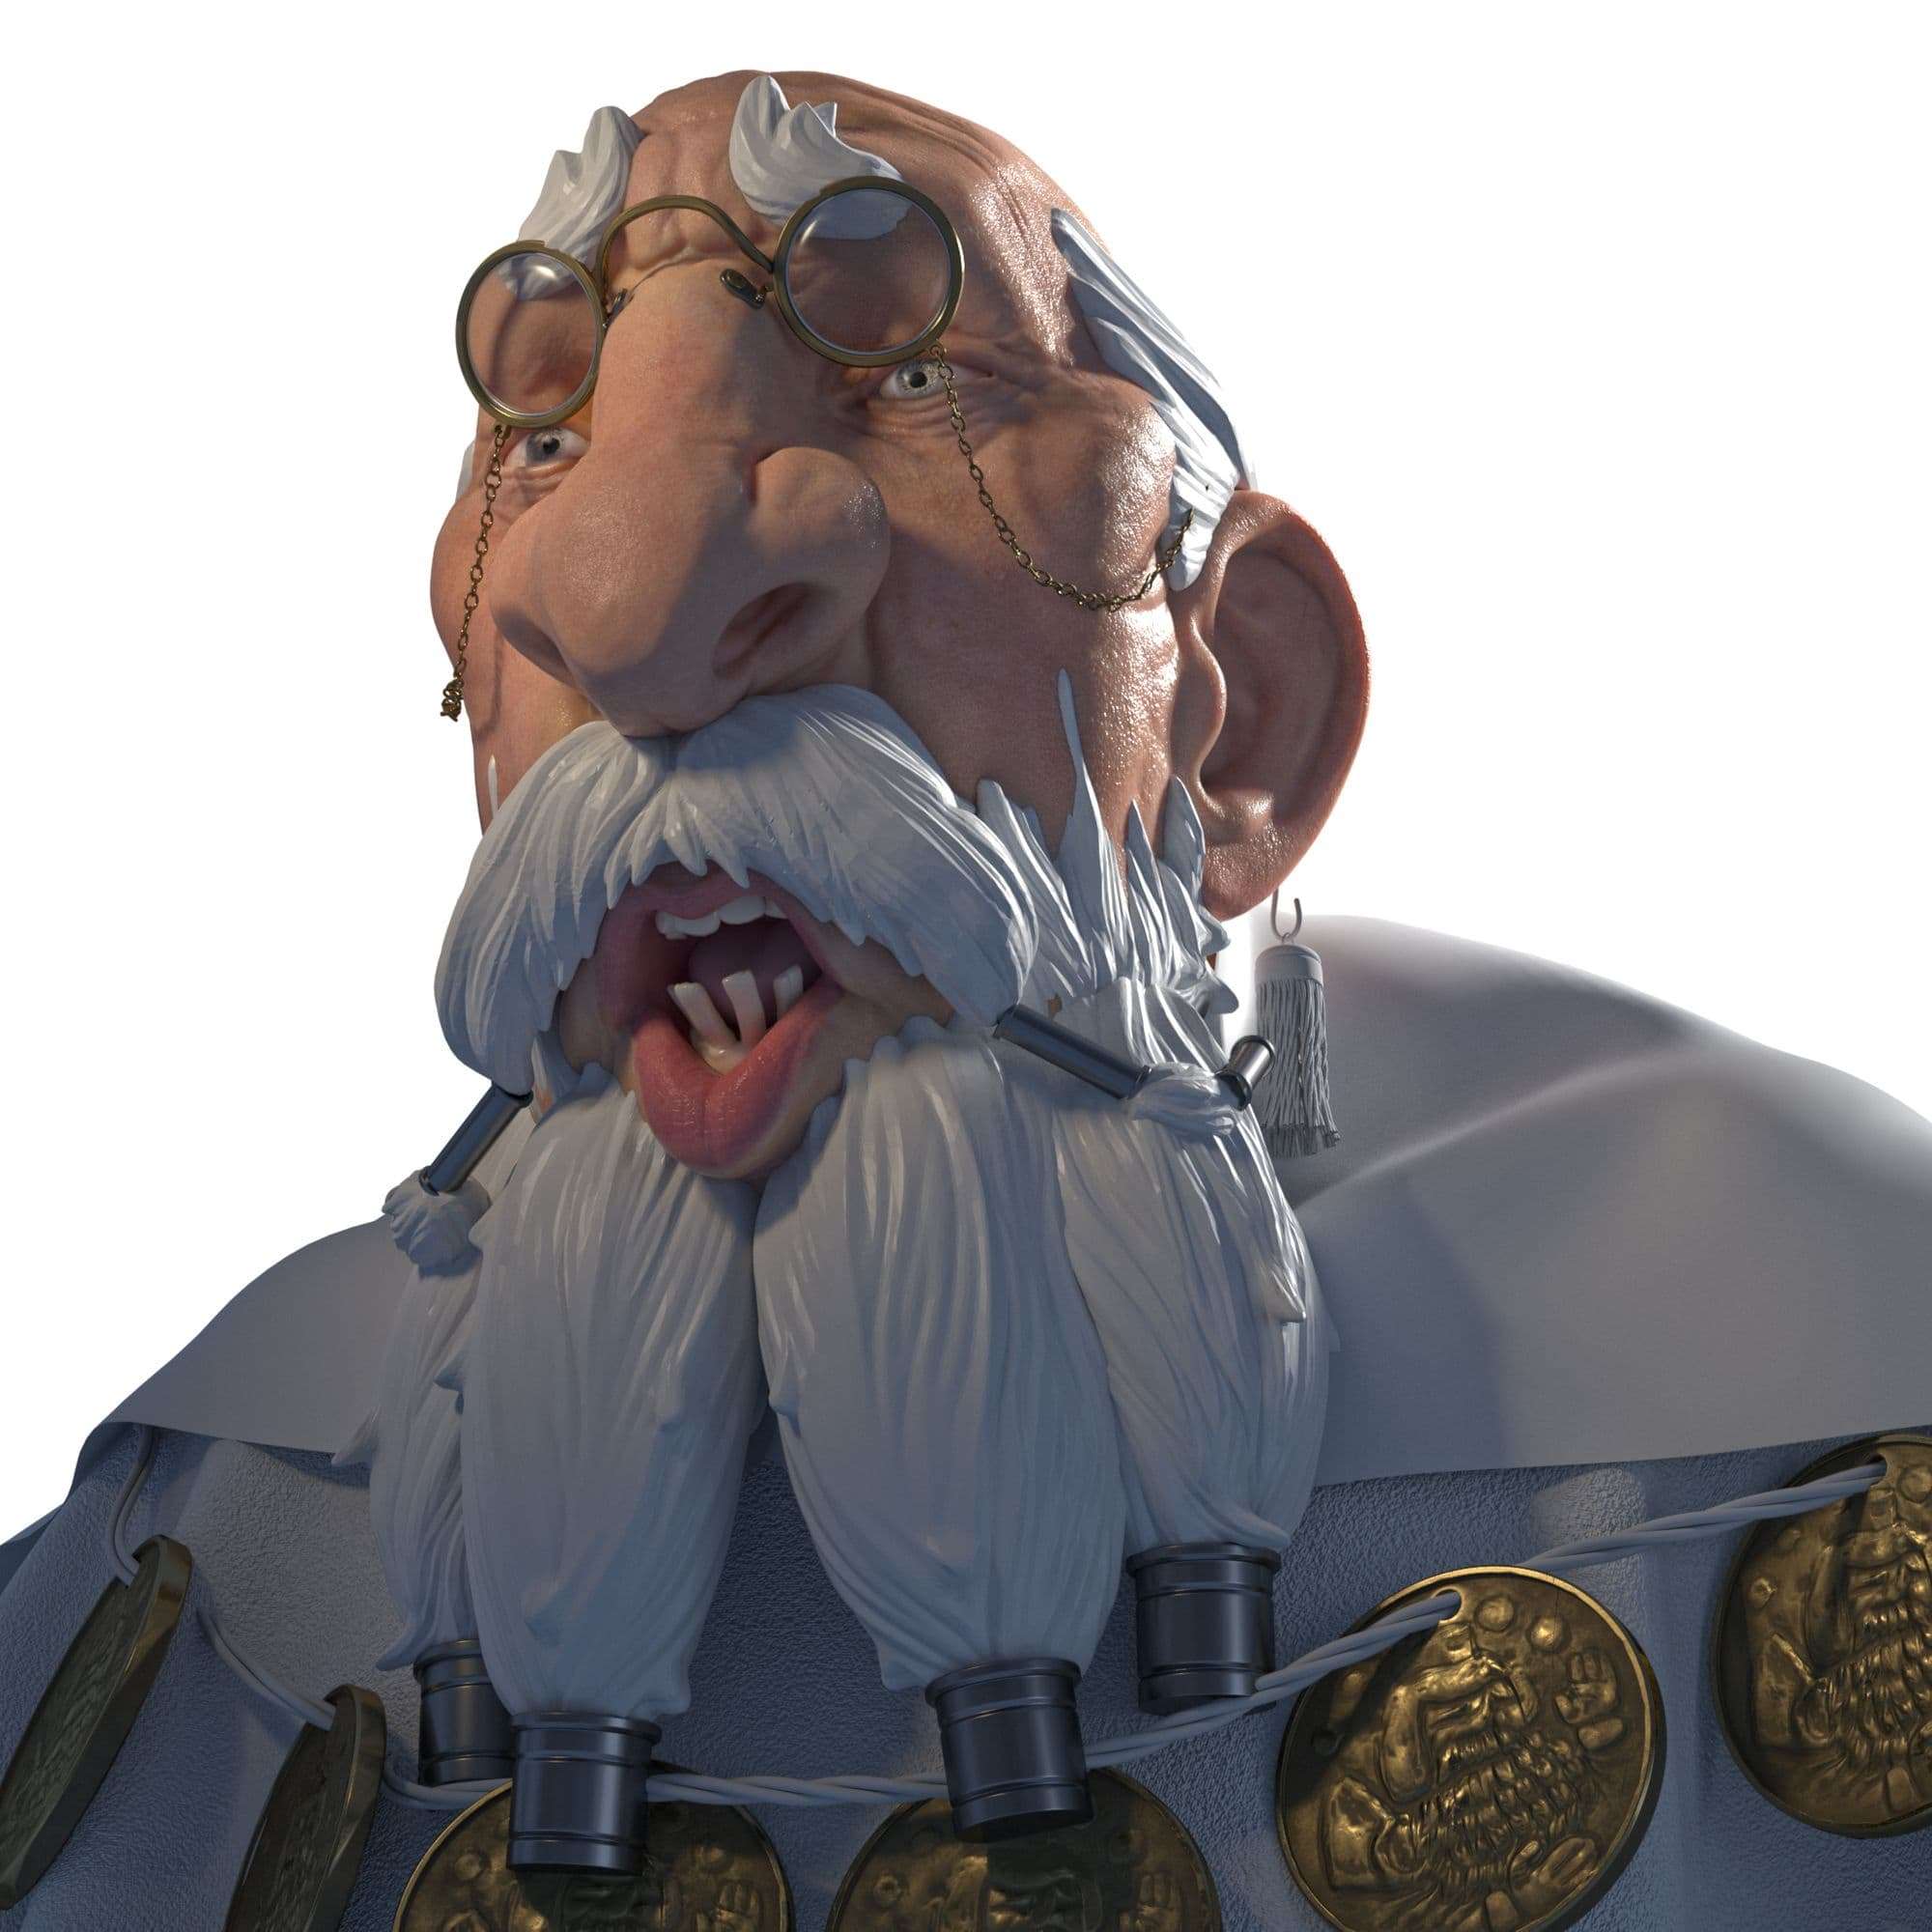
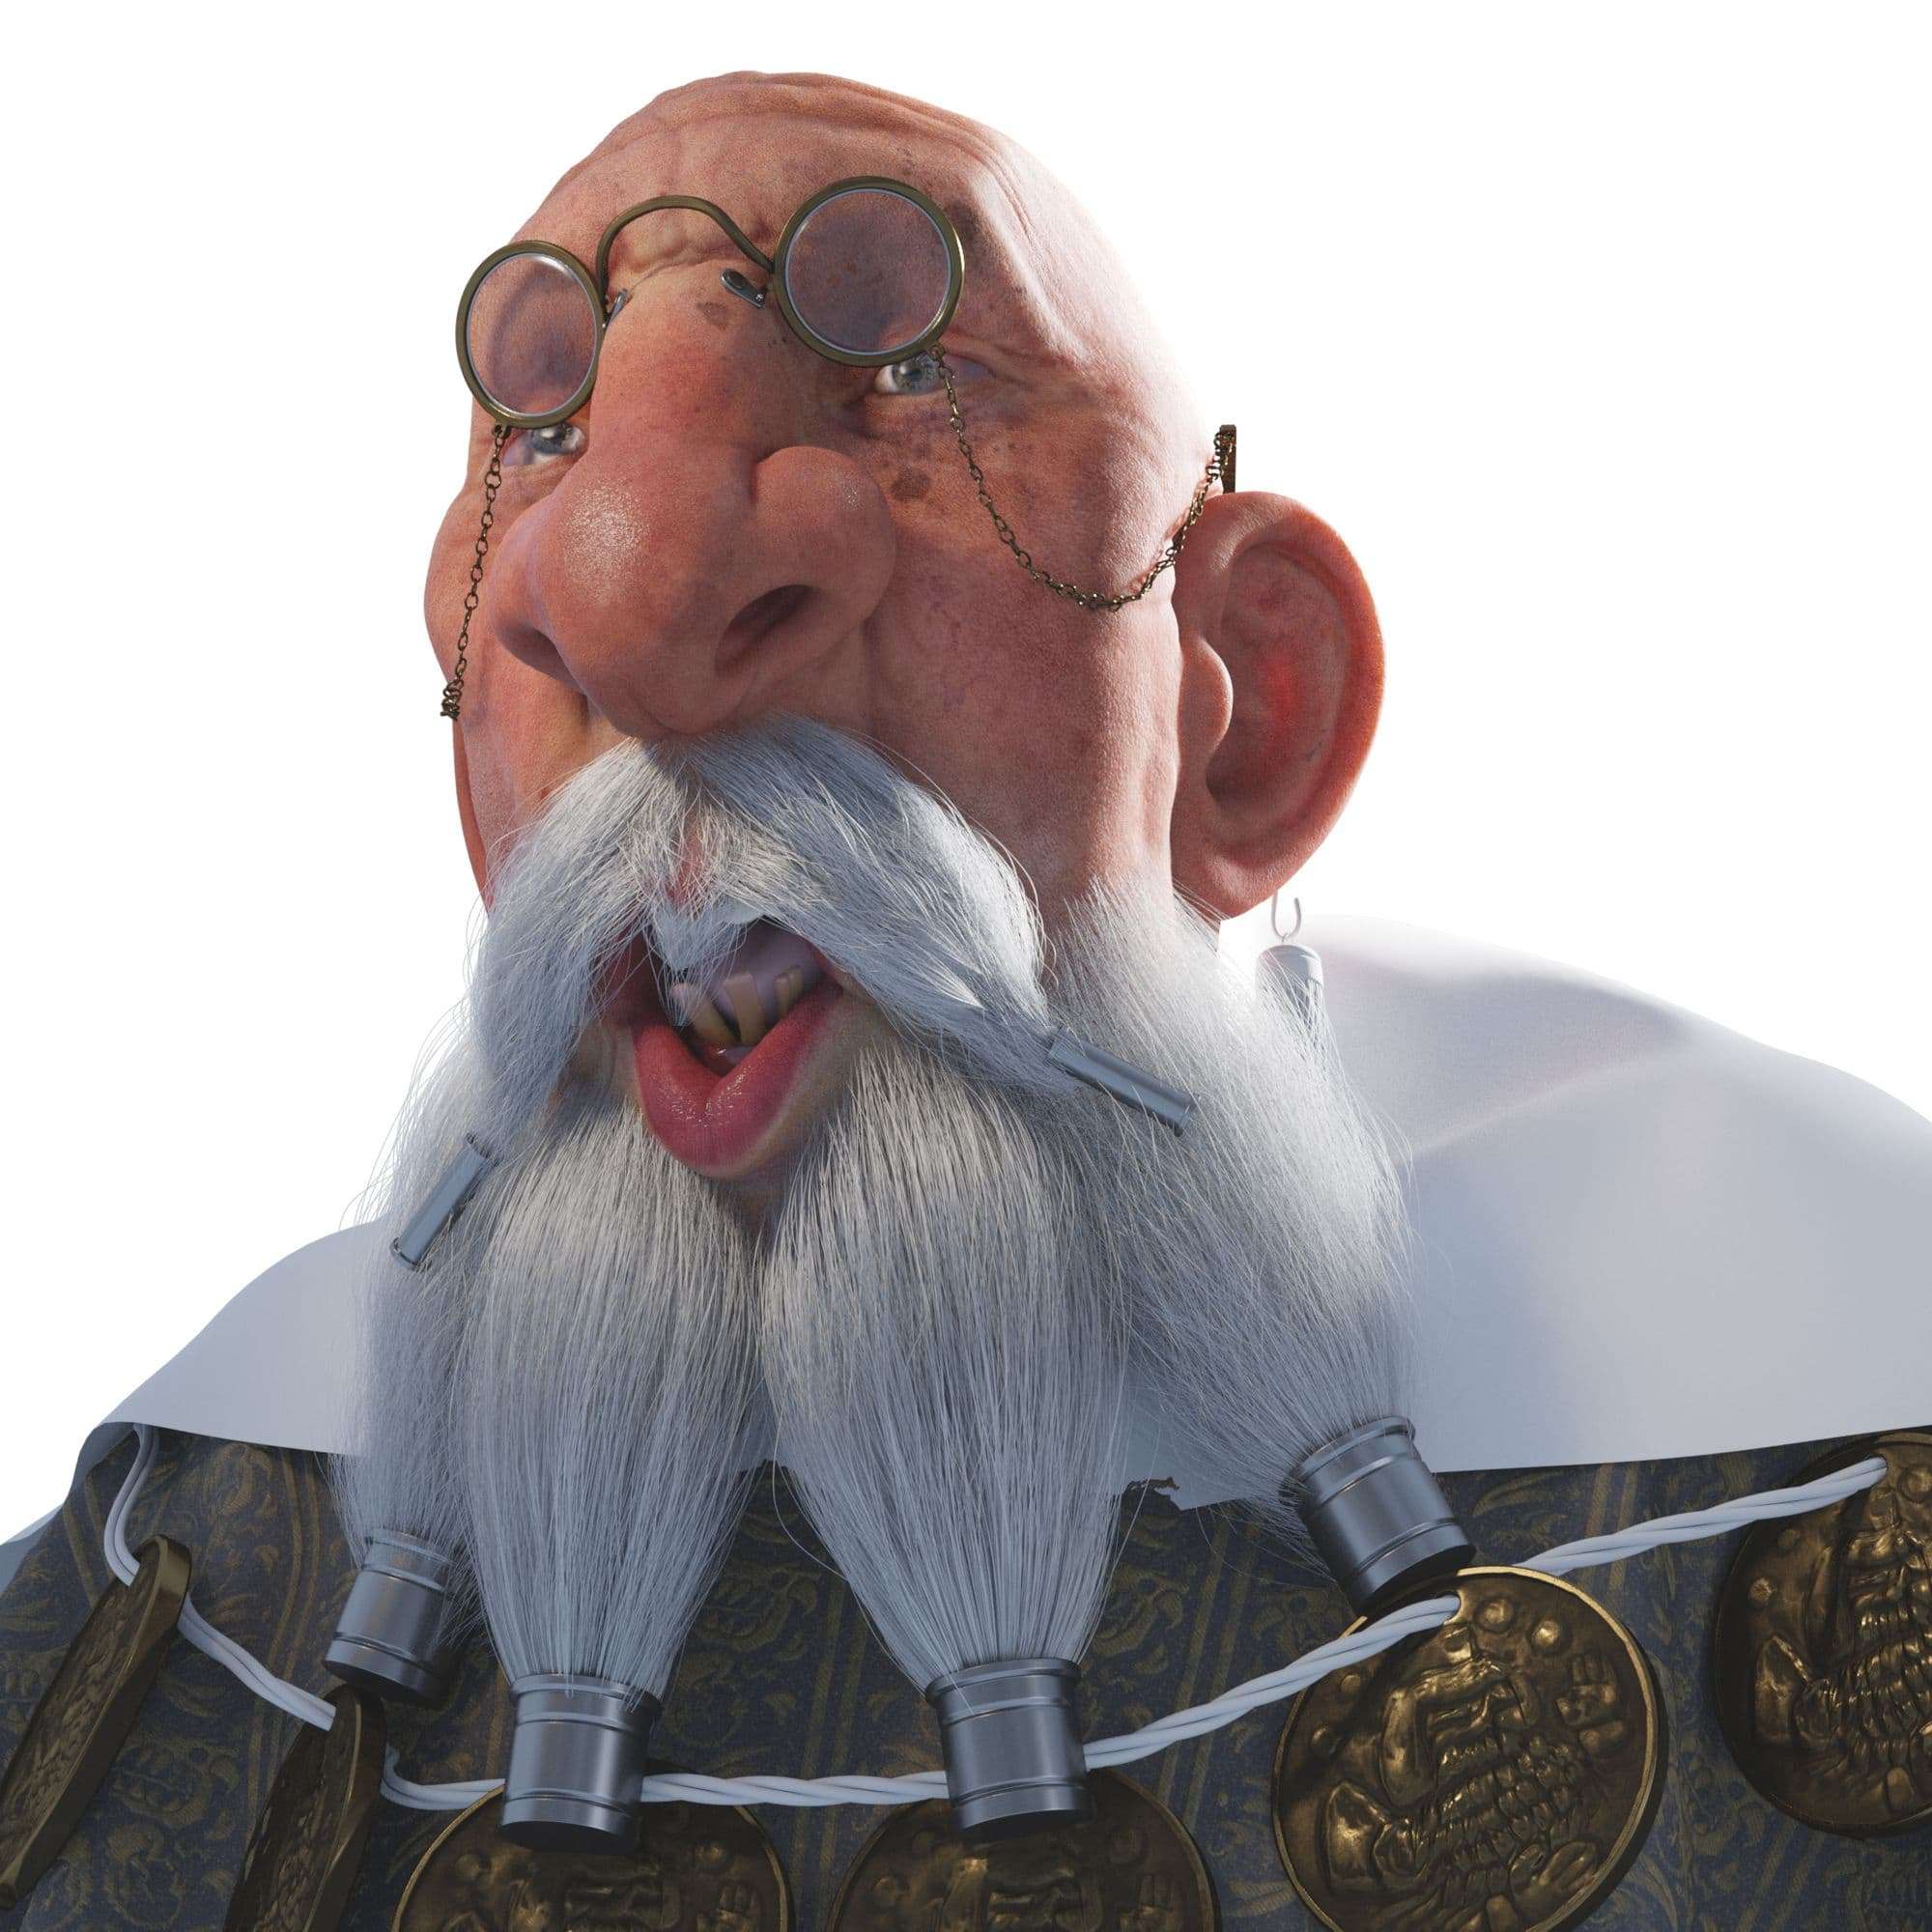
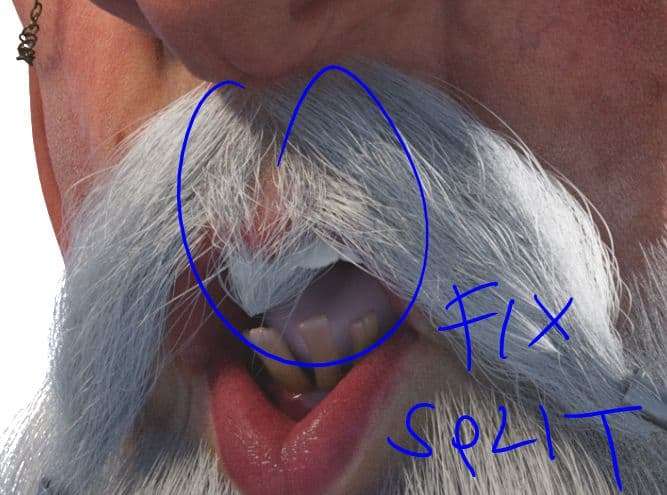
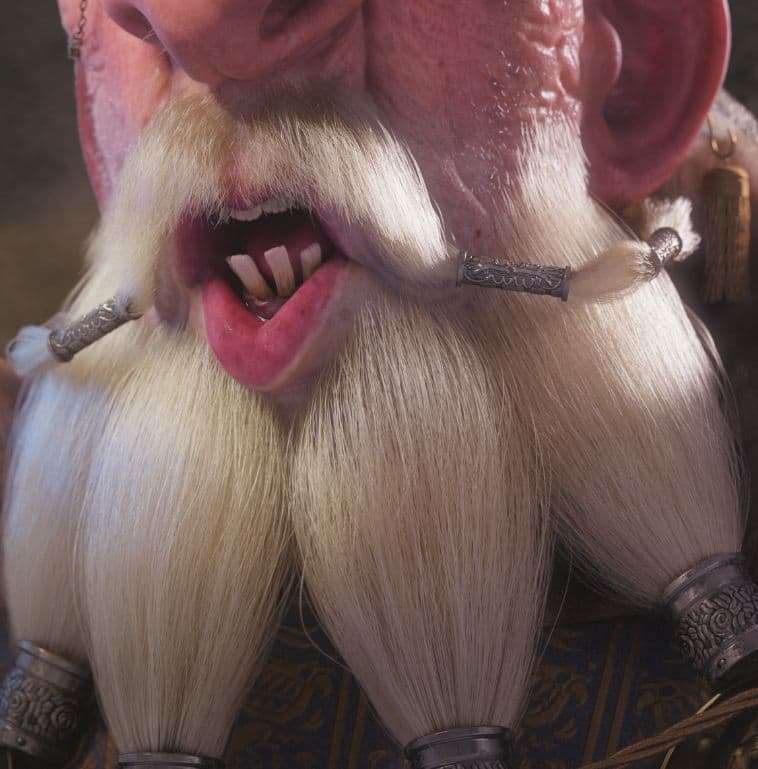
In Xgen, the beard system is broken up into many separate descriptions throughout the entire collection. I used a combination of tube grooming and classic guide placement to get the shapes.
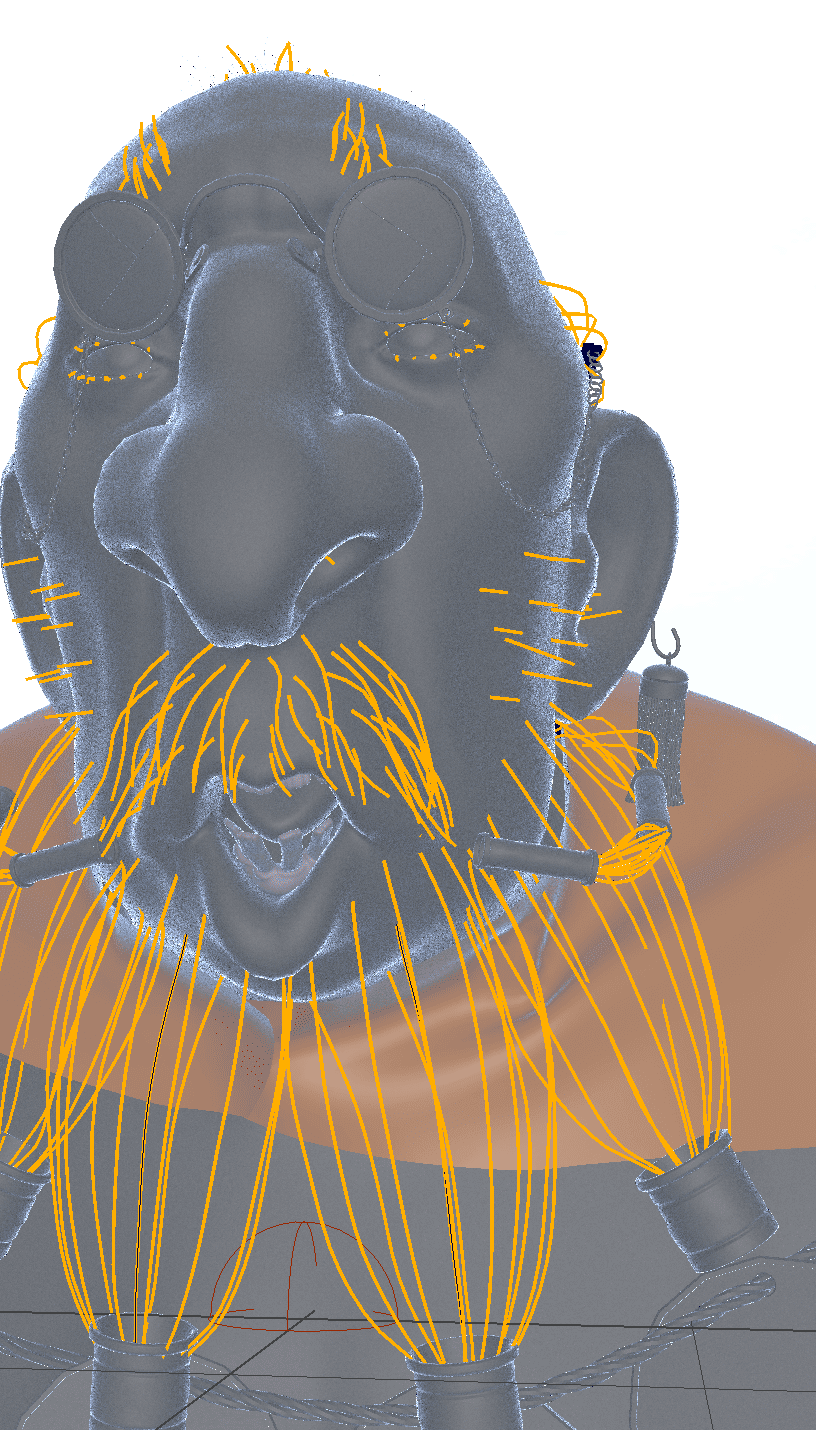
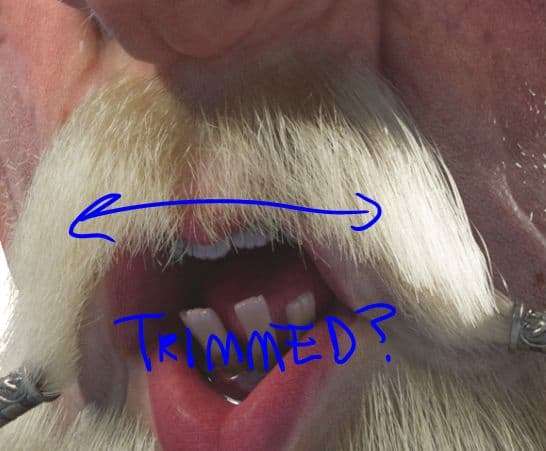
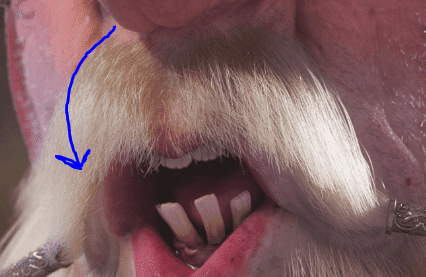
I iterated back and forth on the mustache a lot until I settled on something that was a little more natural and less stylized.
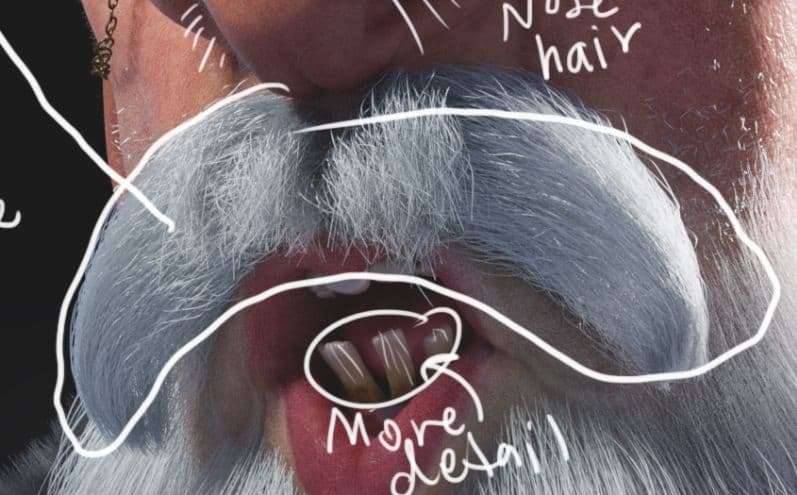
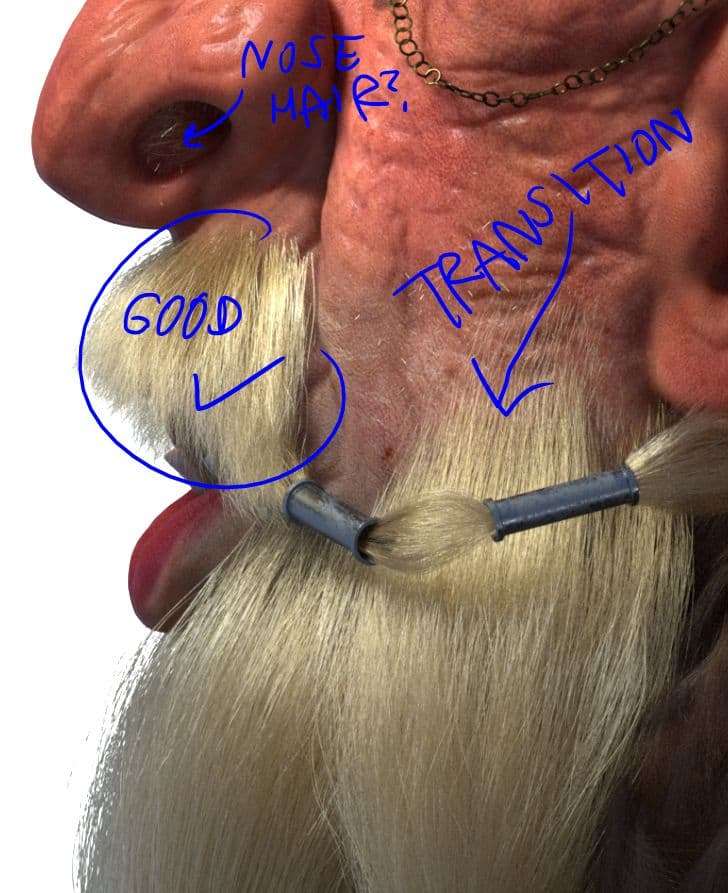
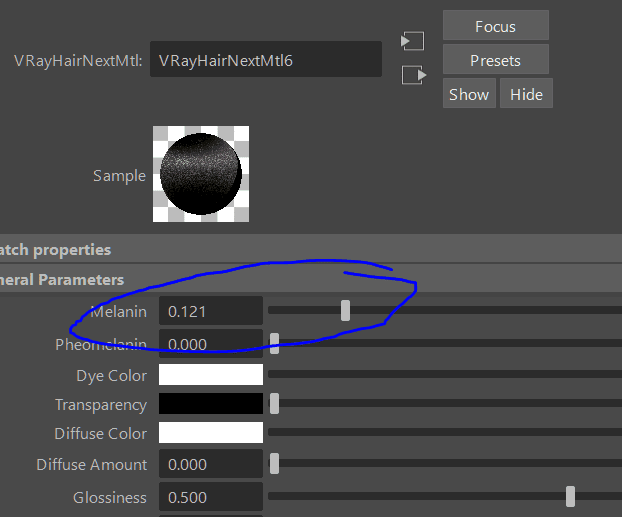
Each collection is generally the same density except for the thinner areas like the eyebrows, sparse head hairs, nose, and ear hairs. The final shader I used was the vrayhairNext material, and I found that when you cranked the melanin extremely low (but not at complete zero), you got a nice natural gradient in areas like the top of the mustache which gave the effect of only parts of the hair turning white.
I kept my glossiness pretty neutral. I wanted the hair detail to stand out without drawing too much attention to itself individually. After reading this article by Ian Spriggs I really wanted to let the shader itself do most of the work in achieving that sexy final look.
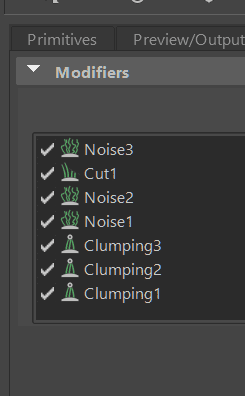
In terms of modifiers, pretty much every hair piece has a simple clumping hierarchy followed by three iterations of noise, from low to high frequency, to keep the hair looking natural. I also used a cut modifier on descriptions with visible tips to add a natural unkempt look. To the best of my knowledge this is a pretty standard way to use xgen; there's really nothing fancy going on under the hood.
Up until this point I wasn’t quite sure what I wanted to do for the final composite, but I did know I wanted to keep it as light as possible. I rebuilt my render in Nuke and added a little bit of glow to my highlights while I stewed on it before deciding it would be funny to emulate the school pictures we used to get when I was a kid.
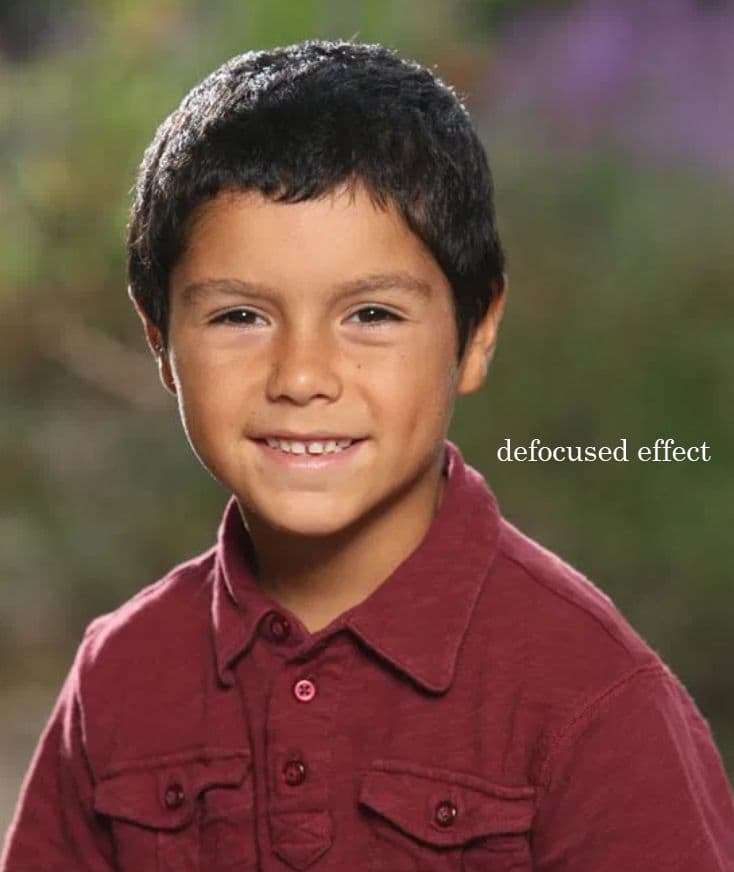
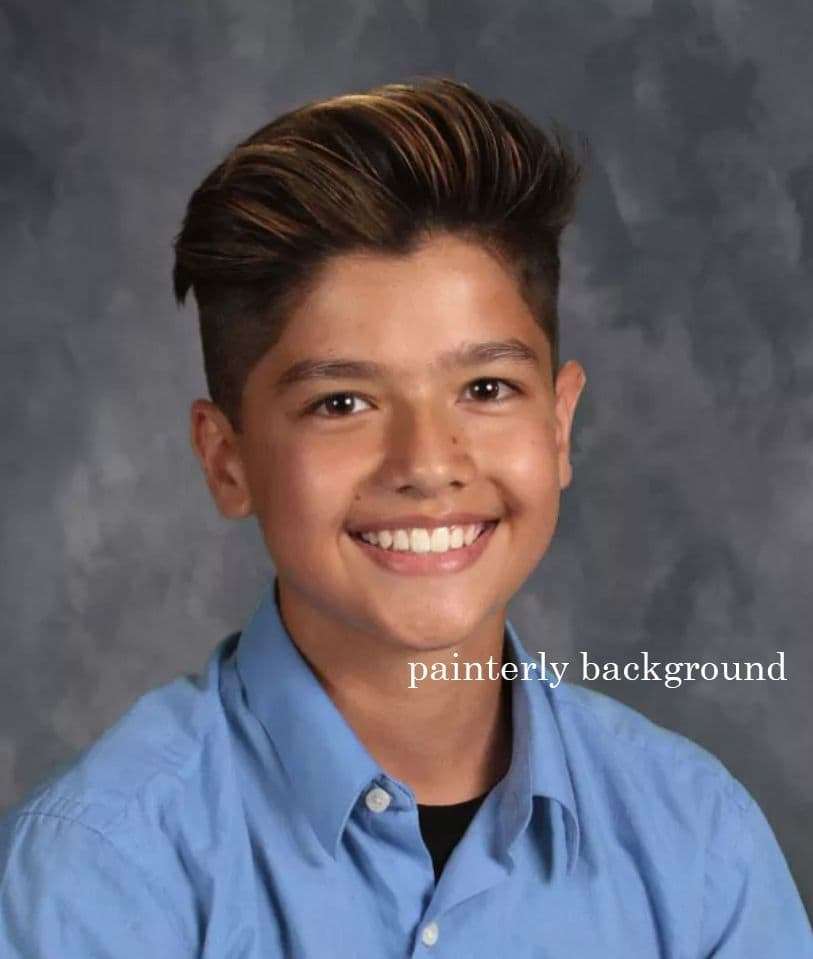
A zDefocus and some film grain to get a filmic look, color correct to match a painterly background, then I was ready to bring it back into Photoshop for that sweet, final 2%.

The last thing I added was a dust/hair plate in Photoshop, just to subtly imply the picture could have been scanned straight from one of my Mom's 1999 photo albums.
This project took about 3 months of back and forth changes and was a very nonlinear and iterative process. Several things occurred to me throughout the whole process:
Thanks for checking it out and stay safe!
You can find me here on the Rookies or on most of the social medias, i.e. Artstation, Instagram, Facebook, or Linkedin.