Digital Architecture: The Making of "When Lockdown Ends"
When I work on a matte painting I usually mirror the image several times so that I have a fresh eye in the composition.
When I work on a matte painting I usually mirror the image several times so that I have a fresh eye in the composition.
Nicola Scognamiglio image "When Lockdown Ends" was born for a competition held at MADI, Master in Digital Architecture at IUAV in Venice, by Cityscape Digital.
The aim was to present a scene from life after COVID-19 in Italy, insisting on how this emergency has made us rediscover family values, made us more compassionate and strengthened our national spirit.
The competition was still valid as the final delivery of the master's degree, so I wanted it to be an opportunity to show the skills gained in these months.
I grew up in Naples and its historical center has always fascinated me. Only walking through the alleys you can understand what it means living together. A city where living space has always been characterized by being together: you live on the street with your clothes hanging high like flags. The population density, the proximity of the apartments makes everyone part of a large cohesive community.
I decided that the scene for the competition should show the end of the quarantine in the alleys of Naples, a symbol of common life.
Of course, the first thing to do is to have references.
They help us to visualize what the final scene will look like, decide on a mood and focus on the story we want to tell.
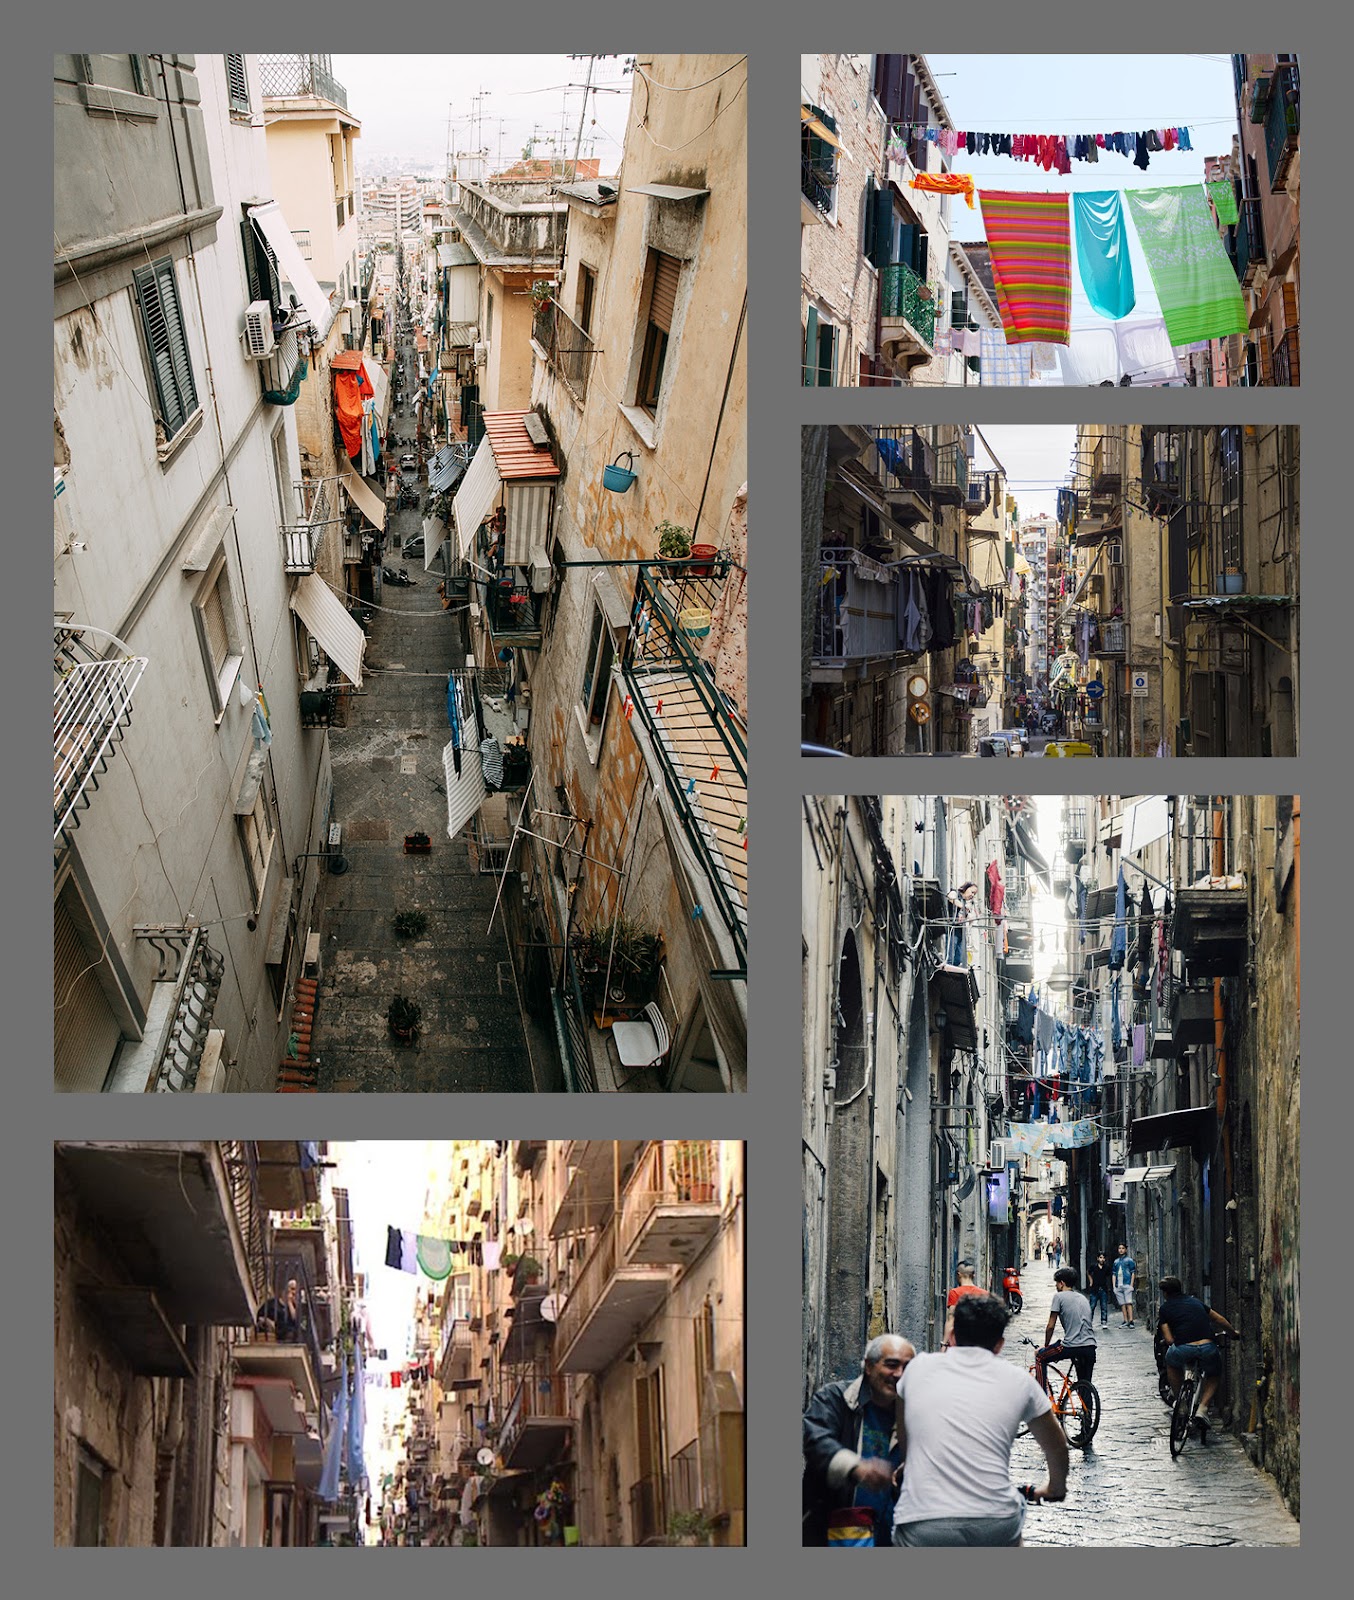
Once we got the references, we were advised to prepare a moodboard, help us in the definition of the storytelling and mood and explain the concept. The credits of the artworks I chose go to: Cabeza Patata Studio, Dina El Geweli, Jungmin Studio.
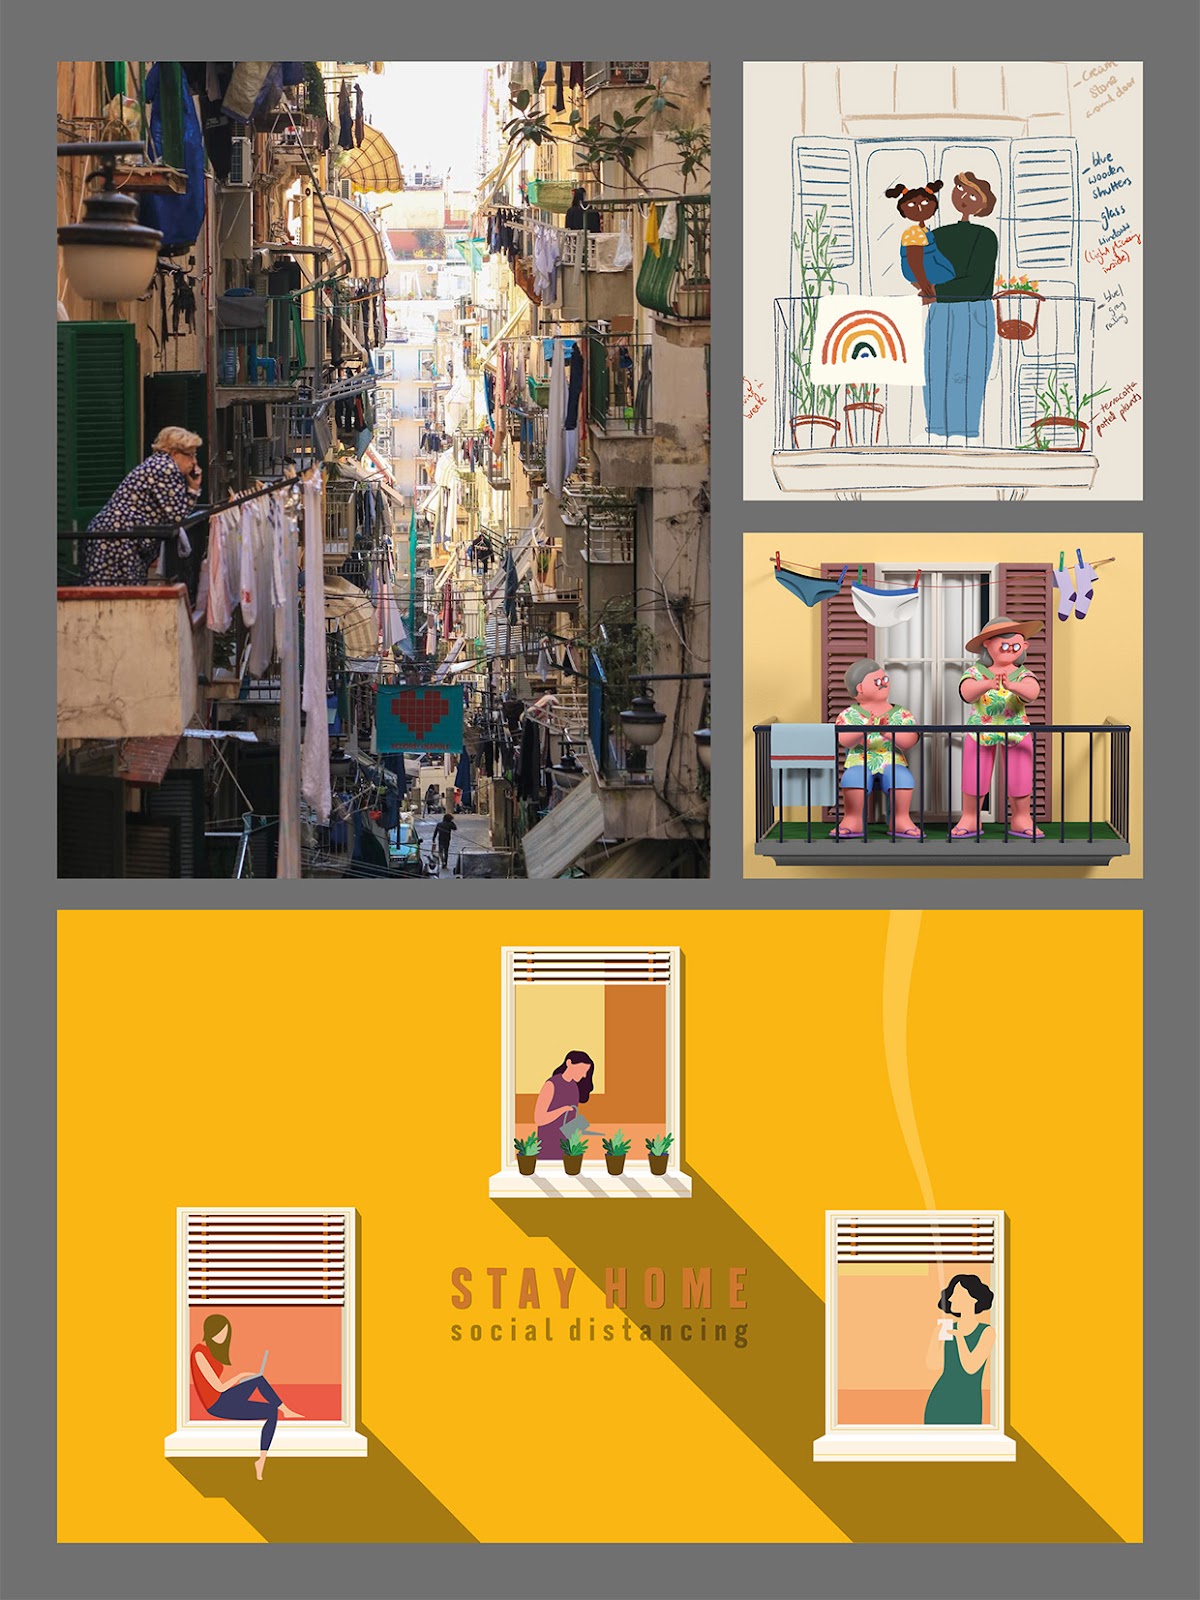
I made these sketches with alcohol based markers to start figuring out the depth of the image. They were crucial for the positioning of the camera too.


It all starts with a box! How real is it?
I started modeling the buildings, trying to keep as few polygons as possible.
Then I moved for other architectural elements such as: balconies, external fixtures, railings..
Later was the turn of all the various types of installations and elements at street level.


The texturing phase deserved special attention due to the nature of the environments.
They are often characterized by degraded facades with exposed stones.
I decided to proceed with Substance Painter to have largest compositional freedom in the creation of the materials.
When I work on a matte painting I usually mirror the image several times so that I have a fresh eye in the composition.
I had to proceed first with the Unwrap of the facades.
Then I attached the objects that were on them such as: pipes, cables and balconies slabs.
Assigning them different Material IDs so that they could be selected in Substance Painter and take part in the creation of the AO map of the facades.

Thanks to the AO map I knew in which position these elements were to highlight the different forms of surface degradation in those points.
I started to paint a mask where the different intensities of the greys influenced the “height map” of the materials.
The mask was then applied to the folder of the material, in this case an “Old Brickwall” to represent the Neapolitan tuff bricks.
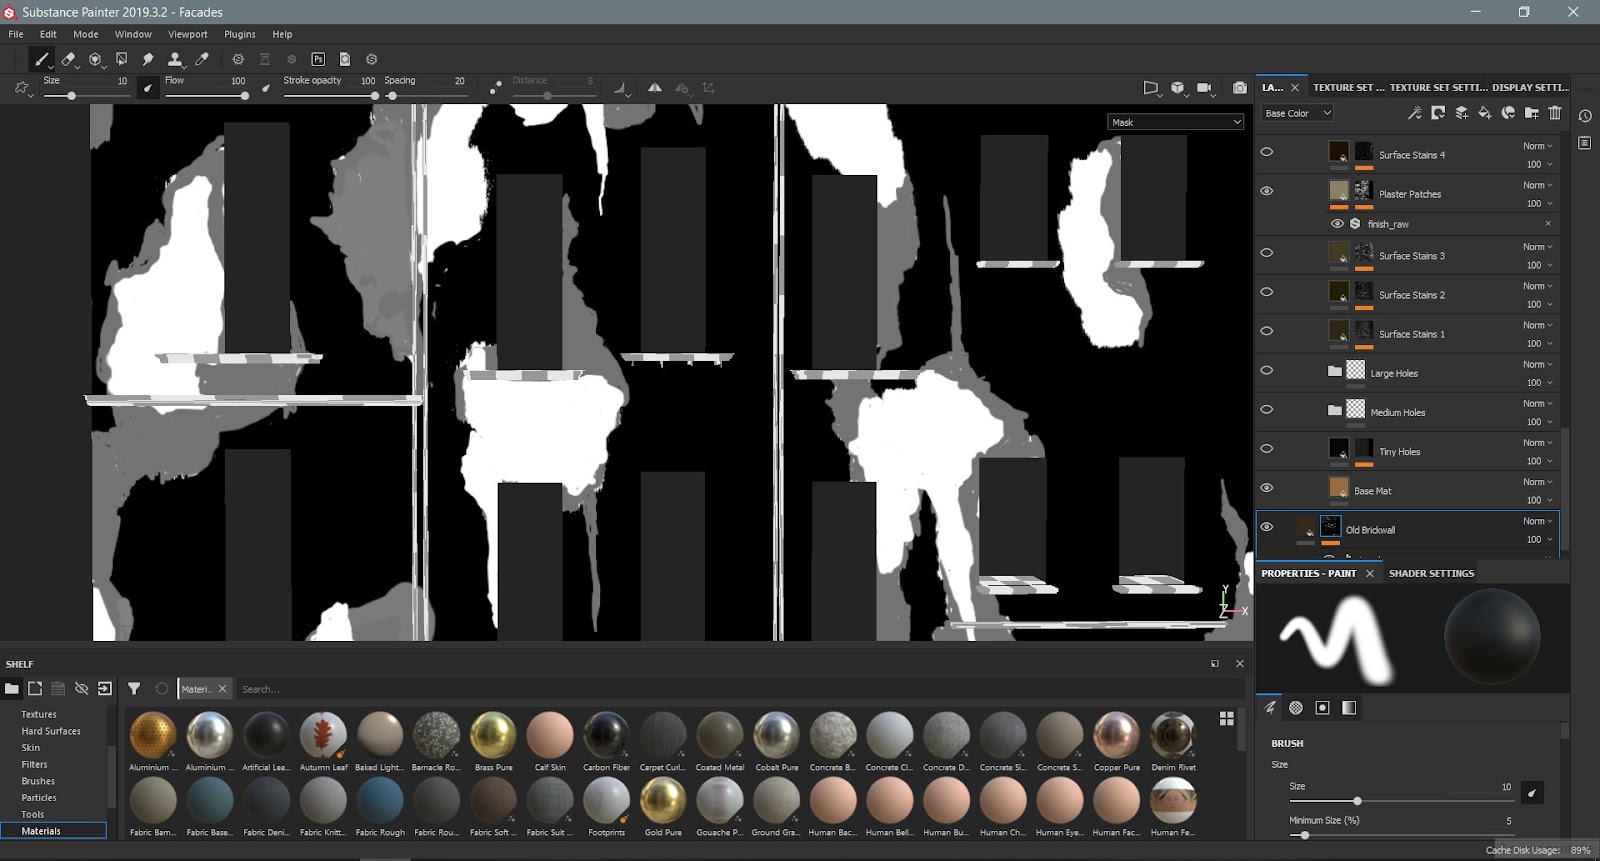
After the necessary adjustments, I inverted the mask and I applied it to a smart material which would have made our typical damaged plaster. Thanks to the this mask, it was applied with the right intensity where no bricks were present.
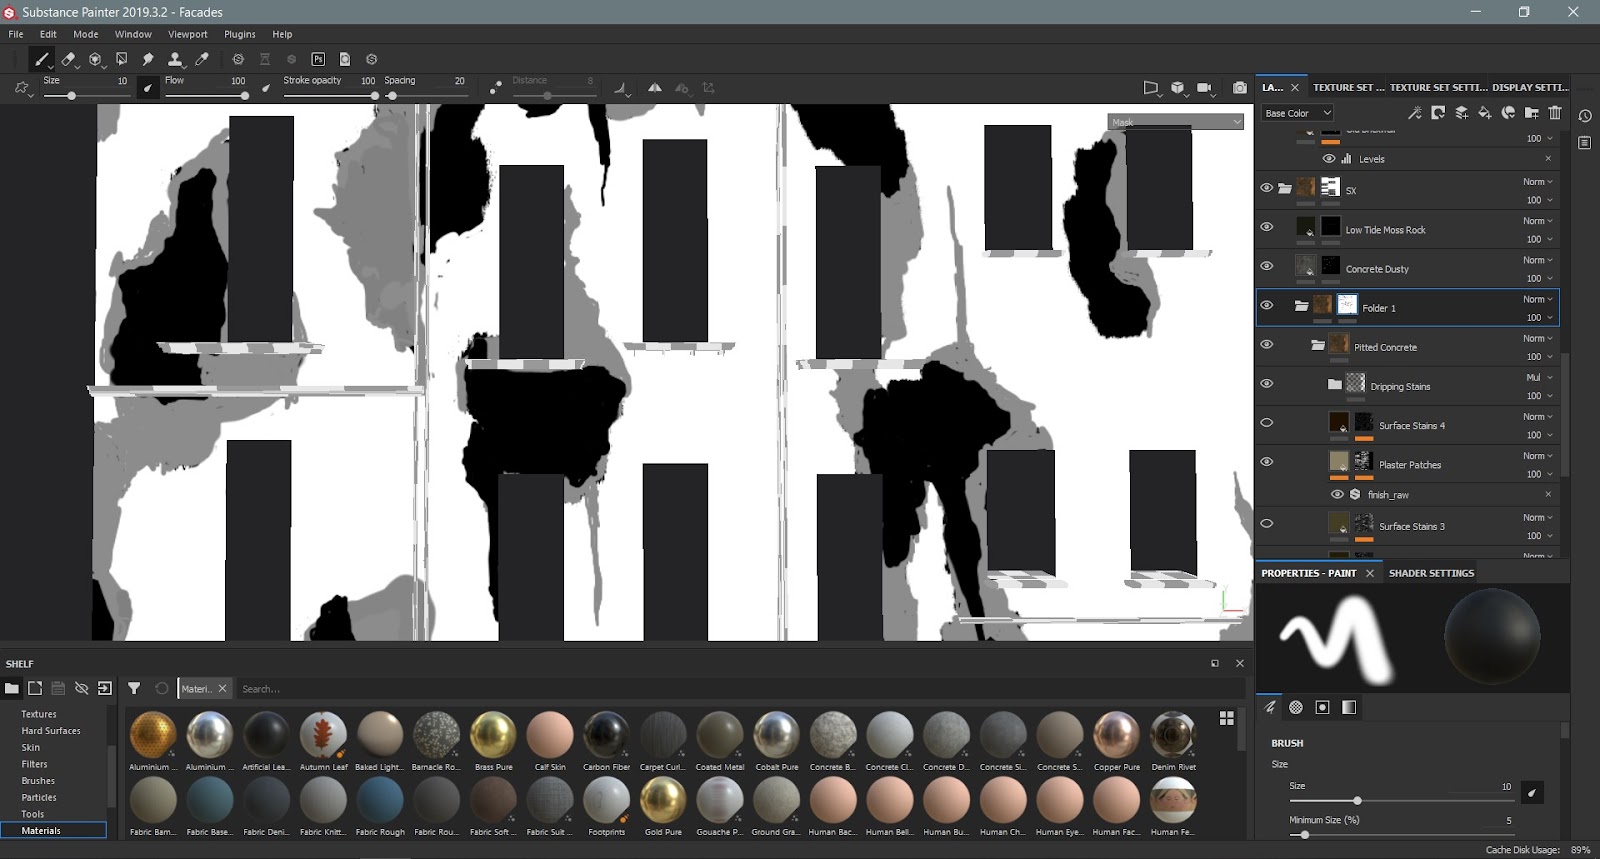

You can see here the final result (the same procedure was followed for the other side).
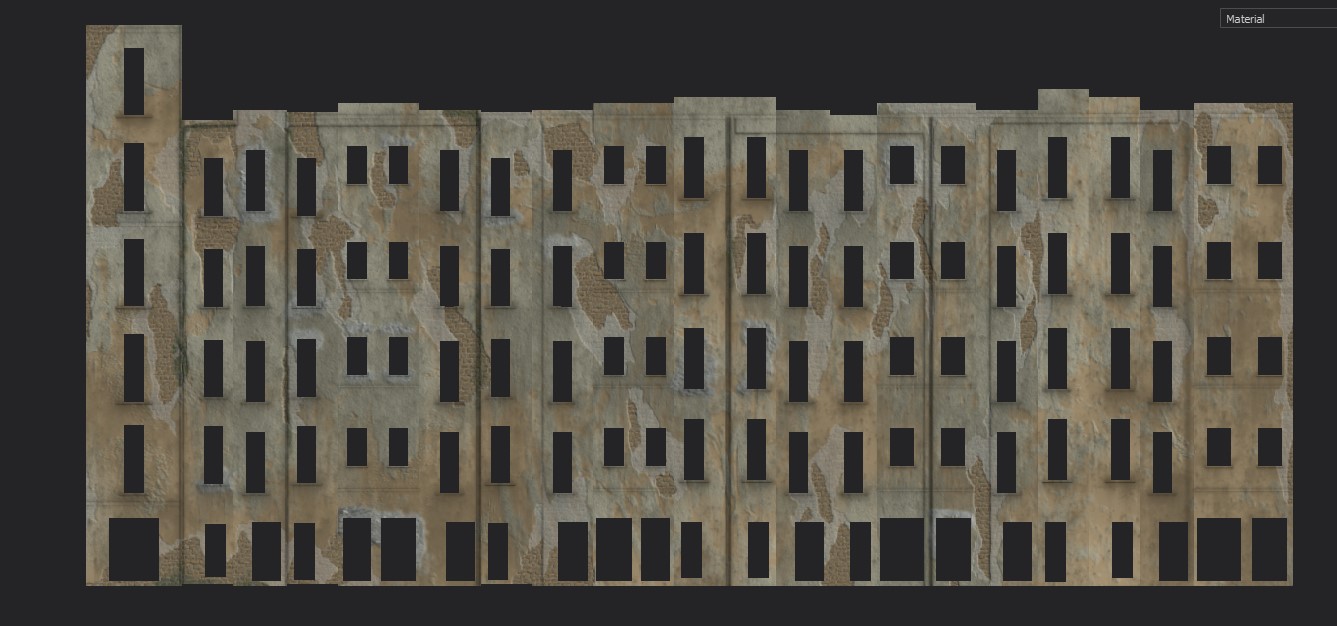
Extracted the maps from Substance Painter I came back to 3dsMax to complete the texturing.
The image straight from the rendering engine was:

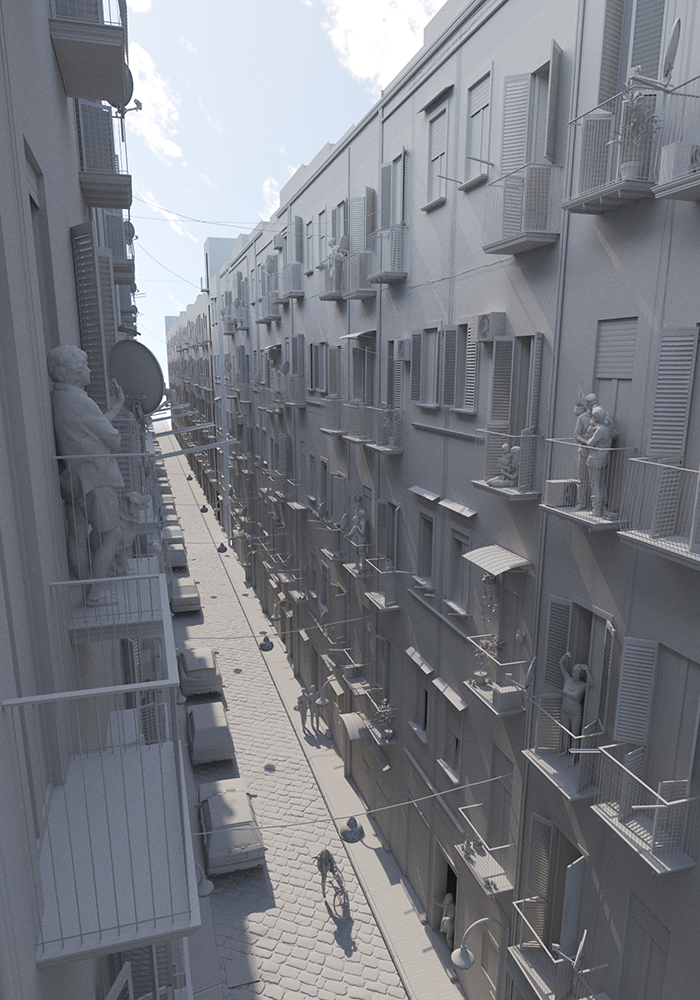
As you can see, other elements have been added to make the scene more real like: cars, street lamps and antennas.
(3d people are from HumanAlloy and Xoio Assets).
Here you can see the clay render:
The lighting is set with a Vray dome light to which a hdri map is connected.
Before launching the final render, some render elements with different functions have been set.
Here you can see the ones that were most useful to me:

To attenuate the presence of any noise in the image I added the channel "Effect Result". It was obtained thanks to the Denoiser to the raw render with a 50% opacity.
The alpha channel served me for an easy background selection.
The five MultiMatteElements are set to help the selection of the different elements.
The adjustments were made thanks to these selections, applied as masks to groups. Inside often there was a RawDiffuseFilter in "Color dodge" that emphasized the contrast of the chosen element.
The Vray ZDepth element is very useful for creating atmosphere.
Putting it in a fusion method that eliminates black pixels (color dodge, screen) and adding adjustment curves.
Likewise using it as a mask for an adjustment curve. These are very useful tricks to achieve this kind of depth in a few steps.
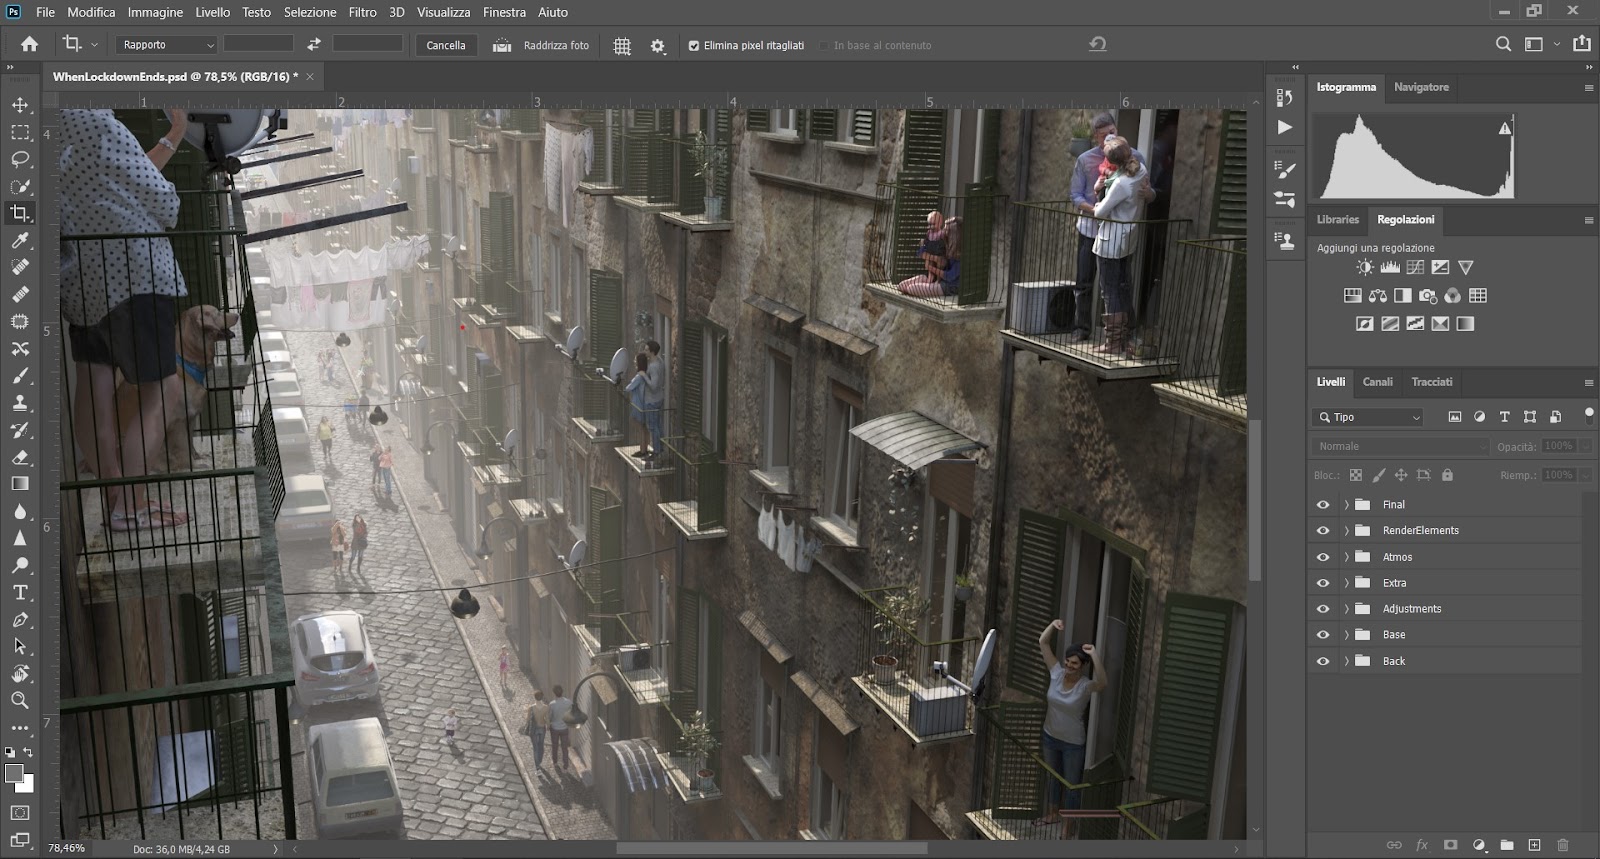
This is how I usually set a .PSD file, thanks to Lucia Frascerra classes at the MADI in Venice.
“Back” folder is for the background. Images usually masked with the alpha channel that came from the render engine.
In the “Base” folder I put the raw render with some adjustments like denoising.
“Adjustment” is the place where I set all the folders for each element of the scene masked with the selections that came from MultiMatte passes.

Here you can see the various folders for the facades, balcony slabs, pipes and others masked with the proper selection. Then the objects are adjusted with the RawDiffuseFilter pass masked by the action of painting the adjustment on that object.
“Extra” folder is for adding new elements to the scene. Here I put all the 2D people, suspended clothes and doves modifying lights and shadows to proper fit the scene.
“Atmos” folder is the one I love the most. Here I play with the ZDepth to create a convincing atmosphere.
“RenderElements” is a backup folder where I save all the render elements that came from the render engine.
In “Final” folder I do the last adjustments with CameraRaw Filter.
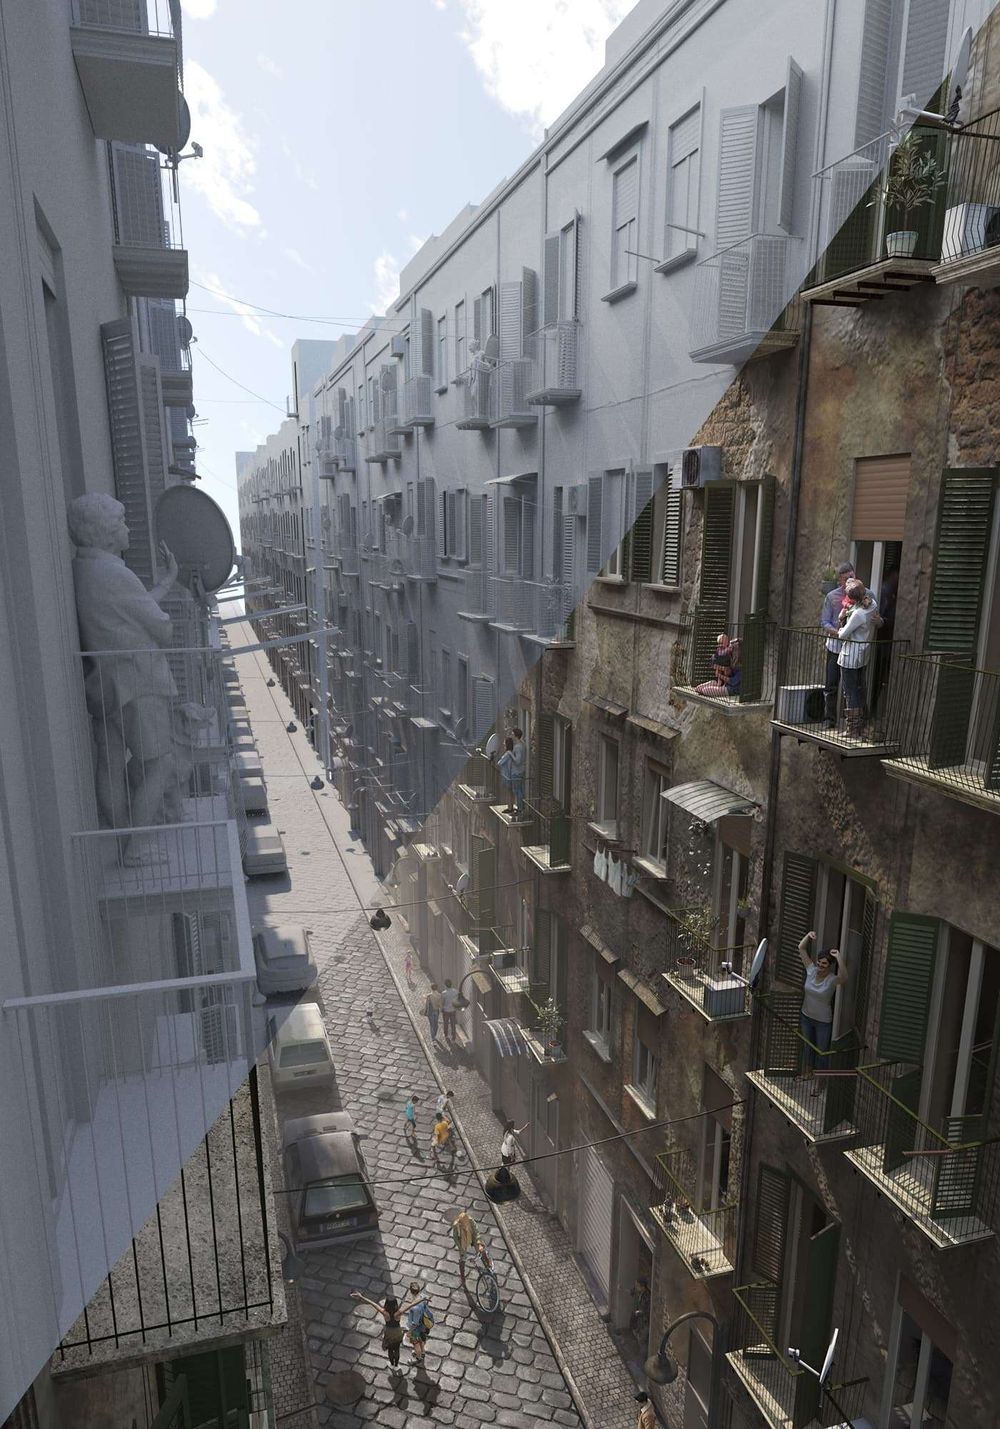
When I work on a matte painting I usually mirror the image several times so that I have a fresh eye in the composition.
So while I was adjusting the image I flipped it and fell in love with the new composition!
Final result:
